Although they might look a little bit kooky… I always thought an XC bike the a Jones H-bar would make a great ‘traily’ gravel bike thing.
1 Like
These are my opinions from the bike’s we built for customers and from the SF gravel scene. Everyone has different perception of gravel, which is both great and extremly annoying to design for.
Gravel tires cut off at 50mm. Any bigger and the casings get much heavier (which is not necessarily a bad thing) and you probably need to use a MTB crankset for the clearance
To me, the gravel bike genre is defined by drop bars, otherwise its a mountain bike. That being said, it does not mean its the right choice for the job. If you are riding 100% offroad, flat bars are better IMO.
Another point is that a full MTB drivetrain (for flat bars) is half the cost of a gravel drivetrain and is way more reliable and works better.
The new 1x12s GRX is very simliar to the 12s Shimano MTB stuff. It works really well. I would avoid 2x, I think its an outdated drivetrain (unless you are building allroad). You get more range with 1x12s compared to 2x12.
For your height, 700c is the right choice. 650b was popular when there were no dedicated gravel drivetrains (wider chainline). 650b allowed you to use a 650x47mm tire. Now you can clear 700x50mm with 1x drivetrains pretty easily.
To me, a gravel bike should have 27.2 seatpost for flex and weight reasons. Using a 35mm seat tube to accomdate a “real” 31.6 dropper would be overkill on a gravel bike. Personally, I am not a fan of dropper posts on gravel bikes. I find people who have MTB experience are totally fine high-posting on a gravel bike.
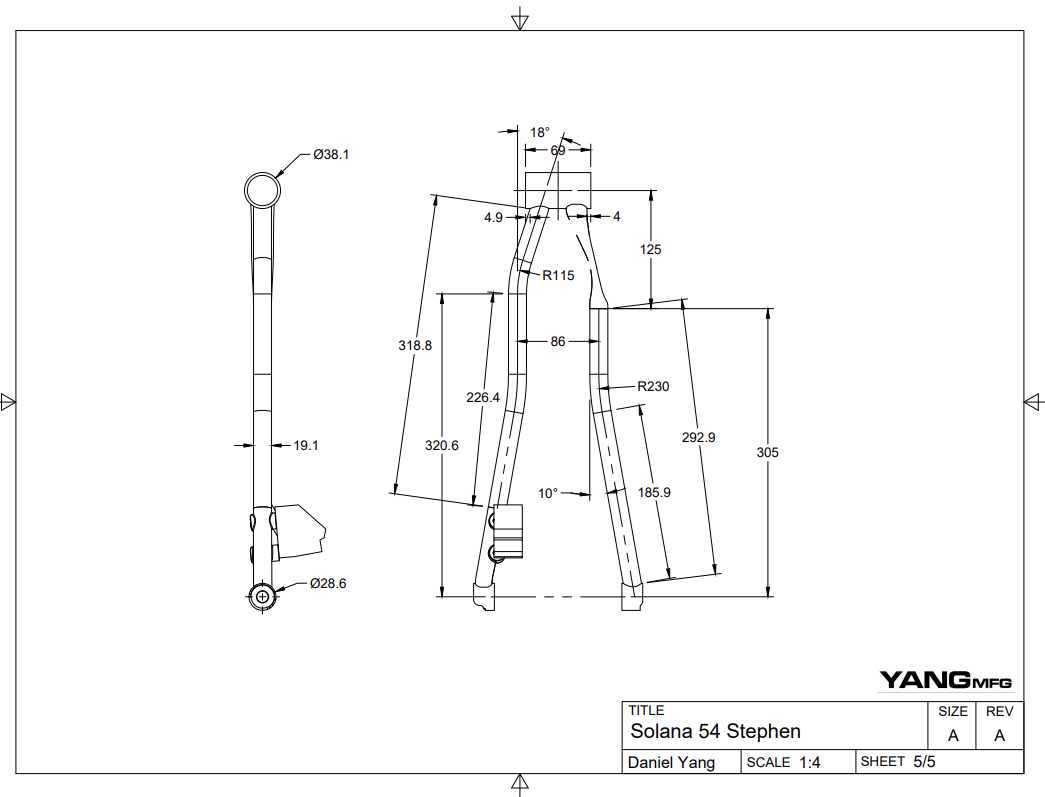
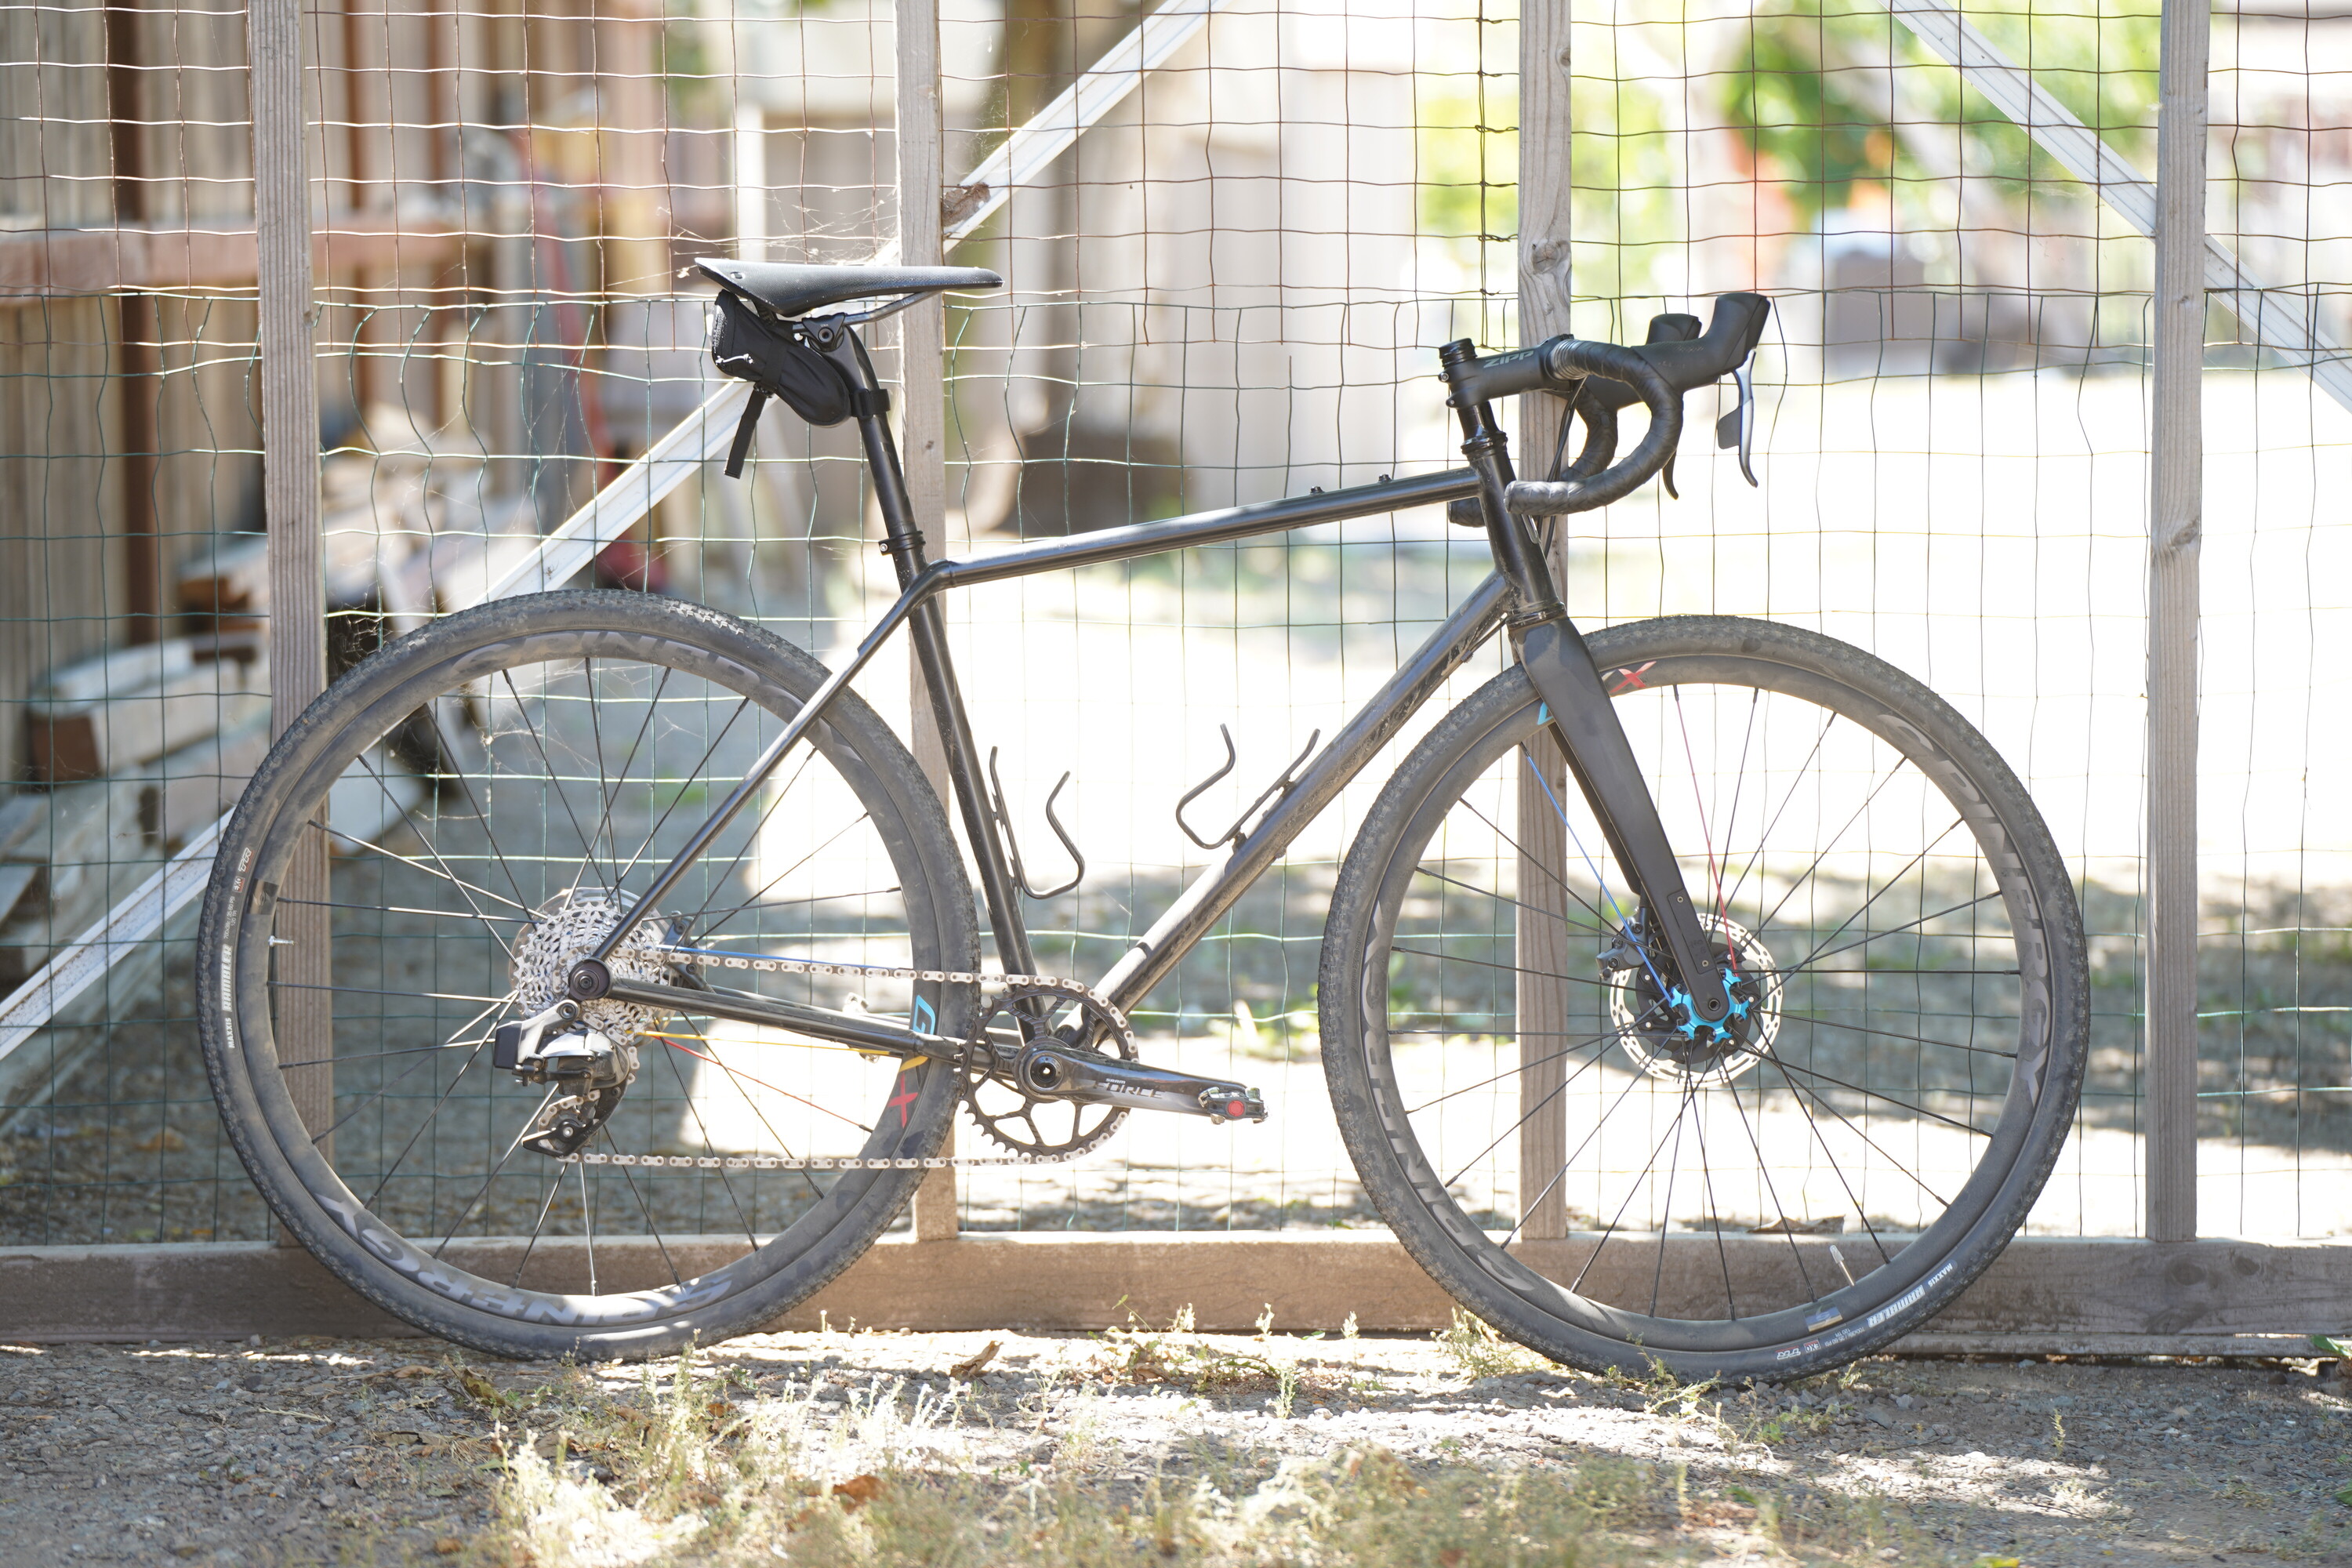
Example: Neuhaus Solana with 27.5x2.2 tires:
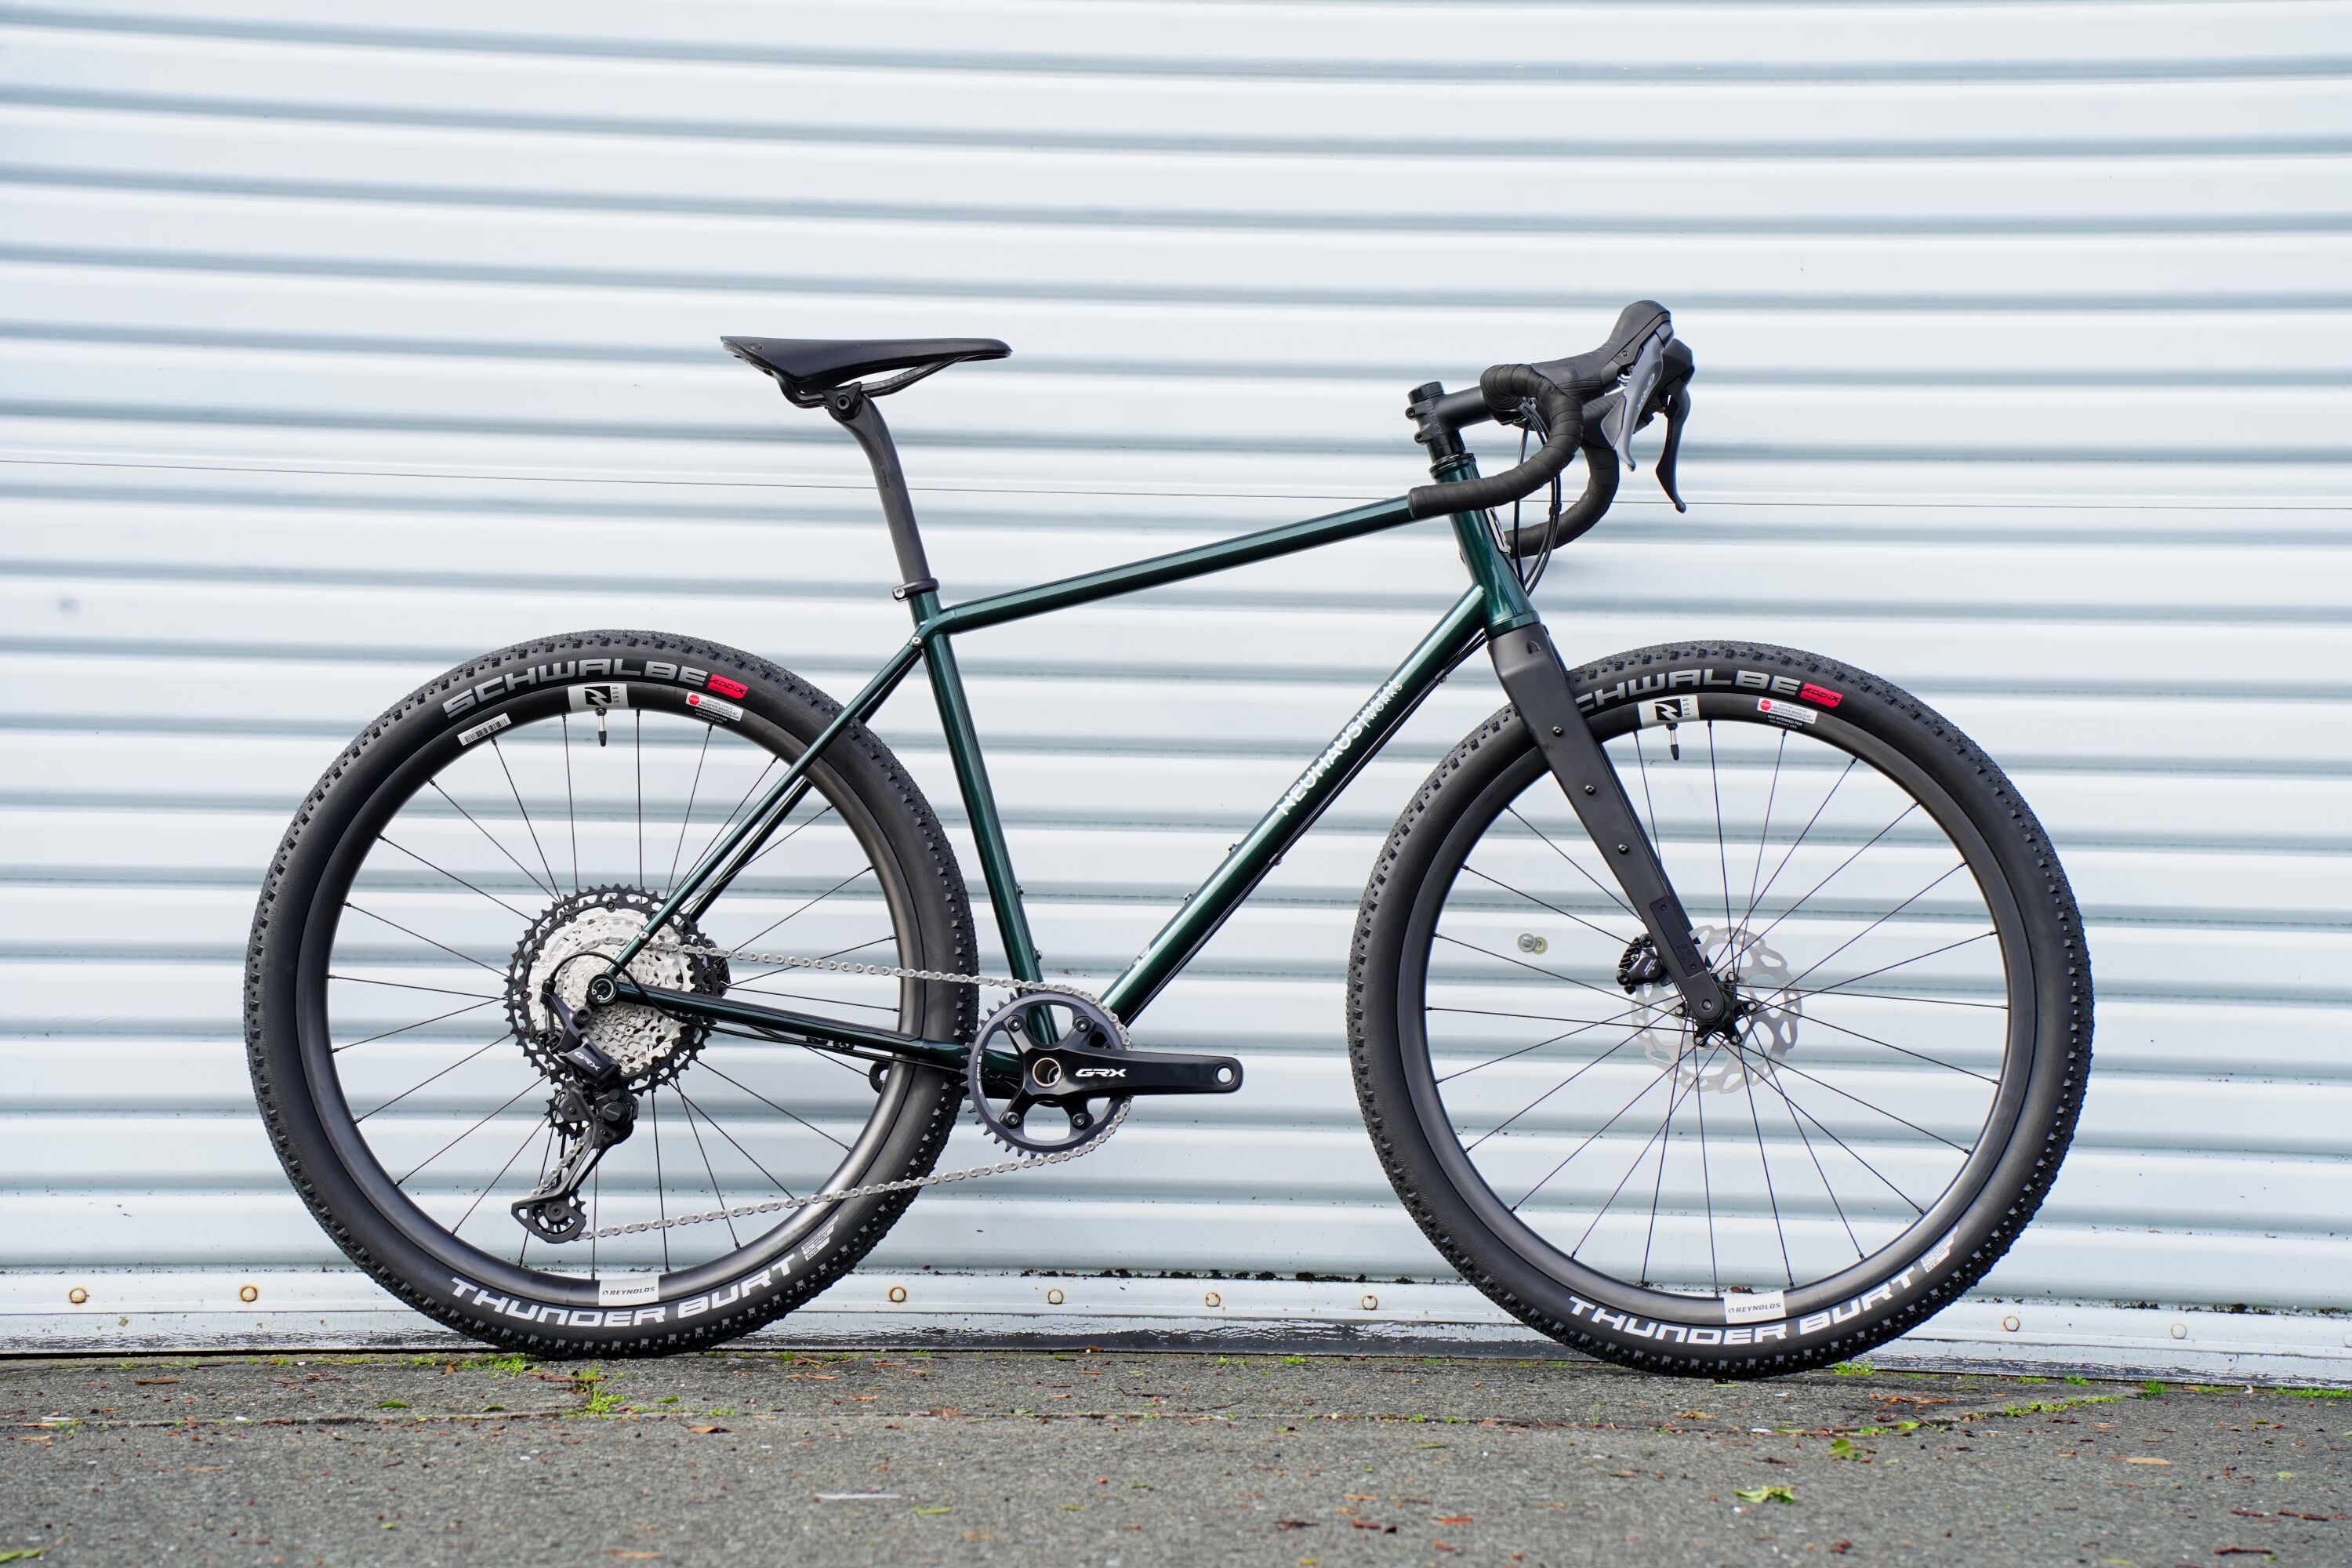
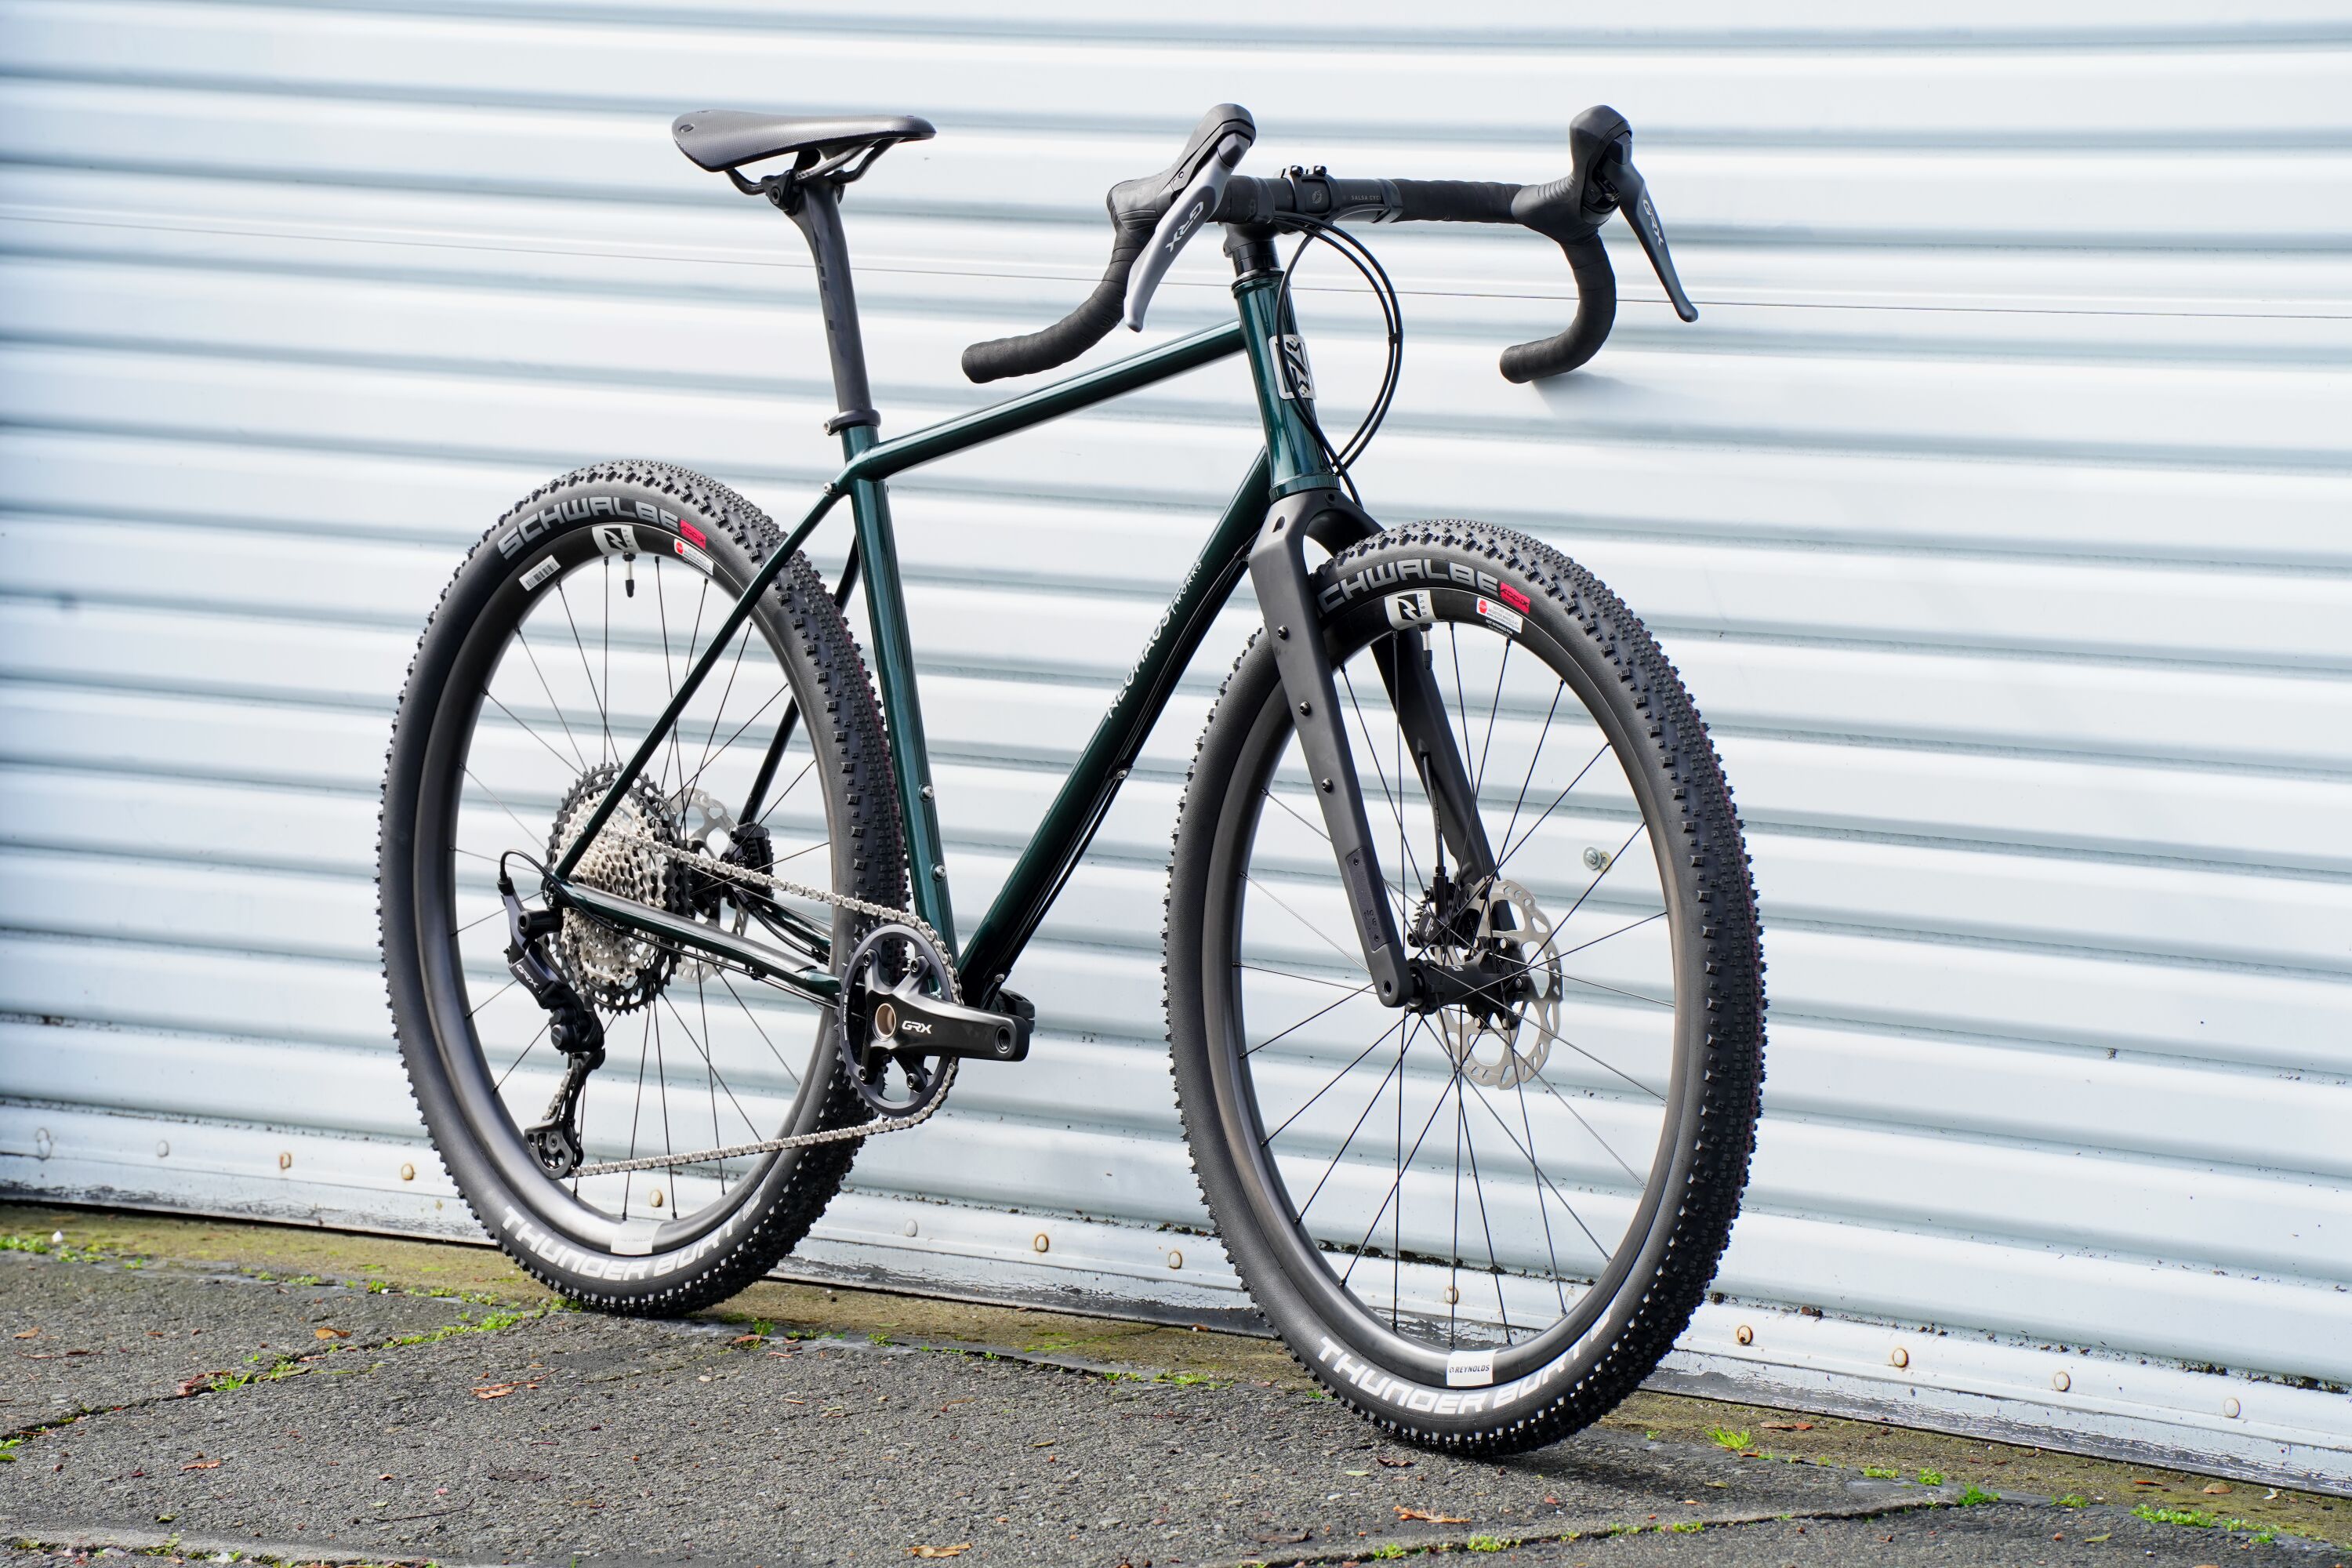
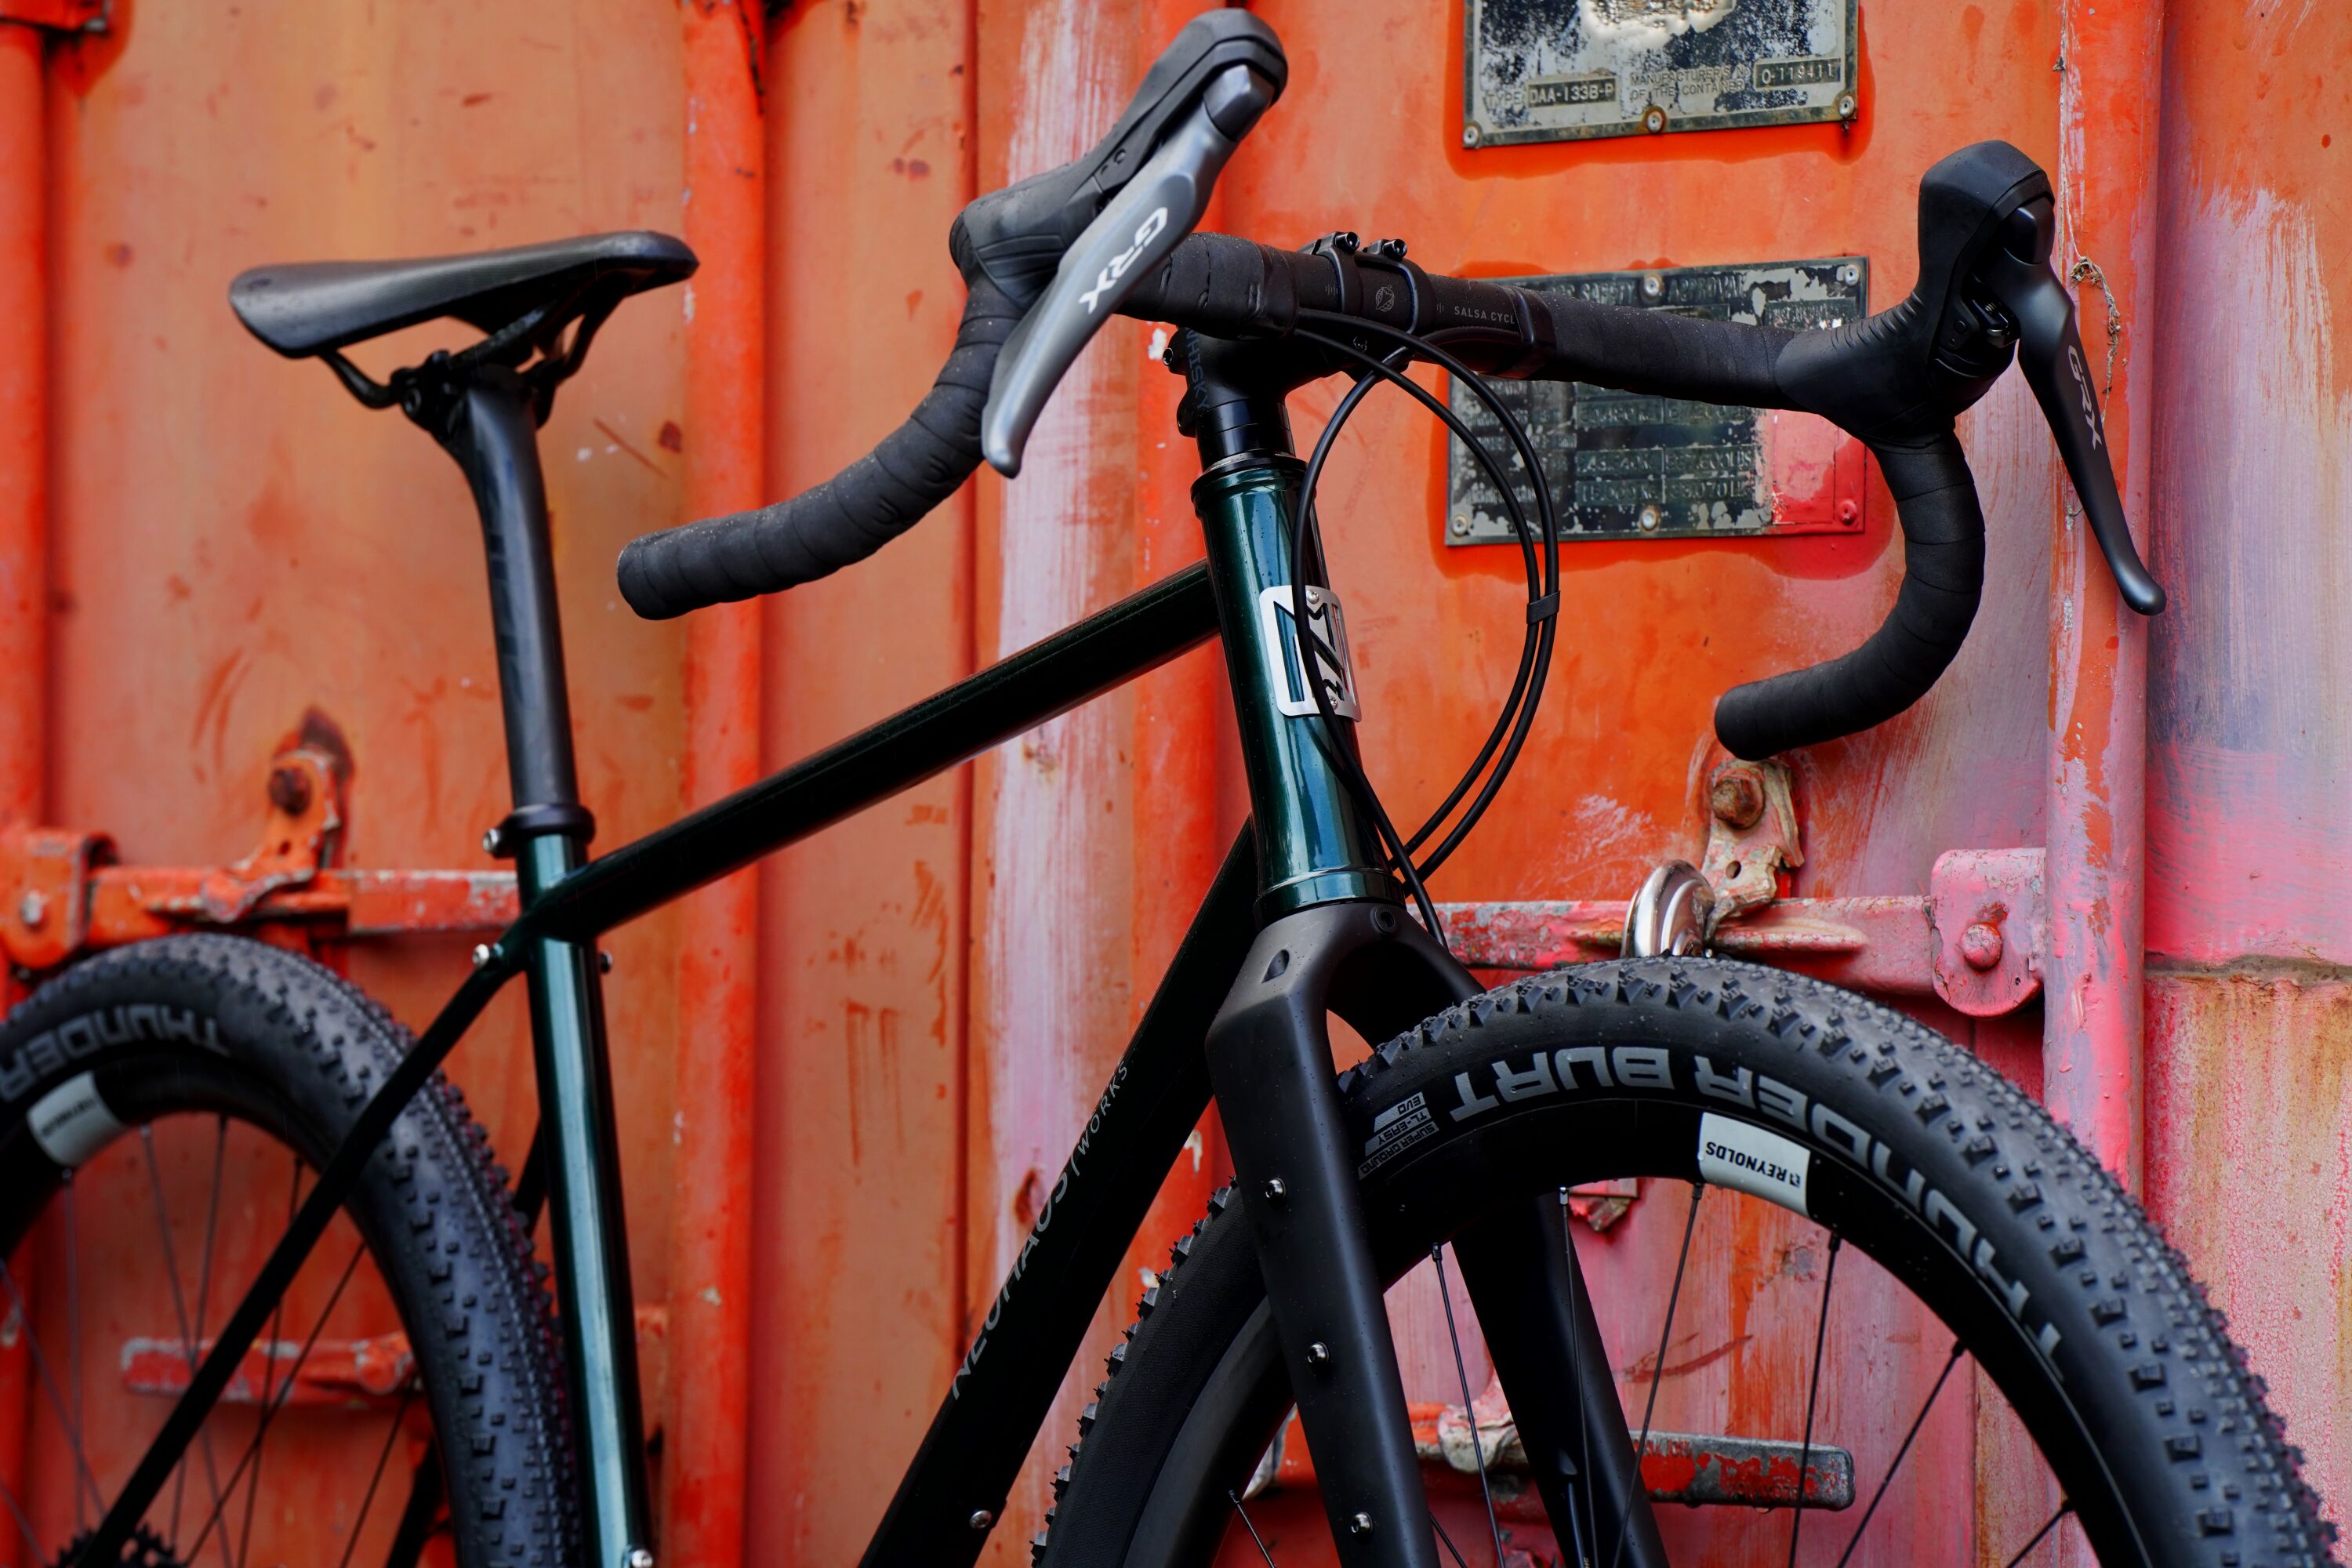
Its for a 5’8 older customer, Hence the taller stack and 27.5 wheels.
The chainstay sub assembly has a 3D printed FM160 nub and a driveside yoke:
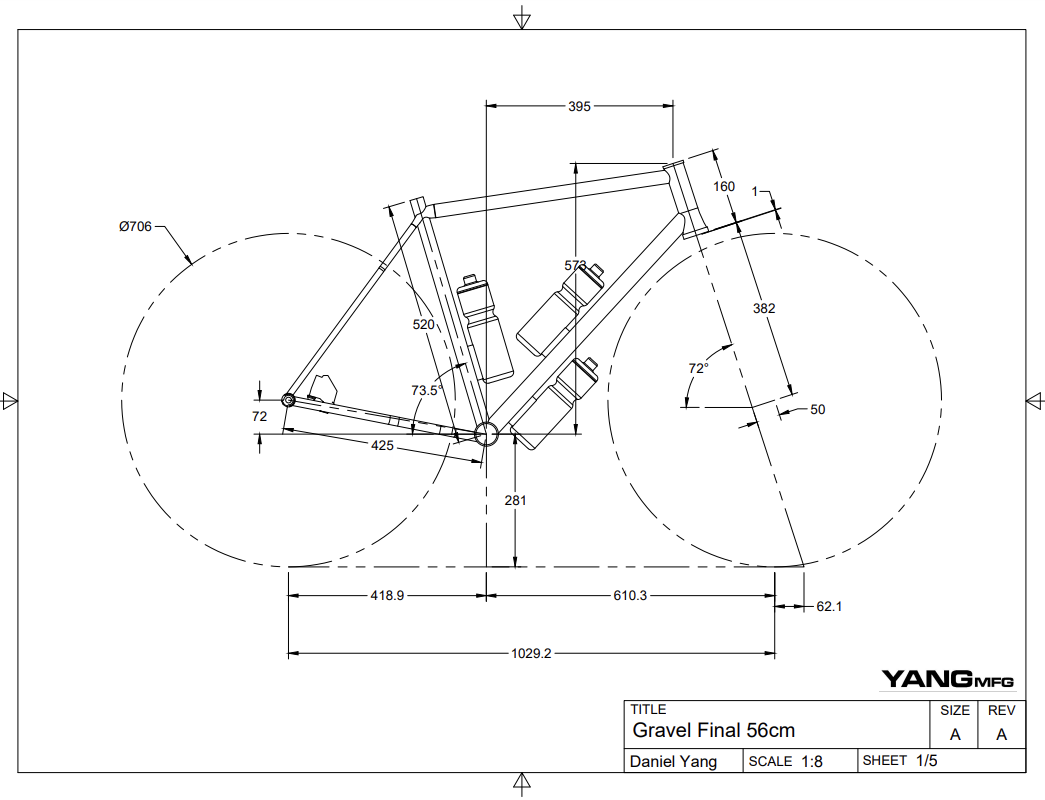
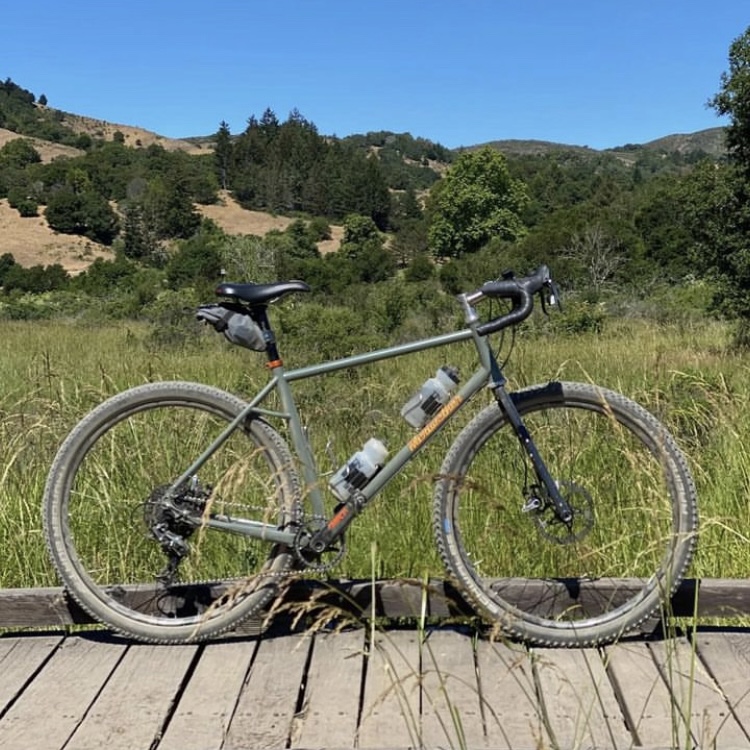
Example: Neuhaus Allroad Solana 56cm w/ 700x40 clearance
2 Likes
I have a 700c x 40 cyclocross bike. It is a very fast commuter, and good for smooth forest tracks , but for riding bumpier roads I’d like more tire - it just tires my body.
1 Like
If we’re splitting hairs, I feel like you’re leaning more toward gravel (adventure) bike than gravel (road) bike which to me are two very different things.
To me, a gravel adventure bike prioritizes:
- comfort through a more upright posture
- control with wider bars (flat/swept/“alt”)
- traction with wider & knobbier tires
- versatility with wide 1x gearing
- stability with “out front” geo
While a gravel road bike prioritizes:
- aerodynamics with a lower posture & drop bars
- cadence with tighter 1x or 2x gearing
- rolling resistance with narrower/less meaty tires
- sensitivity with more traditional road geo
I’ll always take the gravel road bike for racing or if I’m trying to set a fast time on a bikepacking trip, but imo the gravel adventure bike is the right choice for most people who want to go out and have a good time in the forest with their friends. You can ride almost any terrain on any bike but ultimately you’re optimizing for either comfort or speed.
Some thoughts based on what you’ve written:
- Your tire clearance will likely be set by whatever fork you choose, so it’s worth getting that sorted out first. You tend to run into a limit at 29x2.1" for “gravel” forks and then again at 29x2.35" for rigid “mountain” forks.
- Personally, I’ve found that the 12-16º range of handlebar sweep is the sweet spot for all-day comfort while still being very confident for descending. I personally could never get the hang of more sweep than that (like the Jones bar)
- You’ll often be able to squeeze a wider 27.5" tire into a given fork/frame so I think that is the main reason folks choose that on frames that aren’t on the smaller end of the size spectrum.
- A dropper post is so sick if you’re riding singletrack, but imo not necessary if you’re sticking to forest roads. Like Daniel said, a traditional 27.2mm seatpost offers a bit more comfort in that case.
1 Like
Cheers, it’s seen everything from commutes to 4month / 10,000km cross country tours. A great allrounder.
Current bars are SimWorks X Golden Pliers Ramble Bars and I love them. Unlike anything else I’ve ridden and pretty much the perfect off-road cruising bar. Just need to run a long stem to get the right position.
In my experience the only time I miss the extra position of drop bars is when I’m going downhill on pavement for an extended period. Otherwise I feel like having one great hand position beats having one good one and two average ones. And I find long term (8hr+ day) comfort is more about weight distribution than bar shape. I’ve done long days on drop bars, 30deg alt bars and 15deg trail bars and was fine everytime as long as my hands weren’t loaded up.
I also 100% agree that this is the current market trend and it’s why I think most gravel bikes kinda suck. Most of the development is coming from the road end and people don’t wanna give up drops which I find really limits how hard you can ride a bike on anything but the smoothest gravel. And unless your going along at racing speed I don’t find that you give up much speed with a flat bar on sealed roads.
I actually think @liberationfab did a nice job describing the two sides of gravel and I would defo put myself on the adventure side of things. Good luck with the build!
2 Likes
I have those on my chilleur long-wheelbase Ti frame and absolutely love them. I’ve taken them on my longest days on the bike and shredded some pretty hard singletrack with them. I’ve heard some complaints from short/narrow-shouldered folks but for me they fit spectacularly.
2 Likes
Well I guess I’m building a hybrid then ![]() . Or a full rigid MTB. I guess it doesn’t matter. I’ve never been one to worry about titles.
. Or a full rigid MTB. I guess it doesn’t matter. I’ve never been one to worry about titles.
Ah so that’s the reason. I knew I was missing something.
Also I appreciate you readily sharing the Neuhaus bike geo numbers Daniel. It gives me something to think about.
From your description, gravel adventure is exactly what I’m looking for. I just didn’t know what to call it.
This is an interesting take. I can definitely see this being true for me. Finding the right weight distribution is how I approach saddle comfort. Whatever ‘distributes the pressure’ better. I can see how balancing between saddle pressure and hand pressure can optimize comfort.
1 Like
I feel like I’ve tried to push that same distinction between “gravel road” vs “gravel adventure” and I’m so glad that @liberationfab feels the same. The wider industry hasn’t quite caught up to these descriptions, but hopefully with enough prodding, they’ll adopt some terminology that makes sense and helps to not mislead or confuse riders.
If I could add one point of fun inspiration that I feel like suits your interests, it is the Hunter Cycles Bushmaster. Not exactly what you’re looking for but it is proof that wheel size doesn’t have to coincide with rider size.
2 Likes
I know the bikepacking.com crew like the term ATB (all-terrain bike) which I think the industry could possibly use to cover adventure gravel bikes. Like a bike that’s more capable than a drop bar gravel bike, not a full on MTB and not setup for full on loaded touring.
Which reminds me. This Meriwether looks to me like the exact kinda bike you’re thinking about building.
Also that Hunter is an all time favourite of mine too. Would be a such fun bike with some mid size 27.5 rubber.
3 Likes
I’m a big fan of XC race tires on my gravel bikes. It’s what I nearly always try to persuade my customers to go with. There’s a good selection of tires in the 50-55mm range, like the knobbies from Rene Herse (my fave), the Conti Race Kings (Dylan Johnson’s fave), the Vittoria Mezcal (Tour Divide fave), Maxxis Ikon (the classic fave), S-Works, etc. I usually run my tires around 18-19 psi for max grip when cornering all the dusty loose dirt roads in the Sierra Nevada. Smooth is fast baby! I personally consider anything less than 50mm paved road tires ![]()
I waffle on using a dropper post. Since I’m old and not flexible, long descents where I have to remain standing while riding in the drops kills my lower back. That hunched over position is awful. A dropper lets me squat more so I don’t have to be so hunched. It’s also fun to bomb a paved descent with the saddle dropped for max aero gains.
BUT on my latest gravel bike I put the bars about an inch above my saddle and it’s been eye-opening. Riding in the drops on rough descents is so much better. I feel way more upright like I’m riding my hardtail. This bike doesn’t need a dropper for that reason. Plus, I like the visual simplicity of a 1x gravel bike with a long and skinny 27.2 post.
The difference between 650b and 700c is negligible according to everything I’ve read and experienced. It’s a little easier to cram in large tires with the smaller wheel size, but 700x55 is totally doable with 49mm chainlines and road-wide q-factors.
Going with wider bars is probably just a personal preference. I’ve been riding some 520mm PNW bars. They’re comfy but I feel like a sail when there’s a headwind. That’s the big knock on going with flat bars on gravel bikes too. If you don’t often fight headwinds, then lucky you, run whatever bars makes you happy.
3 Likes
This is my experience with tires too. Tried 700x42 semi slick on my bike and it wasn’t that much faster than 27.5x2.2” but gave up a lot of traction. Lightweight XC tyres are so good these days. Anything similar to a Maxxis Ikon.
1 Like
The Humble Hybrid Era
As the debate over what is considered a gravel bike rages on, I’ll be making what I’m considering a hybrid bike ![]() . And if I wish to continue making bikes as a hobby, it needs to be economical. I can’t afford brand new components every 6 months just for myself. This build will be using components from my parts bin. Of course this means there will be compromises, but I’ll be focusing mostly on the process this time rather than the result. And I’m sure I’ll get a bike that’s fun to ride anyway, even if it isn’t perfect.
. And if I wish to continue making bikes as a hobby, it needs to be economical. I can’t afford brand new components every 6 months just for myself. This build will be using components from my parts bin. Of course this means there will be compromises, but I’ll be focusing mostly on the process this time rather than the result. And I’m sure I’ll get a bike that’s fun to ride anyway, even if it isn’t perfect.
The design parameters:
- Fully rigid
- flat bar
- thick tires (2.3")
- relaxed geometry
- stable handling for carrying luggage
- fun
The components from my parts bin:
- 27.5 mtb rims. Front is thru axle, rear is QR. Both disc
- microshift advent 1x9 mtb drivetrain (with clutch)
- a heavy cheap steel fork originally V-brake
- some tektro brakes
- 27.2mm seatpost, some cranks and bars and whatever… other cheap junk.
I have no geometry yet, but I did take the first steps this build a few days ago:
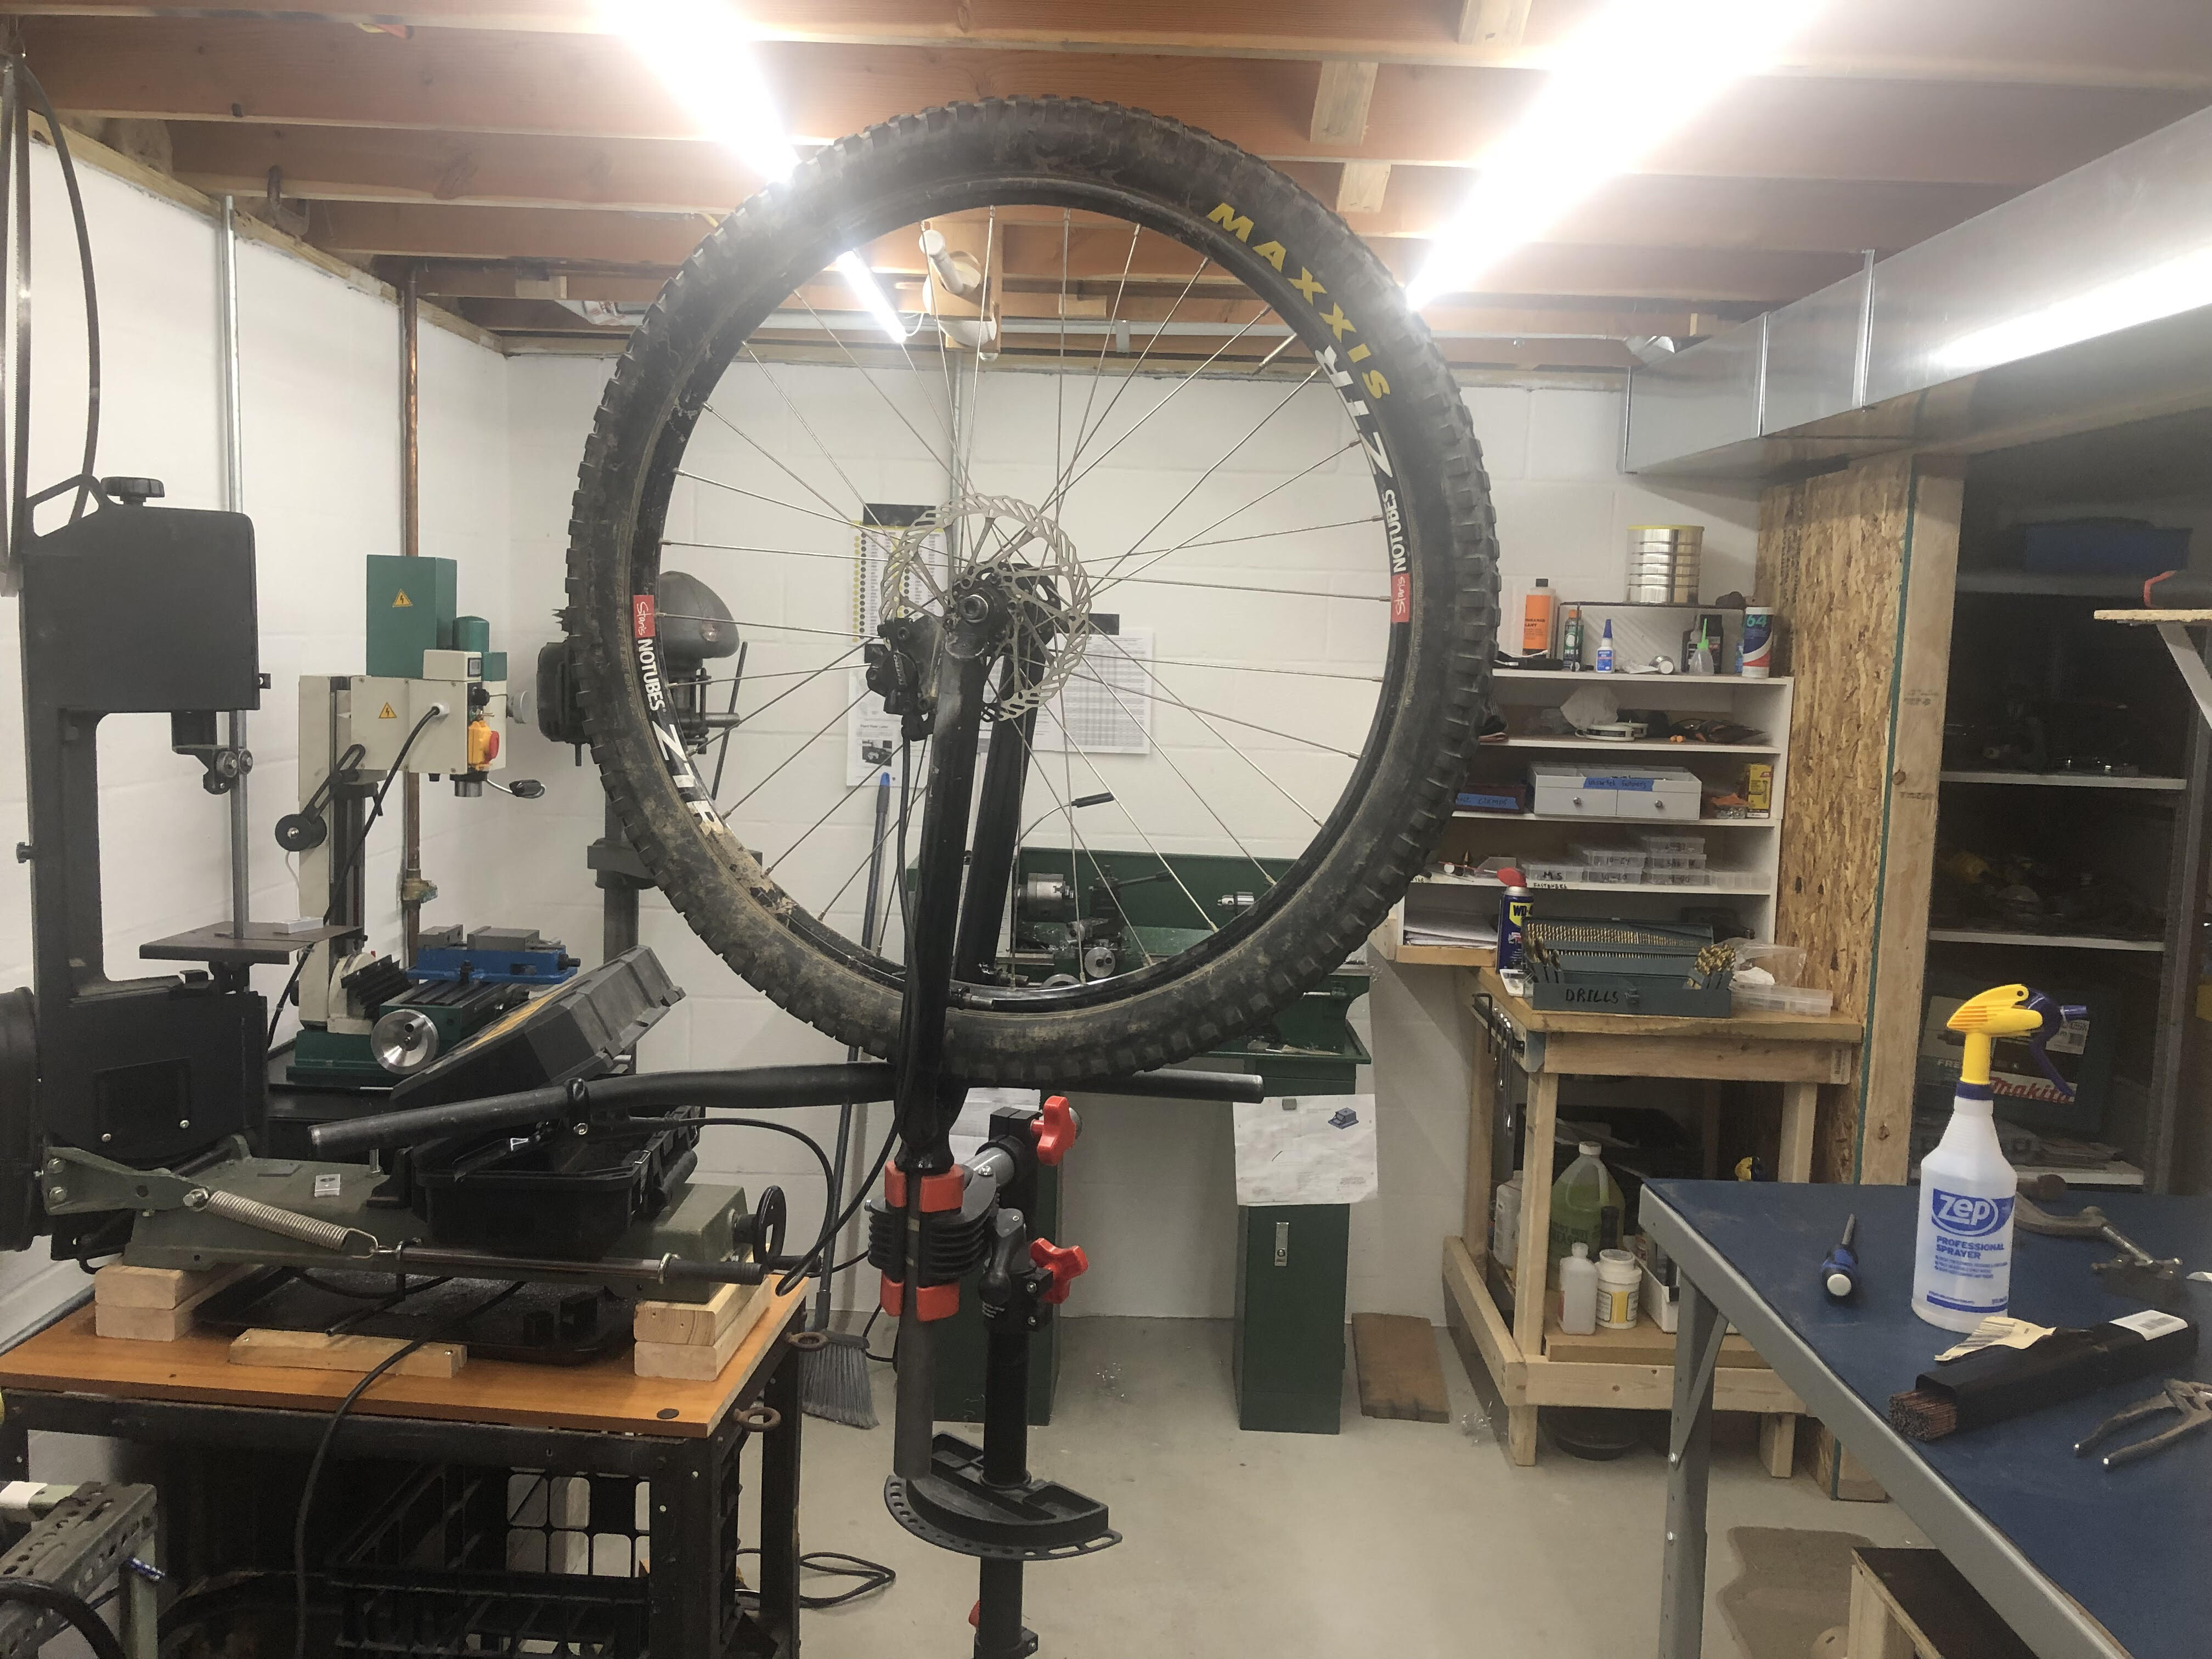
I machined an adapter axle to use the thru axle wheel with a QR fork. I also welded a disc brake tab on. I know people caution welding disc tabs to rim brake forks, but this is not some lightweight high end 90’s mtb fork. It is a thick, cheap, heavy fork from a schwinn. I personally am not worried about the change in load, or at the very least, it is a risk I am willing to take.
If it’s not apparent already, this will be a very ratty, scrappy build ![]() . Much different than the last one.
. Much different than the last one.
Speaking of scrappy, here’s a mod I did to my road bike.
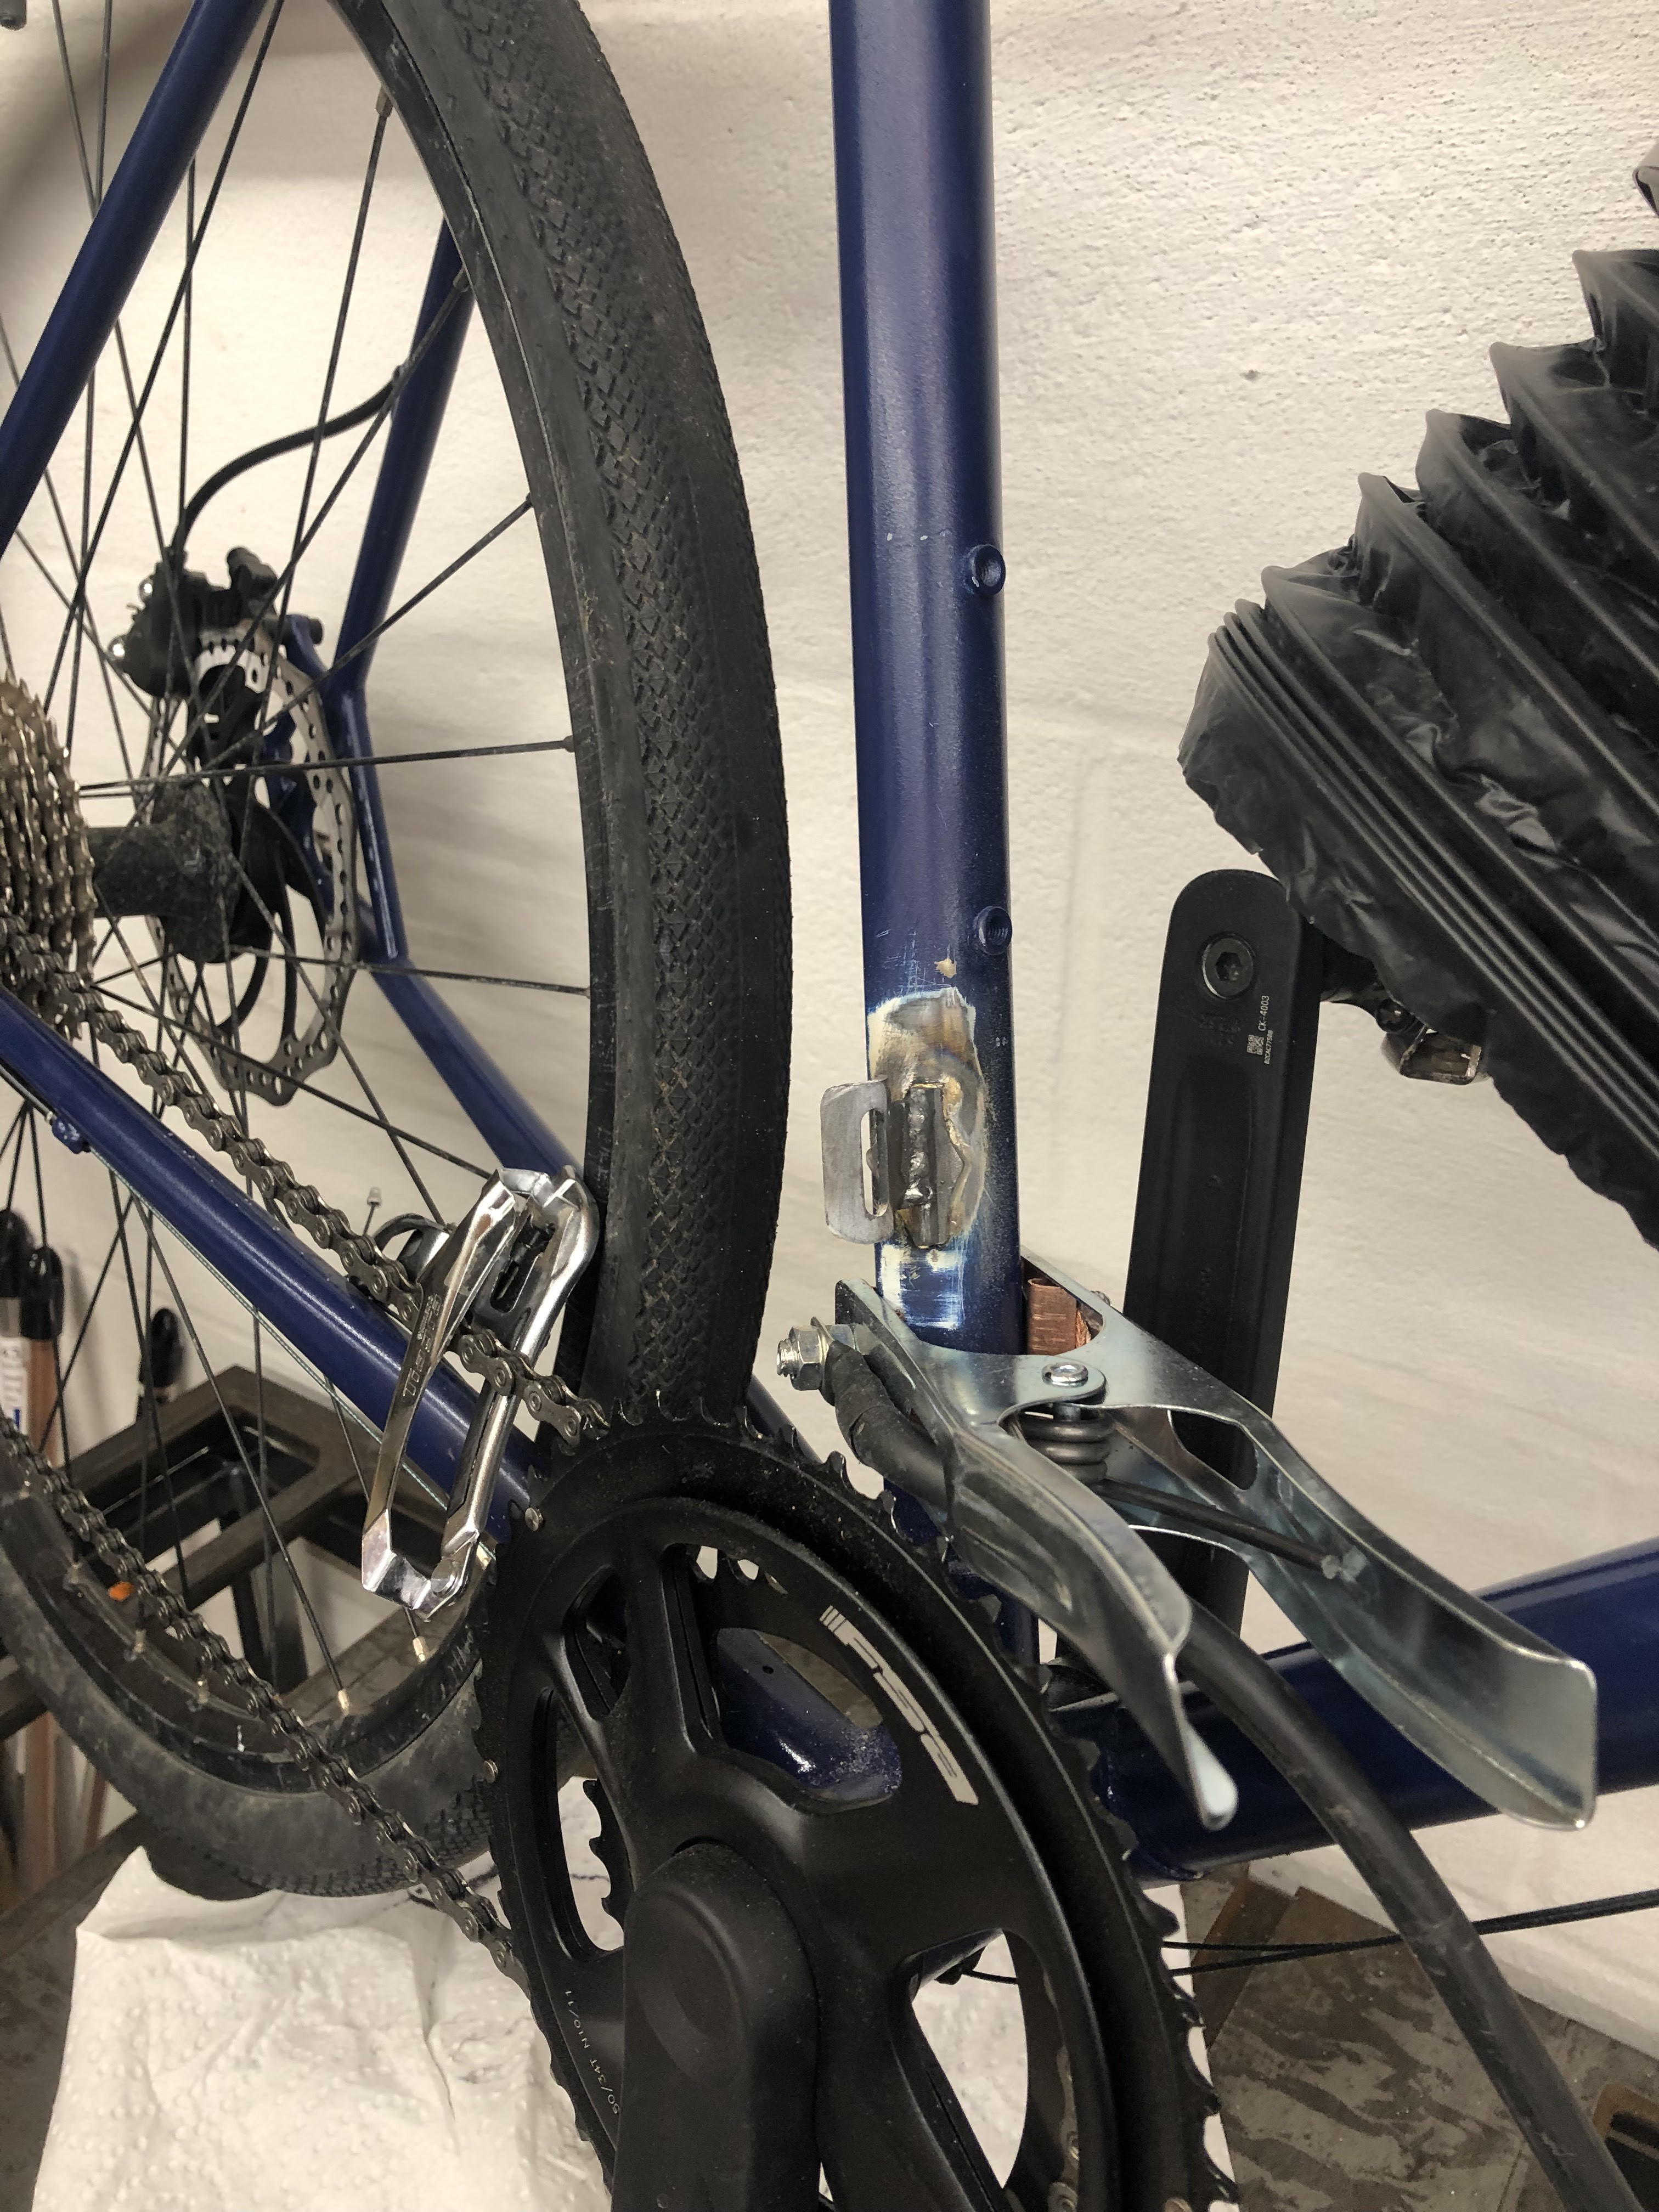
The front derailleur hanger mount didn’t quite hold the derailleur out far enough for proper adjustment. So I cut it off and welded it back with a little piece of steel as a spacer. Not I can reliably get into my big ring with no problems.
4 Likes
Well I’ve started the design. I’m thinking for this bike I won’t bother with 3D cad. I’m an engineer by day and I do lots of cad already so it isn’t exactly fun for me. I’m going to take a more paul brodie approach for this one.
As I design this bike I’m thinking about the construction process. Mitering and fixturing chain stays and seat stays are something that I do not have a good process for. My first bike was lugged with straight stays. My second bike used a very non-traditional way of joining stays.
For this bike, I’d like to use pre-bent stays such as these from BFS and I’m debating whether to use hooded or slotted dropouts still (any input? I want to tig weld this frame). I have some questions and concerns. I plan on making a rear triangle jig which will lock the dropouts and BB in space where they need to be. I imagine myself notching the BB side on my lathe if I can find a good way to hold the chainstays, then brute forcing the dropout side by filing, test fitting, and filing more. The seat stays will be “brute forced” this way on both sides. Is this reasonable? Is there cheap and easy ways to improve this process? I’m aware I’m doing a lot of hand wringing here, maybe when the tubes are in my hands I will have more confidence. Any advice for rear triangle work with basic tools is appreciated!
2 Likes
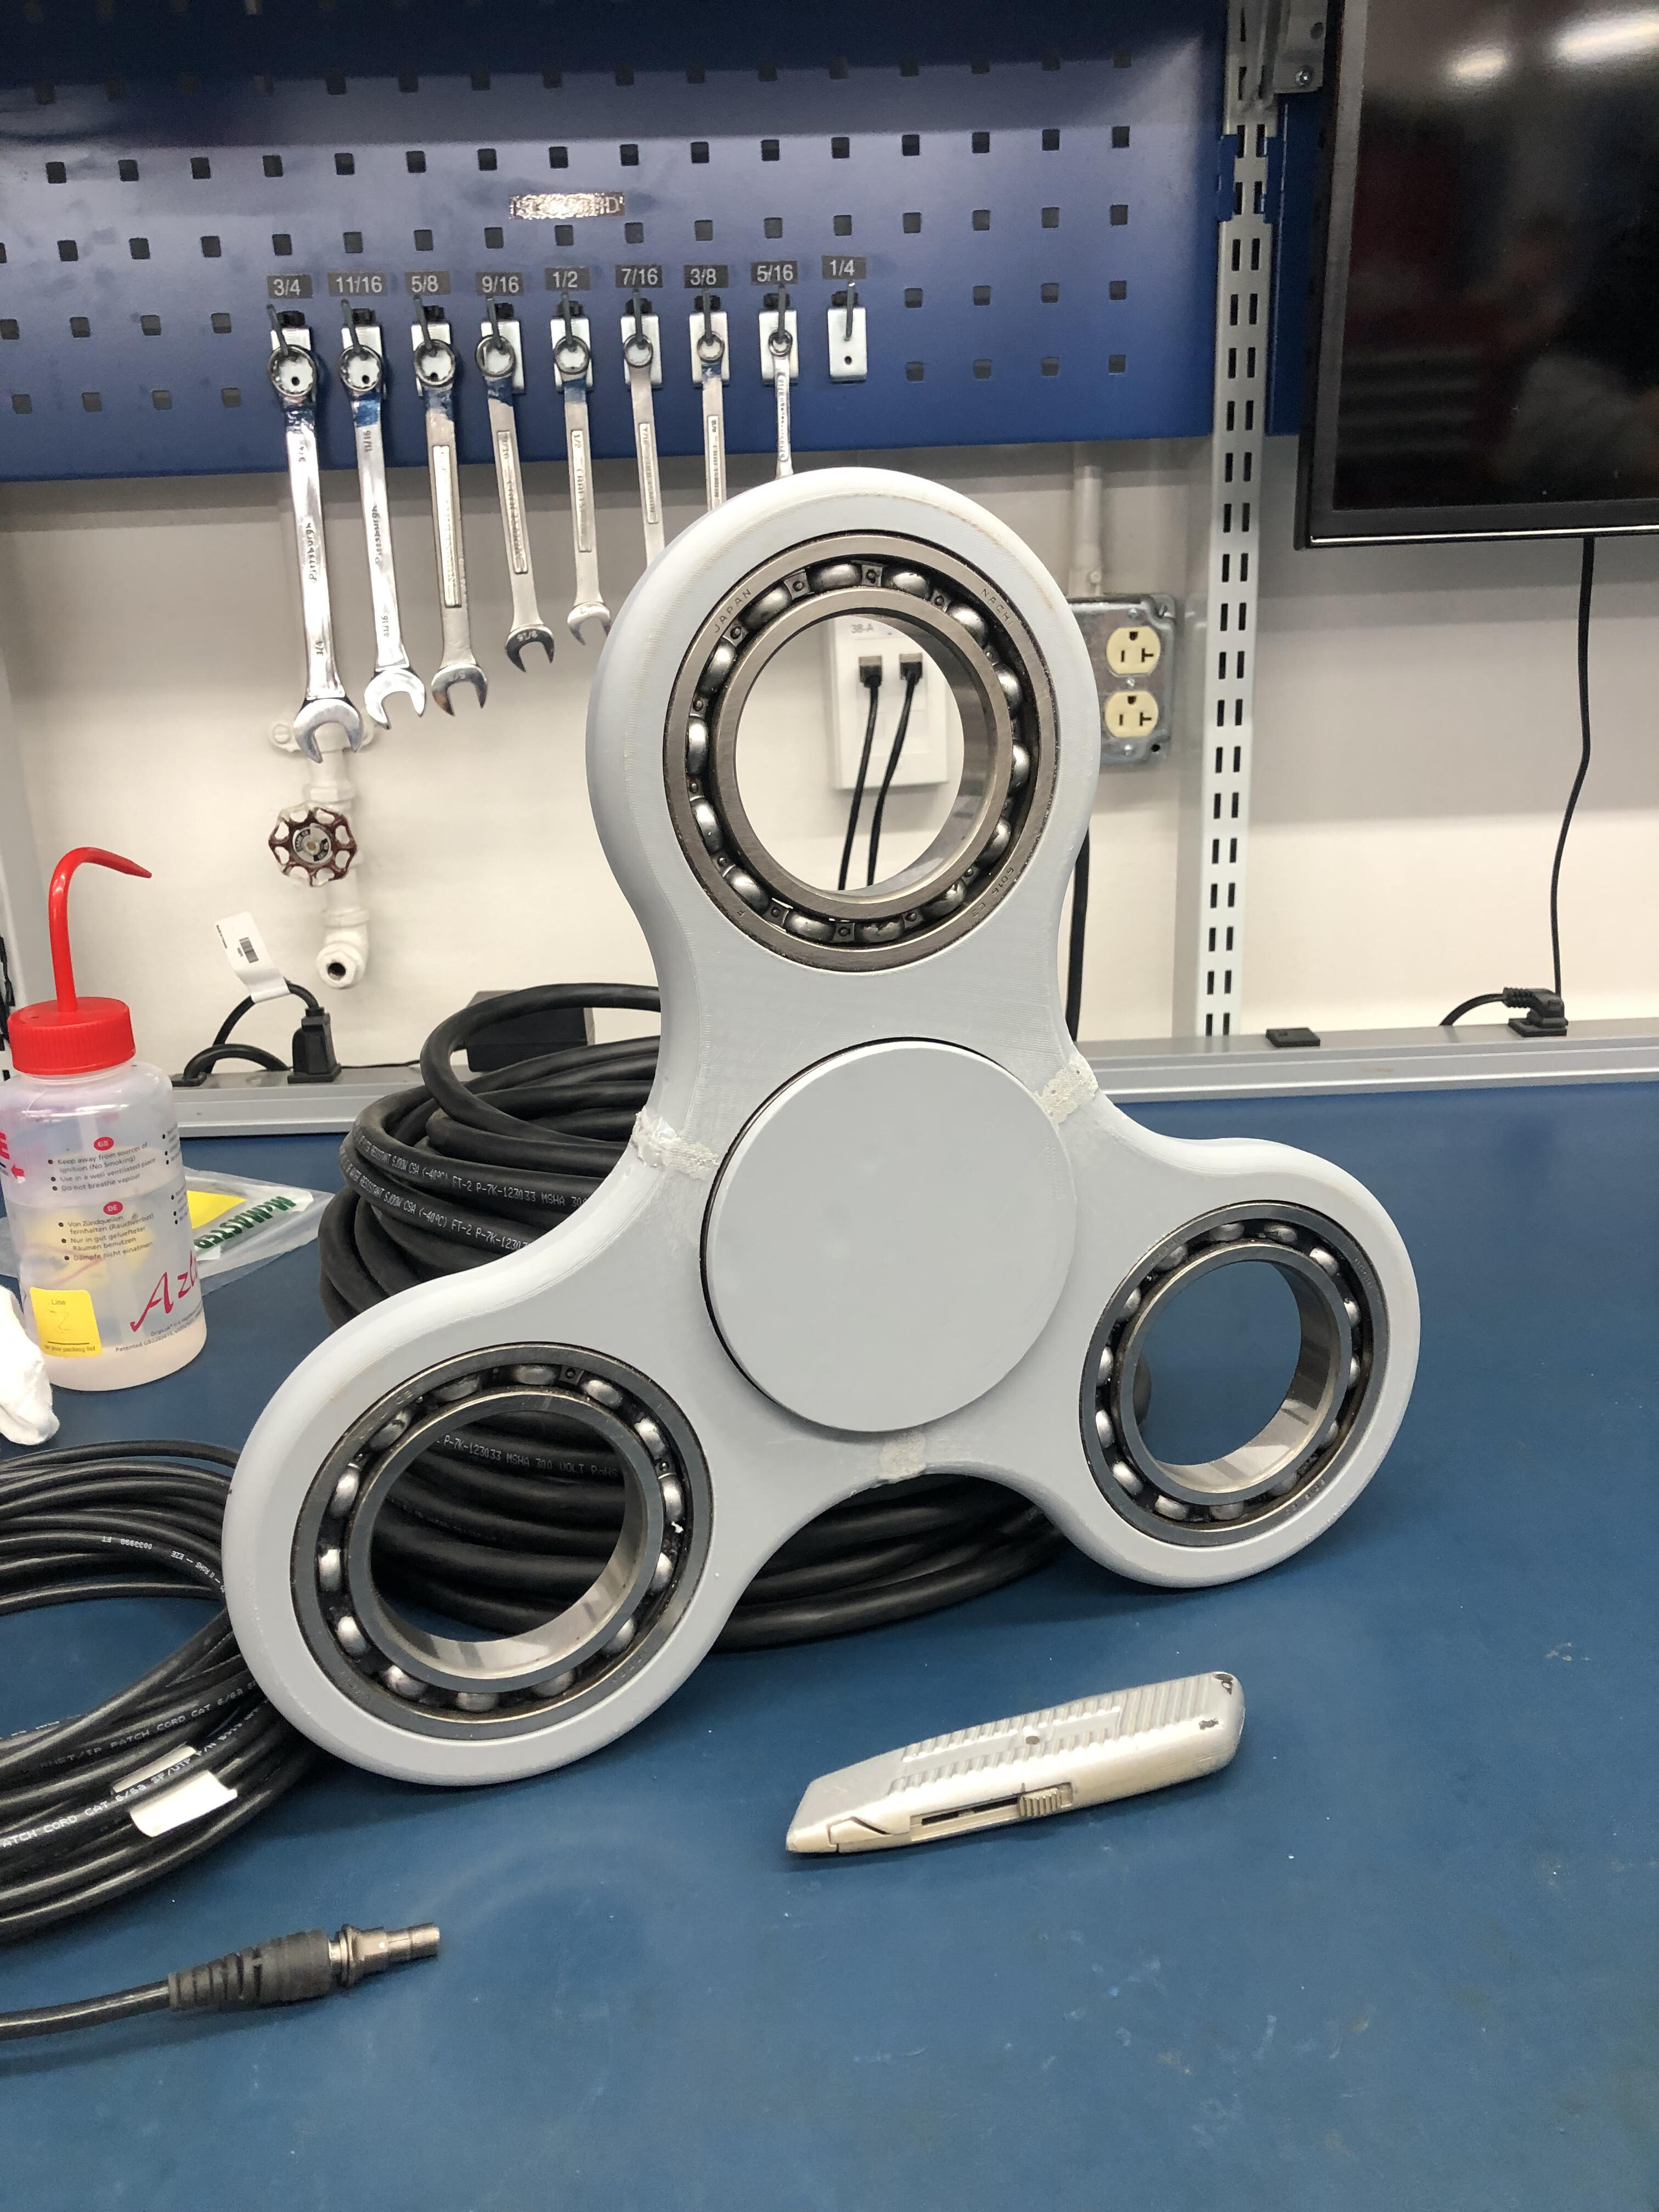
Oh also I found some industrual bearings in the trash at work so I made an enormous fidget spinner lmao check it out. Box cutter for scale.
8 Likes
I have had success 3D printing soft jaws for very specific tube angles and shapes if I need to do a one-off miter.
Depending on your tire clearance, that upper bend might be too aggressive for a tall-seat-tube-style gravel bike. I would do a 2D layout before buying those stays. I would expect a 15deg-ish bend
1 Like
Hey guys… Any idea what’s happened to the website? Is it working now? Or is the problem at my end?
No I don’t see it either.
1 Like

Yesterday I took advantage of an REI sale and got myself a frame bag. It was a great deal but it doesn’t fit perfectly. Maybe I will try to make this new frame accommodate this specific frame bag better. It’s admittedly a little silly designing a frame around a frame bag, but I won’t be altering any critical geo for it. Mostly just top tube angle. We will see how it goes.
1 Like
Some new developments in the JM world
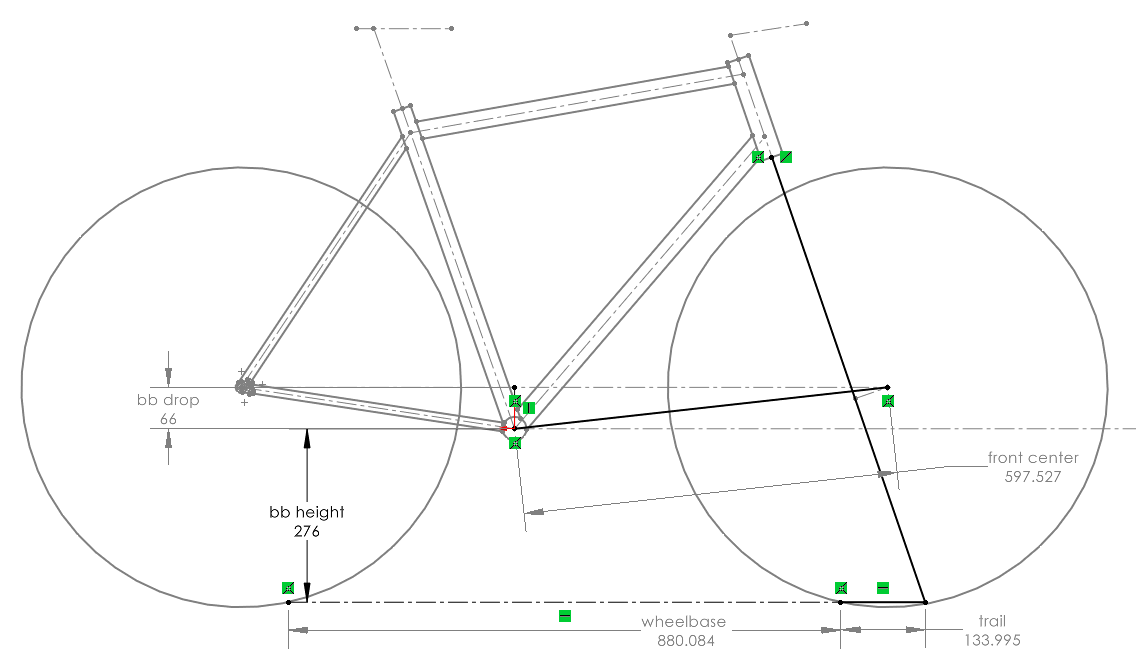
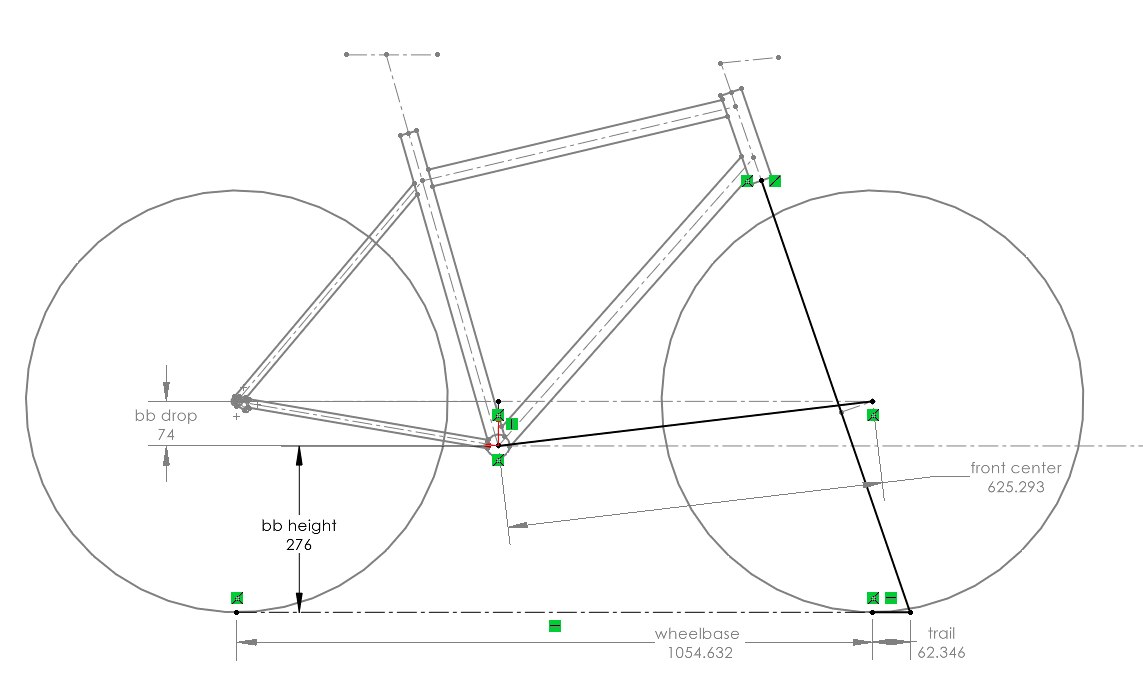
I’m closing in the geo. The one thing I’m still considering is changing the top tube location / angle to best fit that frame bag that I bought a few days ago.
Since I’m not making a 3d model of this bike, I needed another 2d sketch of the rear end to check clearance. After messing around with different bent chainstays on the market I wound up with this. A little tight for my original 2.35" tire goal but knock it down to a 2.1" or so and I should have plenty of space.
Here are the components I’m considering using. I will most likely place my order this week sometime. We will see…
| Frame Bill of Materials | ||||
|---|---|---|---|---|
| Component | Description | Link | Price | Vendor |
| Head Tube | 1-1/8" HT stock | already have | ||
| Top Tube | 28.6 | link | $16.00 | framebuilder supply |
| Down Tube | 31.8 | already have | ||
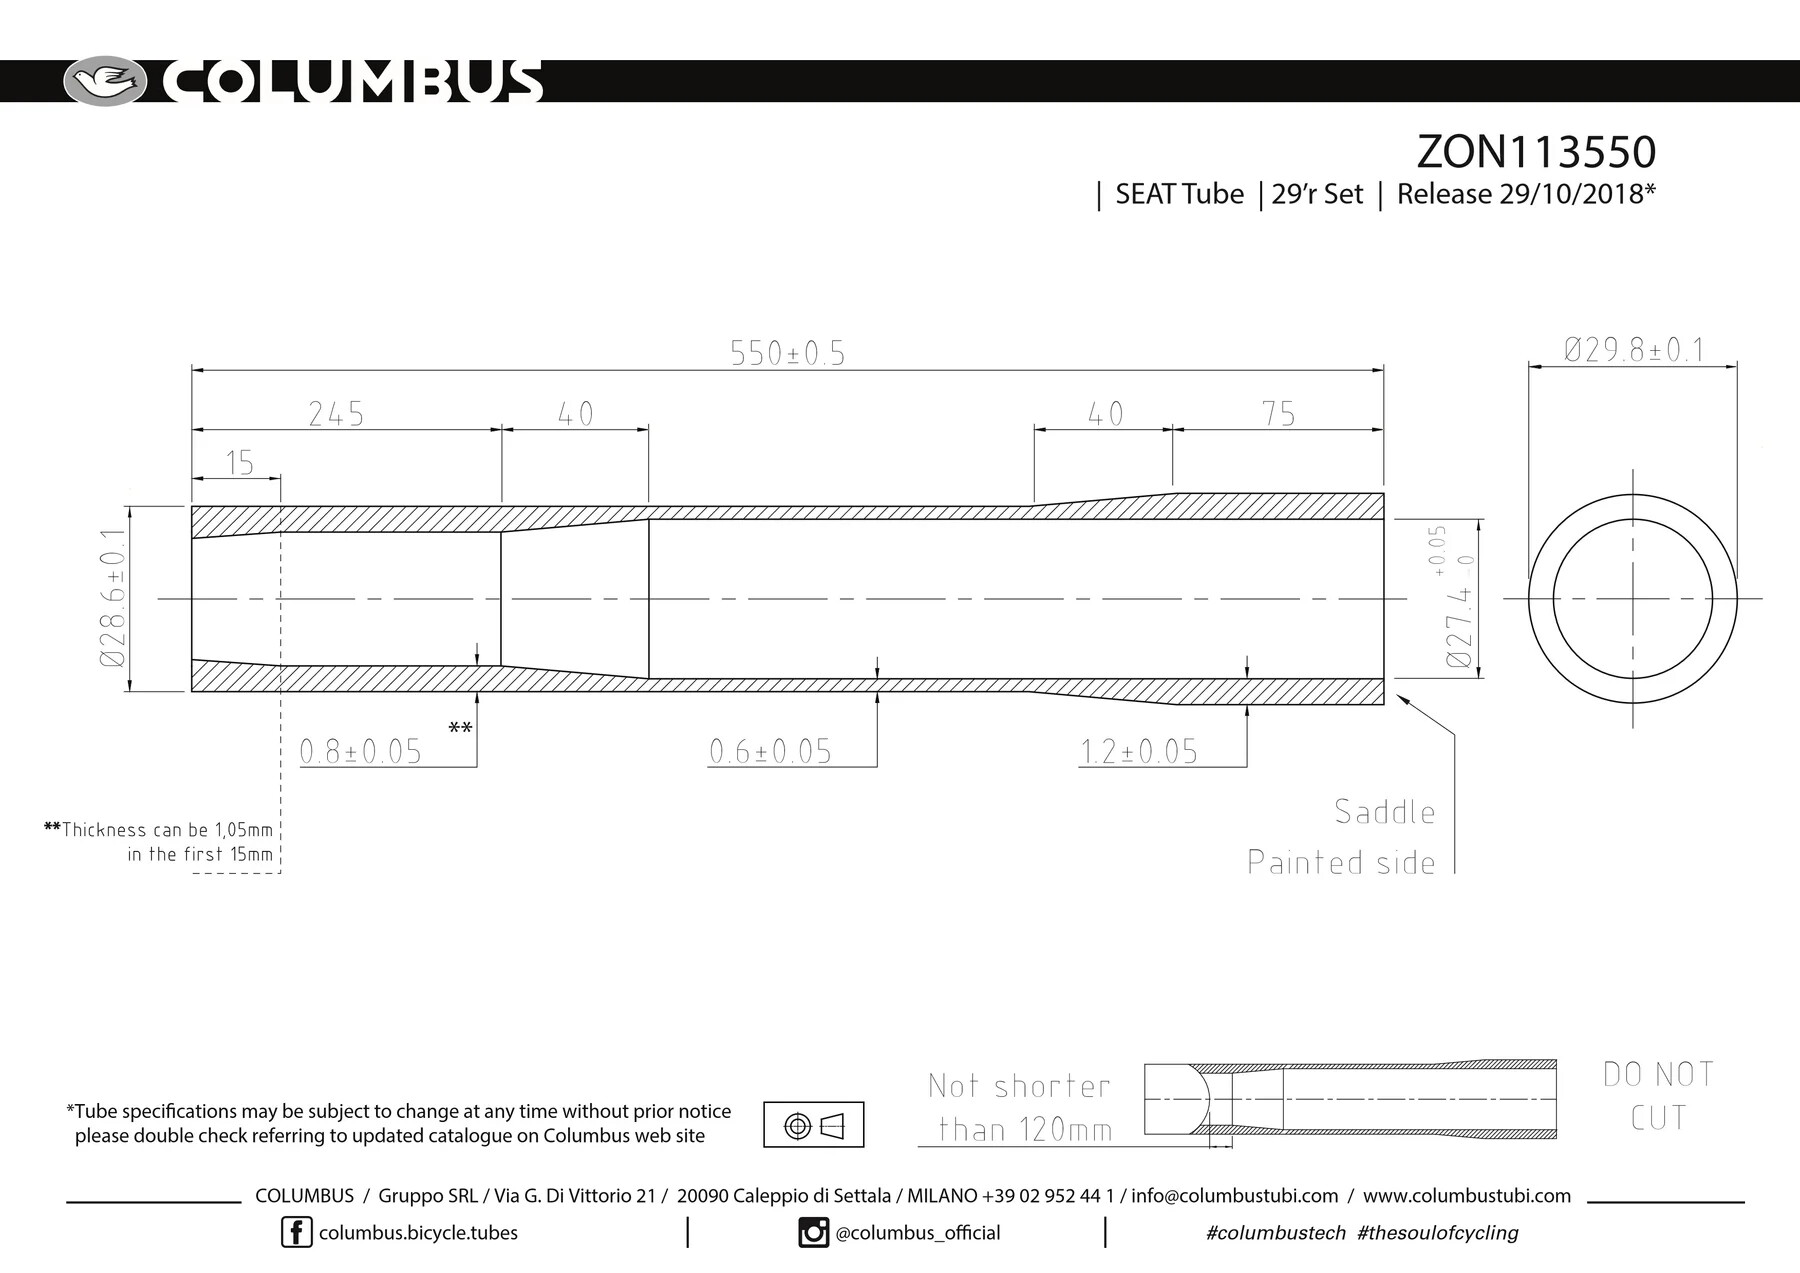
| Seat Tube | 28.6 | link | $17.00 | framebuilder supply |
| Chainstay | link | $38.00 | framebuilder supply | |
| Seatstay | link | $30.00 | framebuilder supply | |
| Dropouts | link | $35.00 | framebuilder supply | |
| BB | 73 width | link | $7.00 | framebuilder supply |
| cable guide | link | $10.00 | ||
| disc tab | link | $8.00 | ||
| bottle bosses | link | $4.00 | ||
| seat collar | link | $7.00 | ||
| Total | $172.00 |
2 Likes
I would double-check if that is the correct seat tube to use. It is designed for lugged frames. The braze on the collar might strengthen the seat clamp area, but your seat stays will still land on a .6mm thick tube. People have reported cracking where the SS joins the ST.
Most people are using the externally butted seat tube for road and gravel bikes:
Also, this is in the realm of personal preference and risk tolerance: for a flat bar gravel bike that size with 2.1 clearance, I would use a 35mm downtube for stiffness and strength.
2 Likes