Hey all!
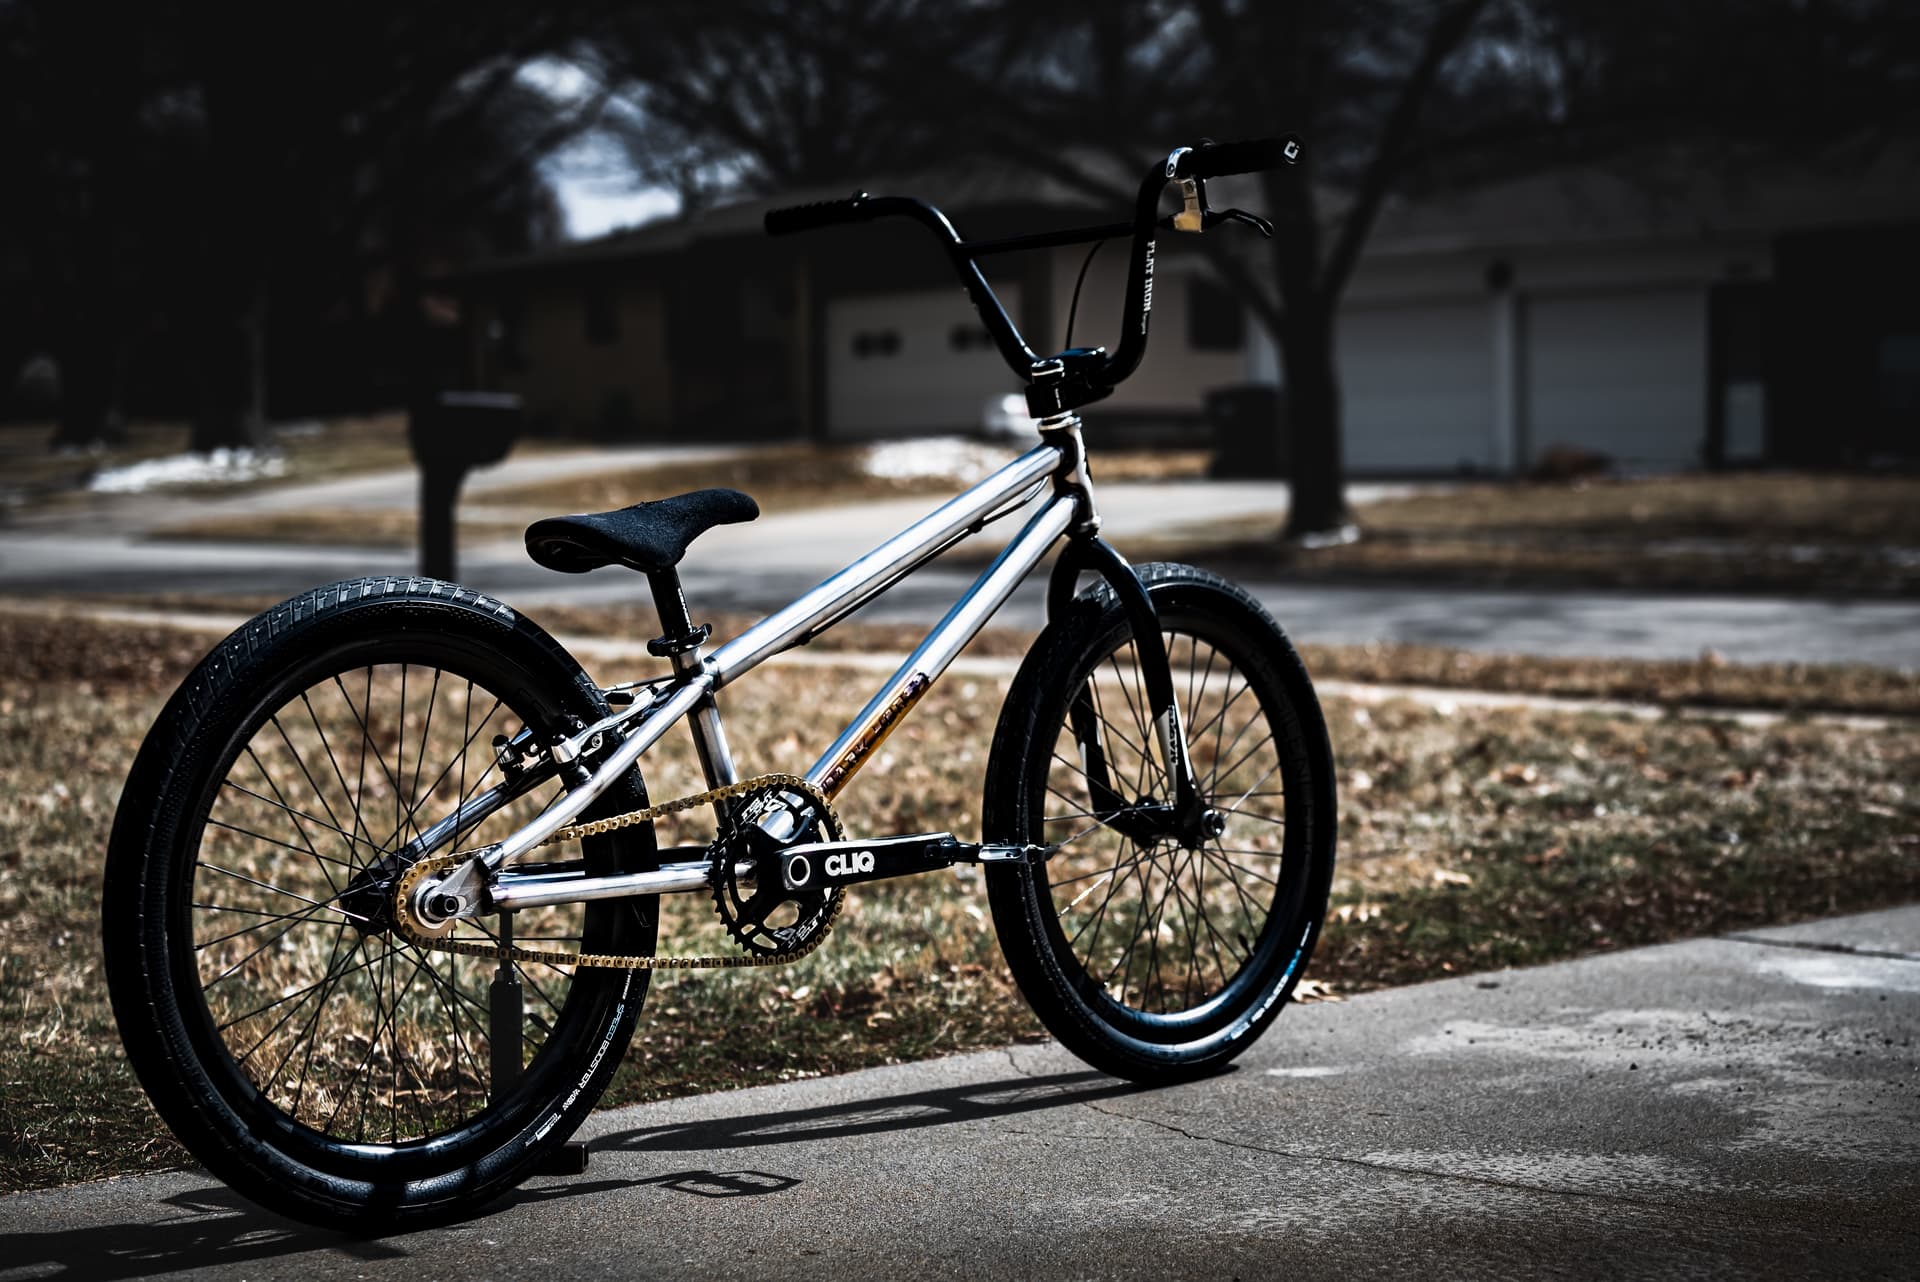
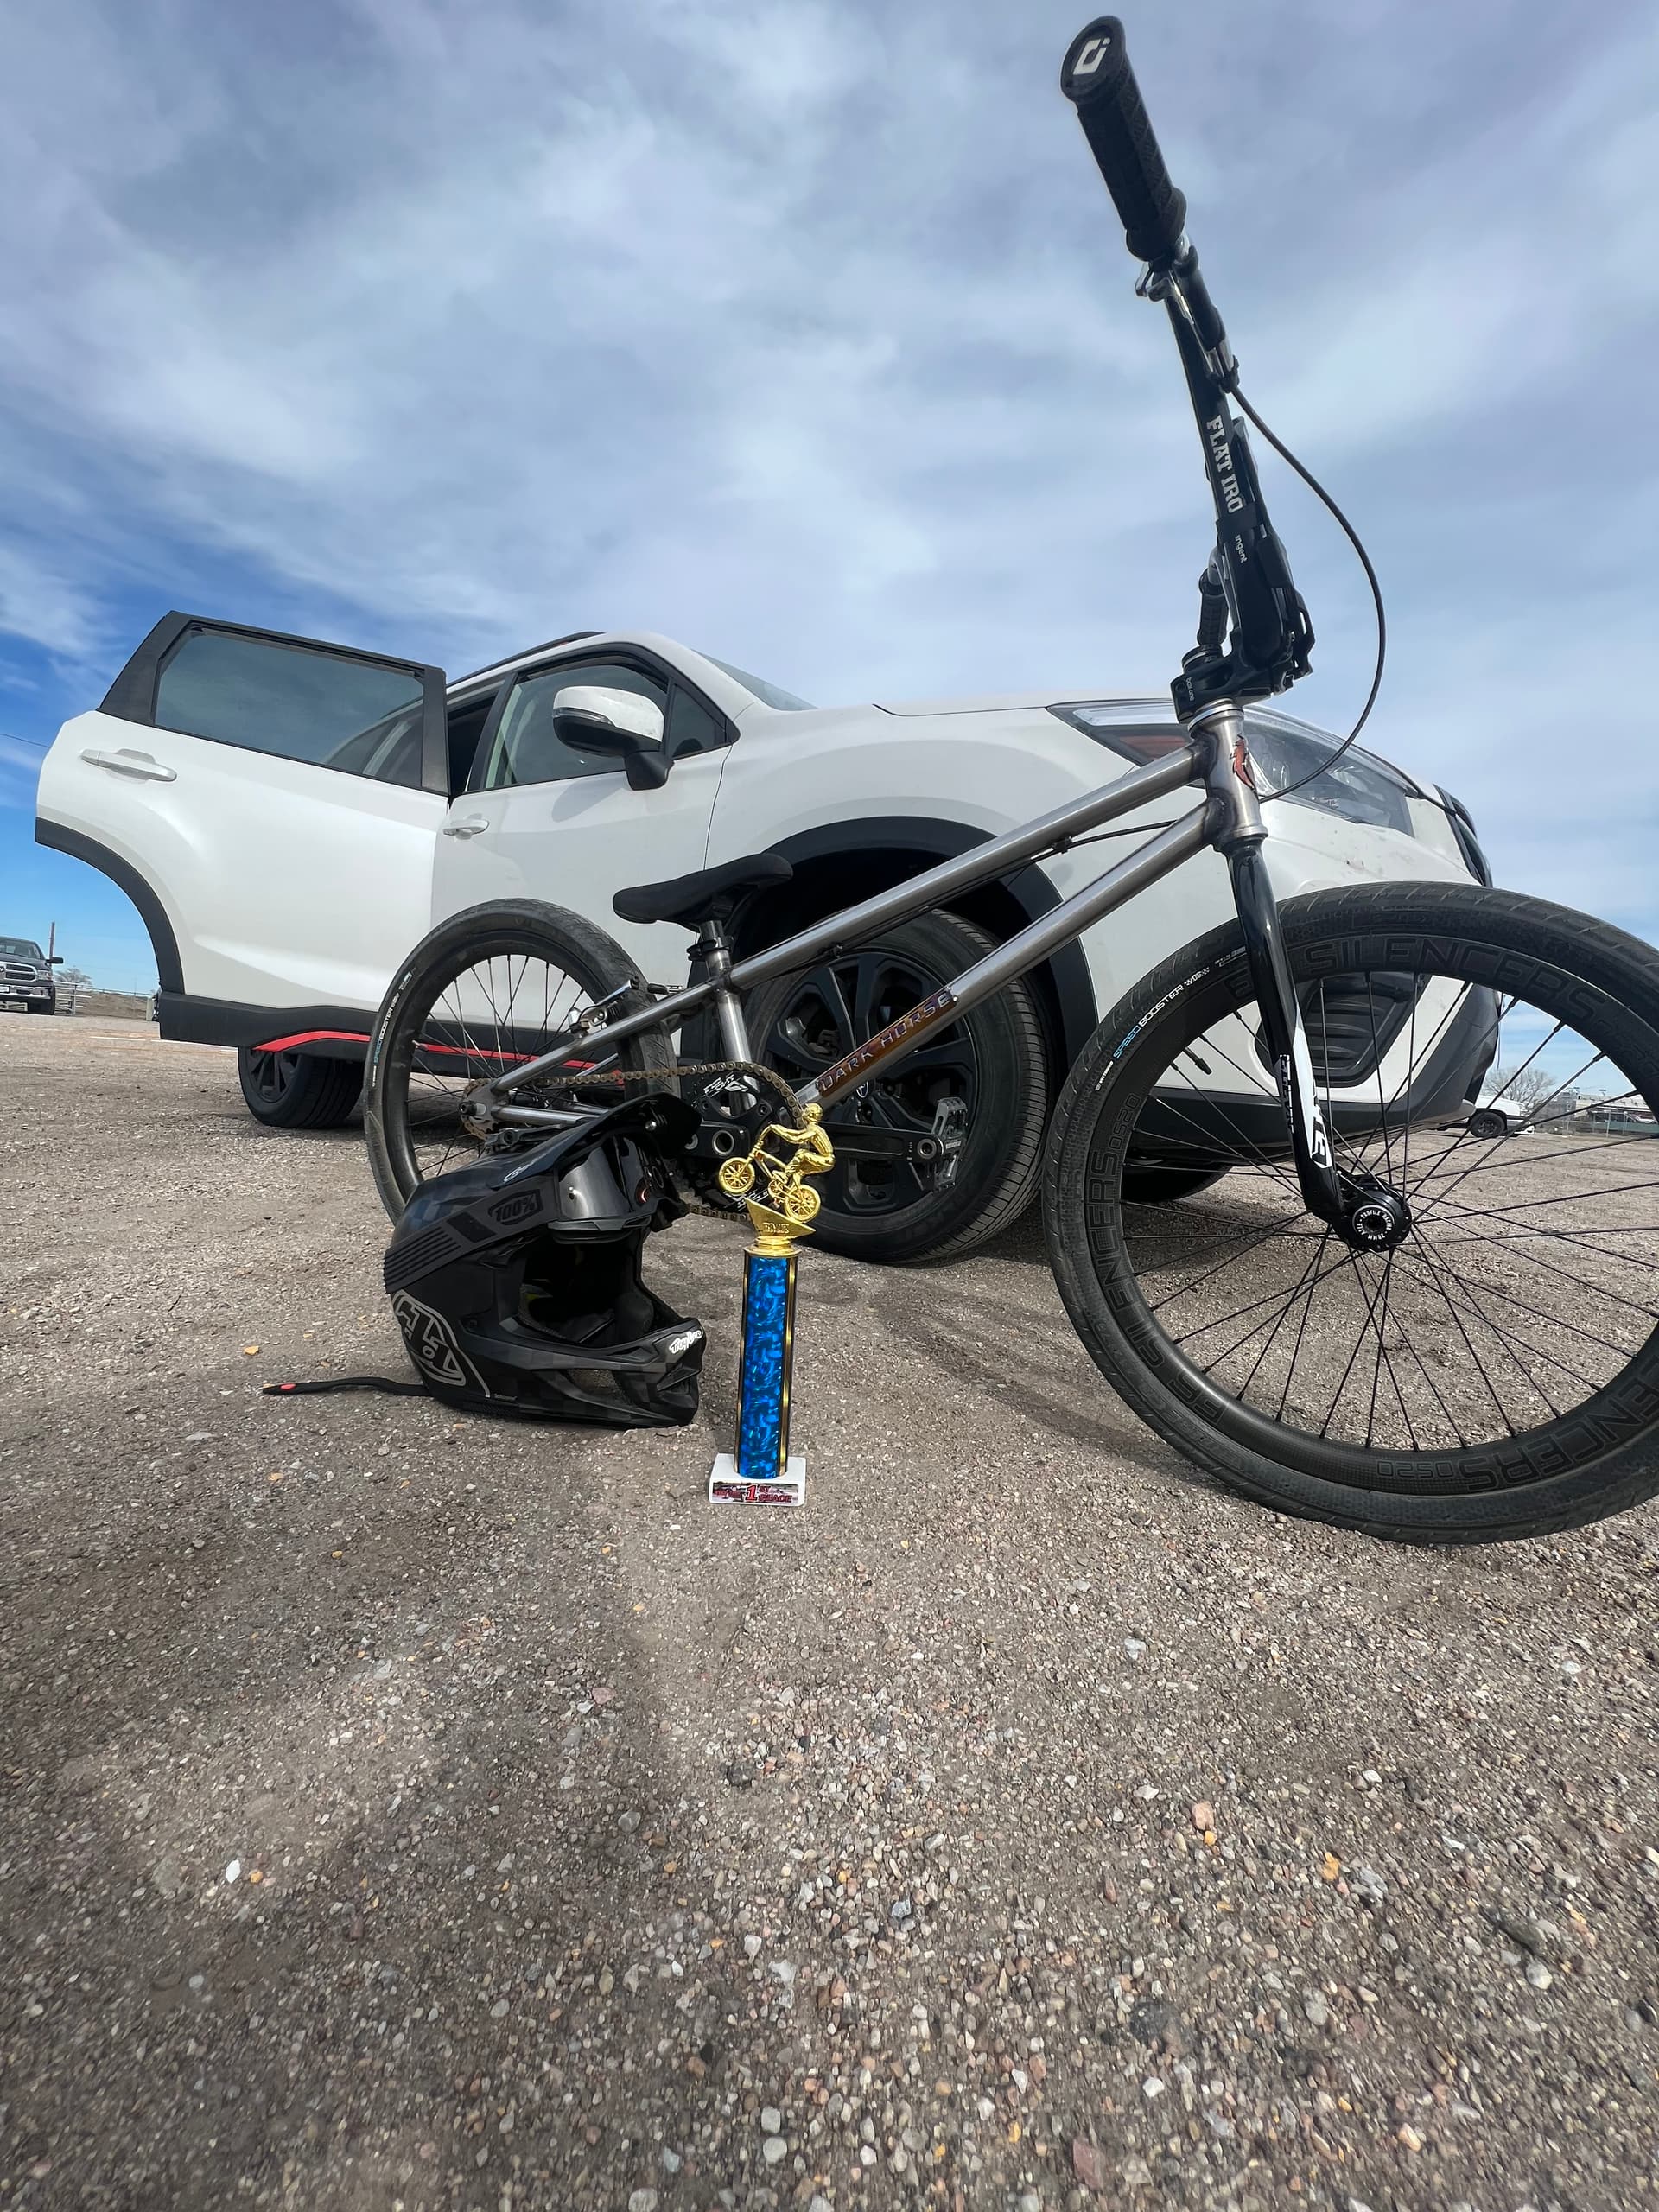
Recently wrapped up my first frame build. Like most of us here I’m sure, I’m very much my harshest critic. I didn’t end up with too many welds I’m proud of on this one, not every dimension ended up exactly as planned, but it still put the biggest grin on my face ripping it around the track for our season opener at the local; even got a W for the day! To say I learned a lot is an incredible understatement. Currently working through a few modifications to my fixture while I plan out #2! A quick shout out to this forum, and everyone out there that shares their knowledge, this literally wouldn’t be possible with out all of you!
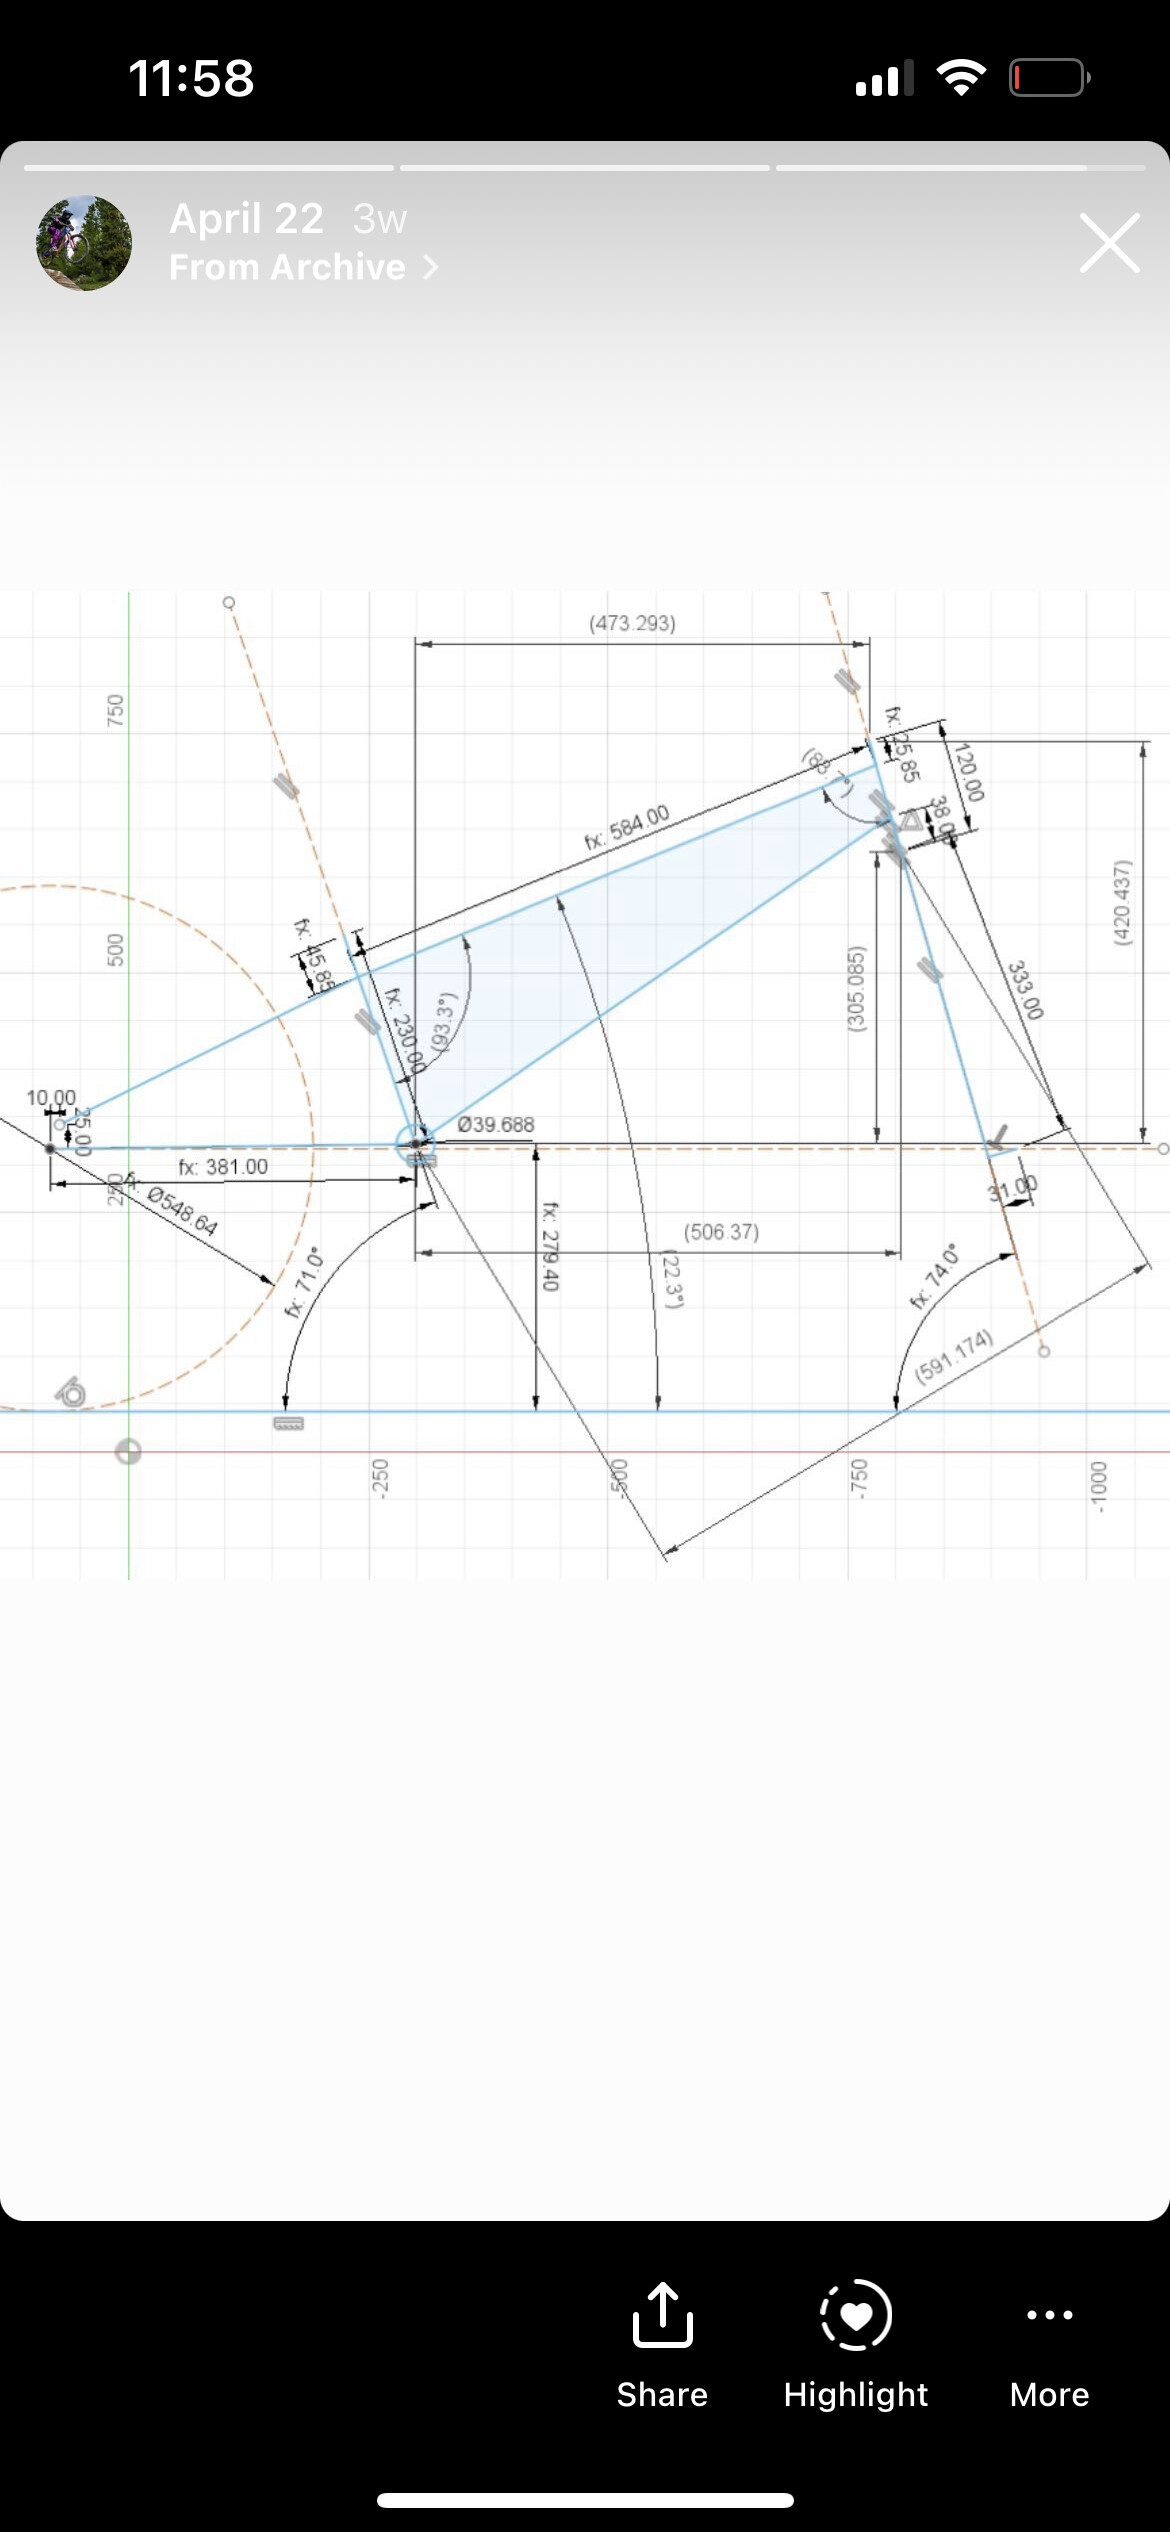
The bike is an OS20 (451mm rim vs 406mm of a standard 20", still legal in class racing) with fairly standard geometry, outside of a lower bottom bracket. The majority of OS20 frames this size will have a bb height around 11.5-11.7", i sat this one down at 10.8 (equates to a 0 drop on my 21.6OD tire). While I’m, still getting use to the fit, it does seem to provide a stable ride and impressive corner carving with the lower center of gravity.
23 Likes
That looks fantastic!! I haven’t ridden much BMX but I have to imagine snagging a win on a homemade frame must be just about the most satisfying experience a cyclist can have.
I’m at a similar stage in my frame building journey. Just wrapped up my first frame and I’m happy with it but it opened my eyes to how many deficiencies in skill, technique, and process I have. My biggest takeaway is that I absolutely must have a stay mitering fixture for my next frame for my own sanity. I’m curious what changes to your fixture you are planning on making and any other major lessons learned.
I love the bare steel too! I was planning on doing that but like you I wasn’t happy with my welds and ended up going with the most textured powdercoat I could find to blend them in 
3 Likes
What a slick-looking build. Must feel good to race something that you built.
Did you use any butted tubing? Did you custom-cut the plate dropouts?
2 Likes
@AbsolutelyHonks It was a pretty spectacular feeling for sure! Regarding fixturing, I found a few areas where things either weren’t held stiff, or perfectly straight, or were just a pain to setup. My fixture was basically a copy of the Pithy Bikes frame, that i had made up before I finished his series where he talks about updates to make setup/fitment easier, lol. I wanted to change how I held the bottom bracket, as well as setting head tube/seat tube angle. Also changing my complete axle fixturing. I’ve ended up with a step child of a pithy bikes/cobra fixture with a few tweaks added in on my own. I’ll make sure and post more on this after I complete my revisions! I love the seat stay bridge you put in! I have a similar design in working for round 2 myself!
1 Like
@Daniel_Y Thank you!
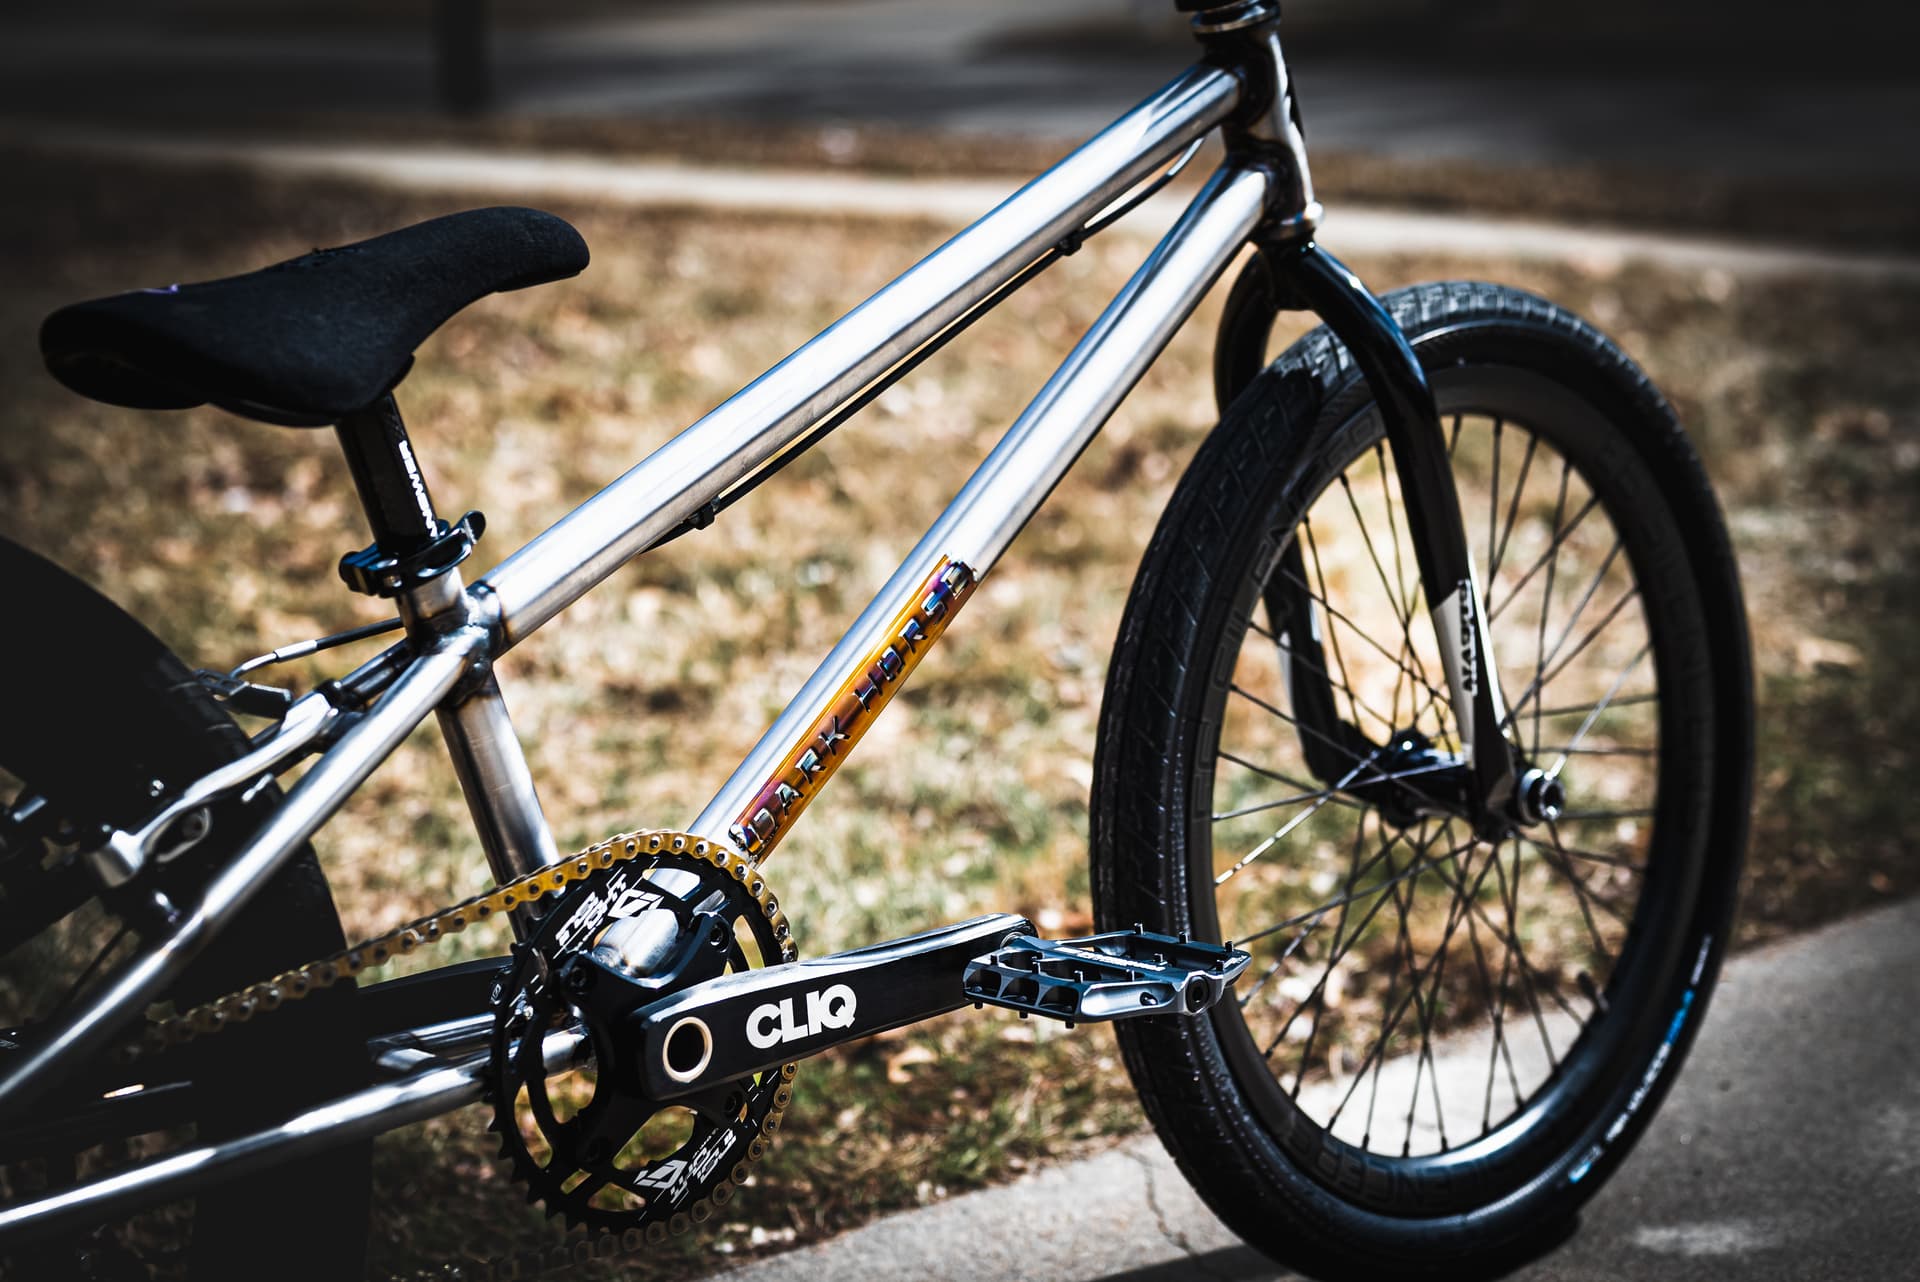
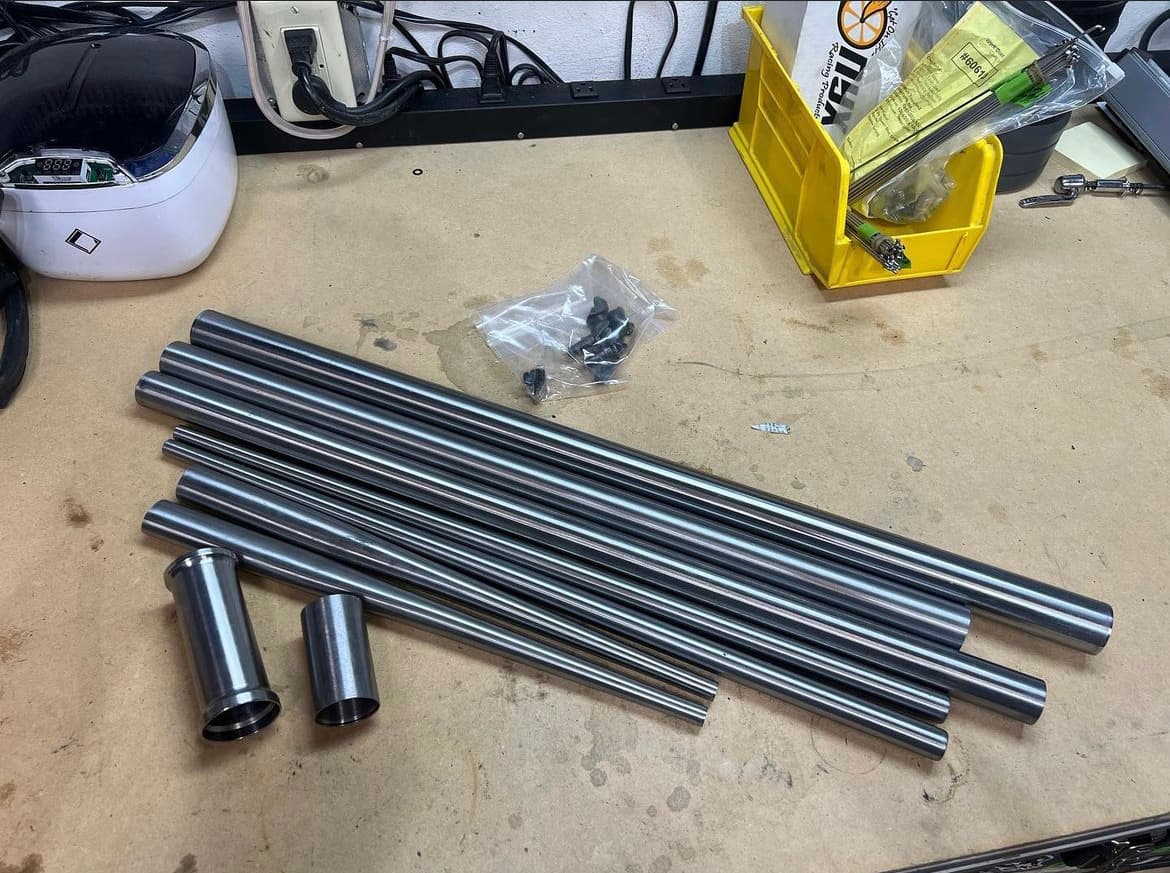
I used butted tubing for the front triangle. I believe .7/.5/.7 on the 31.7 top tube and .8/.5/.8 on the 34.9 top tube, with .9/.6 on the 28.6 seat tube. I will say, the frame feels a little less ‘robust’ than I’d prefer, and its kind of silly how light it is when you go to pick up a chromoly race frame. Honestly think it ended up lighter than my previous Zero Nine aluminum frame though I haven’t officially weighed it yet.
The dropouts were something I drew up and had send-cut-send knock out, along with the badges. I personally can’t stand the look of chain tensioners common in the BMX world hanging off the back of frames, and this was my short putt to have a clean look. The idea was 3 ‘flip chips’ with hole spacing in 5mm increments, and a half link chain, would allow me dial in a sweet spot. It kind of worked, but changing a gear or wheel spacing is a lot more work than usual, lol. My next frame will have some original CNC drop outs with an integrated tensioner setup that I’m pretty stoked on.
3 Likes
I’ve been meaning to update this for a while but ya know, life and what not, lol.
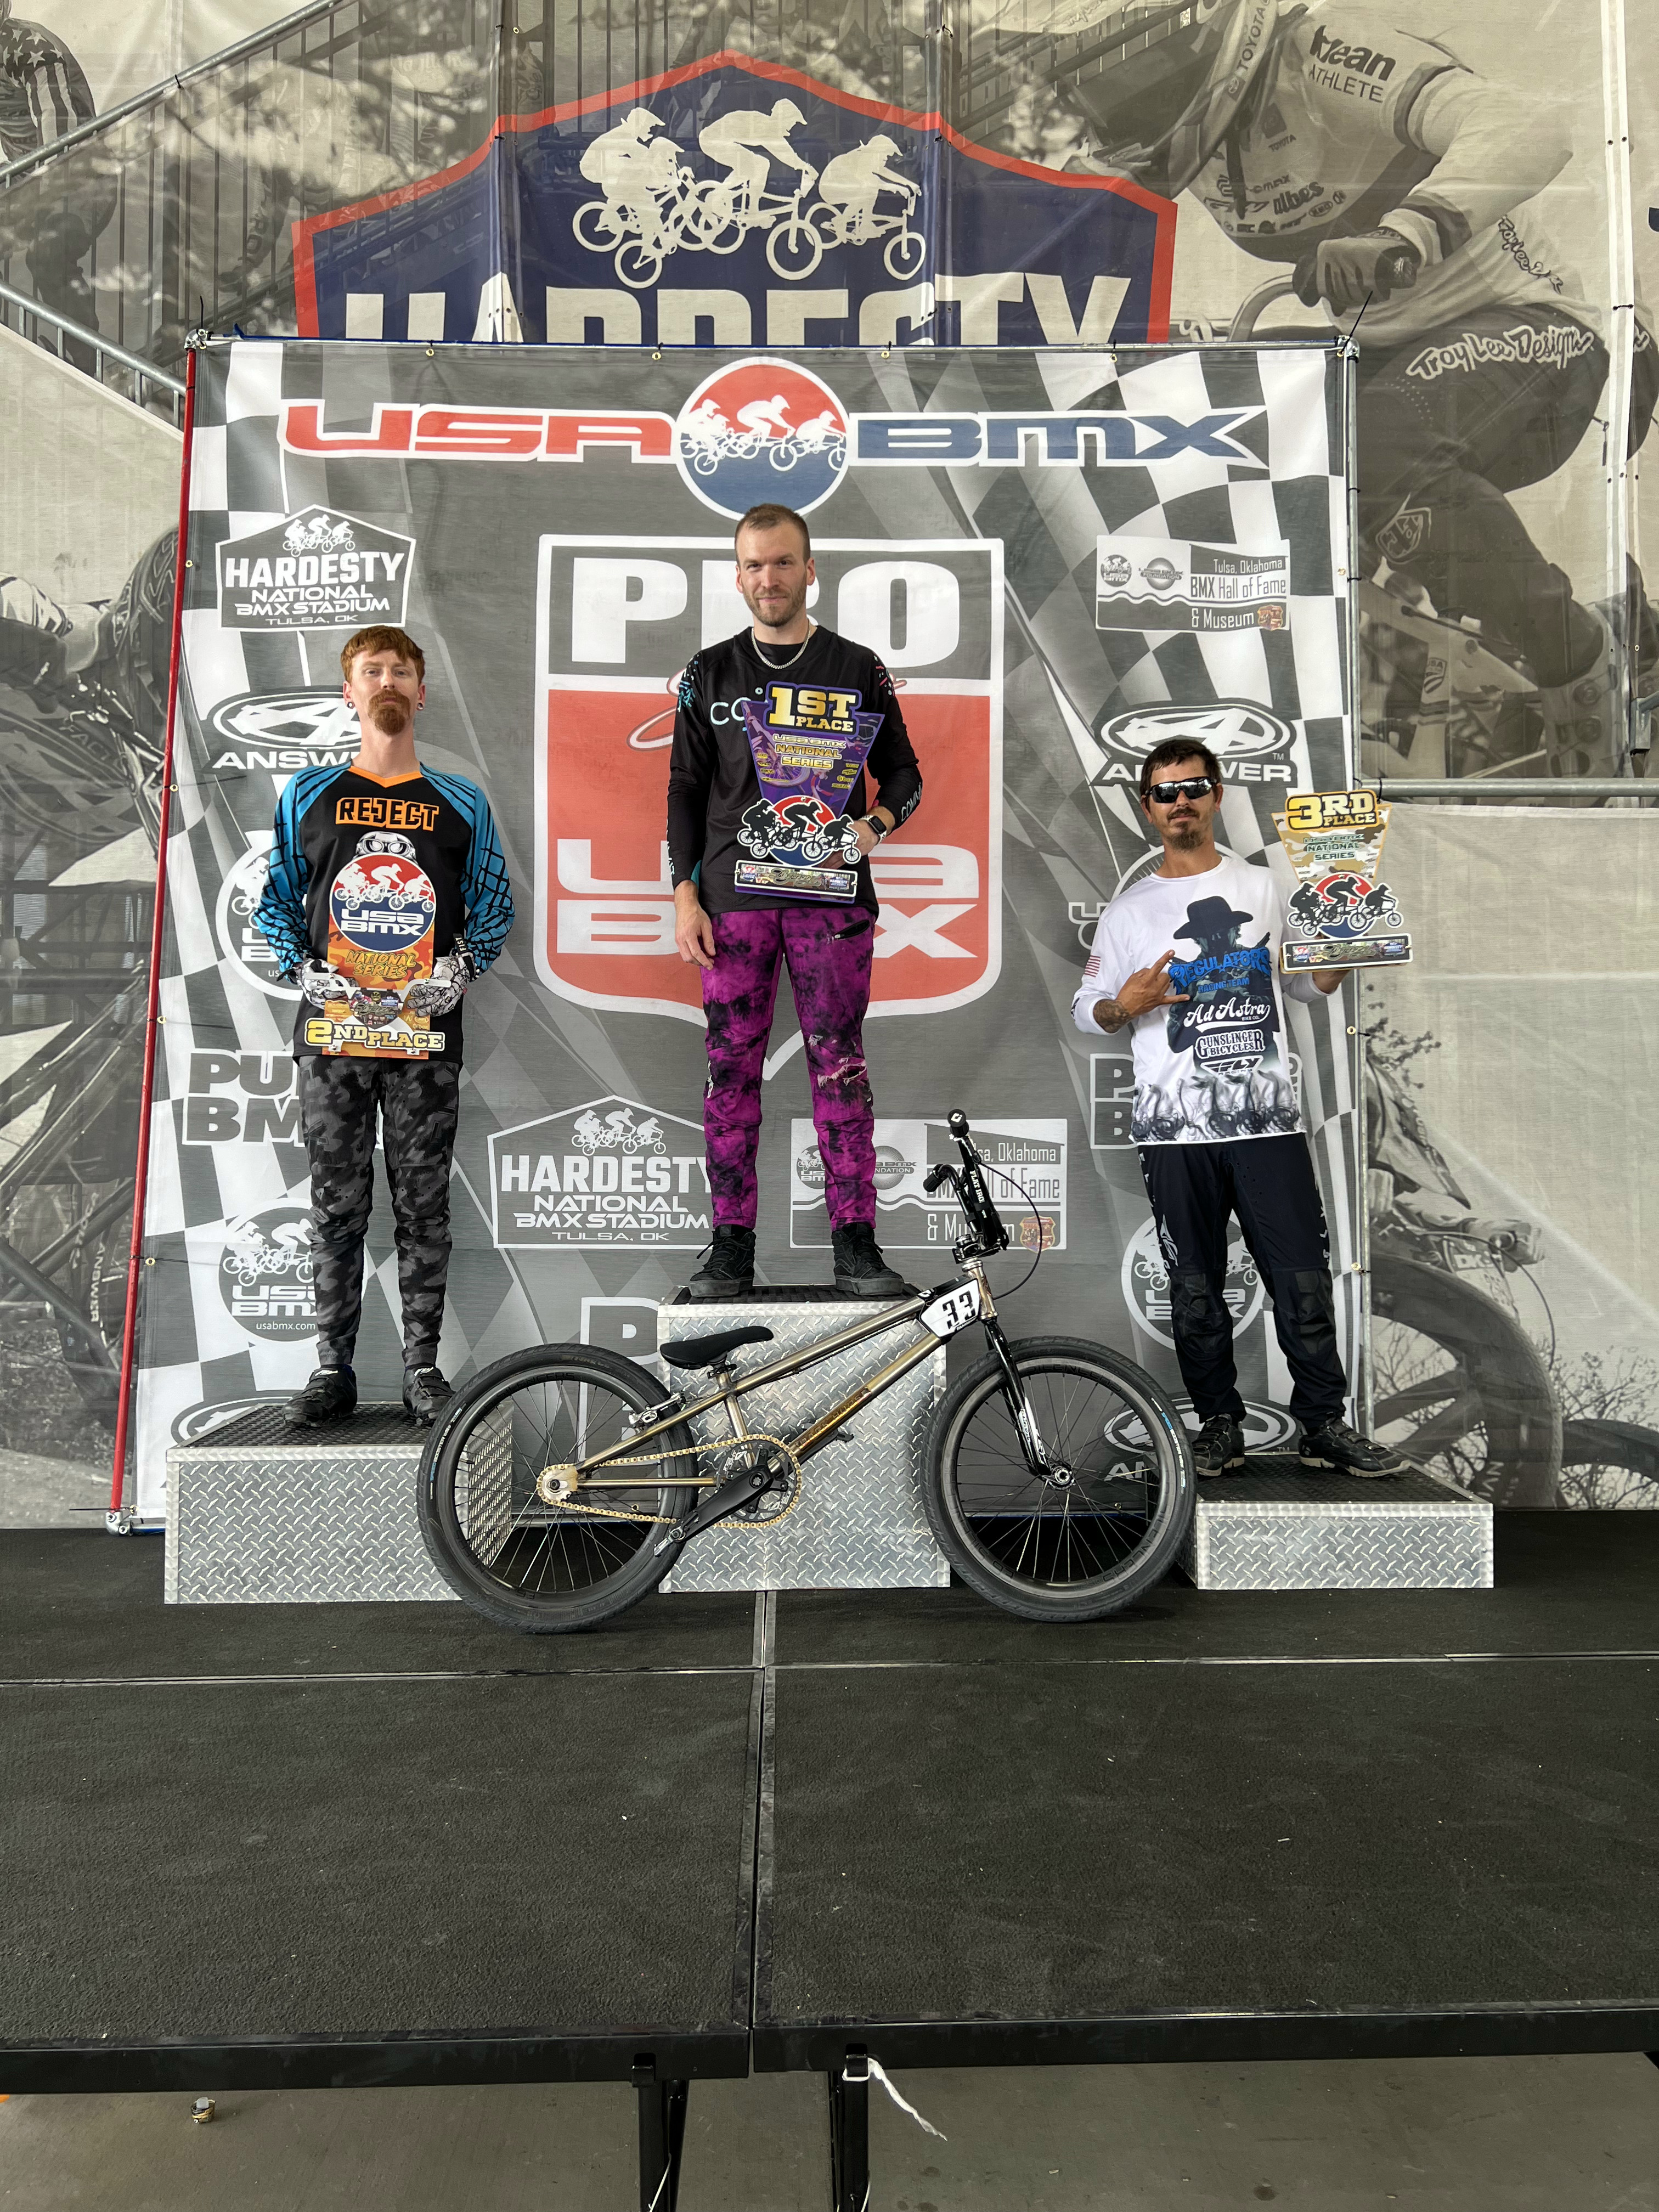
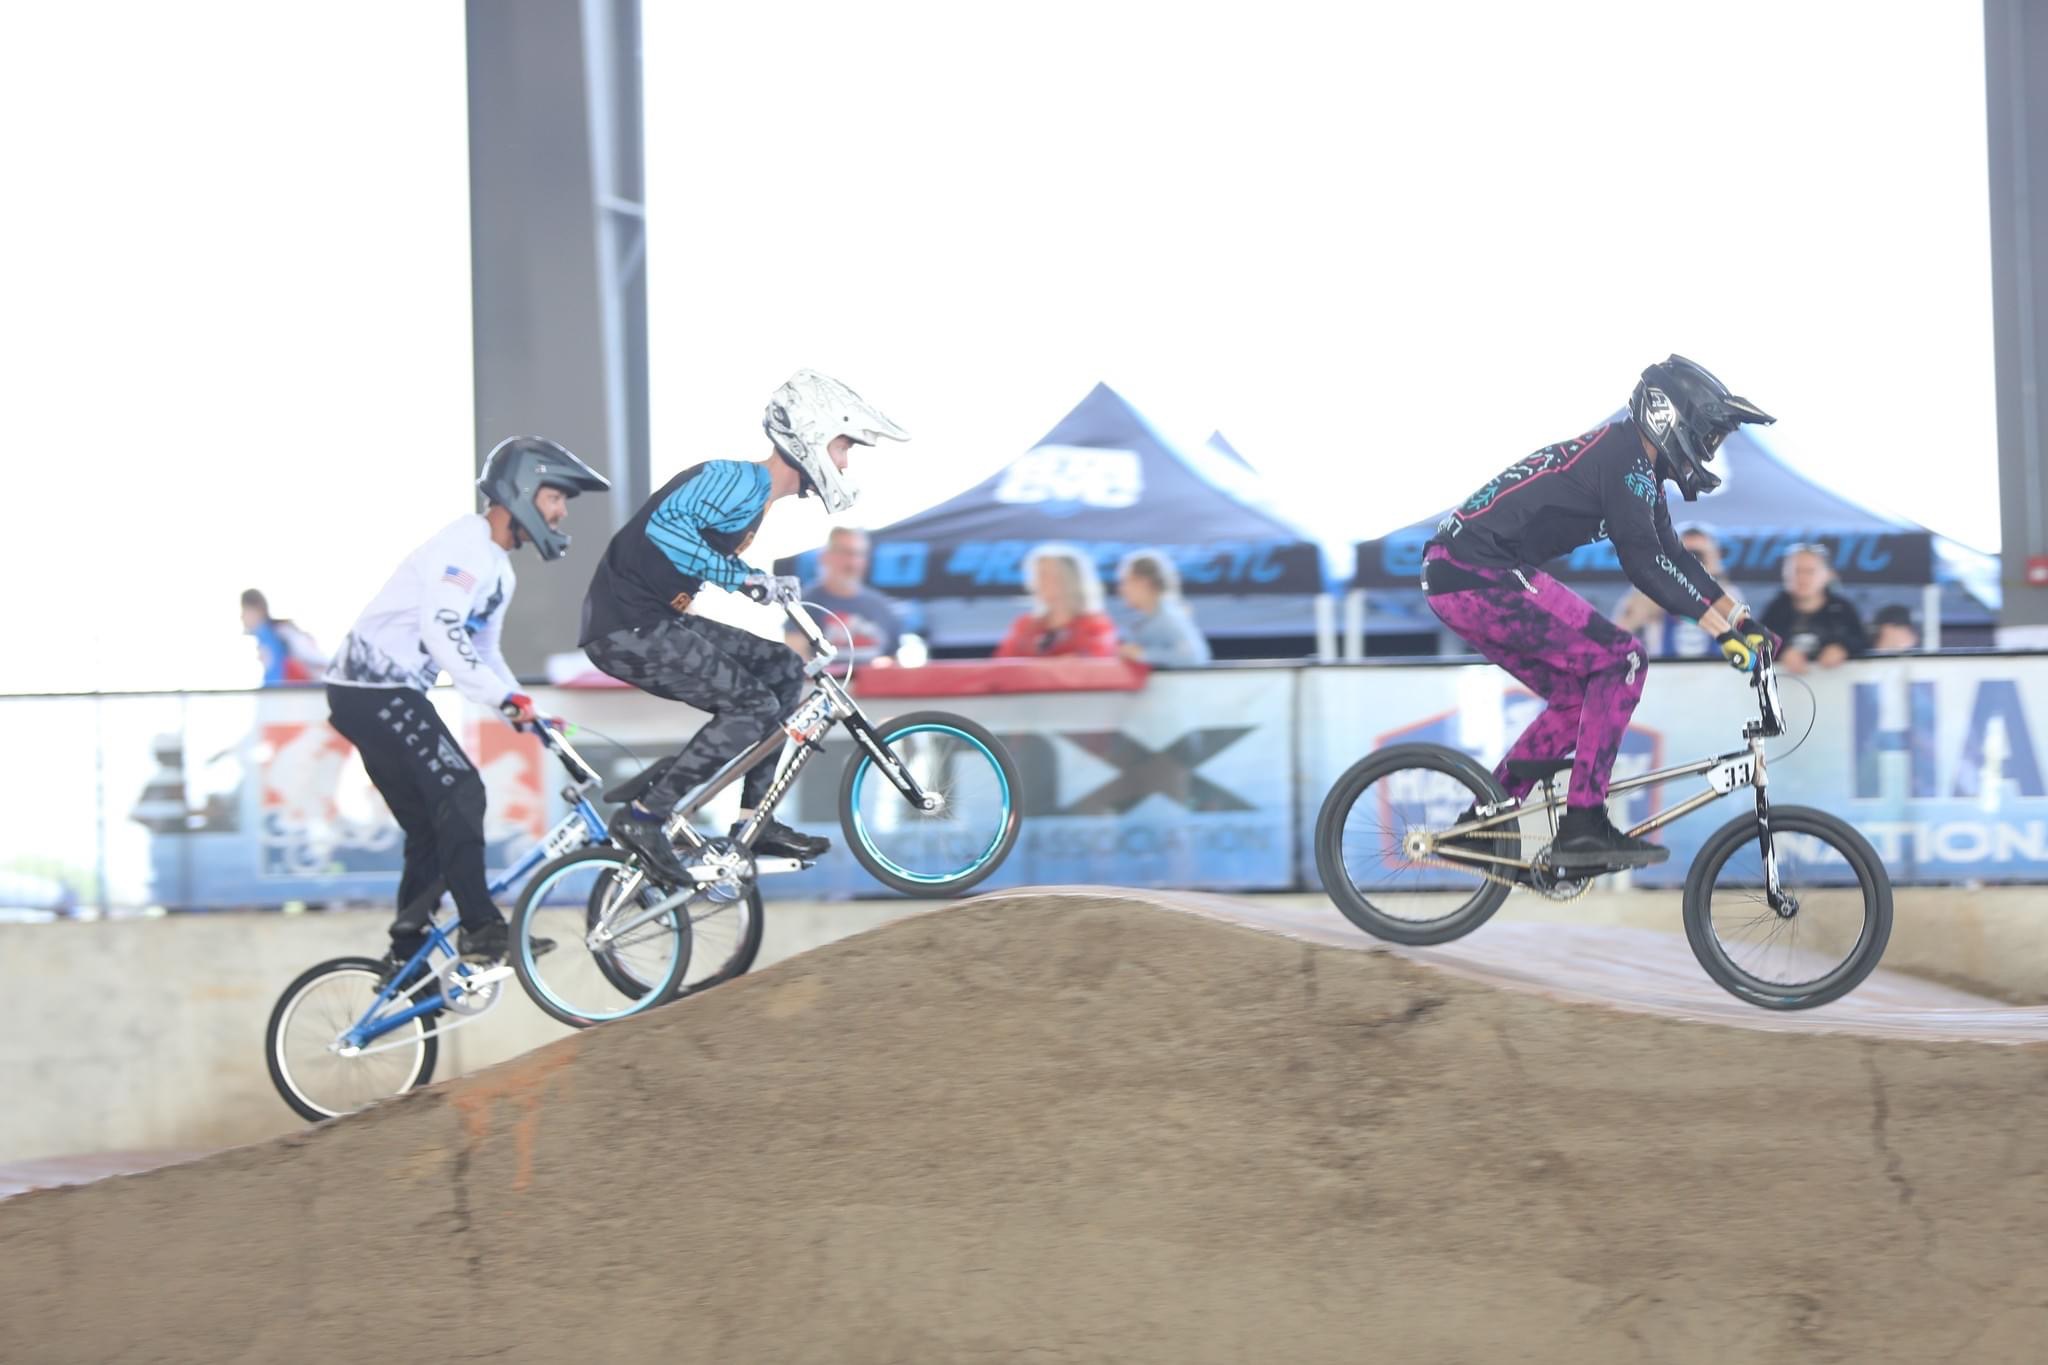
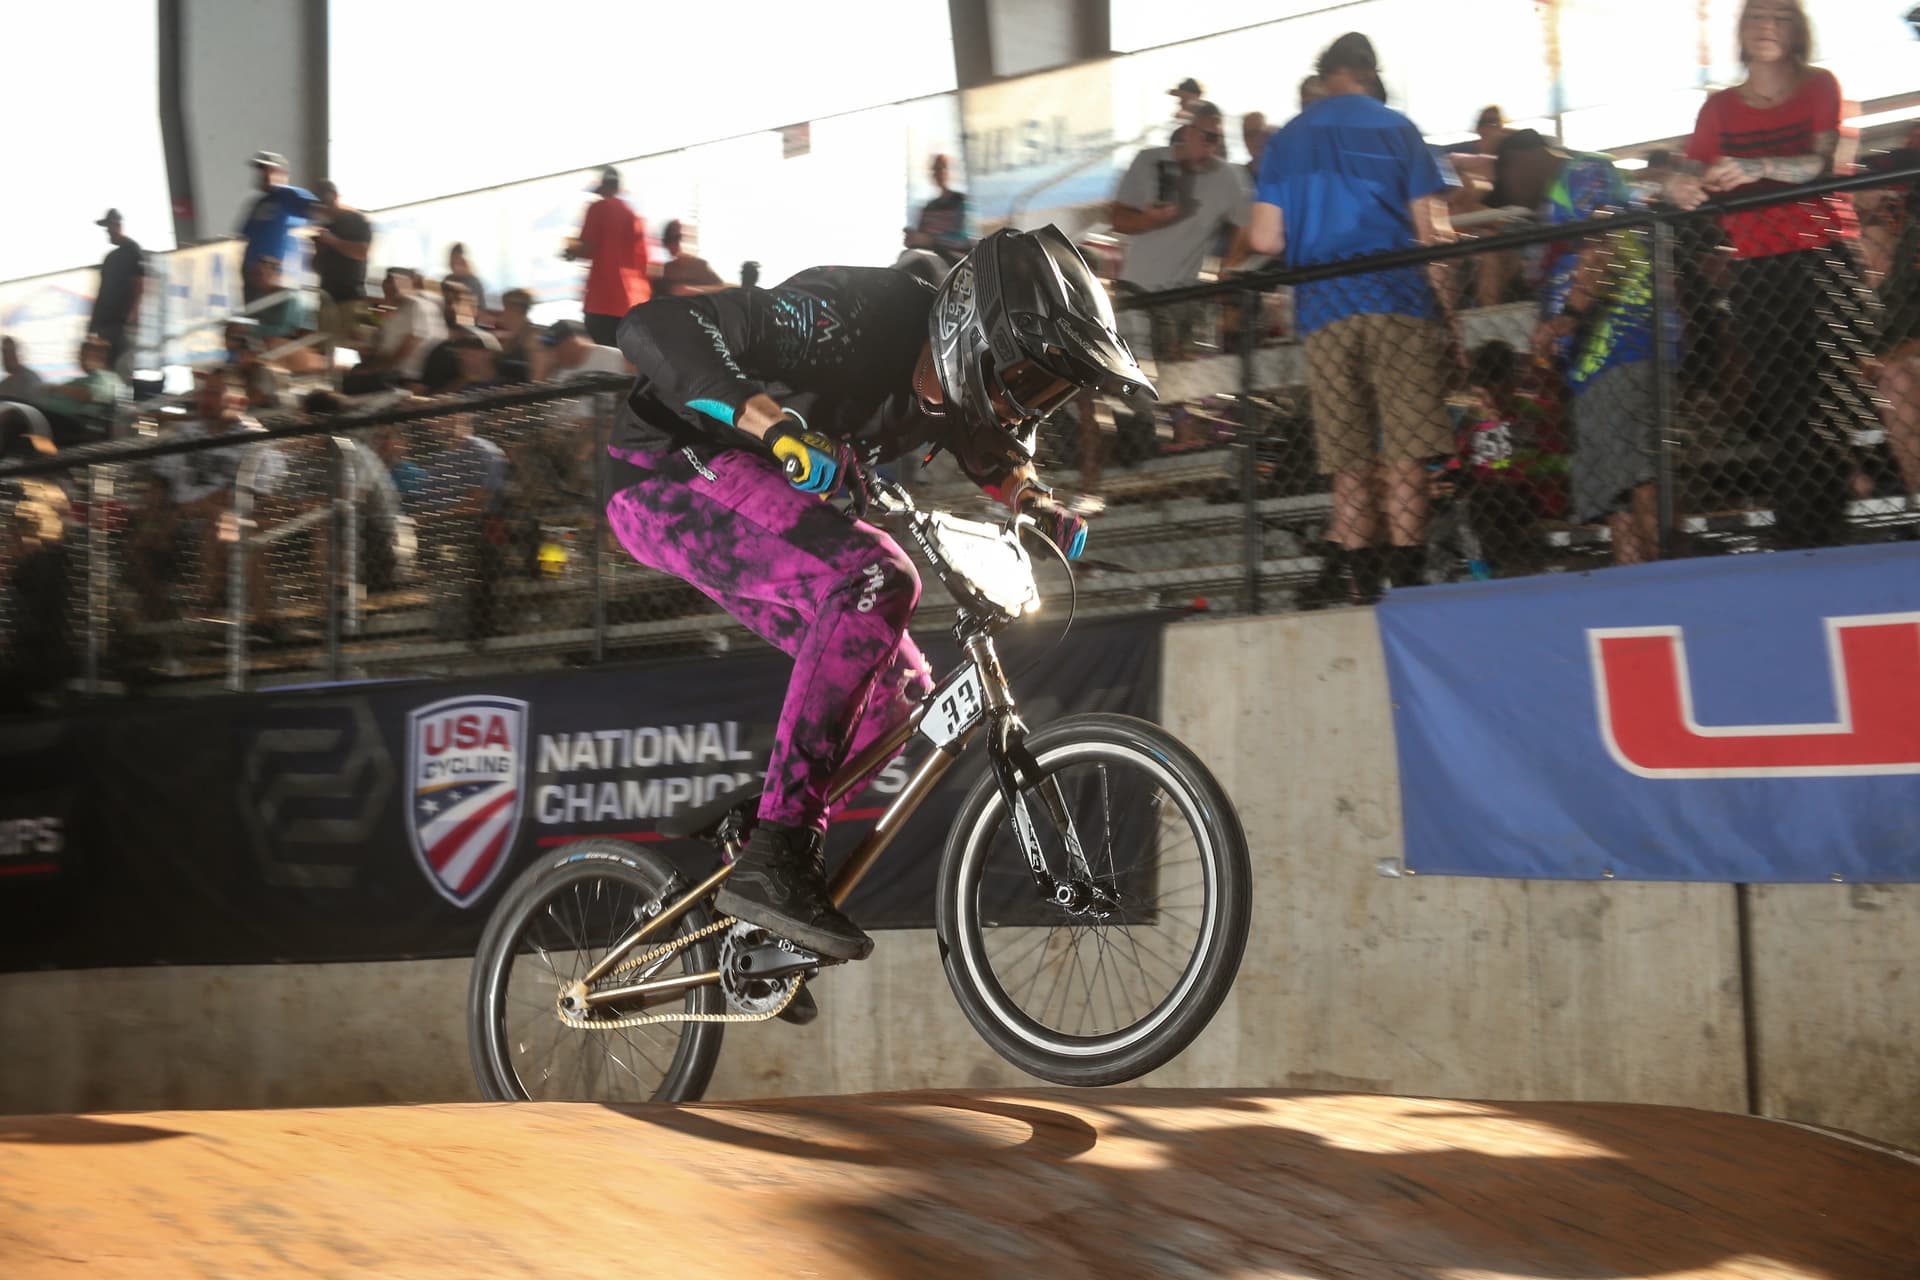
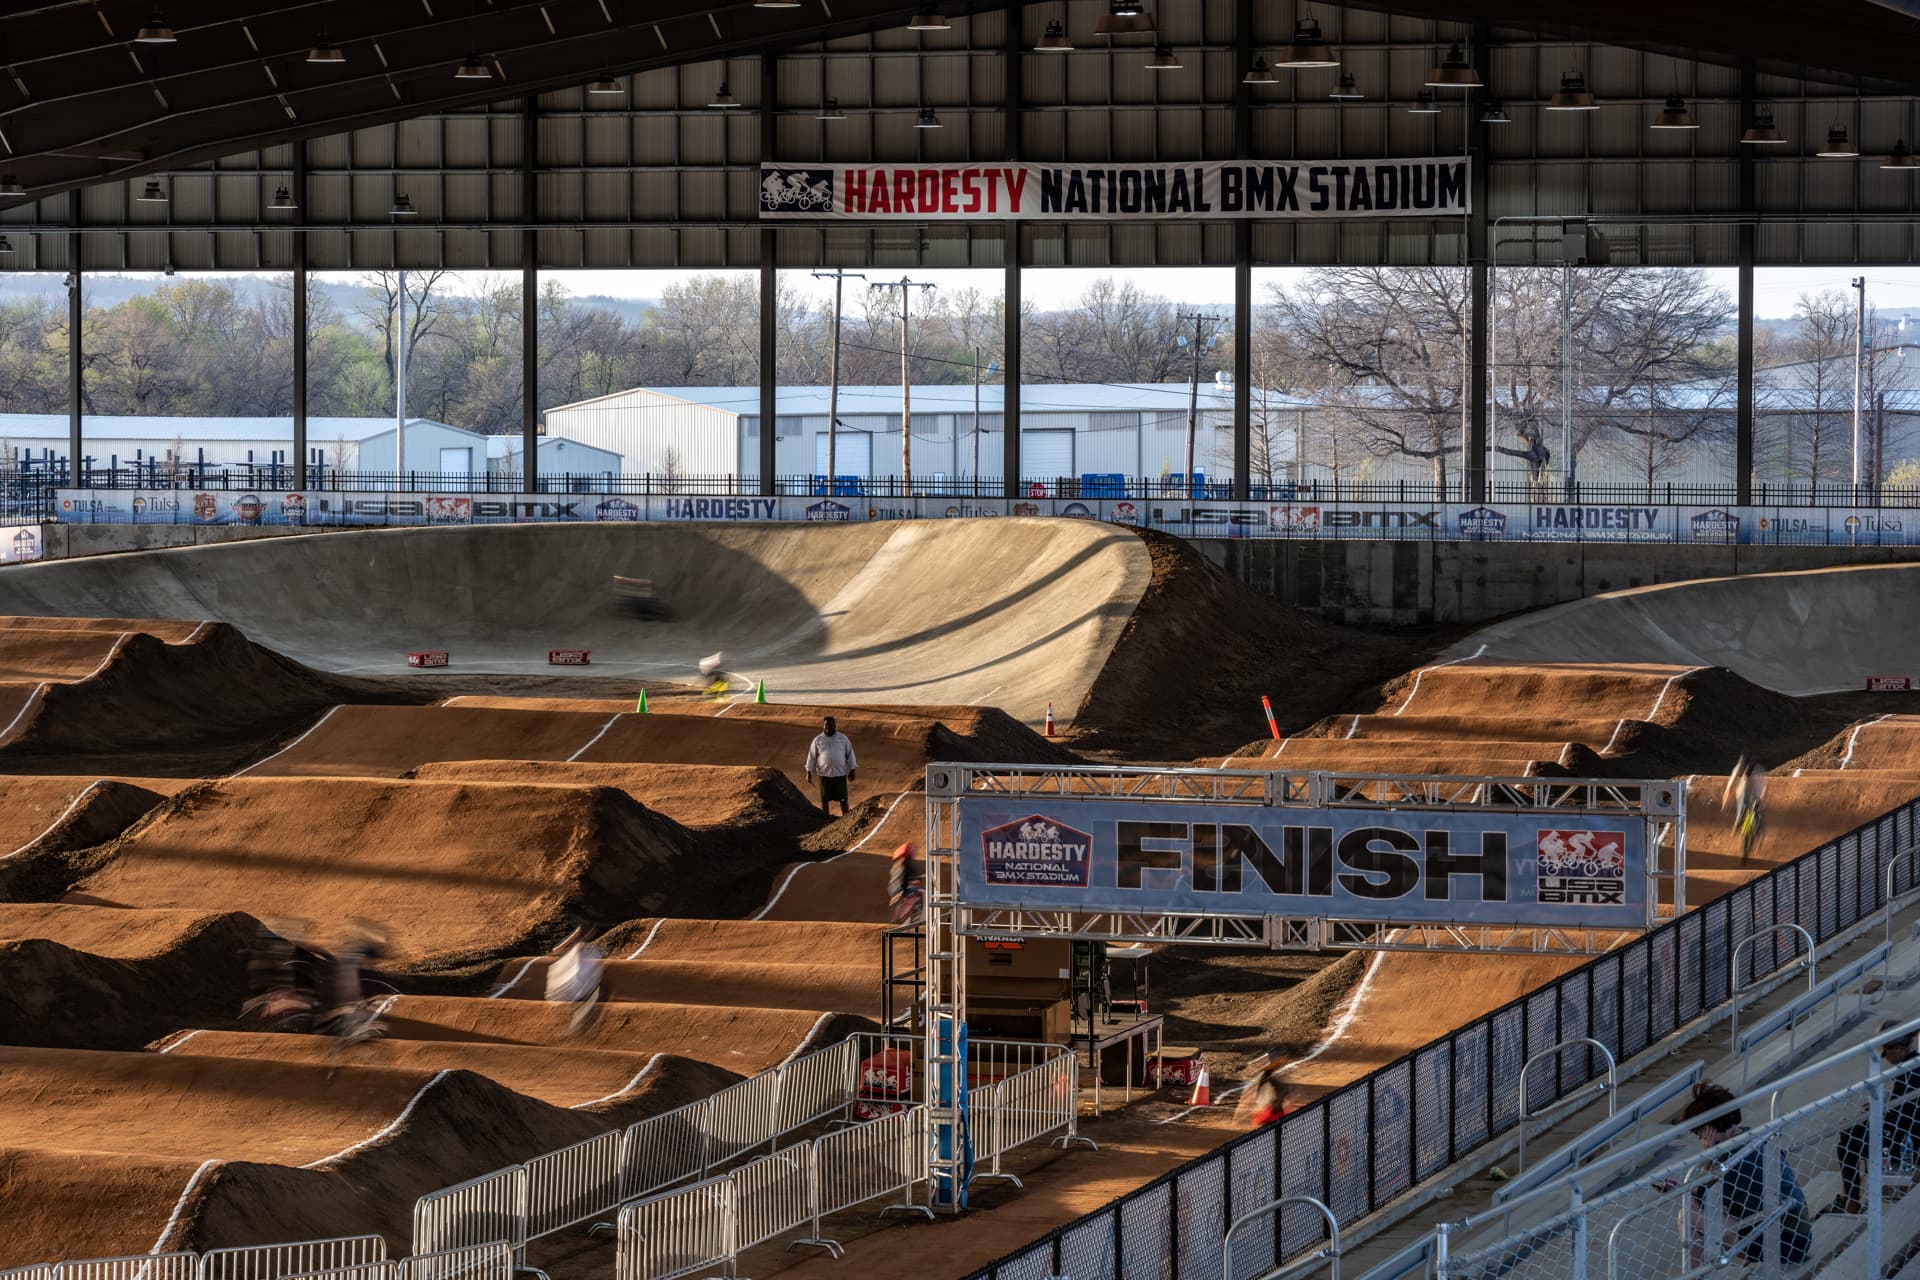
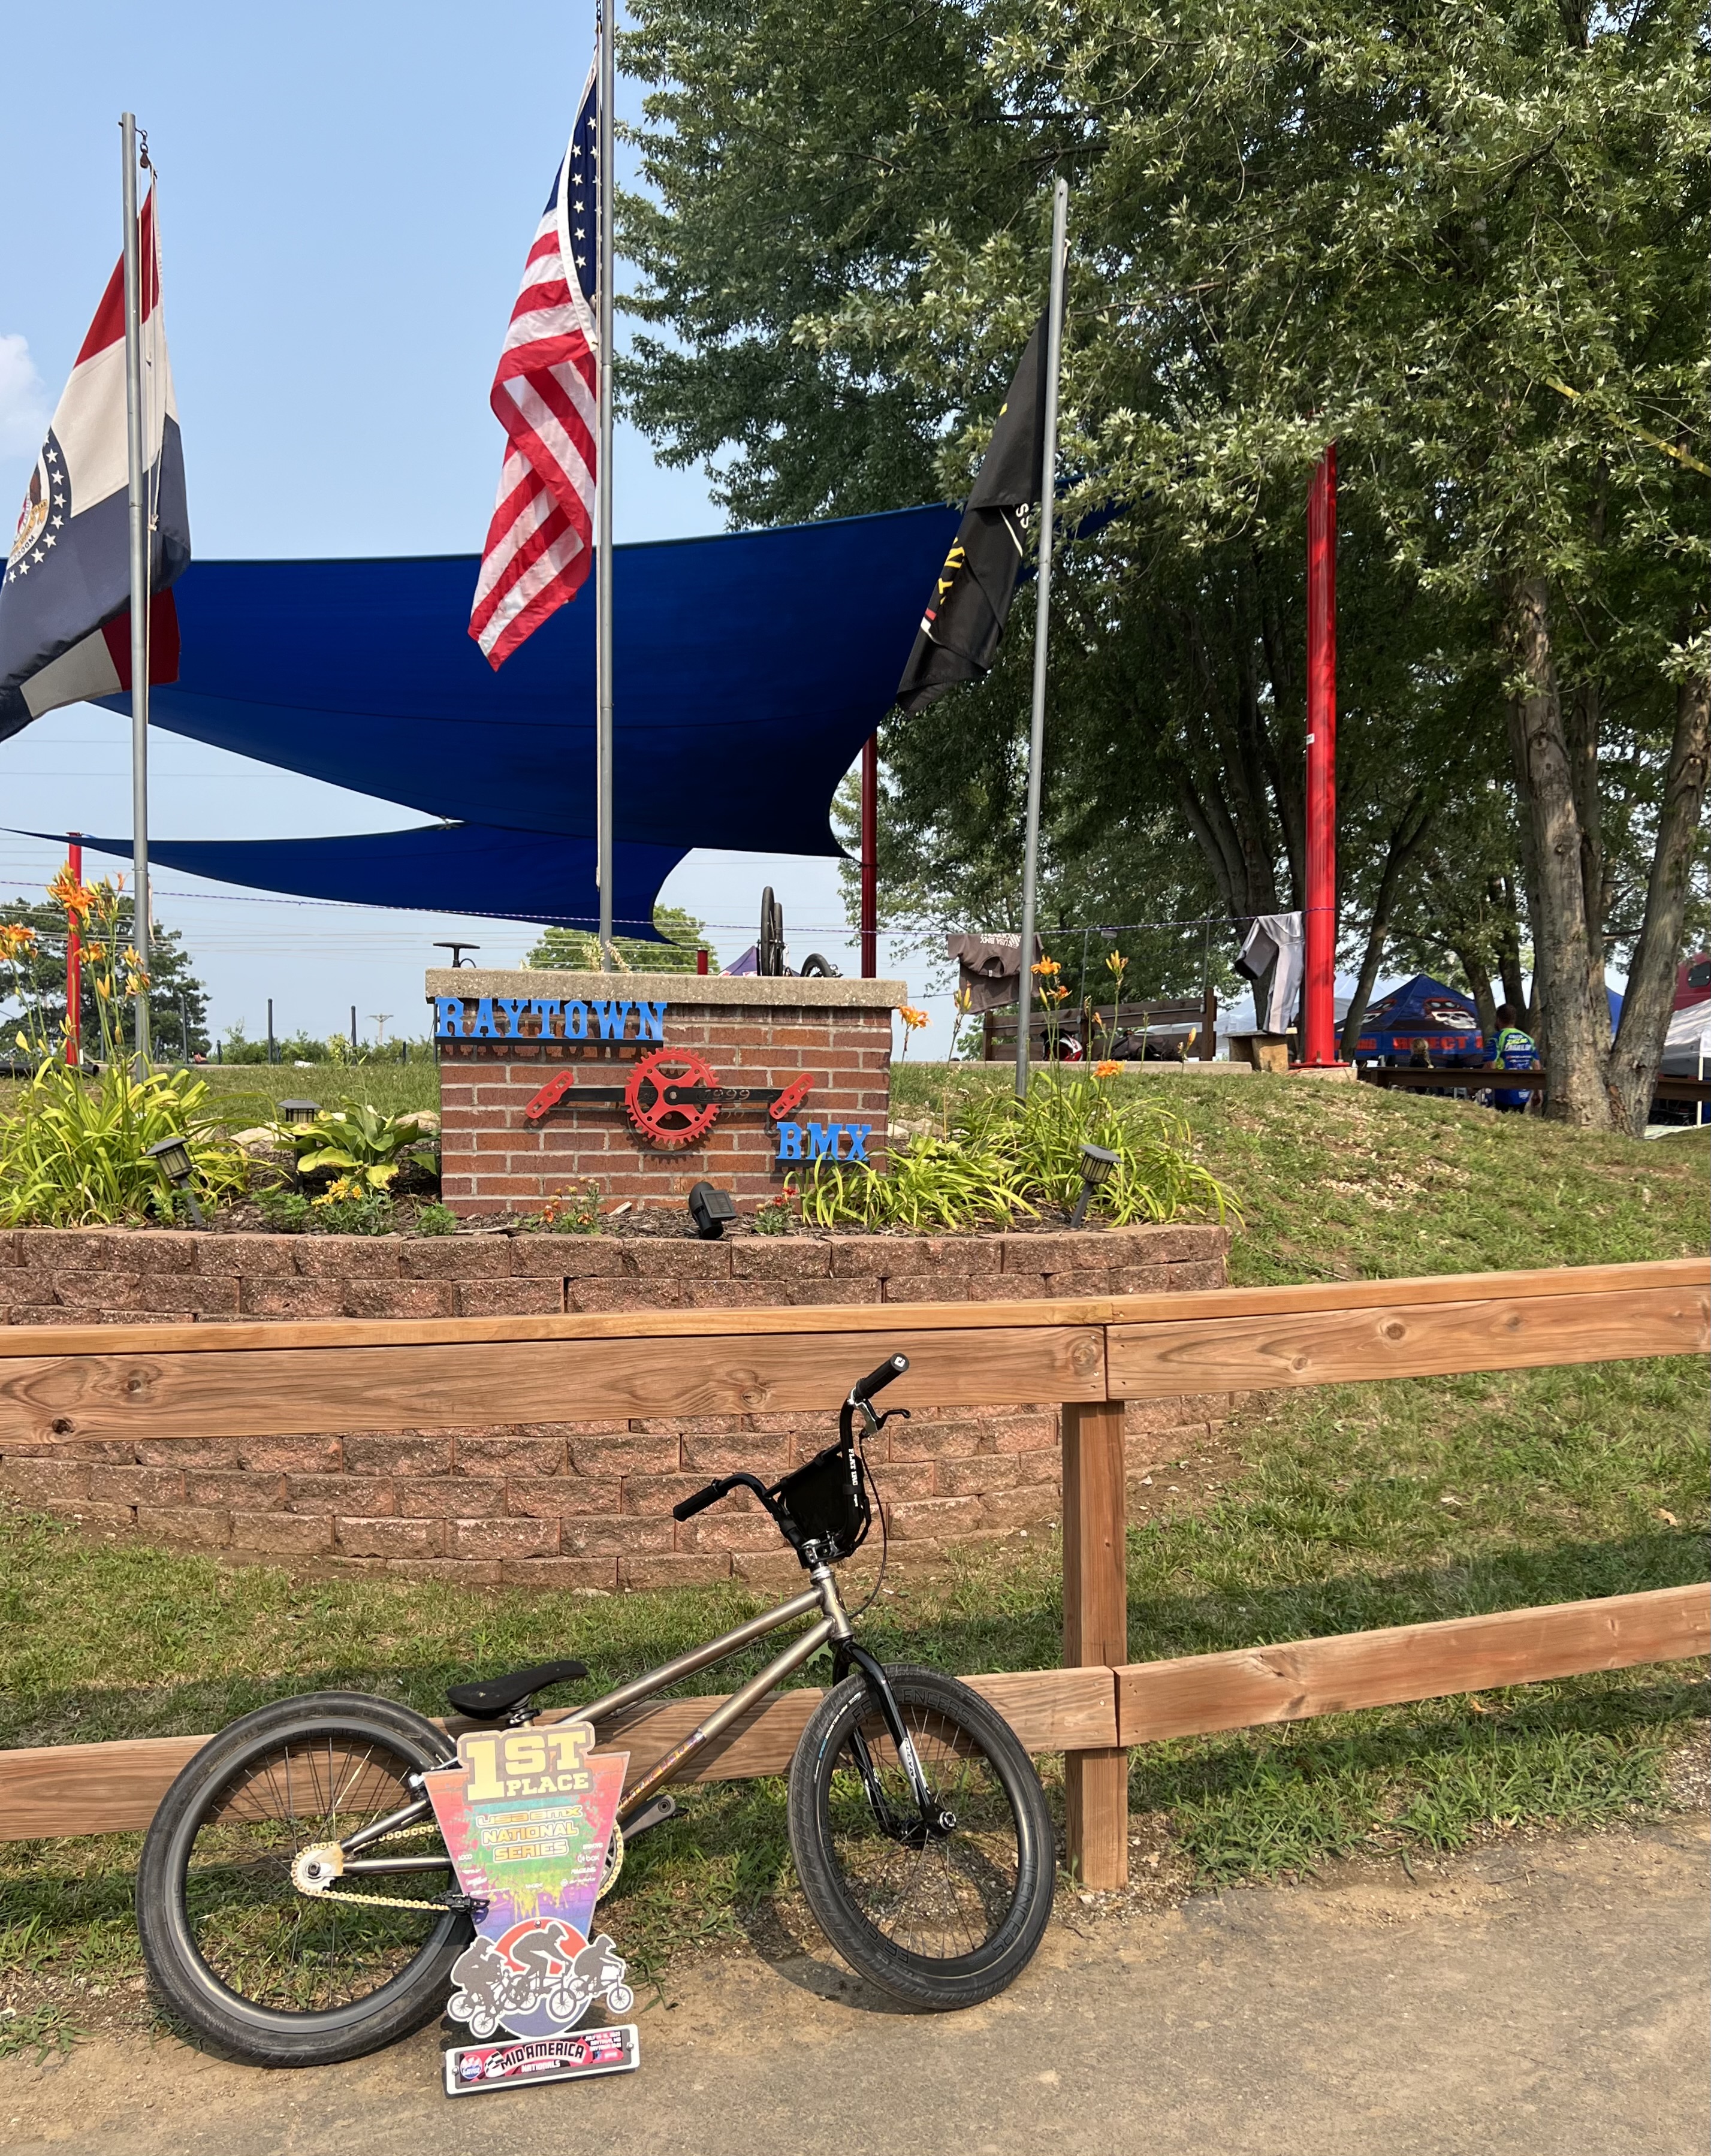
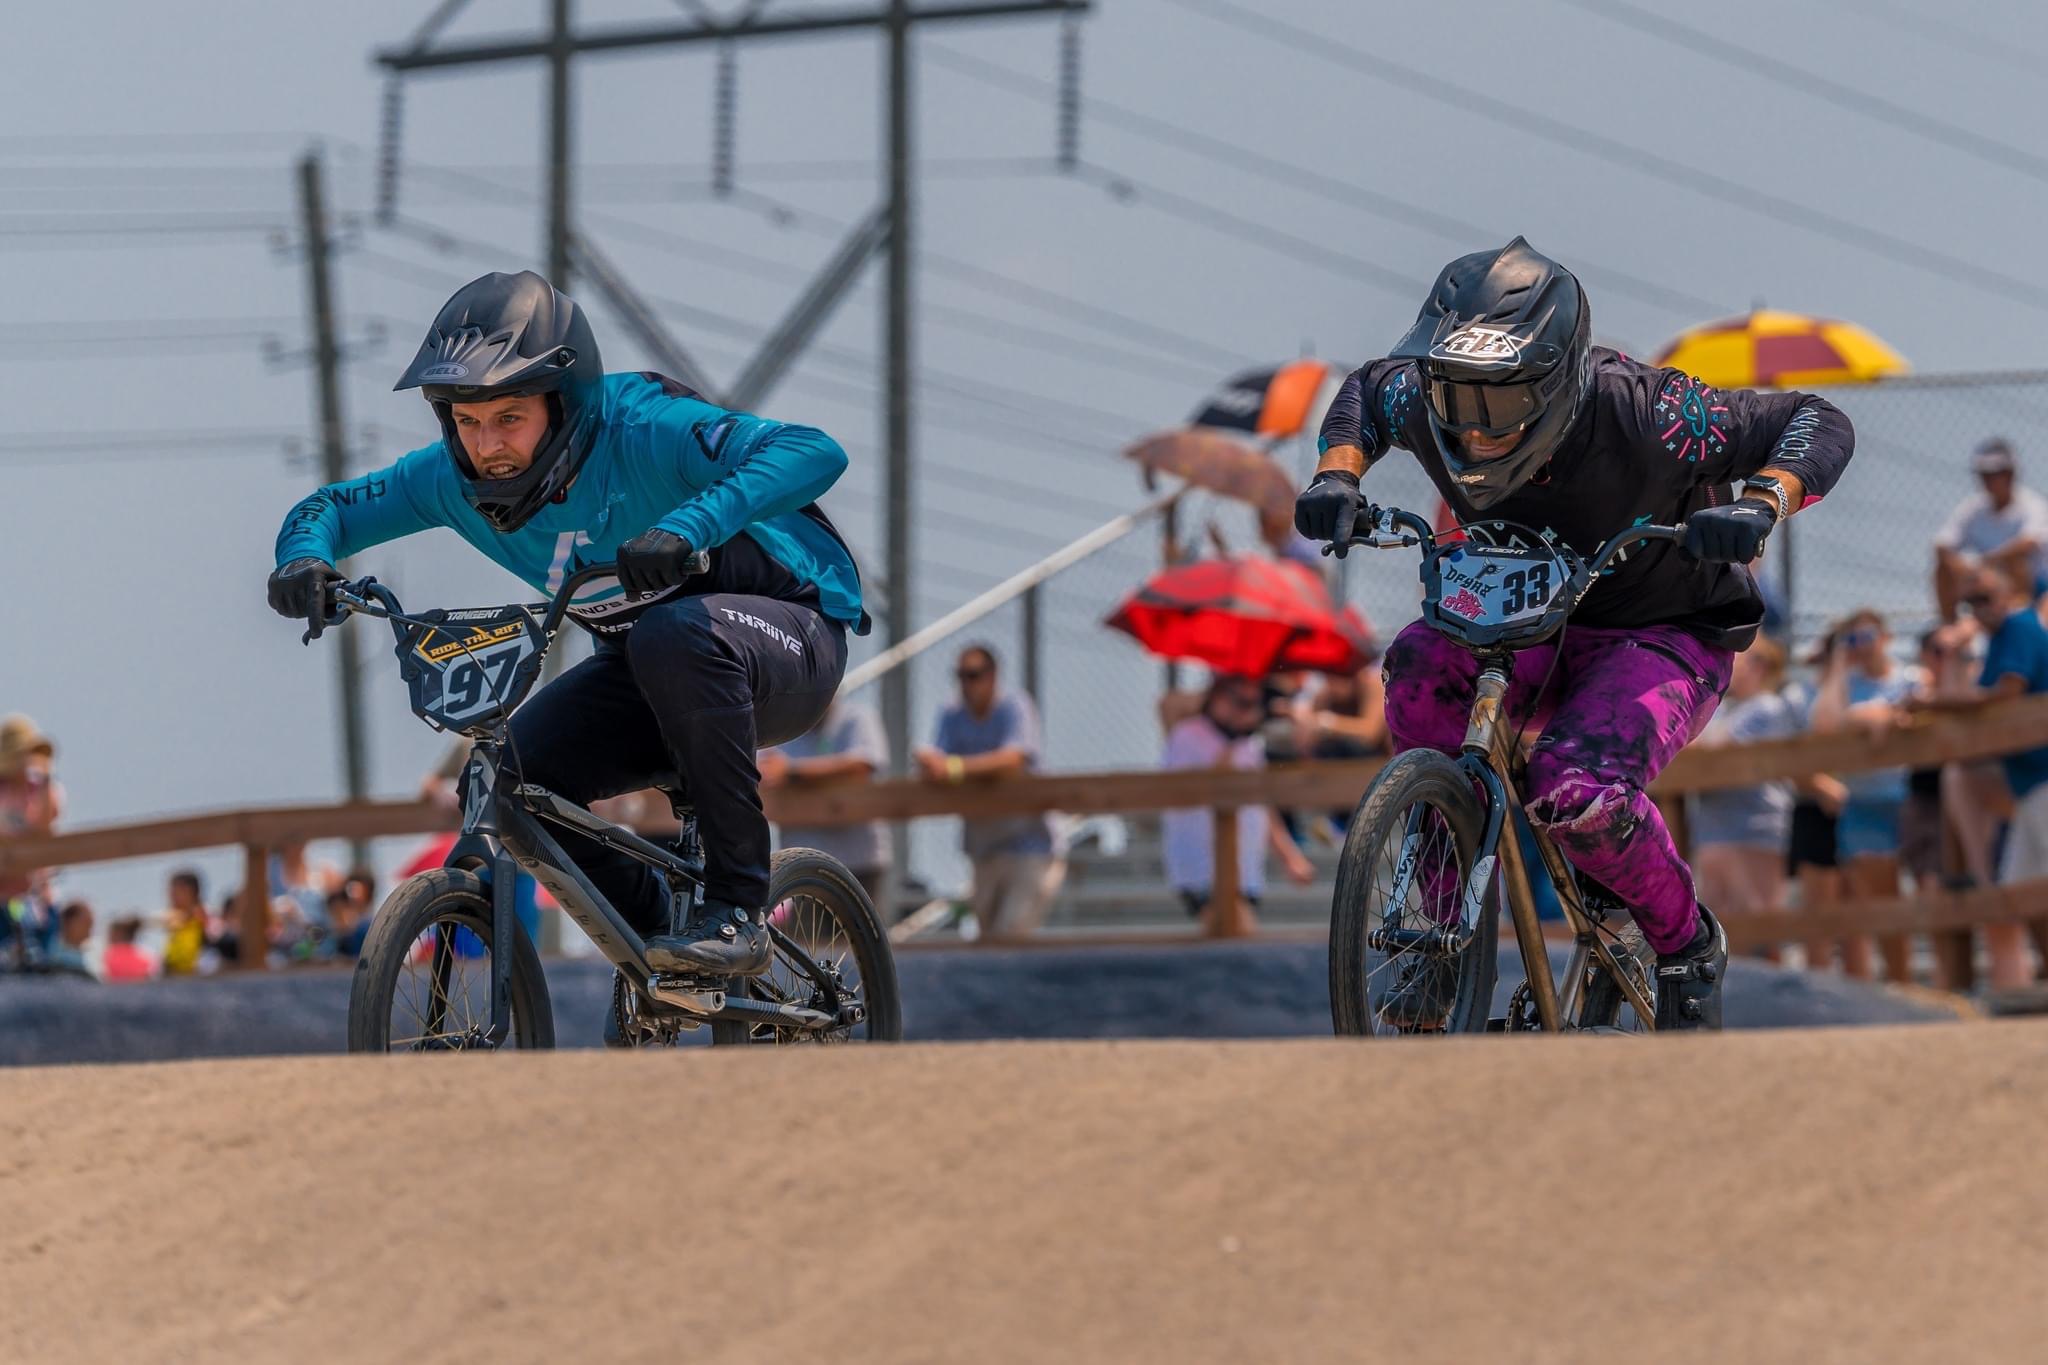
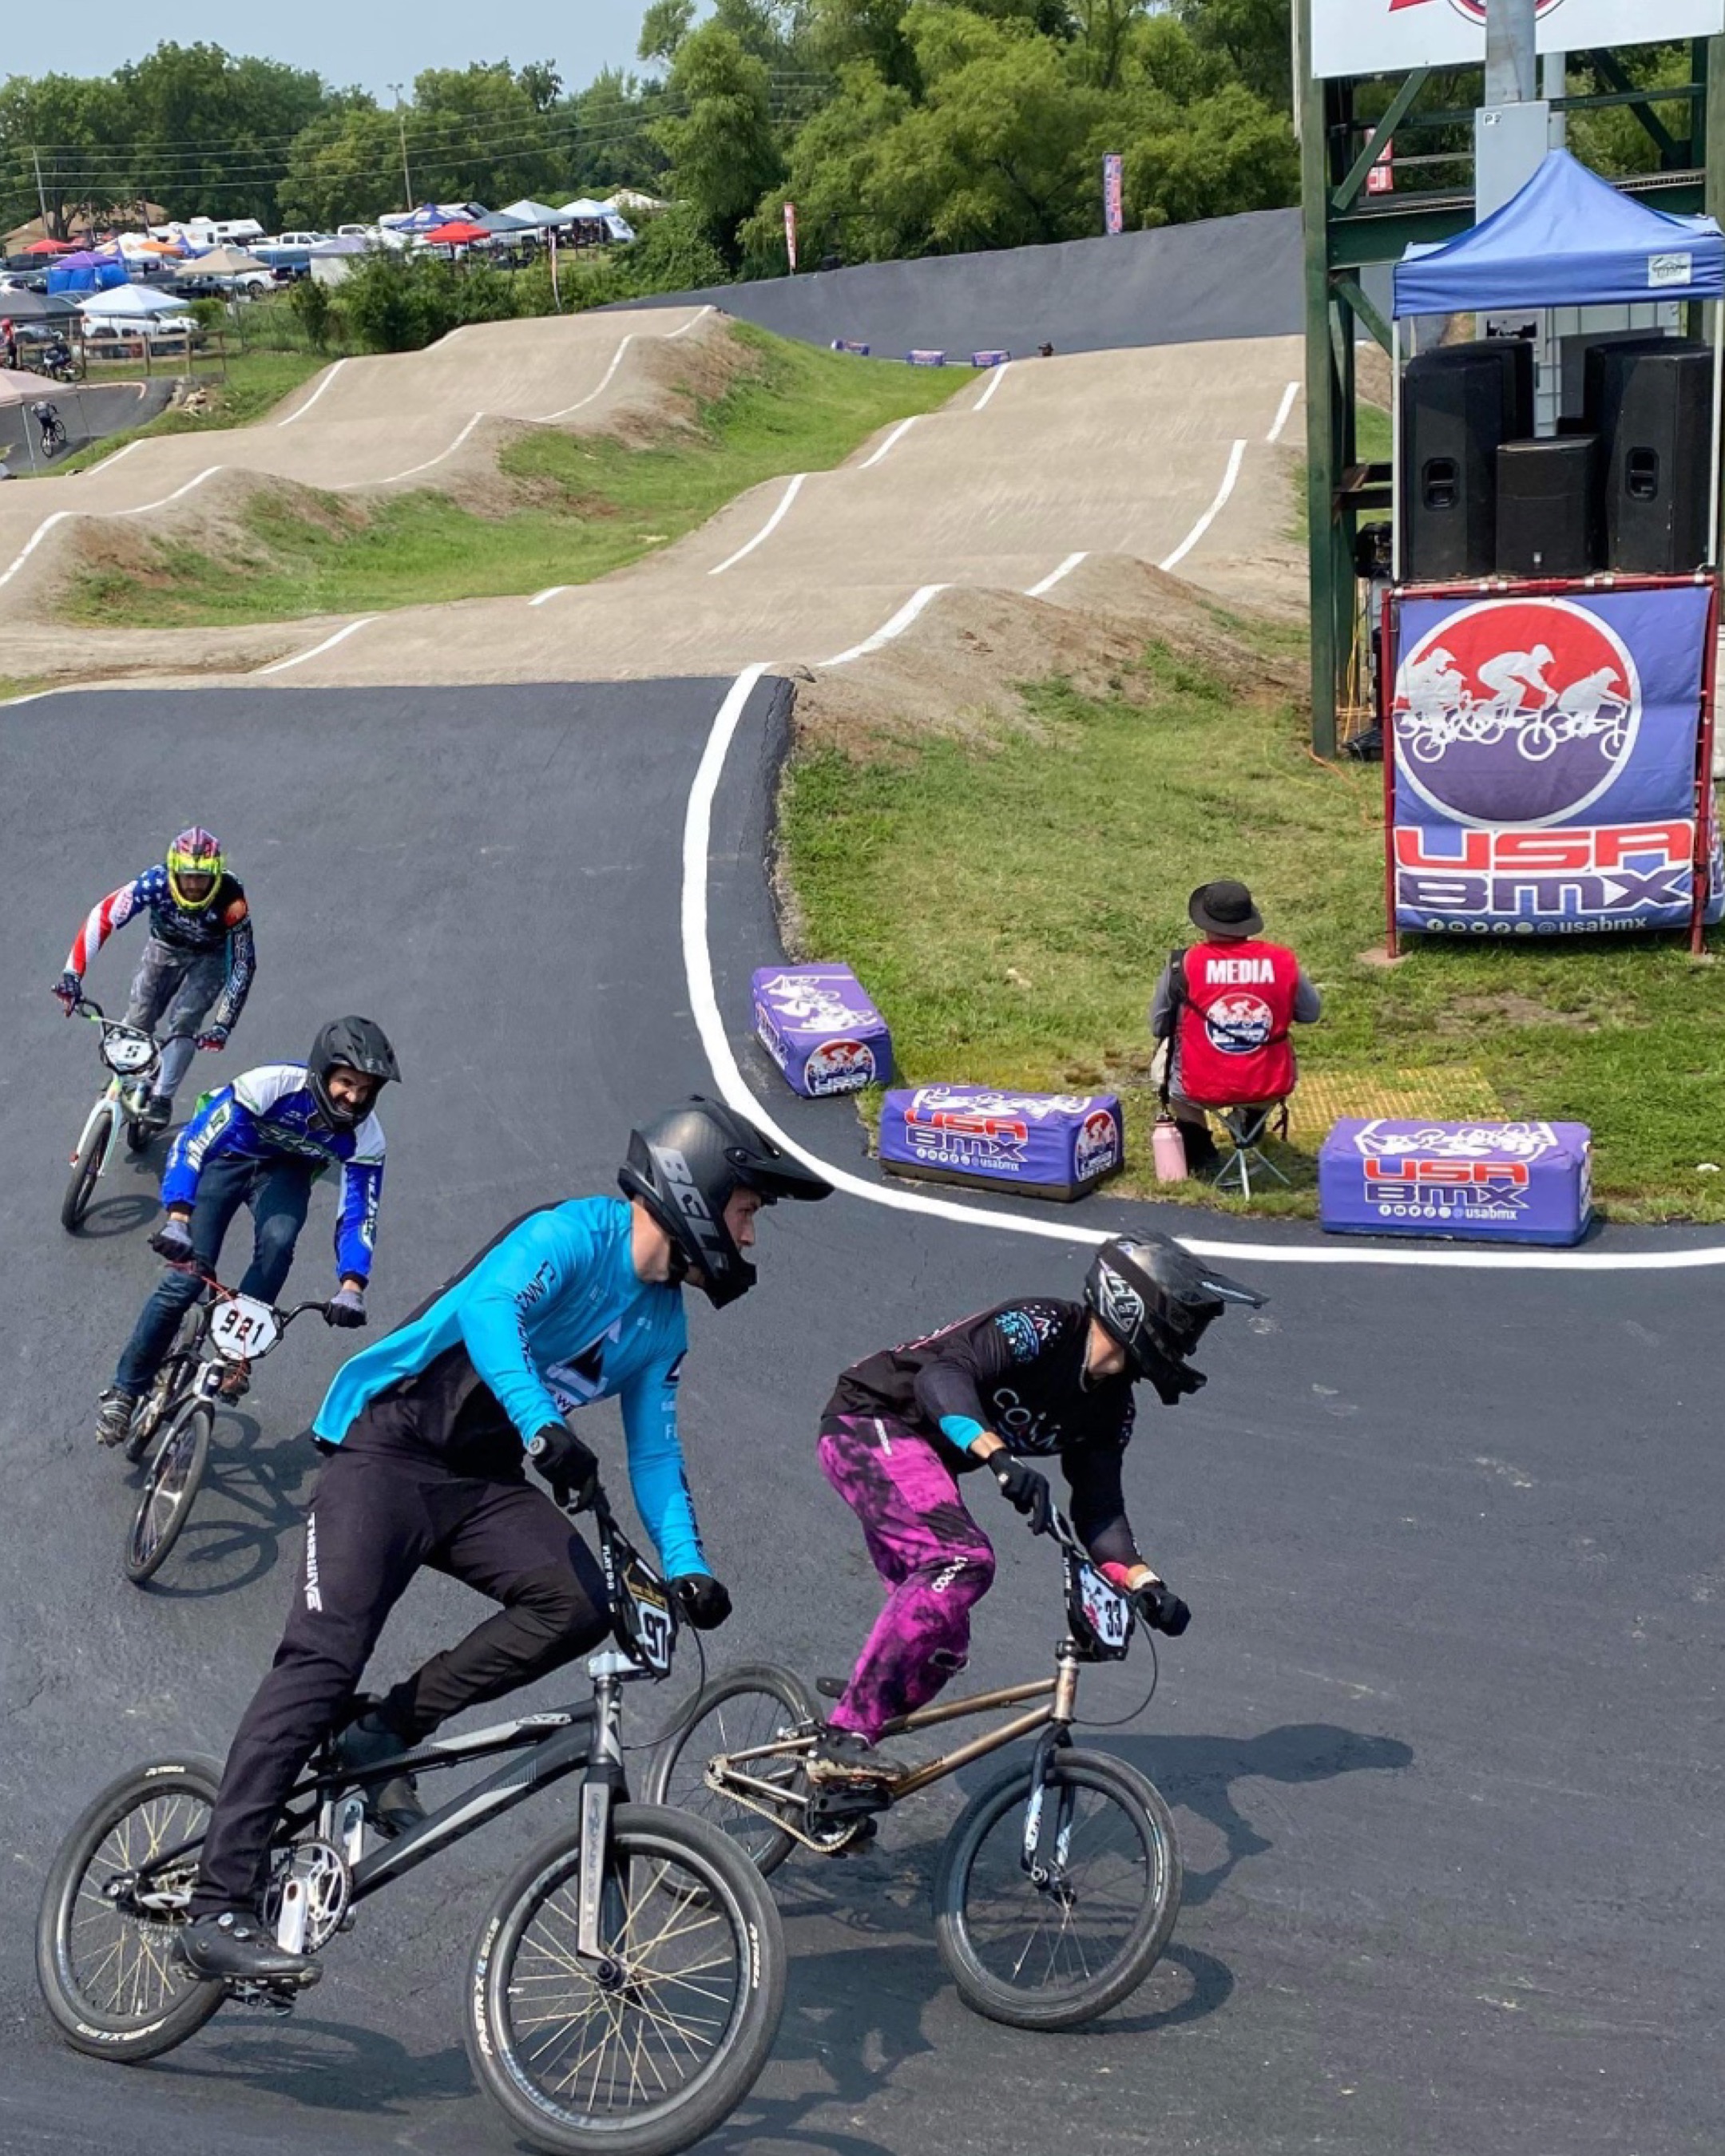
Finally was able to get to our first national this year. The USABMX HQ track in Tulsa, OK is one of the most technical, and longest tracks in the US, and is an absolute treat to race on. I had a rough go Friday for Day 1 and took P5, Saturday went a bit better, got P2, knocking out a goal i had this year to podium at a national. Finally, on Sunday, was standing on the top spot along with my own frame which is honestly a moment I wasn’t expecting and wont forget anytime soon! Whole experience was made even better by the constant questions of “What frame is that” and being able to say mine!
But this is a build log!
Unfortunately i don’t quite have all of my updated fixture pieces done yet. When a buddy is squeezing your work in on the side you cant really complain too much. There’s still been progress!
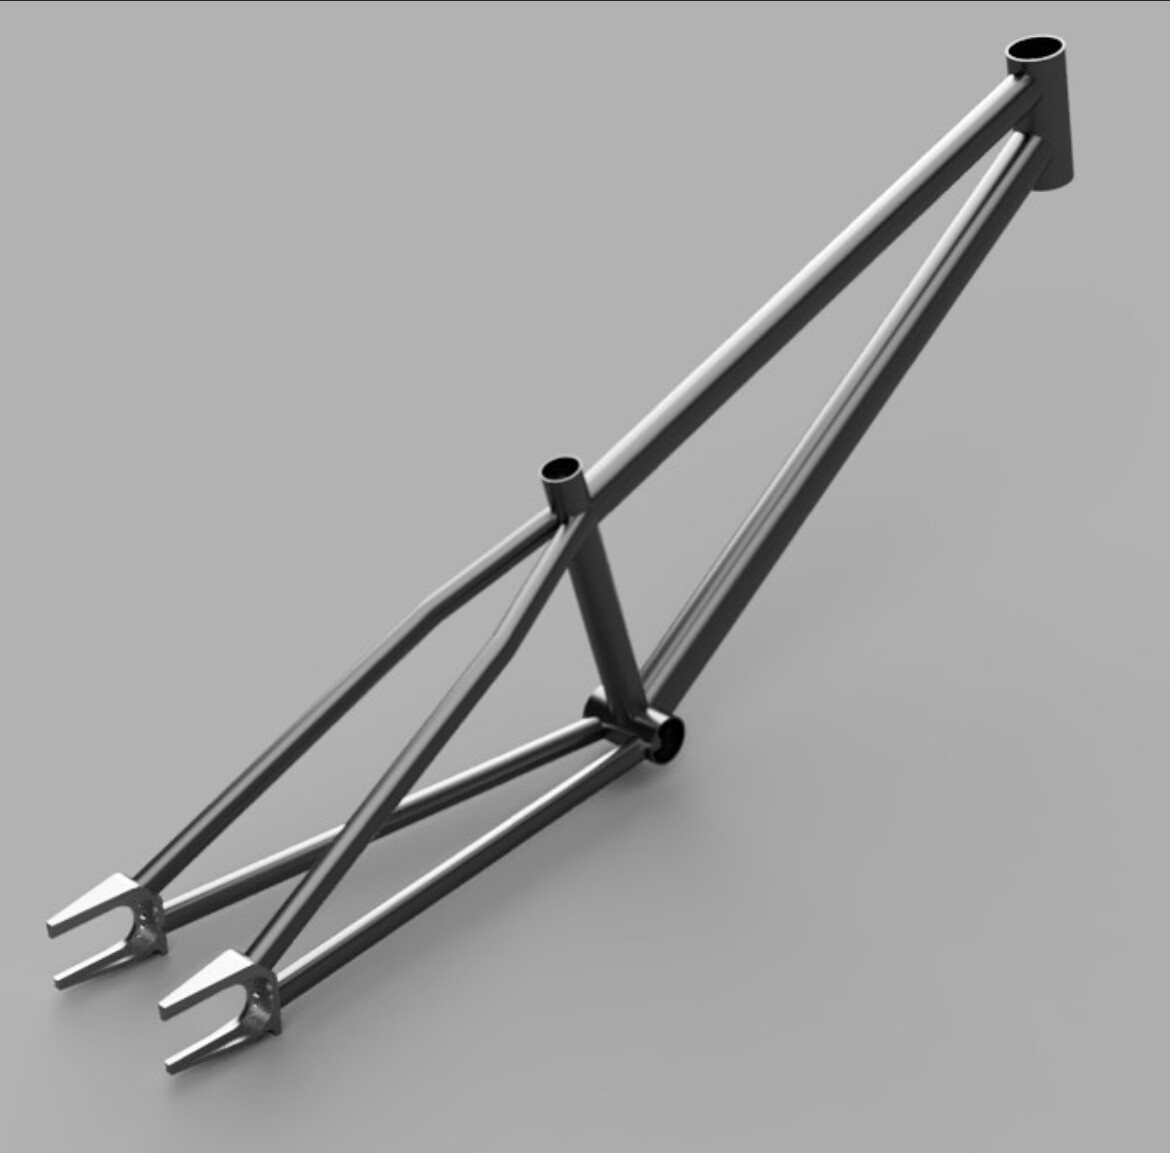
Started up on frame #2. Trying a few different specs on this one; 23”TT, 16” CS, (pretty dang big for a bmx frame), and bringing the BB up a little bit to 11” (previous build was 10.8, crazy low). Also going with a 44mm HT. I’ll also be attempting to bend my own CS/SS on this one.
Some nice progress in my TIG work has been made I feel. I finally snagged a FUPA 12 from Furrick, and the difference is night and day. Currently on hold waiting for my dropouts, but really excited to knock this one out!
10 Likes
So that frame is neat and congrats on the win, but my biggest takeaway from this was was - wow those are some cool pants!!! Mega style points.
6 Likes
@liberationfab Theyre from Dharco! Not only are they snazzy, but super comfortable and very durable; that knee rip is multiple falls in asphalt turns and a few trail slides as well.
4 Likes
Winning a bike on a custom frame is an amazing accomplishment! Some people can buildbikes, some people can race bikes, not many can do both well! Welldone 
2 Likes
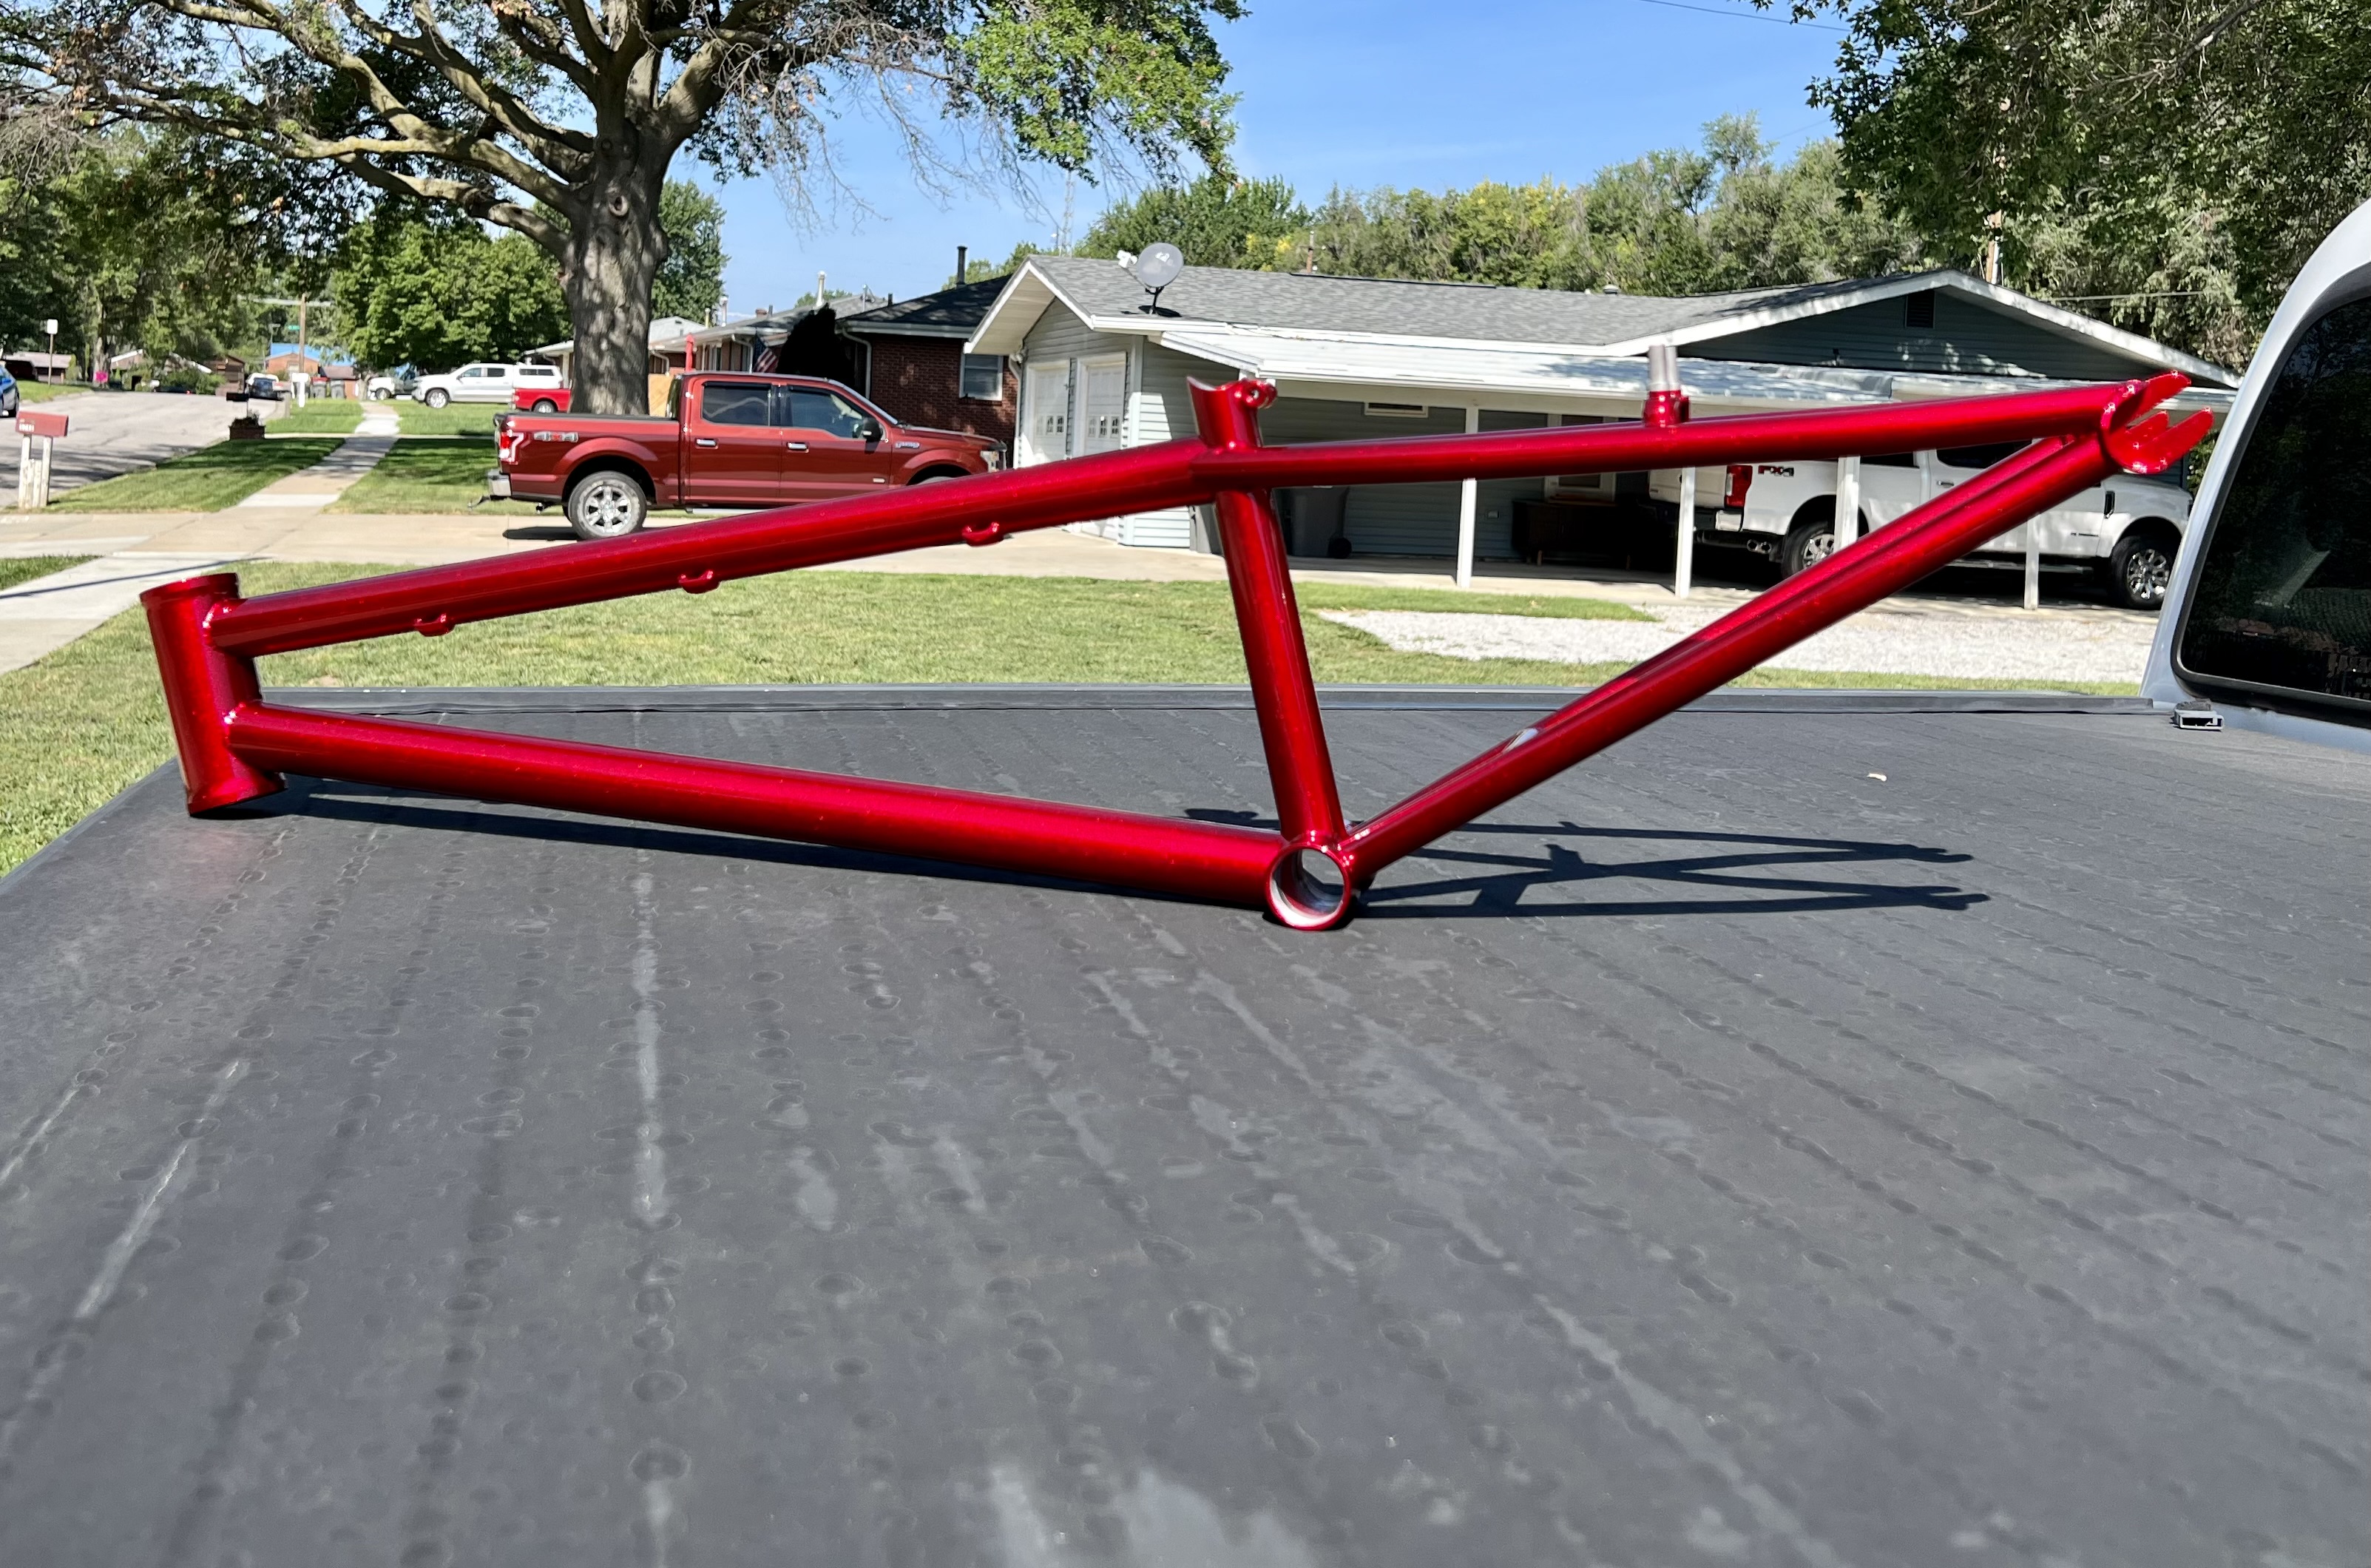
Well, the (frame) build is complete!
Things that went to plan:
- I think my dimensions, angles, geometry, etc… ended up either very close, or at least a lot closer than intended compared to my first frame. I do not have a layout table or surface at the moment, but it definitely scores higher on the eye ball test than frame 1.
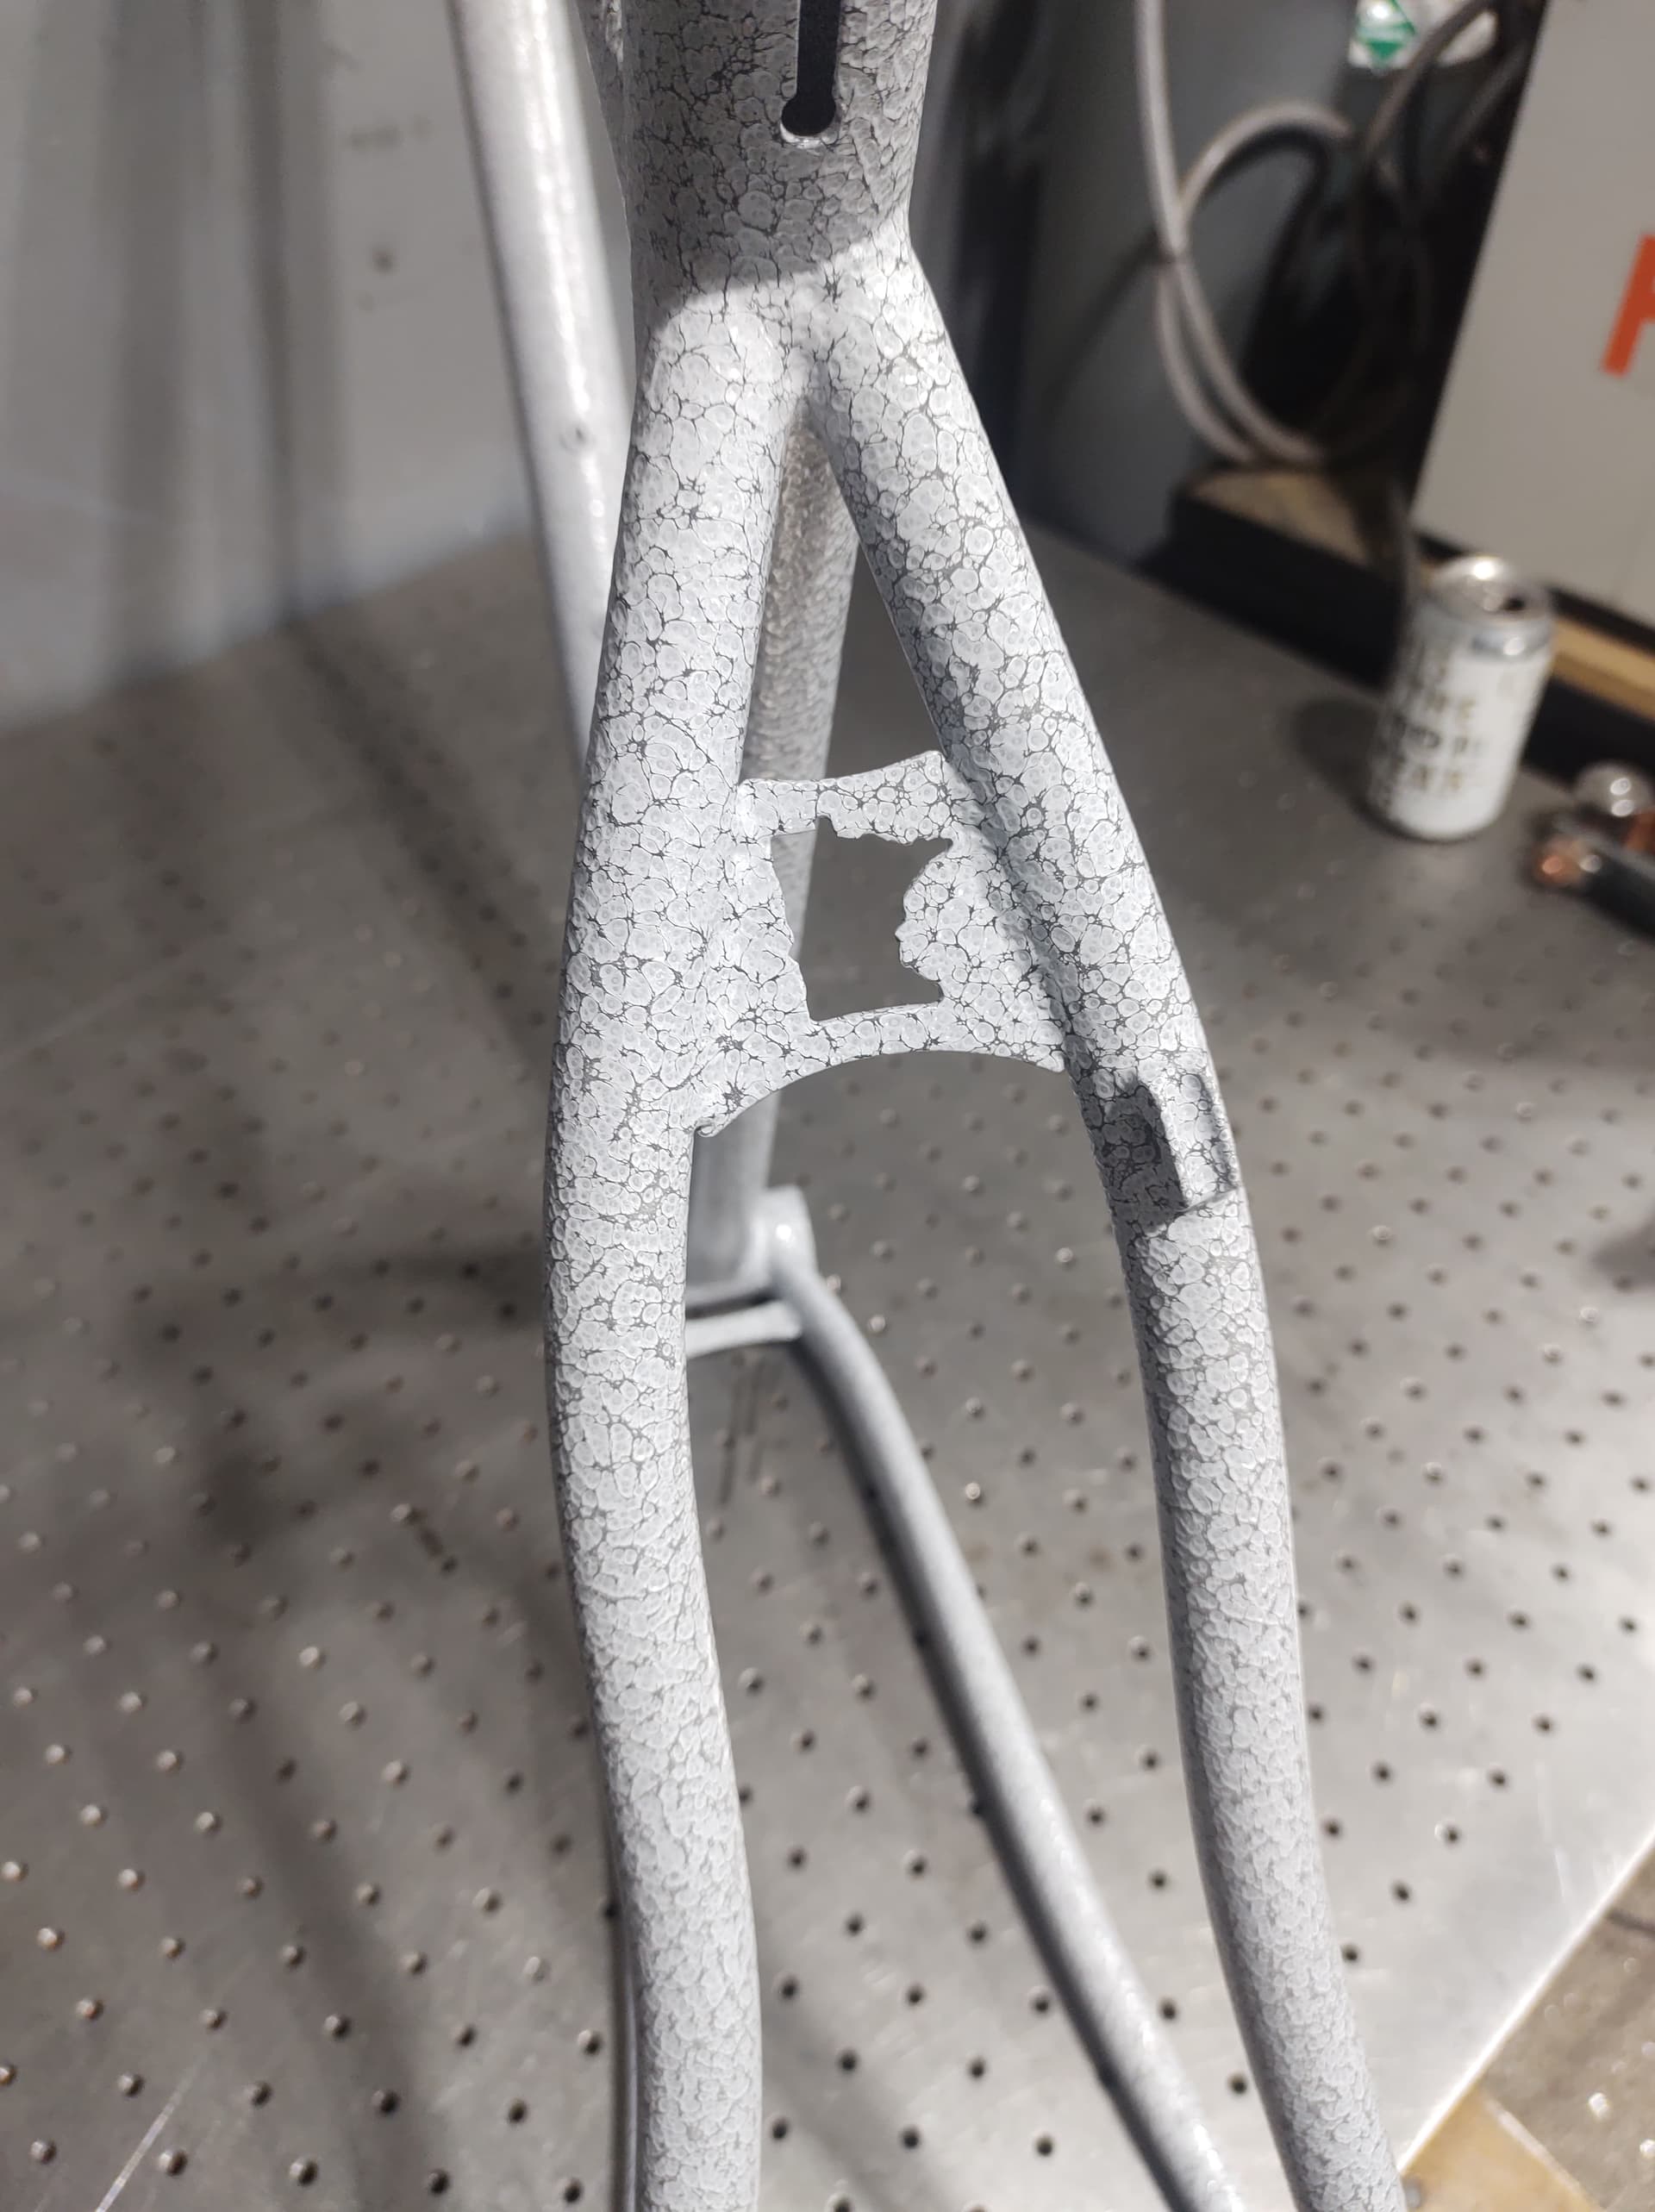
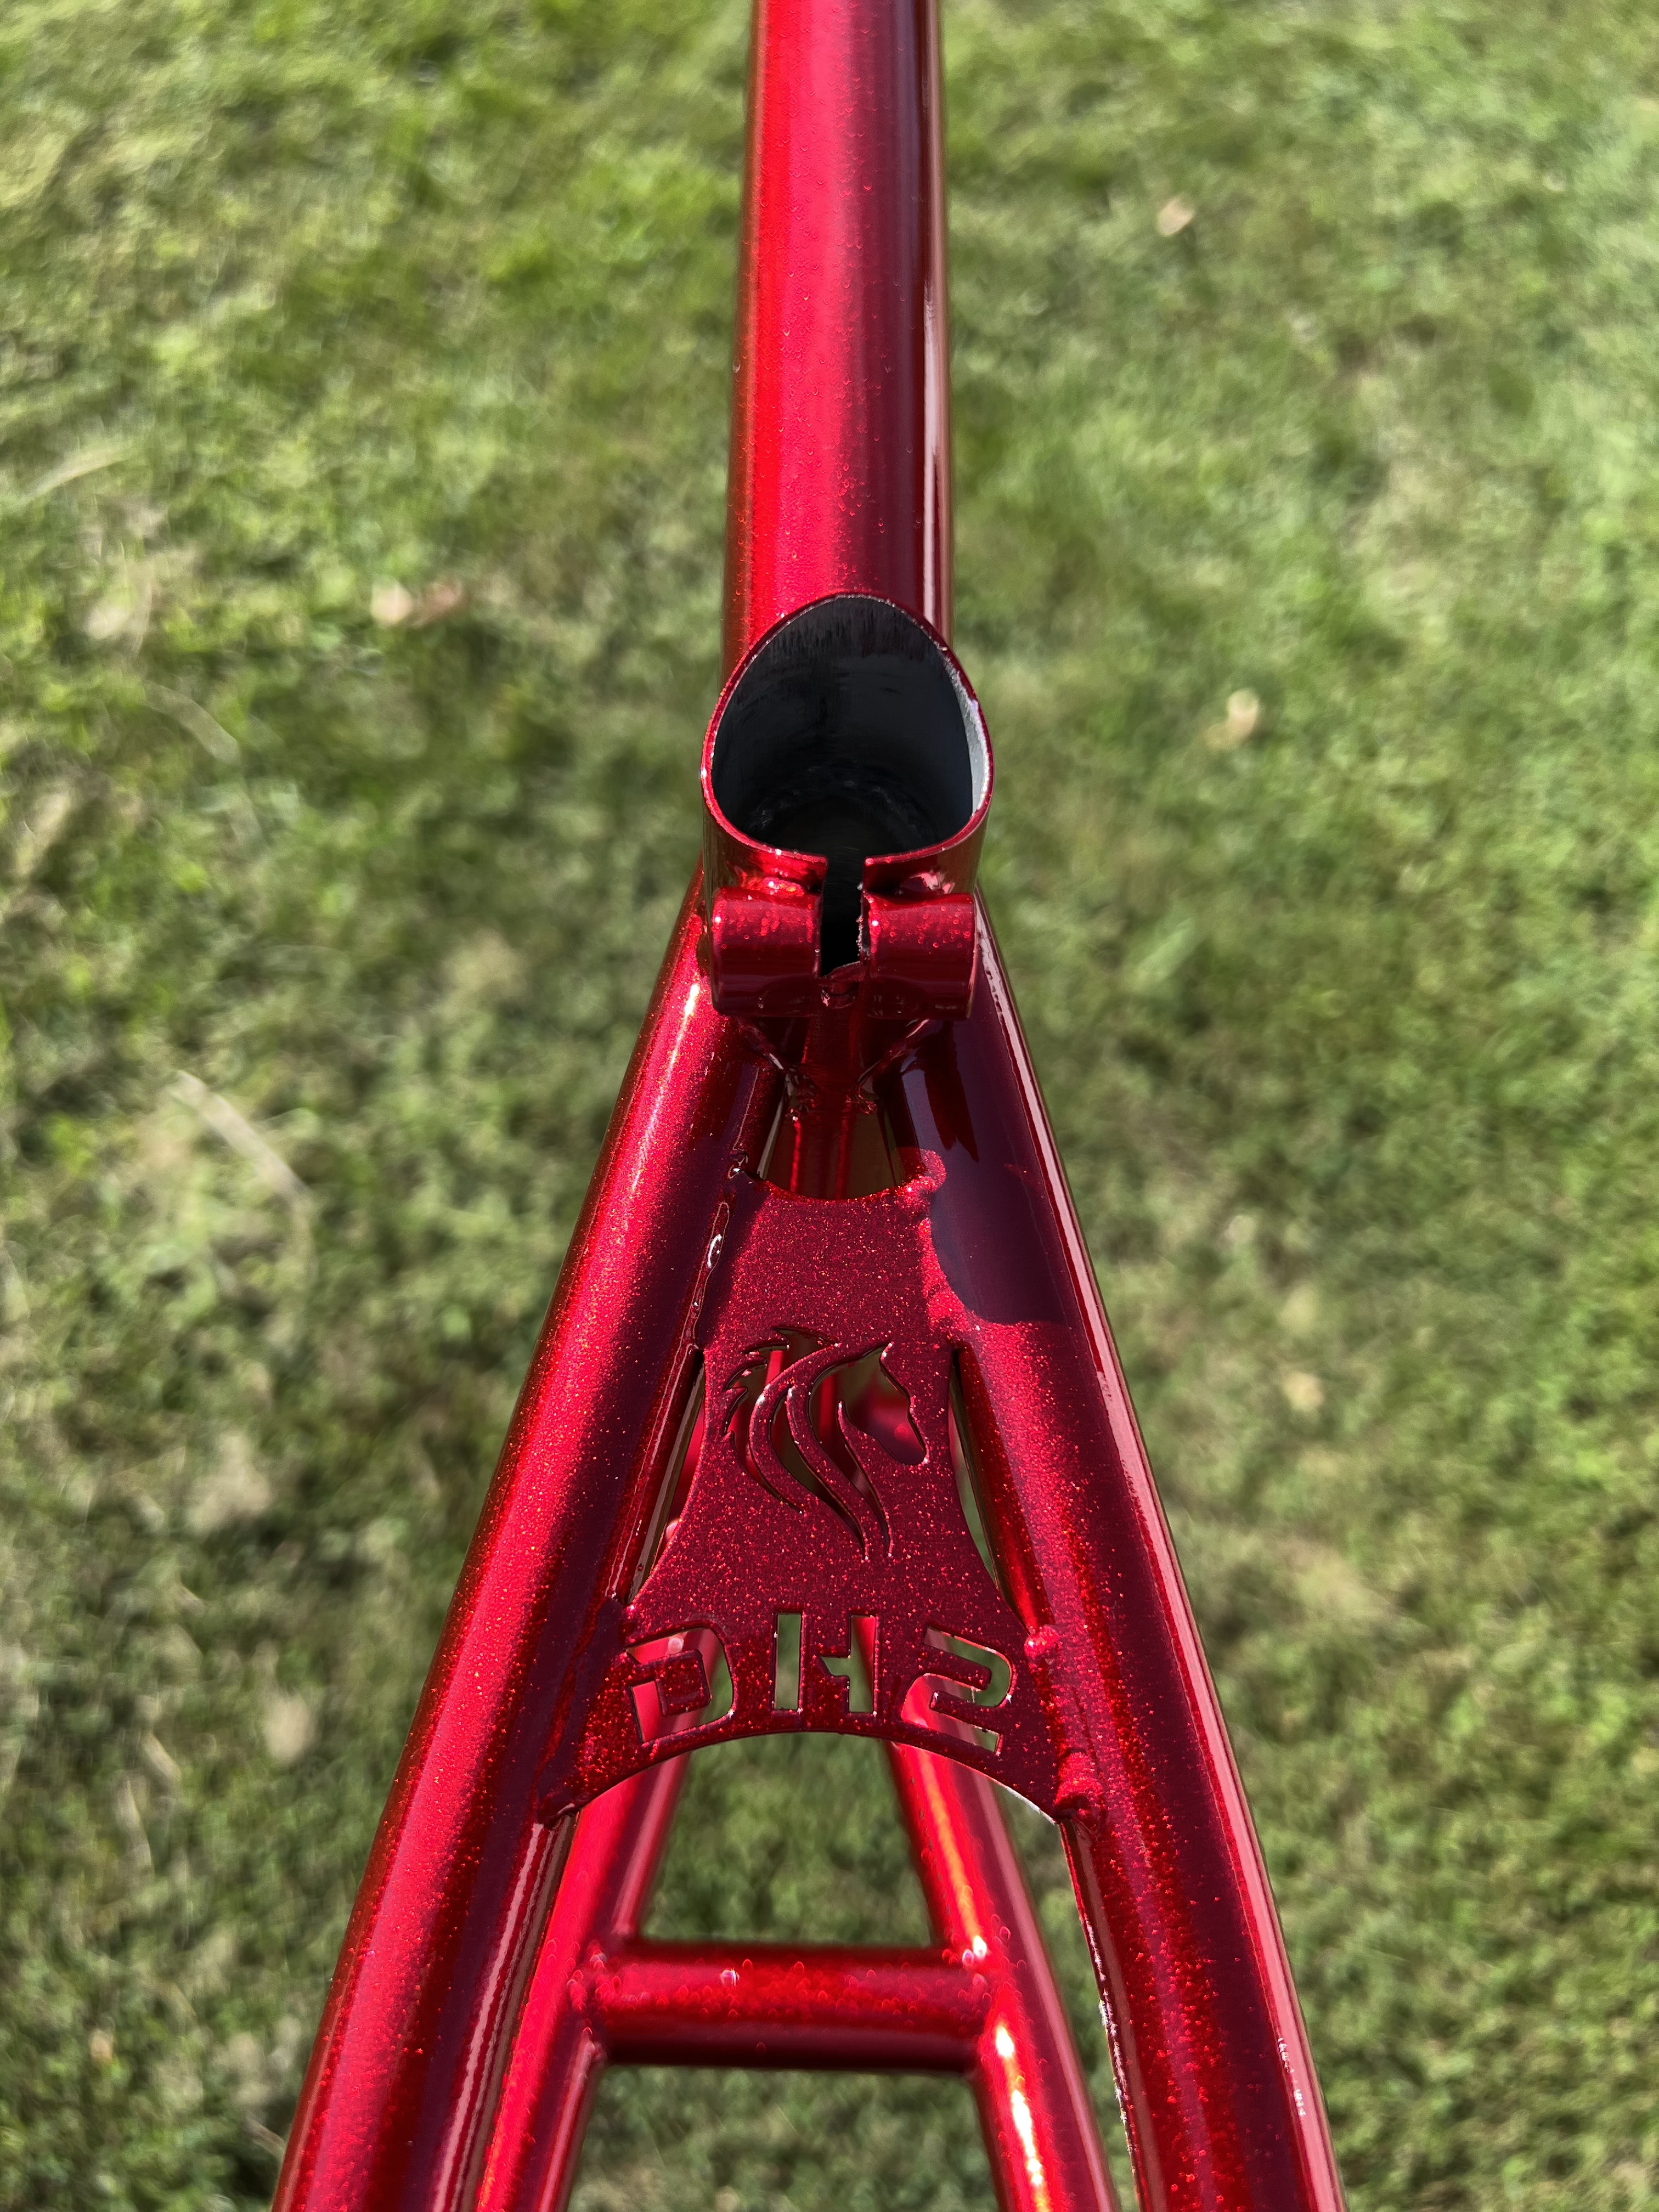
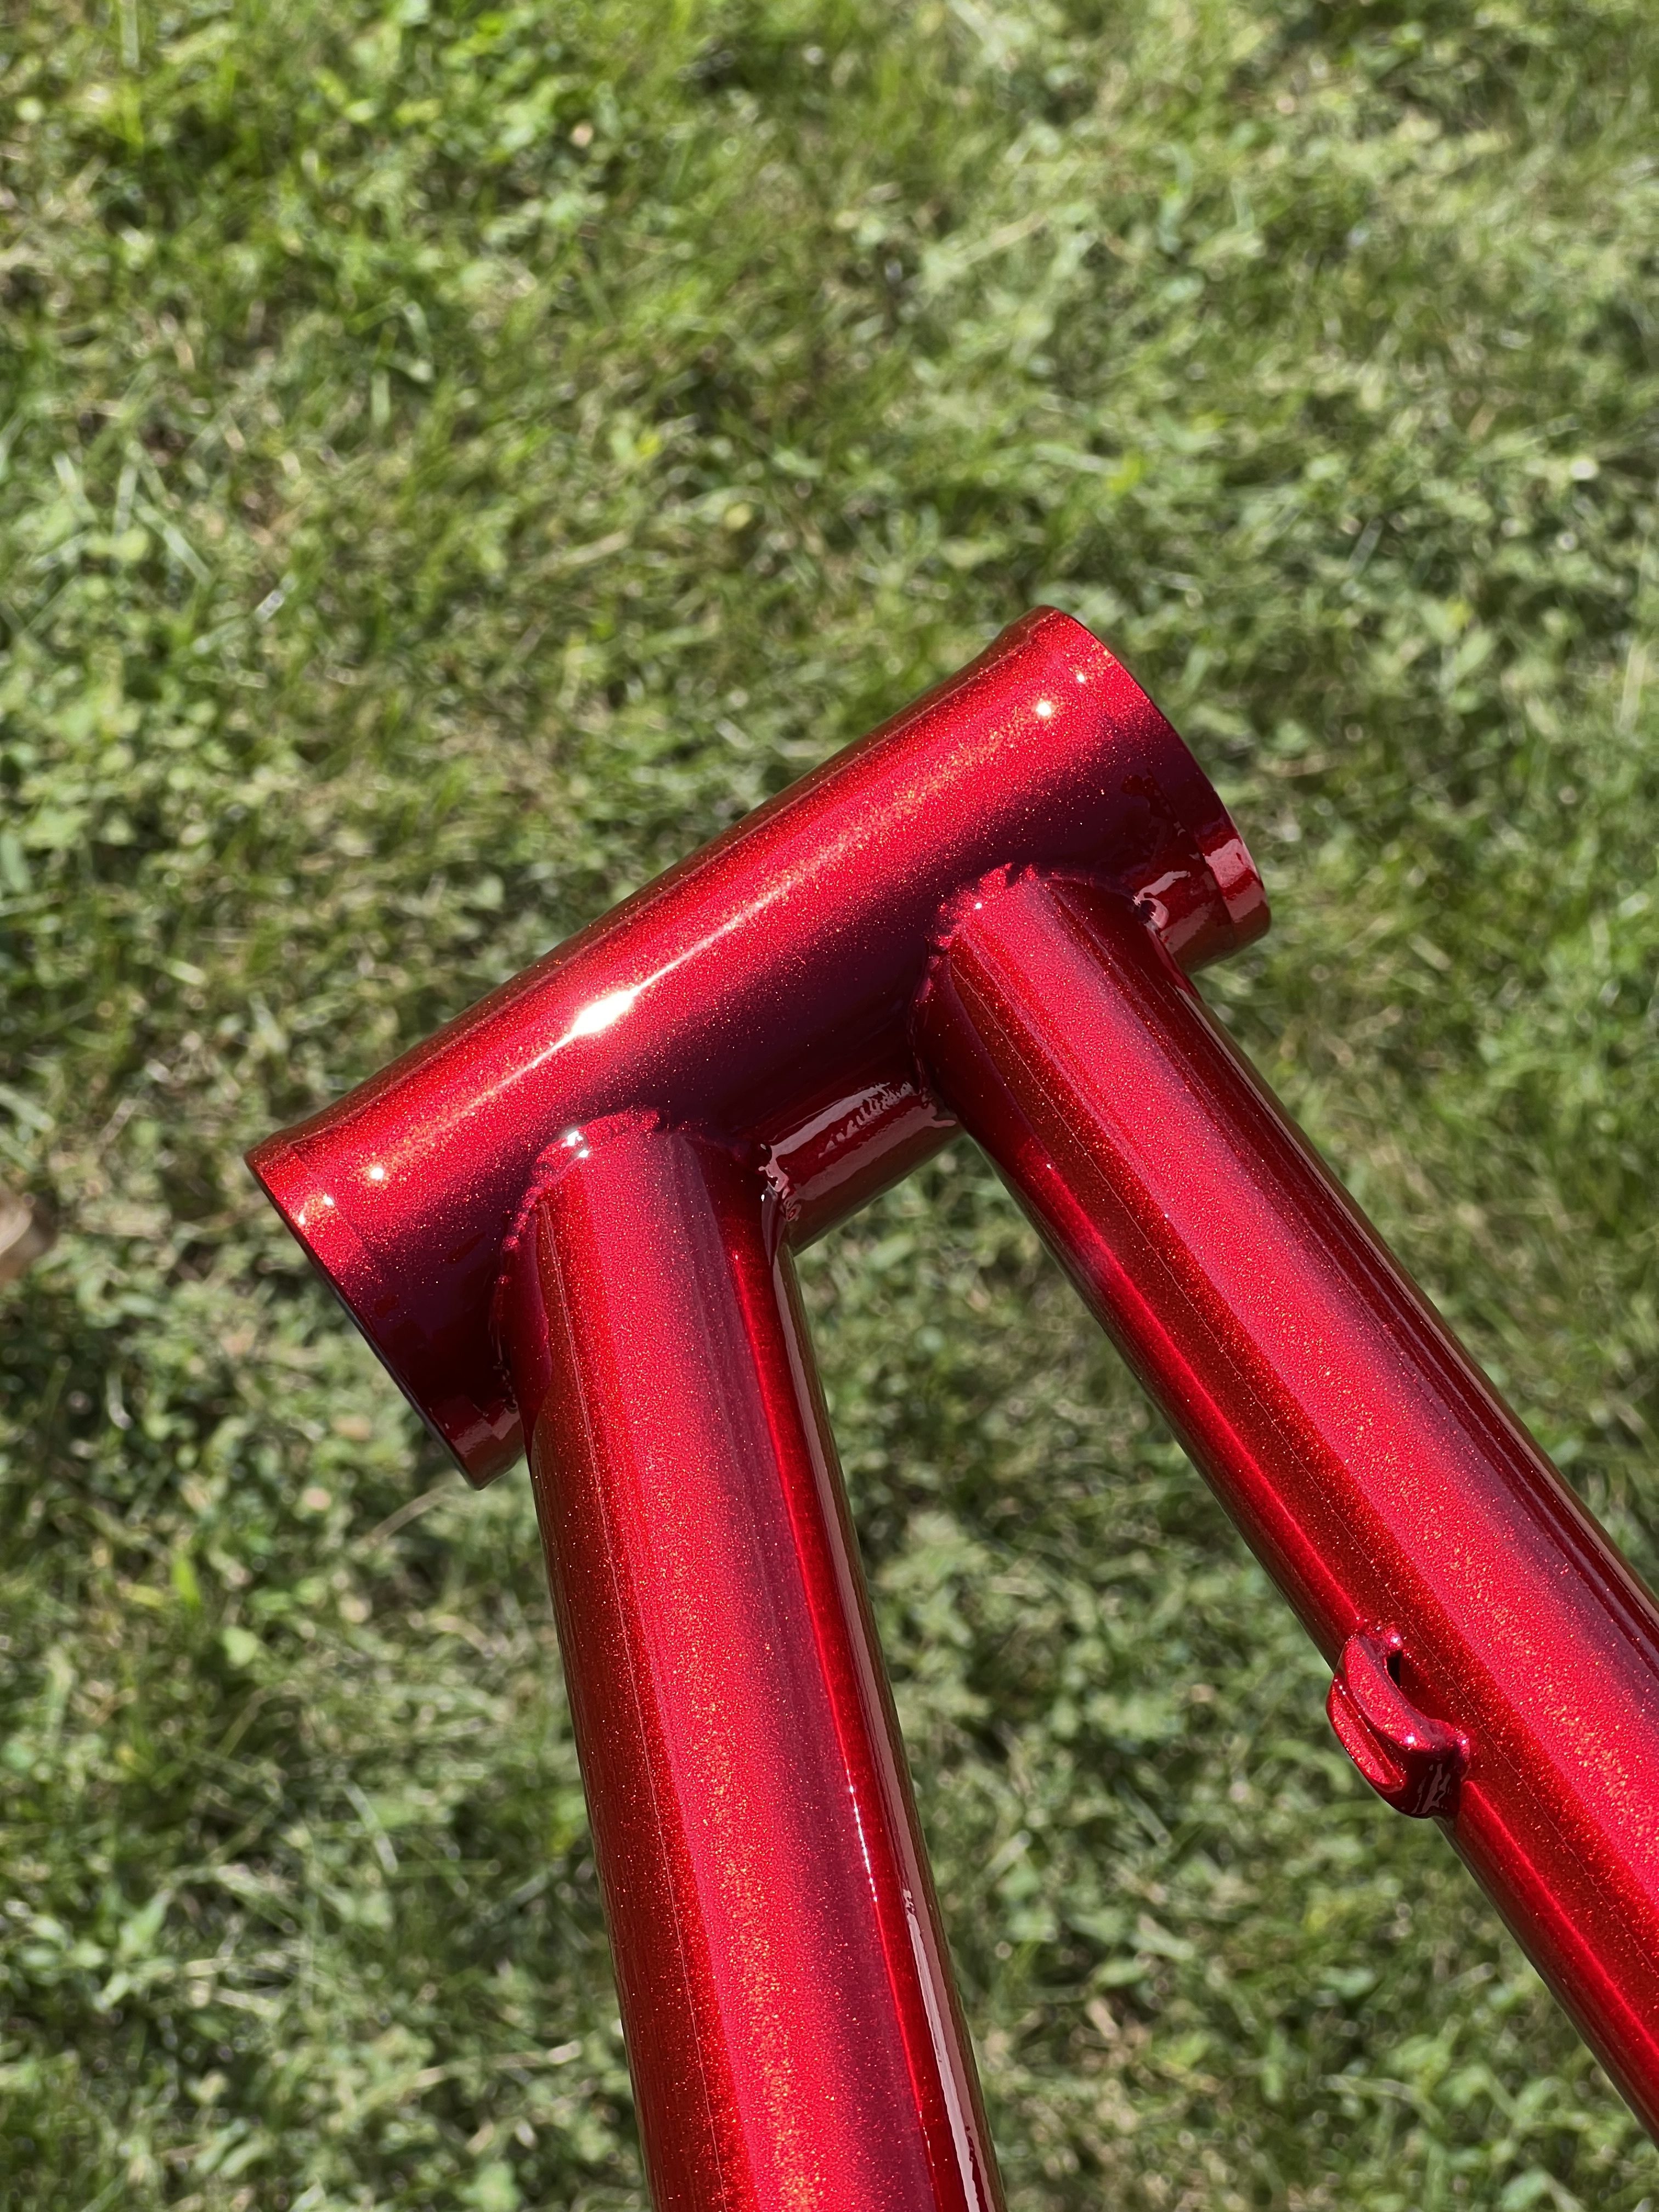
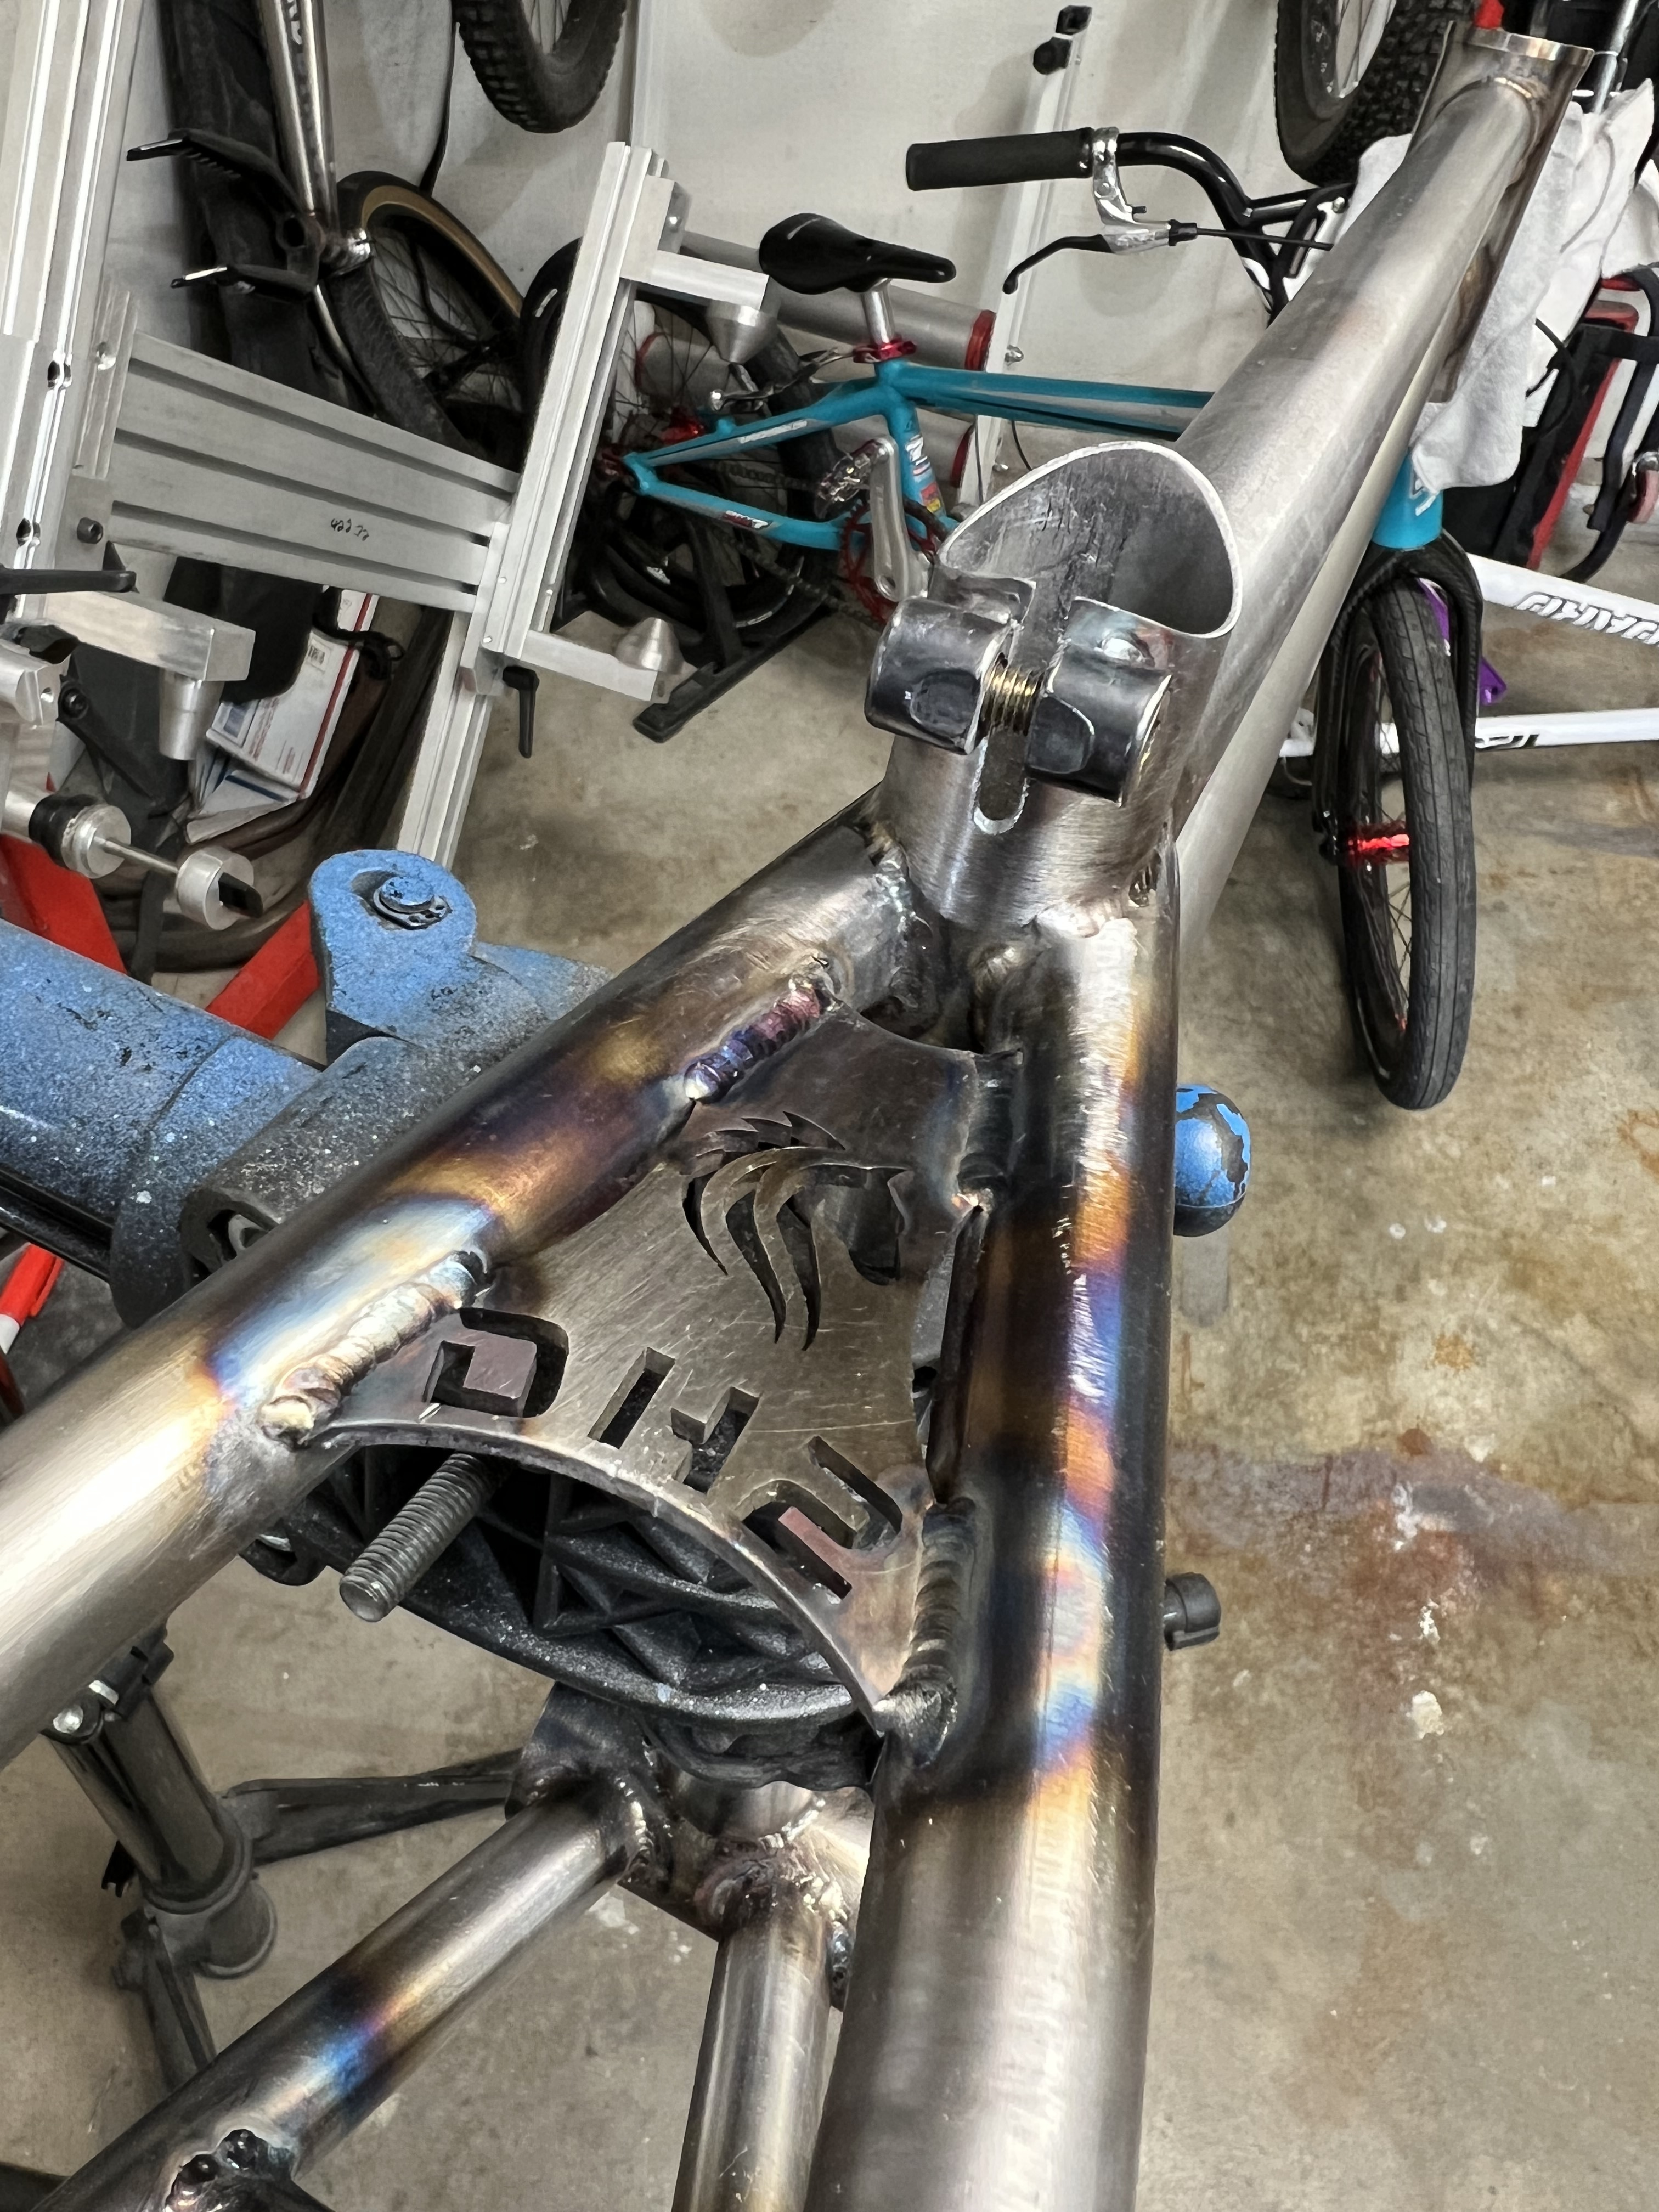
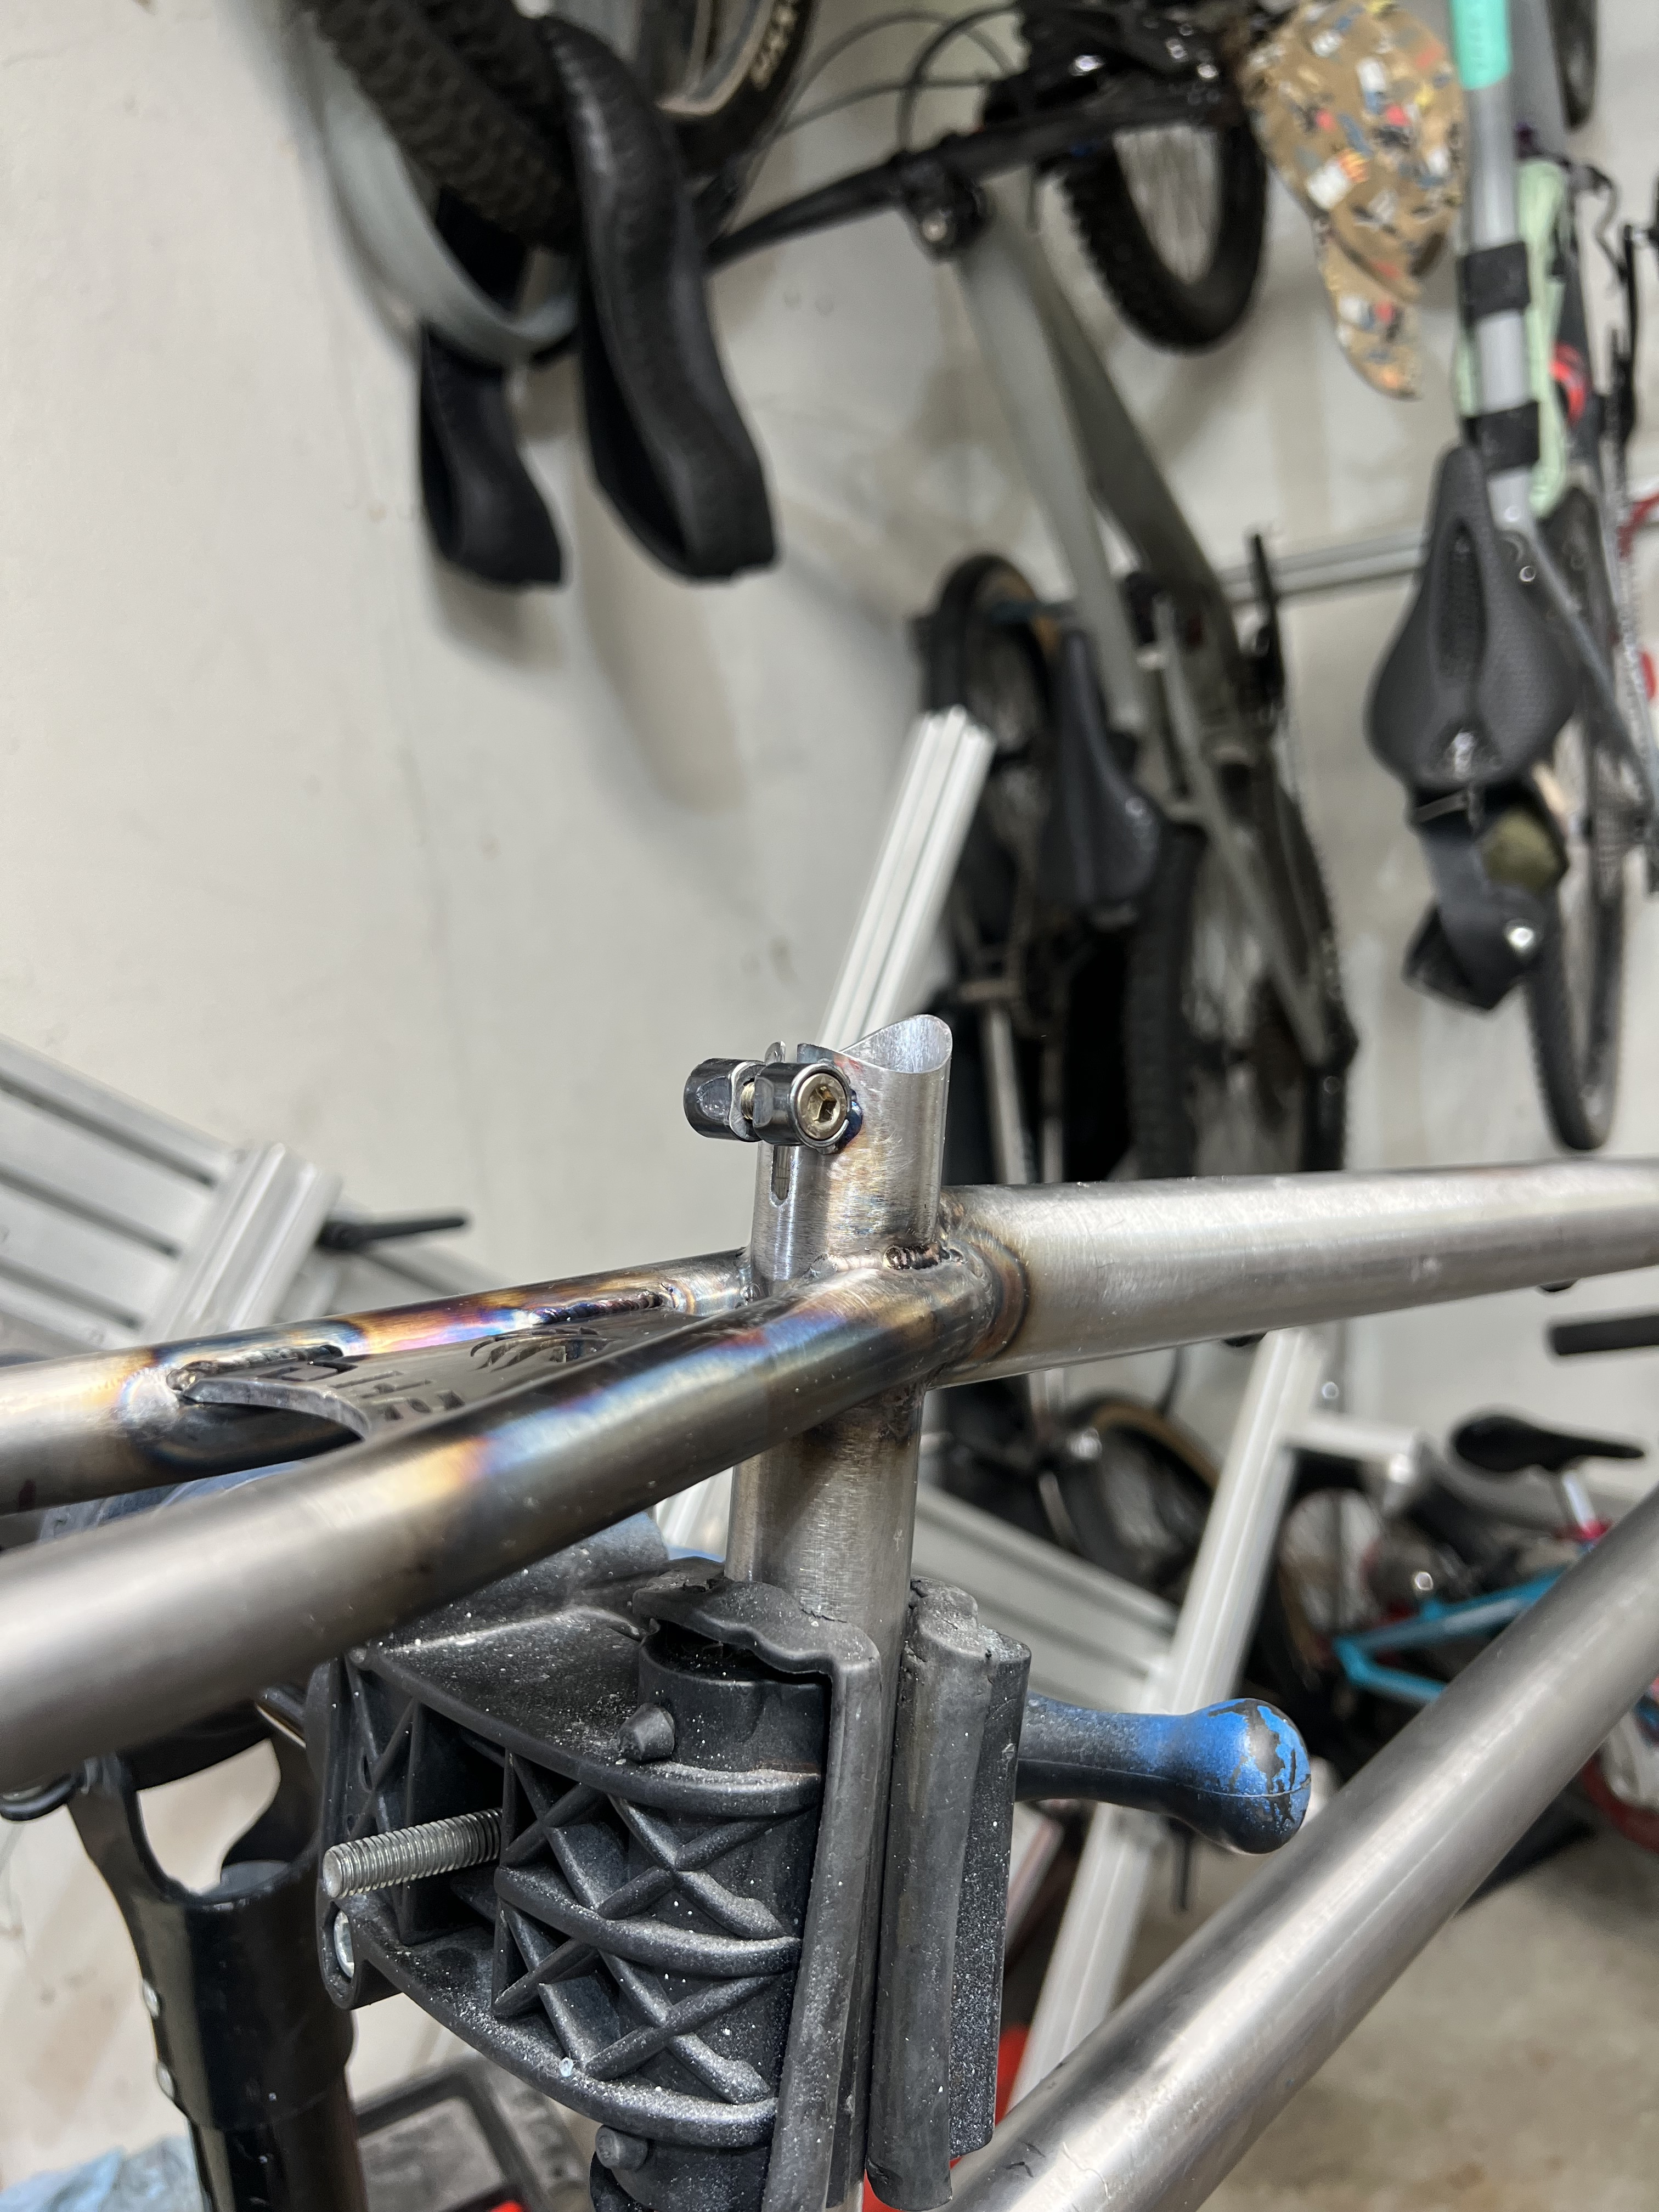
- Really just happy with how this thing looks. I really like the low, long race frame look, and the seat stay/dropout fit up and connection makes me feel warm and fuzzy inside.
- Paint. I’ve painted around a dozen frames now, all done with rattle cans in either temp plastic ‘booth’ in my garage, or outside on a nice sunny windy day. This one is by far the best paintjob I’ve laid and the color looks even better than I pictured in my head. the matching carbon fork is definitely the cherry on top.
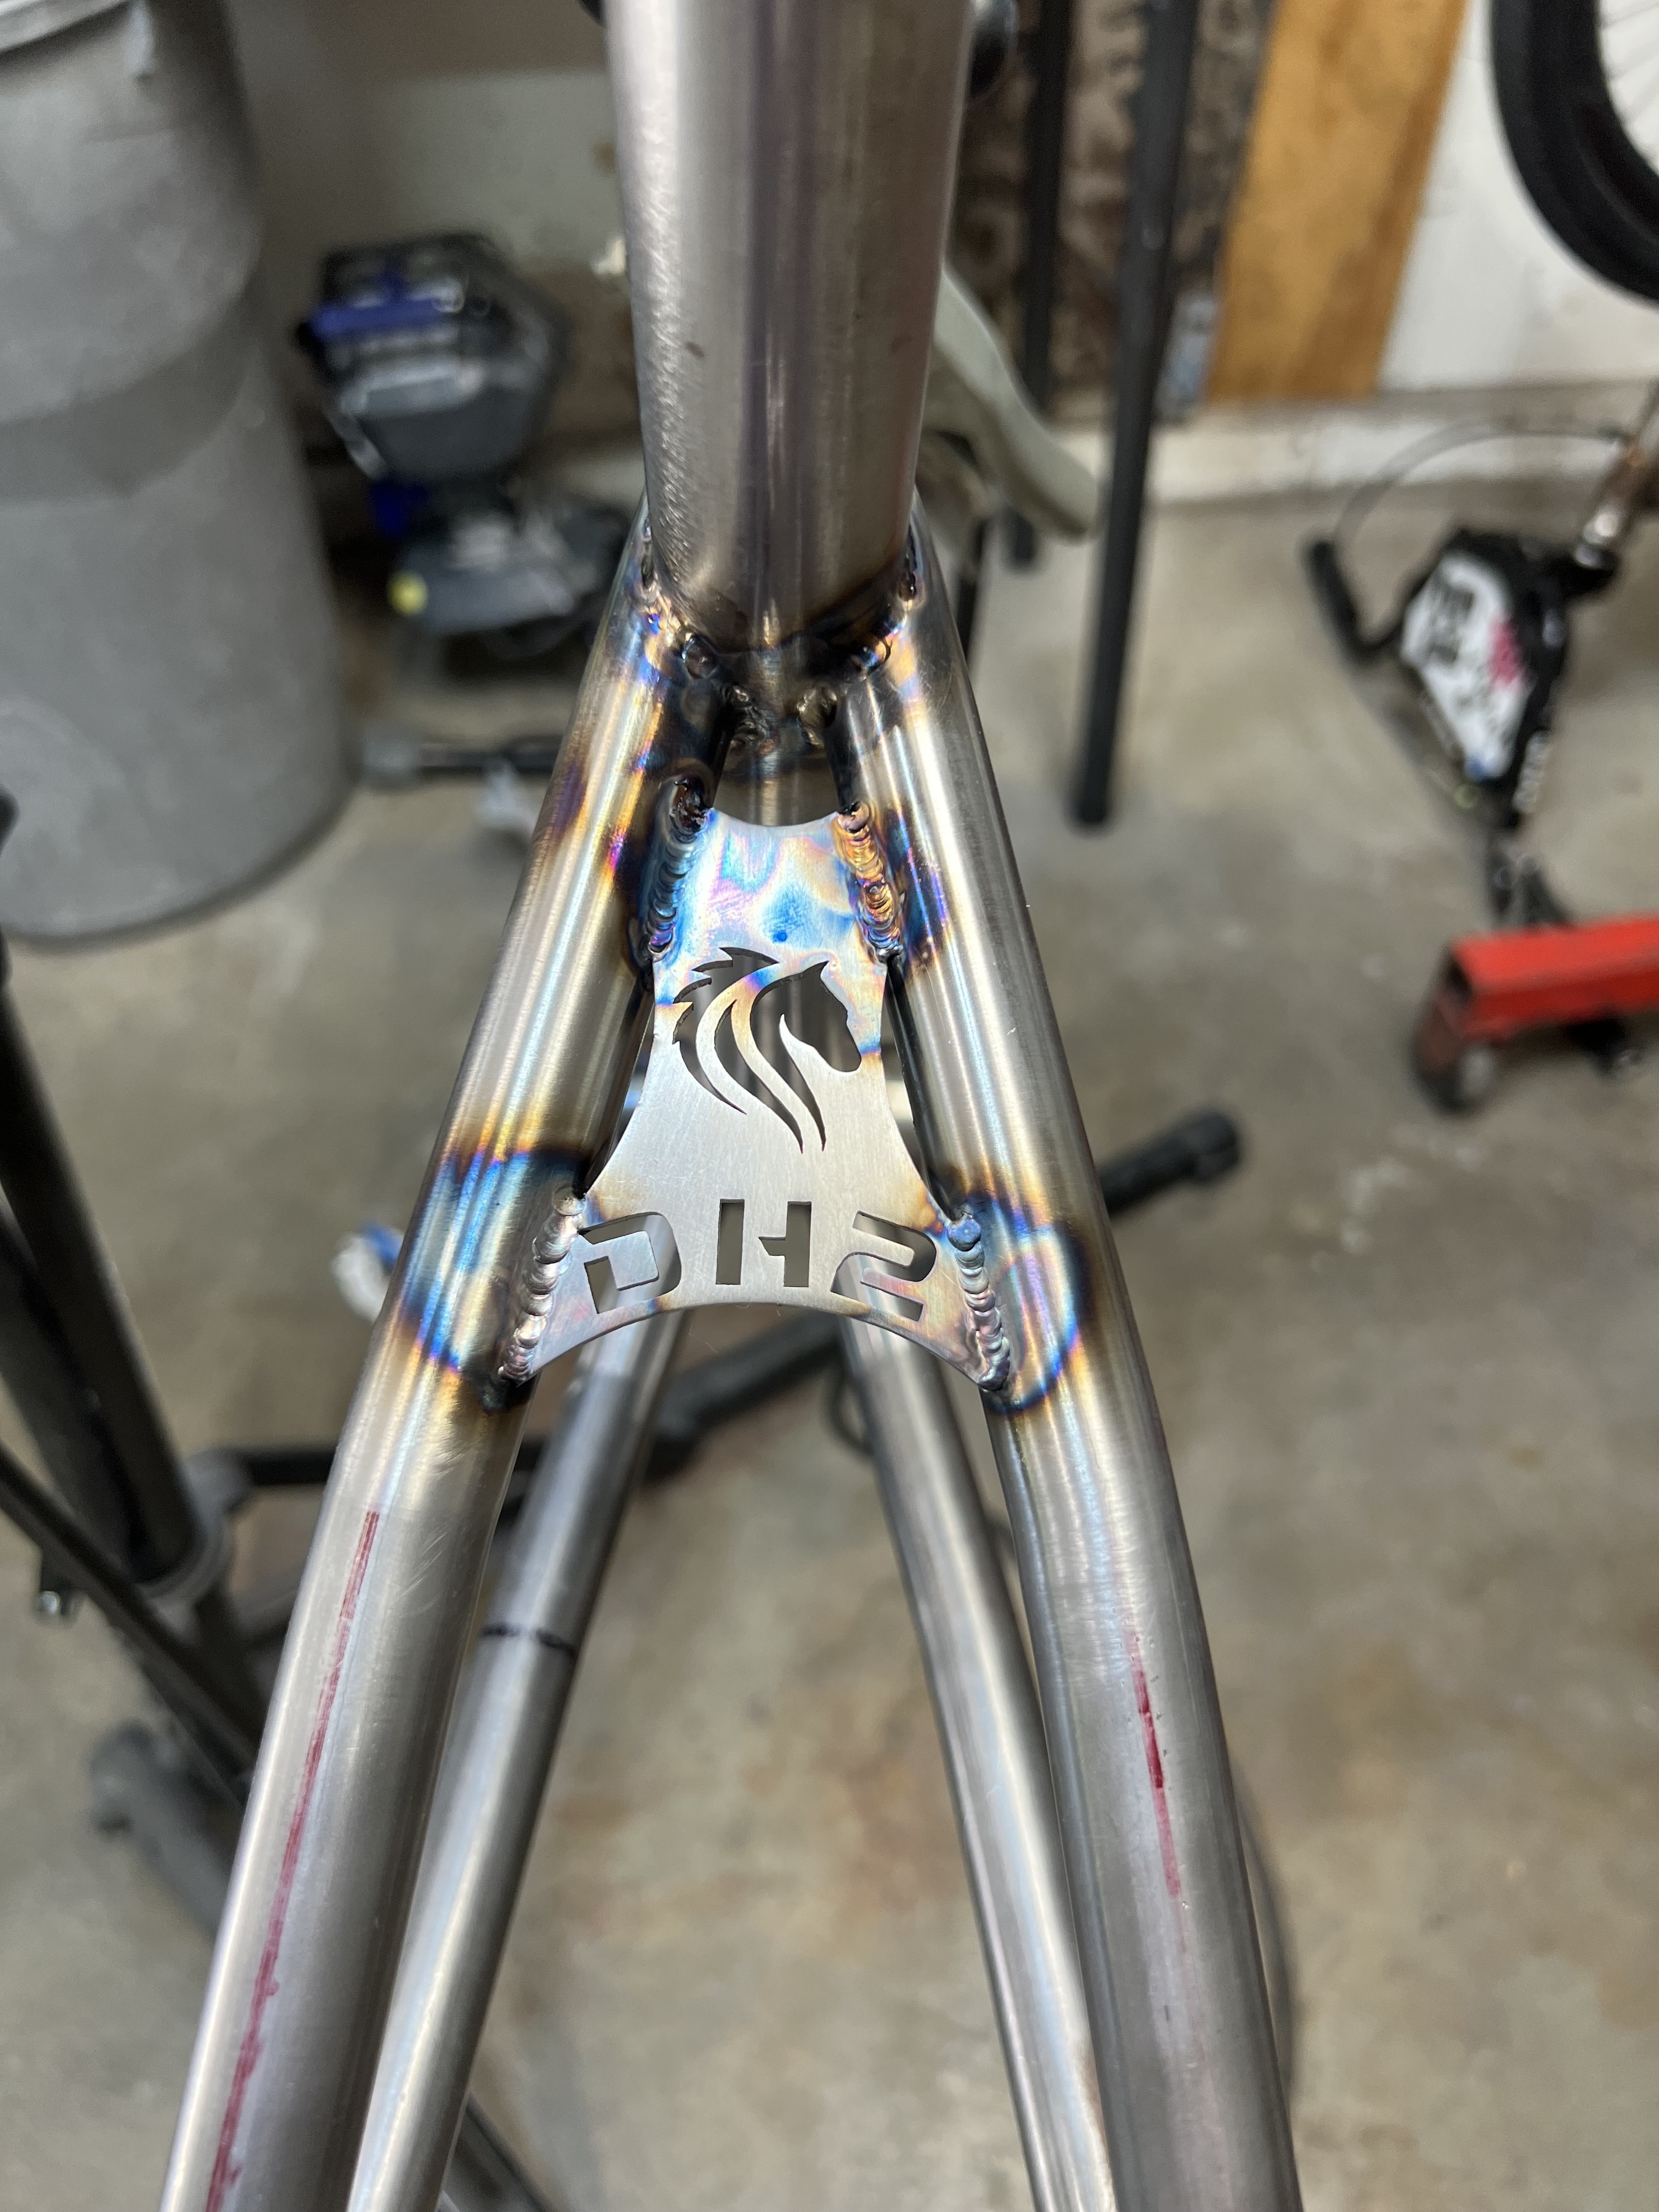
- The seat stay bridge is absolutely sick.
Things that did not go to plan (but thats okay):
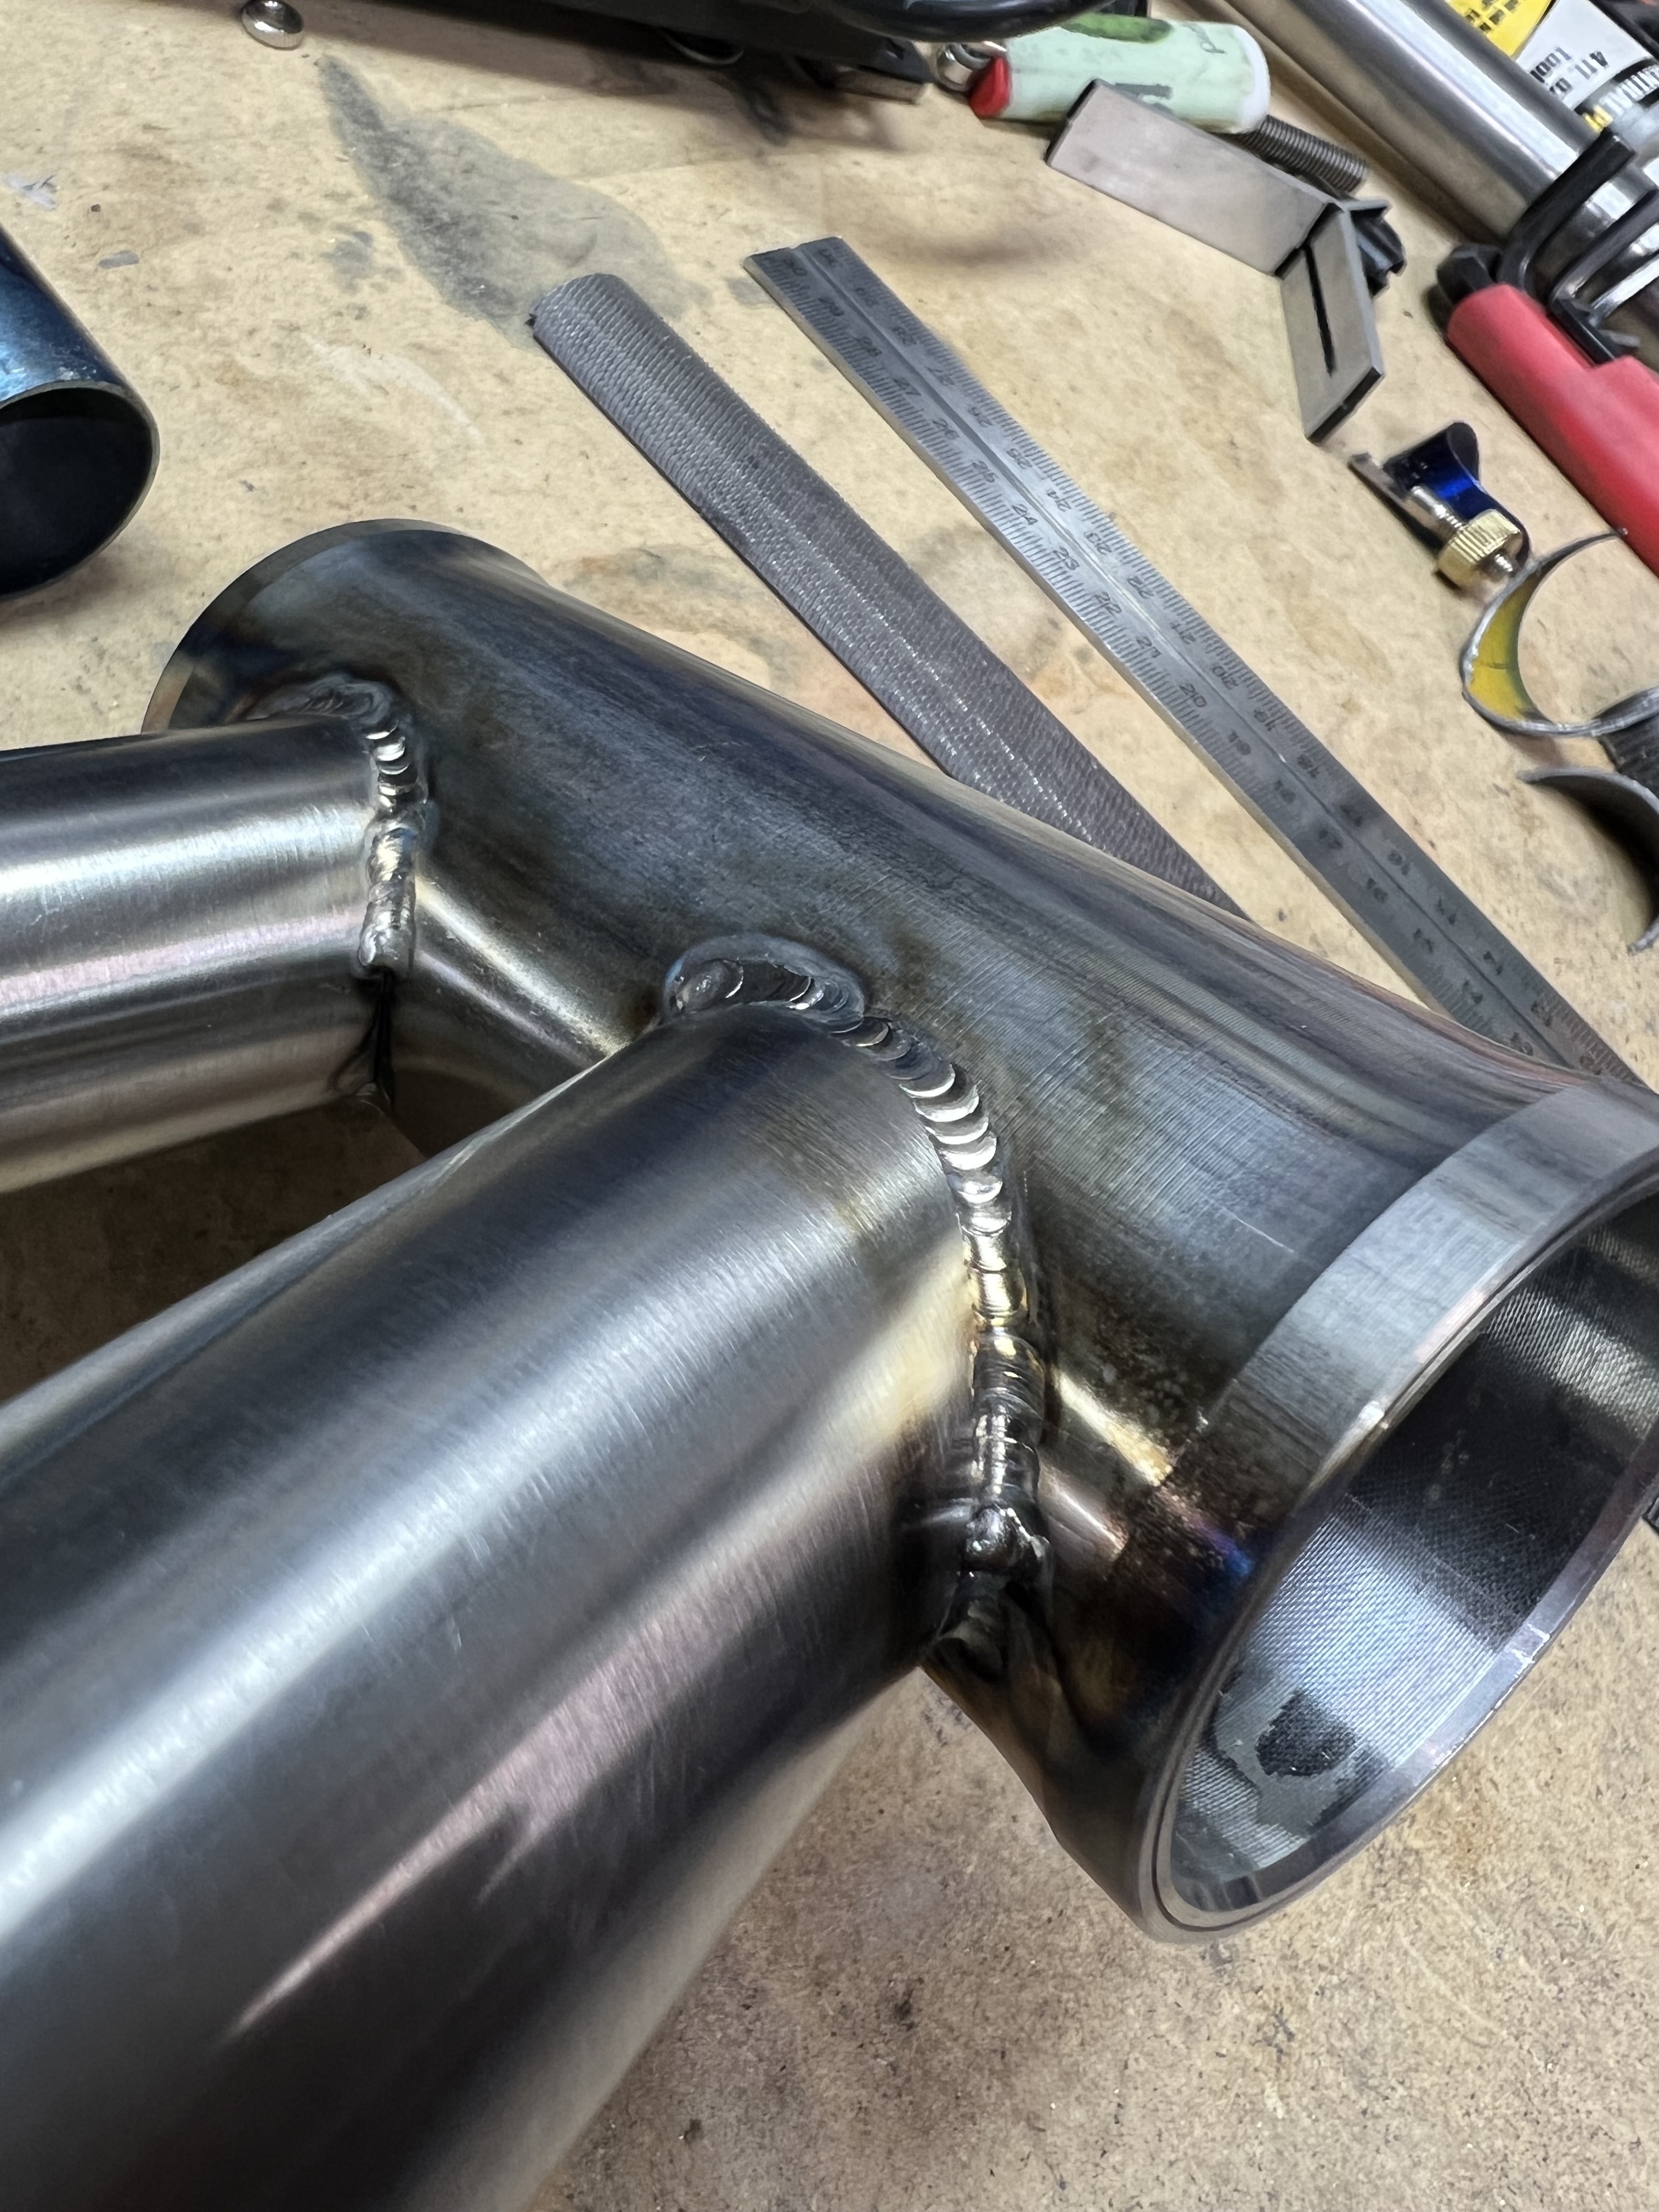
- This was my first time bending seat stays/chain stays. i used a small lever style bender i picked up form Acoustic. While I was able to produce something usable, I need a lot more practice in laying out and getting bends consistent.
- I had a long delay waiting on CNC drop outs, and those never did end up panning out. I didn’t want to just wait on one component and lose all momentum on this build. Decided to just go with the basic horizontals from PMW. I am very happy with how these turned out though.
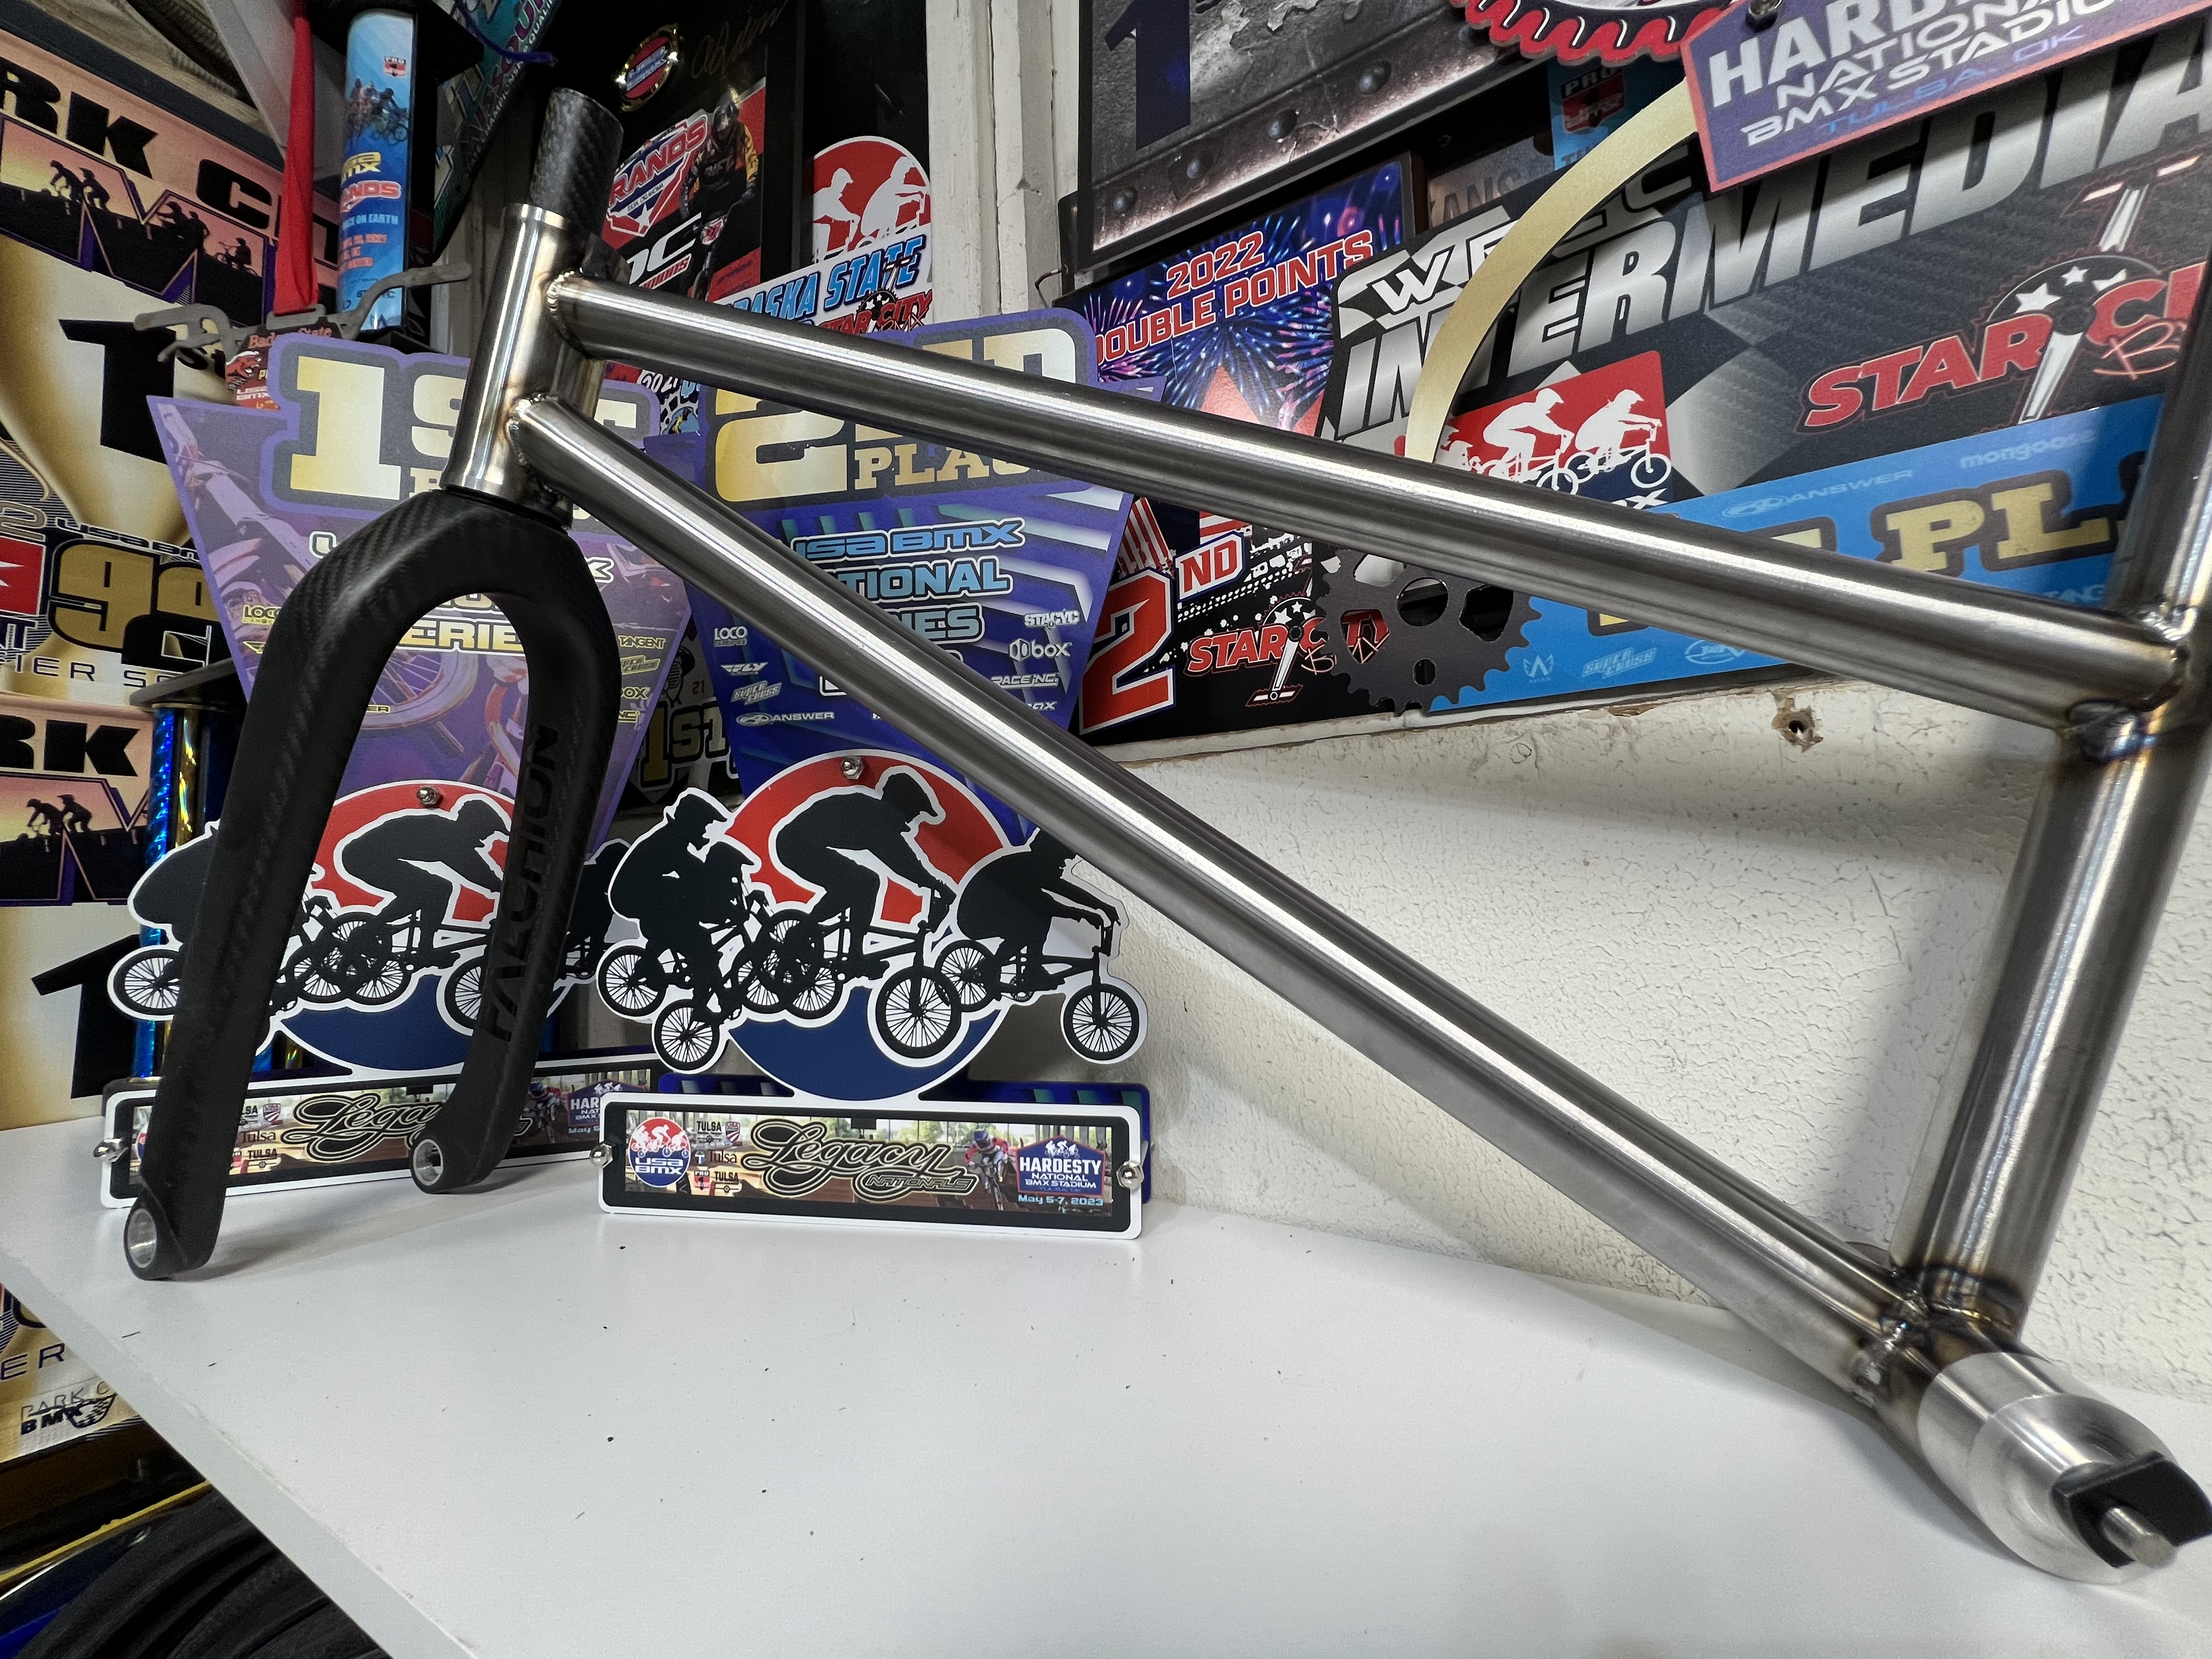
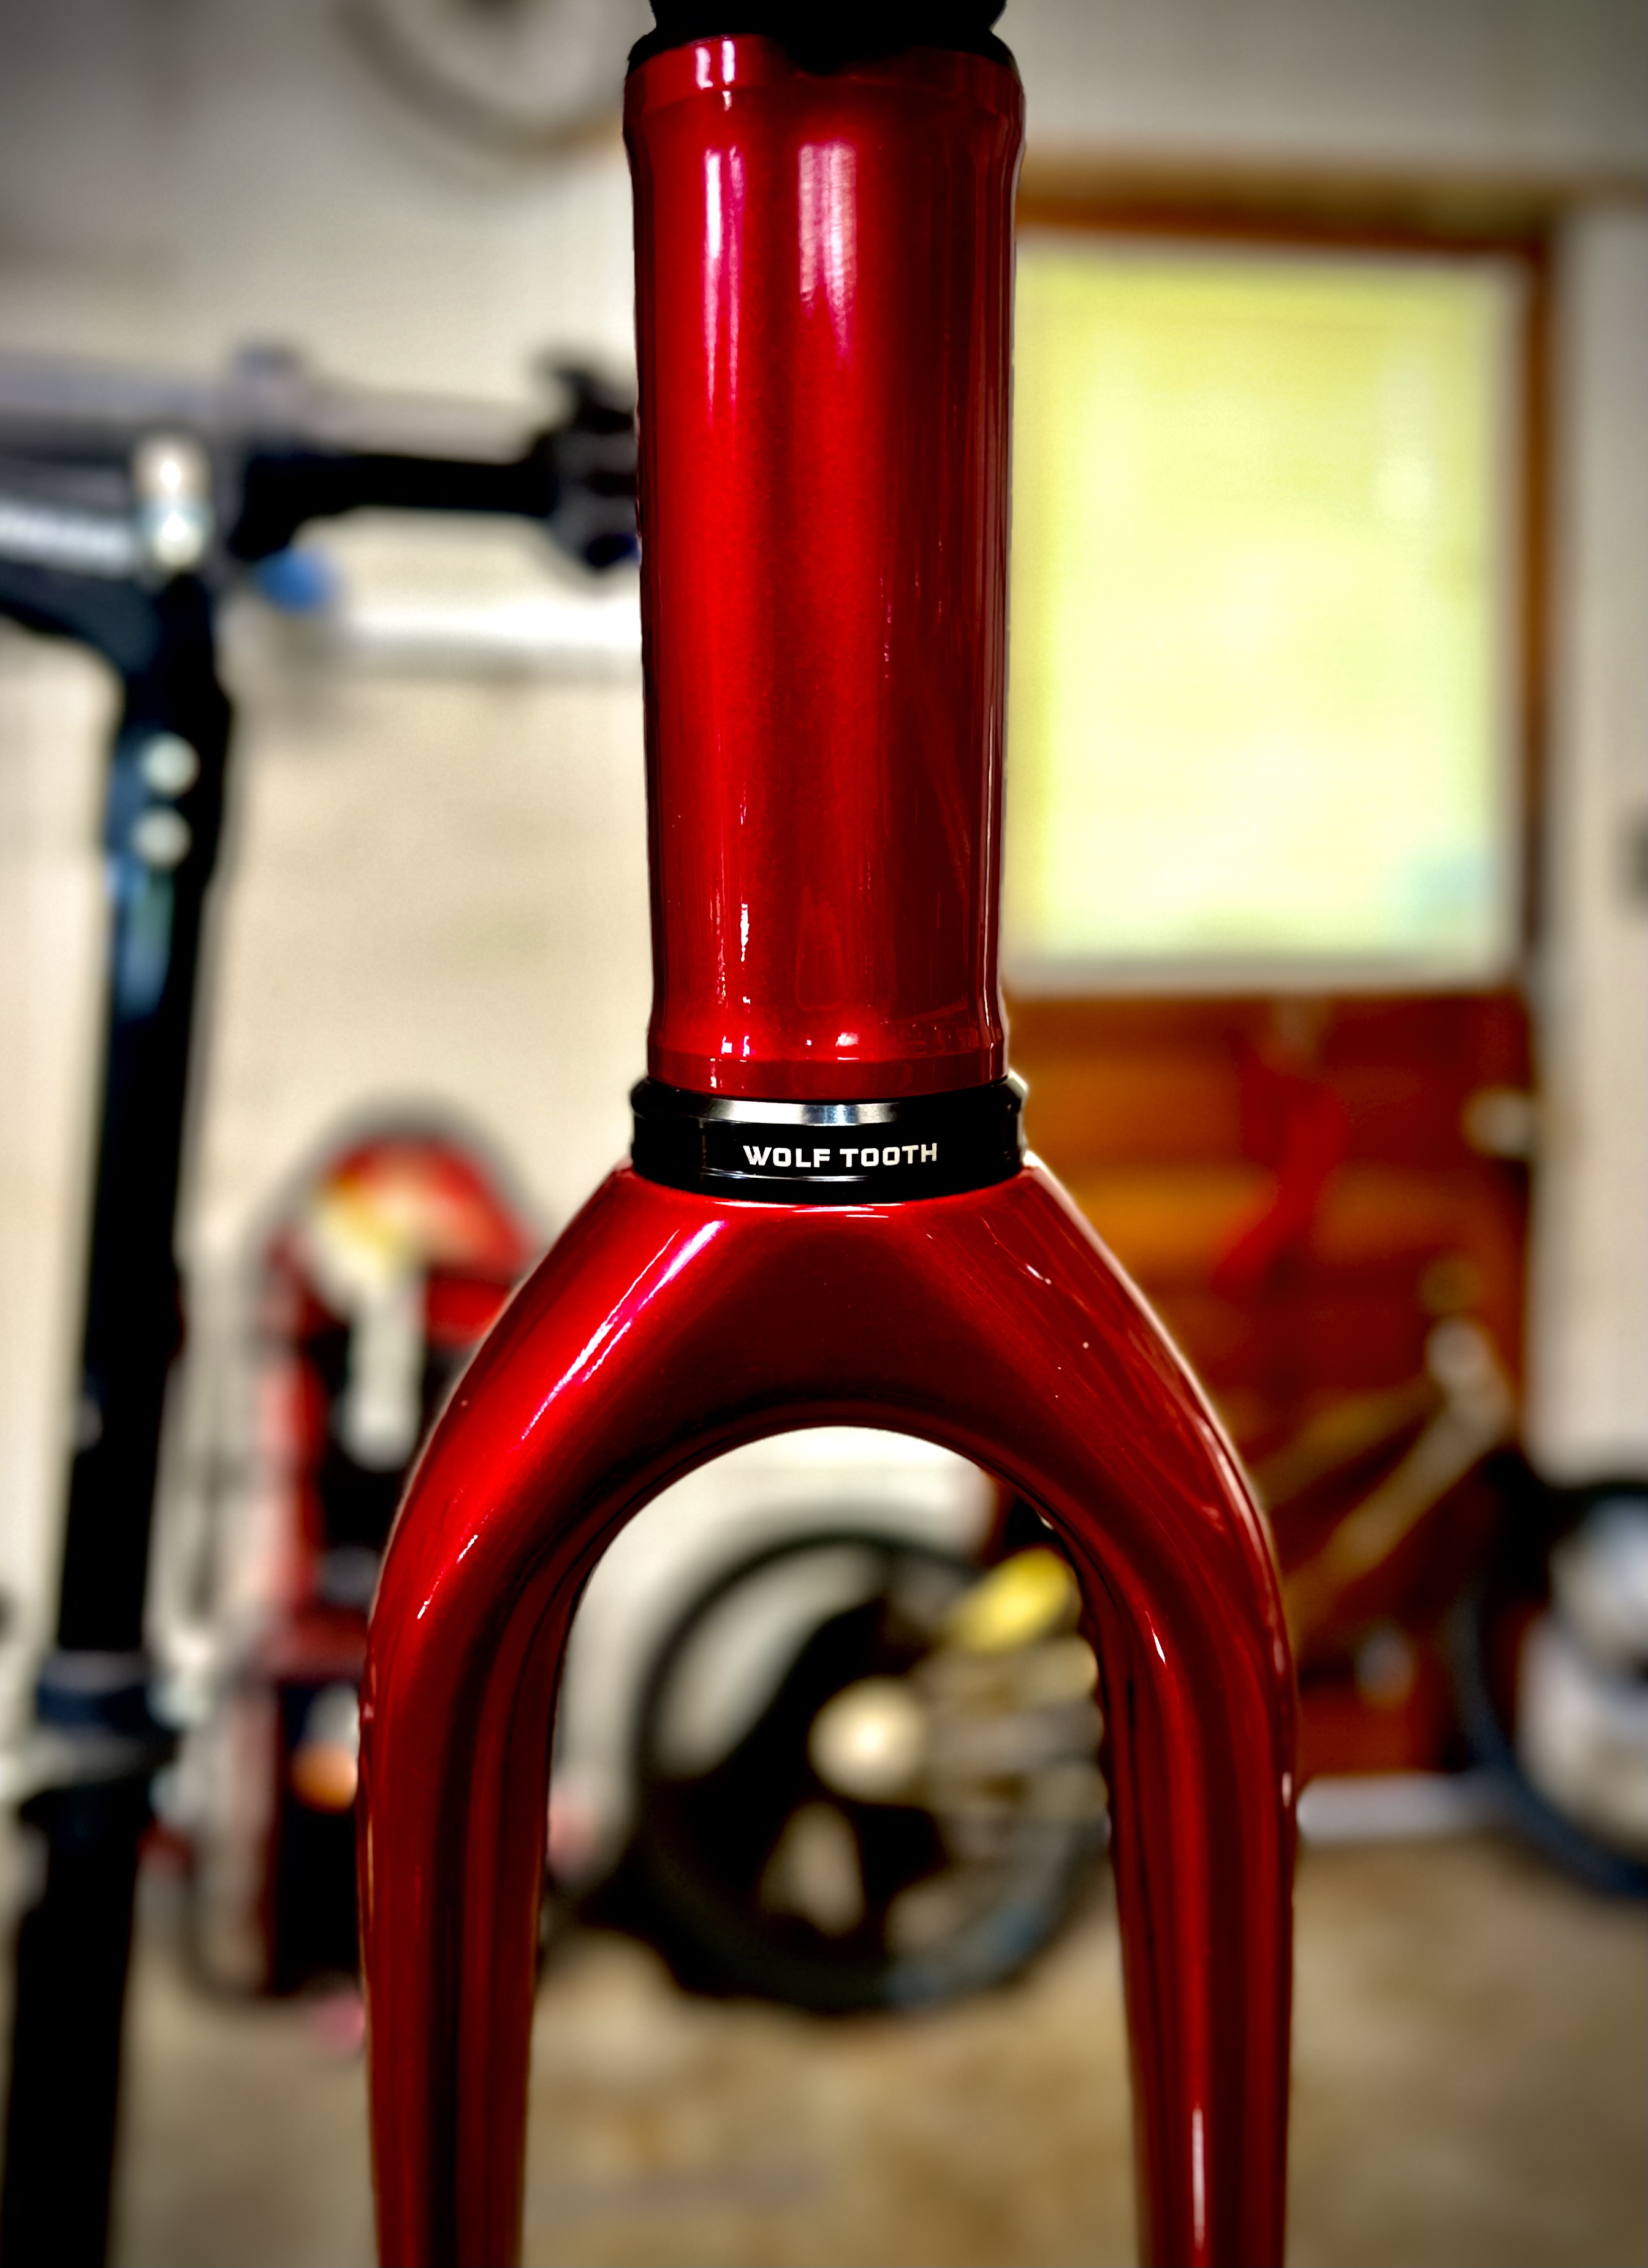
- I wanted to use a 44mm head tube. I do not have a head tube reaming setup yet. I would like to not repeat the process of filing/sanding the head tube by hand to be relatively concentric and fit for the press in cups. That was a miserably long and drawn out process, and I had to turn off the part in my brain that cares out the right way to do things, but it worked, and the cups went in with a proper fit.
I am still in the process of sourcing decals, and I need to finish up my head tube badge, but without further ado, here’s the (mostly) finished Dark Horse Proto 2. (DH2)
Specs: 23" Top tube (compared to traditional frames, this is in the realm of “Why is it so long”)
15.8" chain stay
11" Bottom bracket height (industry standard is in the 11.6-11.9 range. My first frame was 10.8. Really enjoyed how it rode, especially carving in turns and accelerating. It did prove a little harder to pull for manuals and rollers.)
12 Likes
And a second post for other bike related dealings.
Before retiring frame 1; the plan is to make a wall hanging to keep it around as #1; it went out on a few good notes. Was able to pick up another podium (2nd place) and a 2nd national win last month in Kansas City. Really fun track, some good competition, and a lot of rain/heat to battle with.
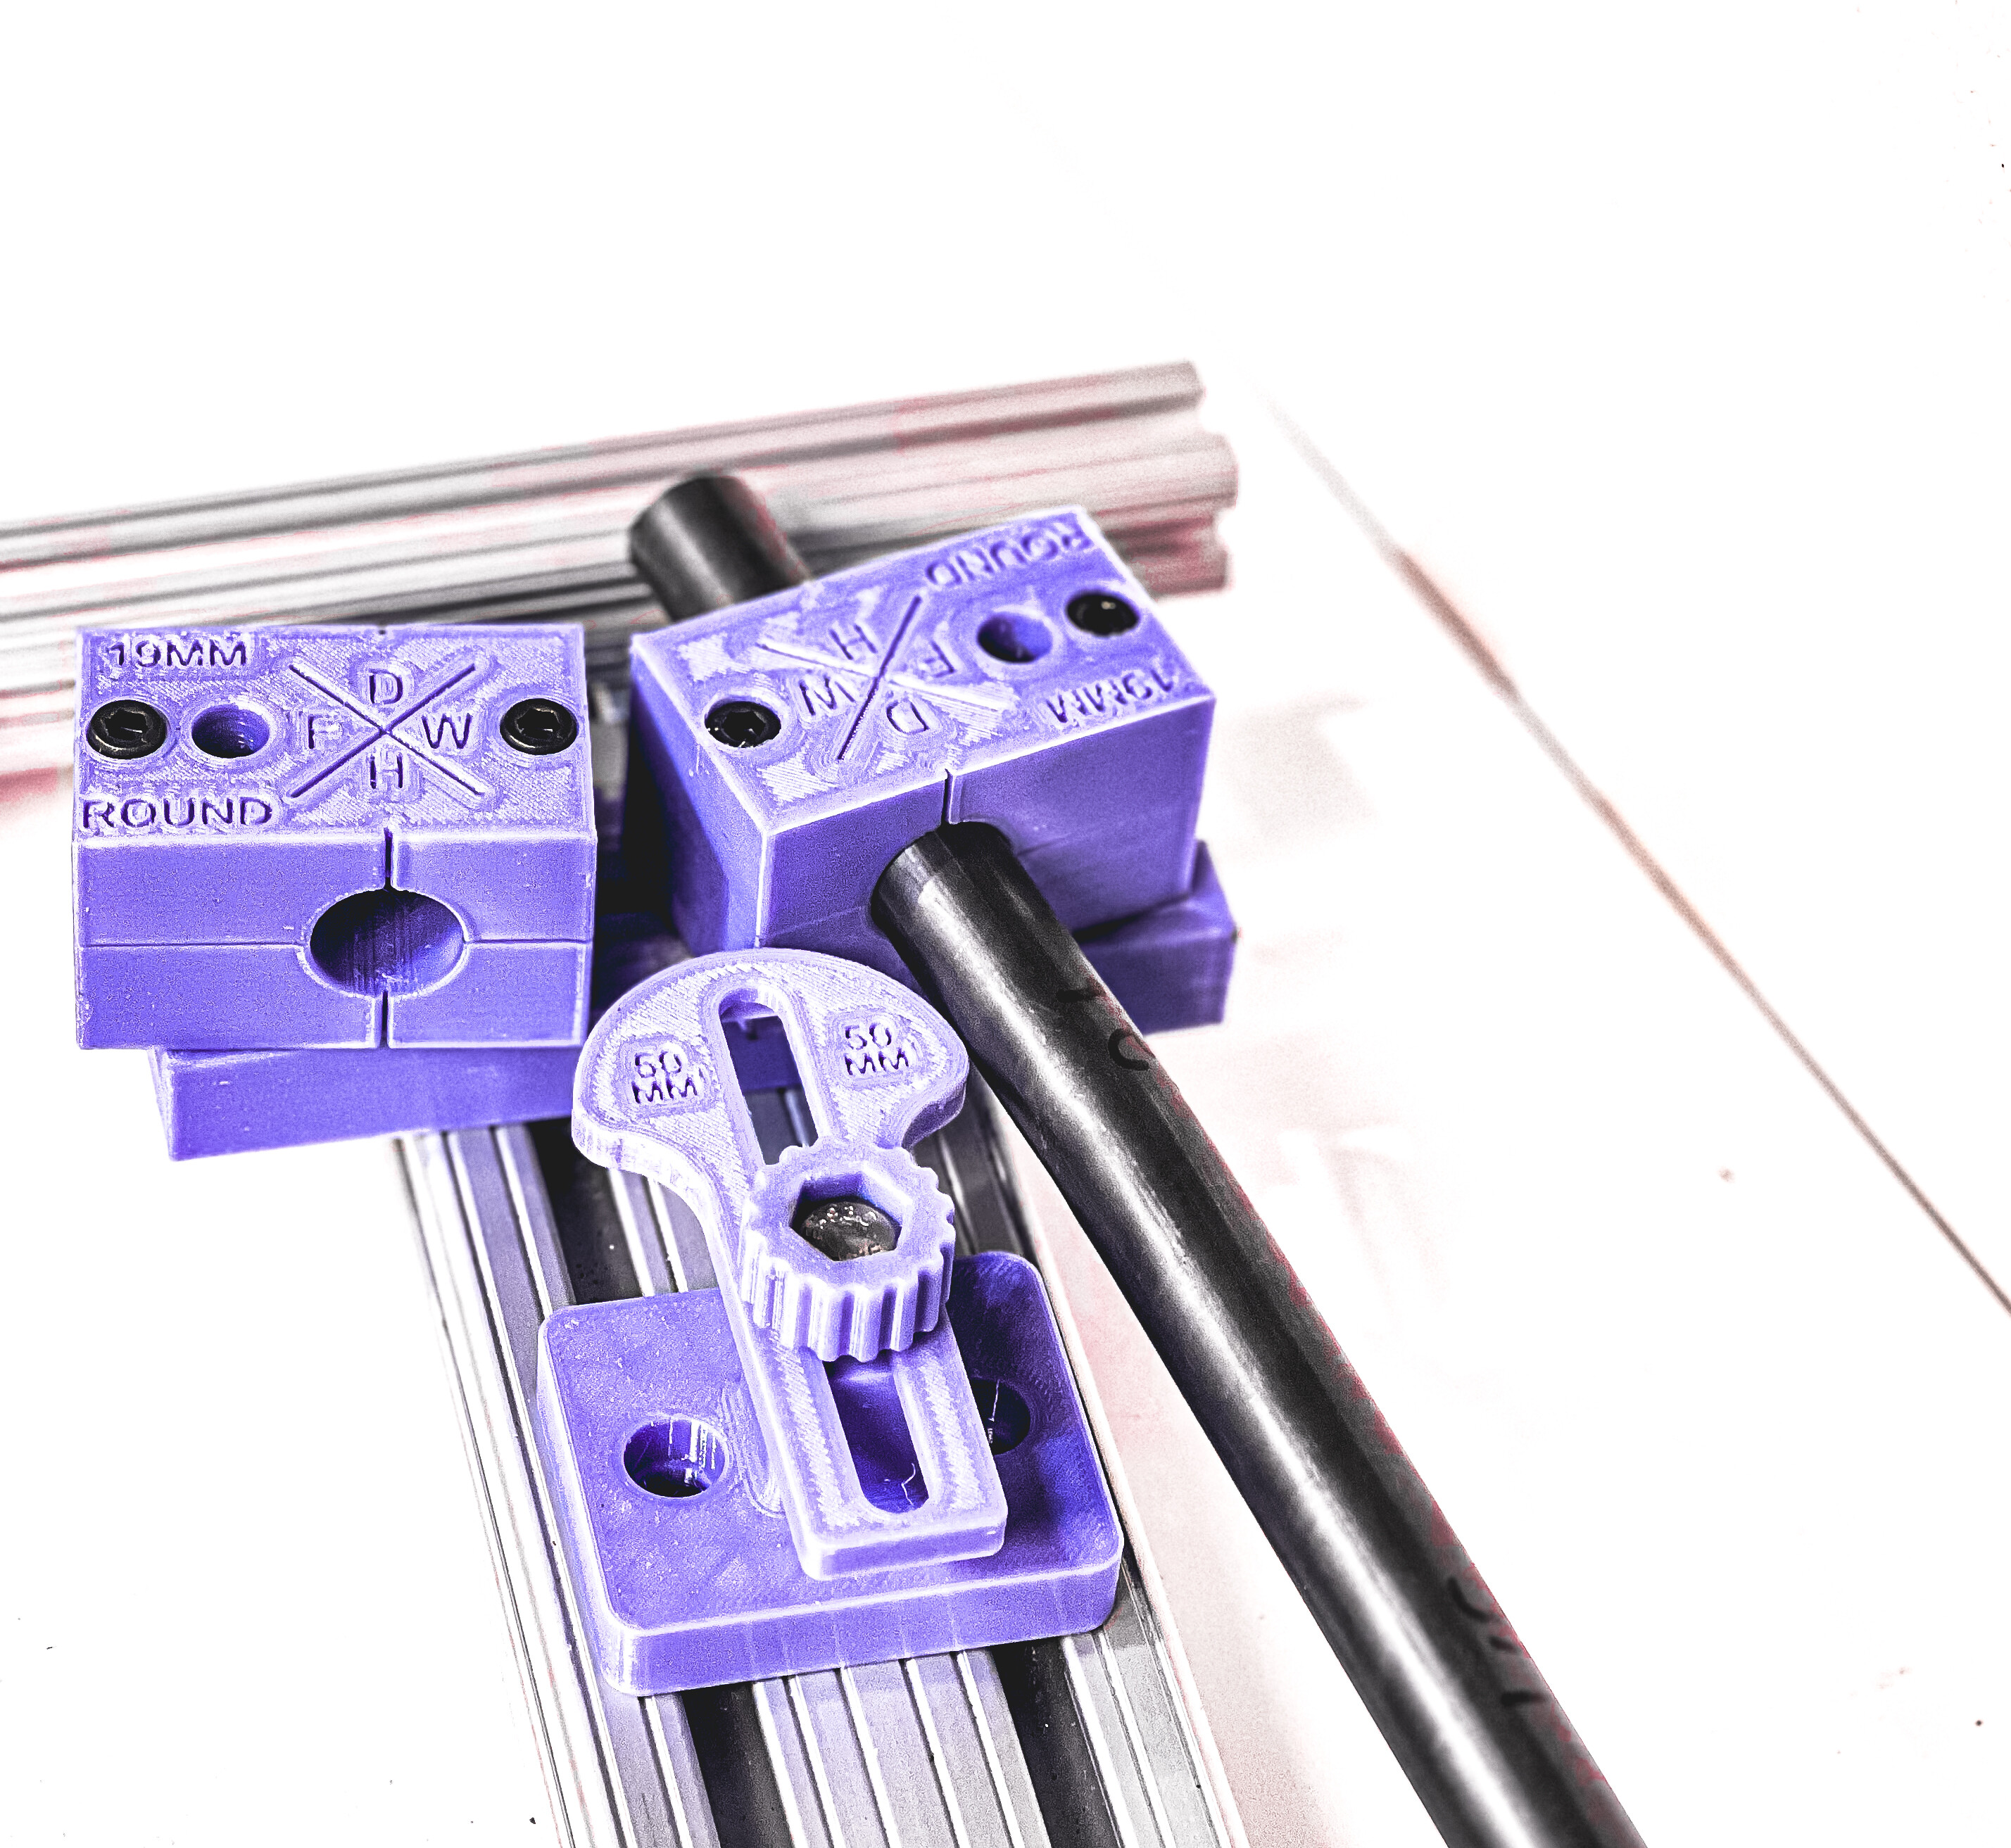
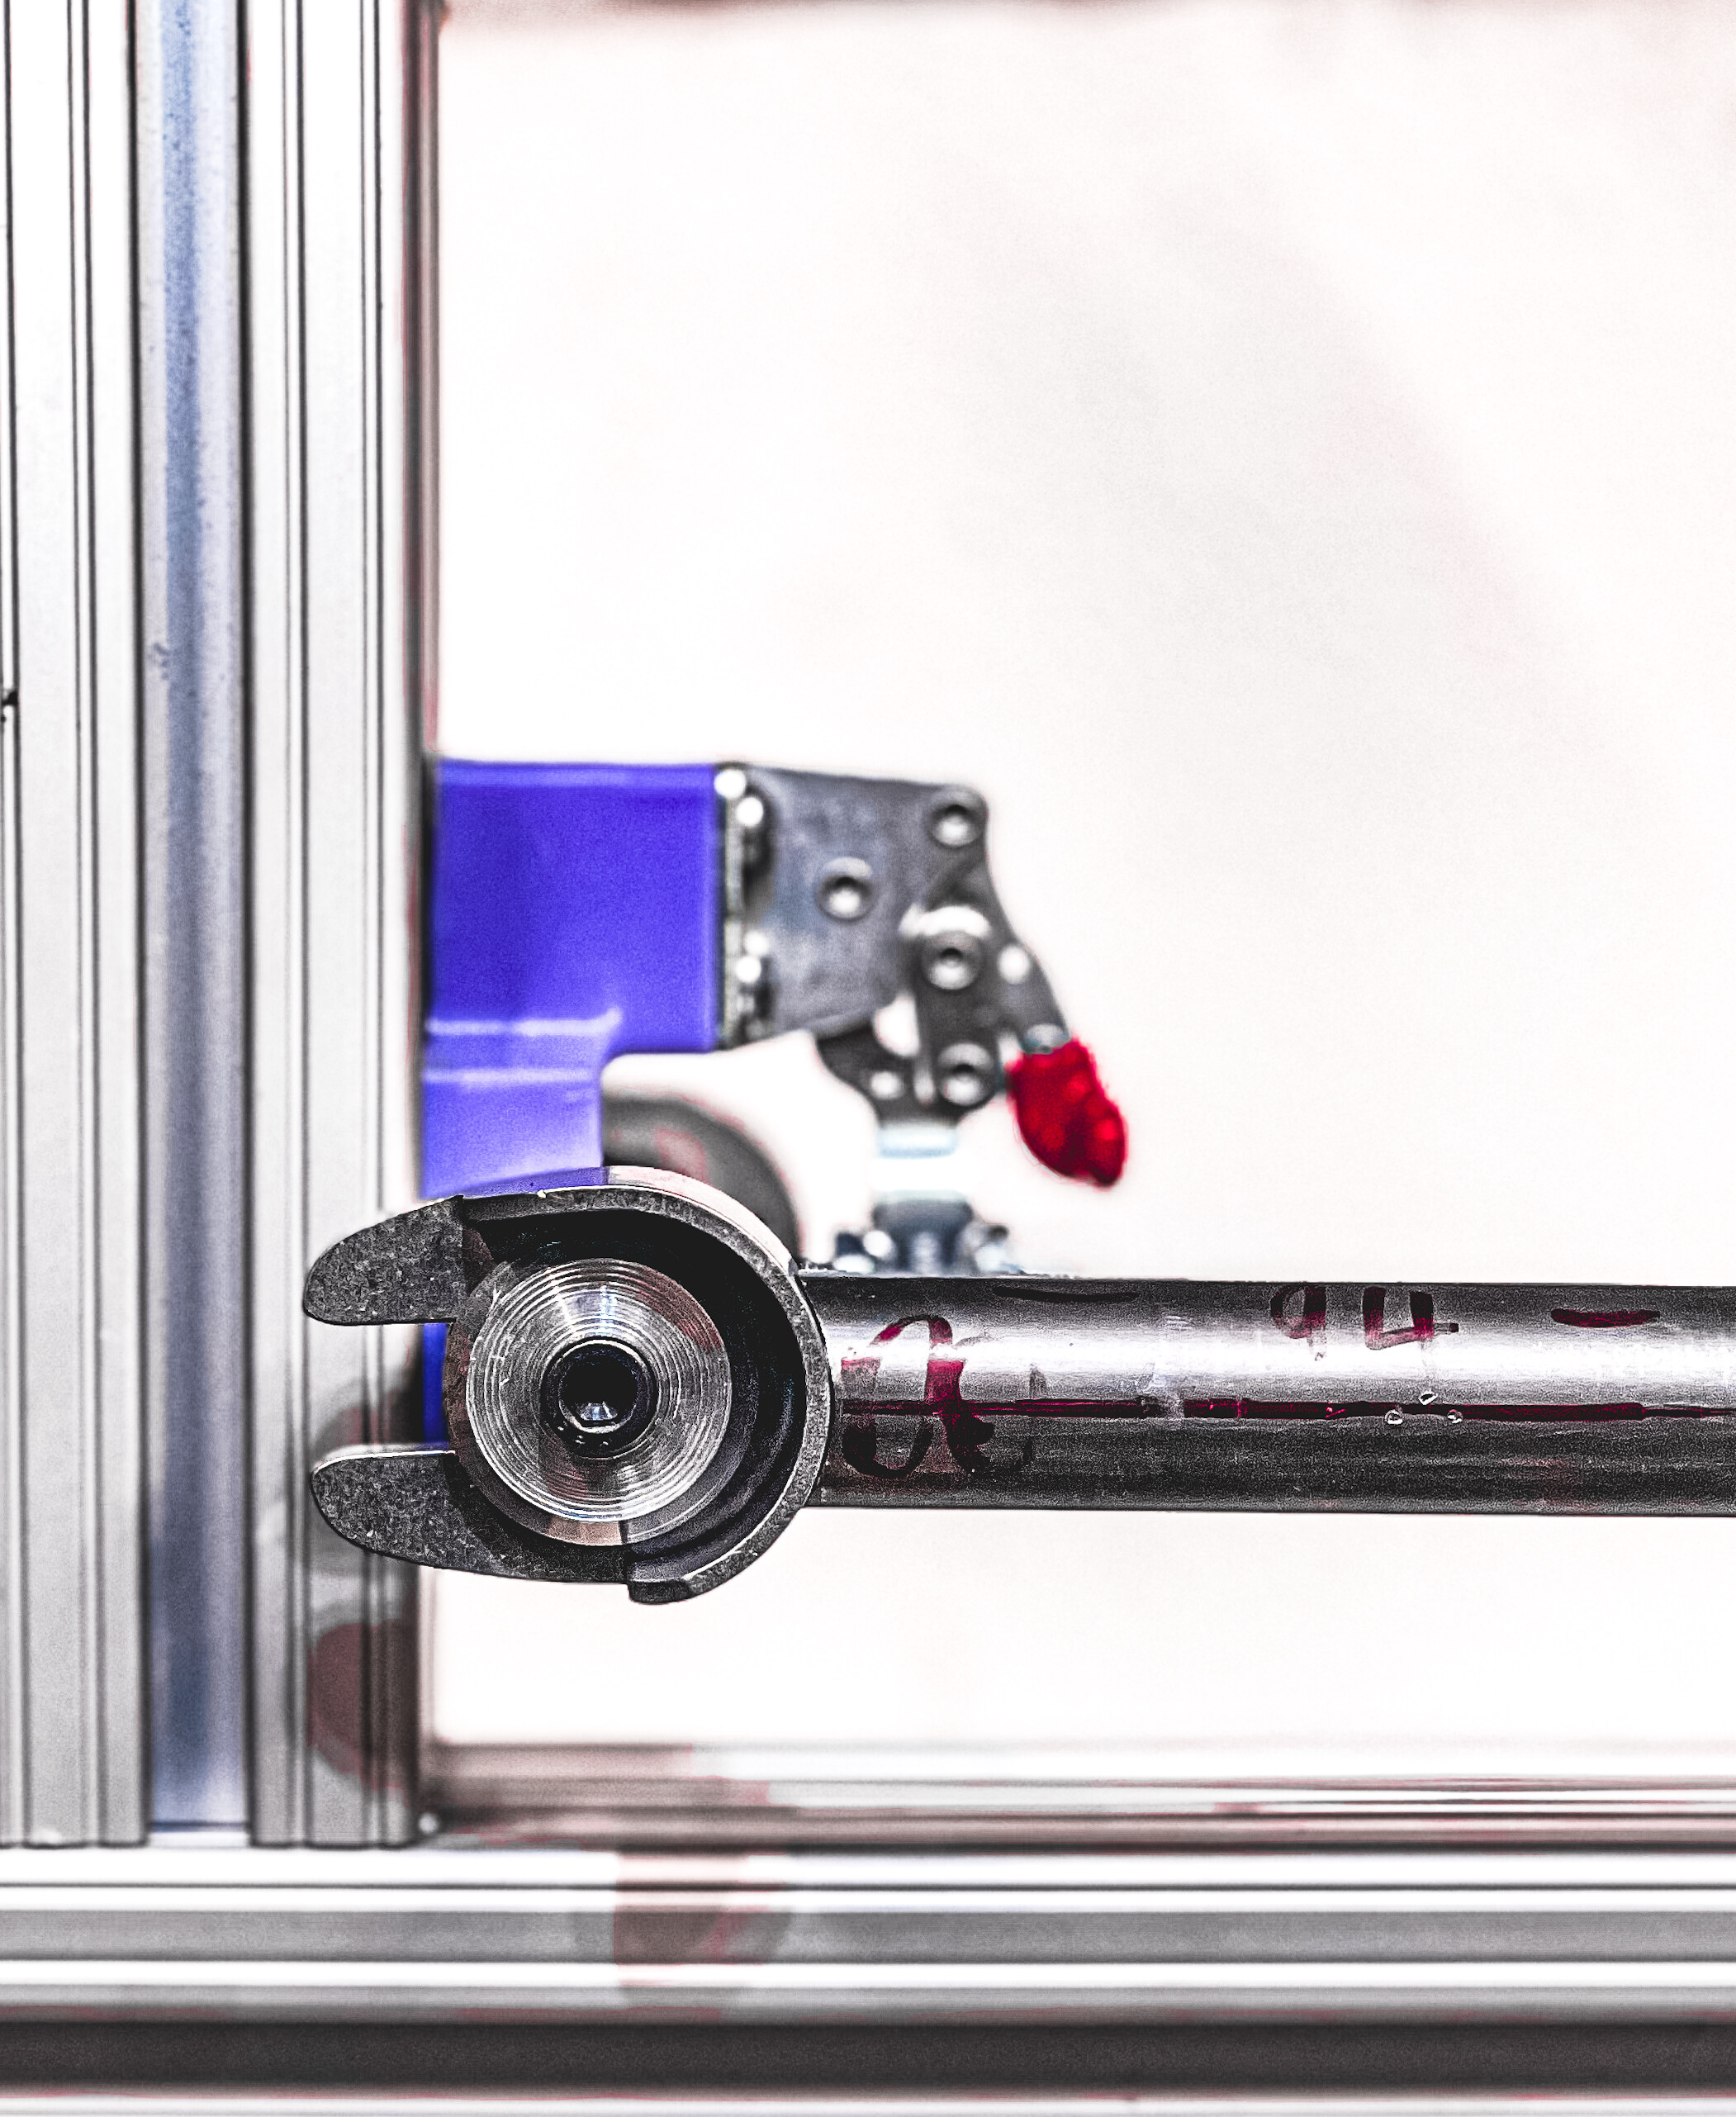
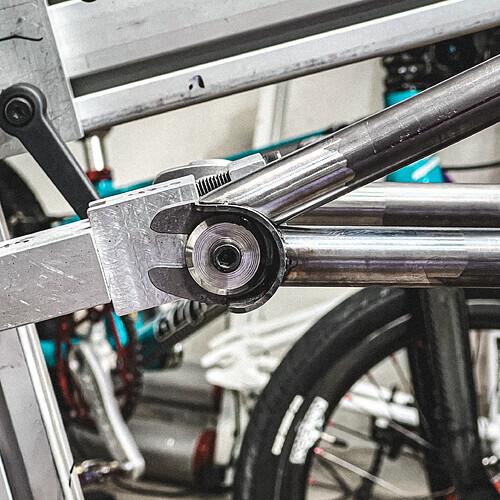
I also started work on a fixture to help me lay out and miter the rear triangle. The layout part of it did its job and definitely helped keep things a little more accurate for me. There will be a slide with a hole saw on a linear rail that will miter the CS for the BB; at least that’s the hope. I’ve been playing around a lot with 3d printing functional and work holding parts. I’m excited to see this either work really well or fail catastrophically. Purple blocks are printed in PETG with high wall/perimeter count and 80% infill.
5 Likes
HECK yeah the seatstay bridge rocks!!!
Love that SS-DR miter too! looks so clean.
4 Likes
Outstanding 
20” track build is high on my to do list
Very inspiring