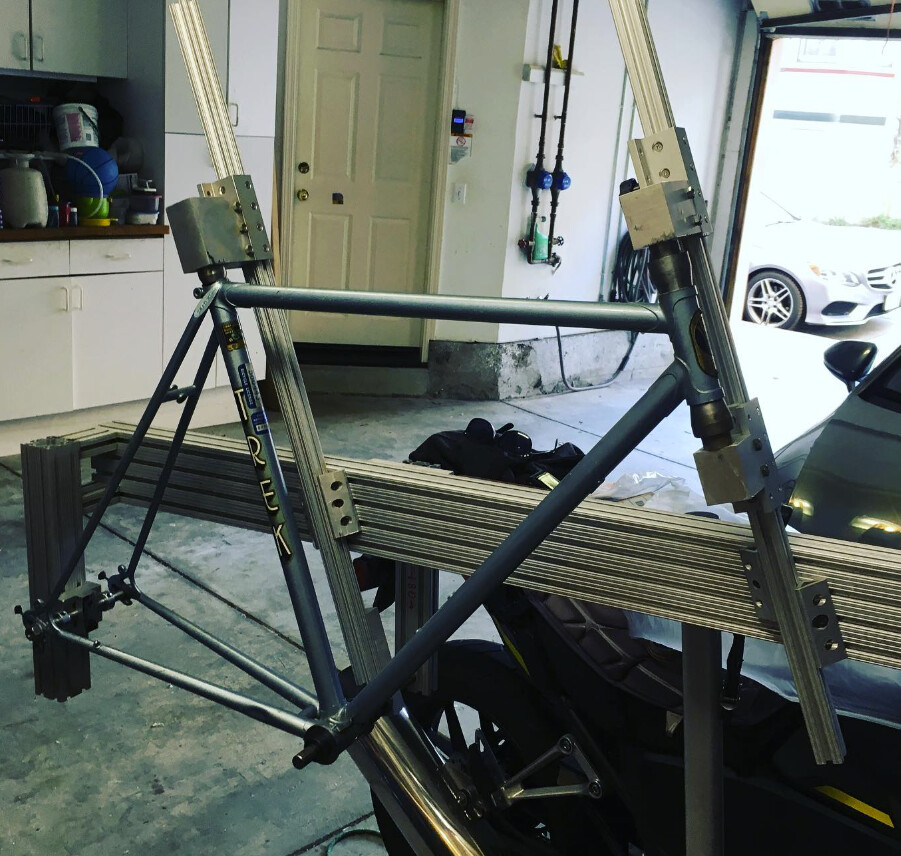
I have a DIY 80/20 jig that I got 2nd-hand. I could use some coaching on how best to set it up to match the geometry of the frame I’m building. I have various angle measuring tools, so I think I’m set for the frame angles (which are 73/73 by the way). I also think I’ve figured out how to set BB drop.
Specifically, I’ve got two questions:
How do I locate the head tube relative to the other important points (e.g. BB center)?
How can I best align the BB shell cups so that it is centered relative to the rear dummy axle, the seat tube cone, and the head tube cones?
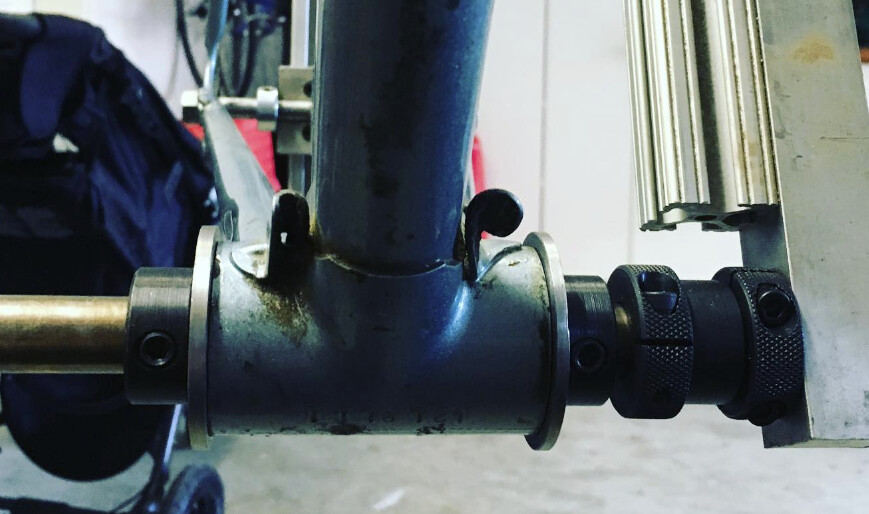
In my Jig everything is aligned to the BB and to do that I have a machined BB shell with a laser pointer in the center so I can fix it in the jig and rotate it to center the rest of the components.
I need to do that because my beams are VERY not straight. Yours should be much more precise.
A plumb bob, a level, some squares, and some clamps are your friends when setting up a jig like this. And a quality precision rule. Trigonometry is pretty handy too and can leverage a precision rule and your angle measuring tools. I had a jig like this for a while and while it was a total pain to set up precisely, it can be done with the tools I listed. I never had one, but a laser level like this one would be handy for alignment:
Hi Matt, interesting! What kind of laser pointer did you use for the special BB shell? How did you mount it to ensure it’s very perpendicular to the BB centerline?
Yep, mine looks very like that except it’s alu instead of printed but I assume you can get it 3D printed to a good-enough precision. There is a set-screw to hold the laser pointer
Mine came with the jig - it’s The Bicycle Academy jig
Here is a video I made about the tool, unfortunately I cannot upload it directly, it goes with the picture of the BB mount, note that in the picture there is a spacer for a 73mm BB shell.
My Bicycle Academy fixture (LCFF) didn’t come with an alignment laser so I made a 3d printed adaptor. It’s available here in case it’s of use to anyone else.