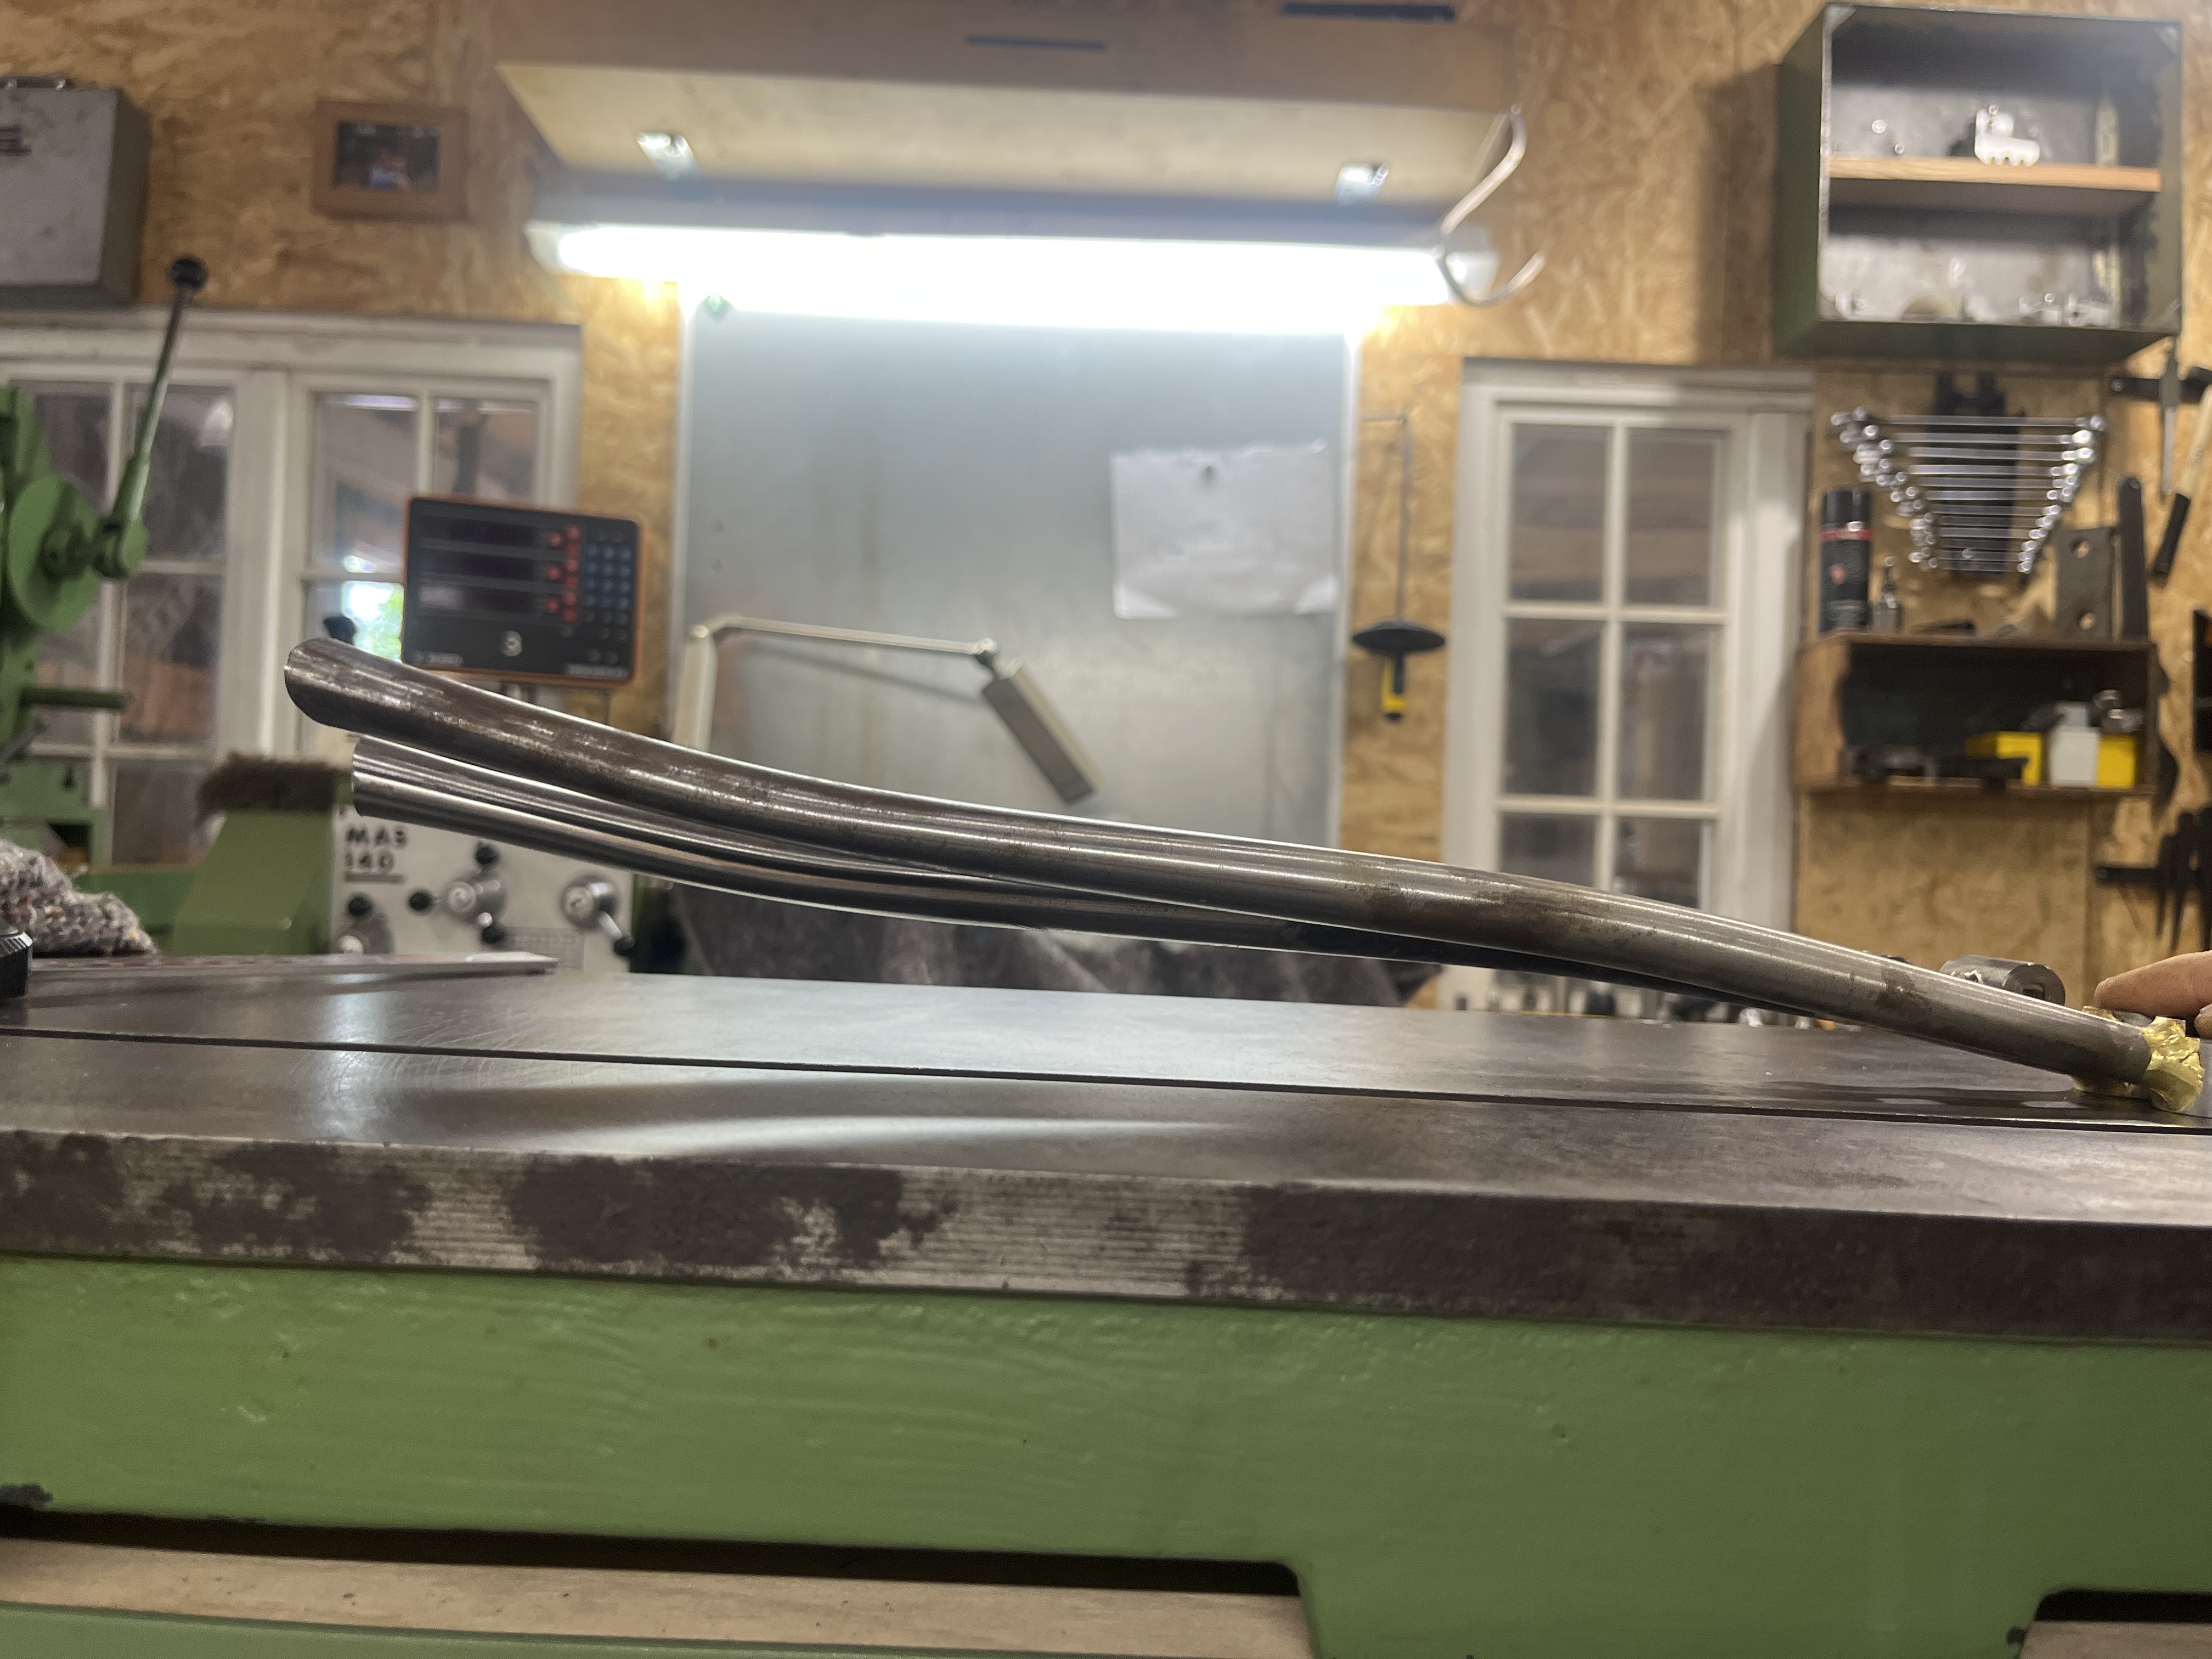
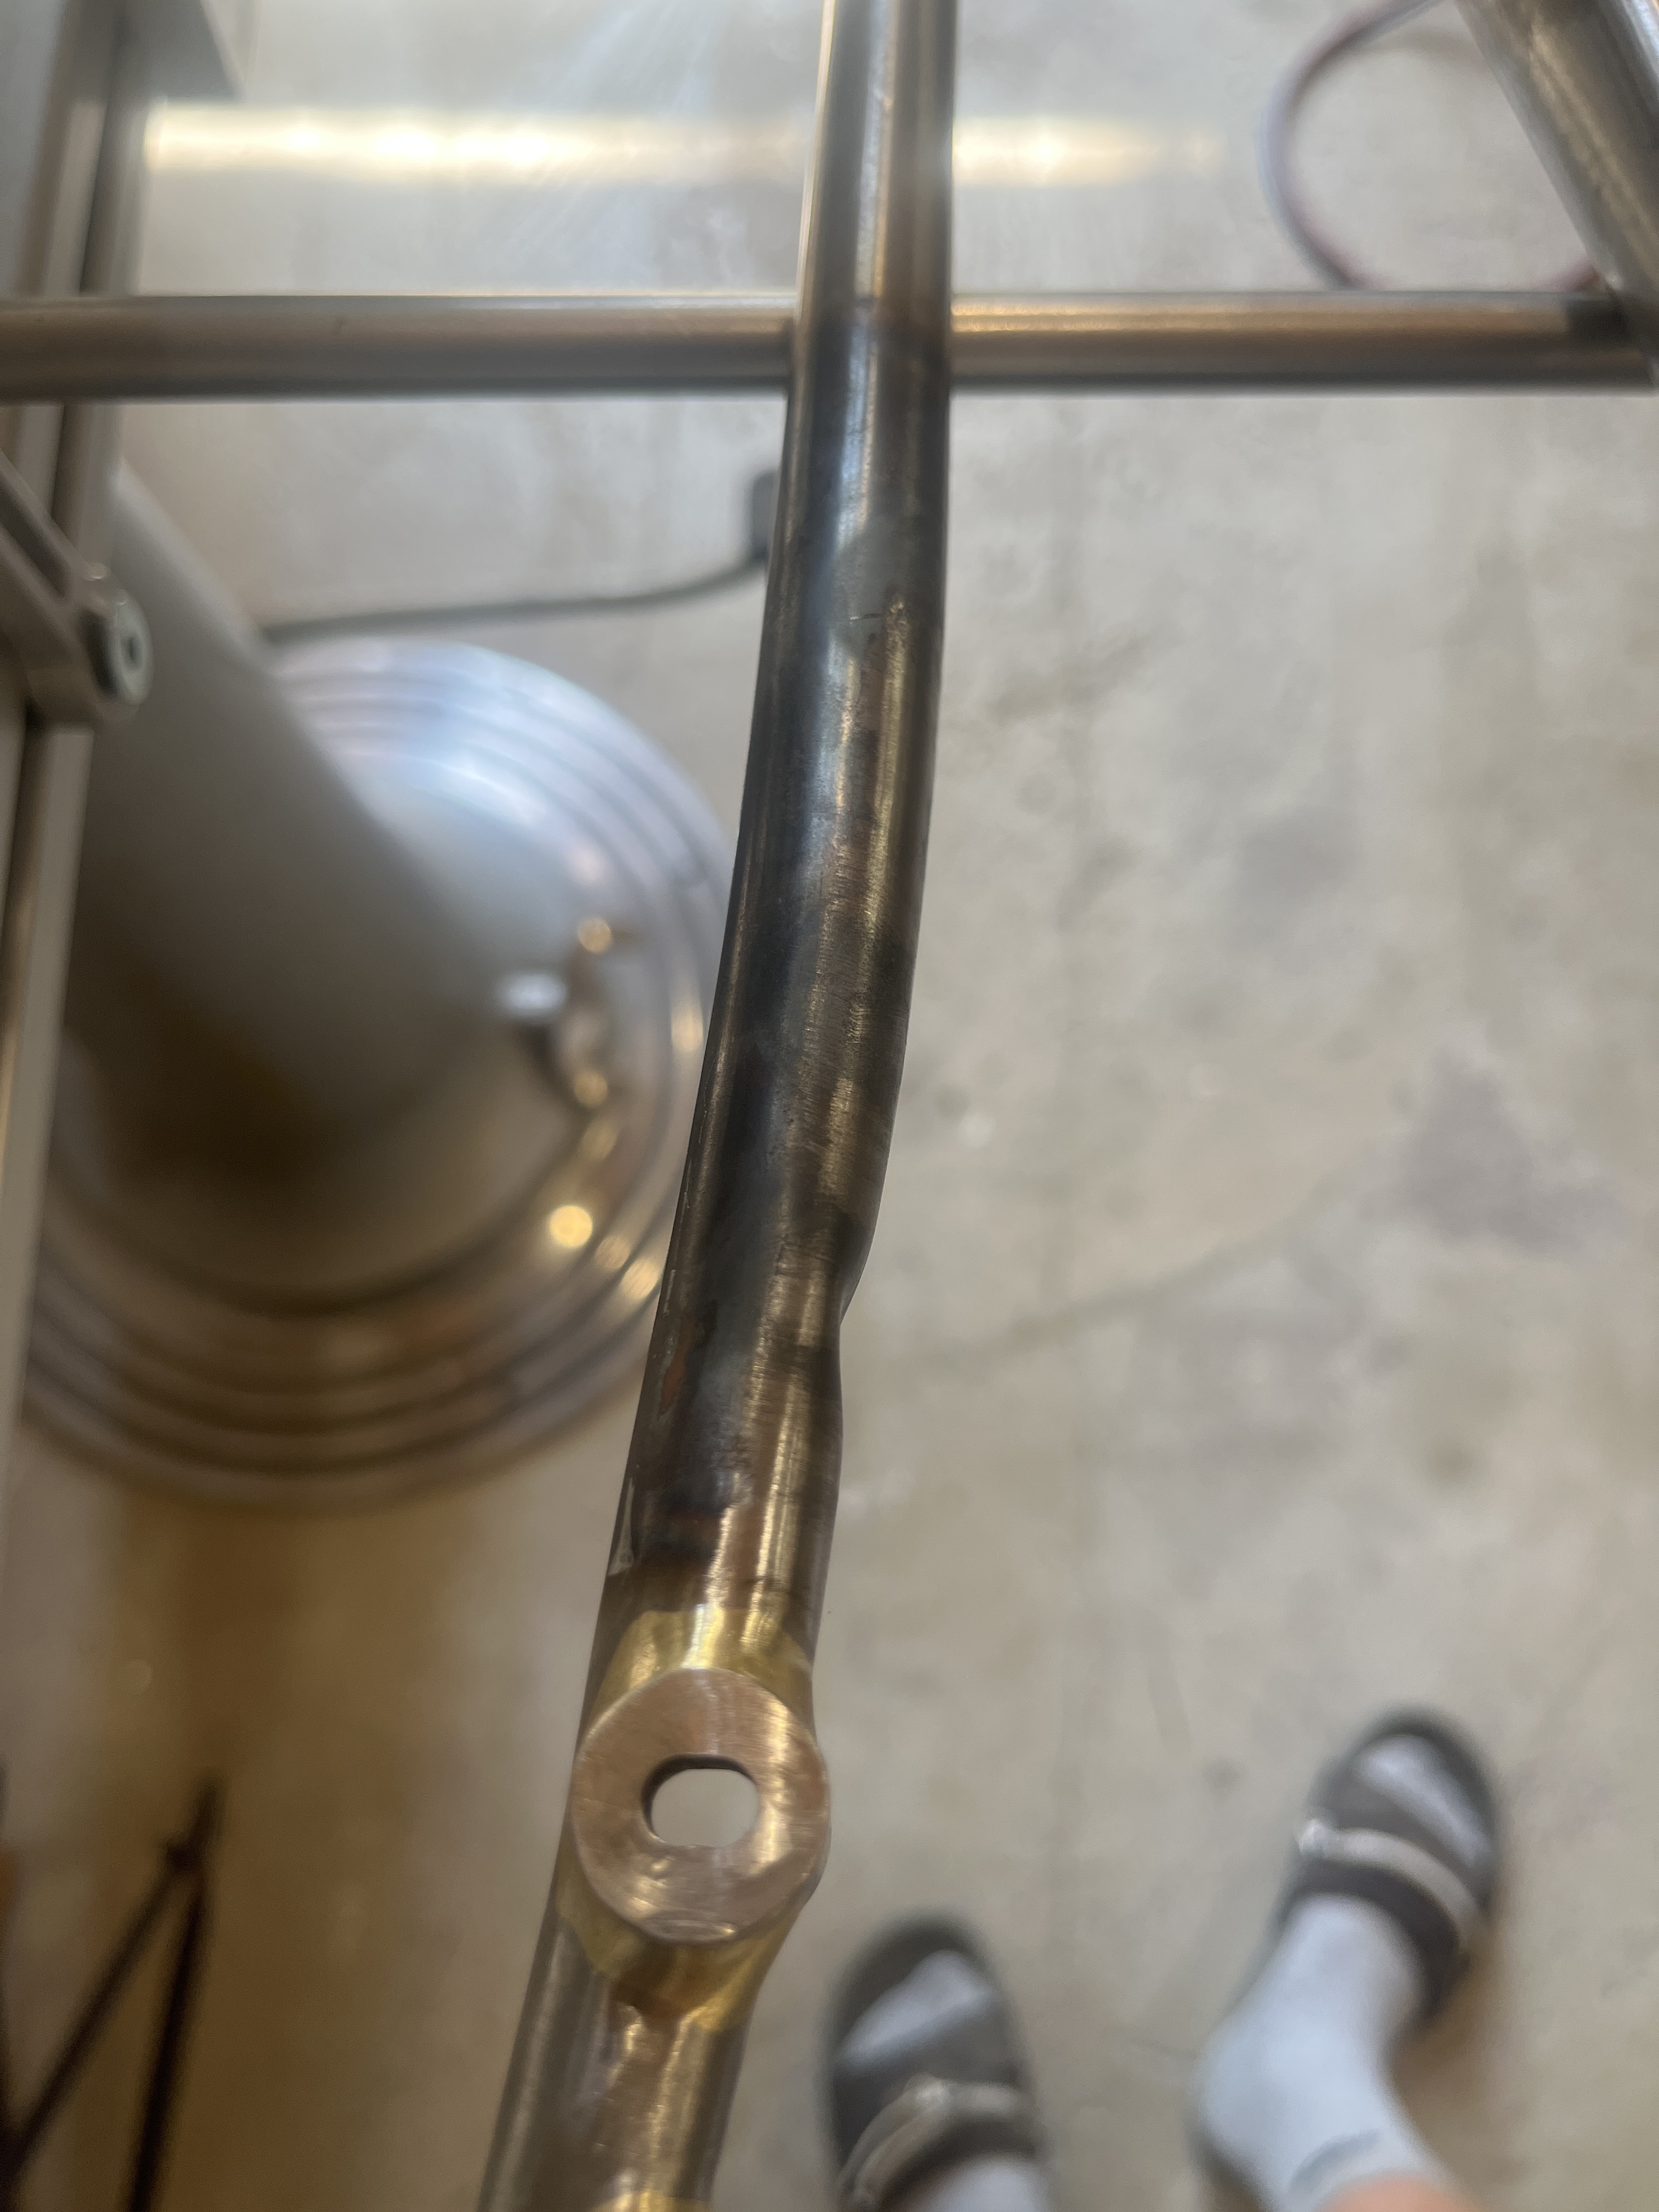
hello everyone, yesterday I soldered a syntace dropout with flat mount for the first time. Now I have the problem that the chainstay on the brake side has warped to the outside. Probably because the flat mount boss slides too much into the tube. As a result, only the outer wall of the chainstay was left. Now the question is, can I bend that centimeter back? Any ideas? I’ve tried heat, which I used to heat the outside of the brake mount. Nothing was moving.
In my opinion, if you’re unable to custom bend your own chainstays, you’d be best served by using a ready-made flat mount dropout.
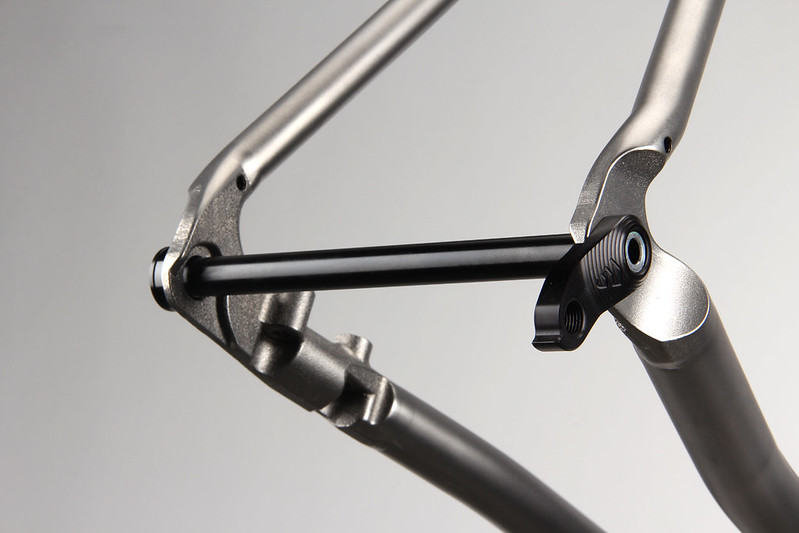
When I use those large Paragon flat mount bosses, I put three bends in the chainstay so the chainstay leaves the dropout close to perpendicular to the axle line. That way I only have to remove a small amount from the chainstay. This reduces the stay movement after brazing. Since there will always be a little movement, I’ll then make the final bend after the bosses are brazed in.
Does the asymmetry look a little funky? Yes. But when you put a wheel in there you don’t really notice it.
I know this doesn’t help you right now. I think the best thing to do is start over.
Hey everybody.
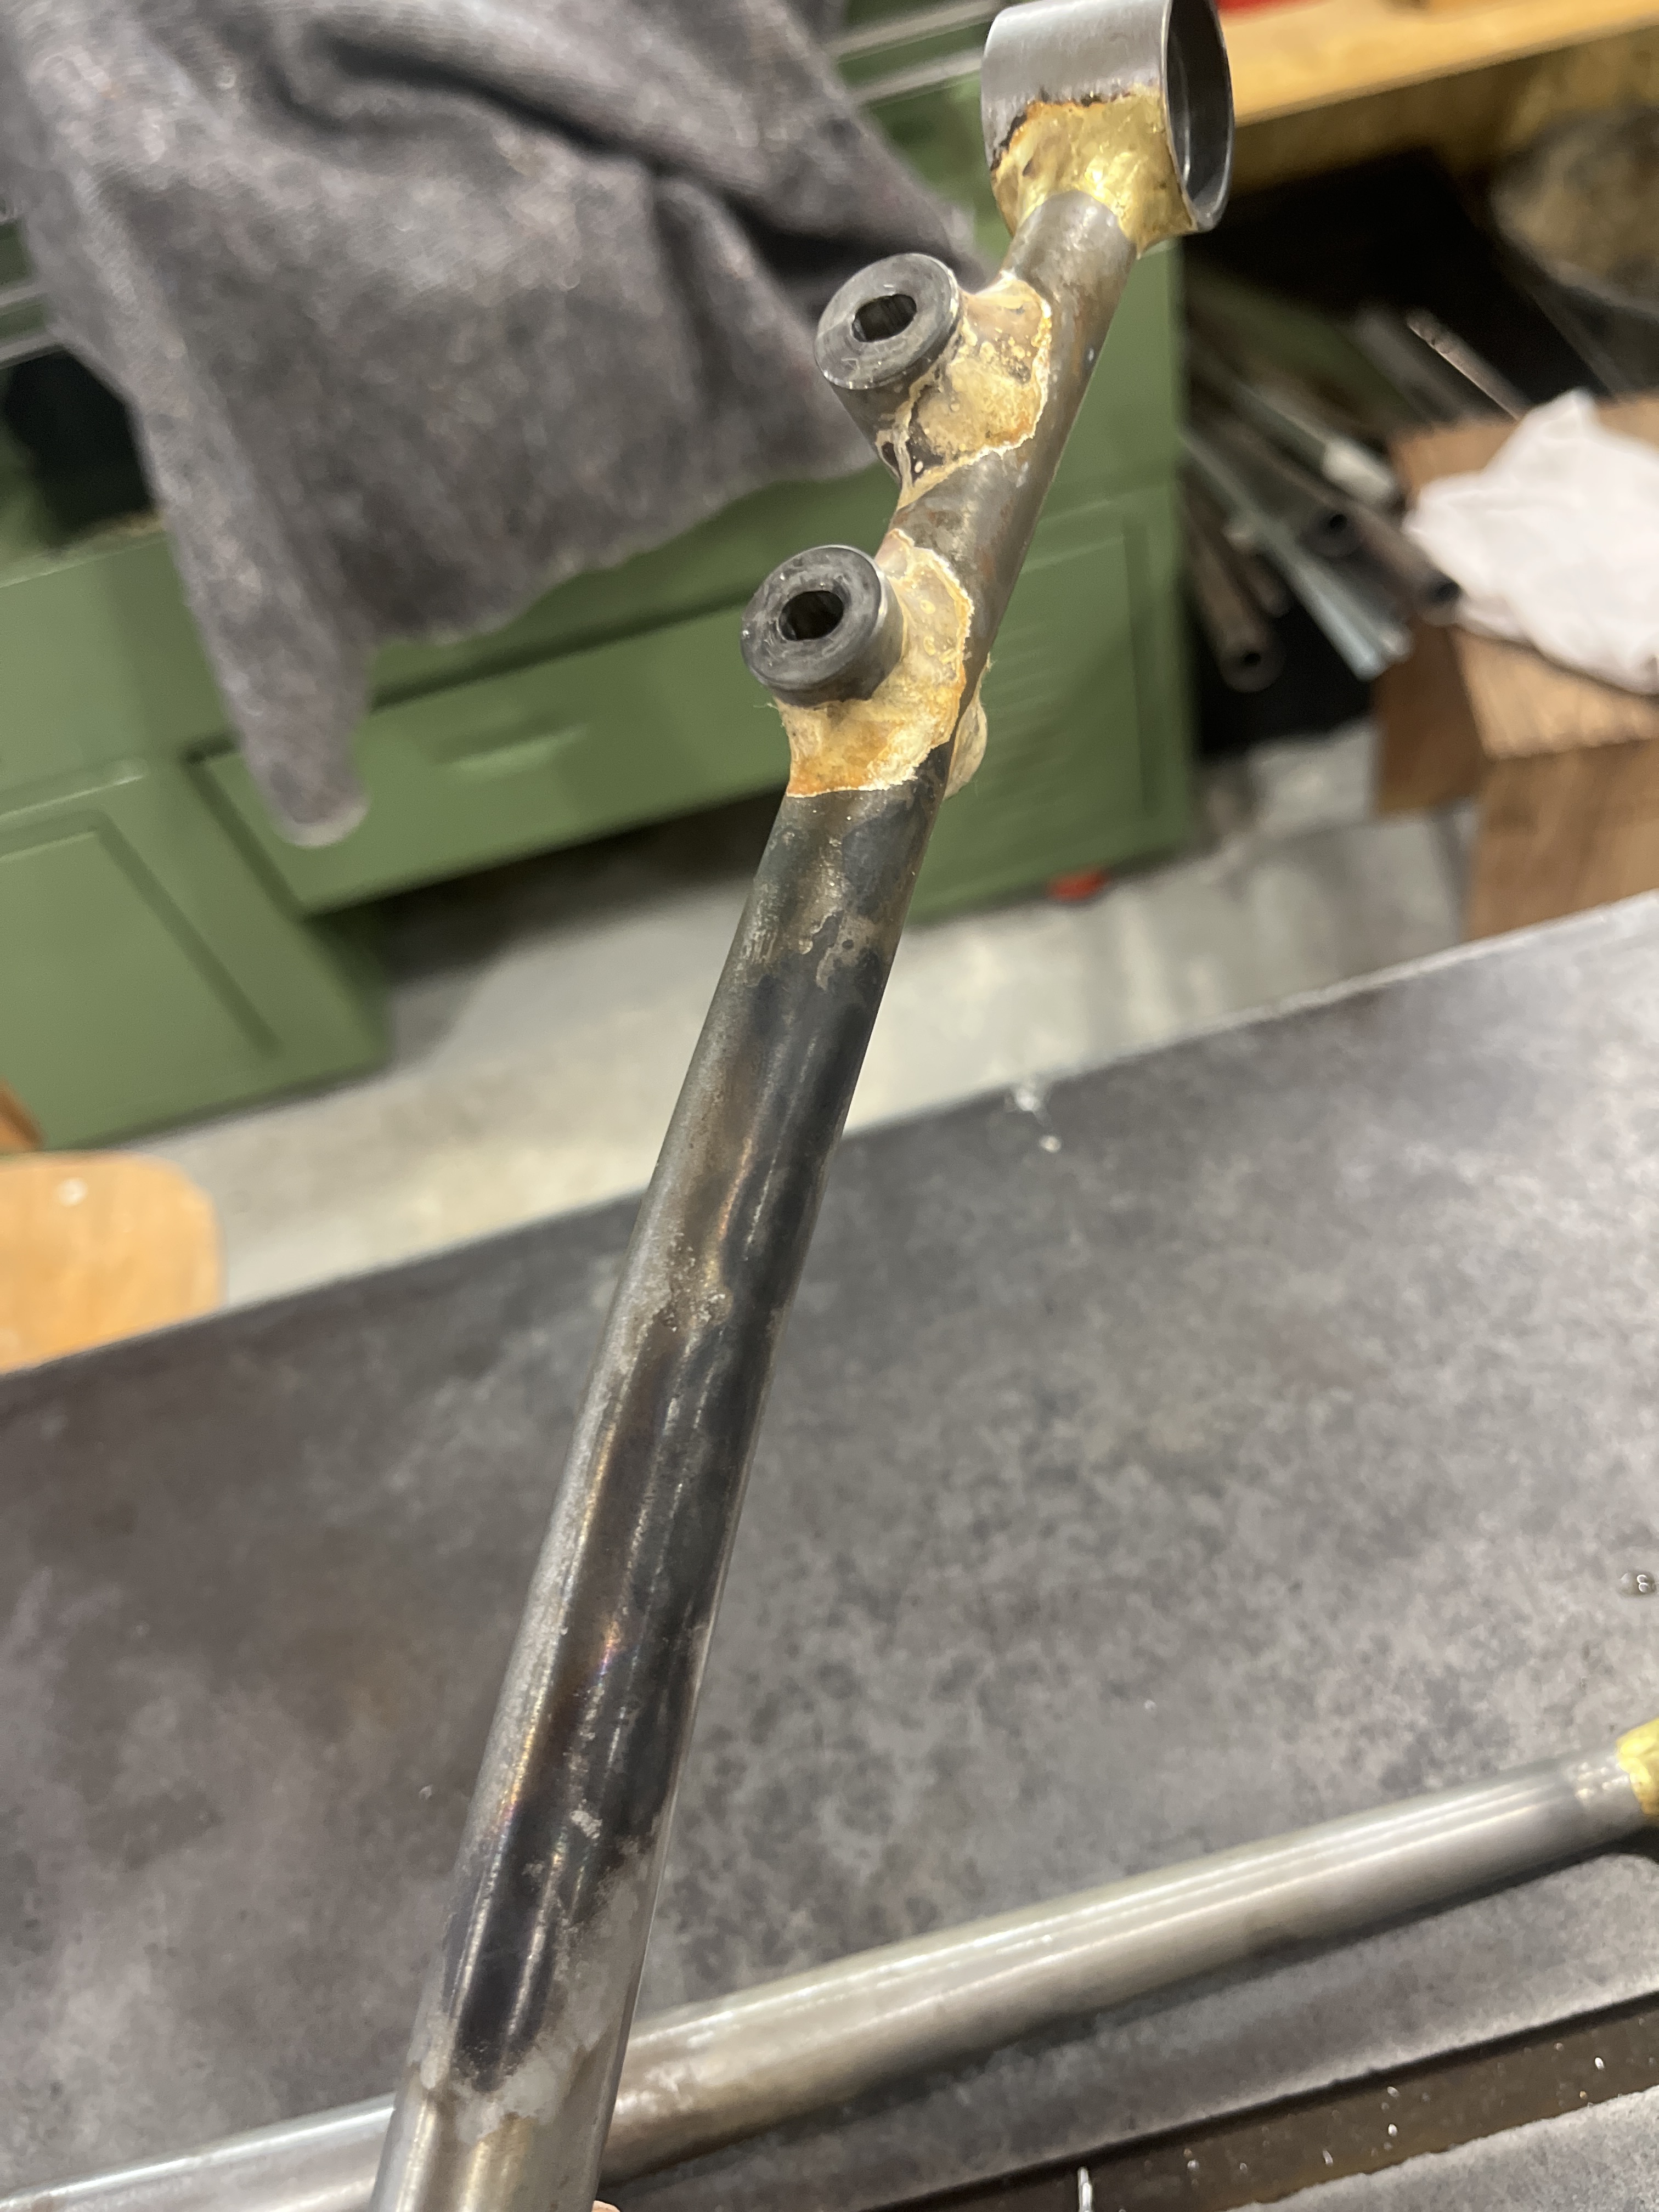
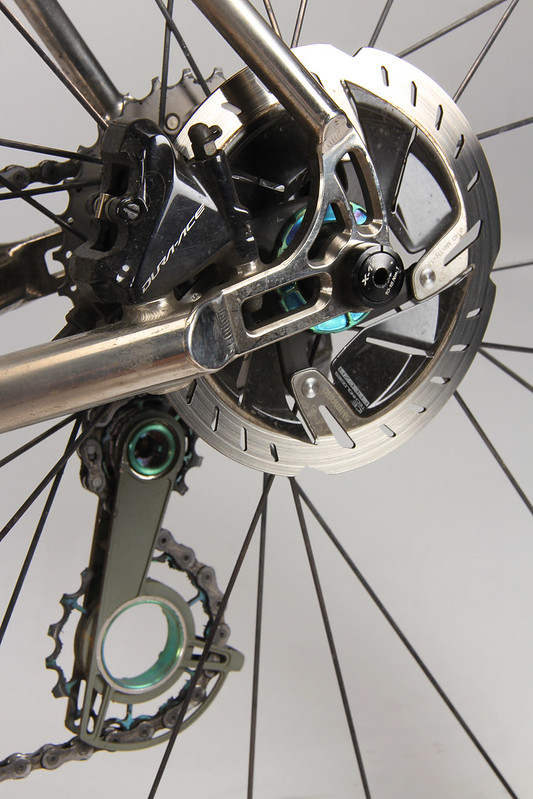
today i tried flat mount with syntace for the first time. Unfortunately, the chainstay has warped. When trying to bend these back I dent the tube do you think that’s a weak point? Or maybe extra space for the disc?
It’s a zona chainstay with gravel bend. And yes it’s the first time brazing flat mount bosses in. Bevor I used paragon dropouts with integrated bosses. Okay sounds like I have to learn it the hard way and make it a second time… any tricks ore working processes for me?
Make sure your miters for the bosses are accurate. then use minimal fillets to attach them. less heat is better for alignment.
I braze them in the jig we use for mitering, so the stay is held in the place I want it to be. If you braze with the stay ends unsupported, it will probably pull.
Consider tacking the BB shell to the CS before brazing the bosses in?
Make sure you heat the outside of where the bosses are brazed in ,just like you do with stays to minimize heat distortion .
Hahn Rossman
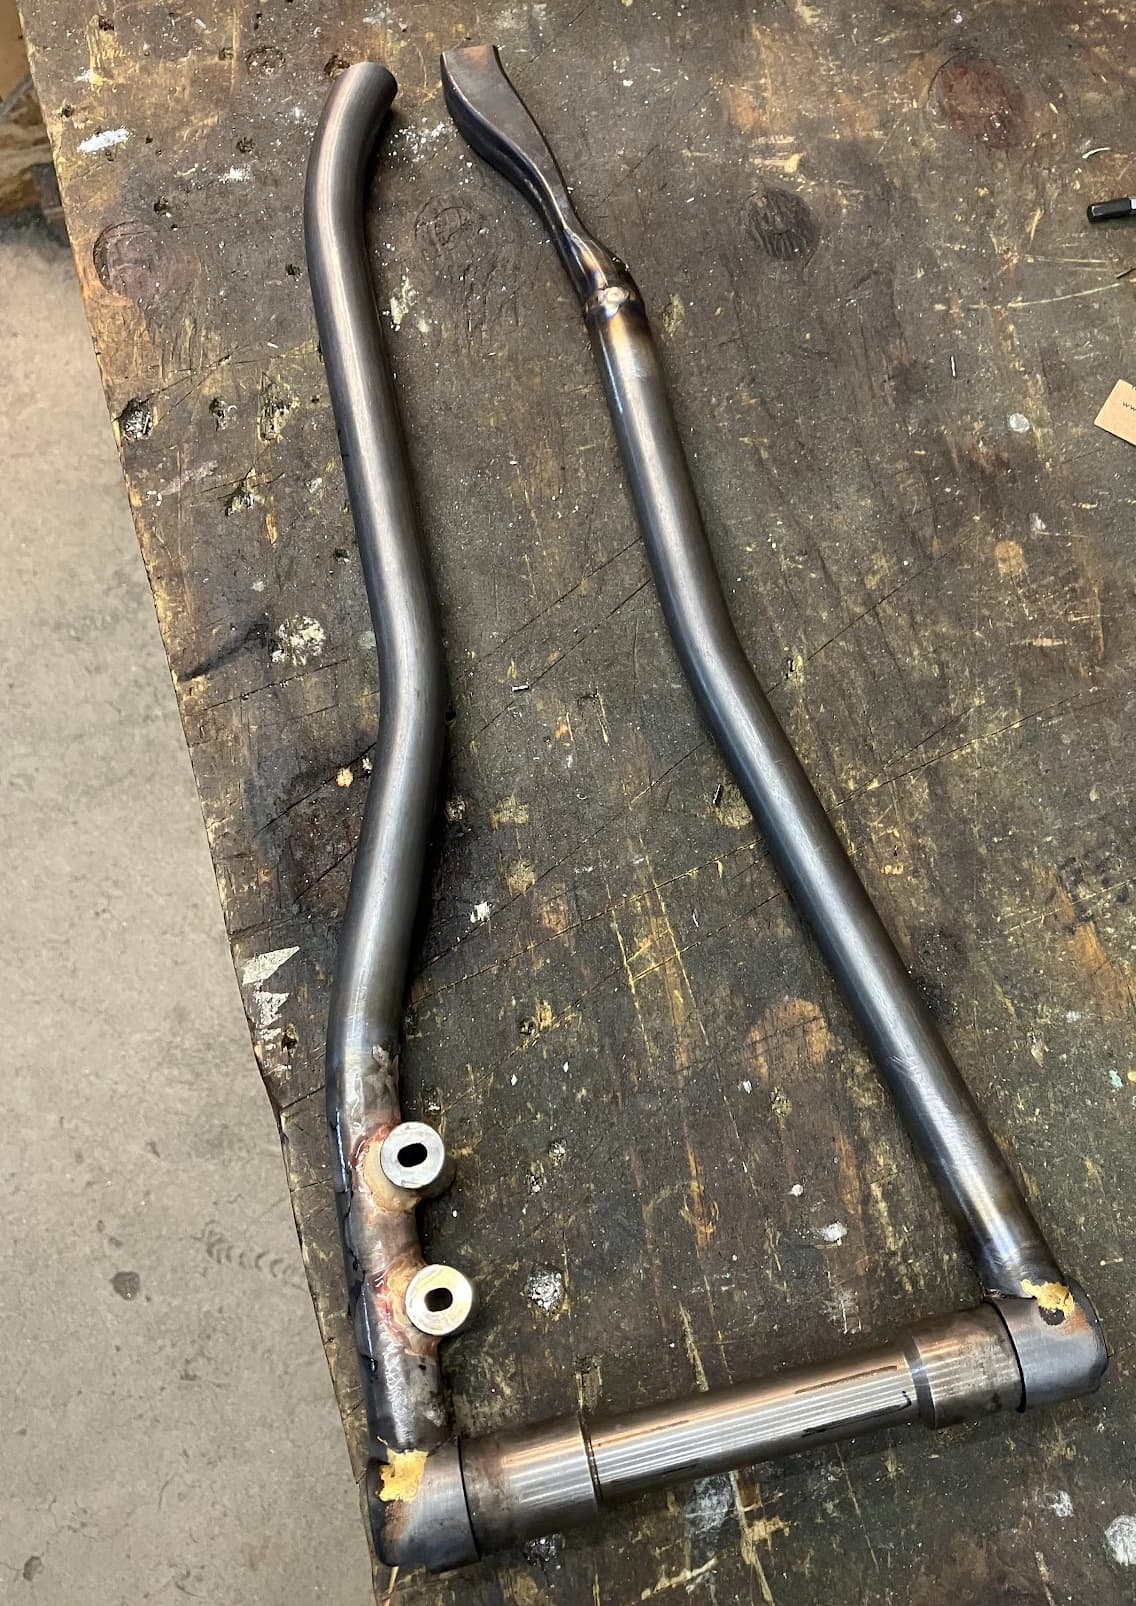
Okay I started again. Last step was mitering the holes for the bosses. My plan is to braze the stay to the bb and braze the bosses in after. You think that’s working?
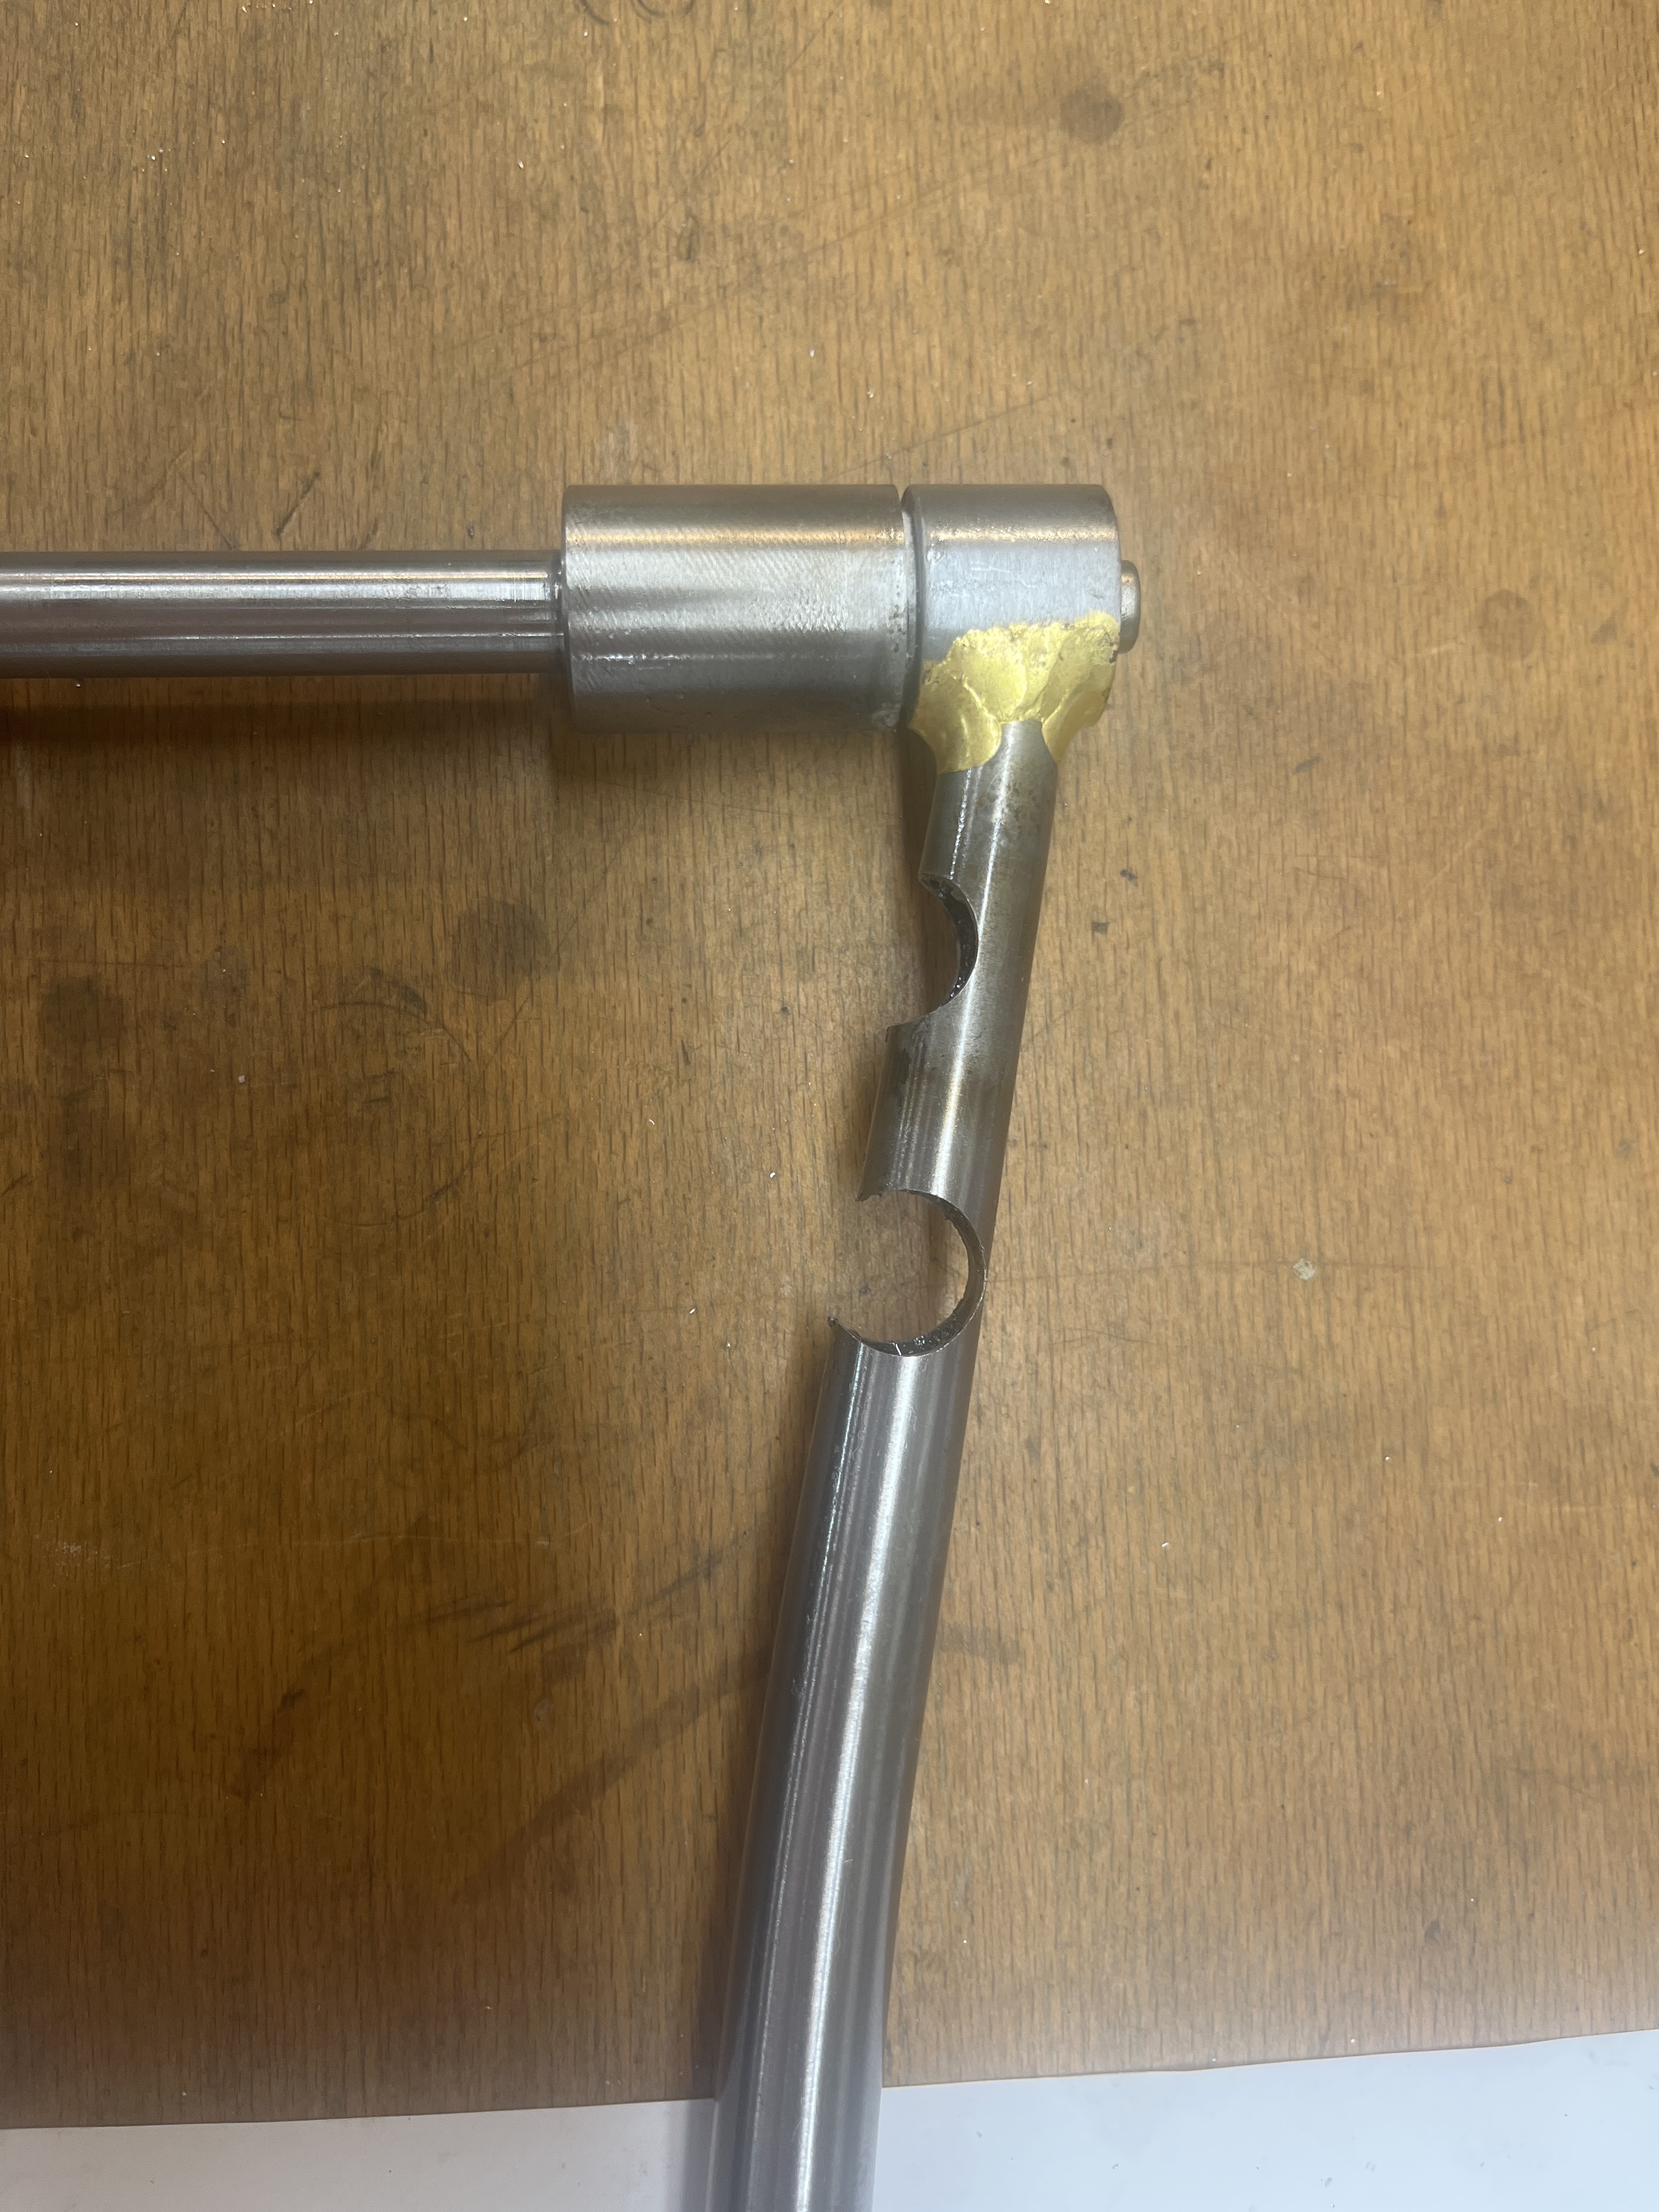
I‘m a little scared about the cut from the second boss… is that’s the normal way…?
I used the position of 6,5mm away from the dropout face and 36,5 from the center. Second one was 34mm away from the first.
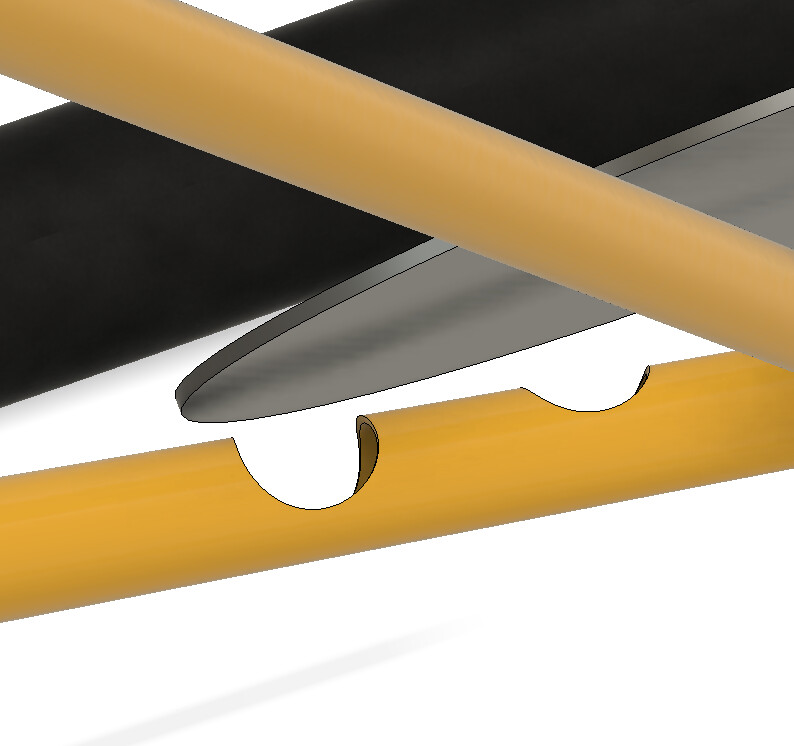
Yikes! That’s a pretty big bite to take out of that tube. I personally wouldn’t feel great about that. I know this may not be possible or easy, but I will generally try to bend my chainstays so they are as in-line with the dropout is possible.
To elaborate on this, the max I’m really comfy with is this, about 1/3 of the chainstay remains. Ideally I’d leave a bit more, but such is life. The more curve of the tube you have, the more it will hold its shape while you’re brazing.
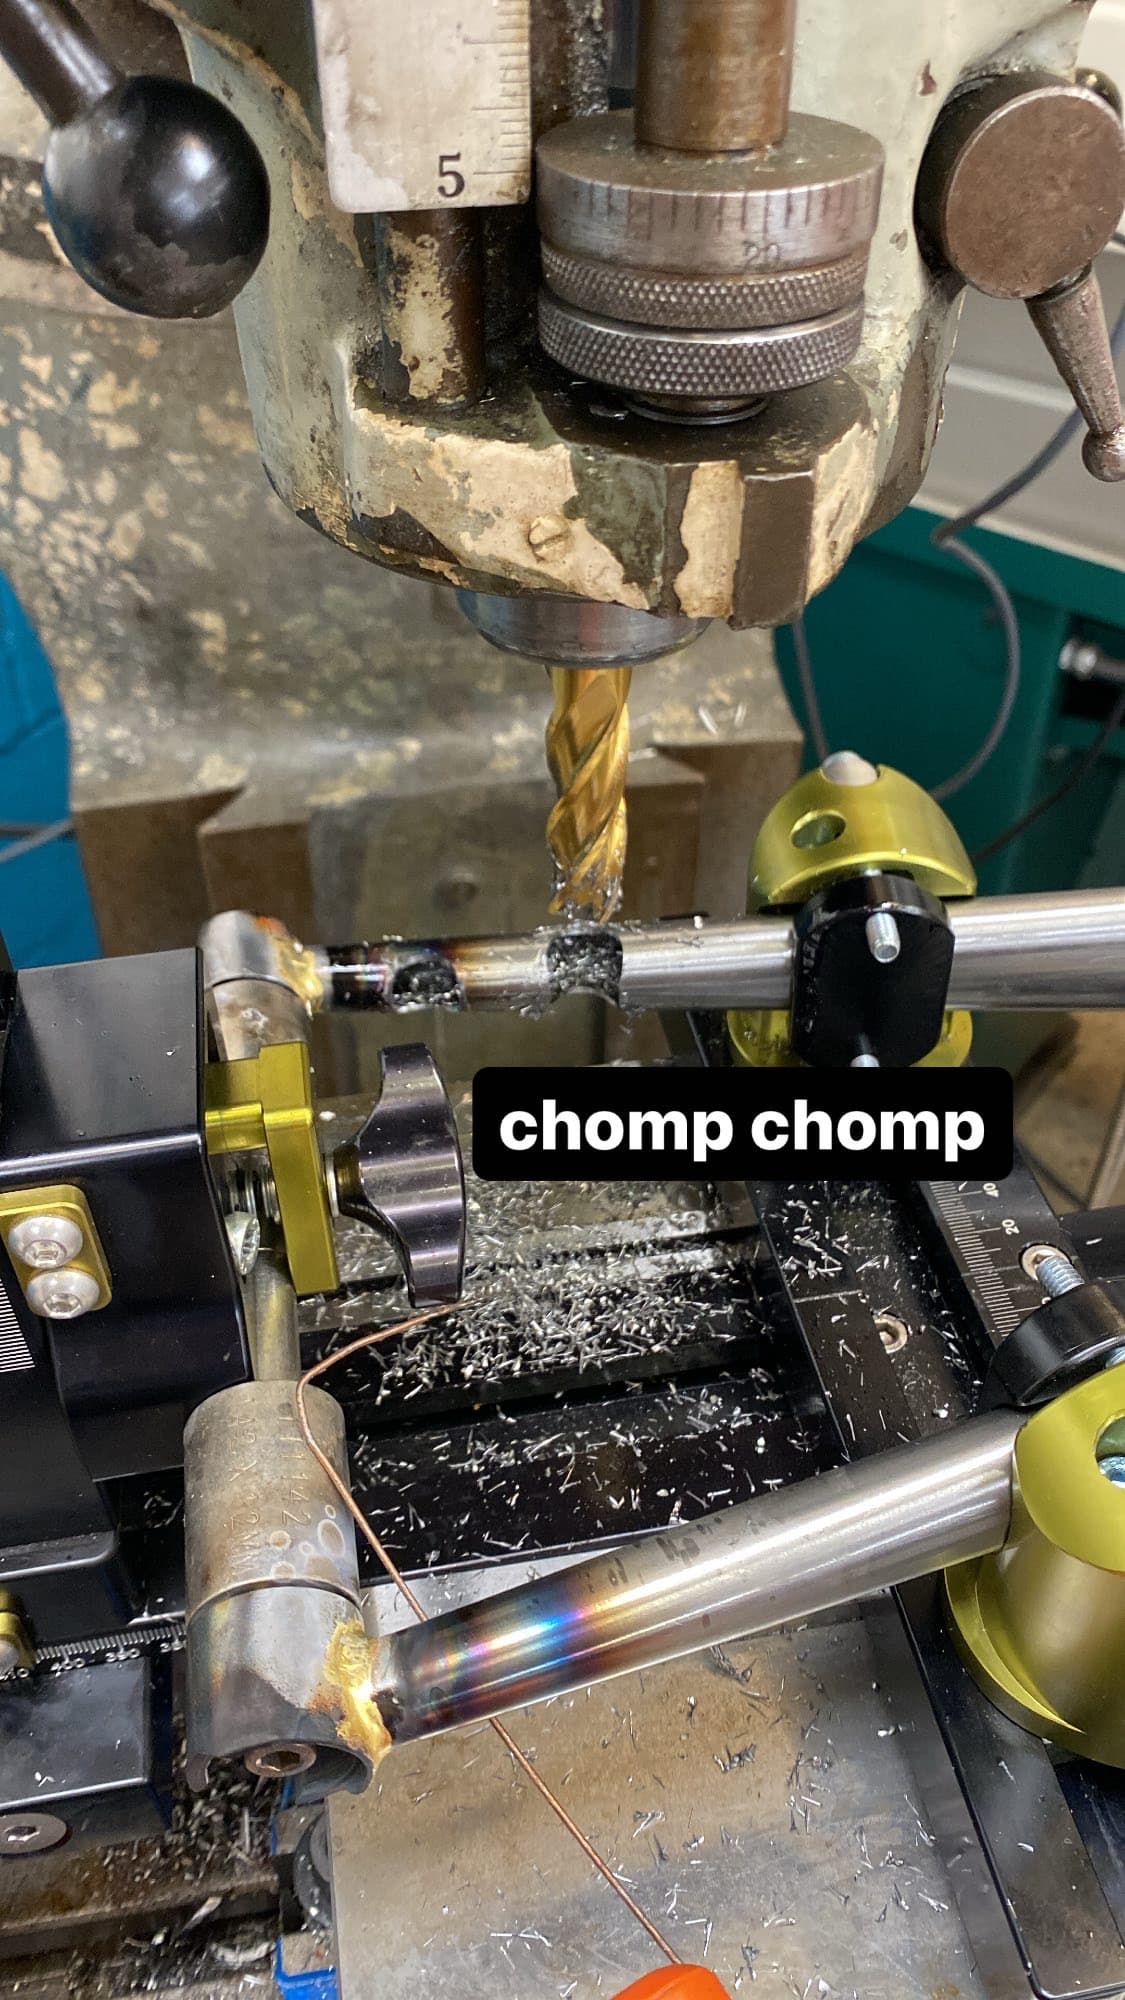
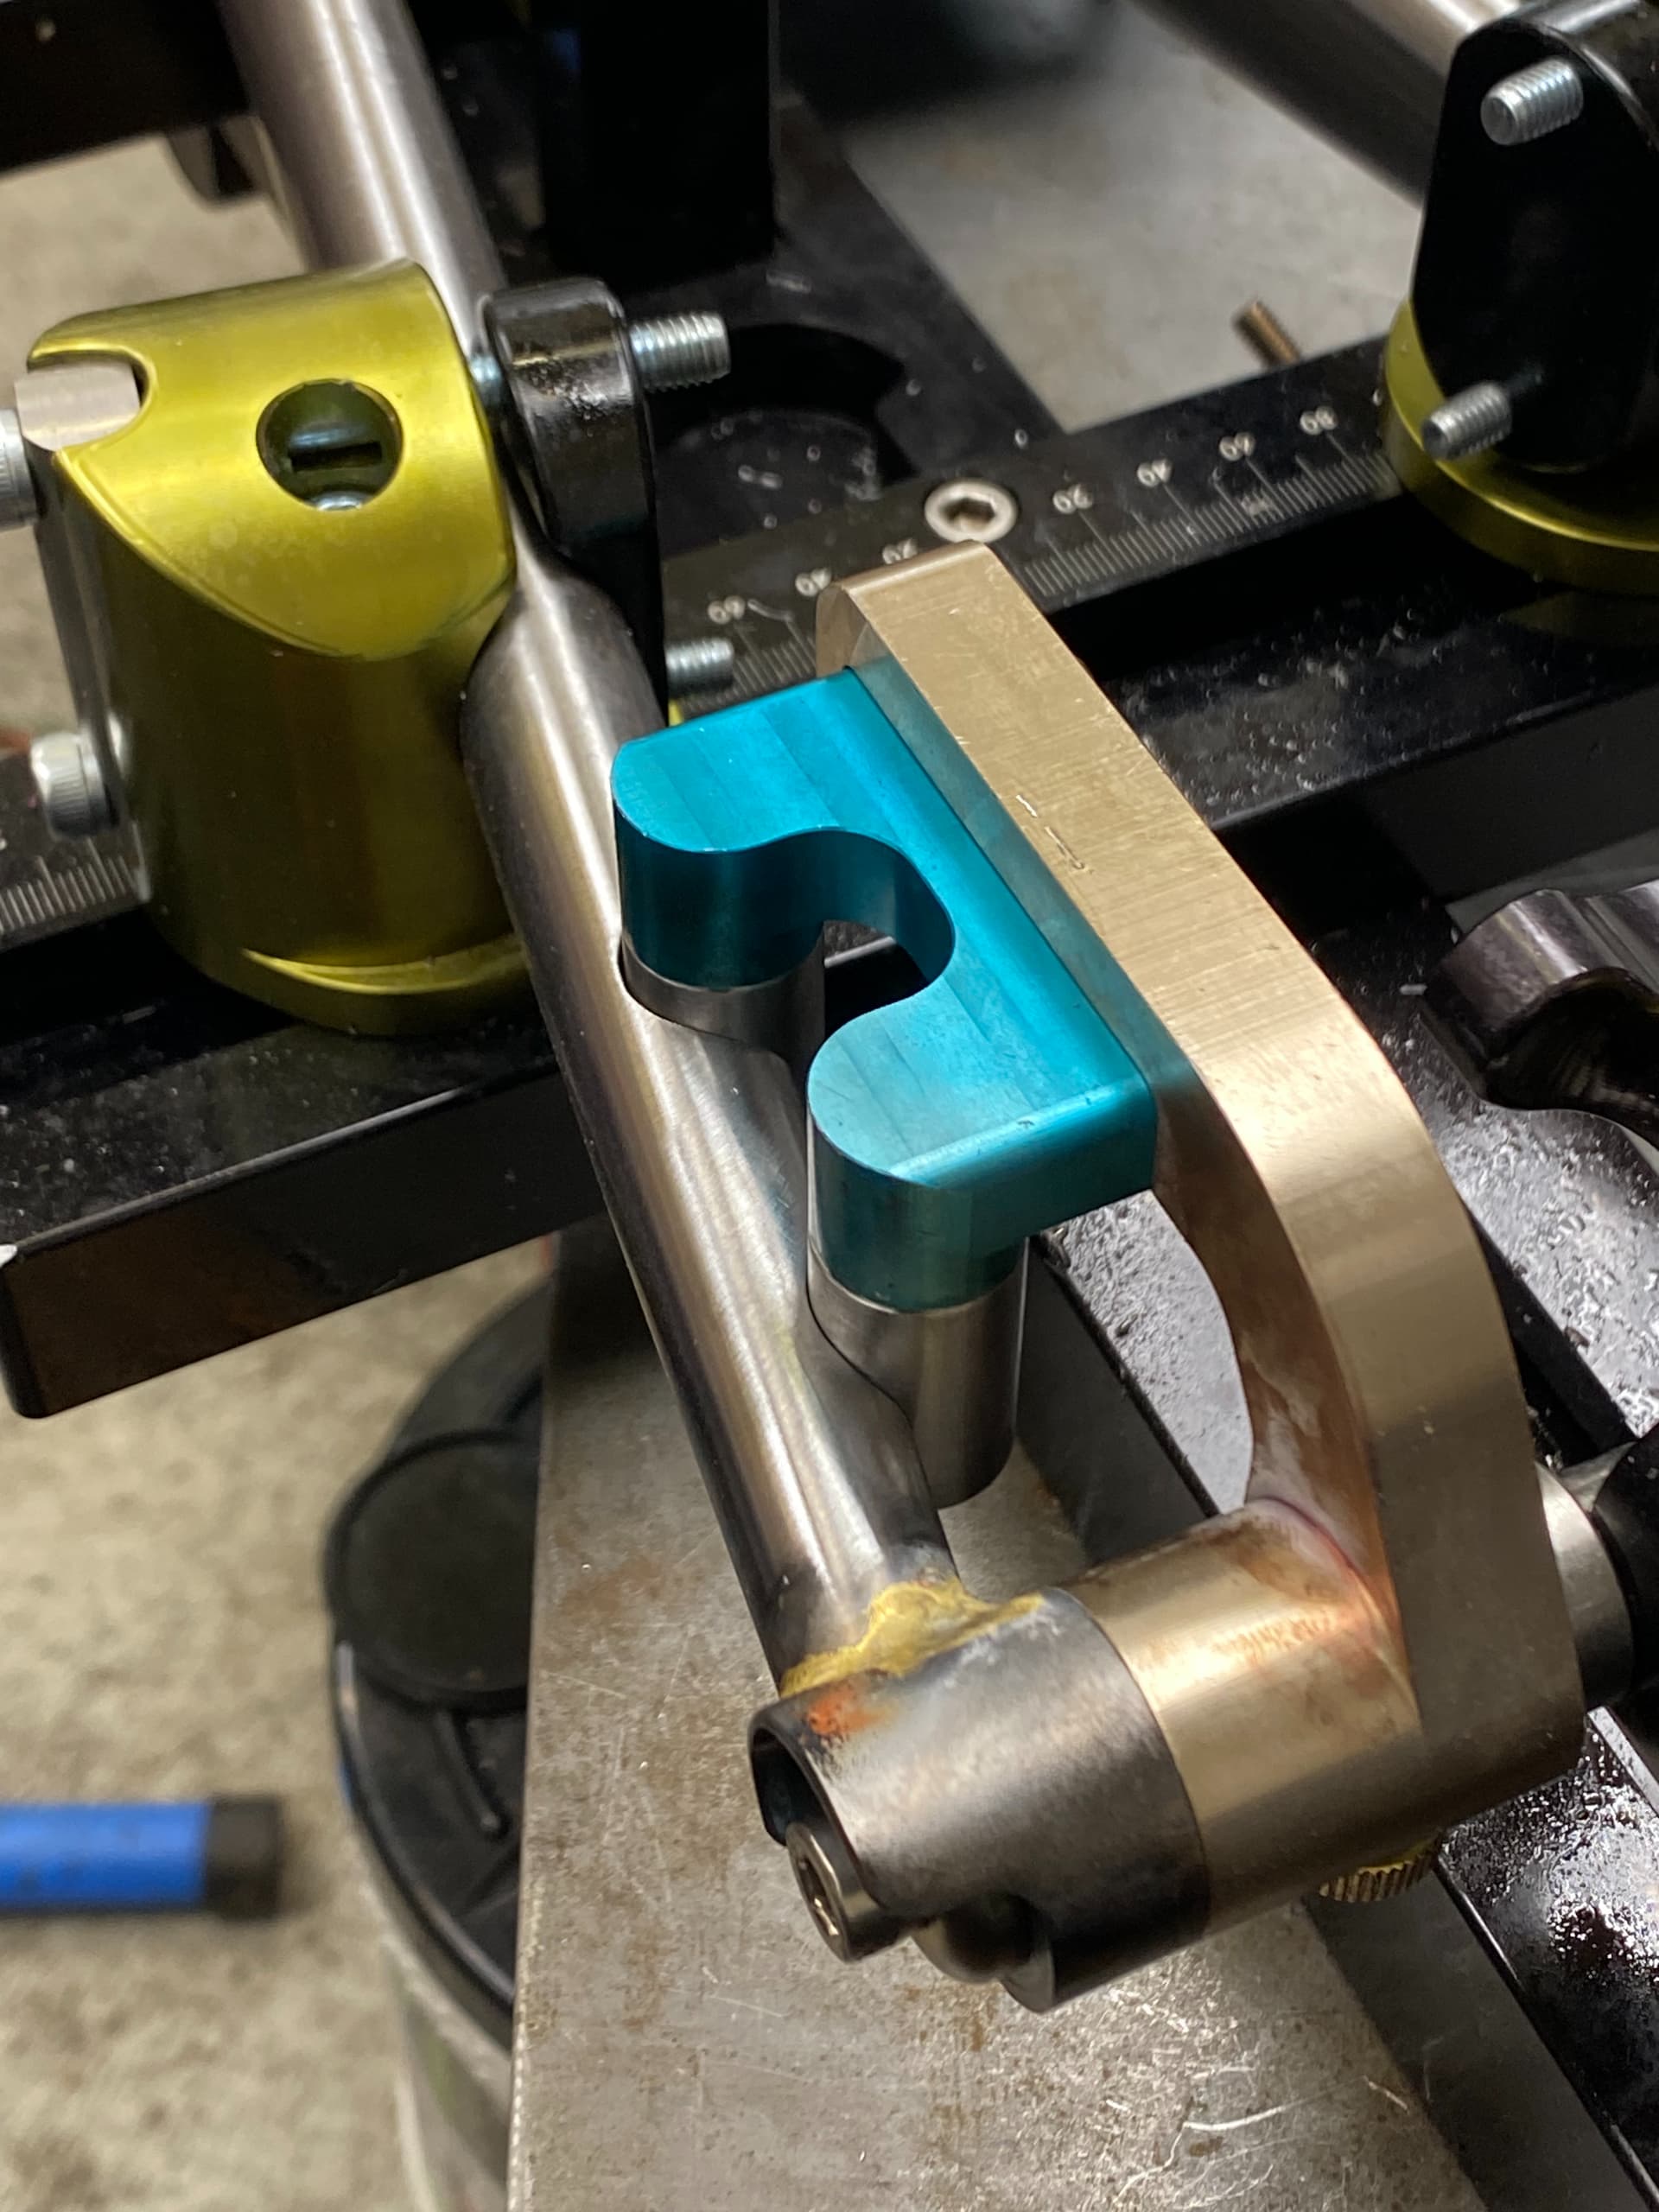
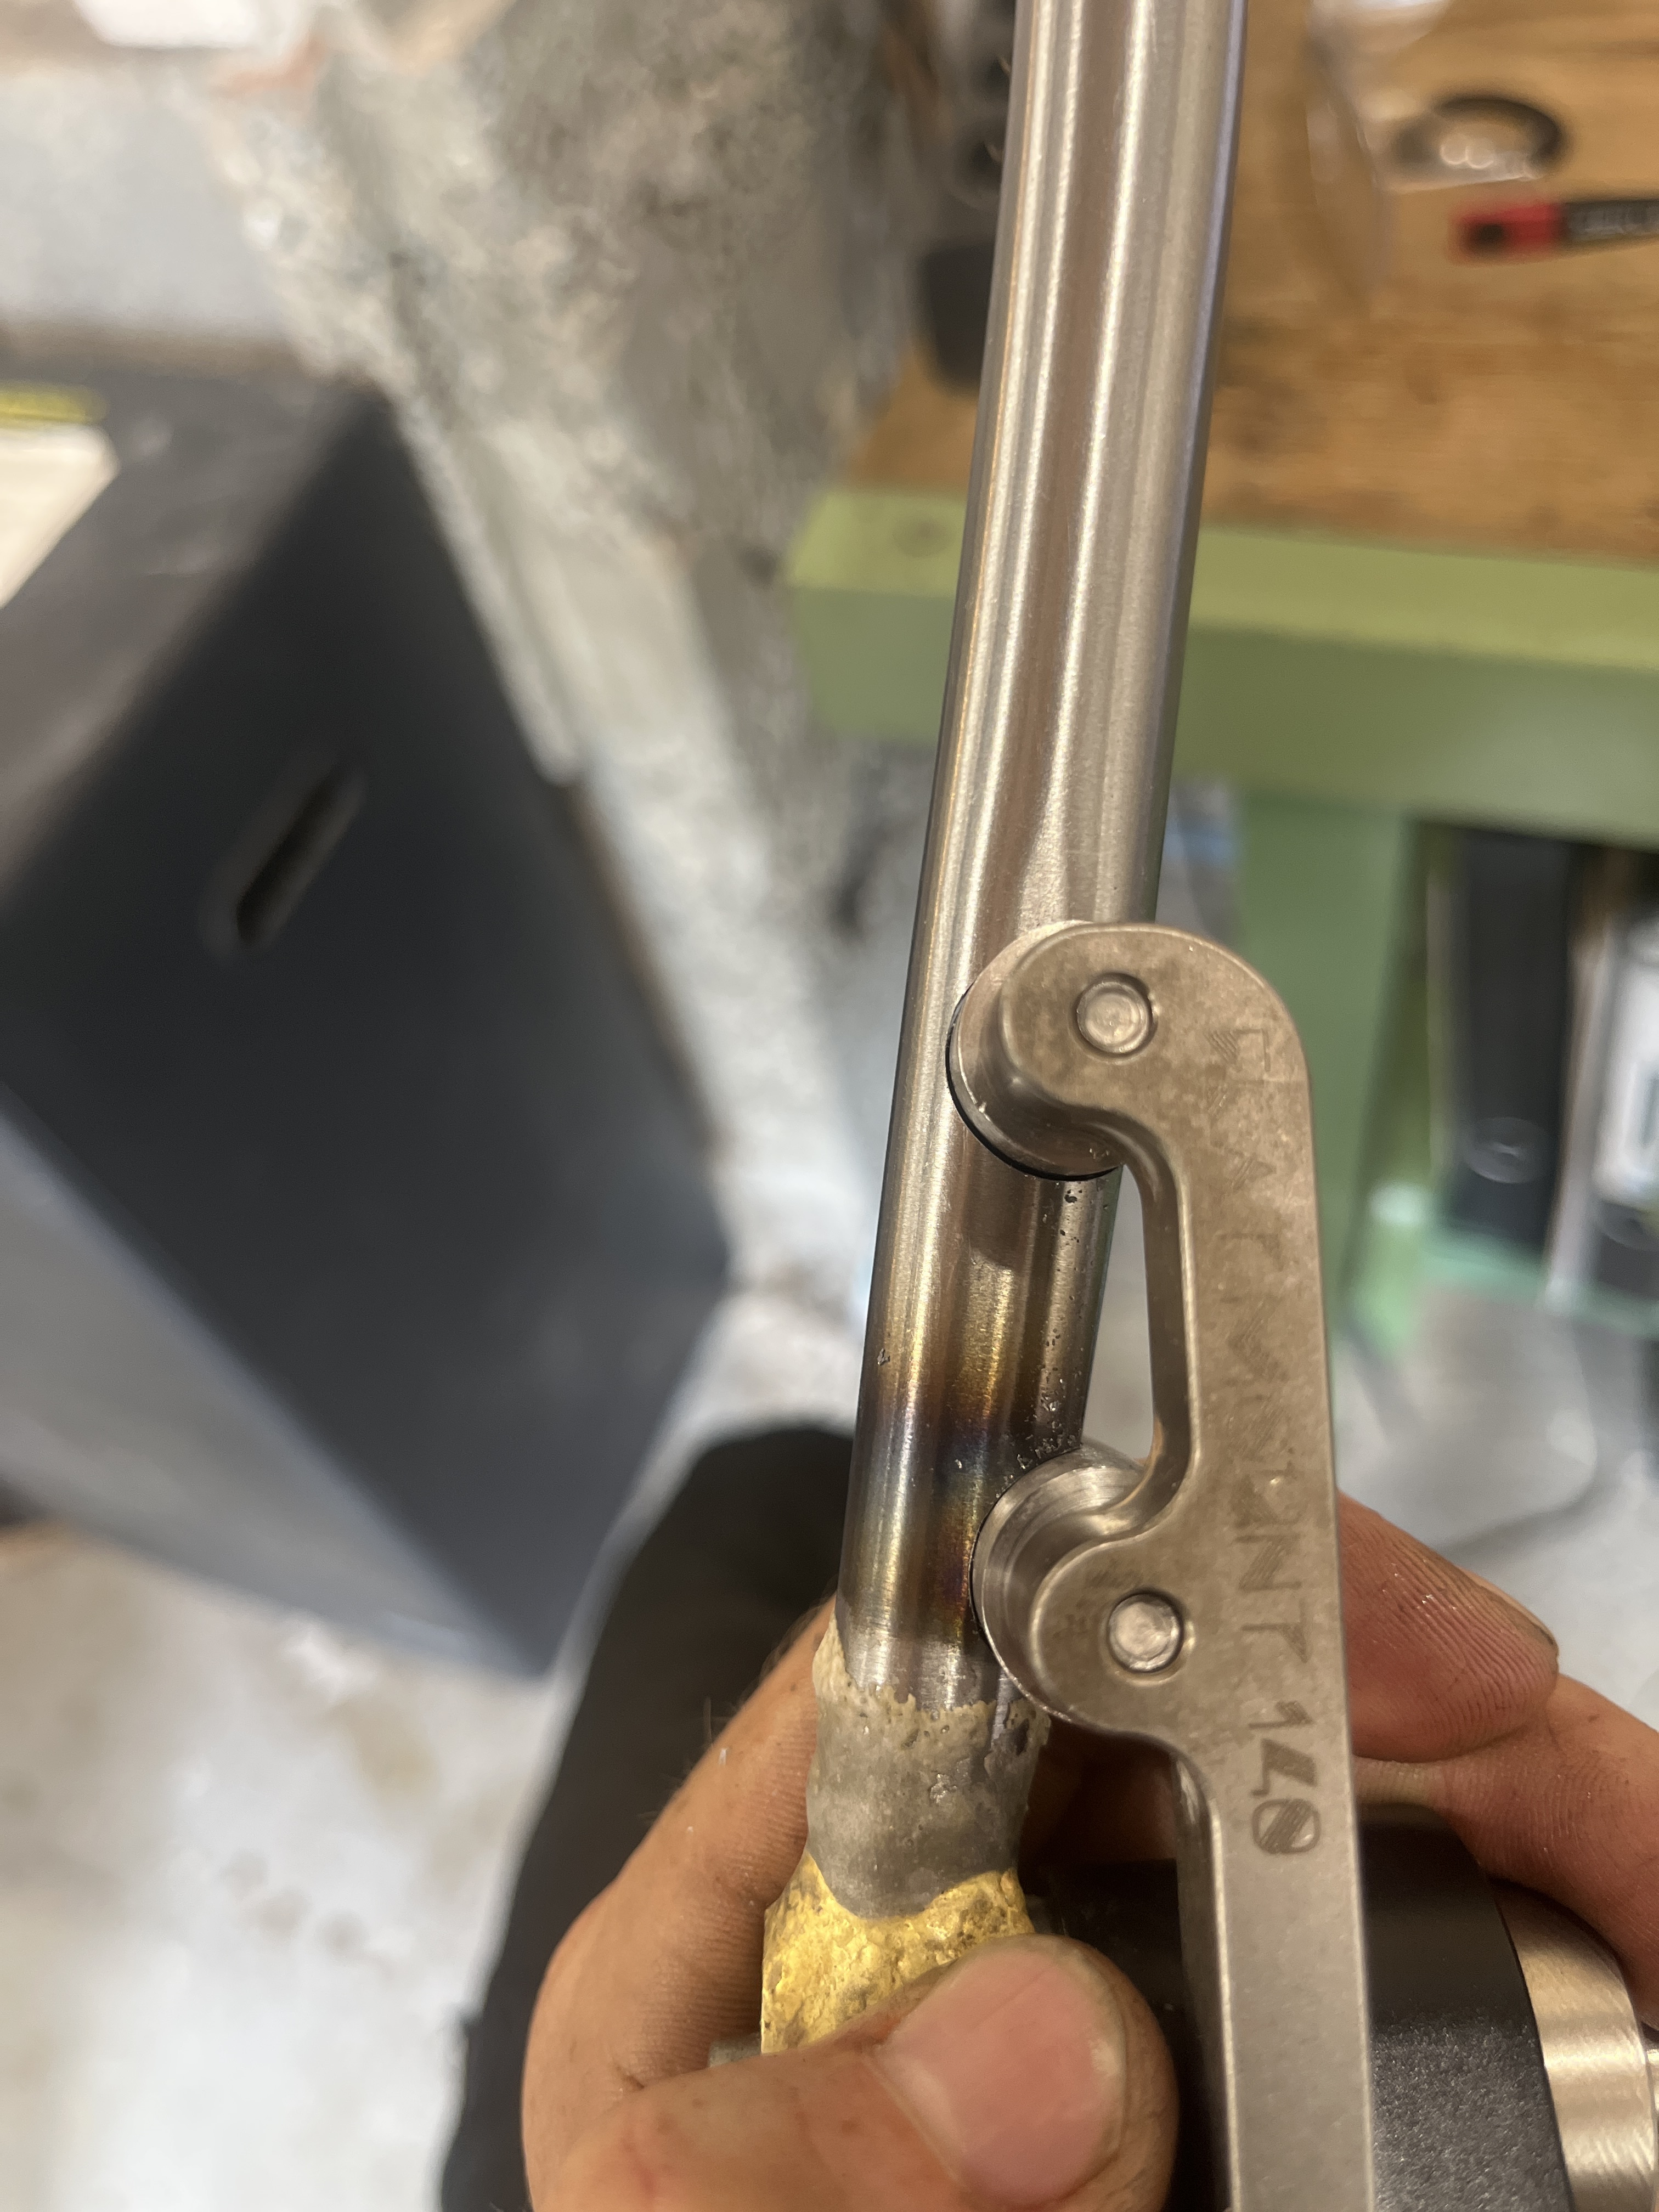
Here are a few process shots from today. You’ll have to forgive the instagram captions, I forgot to take normal pics to share and had to download them from my stories
For this set of stays, I used a slightly different process than normal:
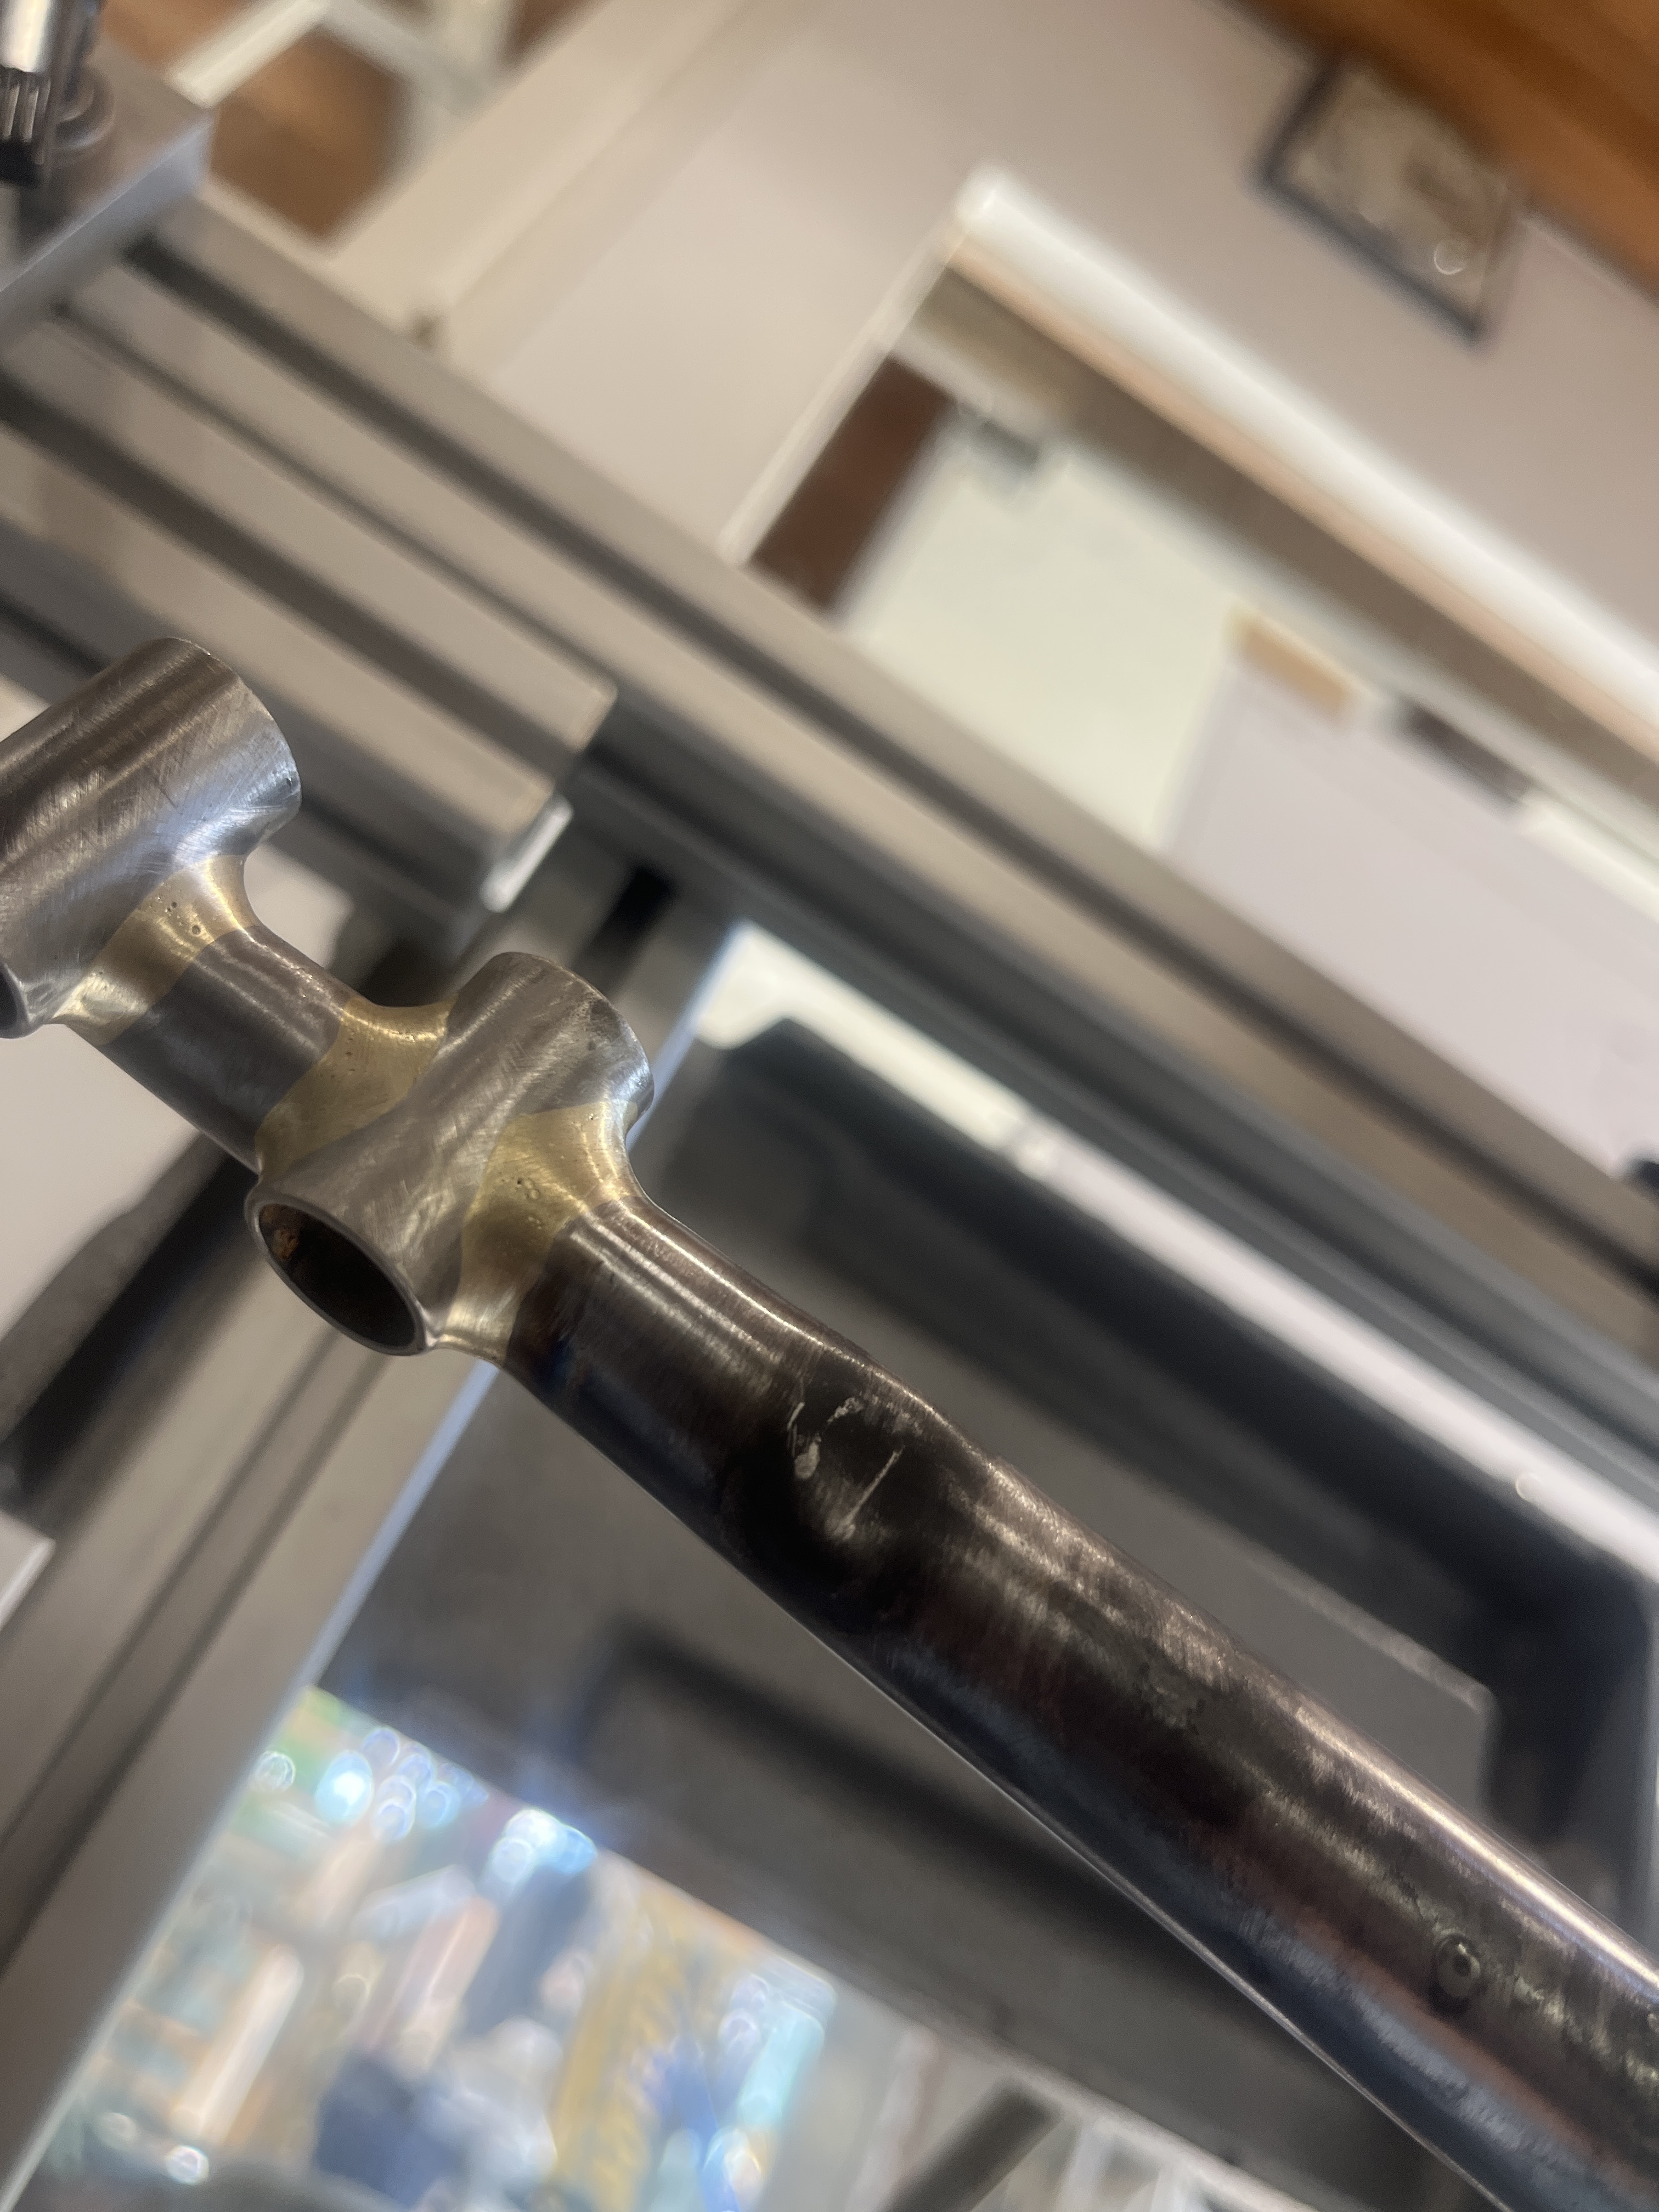
Miter stays to dropout
Miter stays to BB shell
Tack stays to BB shell on the outside - I’m trying to get the stays to pull outward
Yeah next time I will do it this way. But for now the front triangle is brazed and there is no chance to weld the stays on the bb before… so the bite is too big. But what are the options…? Big fail and I saw it coming…
@Janosch that bite is okay. It’s scary the first time, but I’ve got many frames out there like that.
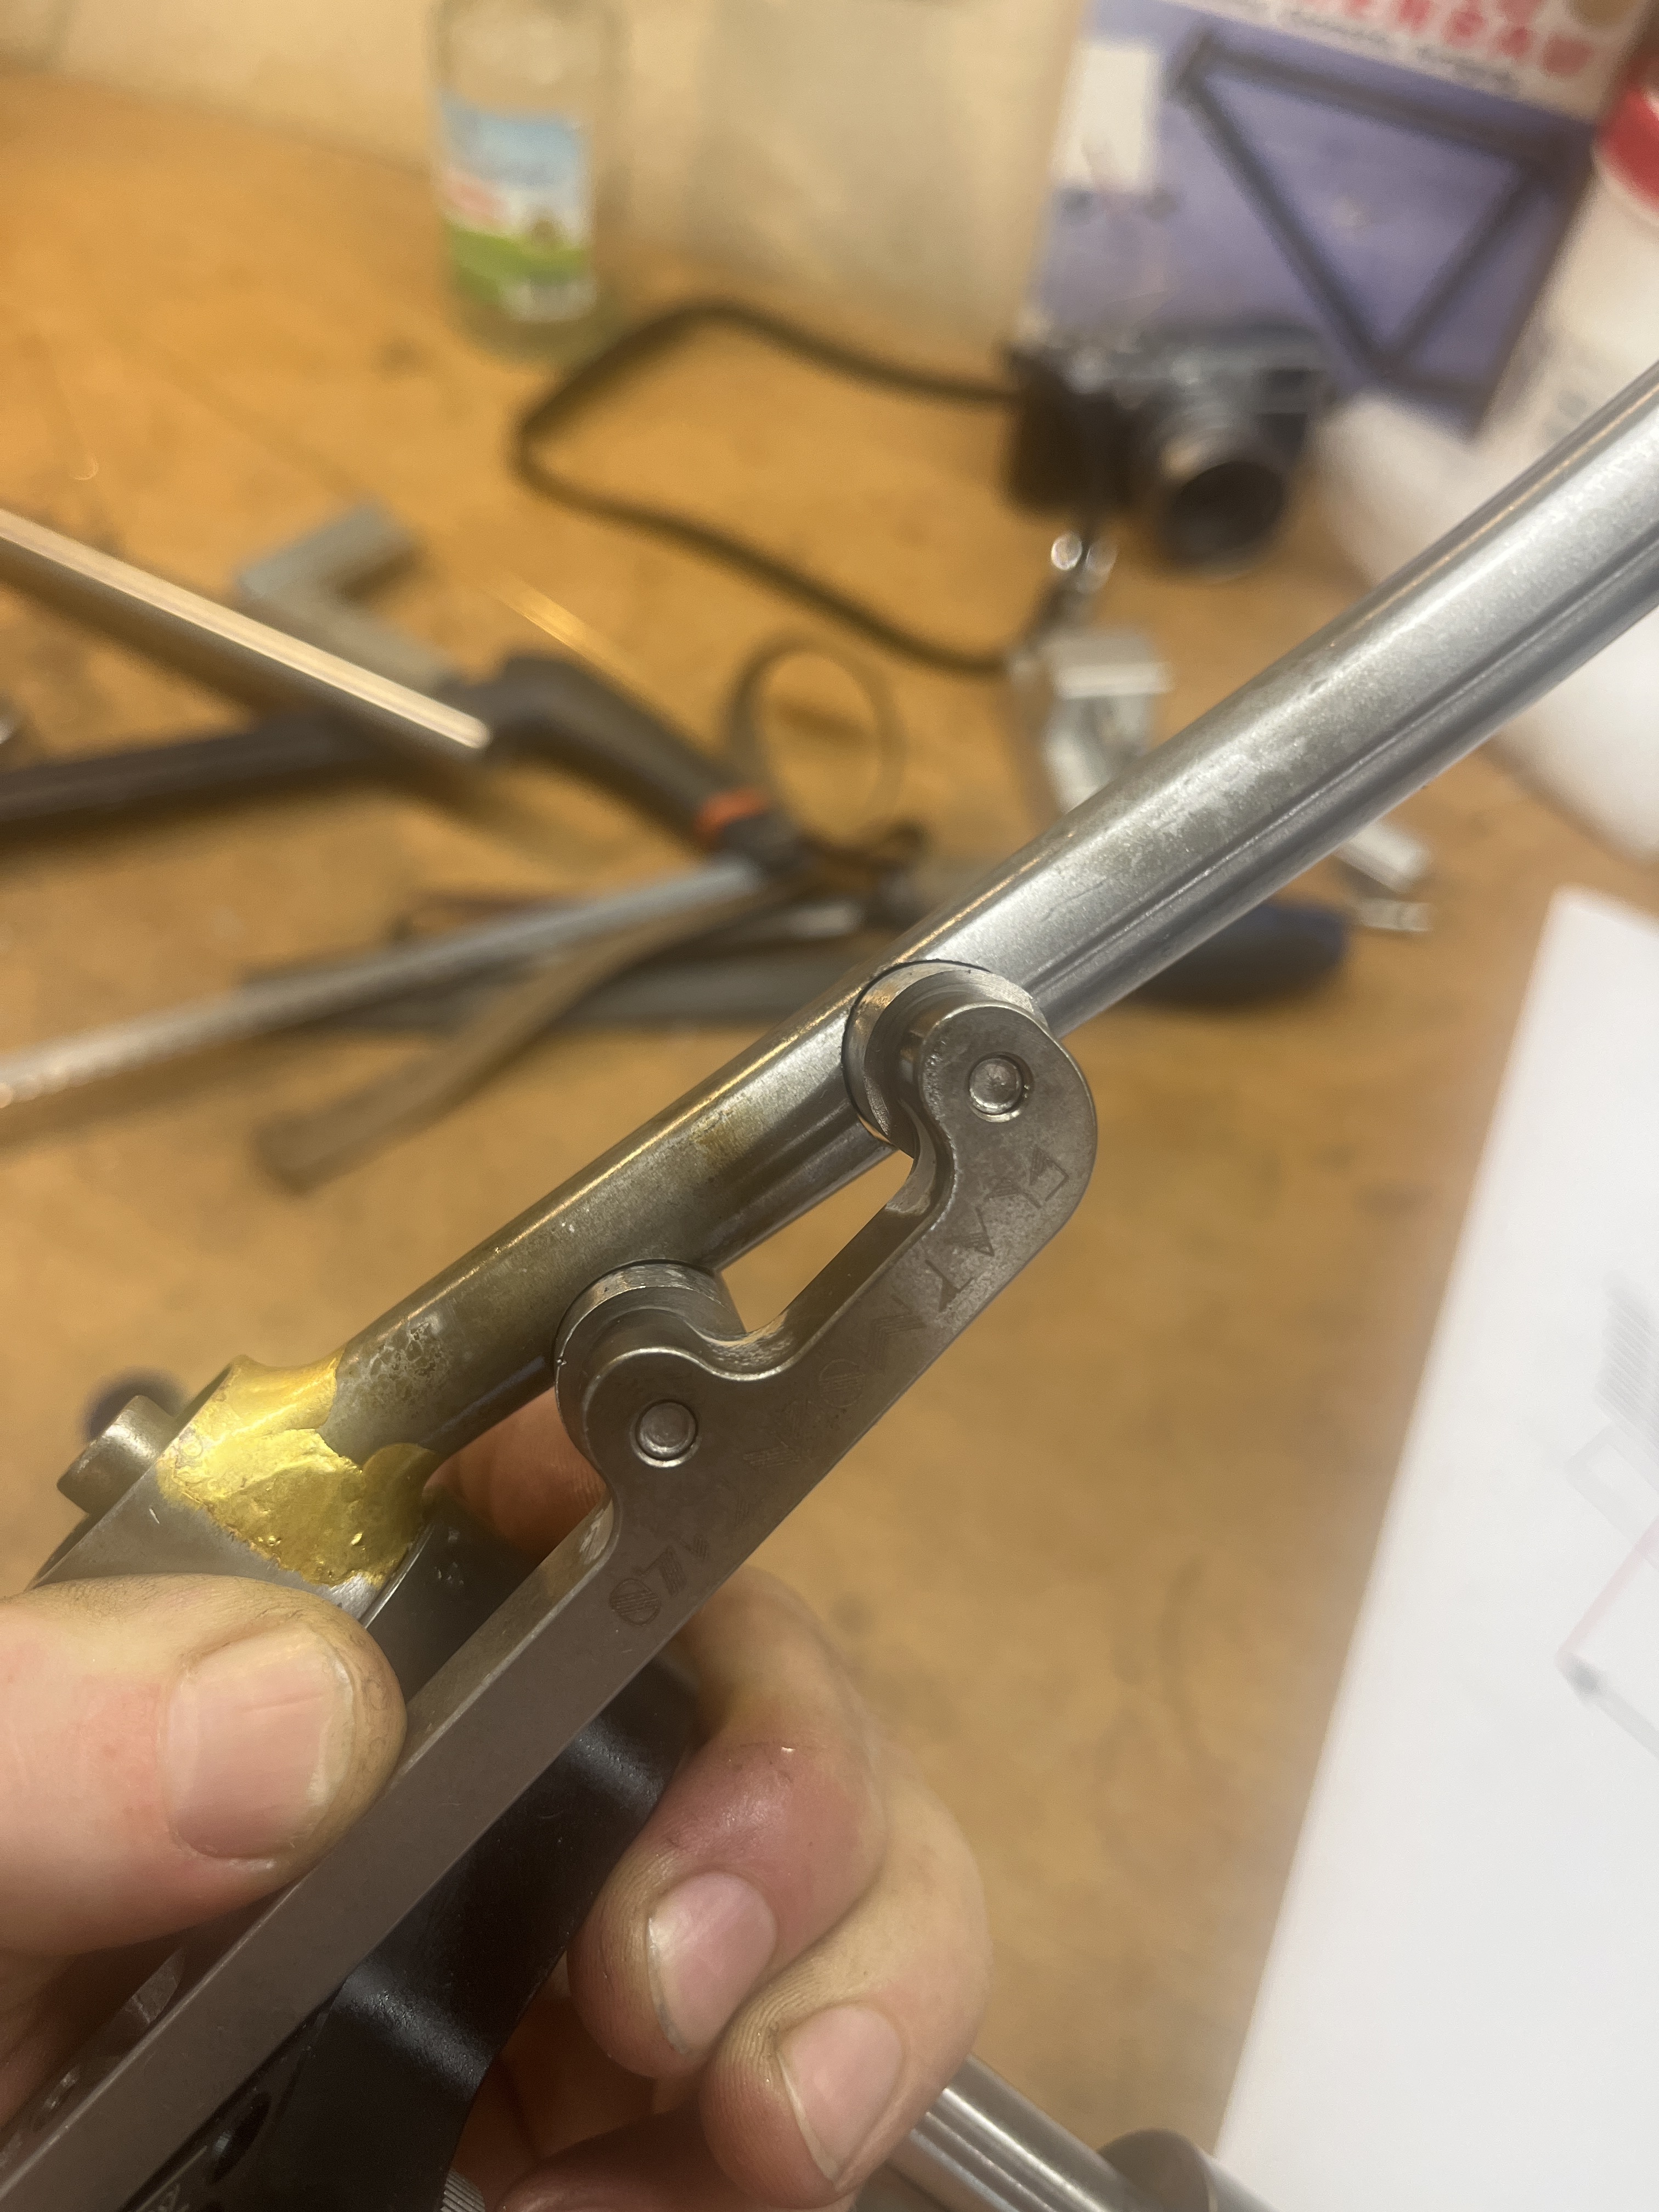
It’s hard to tell from photos, but your holes (miters) look a little loose?
If there is any gap it will pull. If you are using a hole saw instead of the end mill like @liberationfab you can grind the OD smaller if its cutting oversize.
Hahn Rossman
@hahn_rossman thanks a lot! i start over with the third chainstay… some lessons are hard to learn. now i plan to use a cutter instead of a hole saw. maybe the hole saw was not centered well…
I will show u the results!
Think next time i will late the bosses at my own and change the OD to 14mm. is it a option?
Or give a fuck about flat mount:D
I’ve been trying the rear-first process out with the most recent 3 frames I made. Back when I was in Seattle, I got some good mentorship from Smith at RatKing who built frames this way. Previously I was following the UBI school of thought which is front triangle first.
My logic is that I want to isolate as much complexity as possible and “fail fast” if anything goes wrong. Any sort of tire/chainring clearance issue becomes much harder to address once the BB shell is welded on the main triangle. Weld clearance is also much better when doing the rear triangle solo.
I feel like there are trade-offs either way, but personally I think I’m going to stick with the chainstay-subassembly-first method.
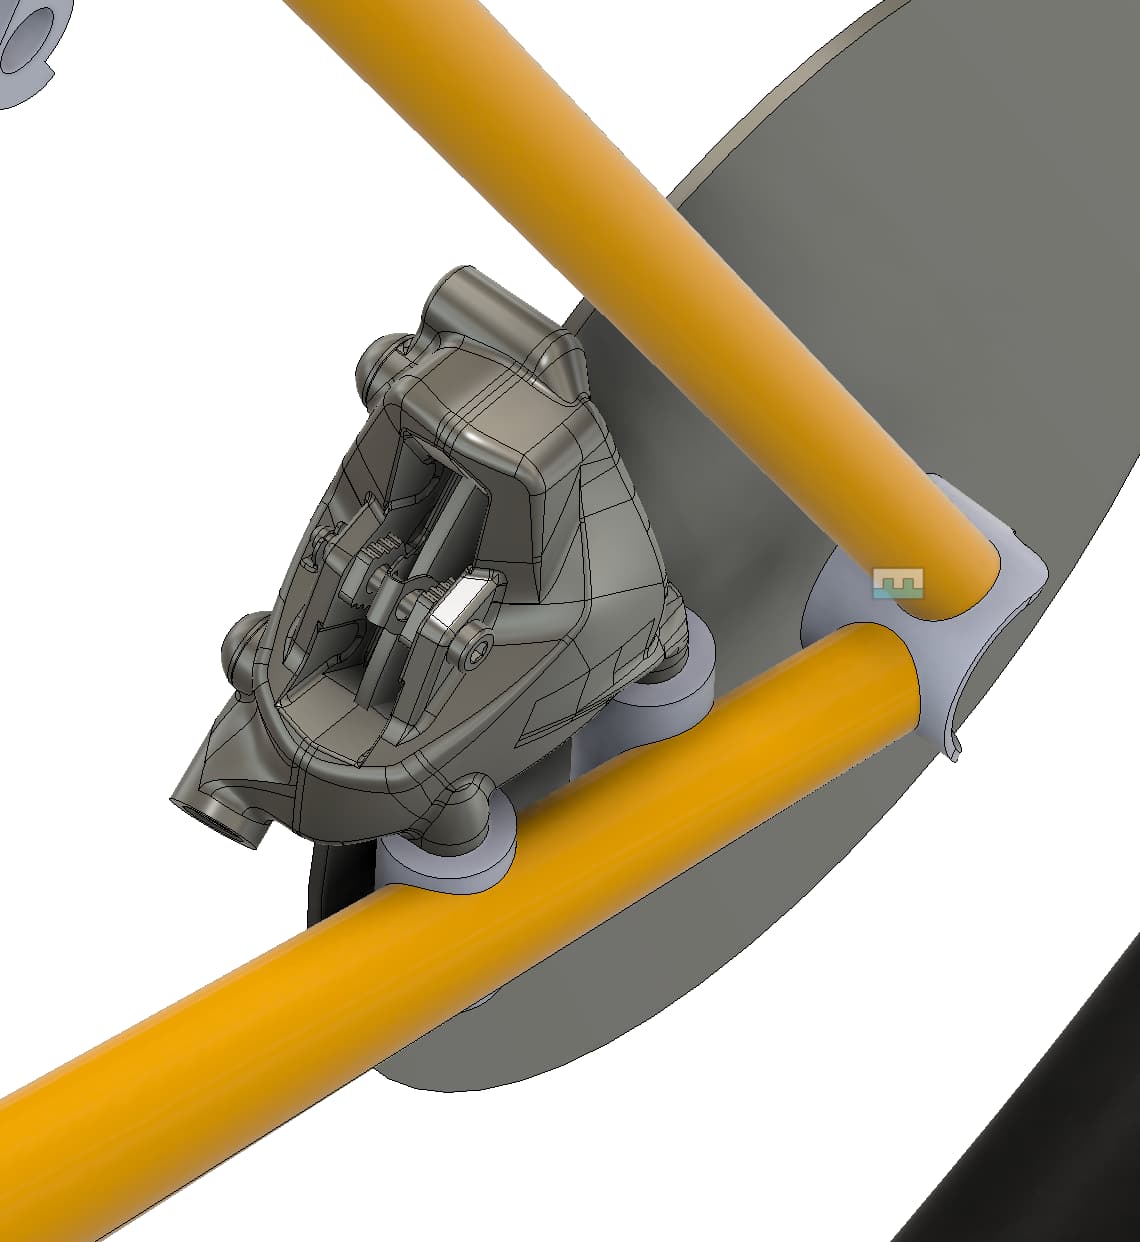
This is the whole reason Firefly went to 3d printed drop outs with the brake bosses integrated into the drop out. My first iteration machined flat mount drop out I put one boss as part of the drop out as reference and mitered a big hole in the chain stay for a boss like what you are doing. We found to get things perfect we had to make the wheel check 1+mm or more off center before welding to accommodate for the shrinkage. It was time consuming to get the wheelcheck (wheel centered in the frame) right.