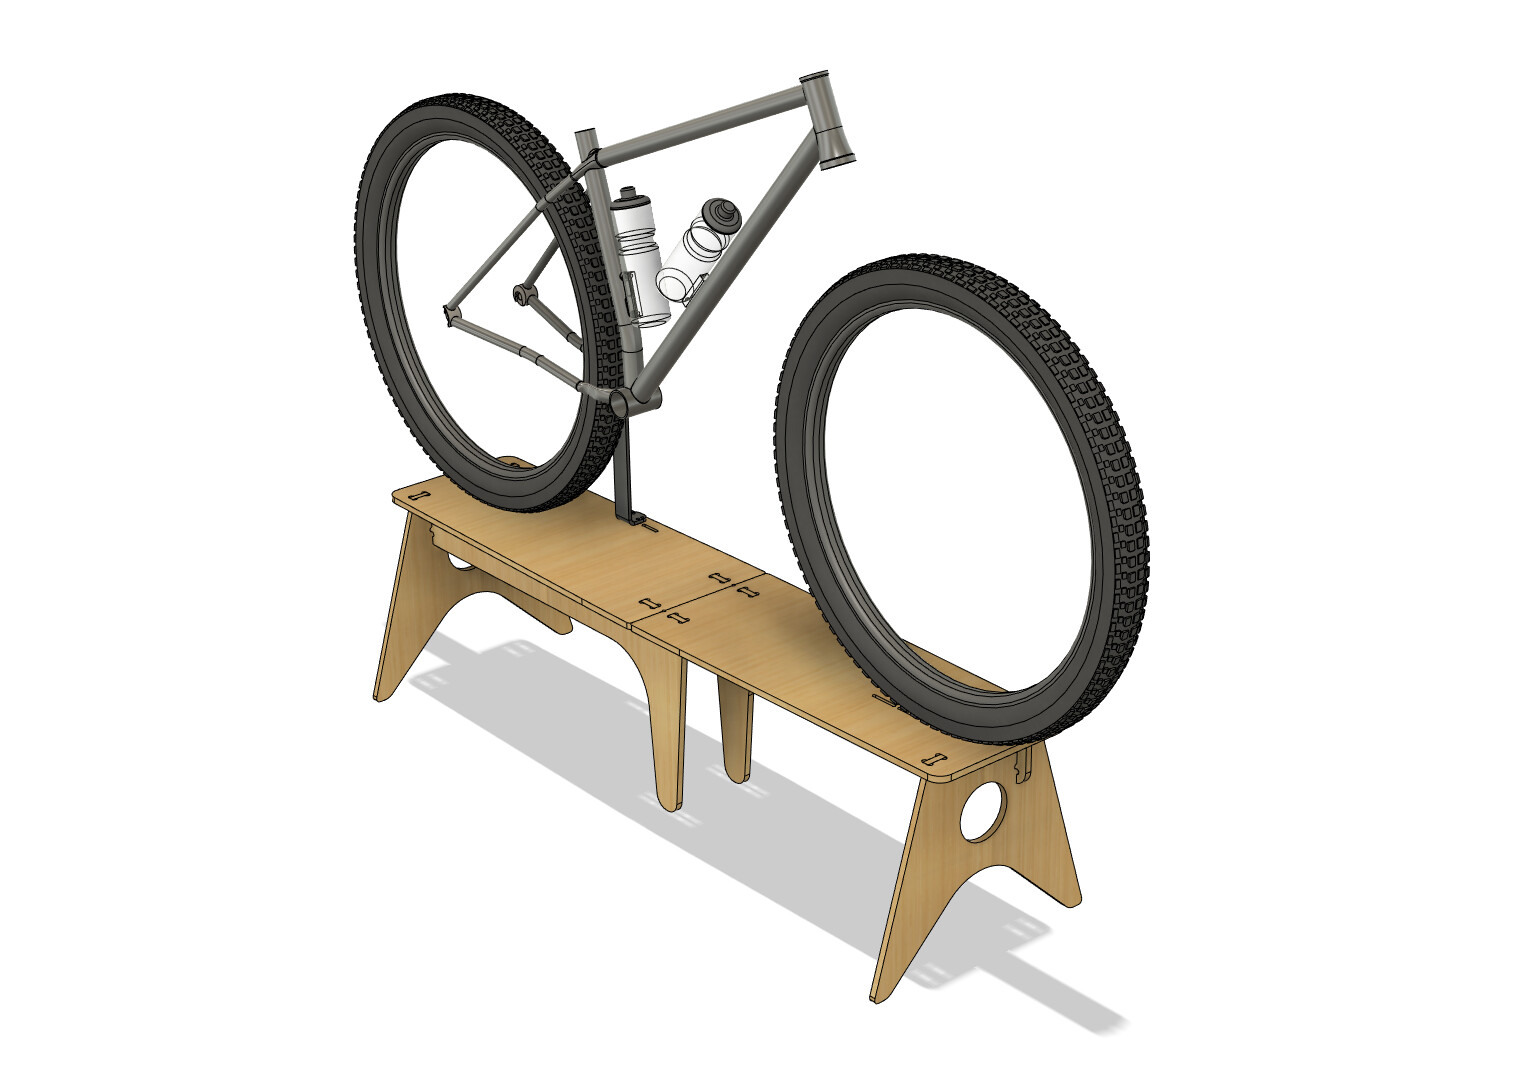
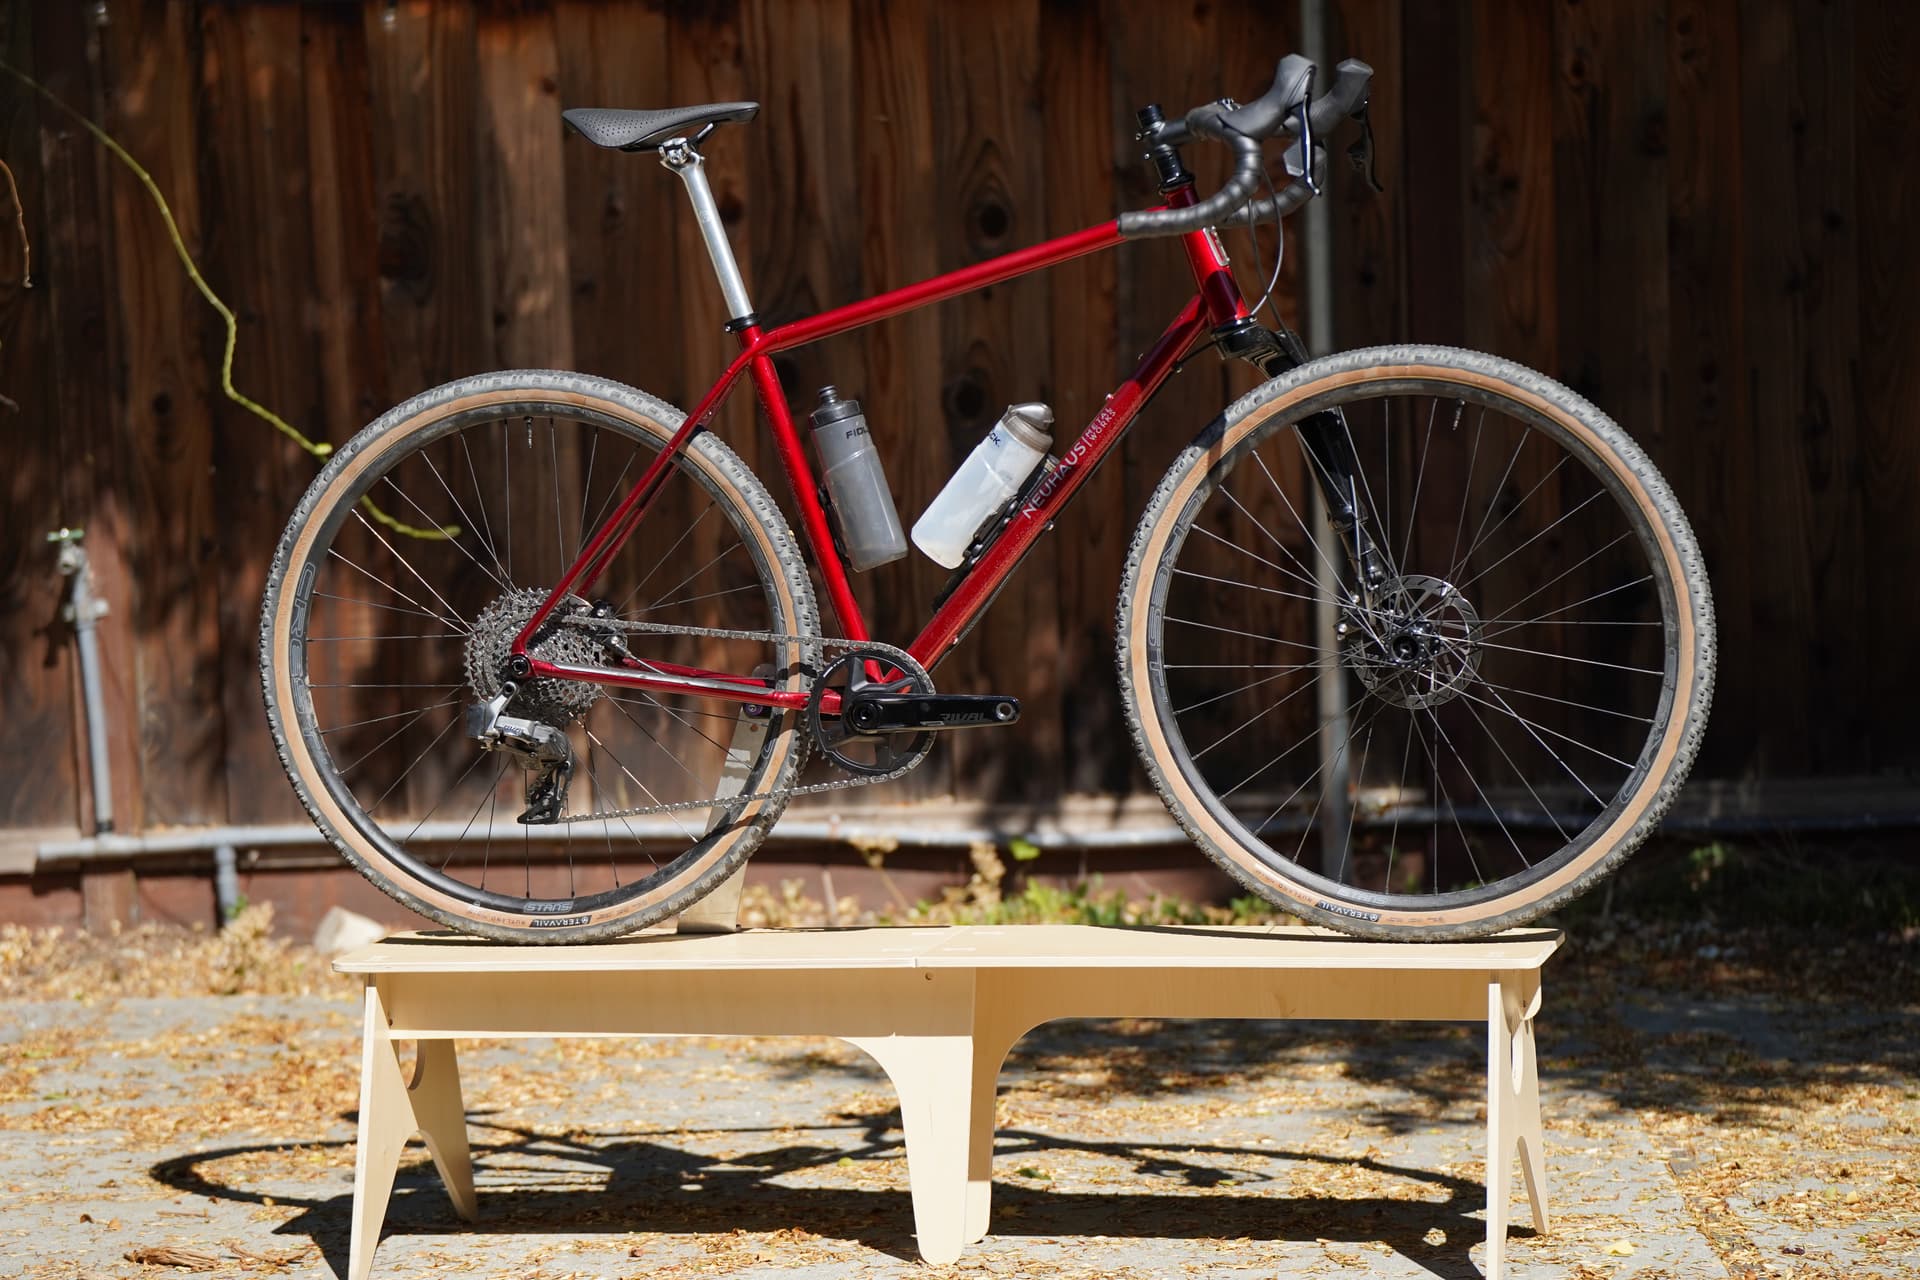
Elevate your bikes (literally and figuratively):
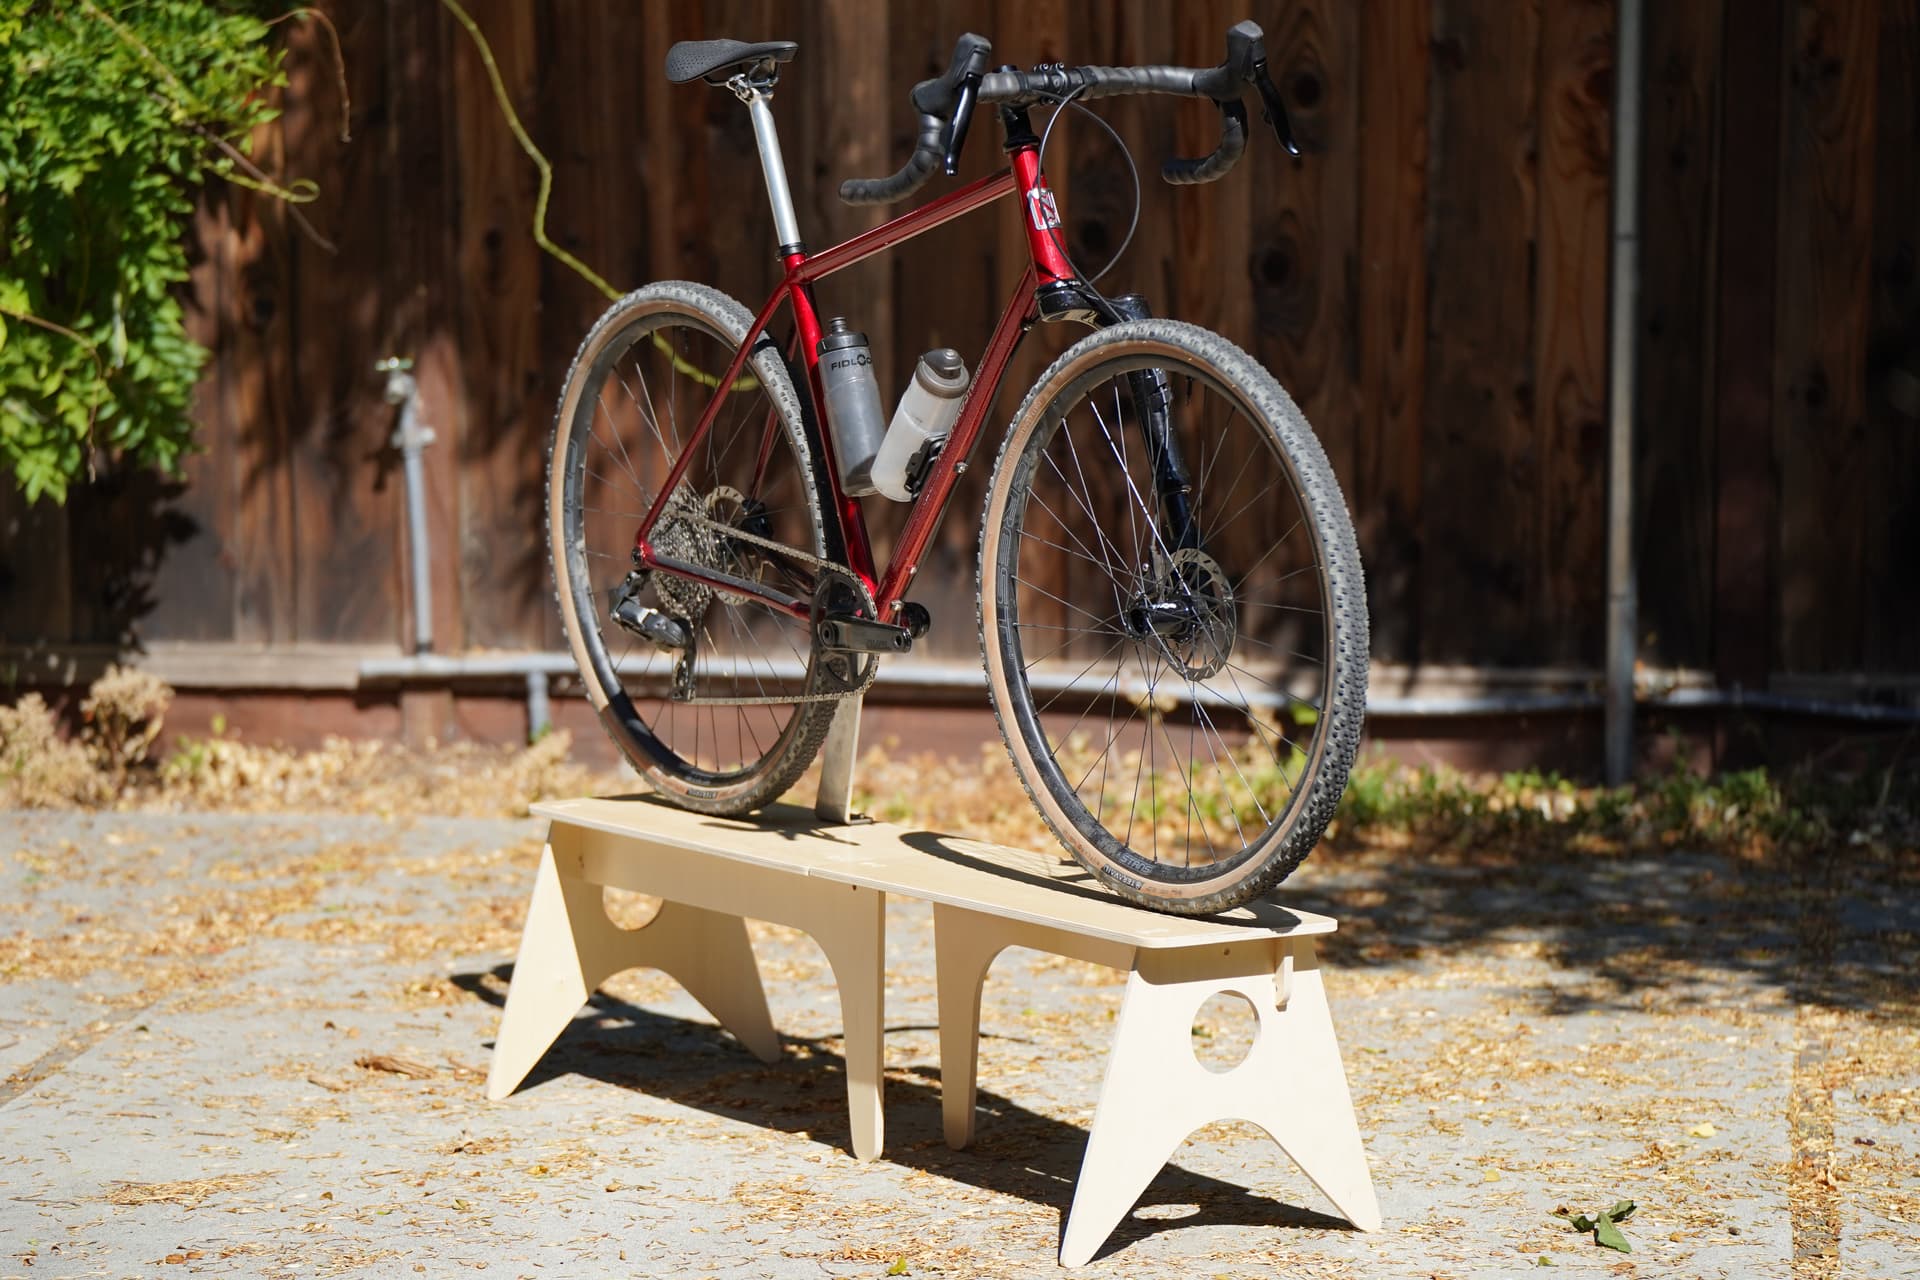
Having been to a few shows (as a fan and builder), I came to the conclusion that the bikes look better 12-18in off the ground. The stands bring the bikes closer to eye-level and hold the wheel straight, preventing the bars from flopping around. Best of all? The stands pack flat into a ~12x30x3" chunk of plywood, allowing you to easily transport, store, and re-use.
In the spirit of stealing like an artist, these stands are a copy of the well-designed stands used in the ENVE shows (TFTI). My contribution to the design: fully parameterized CAD model, a bit lighter and smaller, and optimized for different-sized bikes.
I ended up spending way too much time over-engineering bike stands. If you end up using this design, please make sure to show it off in this thread and credit this post! Need stands for commercial purposes, but can’t be bothered with Fusion360? I’ll be happy to consult for a small fee.
Final Specs:
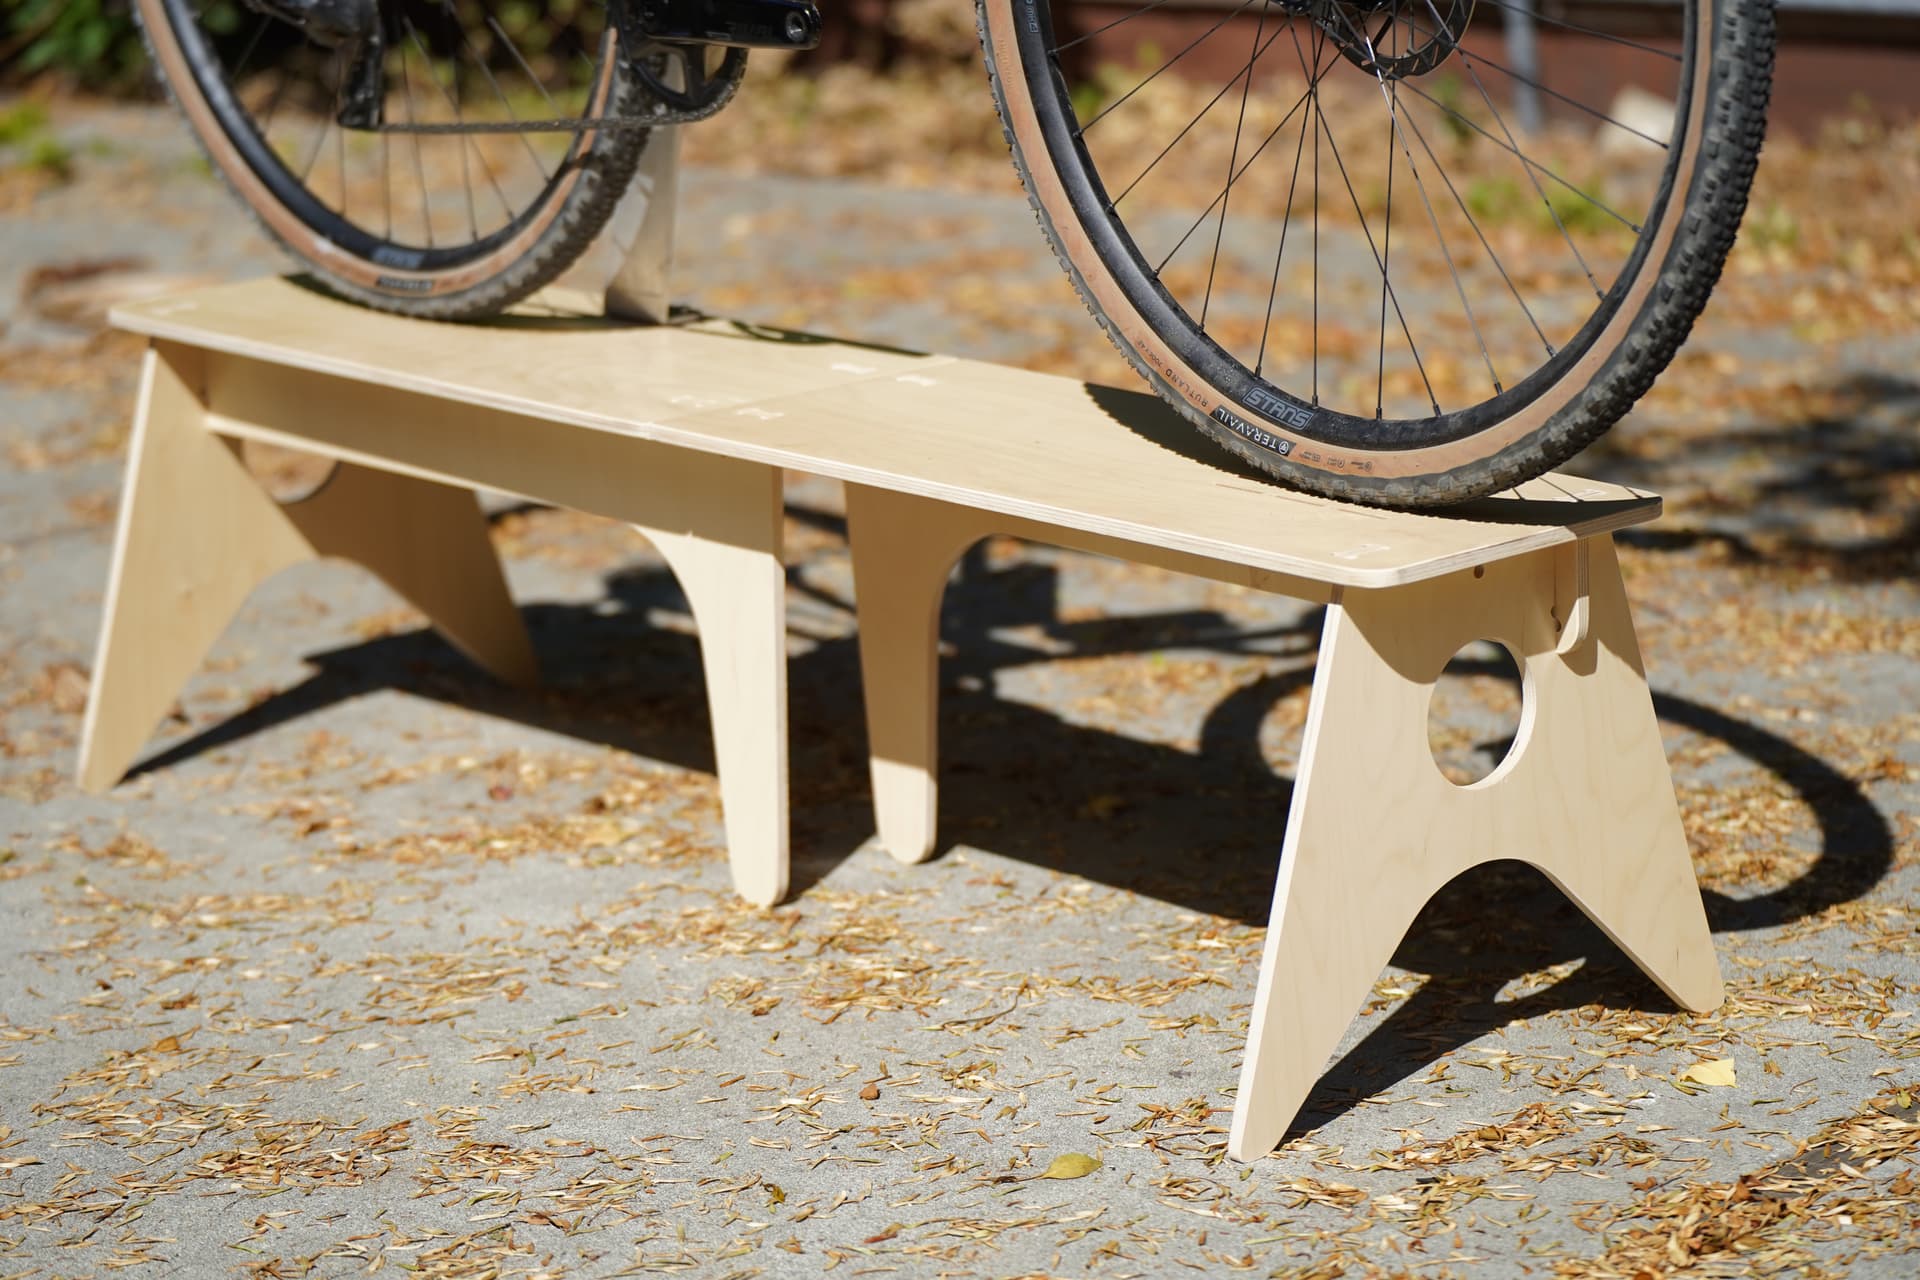
- 58Lx15Hx12W
- 1/2in thick plywood
- Designed to fit on a 5x5’ or two on a 4’x8’ sheet
- Cost ~$180-250ea (depends on tax, material, manufacturer, etc…)
CAD Models
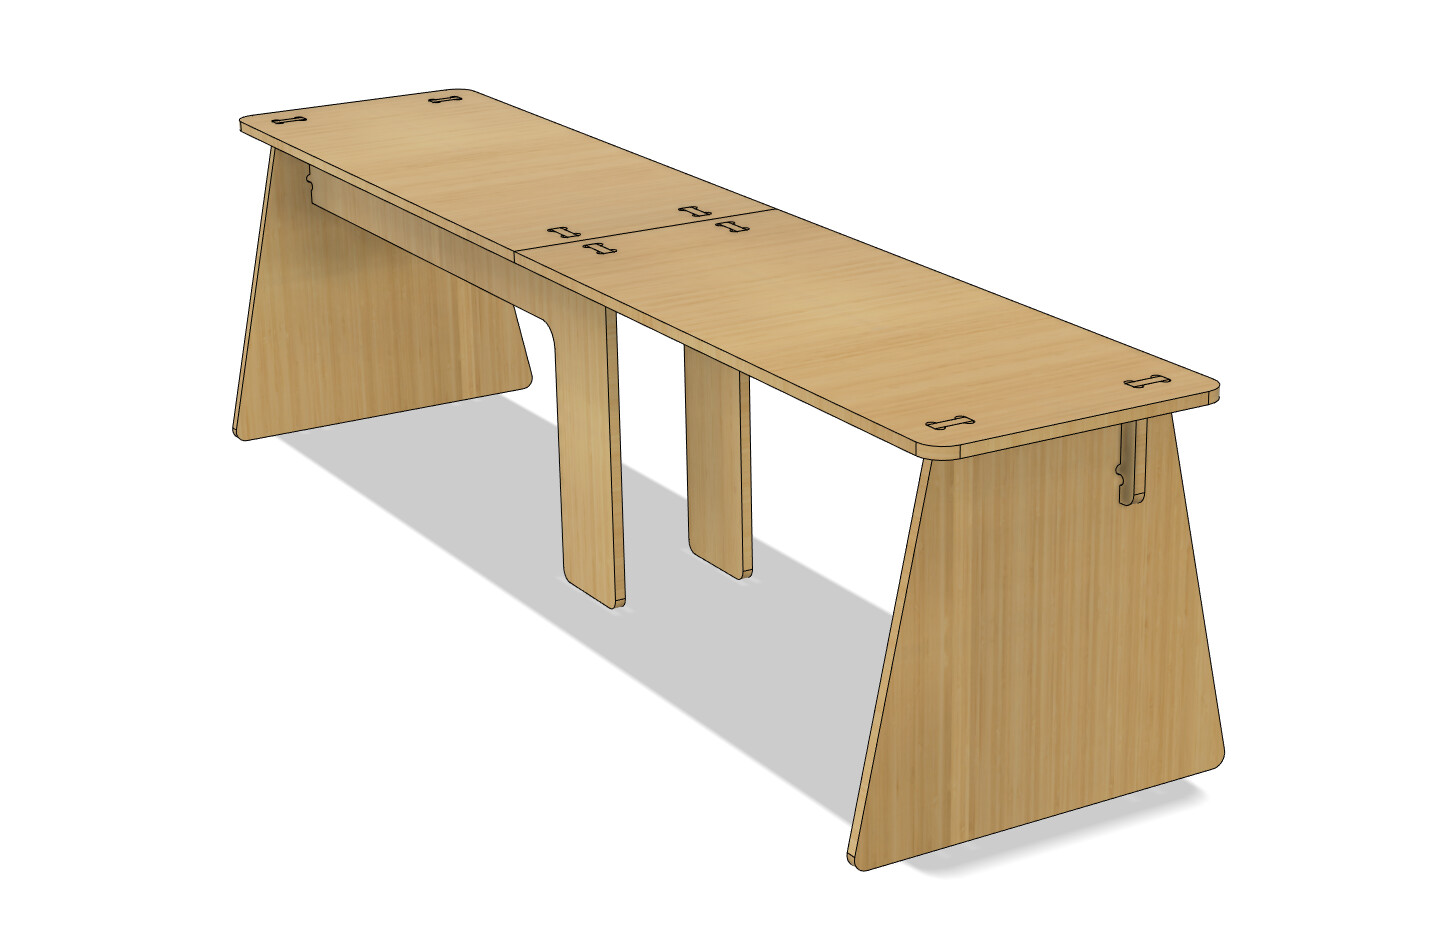
I am releasing a simplified (boxy) CAD model to encourage people to customize and remix the design. I tried to make the CAD as robust as possible but its up to you to make sure everything lines up
- Fusion360 link: Fusion
- DXF: Stand - Mid p46thk p018tol.dxf (12.5 KB)
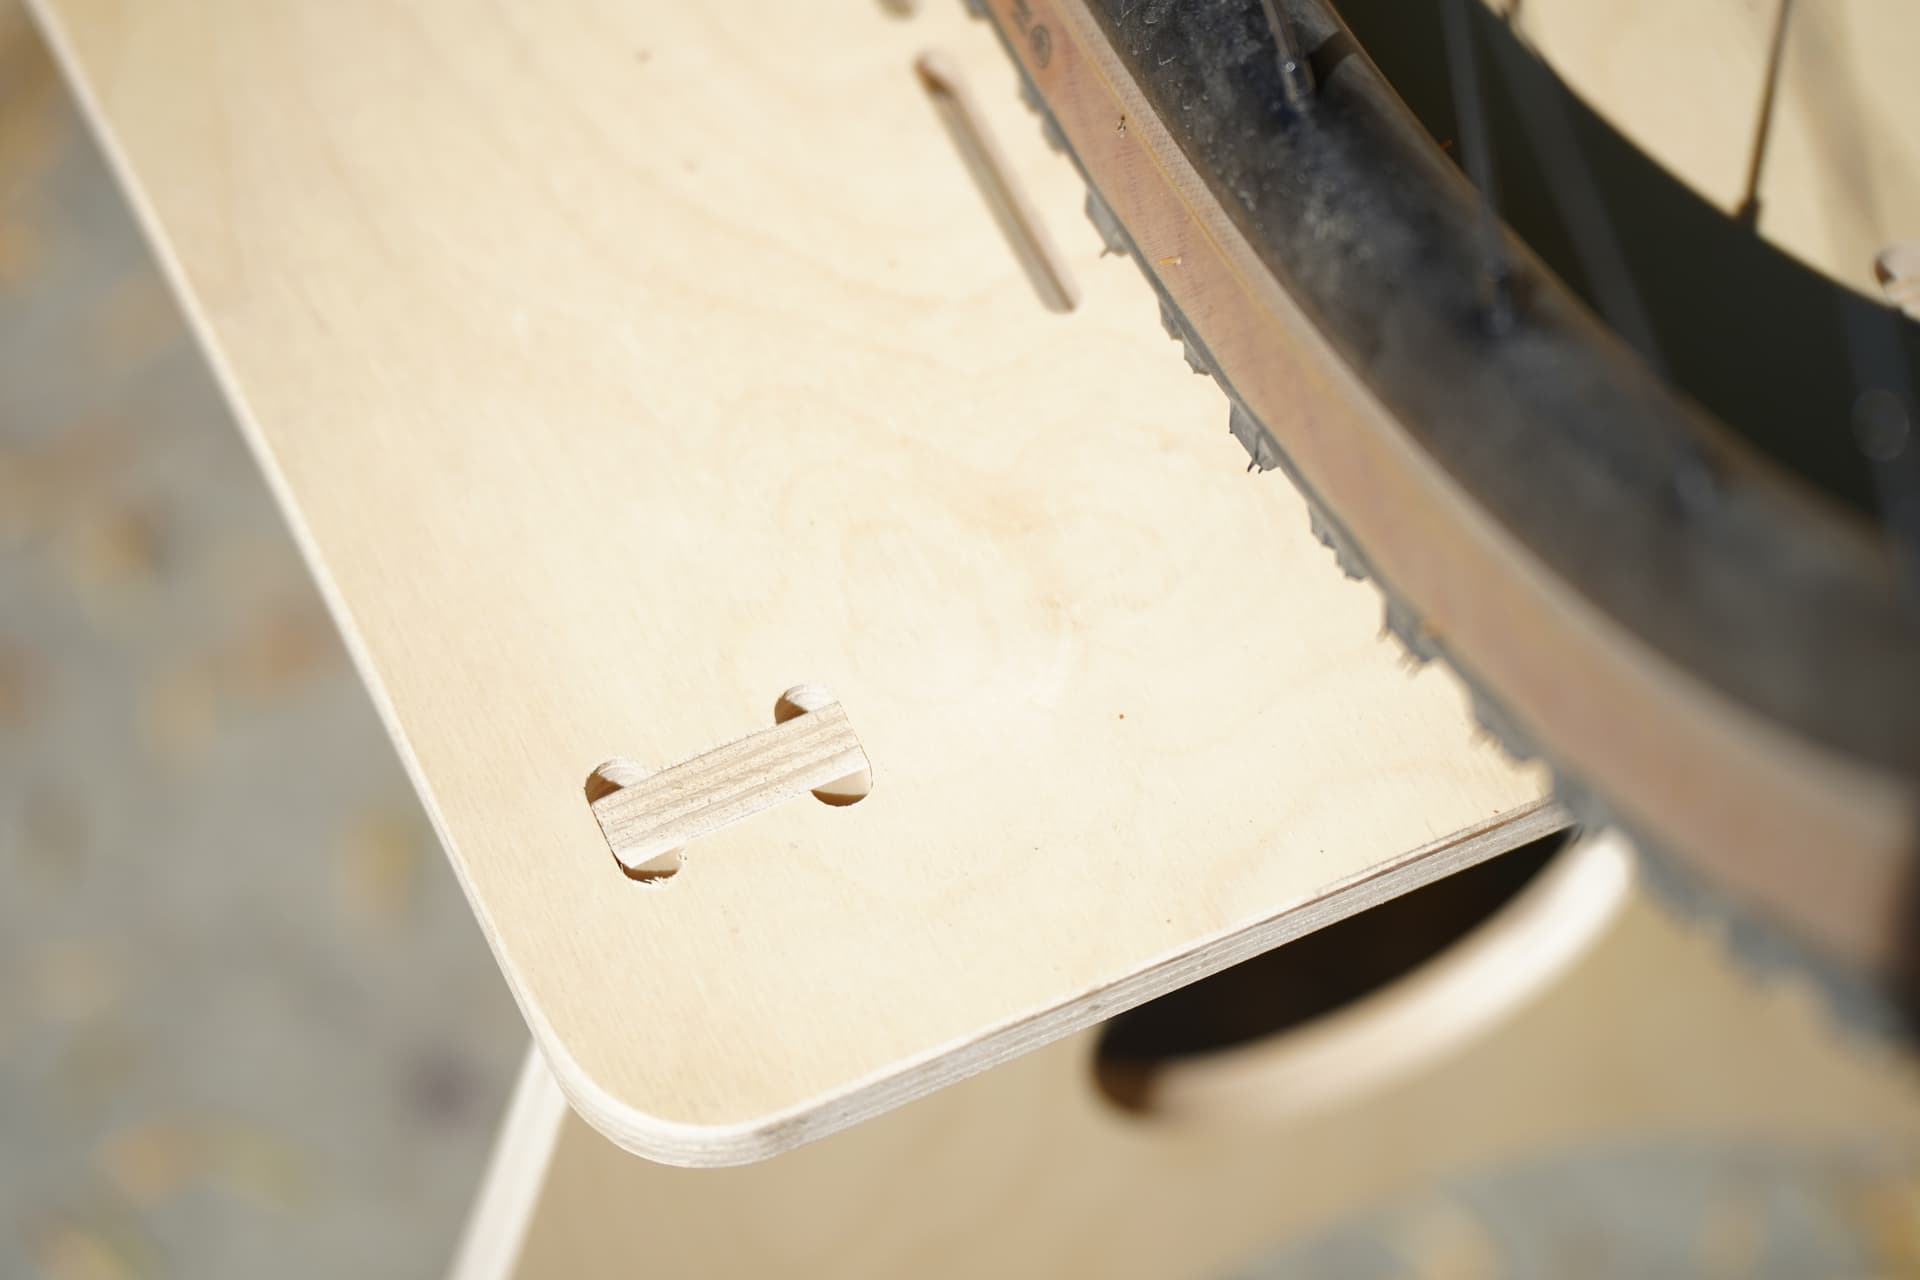
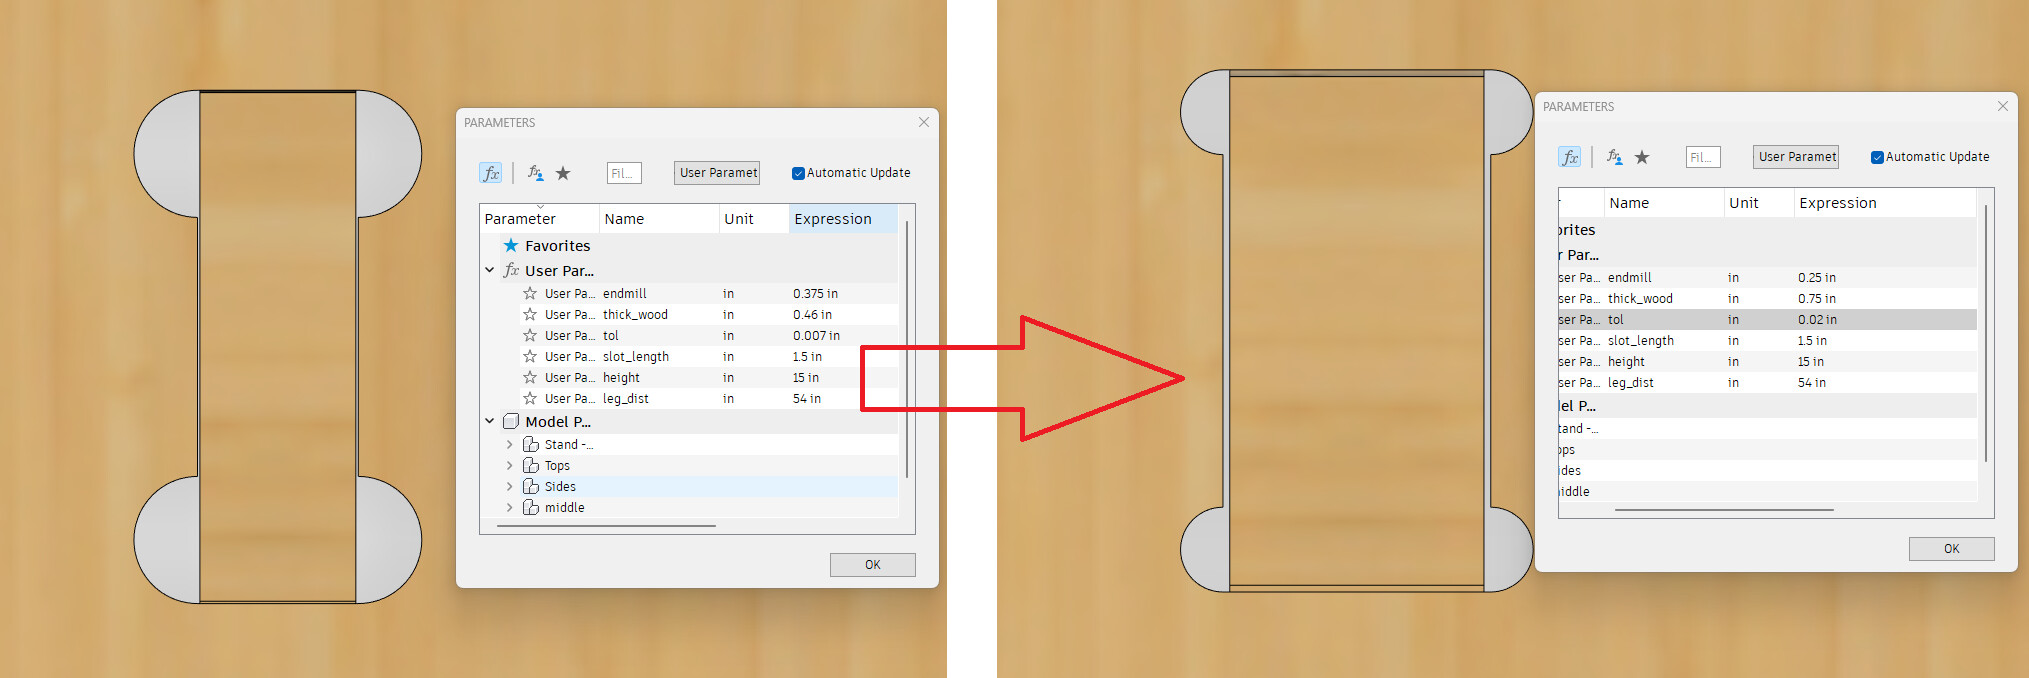
The crux of the design was making it fully parameterized to accommodate wood thicknesses (thick_wood). different endmill sizes (endmill), and tolerances (tol). Wood thickness can vary from sheet to sheet, requiring you to update the slot widths and tolerances. Changing the parameters in the parameter table automatically updates the entire CAD:
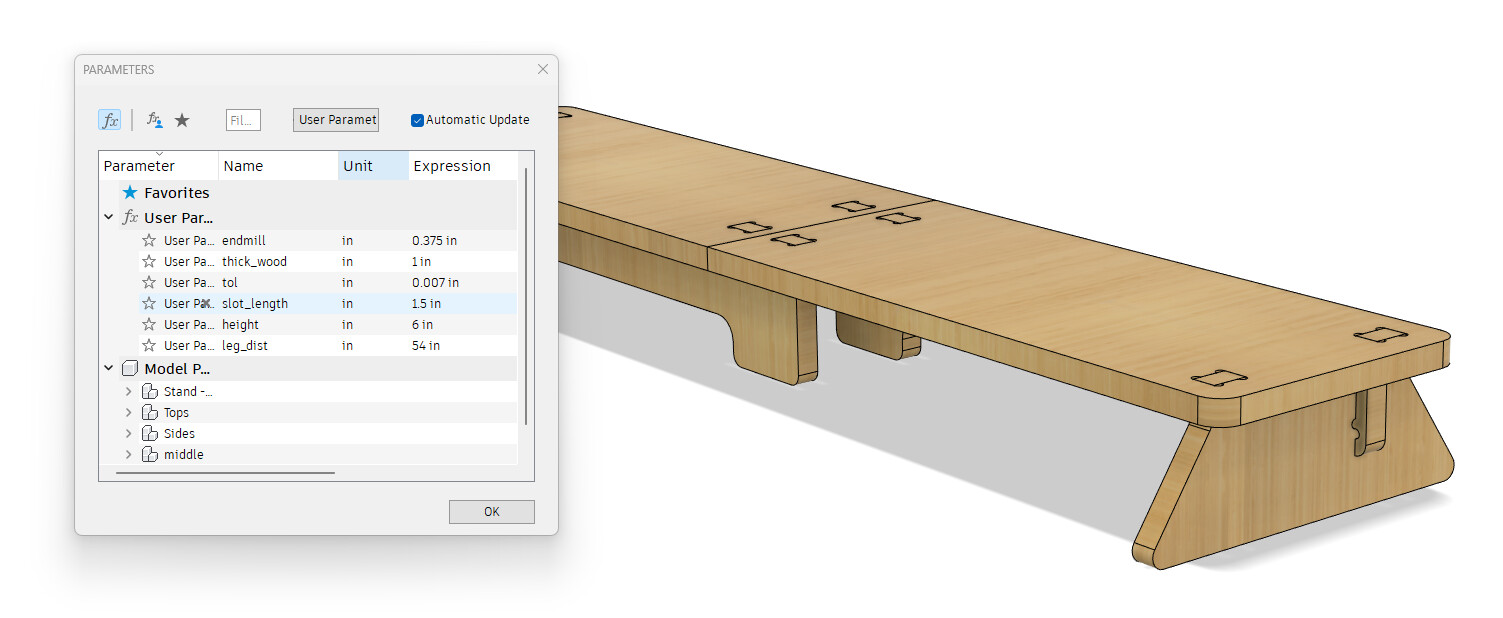
6in tall stand with 1in thick plywood? no problem:
Recommendation:
- thickness: ~5in Use actually thickness of plywood
- endmill: 3/8in cuts faster (cheaper). Use recommendations from CNC place
- tolerance: .007in on each side (.015 total) seems to be the standard recommendation
- height: up to you
Arrange:
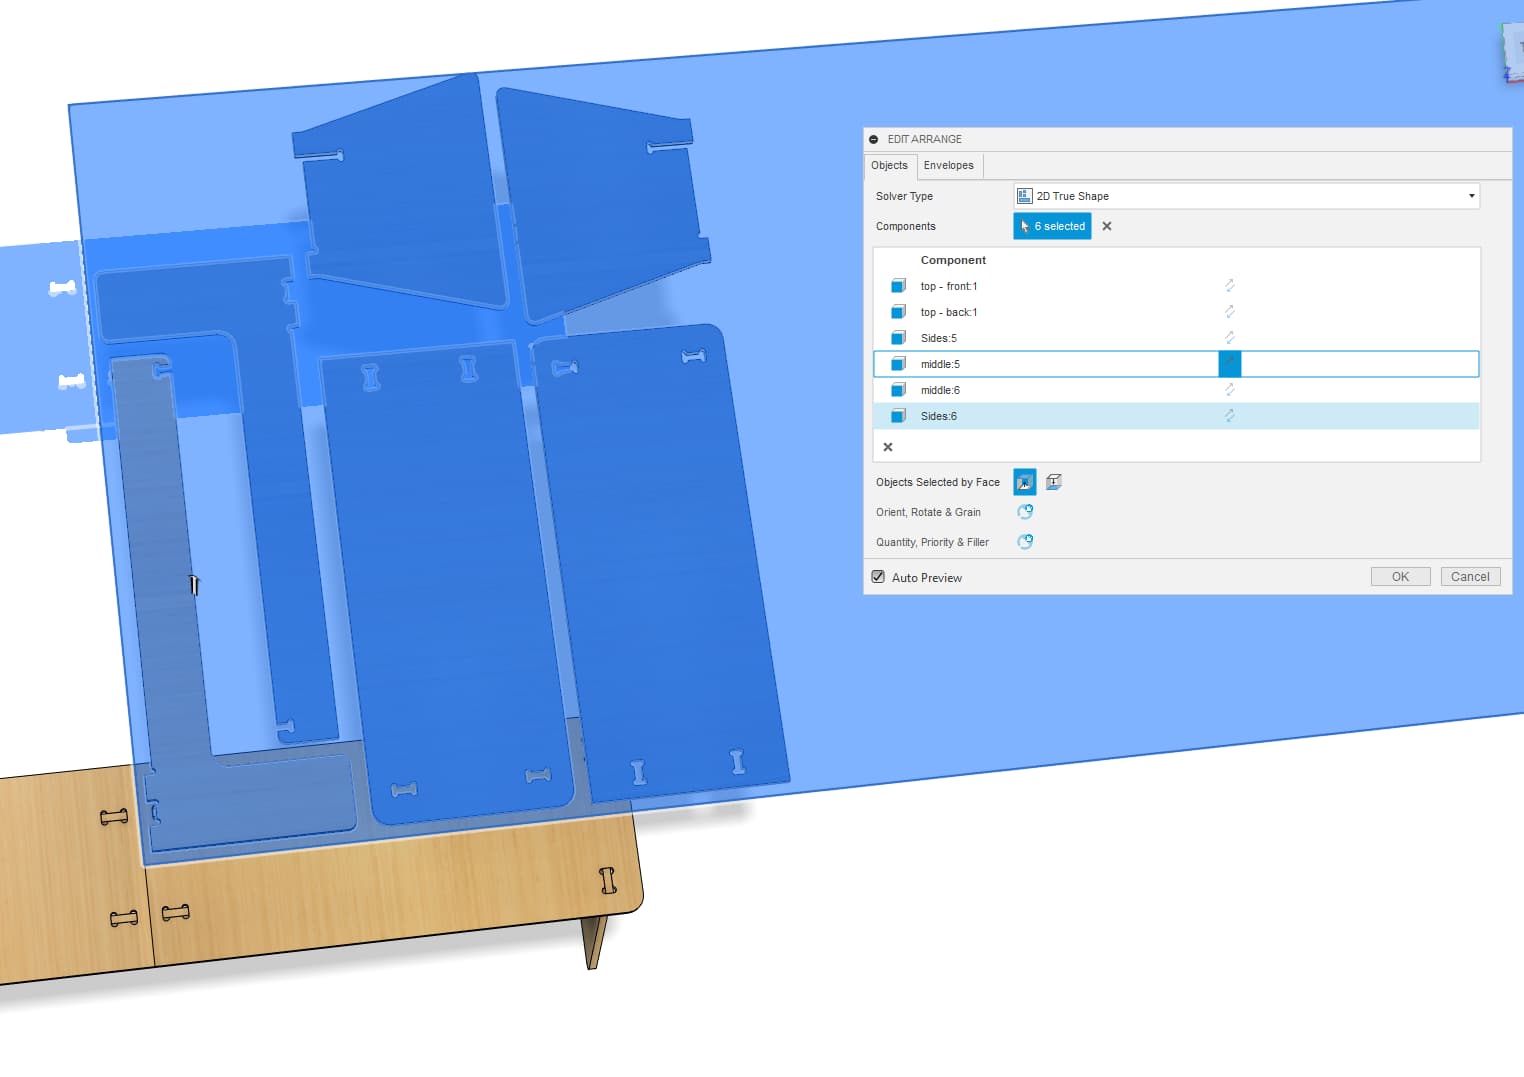
This is the first time I played around with Fusion’s Arrange feature, which allows you to optimally lay out your flat patterns. Either I don’t know how to use it (likely), or it is buggy (likely). Ultimately, the CNC manufacturer will lay out the design with their own software, but Arrange tool is an easy way of laying out your parts and creating a DXF file.
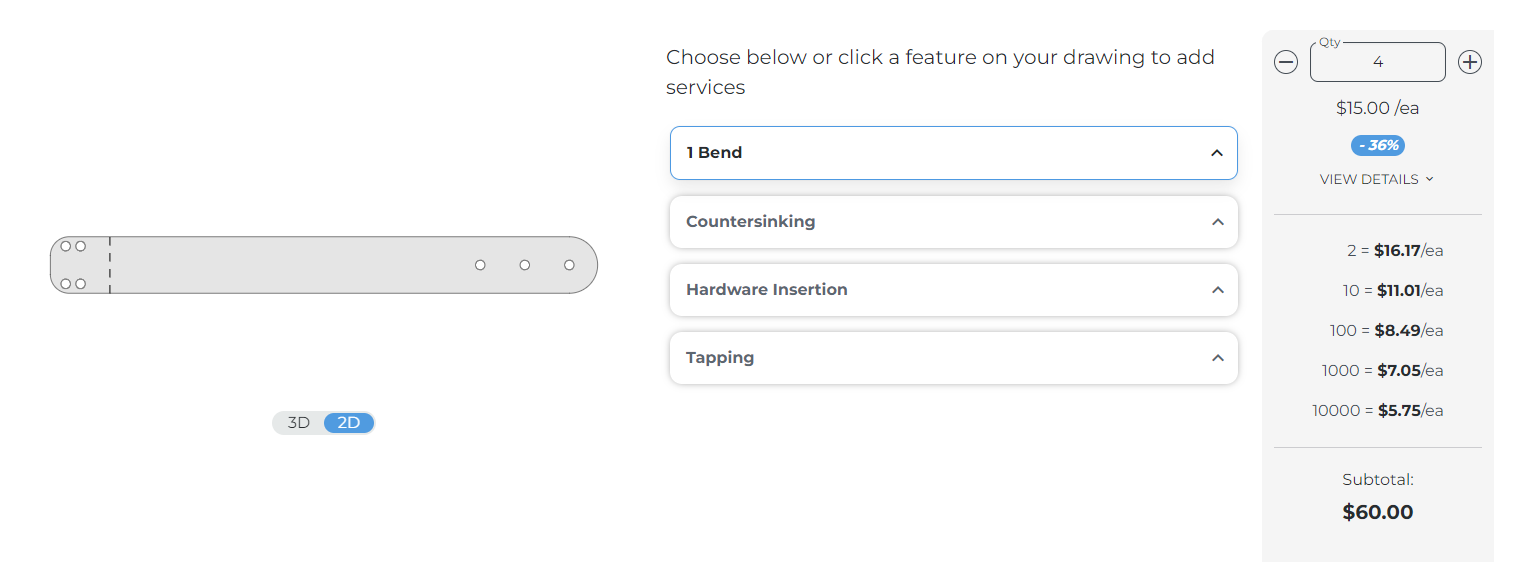
Crank Mounting:
- Fusion360 link: Fusion
- DXF: Crank Stand MID.dxf (4.2 KB)
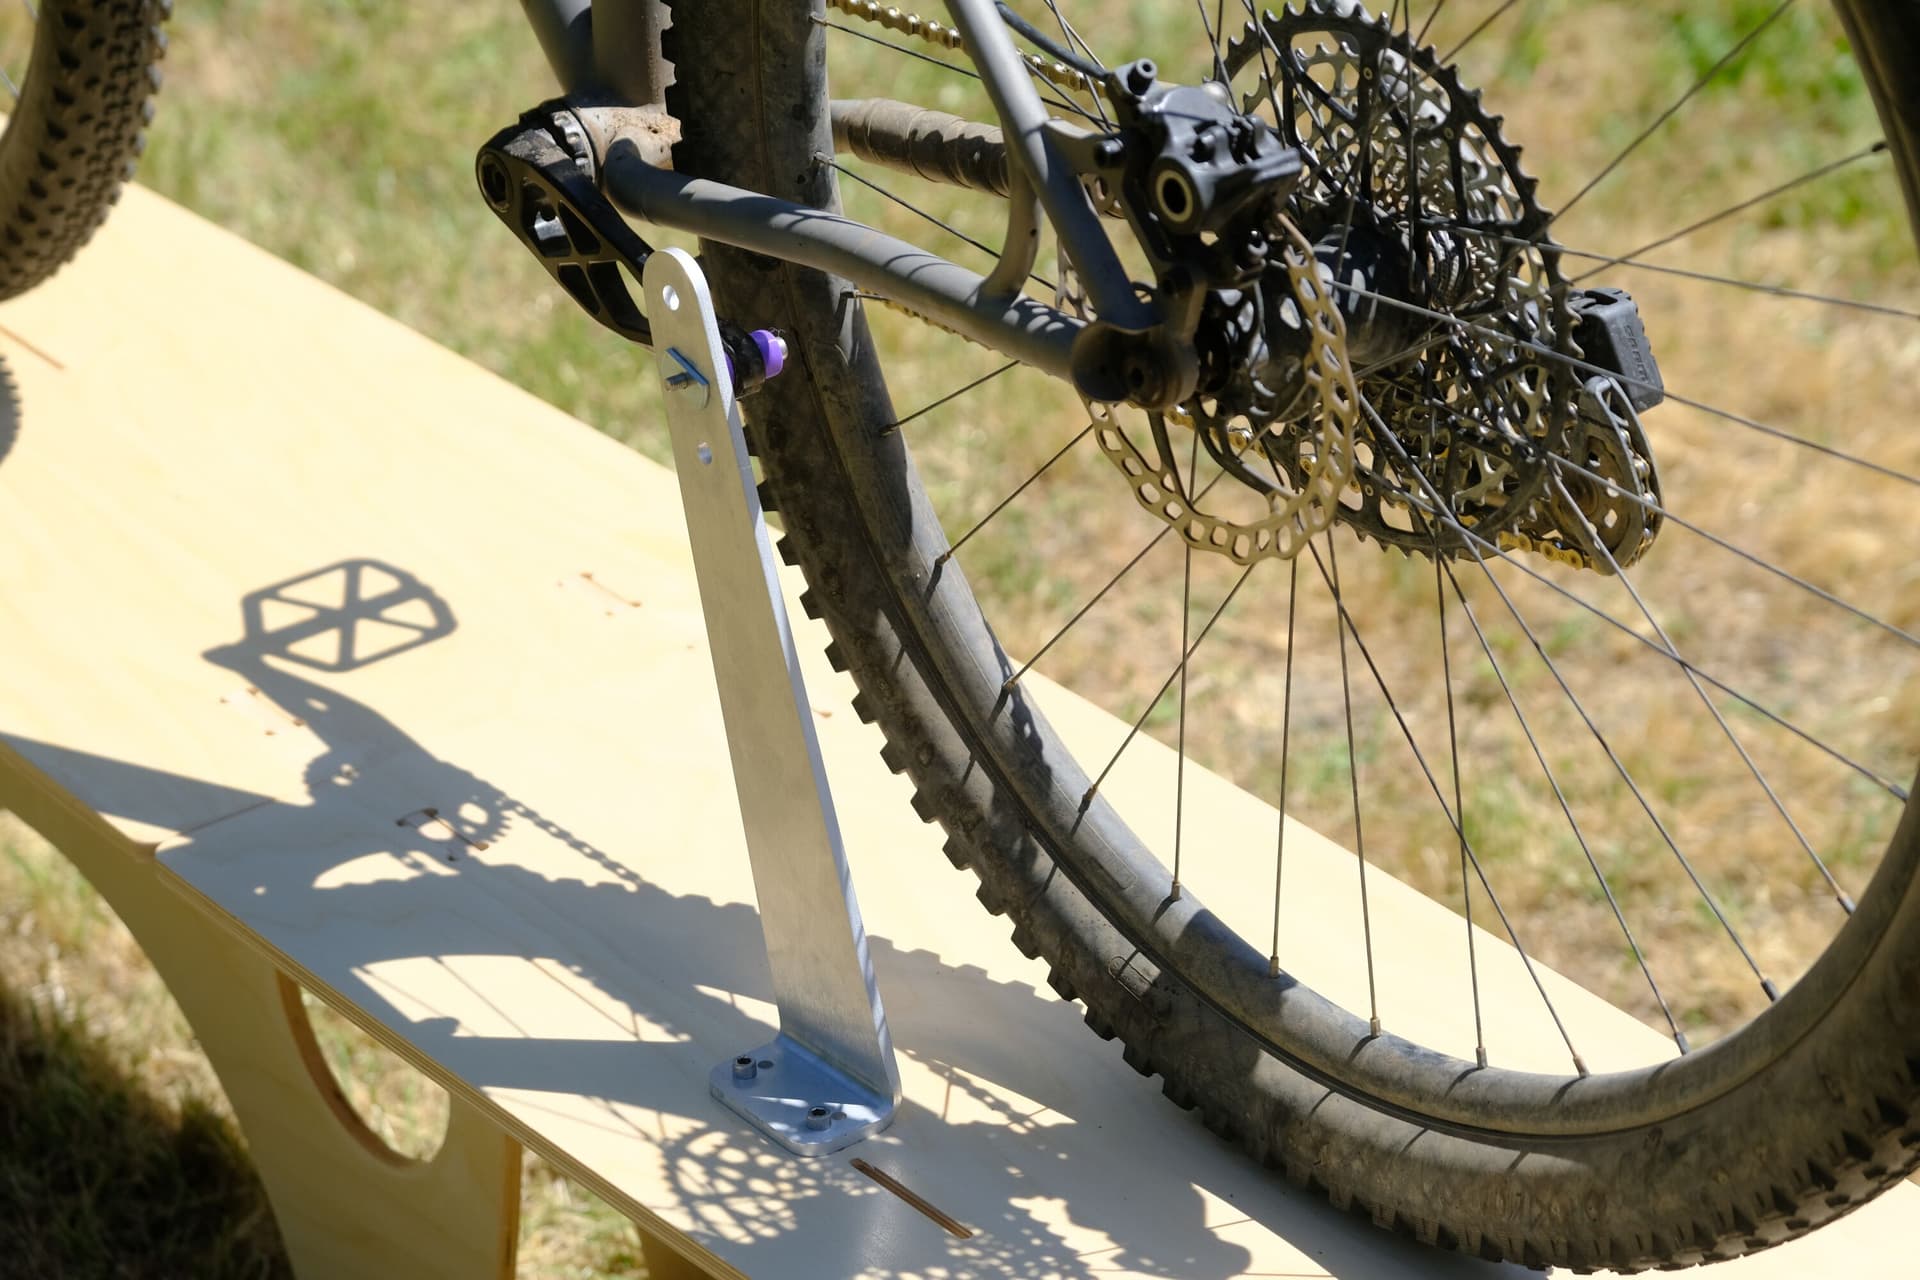
There are many ways to mount the bike to the stand. I chose to go with a simple 1/4in thick bent aluminum bracket with some 3D printed bushings.
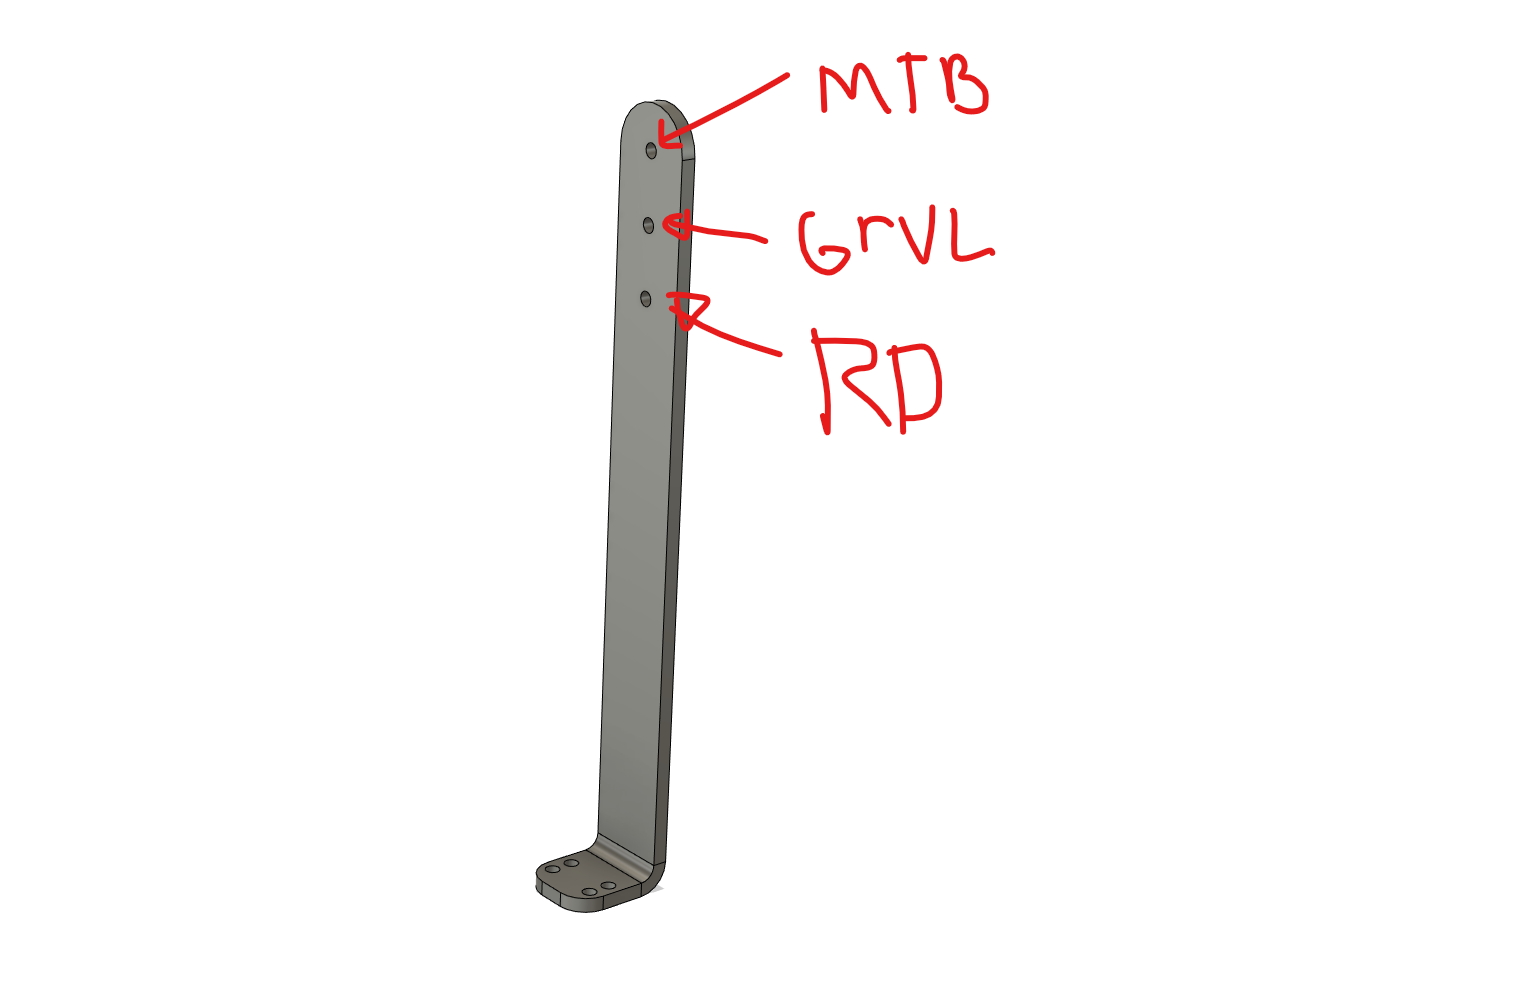
The CAD of this bracket is created with the sheet metal feature using send-cut-send’s aluminum sheet metal rules.
Wrapping Up:
I purposefully released a “blank” design boxy without any cutouts for hardware in order to encourage people to go into the CAD and design their own. My final design has a bit more styling and an (over) engineered slot system to accommodate the smallest road bikes and biggest mountain bikes while keeping them centered on the stand.
Lessons Learned:
- use pre-finished plywood to save you time! Hand clear coating two stands took over 4hrs
- wood needs a lot more tolerances than metal
- the price of CNC woodworking can vary, make sure you get several quotes
- I think the stand looks SLIGHTLY better if it were a bit longer, but it’s significantly more expensive and less portable.
Happy woodworking!