Build Post-Mortem and Learnings- Big Block Bikes

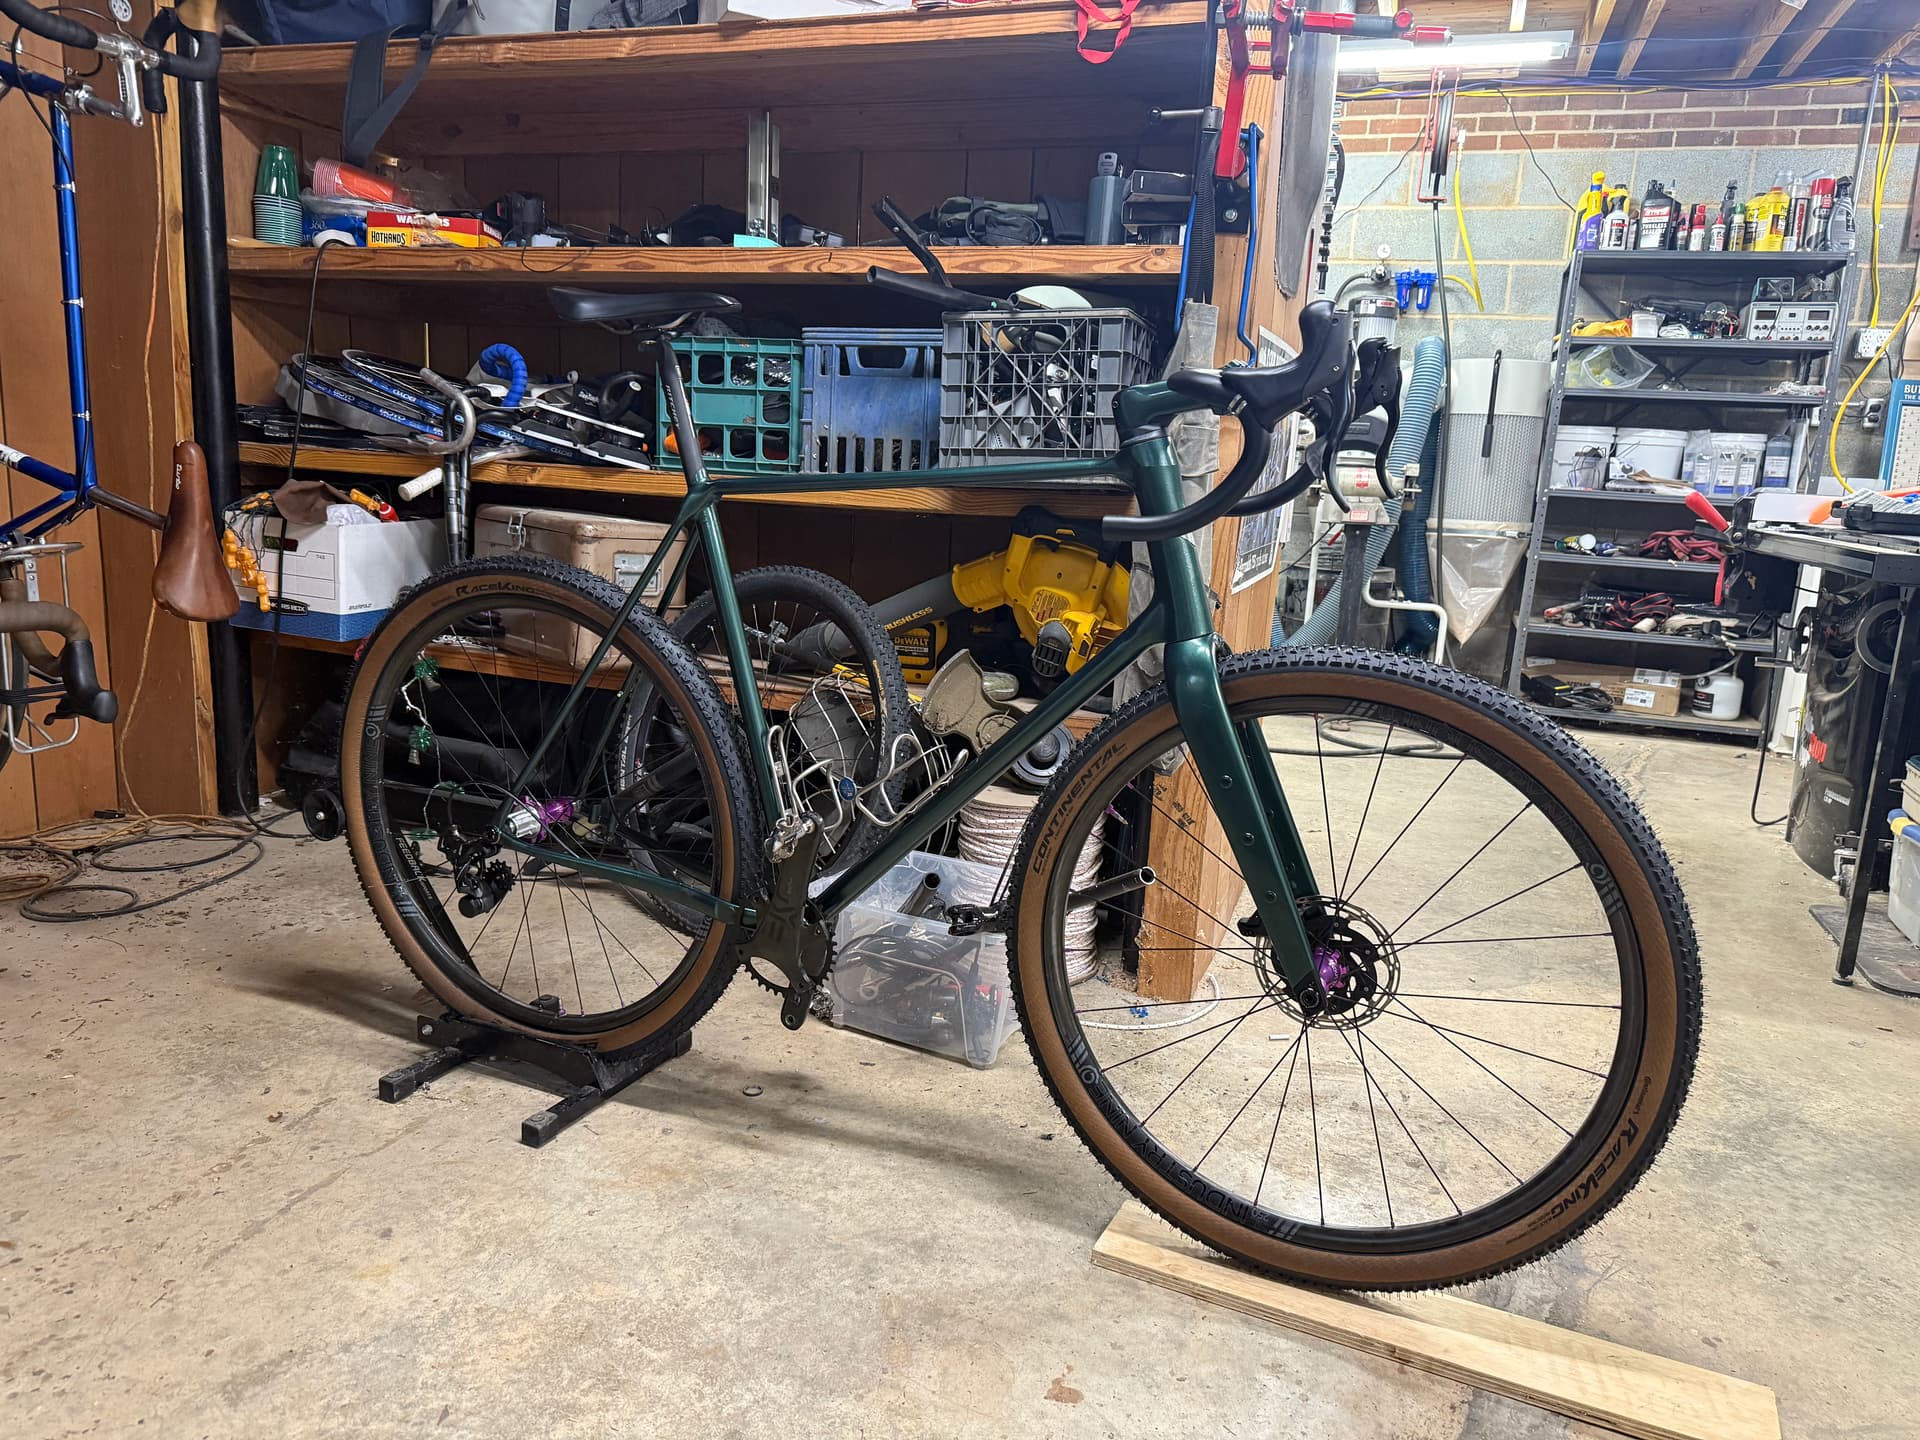
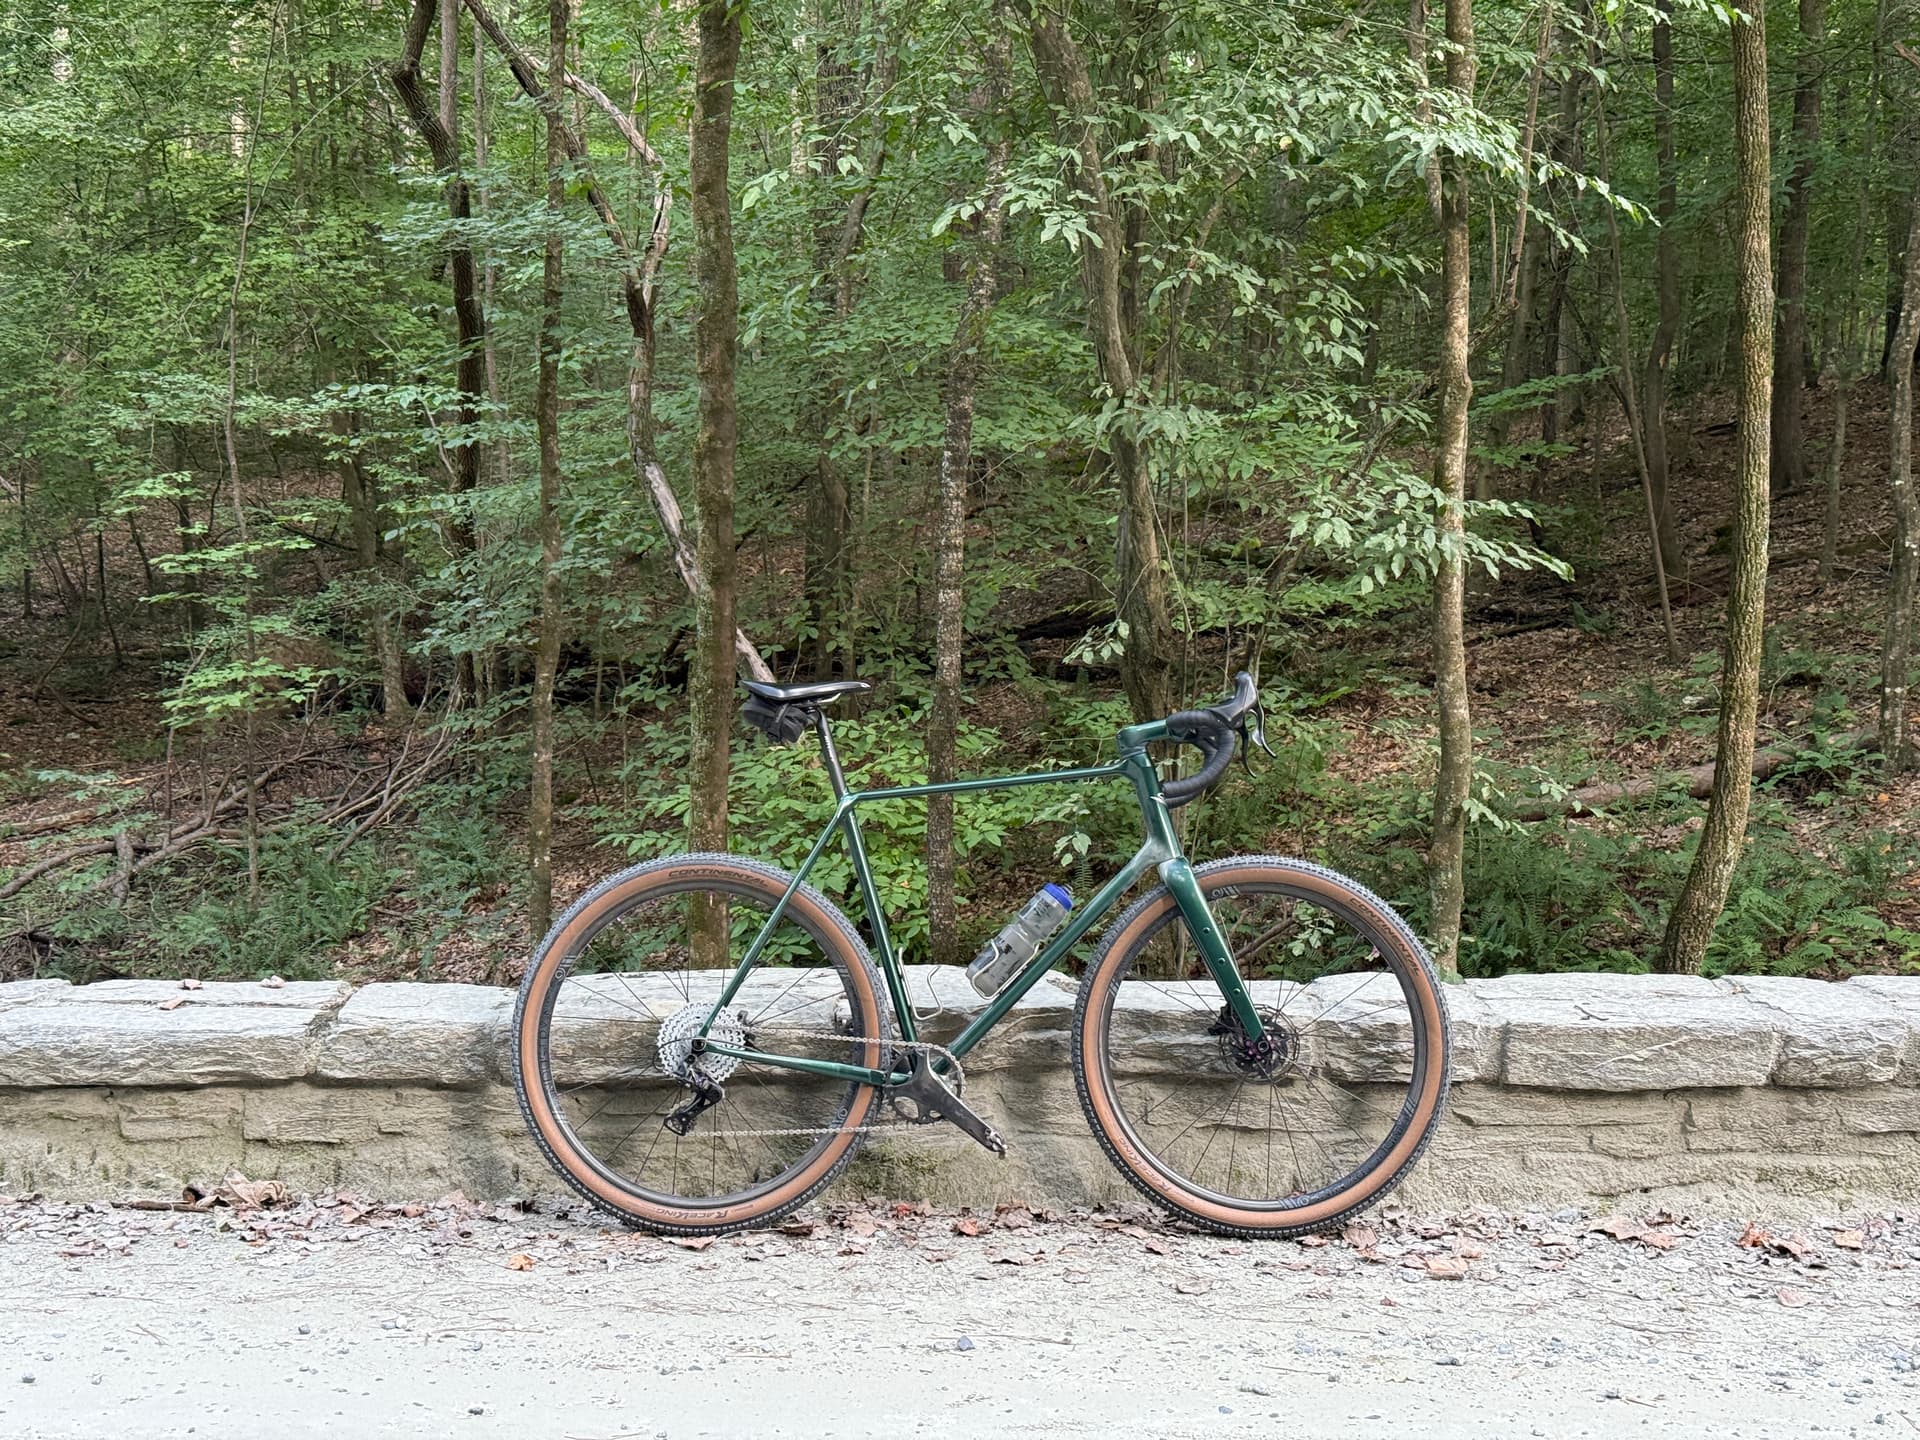
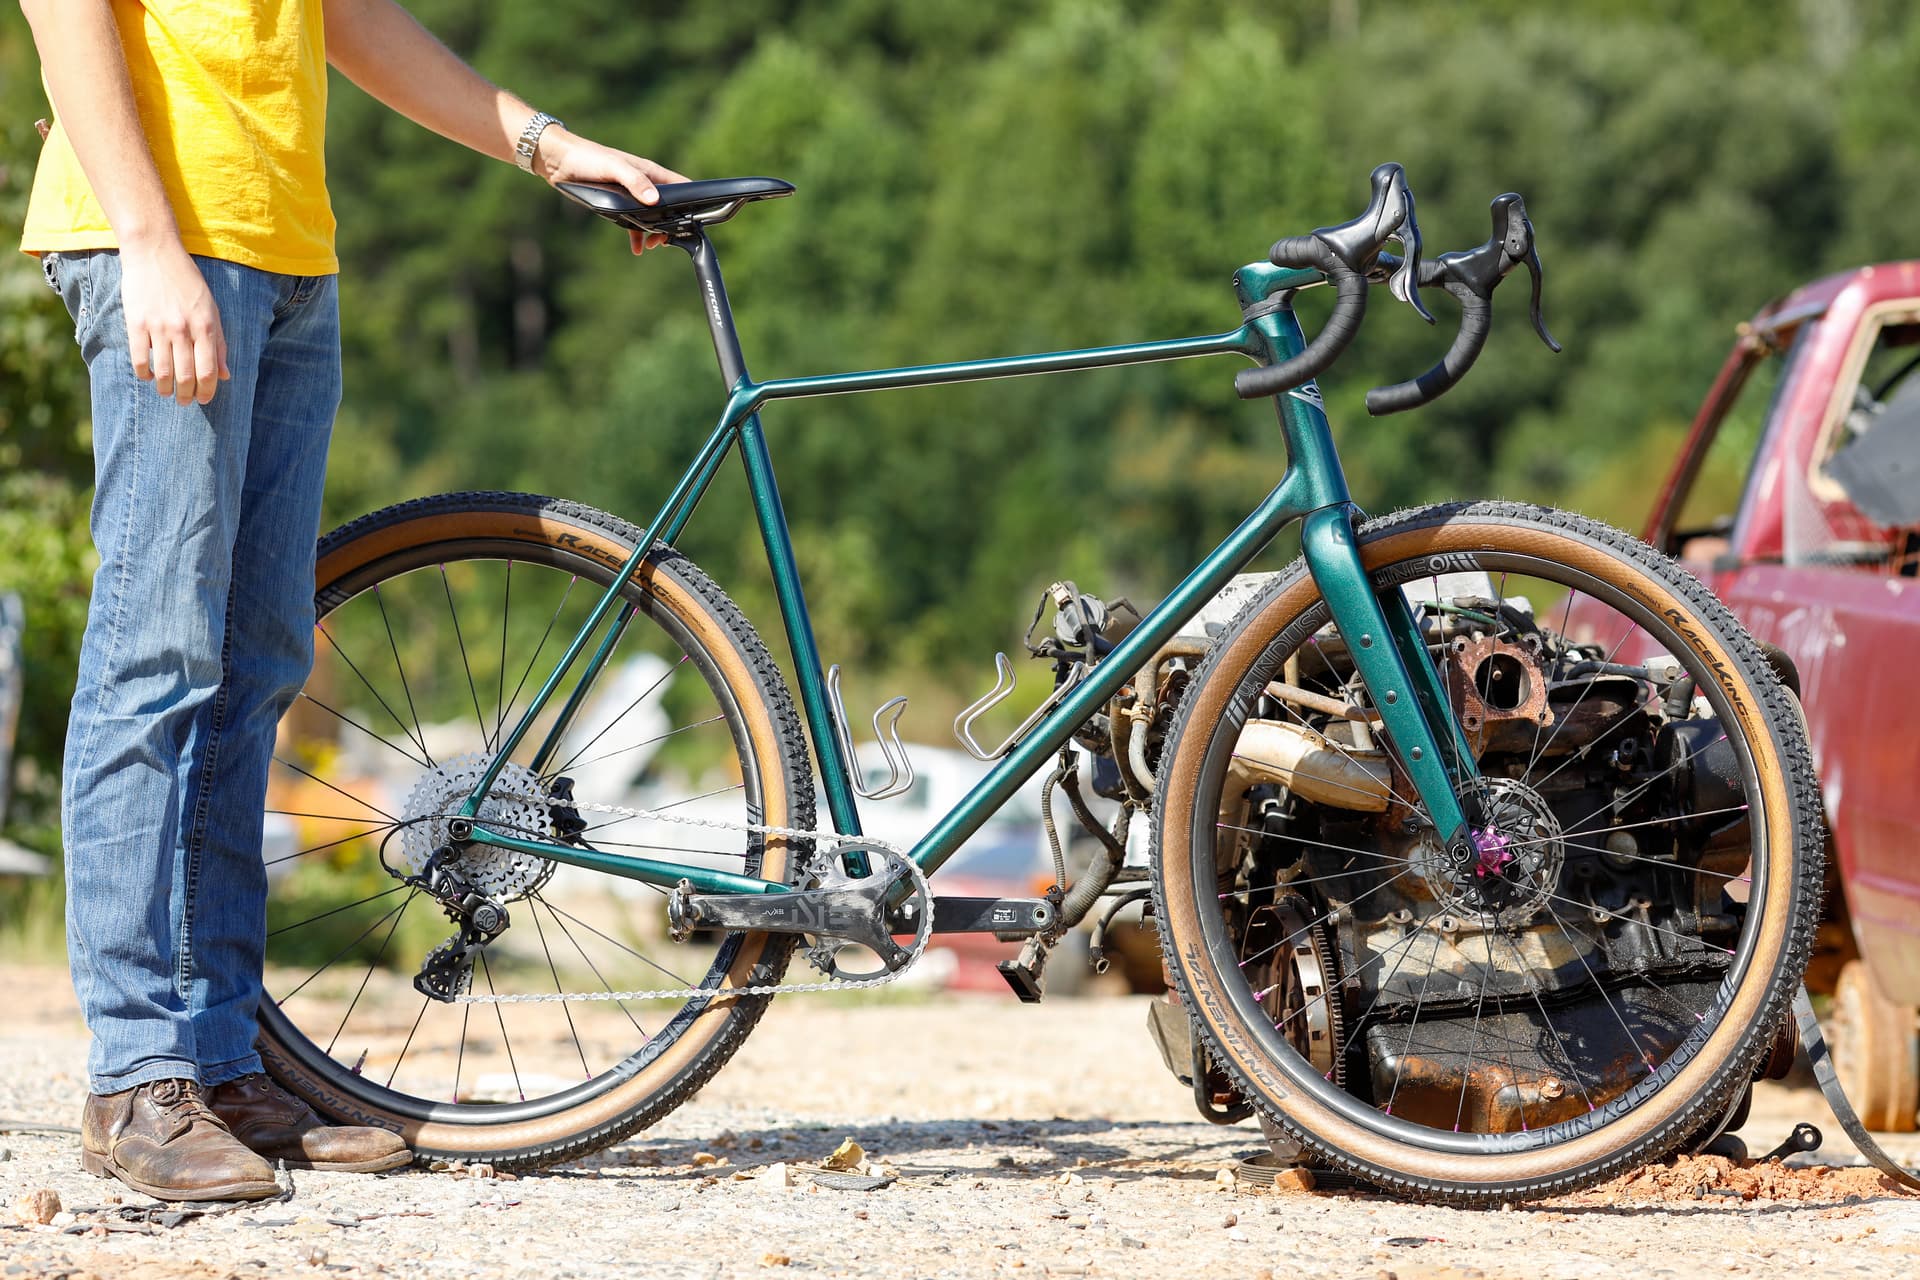
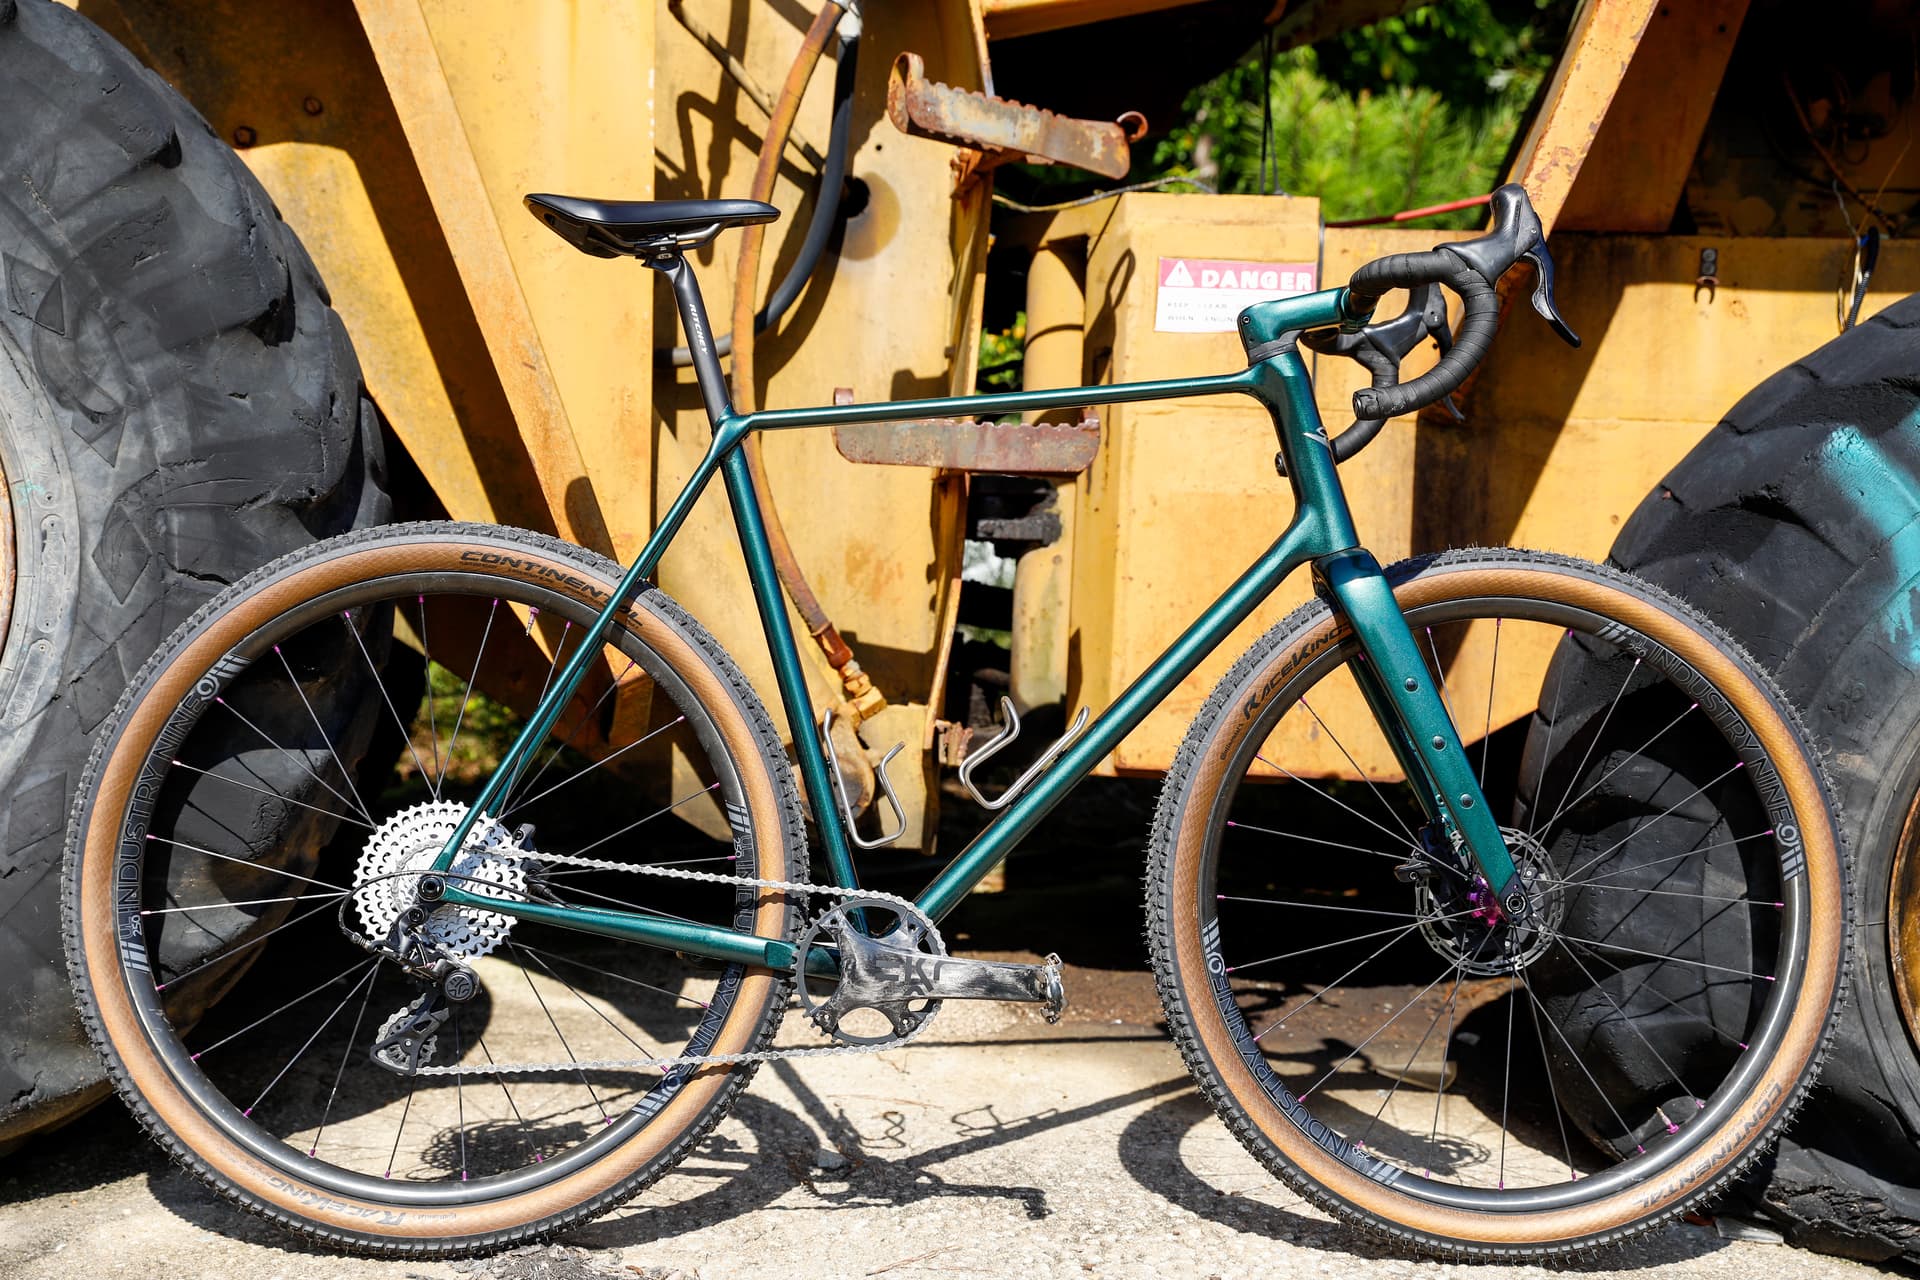
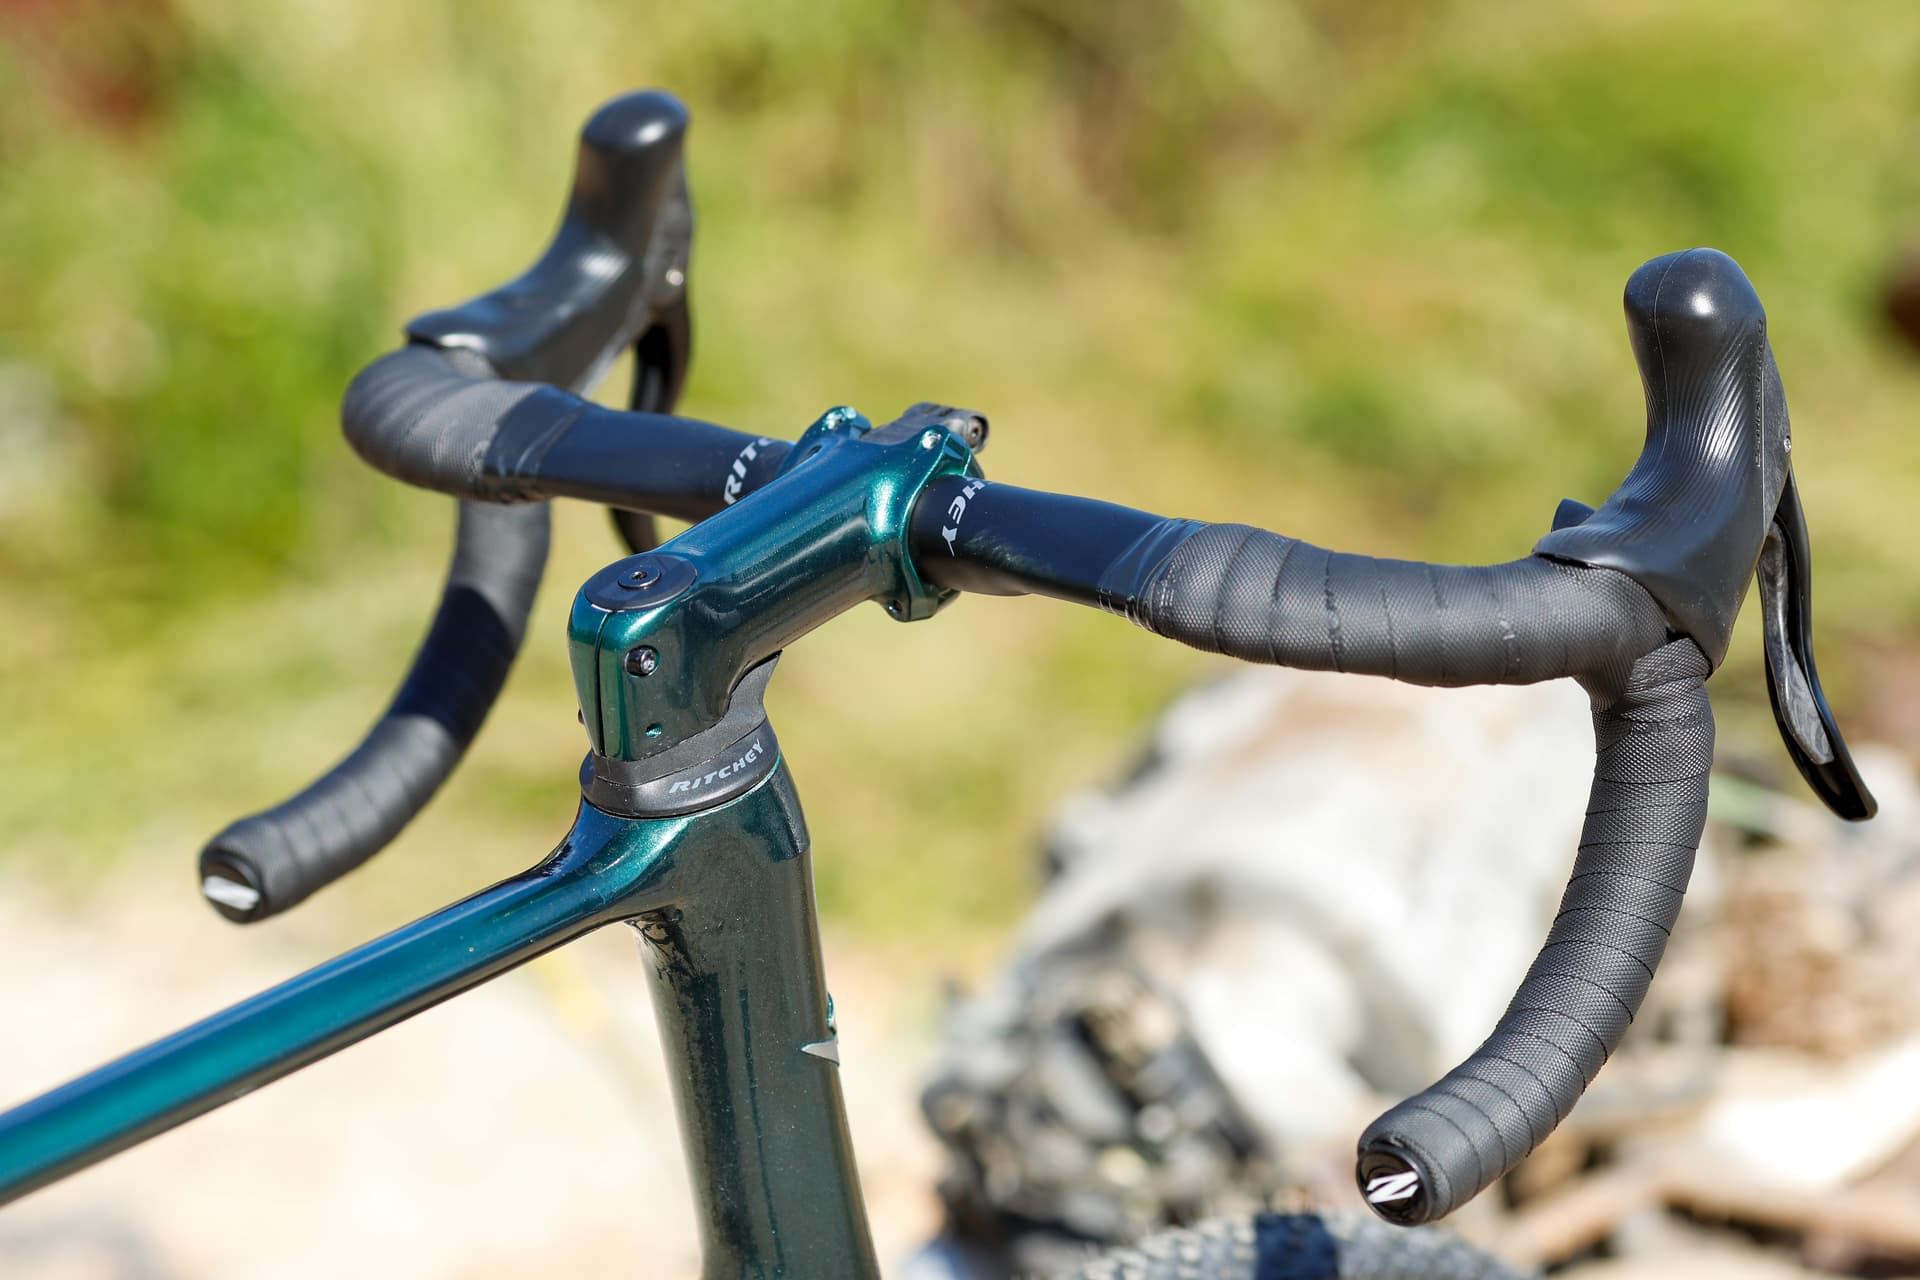
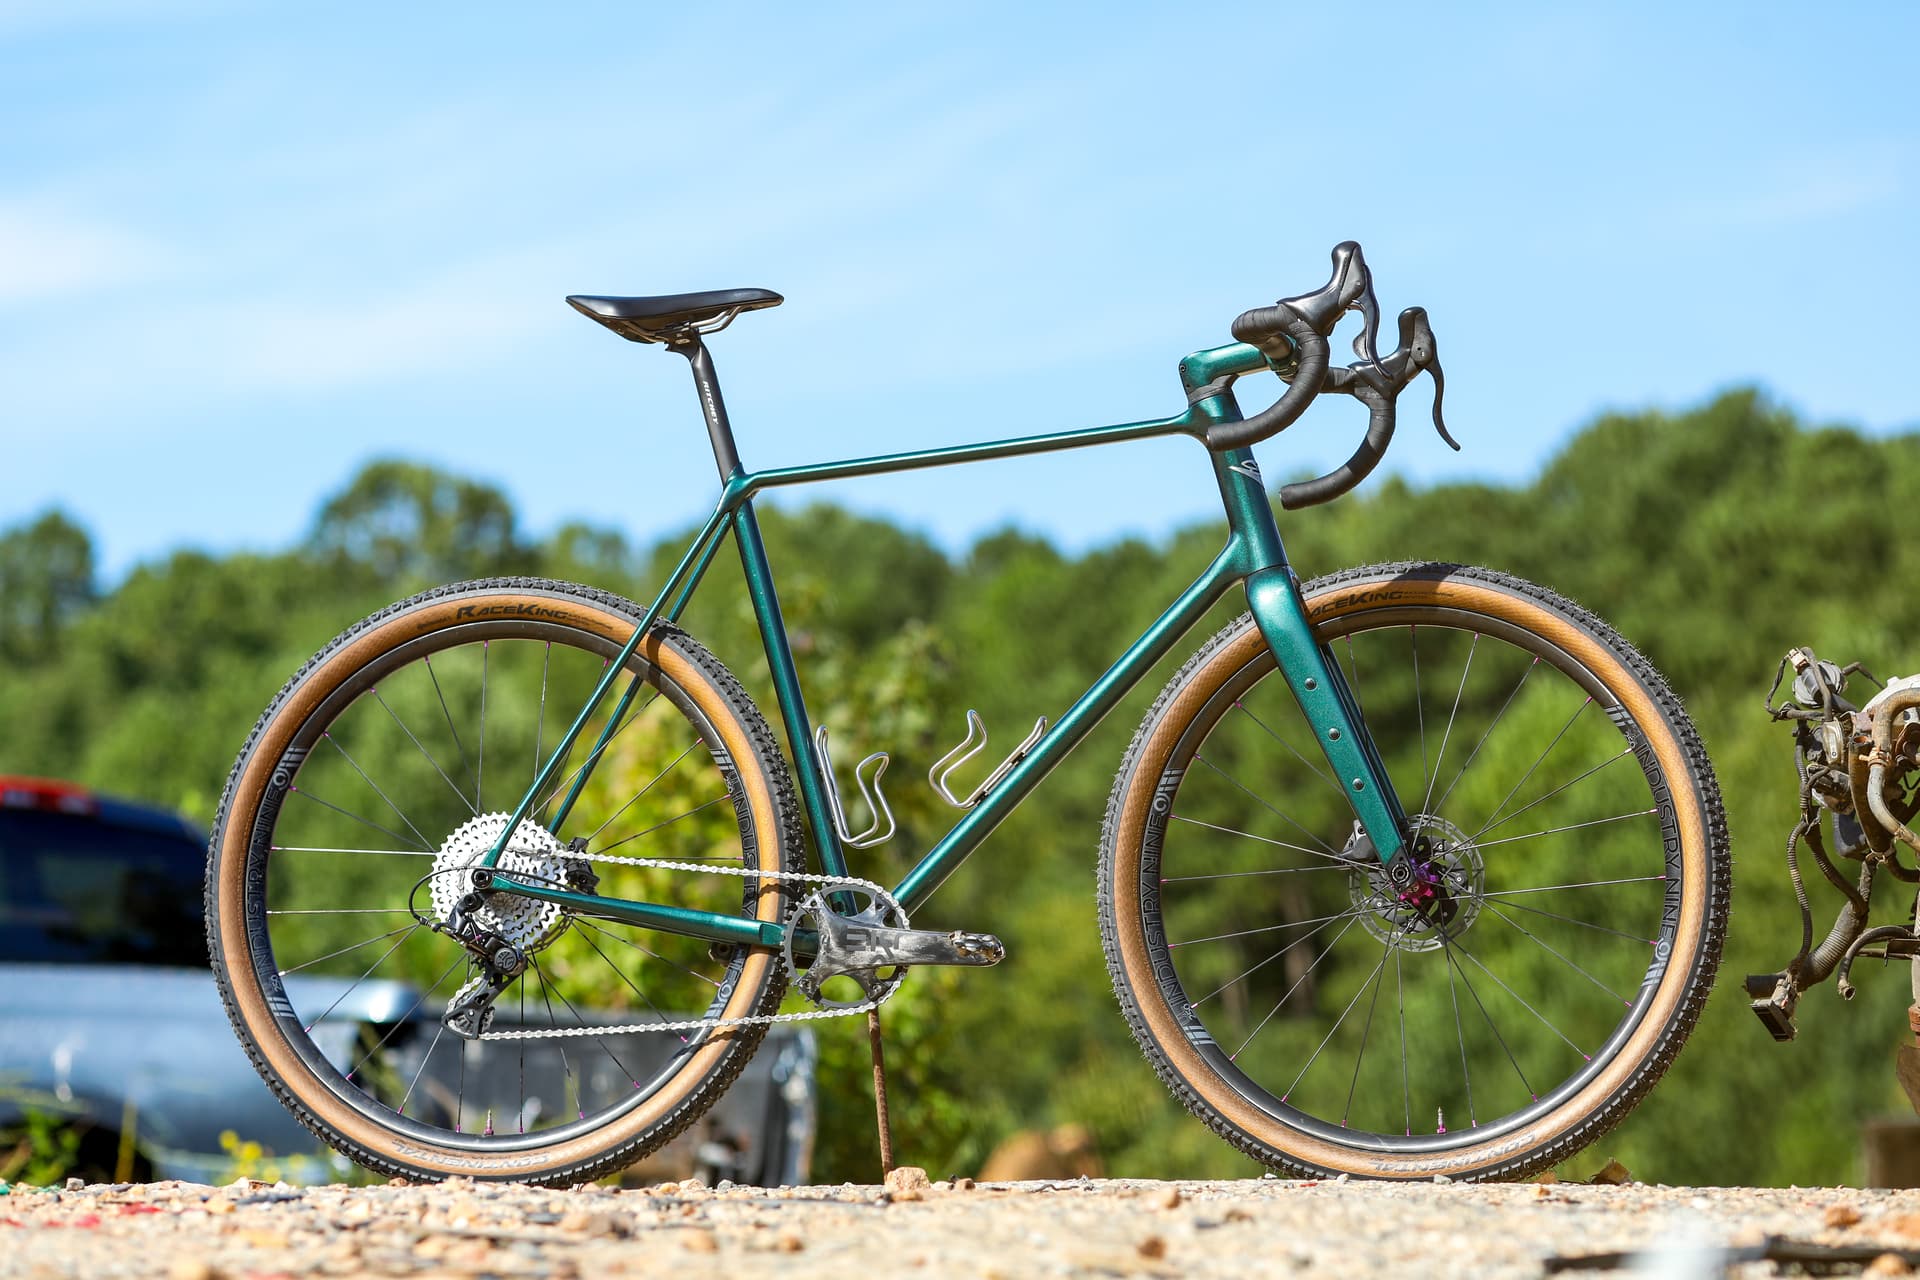
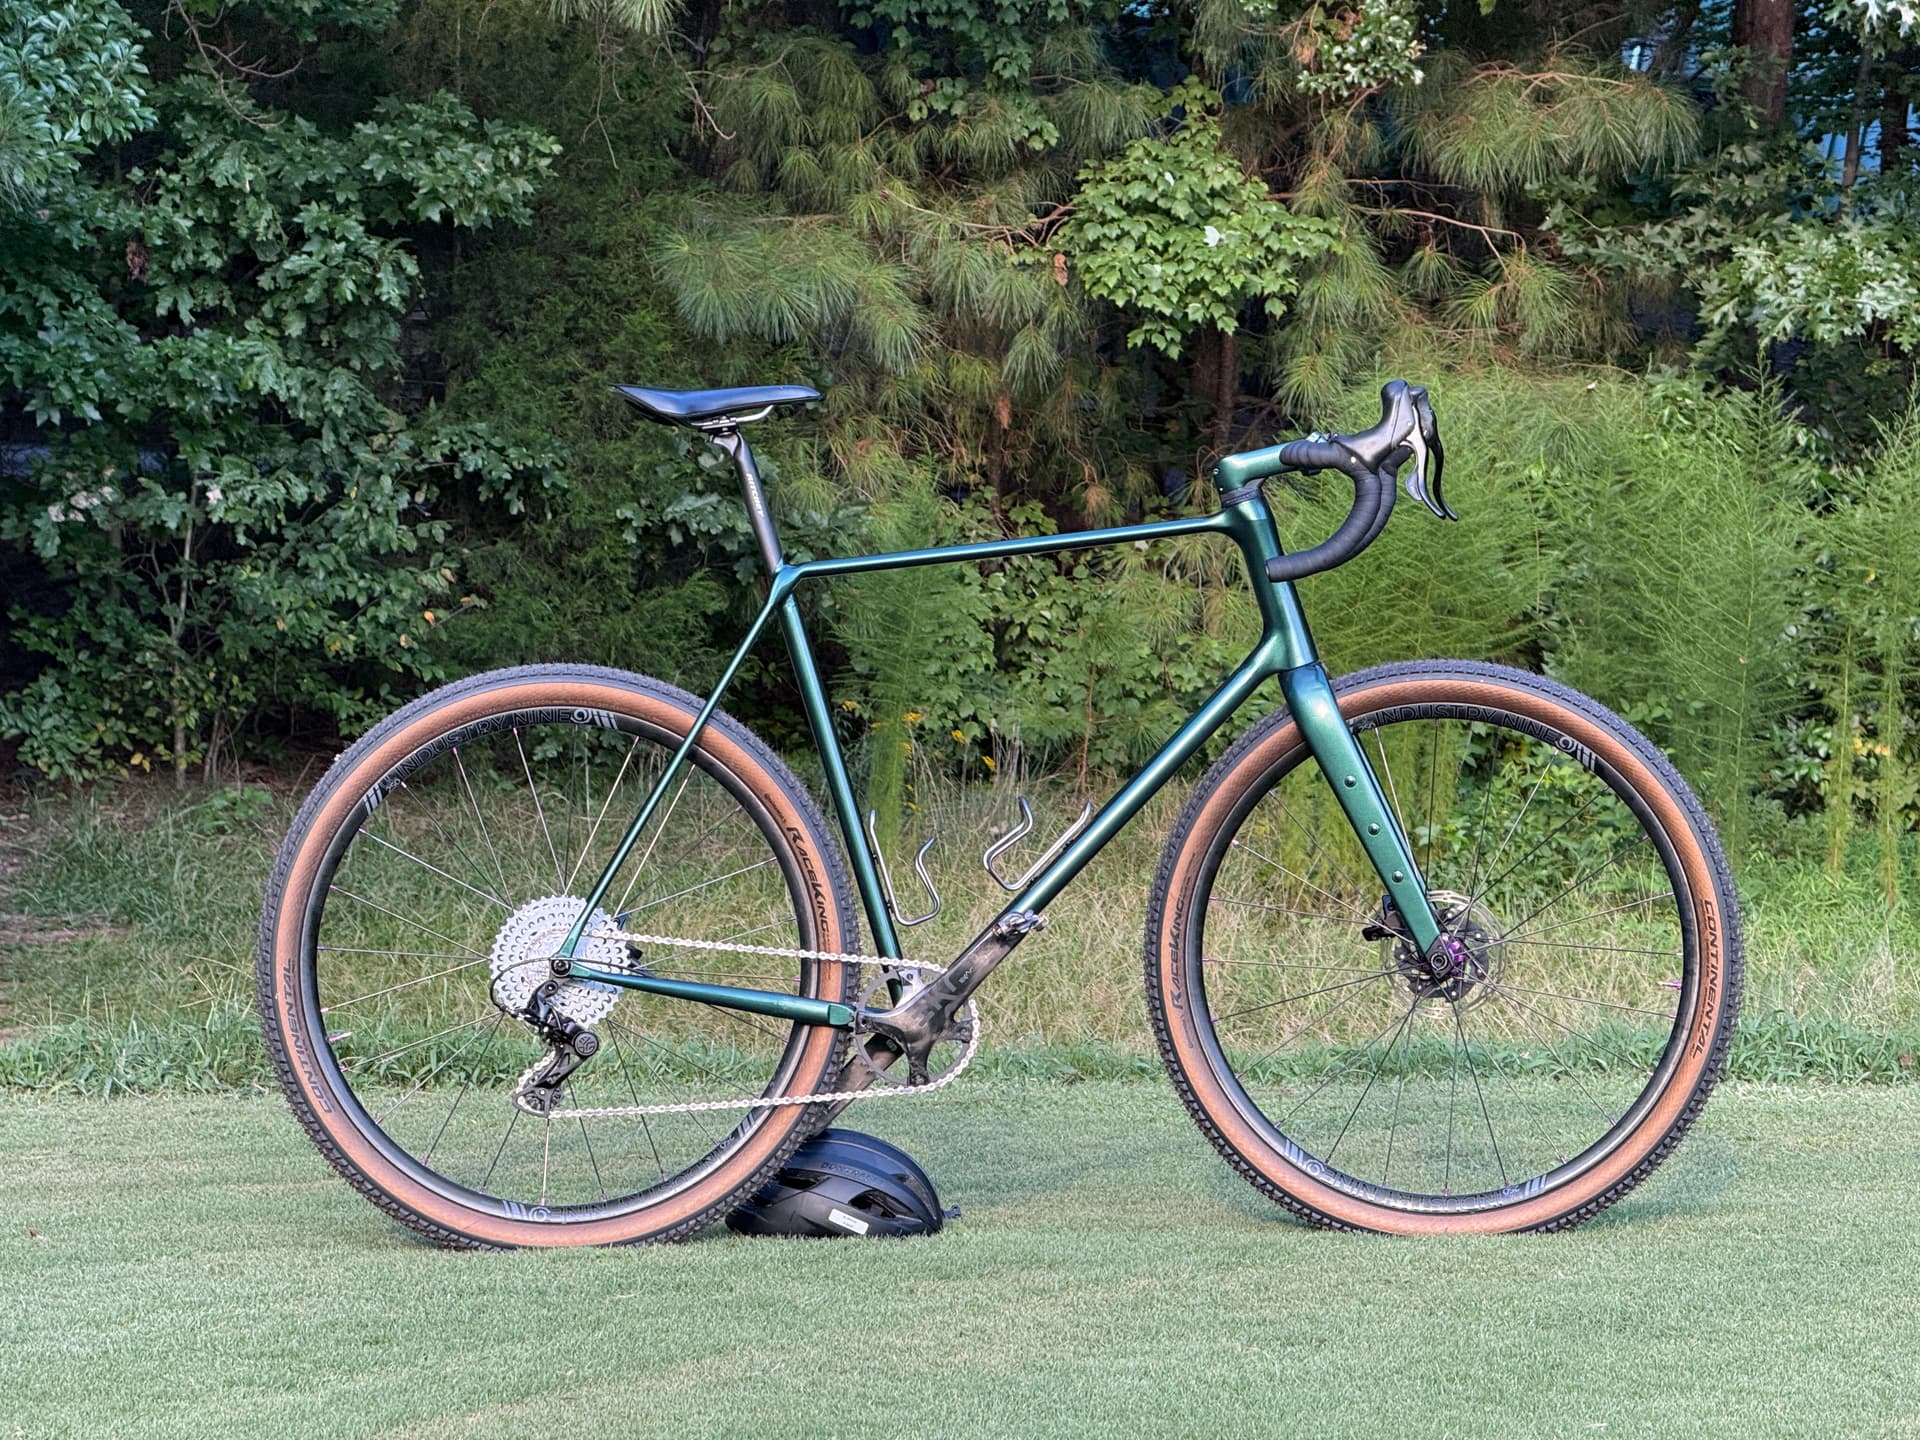
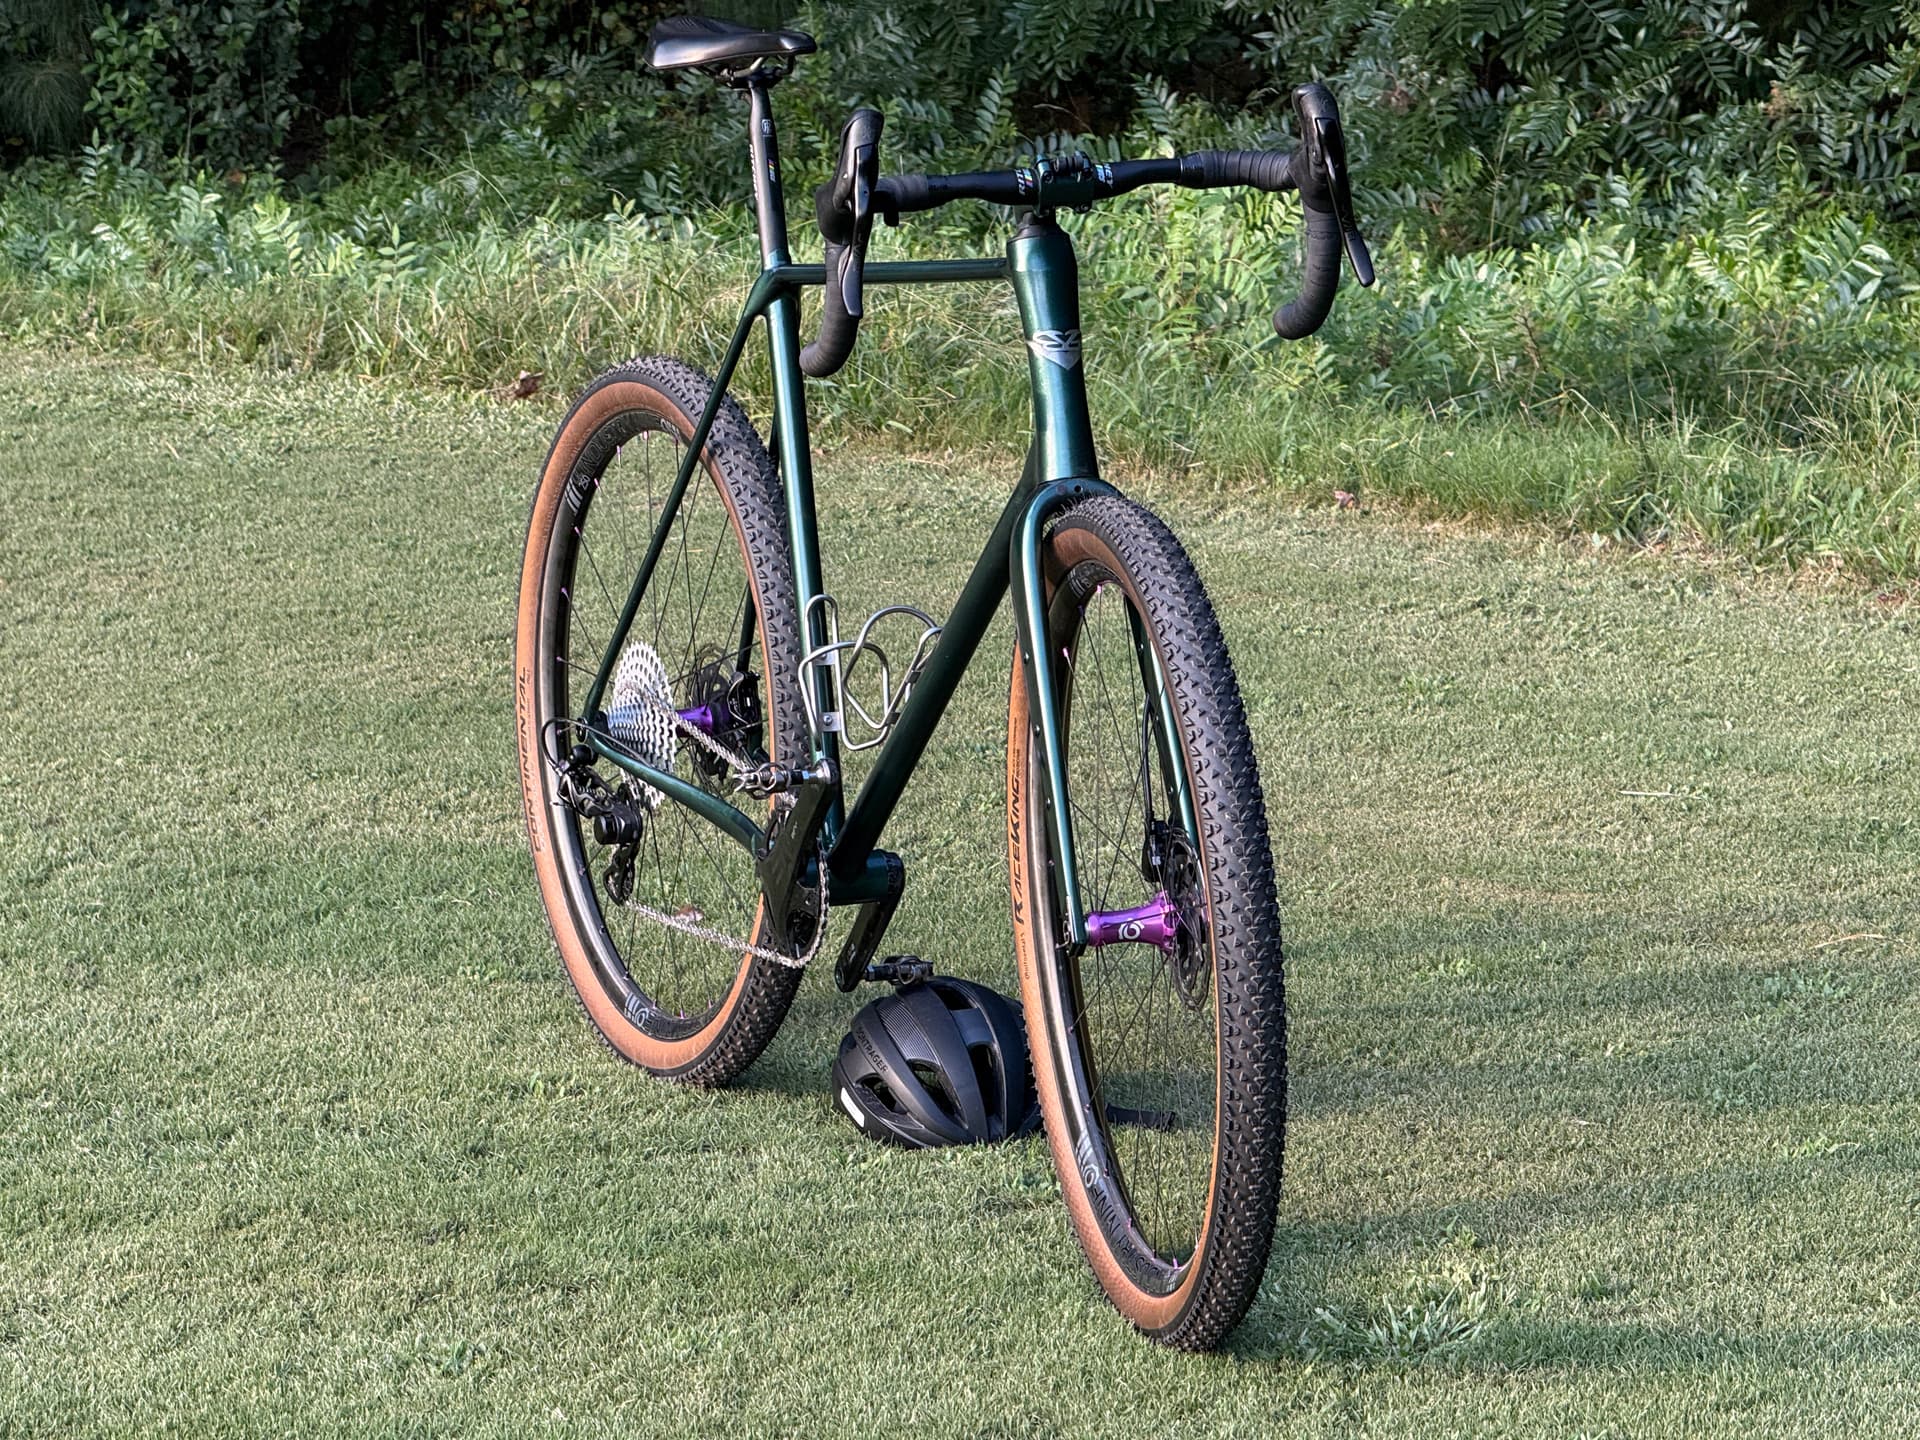
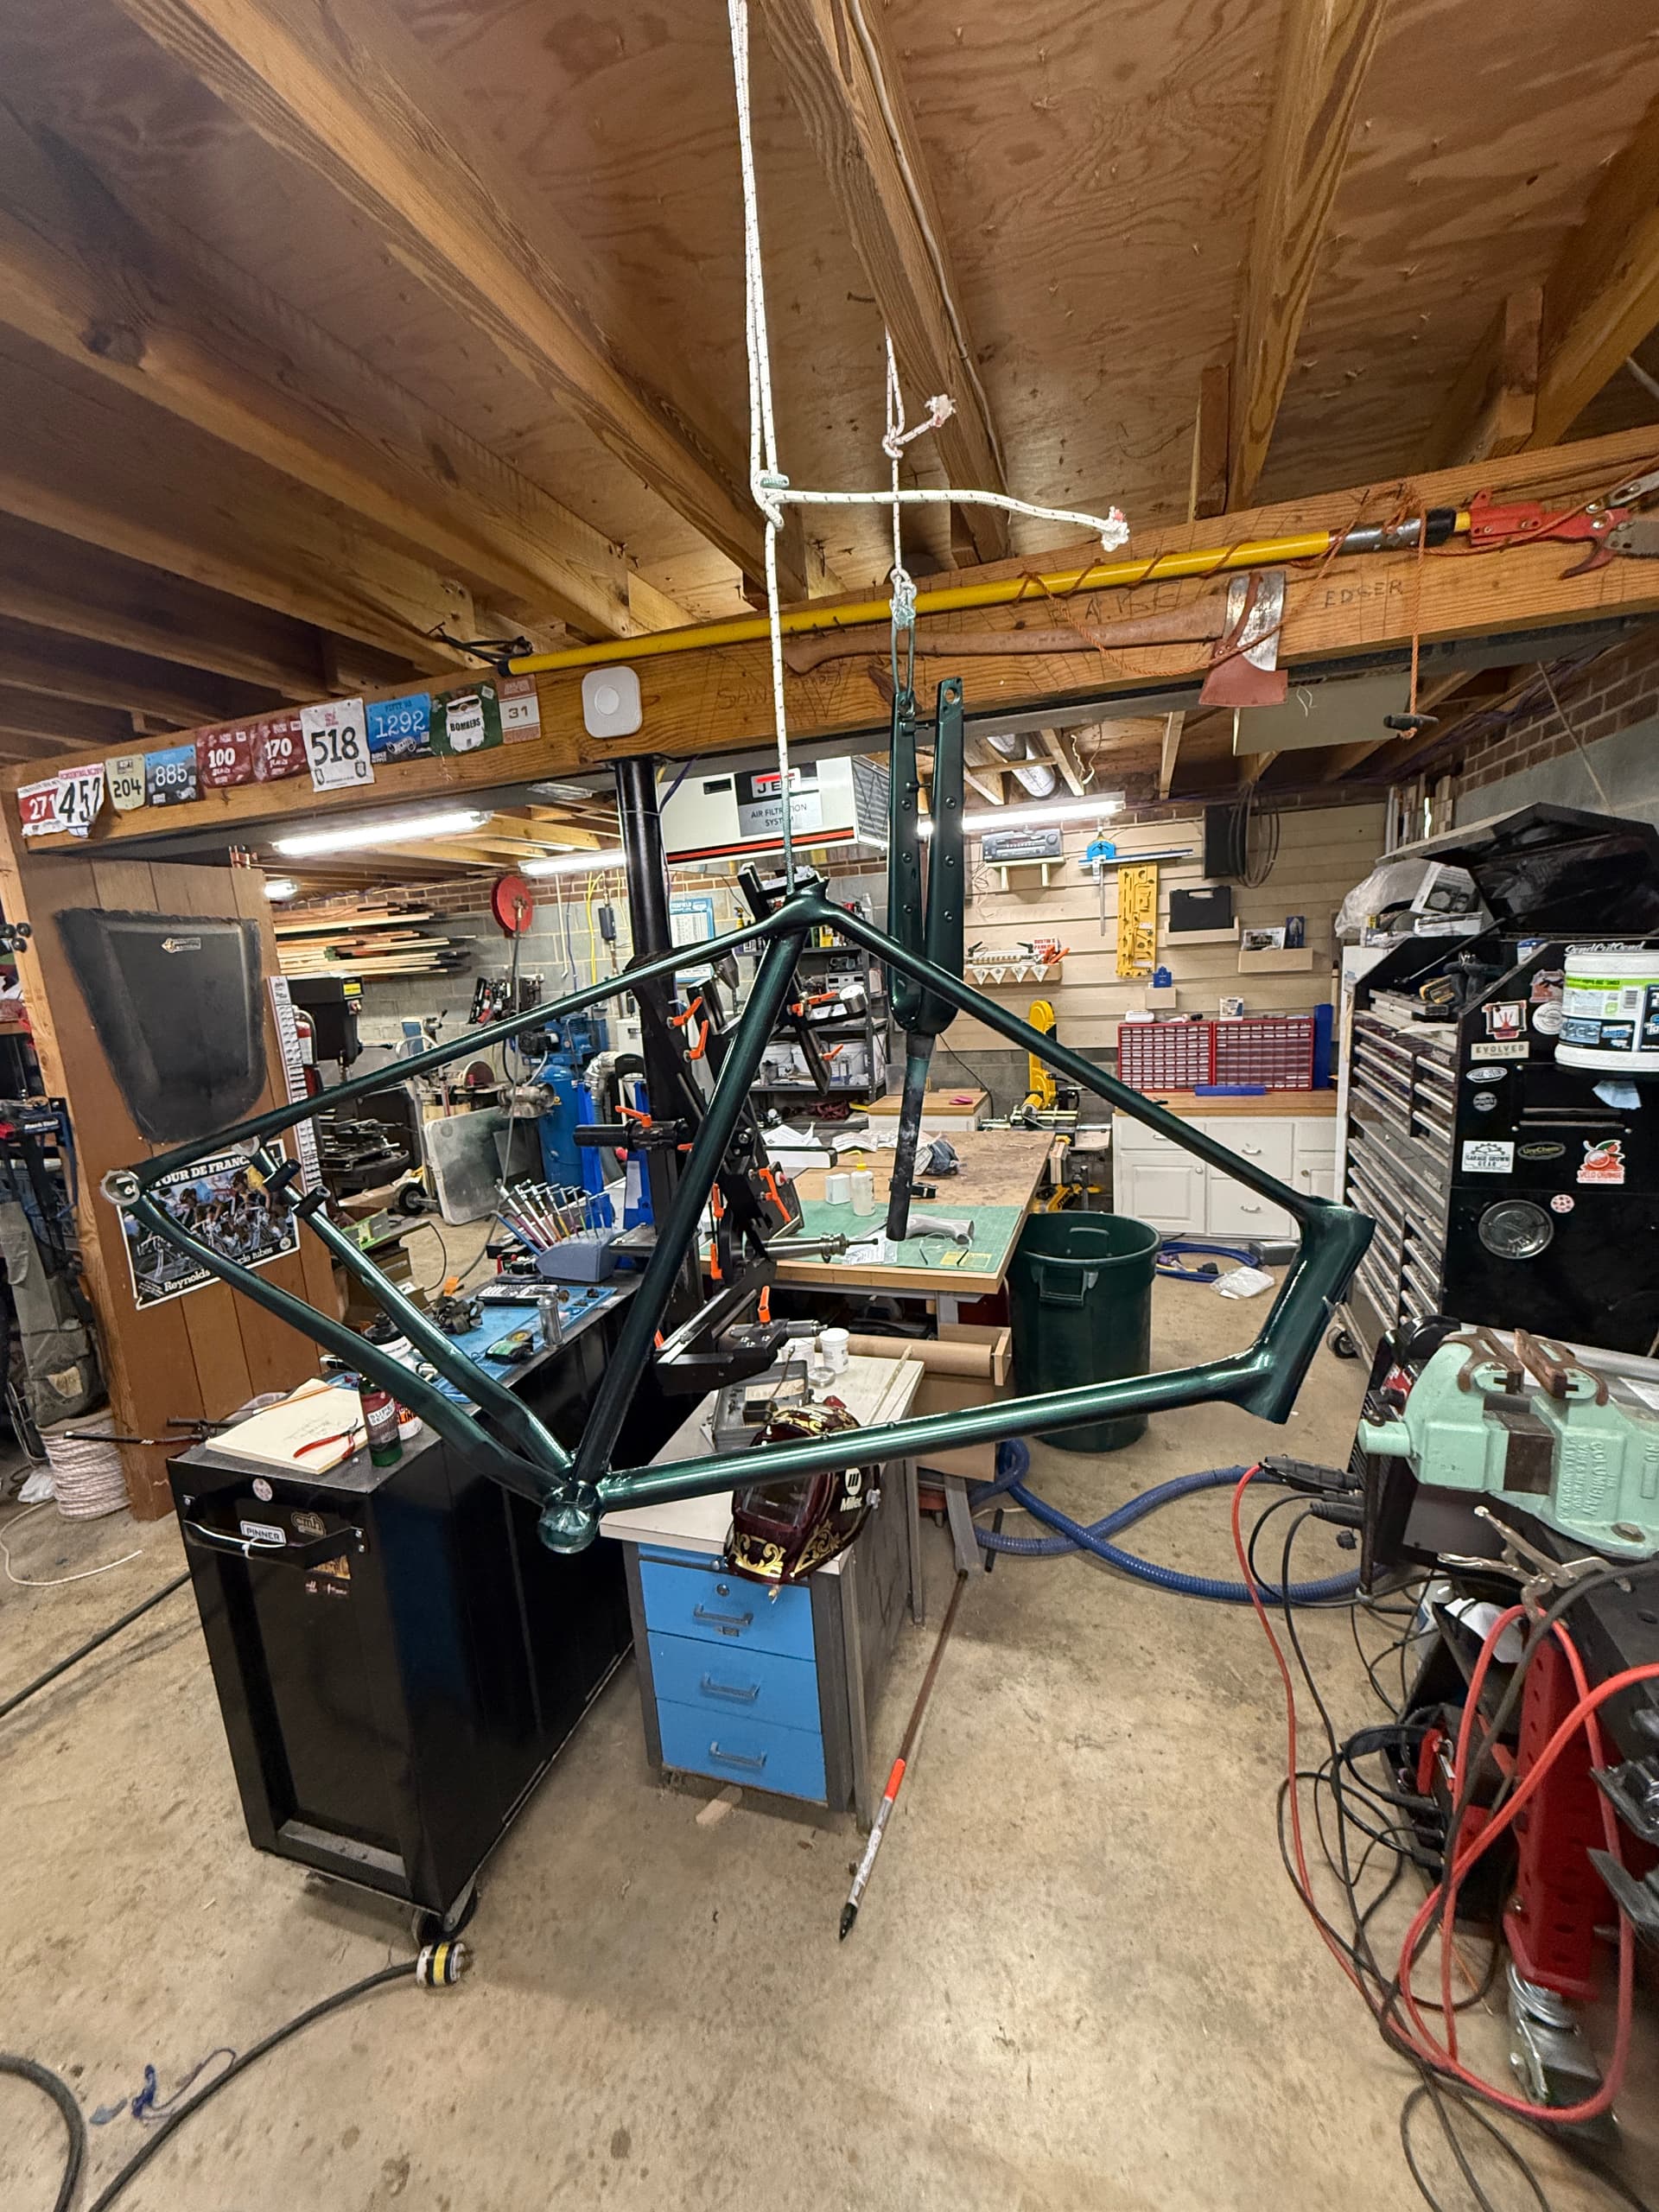
Hi all- long time lurker who’s slowly been working through my first full bike build. Wanted to attack a modern gravel race bike that could clear some big rubber (2.25”) and also play with a few modern components i’ve never touched (internally routed cables, Ekar groupset, etc). Finished product:

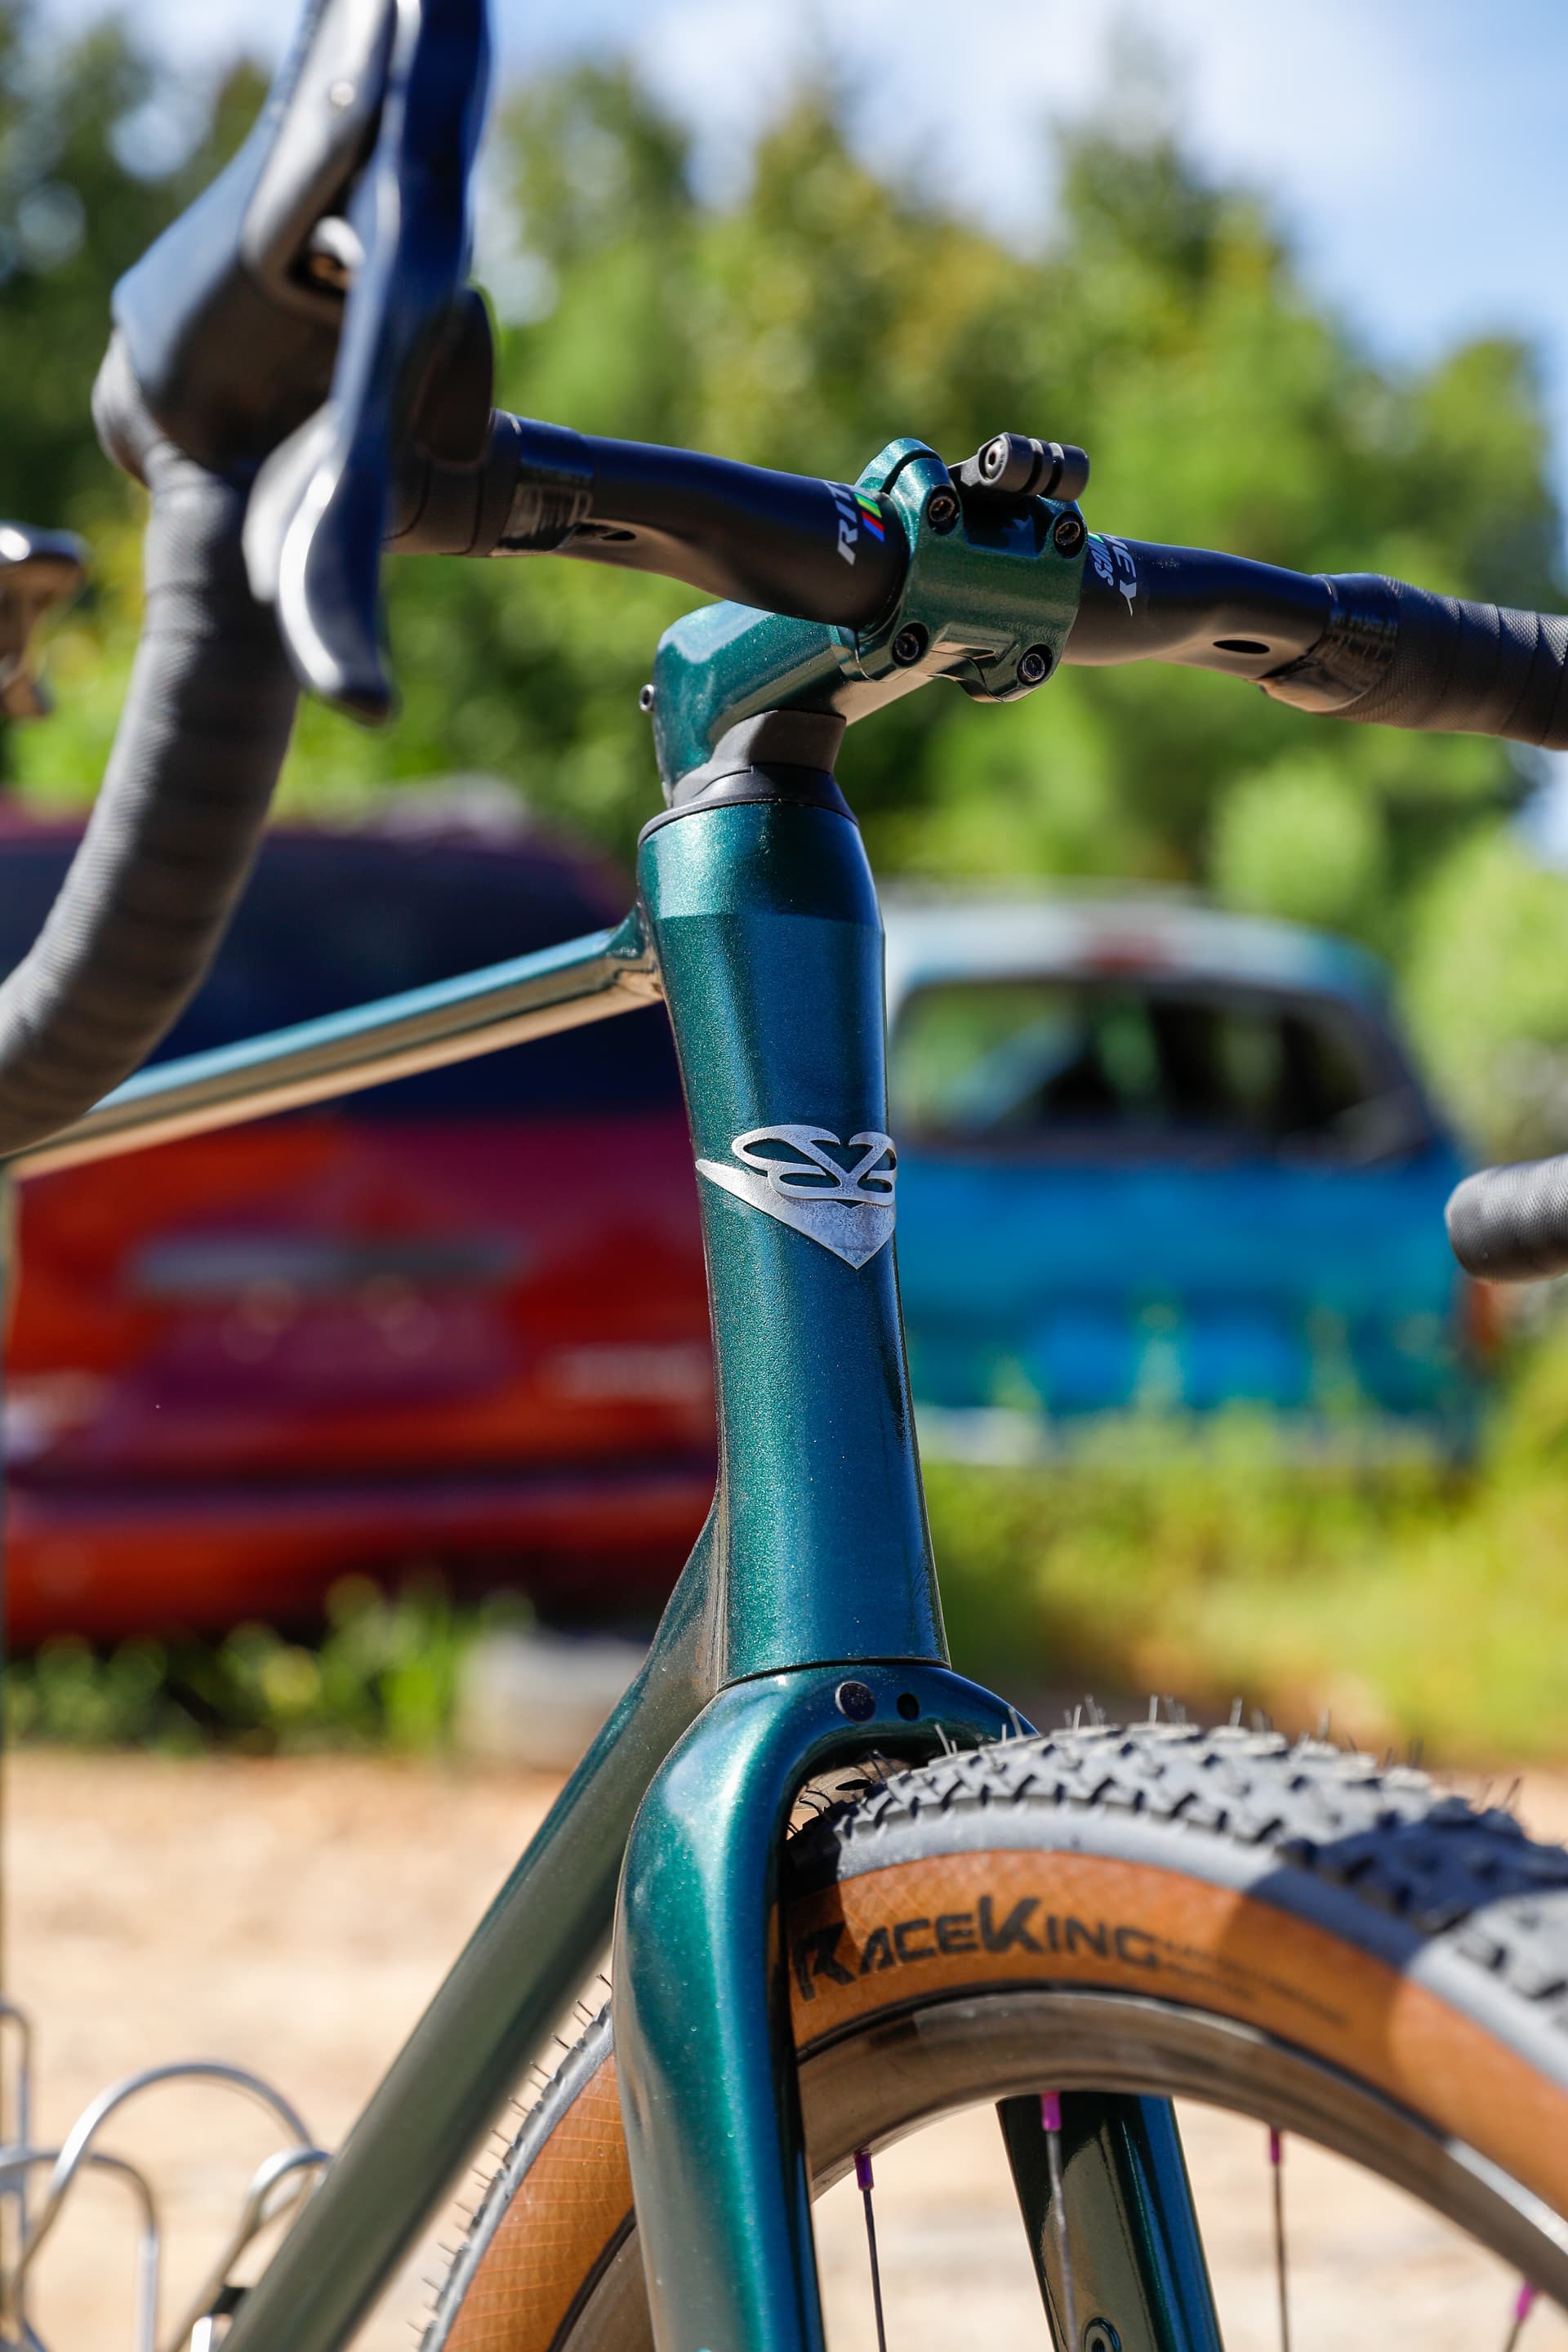
The CAD work took the bulk of the time on this thing- as expected, sculpting the chainstays to get the right tire clearance, chainring clearance, and routing for mechanical shifting was a bit of a bear.One of the nice parts of 3D printing is the ability to put huge fillets on all the “tube” joints which should significantly help mitigate the relative weaknesses of the material/construction. My CAD background is primarily in designing mechanical bits and bobs that will never have an aesthetic consideration, so it ended up being quite the time sink/challenge to try to design things that not only functioned, but had to be beautiful for beauty’s sake.

Had great success using In3Dtec for the printed parts, and went with heat treat just to hedge my bets that i’d built it up enough to be successful. They were able to machine the T47 threads into the BB part pre-heat treat, requiring I only face and chase that area when I got the parts, which was a huge help. The surface finish on the parts was great- after primer/sealer, the parts blend into the normal tubing really nicely.

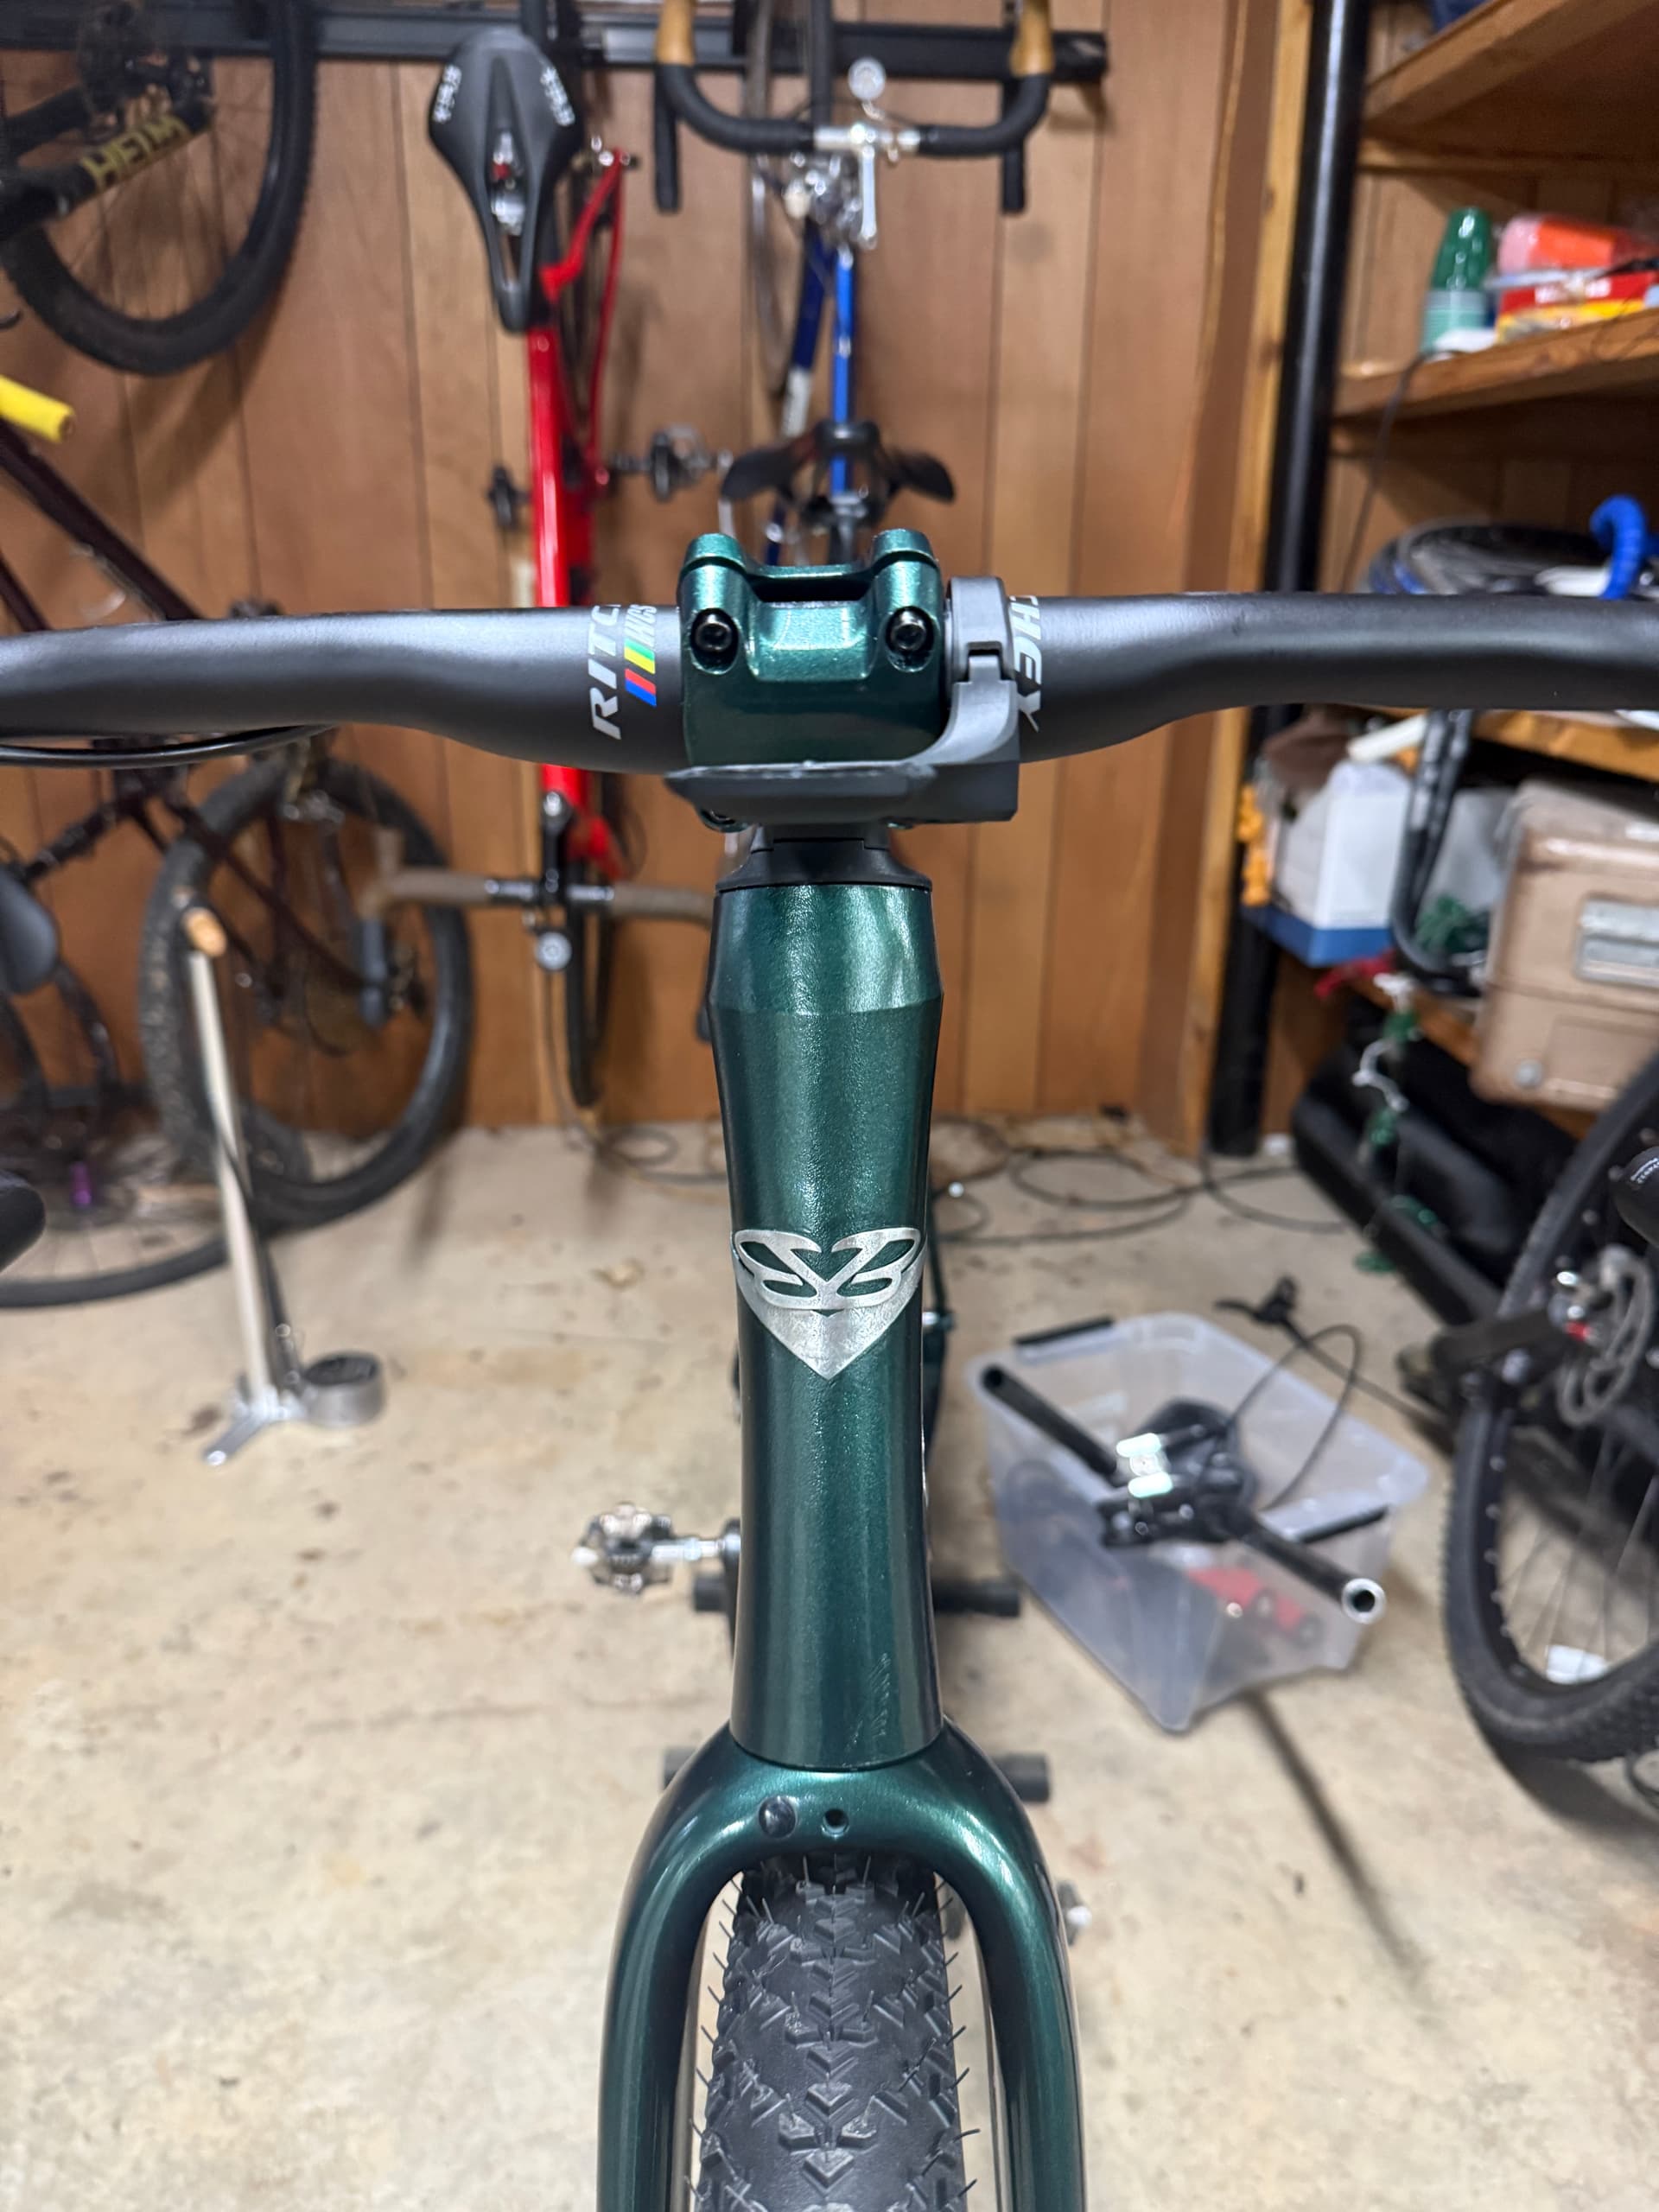
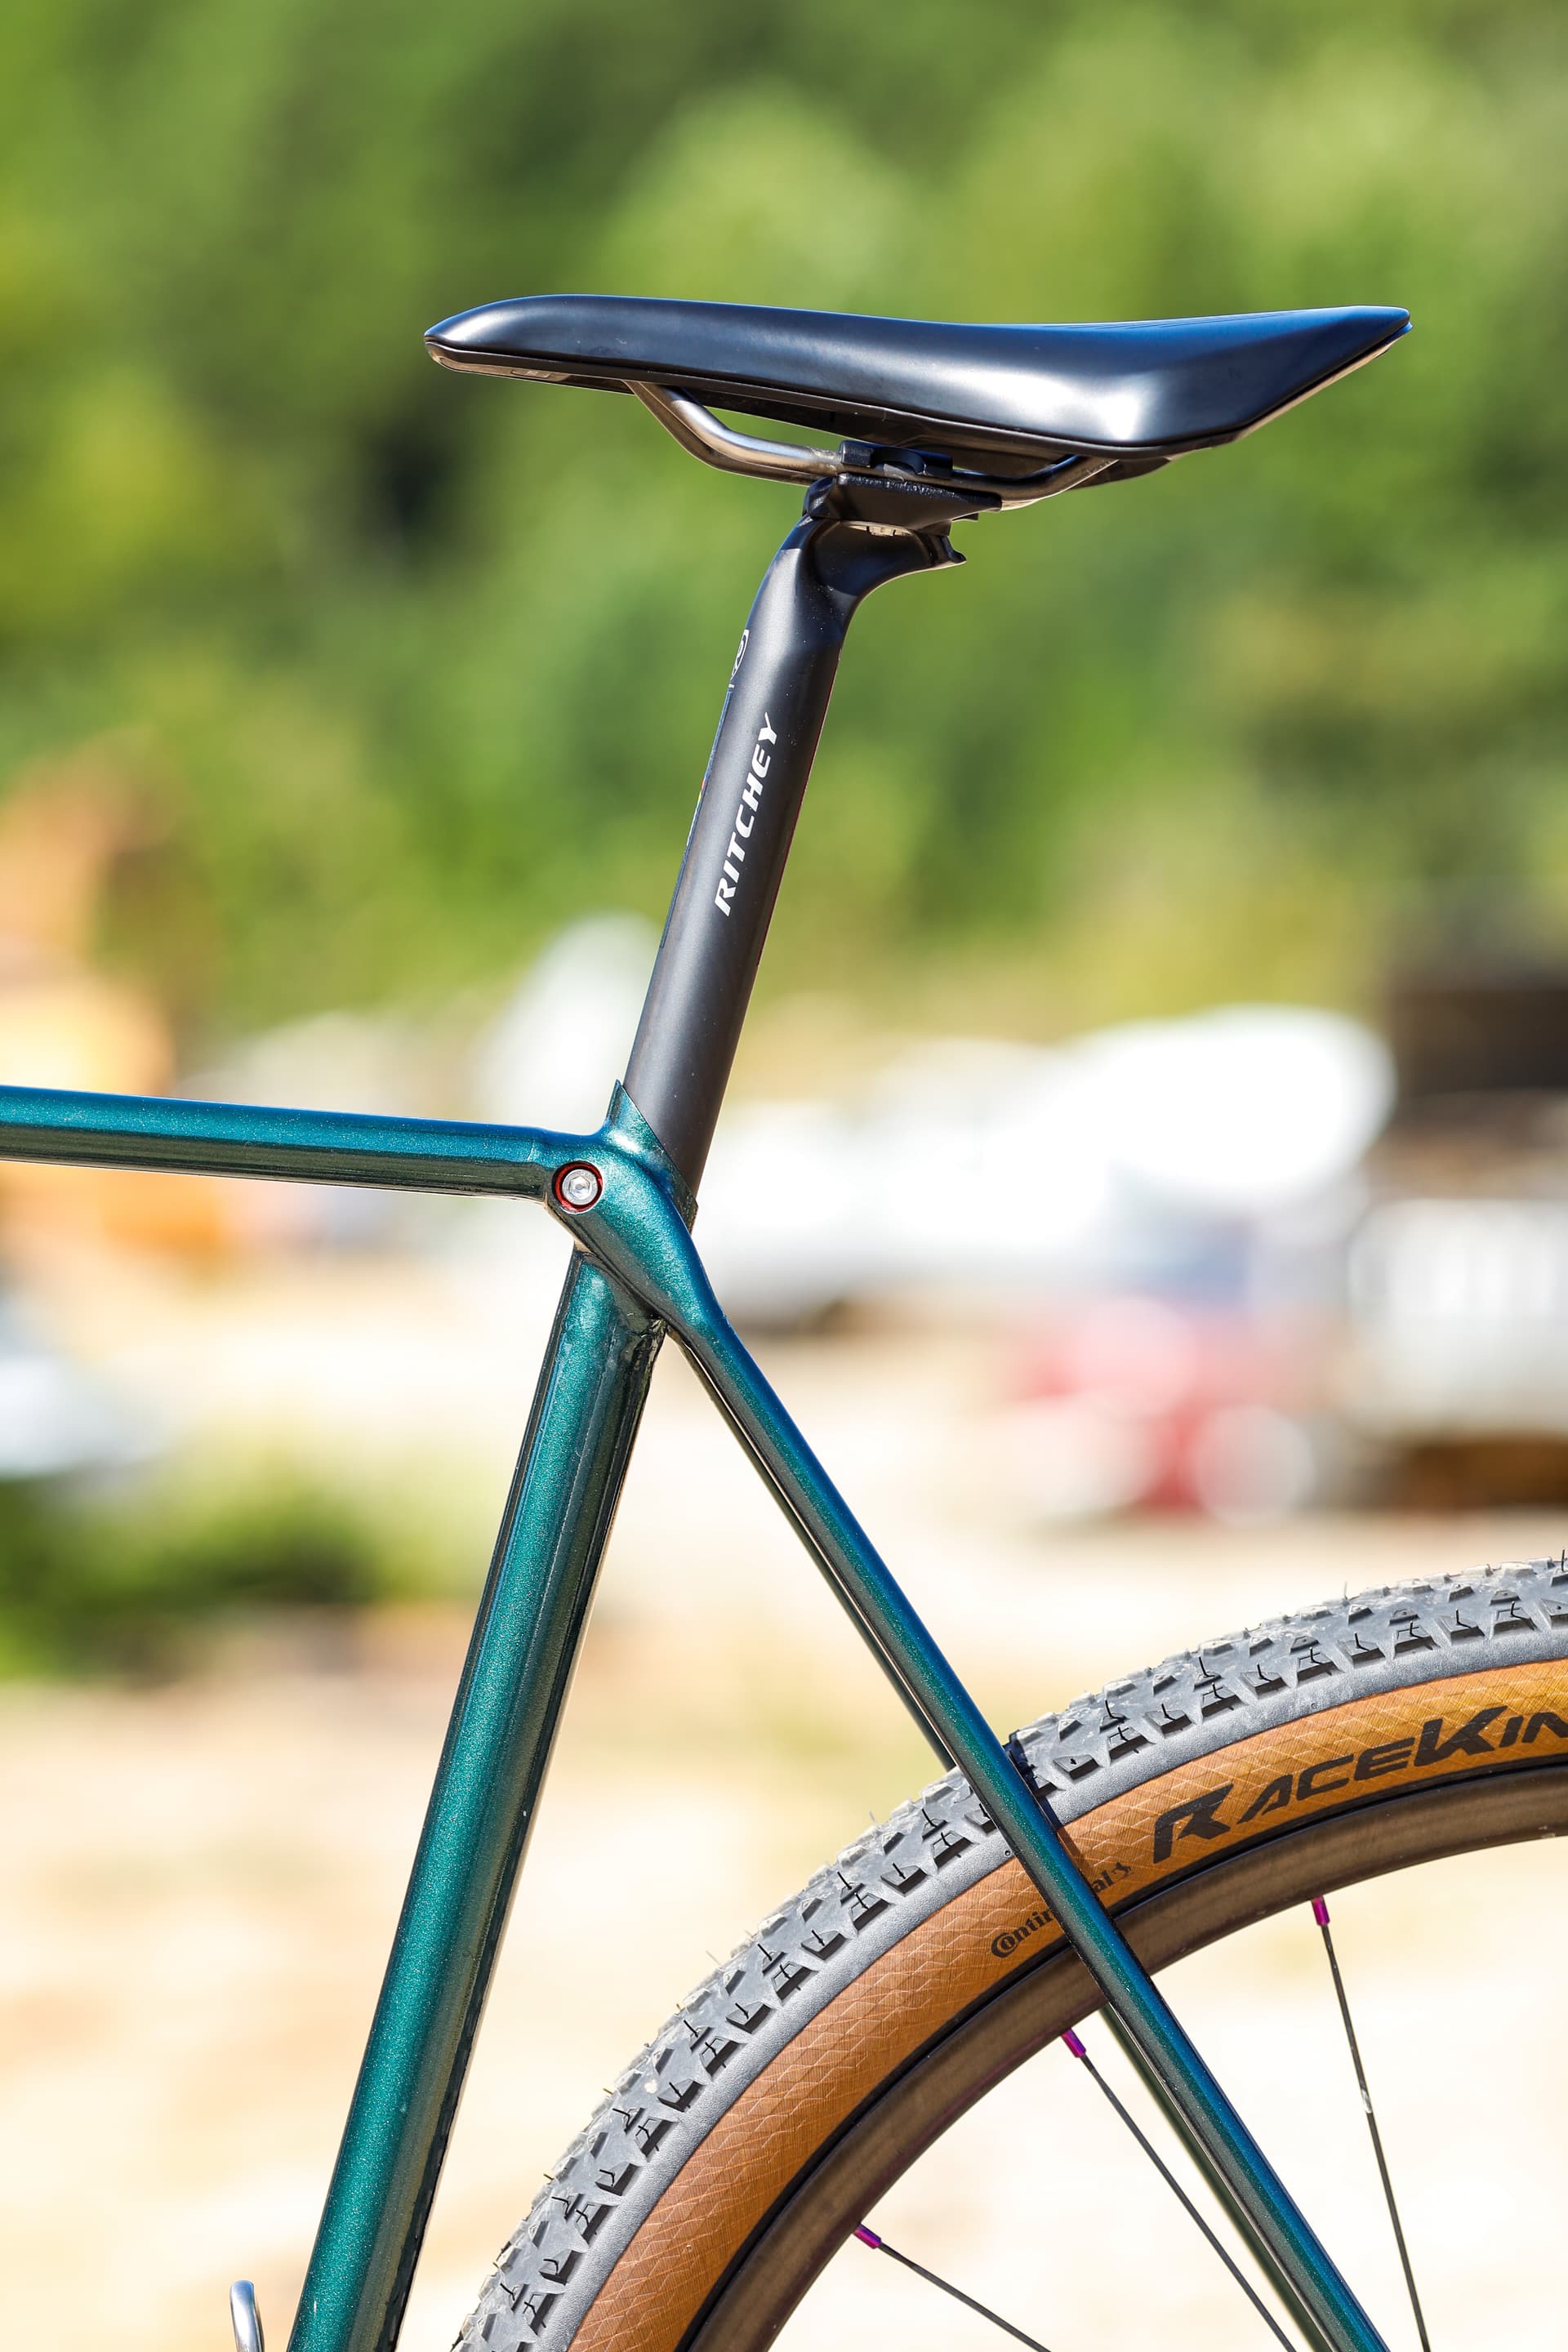
The seatpost wedge system was a design I borrowed from an early '00s Trek stem (which i asked about here!). Another benefit of 3D printing are the blind features required to pull it off which would never work otherwise! Seems to work great, but time will tell how it holds up. I’m pretty happy with how beefy it seems relative to some of the carbon frame solutions i’ve played with.

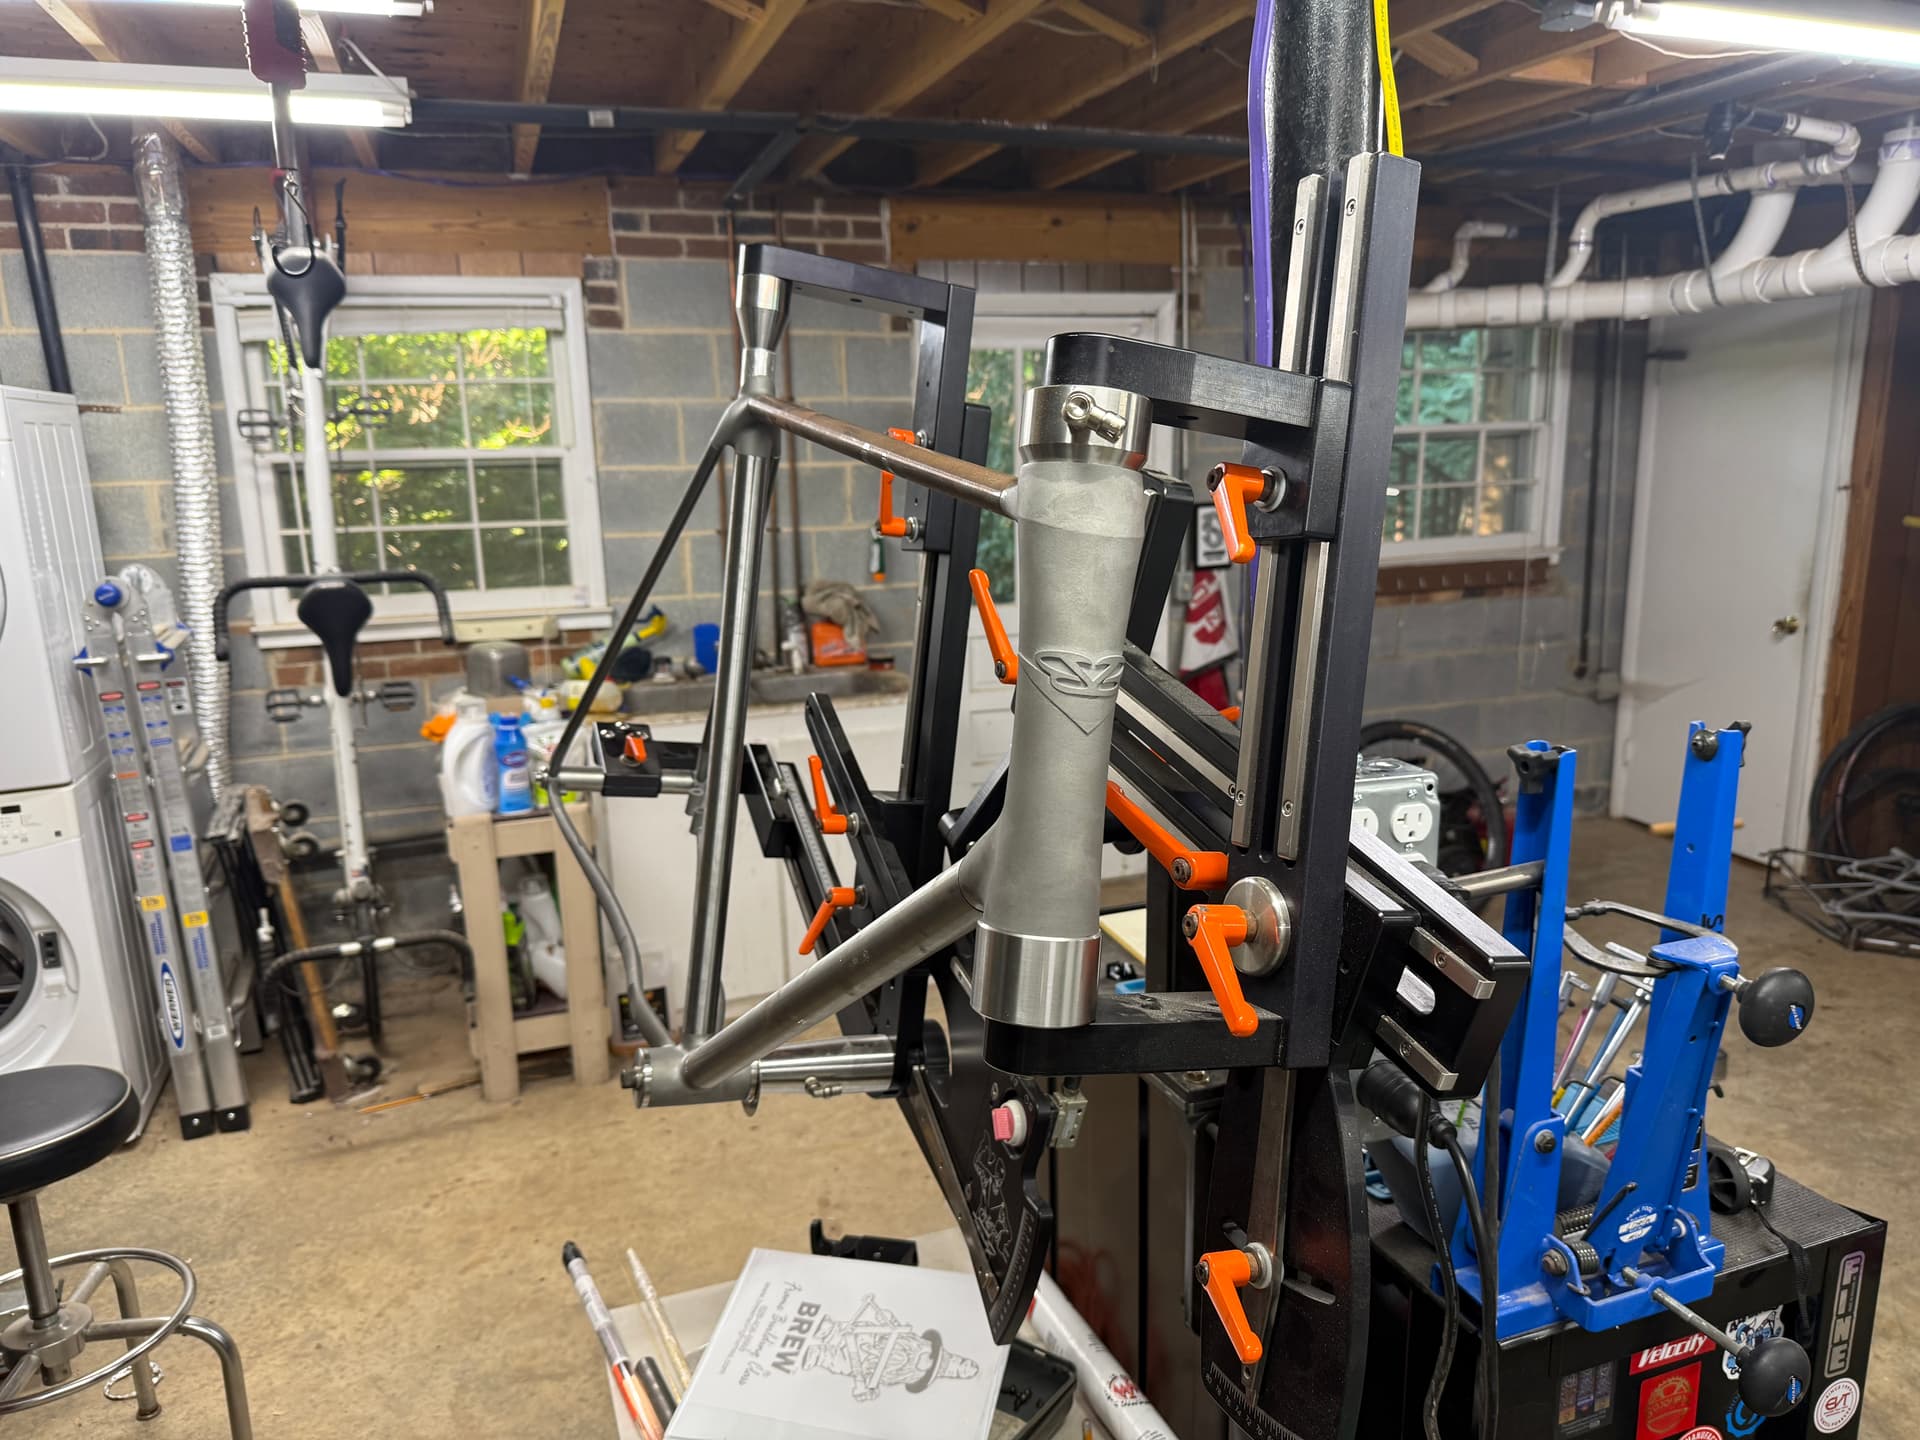
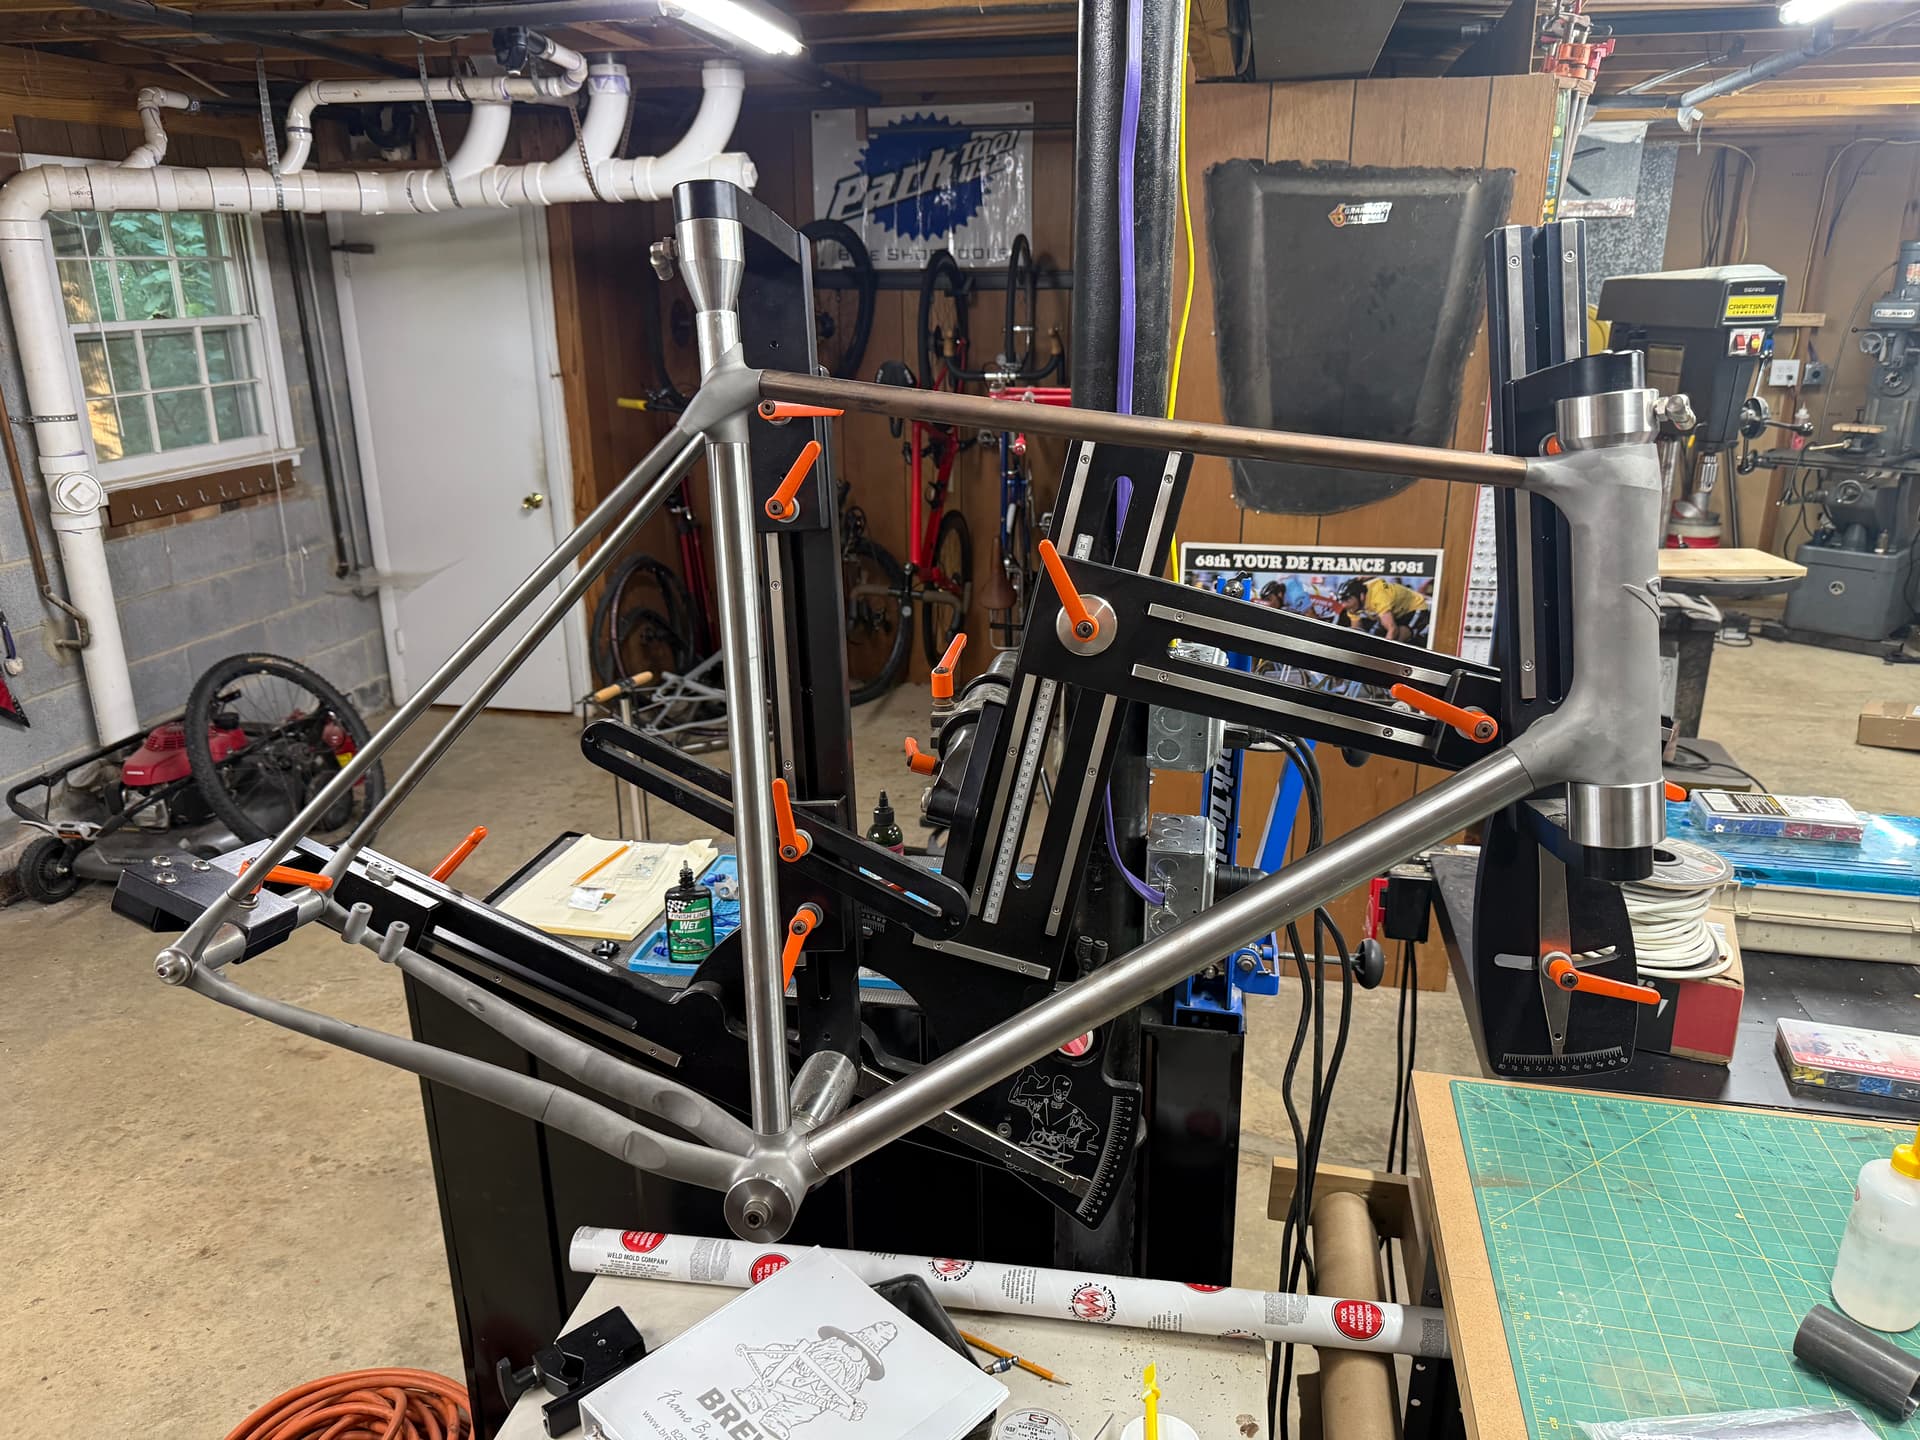
Cutting the tubing was extremely straightforward due to the lack of miters, as was initial fitup and tacking; i was concerned the heat treat would significantly warp the parts, but the only parts with any noticeable deformation was the chainstay halves, which i was able to tweak into place easily. Not the best welder in the world, but I was fairly happy with how it turned out. For a first frame, I tried to give myself a bit of grace that I know it won’t be perfect, but i’ll learn a ton.

Couple of learnings for the group from fitup:

The ovalized toptube has an outer profile that almost perfectly approximates an ellipse, but the inside of the tube has a vastly different profile that shows how it was formed. Since i have “sockets” that the tubes fit into, I had to grind these out on the toptube to get it in place. Easy to fix for next time, but for anyone doing something similar on formed bike tubing, buy the tubes first and verify the inner dimensions.

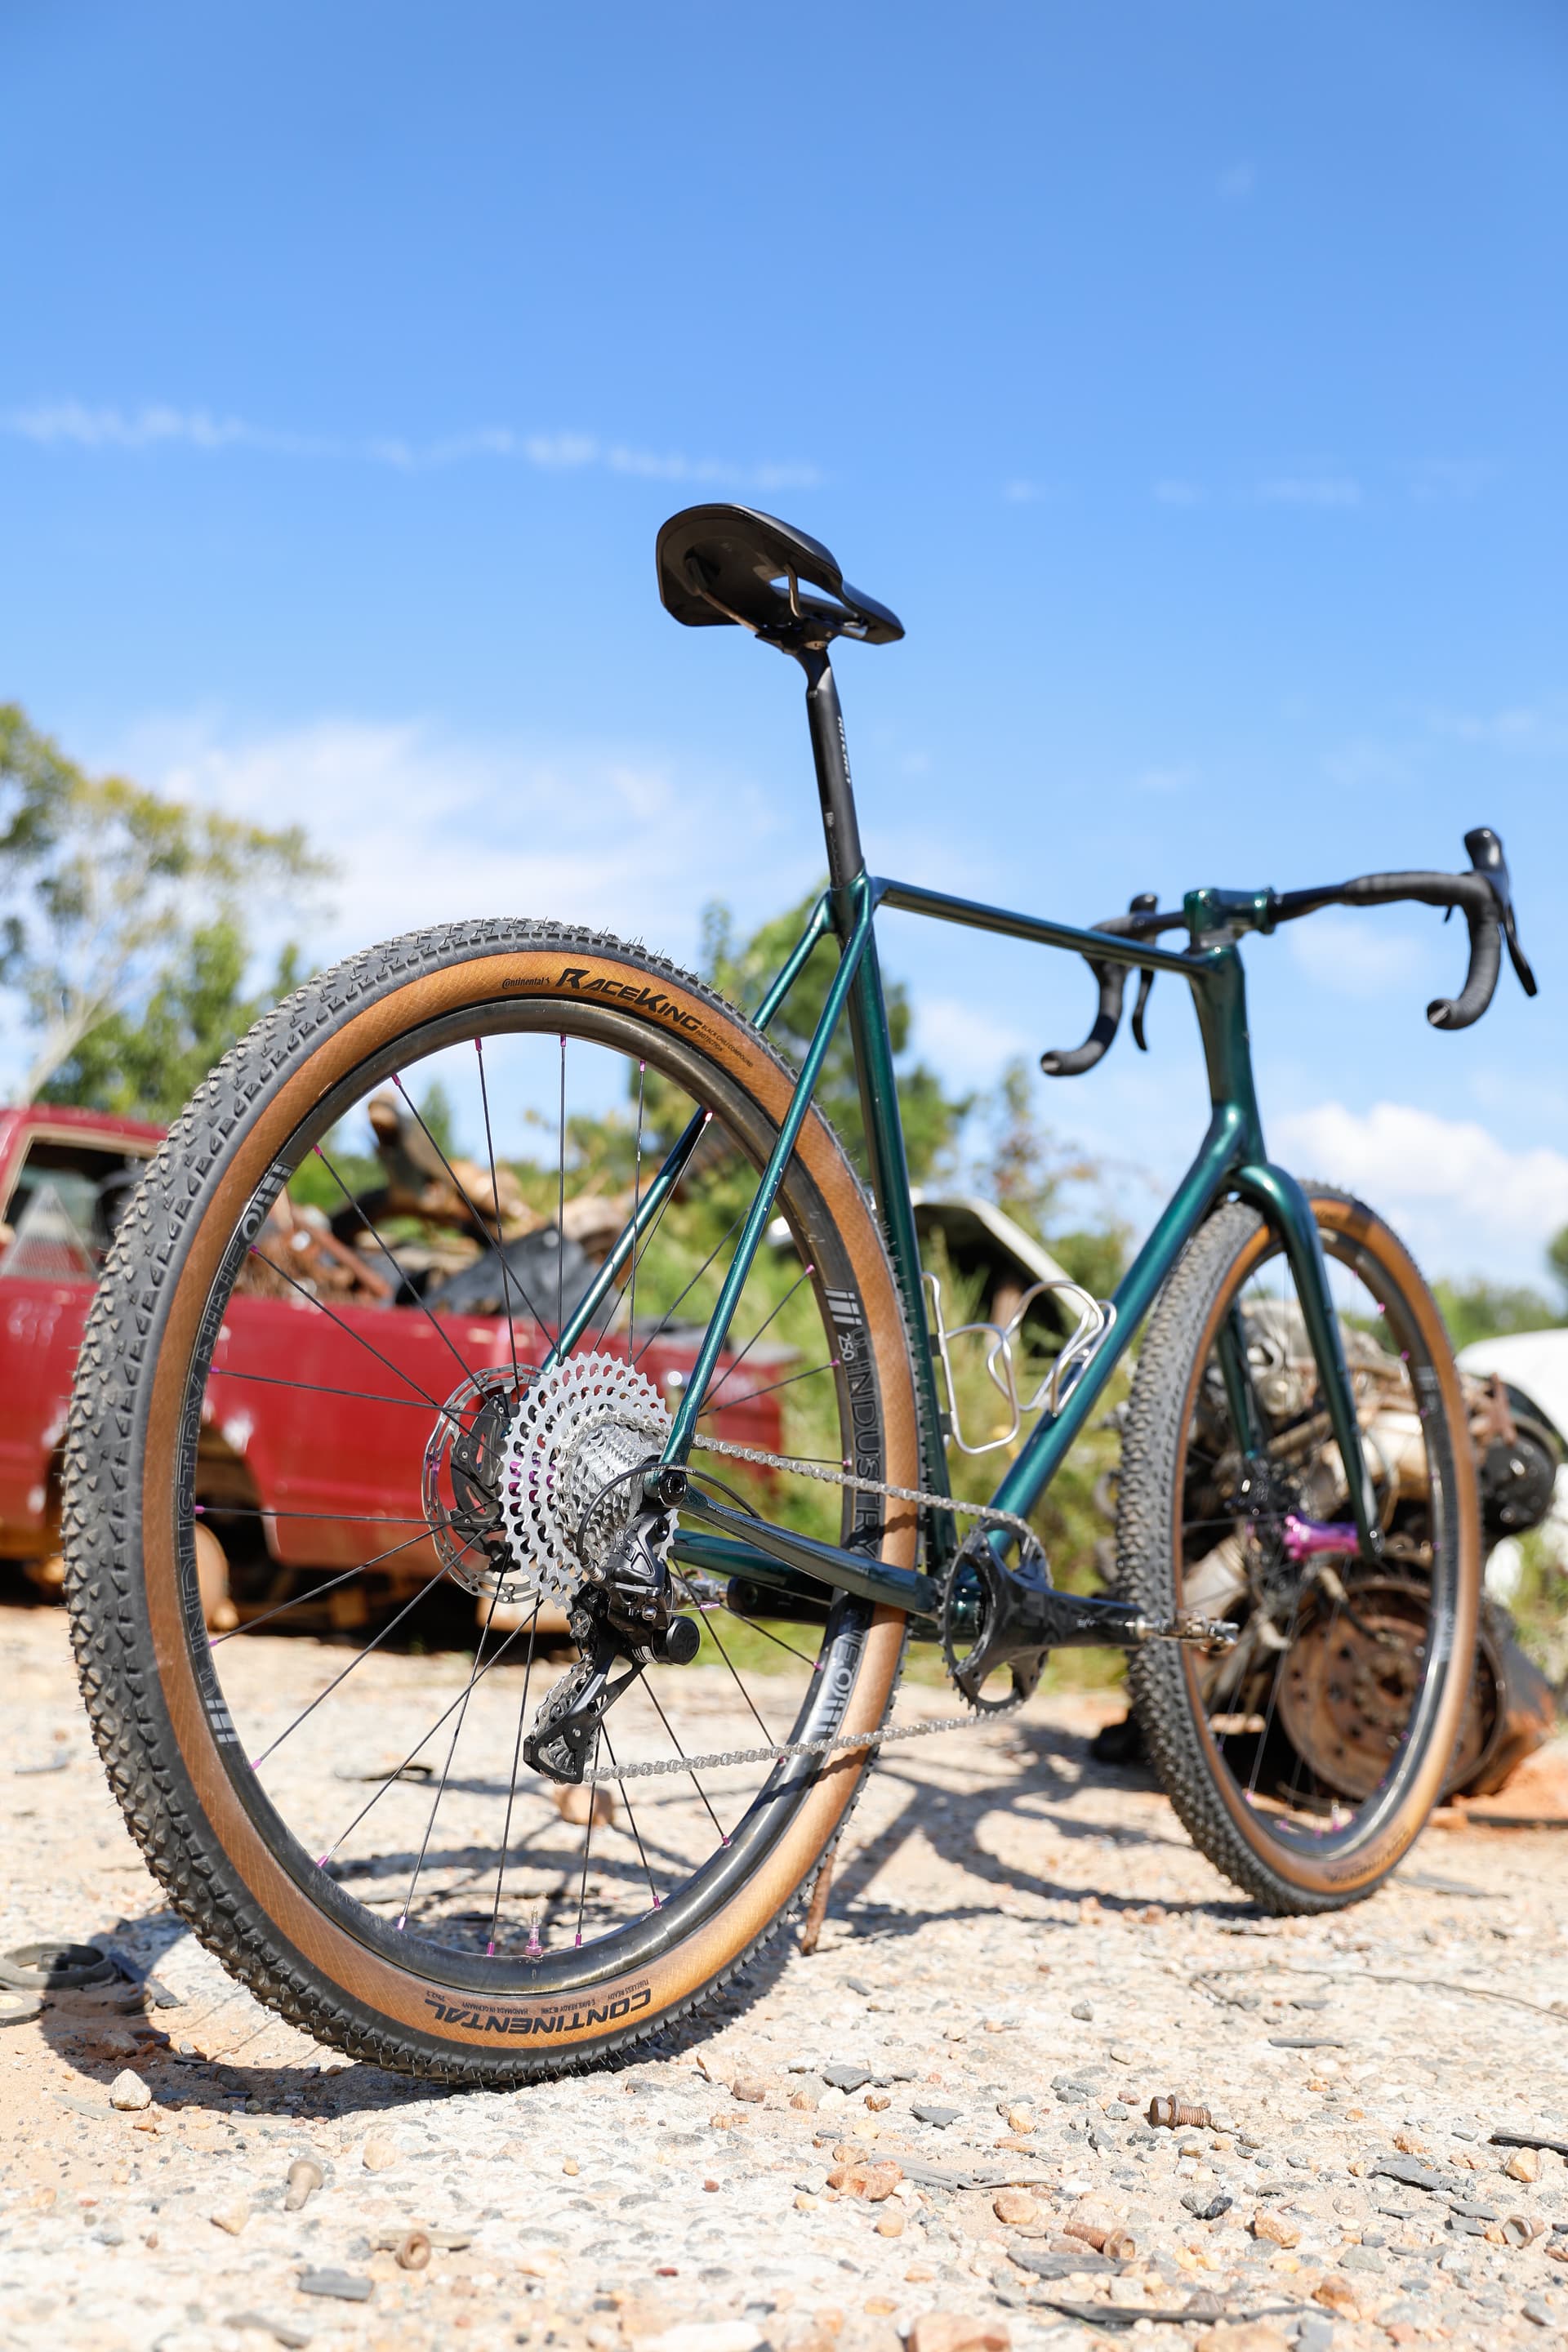
Check your clearances! Still have to investigate this, but the only real “issue” i hit with fitup was that the clearance to my native 160 FM bosses on the chainstay was about 0.5mm to the rotor! some quick work with a grinder solved this and it’s basically invisible, but that’s the only part of the frame design i didn’t triple check (as i didn’t have a rotor modeled). Oldest lesson in the book for sure, TRUST BUT VERIFY.

After welding, I used a band file to grind everything flush. Had plenty of access around all my joints, which certainly isn’t hurt by the fact that the frame is so huge :). definitely need to be careful at this step as it’s easy to forget how thin the tube walls are outside the welds, and how quickly you can make a big mistake! I have a super undersized compressor for this kind of tool, so was running way under the proper pressure for most of it. I left to get a drink of water which let the compressor pump up to full beans, and i proceeded (without thinking) to go at it with the same vigor as before, and filed a hole in a tube, which i then had to go back and patch. Mostly though, it was a great experience and I think this type of bike frame construction really helps those of us who suck at welding have simpler paths to trace while skills improve.

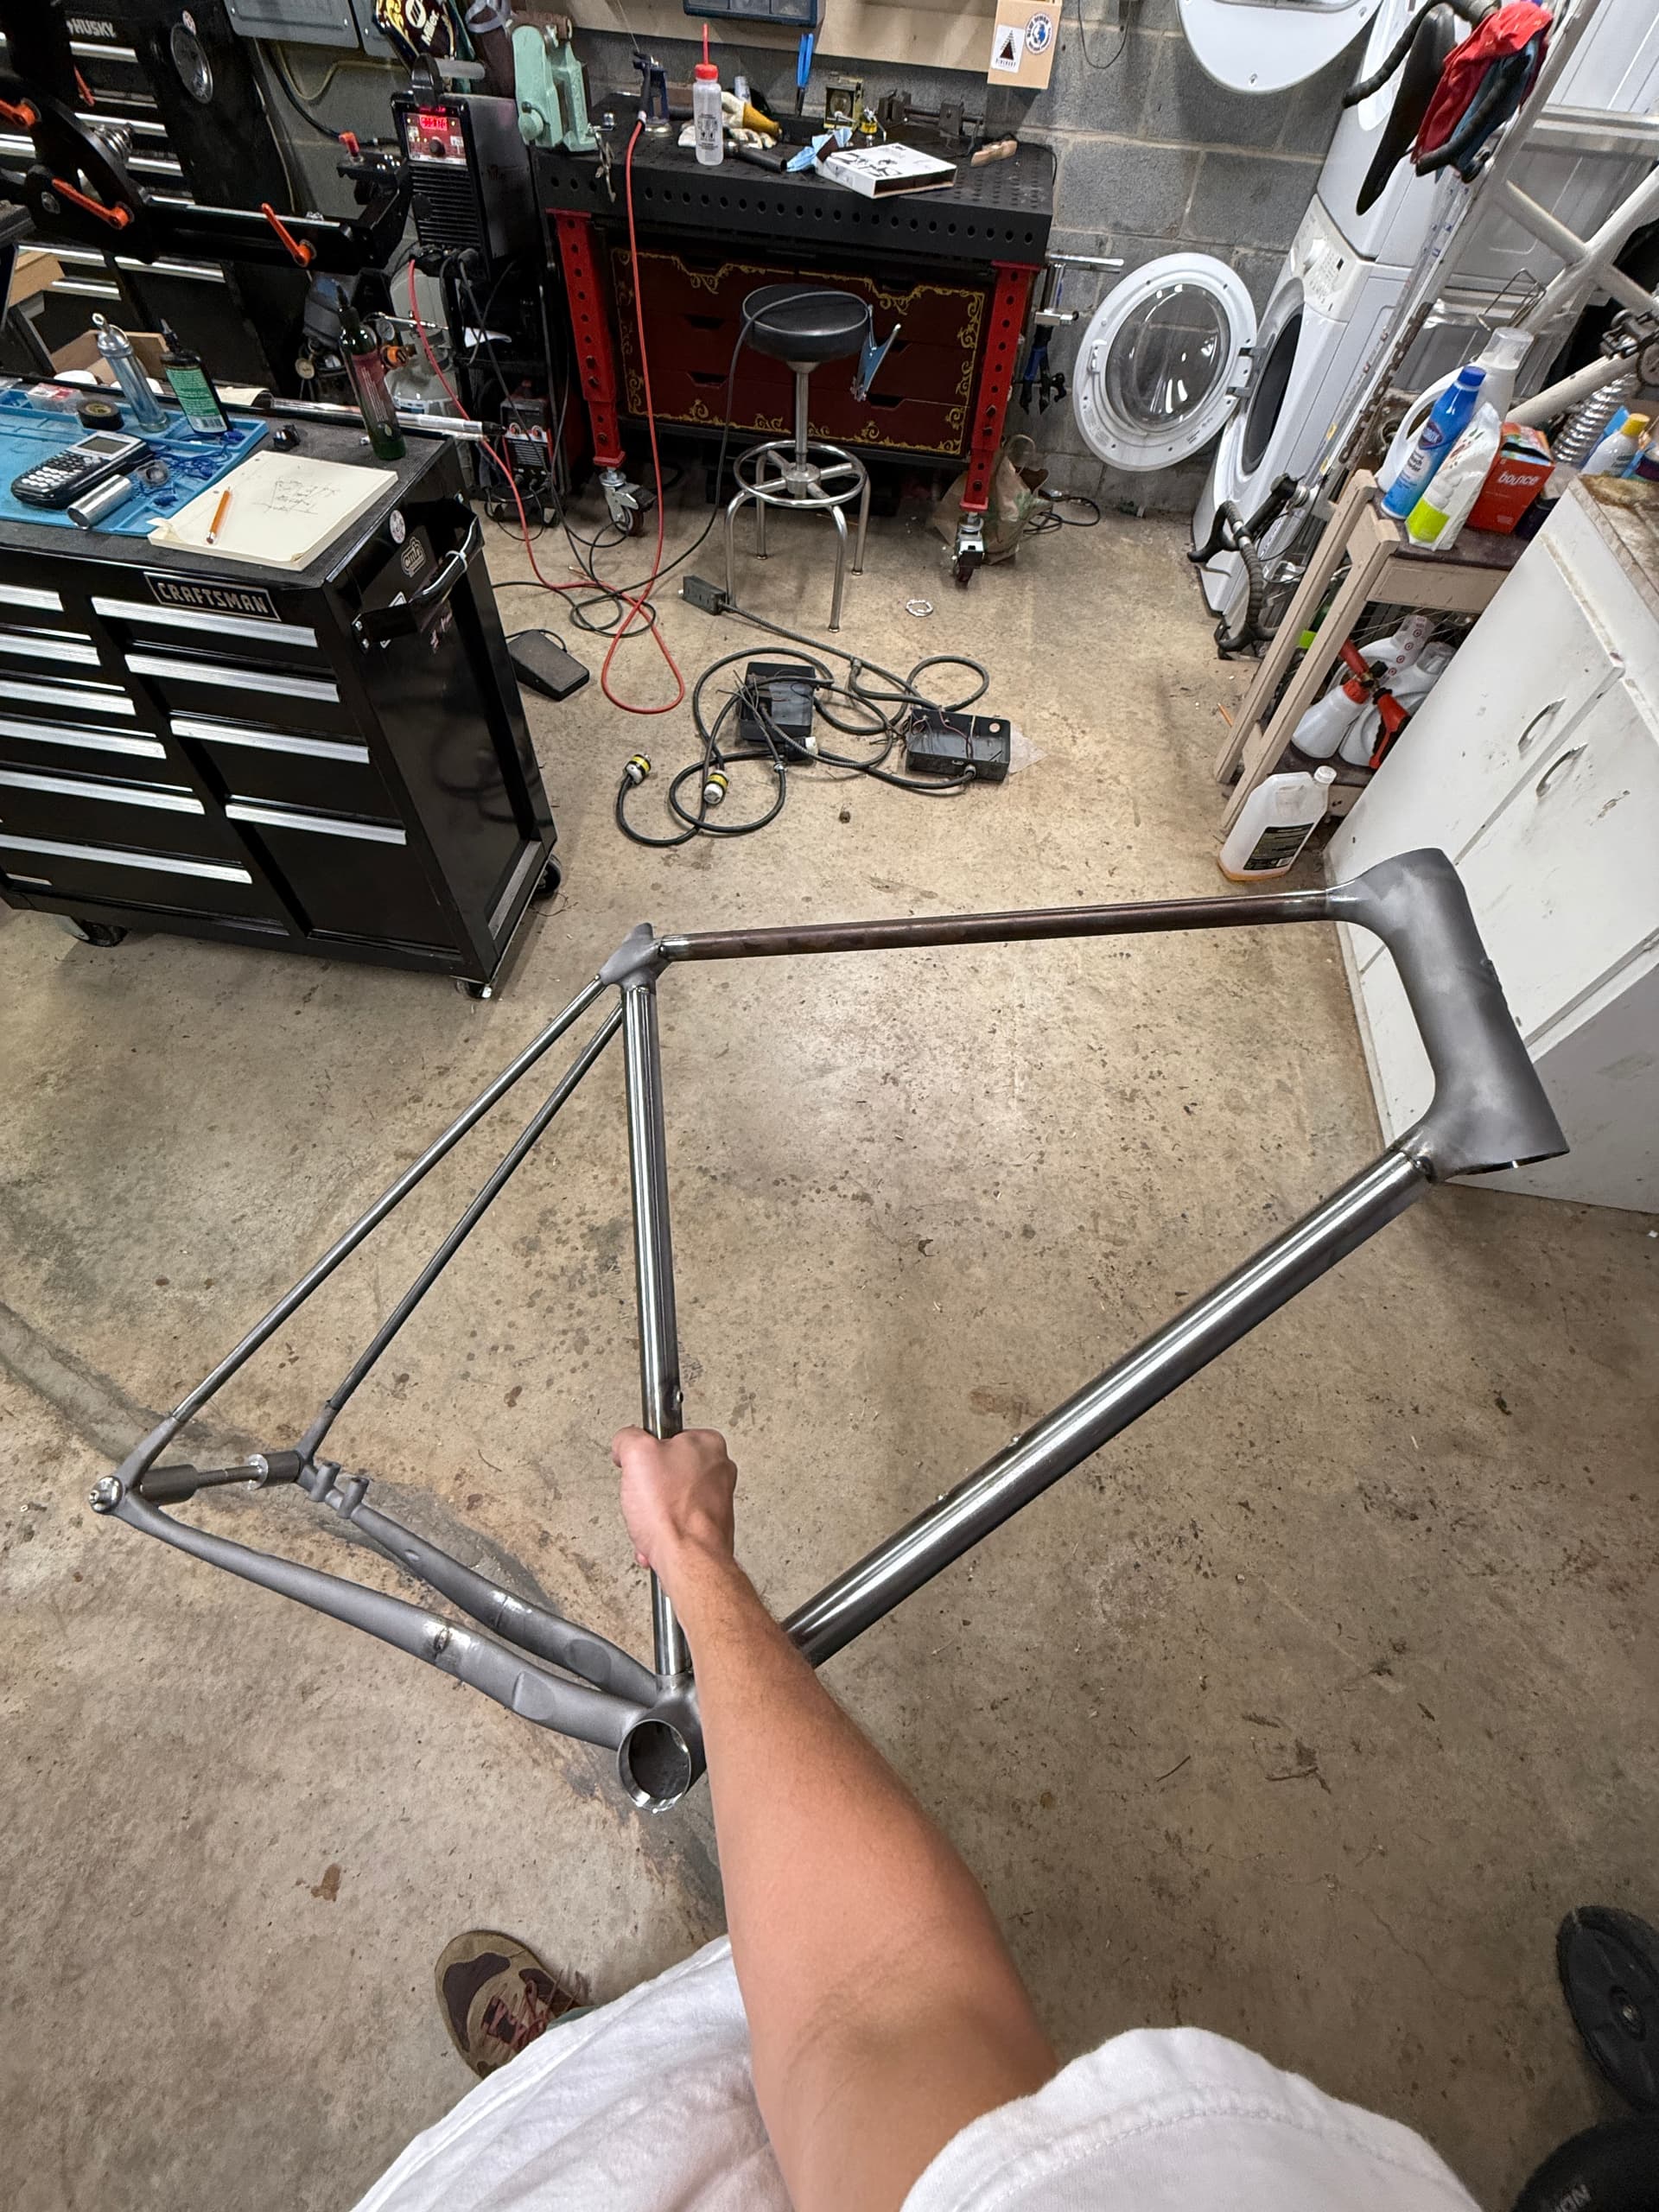
After welding the bike up, I did a rough check of alignment, where i found it’s mostly fine, but definitely induced some skew at the BB area. I realized I had fit up the BB shell in my jig at a slight angle by using the wrong spacer! At this point, knowing it’s my first frame, I decided to just charge ahead and accept that it might be a bit wonky.

All the frame machining was pretty straightforward. The 17-4 material machines really nicely, and i observed zero porosity in the freshly machined bearing seats/BB area/rear axle. This gave me a lot more confidence in the supplier/material.

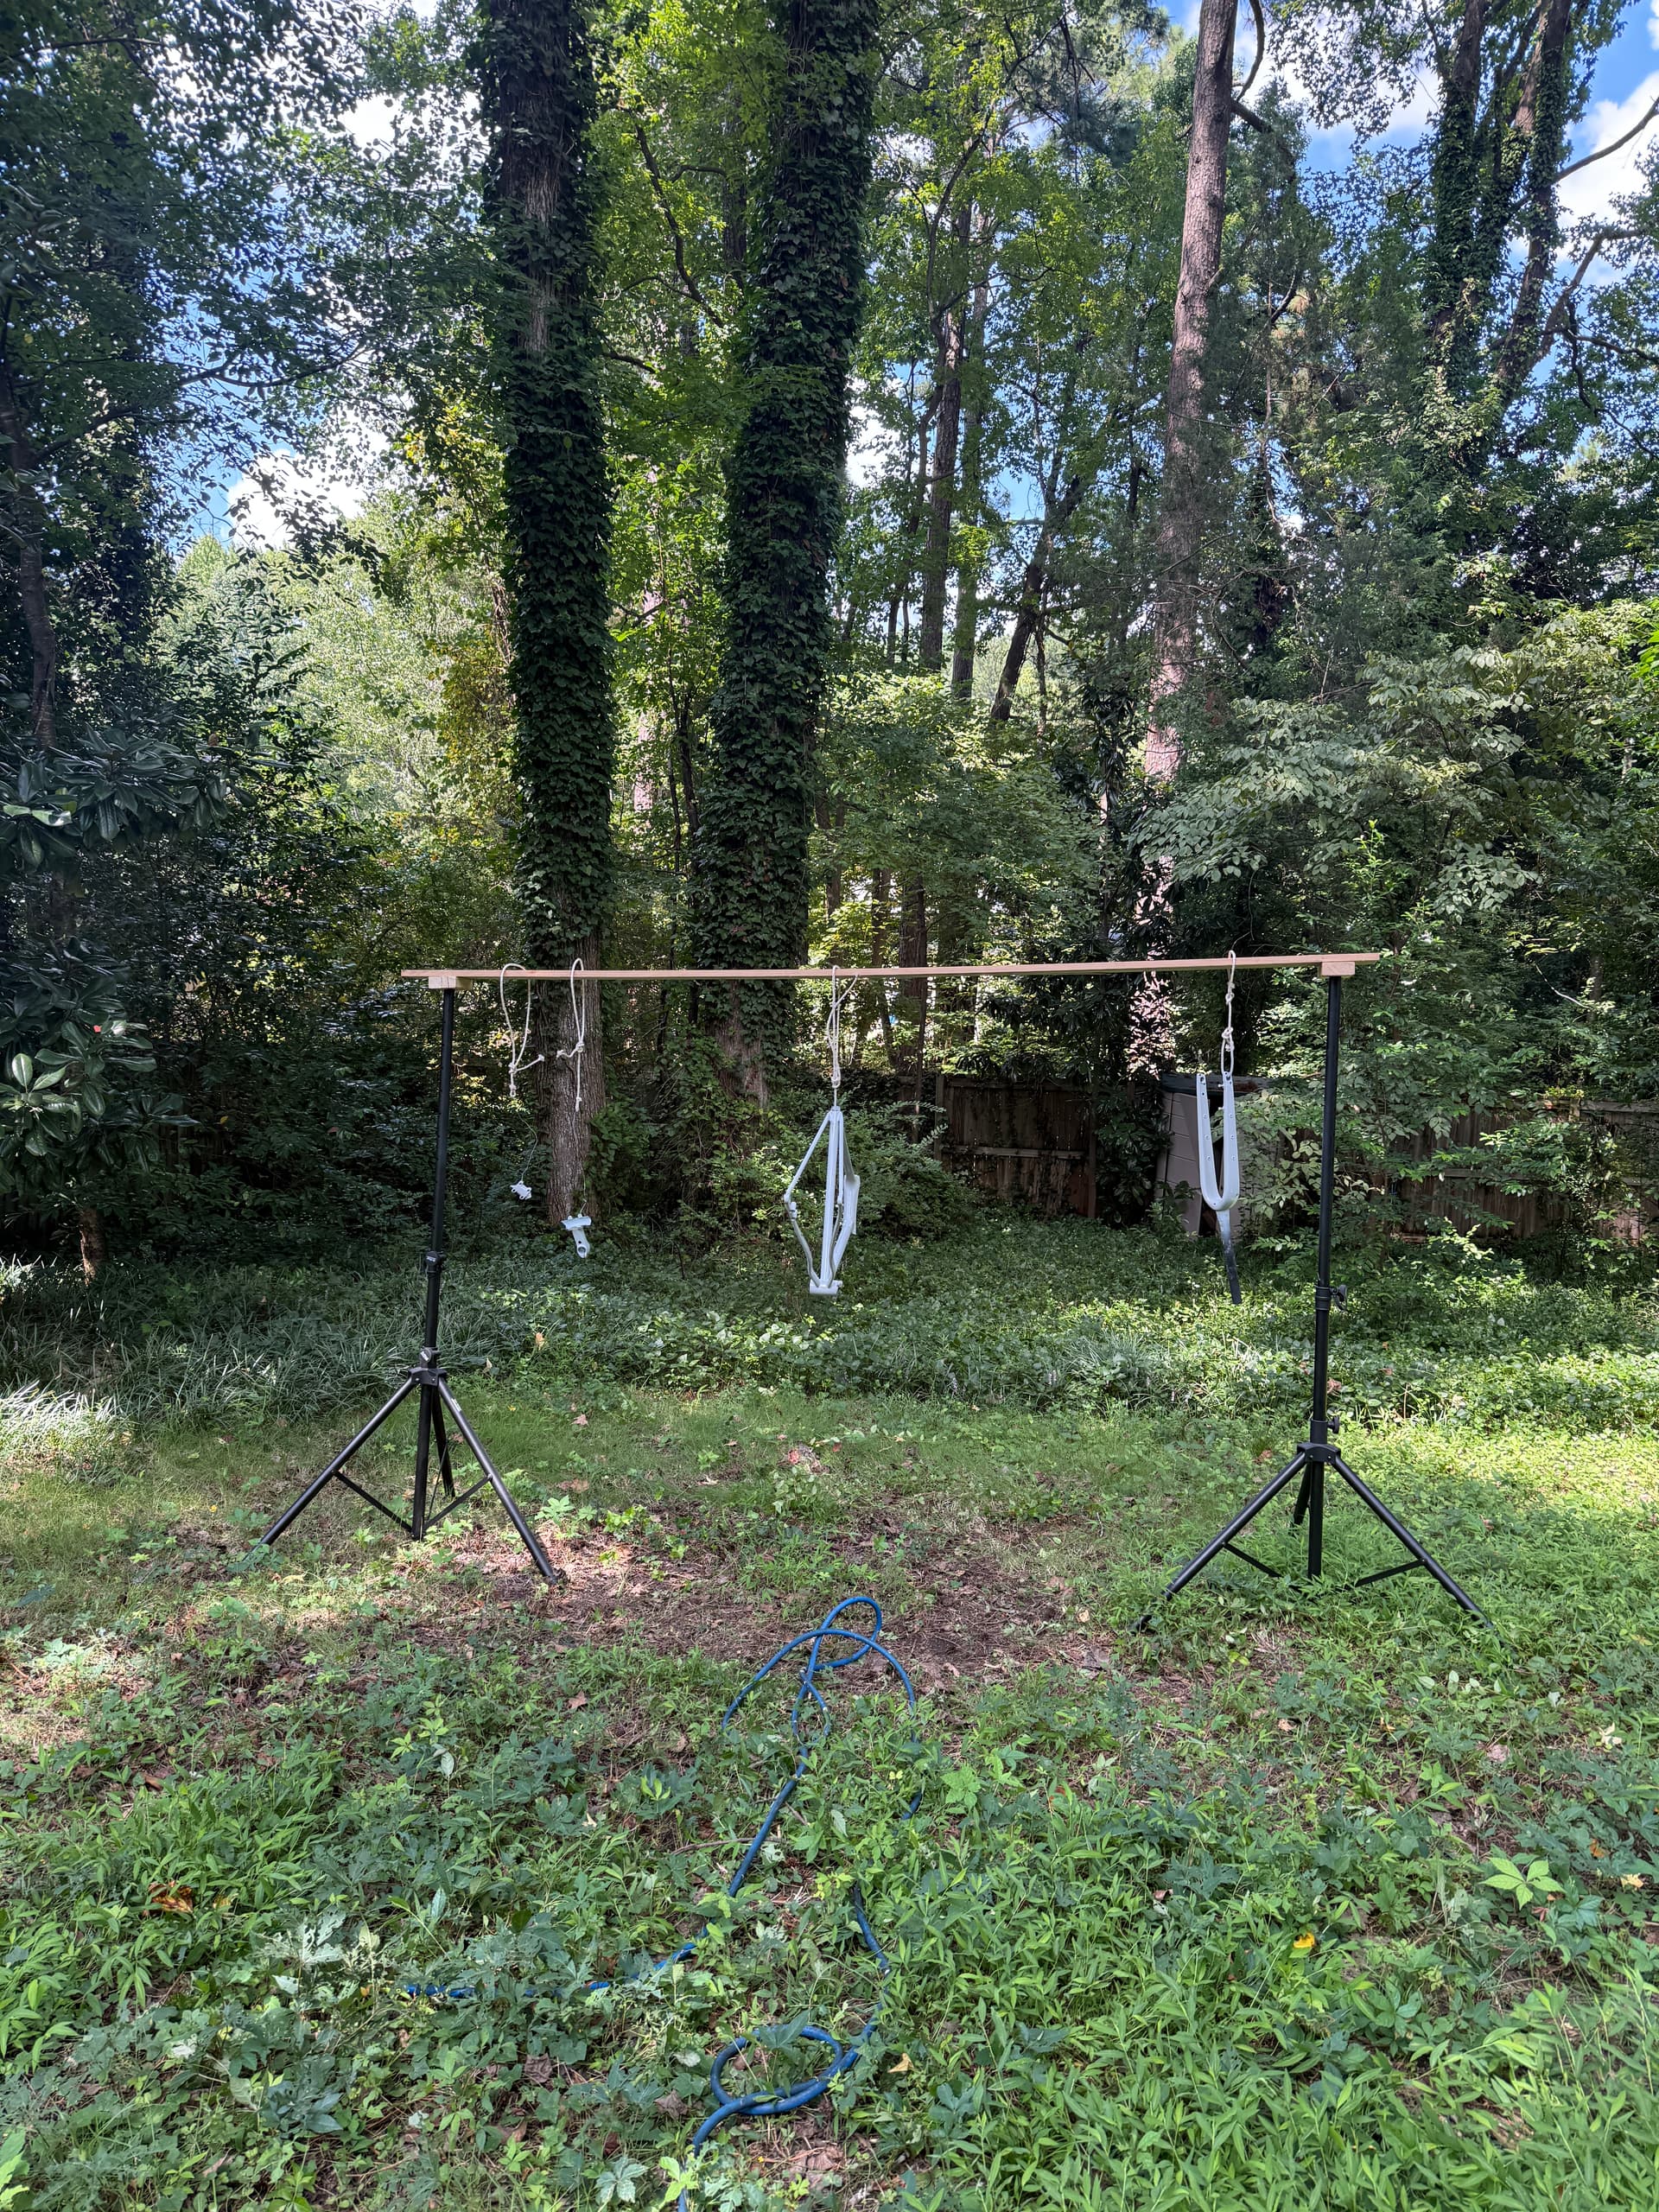
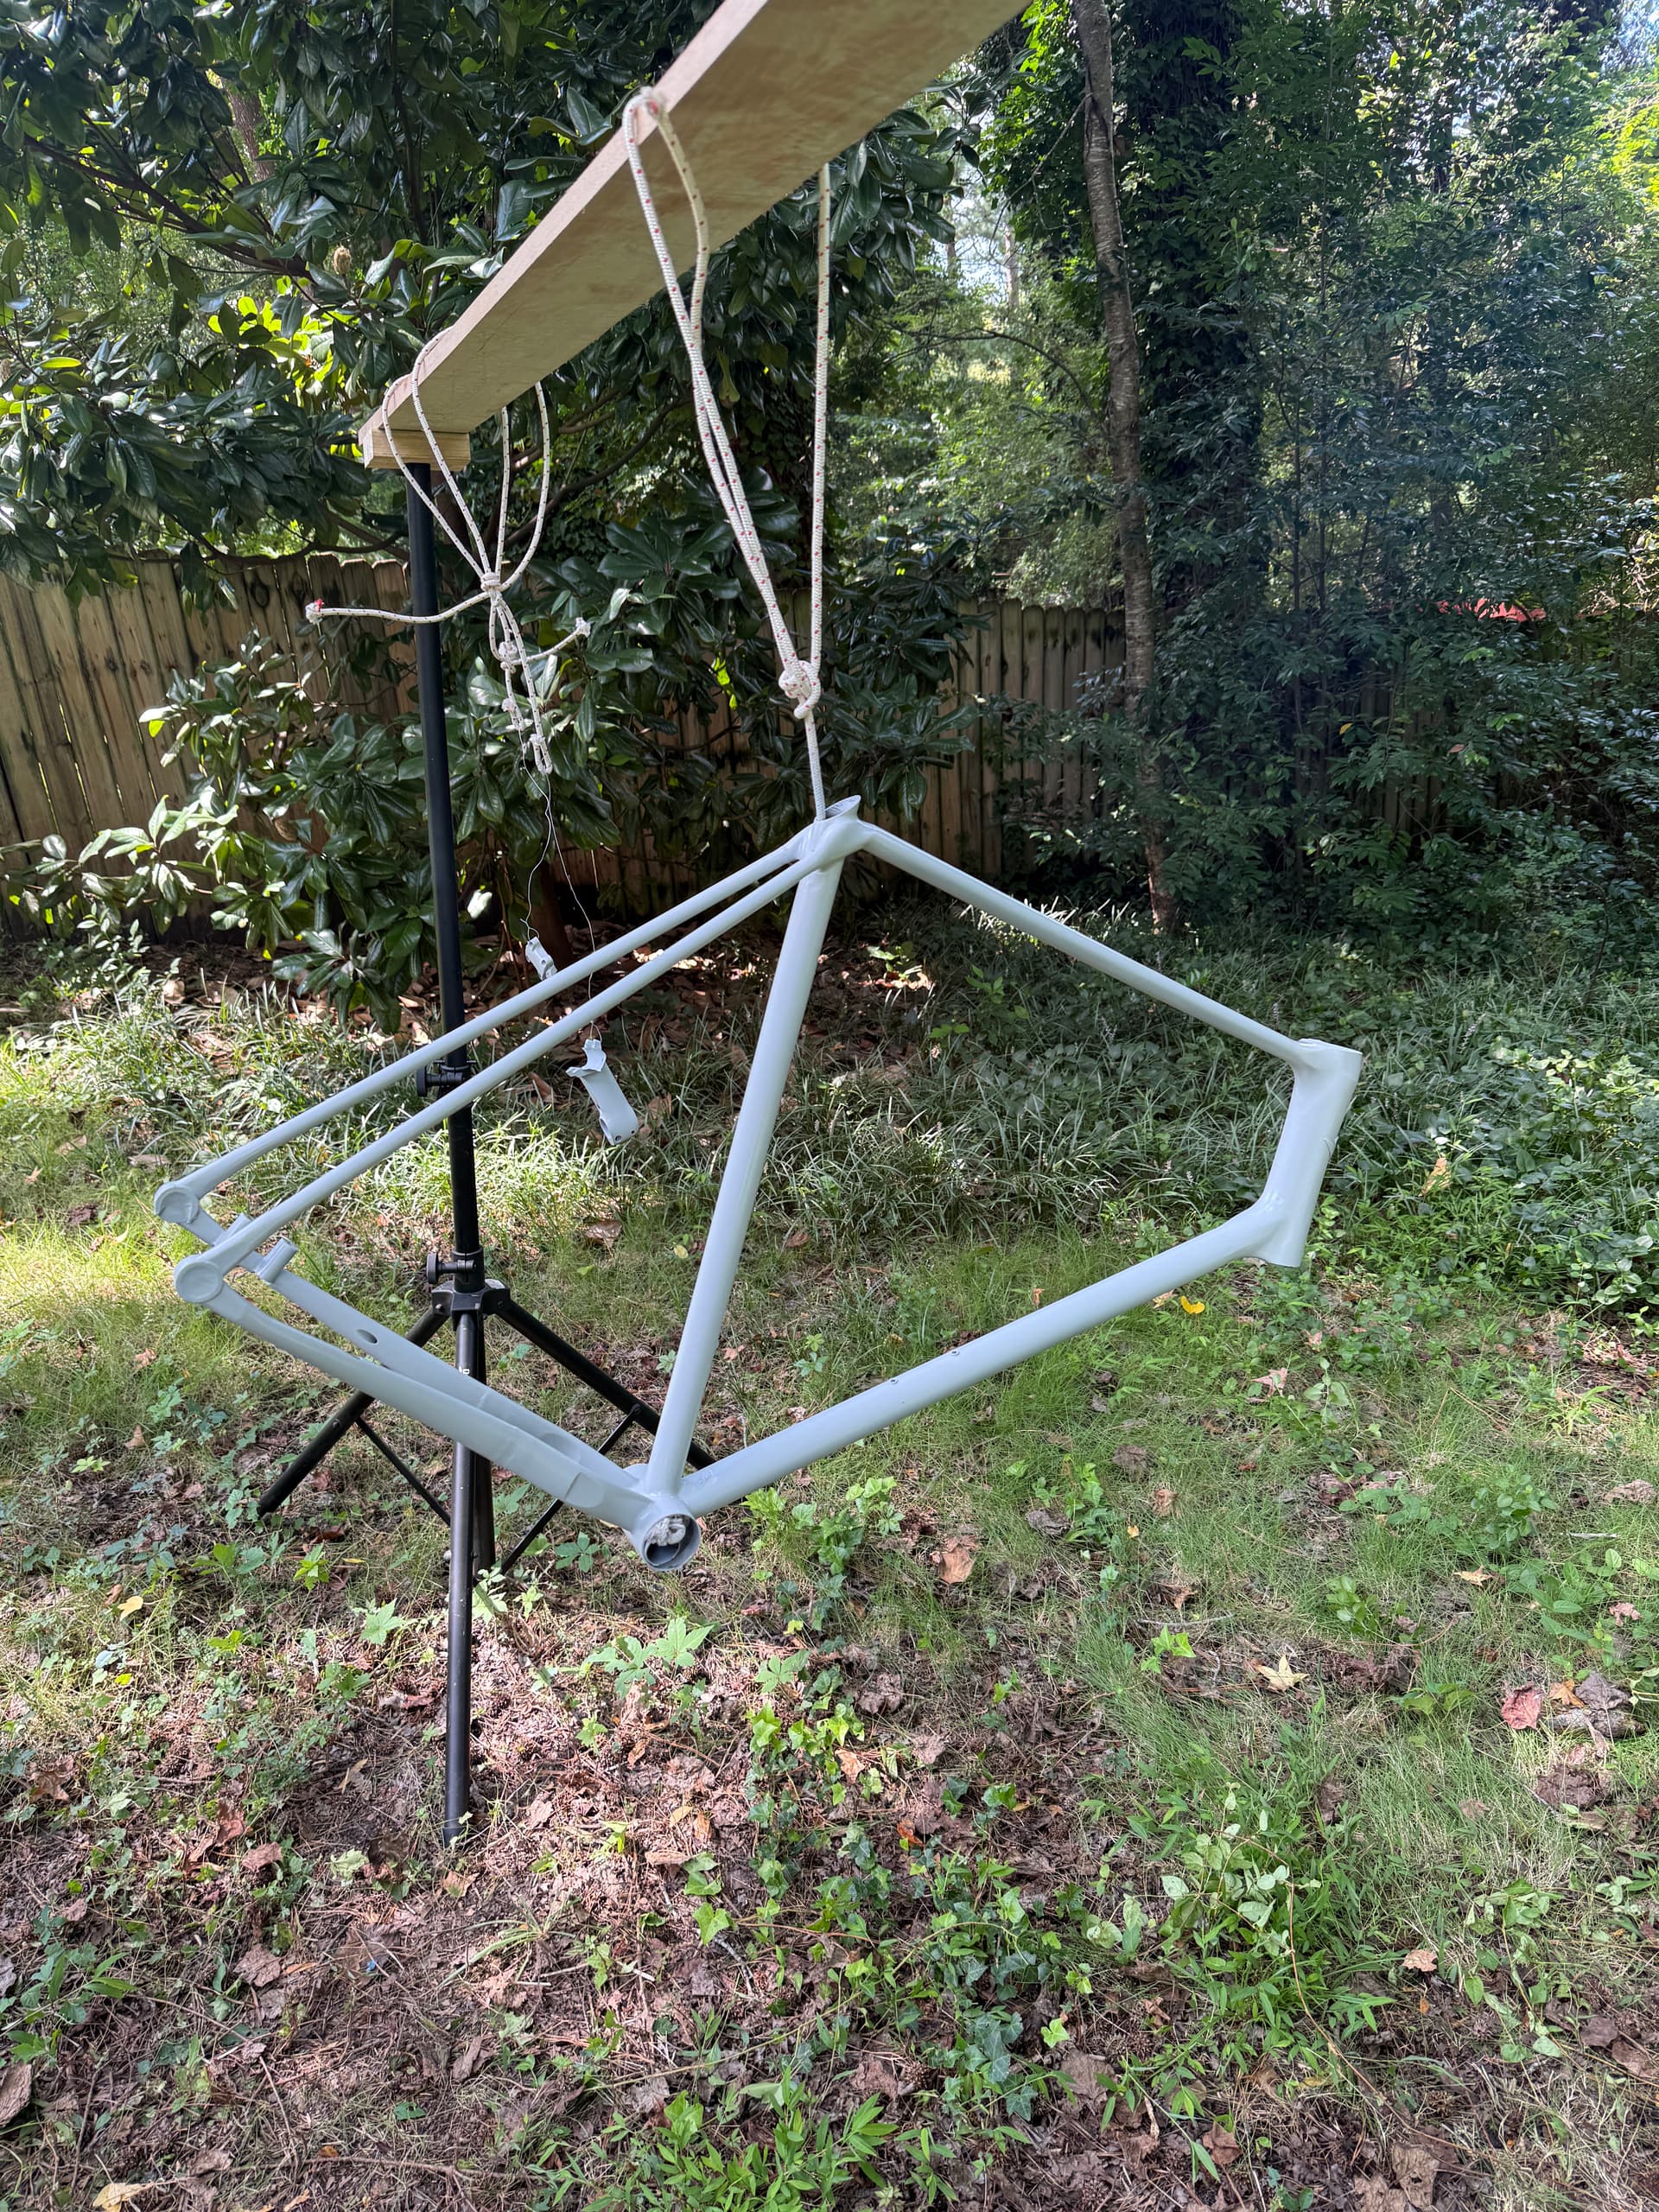
Painting is a bear in and of itself. This is my first bike but i’ve been a tinkerer all my life, so have done my fair share of urethane painting. That said, my current workshop setup is very un-conducive to spraying, so just made the best of what I have. I’m using Urechem paint products, which you can easily by cheaply online and shipped to your door without the hassle of the local paint shops which seem to hate shadetree guys like myself coming by and bugging them. I set up what I like to refer to as the most expensive windchime in history in the backyard with all the parts for the build and went to town. No real issues with the setup other than you just have to accept that it’s never going to be perfect working outside like this, and by the time i was putting clear on, the sun had mostly set, which is worst case for getting a good sheen. C’est la vie.

More to come about assembly in a bit!

13 Likes

Looks great! About how much were all your 3D printed parts?

All the parts together with a beadblast finish was $550 USD including shipping. Heat treat was another $126 total, and the machining was $90. Paid another $100 for customs duties upon arrival, ugh.

So you pay a lot to get this much of the bike 3D printed, to say nothing of the fact it’s heavier! However I’m not trying to make money on these, my goals are to maximize design flexibility without investing heavily in things like bending tooling, and to help make barrier to entry time-investment wise as low as possible. Now that my model is fully parametric, I was able to make a new version of this design for my wife in her custom geometry in an hour or so, vs the 80+ hours i have into the first model. The parts self fixture and the welding is straightforward, so it has some real benefits if you’re a weekend guy like me.

5 Likes

Looks really good! Thanks for the info on cost and time. I’m thinking about going a similar printed route on my next frame to reduce my time hand cutting and filing all my miters, and reducing the number of tricky welds (not my strongest skill). The idea of putting time in for the initial design, then quick tweaking for future builds is really alluring.

2 Likes

Oh cool, thanks for sharing that. It’s quite impressive!

Wow, that is certainly a lot fancier than what my first build is becoming :laughing:

Which tubing is it, Reynolds 853? (Purely guessing by the very oval top tube)

Yup, 853 ST/DT/TT, seat stays are straight gauge cromo.

3 Likes

Awesome first build. The advent of 3D printing has certainly lowered the barrier to making frames of a high level a lot easier. Not a bad thing at all in my mind. You still need to know what you are doing and it’s obvious that isn’t an issue here. I’ve moved to a lot of 3D printing for my mtb as teh time at the bench doing it the traditional way is an exercise of high labour. Some will bemoan the lack of ‘hand built’ but I’m not in it to lose skin off my fingers I’m here to make great bikes. There is not enough profit in bikes to spend all my waking hours building them.

4 Likes

Great build. Looks great. Love the use of 3D printed parts

This means a lot coming from you as I take a lot of inspiration from the work you’ve done with 3D printing to get this far! Really appreciate it and echo your feelings- I think the technology has allowed people (like myself) with different skillsets to get to a functioning, high-performance bike without quite so huge an investment in tooling, scrap parts for testing, etc. I’m a pretty crap welder, but I’m a decent CAD designer, so it’s a great way for me to still build up my fabrication skills while riding fun bikes!

Final assembly/ride notes next.

2 Likes

Painting overall went great- I didn’t do a good enough job removing the ink transfers on the fork (a Rodeo Labs Spork), so in the right light you can still see the outline in reflections. I think if I wanted to I could pretend it was a deliberate choice since it looks kinda cool, but it’ll stay the forum’s secret that it was totally on accident :slight_smile: . The bead blast finish from the 3D prints mostly disappears after primer/sealer, and paint went on really nicely overall. I struggled a LOT more than expected getting a good finish on the carbon fork. I’m not totally sure why it was laying down so differently but I couldn’t get nearly the sheen I was able to achieve on the metal parts. More experimentation here needed for sure. I assumed the fork would be the easiest part to paint since it was so uniformly perfectly smooth, and is mostly big flat sections!

Since the “head badge” is printed directly into the headtube, all it took was removing the paint mask and buffing it out to get it shiny. I really love the two-layer affect on it, and how you can see just a bit of porosity in it which helps reinforce it’s a PART of the bike. Otherwise, I did a pretty bad job in some areas masking off paint which meant a bit of effort after the fact cleaning it up- i’ll definitely be 3D printing paint plugs for all these areas next time to make it much faster and easier.

Assembly was it’s own challenge. This is my first bike trying out fully internal cabling, and my experience was pretty similar to the stories i’ve heard- namely, it’s not HARD per se, but boy is it frustrating to spend an hour trying to fish a cable through a single tiny hole. I wanted to experience it myself, and now I can say I have. It’s really not that big a pain for me personally as I’m not a pro mechanic doing this kind of thing for 8 hours a day, but I totally sympathize with how people see it, as it’s “work” that doesn’t feel productive or even rewarding of the same skills we use in other aspects of bike maintenance. Some tips and tricks I found along the way that might save someone:

Campy installs little fittings at the ends of their brake hoses that seat a shift cable into them which you can use to pull the hose through the frame. This was super helpful in some places and not worth it in others, but a great idea that all manufacturers should do. My secret weapon for this build was adhesive lined heatshrink, which I used to join housing to cables, or hose-to-hose end to end. Gives plenty of bite to be able to yank on cables, there’s no rigid section that makes going around bends hard, and the the super thin walls didn’t create additional resistance. Just snip the end off once it’s pulled through and you’re done.

I swear I had to assemble/disassemble the stem and headset area of the bike 7 different times through the build as I was working through it, definitely some beginner stuff that with a process in place wouldn’t be an issue. My biggest screw up which will live in infamy in my brain- after working for hours to get all the housings routed and terminated, i was finally ready to bleed the brakes, when I realized I’d routed the wrong hoses to each caliper! I refused to be defeated, so decided to swap the banjo fittings at the brake levers, which involved some truly sketchy tugging and pulling of that fitting through the handlebar holes. Lots of cursing and wasted time to avoid having to start all over. Will DEFINITELY be labelling the hoses from now on to make sure this never happens.

Last screw up- this is my first time with Ekar shifting, and when I cut the shift housing to get a nice generous bend, I didn’t realize the derailleur was in a “locked out” state which makes it easier to get the rear wheel out. Consequently, when it’s “unlocked” for actual use, the housing is too short. It works good enough for me to get some miles on it before trying to pull a new housing through, so going to chalk it up to inexperience and fix it later.

Generally the assembly was only marred by self-inflicted wounds caused by inexperience. In future builds I’m confident I could eliminate most or all of these hangups and have a pretty straightforward assembly.

The first test ride was, to say the least, euphoric. I inched around my neighborhood, certain for the first 5 minutes the whole bike would rapidly disassemble underneath me. It was only after getting a few cautious laps in that I felt confident enough that it wouldn’t immediately explode where I could bed the brakes in and do some proper feel testing. An experience I’m sure all of you here have had before, but I’ve built a lot of really cool stuff in my life across a lot of different hobbies, and that first ride stands out above all else on pure satisfaction factor.

The next day I got to bring it into our local state park here to do some proper gravel riding. Still taking it a bit easy but really starting to feel the bike out, it rides awesome. The big tires feel great underneath me, the long wheelbase is super stable, and the fit is perfect. Biggest thing I’m not sure about yet is where I landed on front end geometry- i’m not sure I’m 100% happy with the way the bike is steering in the front but it’s so different than my last bike, I want to get more miles in to really suss this out.

Overall, I’m beyond stoked with how this turned out, and can’t wait to build the next one. Hope this serves as a help to anyone else jumping into this, or maybe it’s just an entertaining look into how I stumbled my way into something pretty sick!

8 Likes

I figured some folks here would enjoy some bike porn, so here are some shots I took over the long weekend with a friend who was willing to humor me on my choice of venue :slight_smile: .

5 Likes

Which wall thickness did you use on your head tube?

Varies throughout the part, but there’s a nominal thickness of 1.6mm through most of it, with it increasing up to 3mm in high stress areas and around bearing seats. Fully radiused internally wherever possible to eliminate stress concentrations.

1 Like

Wow that’s crazy I had no idea 3d printing steel had gotten so cheap. Maybe I really am going to be obsolete soon.

1 Like