Living in a city means less space. I live with my family, as I am still in high school, and I have precisely one spot for my bike. I currently have a 120mm XC bike, but I want to ride more difficult trails around me, and I would feel more comfortable with more suspension. I would be forced to either get a short travel enduro bike, which would be difficult to do on my local XC loop, or a medium travel trail bike, but sacrifice some travel. So I thought, “Hey, I’m an engineer, I can make stuff”, and thus began my journey. If you want more details, please ask; I am more than willing to share anything else.
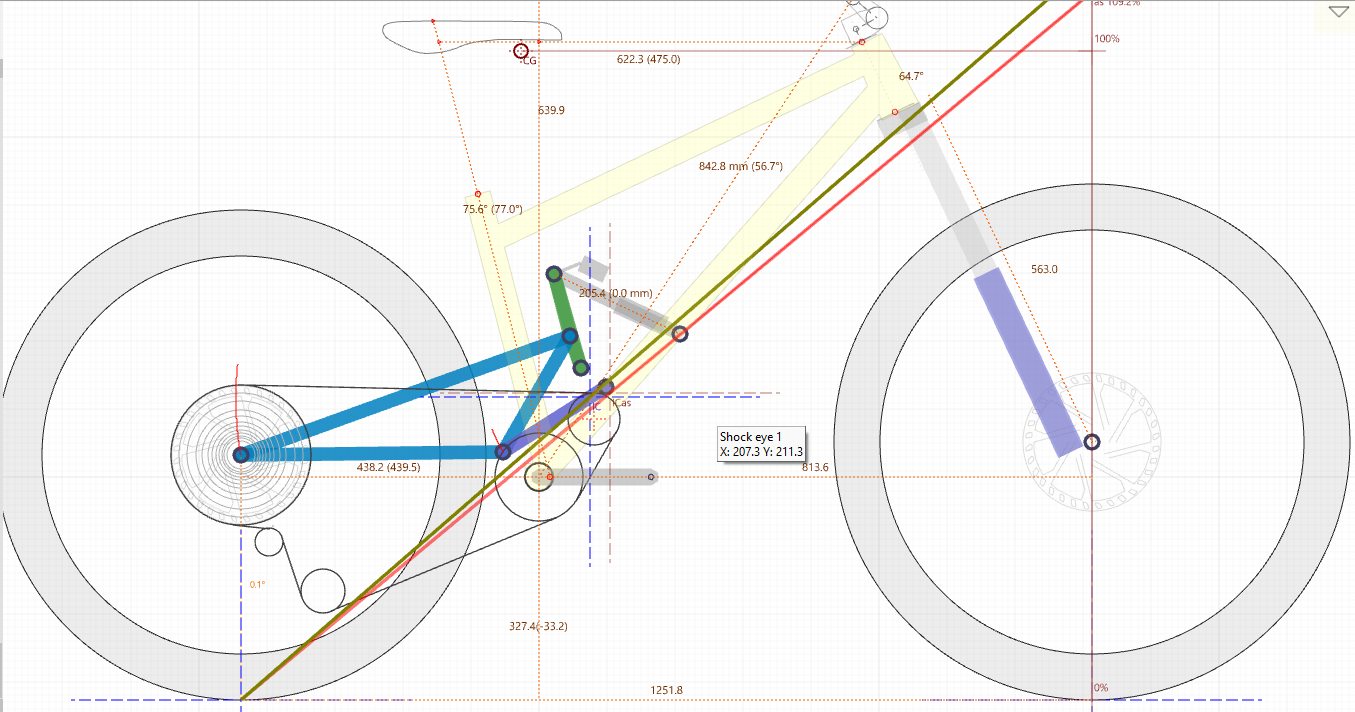
You’re gonna need a lower chain pulley to give you more wrap on your chainring. With the upper pulley so far forward, it’s gonna limit how many teeth engage.
Also, the default Center of Gravity on Linkage is usually WAY off. If you’re wanting to dial in your anti-squat and anti-rise, it’ll be wise to get that figured out. If you’ve got a bathroom scale and a bunch of math, you can figure it out. It’s a pain, but if you want to make sure your suspension behaves how you expect it to and how the numbers say it should, accurate COG is important. I think mine is around (-10, 740) but I’d have to go dig through some paperwork.
Thank you again. I have the cad model and can figure it out relatively where it is. The problem is that I am only using the demo version and the original linkage drawing is gone.
You’re an engineer and in high school?!? They’re just getting younger and younger
No comments on the design, but from experience it’s the tyres (and to a lesser extent wheels) that make the biggest difference between “enduro” and “xc” bikes. The travel not-so-much.
Personally, if I wanted two bikes in one I would go for some simple linkage 150/160mm rear travel bike (no high pivot) and have two wheel sets ready to go (same hubs so as to not have annoying disc alignment issues). One set with meaty DH casing tyres, and the other with some thin casing and bald treaded xc tyres.
Tyres for me define the bike. So much so that when I sit down to design some new frame I will always start with the tyre “spec” or style.
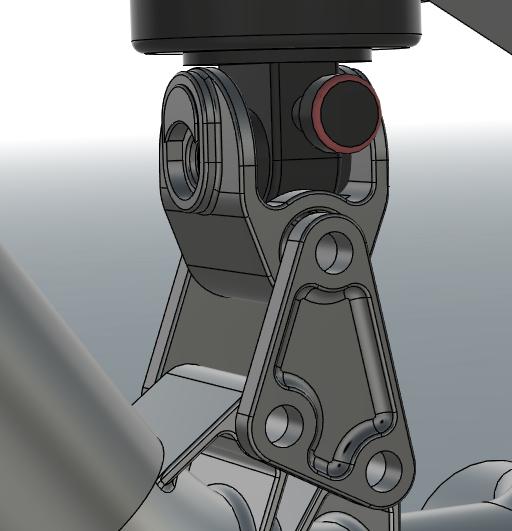
Some words of advice, none of the pivot points seem to have room to fit bearings in, and if you want bearings, they should probably go on the links rather than the rear triangle, as it’s easier to change them on a smaller piece. The best way to do multiple modes of travel is with either a yoke that can be put on a shorter shock that makes up for the smaller eye to eye, or interchangeable lower shock mounts that do the same. I also wouldnt be going with a high pivot bike for your first time, as theres a bunch of strength analysis needed and it’s not the same as other bike bits where “if it looks right it probably rides right.” Other than that, it looks very impressive for a first project and you’ve managed to do a bunch of things I’m struggling with at the moment!
I also copy/paste all the points on linkage to a canvas in fusion so that even if I’m not in linkage I can get them in the right place using the move tool.
Agree here on the wheels and tires making the real difference. The other easy one is switching from a coil shock to an inline air shock. Those two changes on a 150-160mm travel bike make a huge difference.
Maybe make it with a progressive mount and a linear mount, with the linear mount being the short travel option (for air shocks) and the progressive mount being the long travel option (for coil shocks)
I’ve begun working on this project again and was wondering if you could help me. Currently, my frame is 4.8 kg for the frame only. I don’t know how to get the weight down without sacrificing durability and strength.
What manufacturing process do you plan on for the lugs? This will determine what is possible whether something is machined or 3D printed.
Lugs are going to be the heavier part of the frame. It’s a good idea to minimize the size of the lugs and maximize the length of the tubes (when possible)
Materials choice will also make a difference in what is possible with weight
Looks cool. I like the use of the shock mount lug to direct the cables out of the frame.
OMG its been too long. Between applying for colleges and keeping up with my work, I’ve been busy. I’ve decided to put this project in the archive because I just can’t seem to get it light yet strong. The CAD file is a mess, and maybe I’ll continue it another day.