Crack between fork blade and crown

Hi all,

Did a deep clean and inspection of the first bike I built in 2017 and found a crack on the inside of the fork crown where it meets the fork blade. Looks like it is only in the silver and not in the steel itself. The bike is an all road rando Jan Heine koolaid machine. I have treated it more like a gravelbike than a rando, riding it on North Bay CA fire roads/trails, (rr grade, eldridge, coast trail, marin headlands, etc). The brazing was done during a framebuilding course with Doug Fattic which is to say it was done under supervision of a professional :slight_smile:

A few questions:

  1. Would you still ride this fork?
  2. Do you think that removing the little tusks on the original casting caused or accelerated the failure?
  3. All things being equal, would brass been more suitable for this connection rather than 56% silver?
  4. Would you replace the fork or repair the joint and continue on?


Thanks yall!

2 Likes

Bummer! I wouldn’t ride a compromised fork. The risks are too high.

It’s hard to tell if the blade is cracked or if the silver bond failed. Either way you could remove the blade, clean everything really well, and braze in a new blade.

Or you could play it safe and build a new fork.

8 Likes

Definitely wouldn’t ride it like that. And yes, I think the tangs on those castings really help spread the load rather than concentrate it right at the silver joint.
Thanks for sharing.

2 Likes

Silver really wants a very small gap to fill or it isn’t strong enough. I would make a new fork with brass. Take the old fork apart (either with heat or a hacksaw) and determine if the blade cracked and if you failed to get full penetration.
Hahn Rossman

2 Likes

What crown is that, a Pacenti Paris-Brest?

Q: Did you remove the as-cast surface on the crown pocket, so the silver had bright shiny steel to bond with? A frequently-skipped step that has caused more than a few failures.

Unfortunately if the piece was sized to fit the blade with proper clearance without that step, then abrading the cast surface down to clean steel makes the socket larger, so the blade fits looser, maybe too loose for silver. So it’s a catch-22. Also, many blades aren’t really an ellipse, or whatever shape the socket was cast to, the blade is more of a rugby-ball shape, more pointy fore and aft than the crown socket. The shape mismatch makes for gaps, that are too big for silver braze. You can fill a bigger gap with 40% than with 56% silver, but still, for the most part, brass is safer.

That said, lots of people silver-braze cast fork crowns and they don’t break, so it can be done, but everything has to be just right due to narrower safety margins.

2 Likes

Thanks all for the input.

Right now, I’m leaning toward removing the blades, cleaning everything up and brazing them back up with brass.

yes its a 1" PBP Crown. I removed the tangs that surround the lower part of the fork blade. I believe those would have helped give extra support to the blade/crown joint.

I’m not sure, I do remember sanding the mating surfaces when prepping for brazing for all the other joints, just not the fork blade/crown sockets. I went through my photos of the course and did not find any evidence of that step. Not to say it didn’t happen, just that I didn’t document it. I will most defiantly be sanding the surfaces of the next fork build, Ill also be using brass instead of 56% silver :slight_smile:

JP Weigle or Brian Chapman mentioned in their comments that they preferred bronze over silver when there is a limited amount of surface surrounding the joint. I think that makes a lot of sense, especially after seeing this kind of failure.

edit: found it on Retrogrouch but not directly from Peter:

In summary, it feels like the following factors contributed to the failure:

  • poor fit up left too much gap for 56%
  • no tangs to help distribute the force from the crown the blade
  • possible lack of adequate surface prep on the interior of the crown
5 Likes

My impression is that it might be a “cold joint”. Thats where you didn’'t get everything up slightly past the filler metal liquidus to get the proper flow / capillary action going on.

The crown is relatively thick, the blade is pretty thin in contrast. If you don’t really get the assembly evenly up to temp then the silver will just flow around the top edge, instead of going way down and getting a complete fill. Sometimes it might just penetrate around an 1/8th of an inch.

Years ago I learned about this from repairing an early Trek road frame that had a downtube held in the bb shell by a “ring around the collar” of silver, and a single jelly-bean size spot of silver inside the shell socket. While it held up for years and the rider said it felt completely normal, the tube just pulled out completely after it was wiggled around a bit.

I’d suggest that you clamp the steerer in a solid vise and firmly wiggle the cracked blade while you are holding the dropout end. I wouldn’t be surprised if the blade just pops out and there is little or no penetration down in the bottom of the crown pocket.

Just my two-cents here. Even marginal joints usually don’t fail immediately.

Nowadays I pin and braze the crown to steerer, and then the blades to the crown in one shot. The crown/steerer heating pre-heats the crown and IME seems to help in getting the blade/crown sockets up to temp more evenly than when I did the crown/steerer first, and then added the blades later.
Propane and a rosebud also help with a more even heating. Sometimes broad and even heating is your friend. Just not for braze-ons !, LOL.

I doubt the removal of those little tangs did anything in this situation.

Let us know what you find if you do repair this. It’s a good learning experience !
I used to cut up all my practice joints and old frames and check inside the joints for evidence of filler metal penetration. Over many years of hobby building I found numerous joints with a dry-spot or two. This clued me in to spend a little more time on my pre-heats. Later on I found much better flow inside the joint encapsulating all around the miter.

Good Luck and don’t get discouraged !
MF in SF

6 Likes

MF’s reply is dense-packed with good analysis and advice.

I’ll add a bit, some I’m pretty sure is consensus and some maybe a bit far-out.

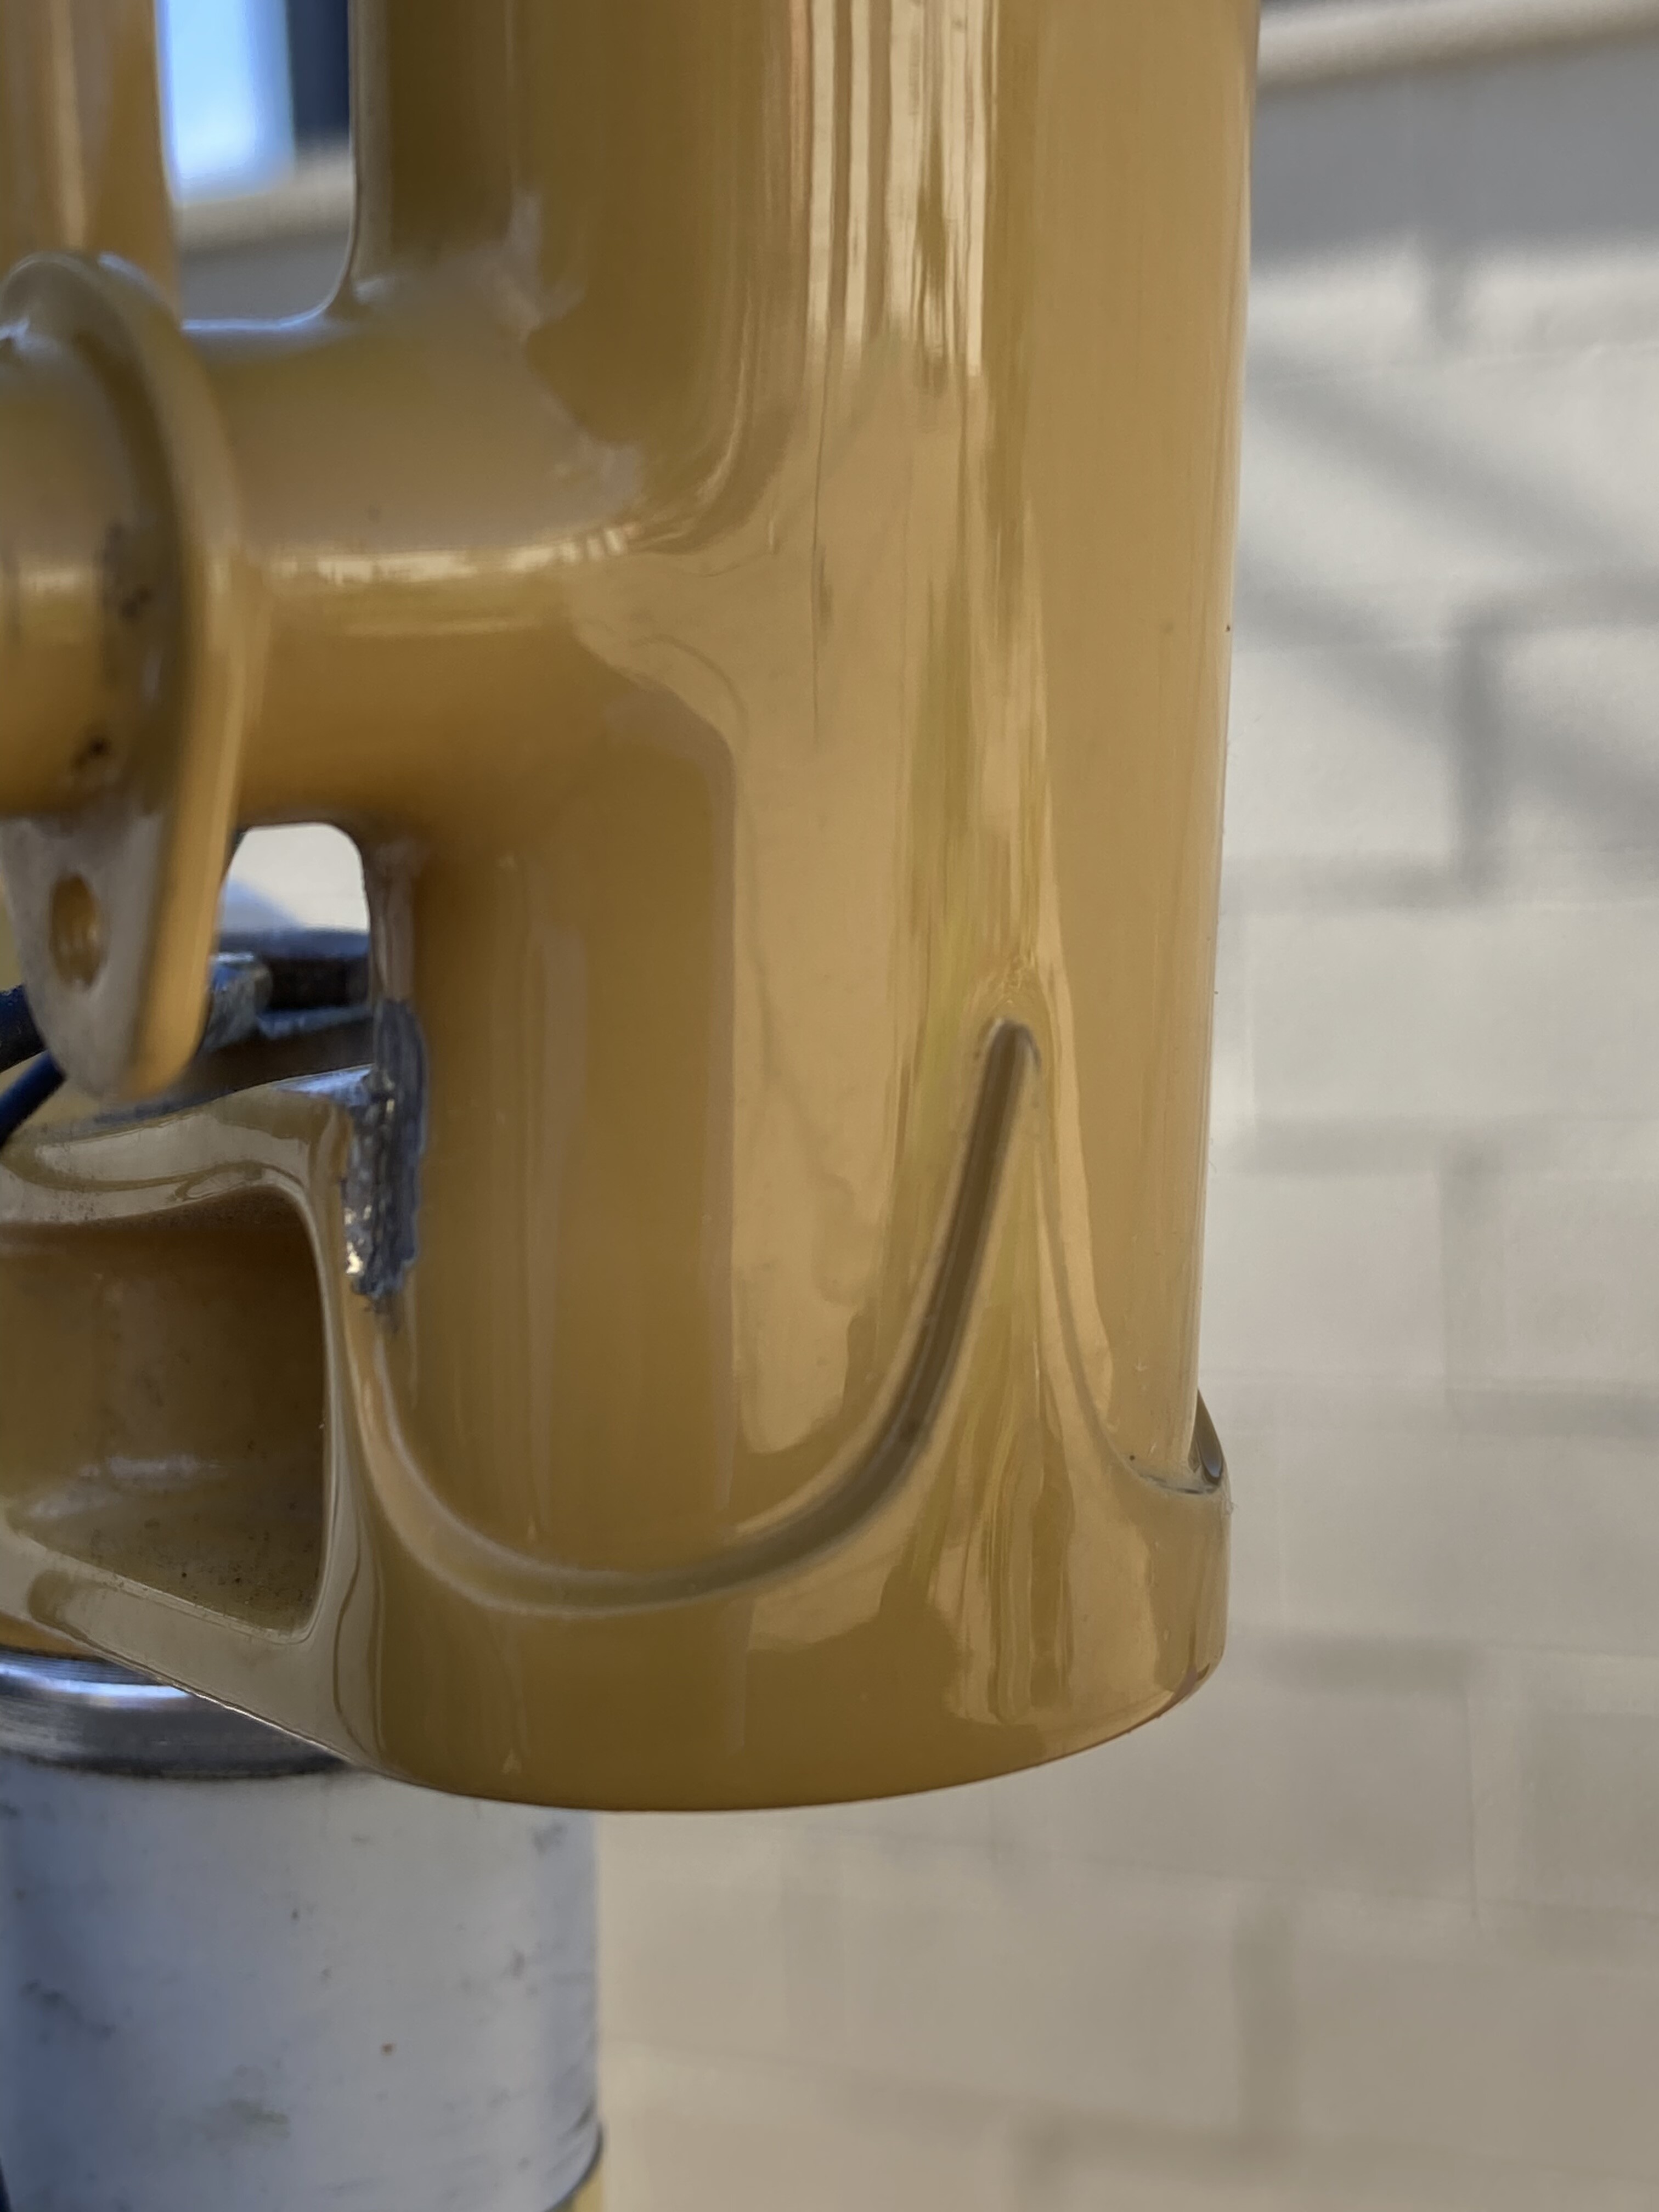
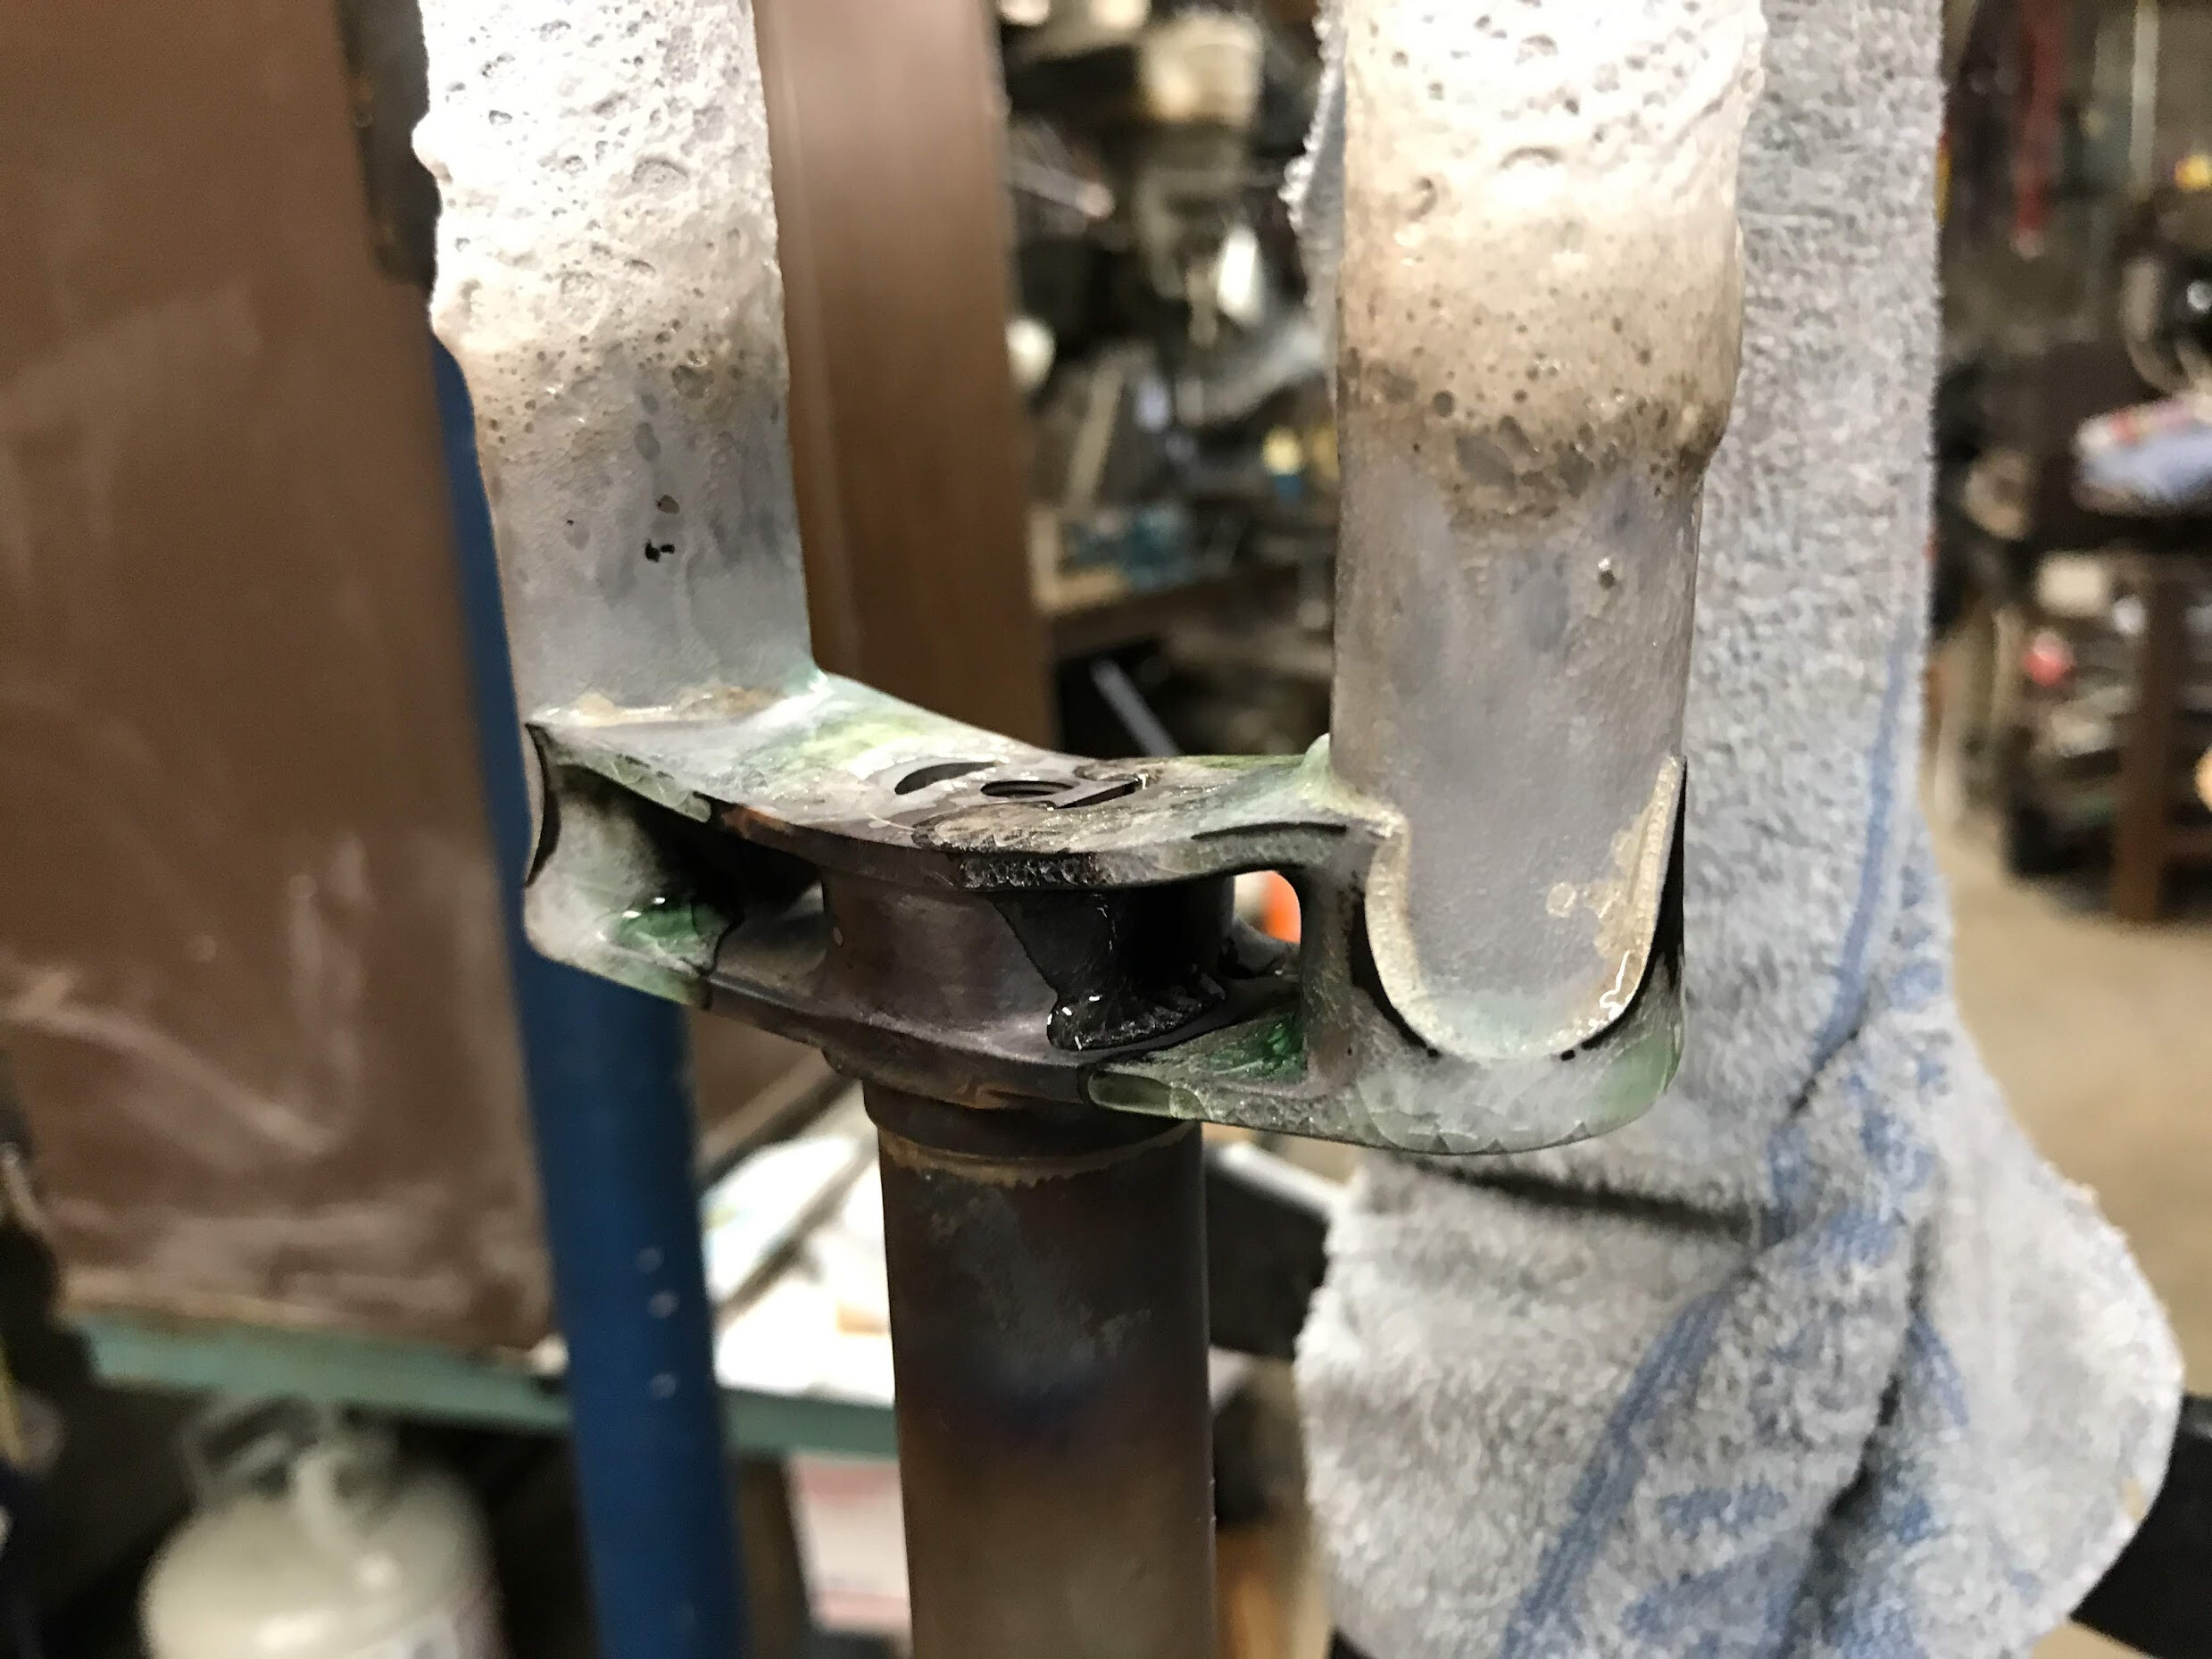
Soaking in enough heat into a crown to make the filler flow everywhere, without cooking the flux, is a delicate balancing act. I believe the key is to heat it up as quickly as you can while still not burning anything. I like really large flames and I do mean plural, as in one pretty large flame in one hand and a gargantuan one in the other. OK not gargantuan like at the shipyard but big by bike frame standards. One torch with a large single flame and the other a rosebud.

Now, two torches is a luxury and I’m not saying you need that, but think about it. With one torch you should probably max out your torch, biggest tip you have for it. I’ve seen videos of FBs taking 10-15 minutes or more to braze a crown, where I’m pretty sure the crowns I brazed in ~2 minutes came out stronger, due to the lower time-at-temperature.

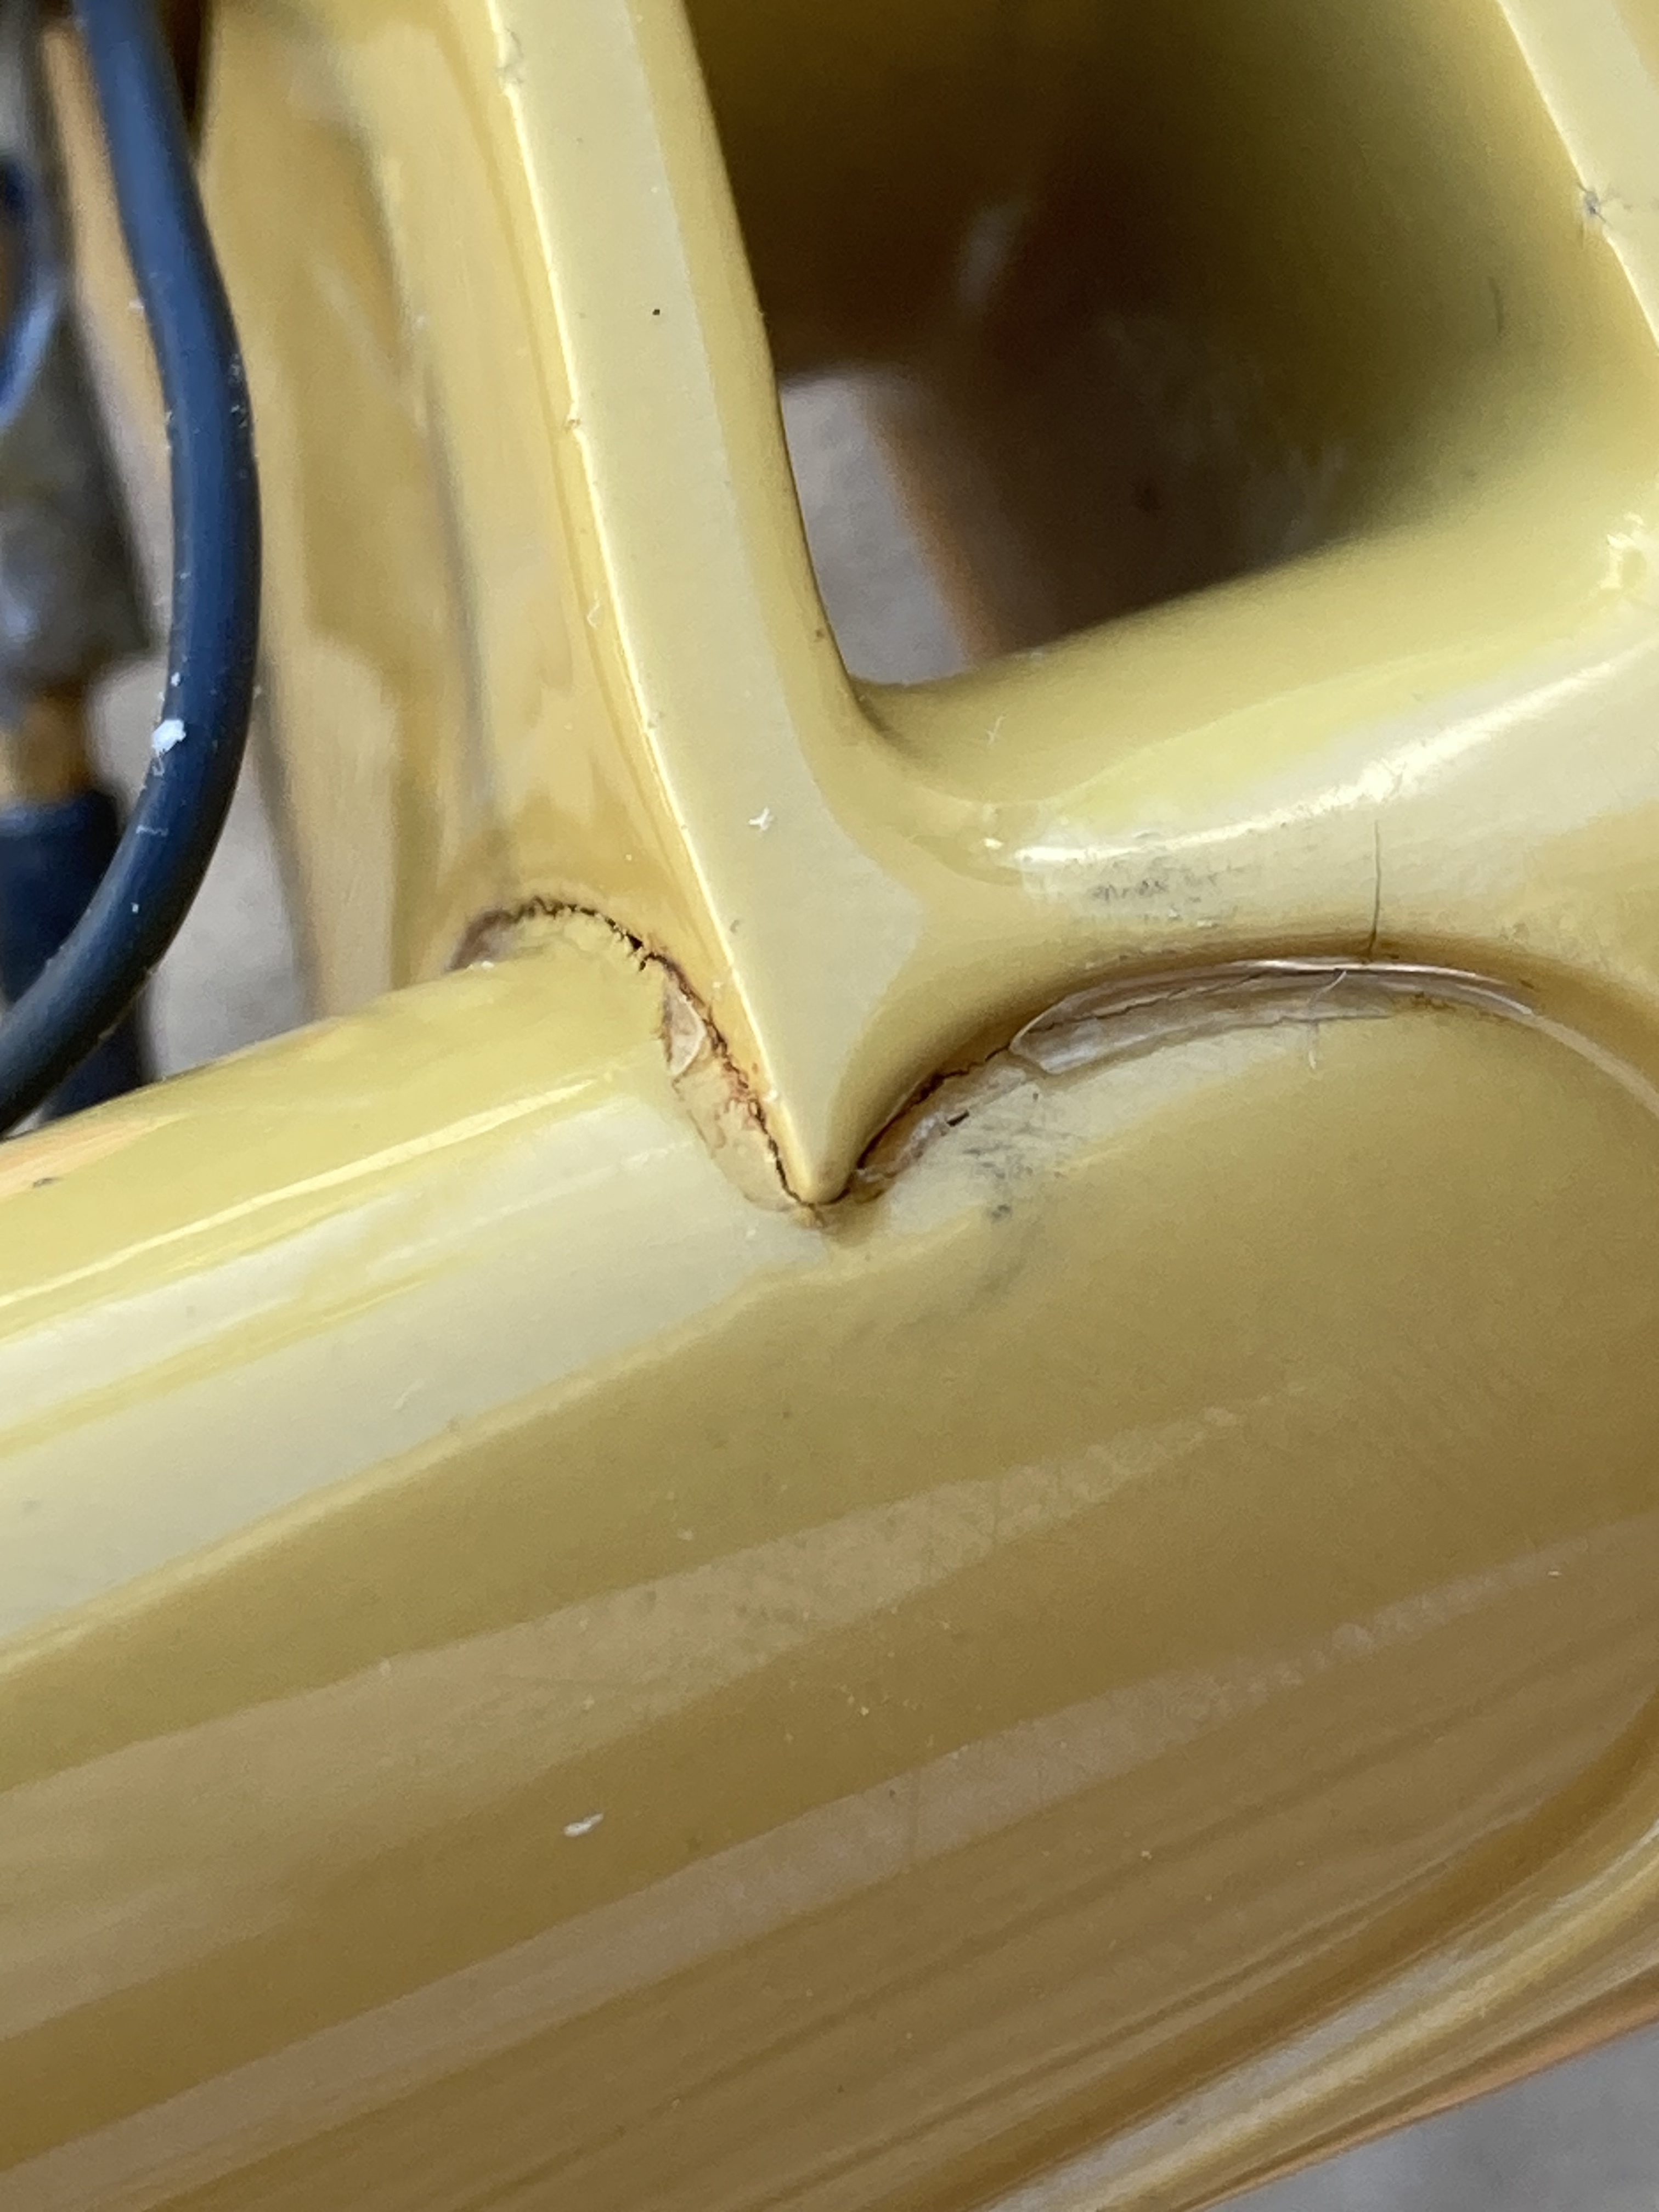
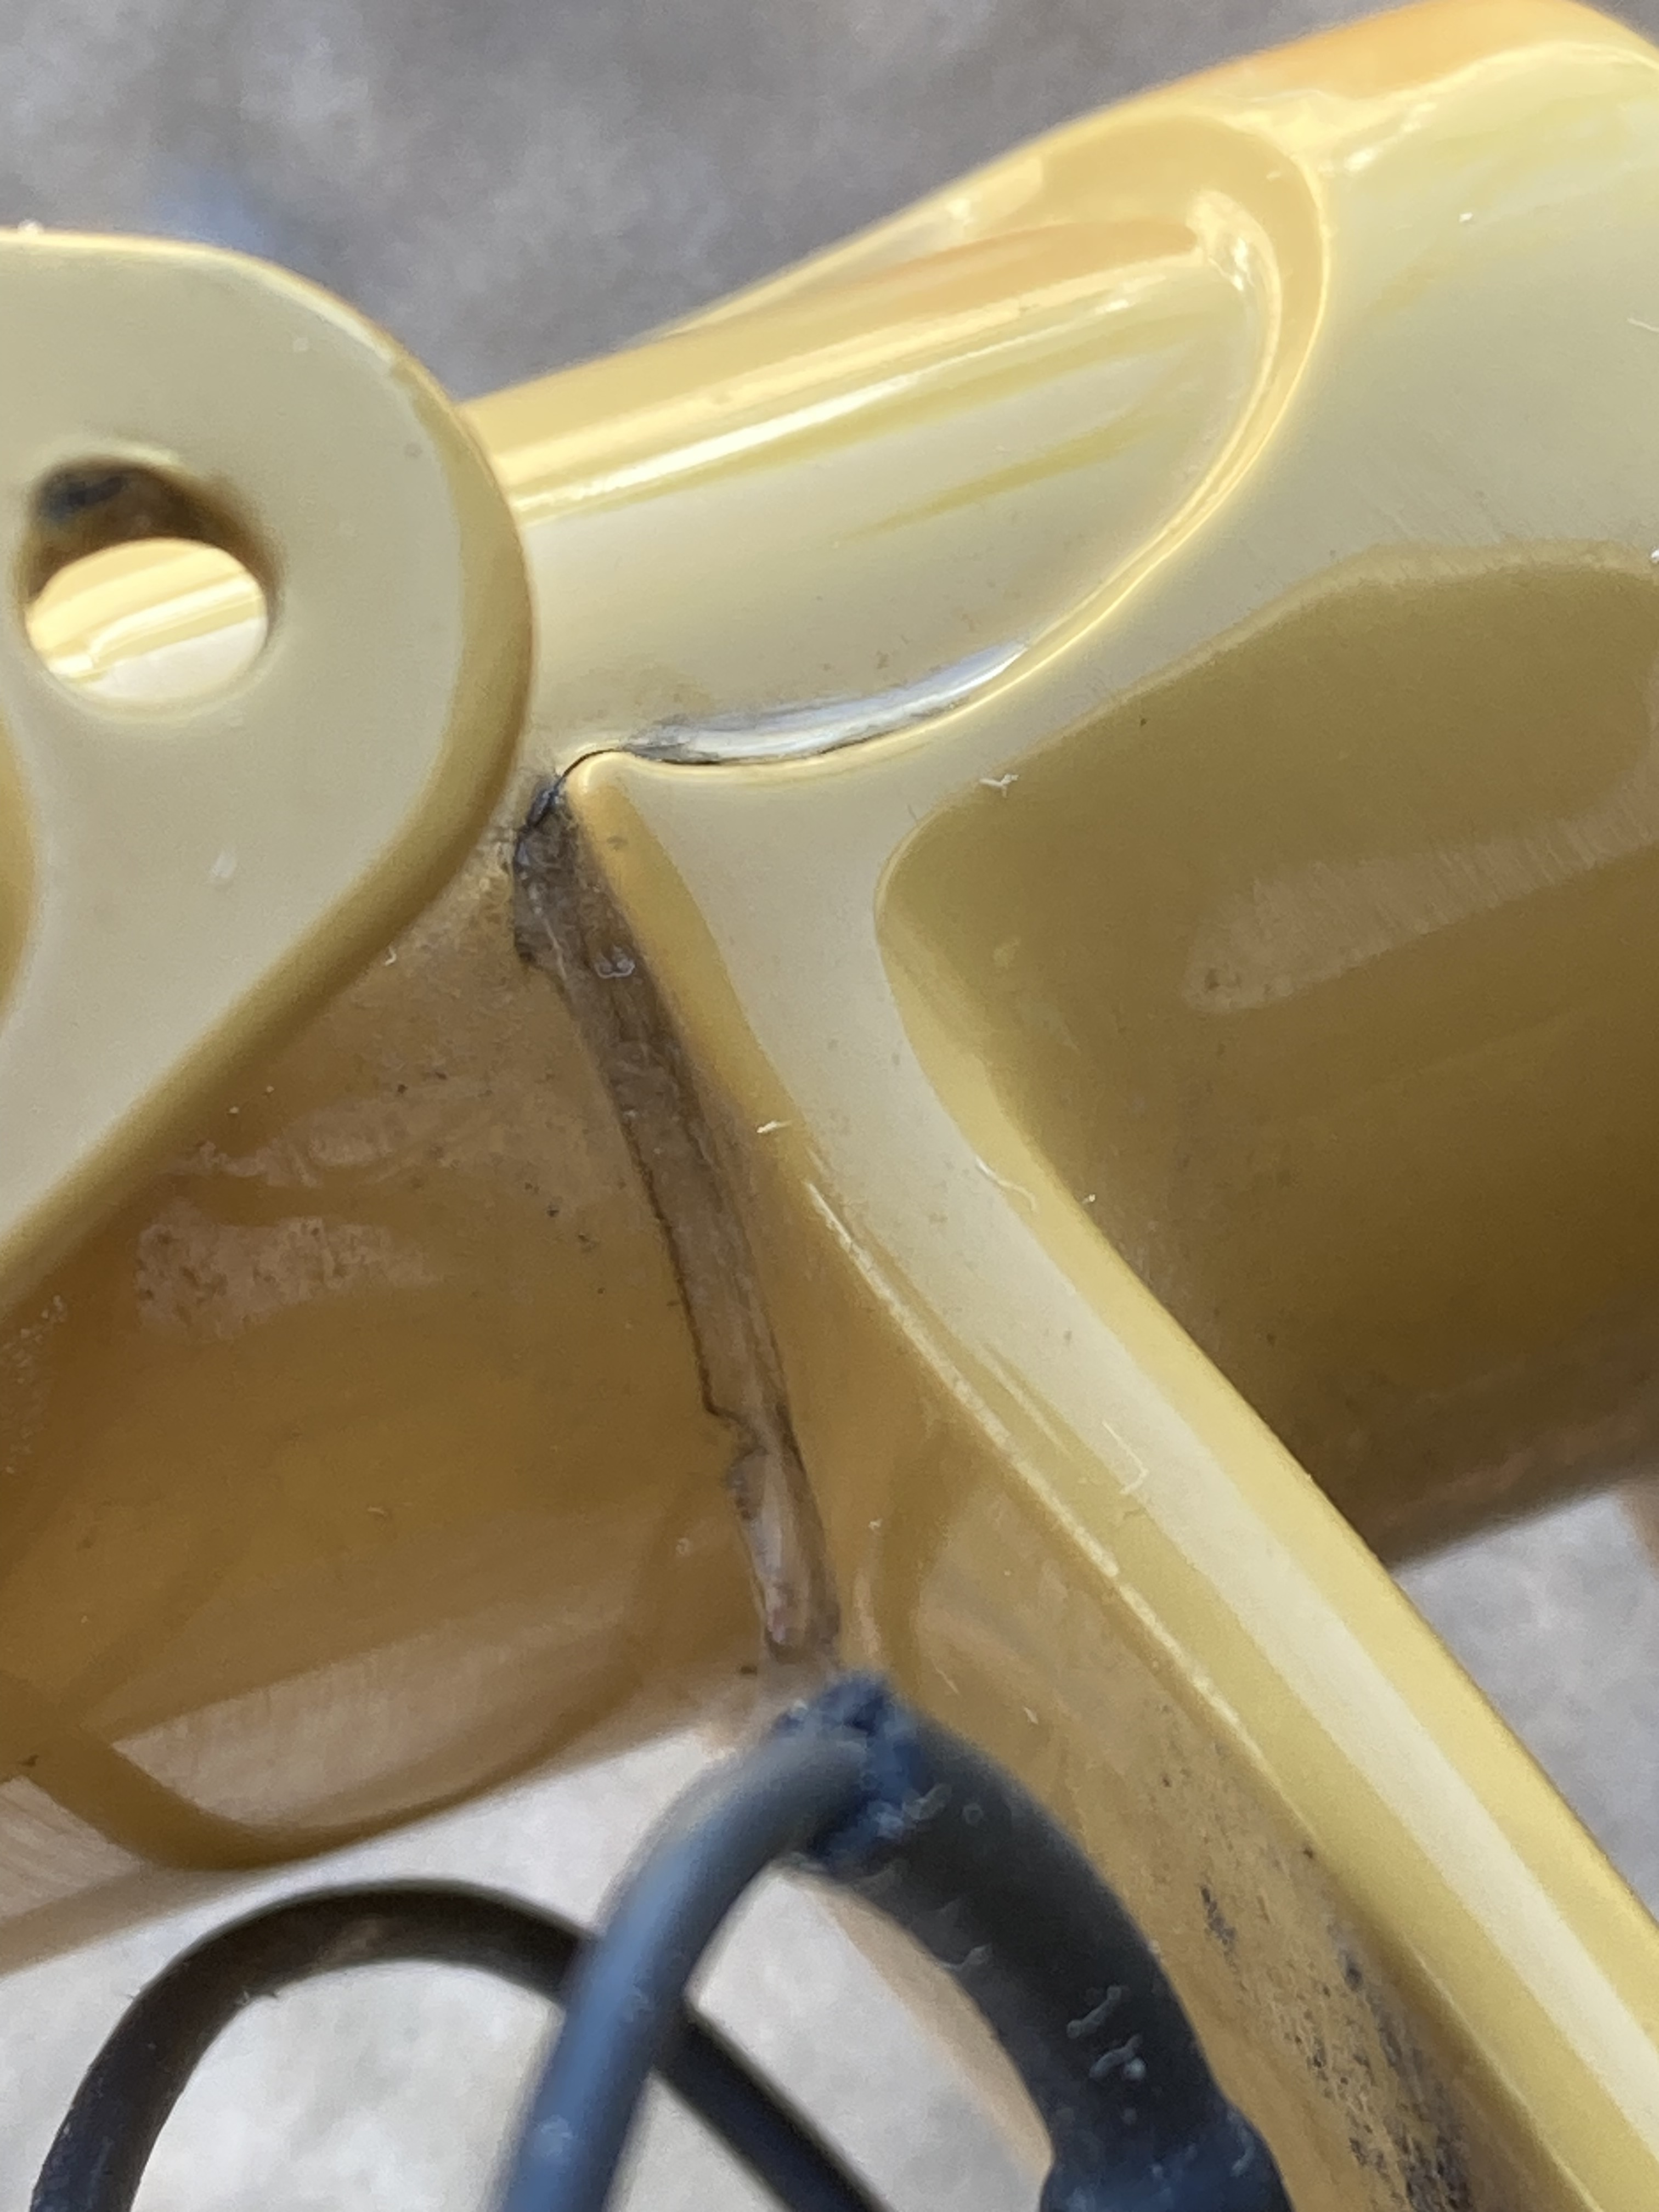
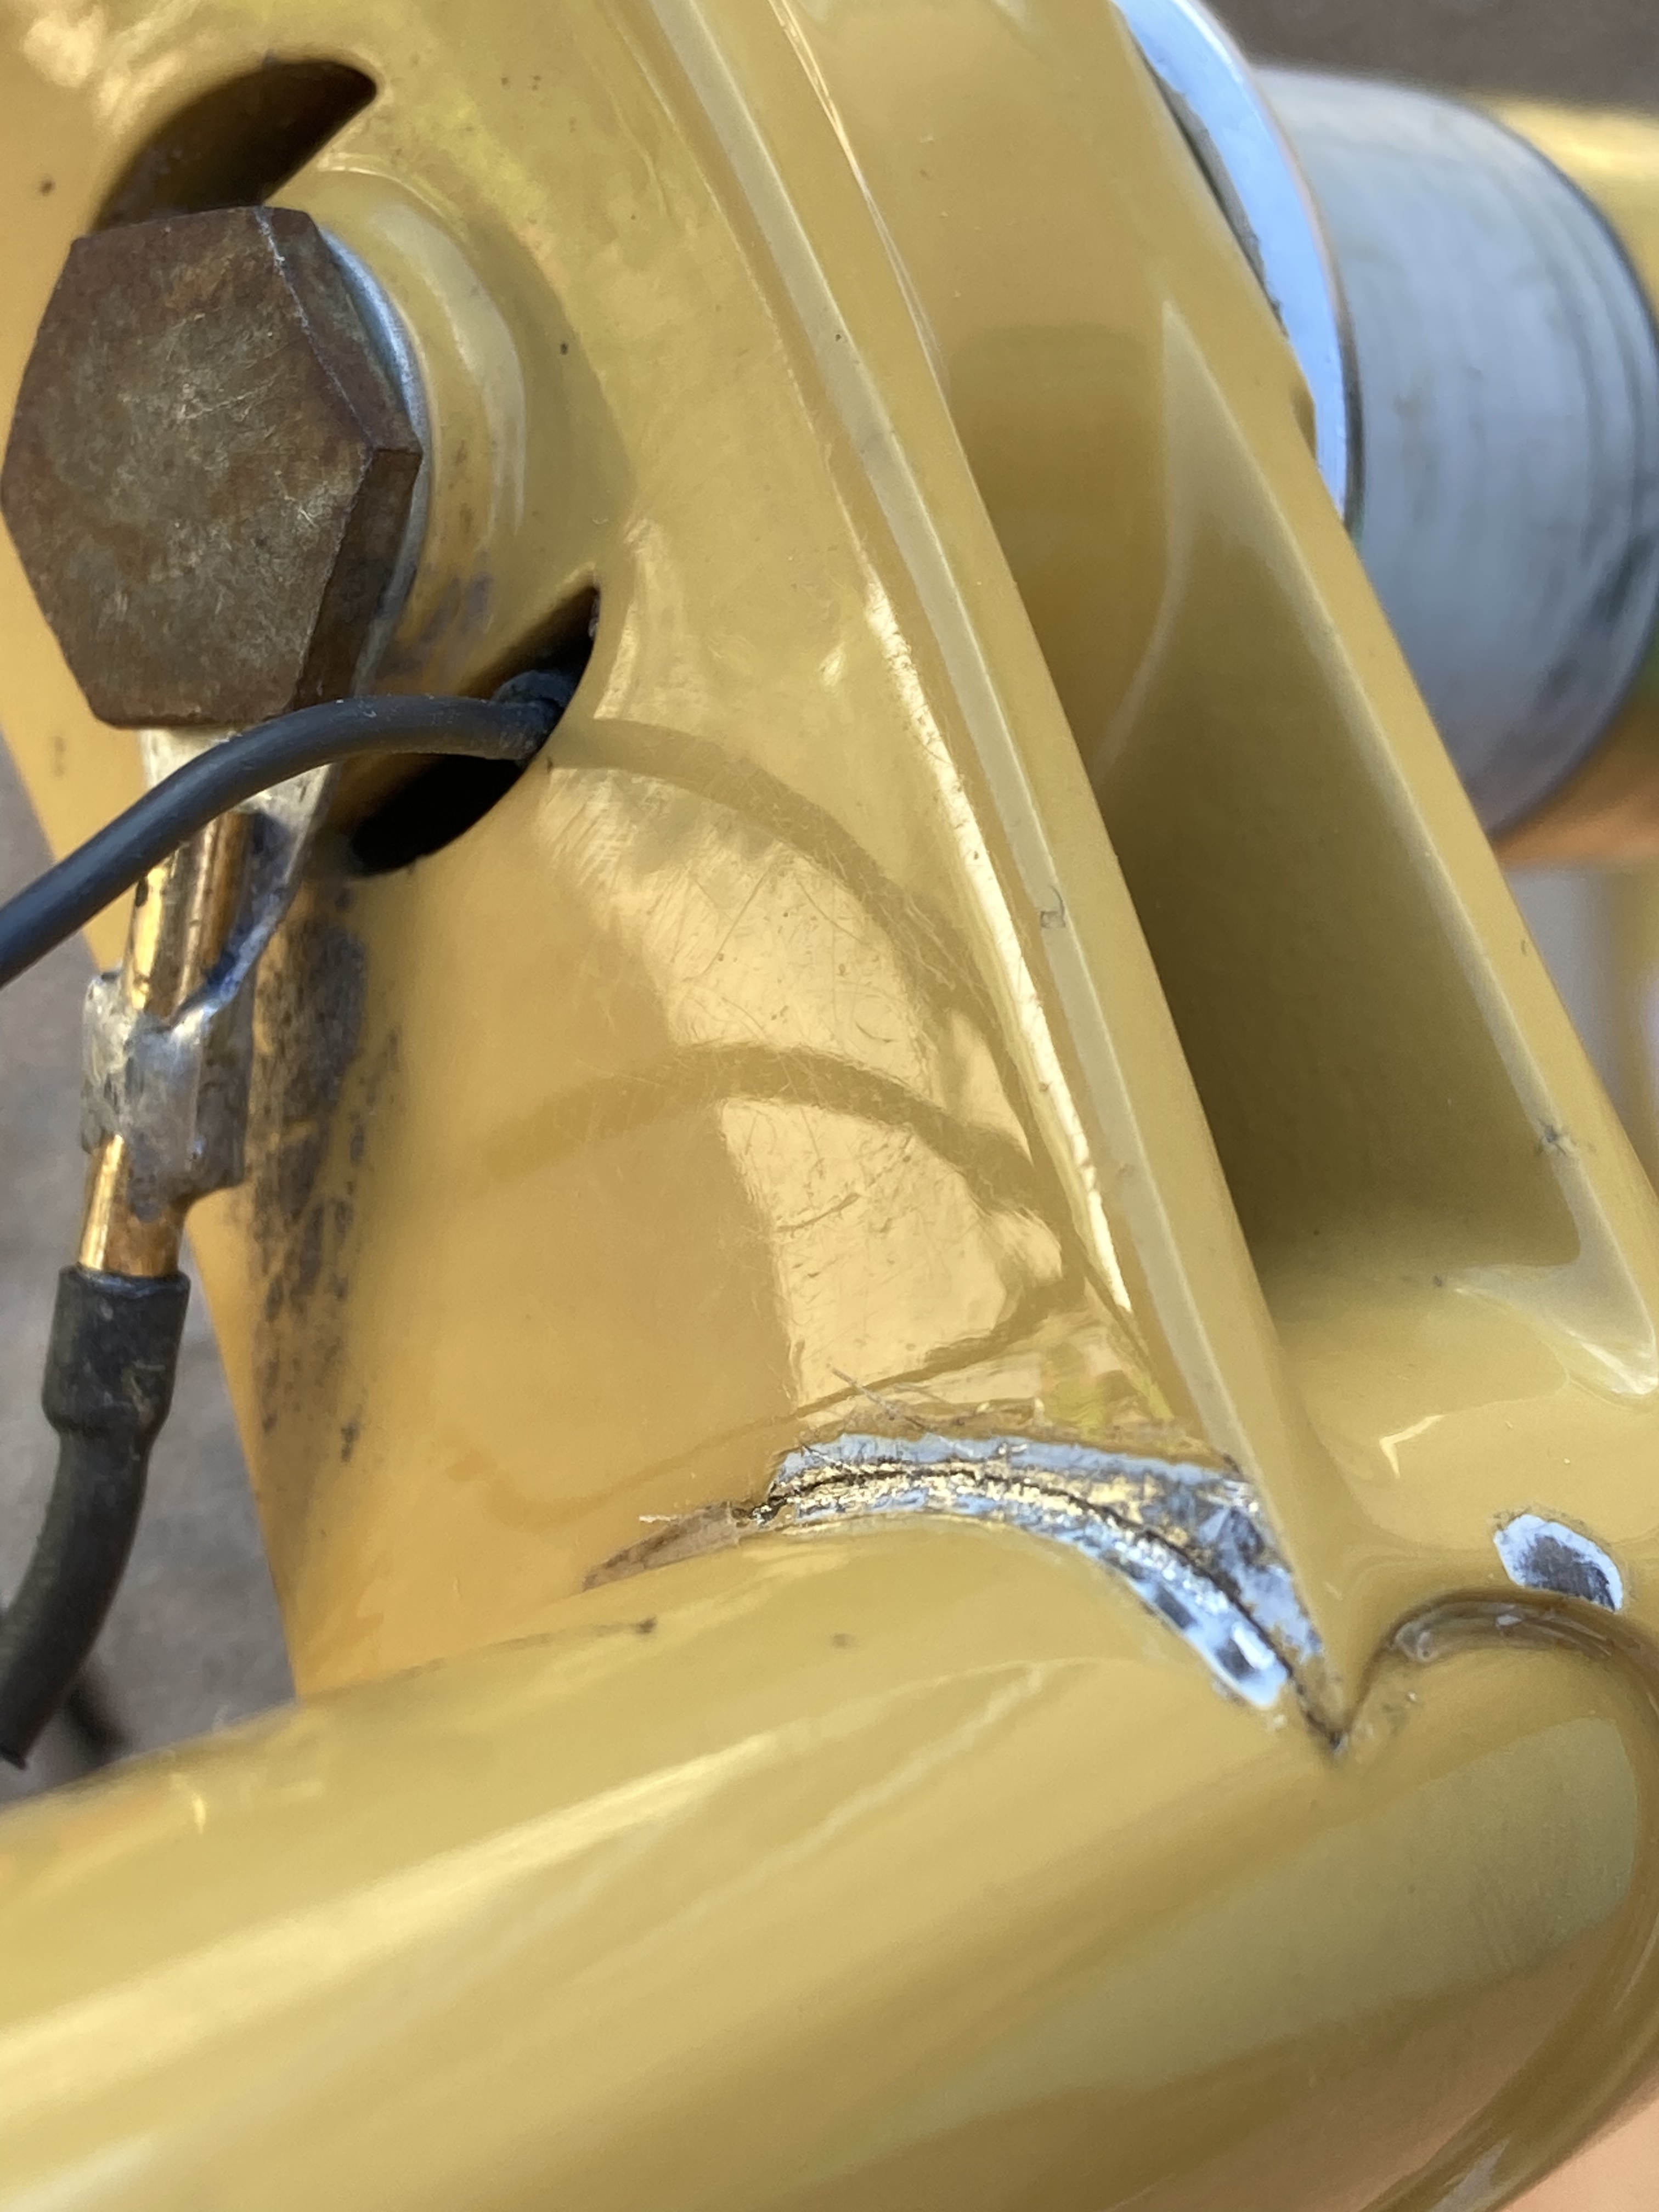
Especially with propane, which gets a lot of heat from its outer flame, you want to hold it further away and heat the whole crown very generally. Spend most of your time heating the thickest part of the casting and whatever’s farthest away from where you’re feeding the rod. Dont apply the rod until the crown is hot enough for flow everywhere. Resist the urge to add filler at the shoreline as soon as the shoreline is hot enough. Wait until the deepest, thickest part is hot enough to flow the filler, then that gap will really suck up the filler, by capillary.

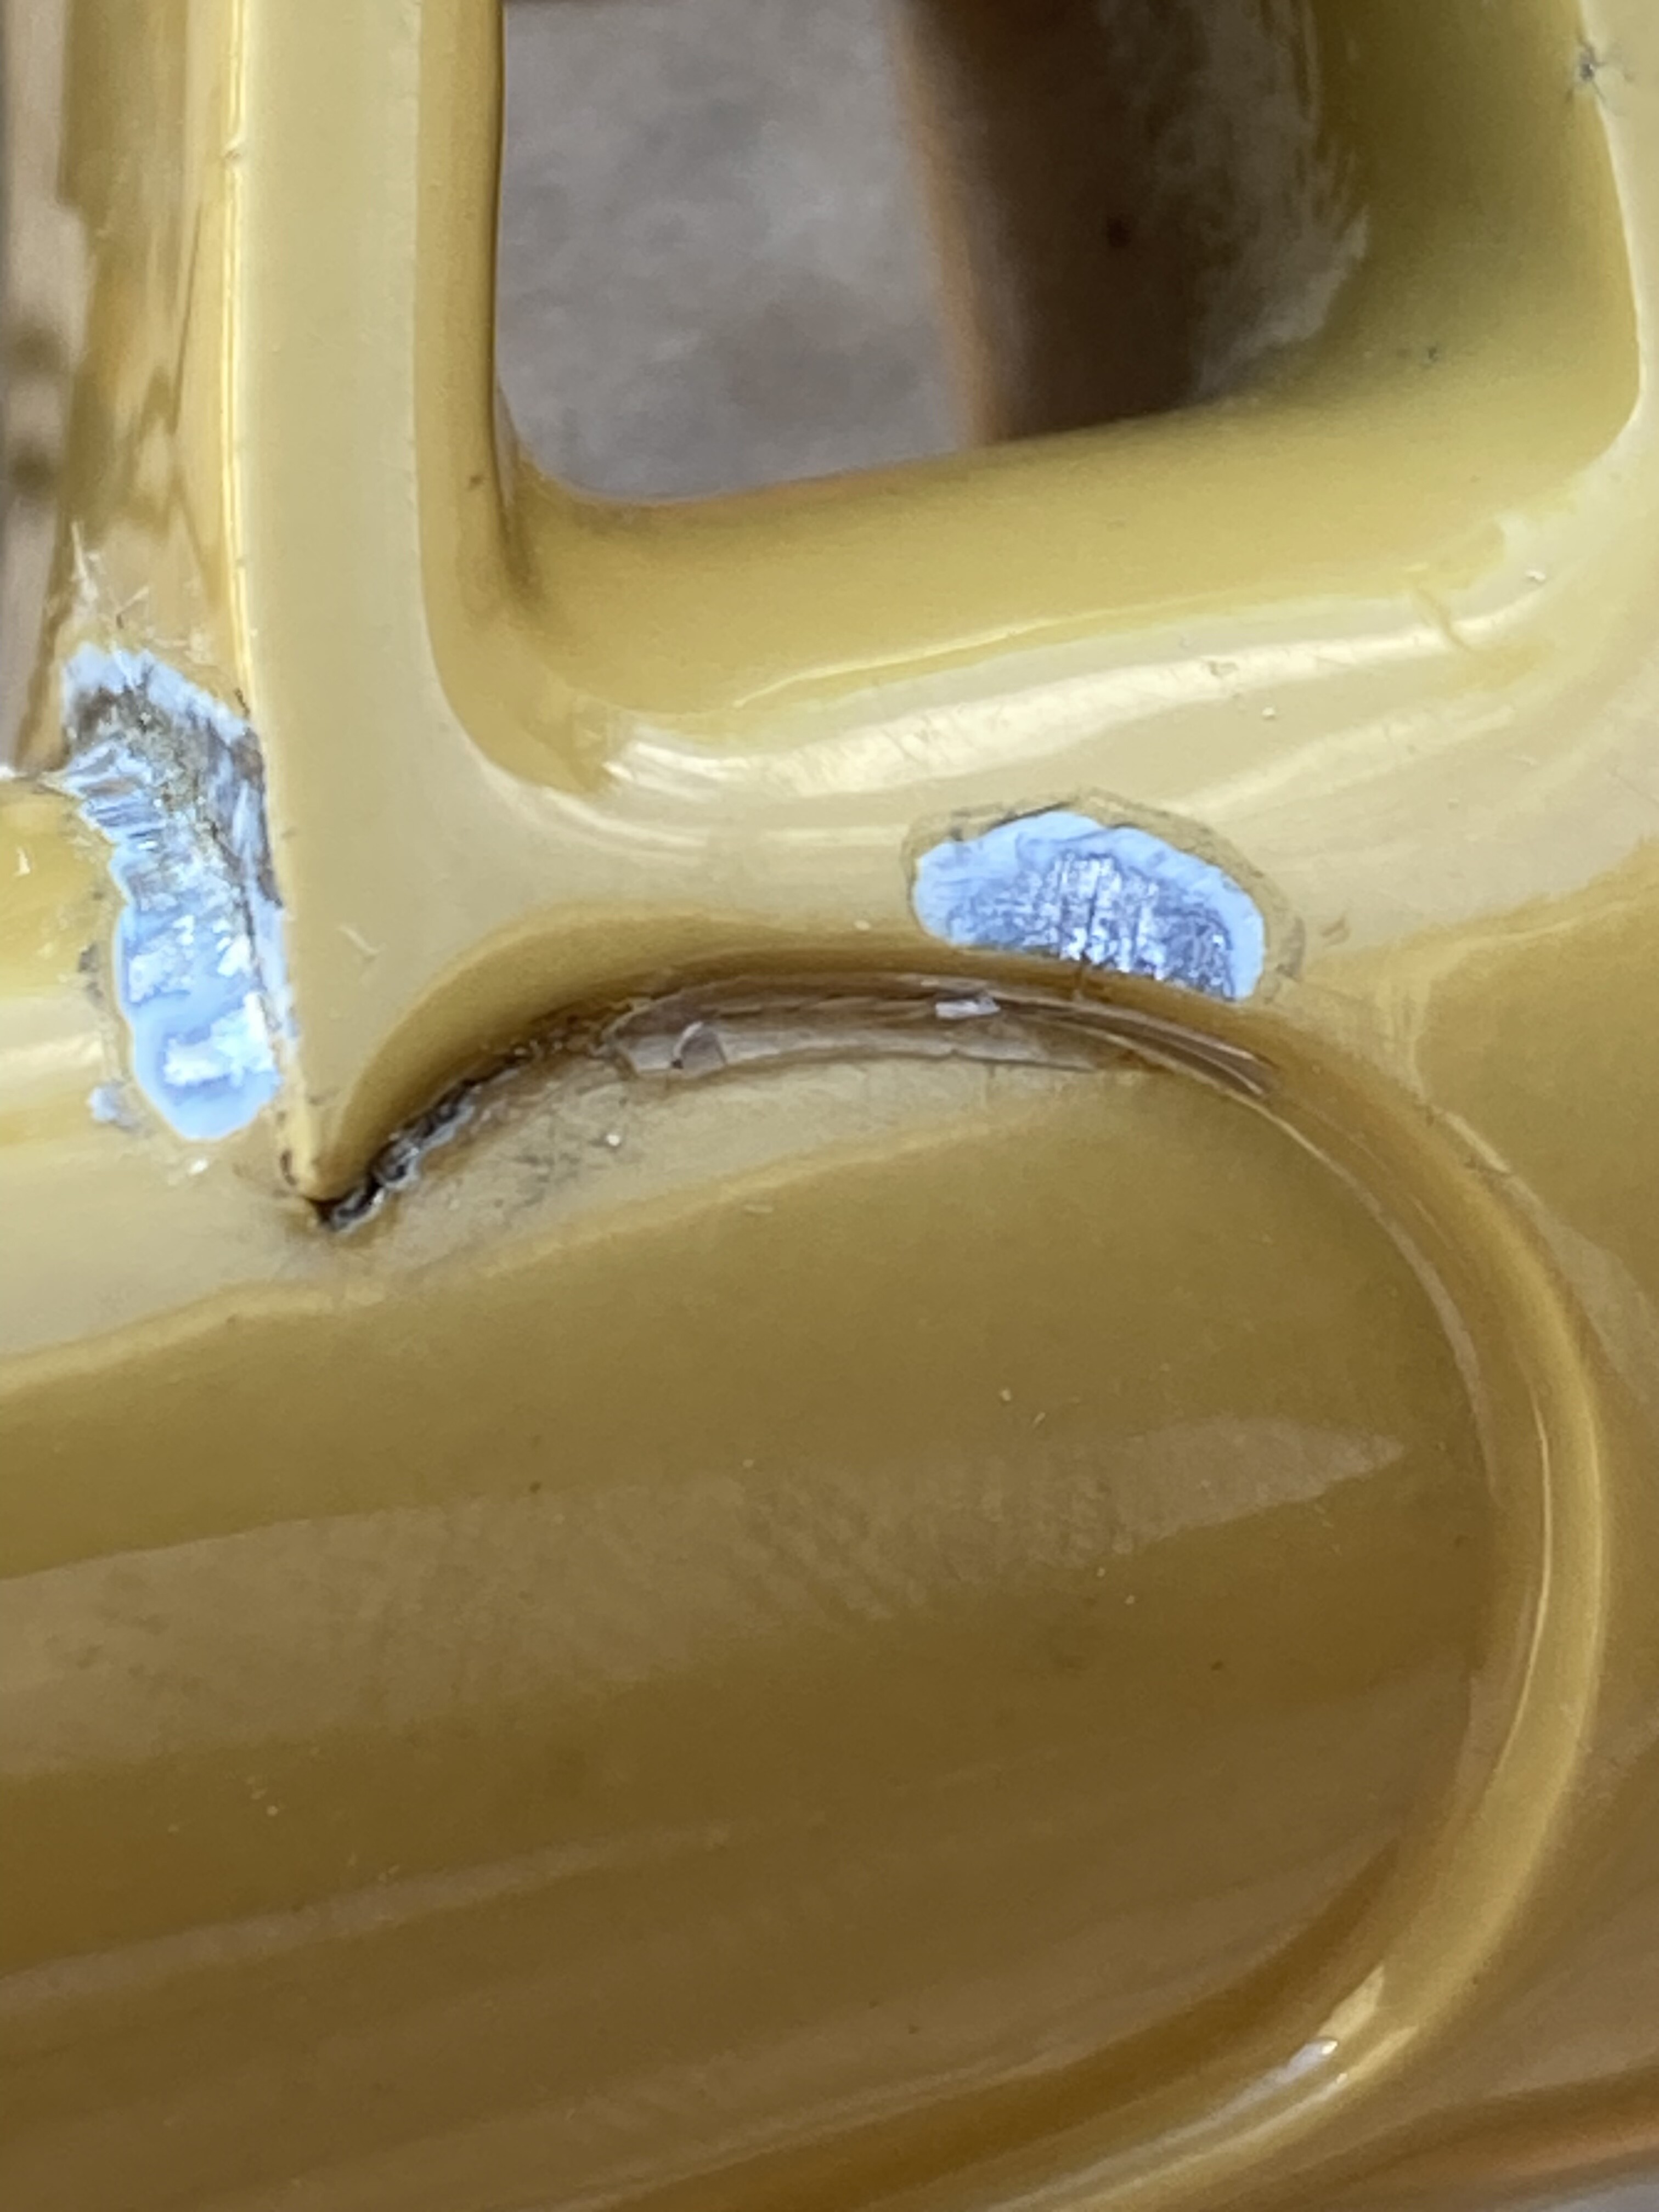
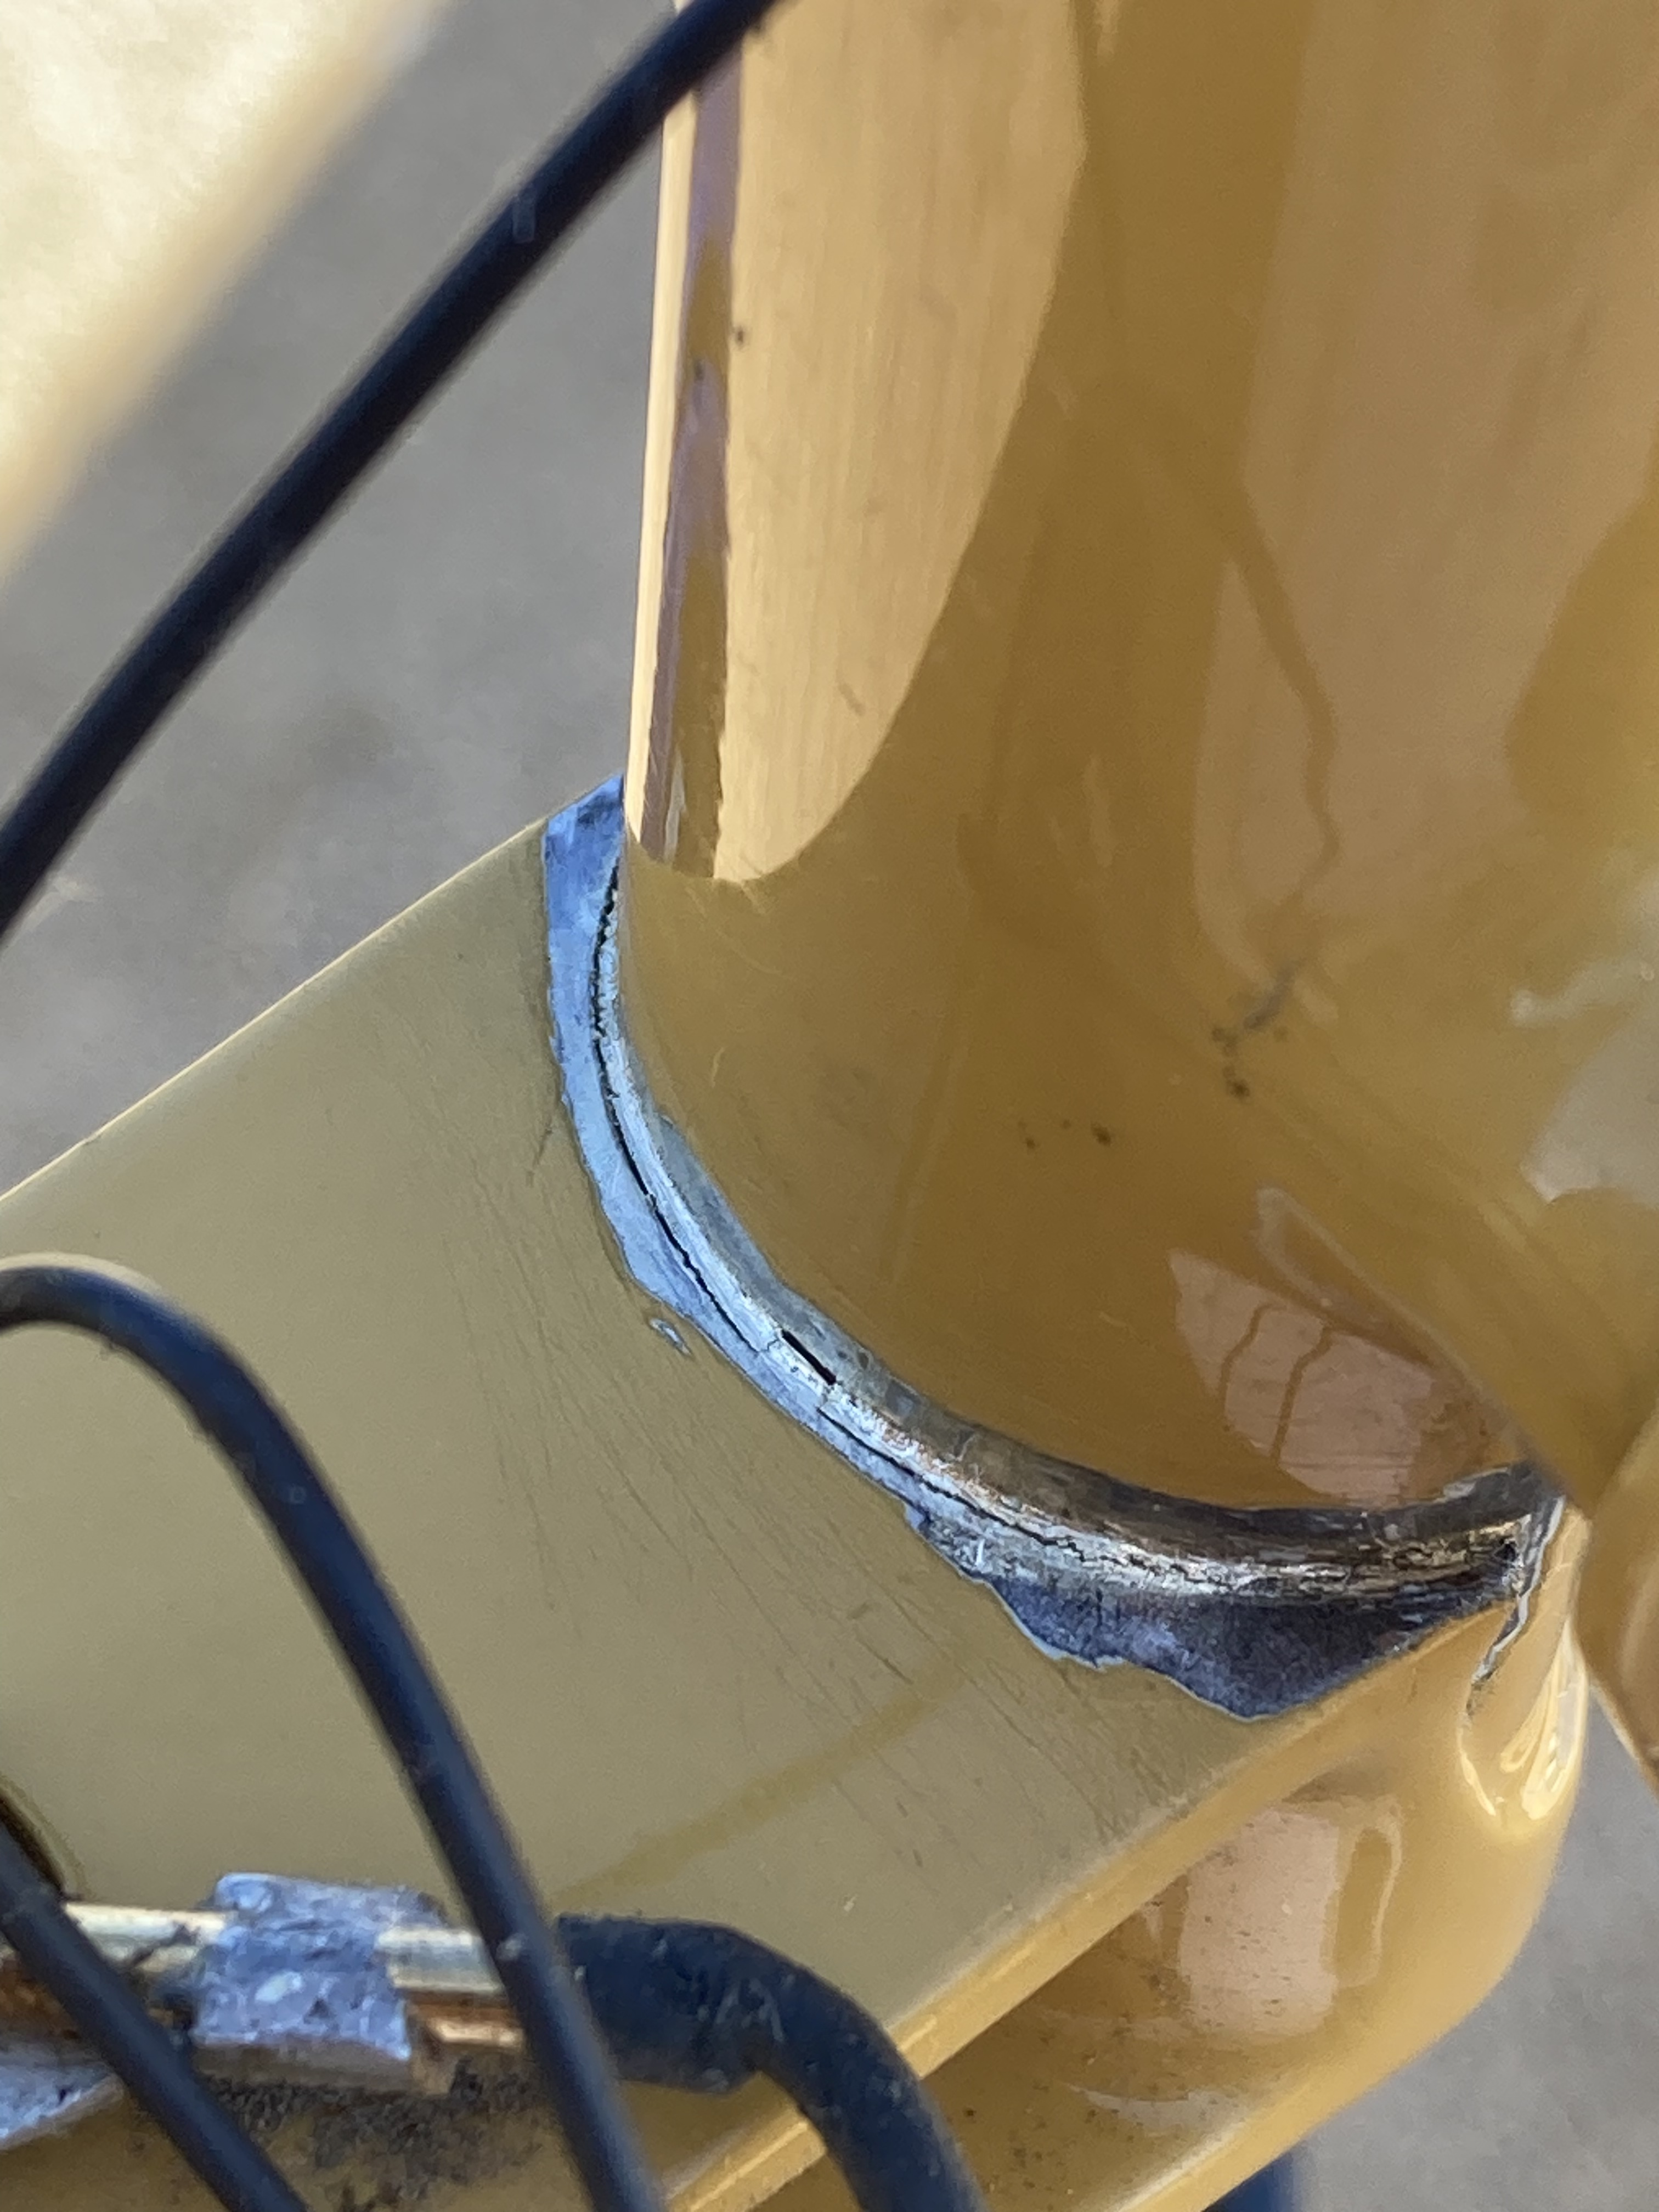
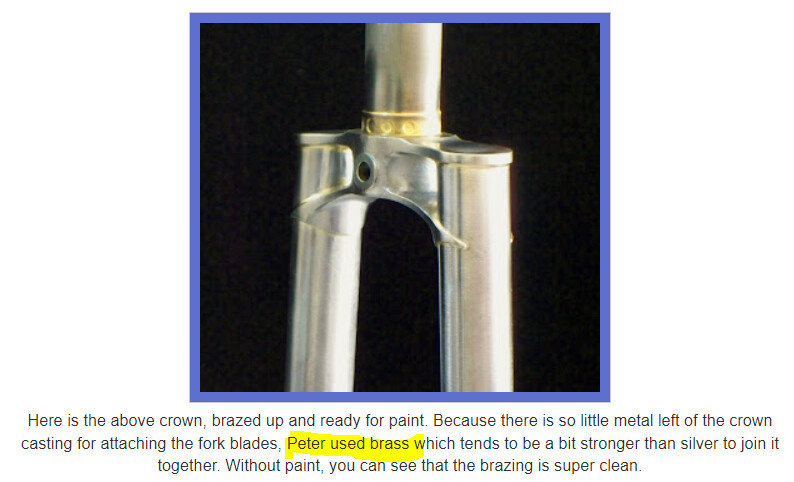
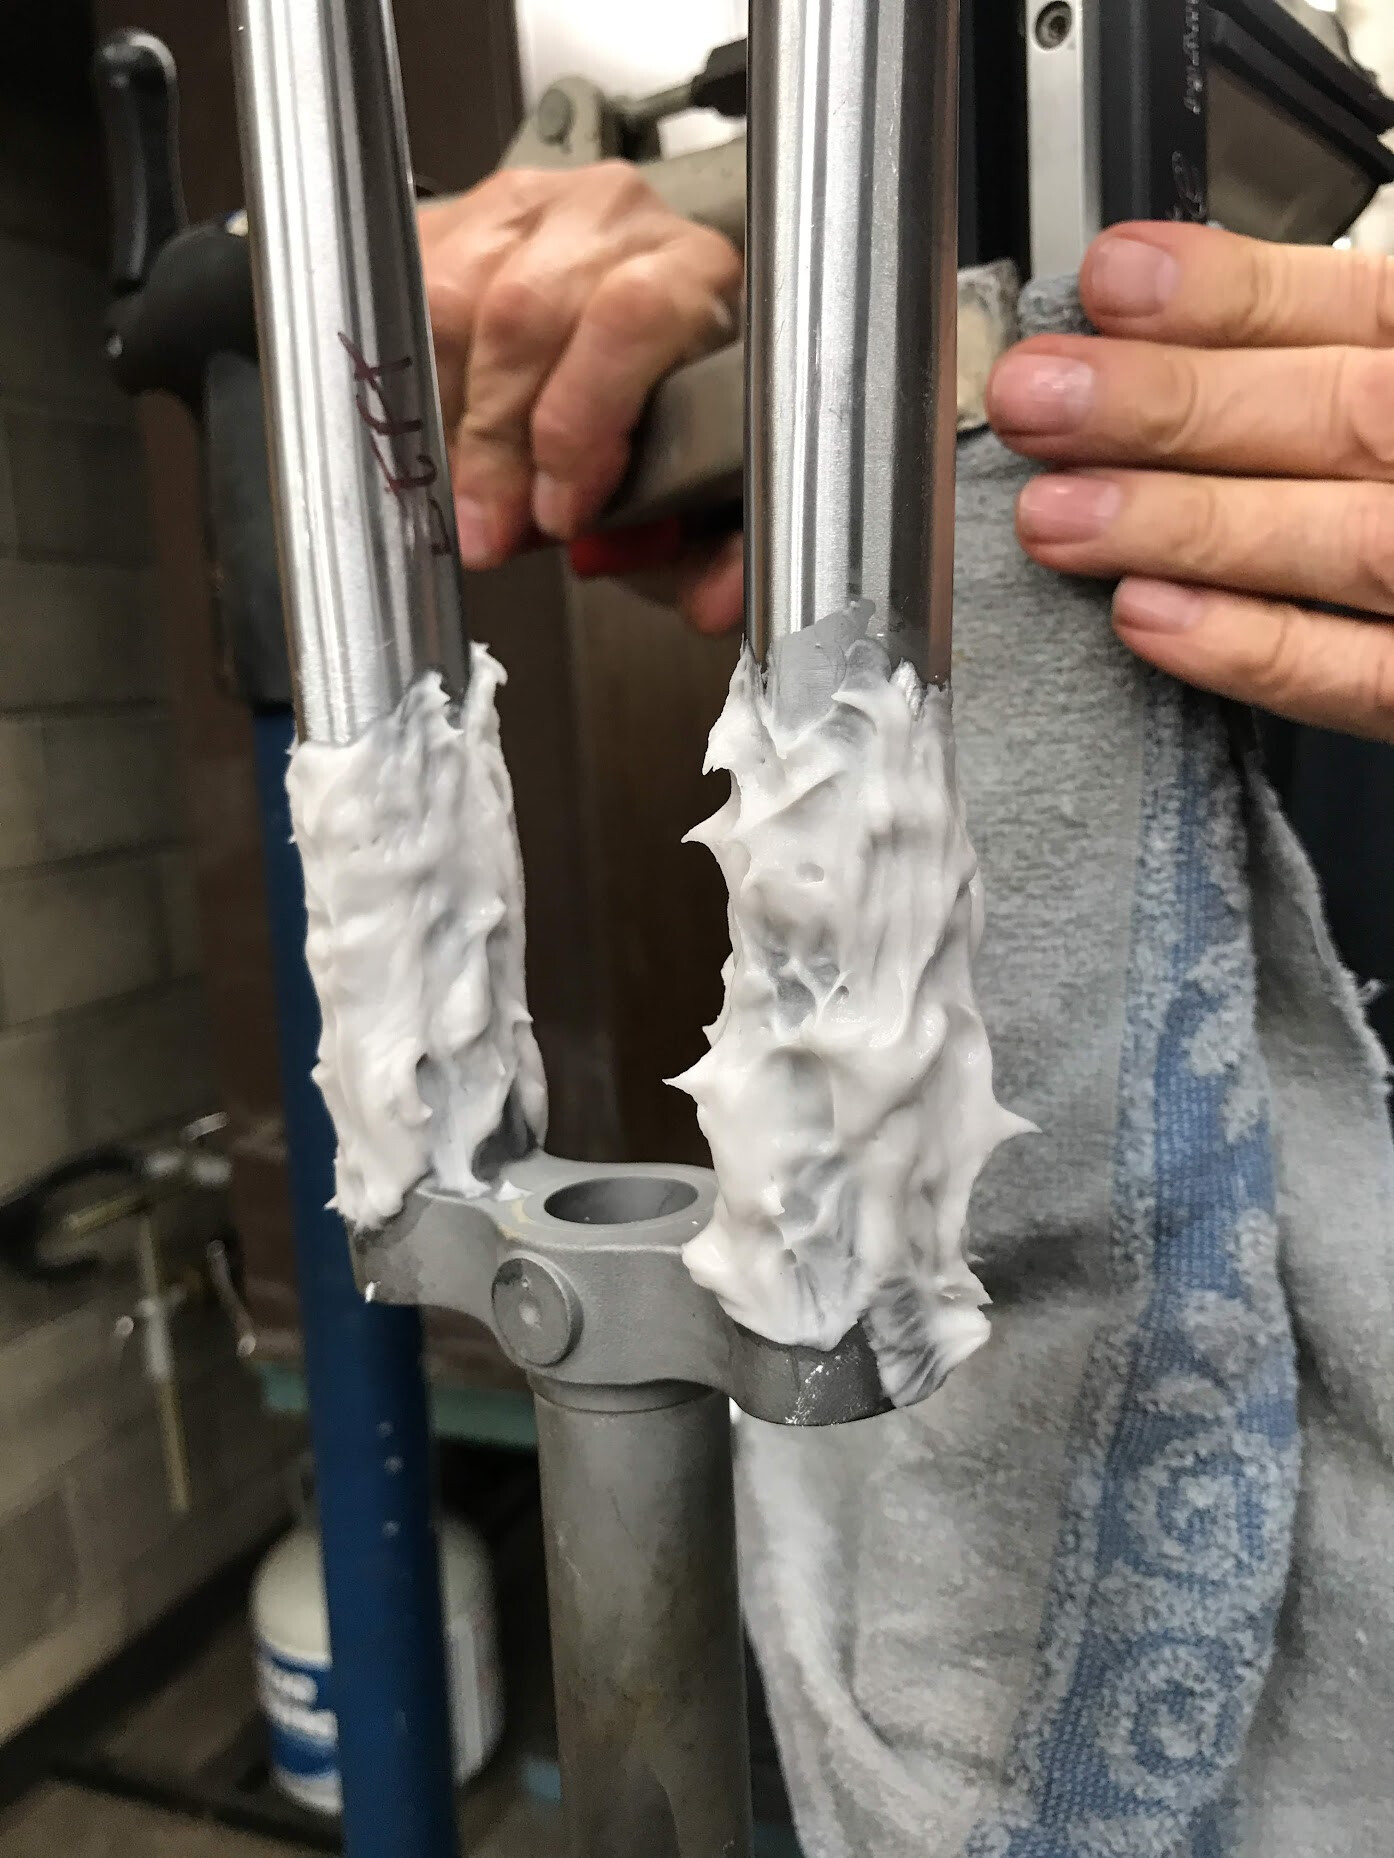
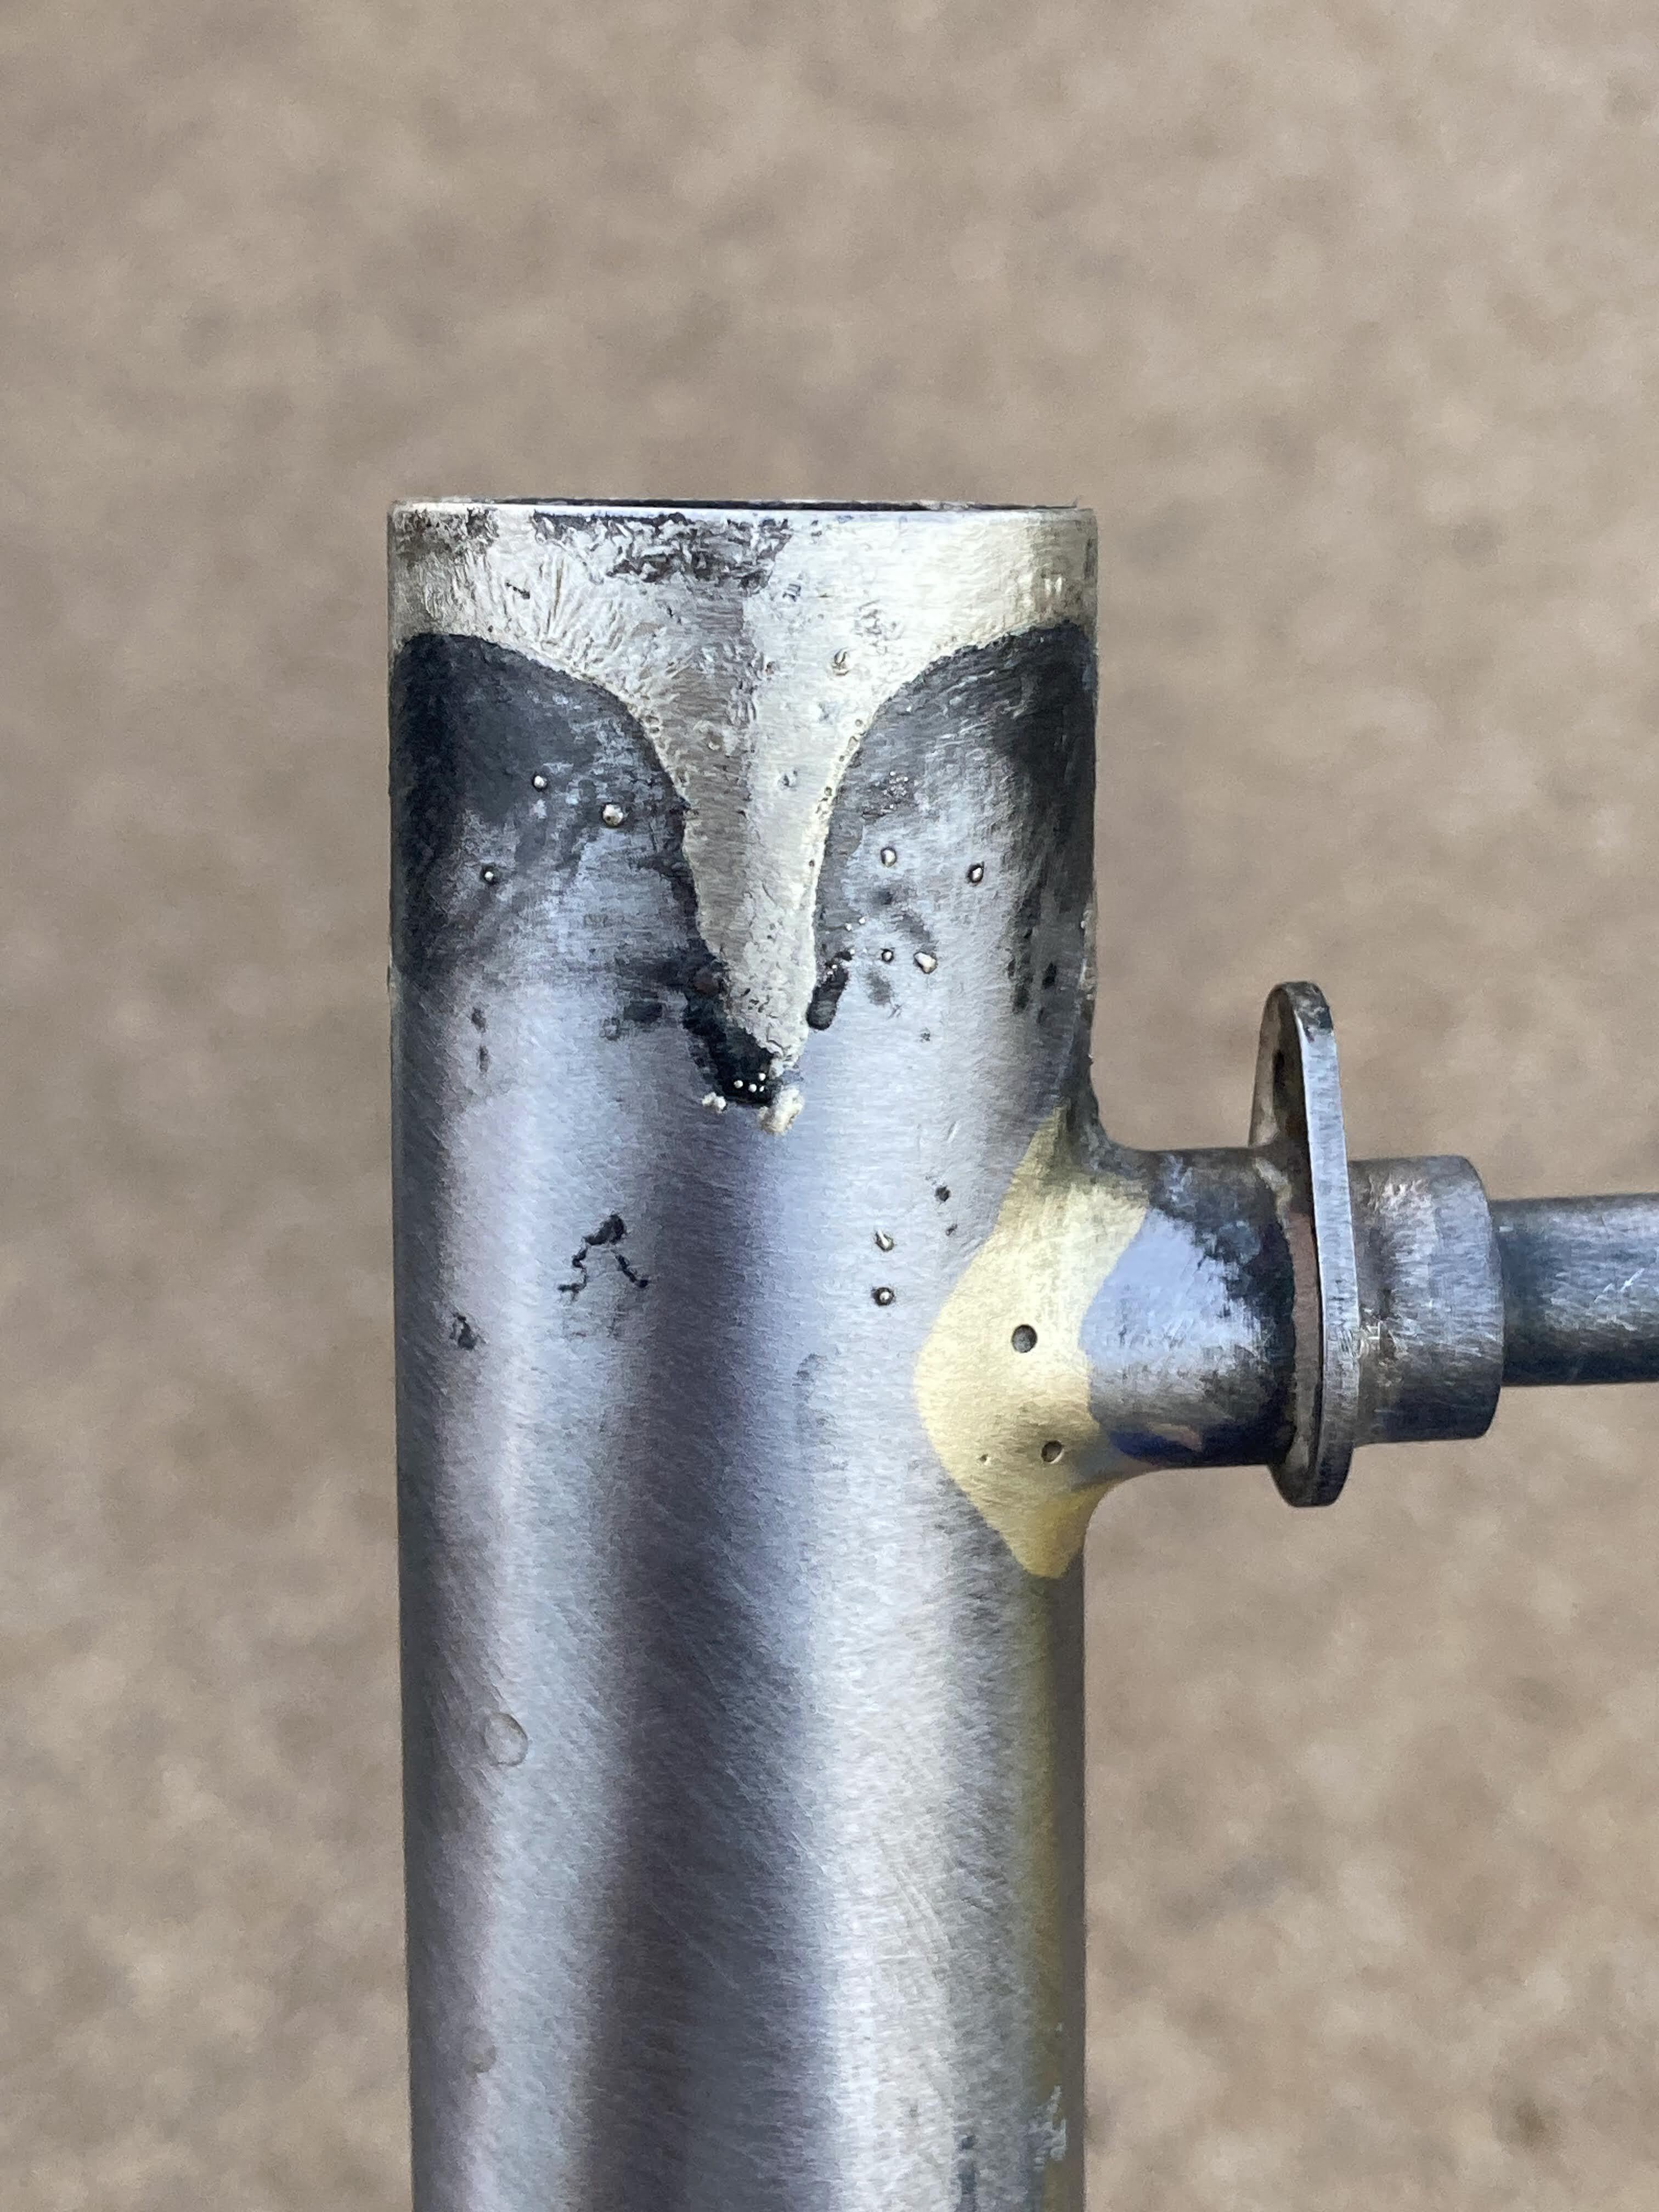
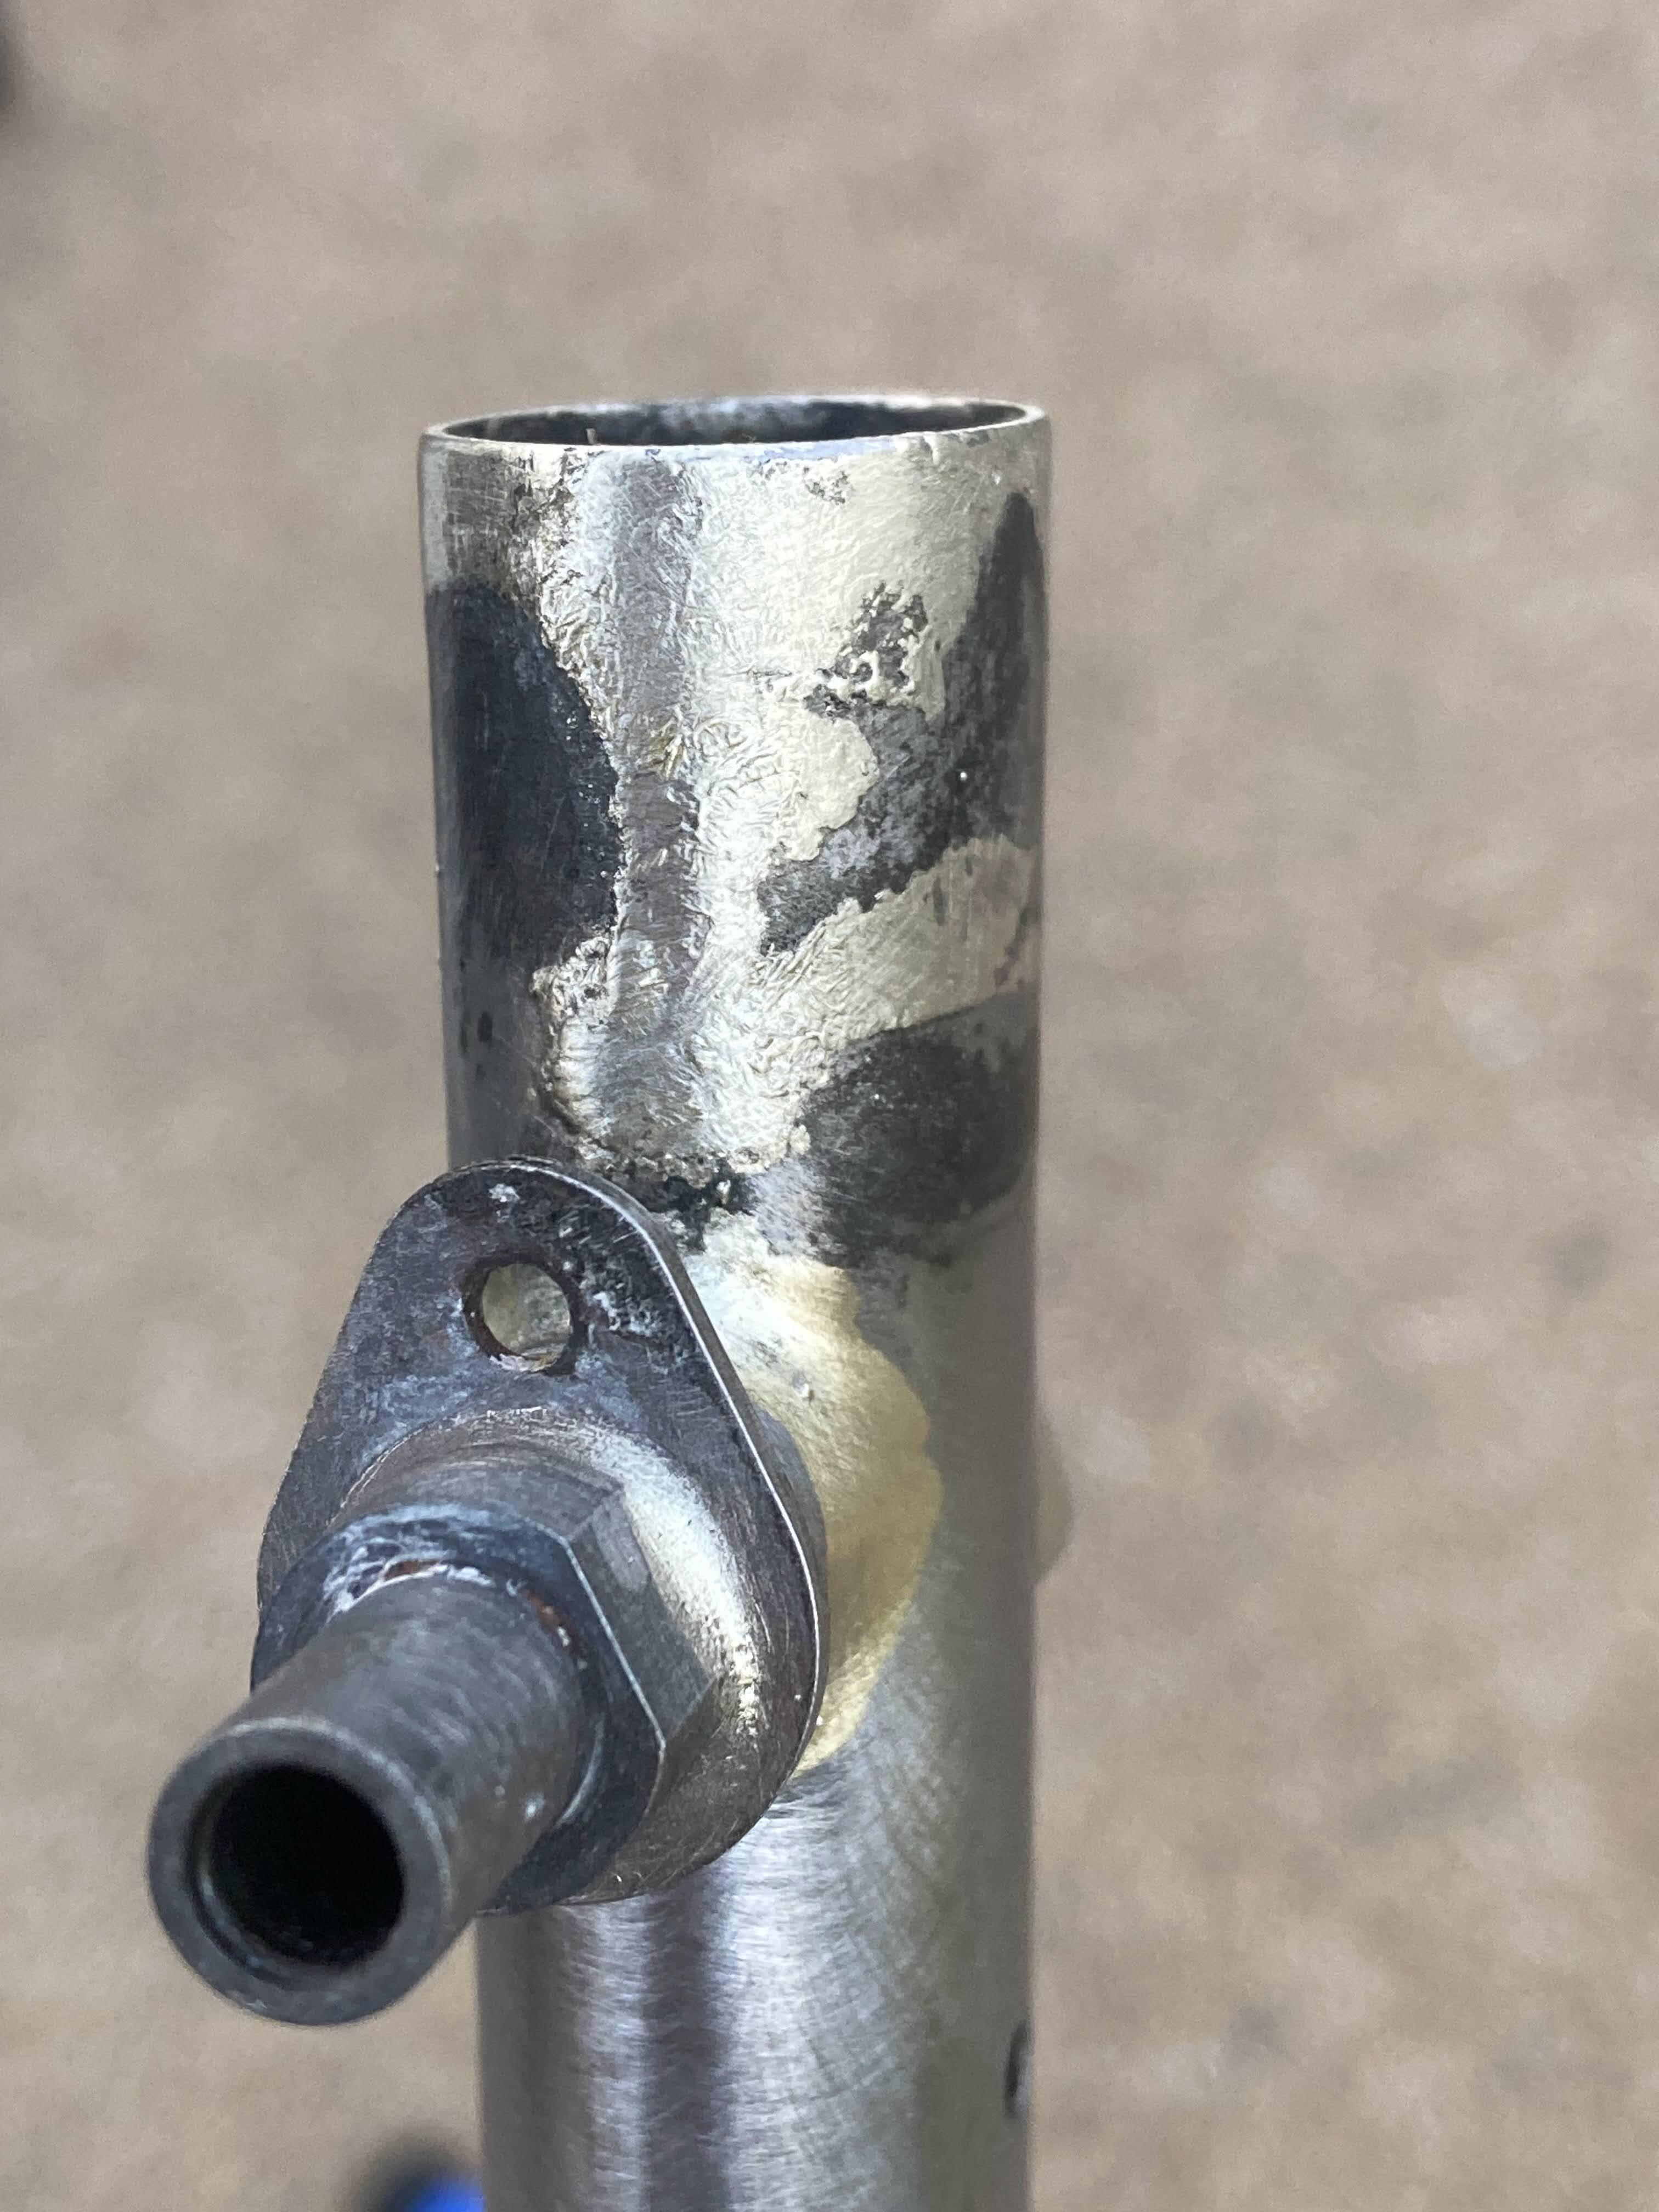
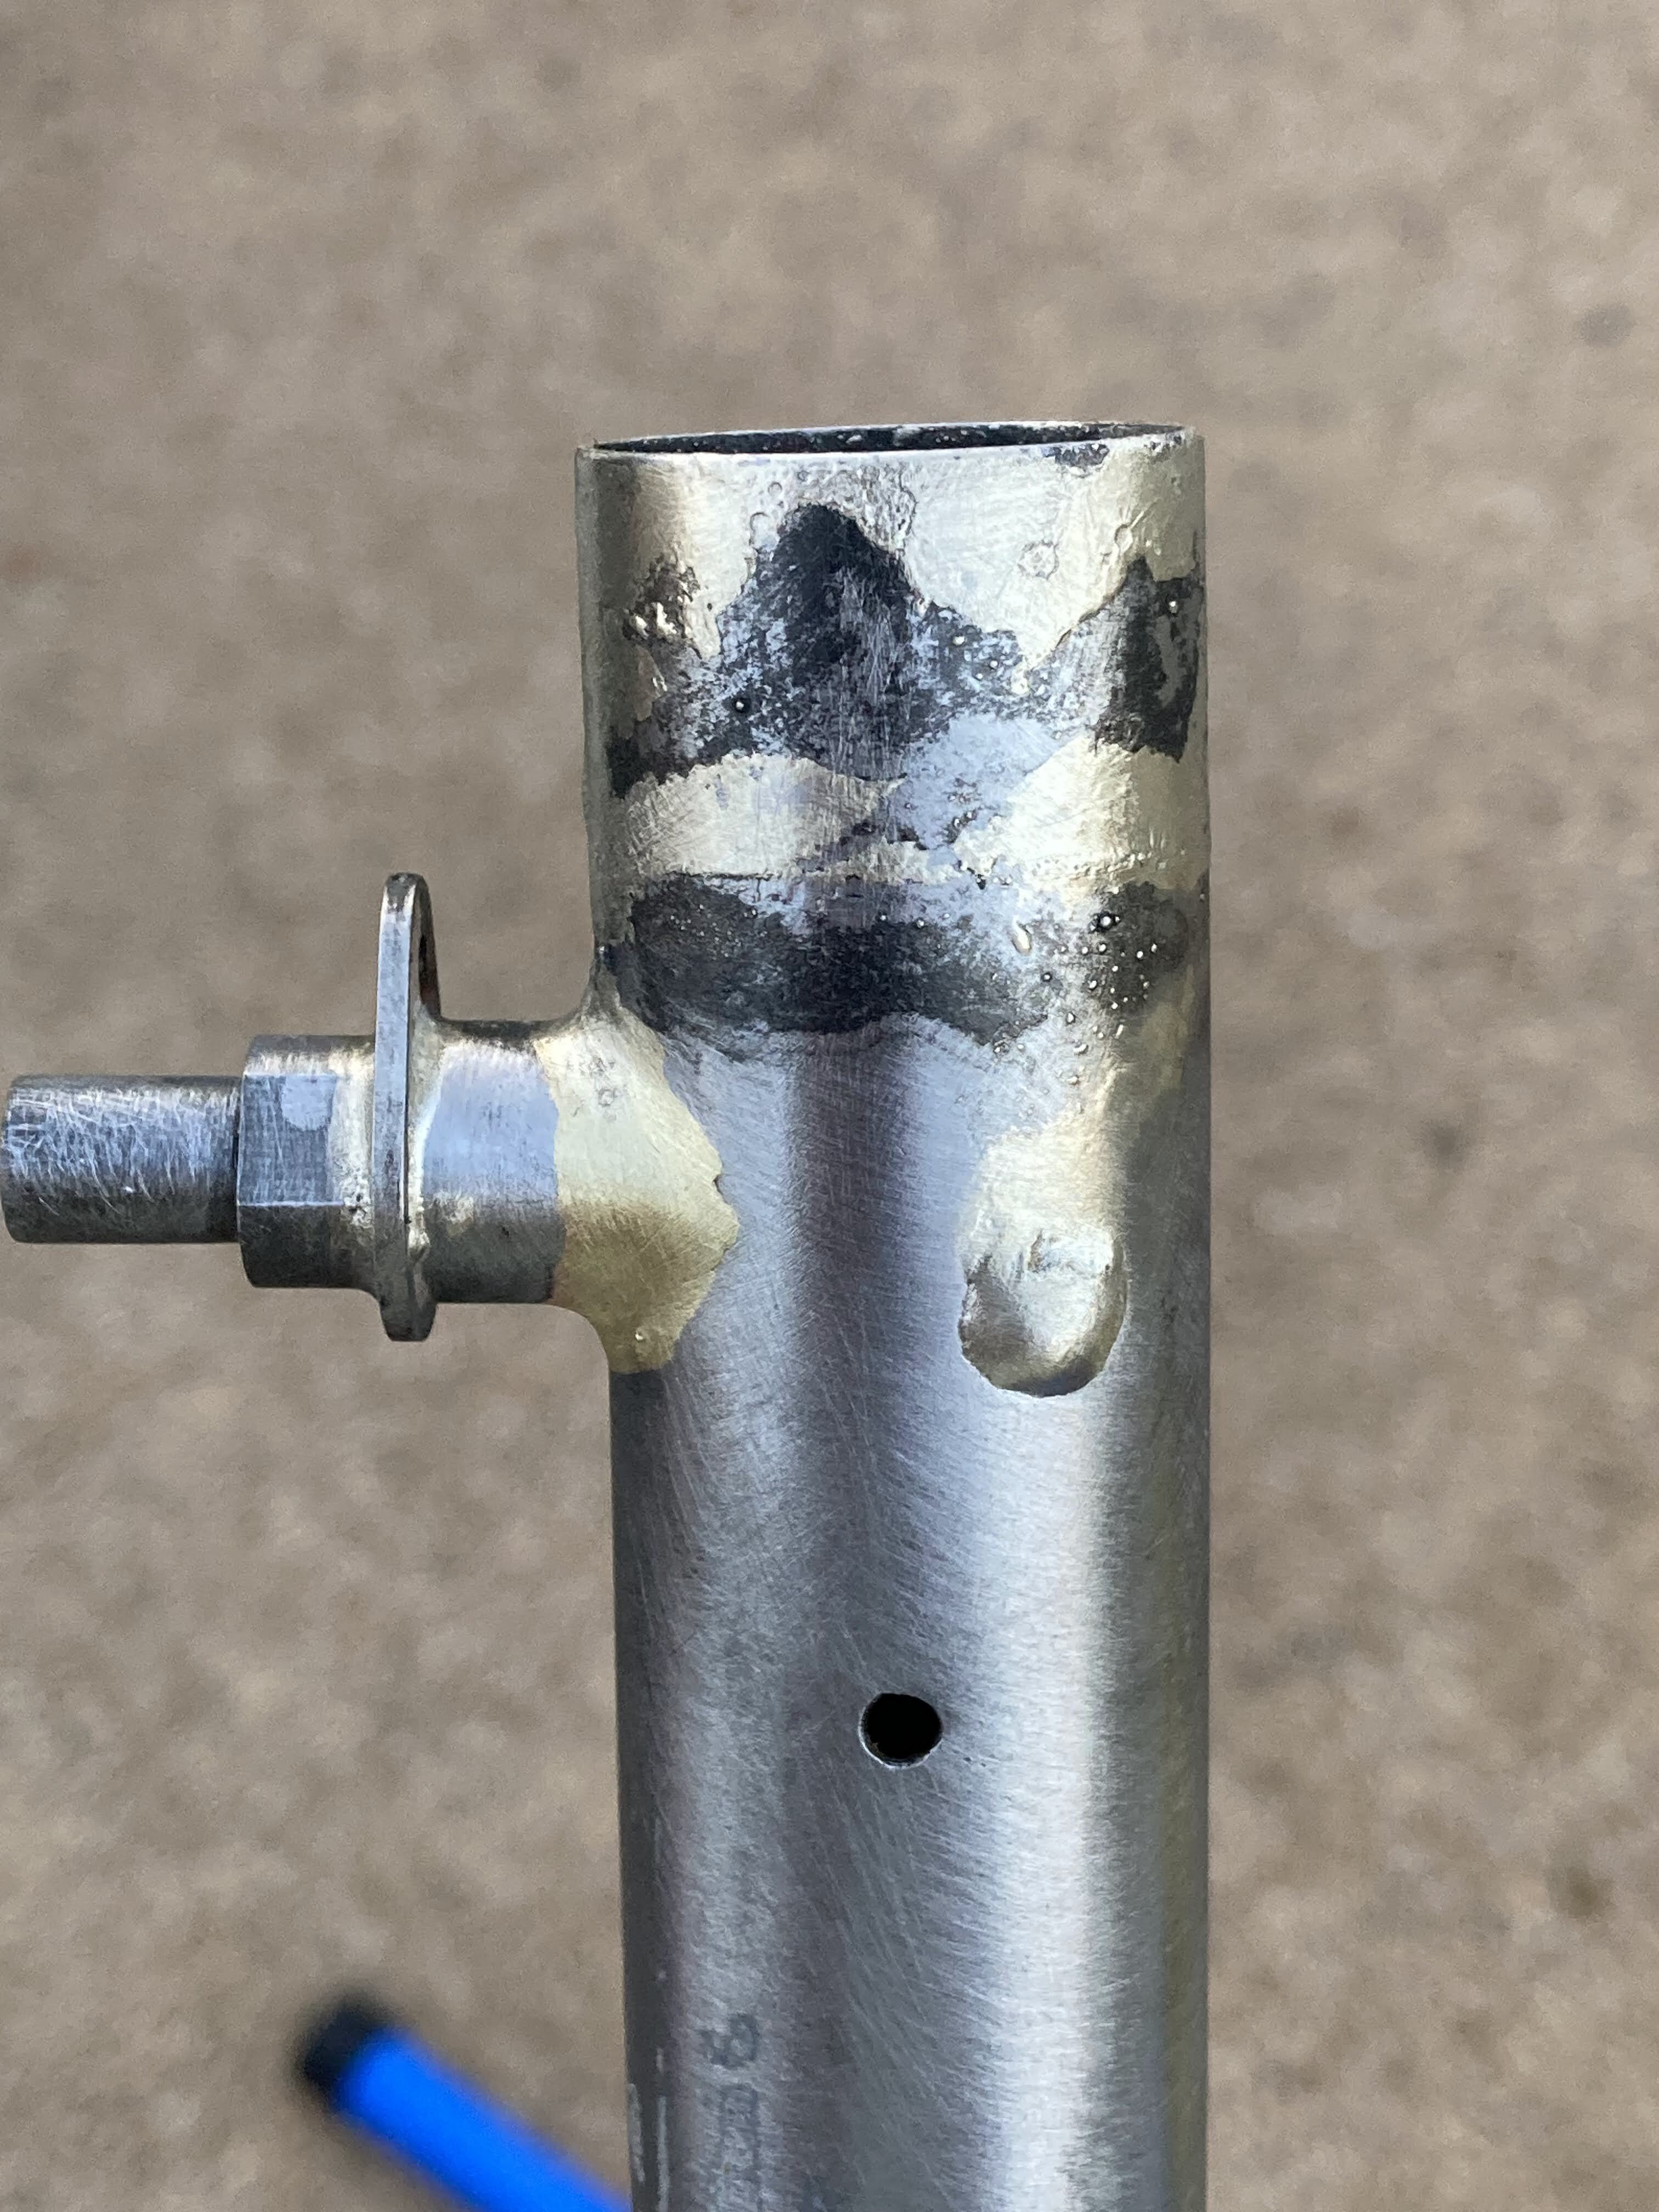
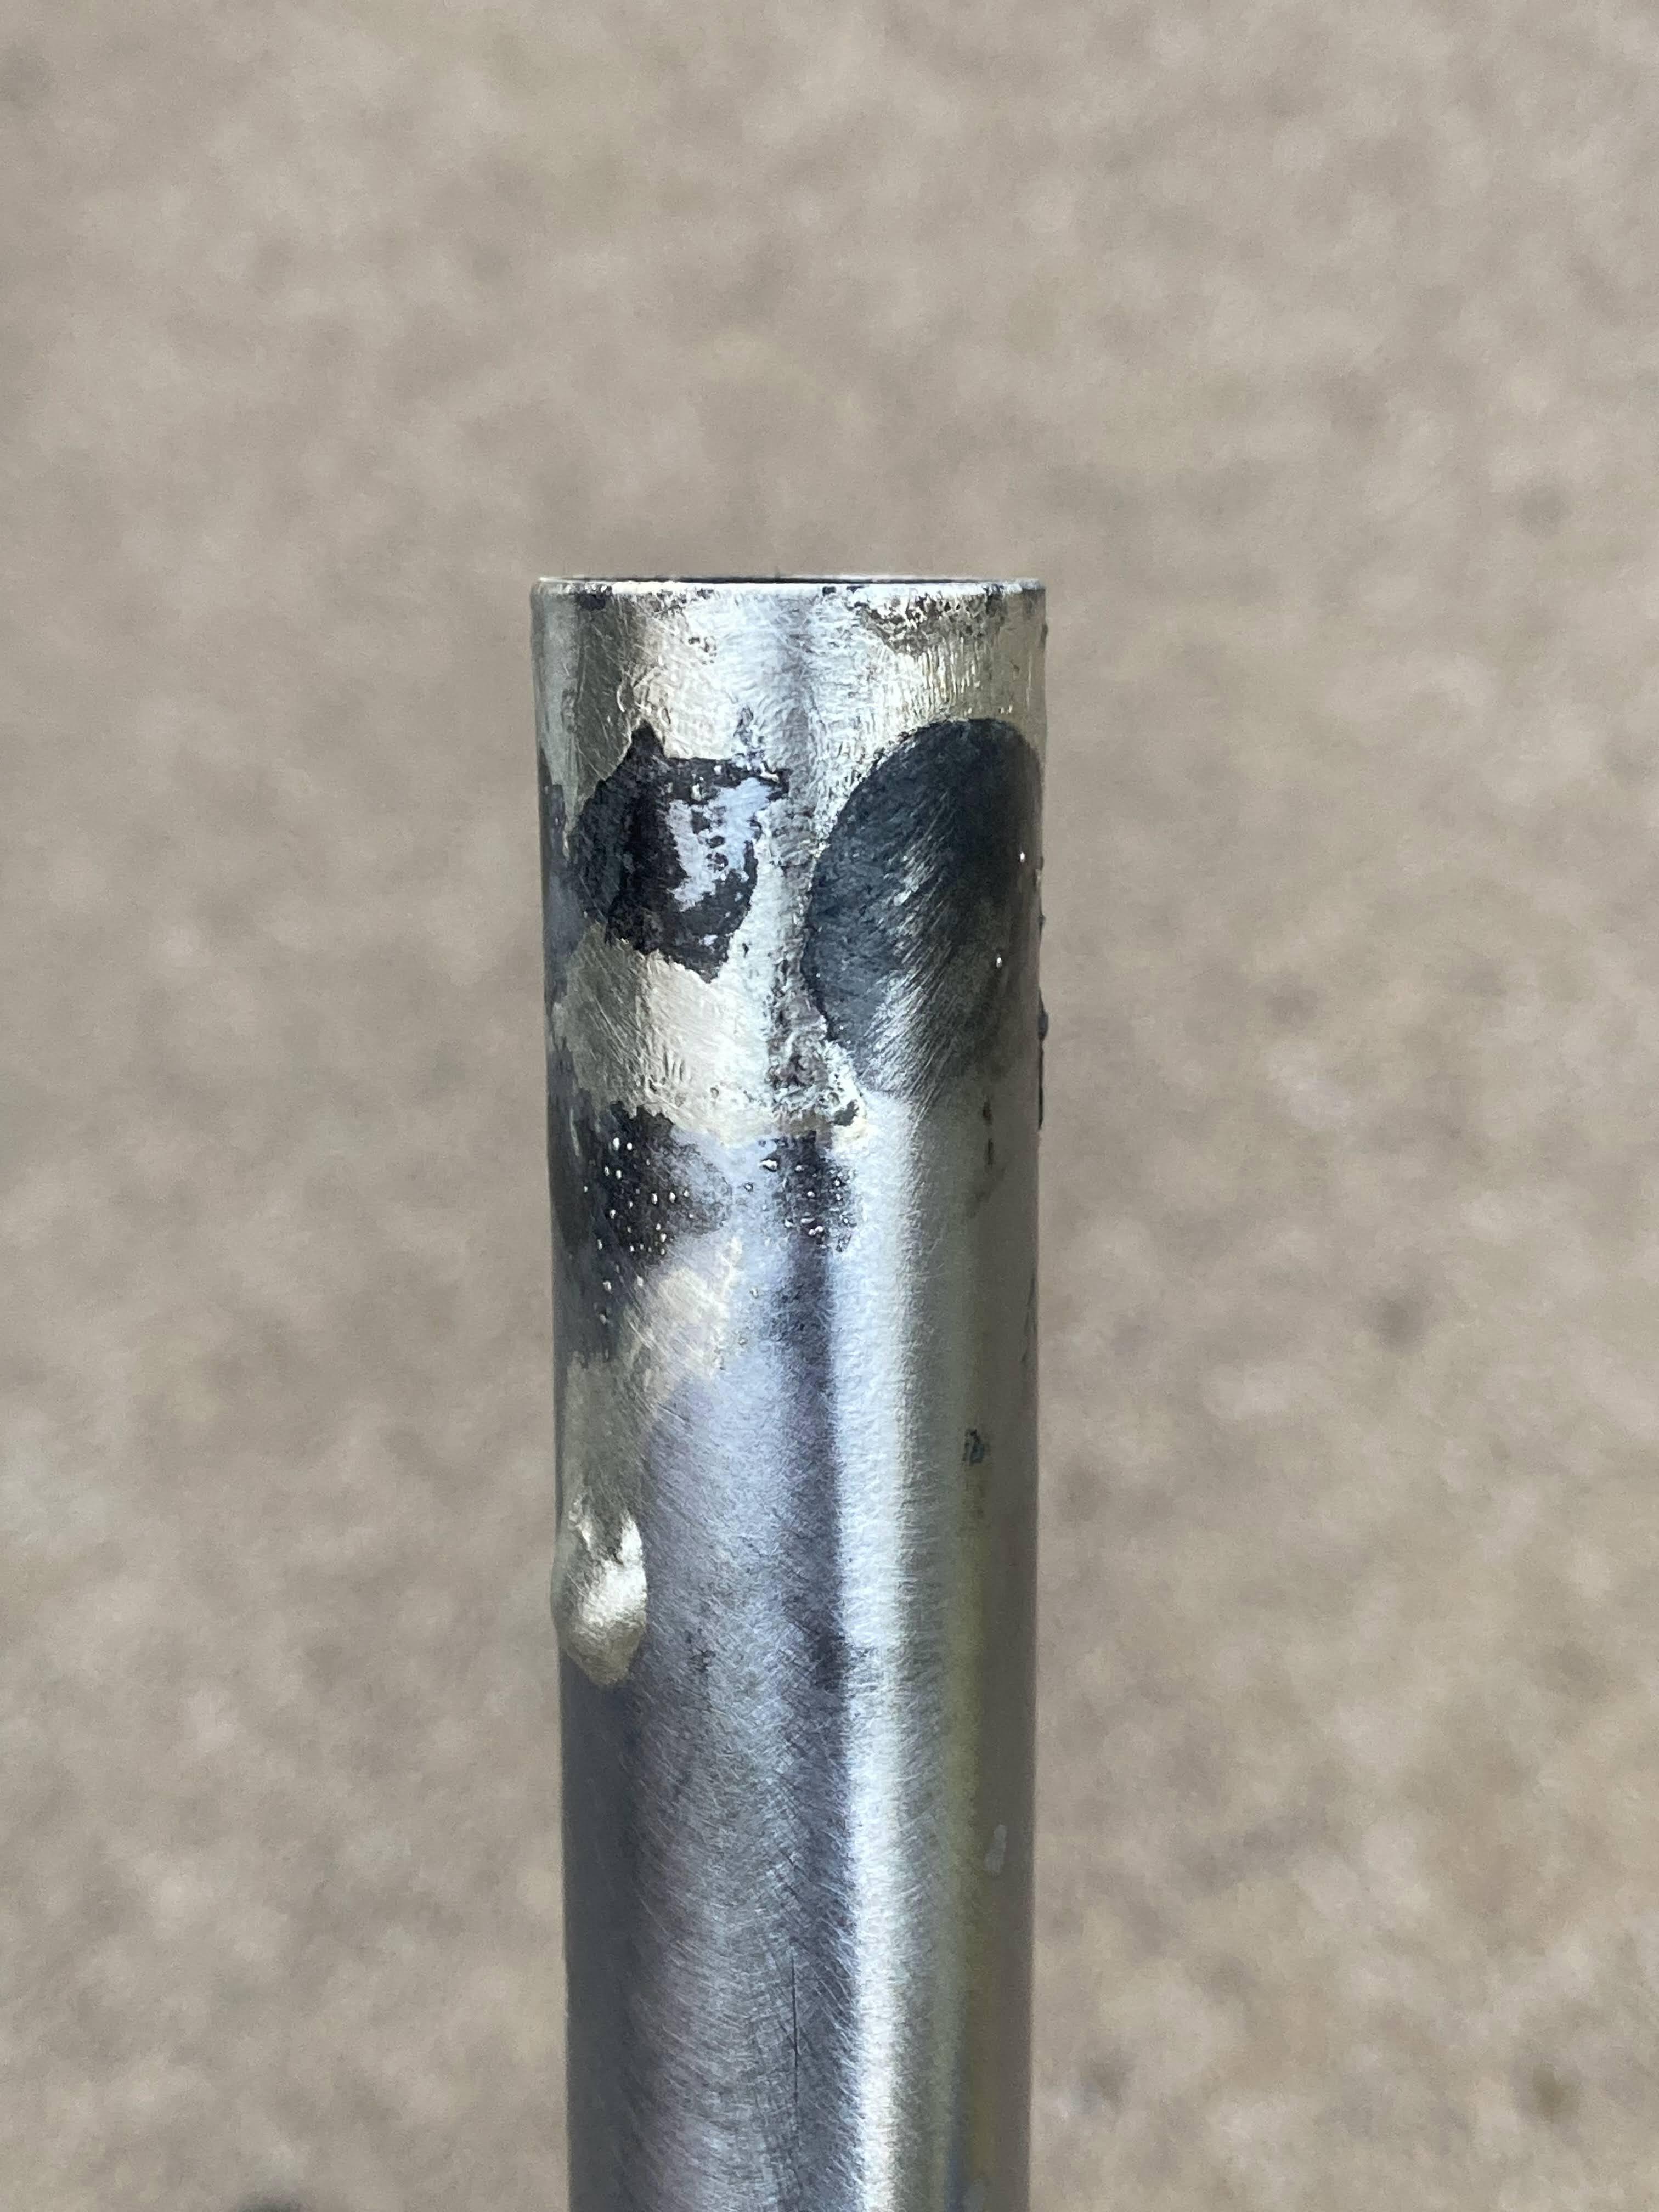
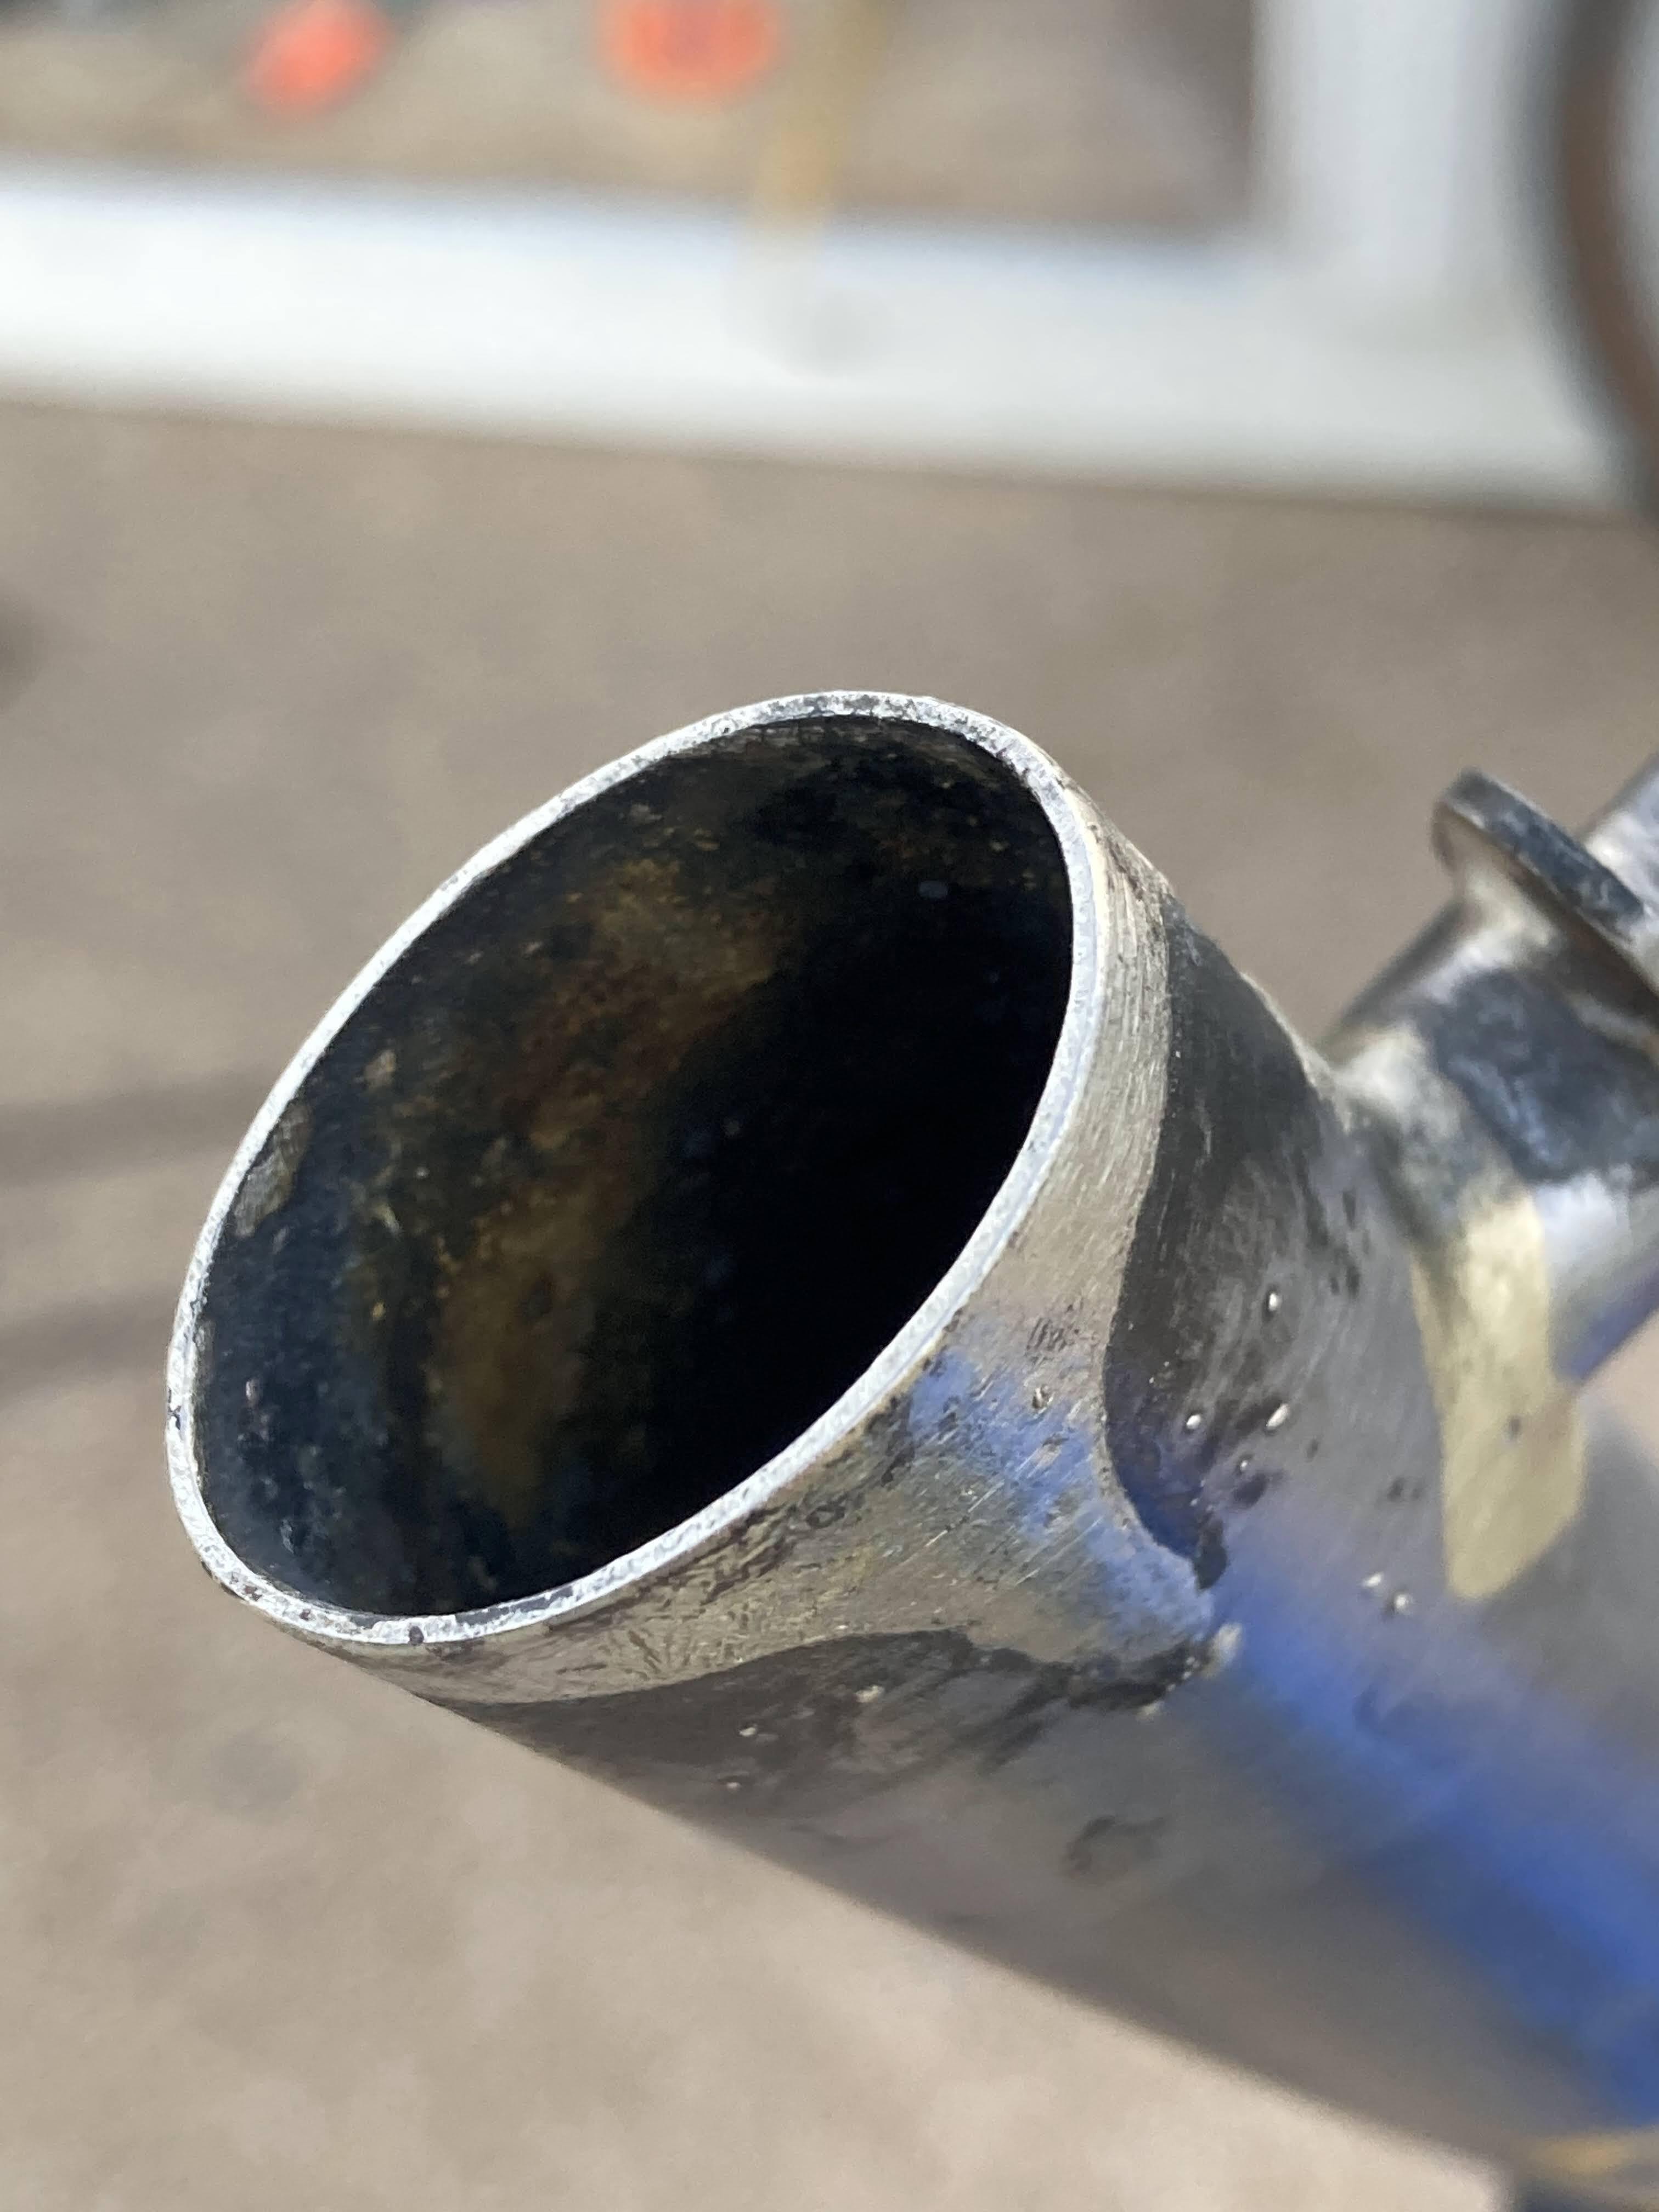
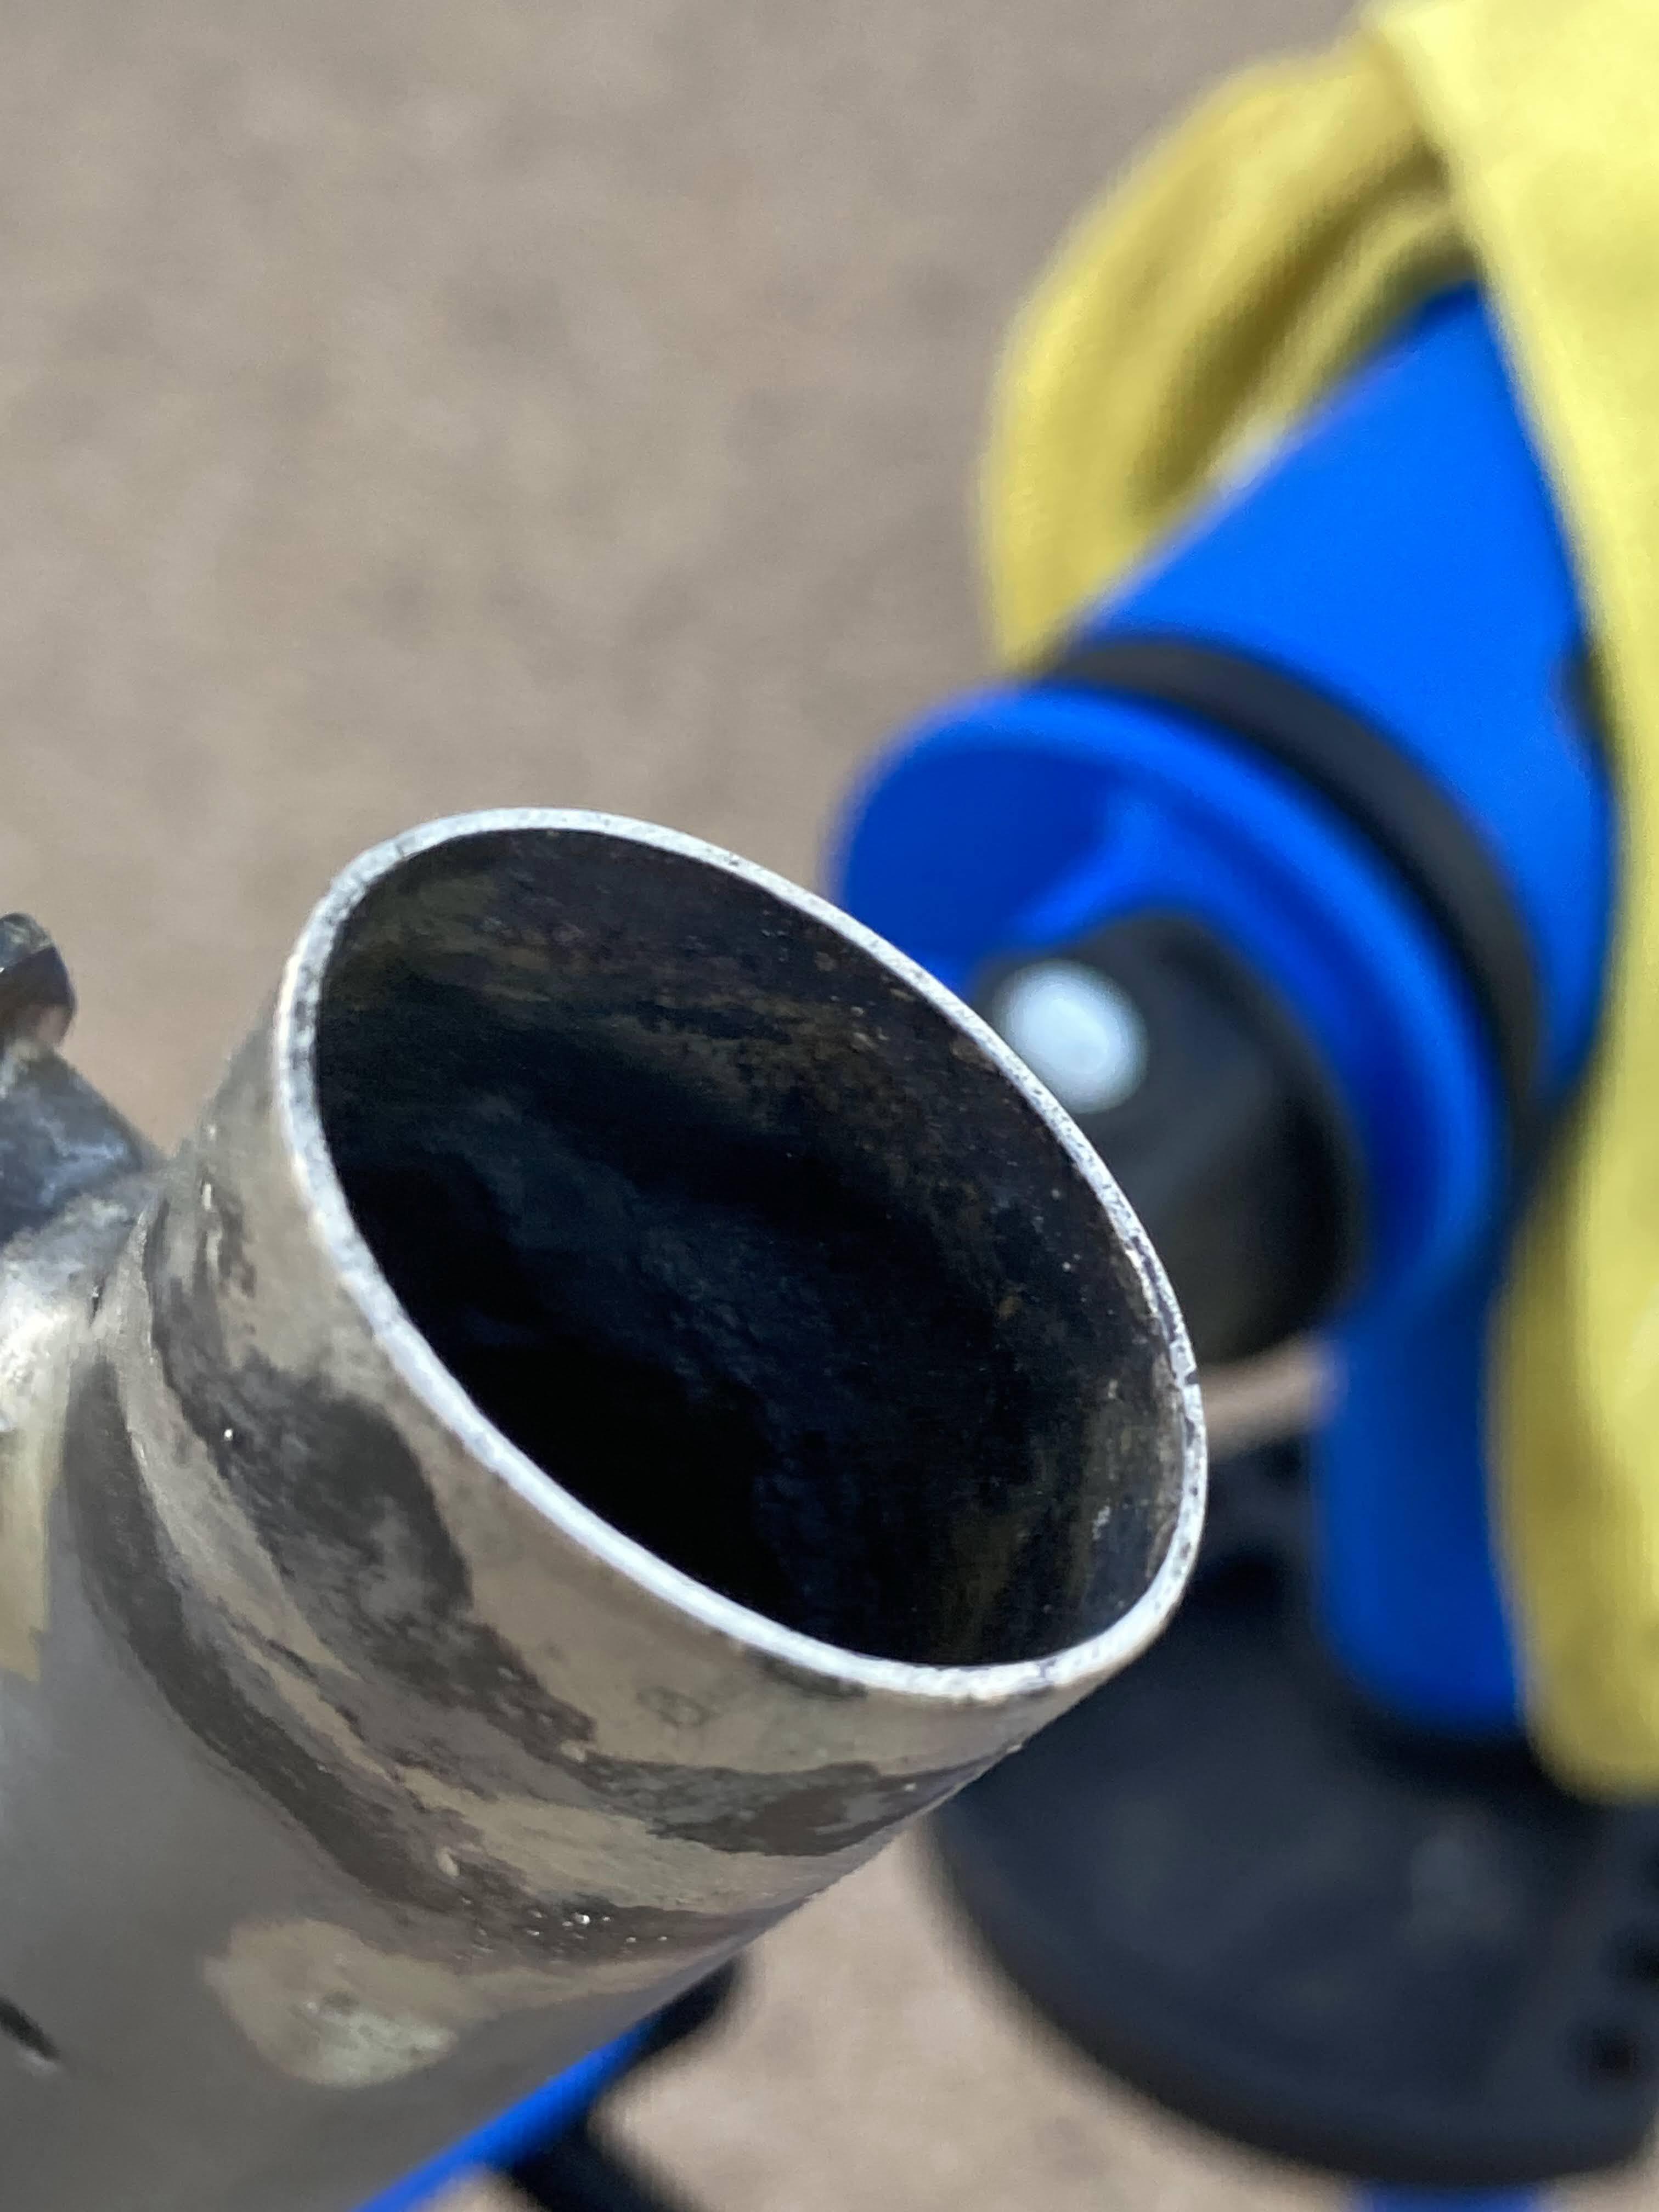
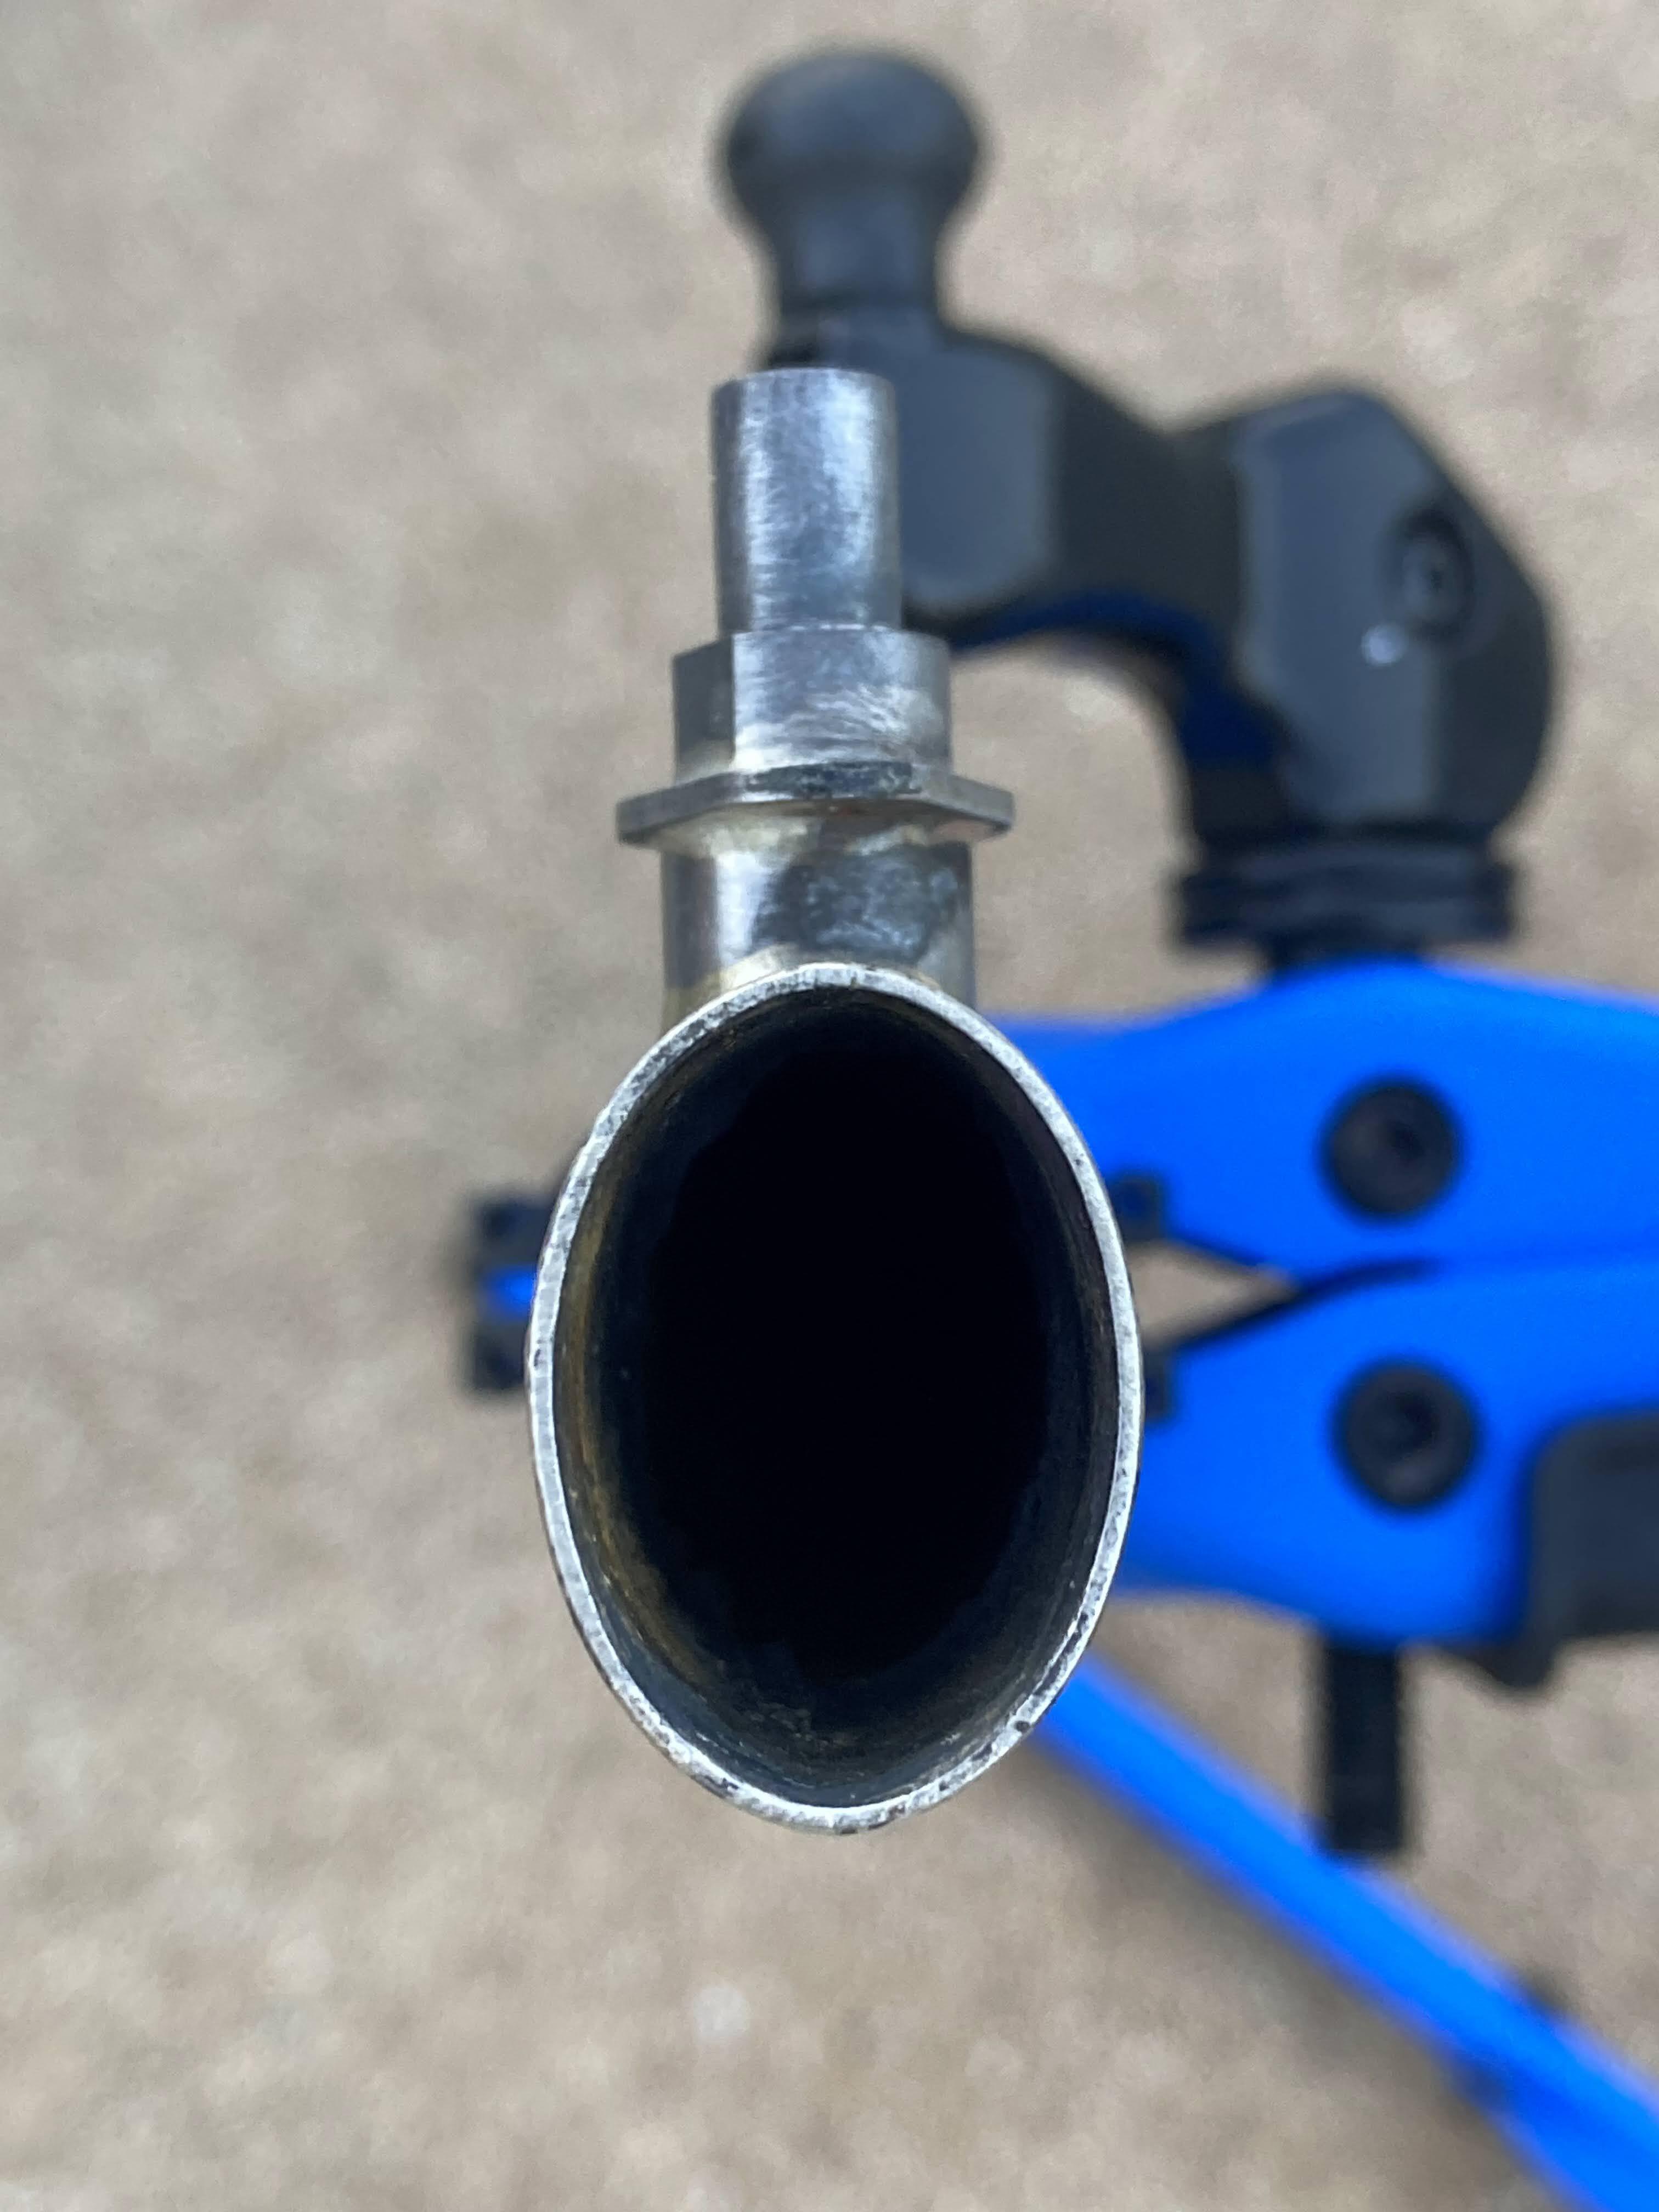
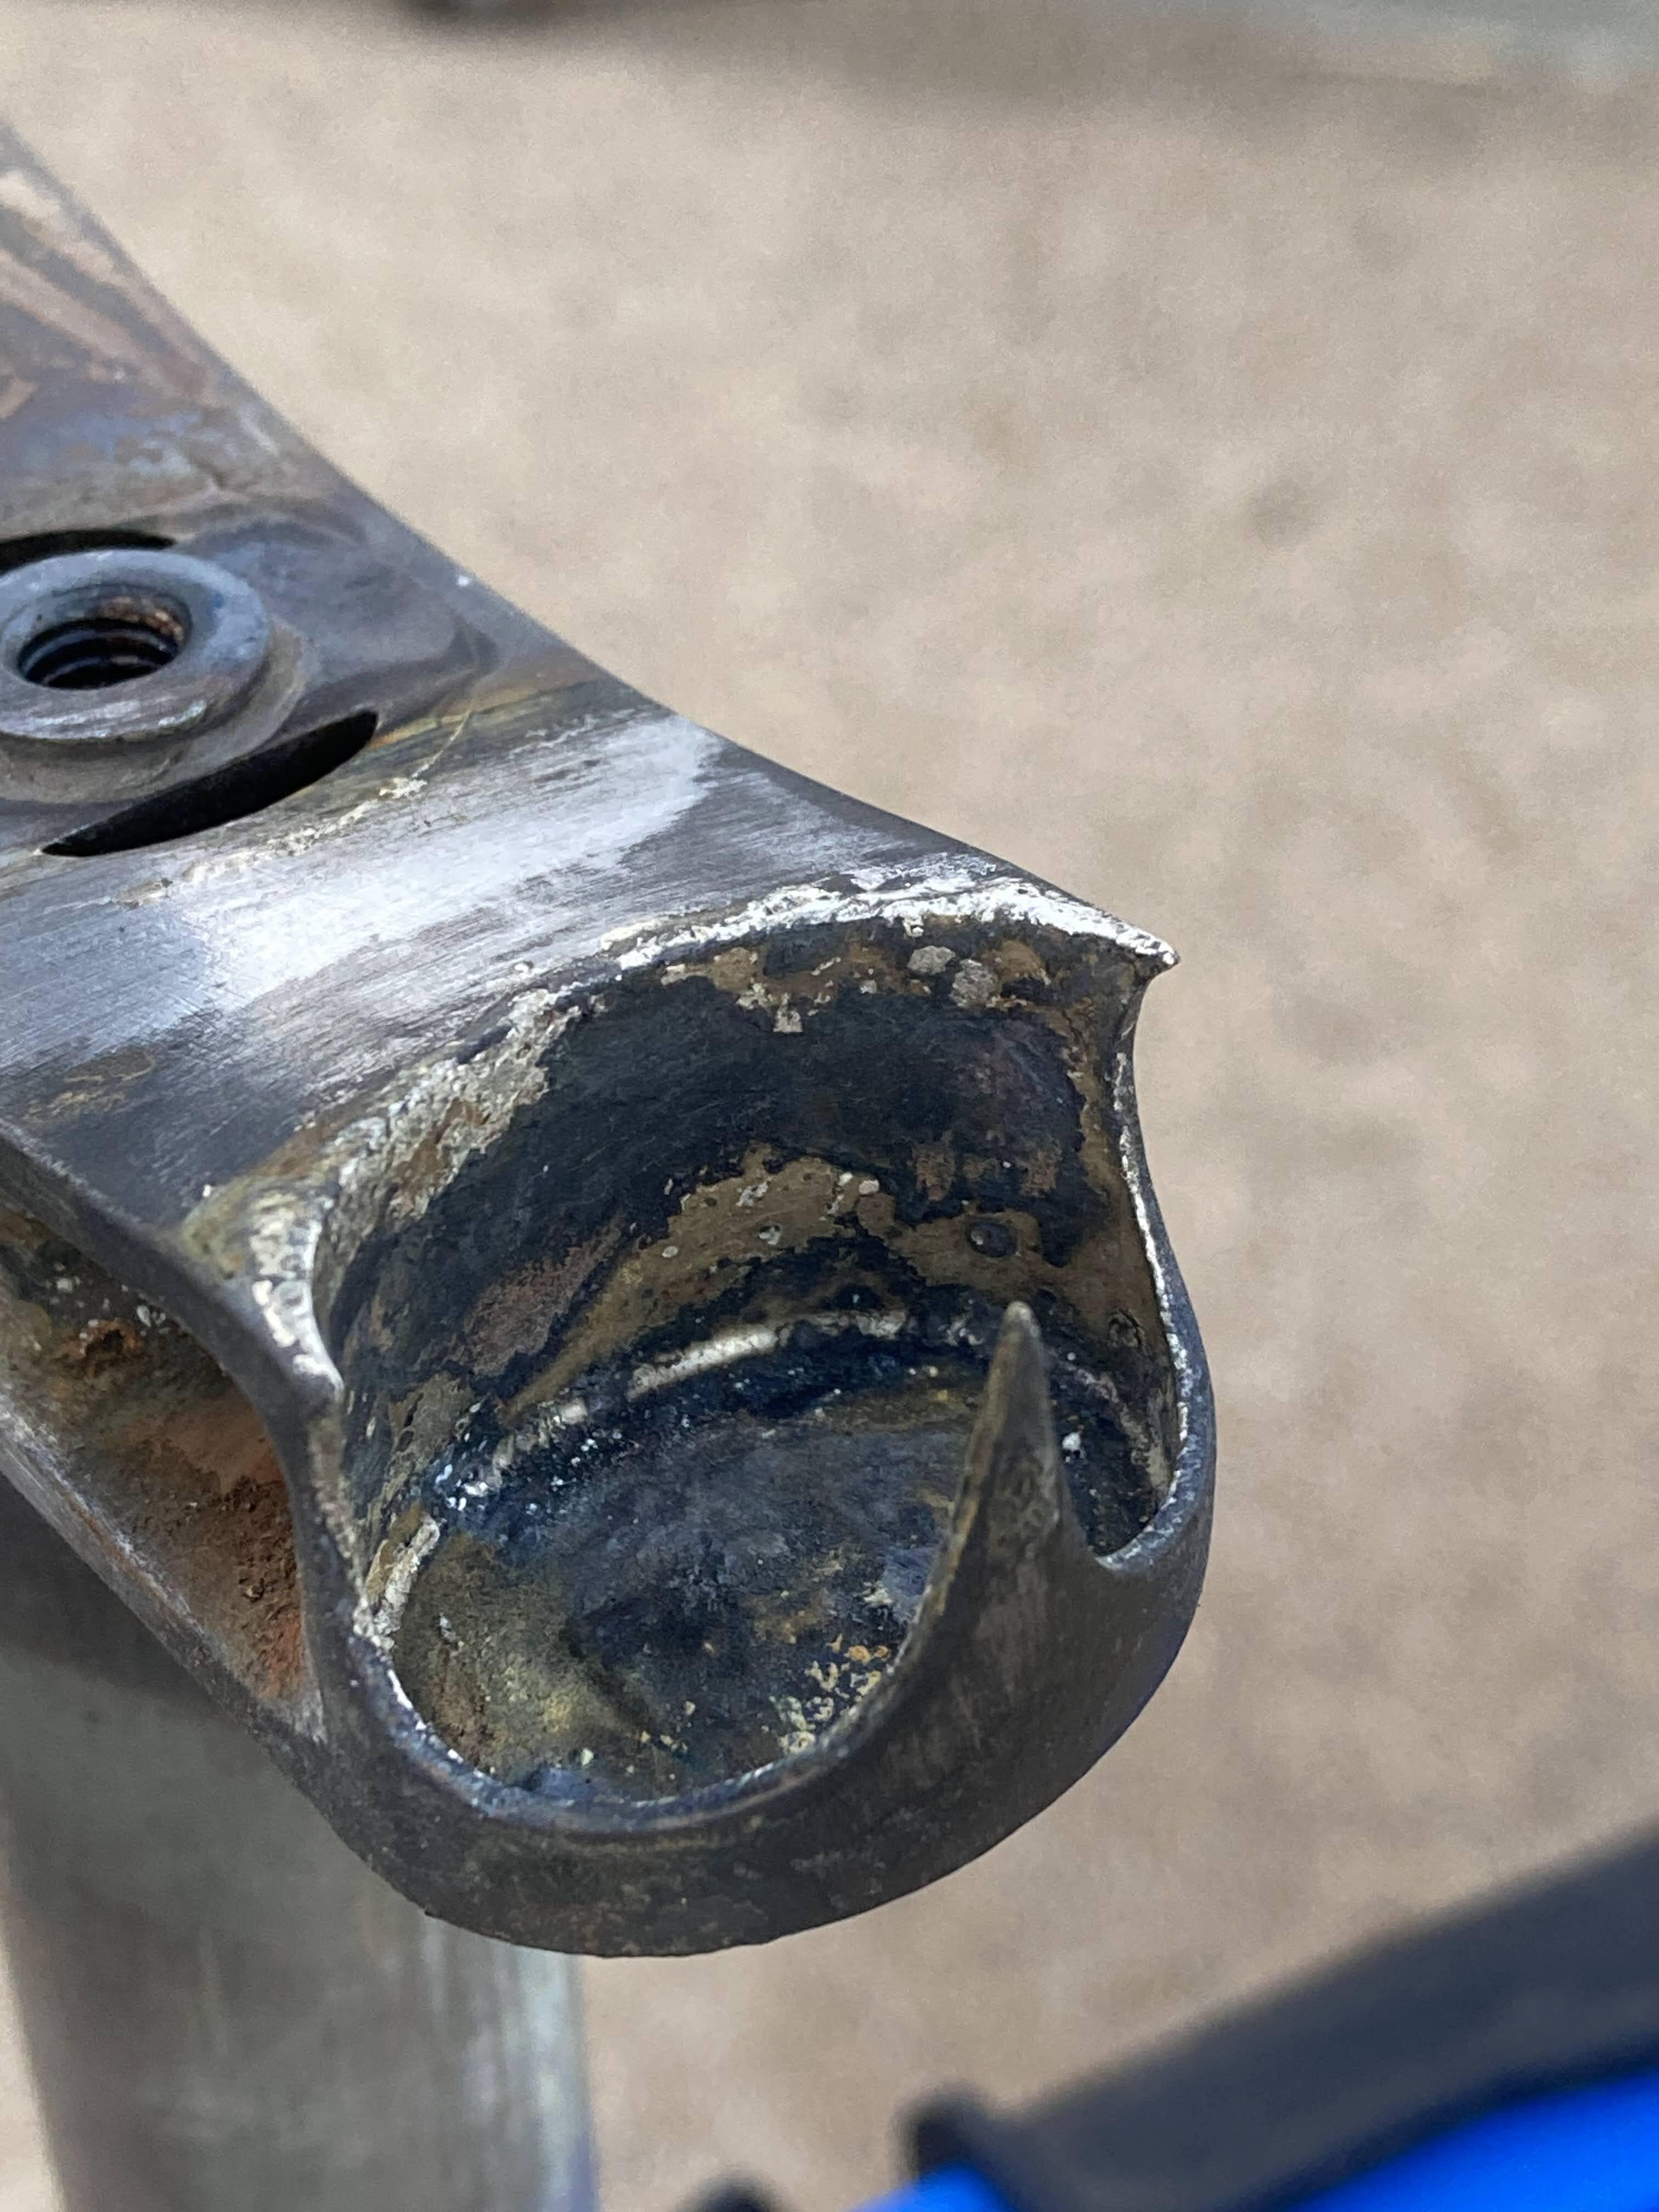
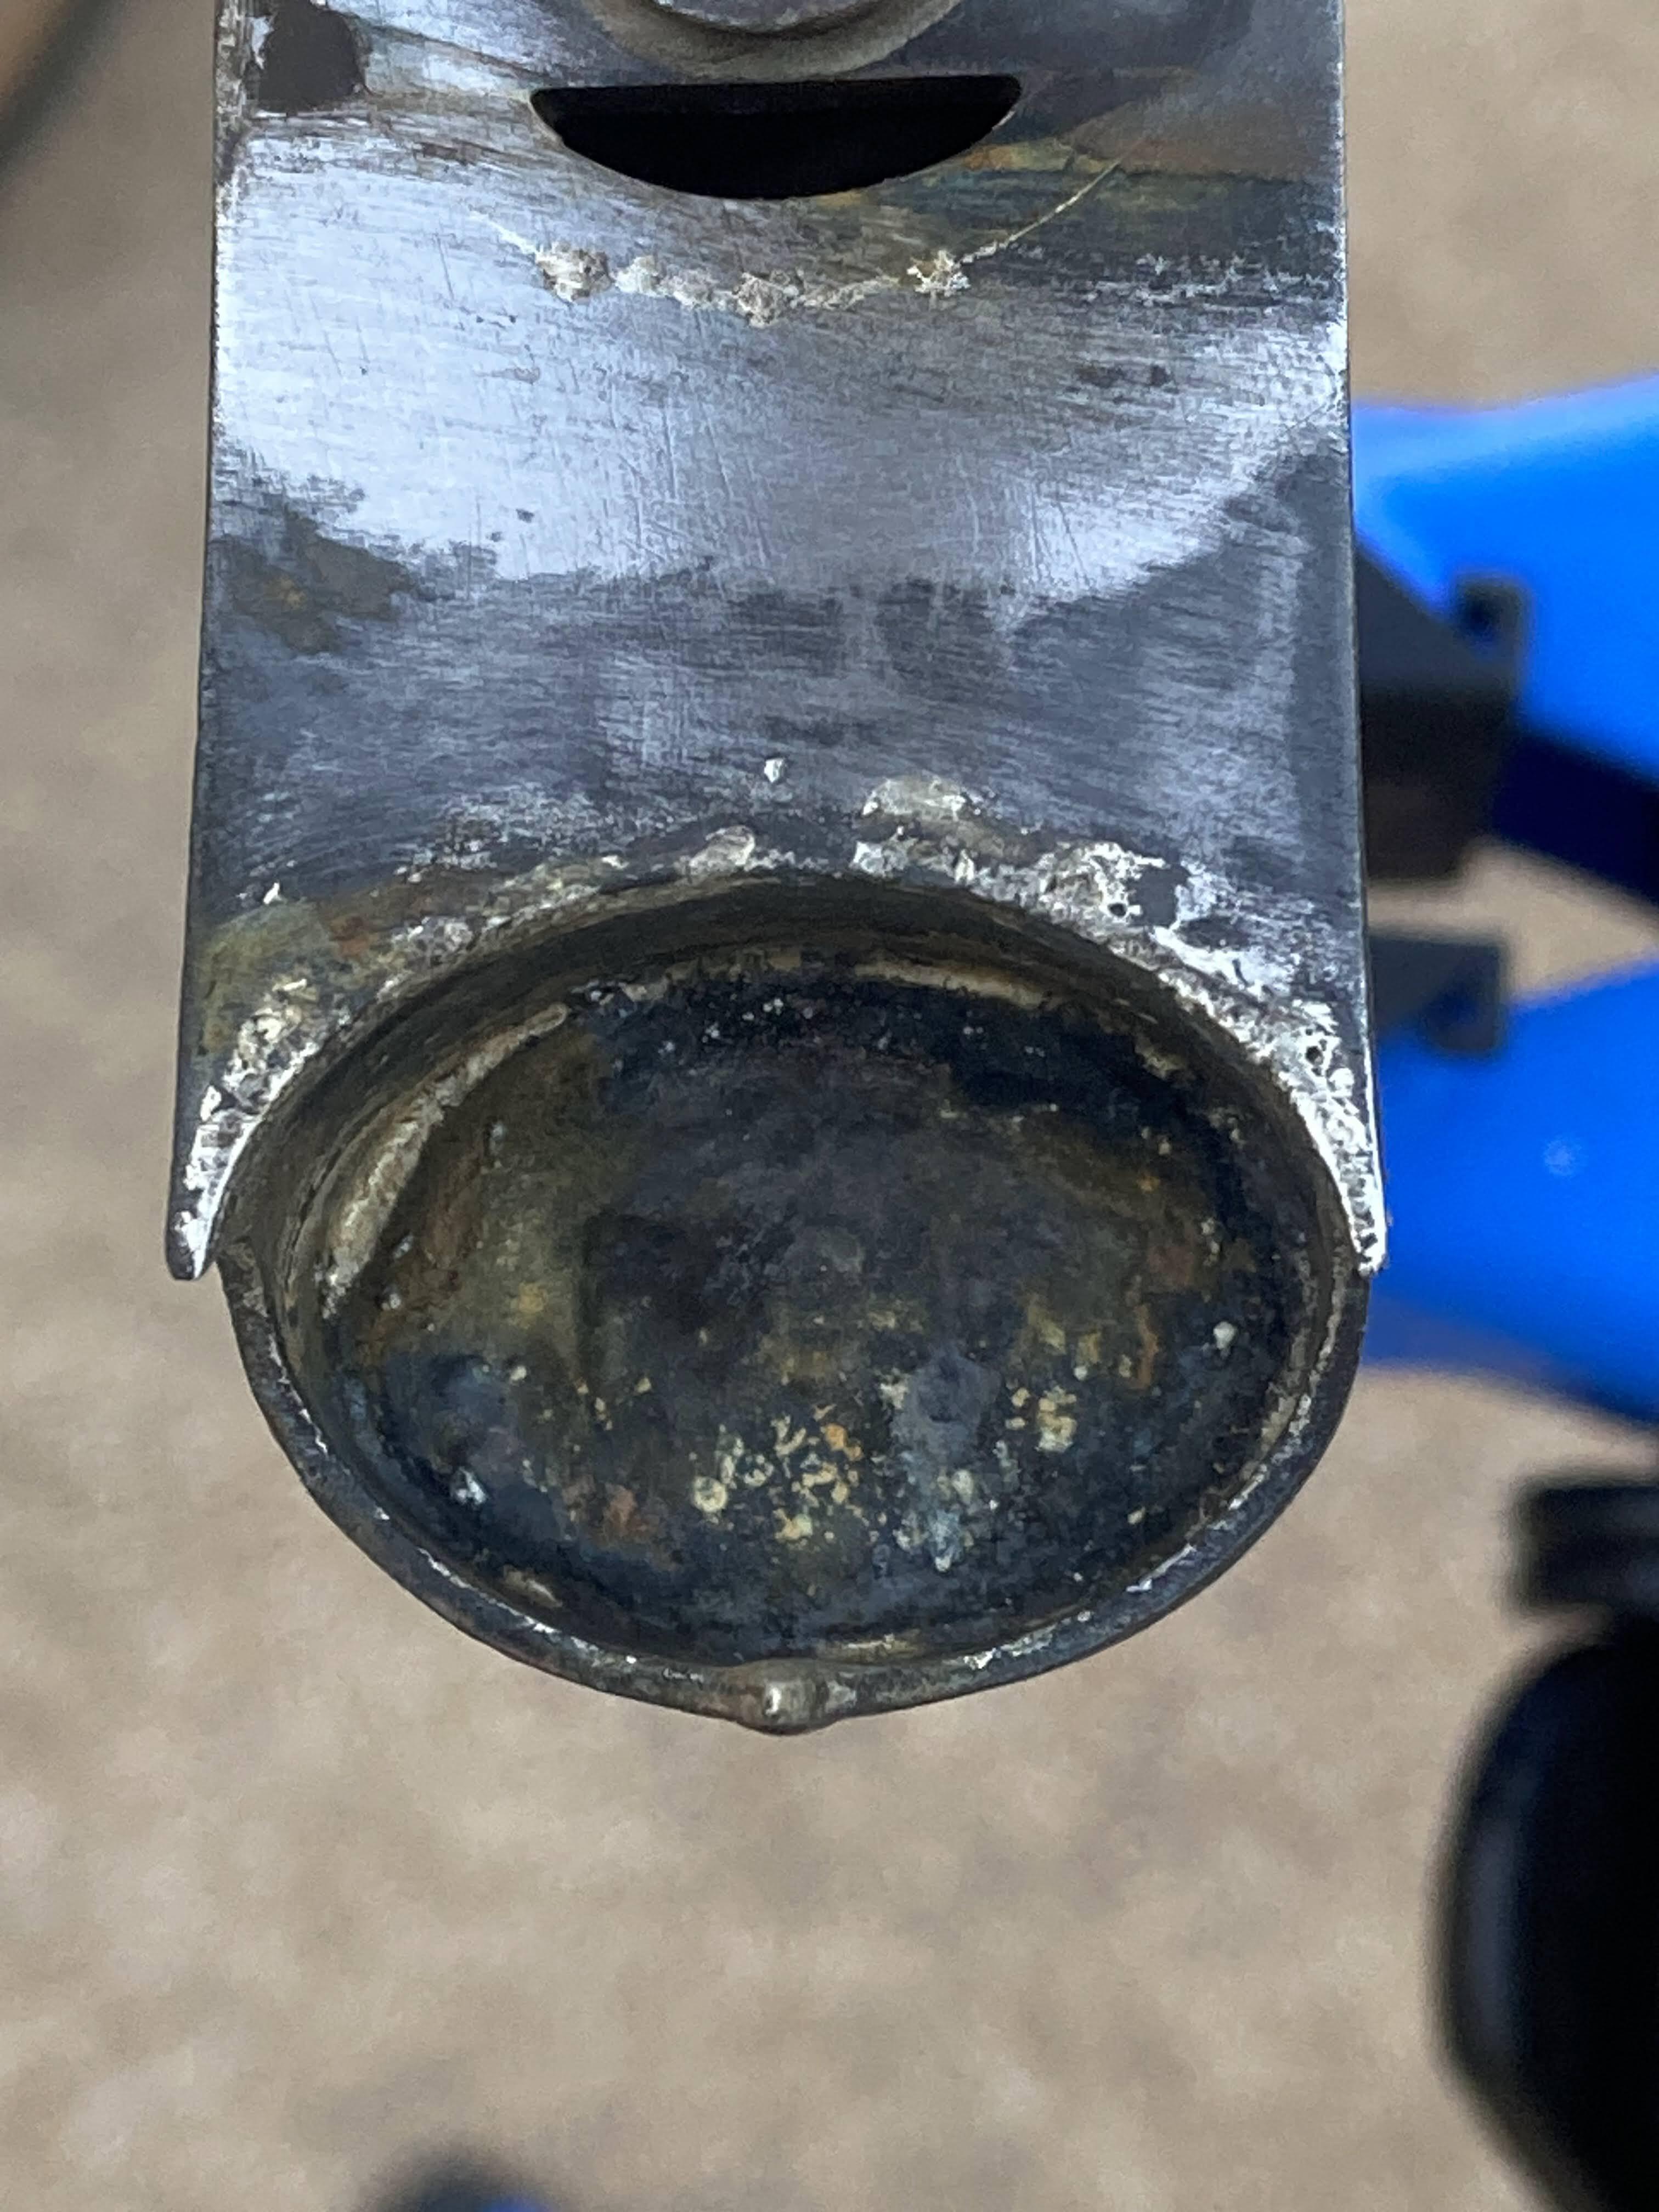
The most sure-fire way to know you have full penetration is to use preforms, filler shaped to fit inside the blade. If the filler started out inside the blade, and you get it to melt and come out all along the shorelines, then you have high confidence that it wetted out everywhere.

Although I’m a firm believer in preforms and will always braze my own crowns that way, I hesitate to recommend it because it takes some trial-and error to perfect, and a lot of people just making one fork should not go down that rabbit hole.

So, assuming you’re not using preforms, the way to know you have full penetration is (1) feeding in a shitload of rod and watching it disappear into the joint, after everything is hot enough, and (2) cut a few of them up to see how you did. Sorry, not a popular bit of advice, but inescapable IMHO. You should never send someone else out on a fork you built until you have destructively tested a few. OK maybe two, if they both had good penetration then maybe you don’t need to keep destroying more forks.

Break them in a stout vise with cheaterbars too, don’t just saw them up. You need to know that even in a bad crash where the tubing fails, the braze must never fail.

1 Like

I agree with Mike and Mark who commented about the lack of sufficient heat and material flow and also the need to thoroughly prepare all cast surfaces to accept the adhesion you’re looking for. And, more than anything, practice is paramount. You can’t practice too much. And I’m aware I’m typing this realizing that one’s budget and available materials to sacrifice is part of the amateur’s equation.

My real add to this is that the cantilever bosses are perilously close to the joint that failed. I’m going to assume that not only were they added after the fork was brazed, but also with brass (or, at least, I hope so.) The sequence wouldn’t help the cause here, that being the longevity and safety of your fork.

1 Like

Thanks for all the input. Doug and I discussed many of the pitfalls mentioned above and decided that using a preform would be the best way to ensure the joint is completely filled. The joint was heated till the form melted and began to show at the shorelines. The joint was then topped off and touched up with a additional silver.

Before brazing we did a few practice crowns both blade to crown and steerer to crown. Again, all of the above was done during a frame building course with Doug watching and commenting on the process.


Different fork but same process as described above. We added a lot of additional flux above the joint for insurance against running out during the heating phase.


the fork in question, shortly after brazing.

As you all know, one of the design constraints working with direct mount centerpulls is that they are positioned much closer to the fork crown than cantilevers. I’ve even seen some where the mount is almost overlapping with the fork crown. When brazing these, I do recall focusing the majority of the heat on the mount itself and not on the blade as melting the silver was a concern. I don’t feel like it got too hot while brazing but maybe the photo tells another story.

Thanks again all for the thoughtful insight and suggestions. Lots of time, expertise, and experience laid out here in text.

I’ll update more once I get the fork taken apart. Need to do some prep before I can really get back into disassembling.

7 Likes

Hi All,

Got some time to bust out the torch and pull the blade from the crown. I set the fork up in a stand with a tube block on the steerer to stop the heat from going up to the clamp. Then I tied some weights to the dropout of the leg to be removed. I used a rosebud to heat the socket evenly. ended up needing to tap the fork leg while it was hot in order to get the blade out. Took about a minute total. After cooling and clean up with a brush, it appears the filler did not penetrate all the way to the interior side of the socket (03 blade). It also does not look like much filler made it to the inside of the fork blade, small amounts here and there but I expected to see more. my plan is to get everything prepped and check the fit. If the fit is good Ill use silver, but if it ends up looser Ill switch to brass.


Things to do differently:
-use a bigger preform I only did one coil of filler, this time I’ll use at least three coils
-prep and sand the socket. not sure if I did this last time but will take it down to white metal.
-focus more on the interior of the socket to ensure penetration

Thanks again all!

6 Likes

Adding a huge amount of pre-placed filler in there is not going to be the answer. You have a relatively small amount of surface area to “wet”, so I don’t think that is going to be very helpful.

By the time you get the fork blade sanded, AND the crown cleaned up with abrasives, I would be very surprised if you didn’t have a really sloppy joint WRT clearances.

Small amount of surface area and a sloppy fit is a recipe for disaster for silver.

If it were me, I just would not trust that fork repair. You’ll probably need to use brass, but then you are going to have to deal with reheating the adjoining steerer and brake mounts, along with the expansion / contraction / distortion issues from triple heating one side of the fork vs. the other.

I do suggest using the repair as a practice exercise (why not ?) but I’d keep it around for emergency-spare usage only.

The cost of building a new fork is paltry compared to dealing with the aftermath of a possible catastrophic crash. Don’t get discouraged, chock it up to learning and keep moving forward.

2 Likes

Thanks so much for sharing your investigation!

1 Like

Thanks for documenting and posting this. Seeing these sorts of analyses makes everyone a better builder!

I don’t know if this was the case of your fork crown, but on some tubes and parts, the mill scale is extremely hard to remove. You have to get pretty aggressive with these little flap wheels and a drill:

Also, a critical point: fully degrease and clean the parts first! Otherwise, you will push all the oils into the material. Wipe down the tube and lug afterwards with IPA (isopropyl alcohol) too!

2 Likes