I like the idea of making forks. I made a road fork a while back and I’ve designed some bikes that will require me to build forks. The only reason I was able to make the previous fork was the 1" steerer the fork used was able to fit into the park tool fork alignment gauge which I used as a makeshift jig. It worked and the fork came out straight and true. I don’t want to be stuck using 1" steerers forever, so I need a solution to work for 1 1/8" steerers. I saw this post in the DIY tools thread and was inspired to design my own solution (while stealing several of brads ideas)
I have a dummy axle that is designed for the rear of a bringhelli jig but is 100mm wide. This should actually make things easy since the 4040 aluminum extrusions use M8 bolts and the dummy axle also uses M8 bolts. I figure if I can securely mount some extrusion sideways, I can just bolt the dummy axle to the extrusion and that will hold it square (after some alignment I’m sure).
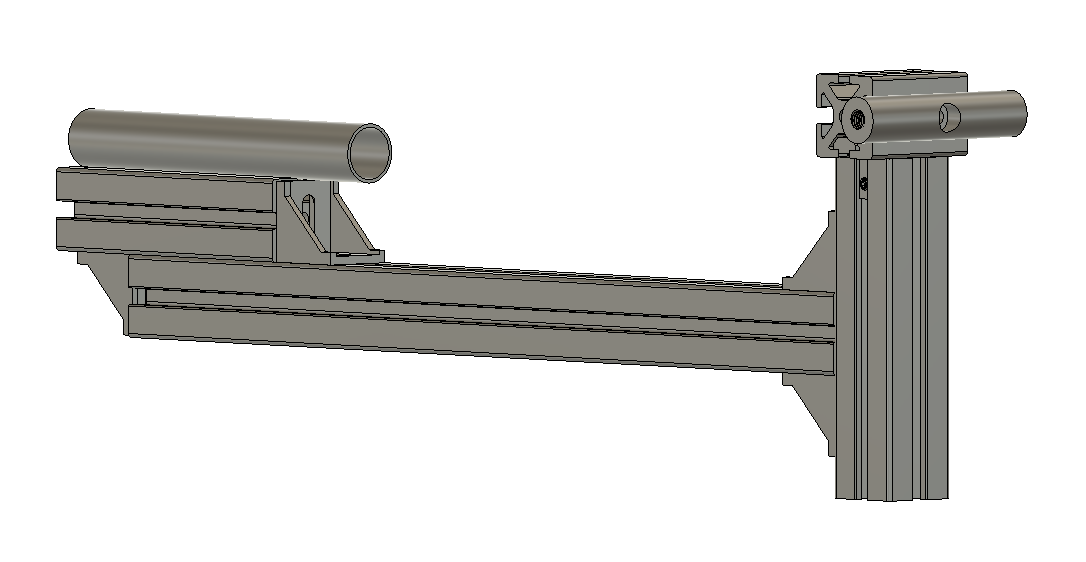
I’m on a super budget, so I’m also going to focus on materials use and using the least amount of material possible. I’d probably just mount the fork jig in a vice so I don’t really need a stand. I’ll try to maximize the adjustment range while minimizing the actual length of the jig. Here is my first stab at it.
I think I might need to include the fork leg supports that brad has in his design. The other thing I need to figure out is how to make sure the cuts are all square. I figure that’s actually quite important. I think I plan on getting the extrusion from online metals. They seemed to have the lowest prices for 40mmx40mm extrusion.
Am I missing anything? Have I overlooked some obvious details?
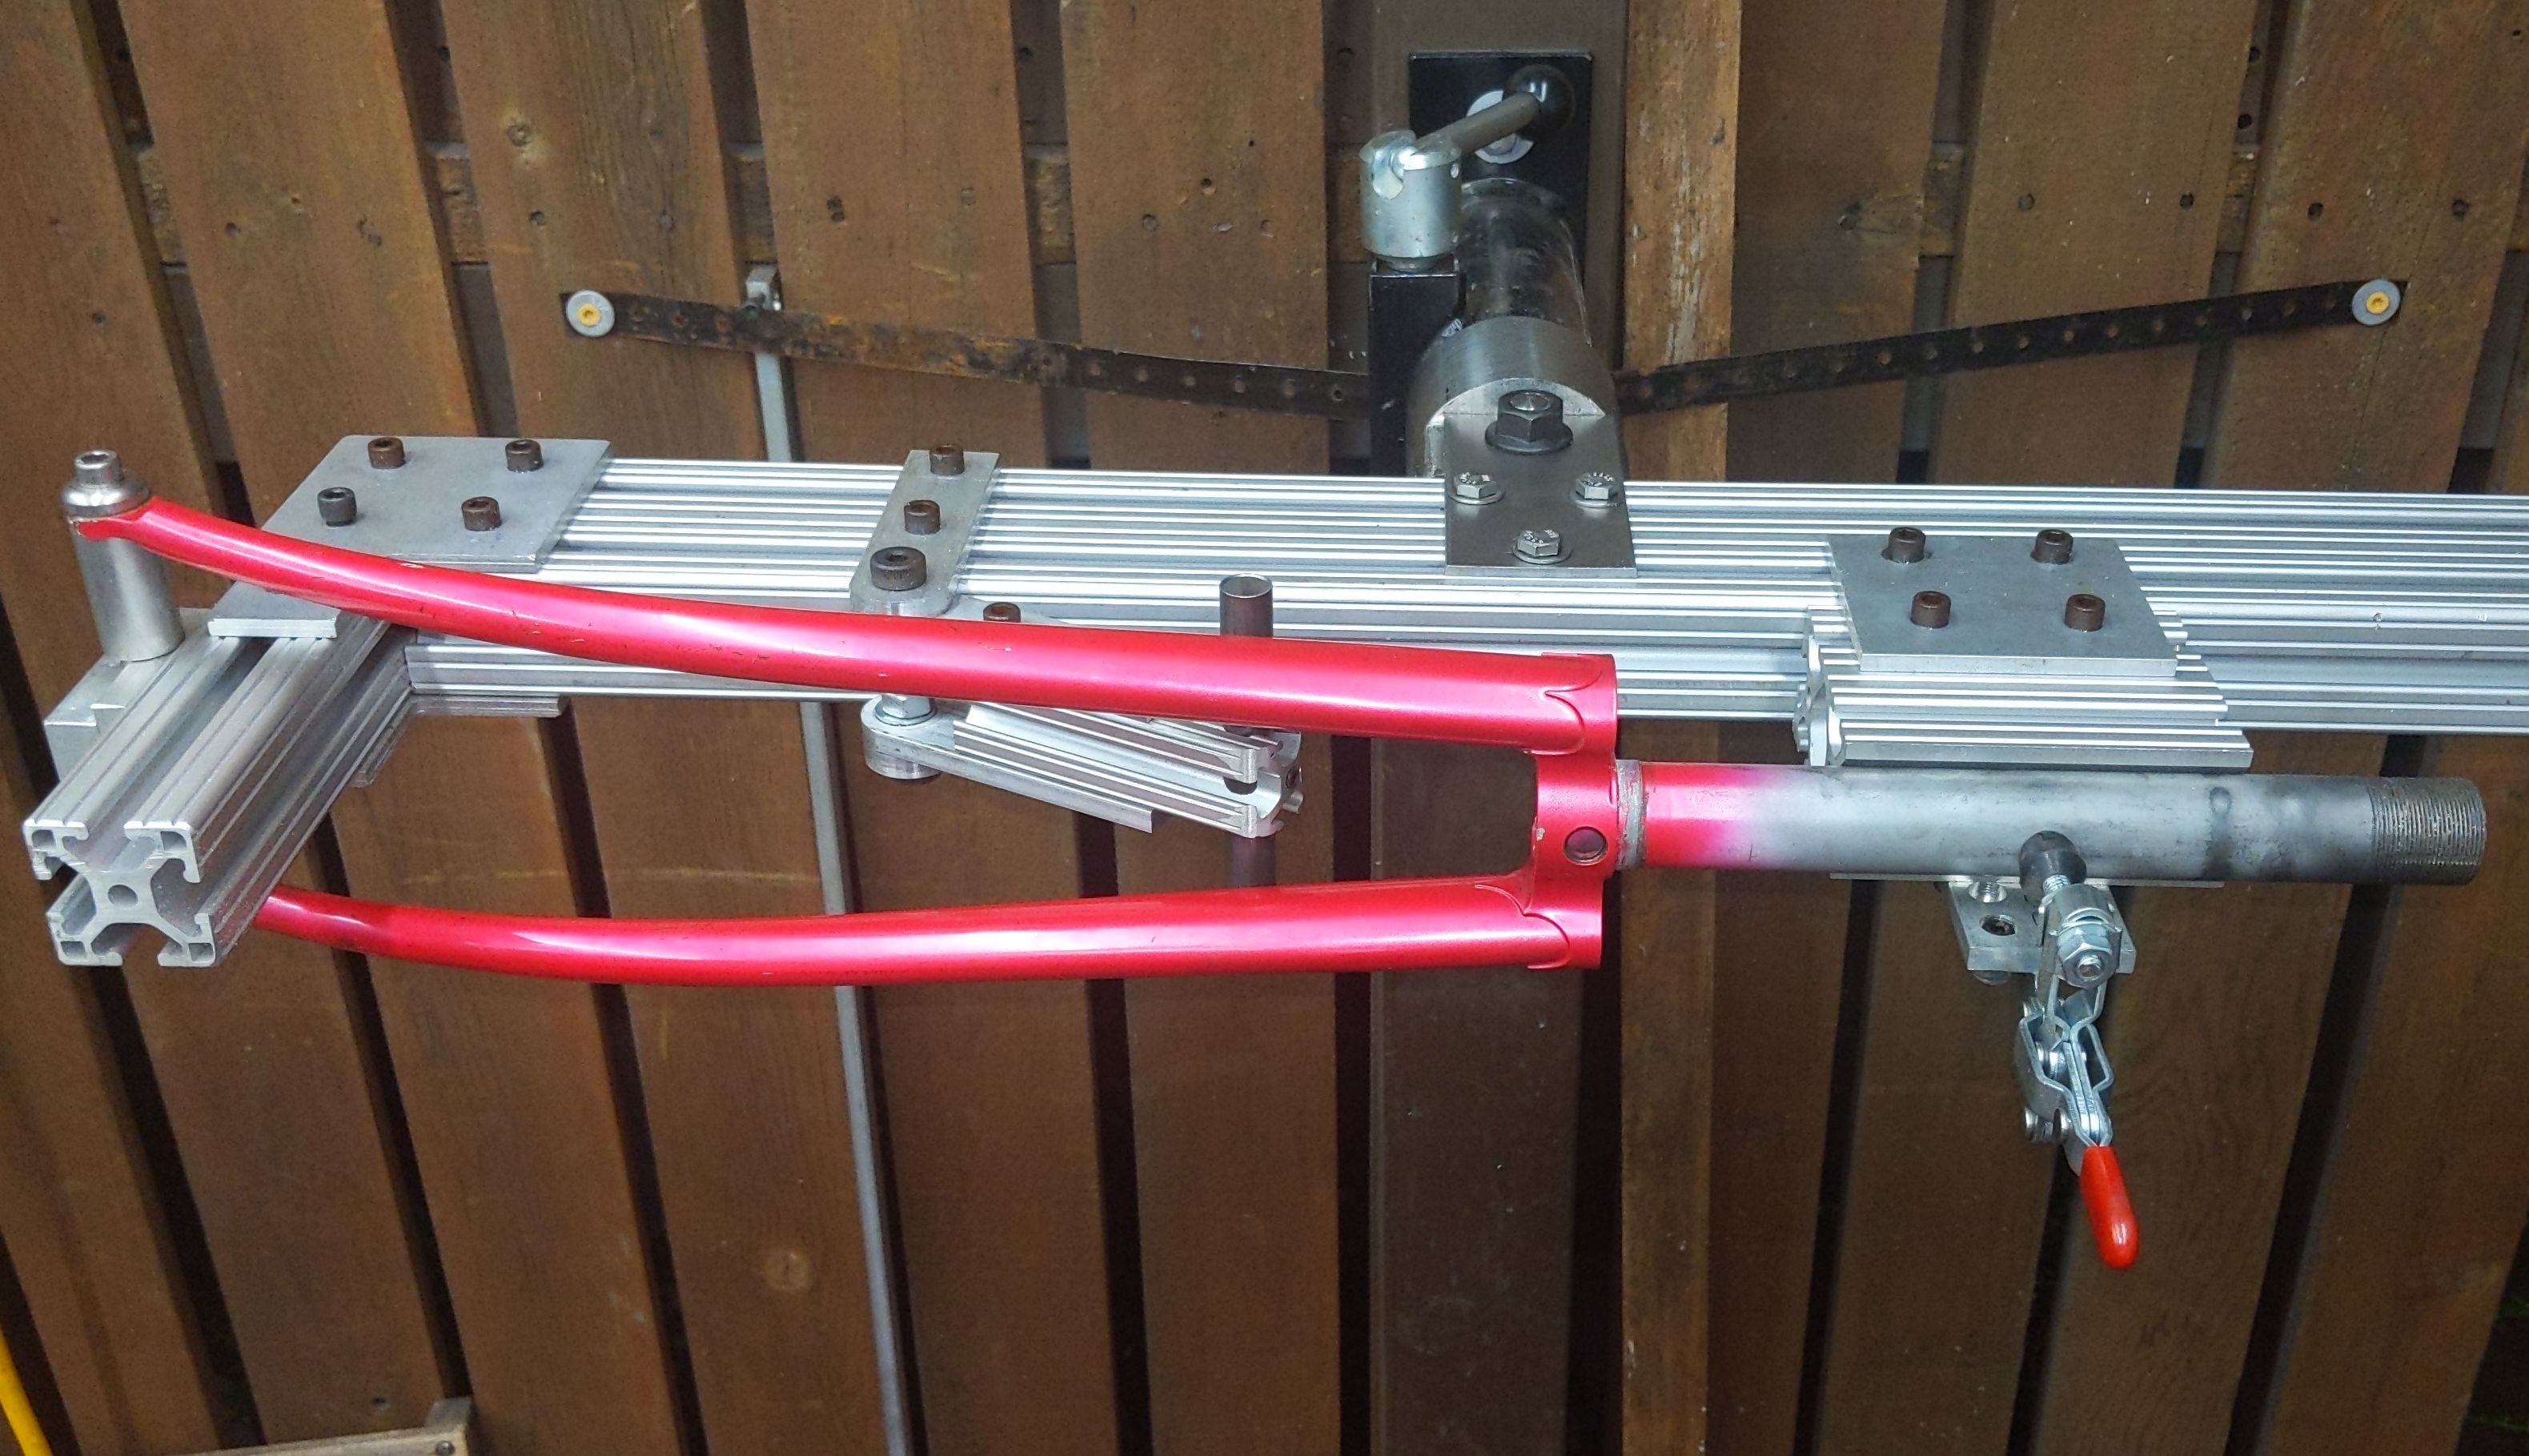
Buy the 1 1/8 tube block from Paragon and mount that on the jig instead of the extruded section. Just accurately drill a hole in the center of each half with a recess for a bolt head. I spaced them away from the spine for better access to the crown. Way better holding. I use a toe strap around the steerer/jig and axle is on the inside so I have better access around the fork leg for brazing.
Awesome! Extrusion was the largest expense. eBay was the best price I could find due to shipping costs.
A vertical component to support the legs was very useful although mine worked horribly. Tacking the fork was among the most frustrating things I’ve dealt with building bikes. Next time I will make printed v block clamps.
I also suspect there is variance in quality of 90 degree connections. Mine were the cheapest possible from Amazon. They make a lot of slop that requires a square when tightening.
As for cutting, I just used a miter saw. I didn’t even take off the old blade from woodworking.
Also, Paul Brodie’s recent fork building video is what inspired me to build forks without a mill/lathe. The paper drawing for marking miters worked great.
This is likely specific to @Spencermon but might apply to anyone else in Utah or anyone who lives near an extrusion manufacturer or distributor:
I’ve bought some extrusion from Bonnell Aluminum/Tslots in Clearfield. I got it from them because the price of the extrusion is (maybe was, haven’t checked lately) reasonable and they would let me come pick it up from them, I just had to call. I think their parcel carrier wanted like $50-$80 to ship the extrusions from Clearfield to SLC (like a 30 minute drive) due to their length and weight, so I just drove up there and got them. Not sure how far you are from them but I recall you saying you are in UT so it may be worth it. They also cut to length and I thought the quality of their saw cuts was very good.
That’s some great advice. I’ll look up their stuff. I still need to do some measuring. I want to make the jig to be able to fit forks from 29" suspension corrected down to 20" wheel forks.
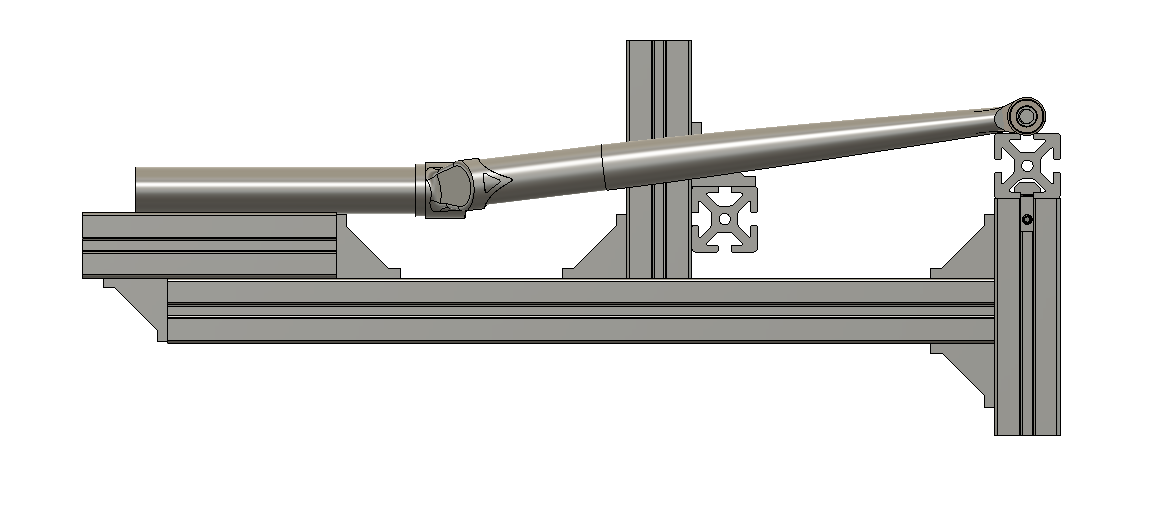
I can place the dummy axle on the top, left or right sides of the extrusion profile. I think that will help out with keeping the jig compact. The axle can go on the left side for extra short forks and on the right side for extra long forks. This will allow for an Axle to Crown measurement of up to 520-ish. I doubt I’ll ever need to do more than that. I’ll probably keep it centered though so that I can put on some sort of ruler.
I haven’t figured out the exact fork offset range I have, but this is 45mm offset. All I really know is that my MTB is 44 or 42, my gravel bike is 50mm and my track bike is 30mm. This should satisfy all of those quite easily.
I’m stuck on what to do for the fork leg supports. I have access to a 3D printer but I want to make sure that the supports are mounted in a way that is symmetrical. I think that maybe a little tower that can be moved left and right with a crossbar that I can bolt some v blocks (or just custom shaped 3D prints) to at the appropriate angles would work. like this maybe?
Right now, this is just under 4 ft. of extrusion. If online metals is to be trusted, that’s $27. But I just checked shipping and its $23. haha nevermind. Hey, @sunshine.fab , how did you get a quote from Bonnell? I didn’t see any pricing anywhere. Do I just have to request a quote from them? I may just use the Ebay option.
@Spencermon Just looked through my email (I got the extrusions in 2018) and I actually placed the order through InPosition Technologies. I contacted one of their sales engineers and he made the quote. I specified will call when I paid and was able to pick the extrusions up from Bonnell in Clearfield.
How about a nicely cut block of wood for the leg supports? It won’t get much heat, and it’s within budget. Rest it on the extrusion about where your fancy rest is, and put a square on it for perpendicularity to the jig. Hold it with a clamp or bungee cord.
My one suggestion is put the steerer higher, away from the backbone. With the high thermal expansion coefficient of aluminum, the jig might expand a lot if you lick it with flame, or even just from heat radiating from the hot steel.
To keep the whole thing rigid, have the rake go toward the backbone rather than away, so the dummy axle is as close as possible to the backbone.
Note how the thing that holds the crown parallel to the dropouts is just a piece of 1/2" tube, on a tower that pivots. You can easily move it out of th way, or swing it up when needed.
I’m pretty sure Alex doesn’t have any more jig kits, but as you can see it’s pretty simple to make.
I’m loving all of this inspiration. I was actually looking at using the toggle clamp in the exact same way as what’s pictured here. So at least I’m onto something there. Still gotta figure out the other factors. I think that 3D printed fork leg holders might be the way to go since they can easily be made specific to each fork. Which could help hold them in place with angle and spacing.
This is where my lack of knowledge on the subject starts to show. I wonder how much heat will have an effect on the straightness of the fork. Do most people braze the fork dropouts in the jig, or do they do that somewhere else? Seems that’s an area that you would want to keep away from the aluminum jig if it’s going to see a lot of heat/torch. I expect that if I continue making forks, I’ll make them with tabbed dropouts as well as hooded dropouts. I figure hooded dropouts have to be done in the jig, but tabs could be done (if you’re careful) outside the jig? Lugged forks won’t see as much heat as a fillet brazed segmented fork. I guess I’ll try to make this suit my needs the best I can and hopefully not end up on the Fail thread. lol
“3D printed fork leg holders might be the way to go since they can easily be made specific to each fork. Which could help hold them in place with angle and spacing.”
OK go for it if you love that idea, but I think you’ll want to keep anything plastic far away from a brazing jig. Yes there is metal 3D printing, but that’s an expensive process for something with such simple requirements.
I believe you do not need to hold blades for angle and spacing in the horizontal plane. Those are determined by the dropouts and the crown (or miters, in the case of unicrown or segmented construction), so you only need to hold them to the same height, right and left. Most of the thousand (or 2k?) forks I brazed were on a jig that just had a pivoting indicator like the one shown on the Wetmore.
As to whether to do the dropouts first or in the jig, try both but I daresay most people put the dropouts on first, outside the jig. Though I brazed many forks with the blades left plain on the small end, with raking (curving), cutting to length, slotting and brazing in the tips done after the crown/blades/steerer was all brazed up. You can tell I’m old school, what with curving the blades and all… Our fork raker curved both blades at the same time. That was when I worked at a “factory”, now I’m a retired hobbyist.
I modified Alex’s design. Mine uses a Paragon block in a ‘seat’ for the steerer. It’s clamped into place with a couple toggle clamps opposing at 90*. This allows me to use a 1" or 1-1/8" steerer but the scale remains the same as the steerer is centered in a 2" block - instead of the ‘V’ arrangement that many use. I don’t think the 1-2mm of extra (or missing) rake is significant but, why not try to get it as close as my overthinking will allow.
Year plus later and I finally ordered the parts to make this. I’ll post my progress in the coming days. Gonna have to buy a thread tap for the ends of the extrusion and to modify one or two brackets.
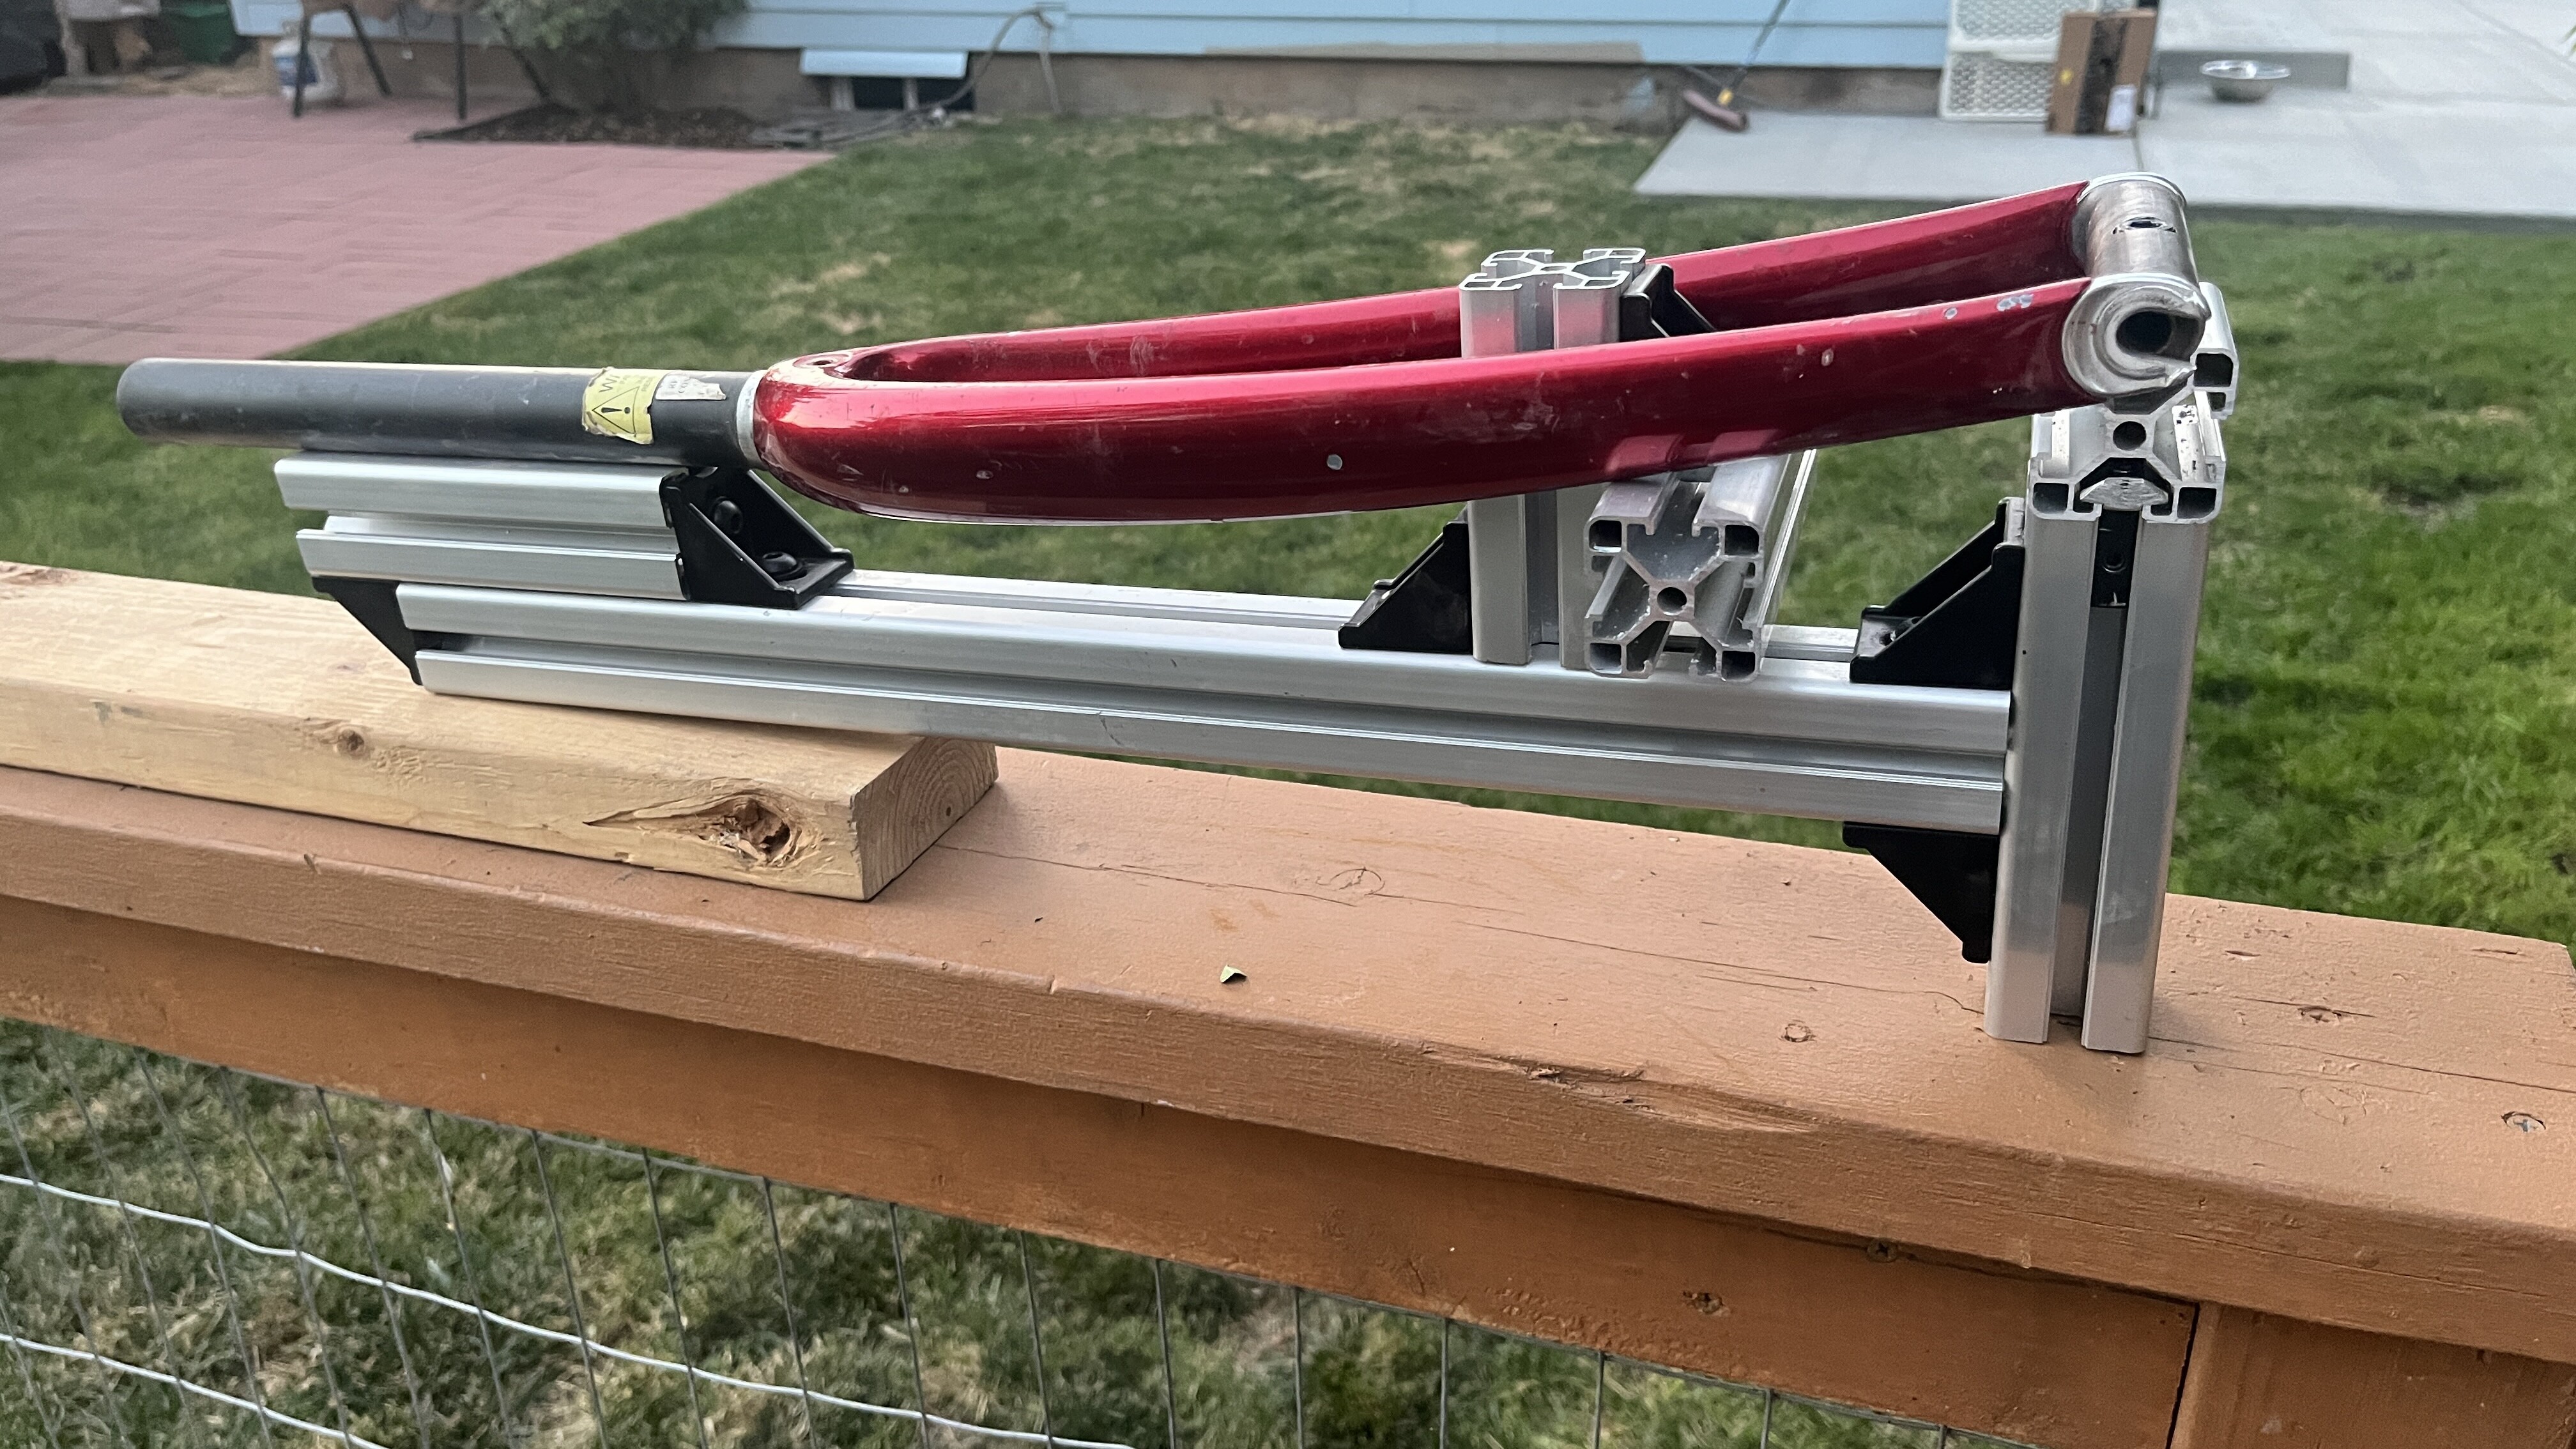
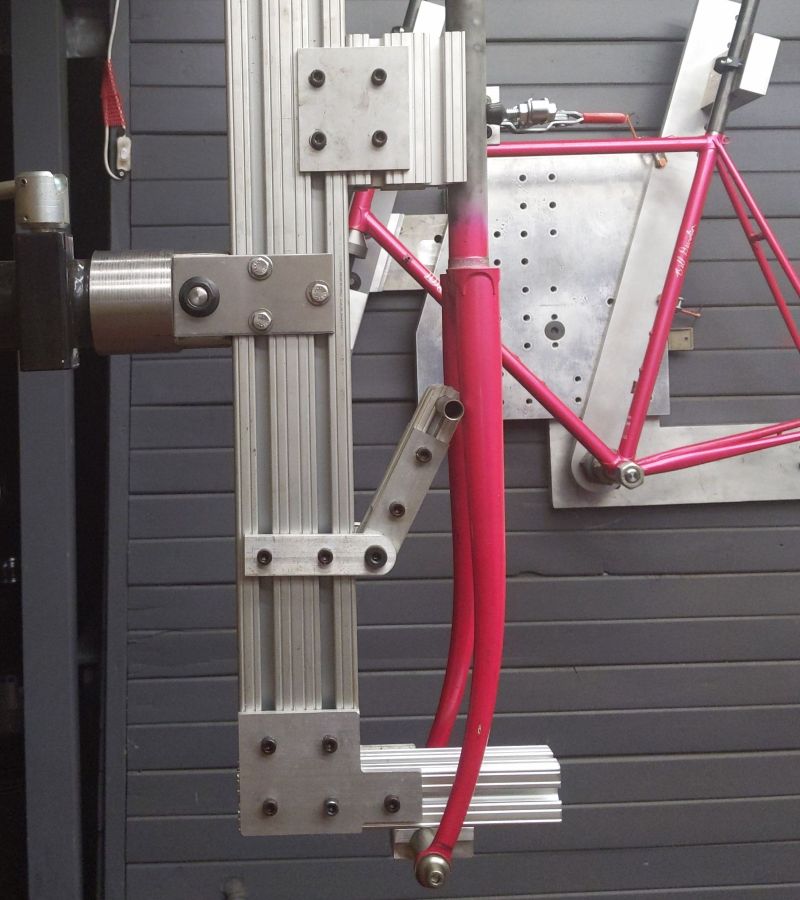
I’ve finally got this thing assembled. I’ve been a little busy between prepping our house to list it for sale, having a litter of puppies and trying to buy a house.
I just need a way to hold the steerer in place. Right now I’m using a premade fork to align everything. It’s not gonna be easy to align the whole thing since there is some play in the brackets and bolts. I’ve got two forks to build, but one fork is missing dropouts and the other is missing fork blades. Once I get those, I’ll test it out and let you all know how it goes.
If I were to do it again I might do that. But I also might just get some laser cut plates from send cut send. I’m also a little budget minded so this whole thing cost me $80. And that’s with enough supplies to make a second jig. So really it only cost $40. I’ll deal with the little slop I have to straighten out if it saves me some money.
In other news, does anyone want to buy a fork jig off me?
That’s how the Wetmore design is made. I think it’s a simple no-fuss way to ensure the alignment is “good enough”, no granite surface plate or optical instruments needed!