Hi,
I’m currently doing a design for a gravel bike frame and am stuck on what do with the rear brake mounting. It seems like going with a flat-mount brake with a 160mm rotor would be the play (on the chainstay), but from what I’ve seen all brake designs are around a 140mm rotor and an adapter is added in later on (maybe not the case and this is where my confusion starts) to accommodate a 160mm.
Is there a reason why this might be the case? Or should I just design for a 160mm flat mount dropout and omit the adapter?
Any recommendations on what might be the most optimal solution would be appreciated.
Thanks!
In my opinion, 160 is the ideal diameter to design around for flat mount rear brakes. Packaging the mounts will be much easier with 160 than with 140.
And unless the bike is particularly small, with a very small light rider, I wouldn’t spec 140s on a gravel bike. And if you’re not going to use 140s, there’s no reason to pack the brake mounts so close to the dropouts.
The adapter is only necessary if your brake rotor mismatches with the frame’s mounting locations. So mounting a 160 rotor on a frame with FM140 mounts. Or a 180 rotor on a frame with FM160 mounts.
You can find all the specs for different brake sizes in Sram’s frame fit guide: https://www.sram.com/globalassets/document-hierarchy/frame-fit-specifications/road/2024-road-frame-fit-specifications.pdf (page 85).
I’m currently building a cargo bike, and I’m building it around FM180 in the rear. There’s lot’s of room around the dropout!
4 Likes
Thanks for help! I swear I have seen that SRAM one multiple times or in different formats but that one really makes it clear for me that just designing for the 160mm rotor is a valid choice.
And ya I agree, it seems like most bikes (from what I’ve seen anyways) go with the 140mm then adapt to 160mm but it should just be standard to go with the 160 with no adapter, and if you have a 140/180 then get an adapter.
Good luck with the cargo bike, would be interested to see the final build!
The only issue is it’s only possible to adapt to a larger rotor and only by 20mm. So its either 140/160, 160/180, or 180/200.
I would guess that the reason FM140 is used is its compact design makes for smaller steel parts. Or that it was just the first on the scene so everything was designed around it and never updated as everyone realized 160 is just better.
1 Like
I think flat mount is designed around 140mm discs because it was a carbon road bike standard, and that’s what Shimano thought would work best for that application. Unfortunately, they would never think about steel parts.
2 Likes
My vote for going 160mm. If you are building a custom, no reason to follow industry standards.
Btw, is there a precise spec document for the dimensions of a 160mm rear already? 
1 Like
Depending on how you’re actually making the calliper mounts and fixing them to the stays, it would be worth modelling them to see where the mounts end up being on the chainstay and/or dropout. You may actually find that the 140 spec puts the bosses/mounts in a better place.
4 Likes
I had to interpolate the 140 mount and adaptor to make a 160 jig.
Ah good to know! I can’t see myself needing to go larger or smaller in the future for this build so this just solidifies the 160 decision even more.
1 Like
Ya I have it modelled in Solidworks, and after posting I played around with it and realized I would need to cut back the chainstays a bit more to accommodate them. So in that regard I can see the benefit for the 140 and an adapter, but I don’t think it will be a deal breaker.
1 Like
Agree with what @stevenshand said. With a 160mm mounting you end up pushing the mounting hardware pretty deep into the chain stay, sometimes cutting almost all the way through it. Ok so you move the chainstay out a bit, relocate the bends, whatever, but then you might be clipping your heel on the tube when you ride. This can especially be an issue if you’re going to “boost” the rear spacing but even with 135/142 spacing (yes it’s the same thing lol) heel strike can be a problem on disc bikes. So you really have to look at your pedaling movement, shoe size and crank Q-Factor to fully analyze this.
2 Likes
Sounds like I’ll be modelling in my shoe when I get home. Definitely hadn’t thought about the heel striking, though I do have the cranks and pedals modelled in, so shouldn’t be too much work checking that clearance. Thanks for the info!
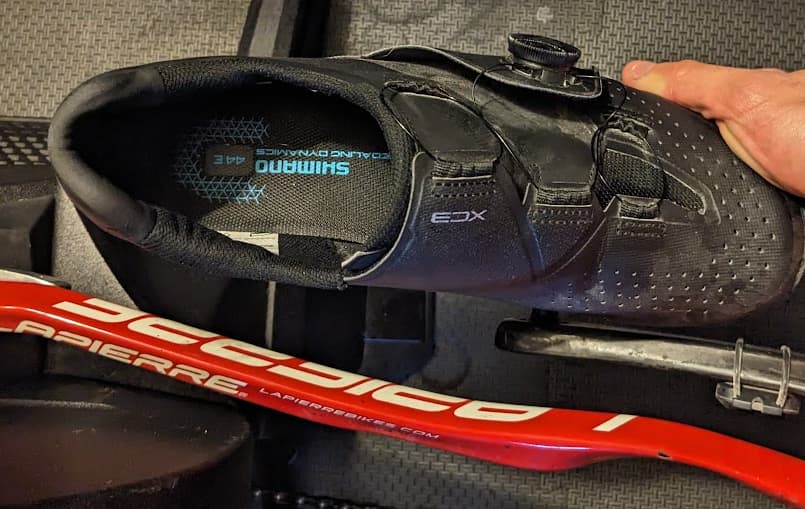
Get a buddy to ride behind you and watch how your feet move when you pedal. Or, if you have shoes and pedals already set up and adjusted on an existing bicycle in a way that you like, clip a shoe into a pedal and measure the distance from the heel to the center line of the bike (center of rear rim) when the shoe is pushed over to the inside limit of the float.
2 Likes
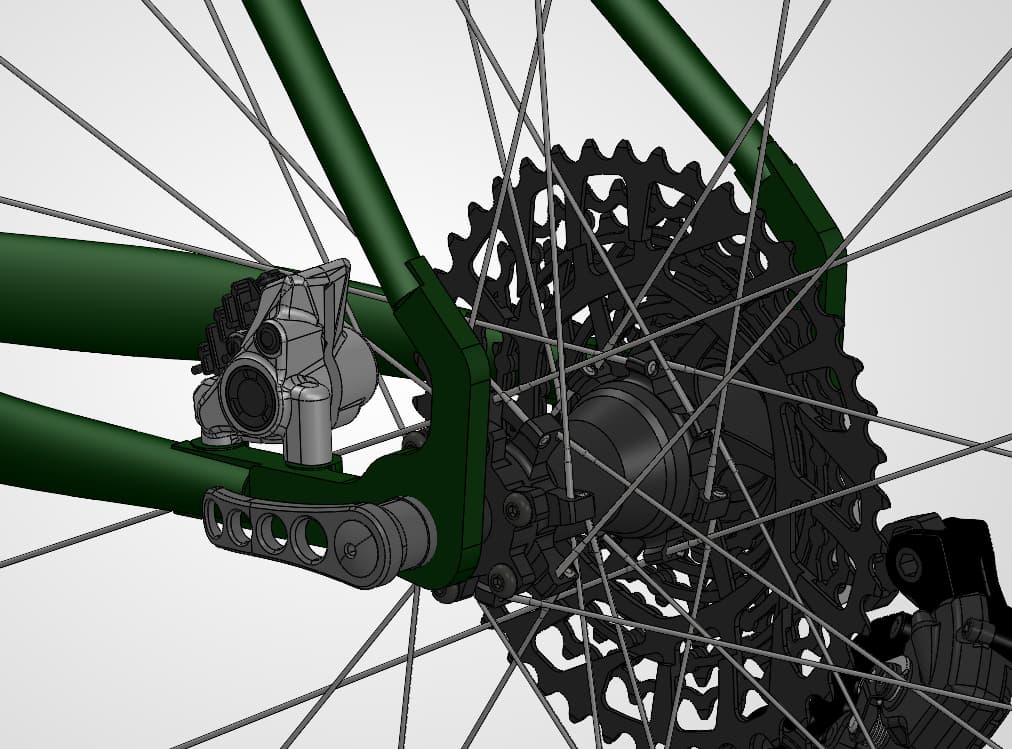
my 160mm FM setup on a cross/gravel bike.
1 Like
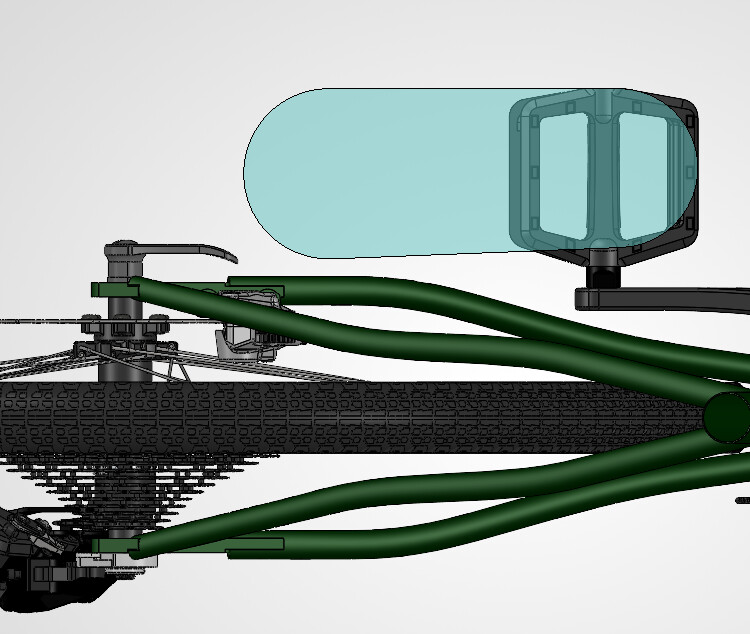
Put a (very) rough shoe envelope in and looks like it should be good. Have about 3/8” clearance between the heel and chainstays.
Did a sanity check to see if my heels turn ridiculously inwards with my shoes on the bike trainer and shows similar results.
I like how simple and clean this looks. I might need to revise my design a bit to match similar to this.
It looks like there’s an added risk of distortion on the chain stay from the added welding though, did you avoid doing it this way in future builds? Or was the risk negligible enough?
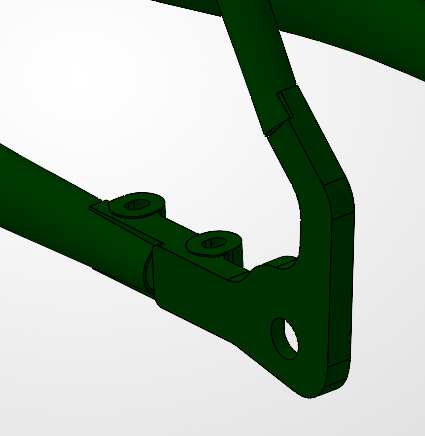
Thought I would post as a follow up to where things ended up in terms of design.
Design-intent was to try and keep the dropouts simple and a ‘one piece’ design. I also like the idea of the dropouts controlling the angle and attachment for the seat stays and chain stays, and maintaining the location for the brake mounts relative to the axle.
That being said, I’m not satisfied with these in terms of look and overall “chonk” factor. I’ll probably end up changing the design for where the seat/chain stays connect, and hopefully reduce the overall complexity of the part. Initially I was trying to keep the dropouts simple with limited machining, but that was lost along the way somewhere.
Any opinion/advice is appreciated! And thanks again for all the help/info posted already!
This style looks good, but I hate how complicated mitering these mounts are. I recommend any first time builders to use a drop-out with an integrated mount. I didn’t have much issues with welding - if you have half a proper jig, it should keep everything in place until parts have cooled.
2 Likes