To quote Eames: “The details are not the details. They make the design.”
Looks great ![]()
To quote Eames: “The details are not the details. They make the design.”
Looks great ![]()
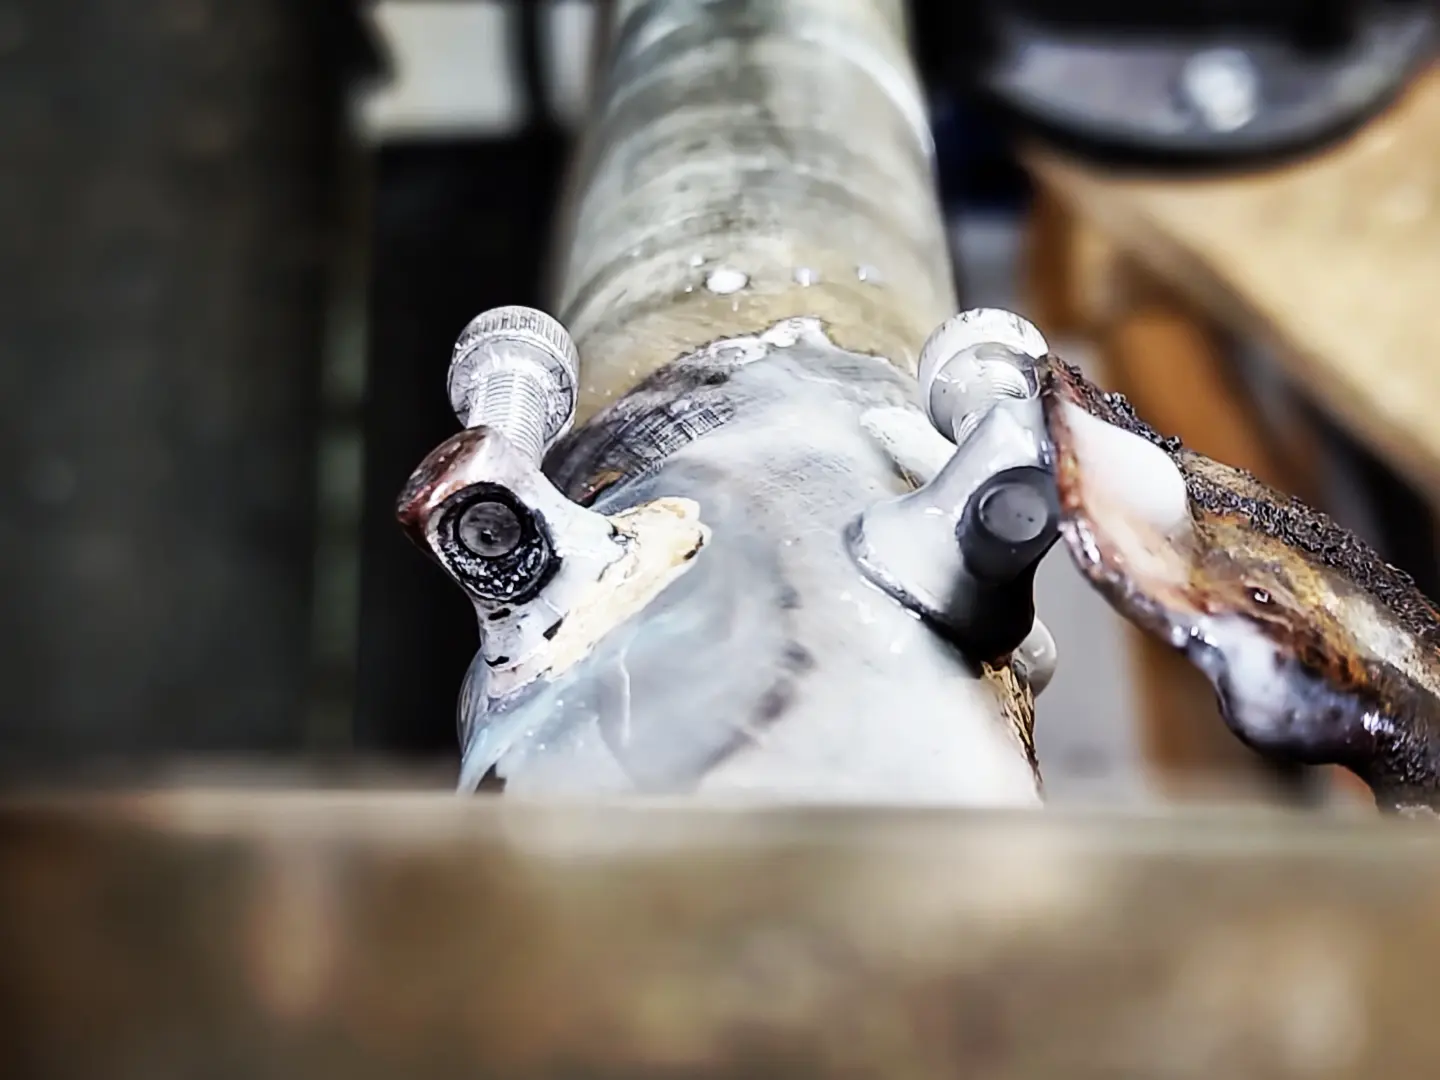
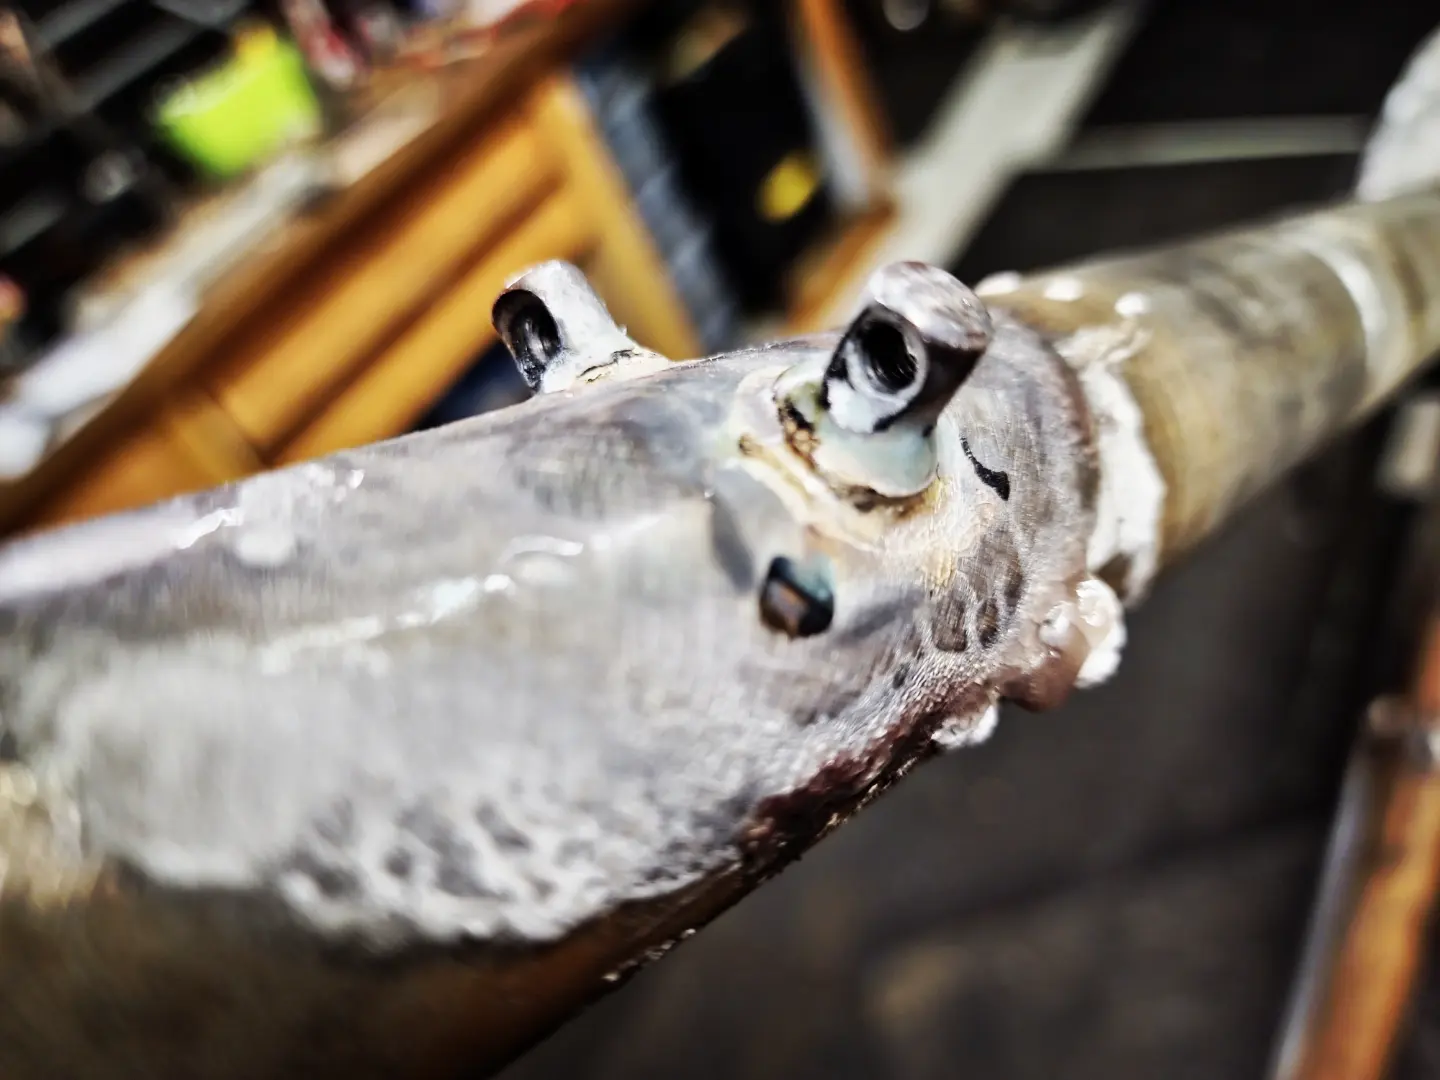
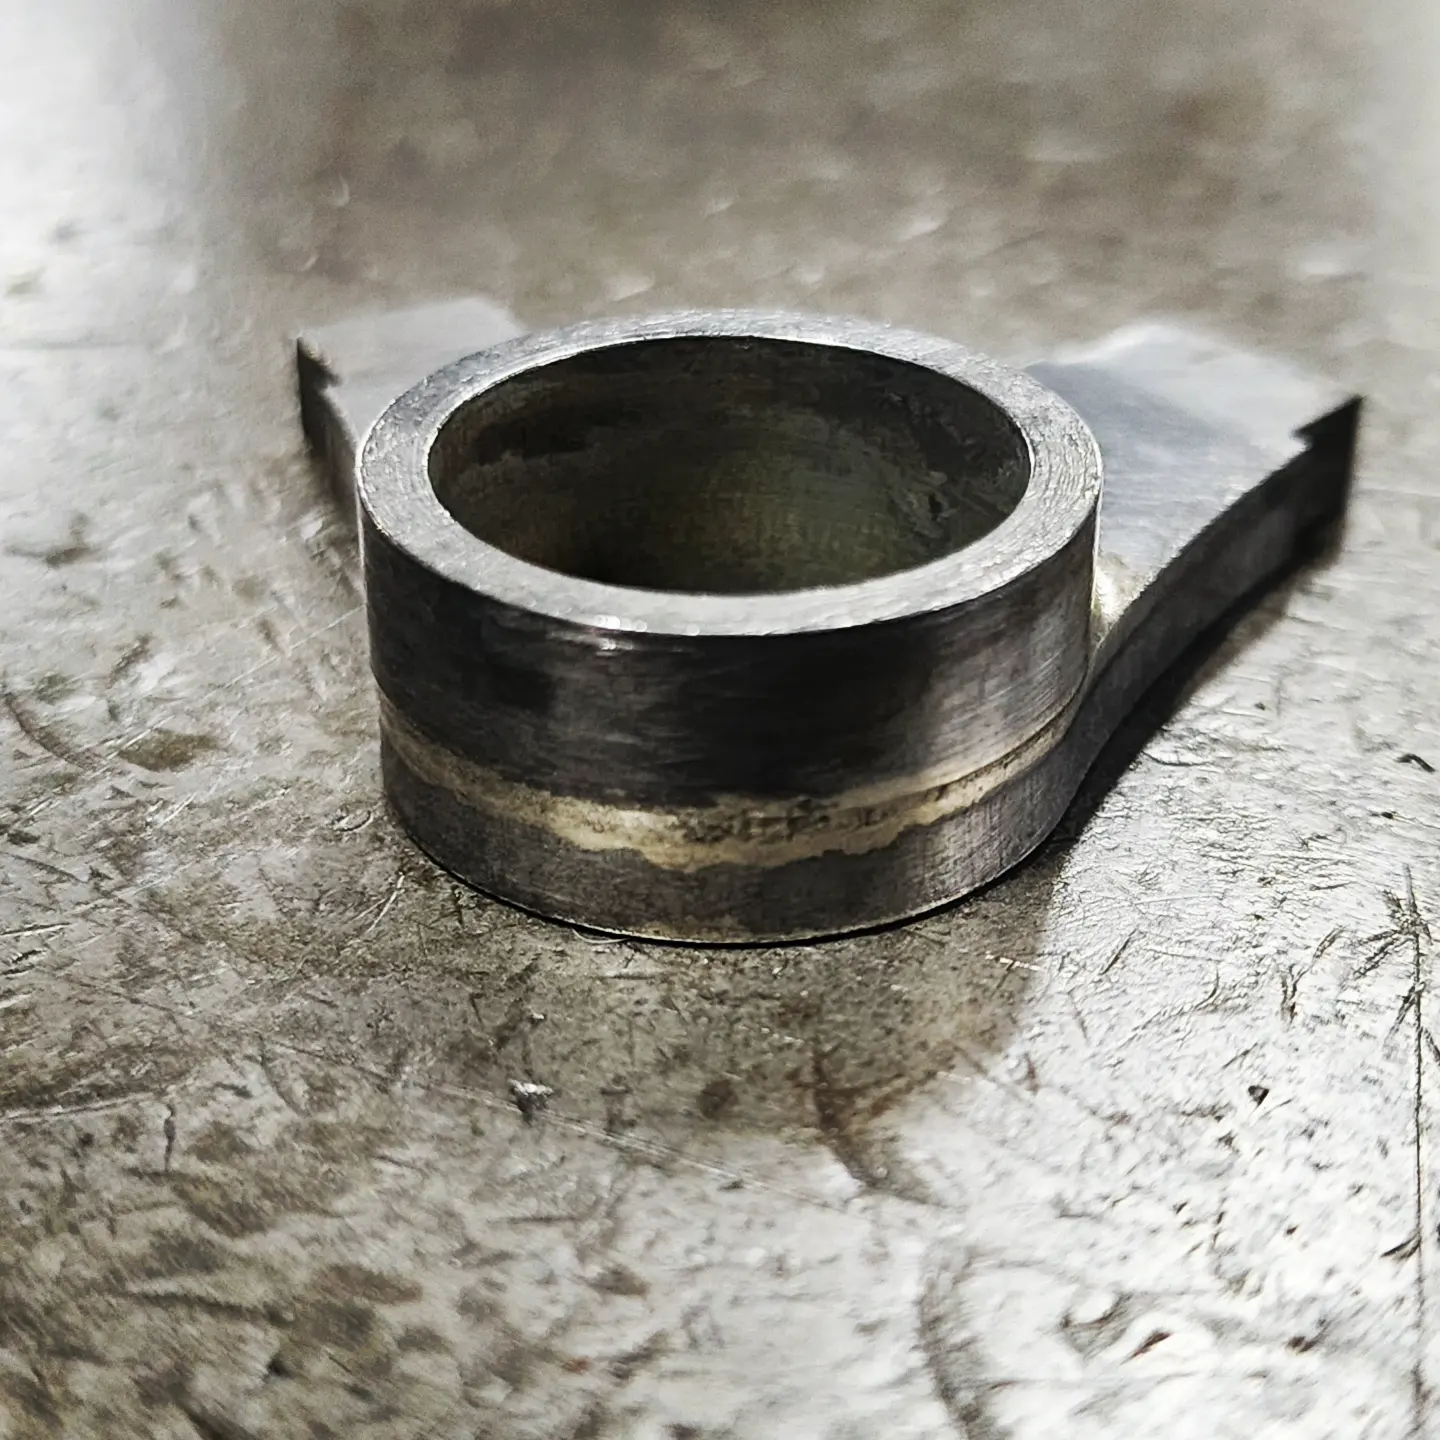
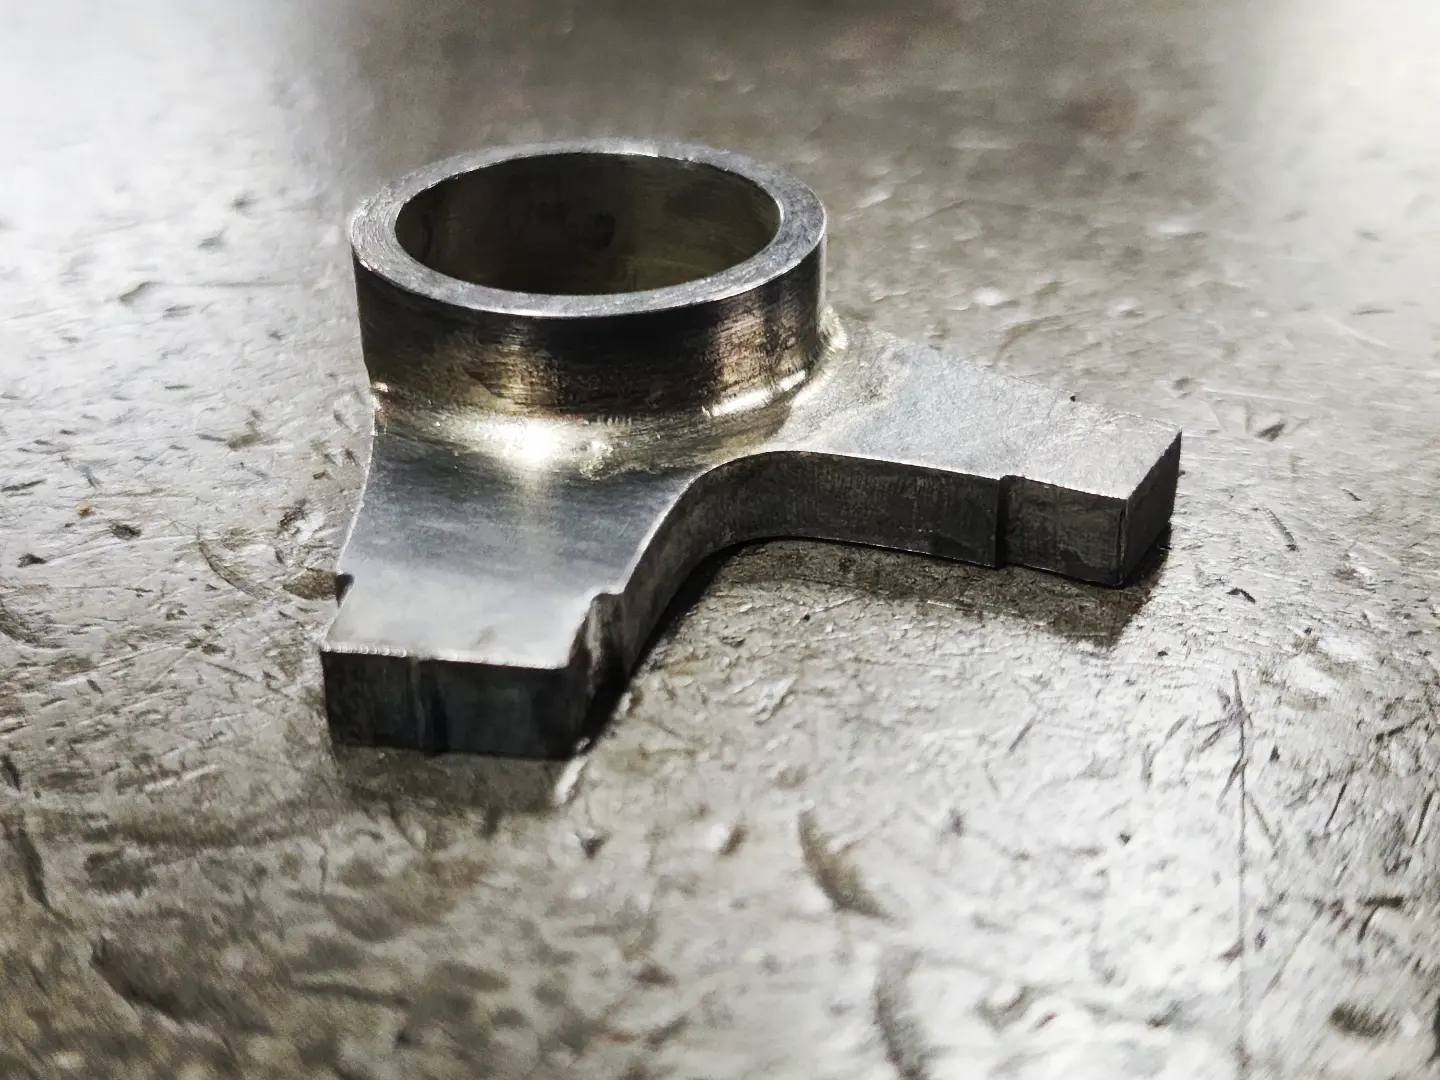
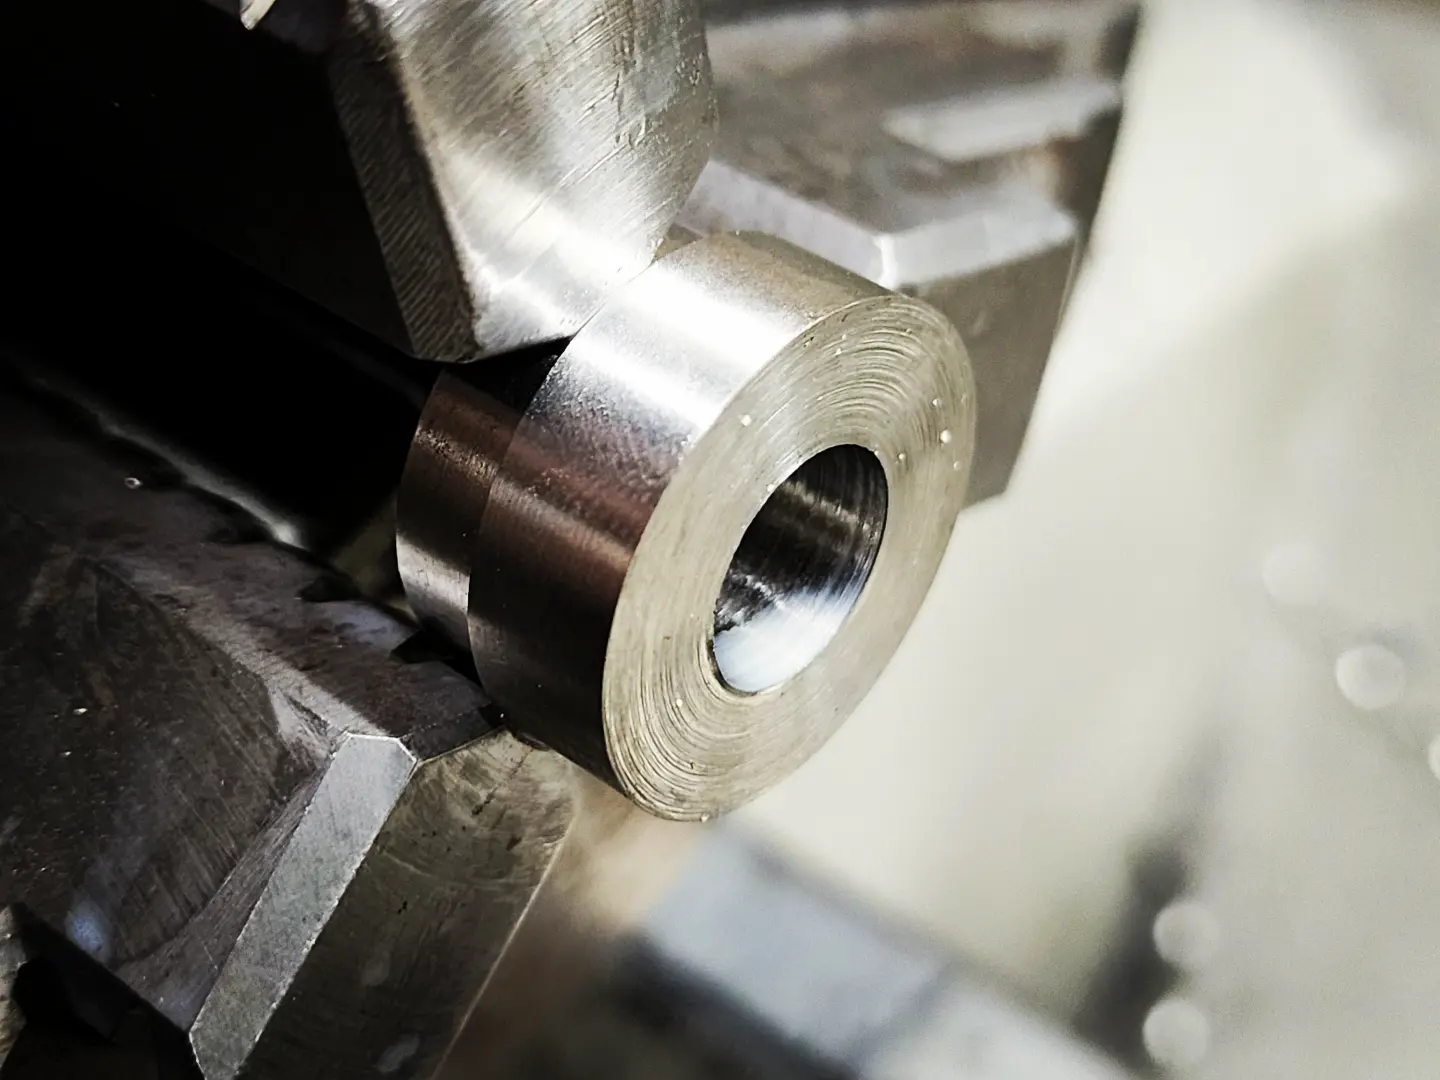
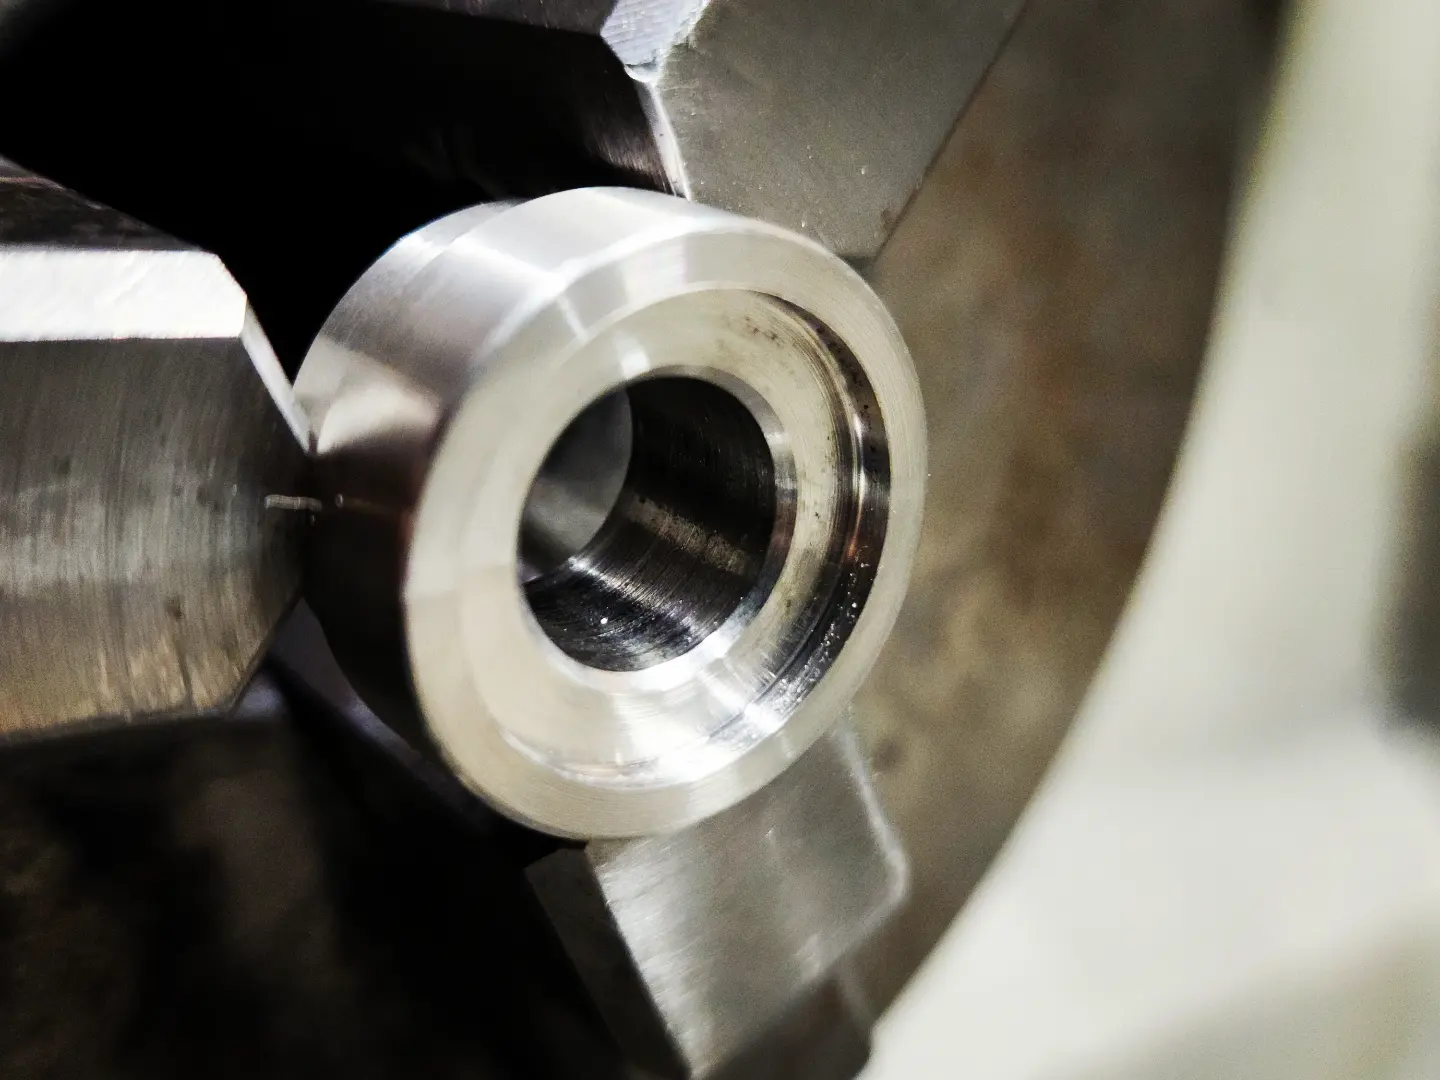
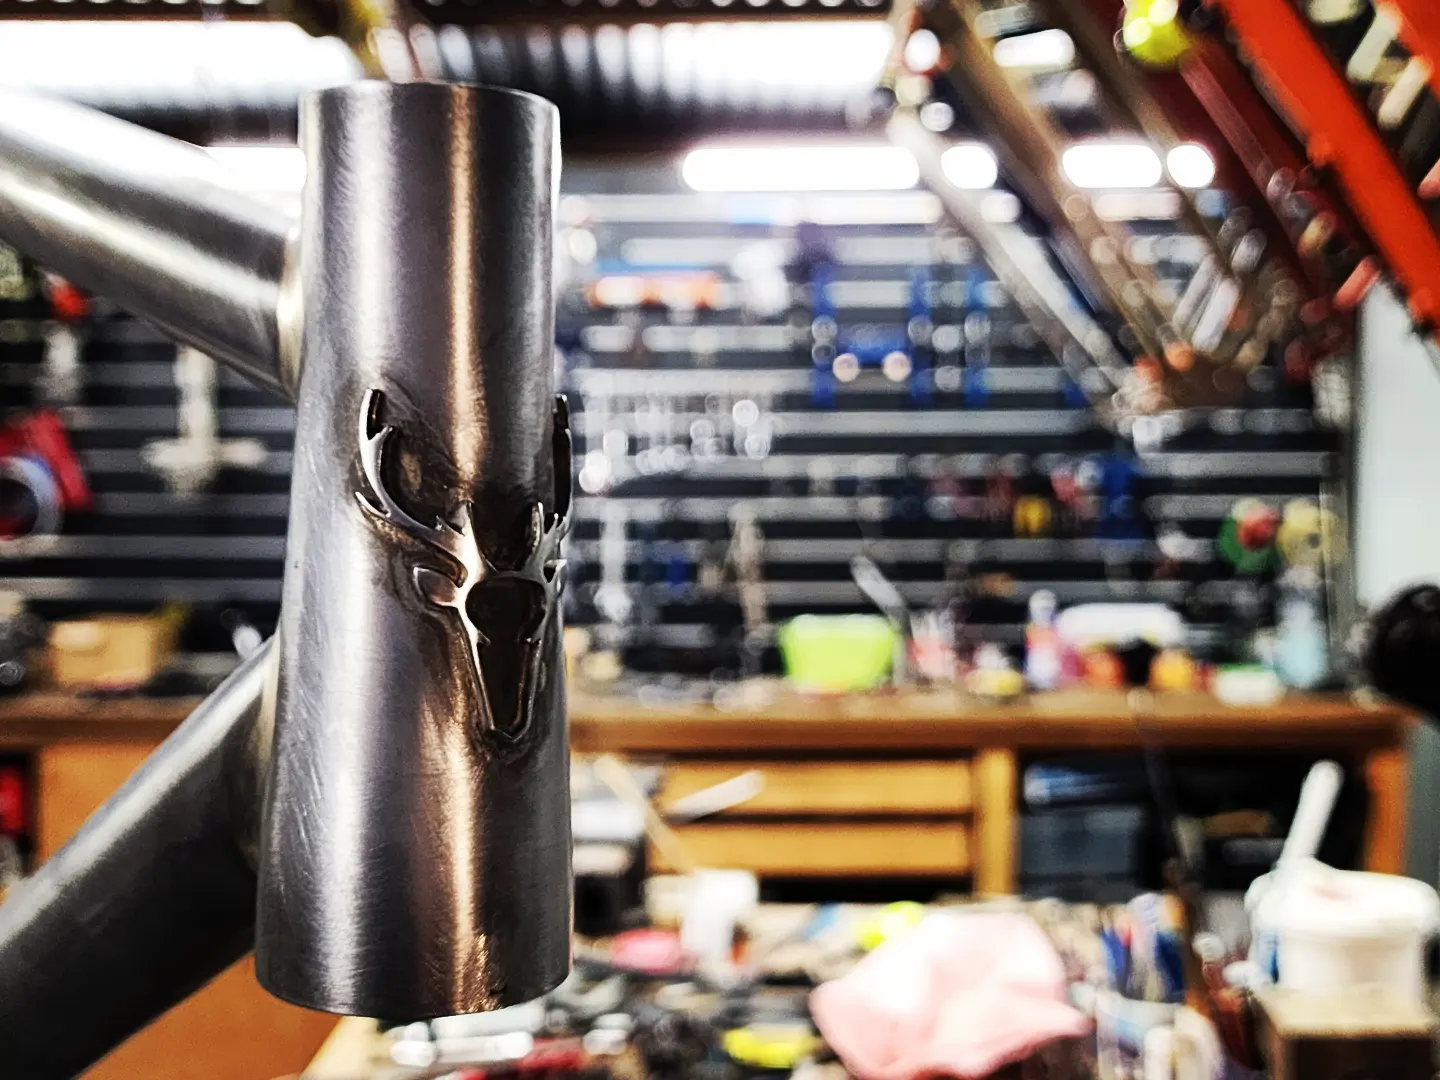
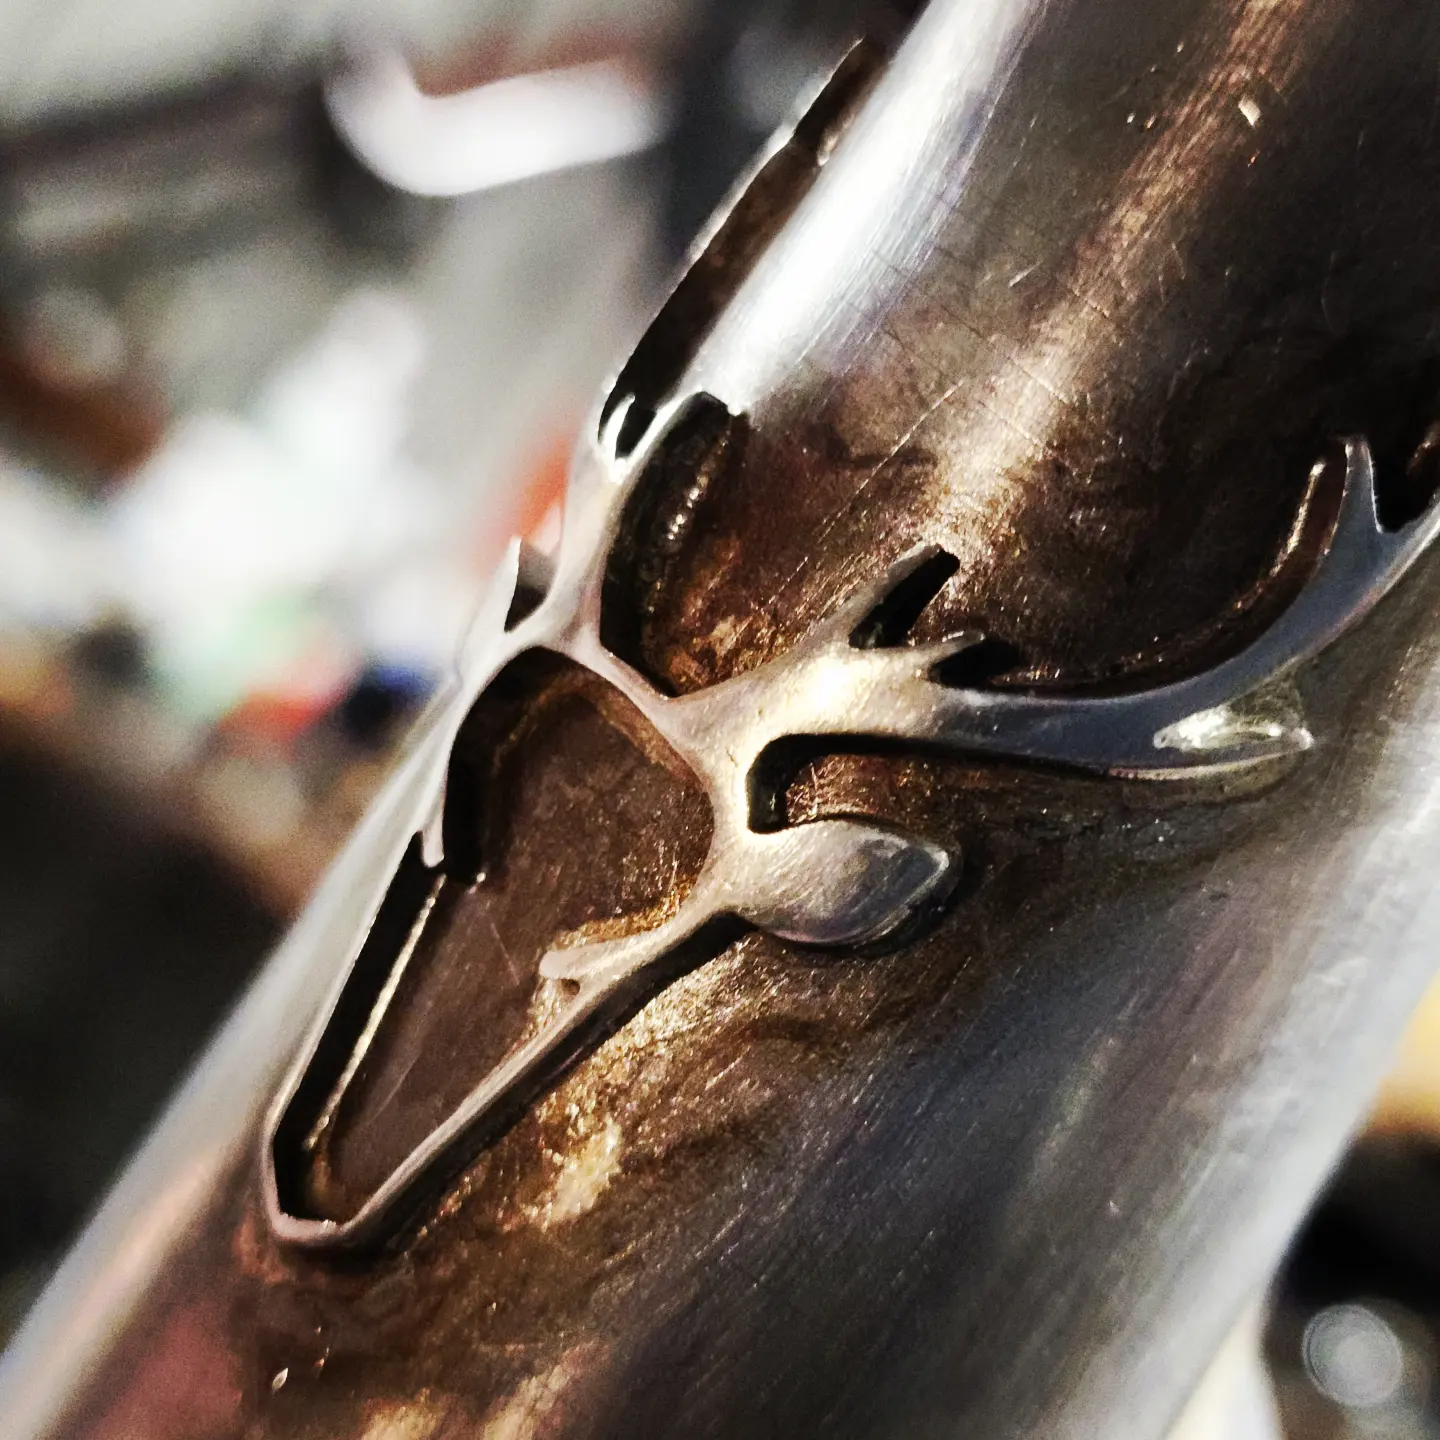
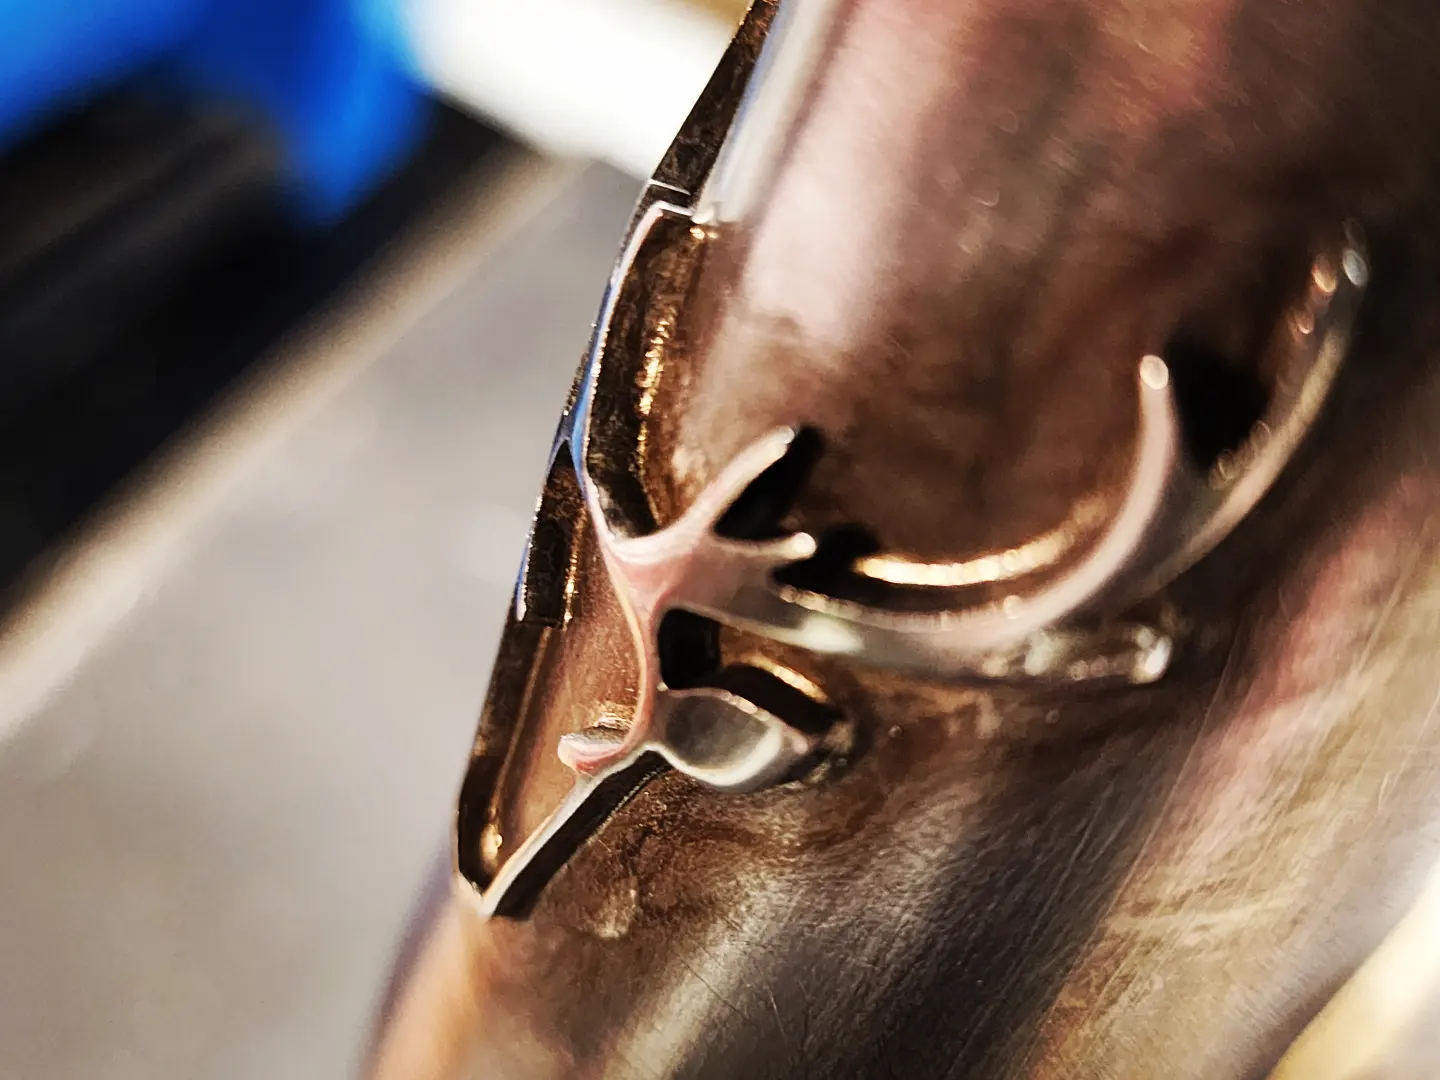
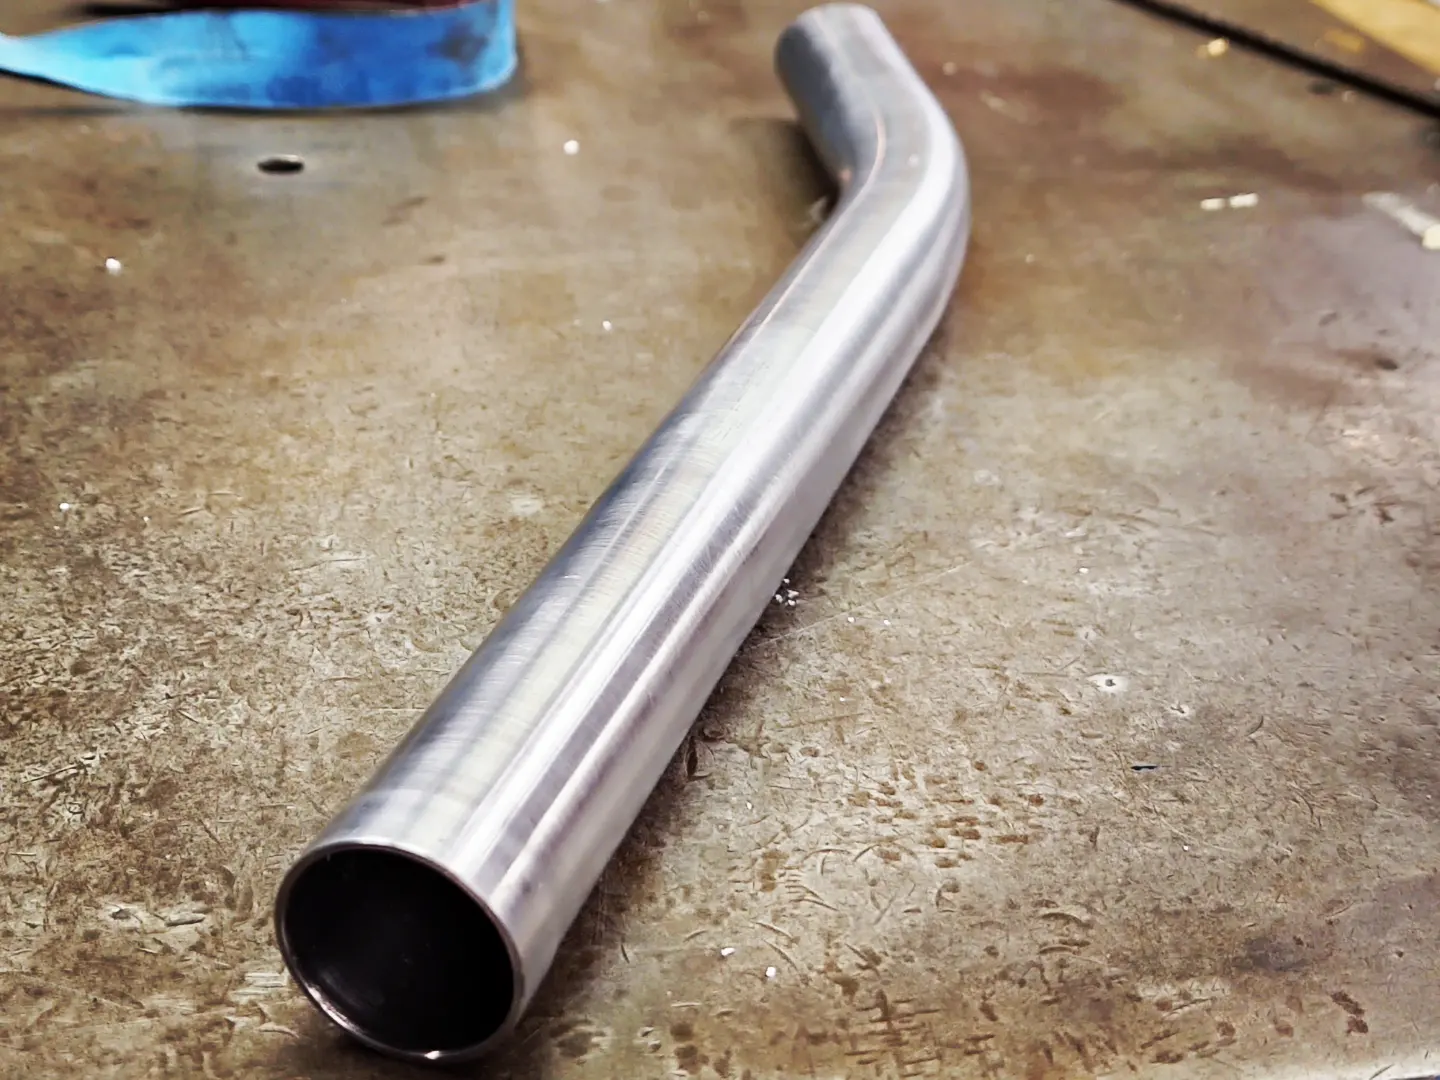
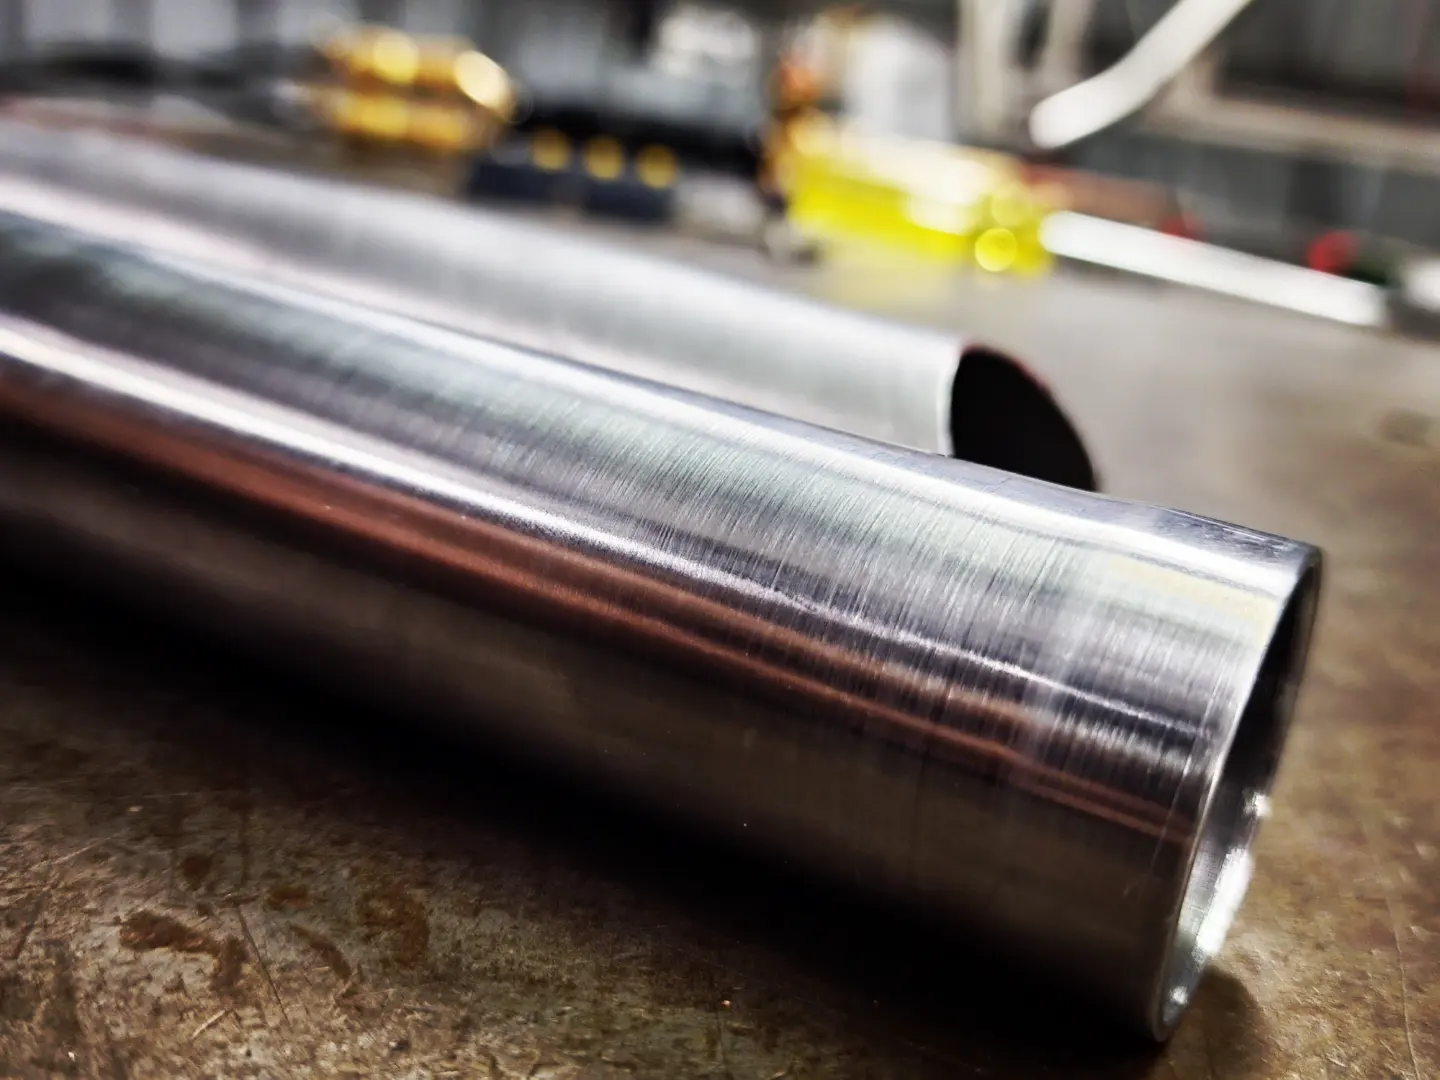
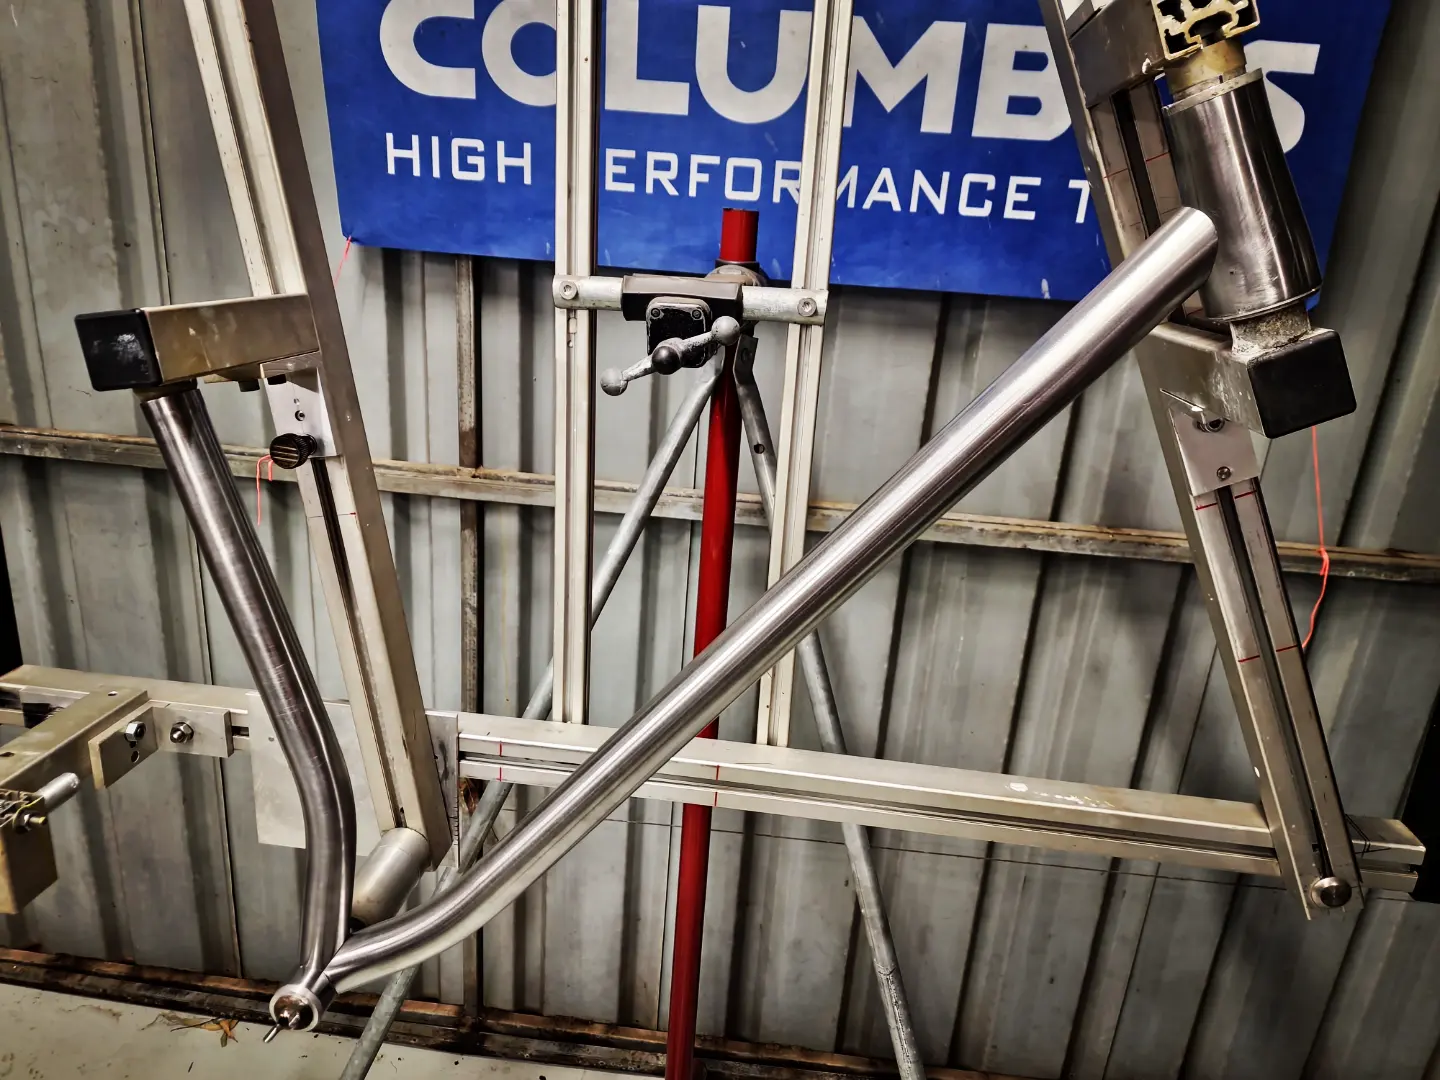
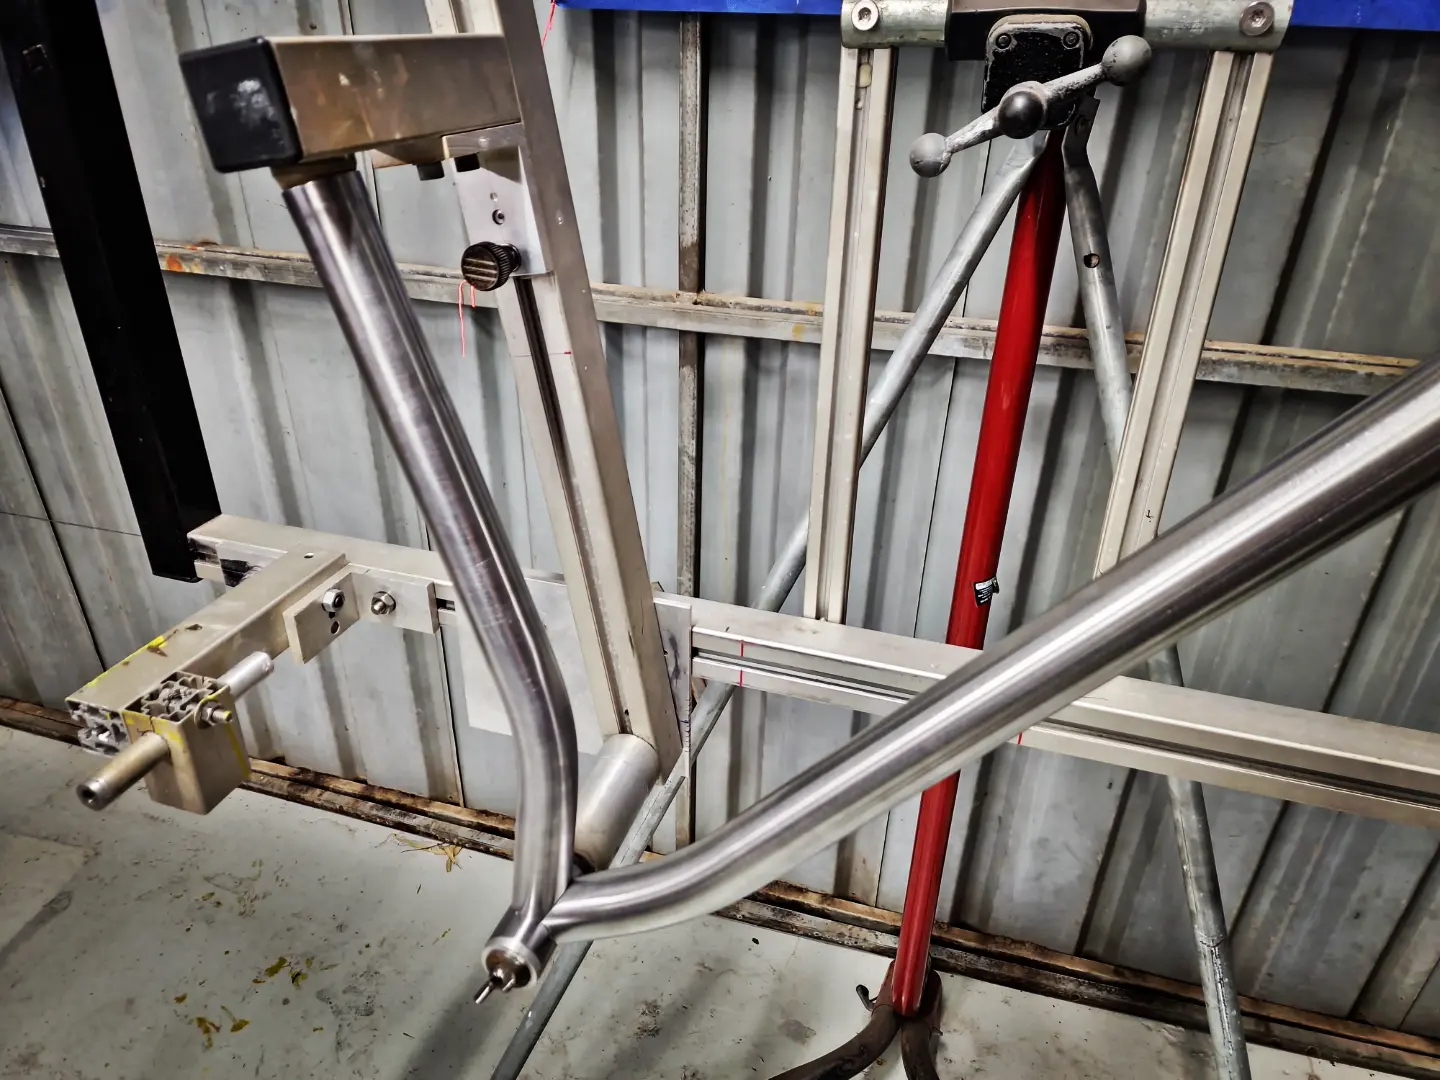
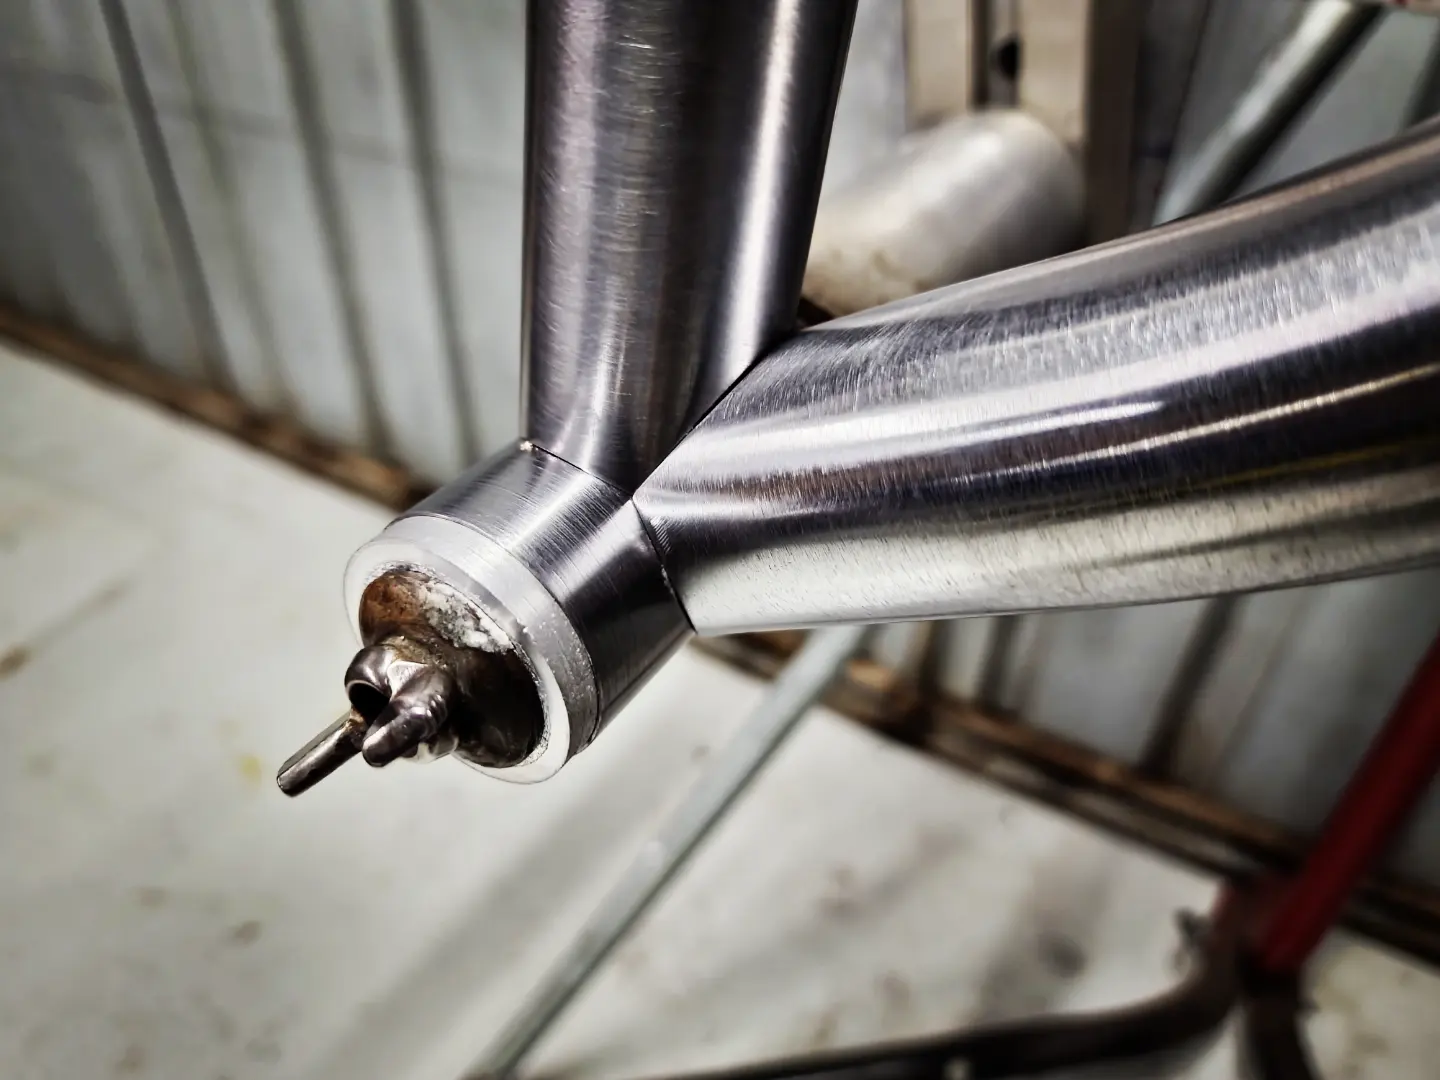
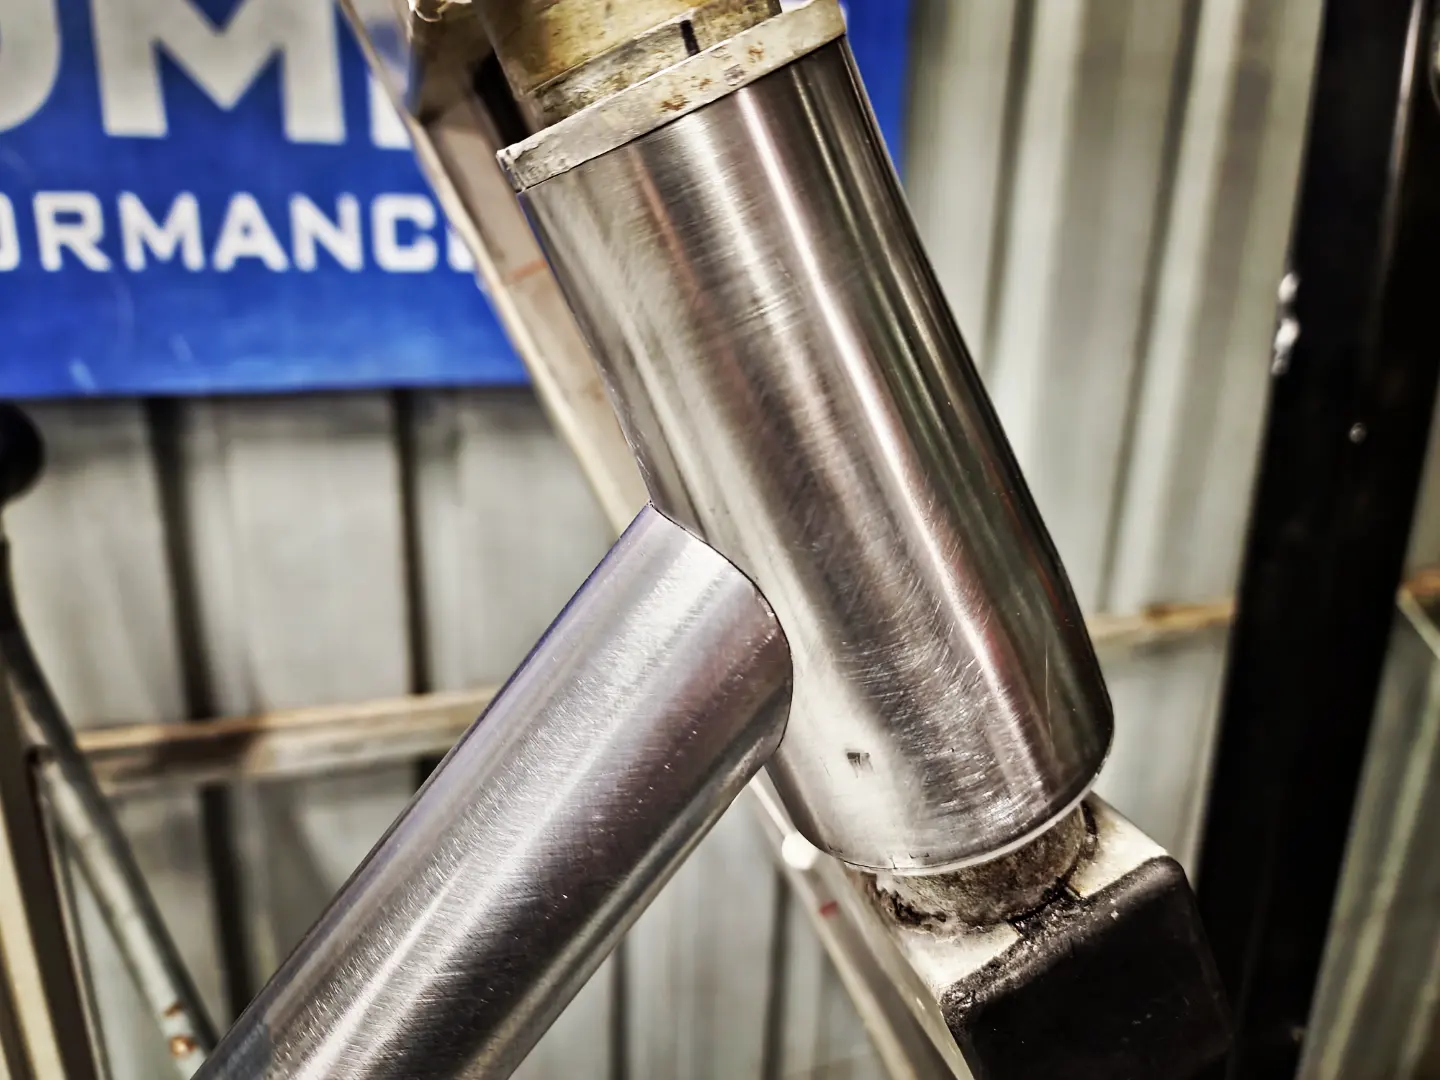
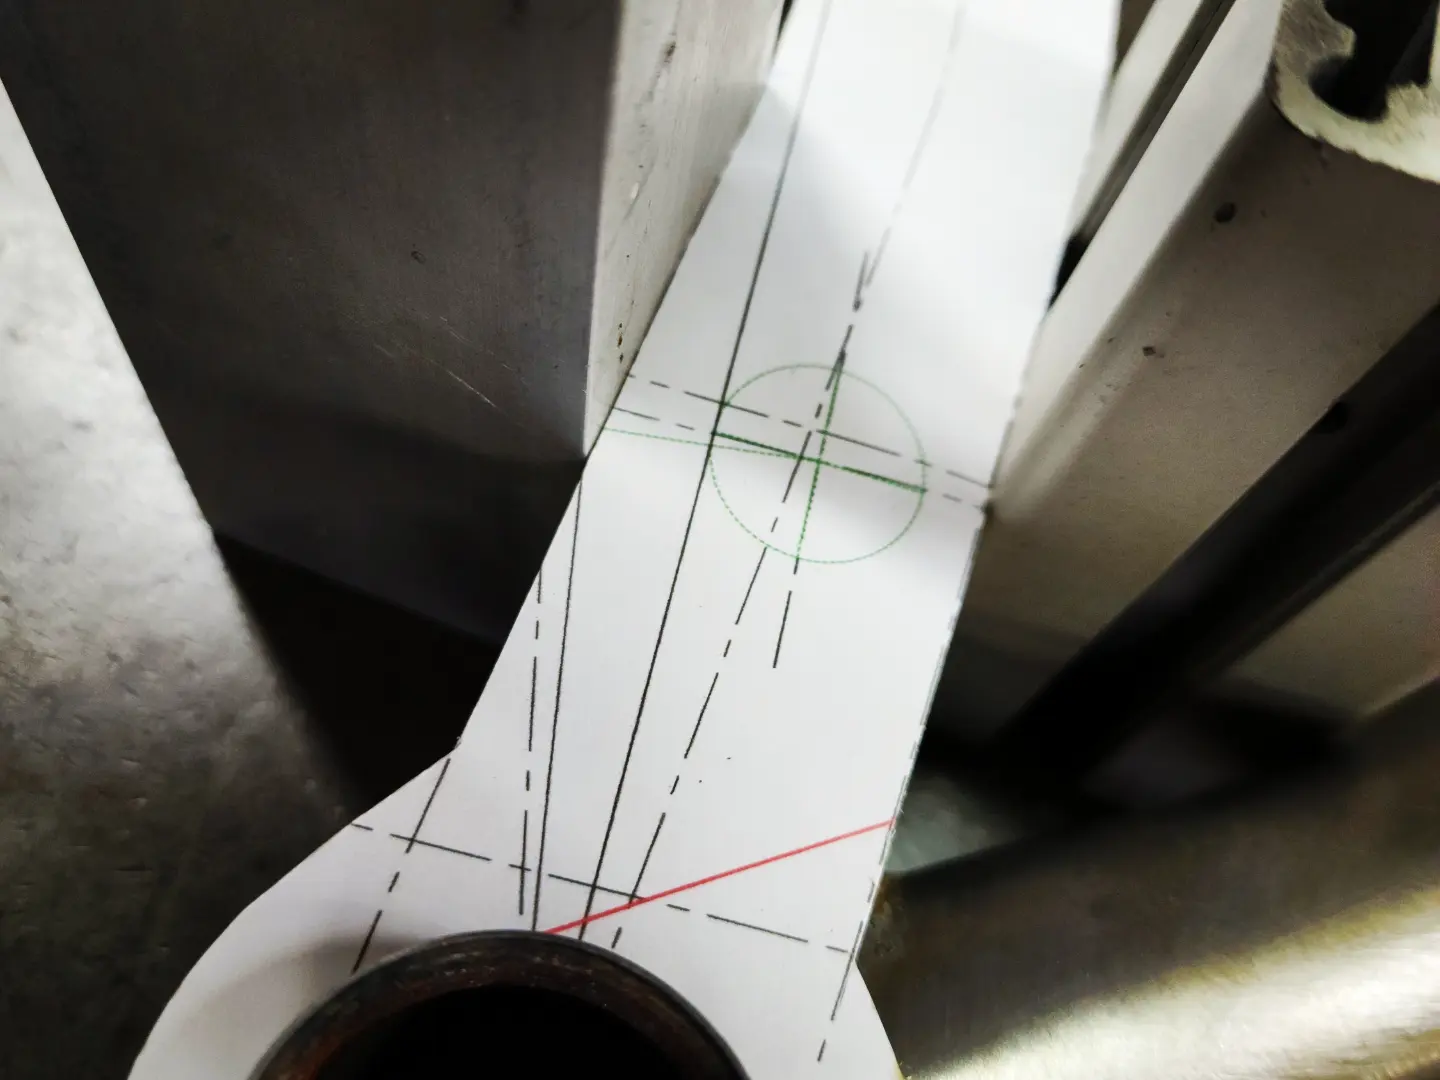
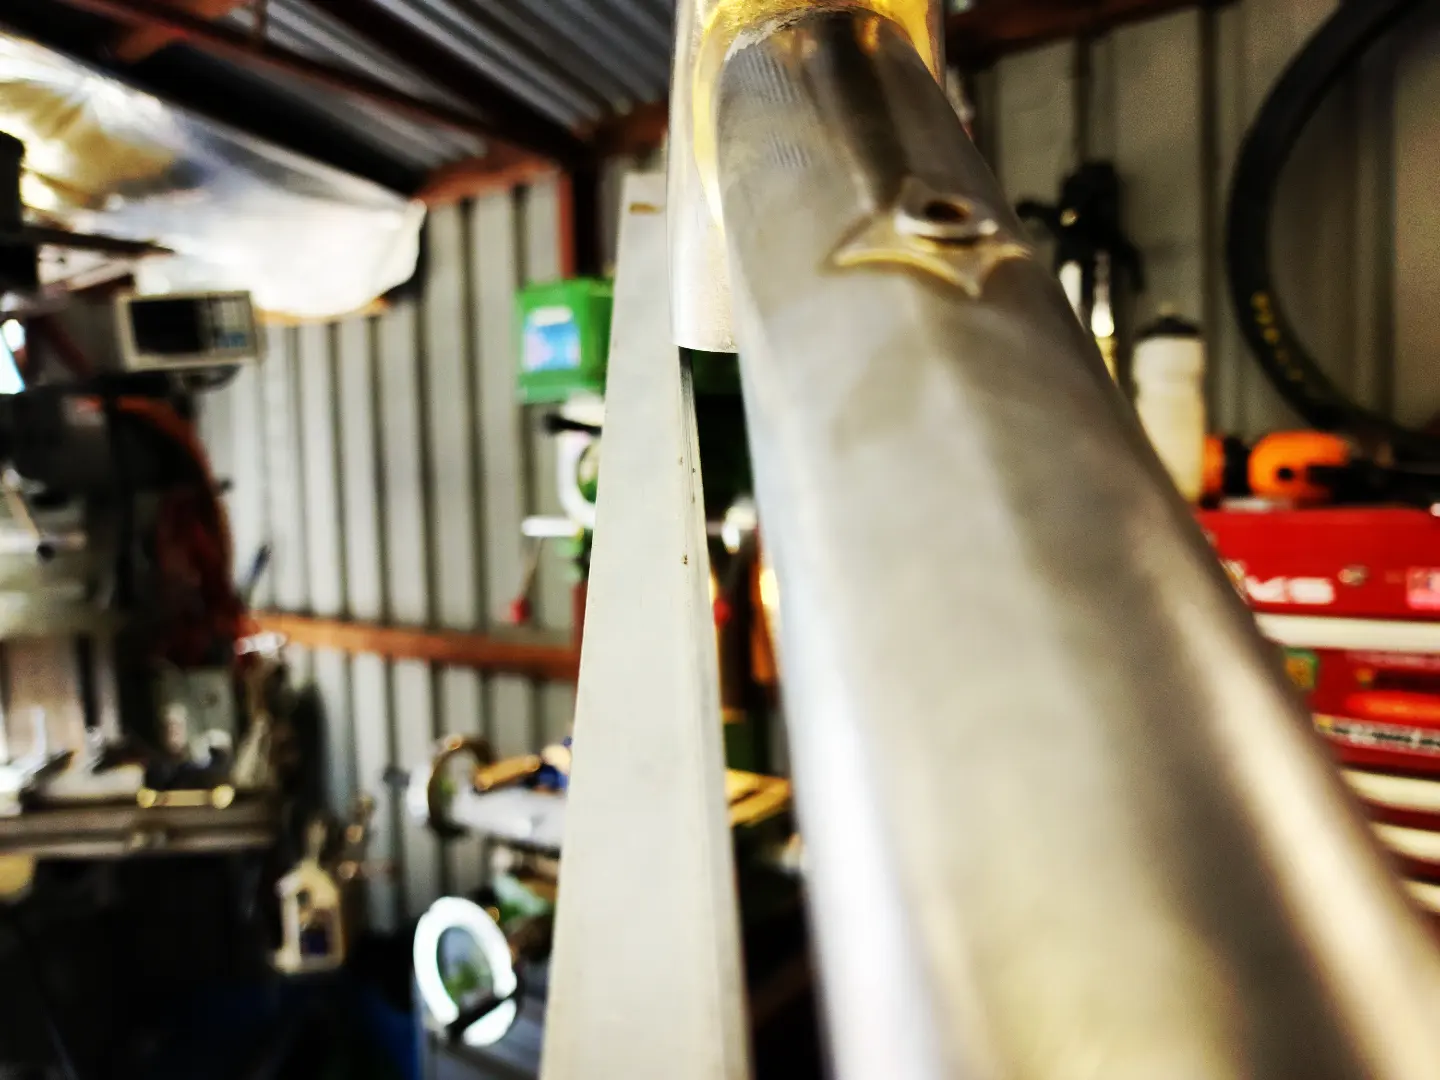
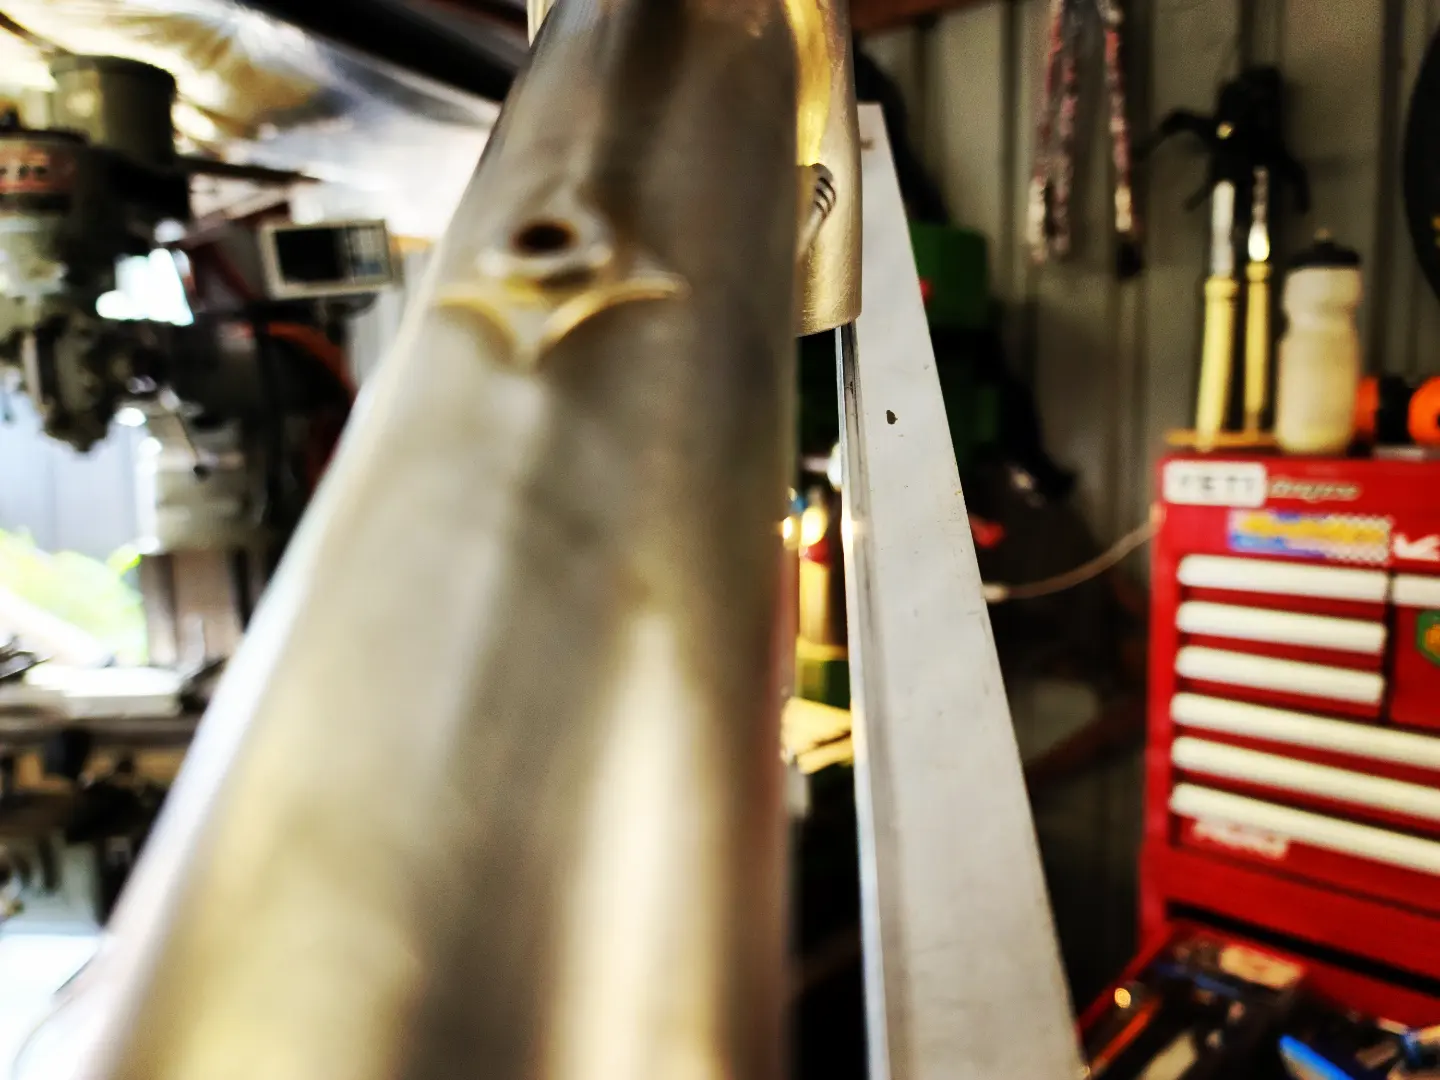
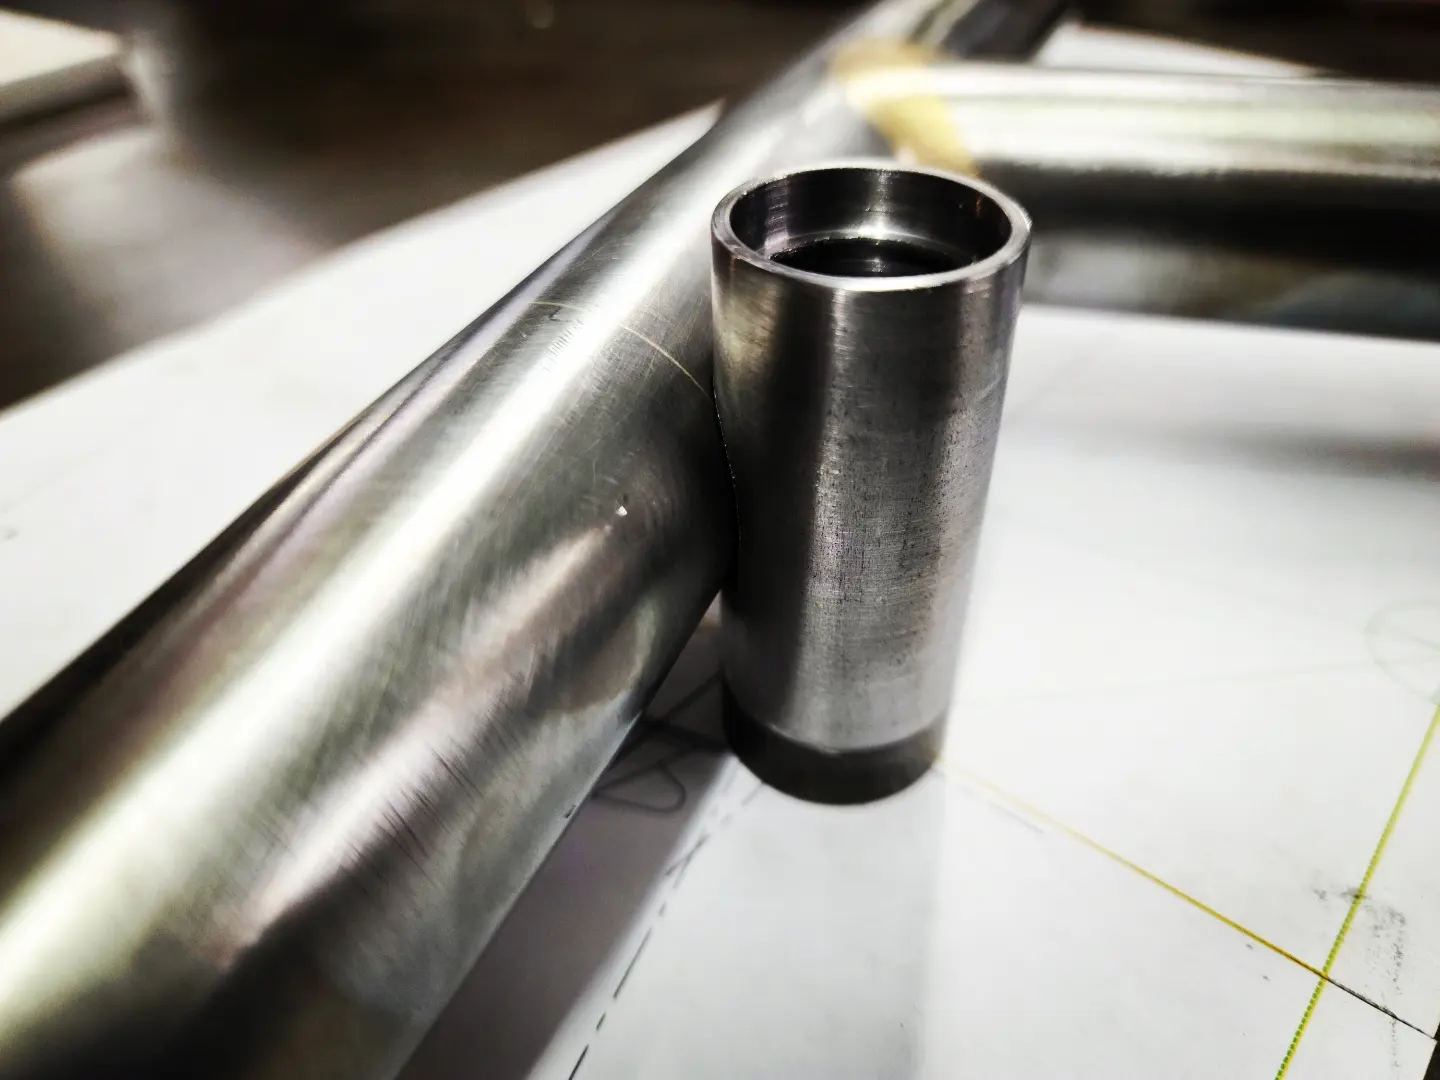
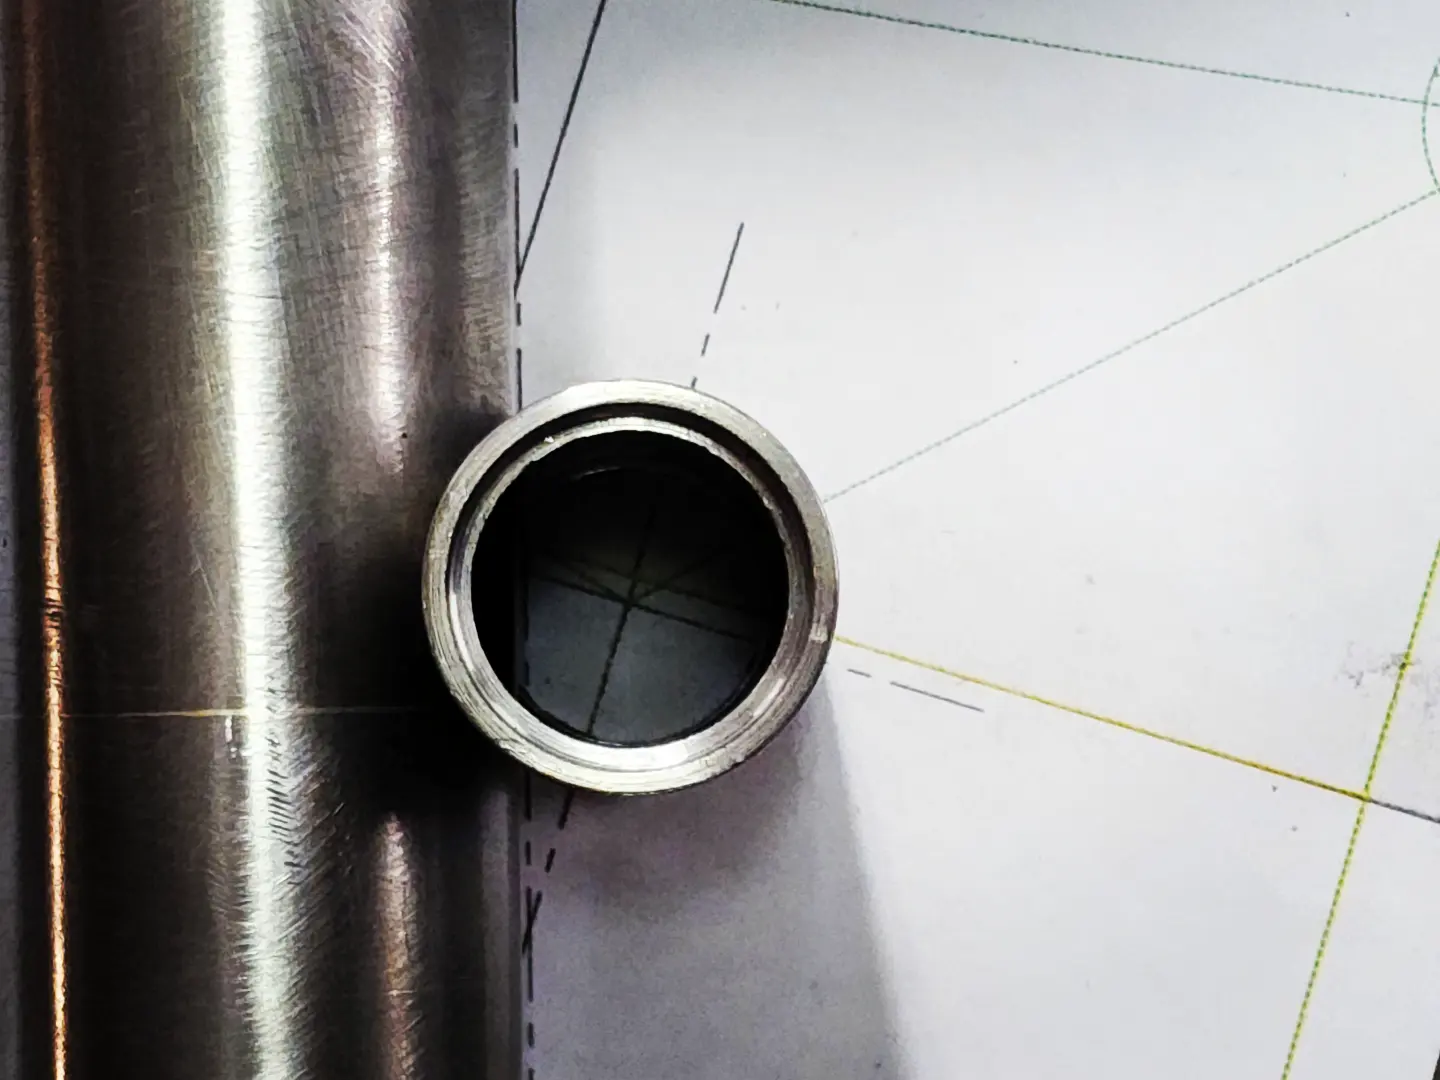
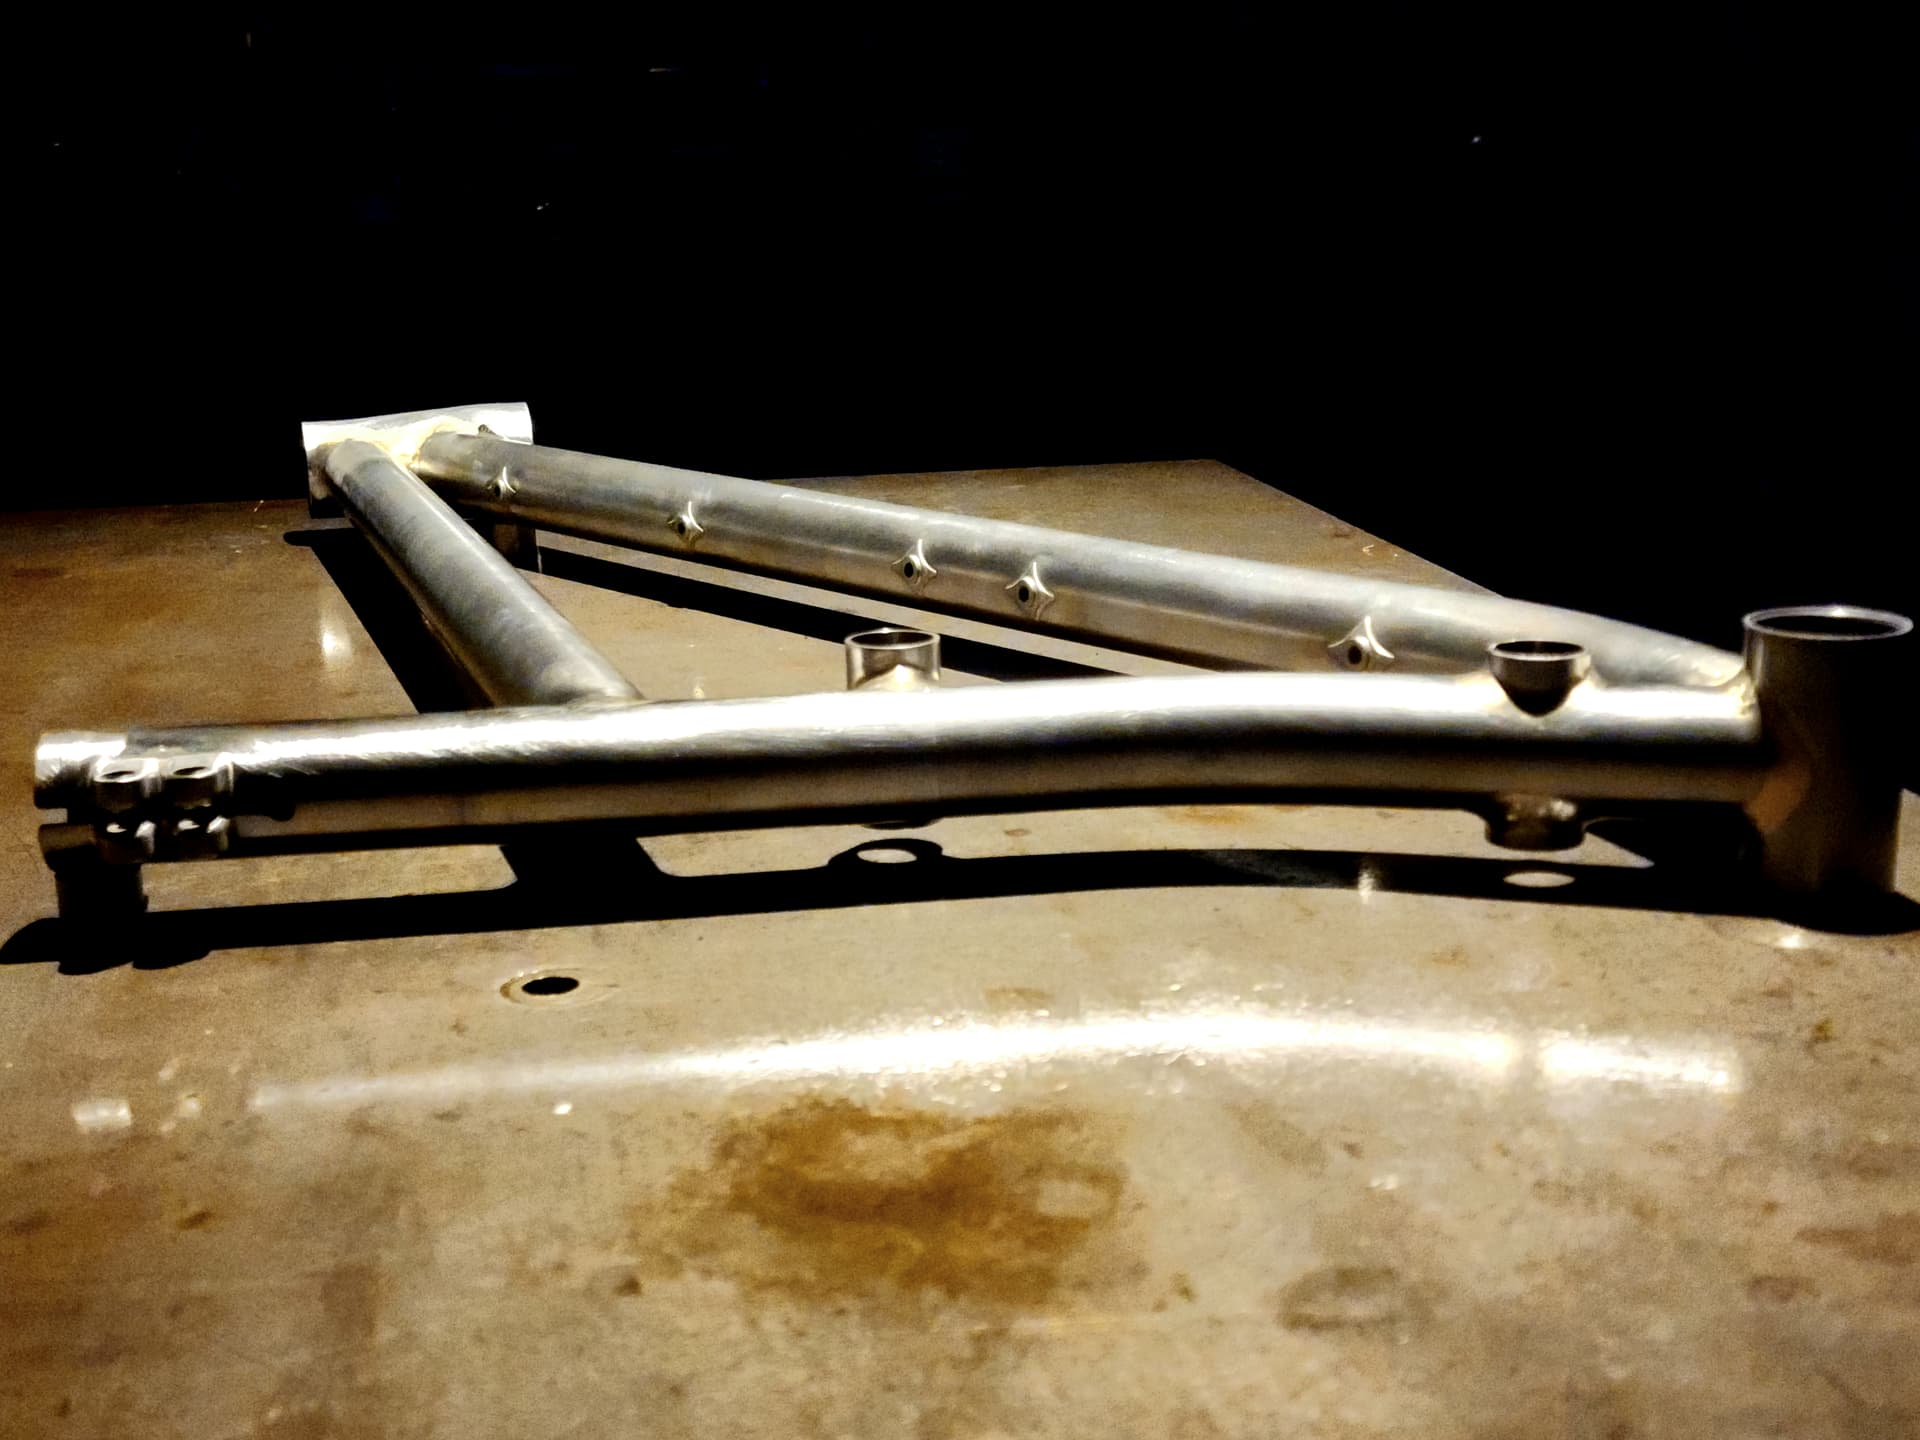
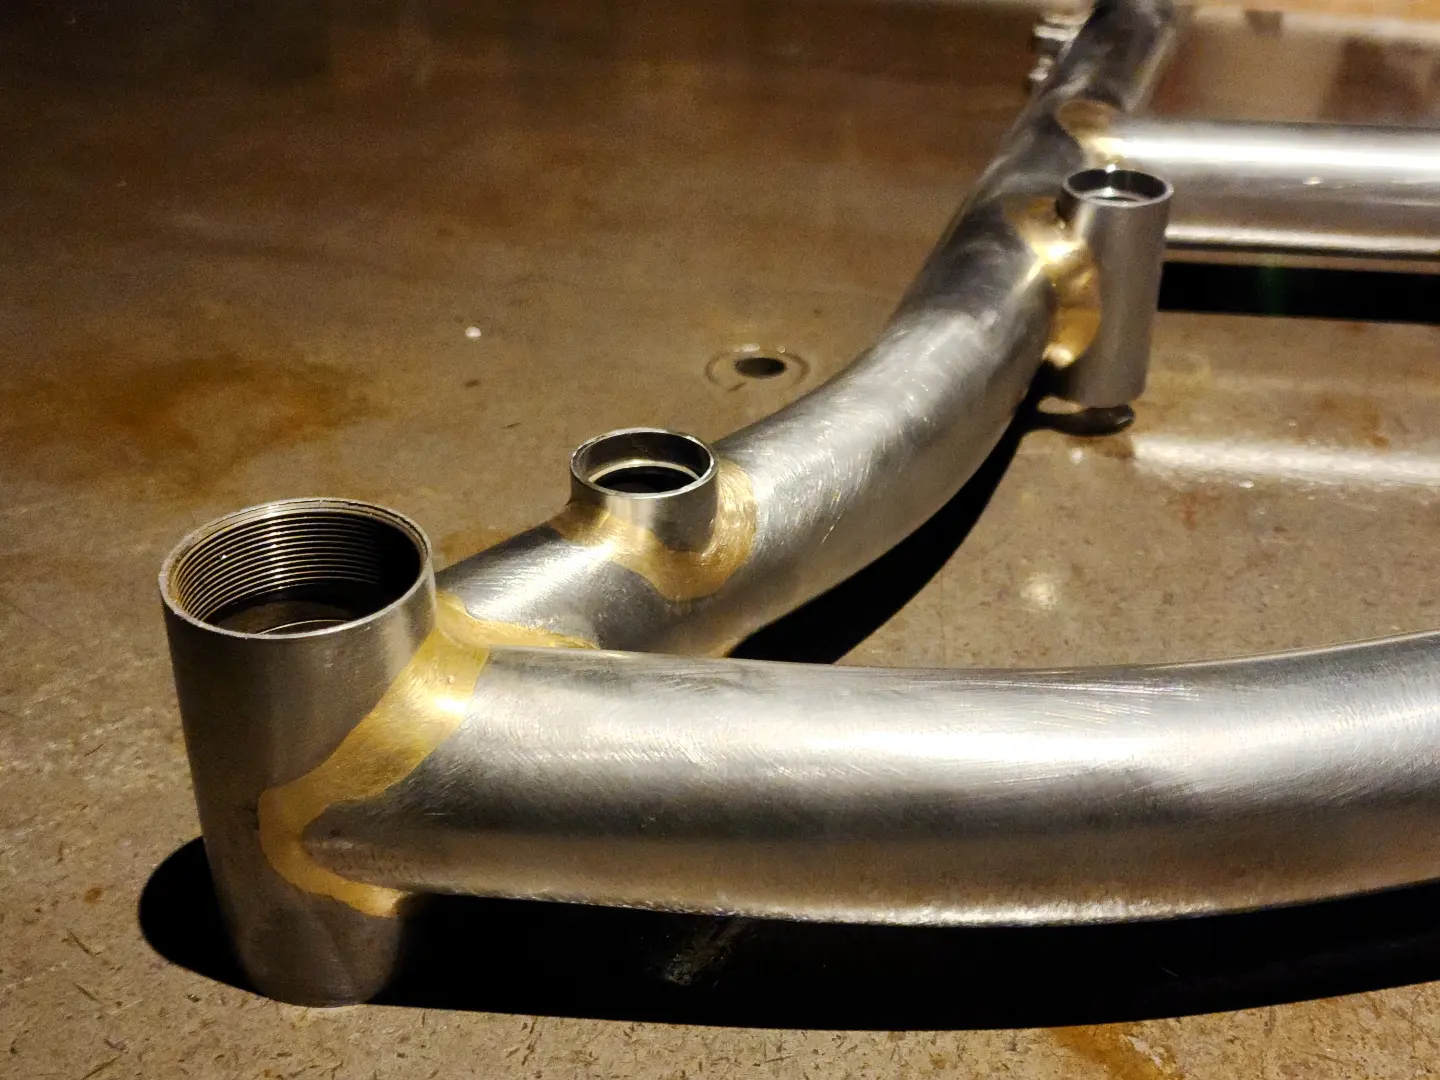
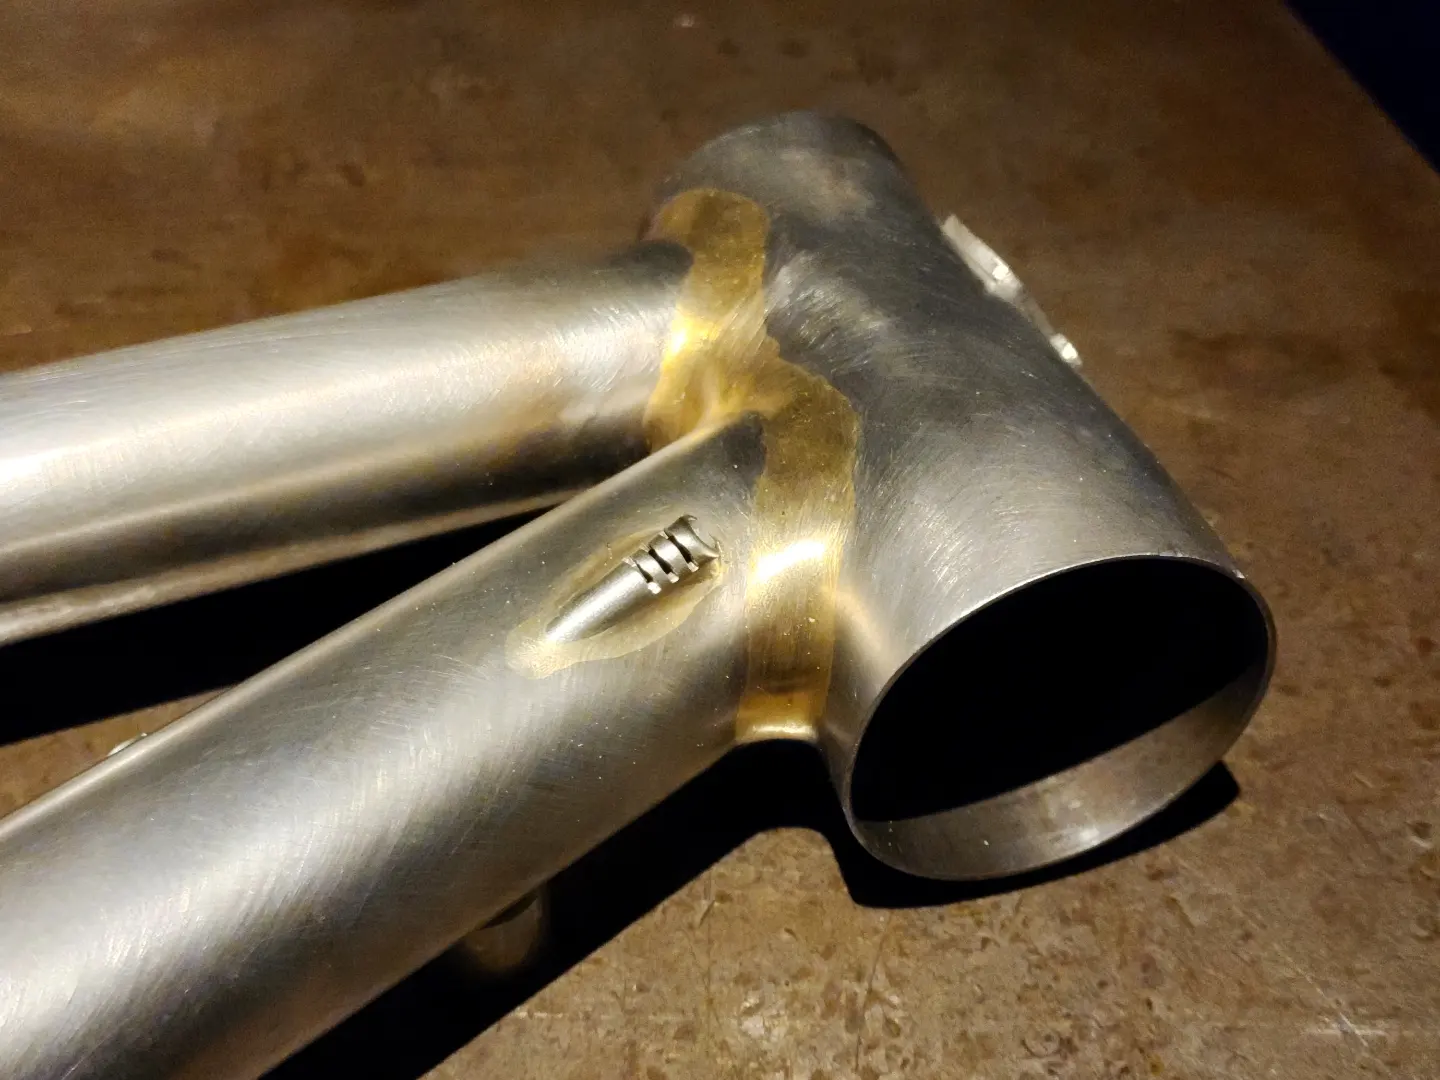
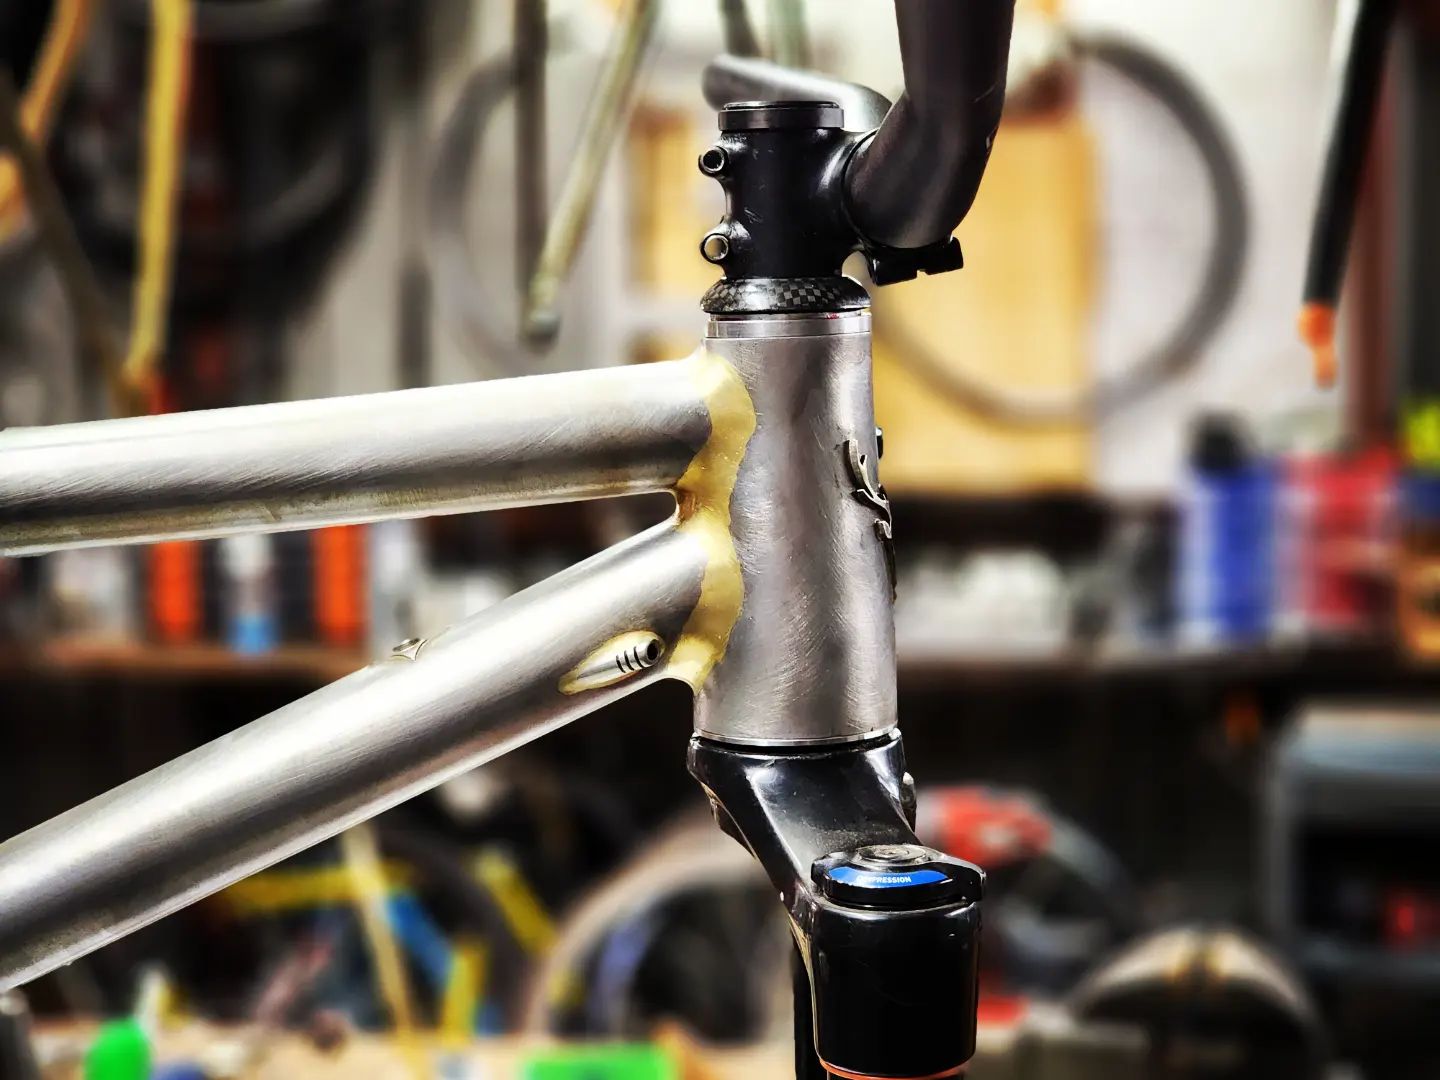
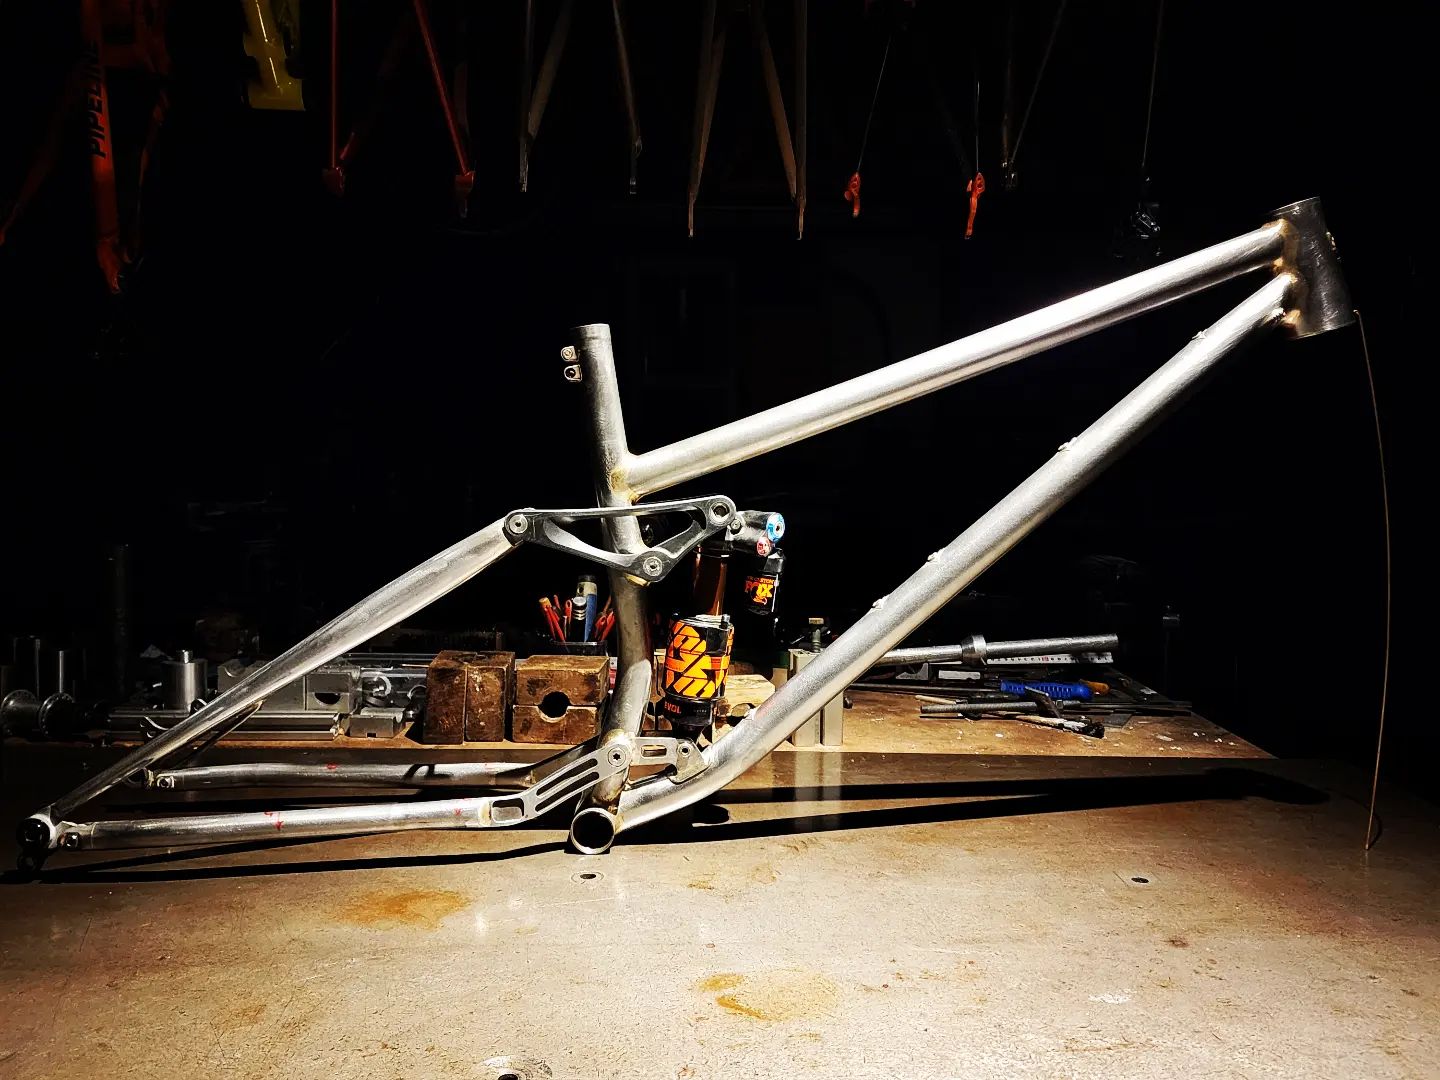
Thanks Daniel. I’m still tweaking the rocker and that scallop will be for the whole internal opening in the final version. I originally had a bolted cross brace in the front half which was easier to build with the flat surface.
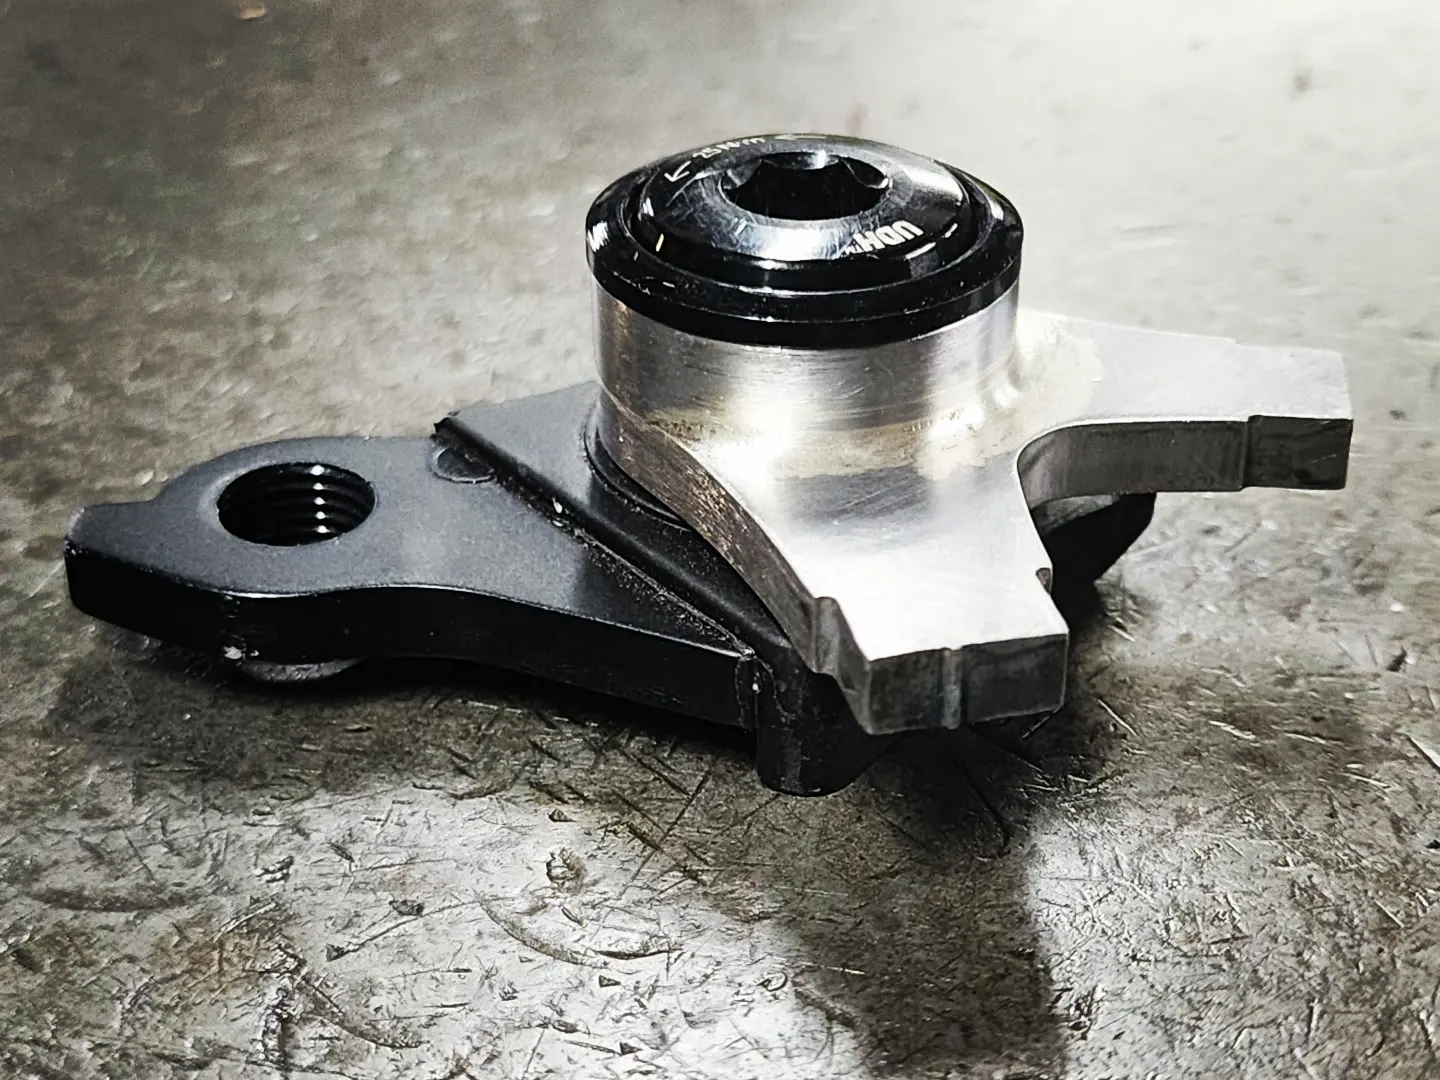
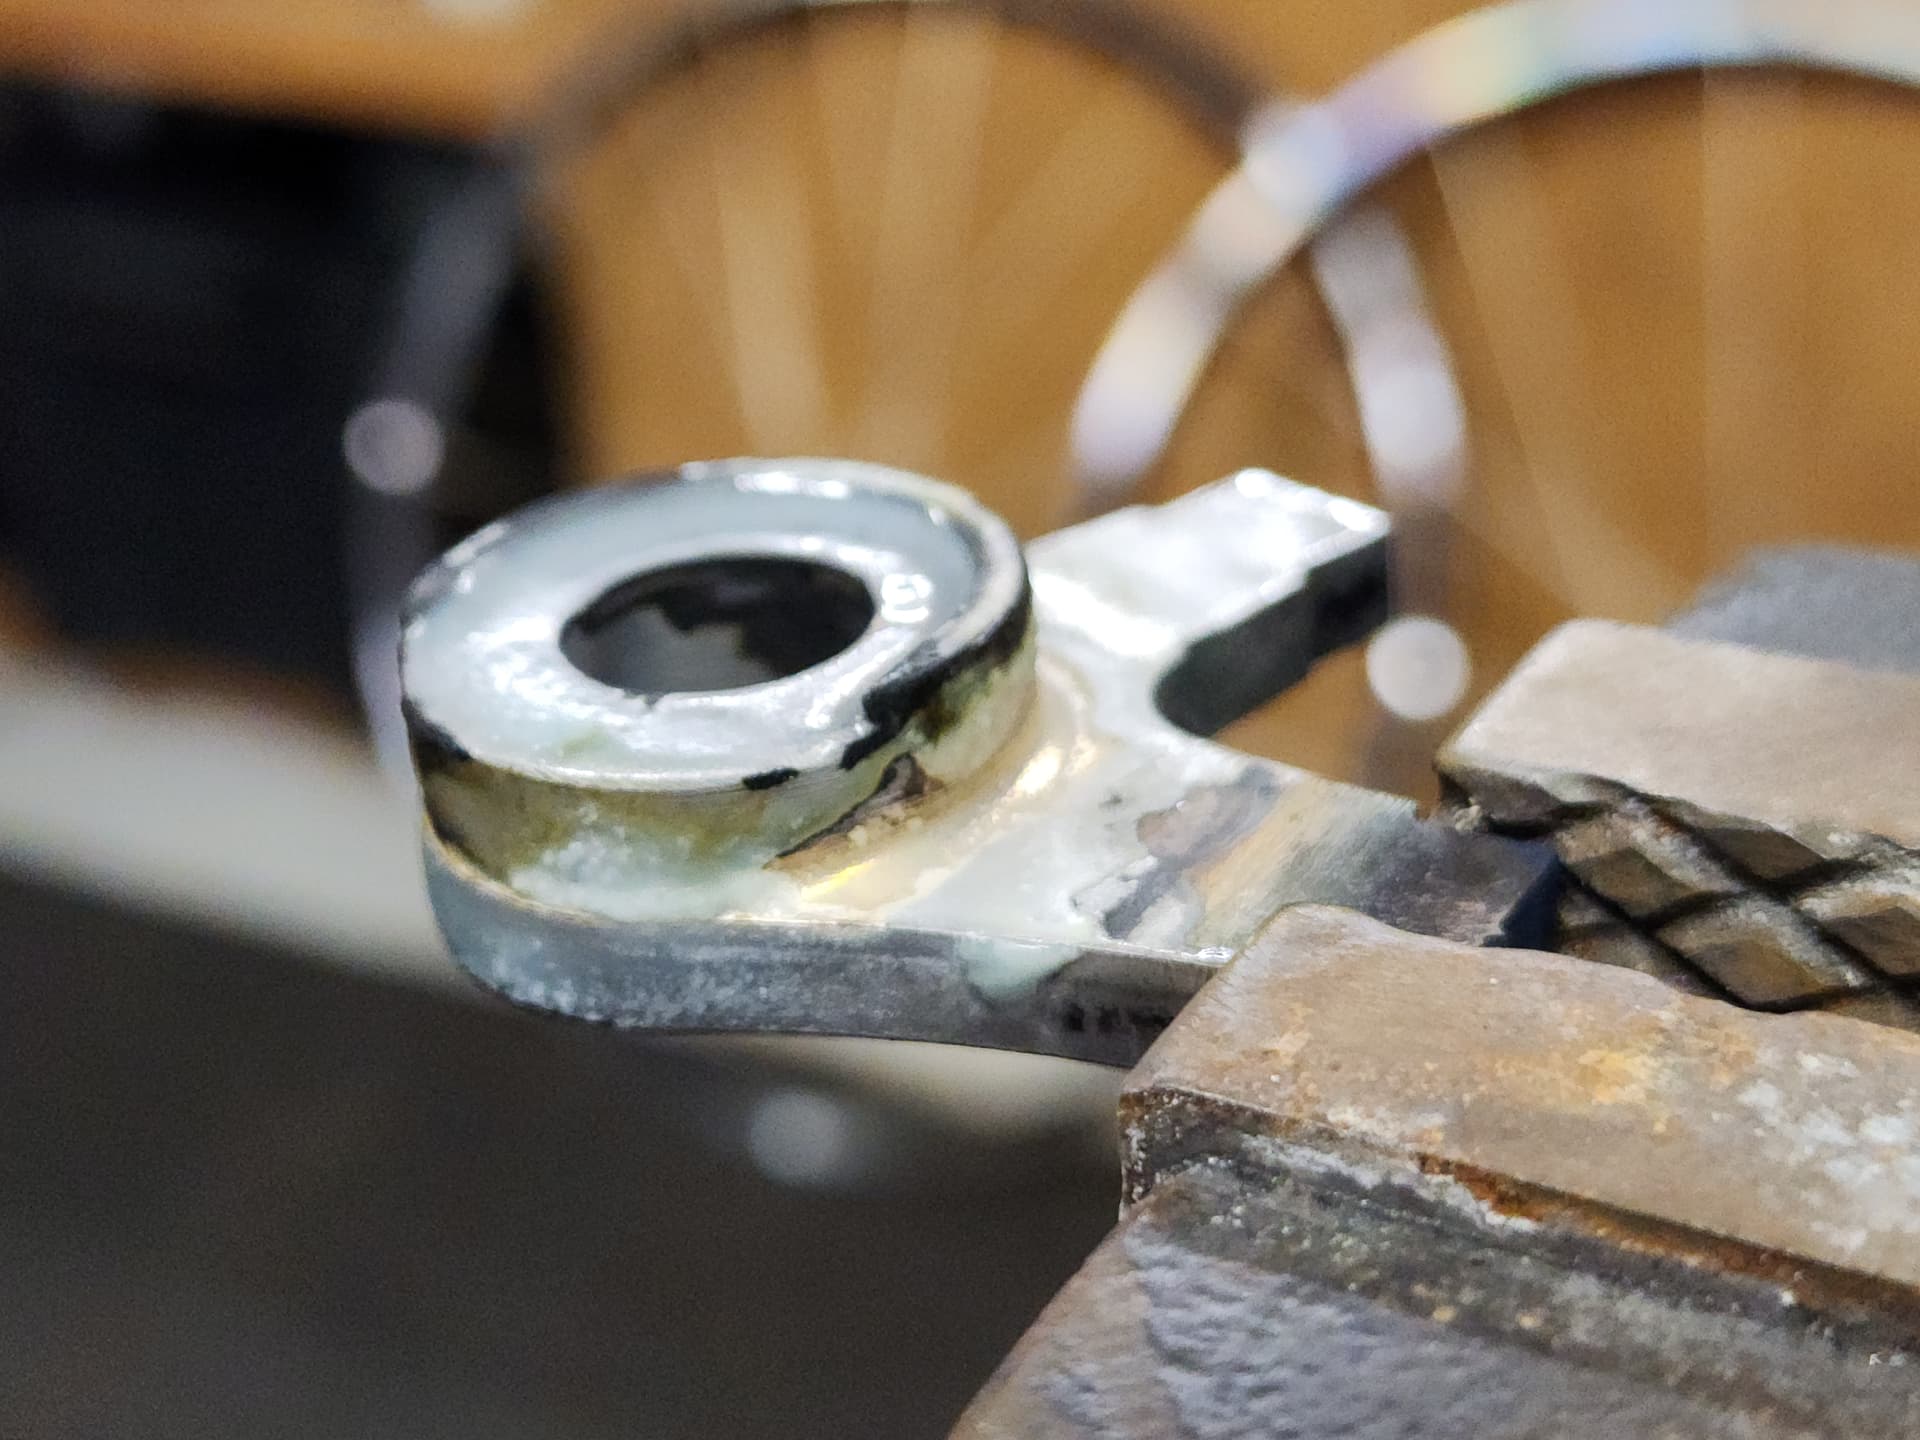
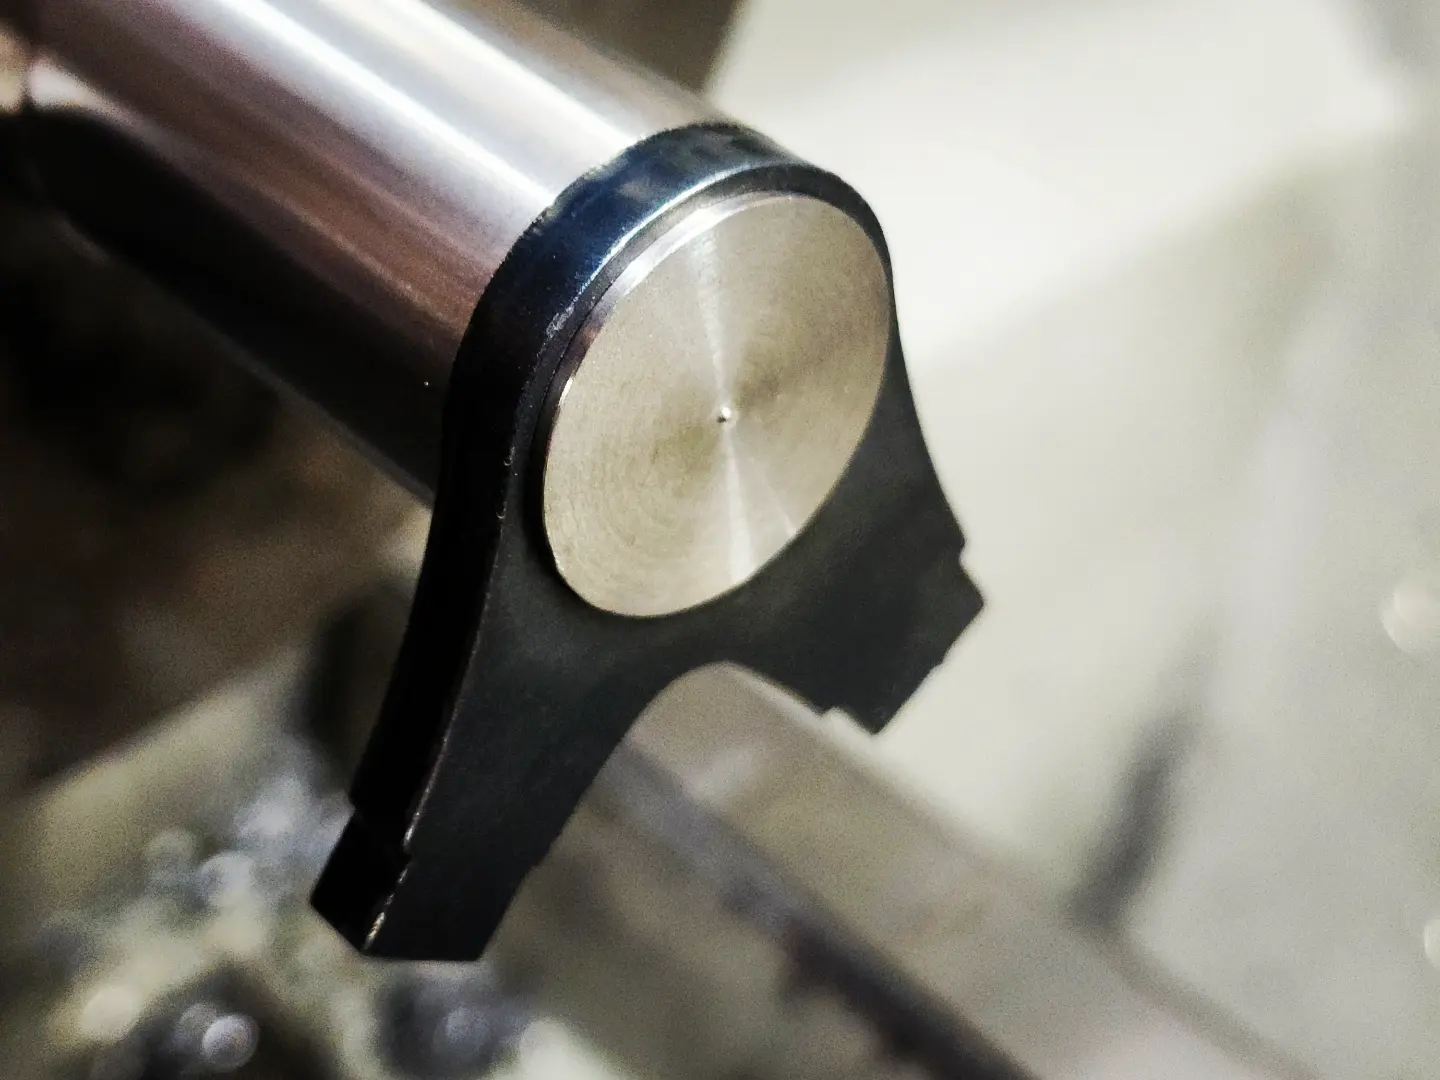
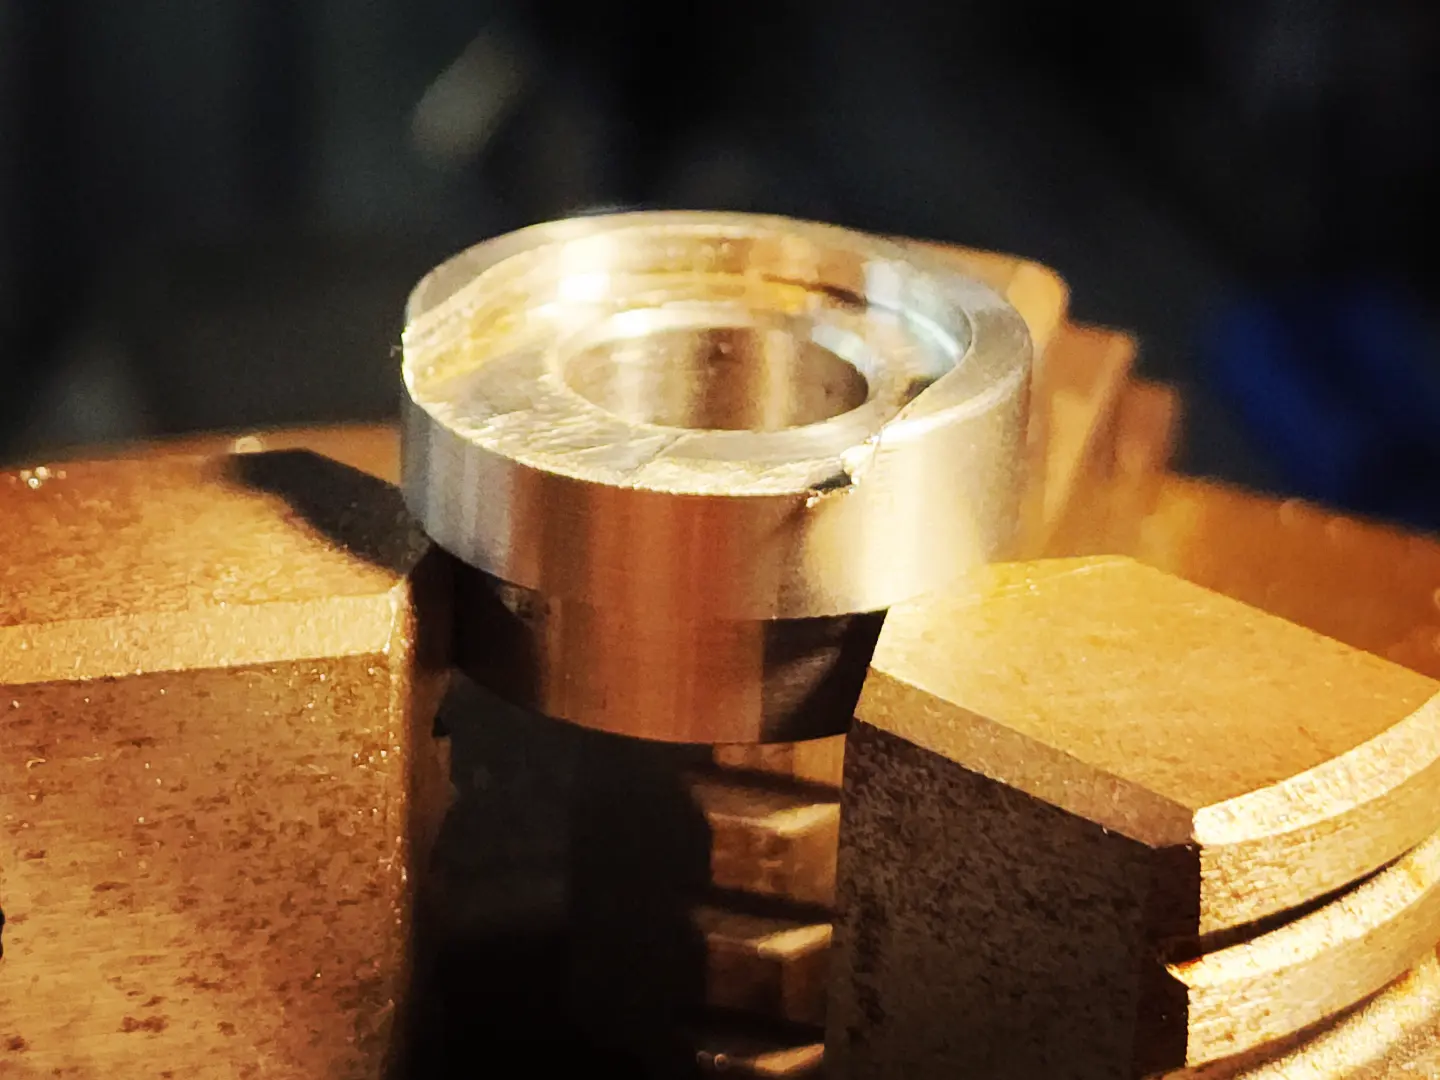
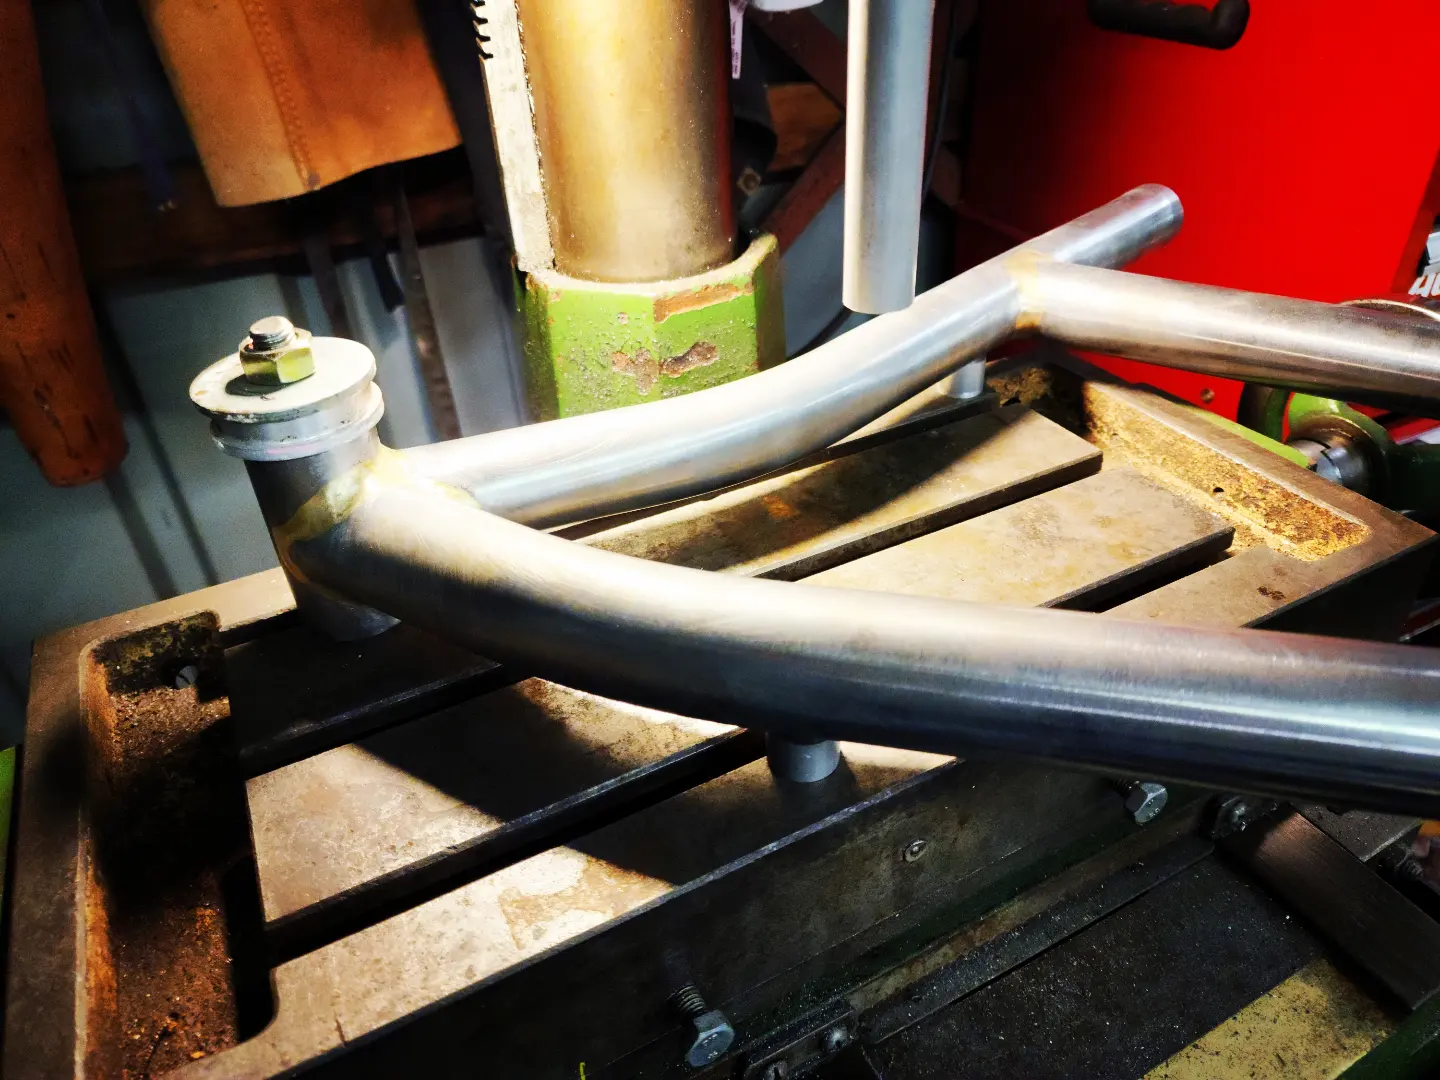
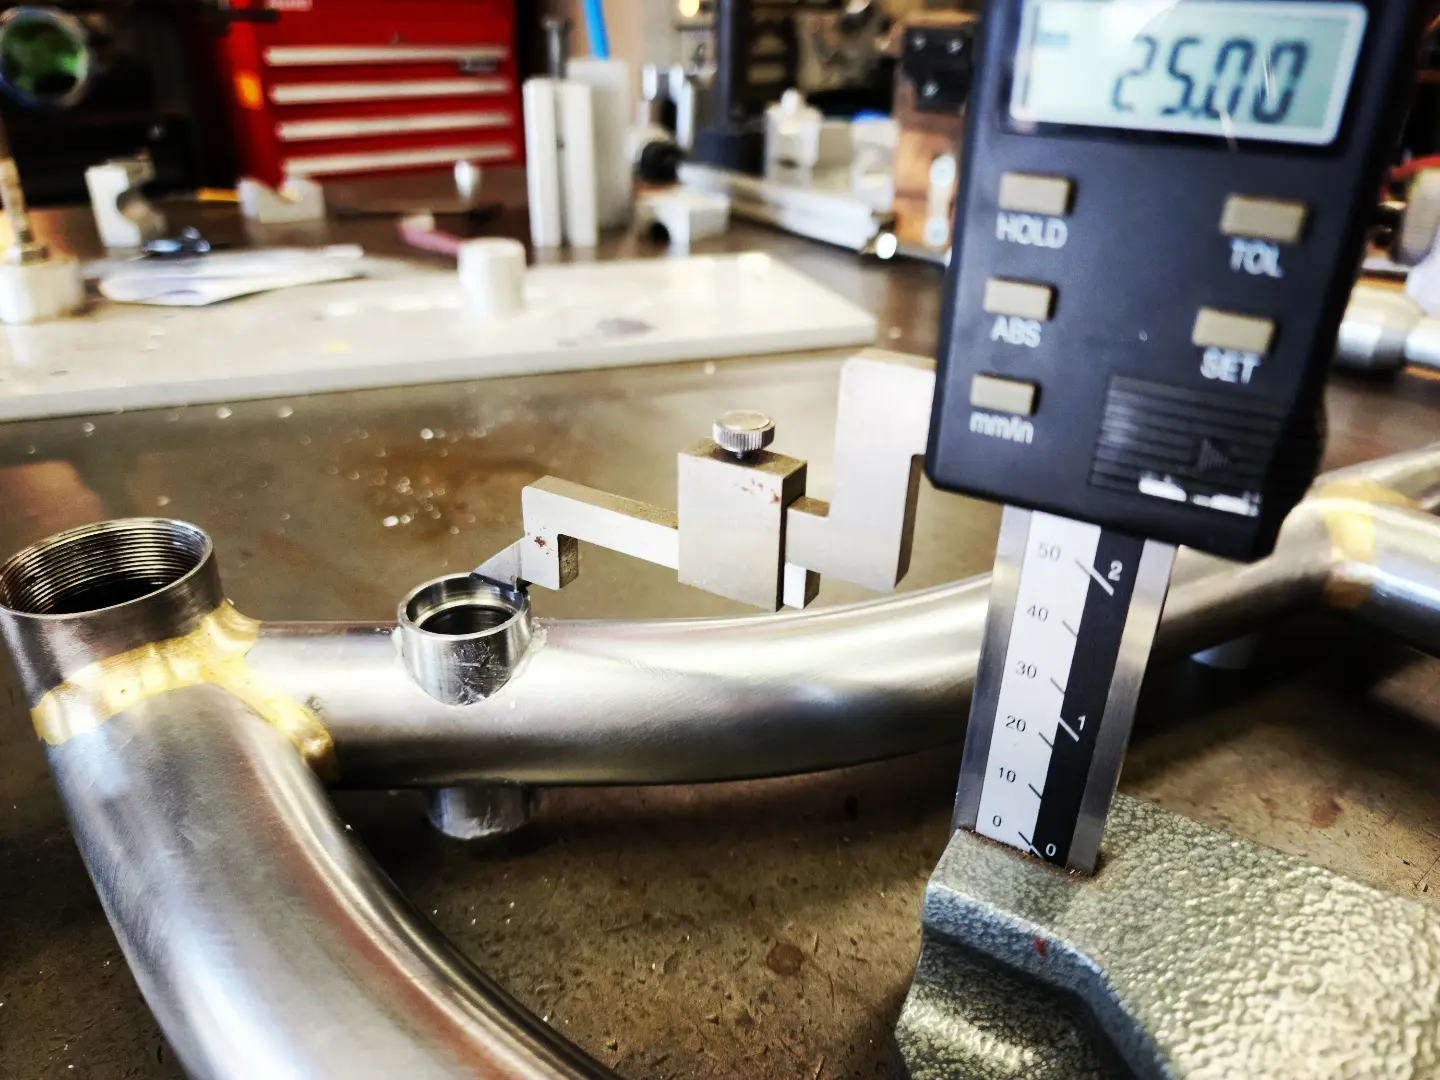
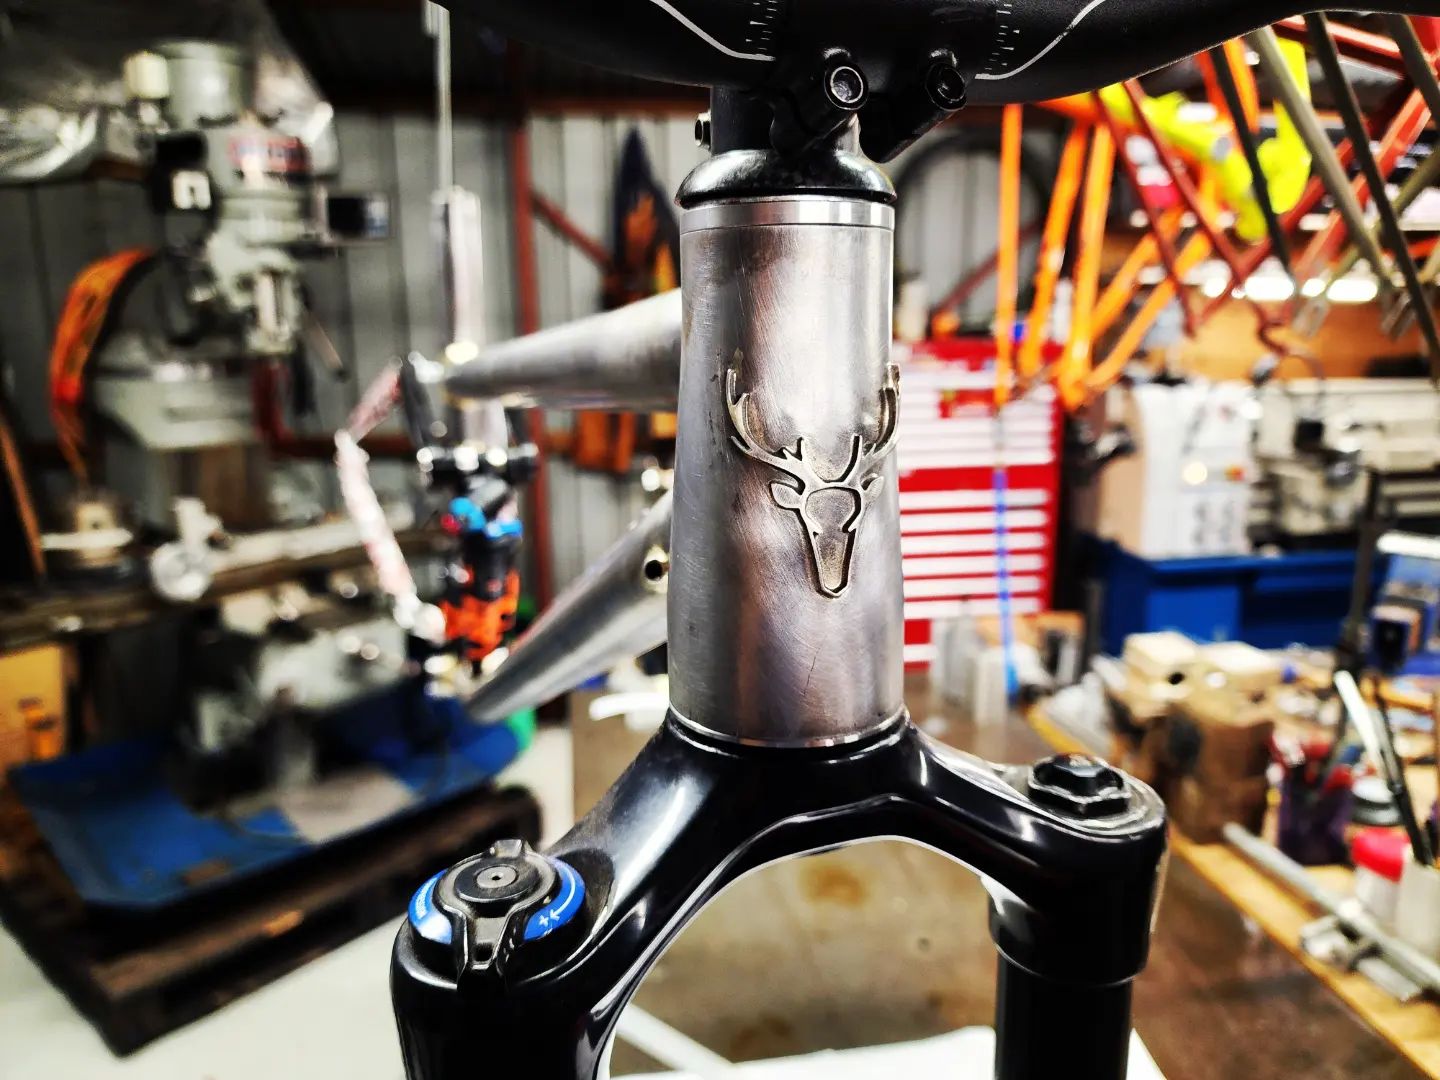
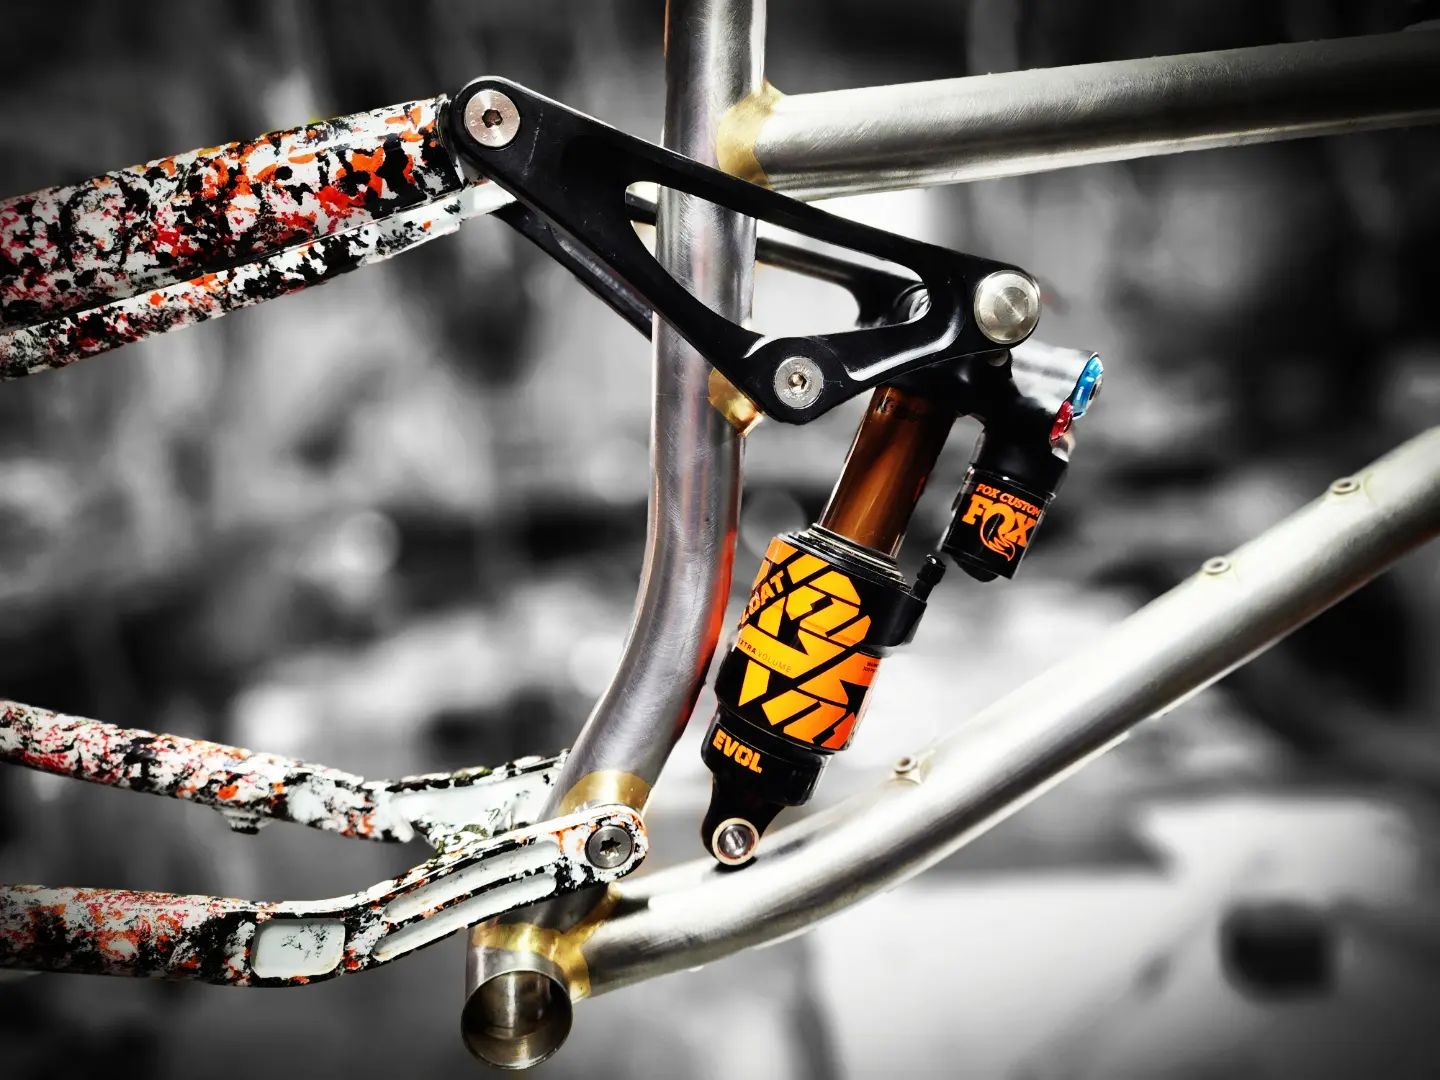
Doing some mock ups to check a few things. Still haven’t decided which styling direction to go on the lower shock mount. It actually sits a bit higher and a touch forward from where it’s resting. I may add some adjustment here to alter the spring curve a little. I still need to machine the top cap for the headset as well.
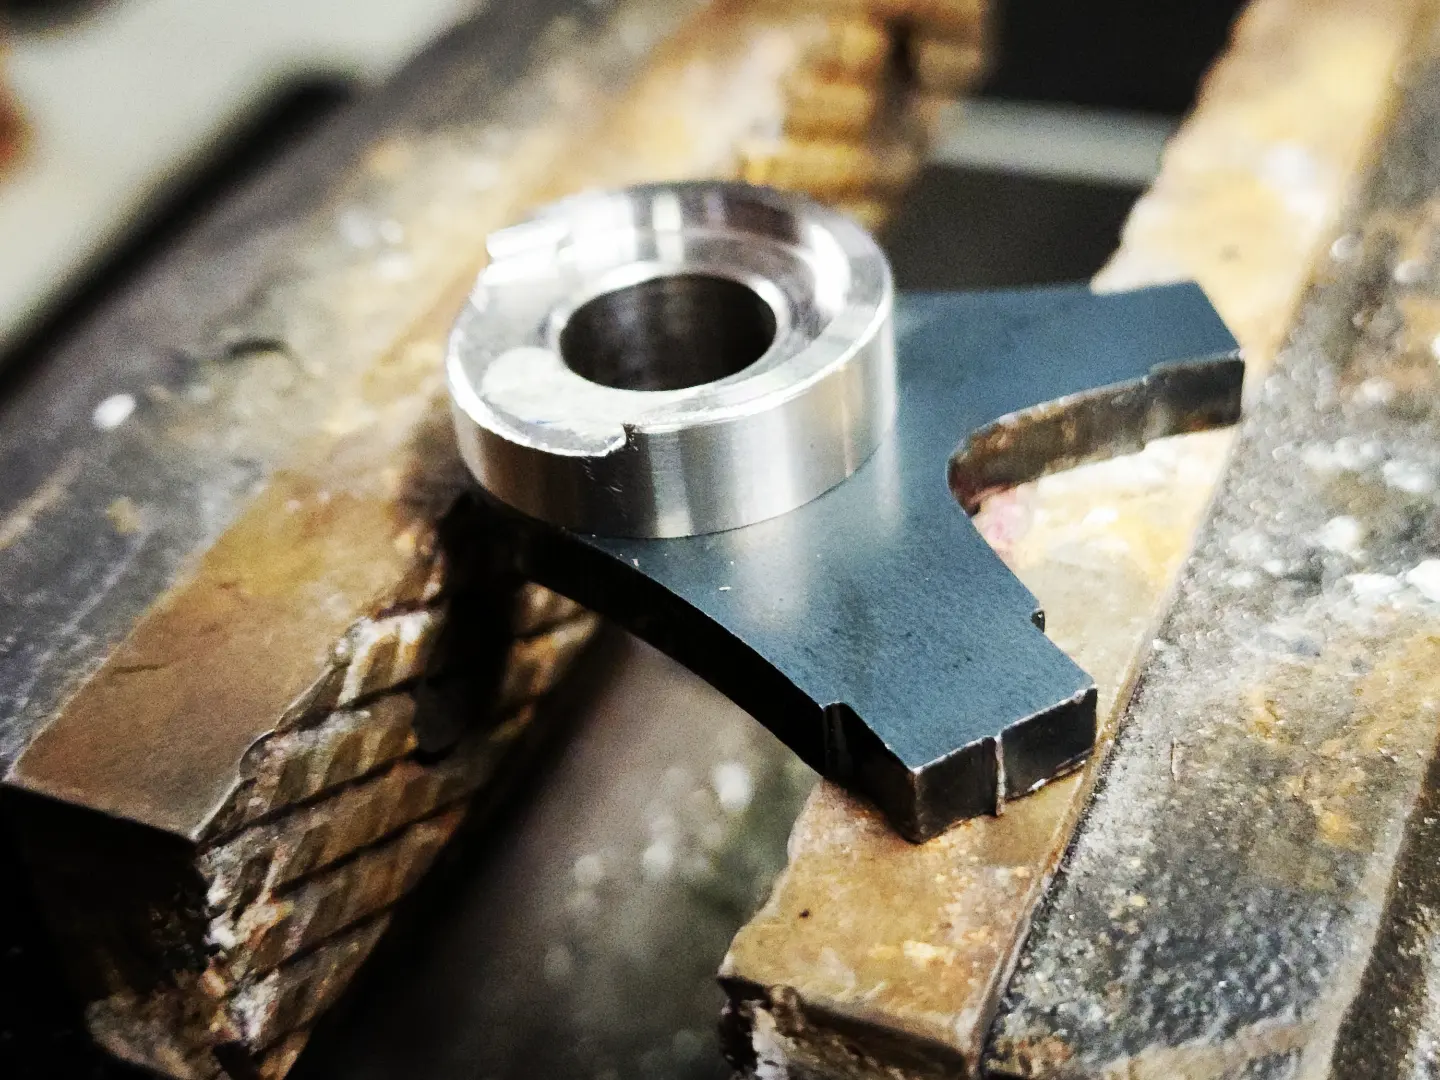
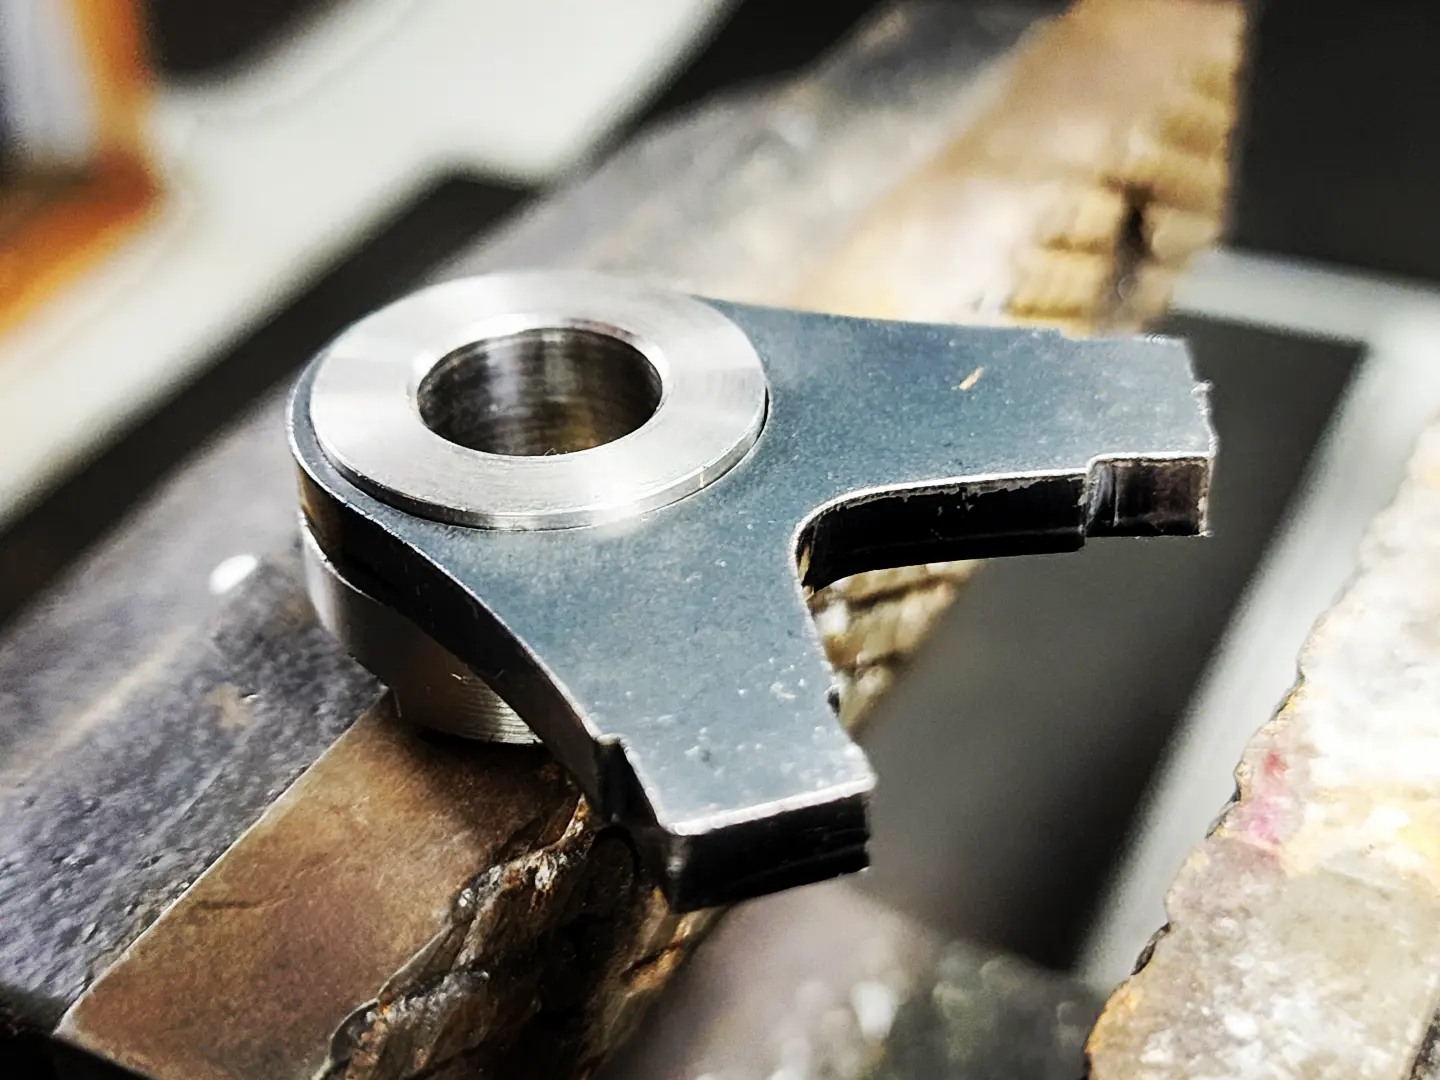
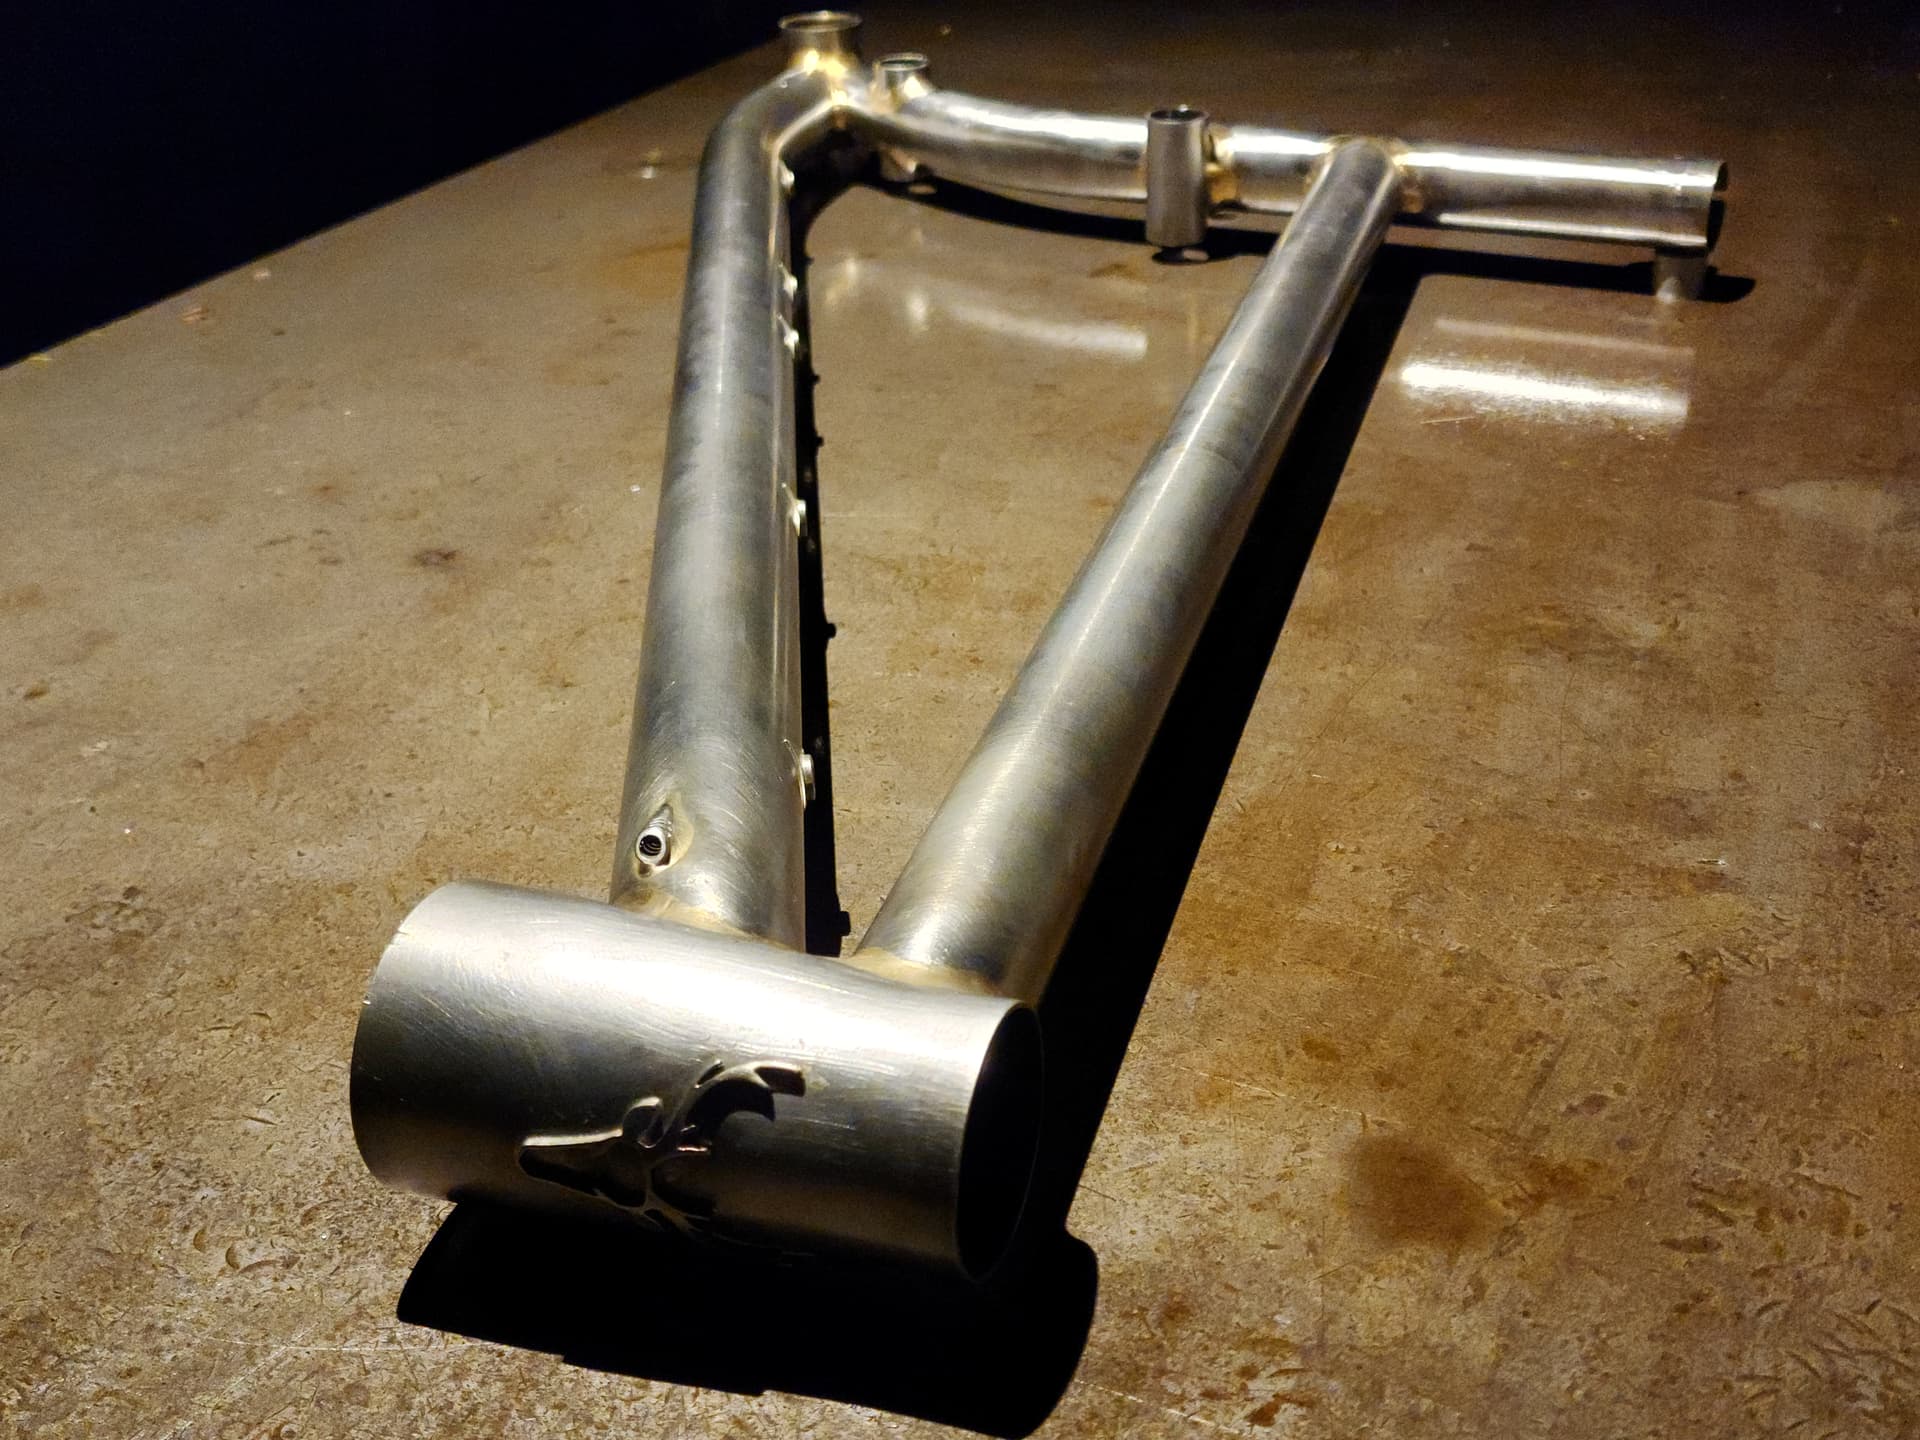
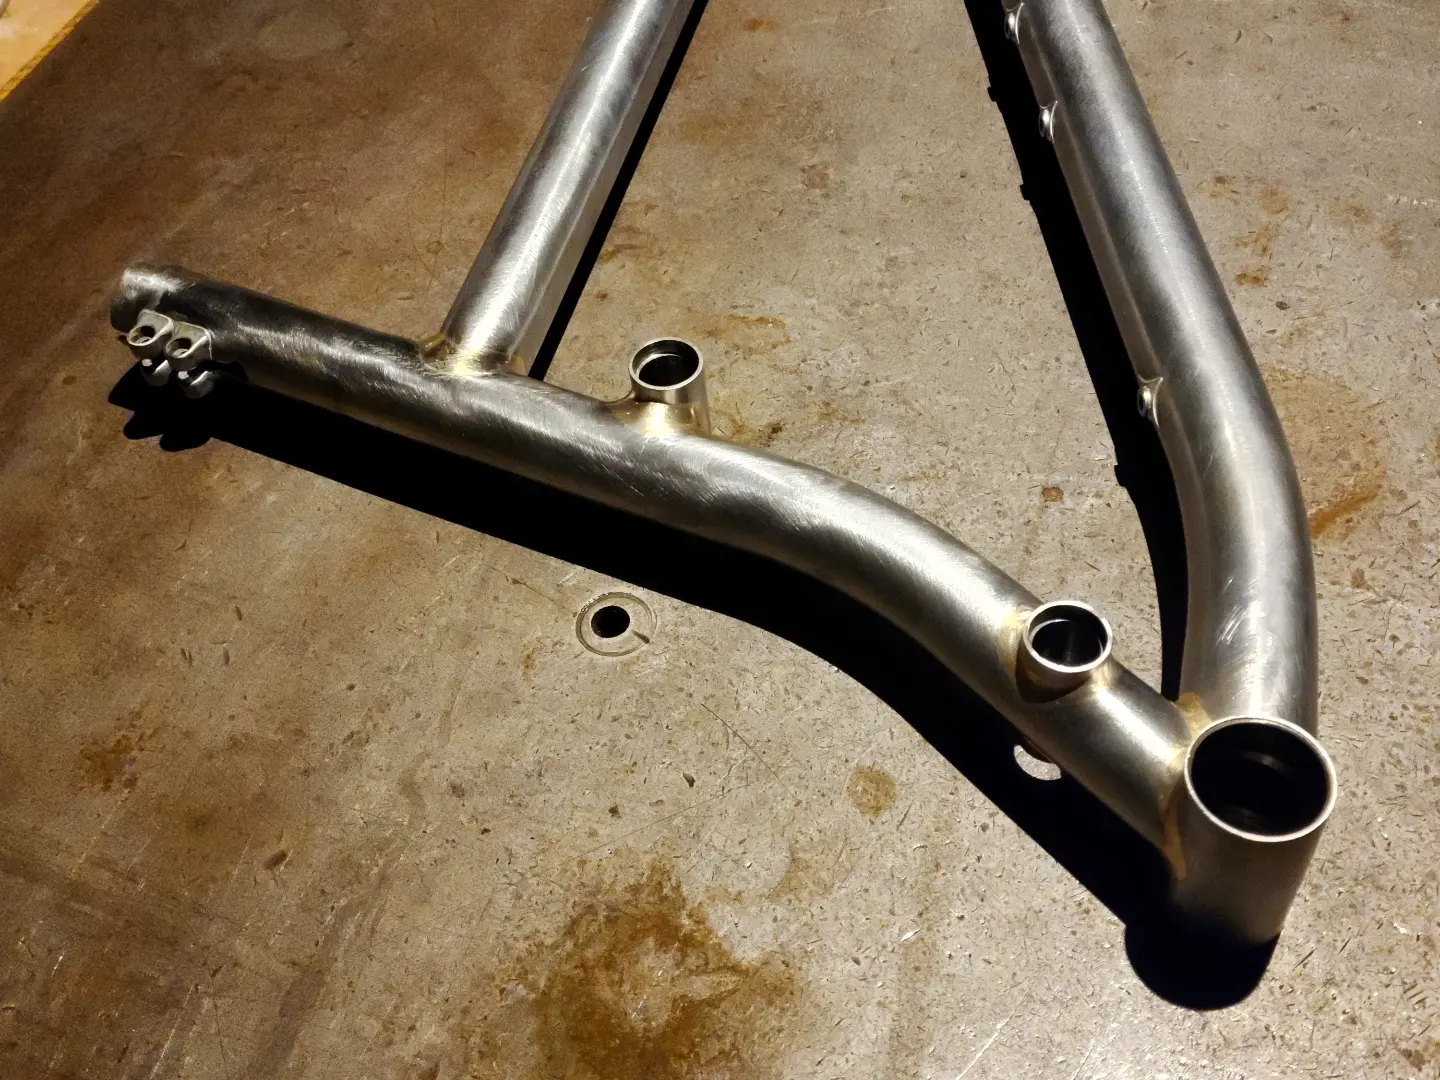
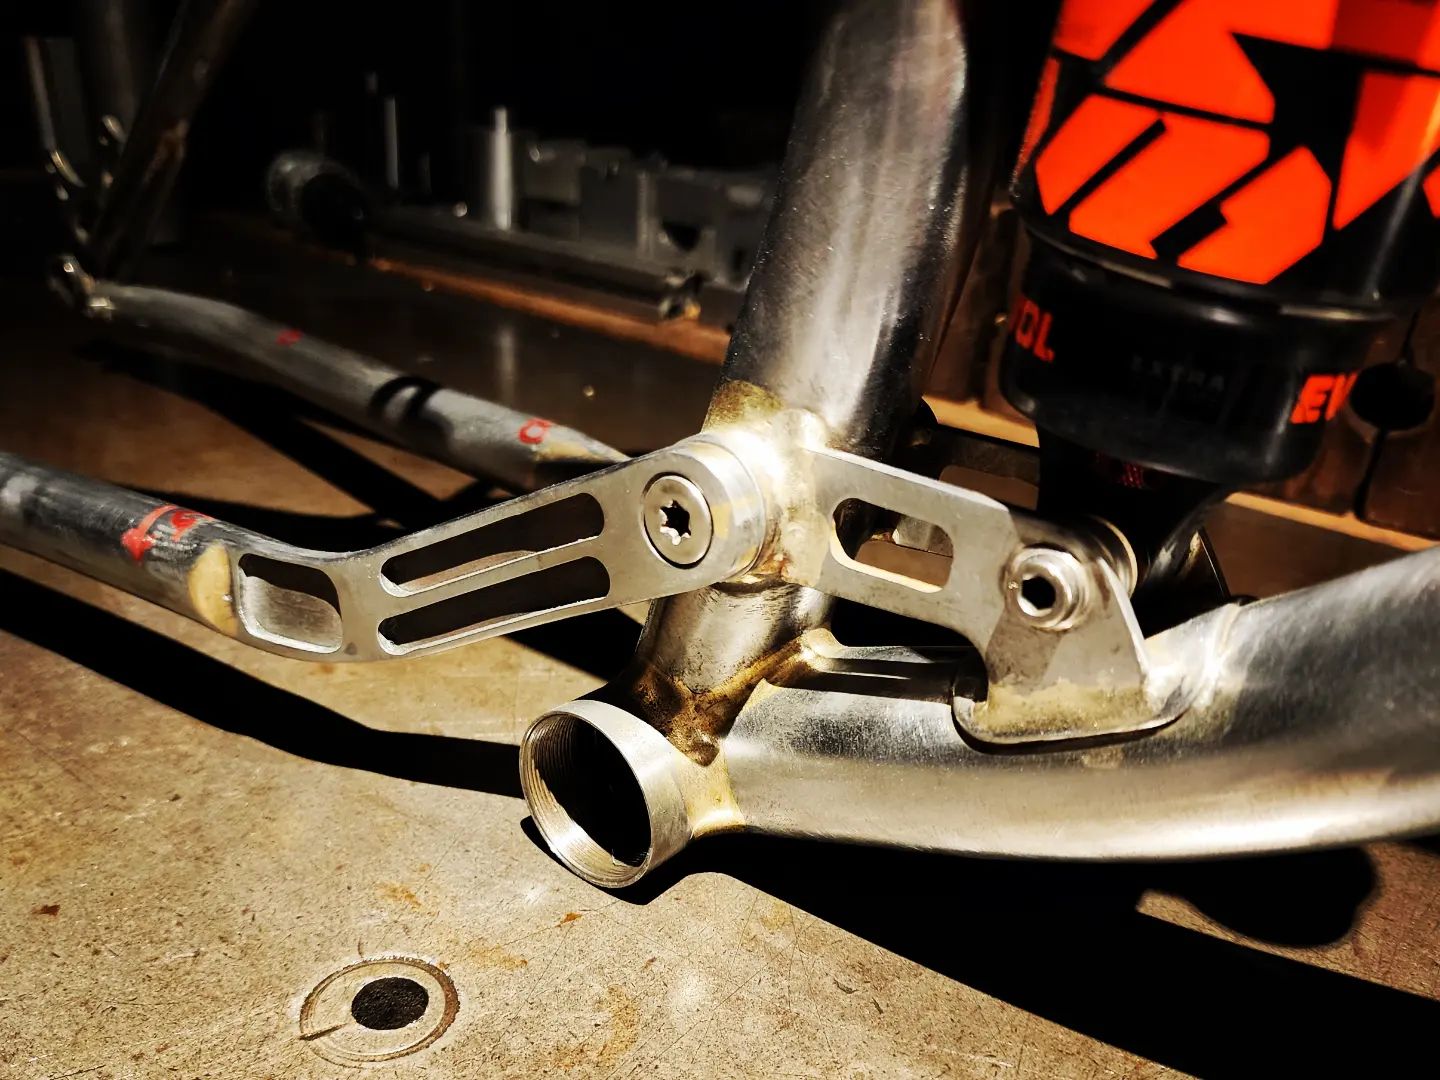
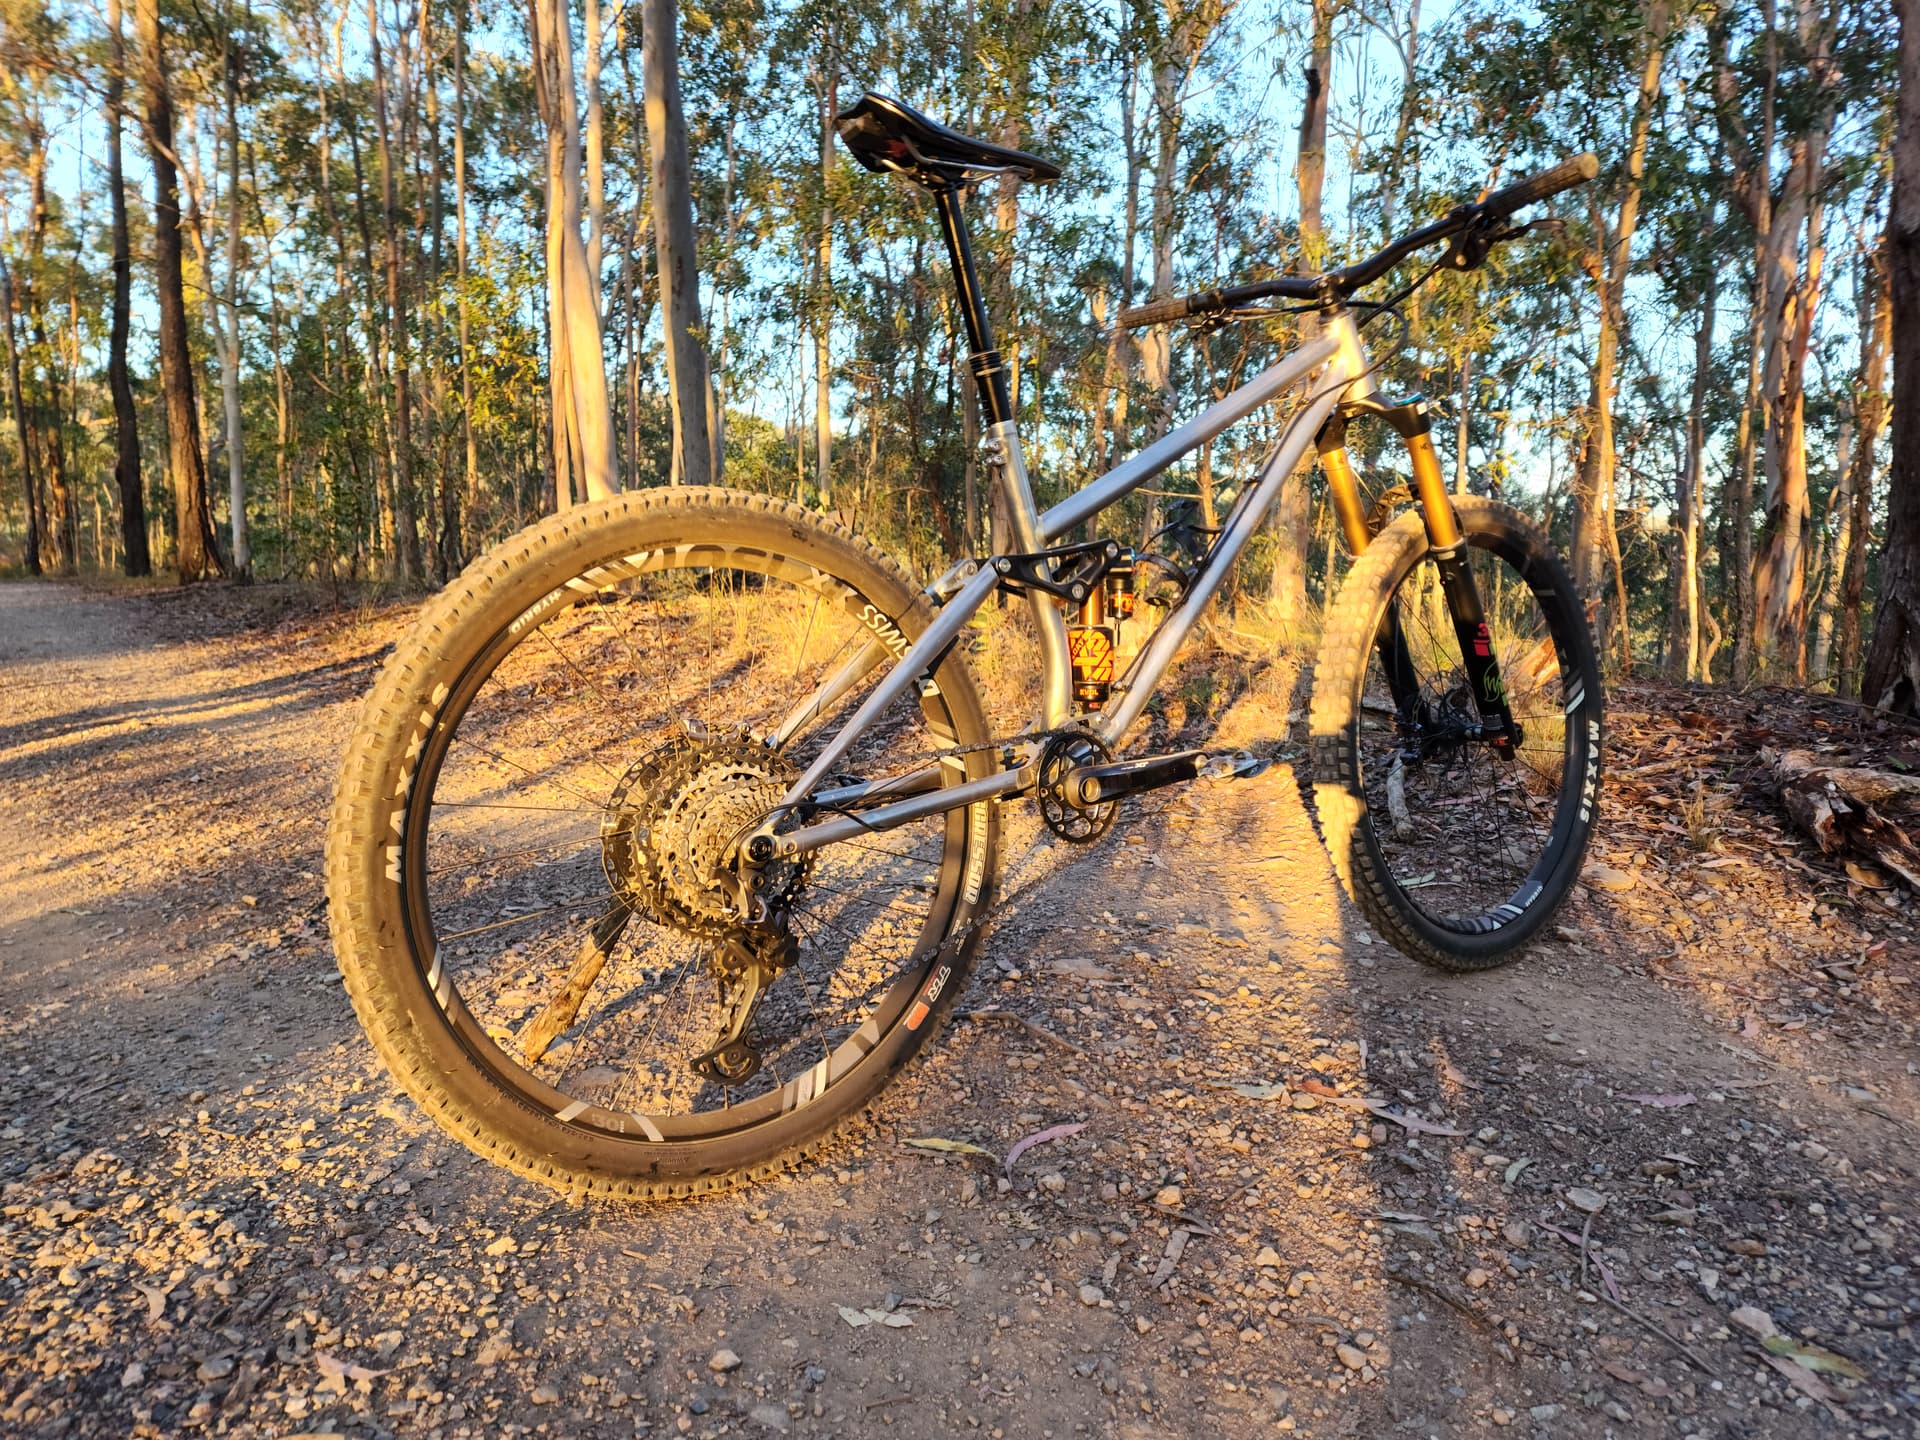
Rear Suspension Articulation

Bravo! That looks amazing.
I think I prefer the tube linkage though.
Cheers mate. Yeah, lots of people say that too. Both will be available when the customer orders a frame. I’m looking at 3D printing the nodes so it’s just straight cut tube and when paint still looks like its fillet barzed.
Amazing work. Great skills man. I wish I had half of your skills.
Thanks man. To be honest I reckon most in here could do the same. Patience is the biggest skill Ive learned in doing this.
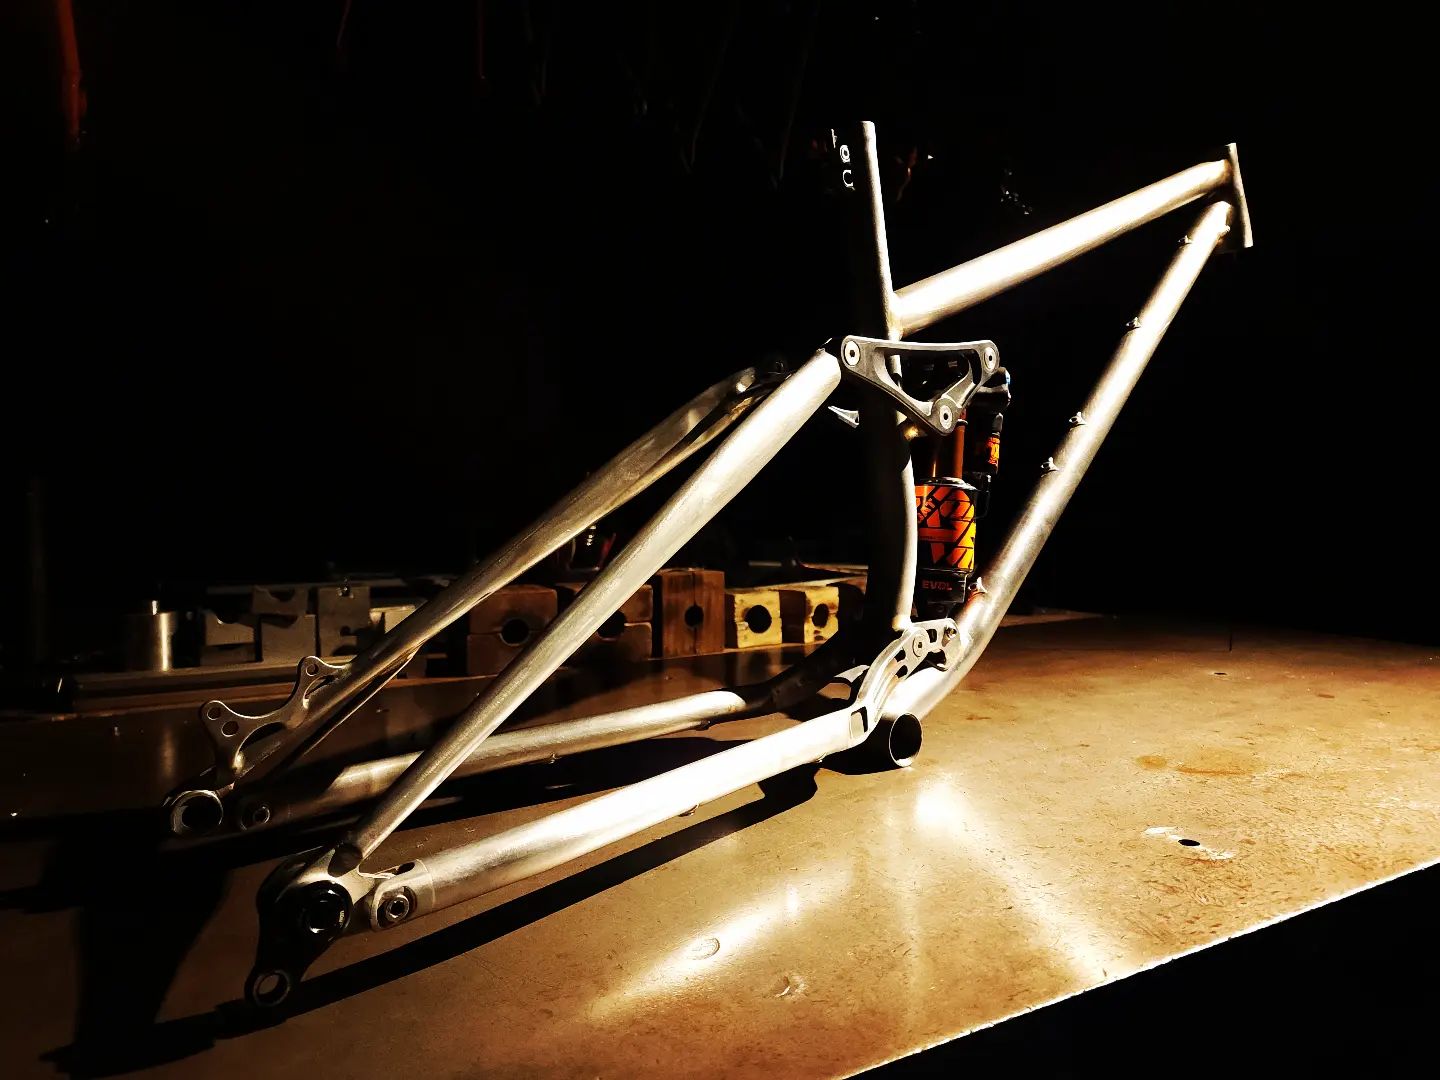
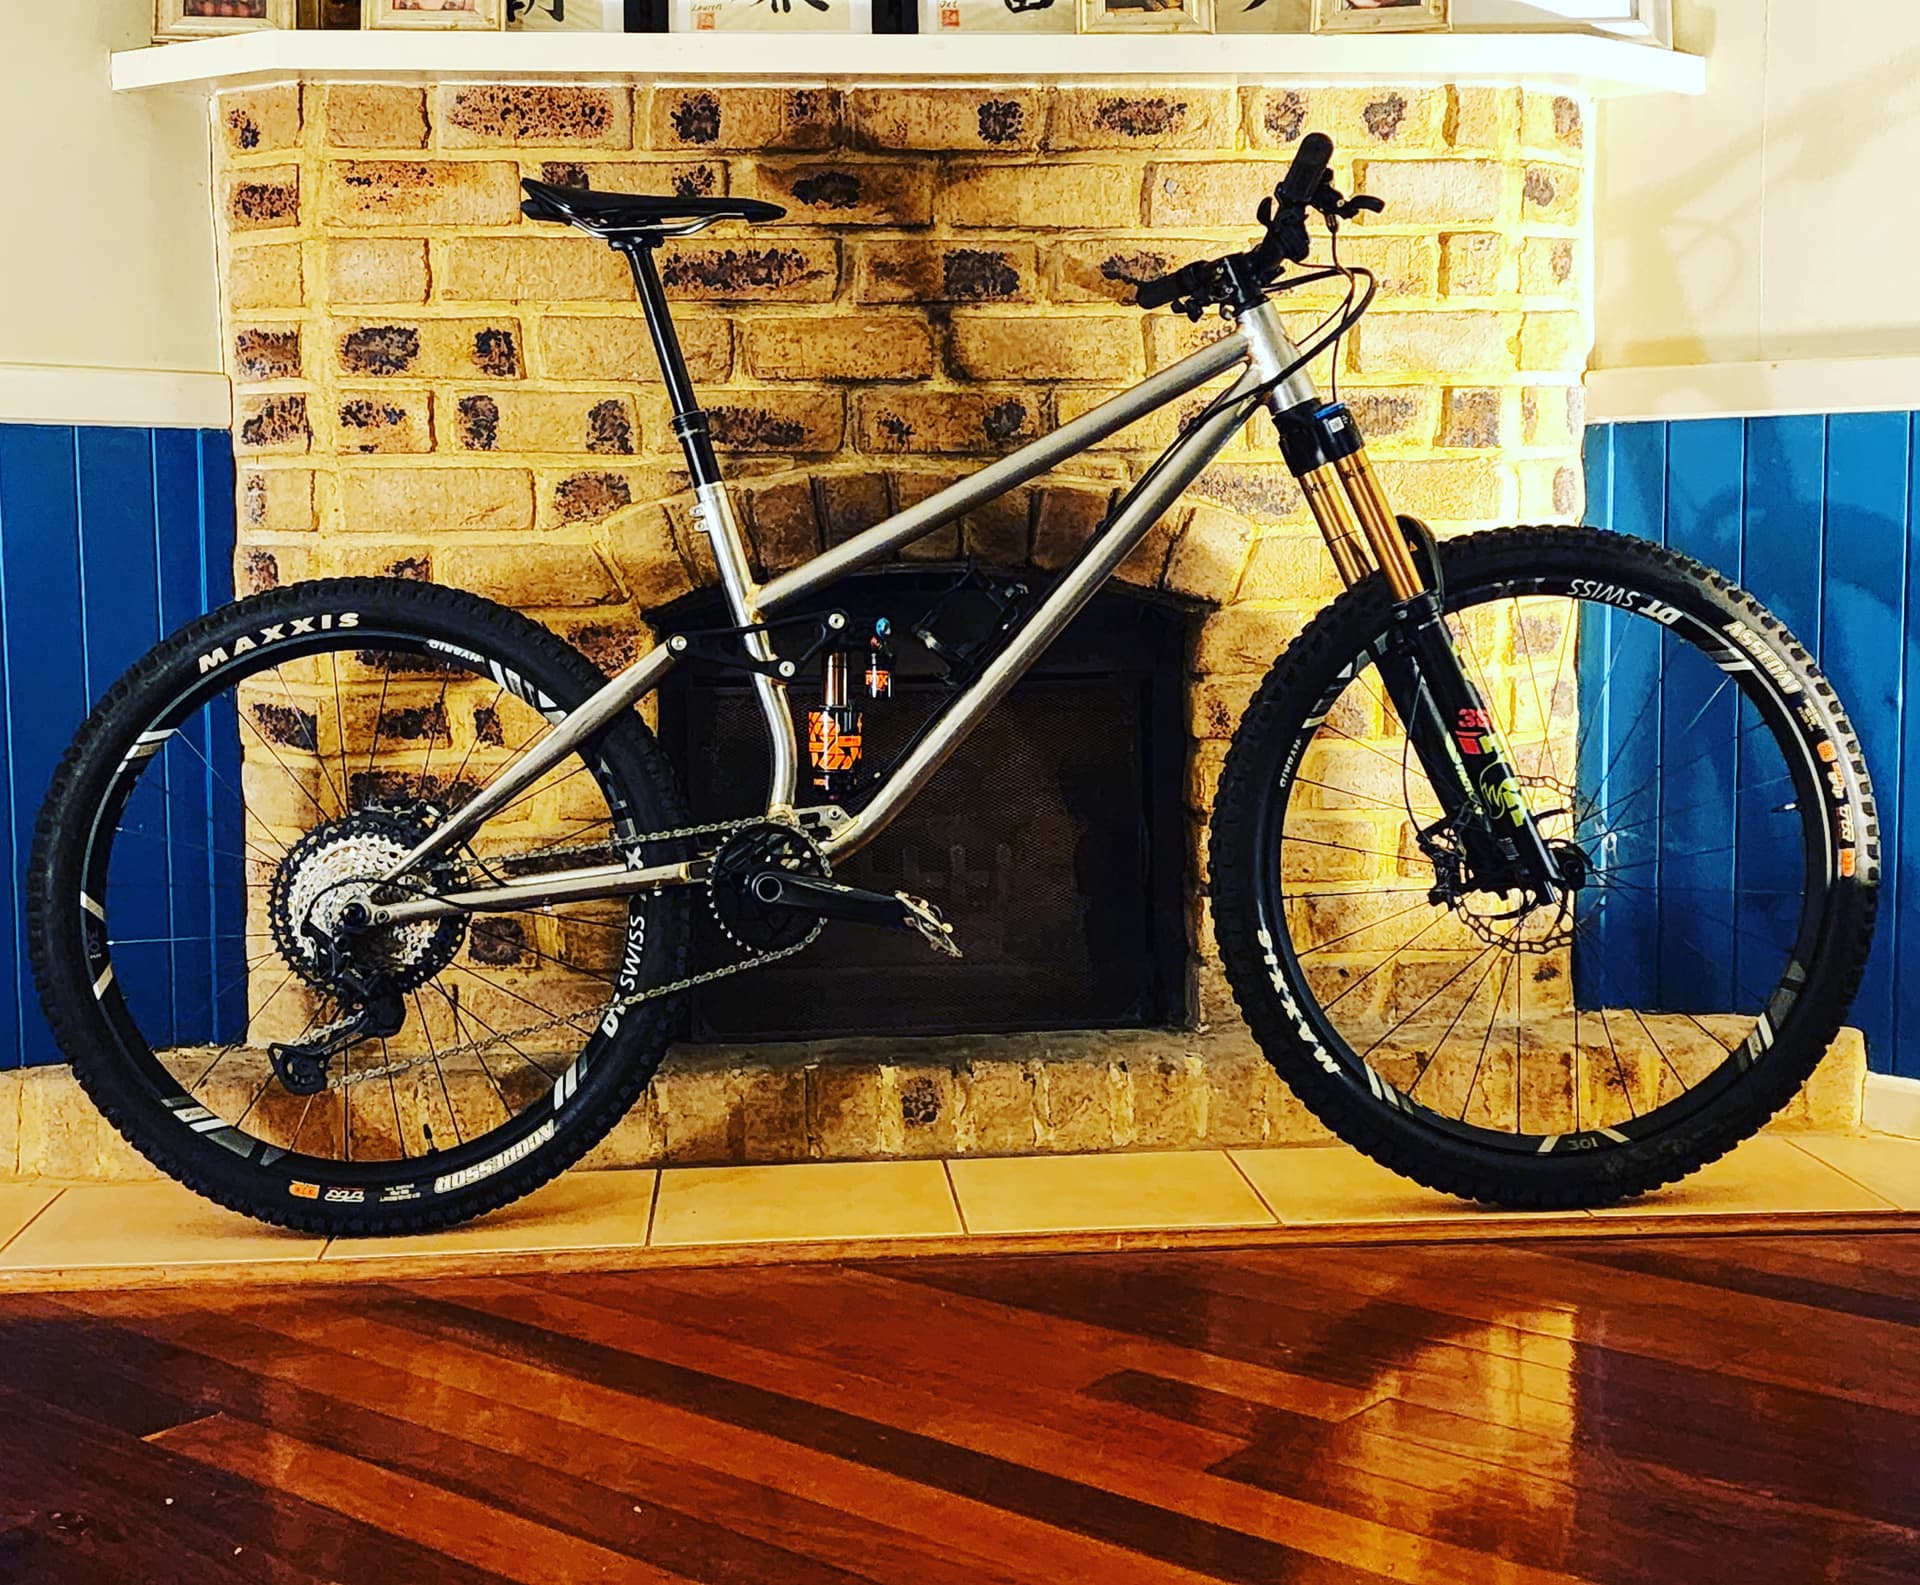
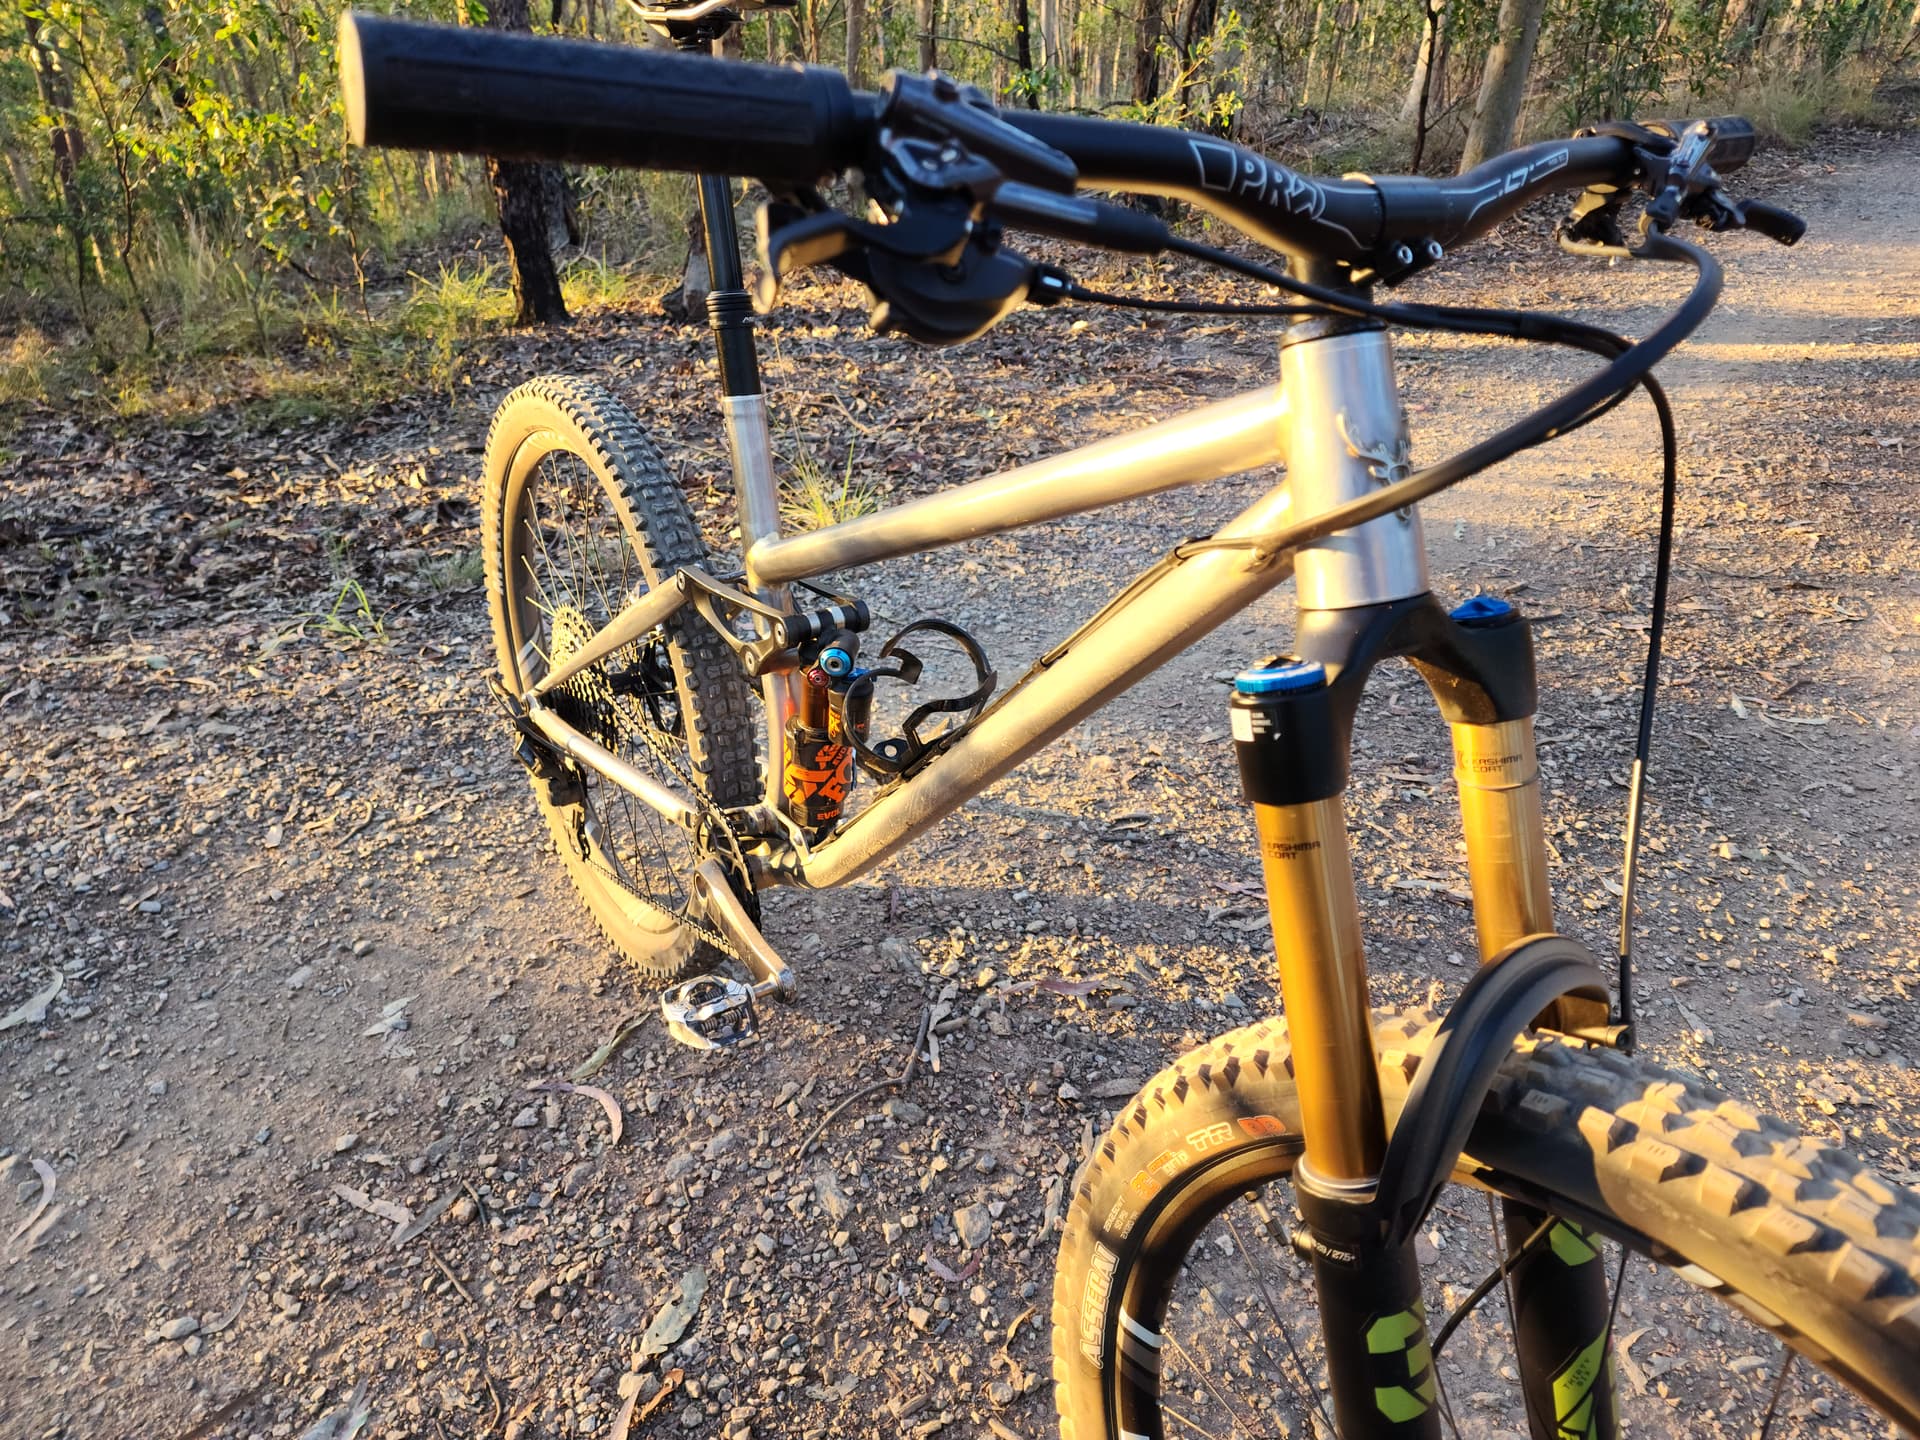
So today was a great result of lots of hard work. The things I showed in yesterdays video paying dividends out on the trail. Being obsessed with alignment and mechanical refinement means I have a bike that turns both directions with the same dynamics and a suspension action that responds well to both terrain at shock forces.
With only standard tune settings from Fox it is already really well planted on the trail, giving great feel through trail chatter but also having a nice pop off jumps and features with a really quiet touchdown. With a few runs and some minor adjustments it’s going to be stellar.
Geometry wise it’s a bit longer than the previous longer reaches I’ve been playing with. I’m 177cm with ape index if +5ish so have usually been comfortable on “large” frames. That can range a lot in actualy frame dimensions and I think it confuses people and I see a lot of customers stuck in the ‘I’m a small/medium/large/etc.’ mindset.
There are a few things that go into getting the right size bike that the inconsistant size classification across all the brands doesn’t really do well. While we aren’t talking road bikes here, there are definitely things to look at that affect both the up and down riding in different ways.
The Jester will be offered in 10mm frame reach increments with corredponding stack increase and matching chainstay lengths. I’ll have a geo chart out soon, which will outline the dna of the Jester, and sizing will ve referred to by the frame reach number, so a 450, 460, 470, 480 etc. There is also the option to increase or decrease a stack height if needed. Being a small builder means I can meet those custom options fairly easily.
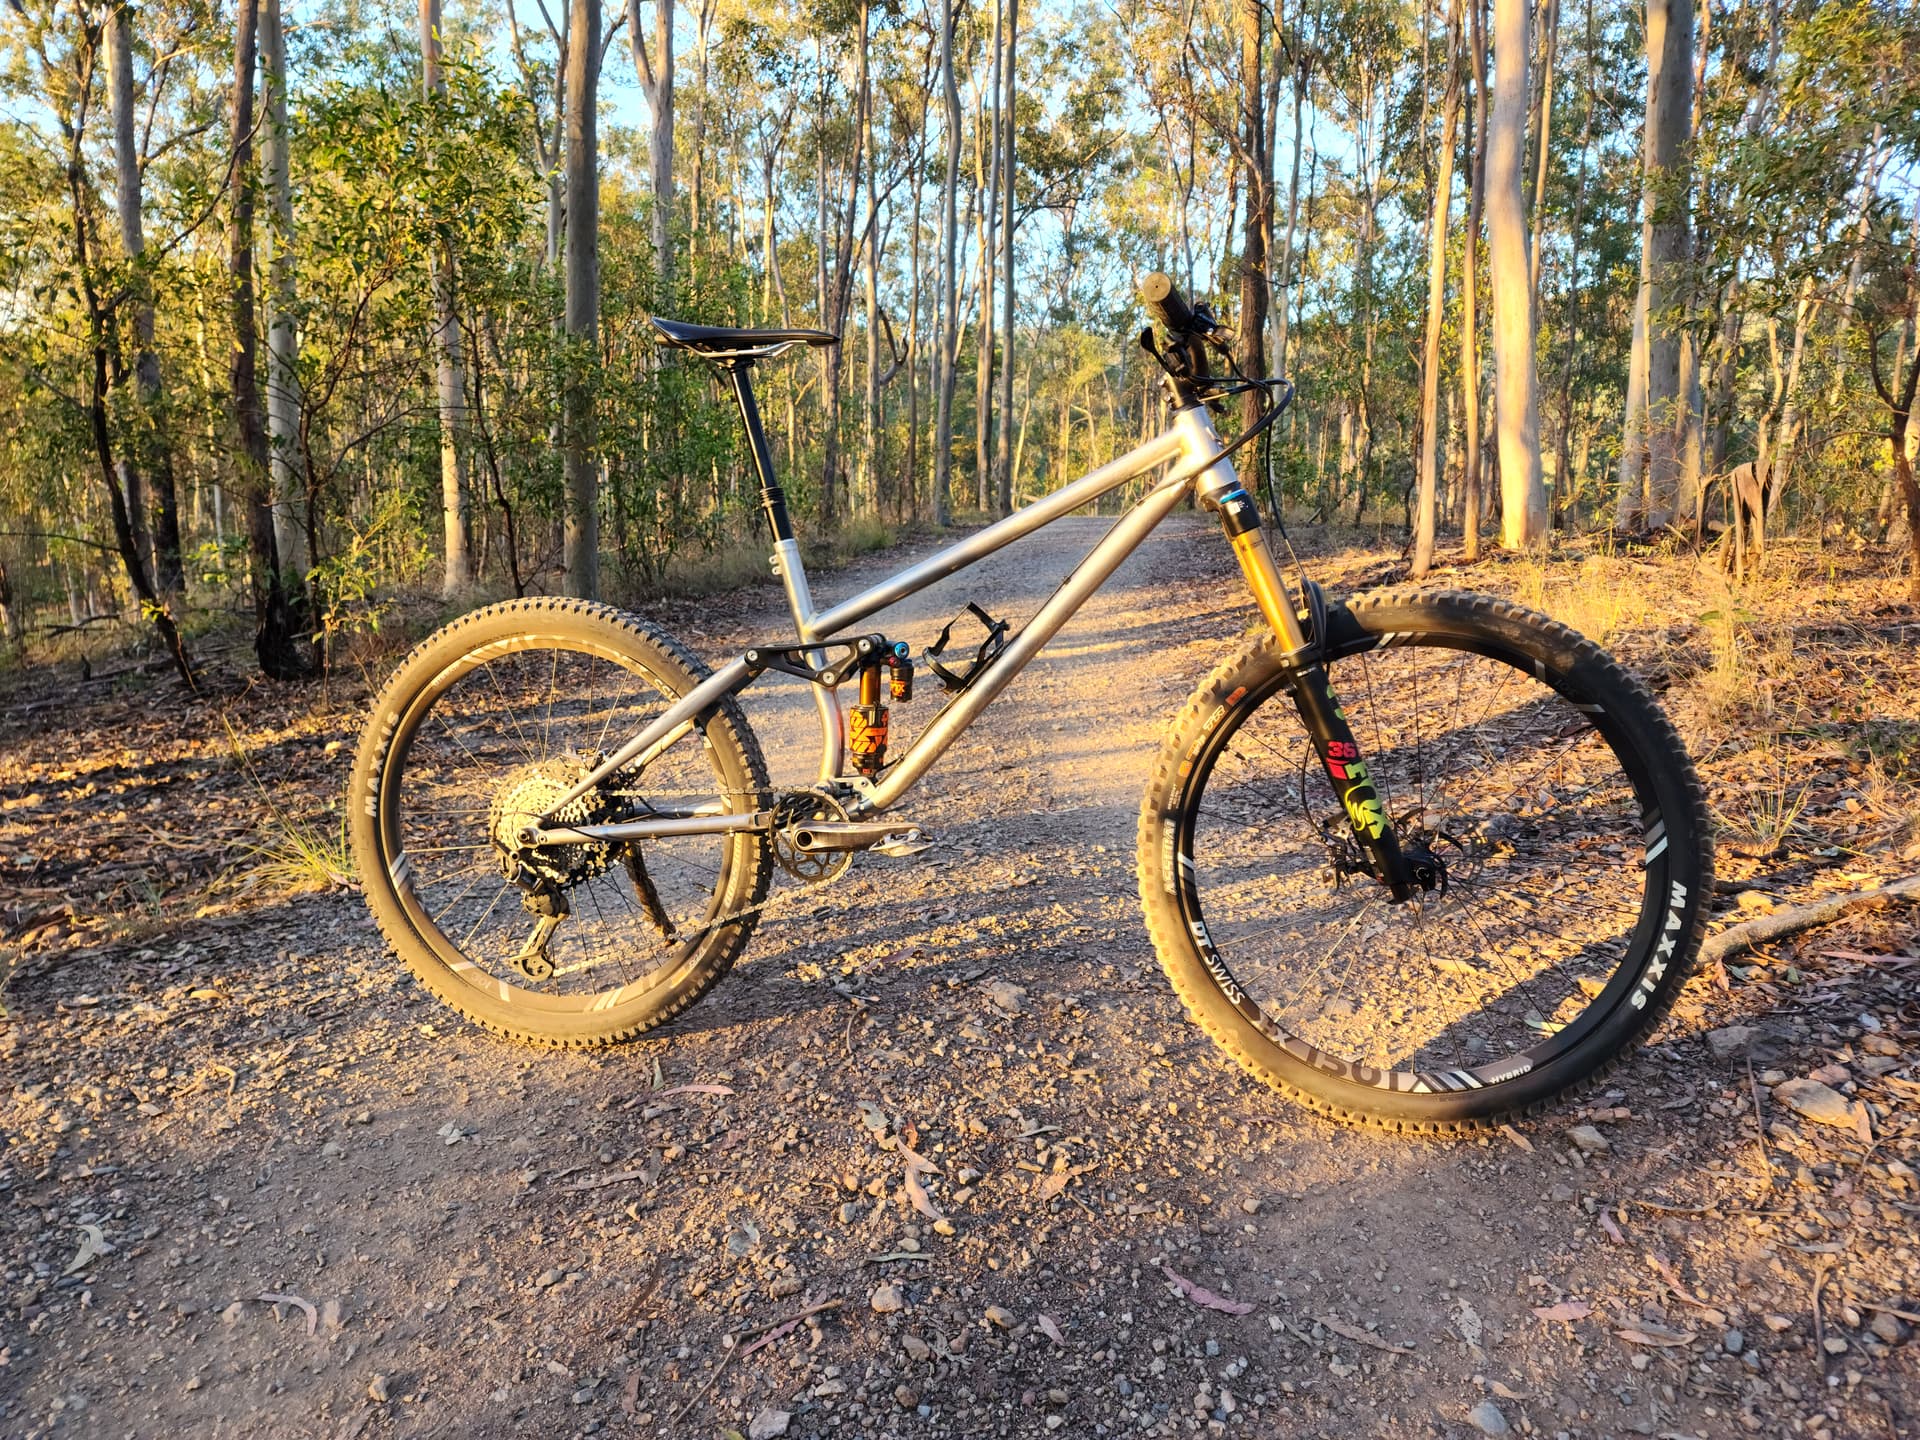
So this is not a bike you would back into a corner and get rowdy like you’re in a rodeo. With is 31mm long stem it puts the hands in line with the steerer cebter line and ends up only being 10mm further from the BB to grip center than on my Oisin but also sits higher due to the longer fork. What this does is increase the front with the longer frame reach, it is 585mm on the Oisin and 510 on this bike. Yes, you read that right.
The Jester platform is designed for racing and covering ground as efficiently as possible. It’s already proving to do that by first ride out without being dialled in setting PRs on a couple tracks. The philosophy is that a bike that is unstable and has you fighting it to stay on the trail is robbing you of forward energy.
The composed nature of the Jester over the chatter, absorbing bigger bumps and drops and stable over bigger jumps means you have more energy and better control in just going forward faster.
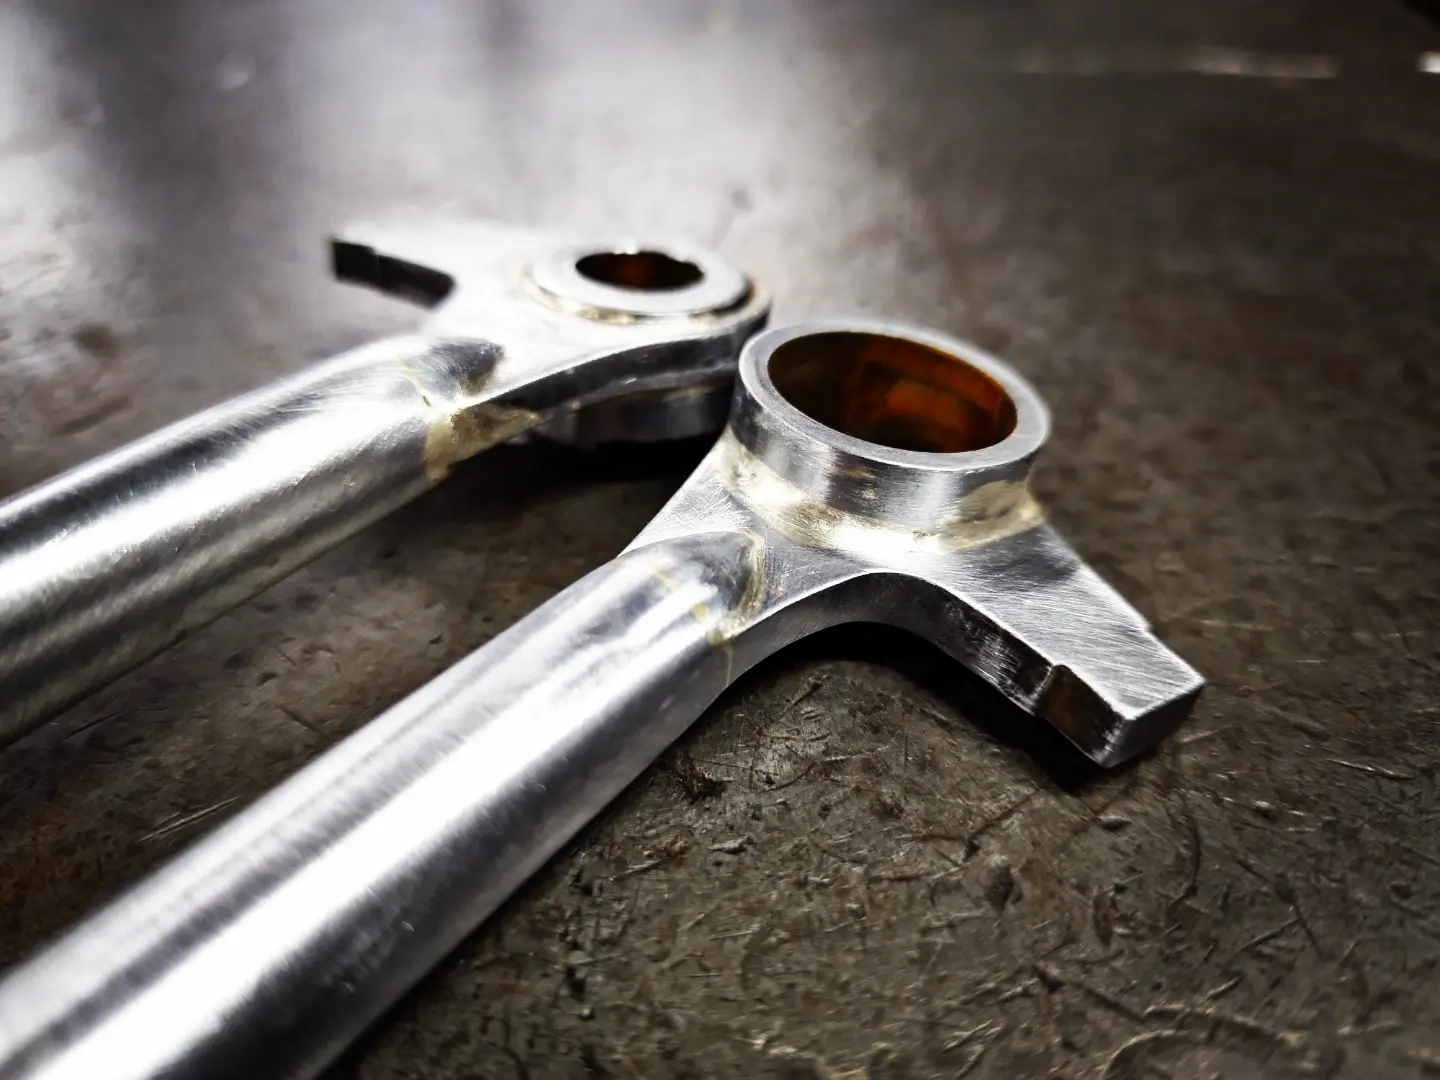
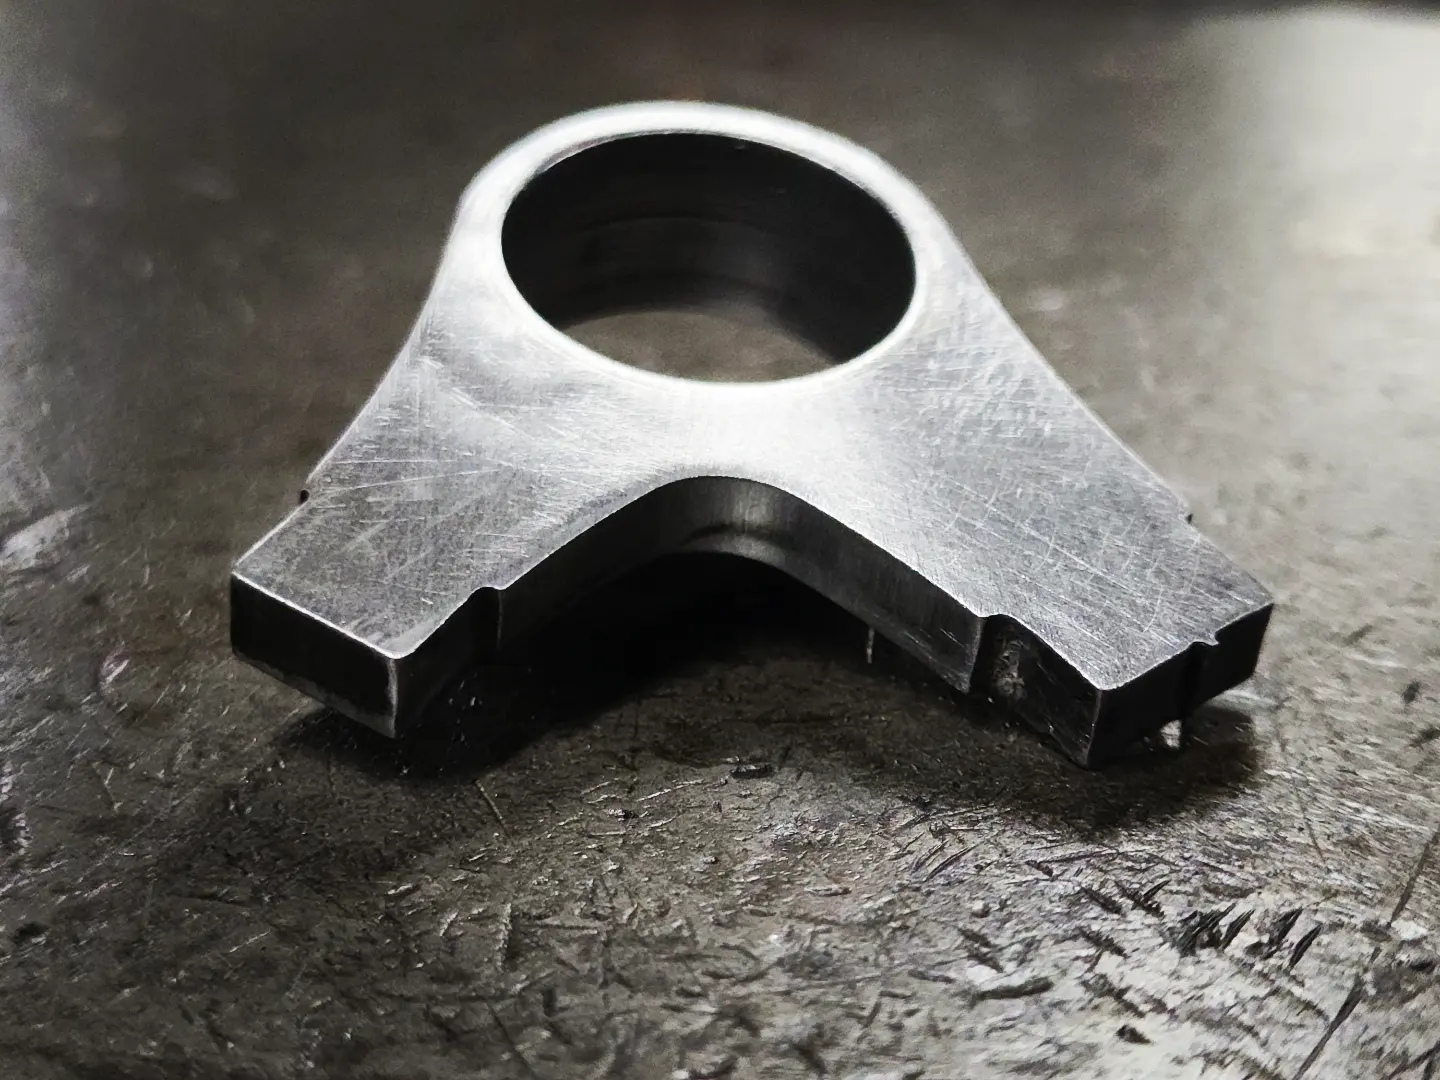
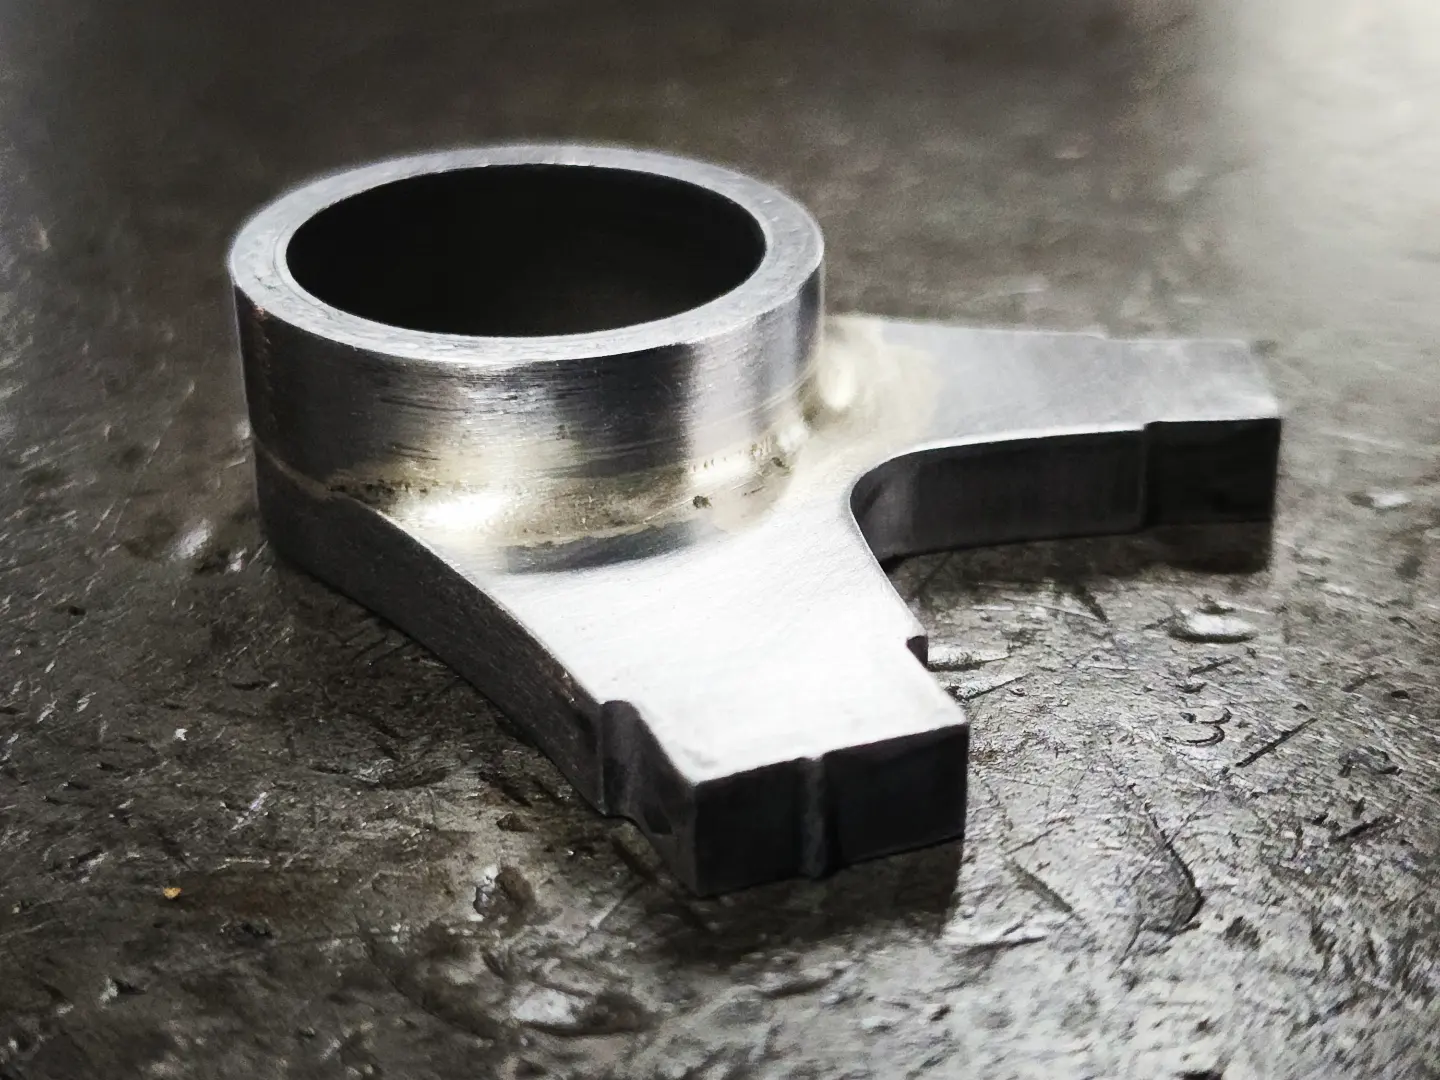
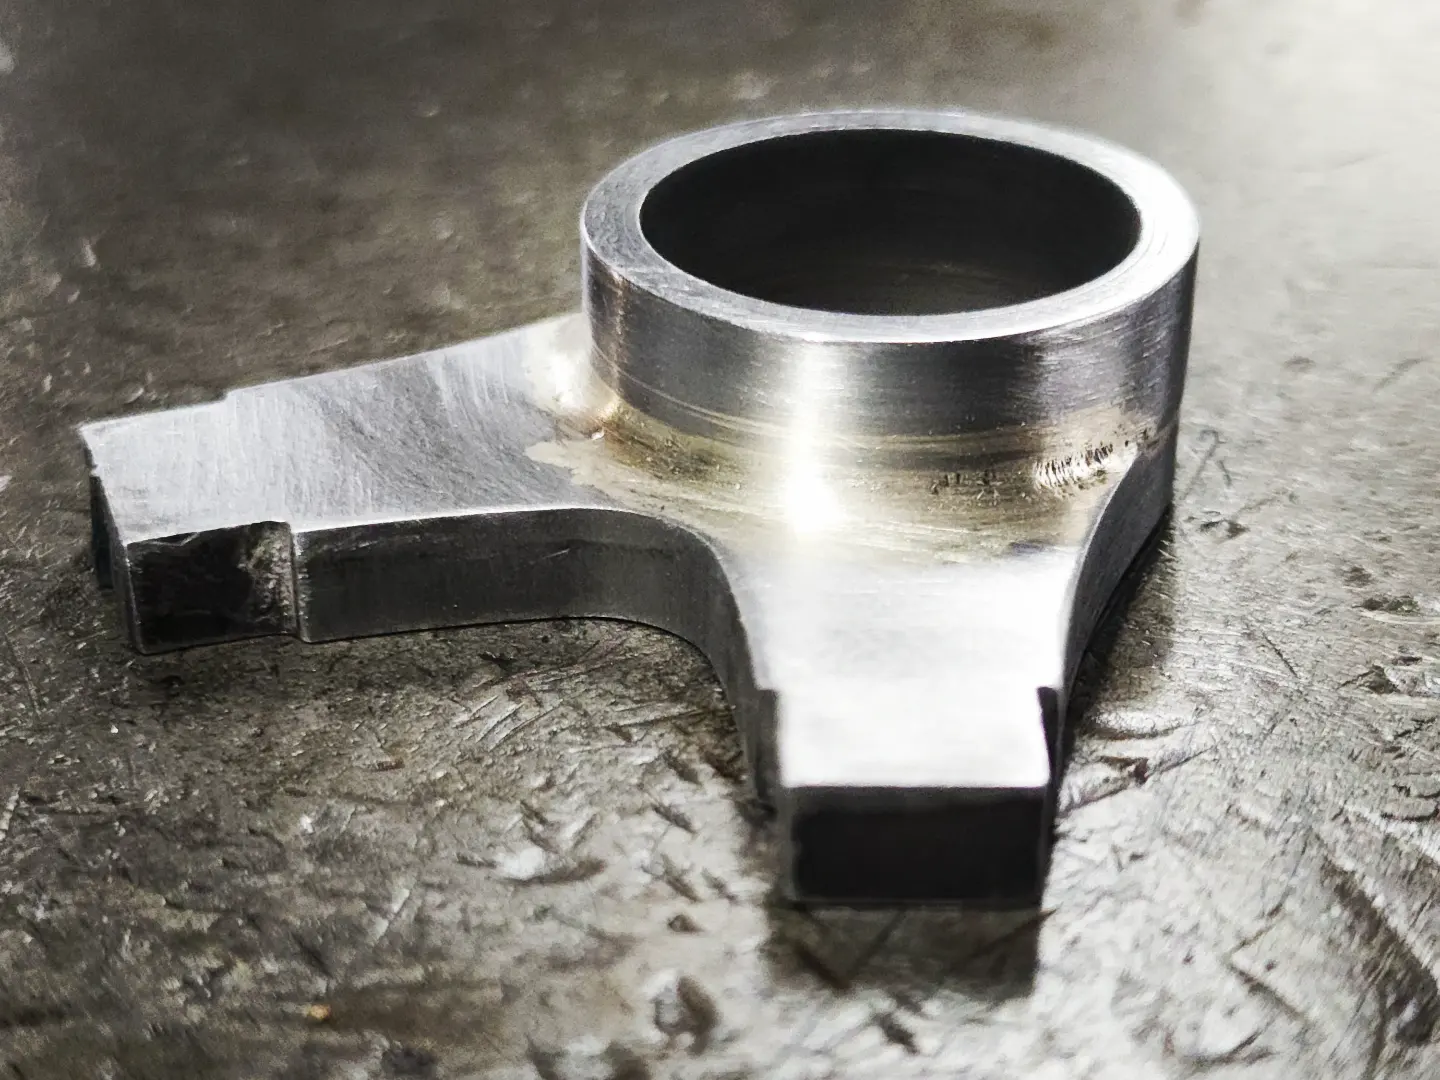
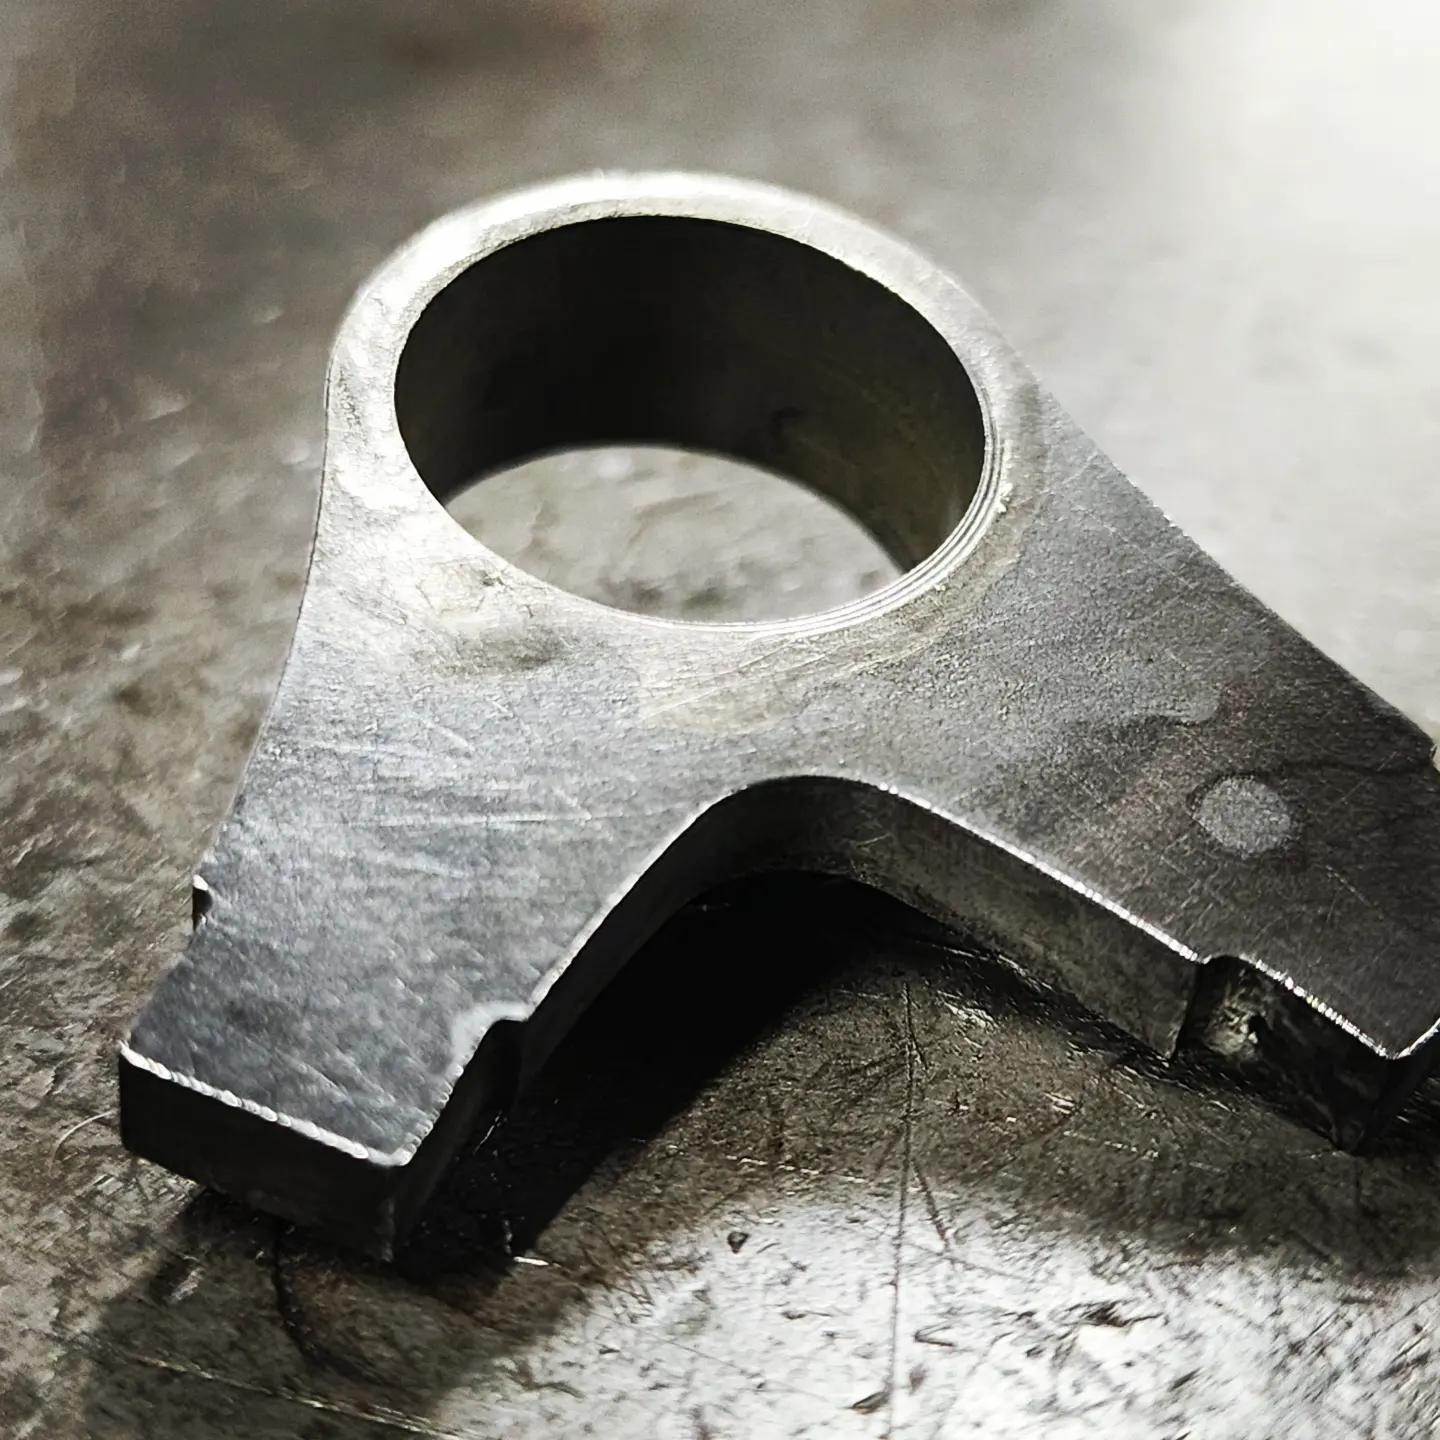
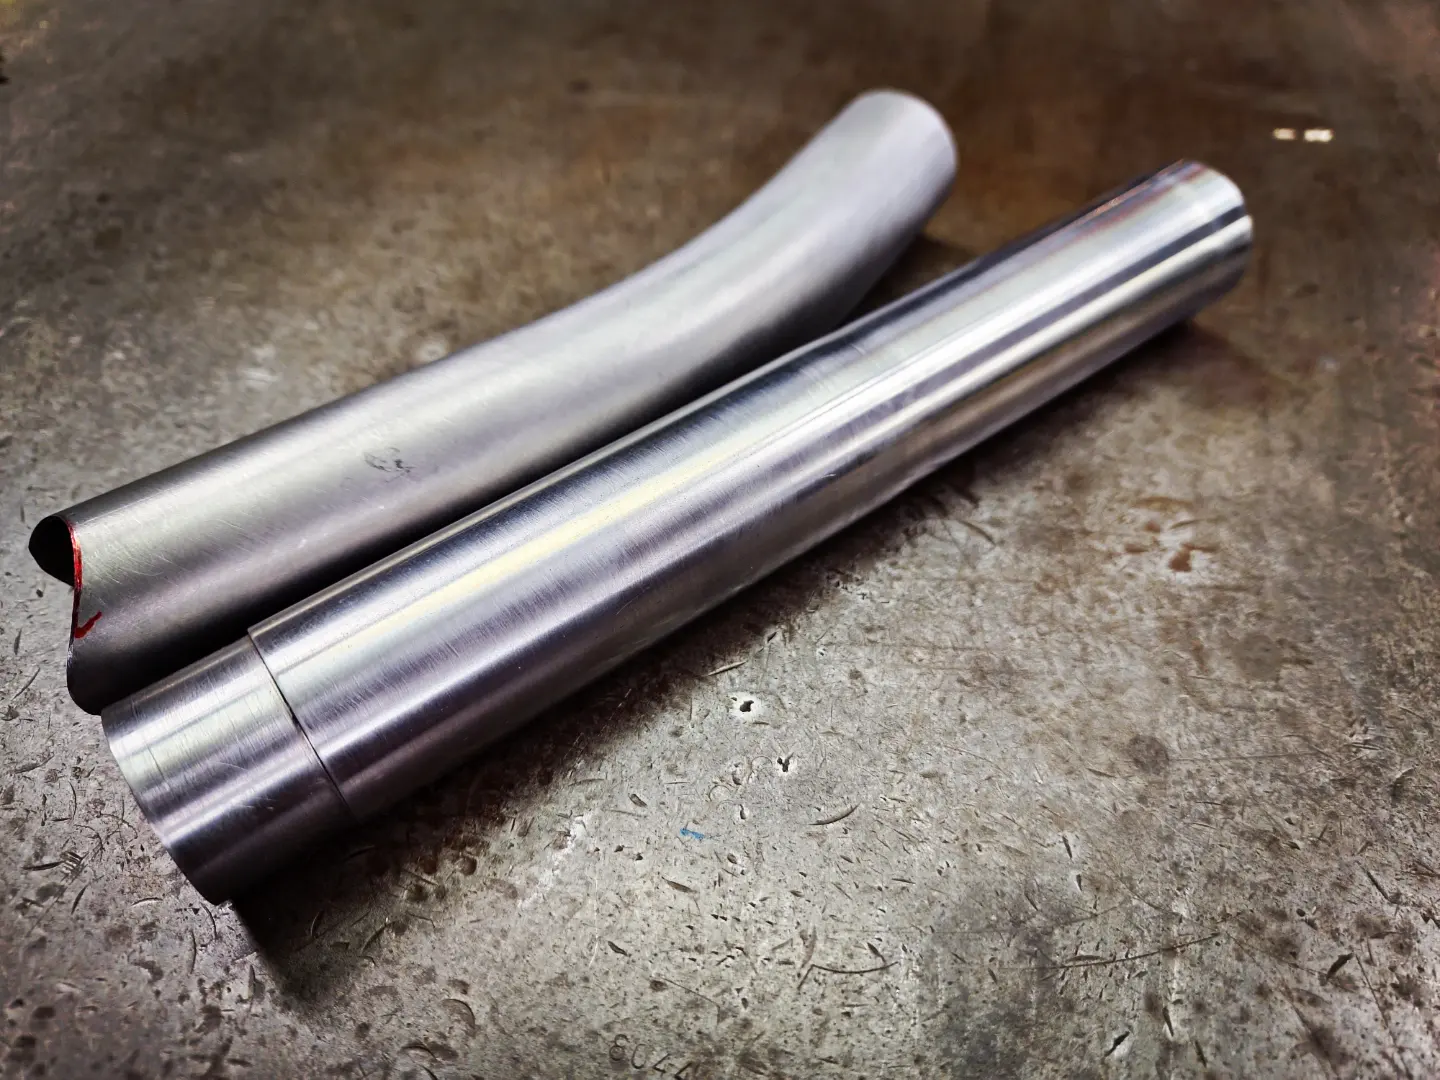
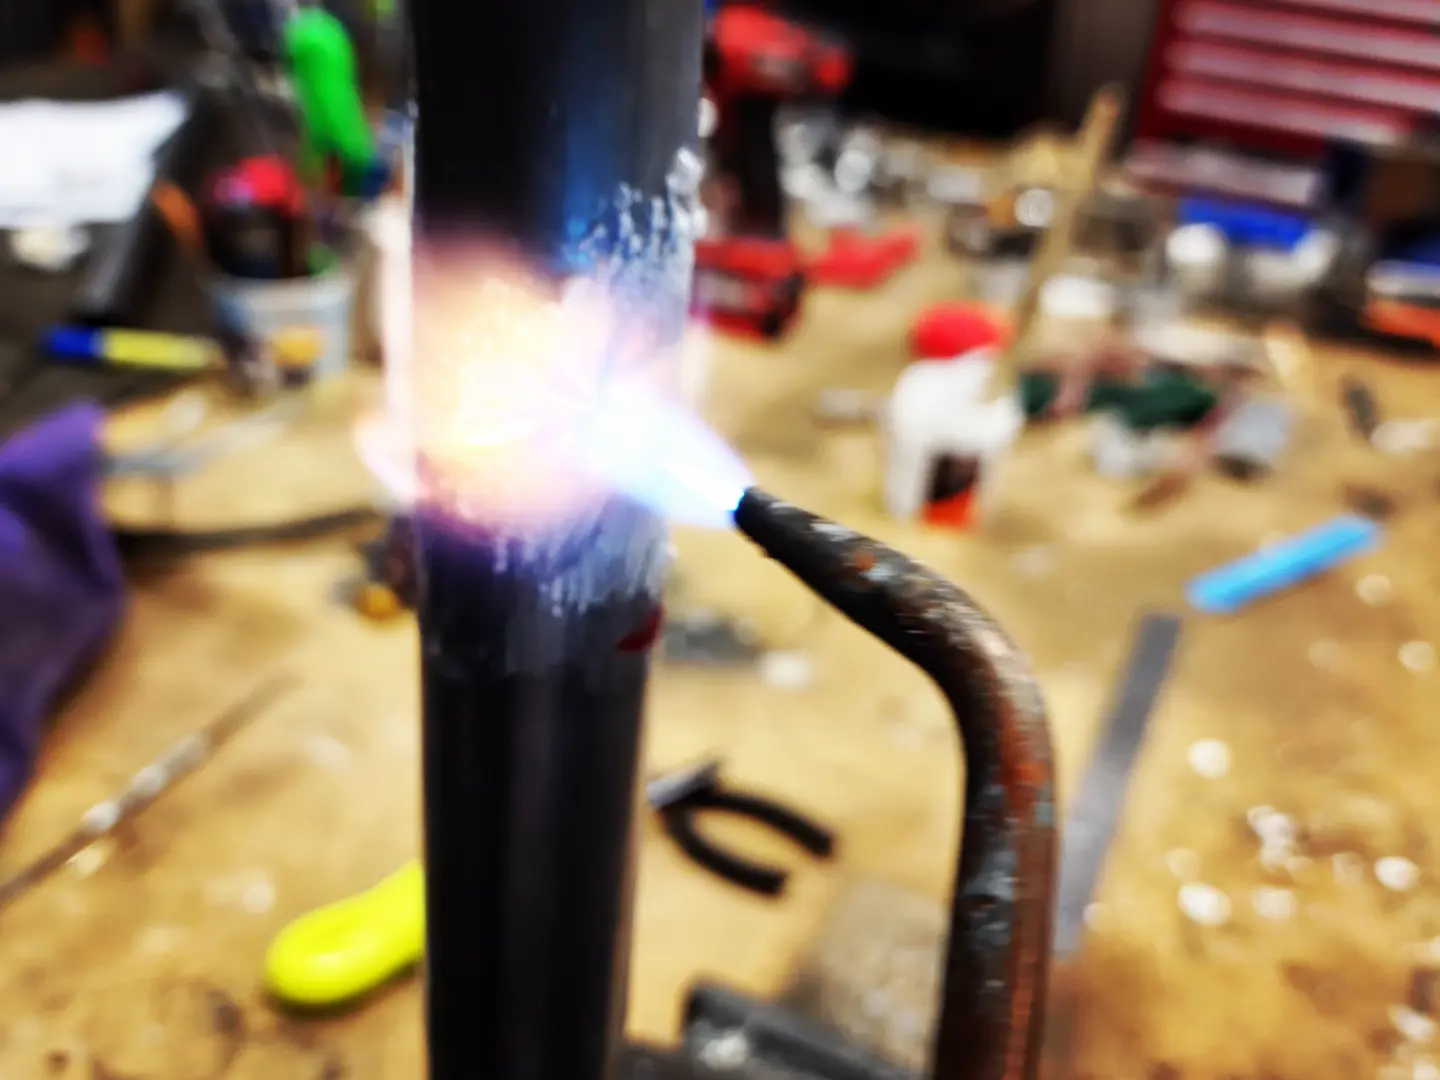
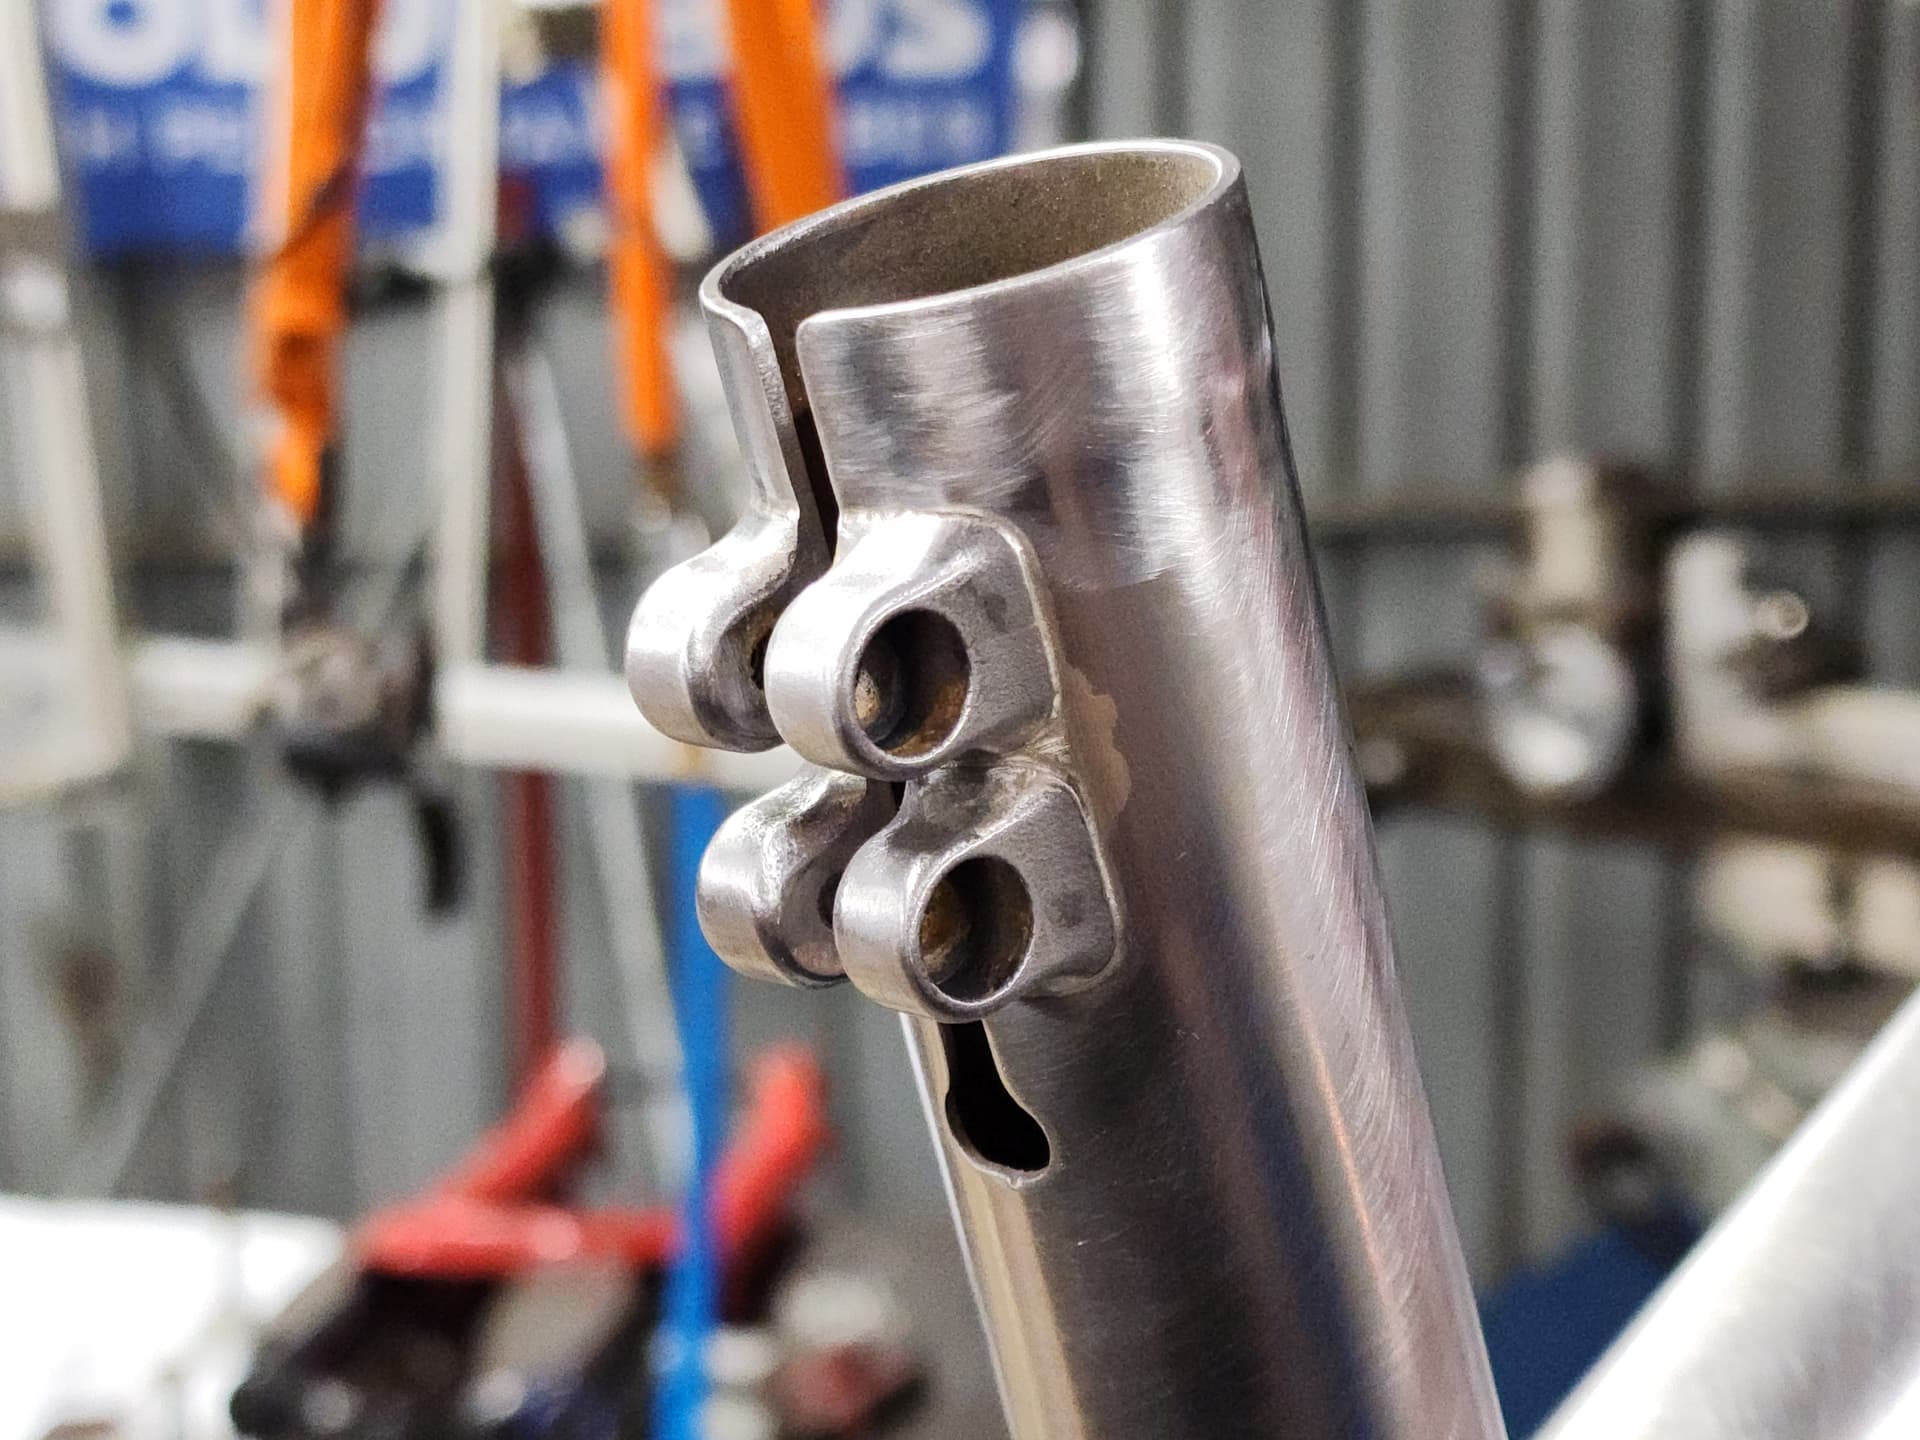
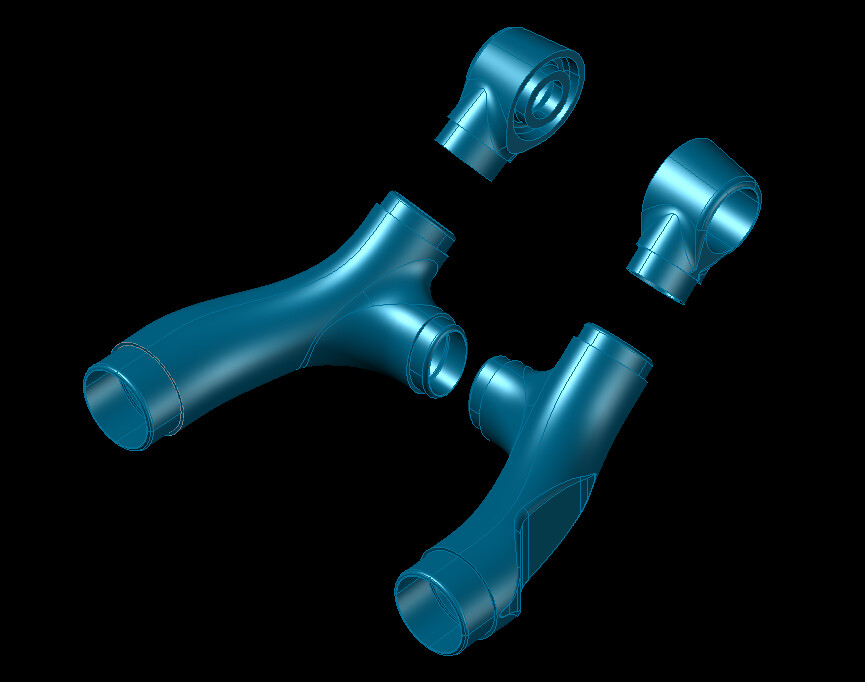
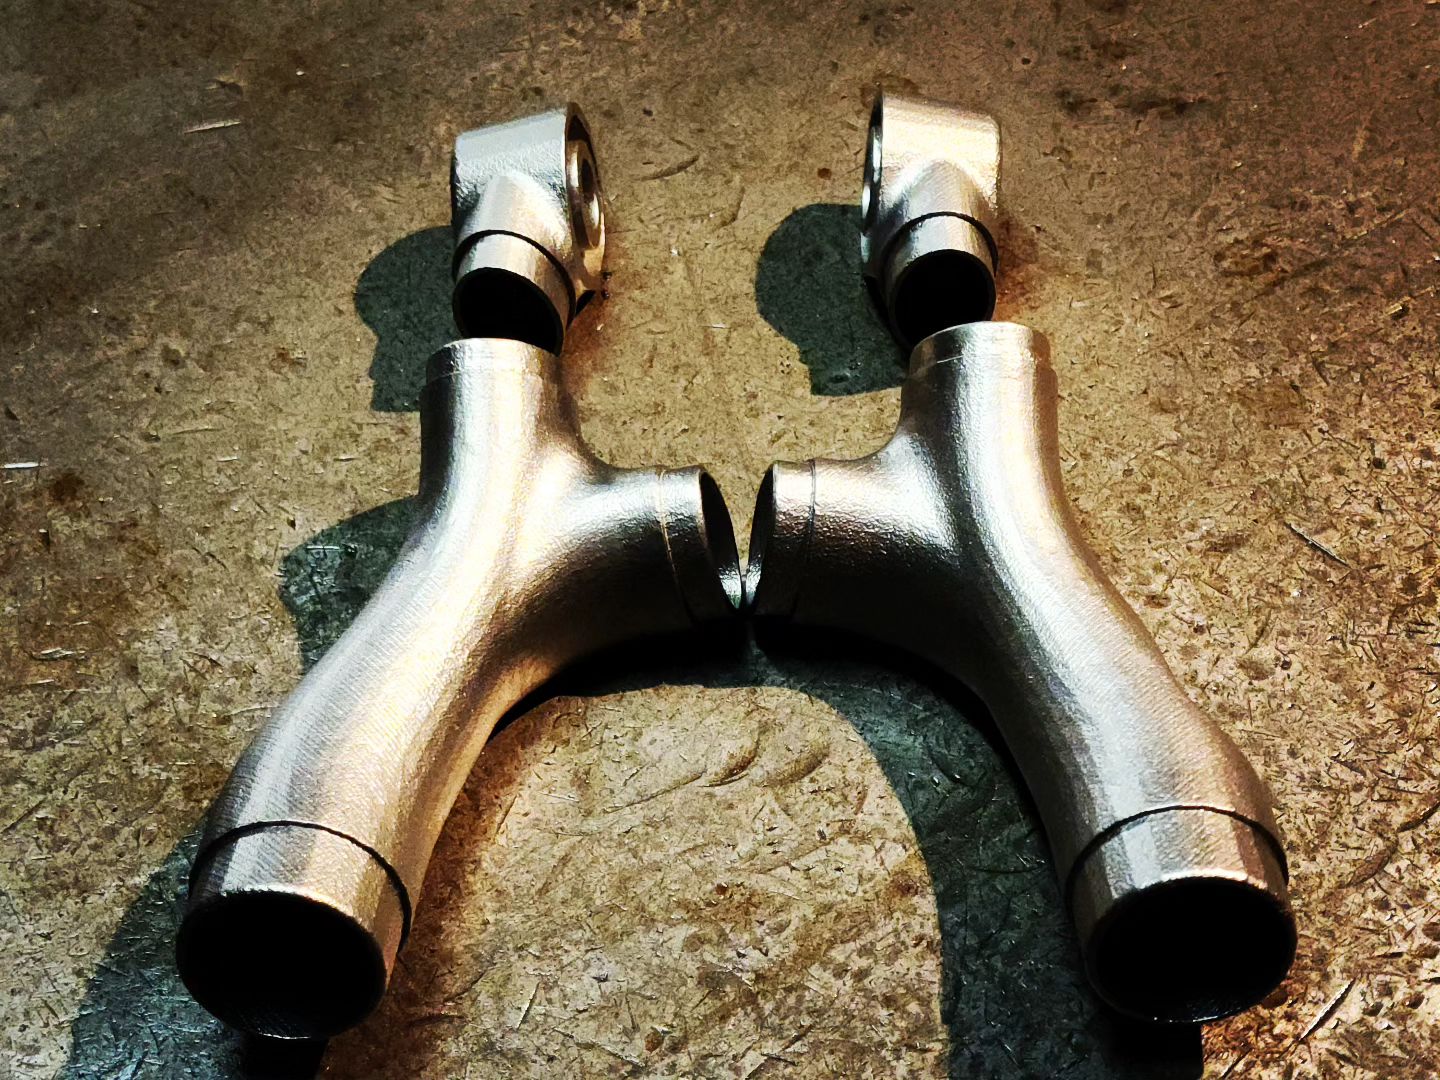
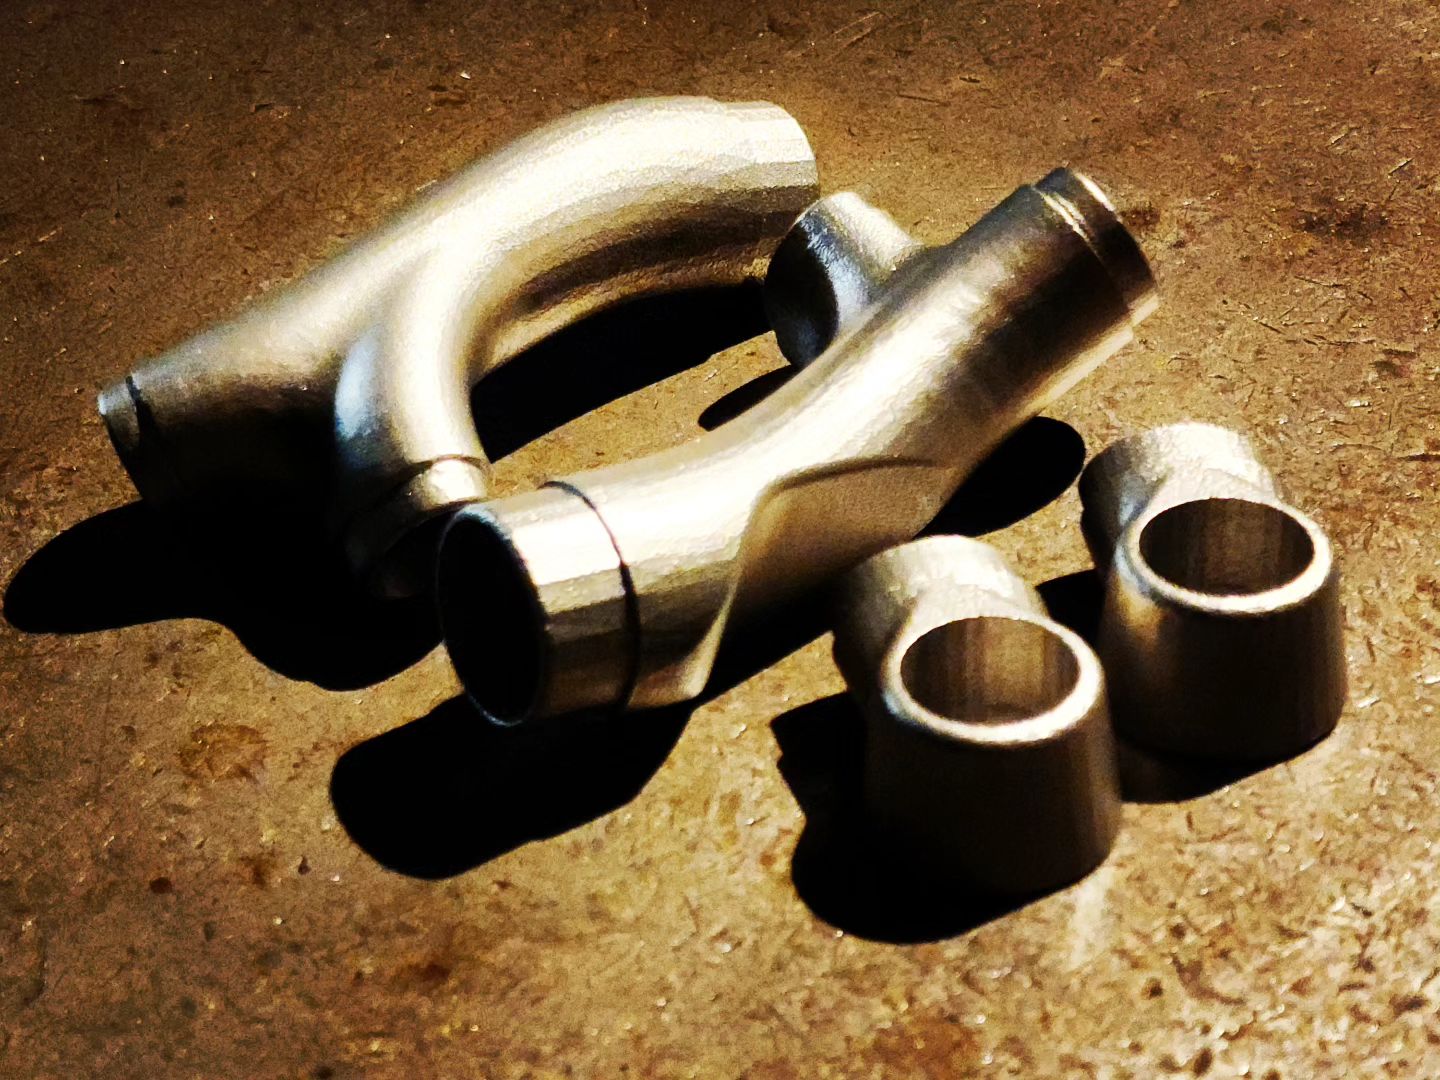
A rather exciting day for me at Devlin today. Finally have some metal 3D prints in my hands. Something I’ve poured a huge amount of mental energy into. Made from stainless steel and run at a 1.2mm wall thickness.
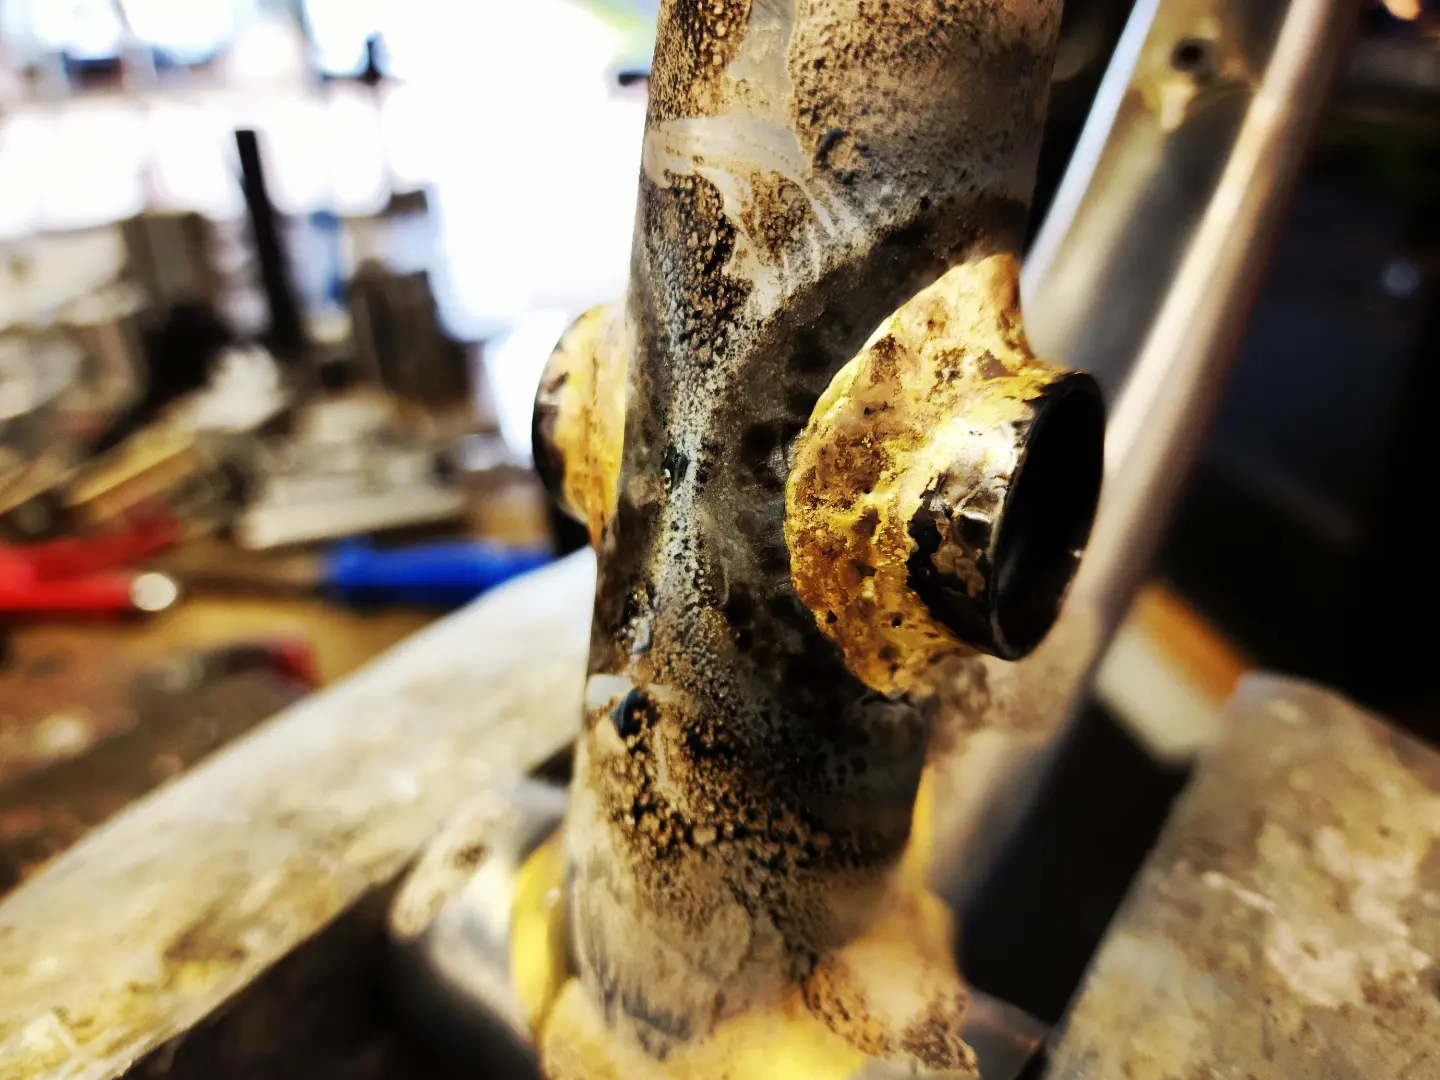
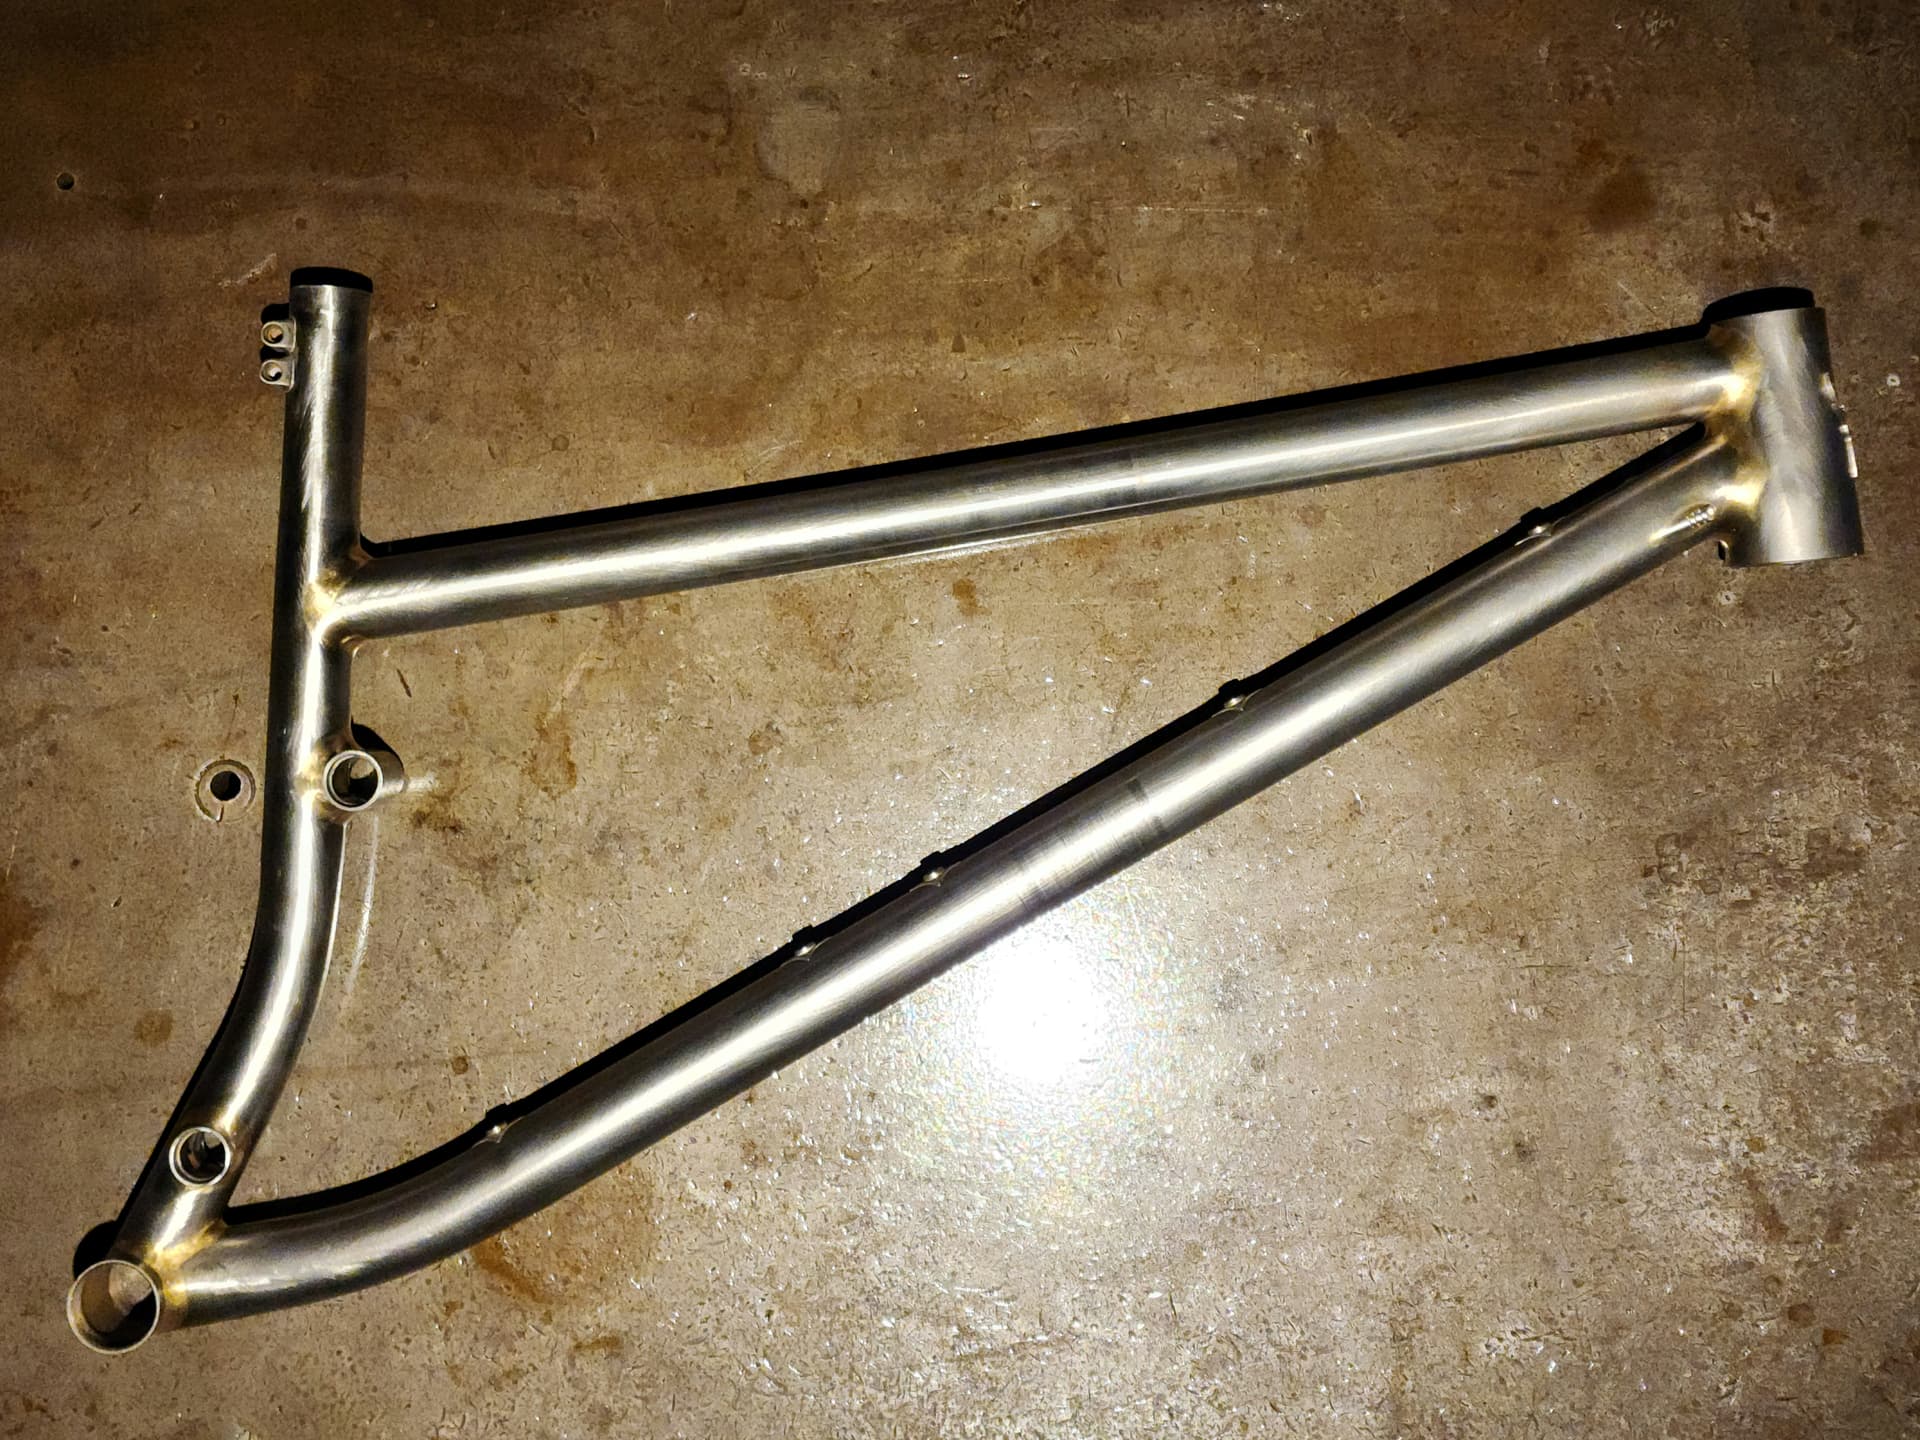
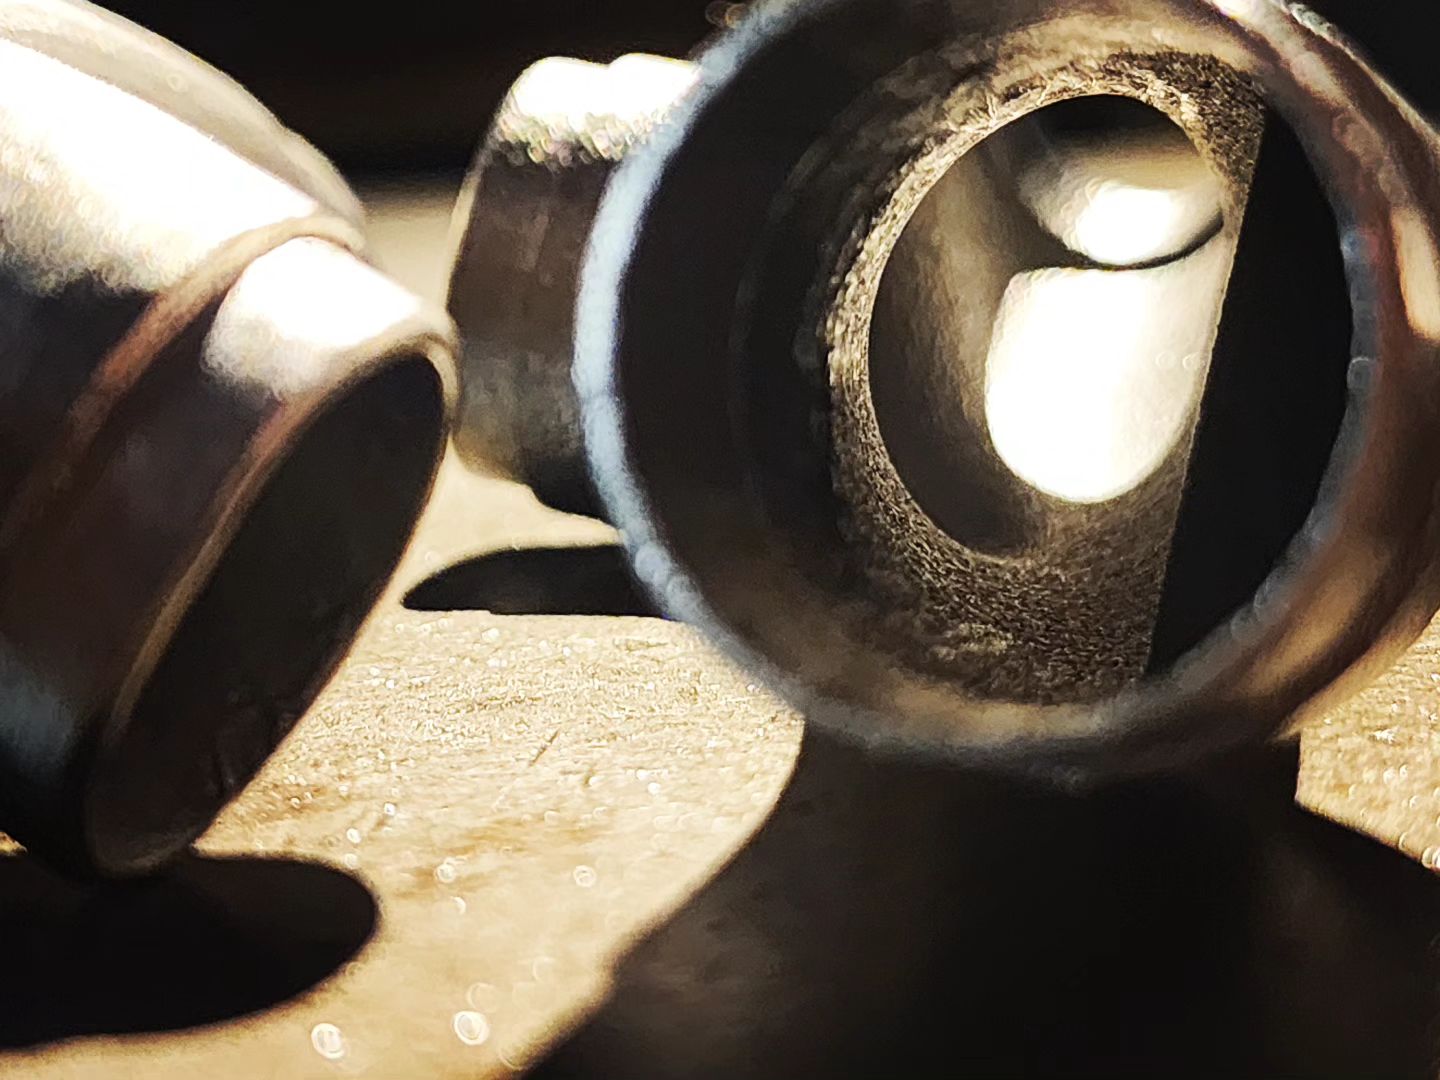
These parts make up the main pivot end of the swingarm. I’ve purposely designed it to be in four parts so I have some flexibility in the spacing of the bearings and chainstay location and also the length between the bridge and the pivot. It’s intended once I fine tune those dimensions to go to a full print.
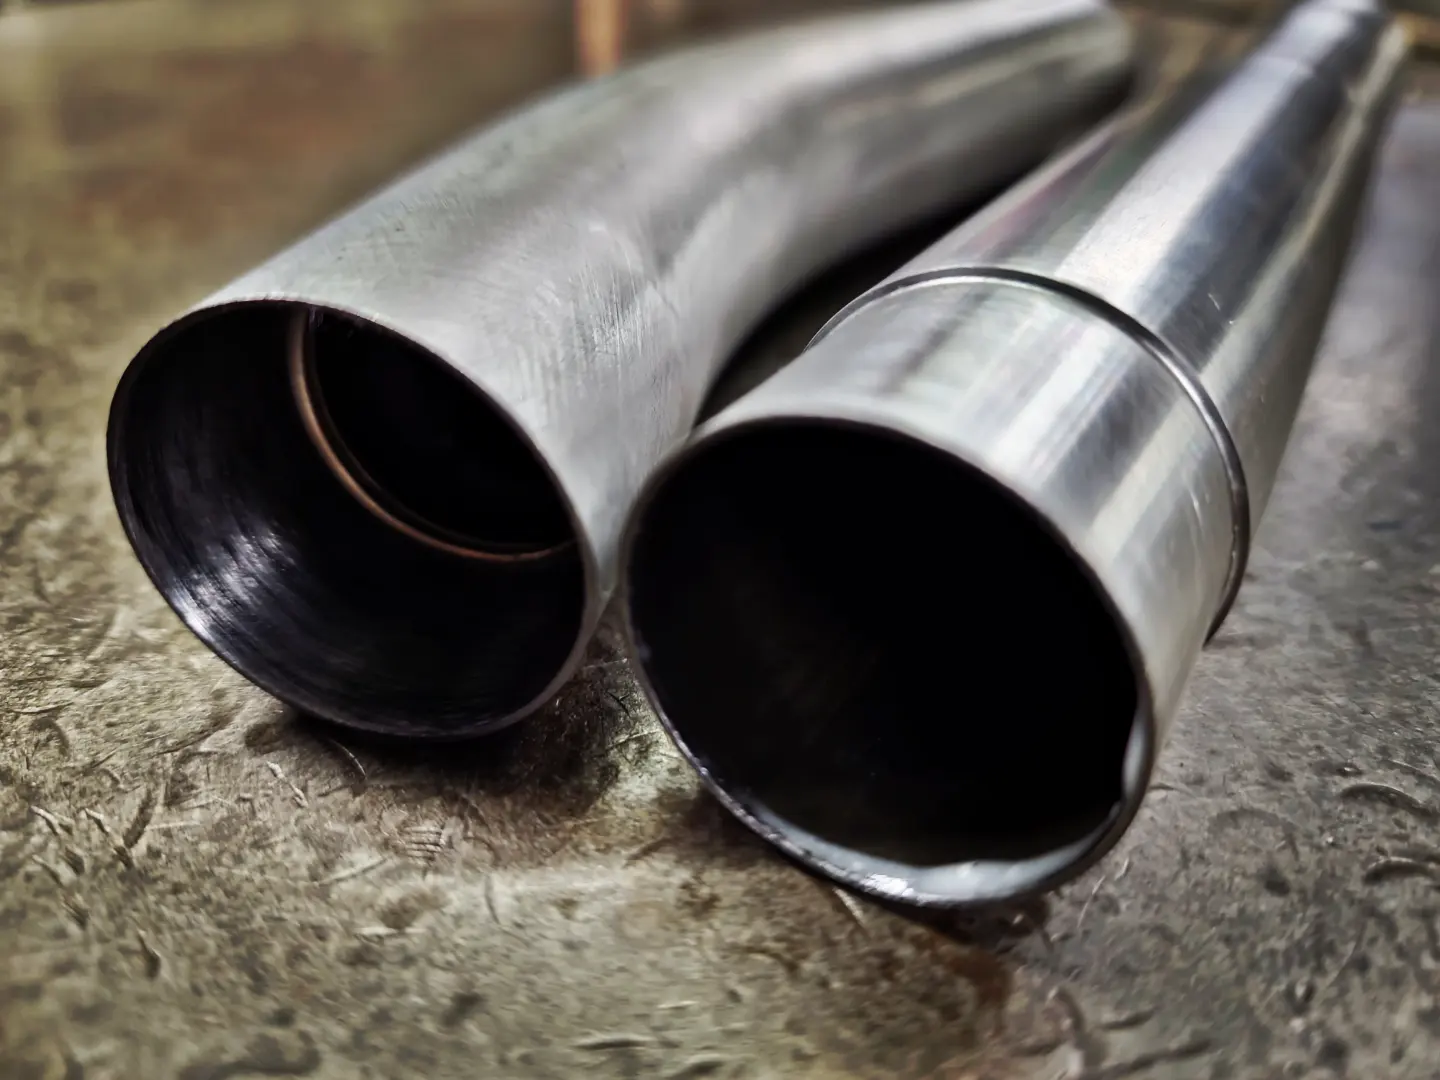
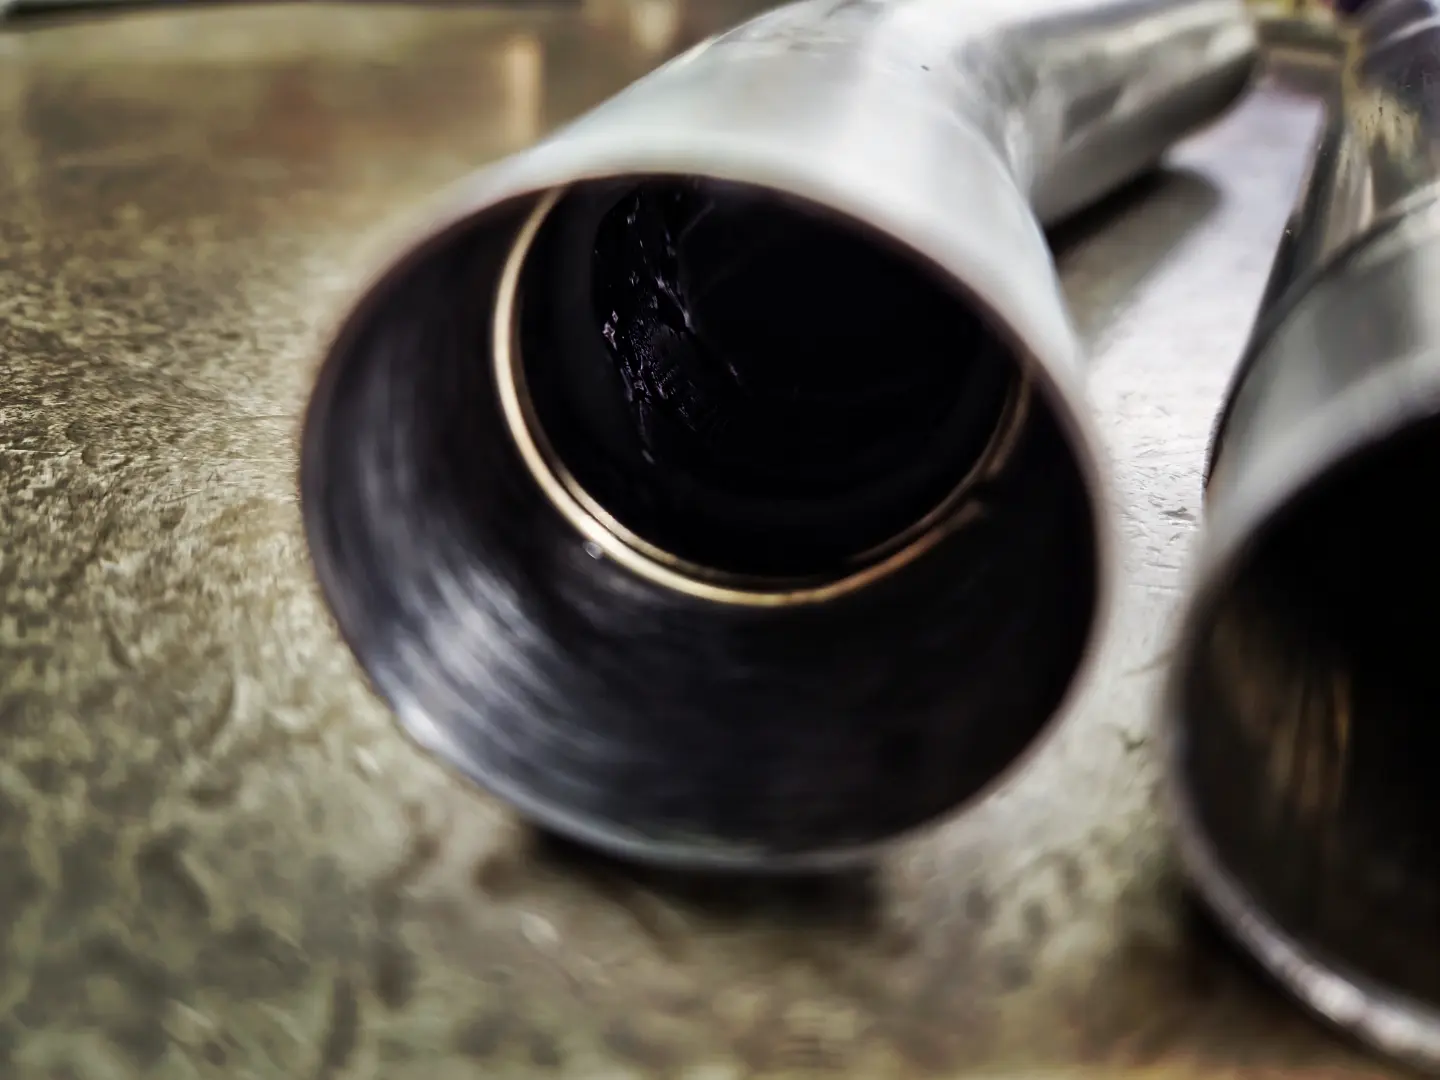
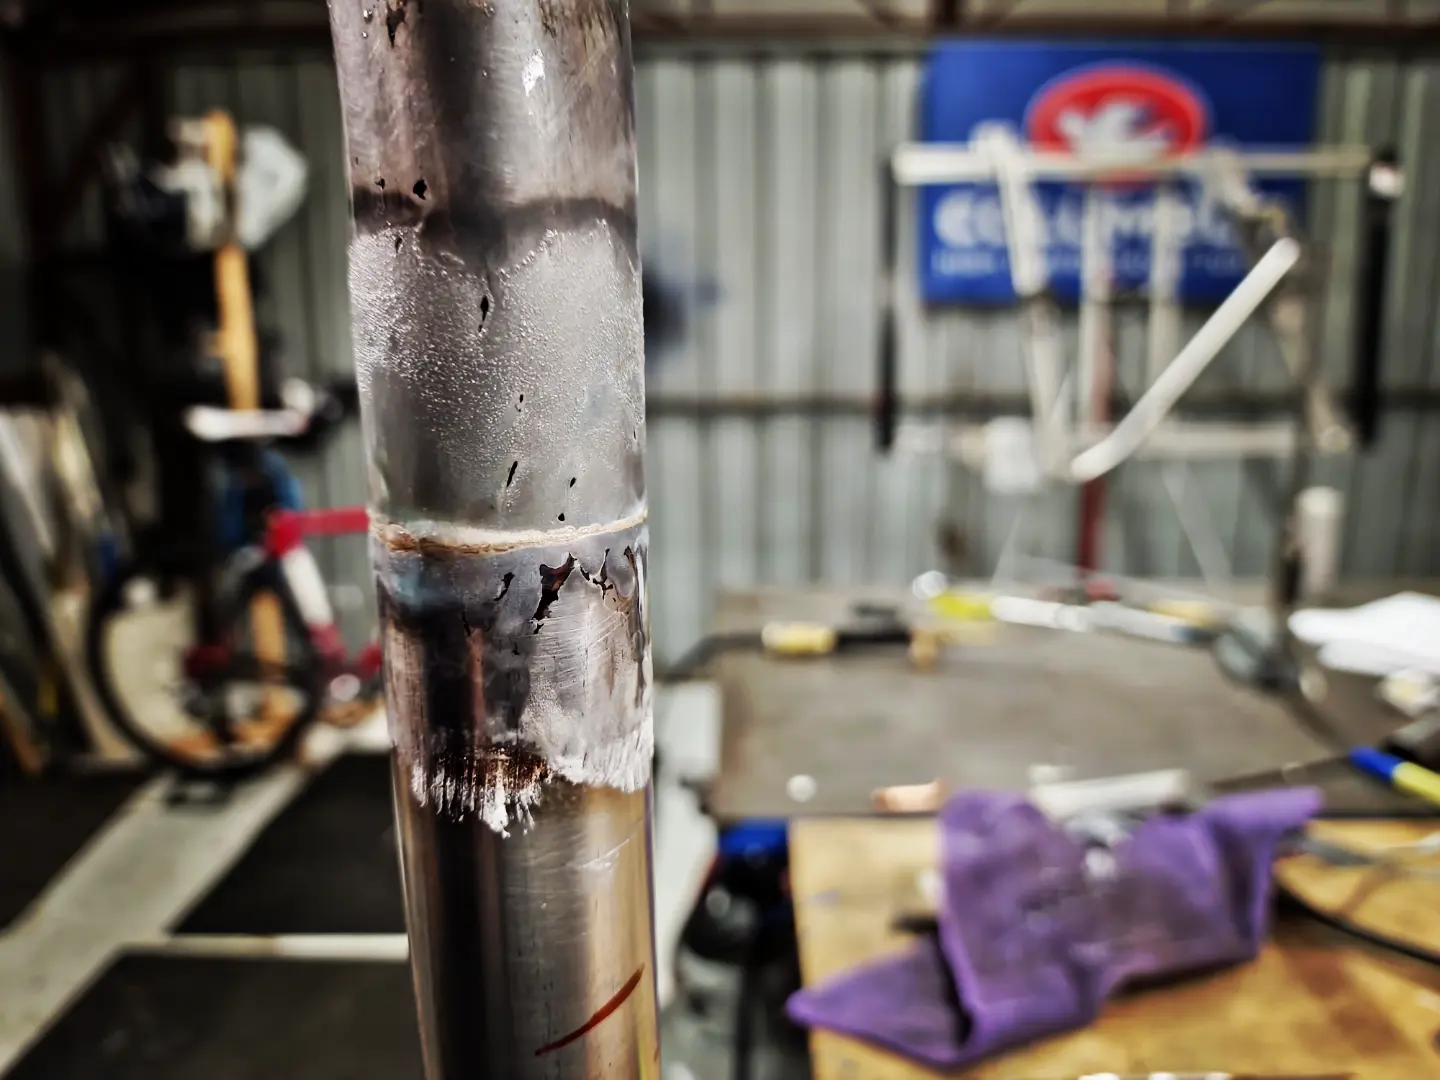
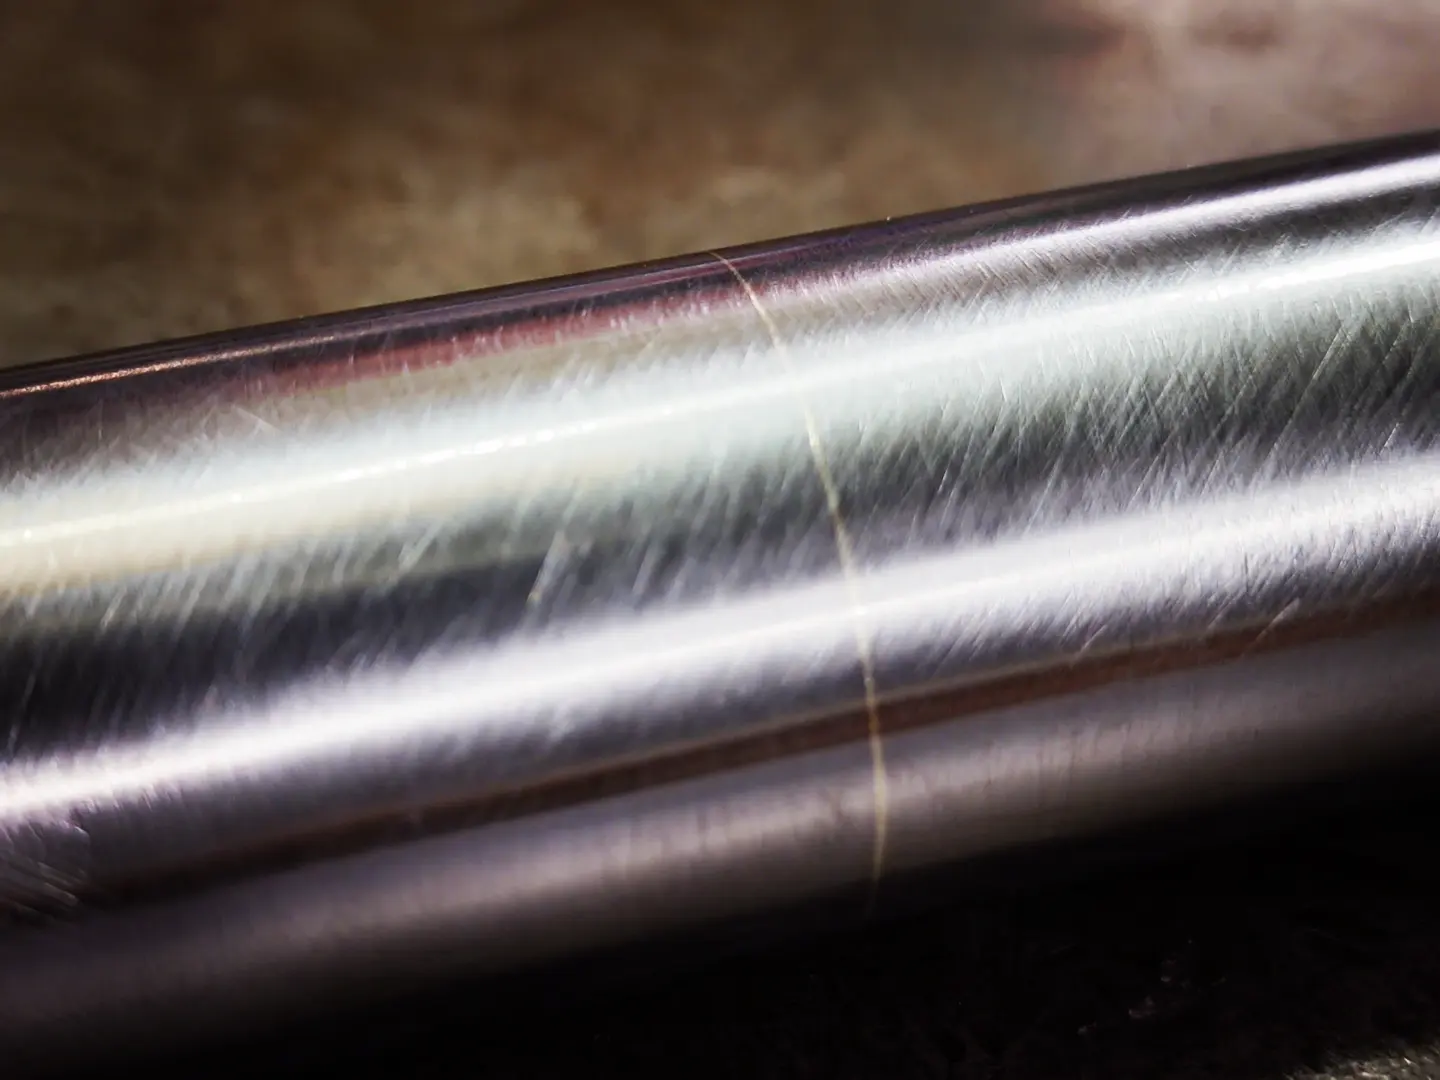
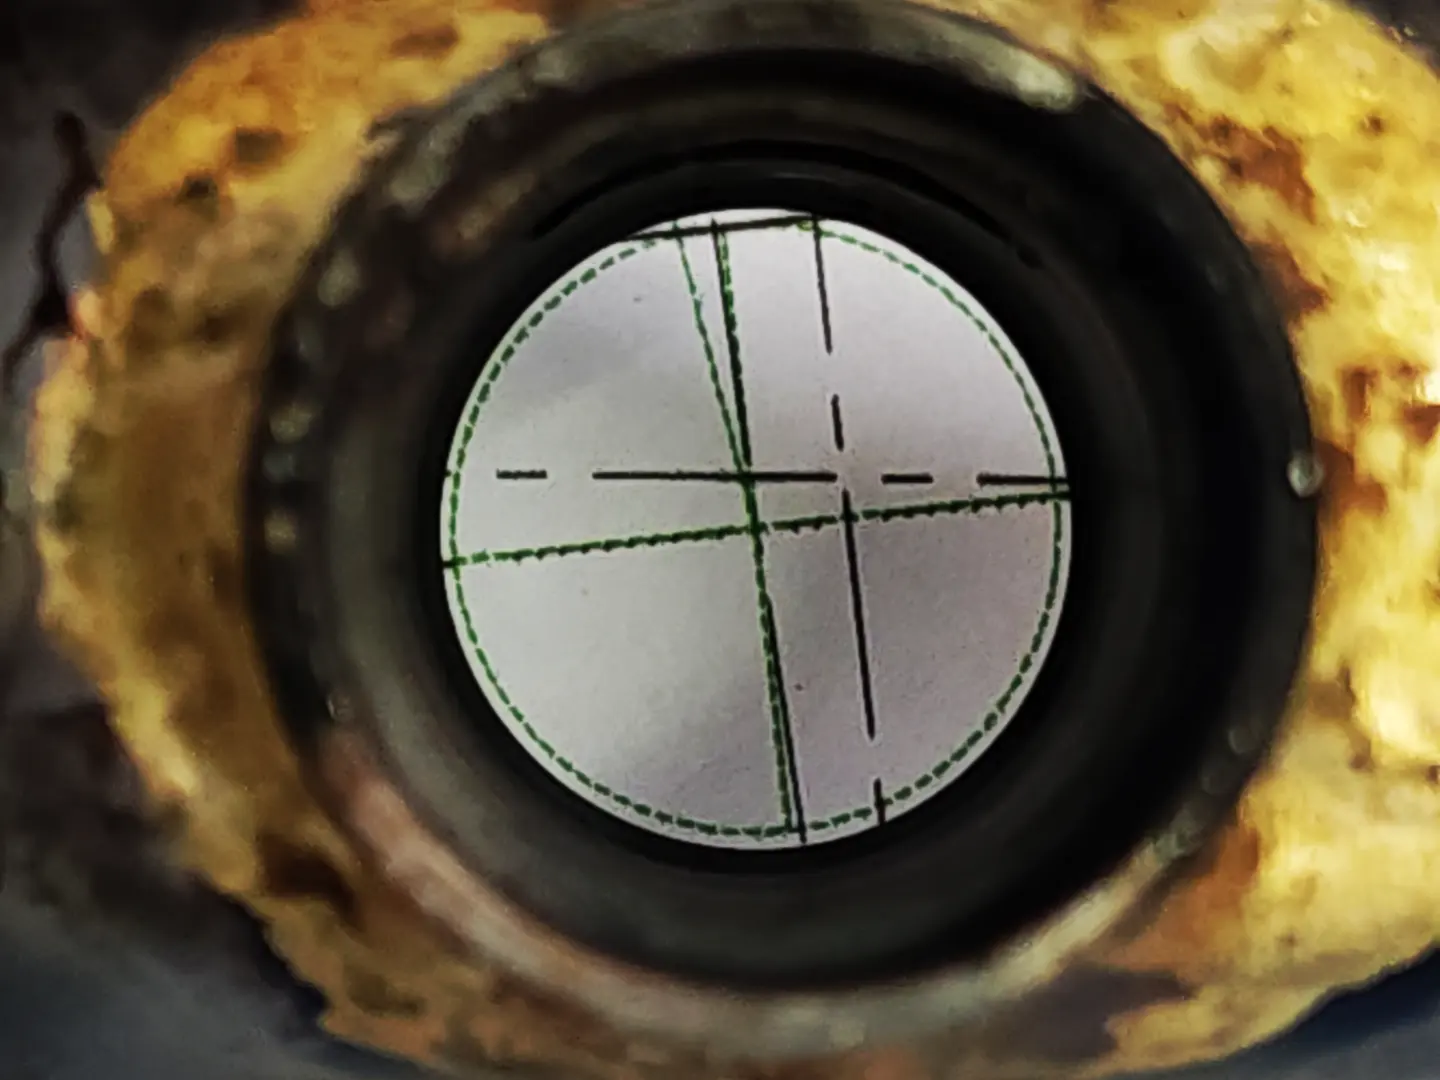
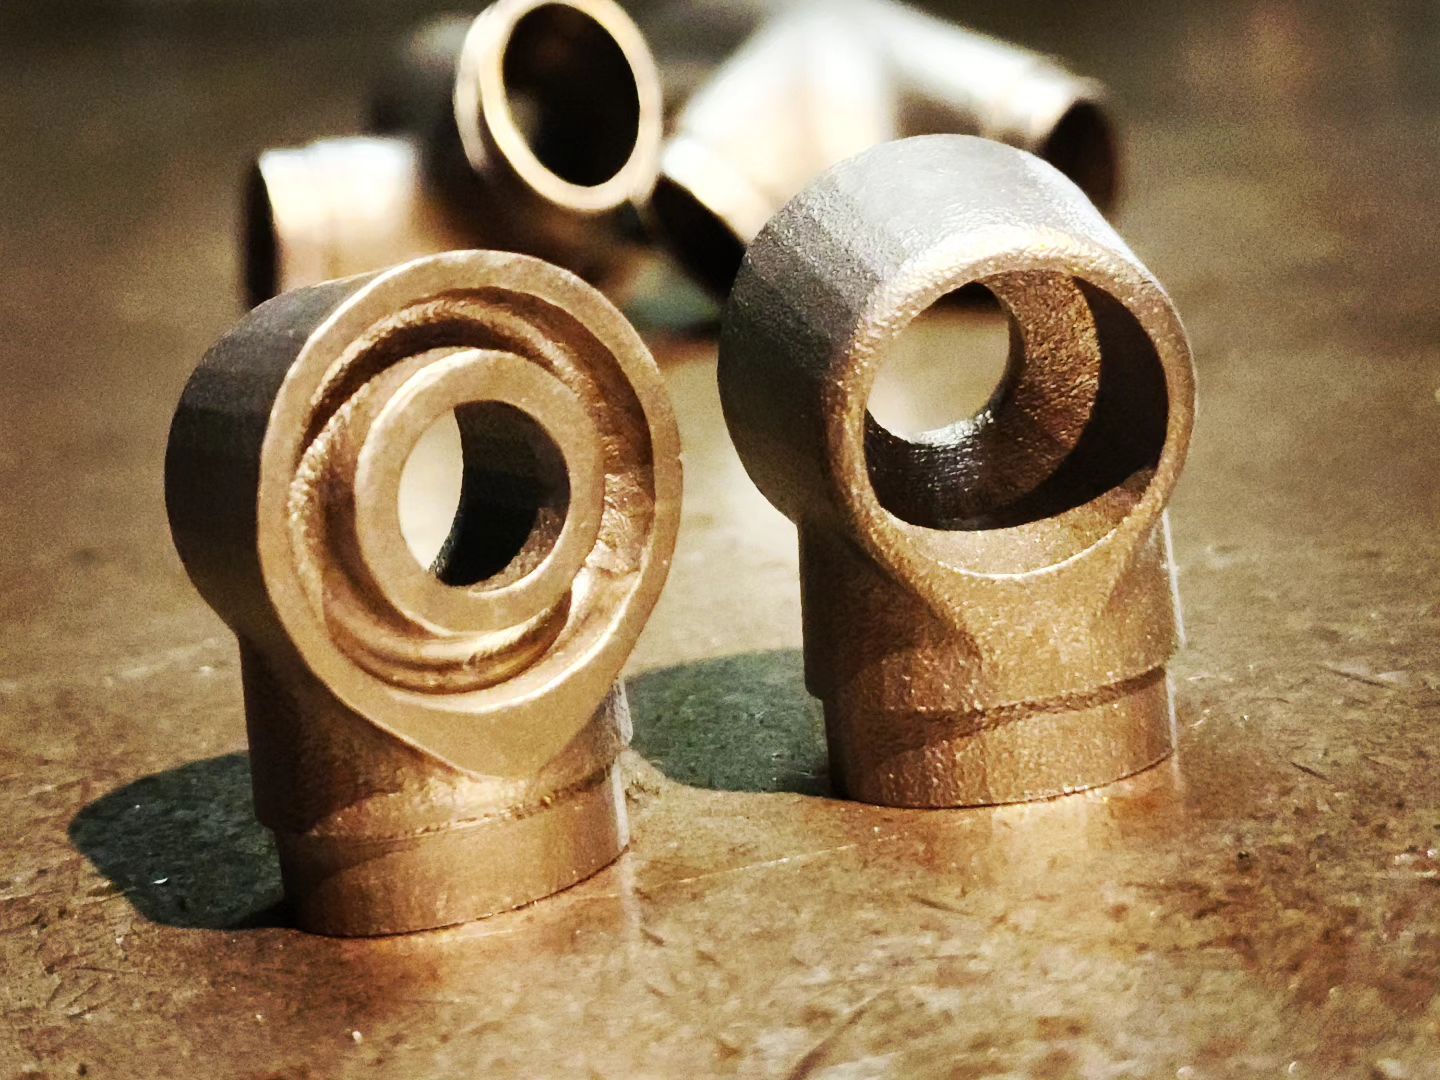
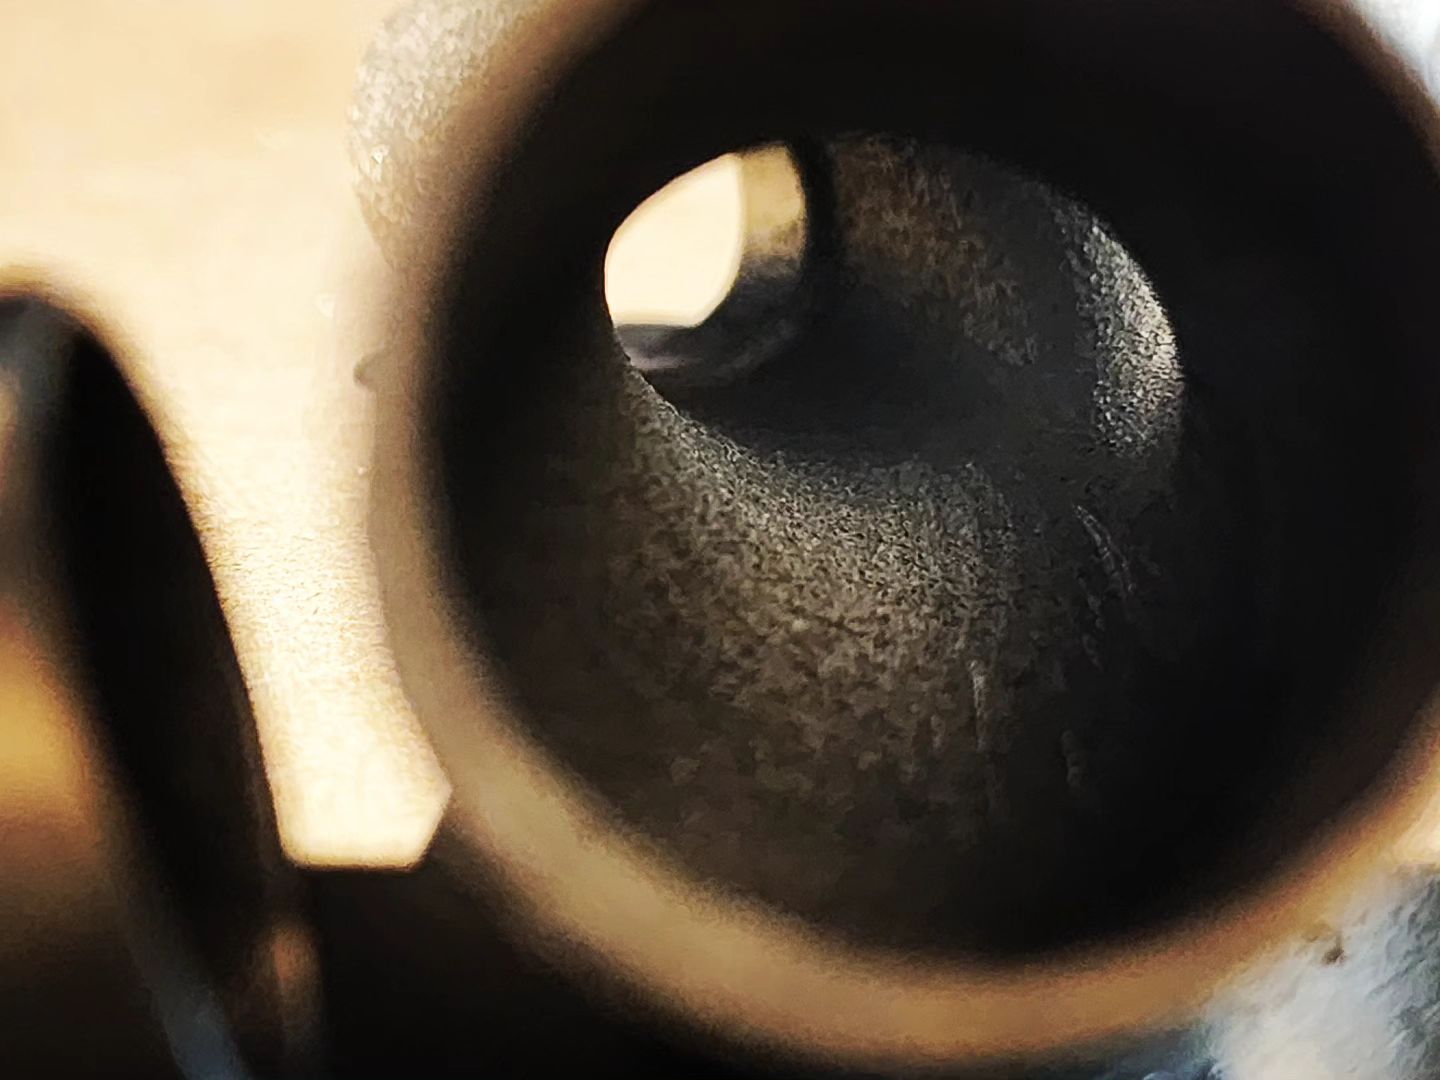
On initial inspection there is a grain to them. That was expected but I am unsure how ‘smooth’ these are meant to be. There is also some faceting where I expect to see smooth curves. I assumed the print company would have imported to their system etc. I’ve since learned teh stl file needs a higher resolution and possibly send a different format instead.
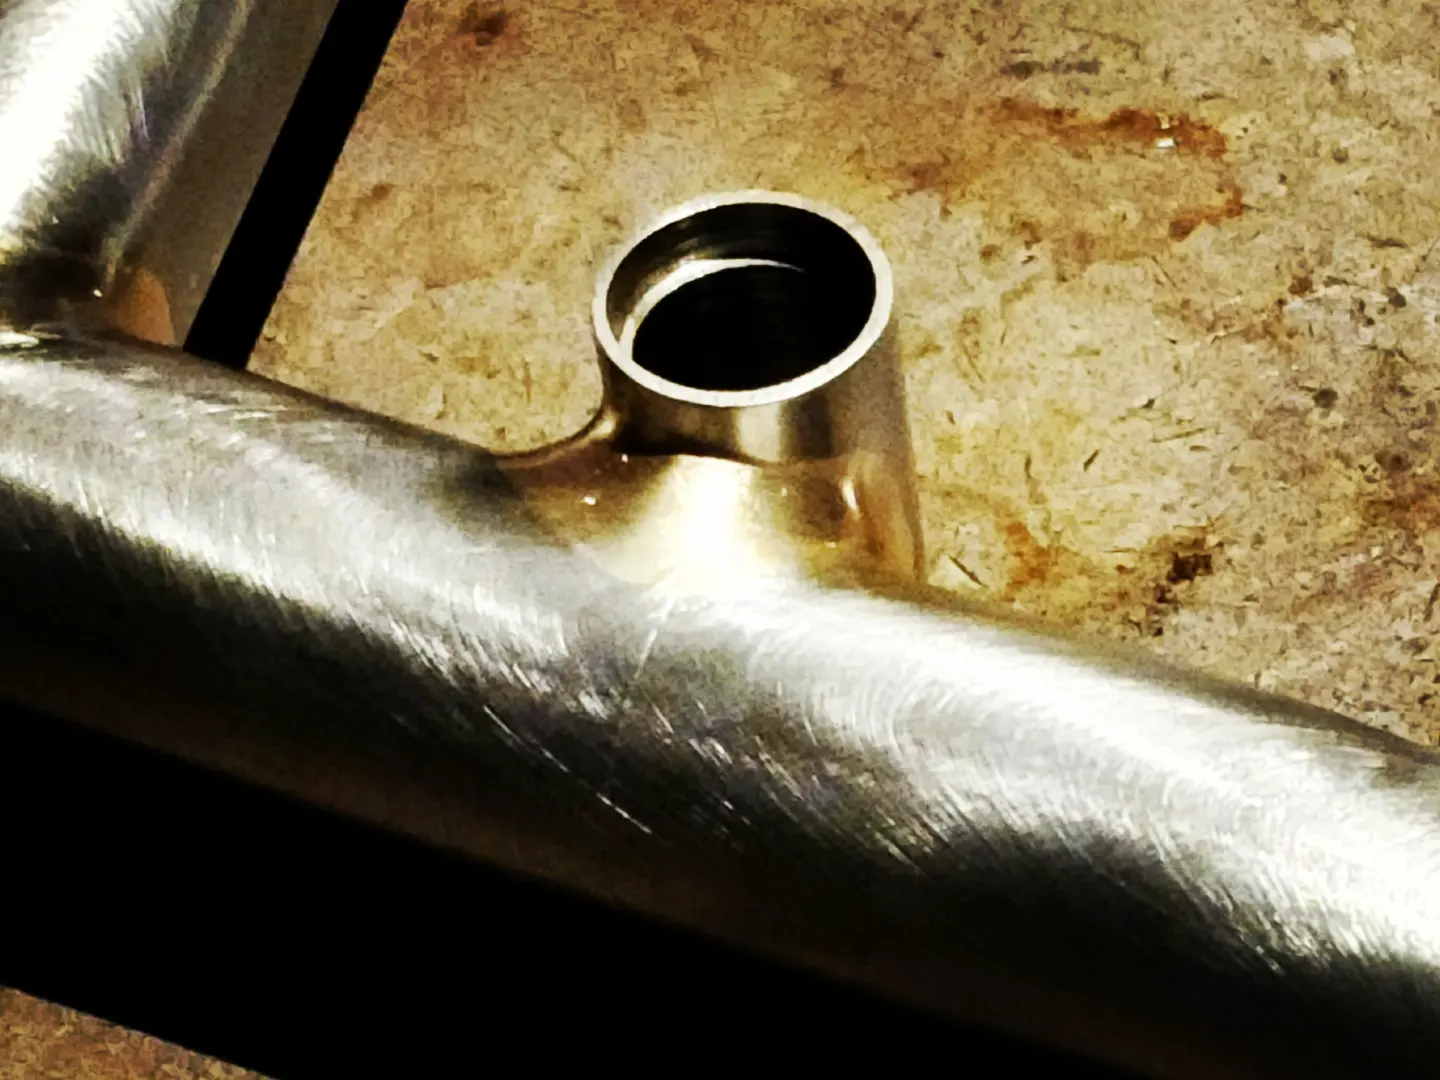
Pretty happy overall. Need to get onto making the new swingarm and get the whole lot to the painter. There are some modelling errors. First being the matching spigots between front and rear sections are different sizes. I know how I ended up there so need to fix that. Also the rear spigot to the chainstay tube is the wrong OD. Not sure how I got that wrong but obviously my checking process needs work.
Also now that I have assembled 75% I can see that I should just print the whole thing in one and that having the flexibility of geometry I was building in with connectors is not needed.
The other interesting learning was a couple builders contacted me and shared their experience with 3D printing and had some excellent advice for me to improve them with. One will be possibly going with a slightly thicker wall and maybe a different material selection.
very nice! parts look great for a first print.
One tip… I think your STL export settings are a bit off:
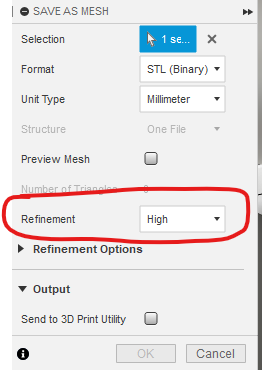
With Fusion, it defaults to medium, which gives that mesh surface pattern (don’t ask me how I know ![]() )
)