Solid start after a 2 year hiatus from steel frame building.
Got the jig set up and did all the mitering and cutting of the down tube on Sunday afternoon/evening.
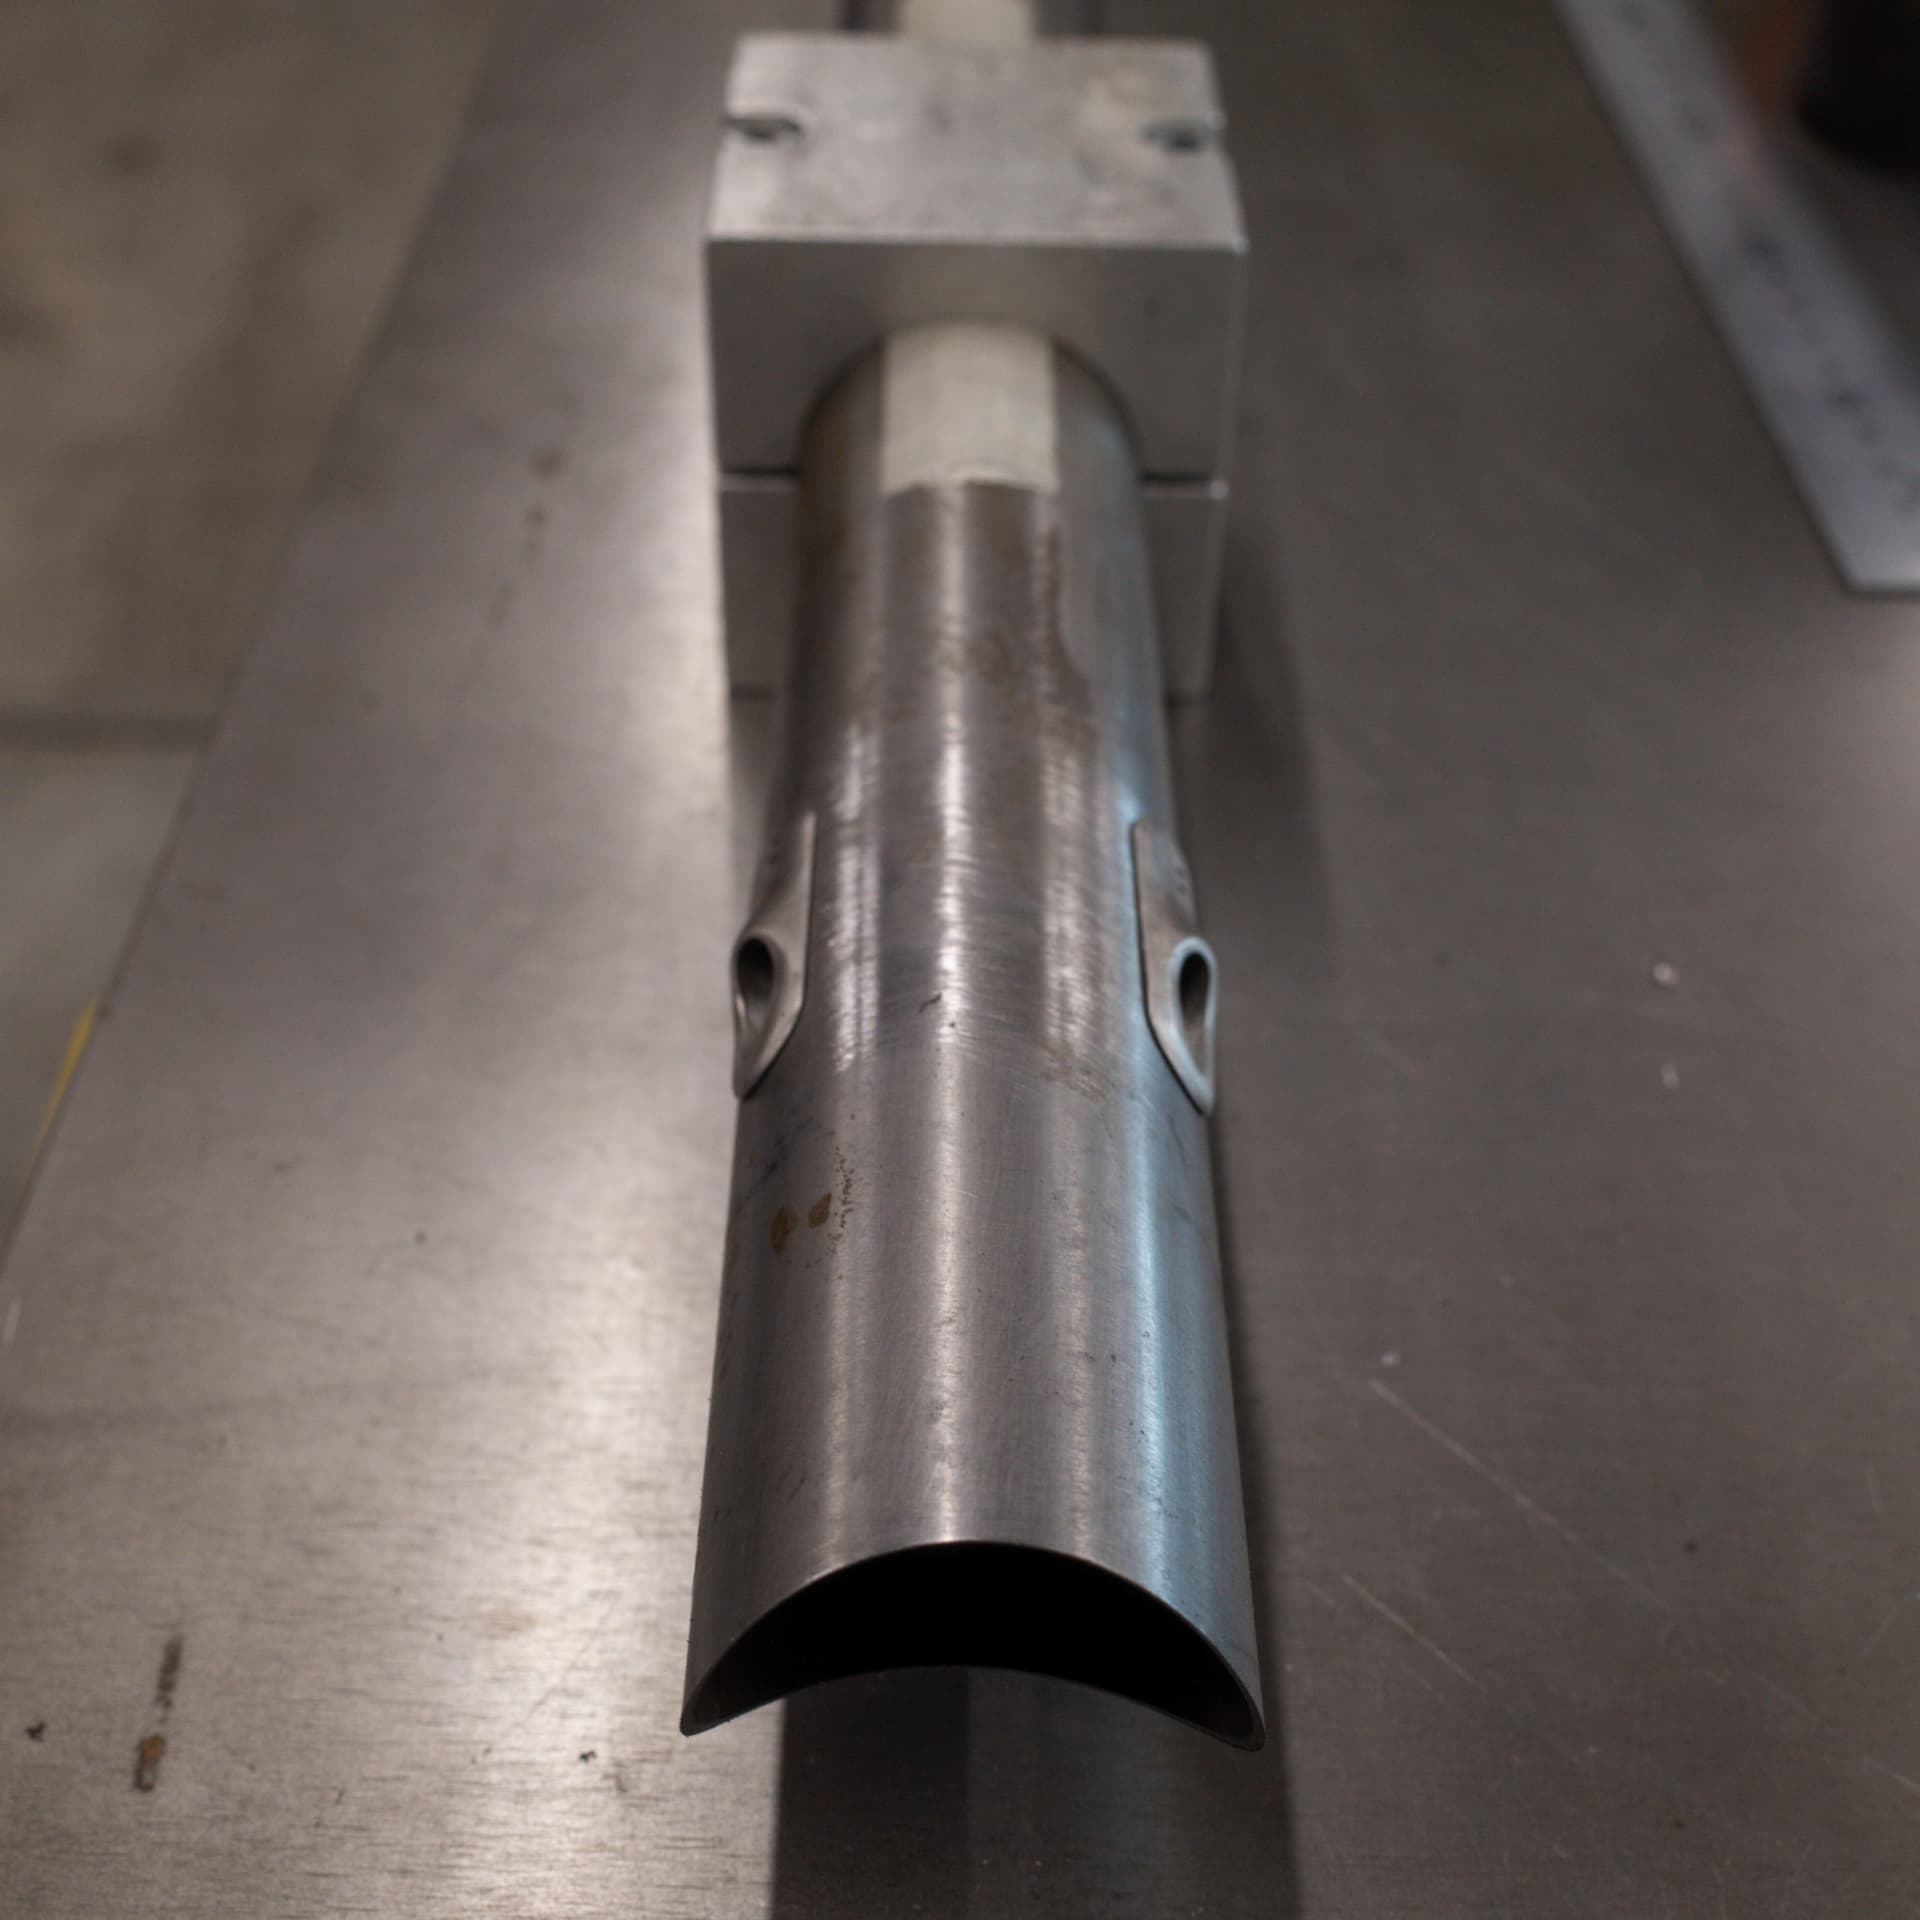
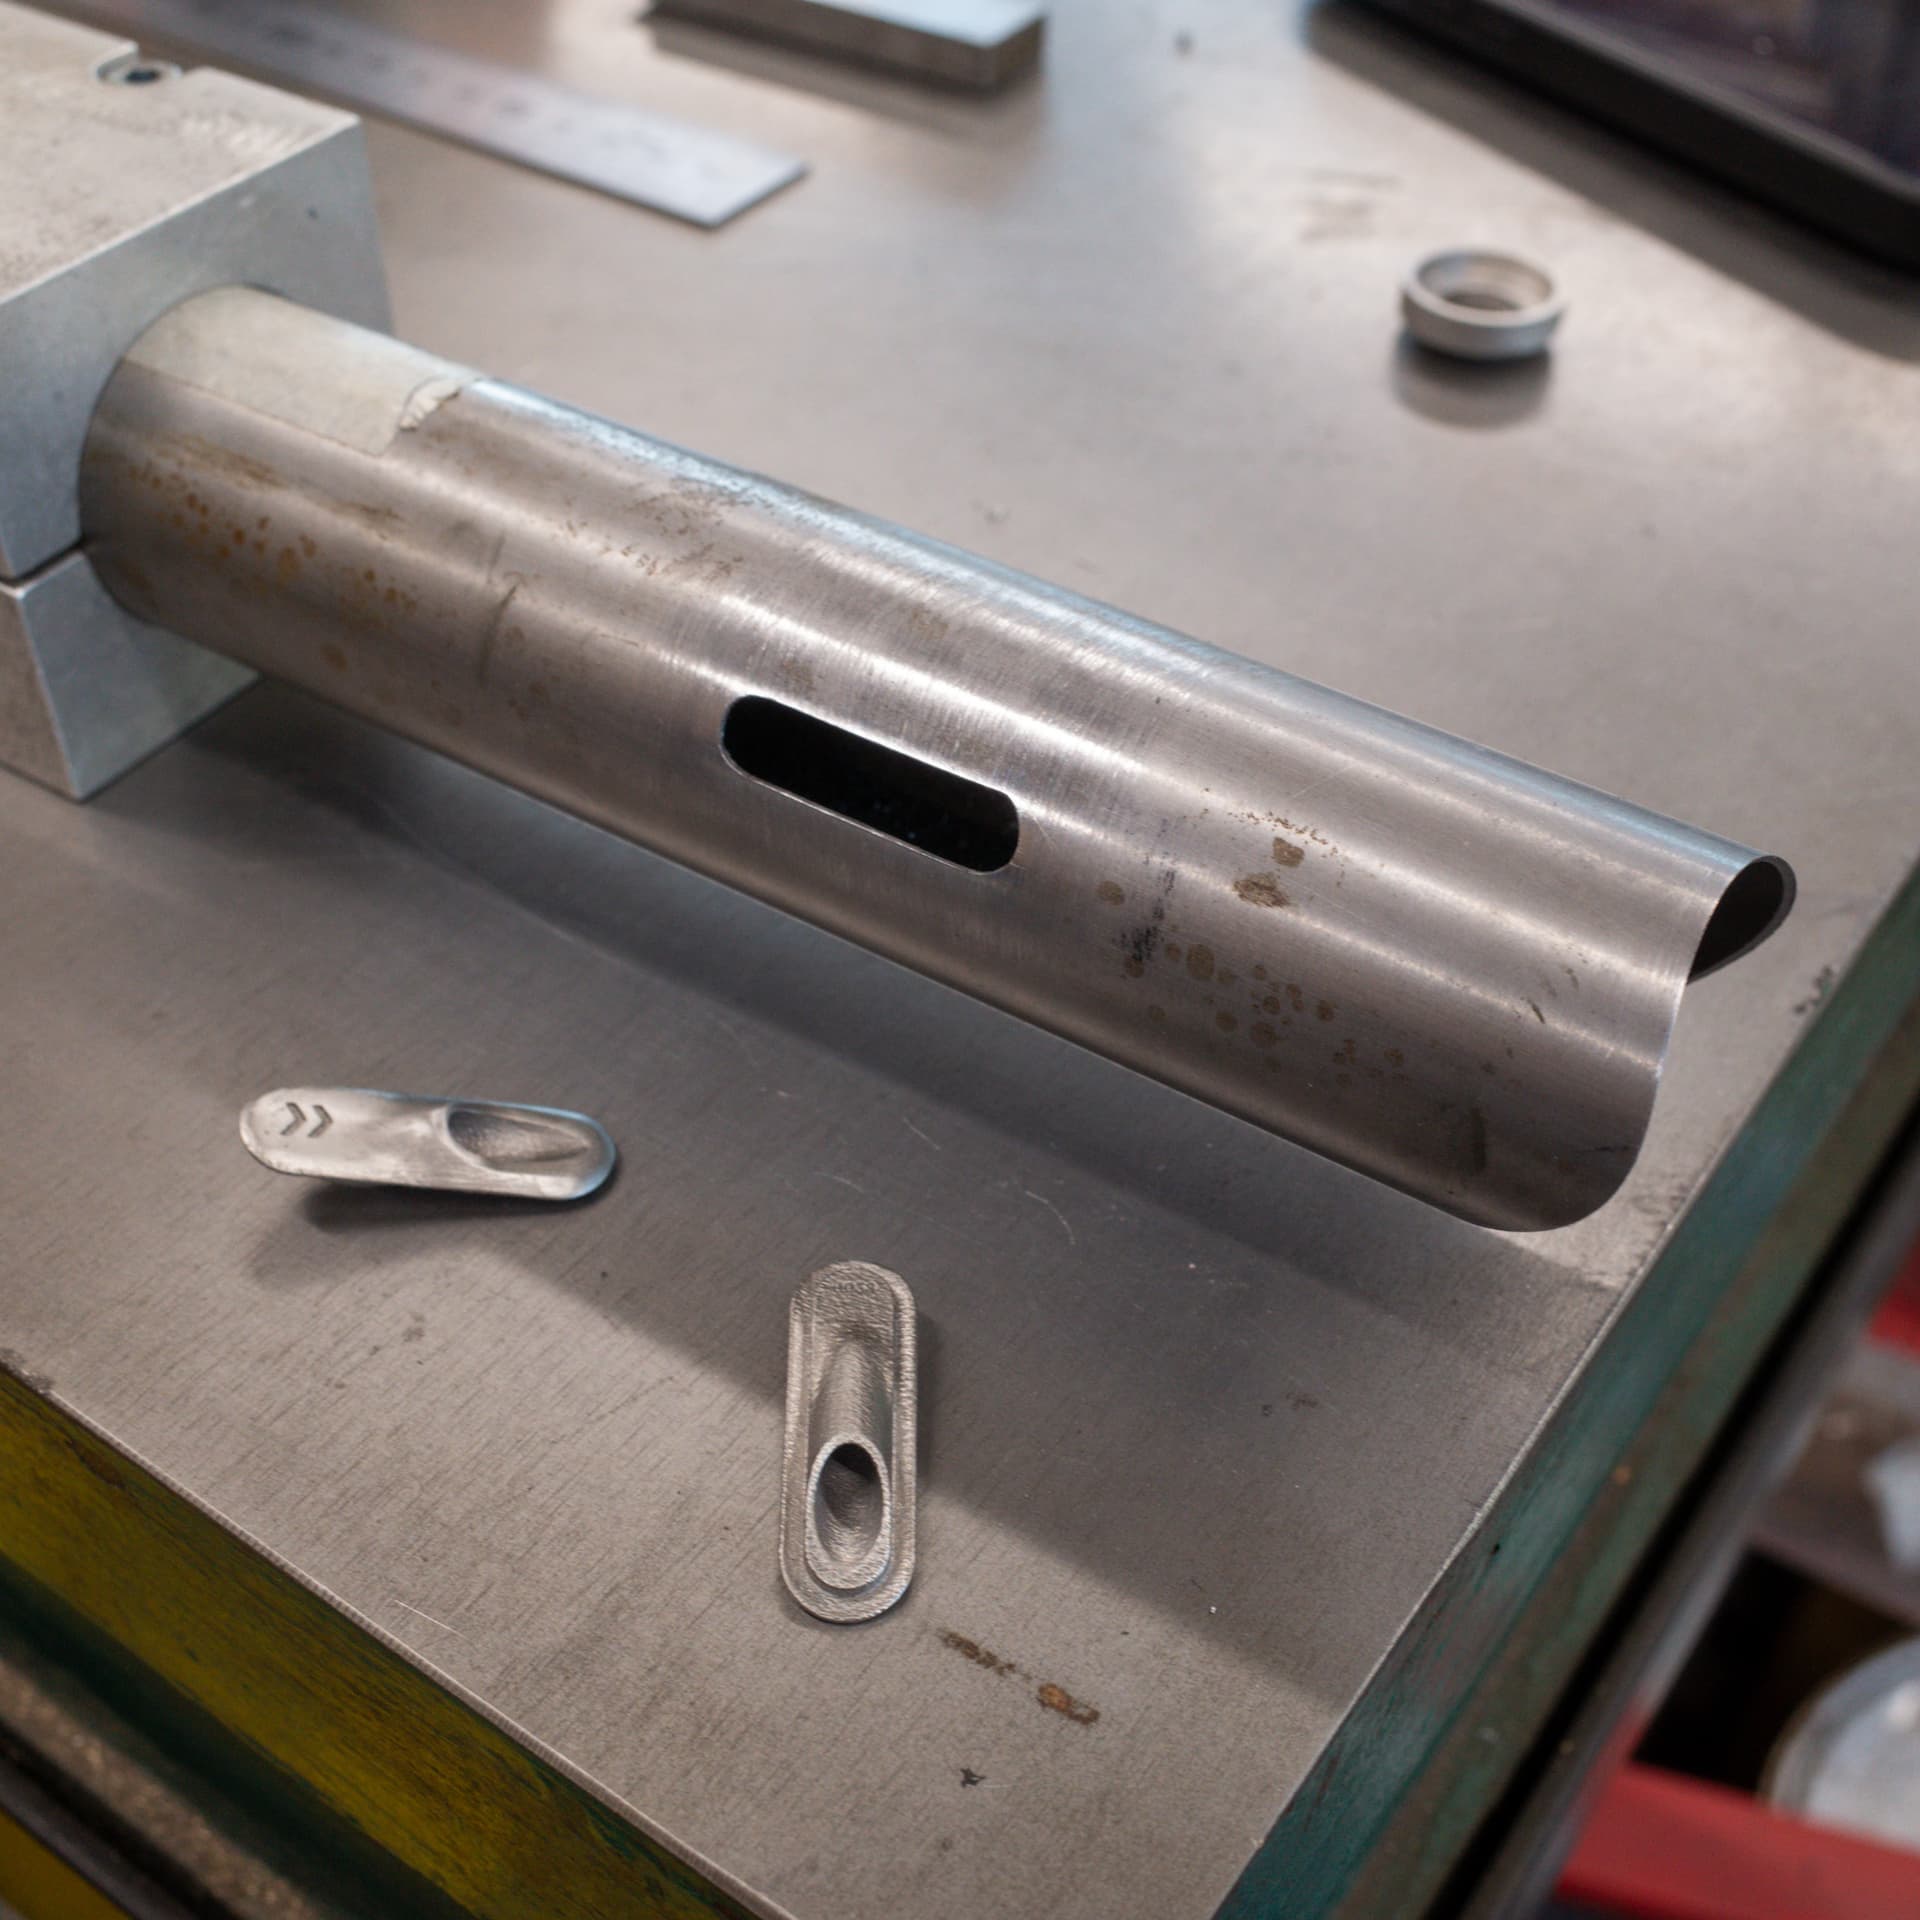
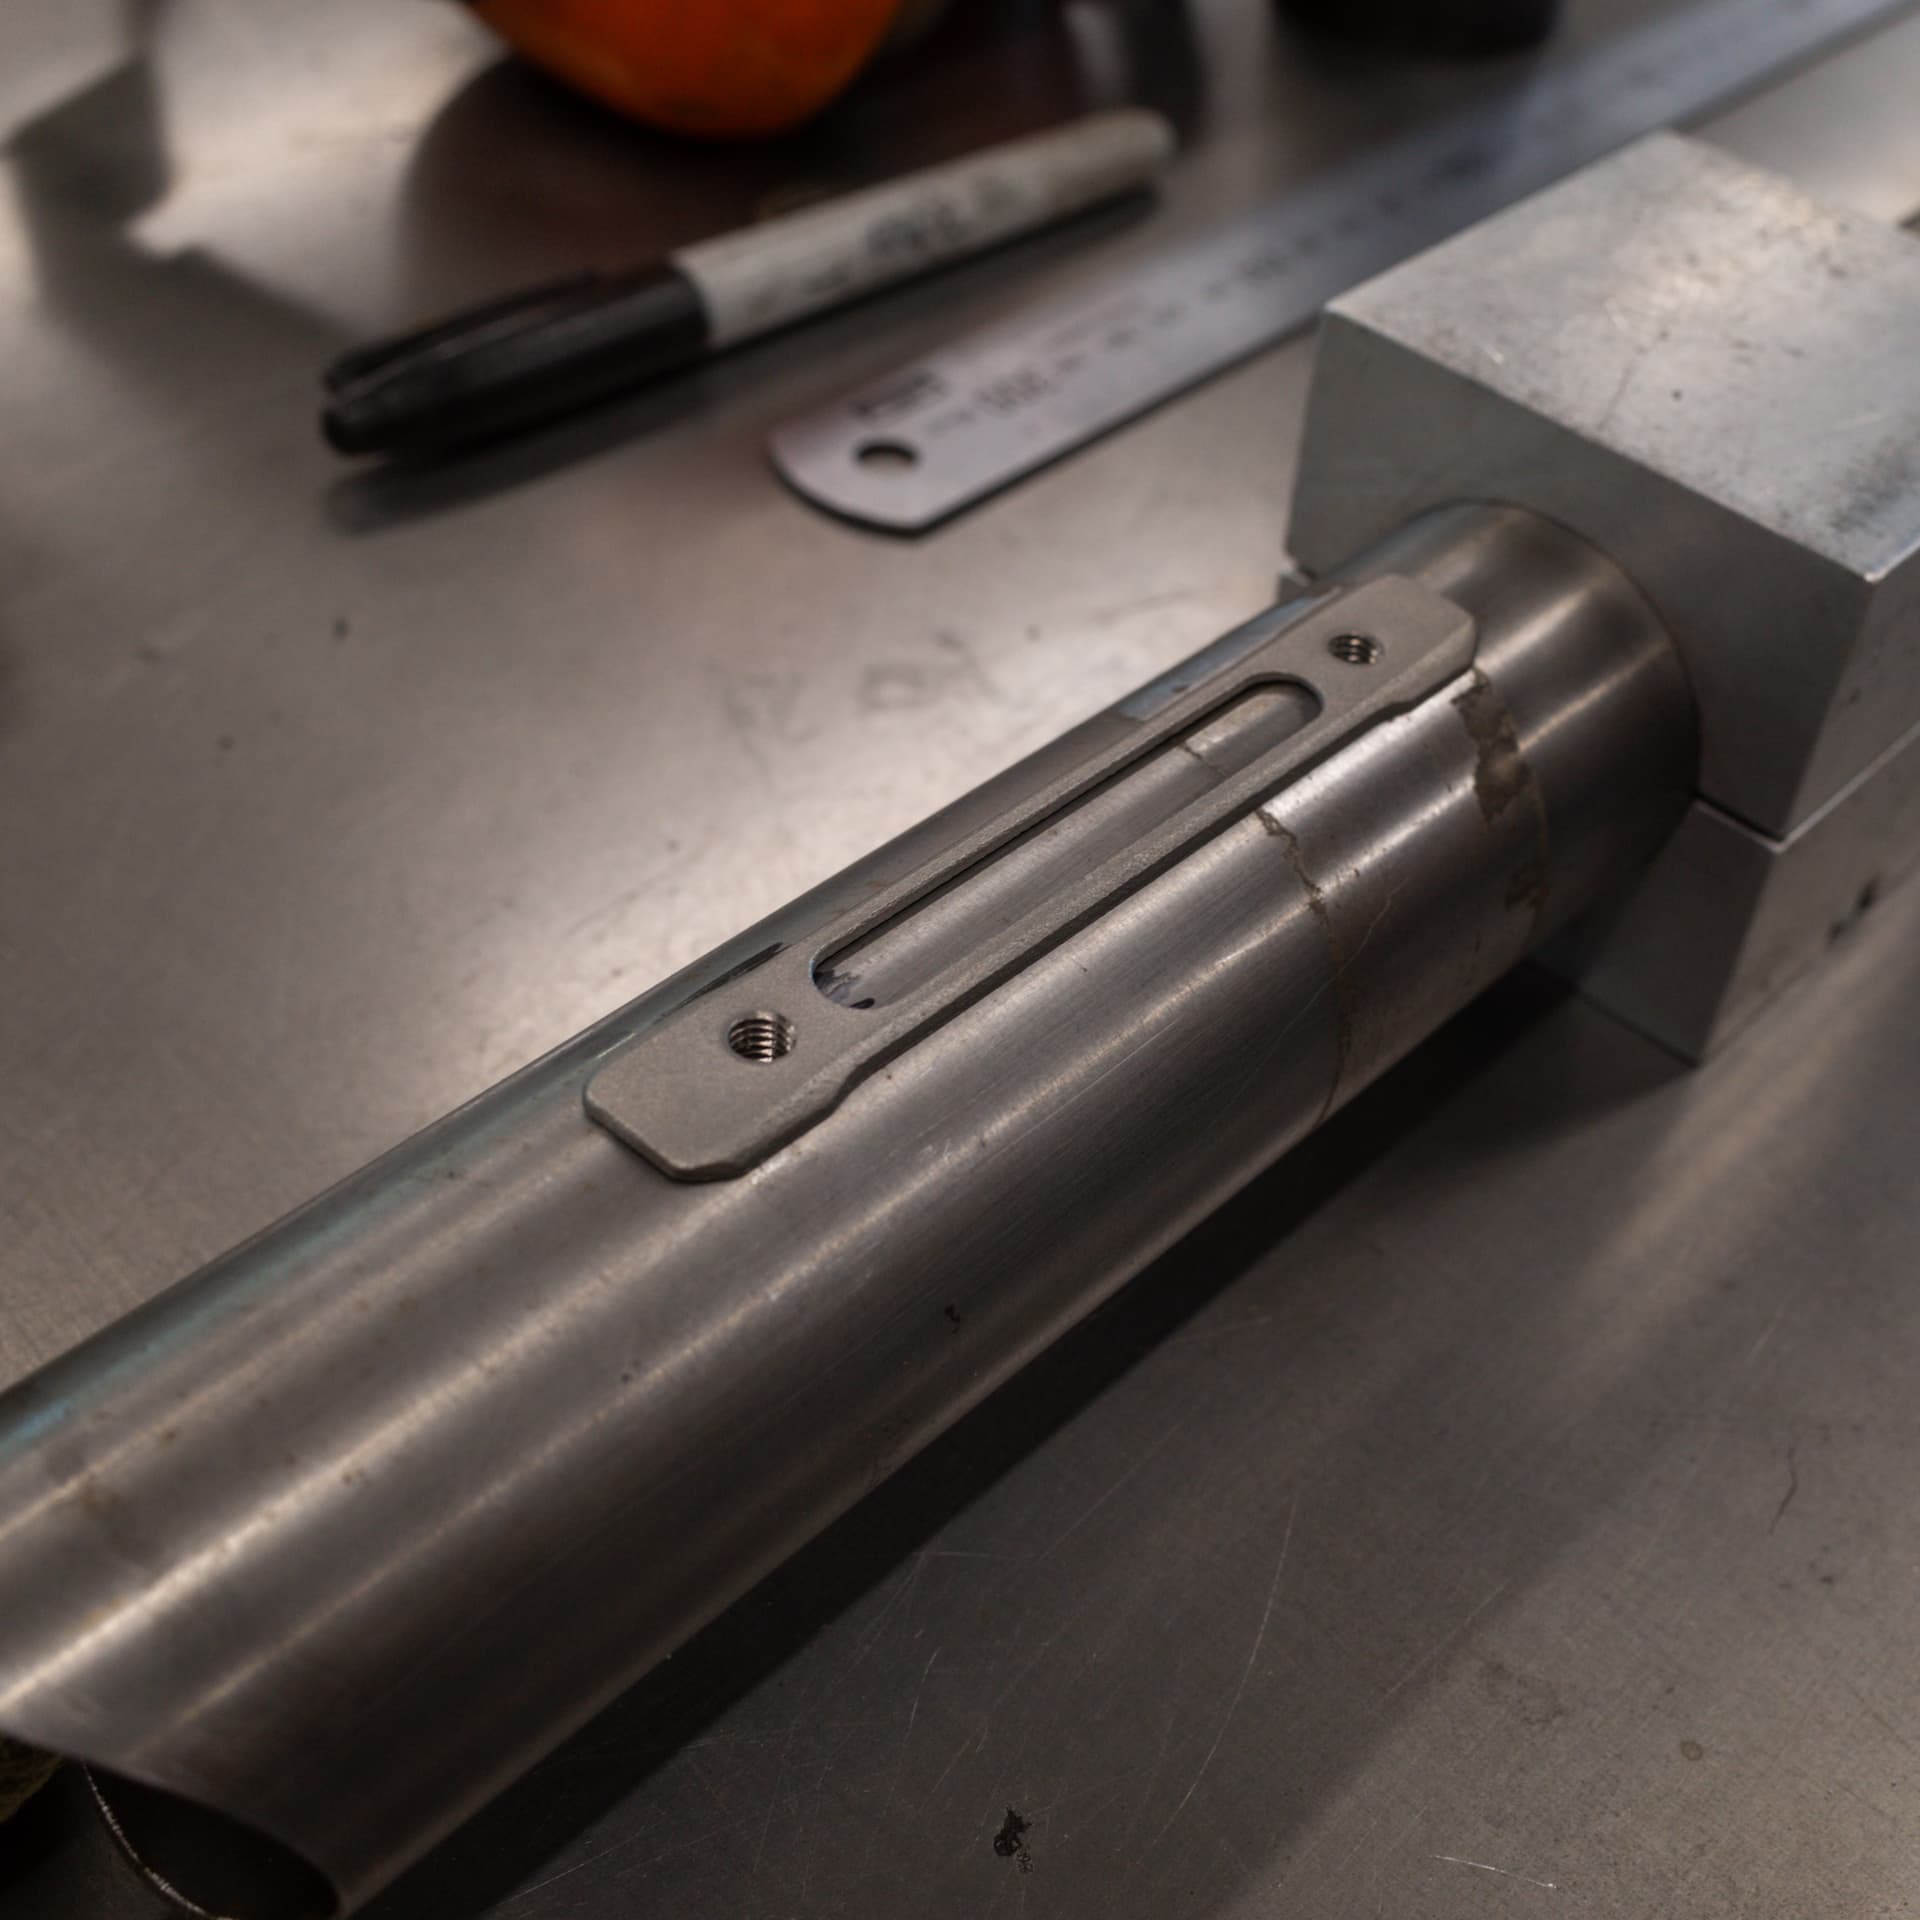
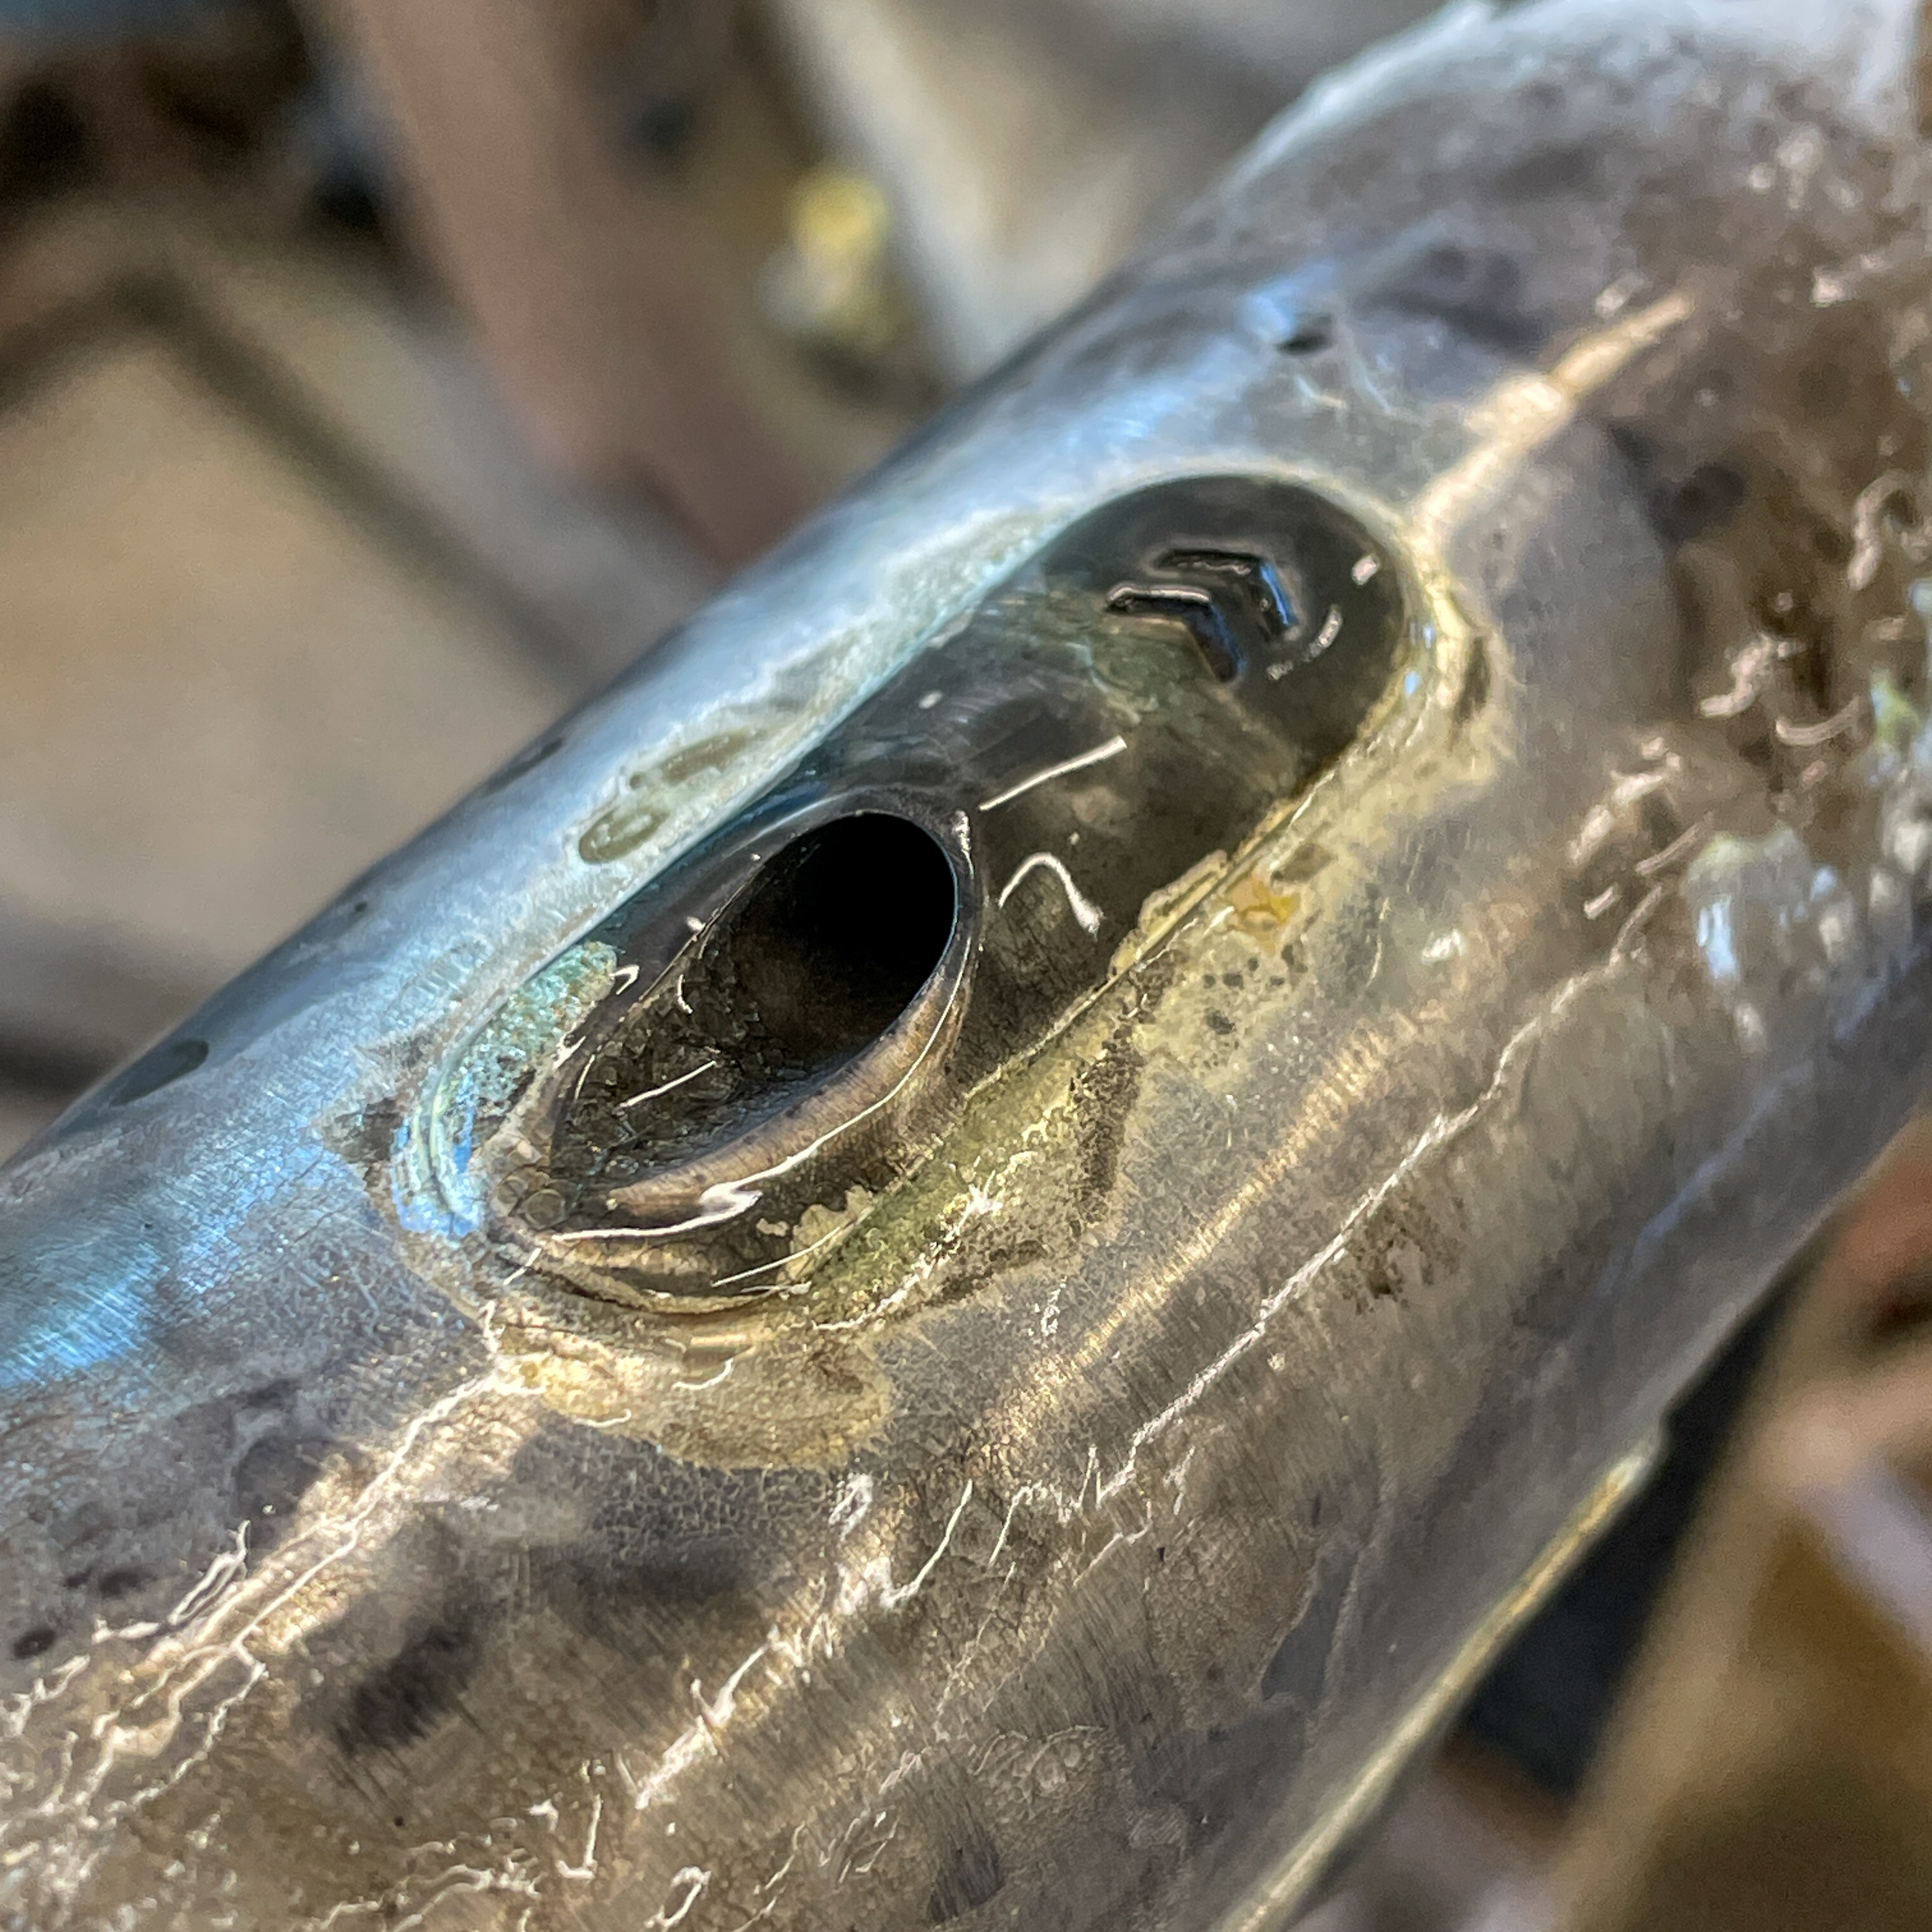
Slots for the printed cable ports milled and fine tuned, and the holes for my bottle boss/reinforcement brackets all drilled.
Monday evening I tackled the straight cuts for the chainstays (plus cable port slot) and it all came together very nicely once I worked out a good method to get straight cuts and trim the lengths of the 4 CS pieces to match my SolidWorks CAD output.
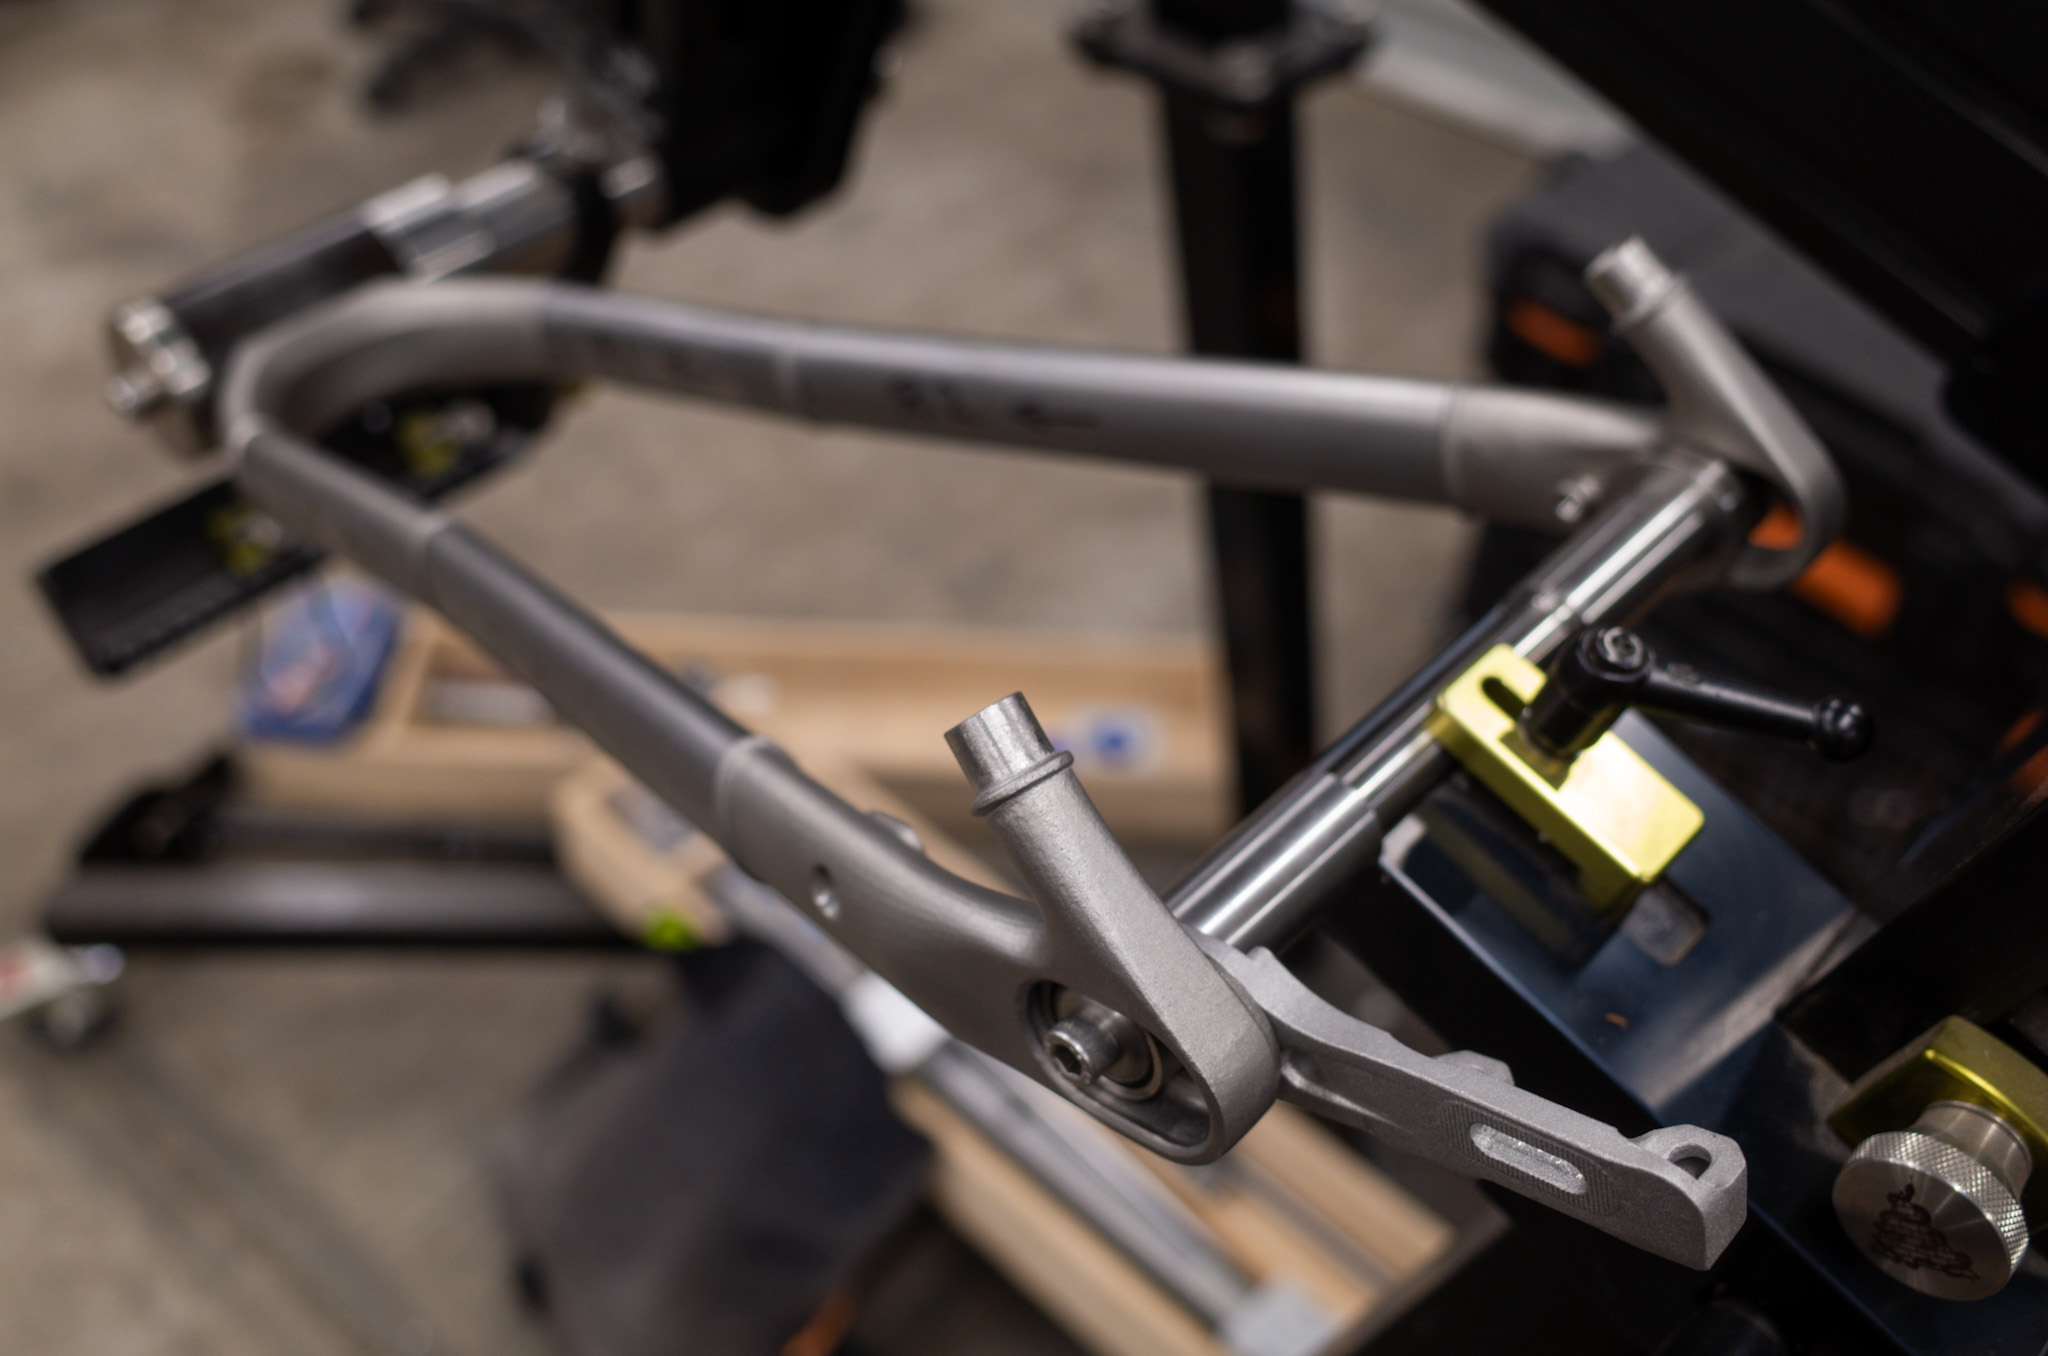
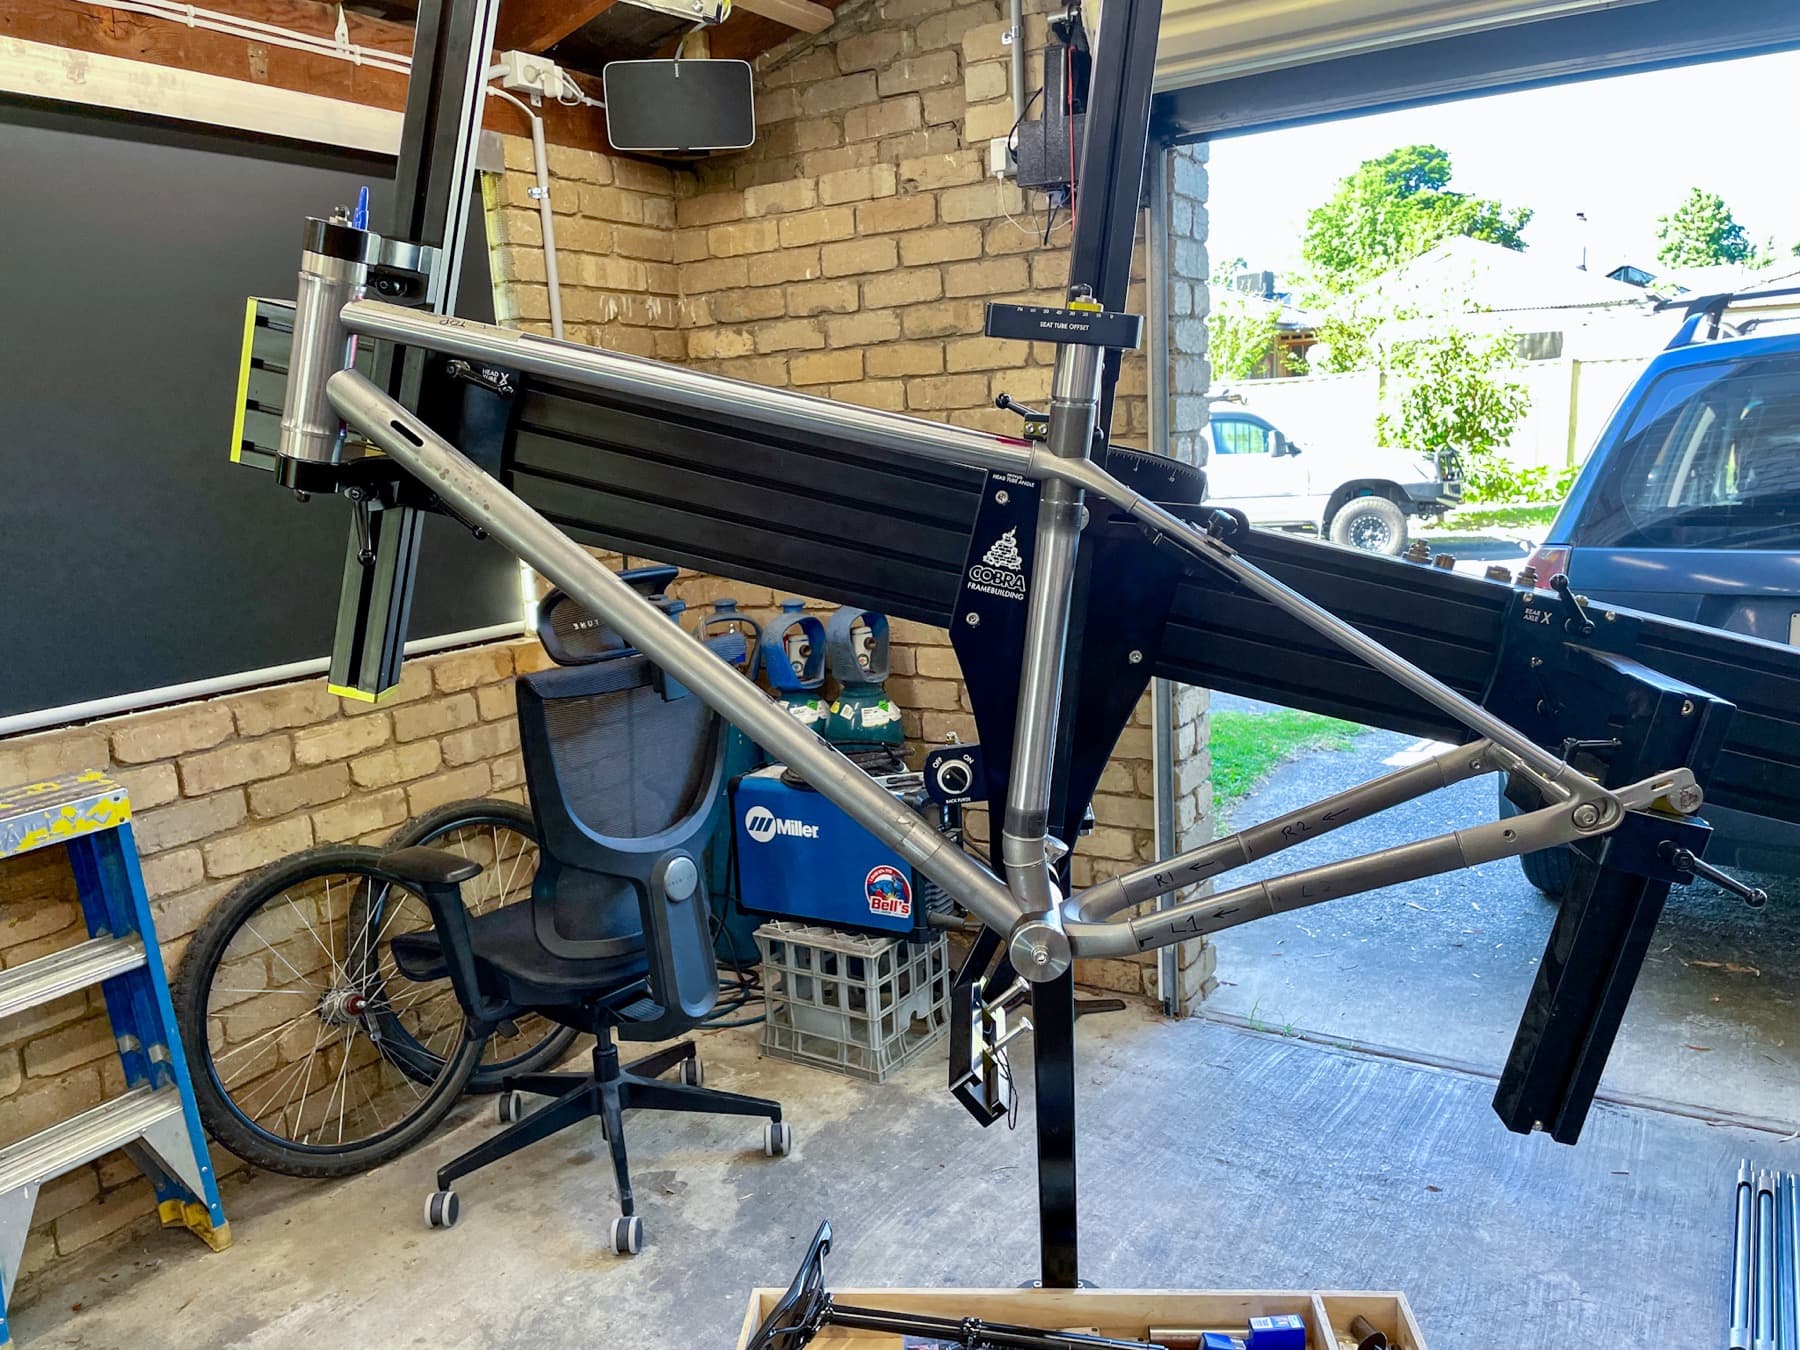
Super impressed with the Cobra frame fixture - so easy to set up with input from BikeCAD and so far all the bits have fit perfectly right off the mill.
I’m very excited to keep going with this and finish it off in time for our end of year break so I can put in some time riding this thing before getting it painted.
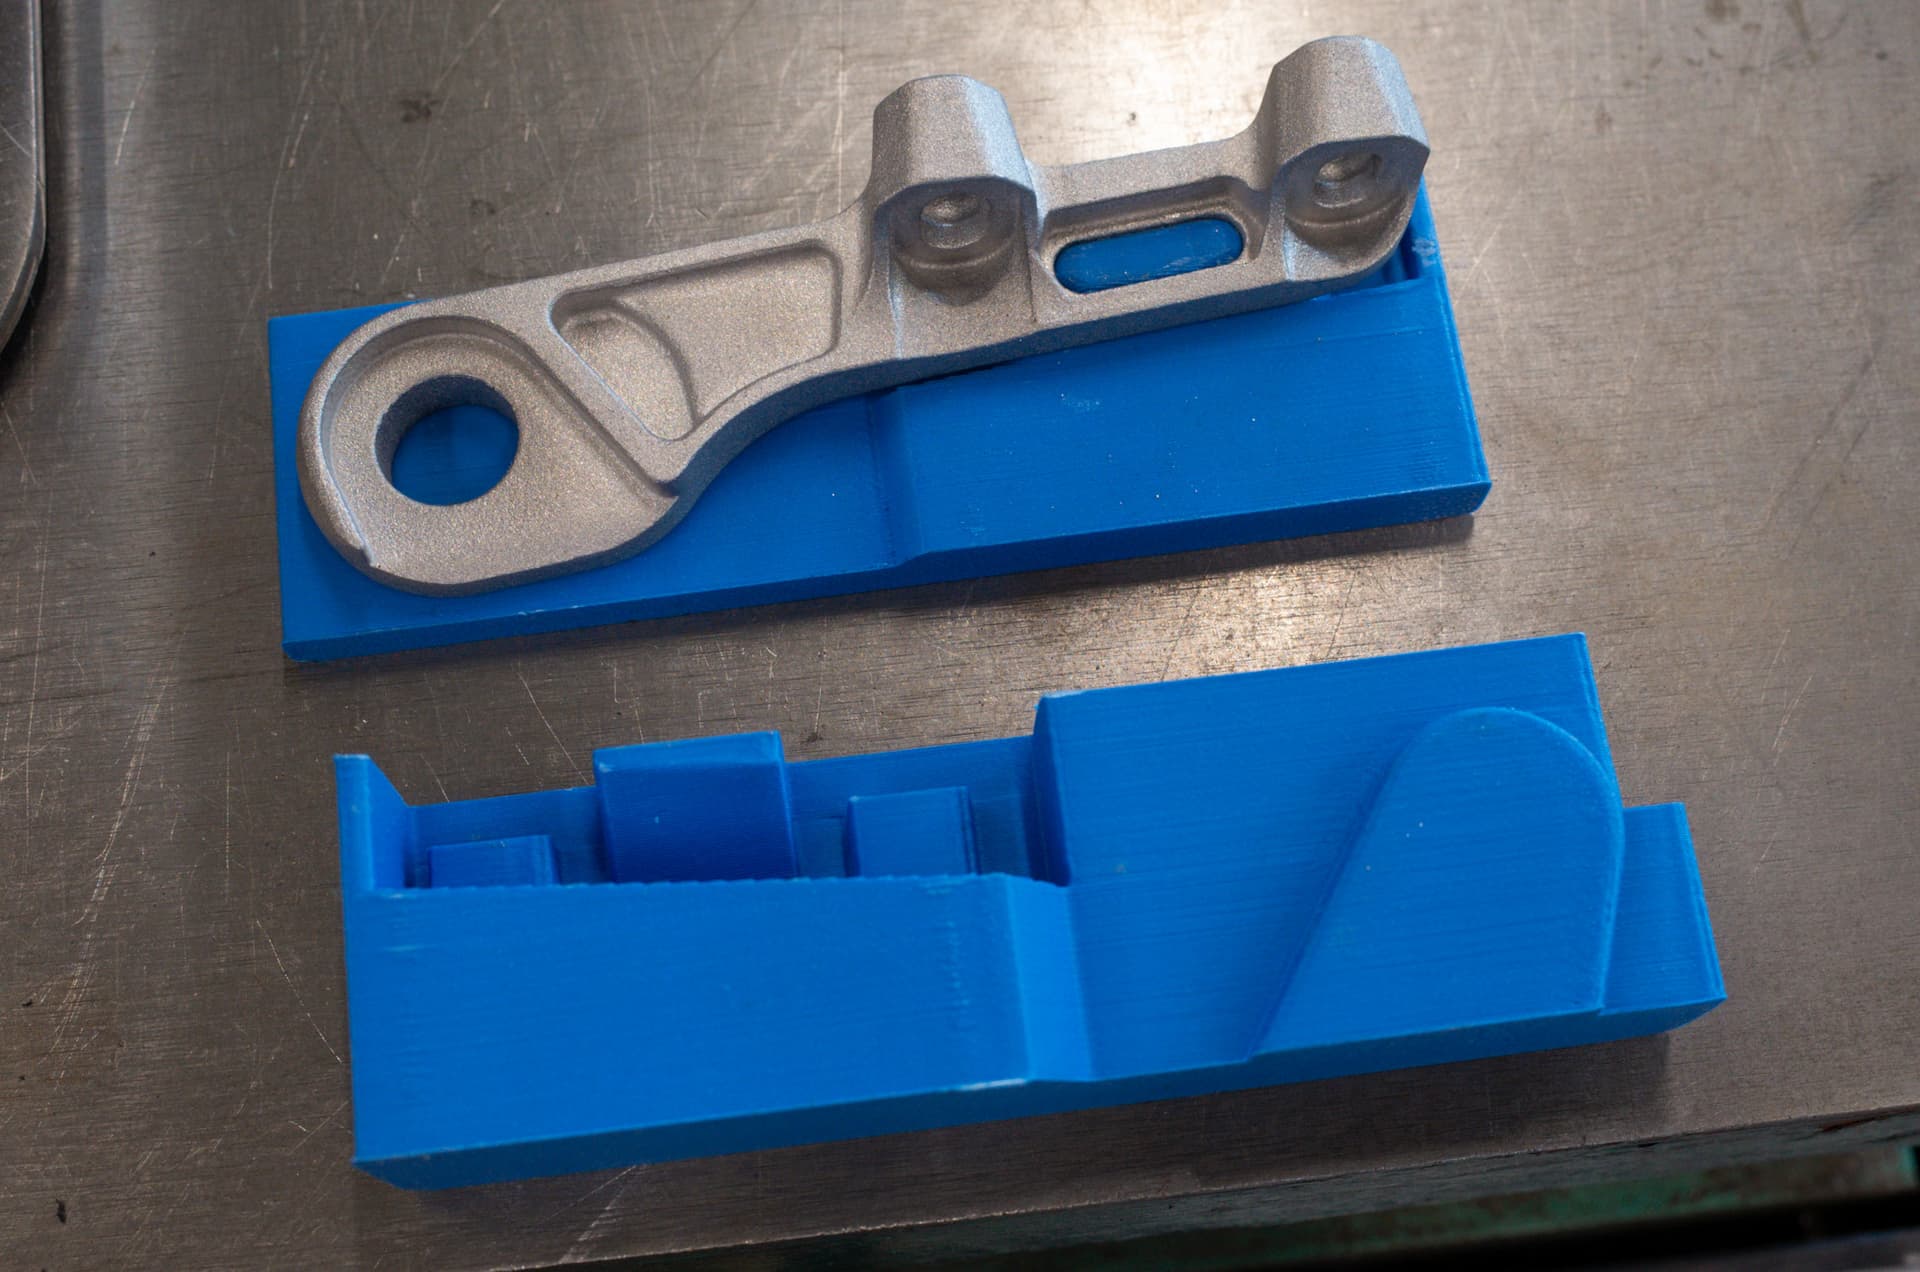
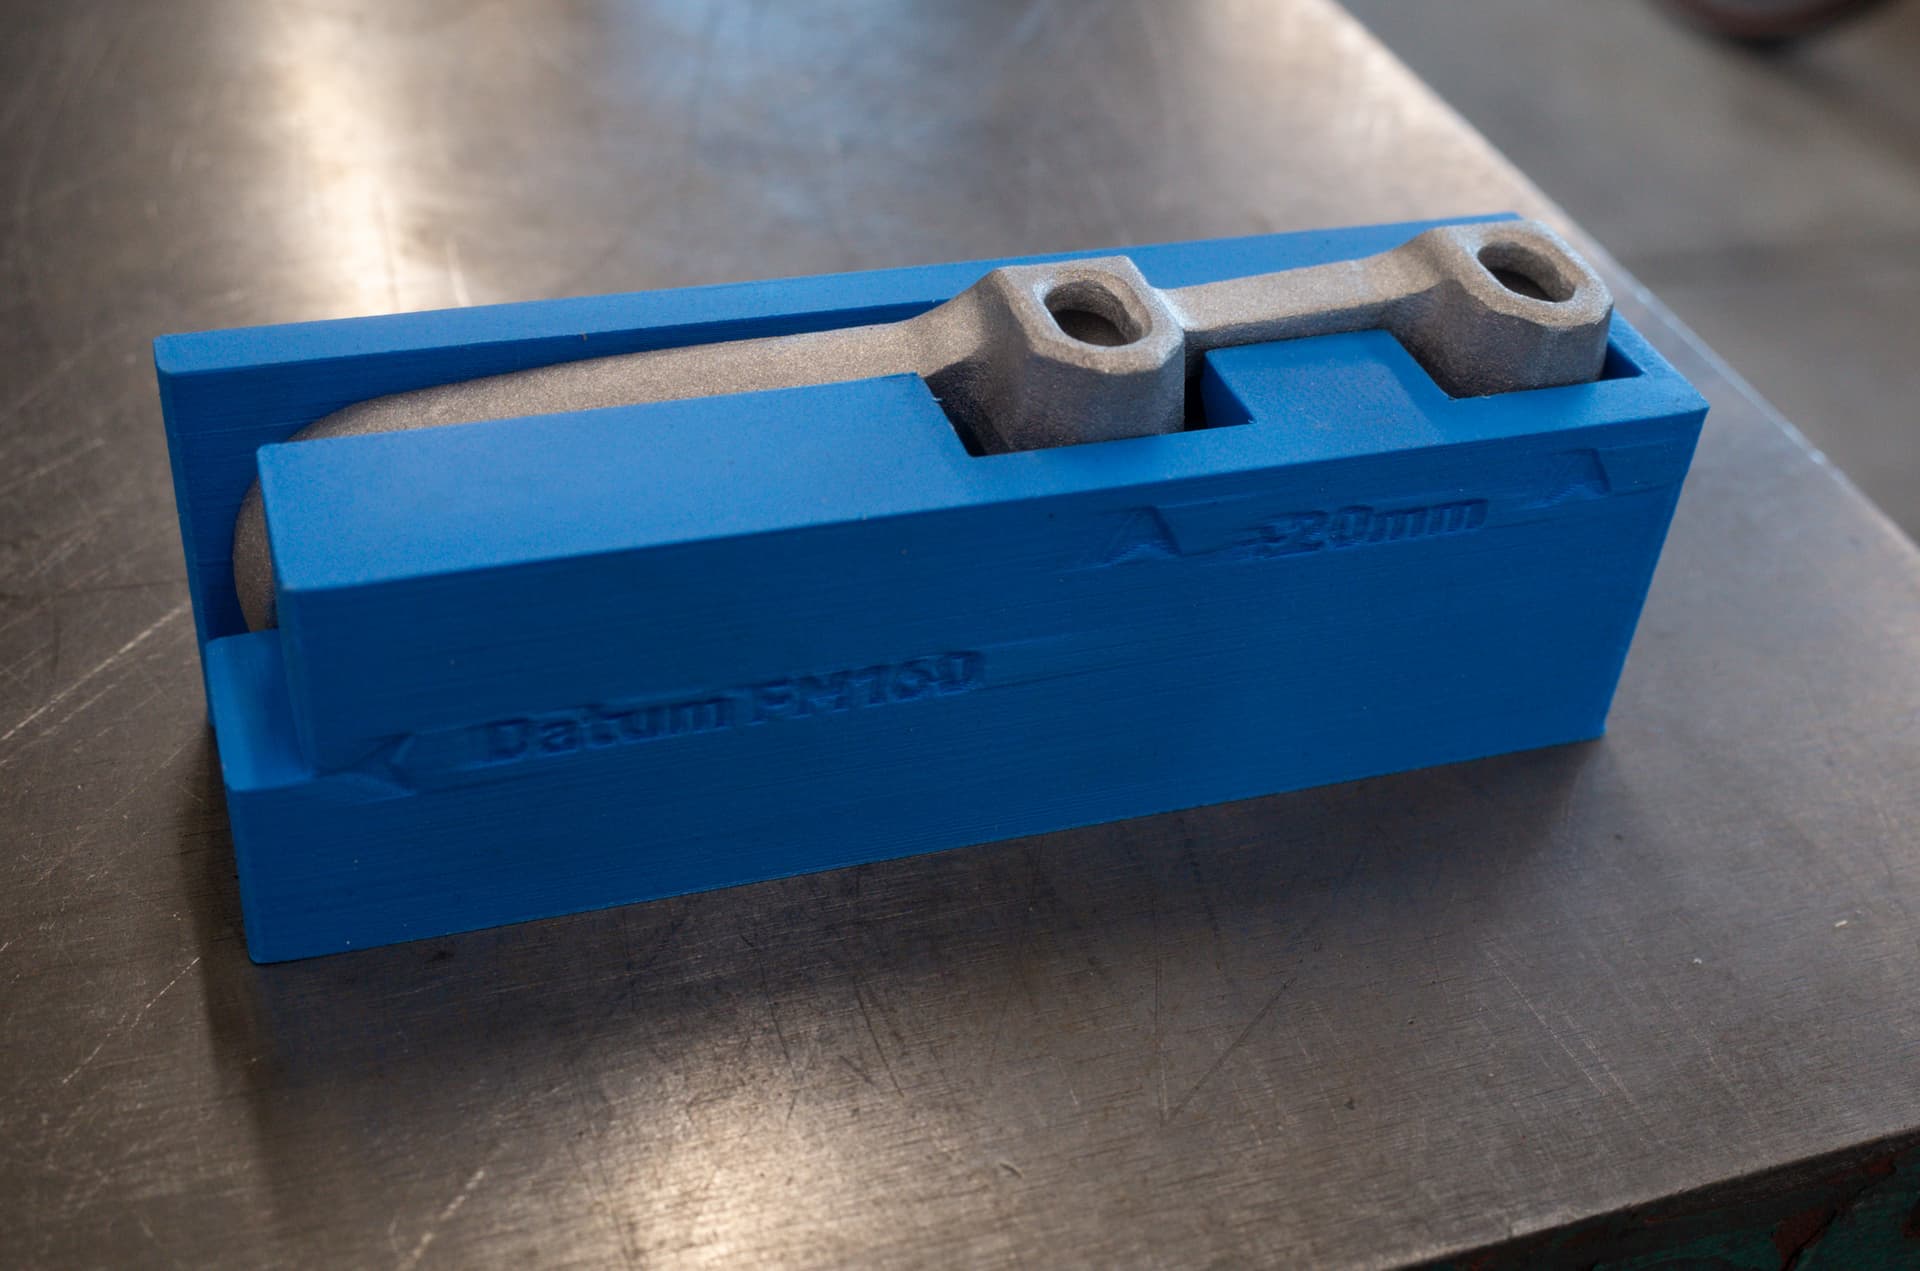
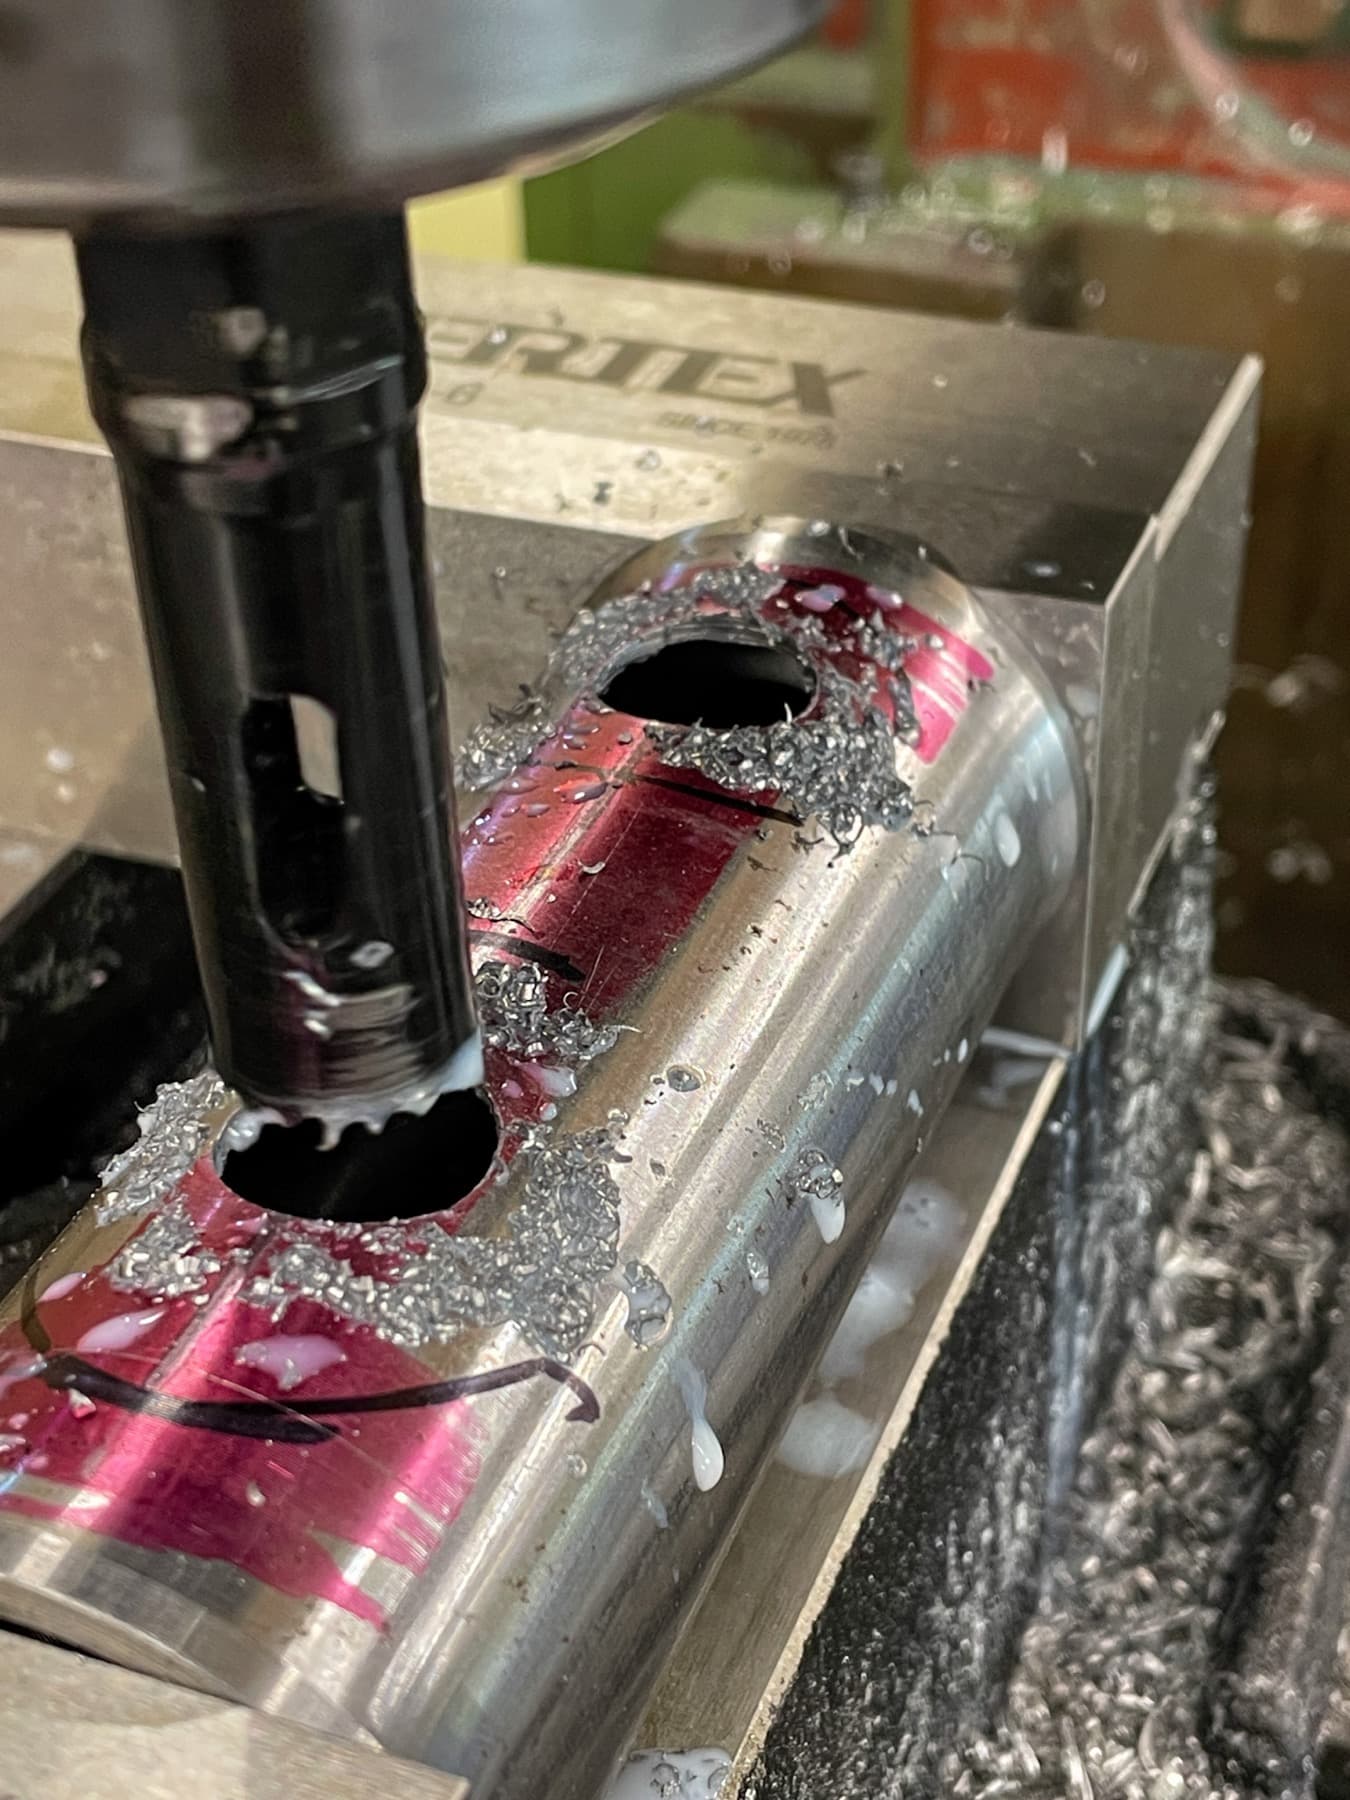
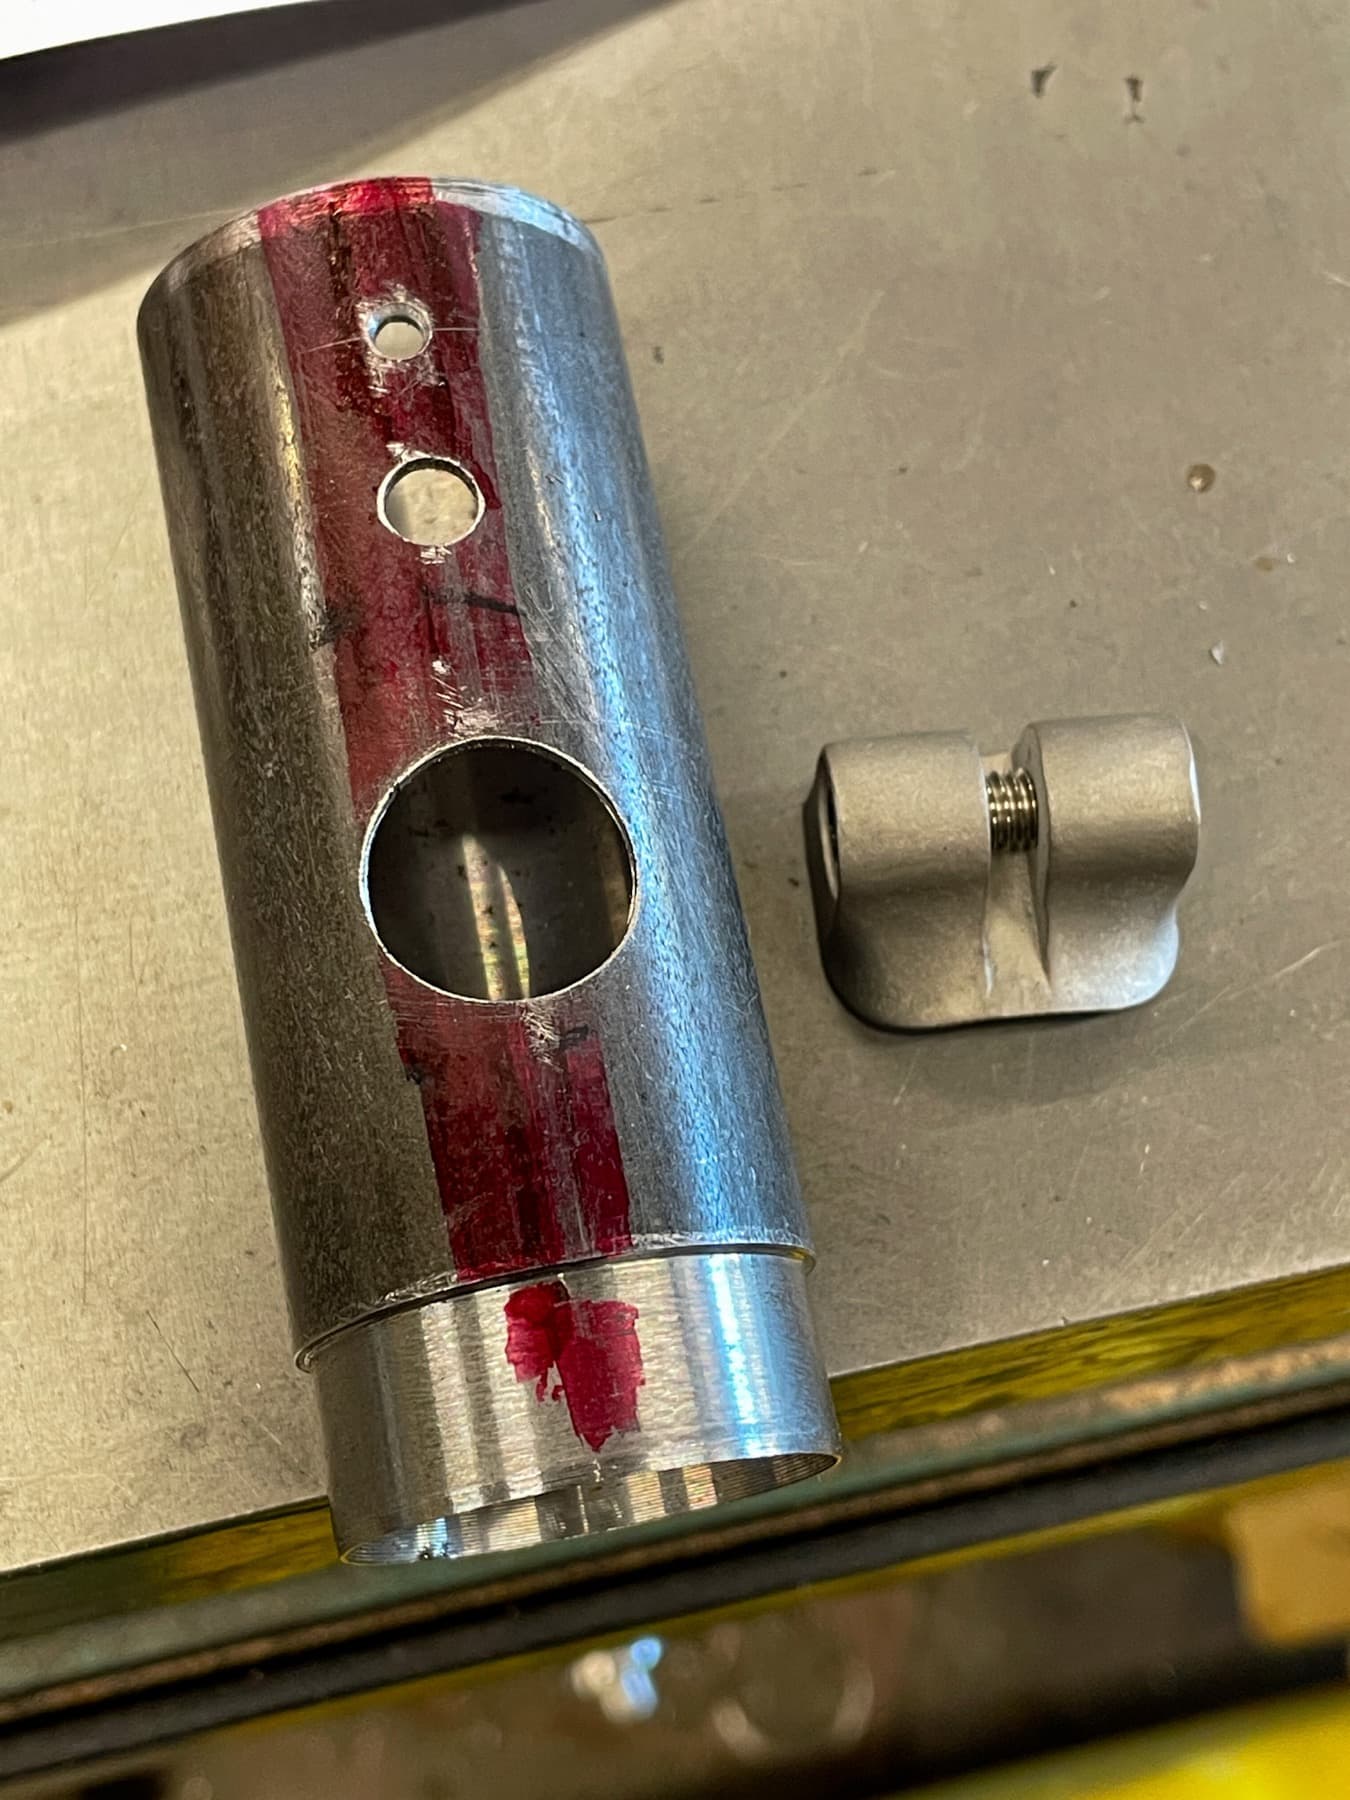
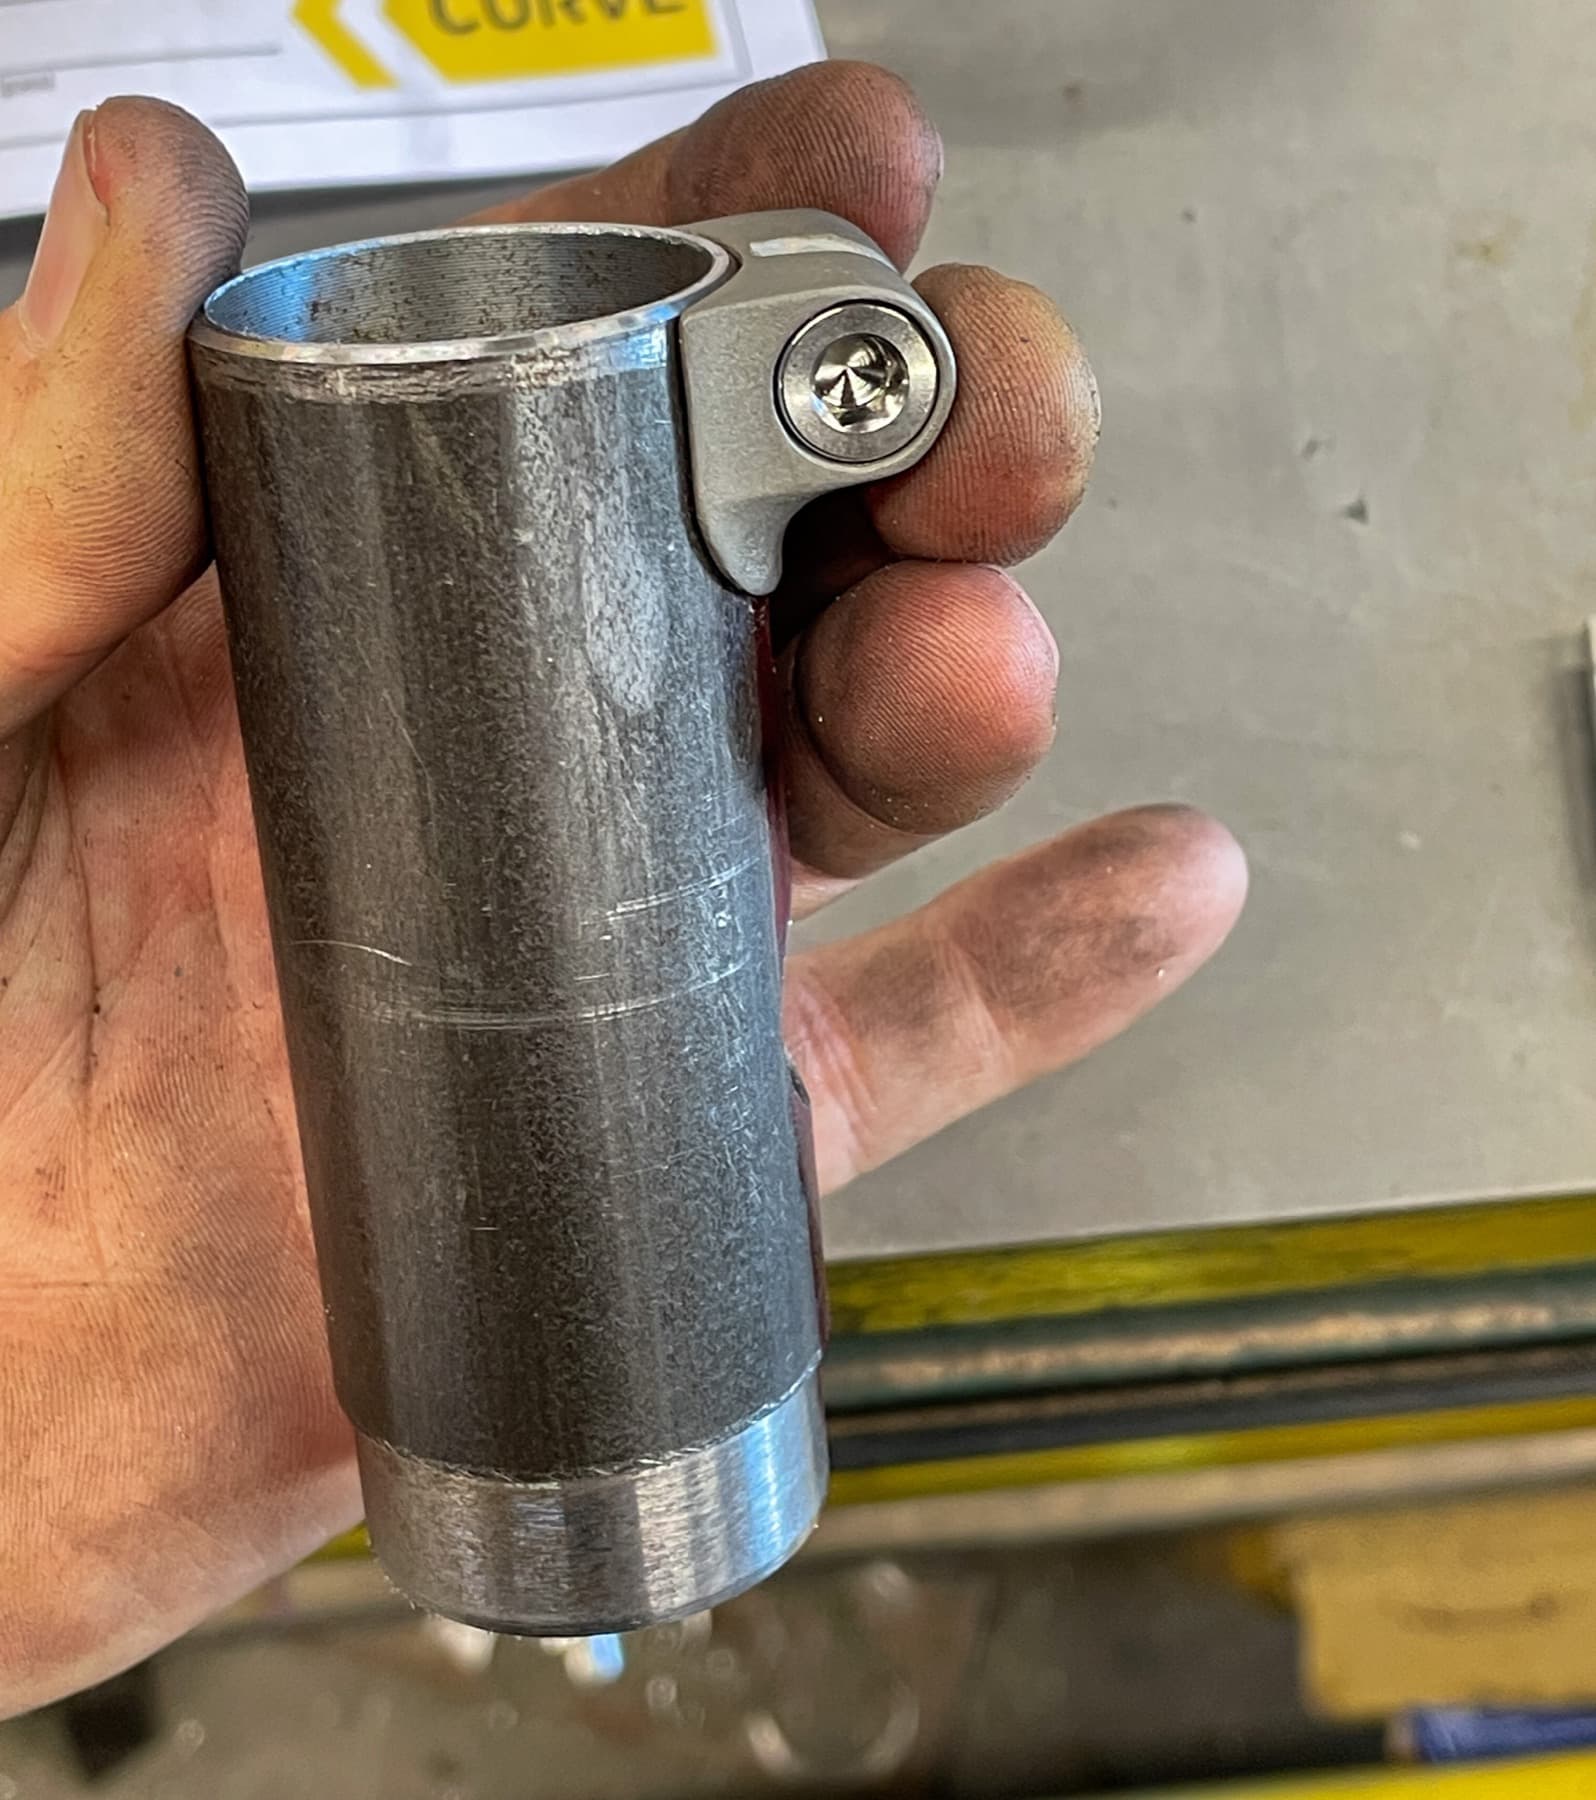
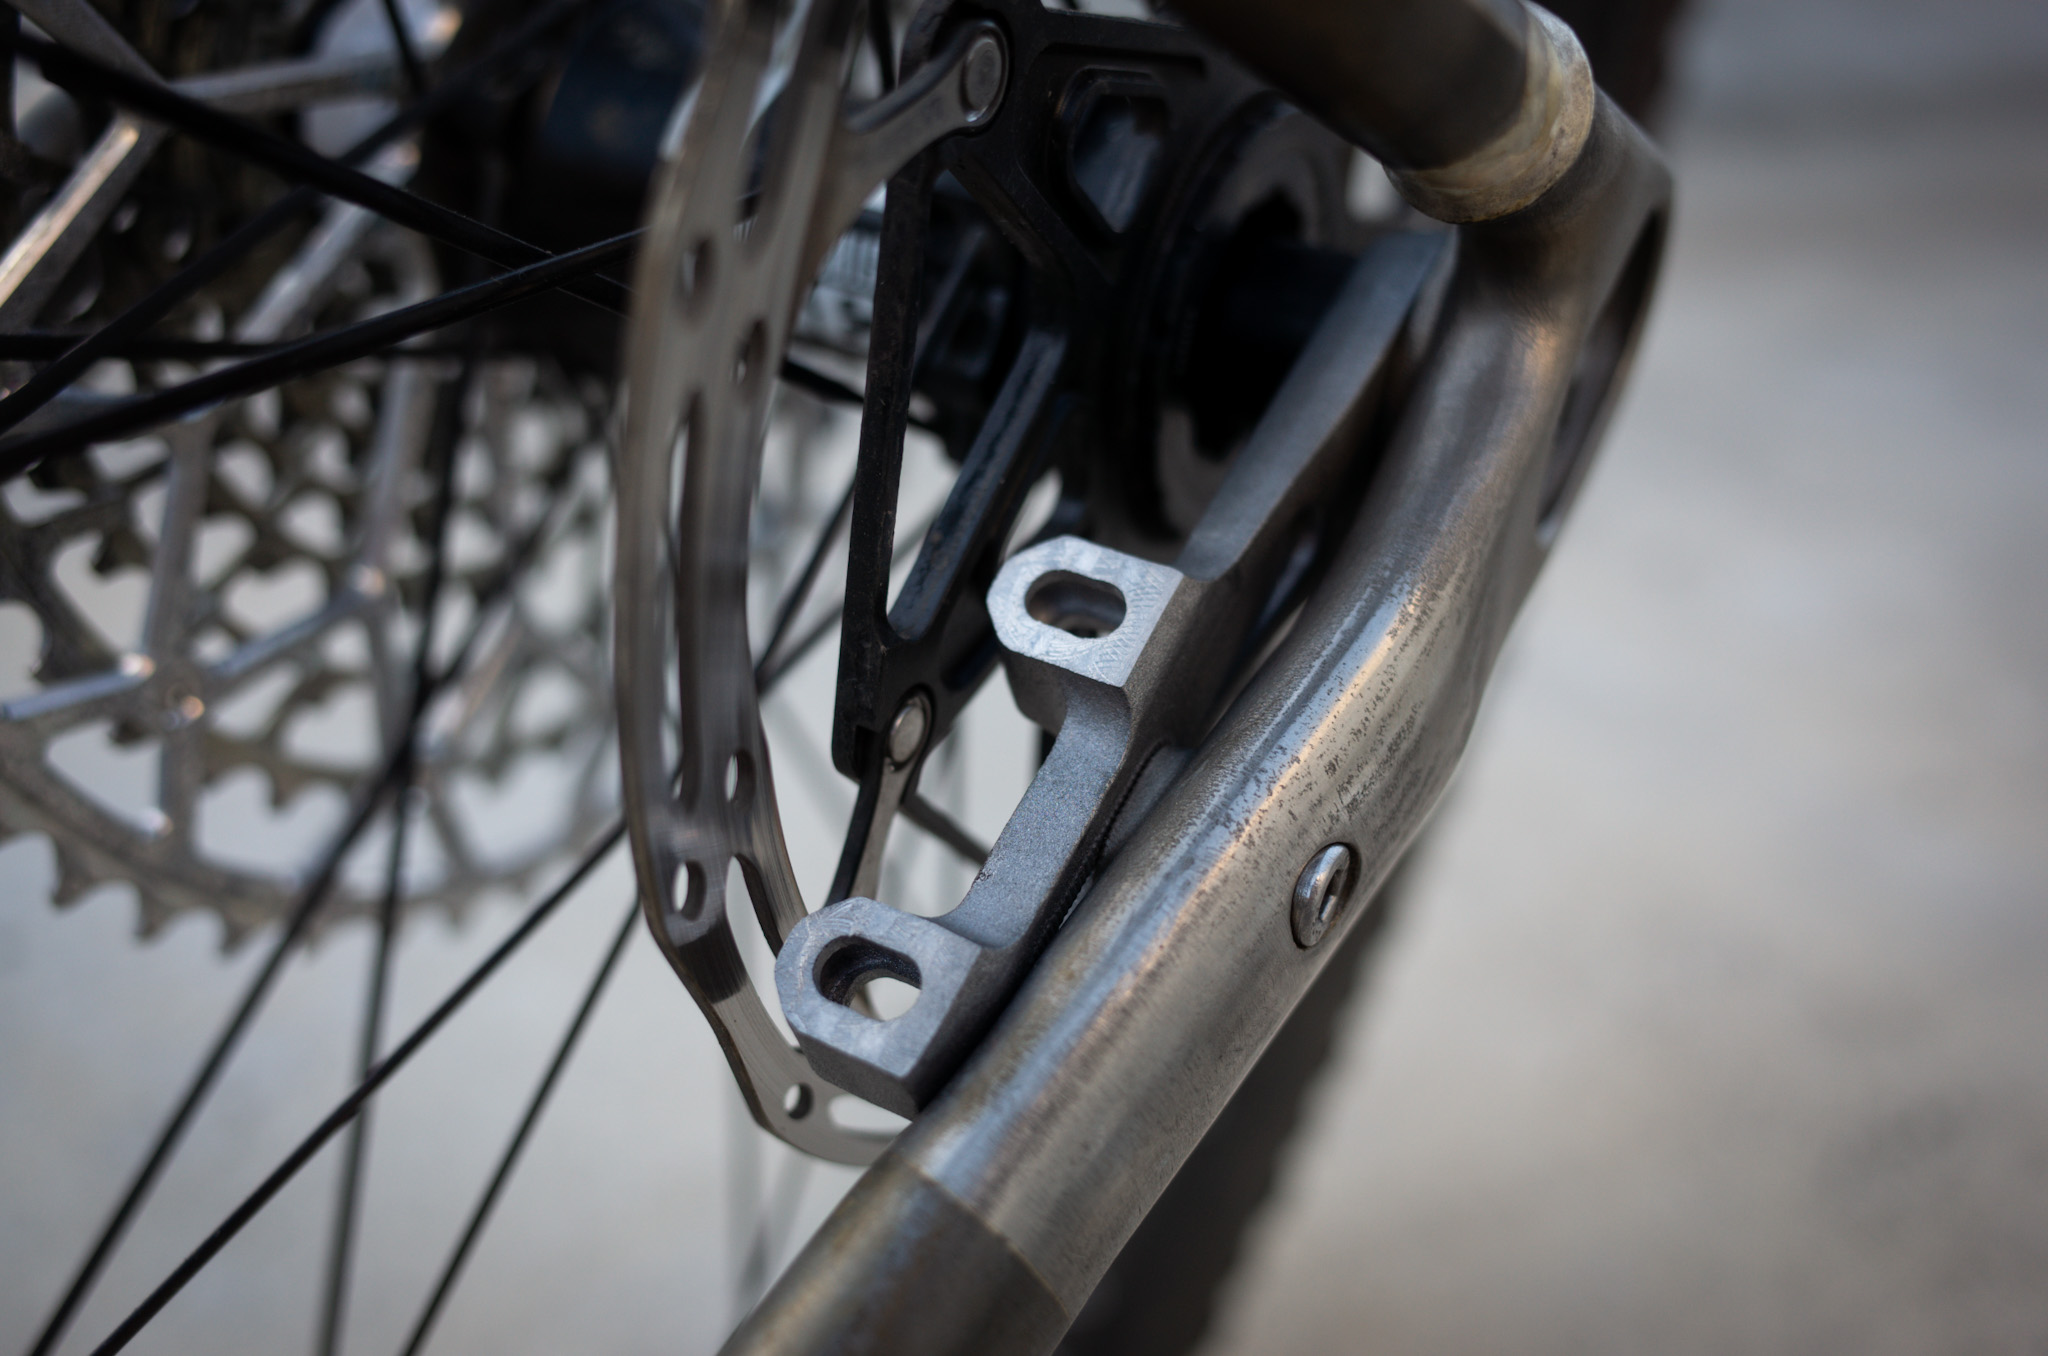
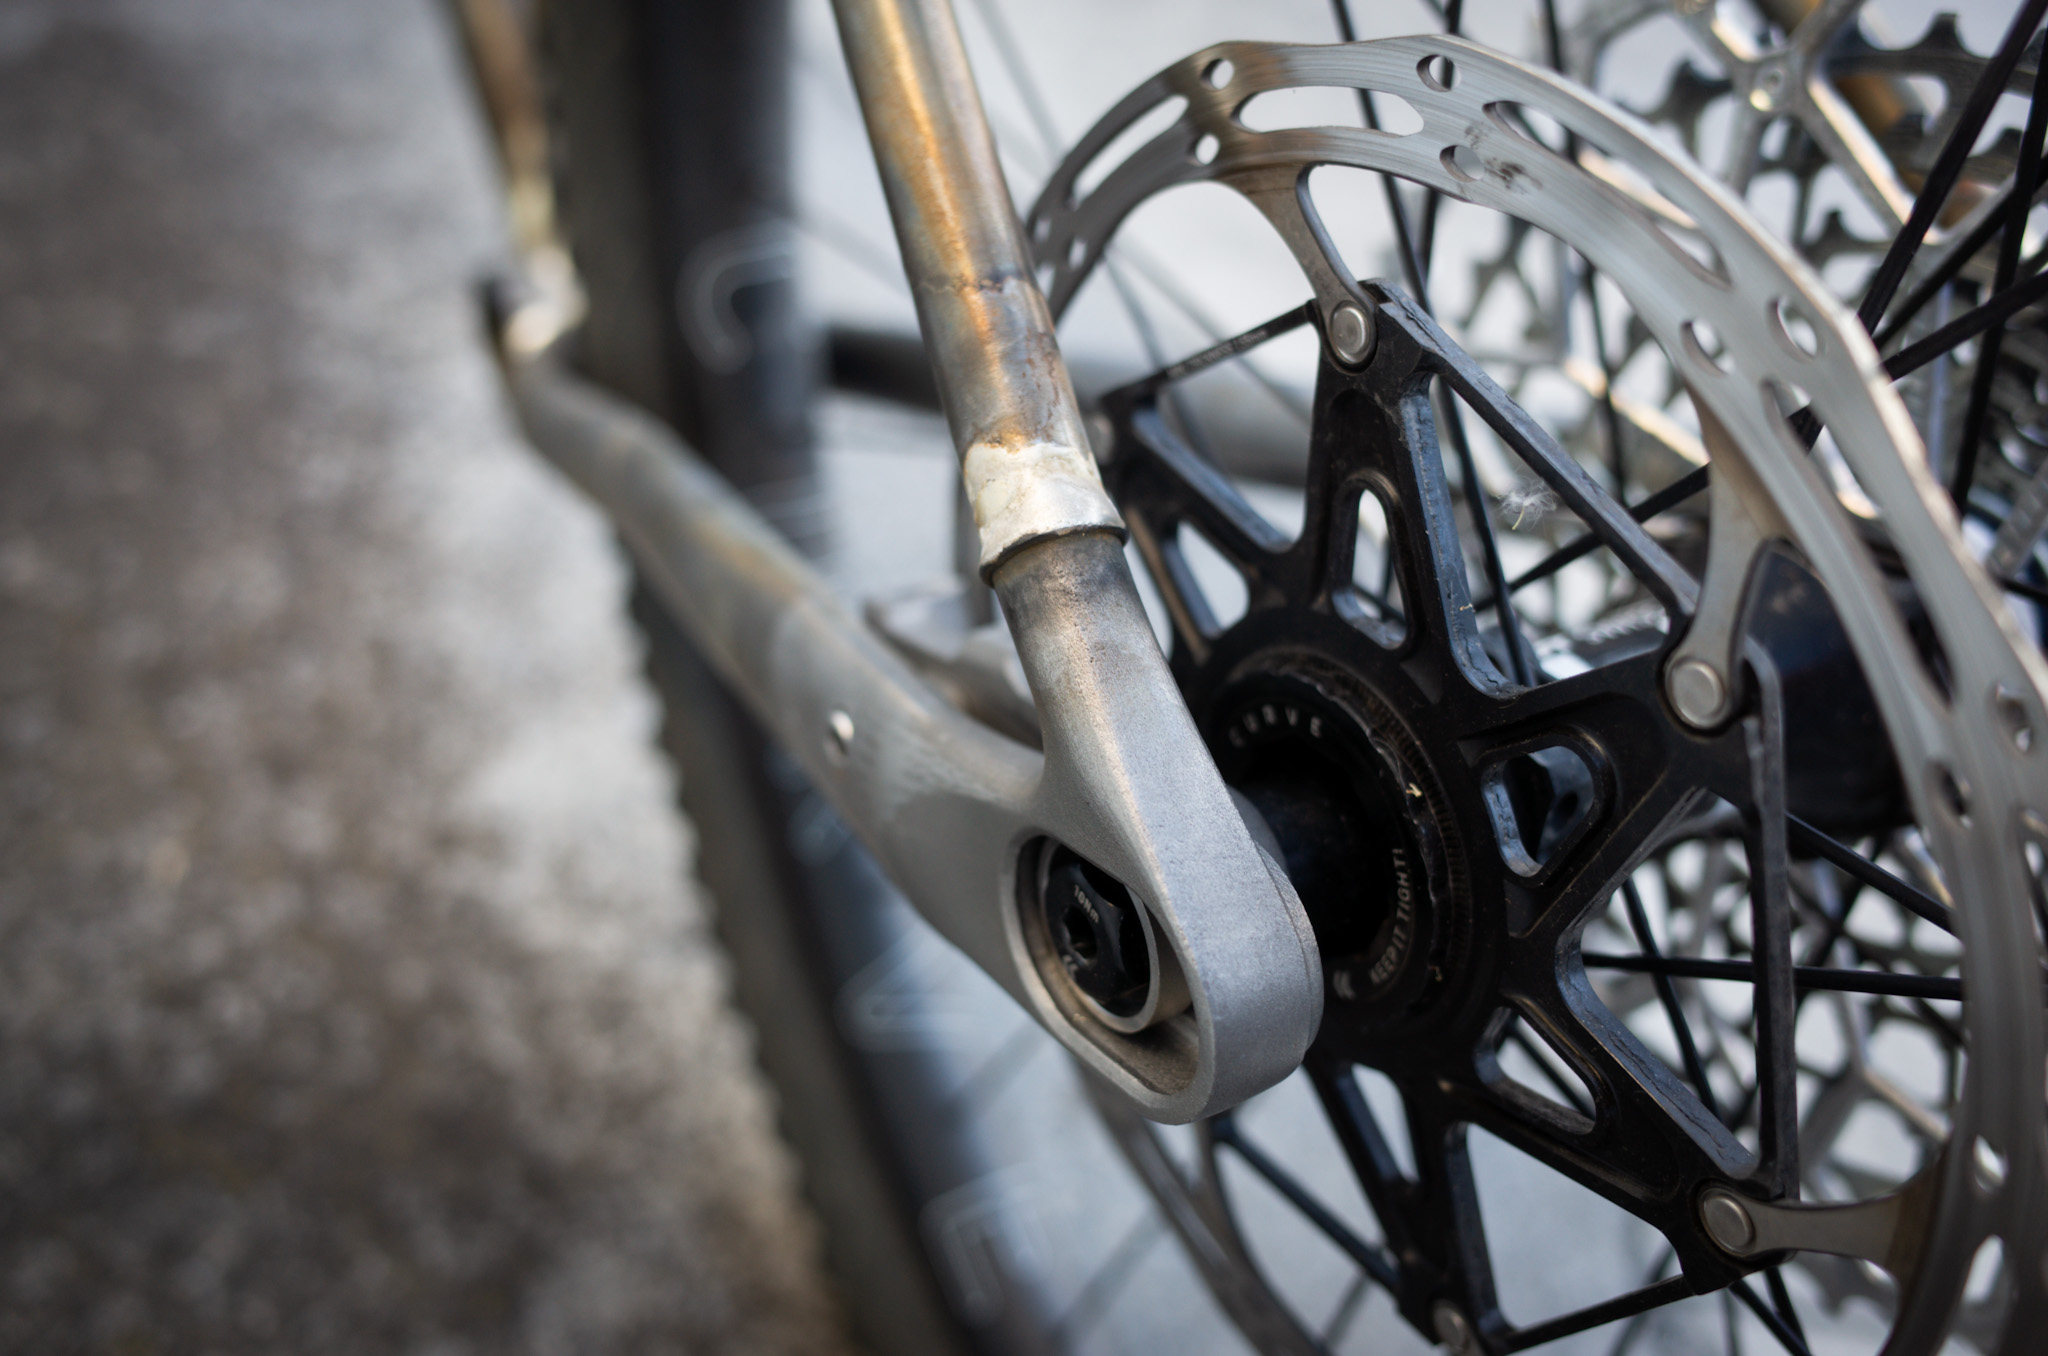
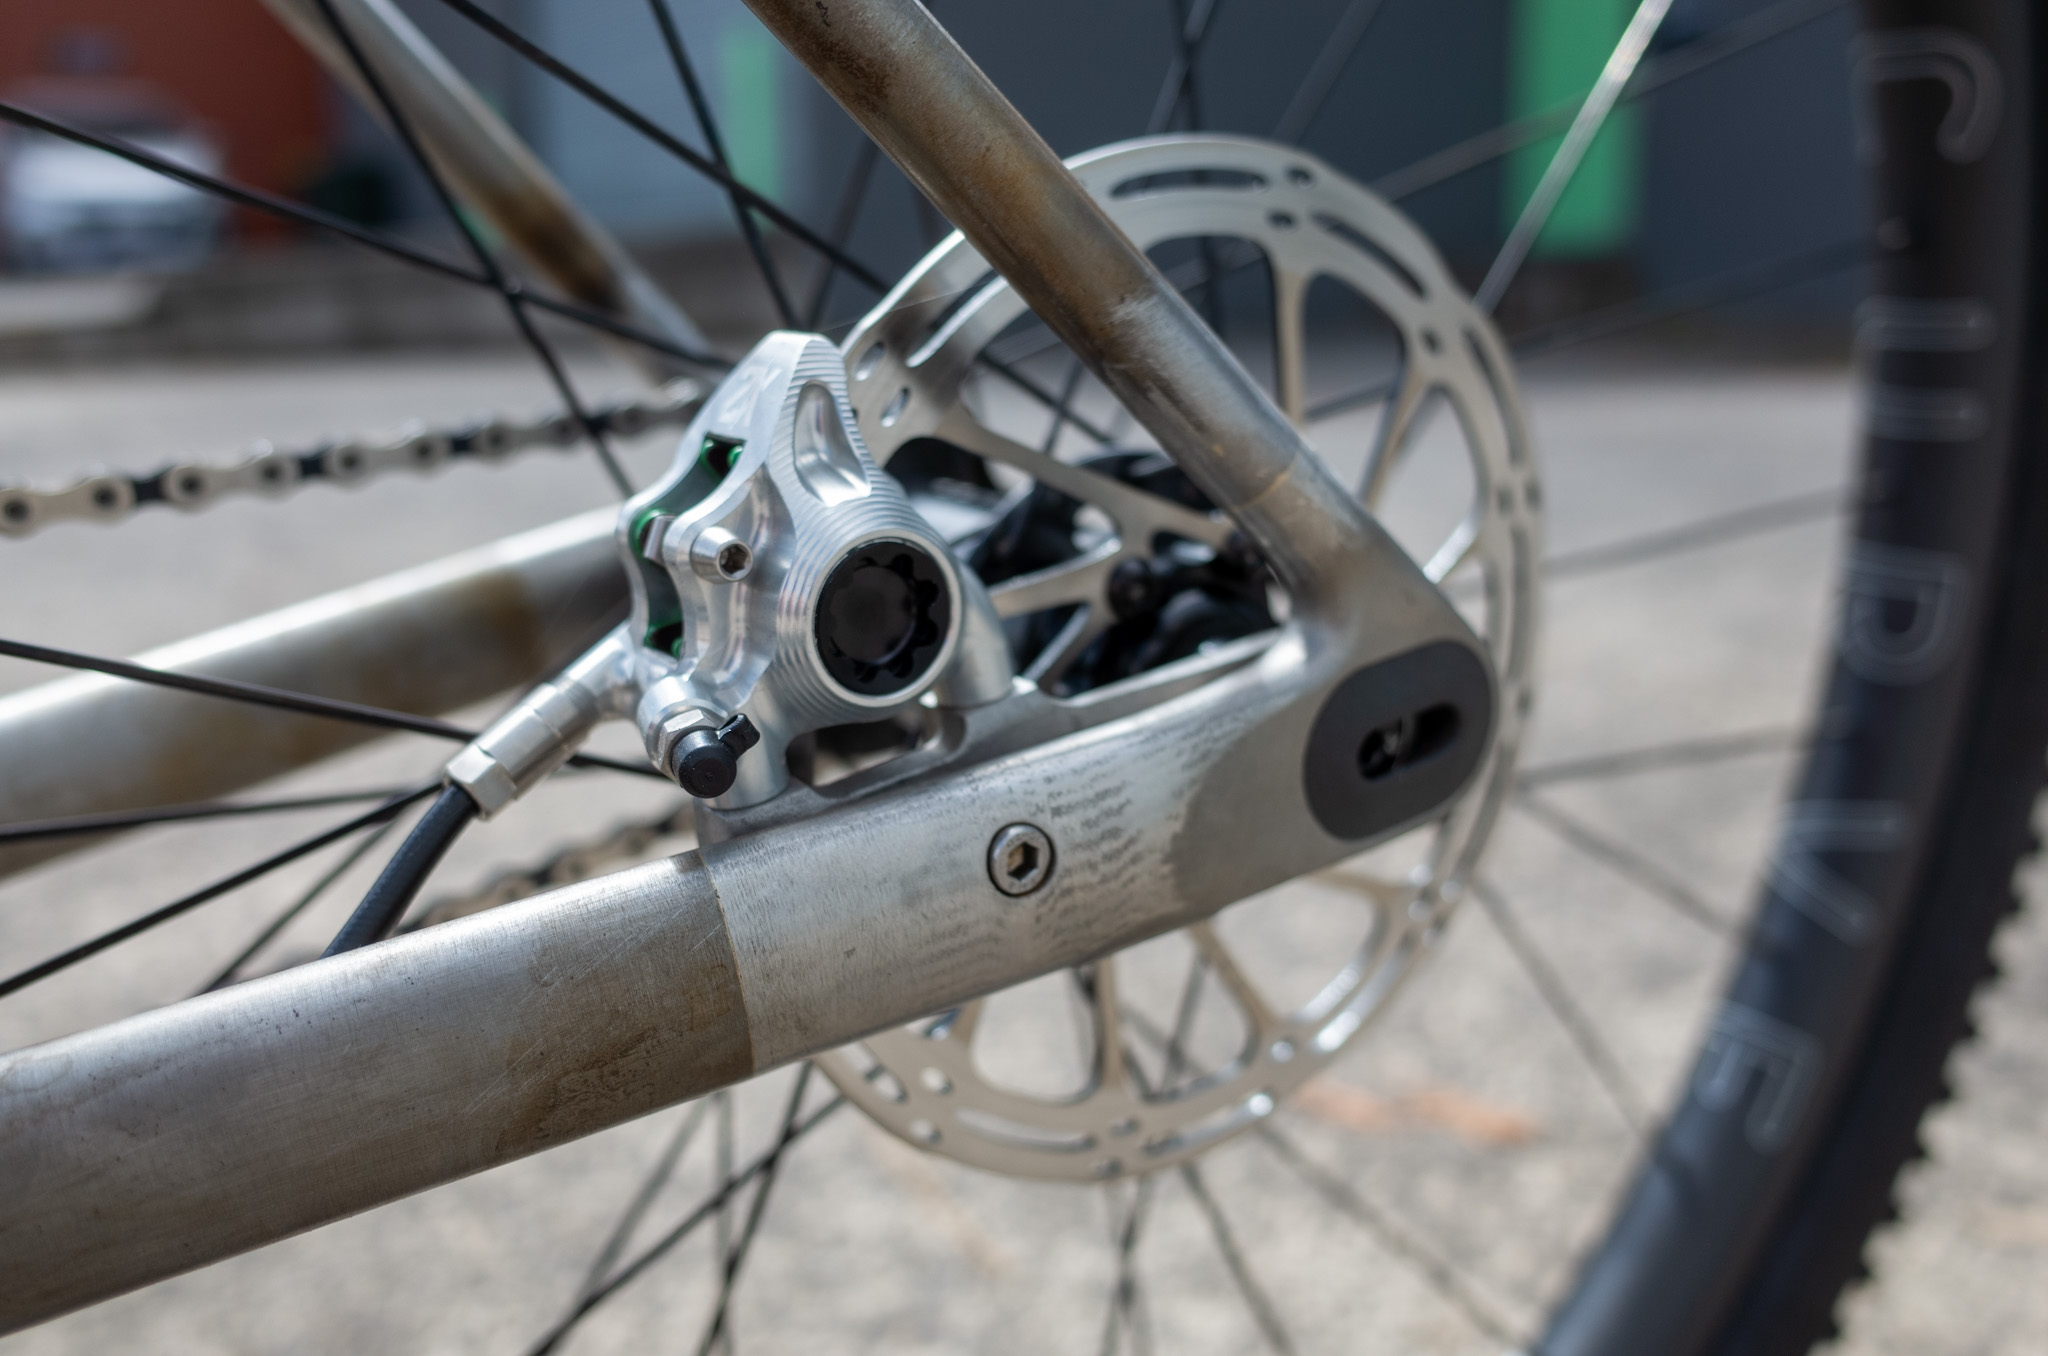
Yeah, the flat mount insert is aluminium. I’m quite impressed with the quality. Not far from the stainless to be honest. I gave the 3D model some extra meat on top of the mounts so I can face them flat. Whipped up a quick fixture for the insert. The little step on the side is the datum point to zero the mill on, then I just have to wind the z axis down by 20mm and shave some off the top to get to the proper FM spec.
Very nice. The custom-printed aluminum insert may be a game-changer for dropout designs. Could easily prototype something new without committing to 20 inserts.
I’m a far less skilled fabricator than a lot of people on here for sure, nevertheless I absolutely appreciate the compliment!
As for the CAD skills, that comes down to many hours of screen time and lots of trial and error learning the various tools. And I still learn stuff every session. I’m blown away by what some other designers have learned and put out in what seems like a much shorter time using various CAD software.
The bits I had made for this frame cost me about $360 (USD) which included shipping and also duplicates of some small parts that I had made in two materials for testing purposes.
Another Sunday & more progress.
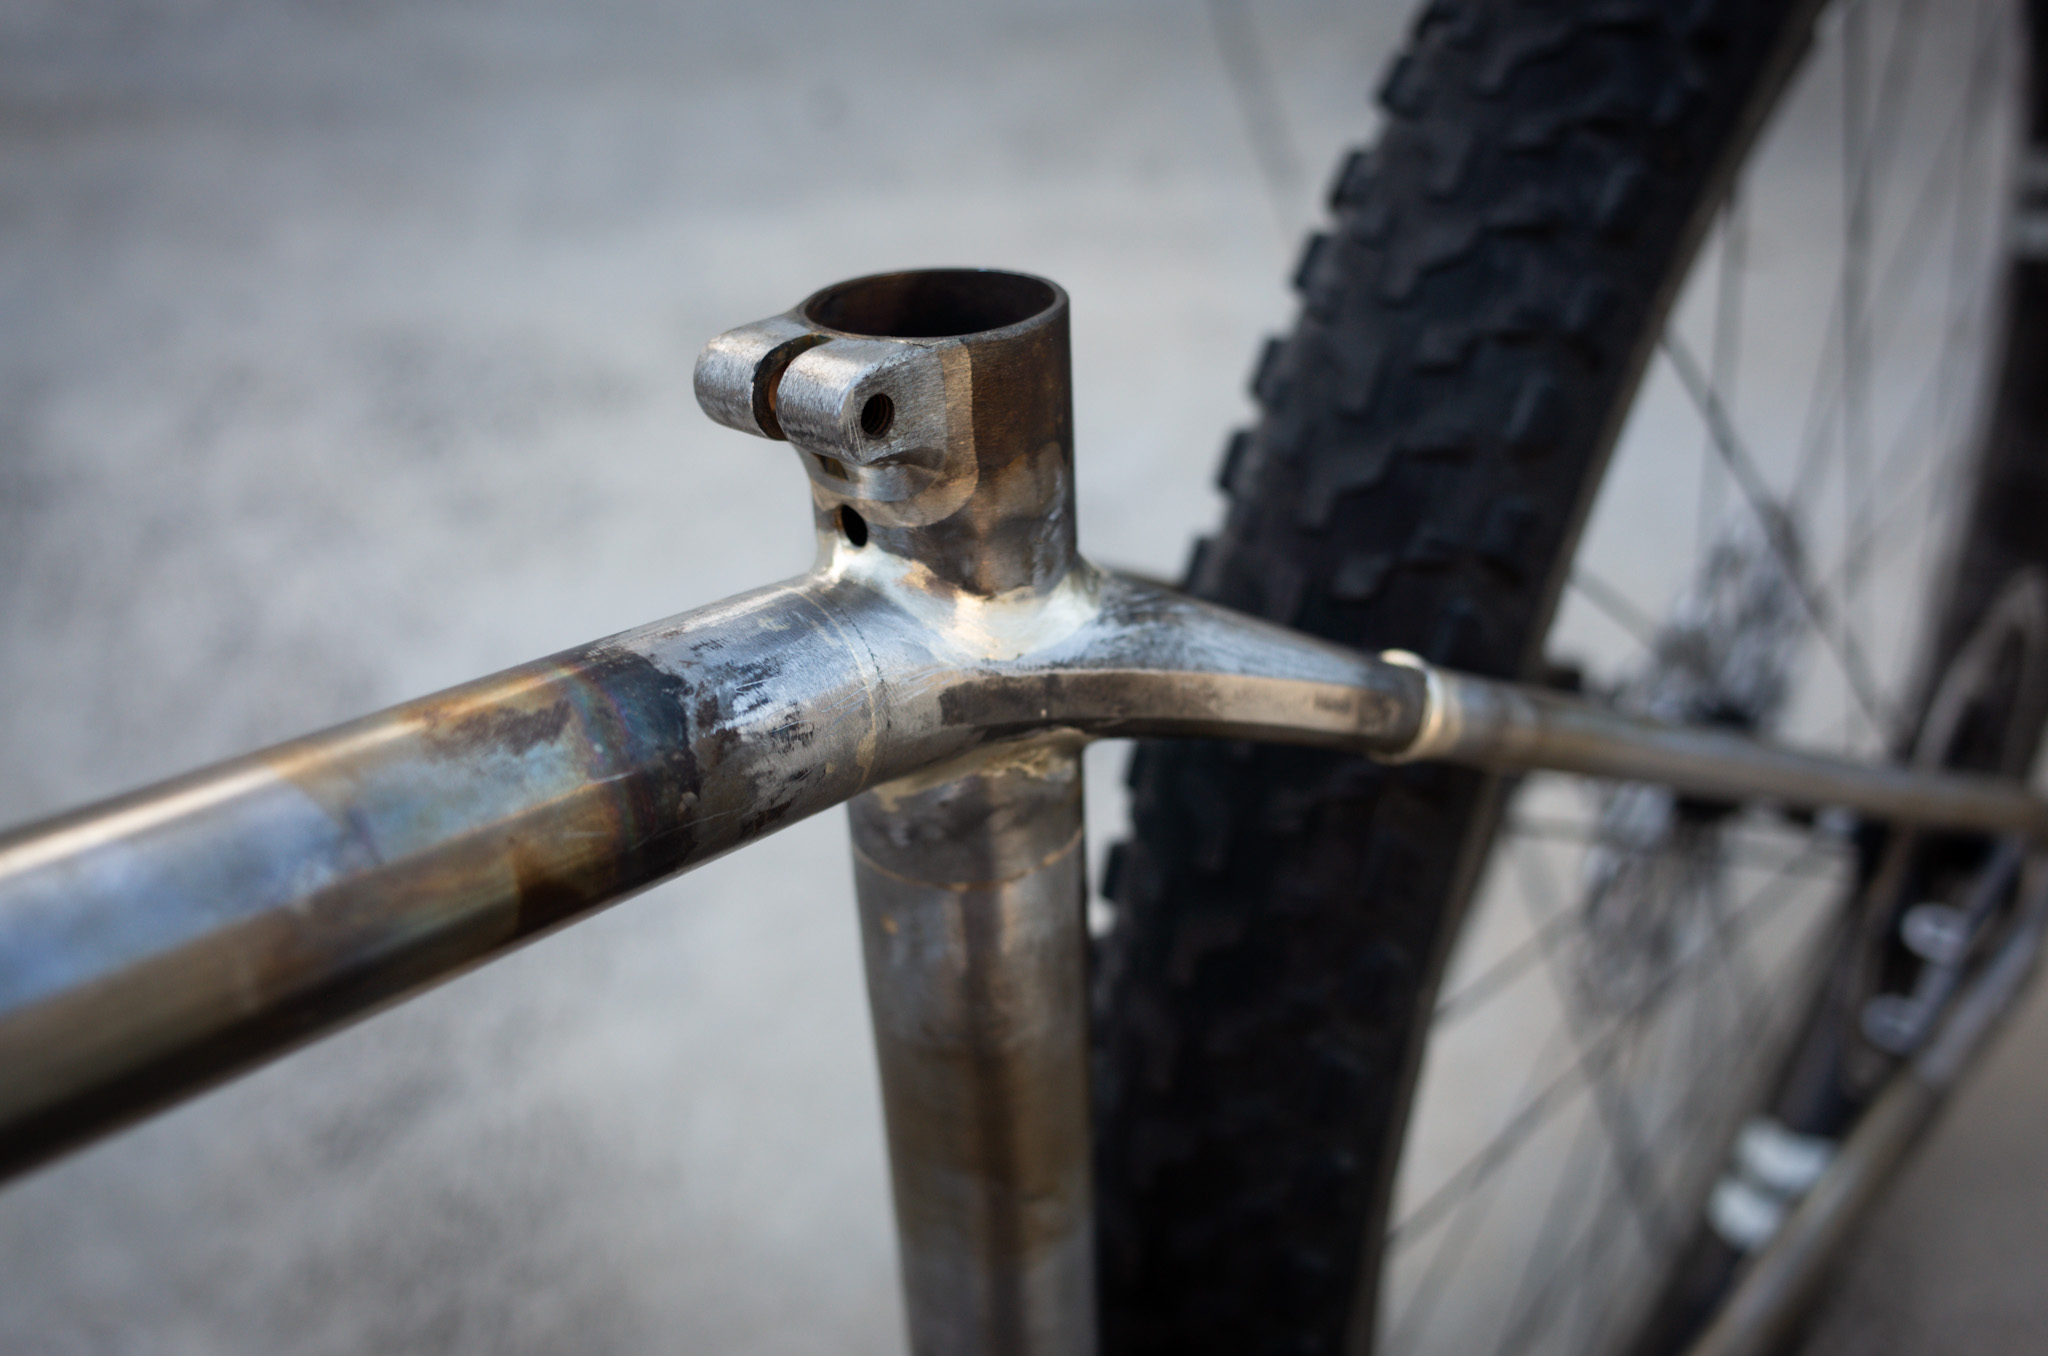
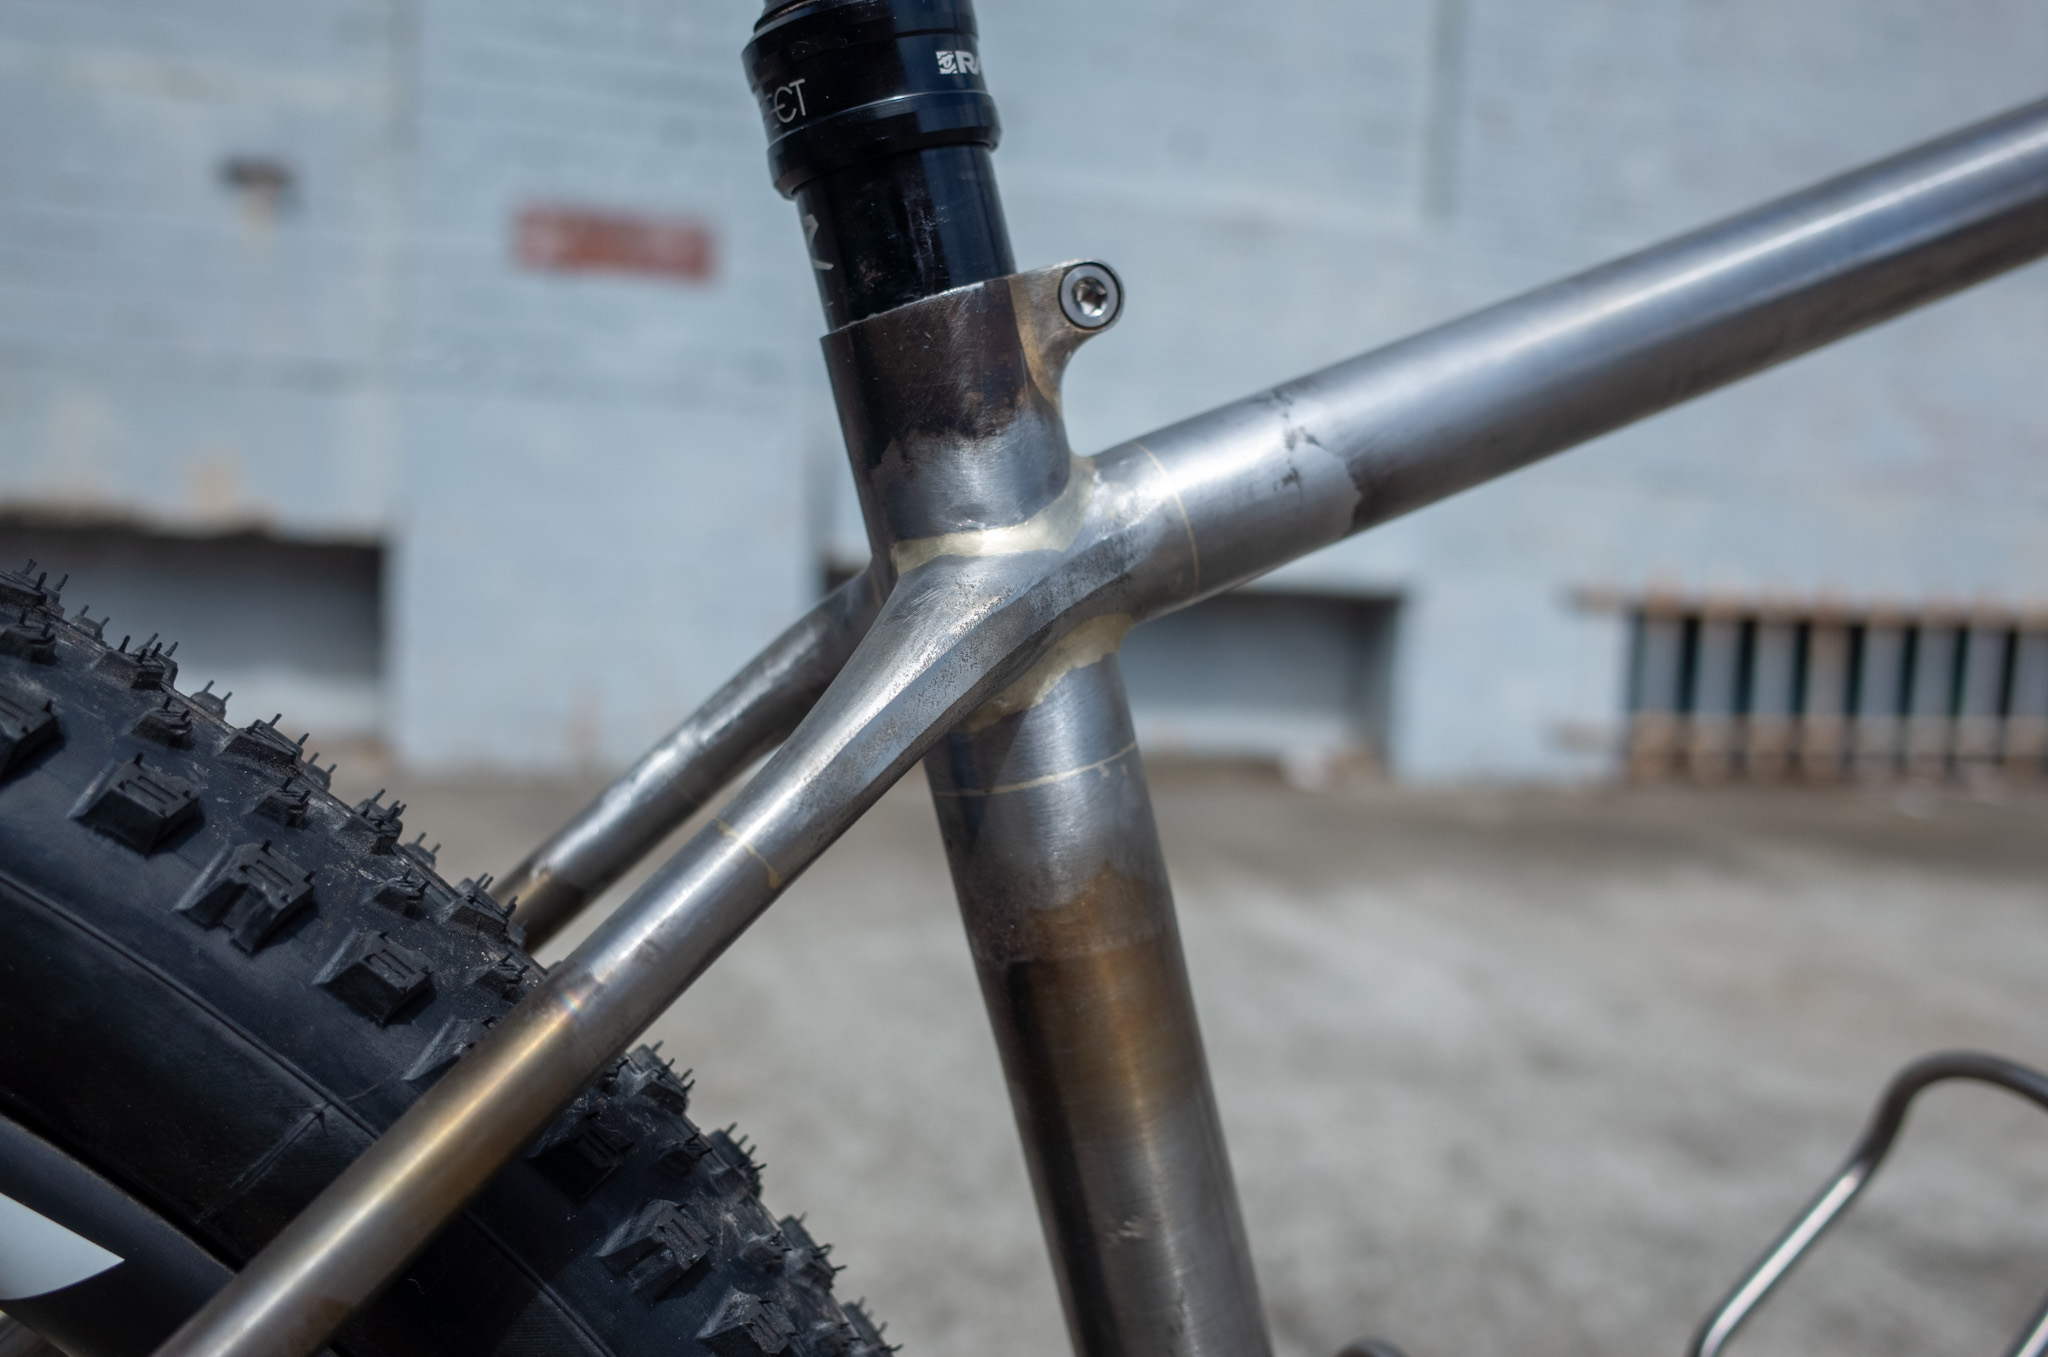
Finished off all the tube fitups today.
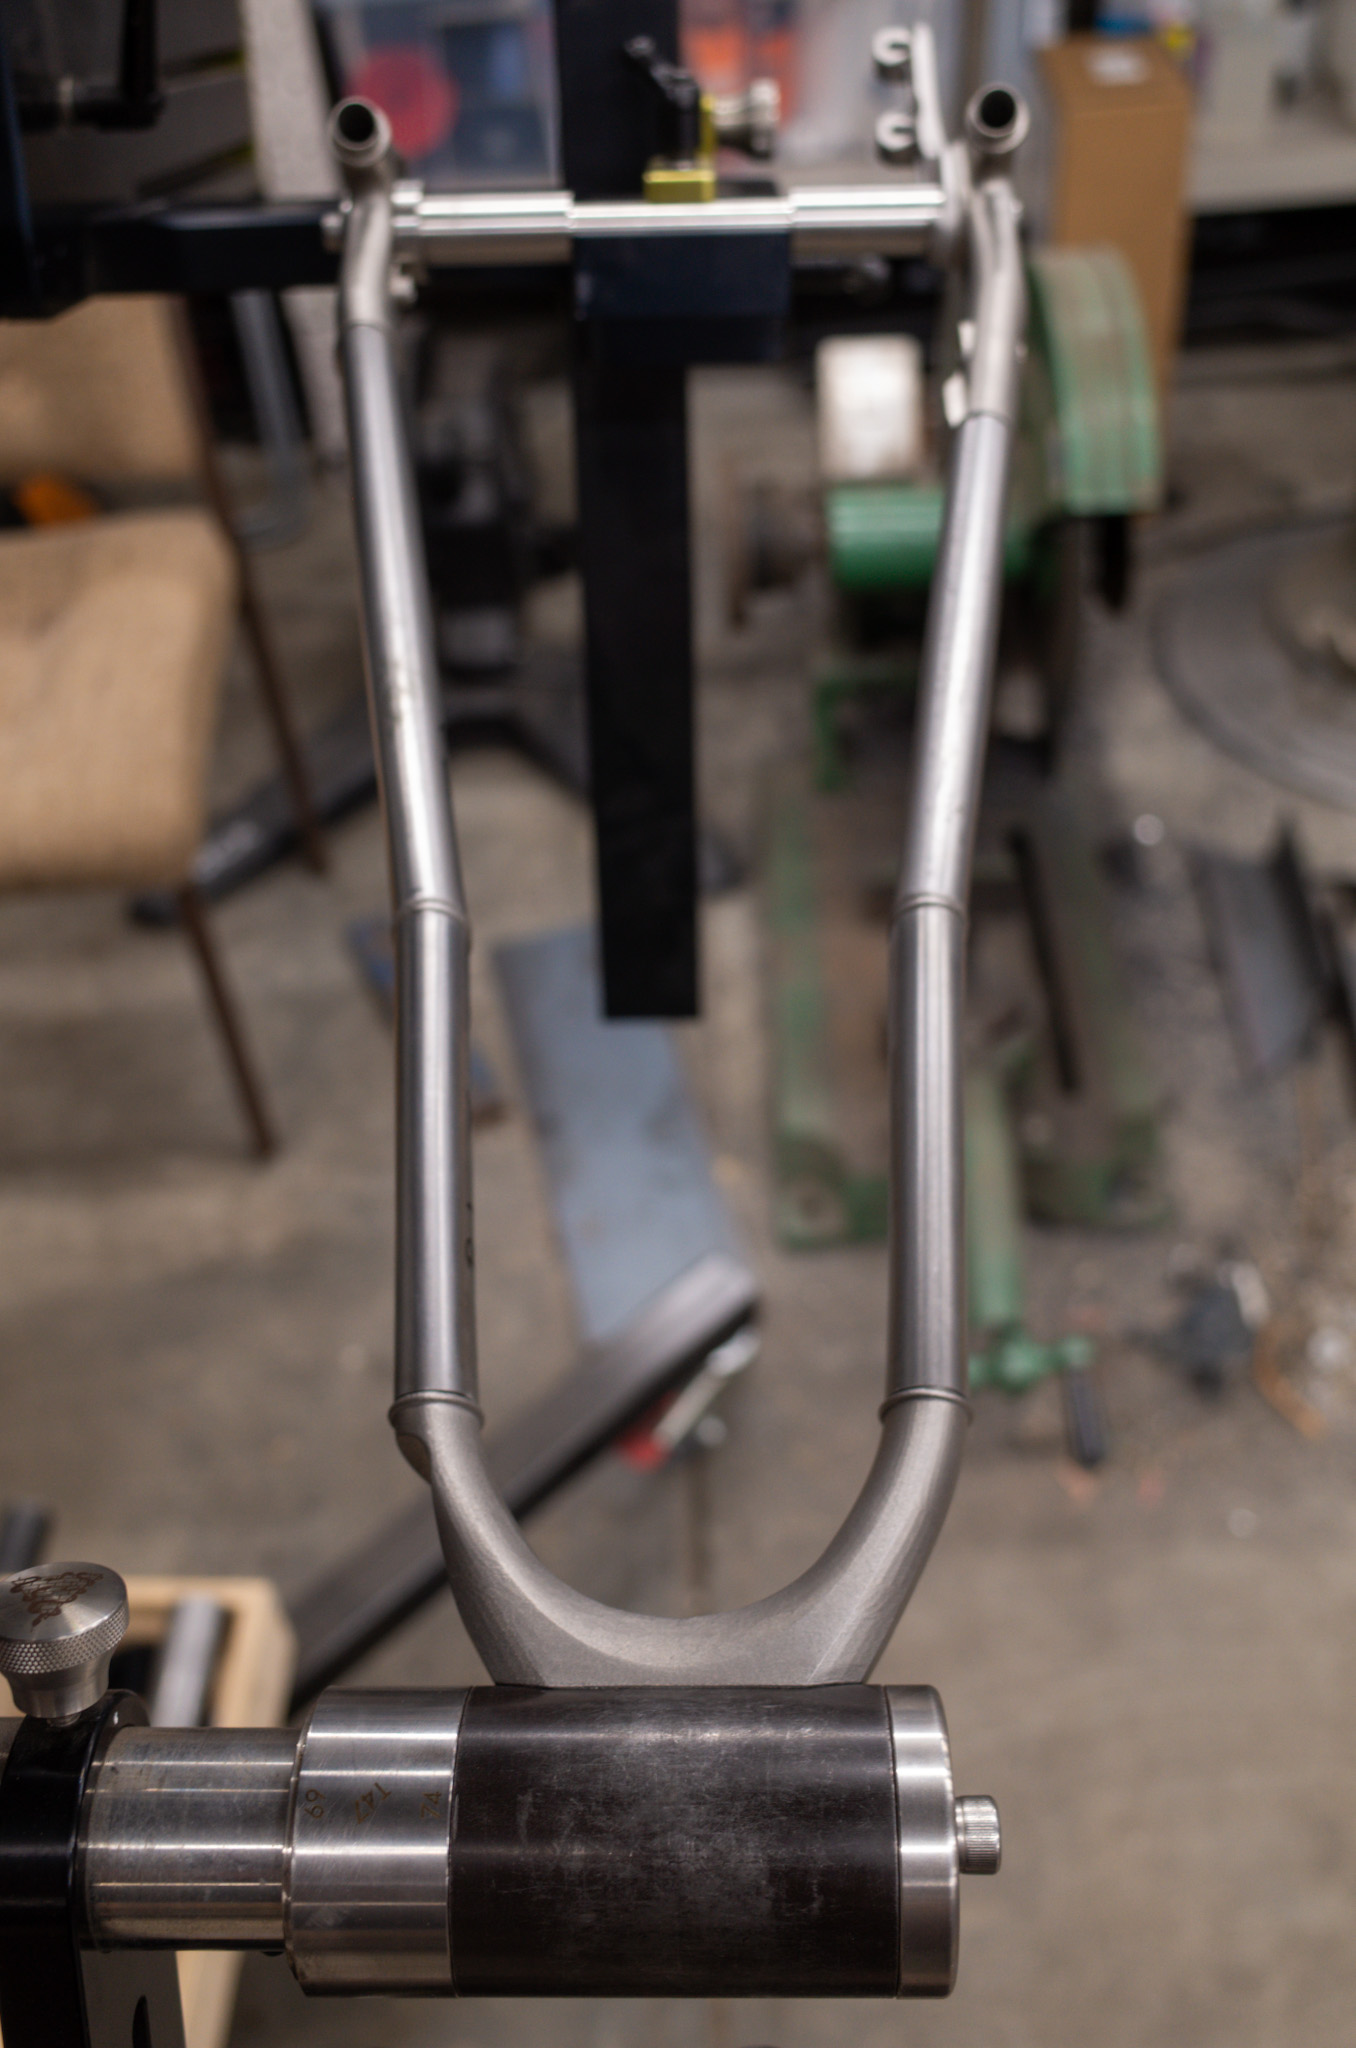
The biggest project was to sort out the middle section of the seat tube. The local supplier of 4130 tubing didn’t have the 35mm x 0.9mm (1-3/8" x 0.035) tube that I needed, so I had to get some 1.2mm (0.049") wall tubing instead.
Good thing my mate has a lathe so I could shave down the tube a bit by externally butting it. It’s been many years since I operated a lathe in any capacity, so after a bit of coaching from my mate I was able to get it done. Ended up with a 0.8mm wall thickness in the center and a smooth taper to the original OD on either end. Both ends got the necessary counterbore to fit the 3D printed ST bend and the top 31.6mm ID sleeve.
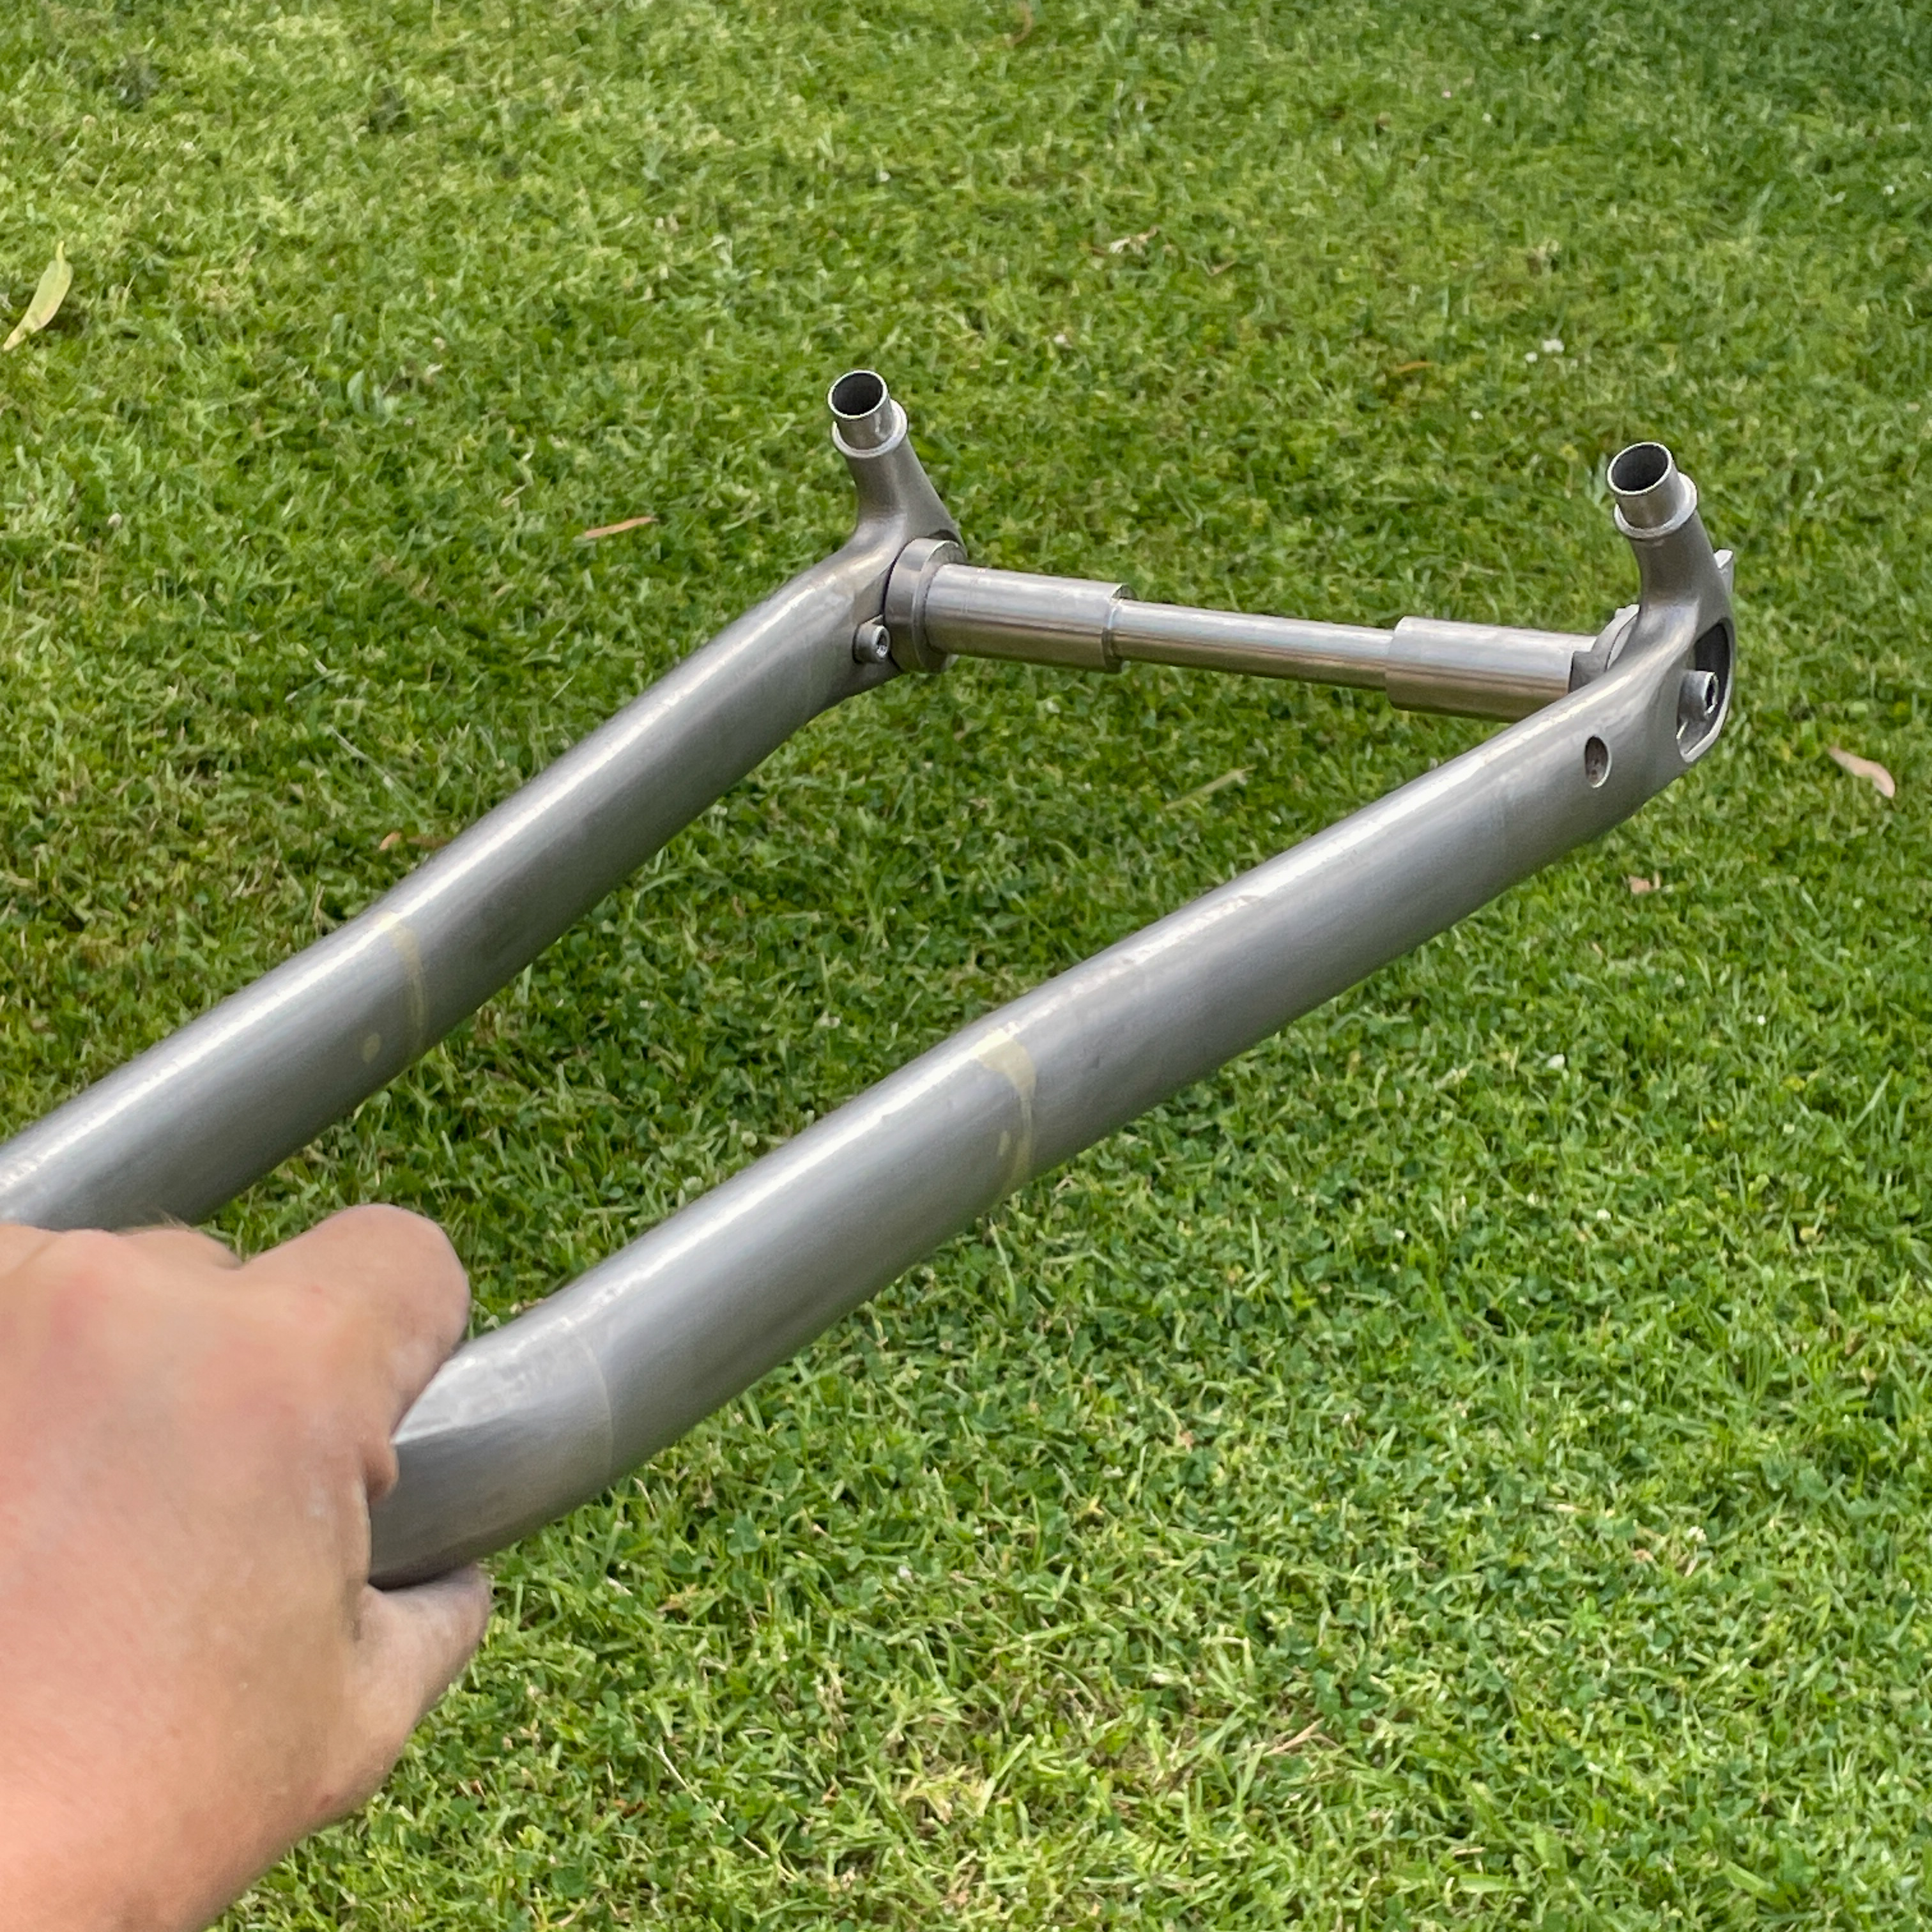
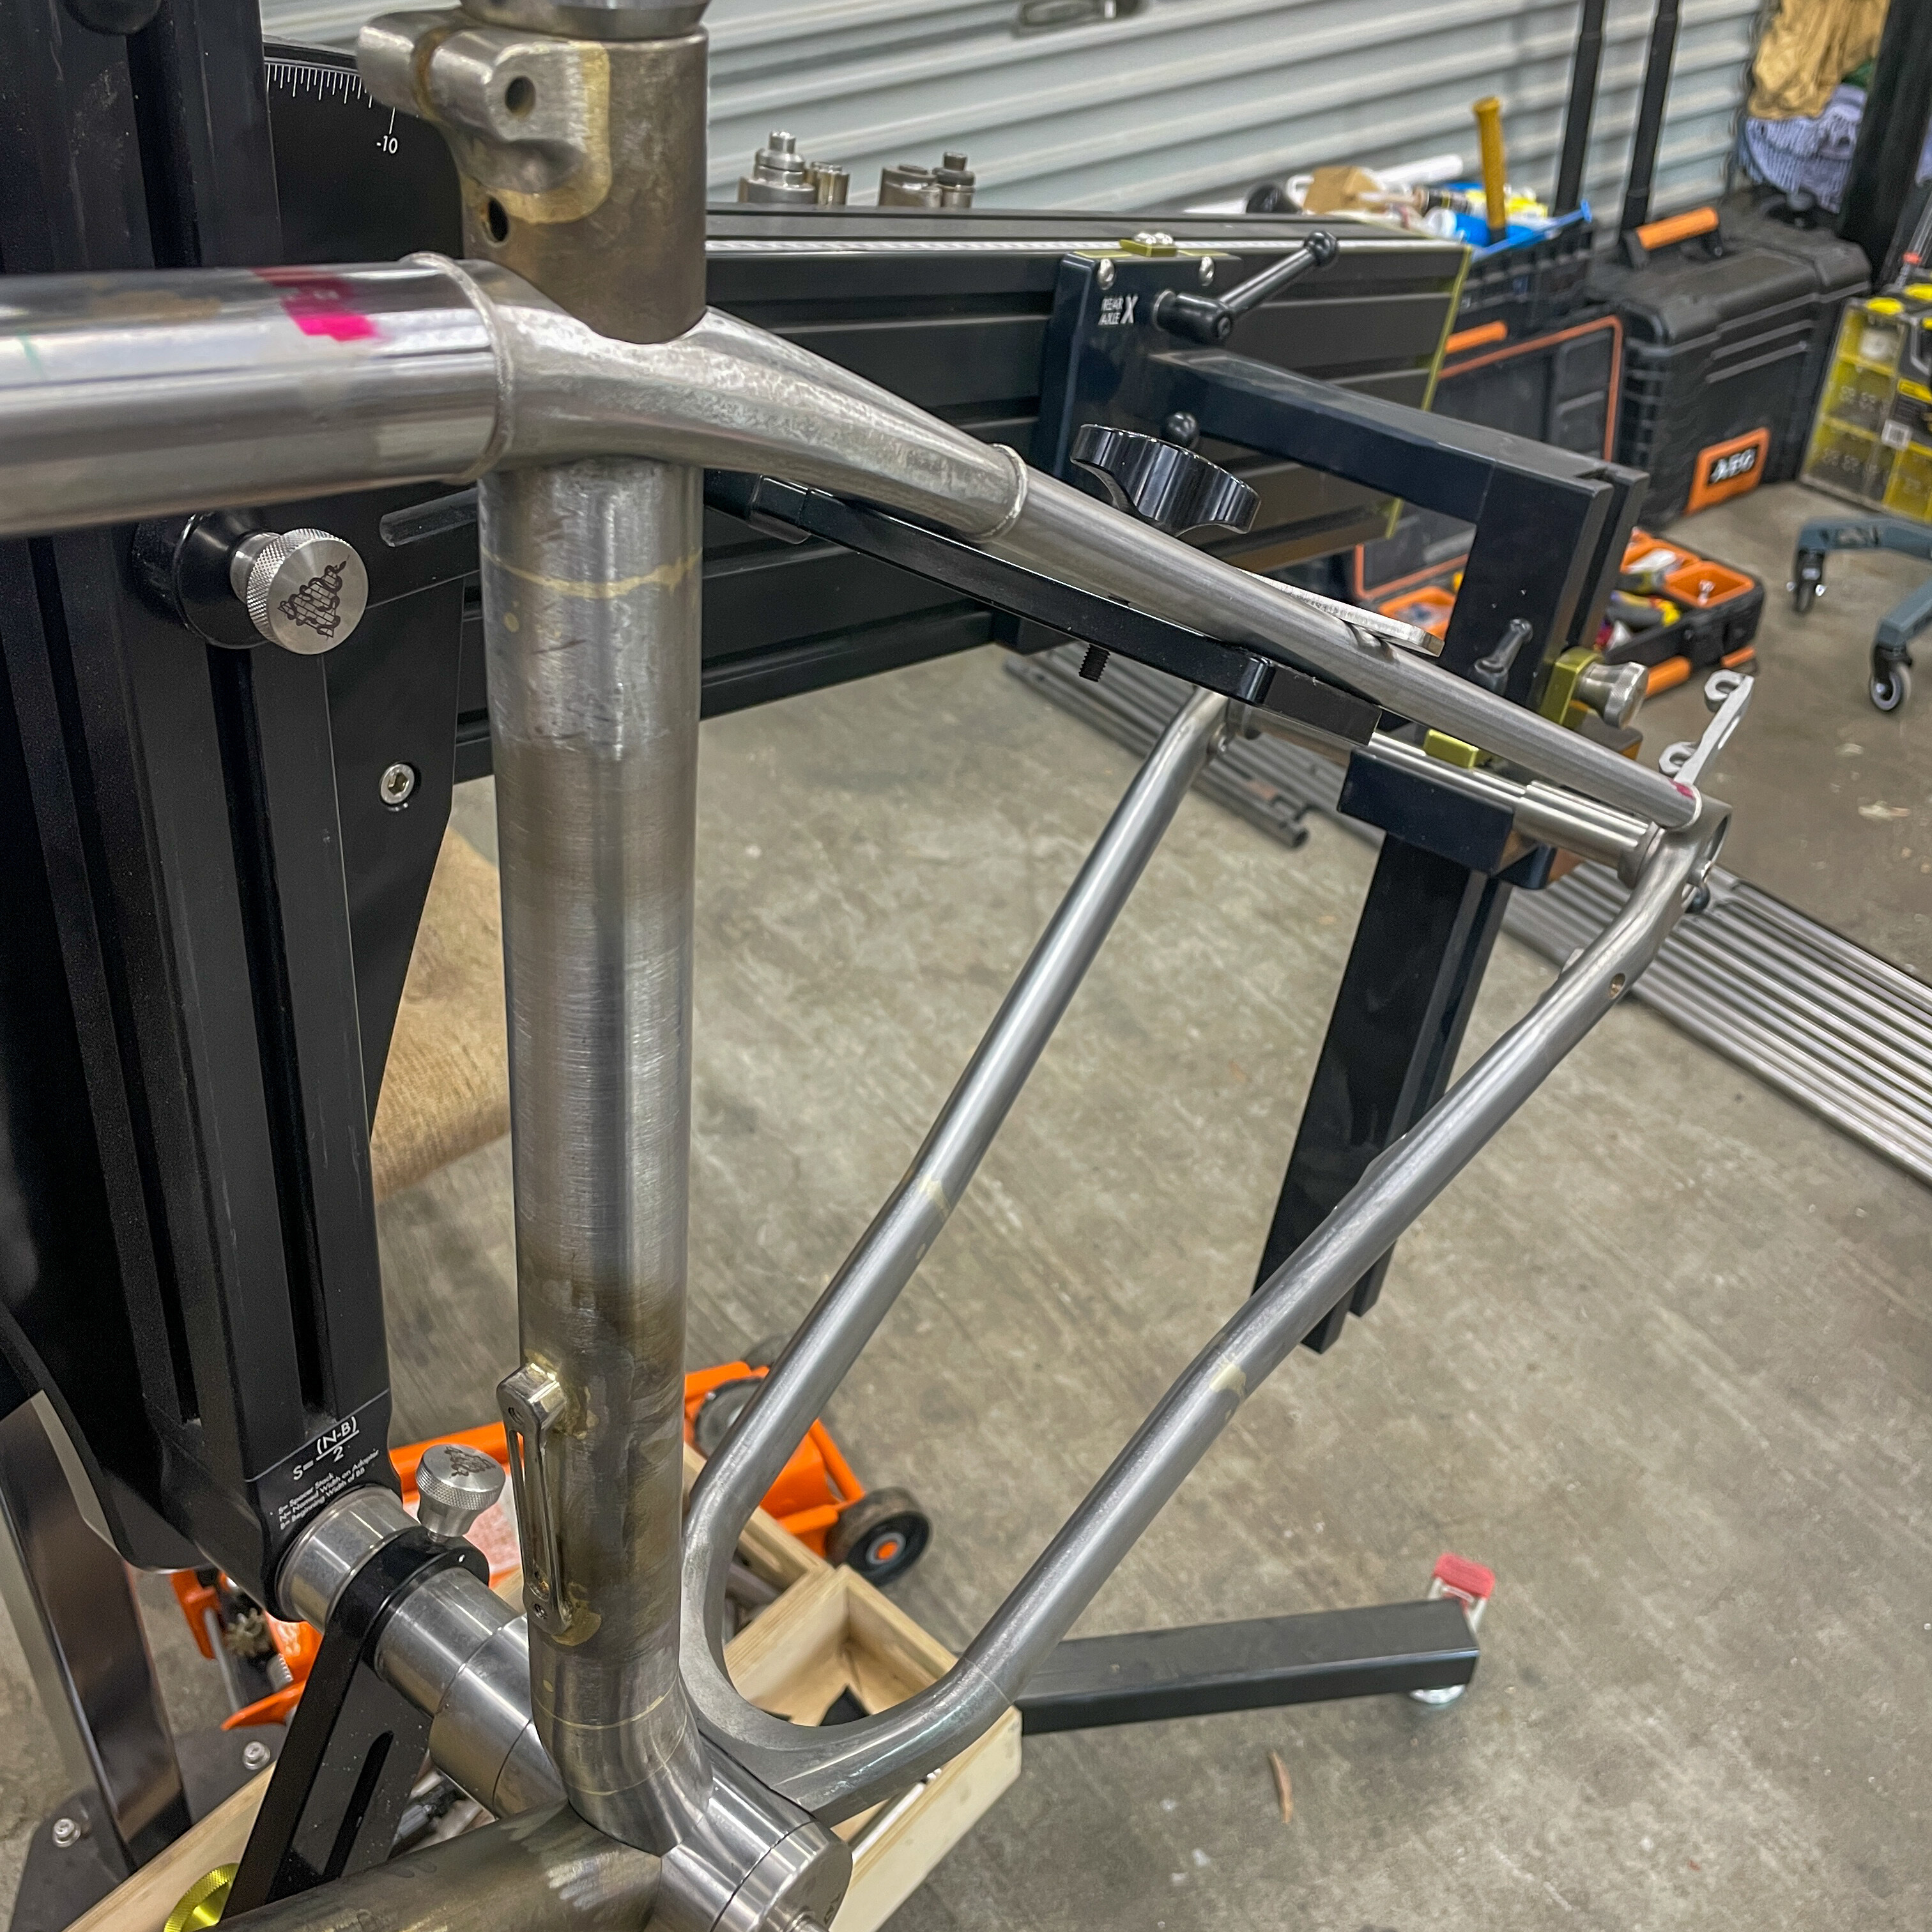
I also used the lathe to lop off the chainstays for perfectly straight cuts and equal lengths. Mitered the HT end and and trimmed down the ST end of the top tube to make it fit onto the SS yoke. After notching the DT to fit the bottom part for the ST, and cutting the HT and ST vent holes I was able to fit it all up in the Cobra fixture.
All the fixture setup dimensions from BikeCAD matched up perfectly so it all went together nicely. Did I mention I’m really impressed with that fixture?
Next weekend it’s time for all the hot works and I’ll hopefully have the bike built up a day or so after that.
Short update this time.
Been chipping away at it with a couple of setbacks. Main one being that I was a bit rusty on the old torch and cooked some braze-ons. That made me lose a bit of confidence in my ability and slowed down progress until I got my mojo back.
I put it down to a few factors. Oxy-acetylene setup with a gasfluxer attached gives the flame a different colour from what I’m used to. The goggles I used were also a shade or two darker than what I’d used before - both these details made it hard for me to gauge temp and colour.
But excuses aside, the biggest issue was probably that I’d not touched a torch for over 2 years.
Anyways, I’ve now got a seat tube and a chainstay sub-assembly all brazed and cleaned up. Should have a rideable frame by the end of tomorrow.
Rather intense session today trying to get the rest done before the deadline (getting home in time for xmas eve dinner) and I got 95% there.
Brazed up the rest of the frame and did the first rough pass cleaning up the fillets. Didn’t take any “off the torch” photos as they were not the prettiest (definitely not living up to the standard I set for myself when I was actively building). Again, the 2 year hiatus made itself known.
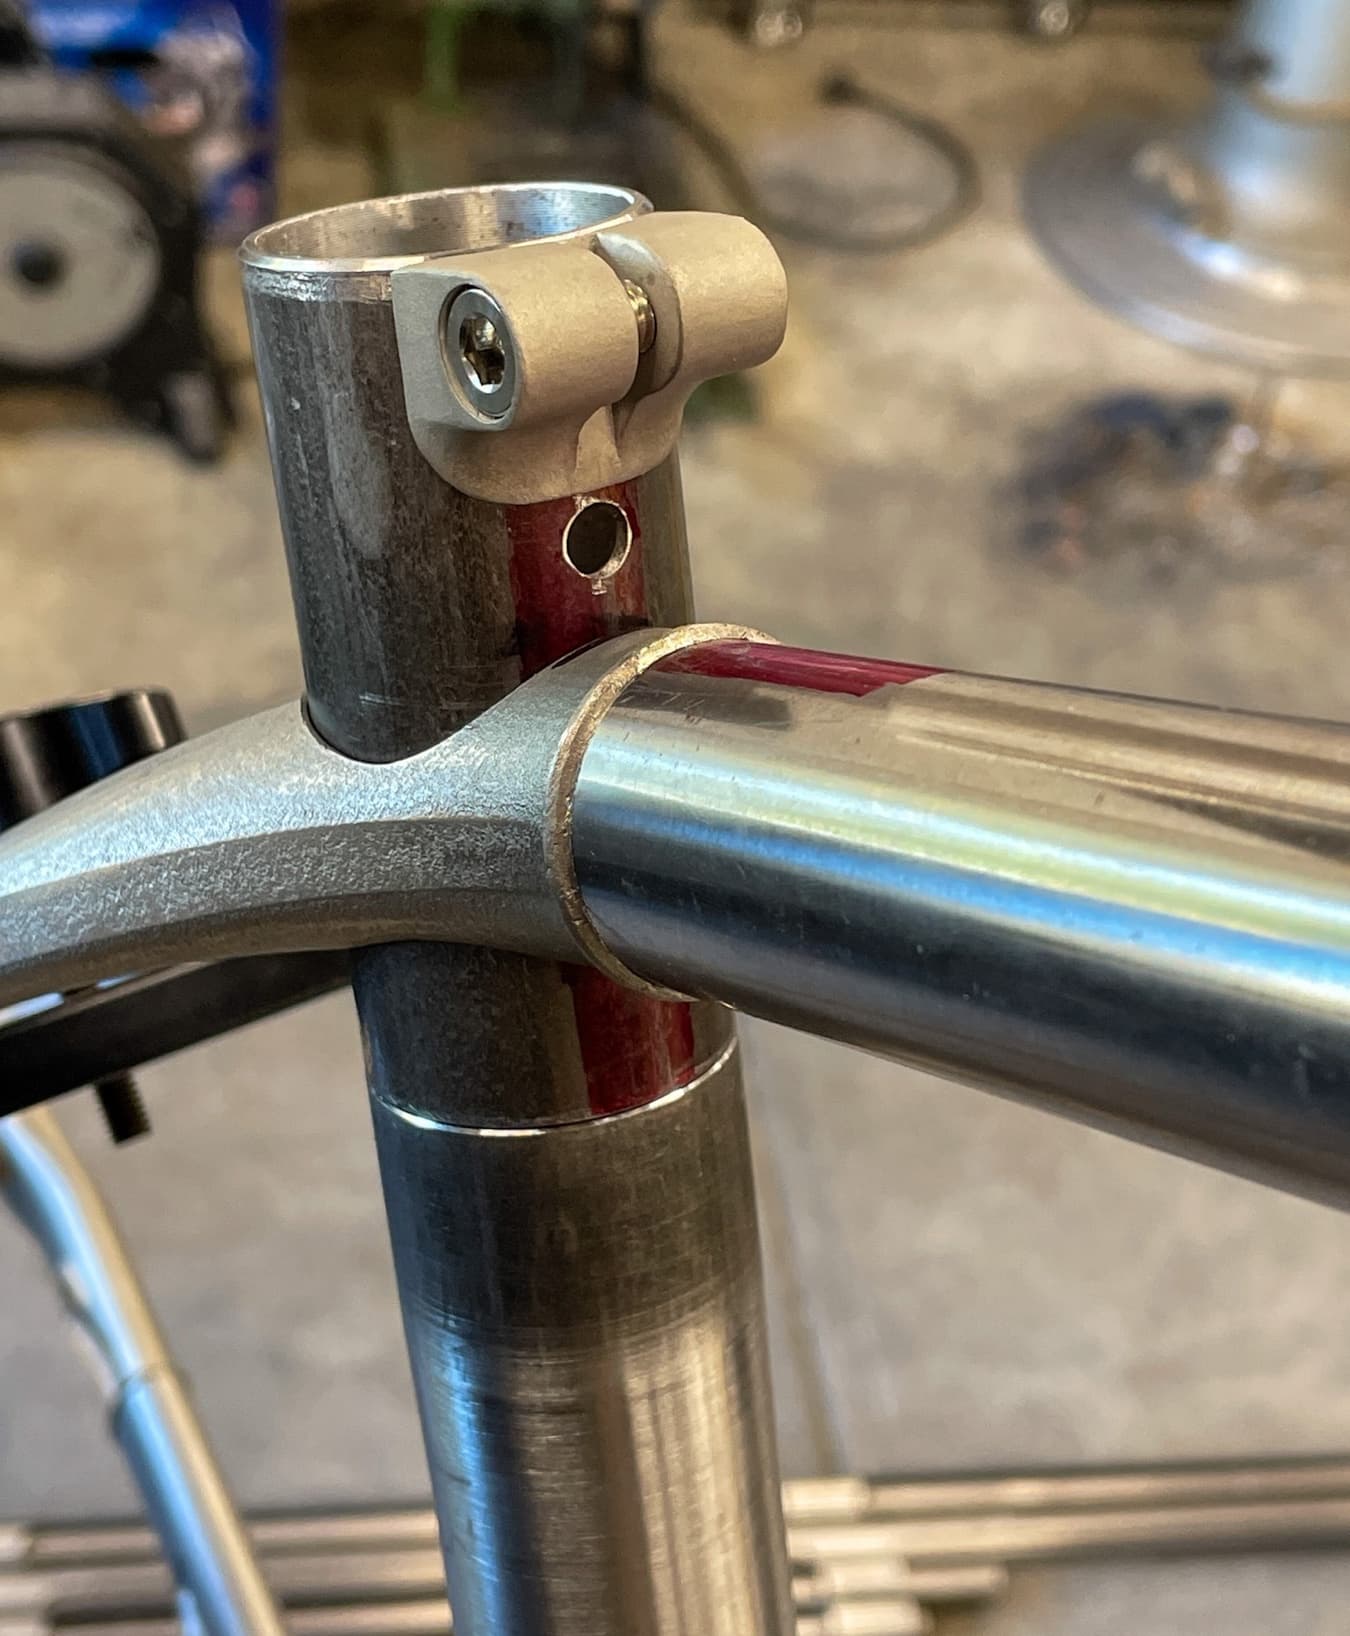
Also managed to face the flat mount insert in my special fixture. Looks like it worked out well.
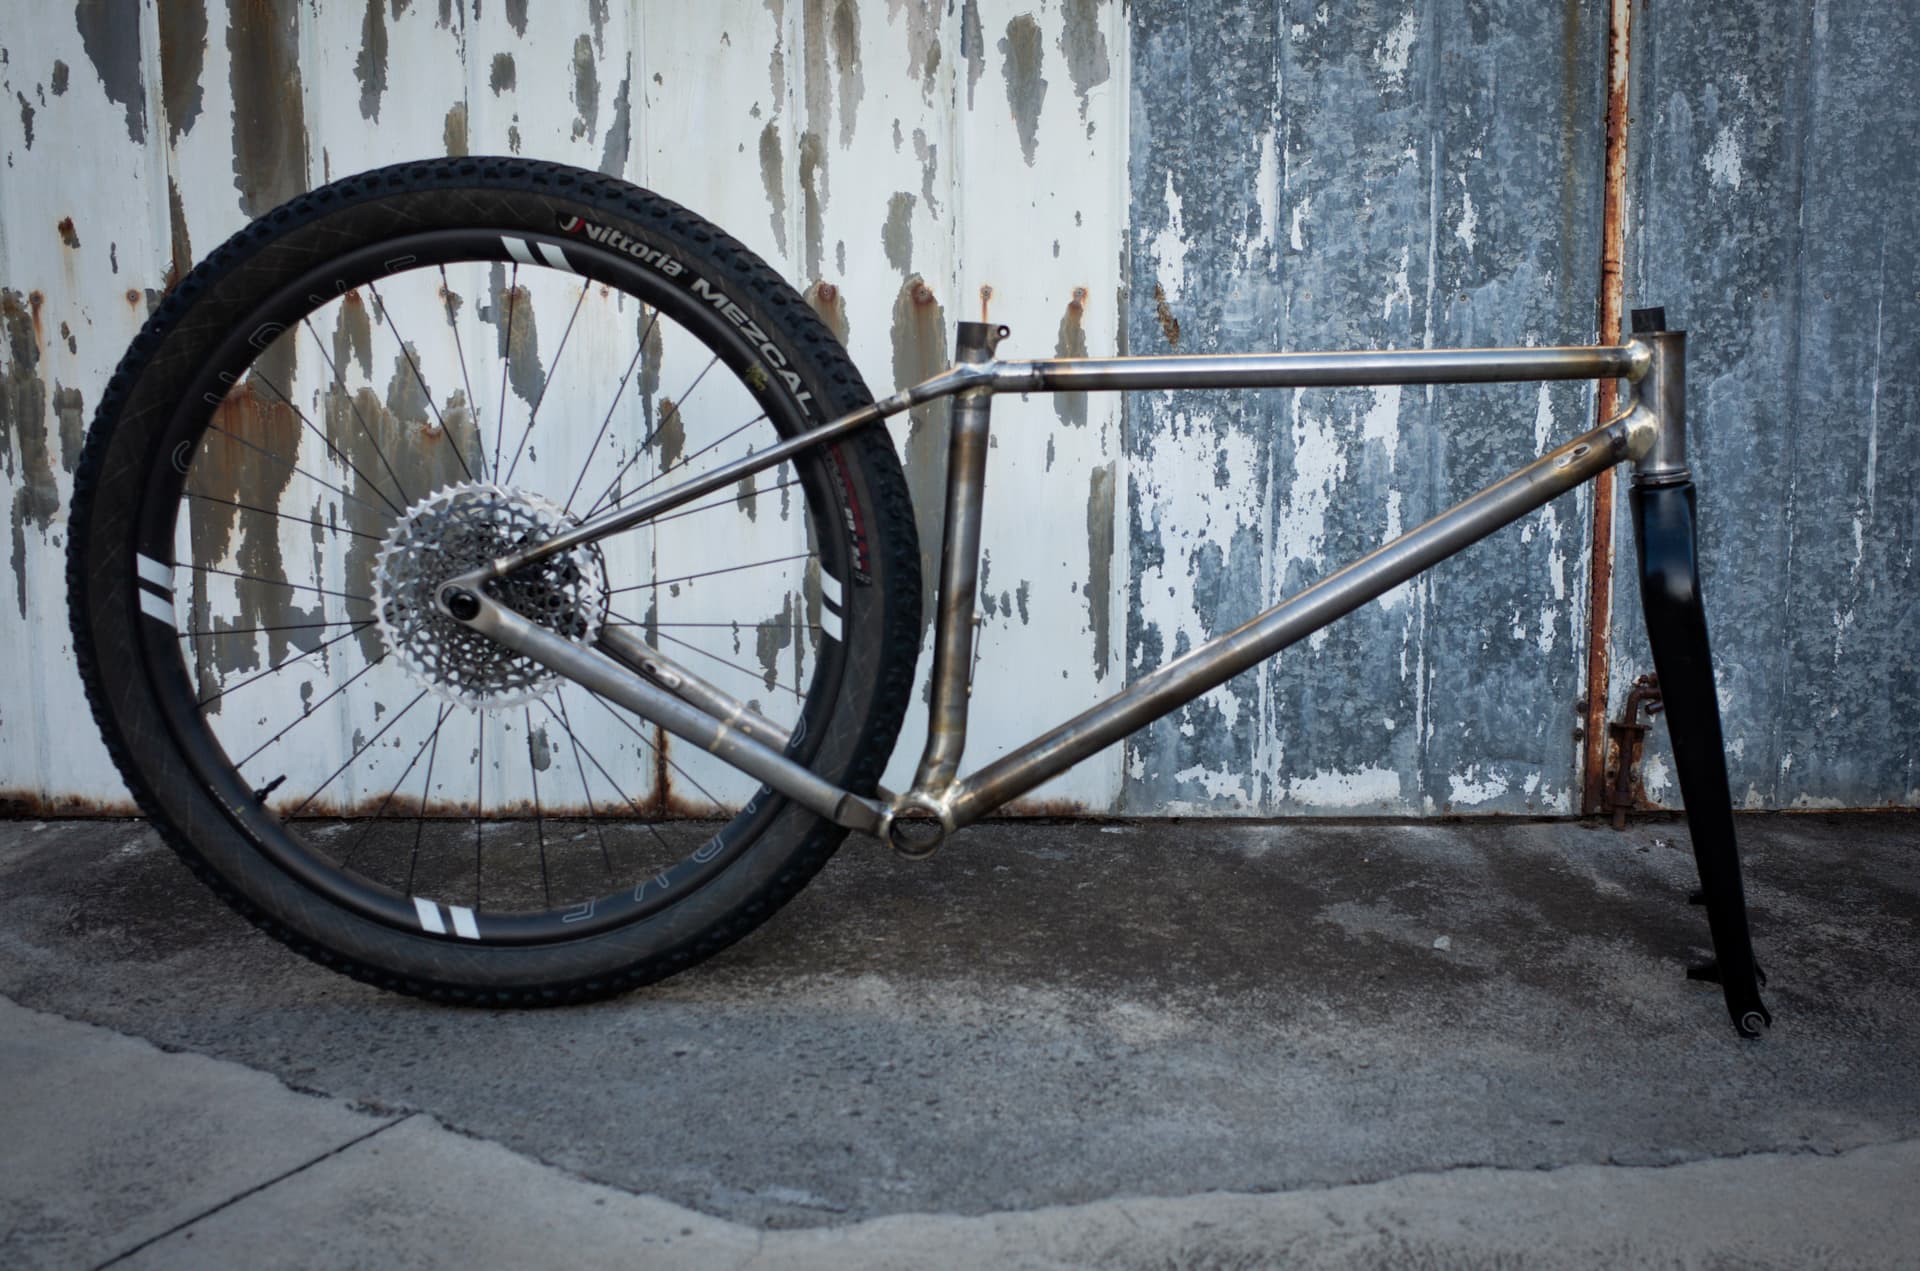
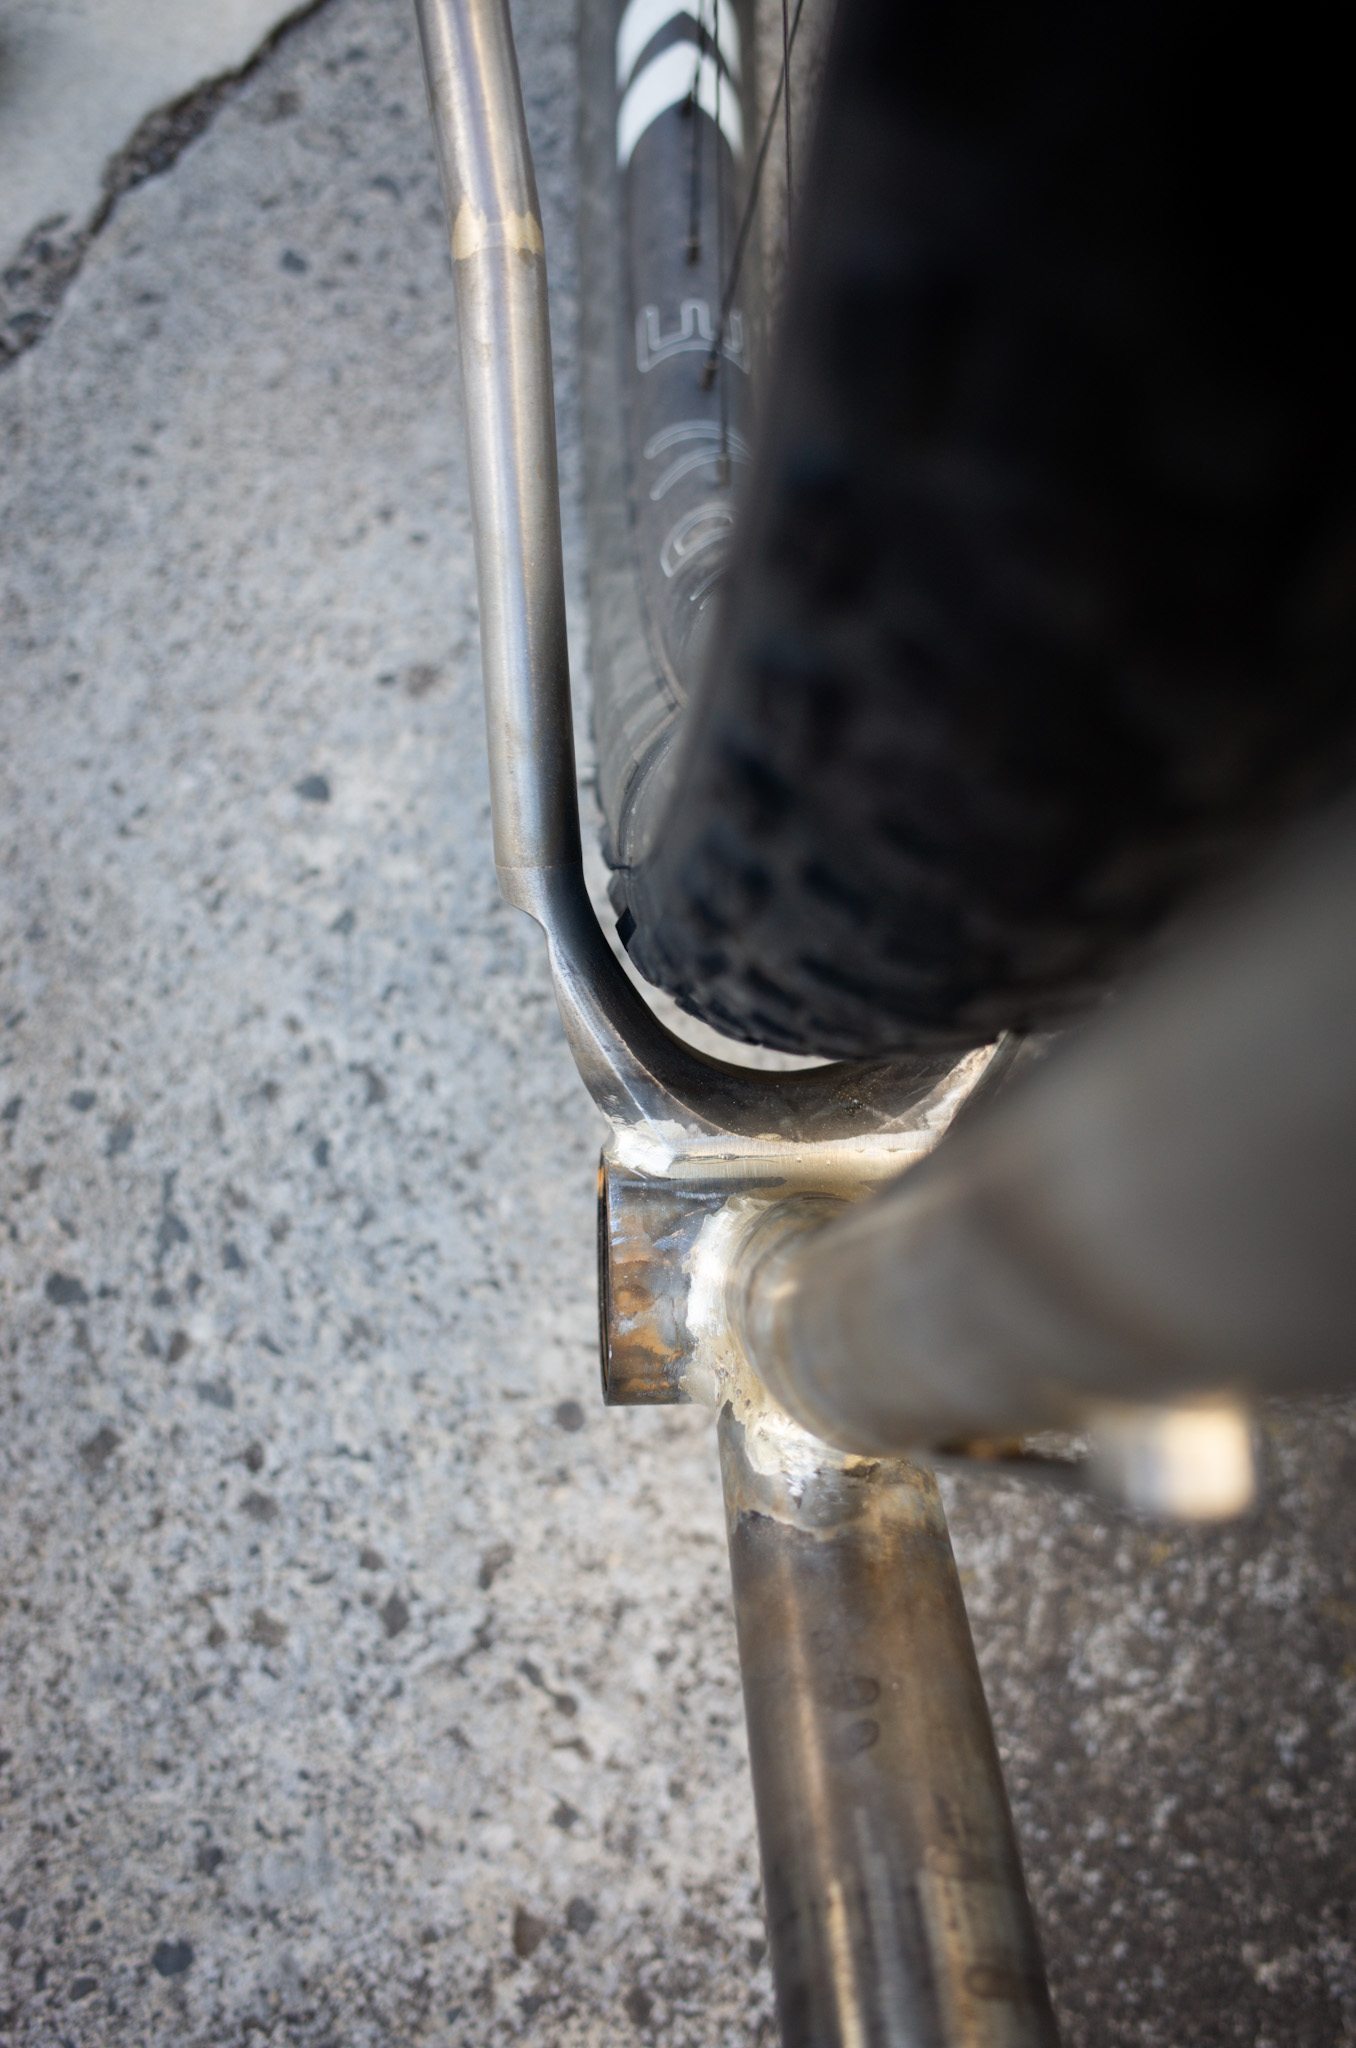
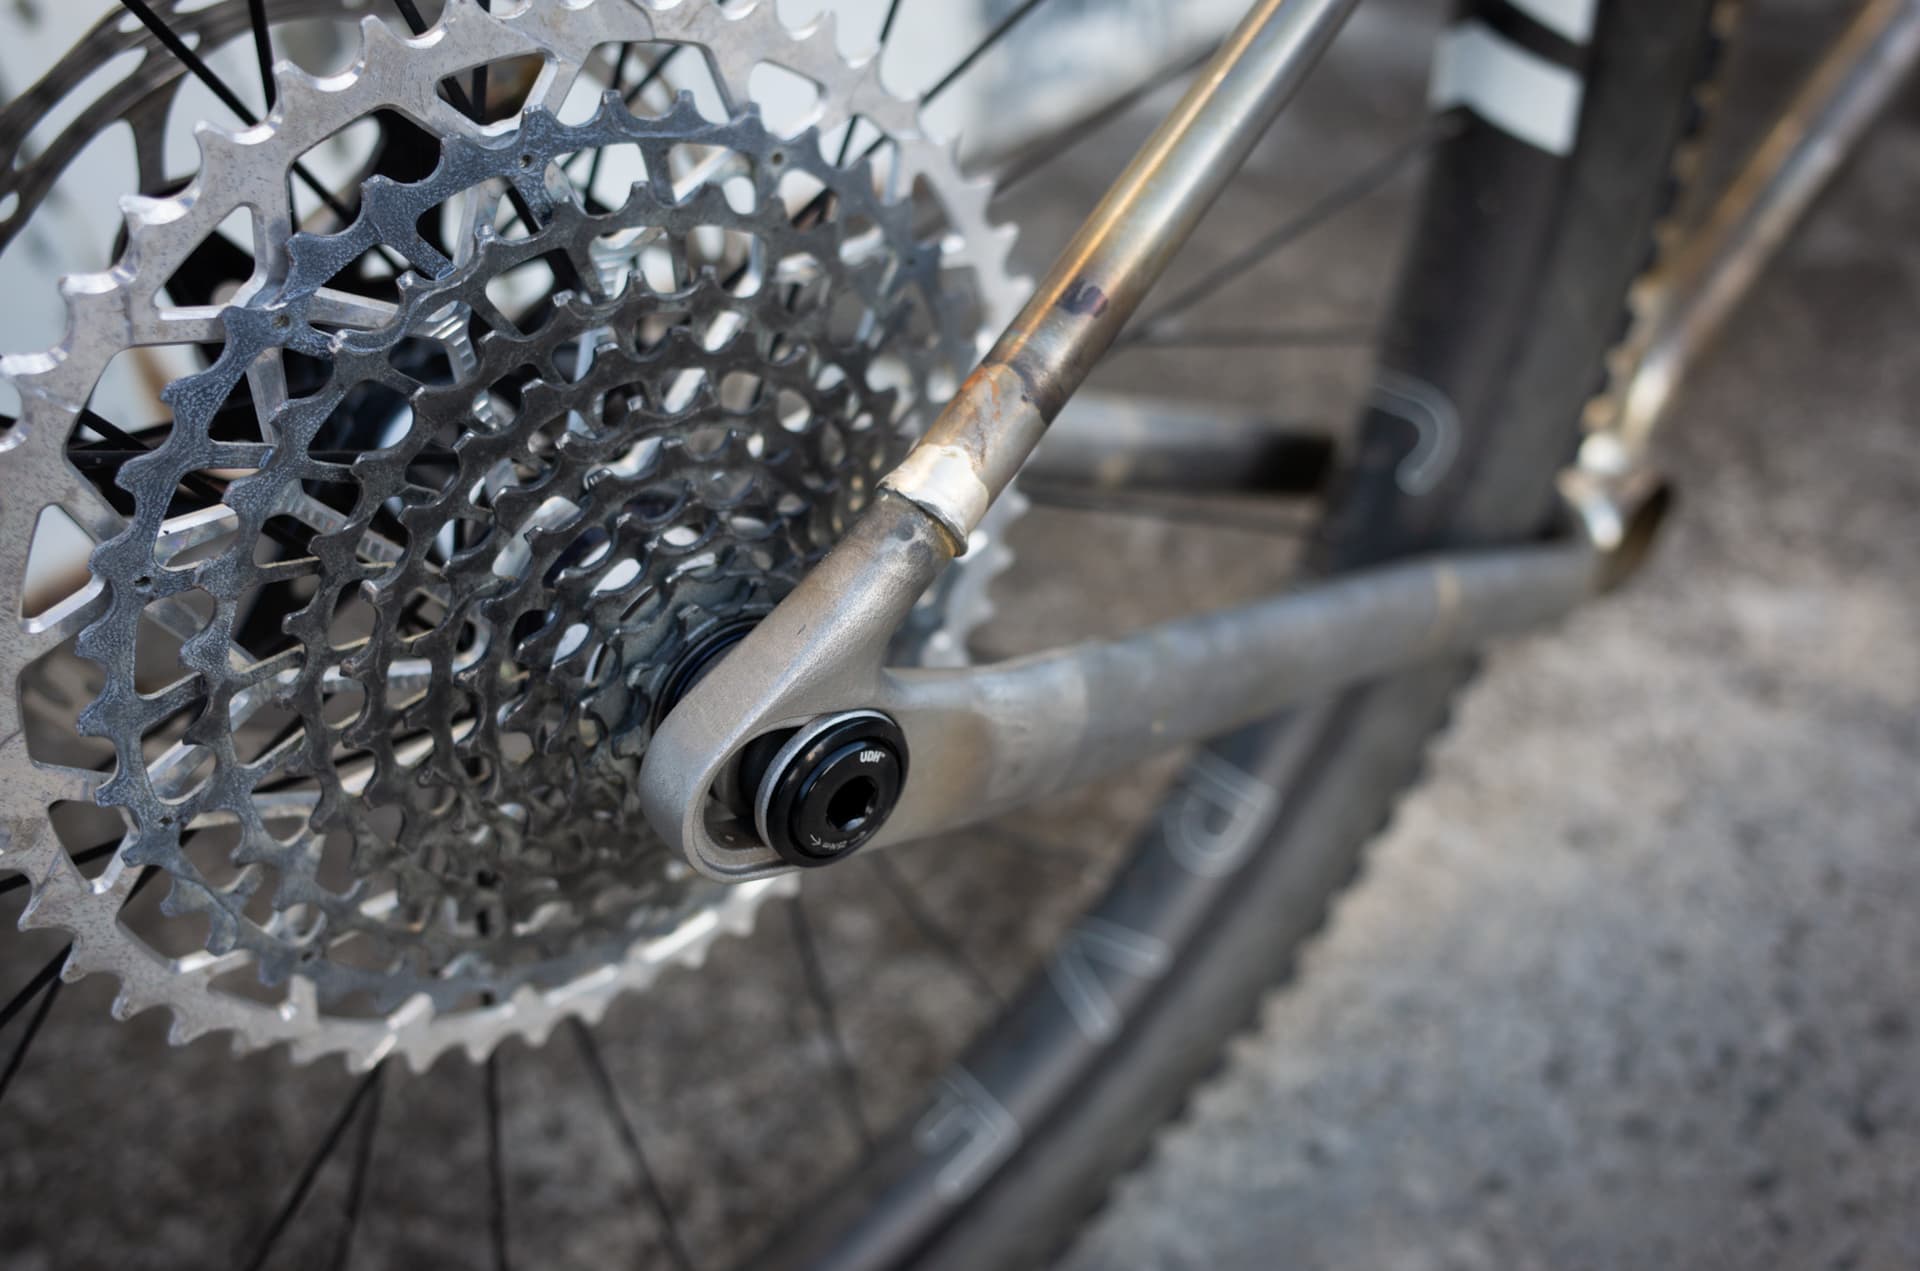
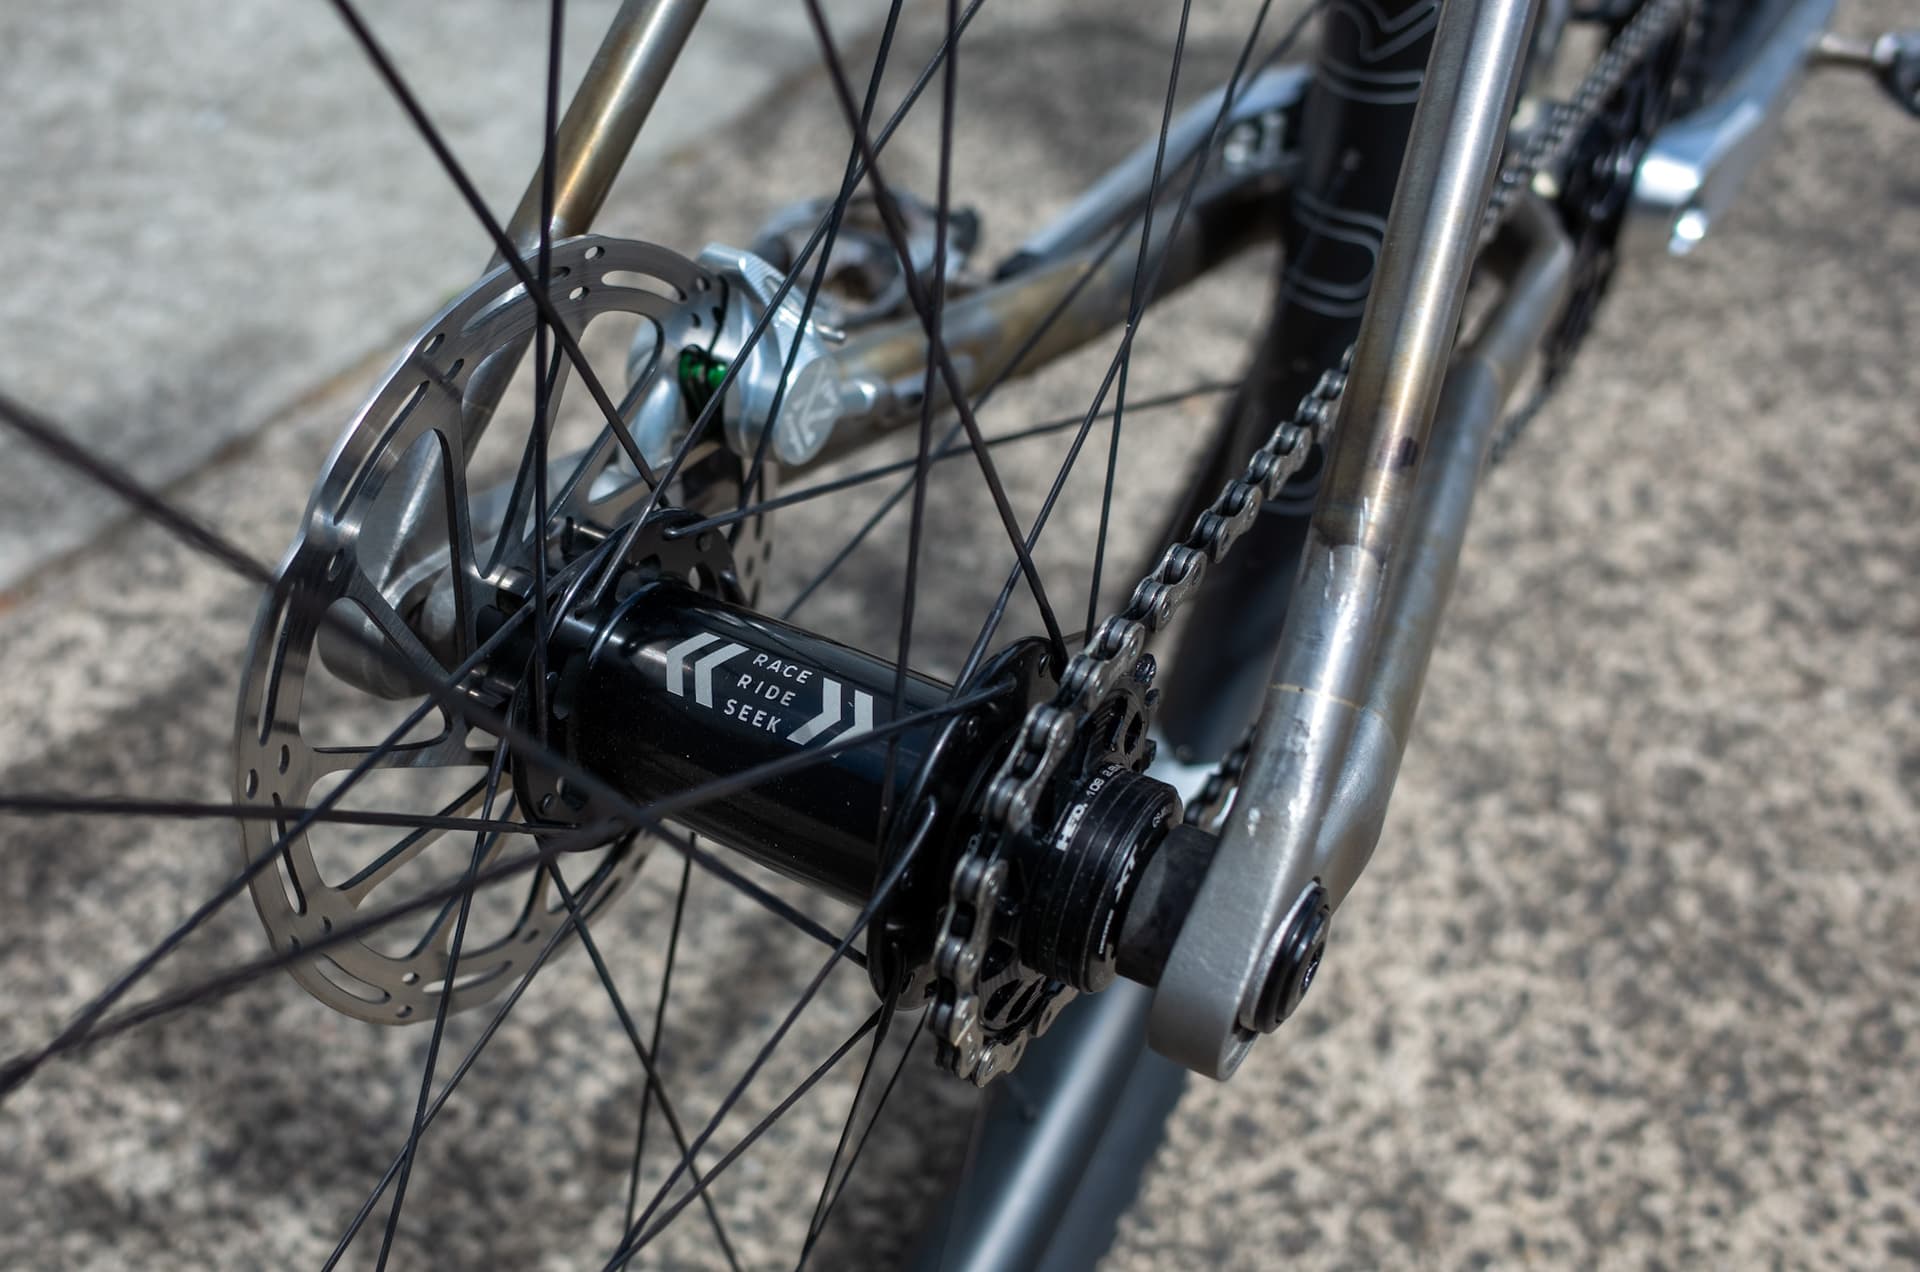
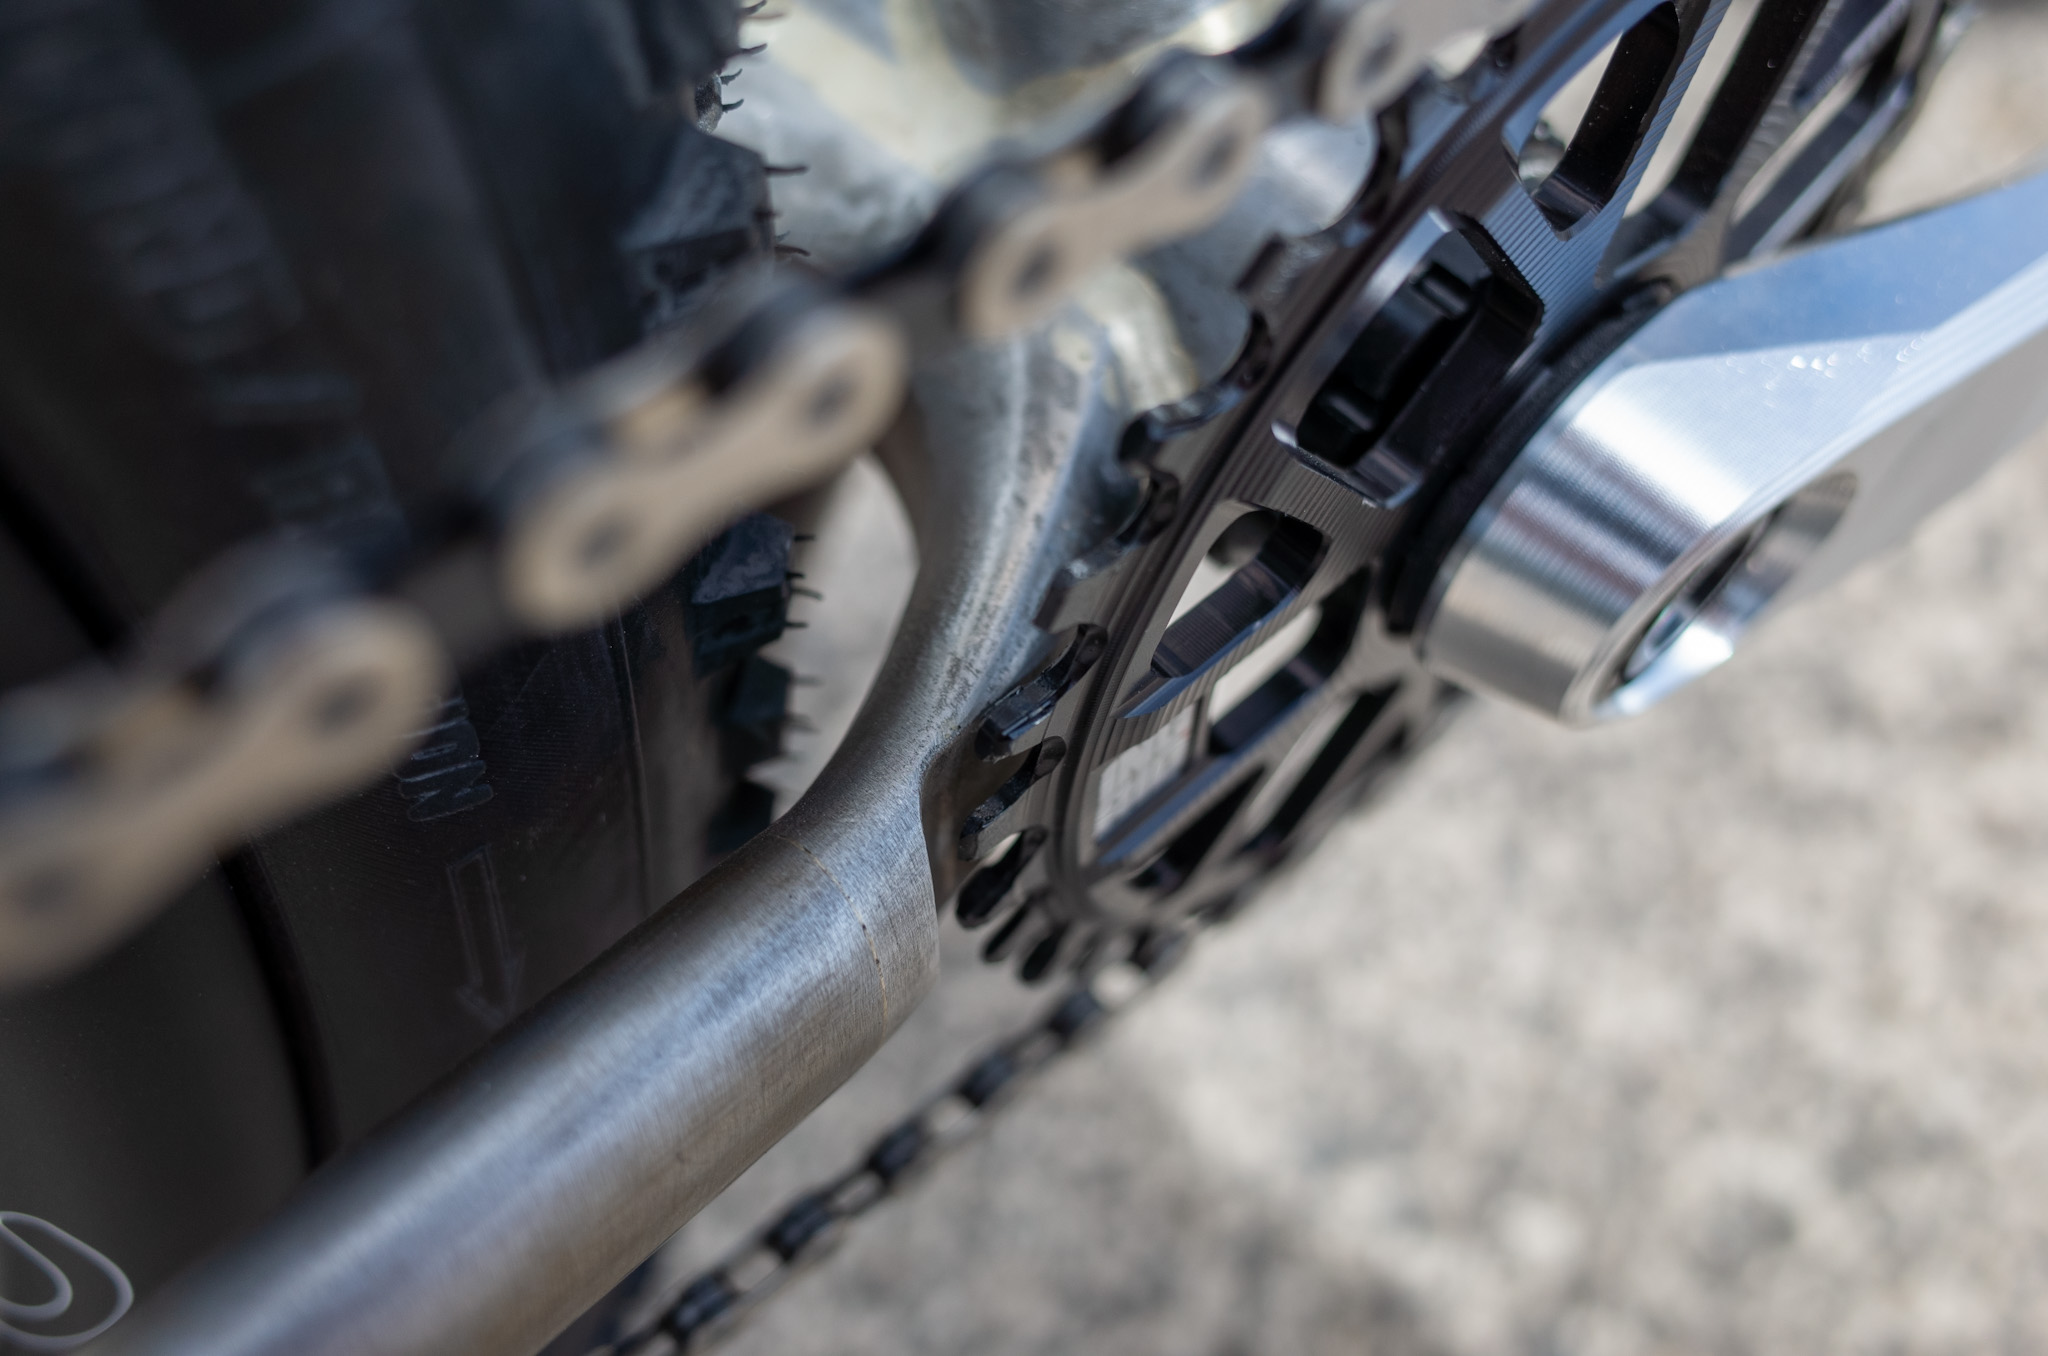
Test fitted a wheel with a 2.6" Vittoria Mezcal, dropouts all the way forward. Clears the tyre and the rear end is straight (always something I fret about). Though I will only run 2.4" tyres on this bike.
All that’s left now is the final beautification of the fillets with some emery cloth, cutting the ST slot, and finally the reaming, facing and thread chasing.
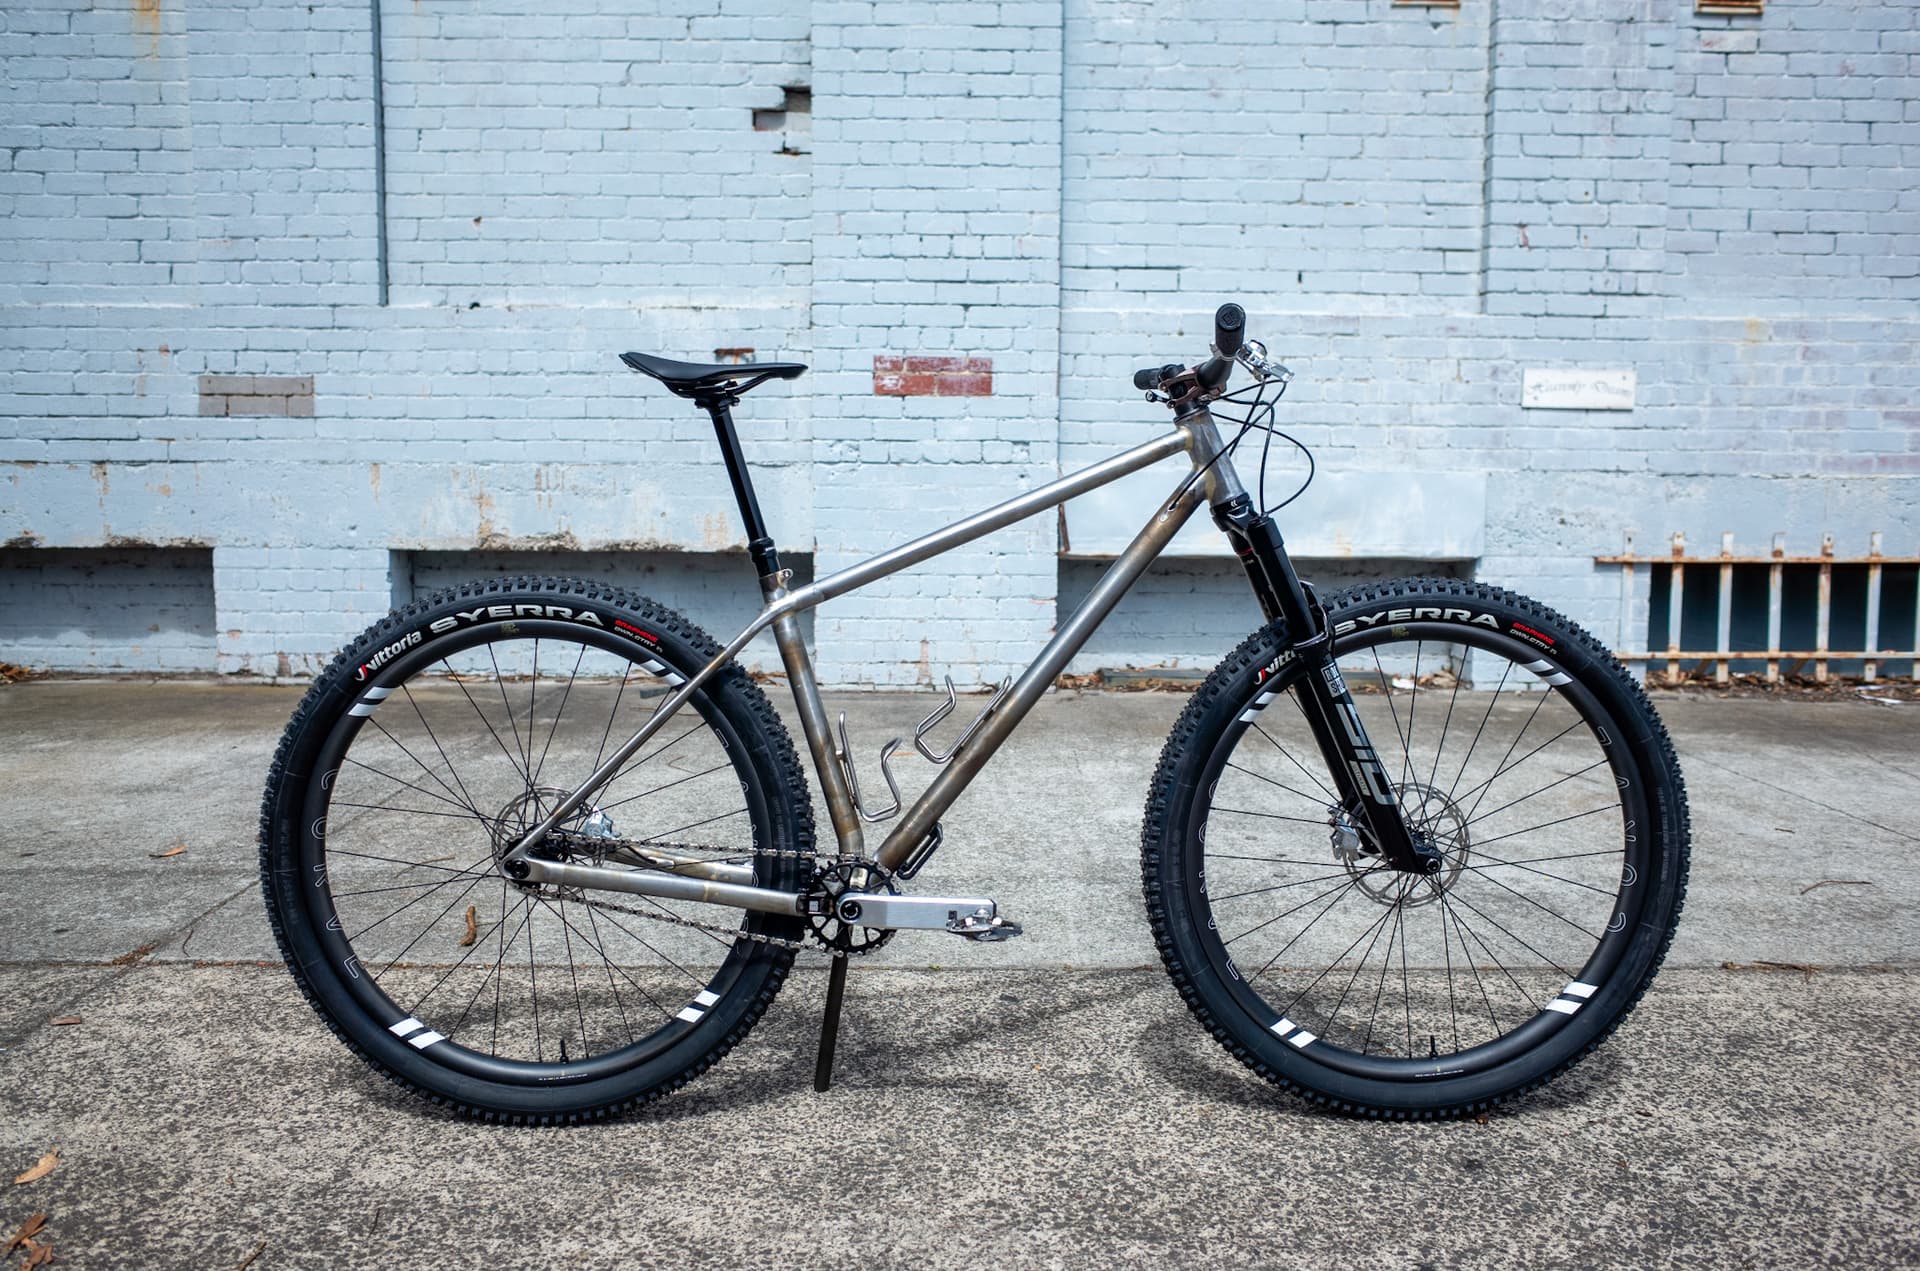
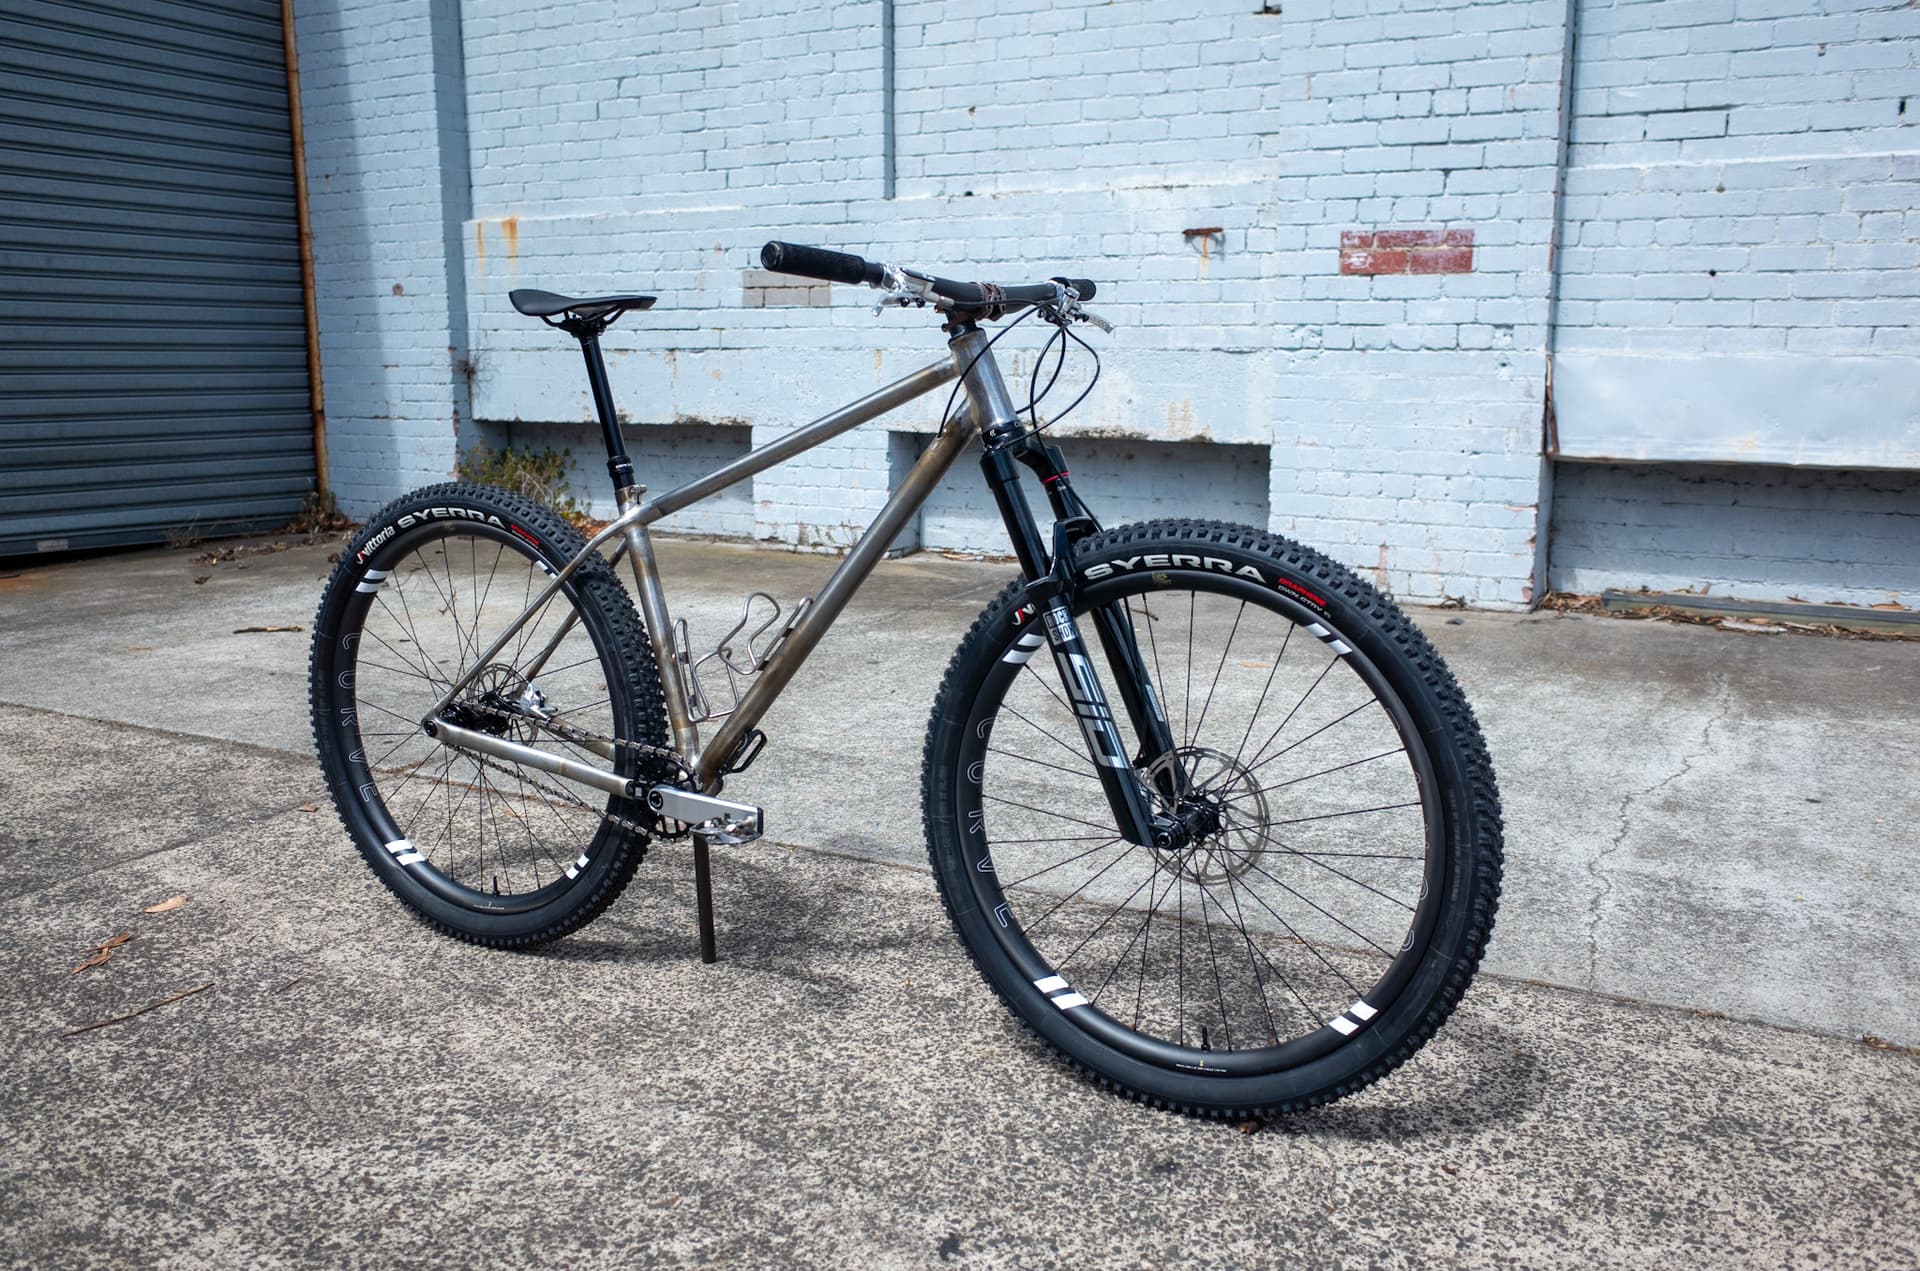
After a mega-session yesterday filing and sanding fillets, all the reaming, facing & chasing & cutting the ST slot, I was able to assemble the bike for test riding before committing to paint.
The build in its current state weighed in at 11.9kg (with pedals, cages and sealant) which I’m totally ok with. I’ve only put 8km on it so far - basically just riding home from the workshop at work late at night after getting it rideable.
The cables will be shortened and tidied up for the final post-paint build.
Here’s a build list:
Build List
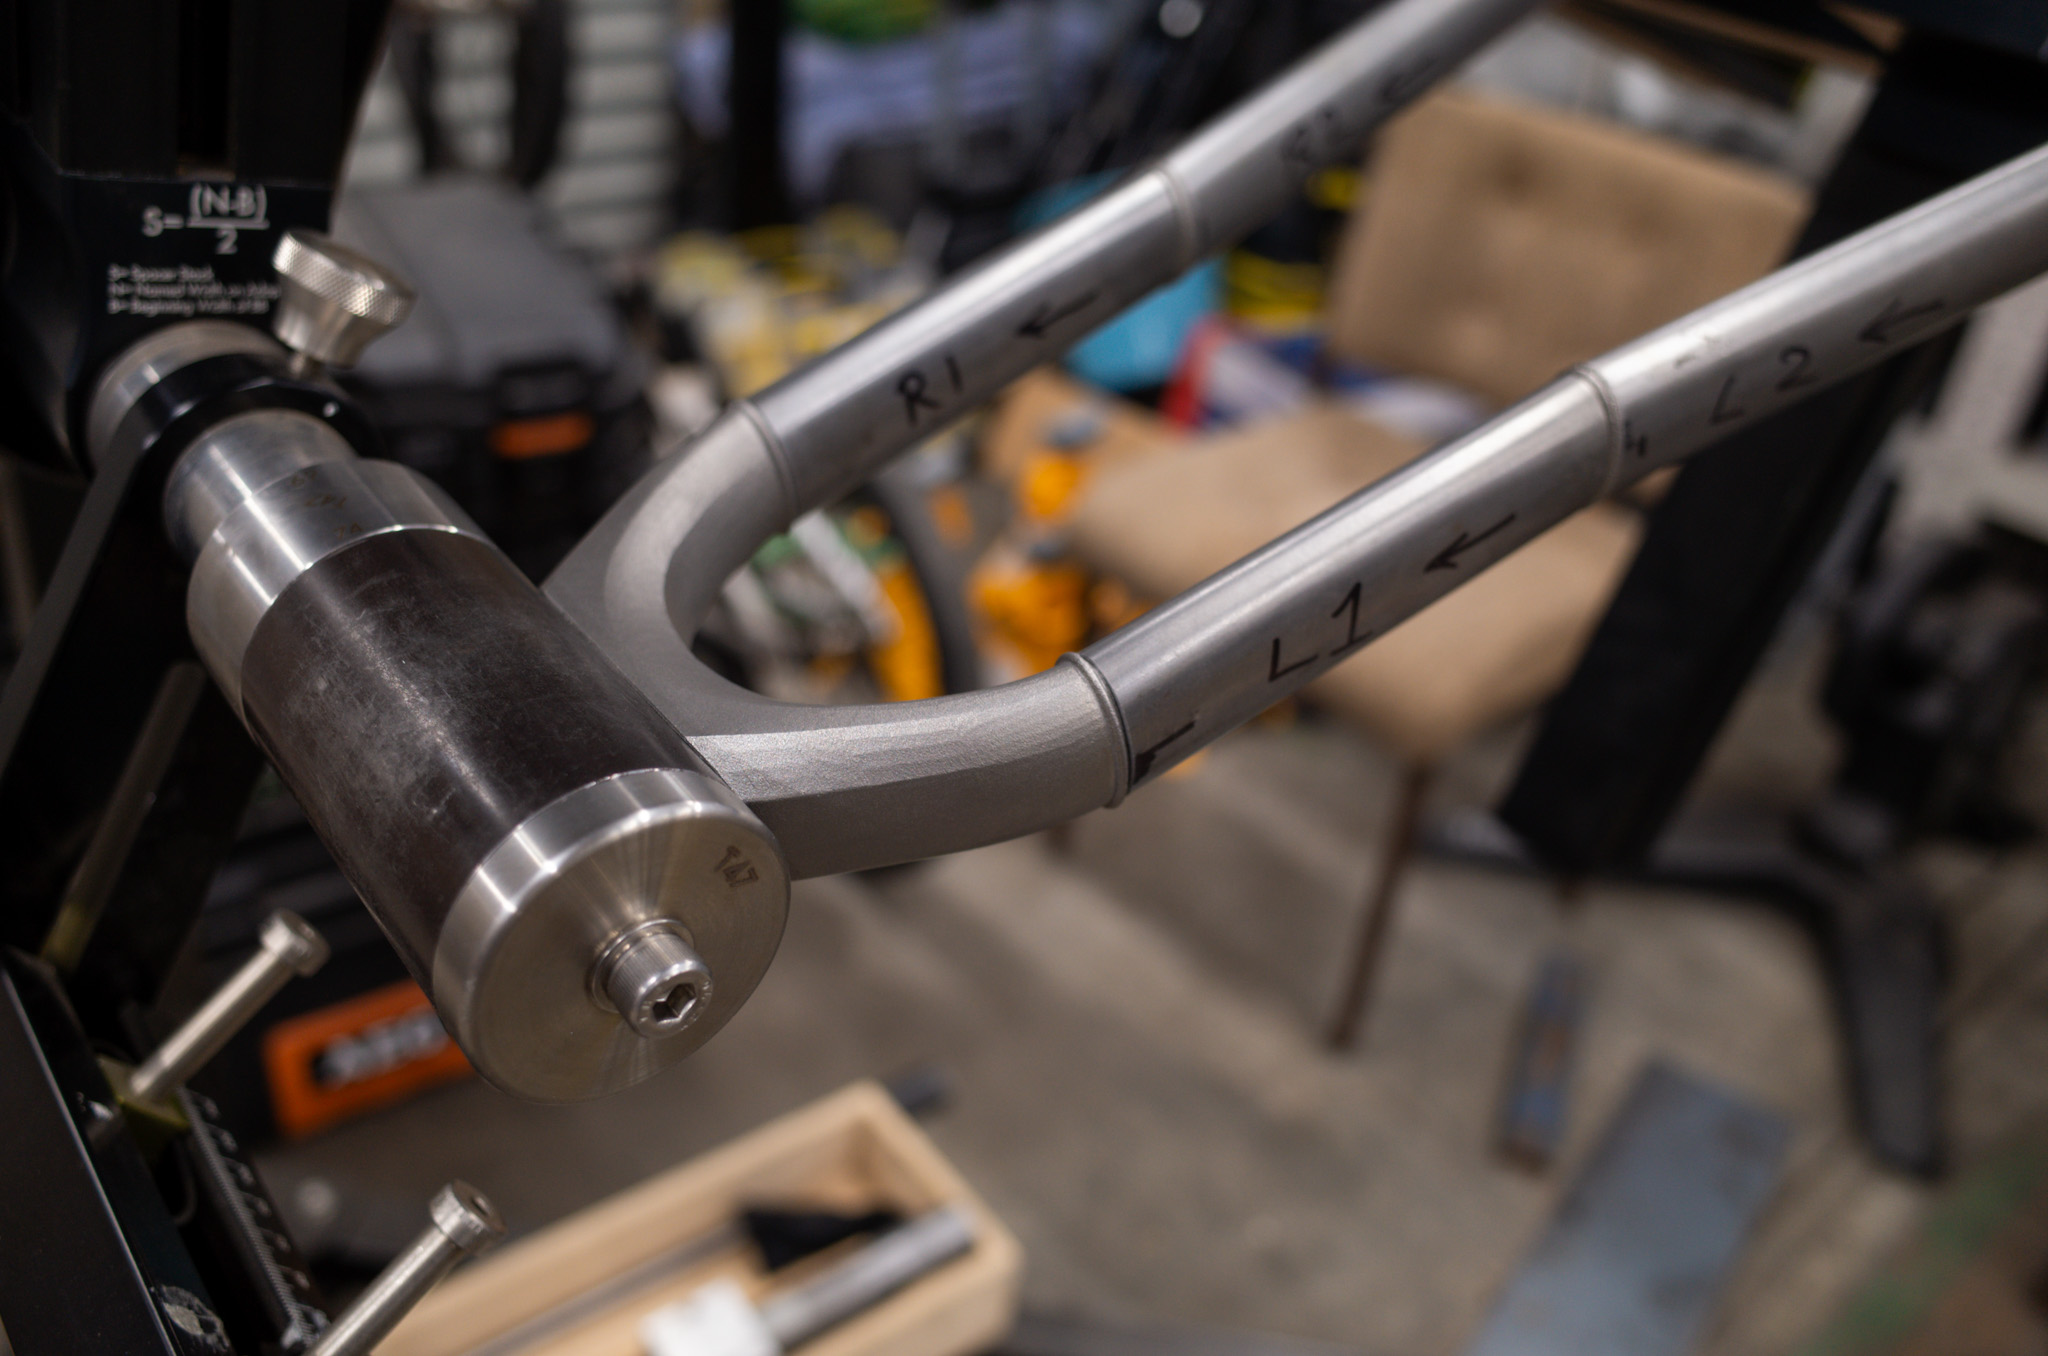
Fork
RockShox SID Ultimate
Headset
Curve 44ZS/EC
Stem
5Dev Ti [40mm]
Bars
Generic Carbon [35mm clamp, cut to 770mm]
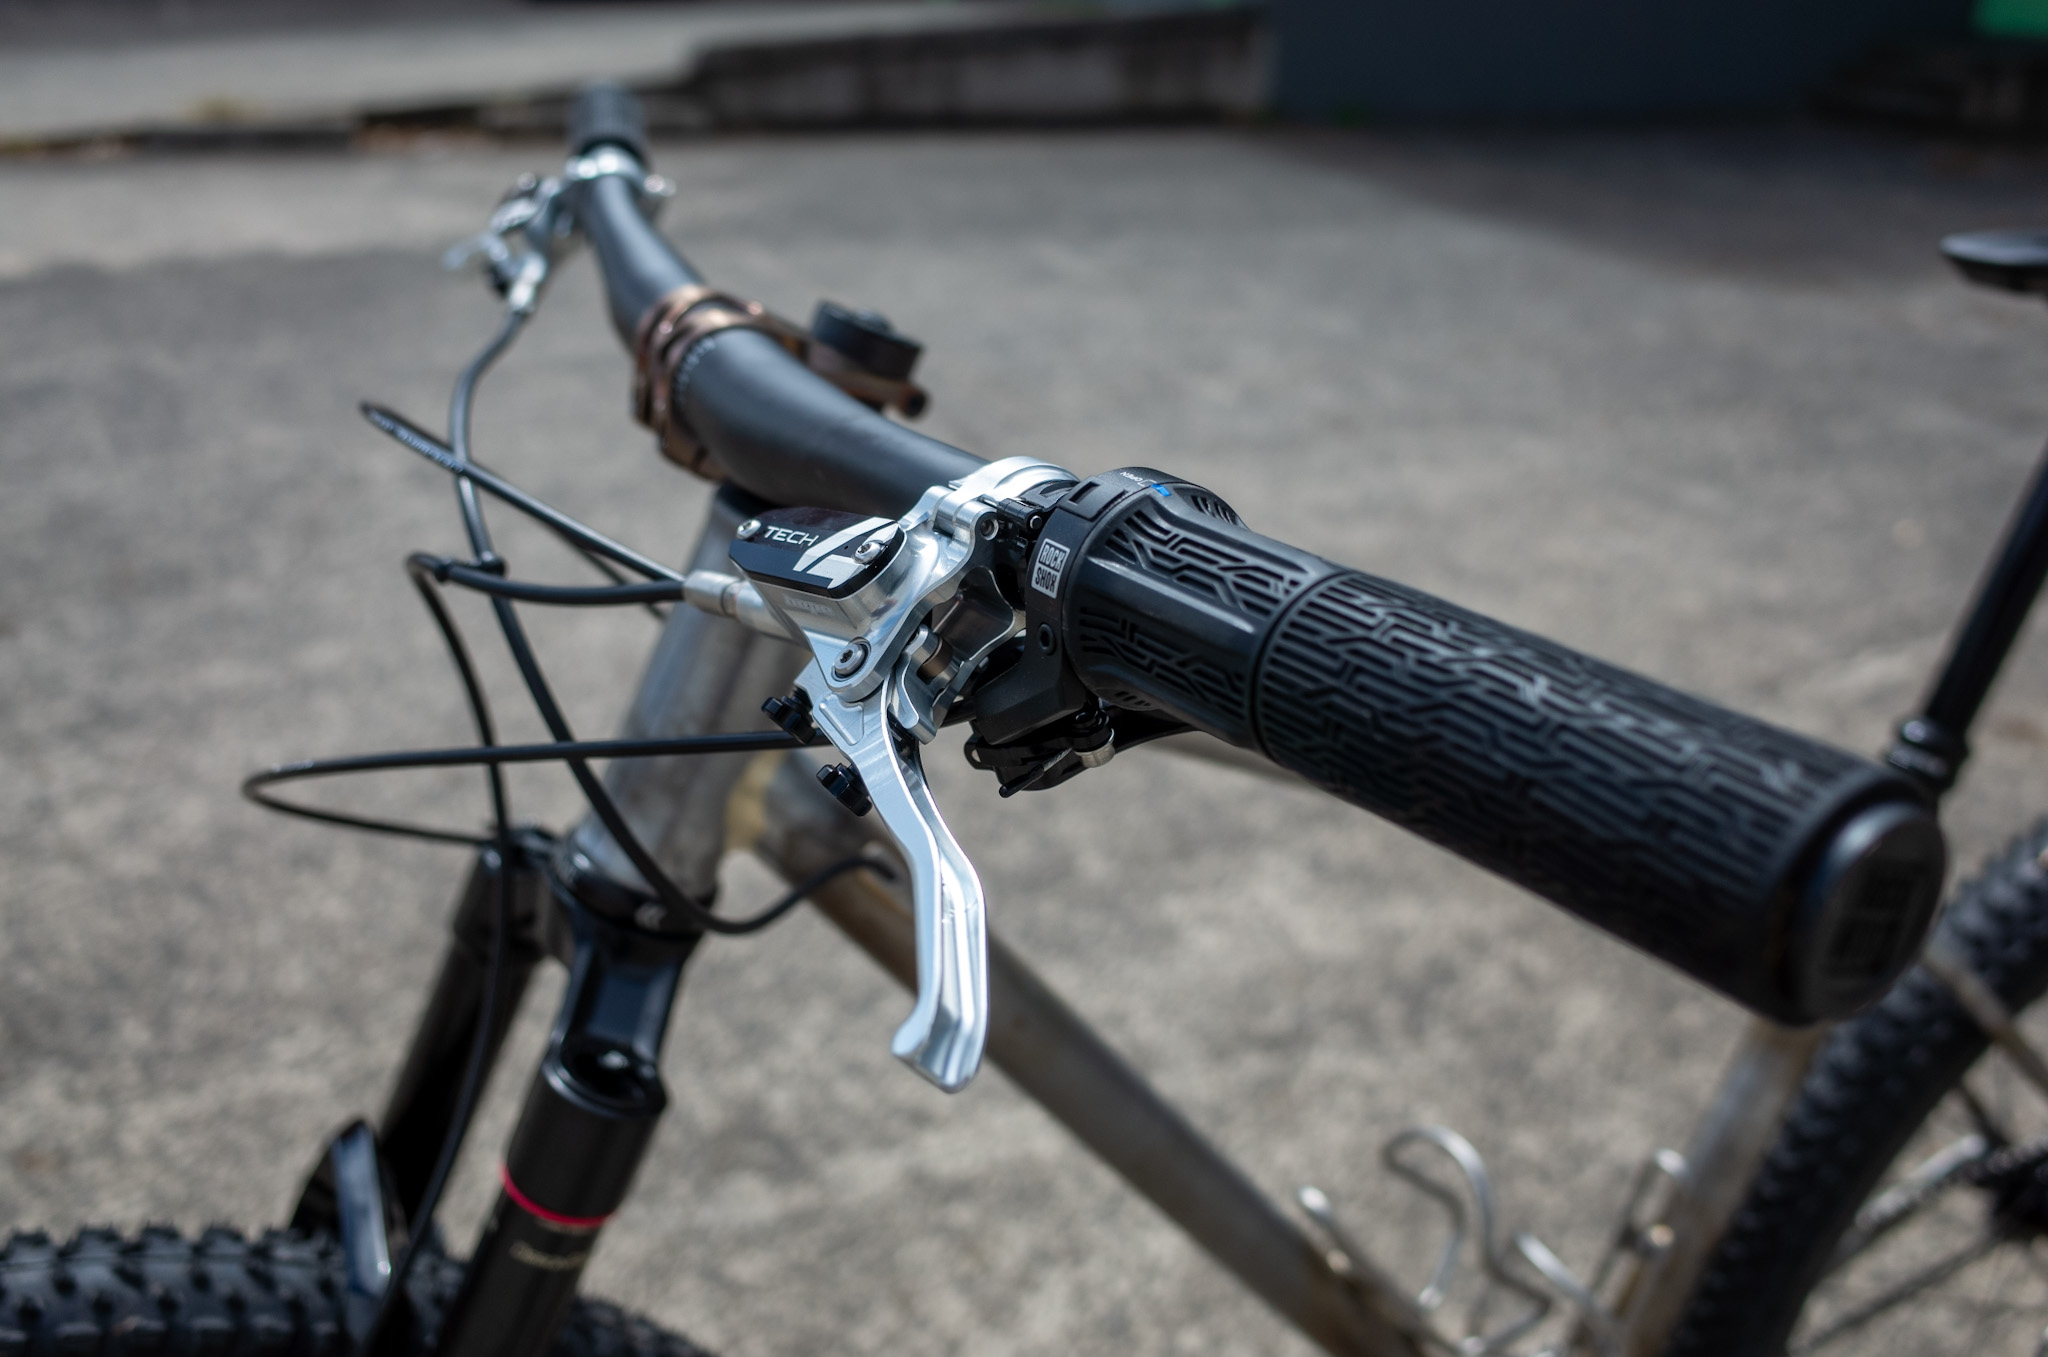
Grips & Lockout Remote
Rockshox Twist Loc
Cranks
Ingrid CRS-X 170mm w. 32t chainring
Cog
Absolute Black, 18t
Chain
SRAM GX Eagle
BB
White Industries T47
Dropper
RaceFace Aeffect, 170mm
Dropper Remote
Wolf Tooth ReMote Pro
Saddle
Syncros Belcarra
Brakes
HOPE Tech 4 X2/X2 Flat Mount w. SRAM Centreline rotors
She’s a beaut! Really like the dropout solution If my new mountain bike design had 3DP stuff and FM brakes on it, I’d probably make something “inspired” by your design
As usual life has been busy, but I’ve had some time to ride the bike on various trails and I feel that I made some good choices with the geo.
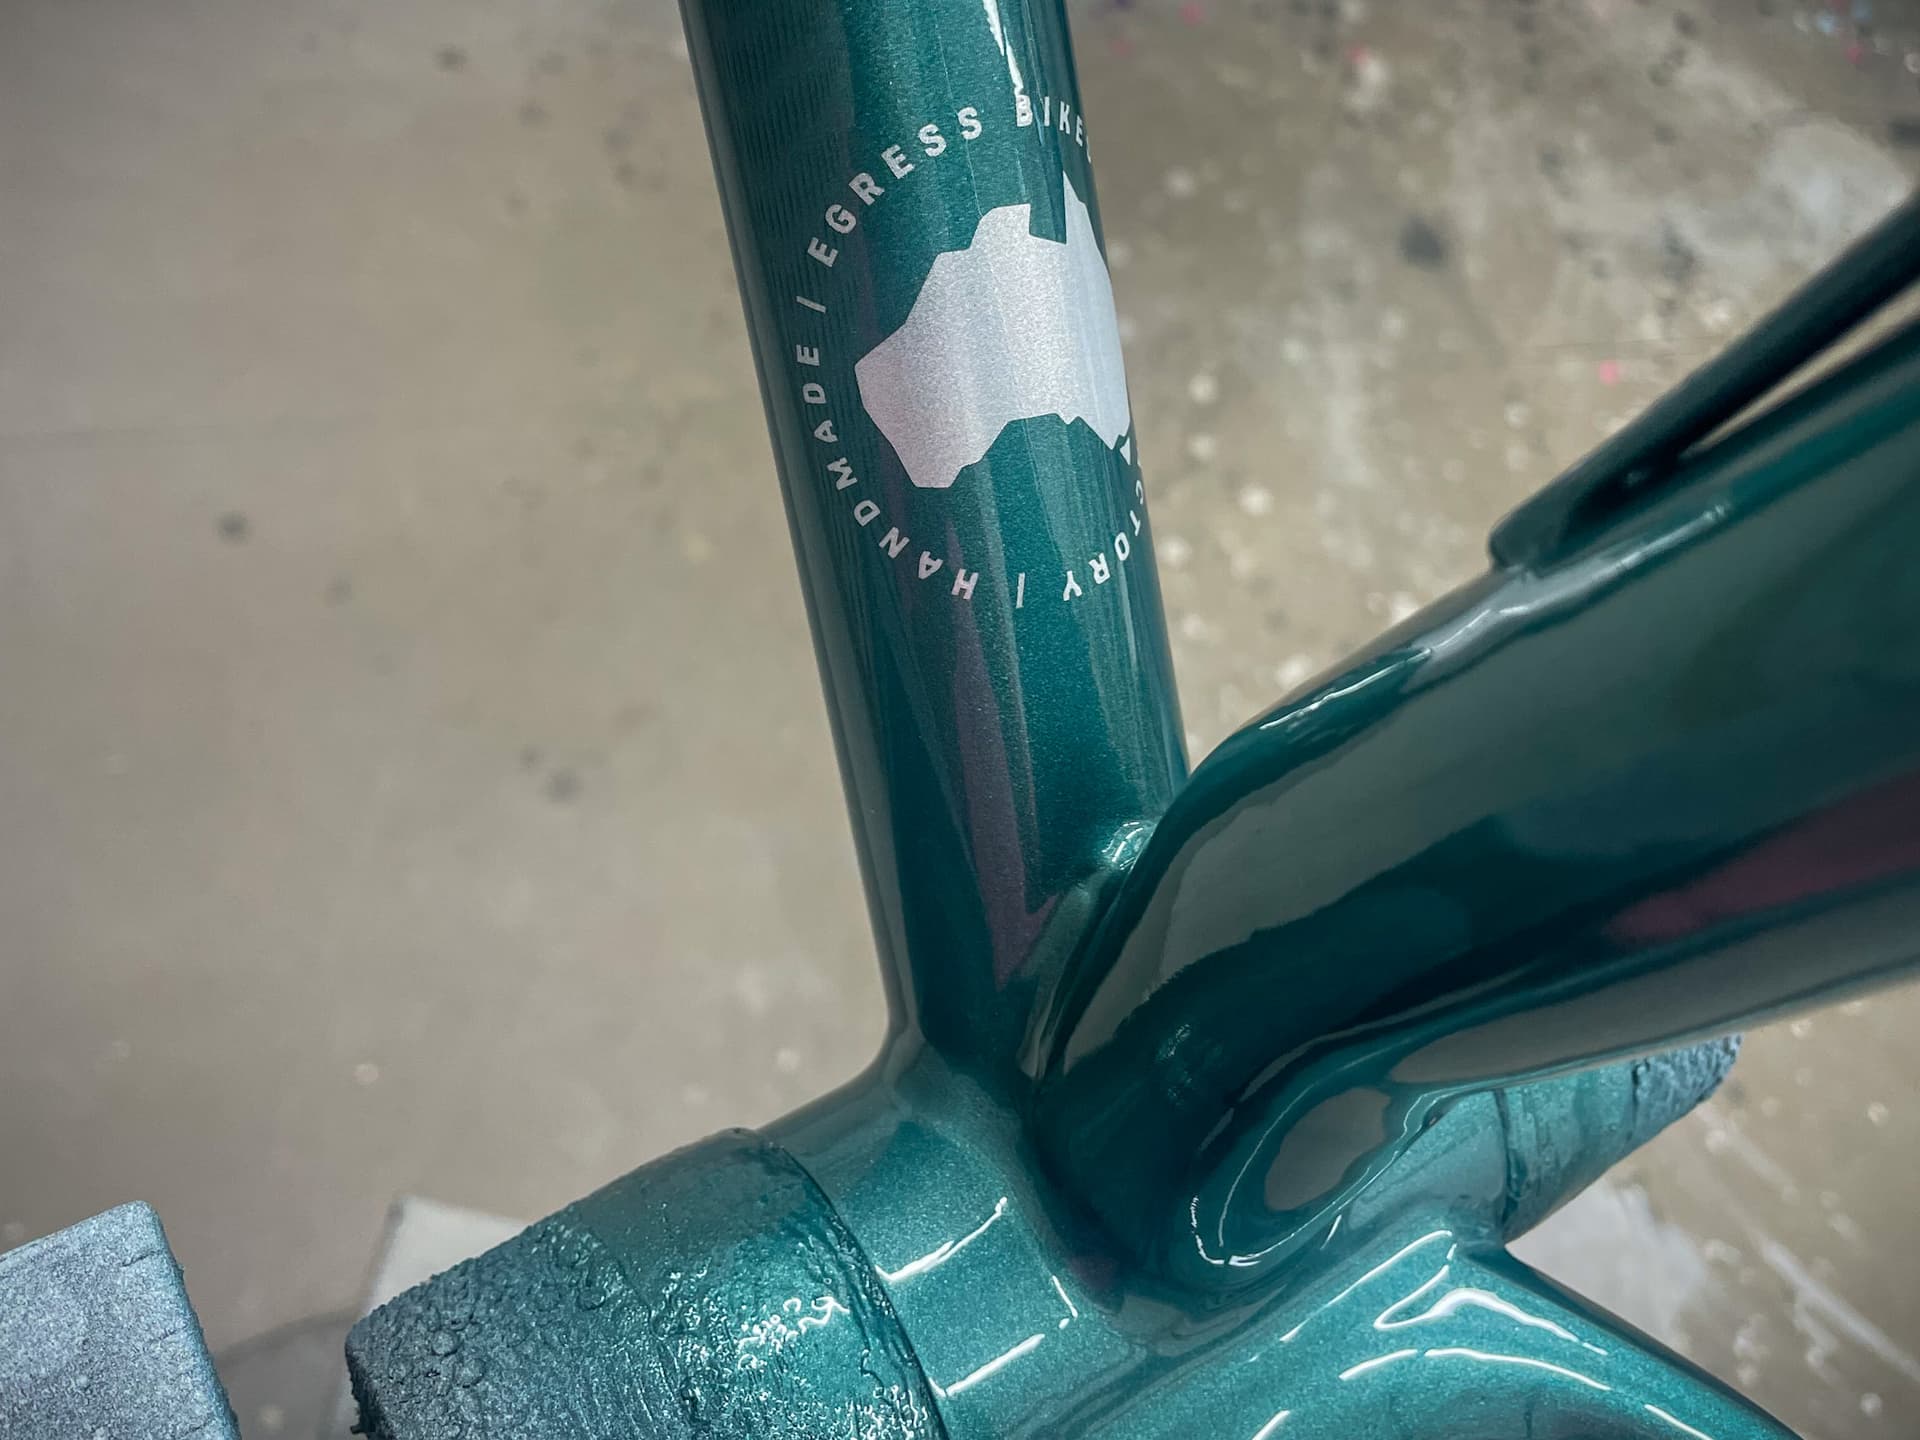
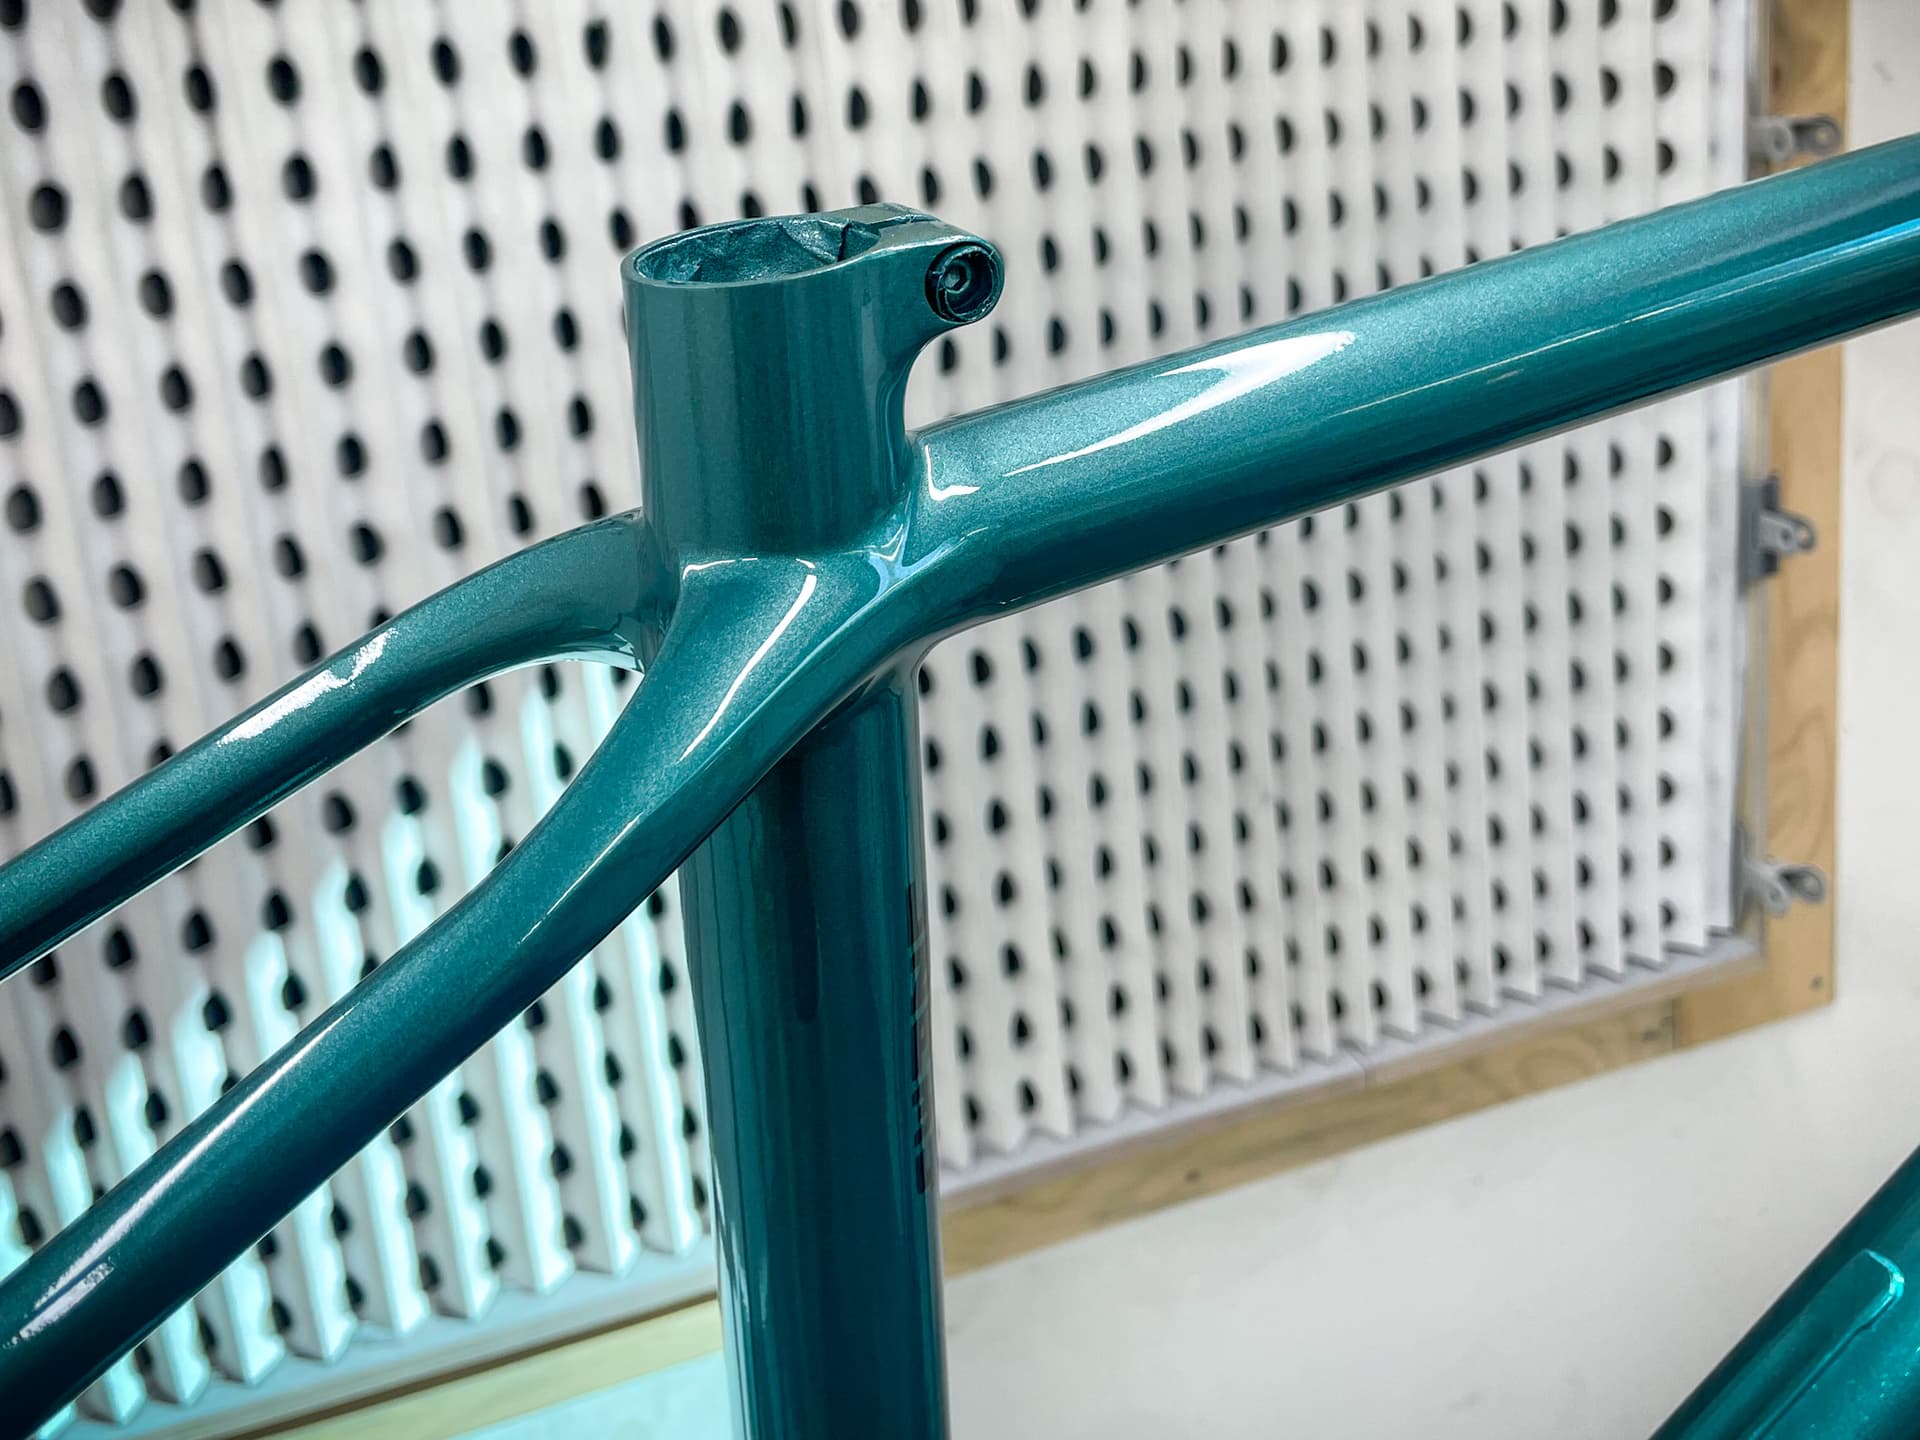
A few weeks ago I stripped the parts off the bike to get the frame painted by my colleague while I was focusing on a time consuming project at work, and most recently a week in Taiwan.
Here’s a sneak peek at what will be waiting for me when I get back to work tomorrow.
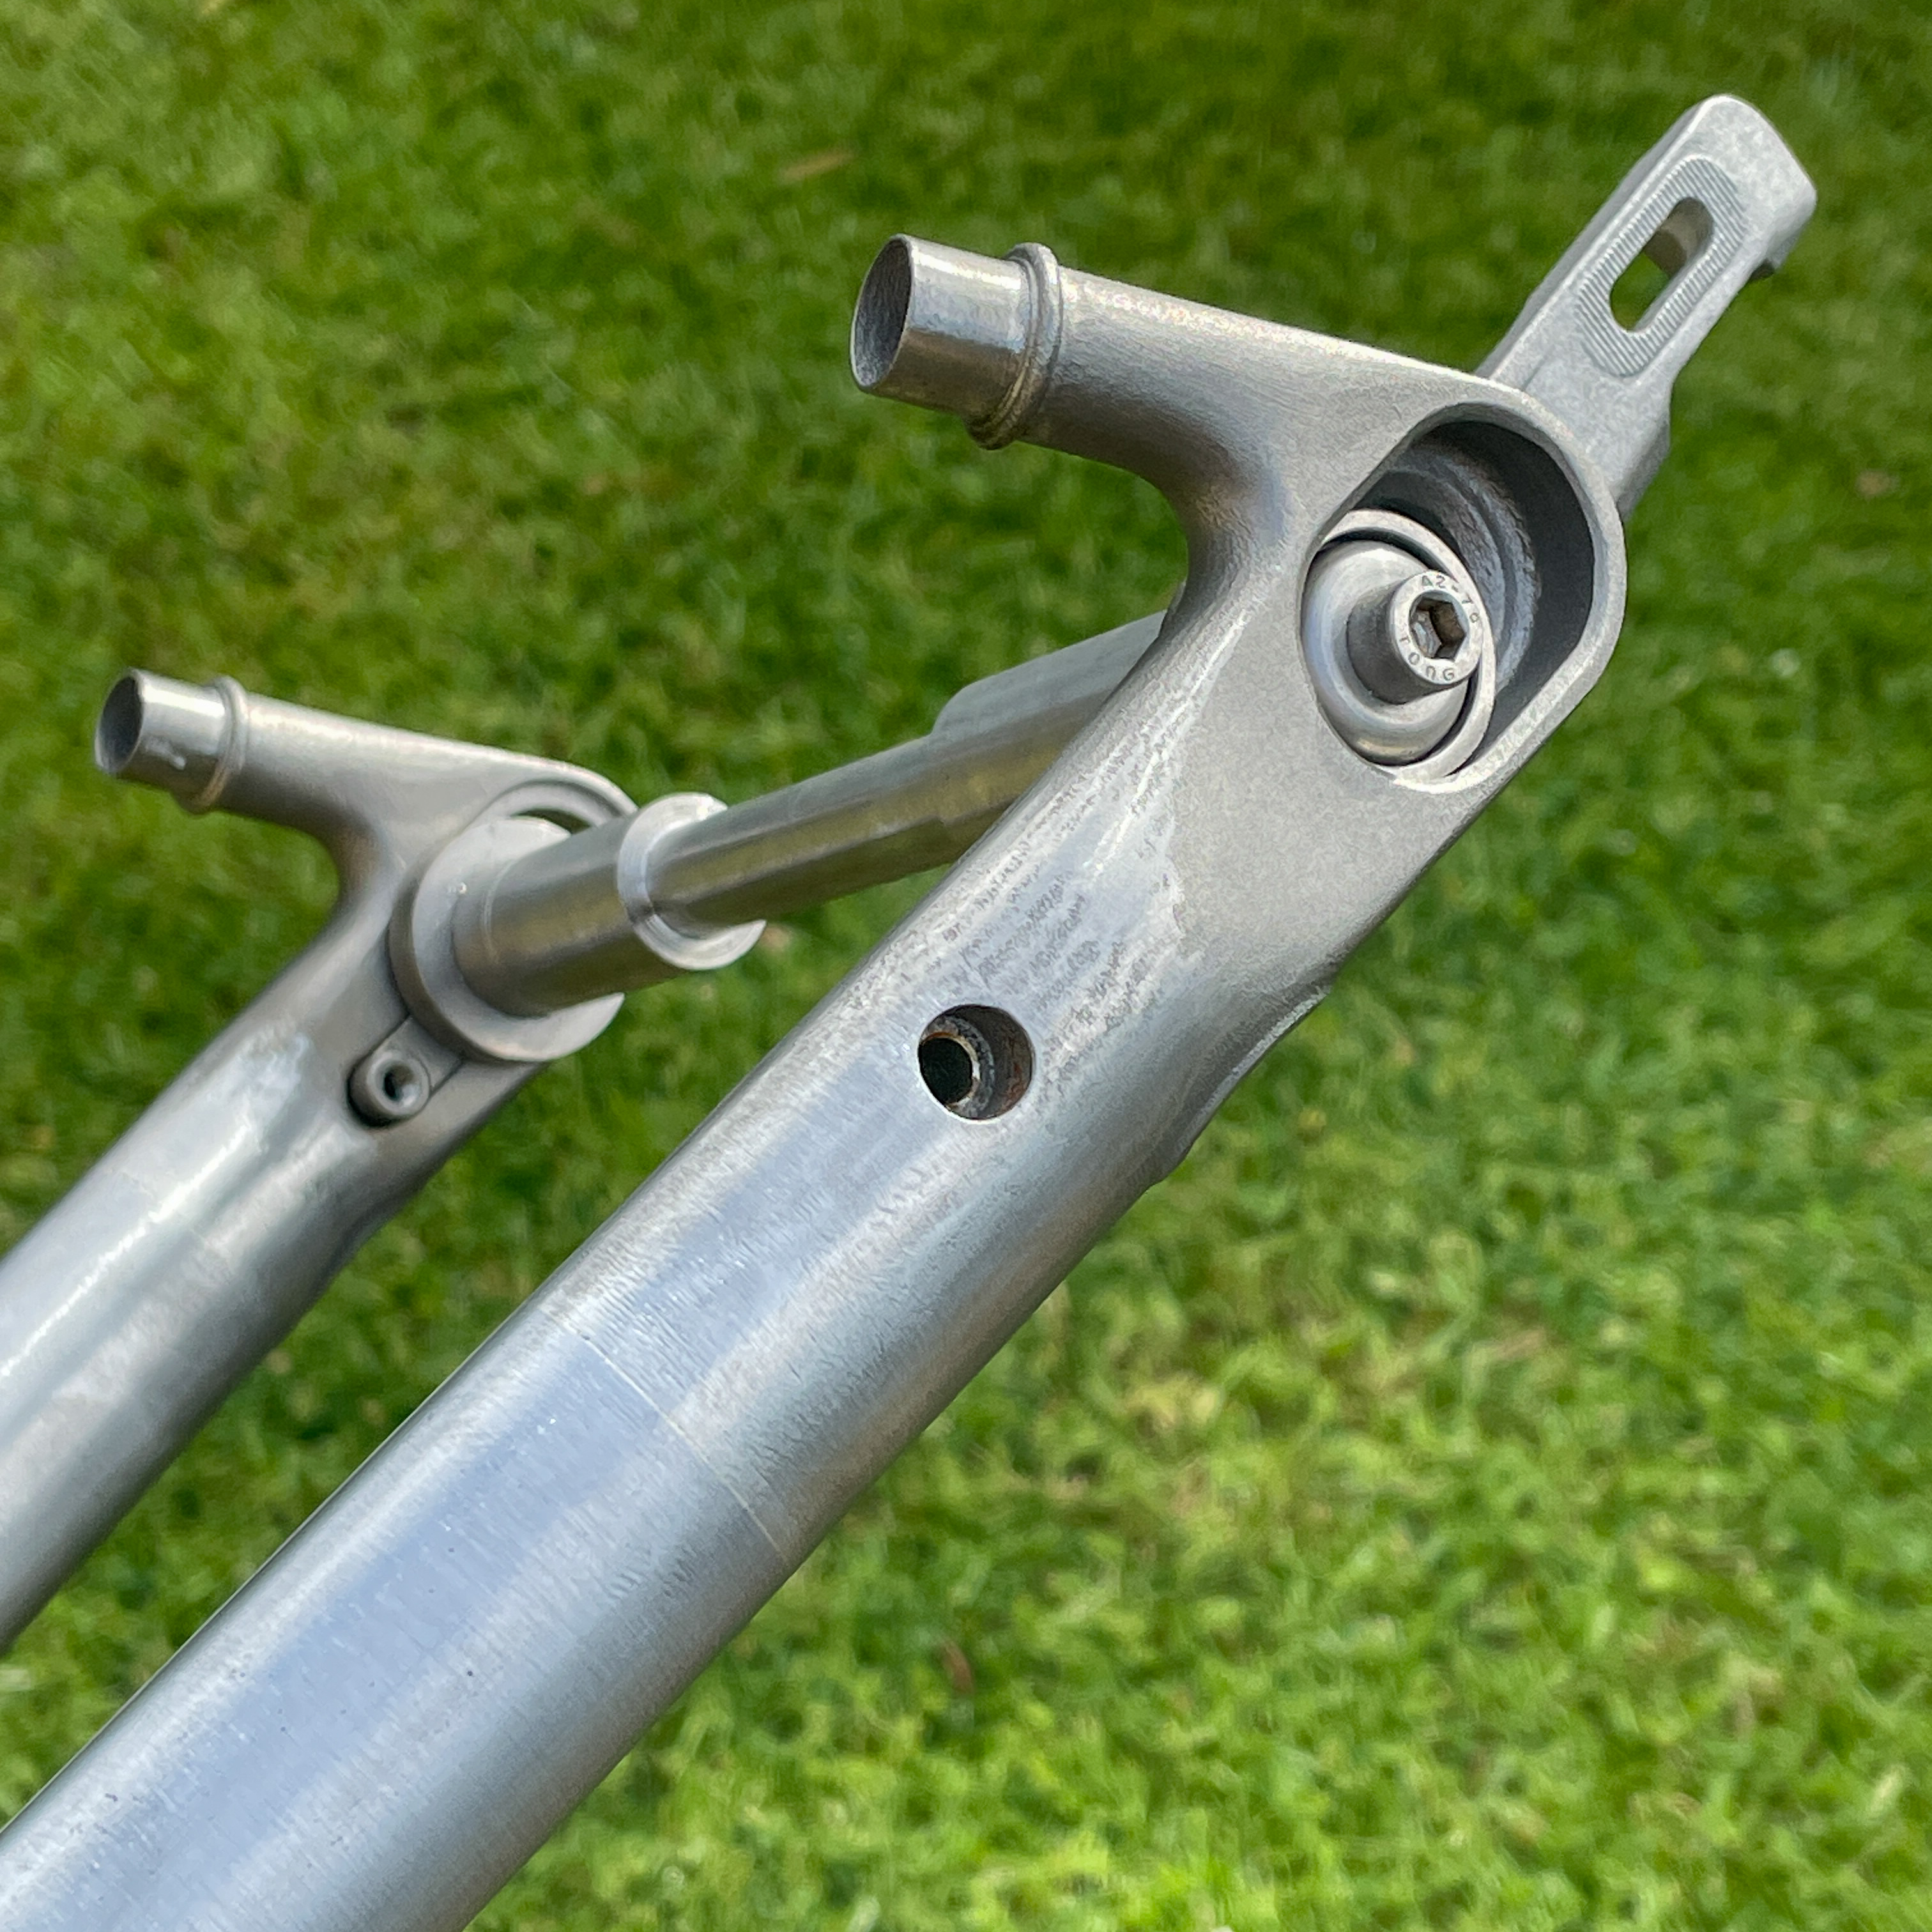
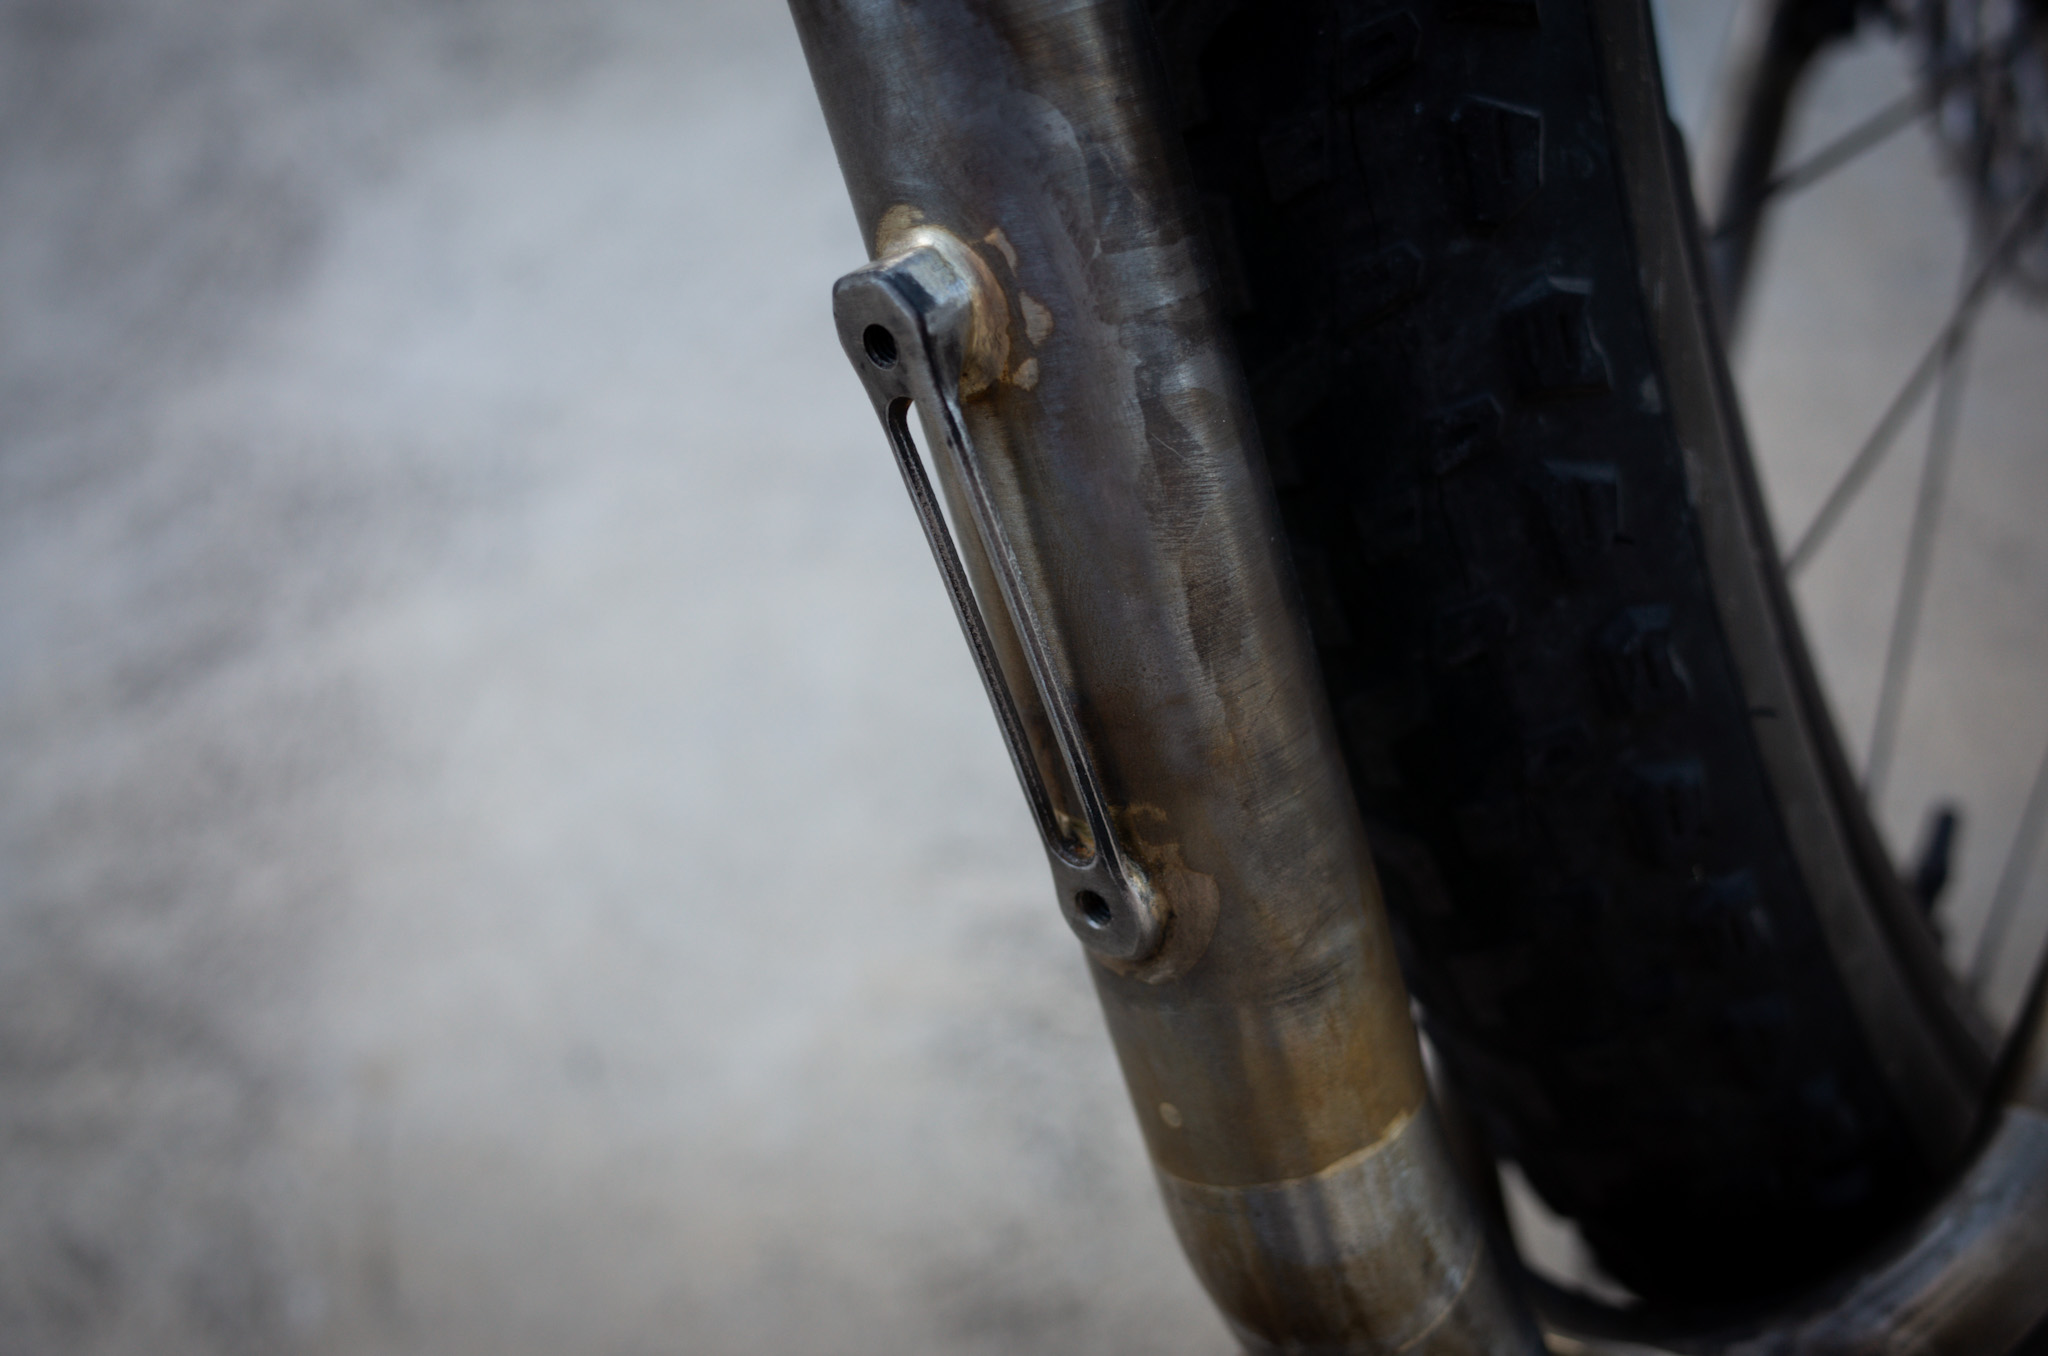
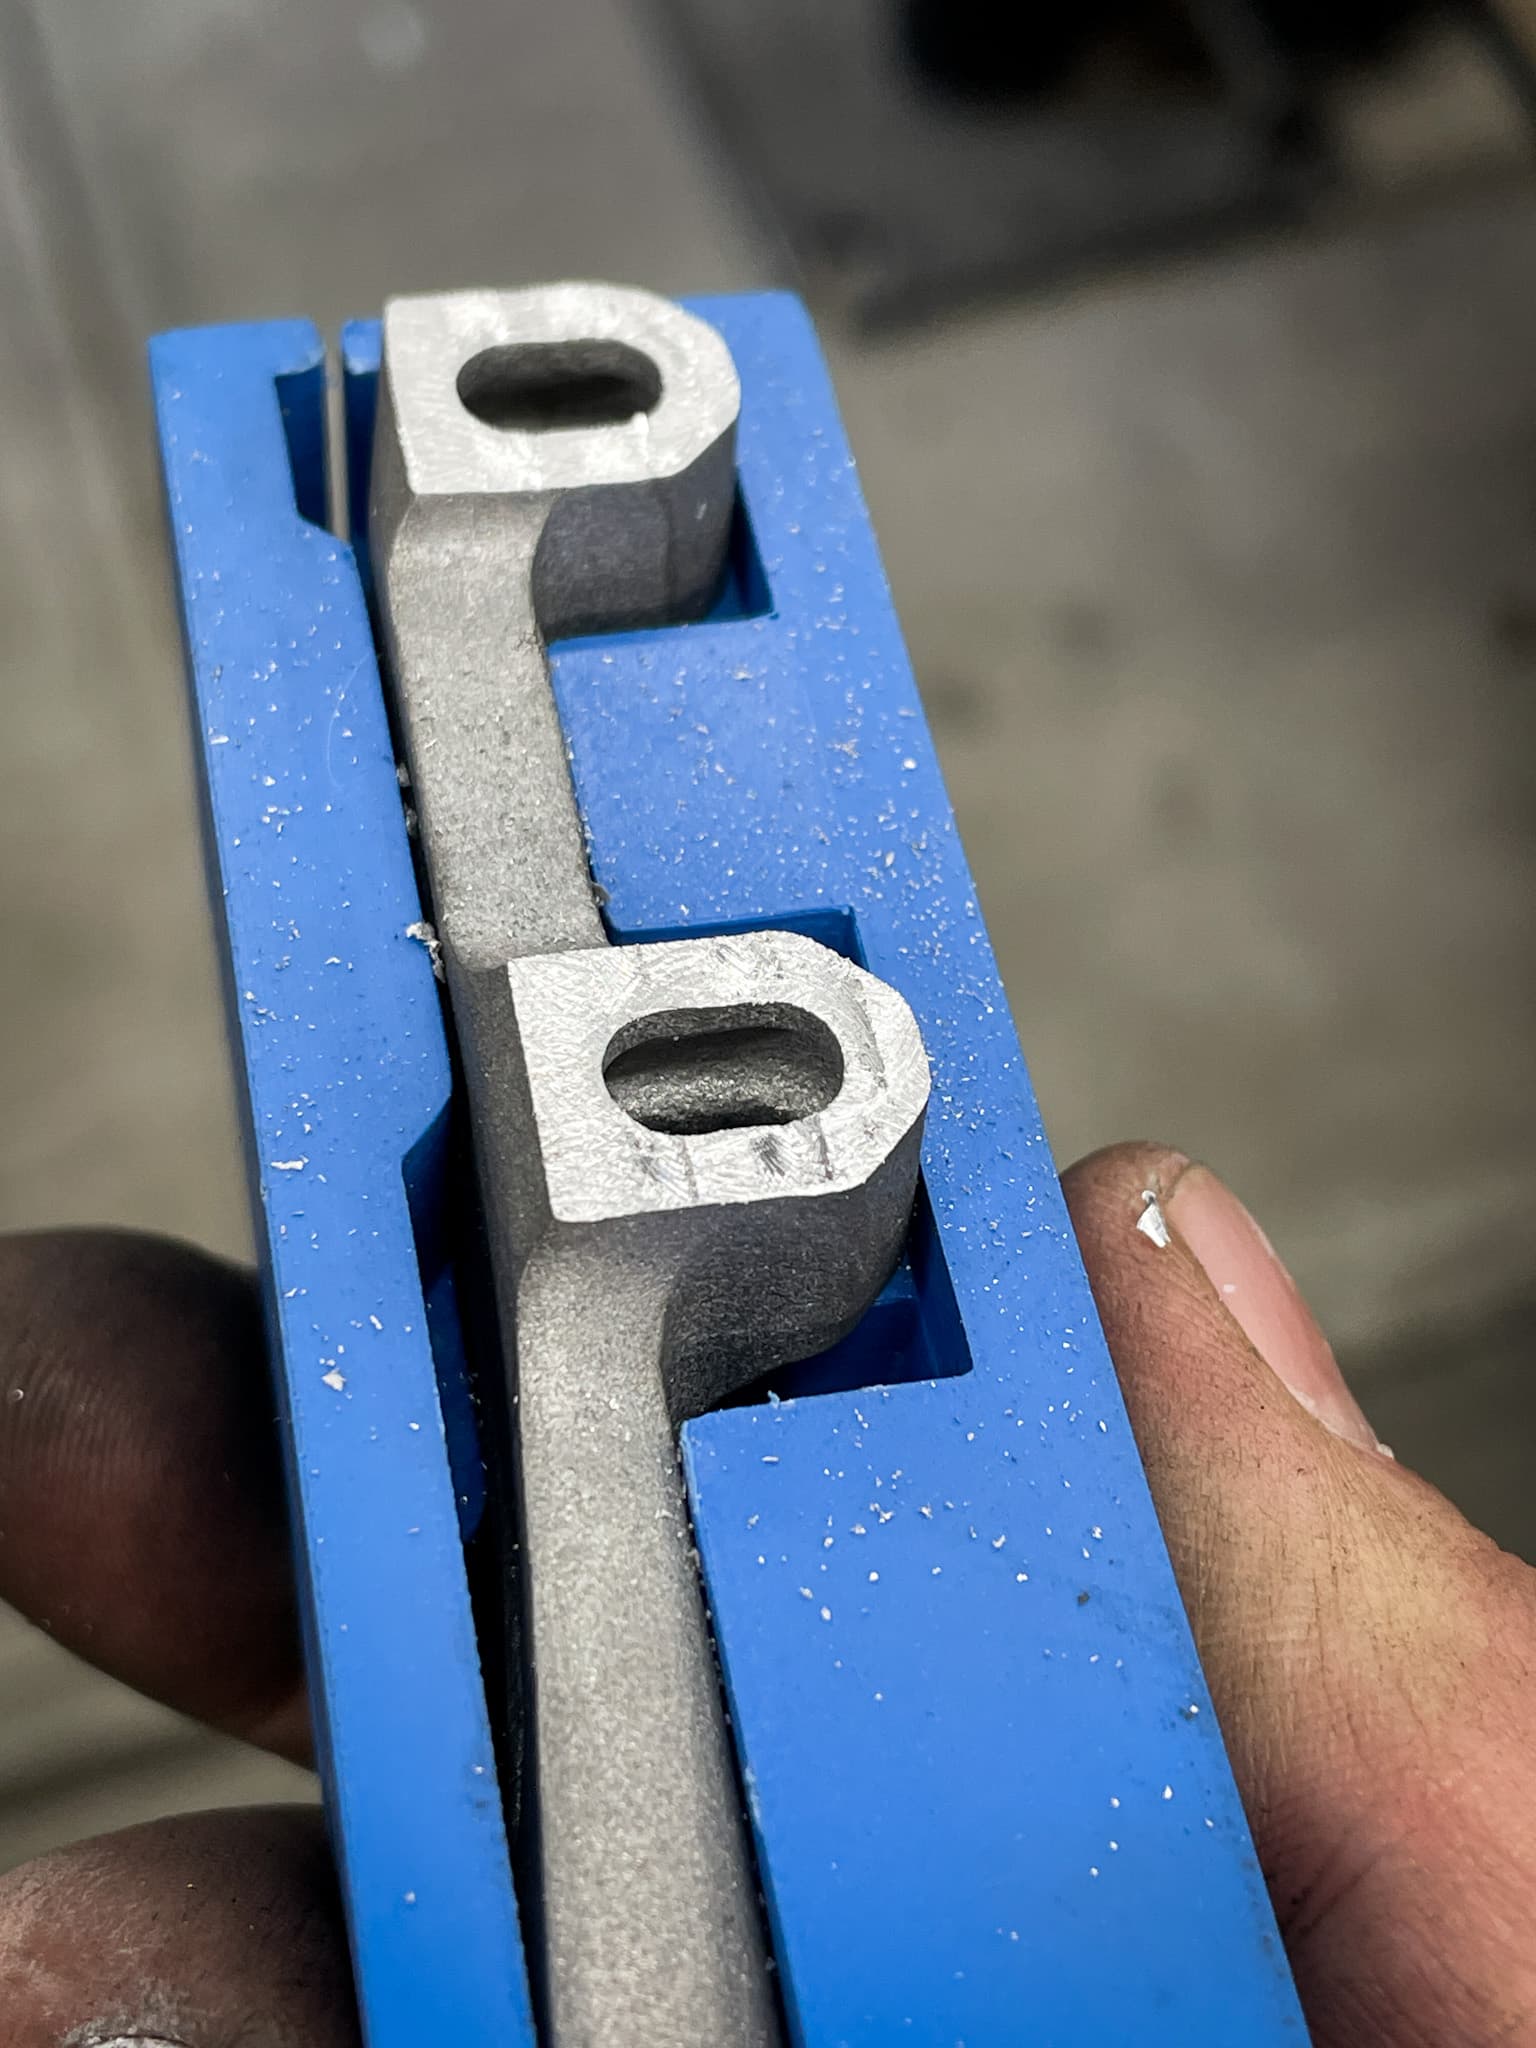
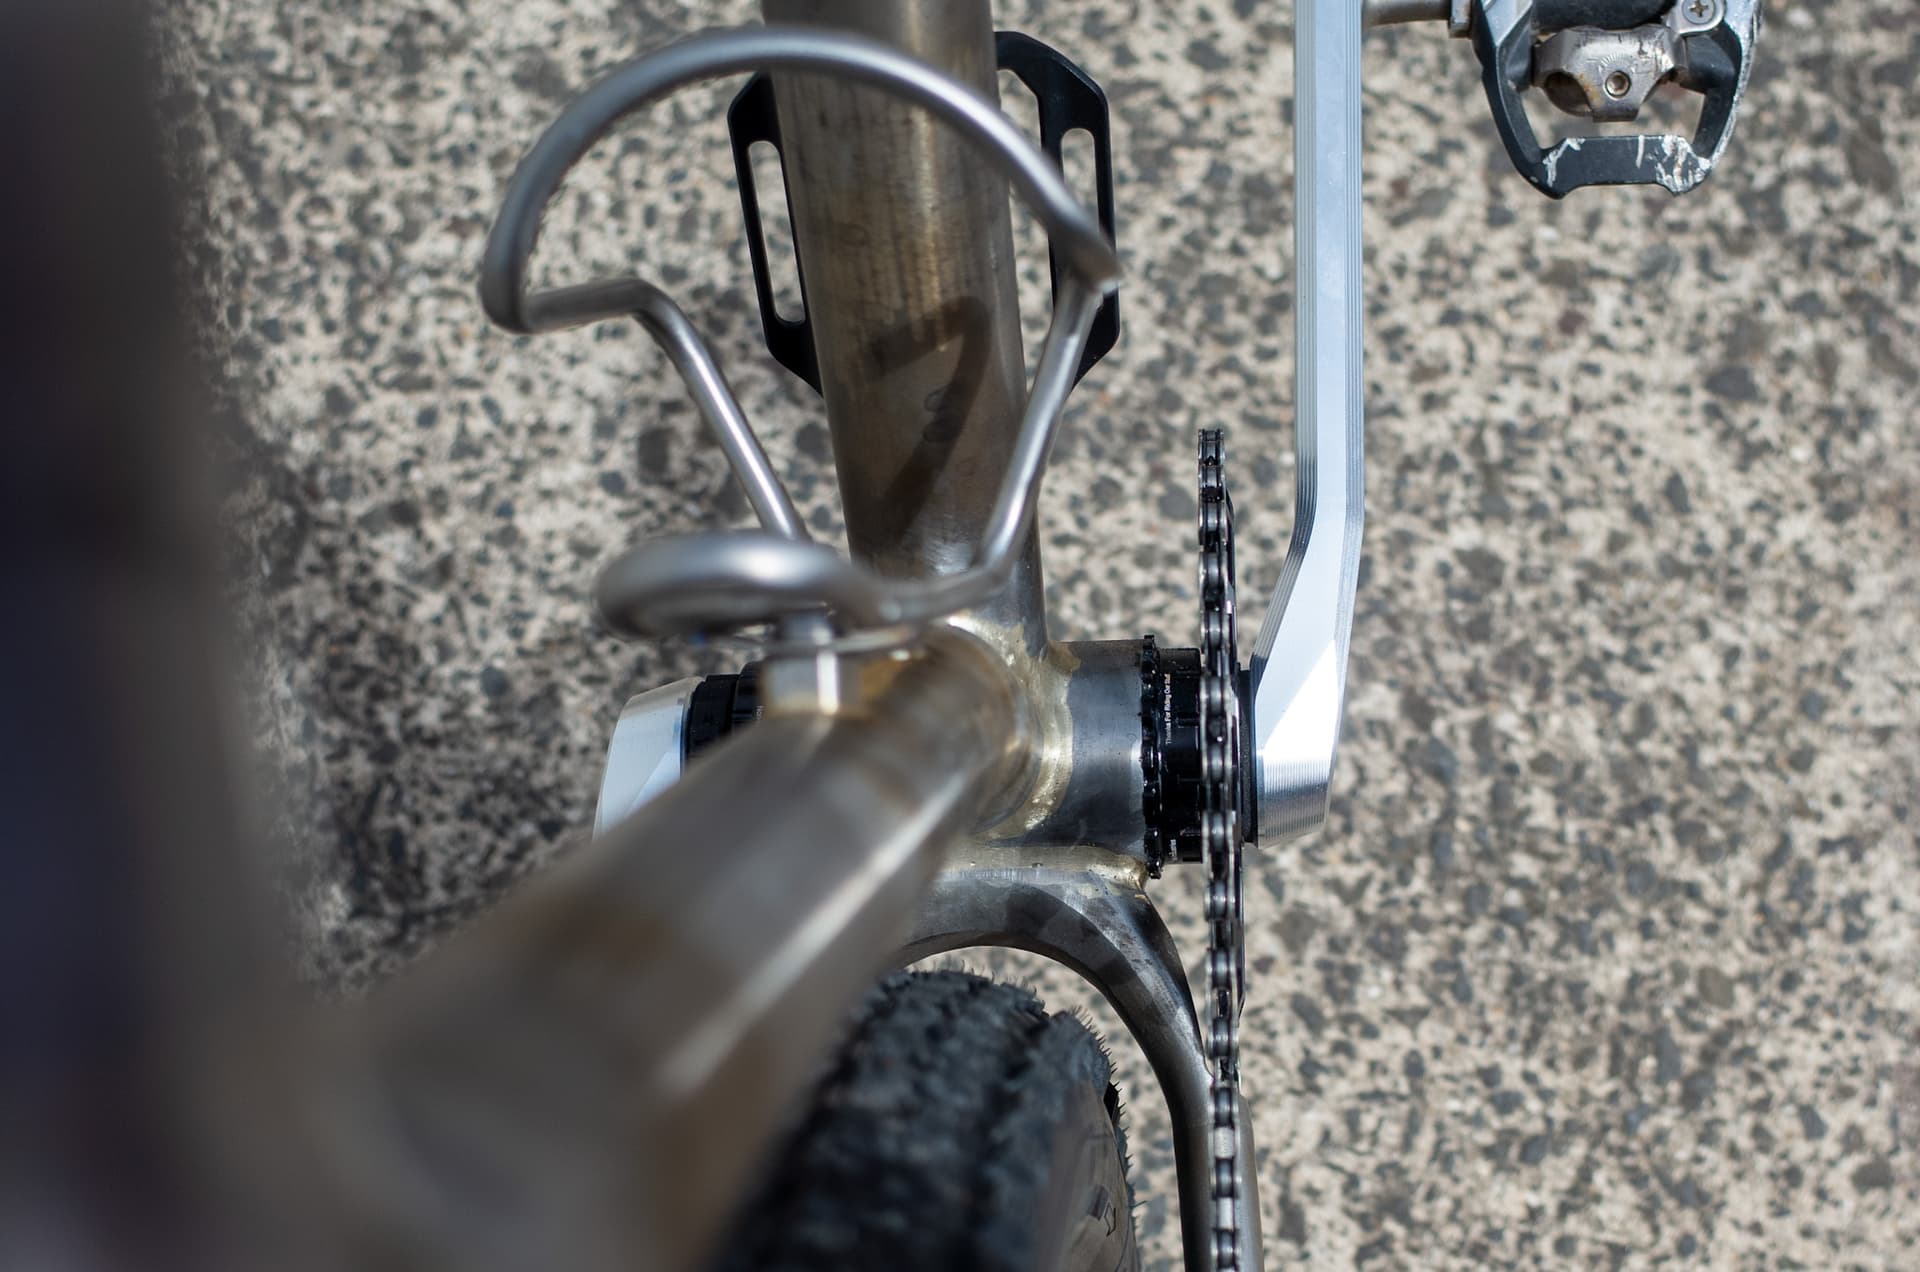
Hi! im trying to build the dropouts and noticed that your lugs are designed to be inserted INTO the tube, is there a reason? does it gives more strength to the union between the lug and the tube?
This is a common design for joining 3D printed parts to regular tubes.
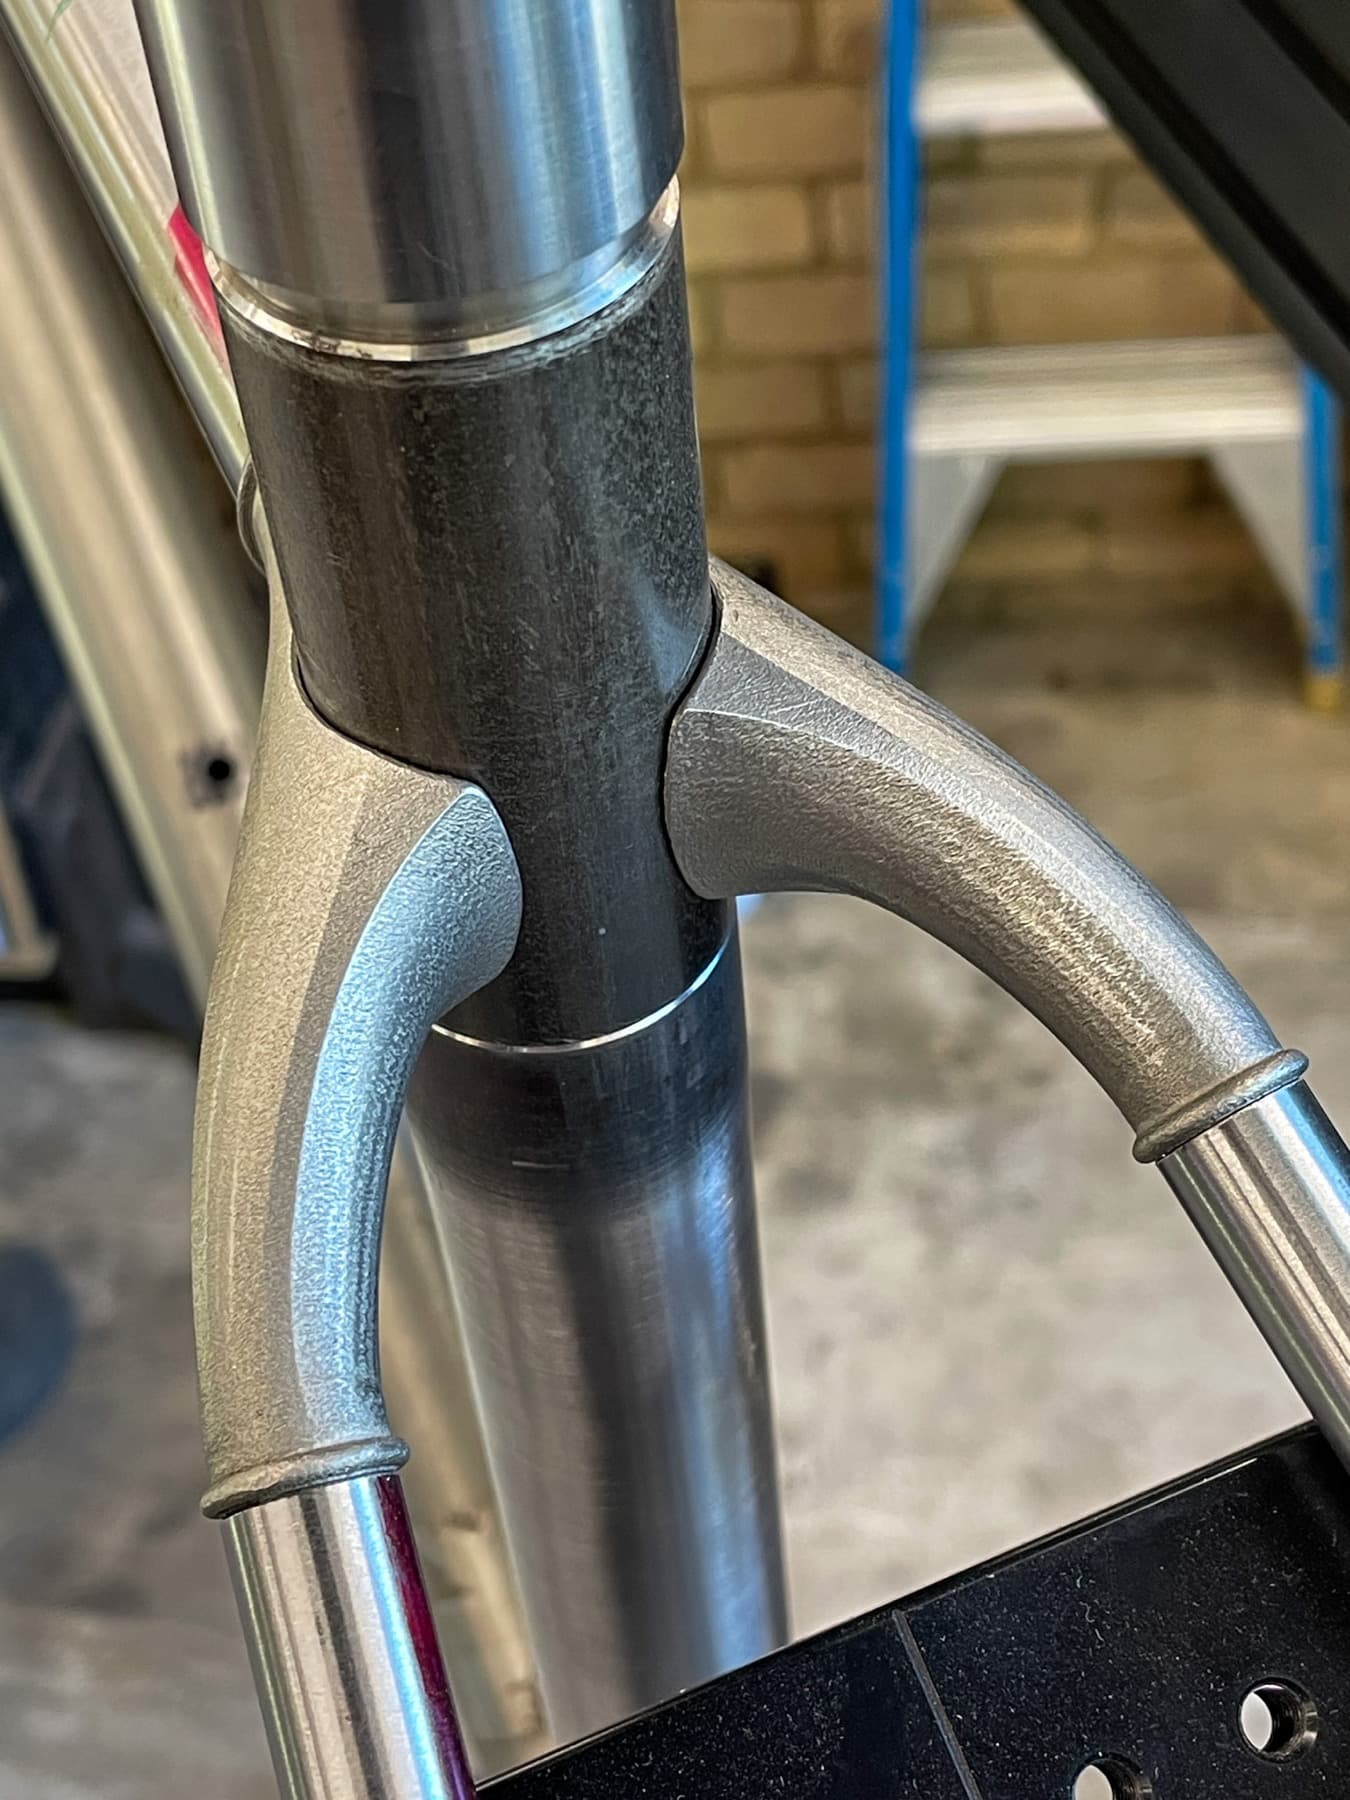
I was after a smooth look where the tube and lug flow into each other, as opposed to a traditional look where the lugs are external and often ornamental. So I made the overlap internal to the tube to be able to silver braze the joins and make an almost invisible transition between 3D print to the tubes once the excess filler has been removed.
I deliberately made the ‘sockets’ extend 10 or so millimetres into the tube to provide adequate surface area for the silver filler to join the print and tube together. When TIG welding, the overlap can be smaller.