I have heard it said that Tig welding is like playing an instrument. If it is, then I am like that kid at middle school band concerts sweatily screeching his trumpet through some watered down Gershwin. This is my first bike build and it was a real good time. I learned a lot as I am sure everyone does, which is my way of saying “some of it is kinda bad, but hey, I am learning”. Anyway, I just dropped everything off at powdercoat and anodize so now is the time to document some of the process for myself. And others if they mostly want to learn what not to do.
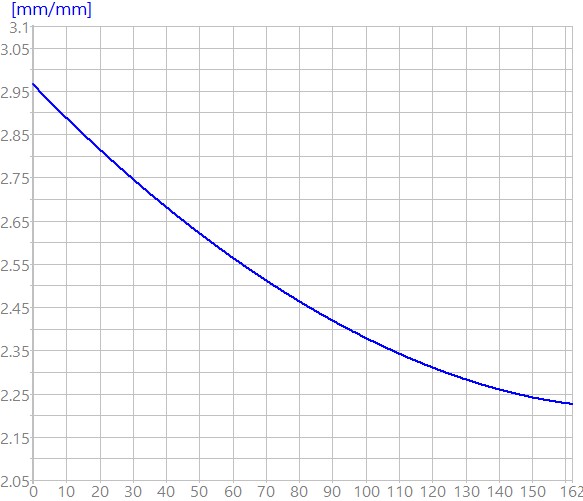
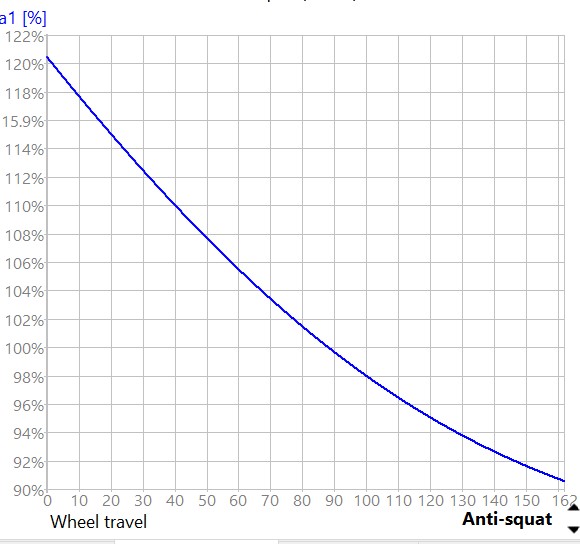
Design: I wanted to design a bike for what I like to do most, which is pedal up for 2-3 hours then kinda scare myself but hopefully not descending some sketchy pirate lines. So basically a mountain bike. I like the CBF suspension, but the geometry has never gotten along with my weird bod, so I adjusted some things to what I hope will make a good setup. The short of it is:
HTA: 64.5 (w/170 fork)
STA (eff): 78.5
Reach: 480:
ST length: 405
CS: 444
Travel (60mm stroke shock): 151 (65mm stroke shock) 161
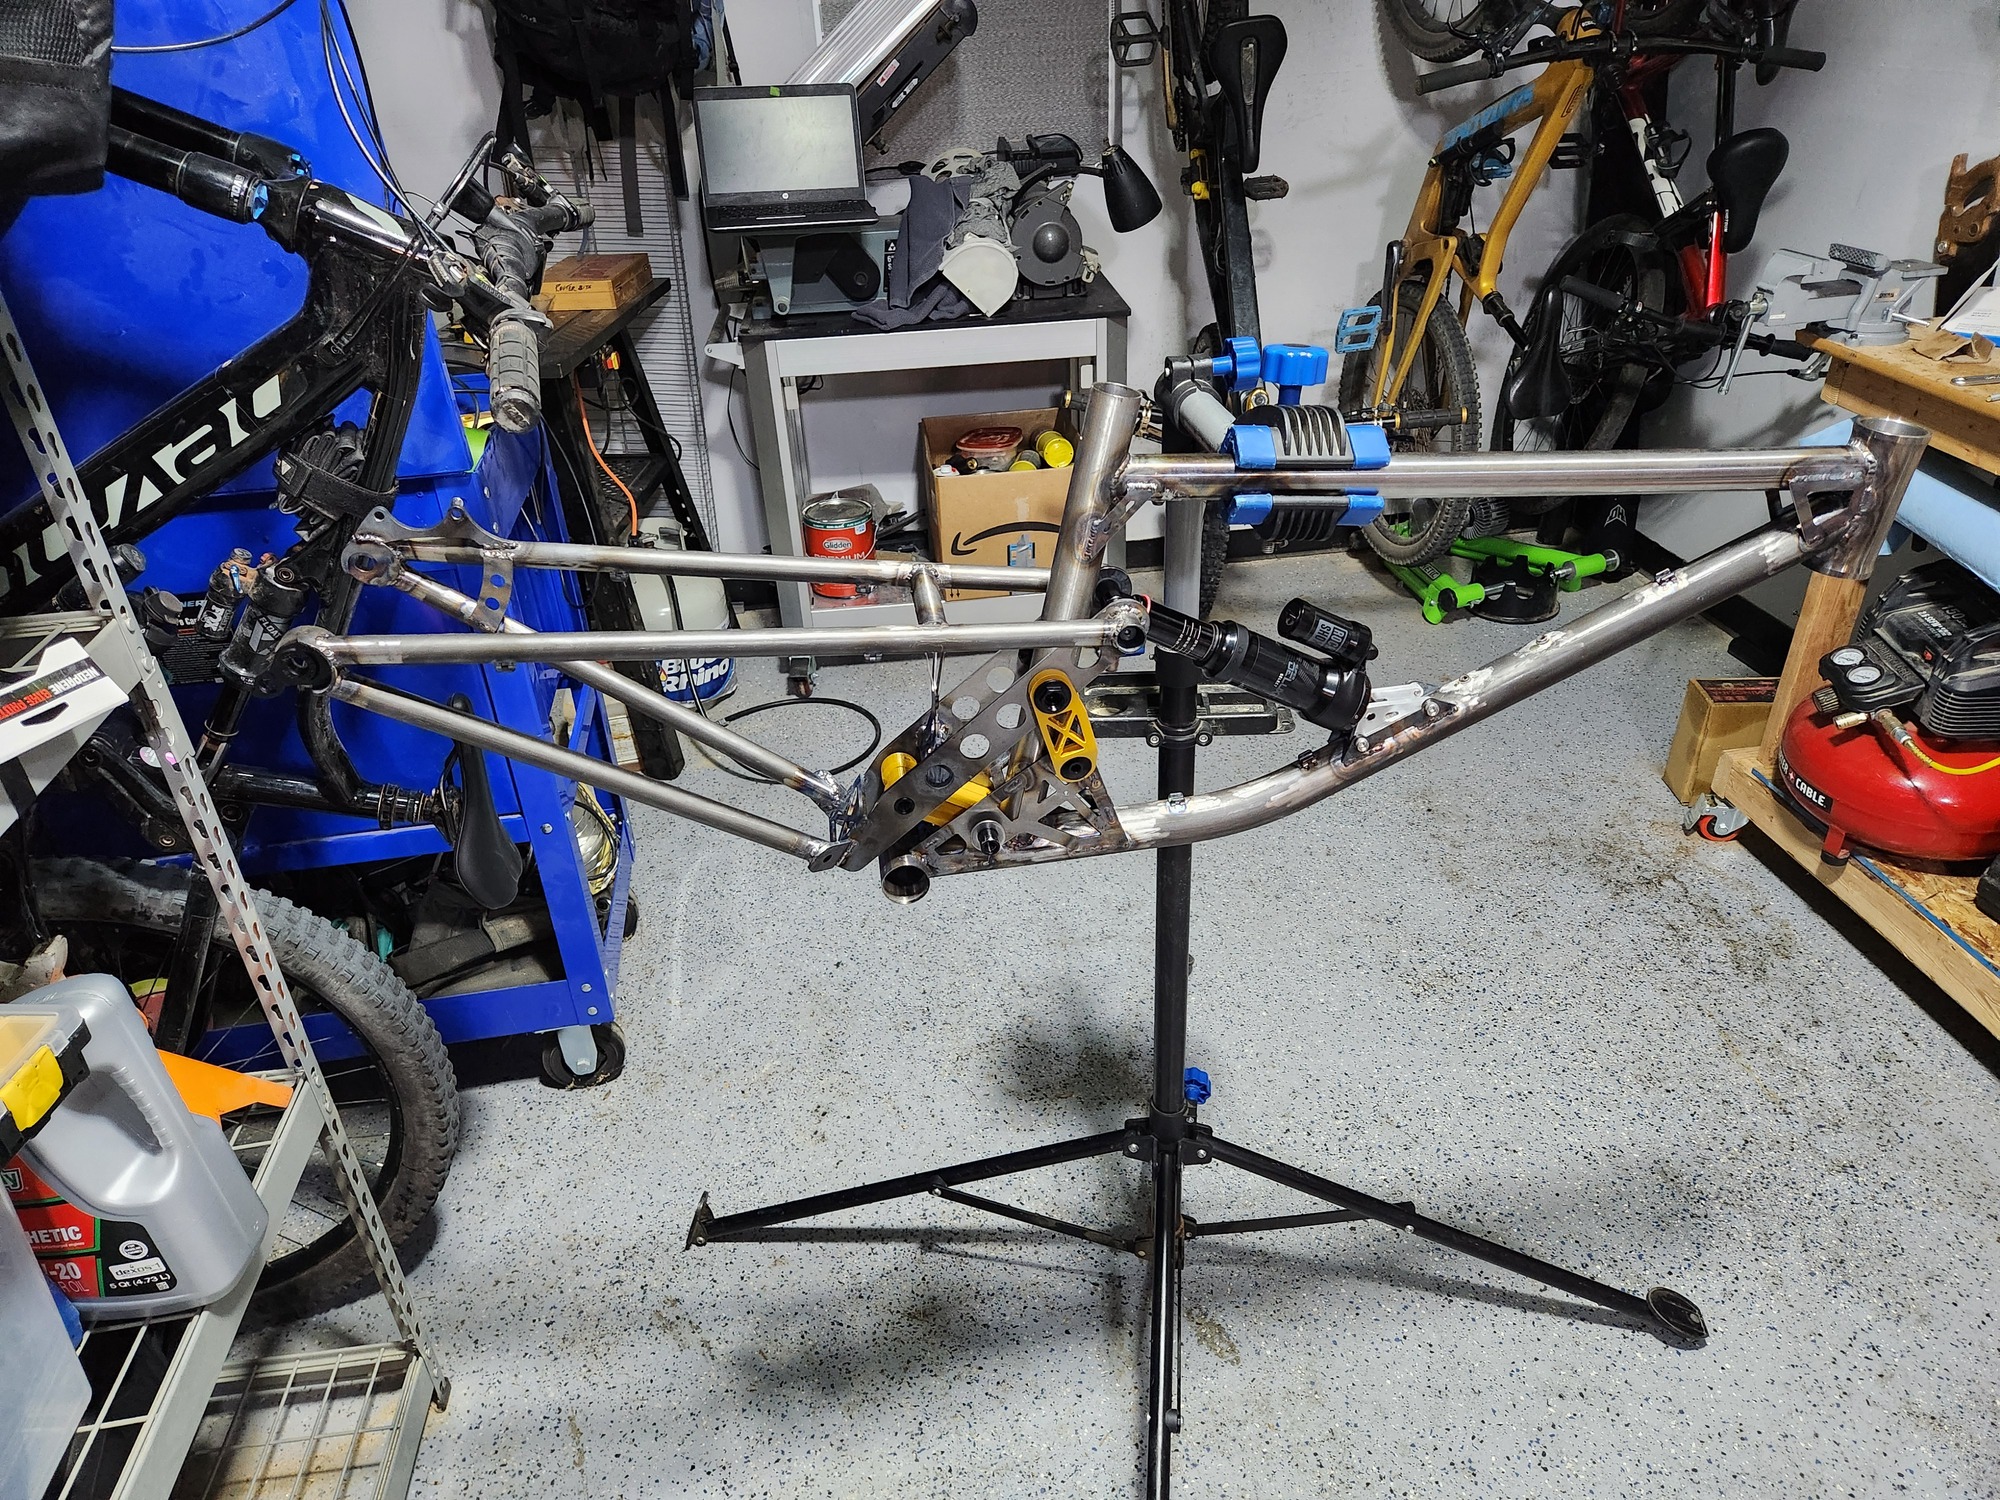
I forgot to mention that Pax is my fake bike company that I will be building under on here and this will be the Orion. Anyway, back to business:
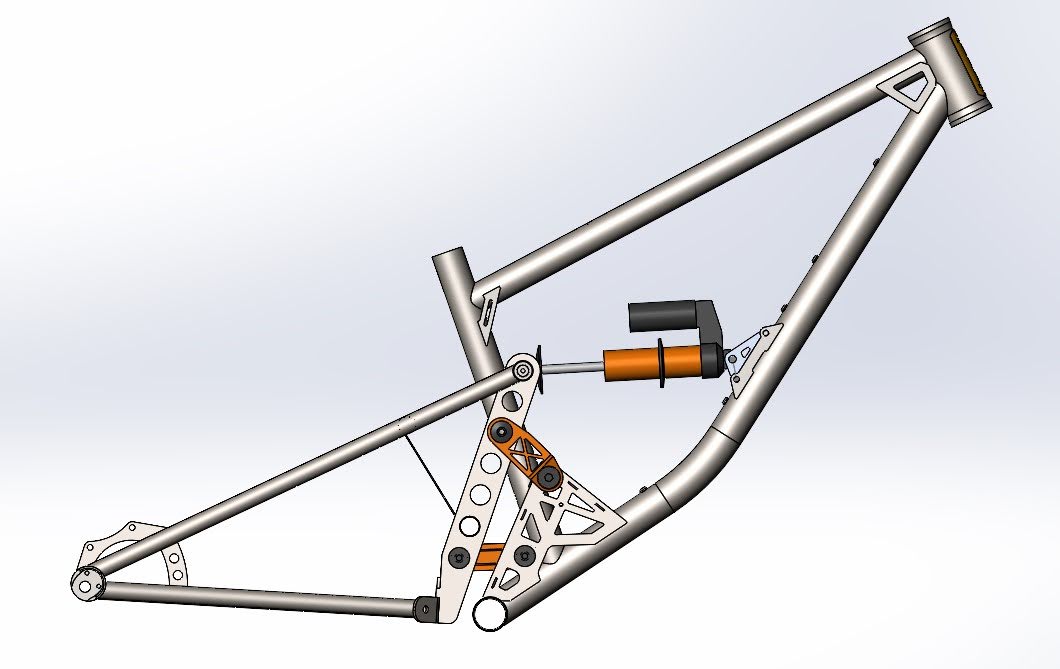
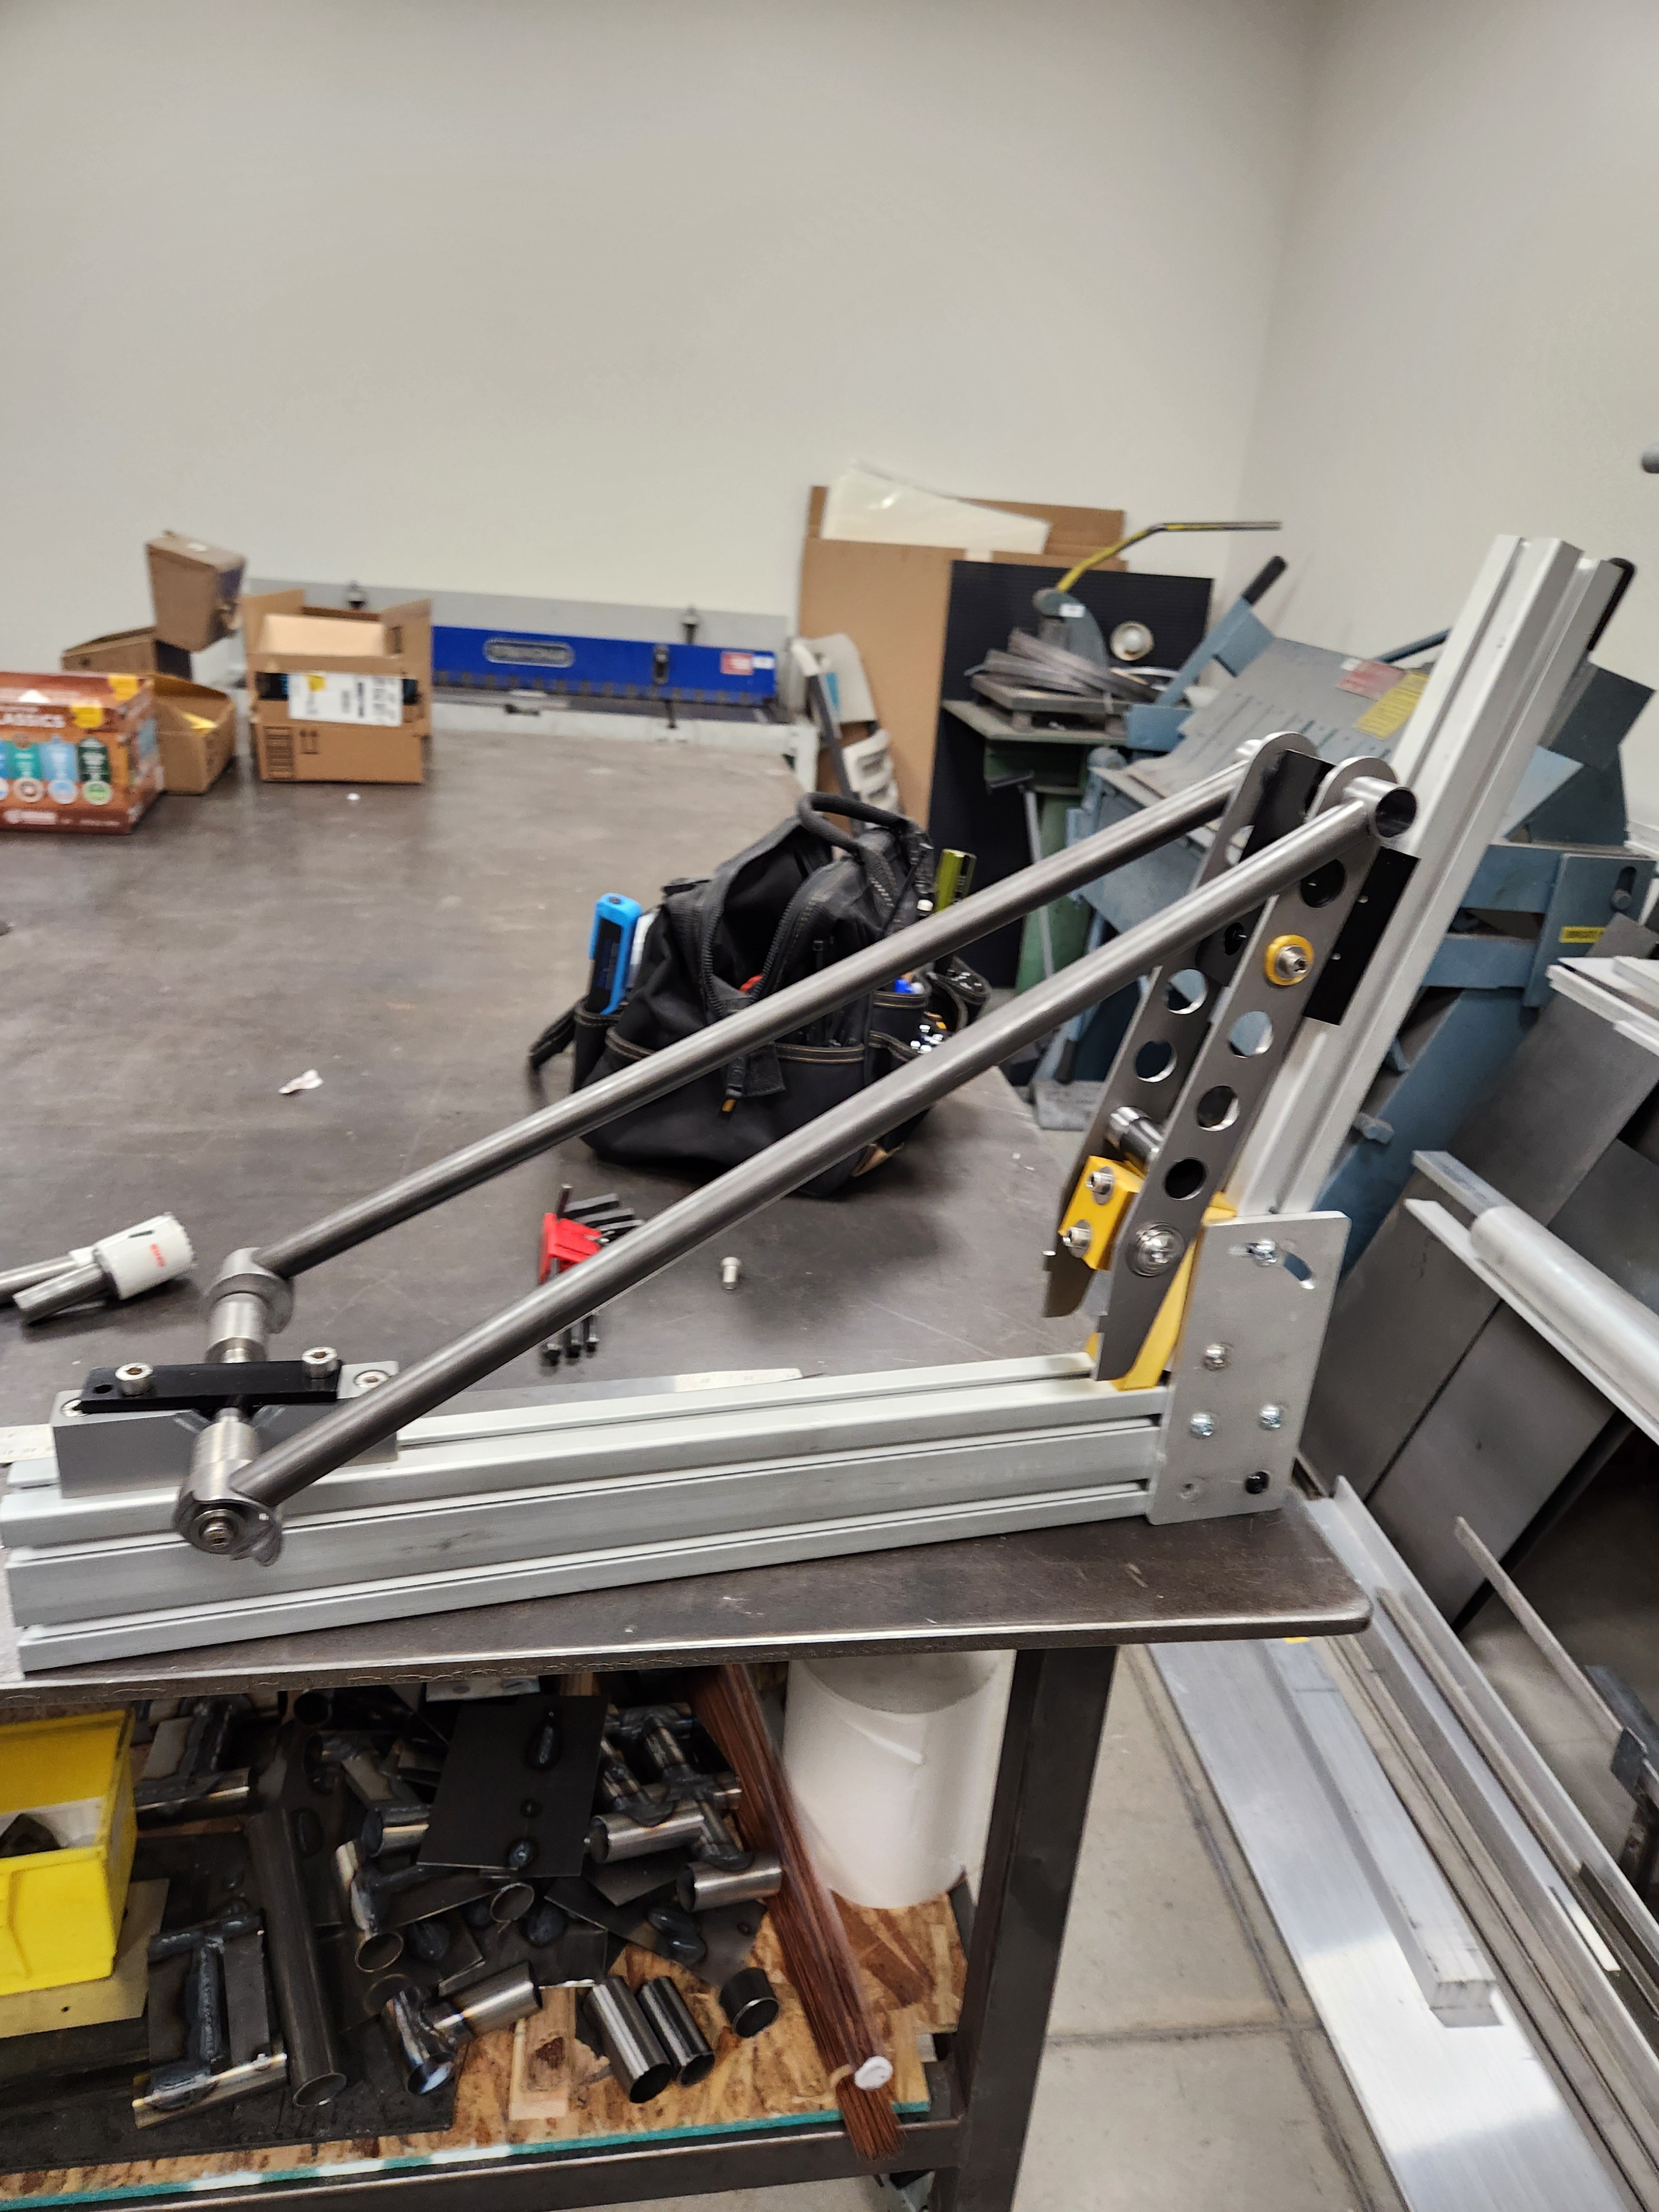
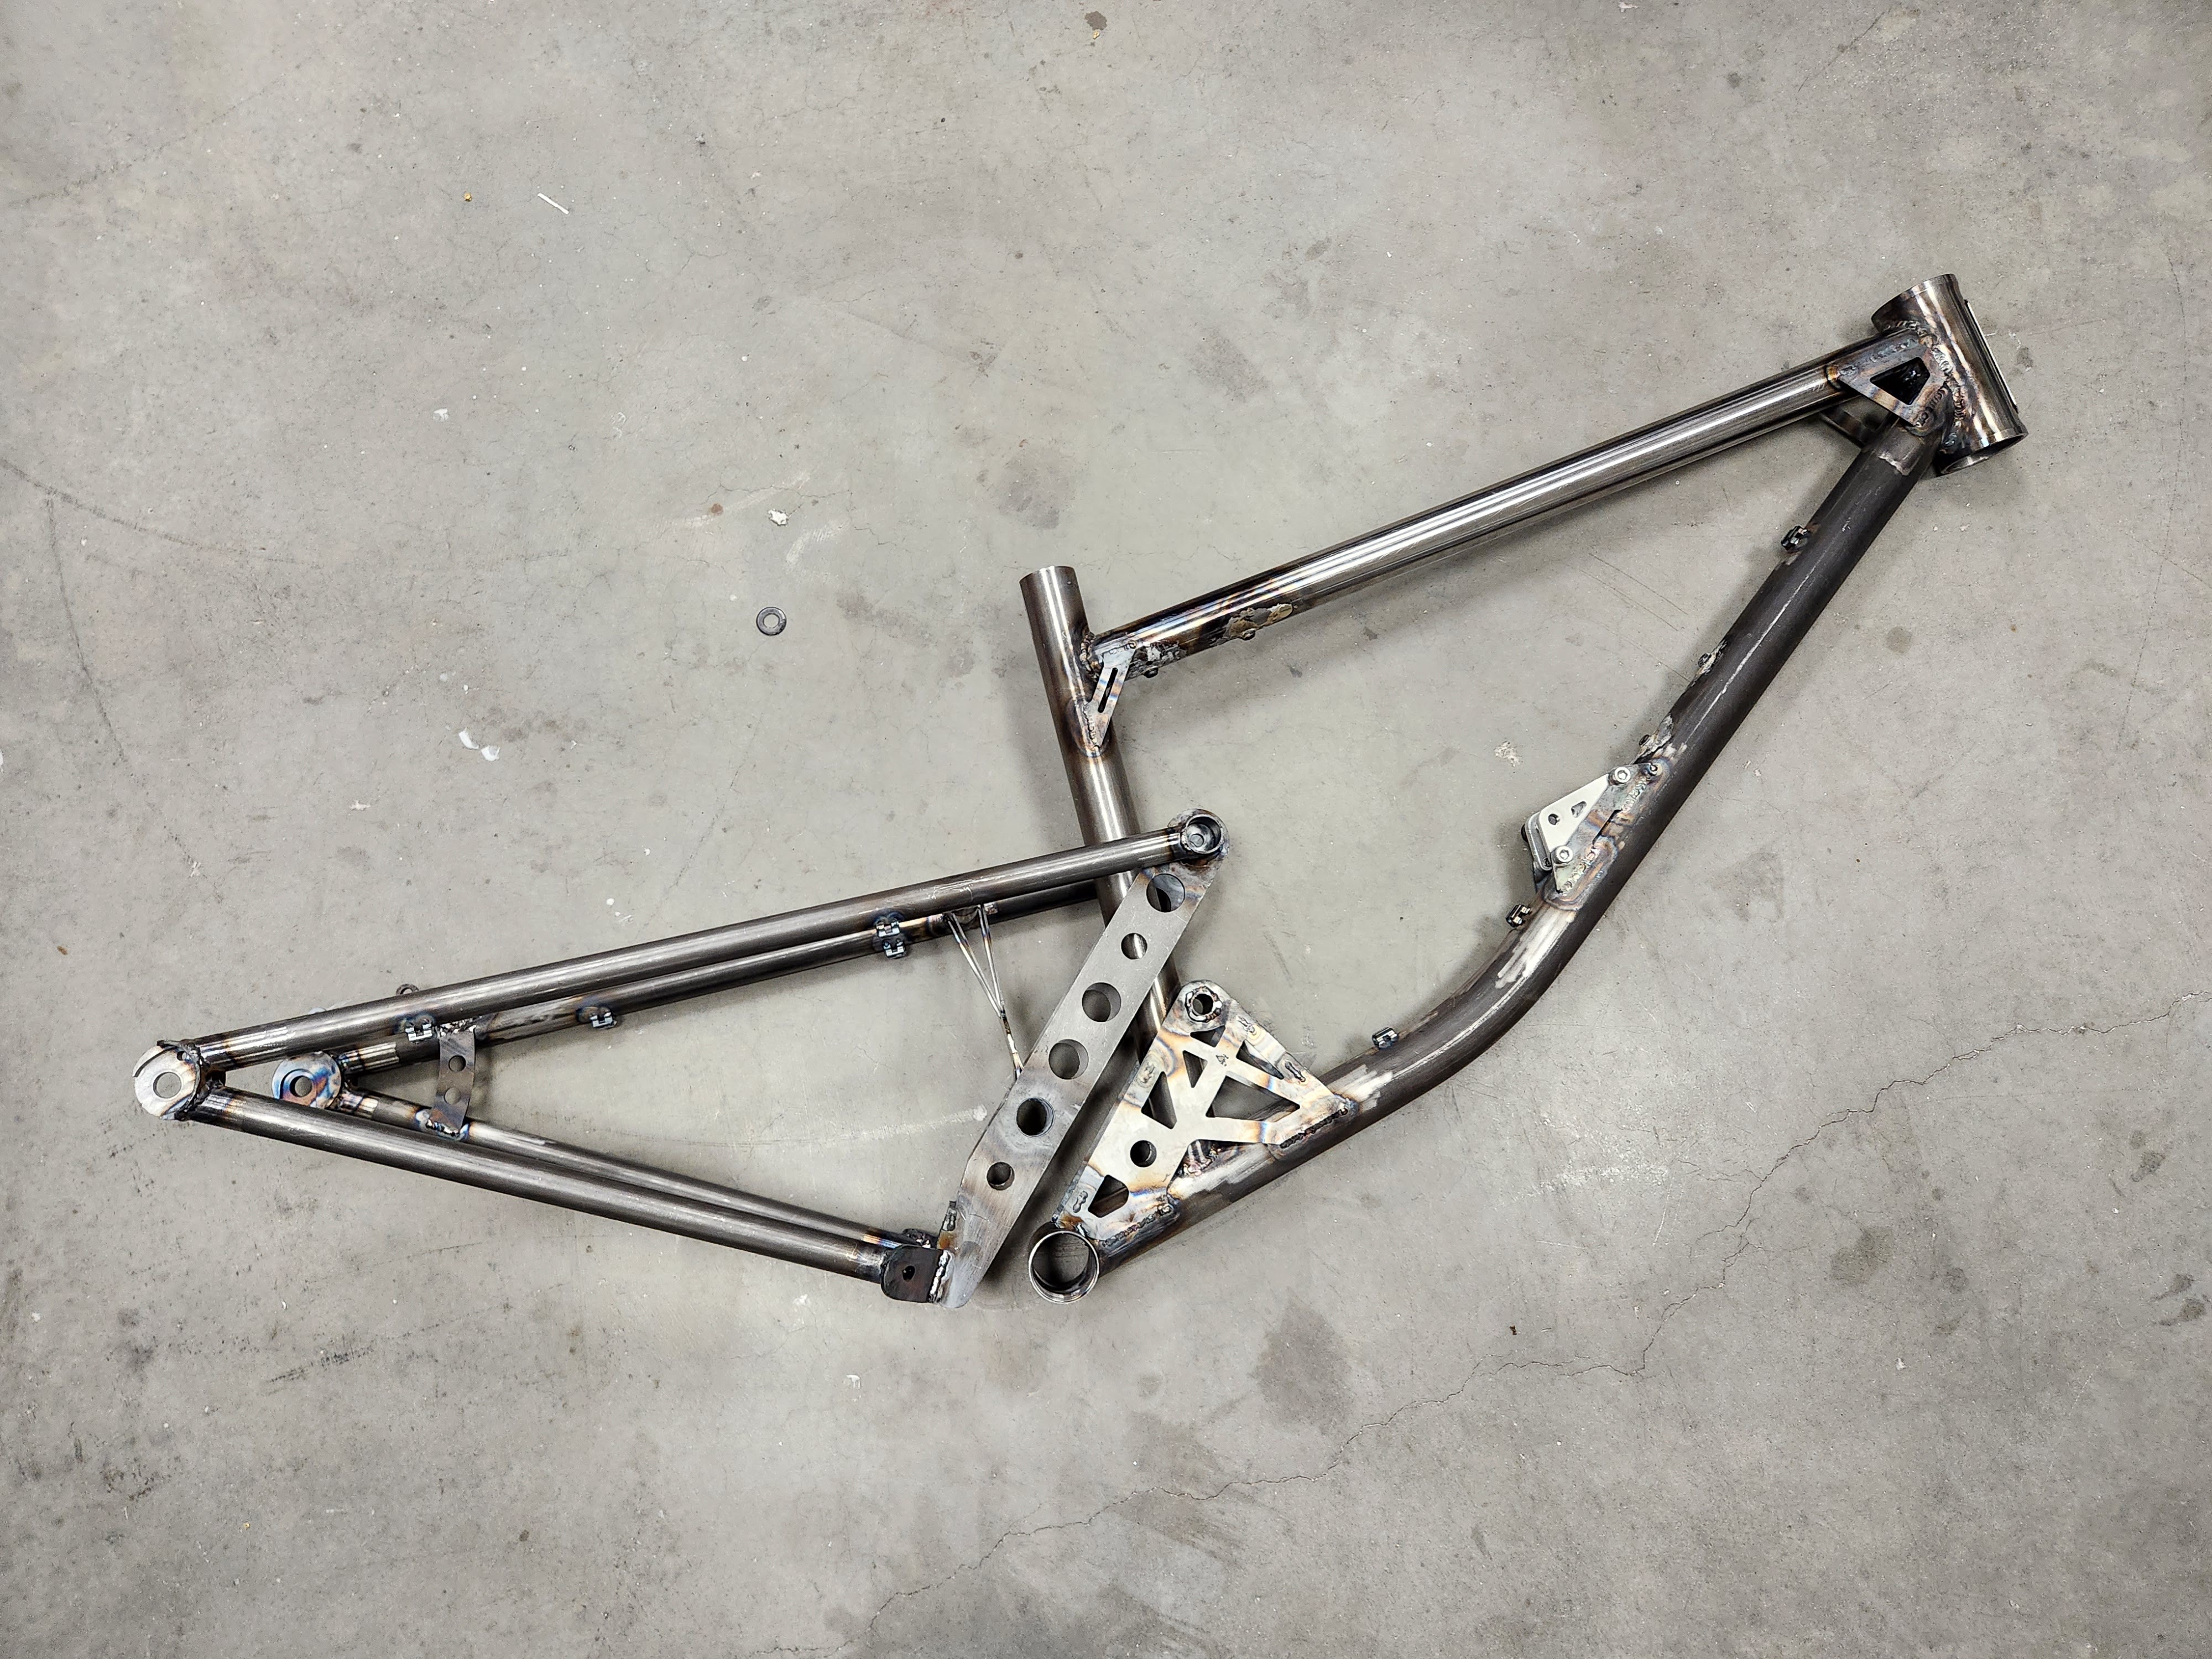
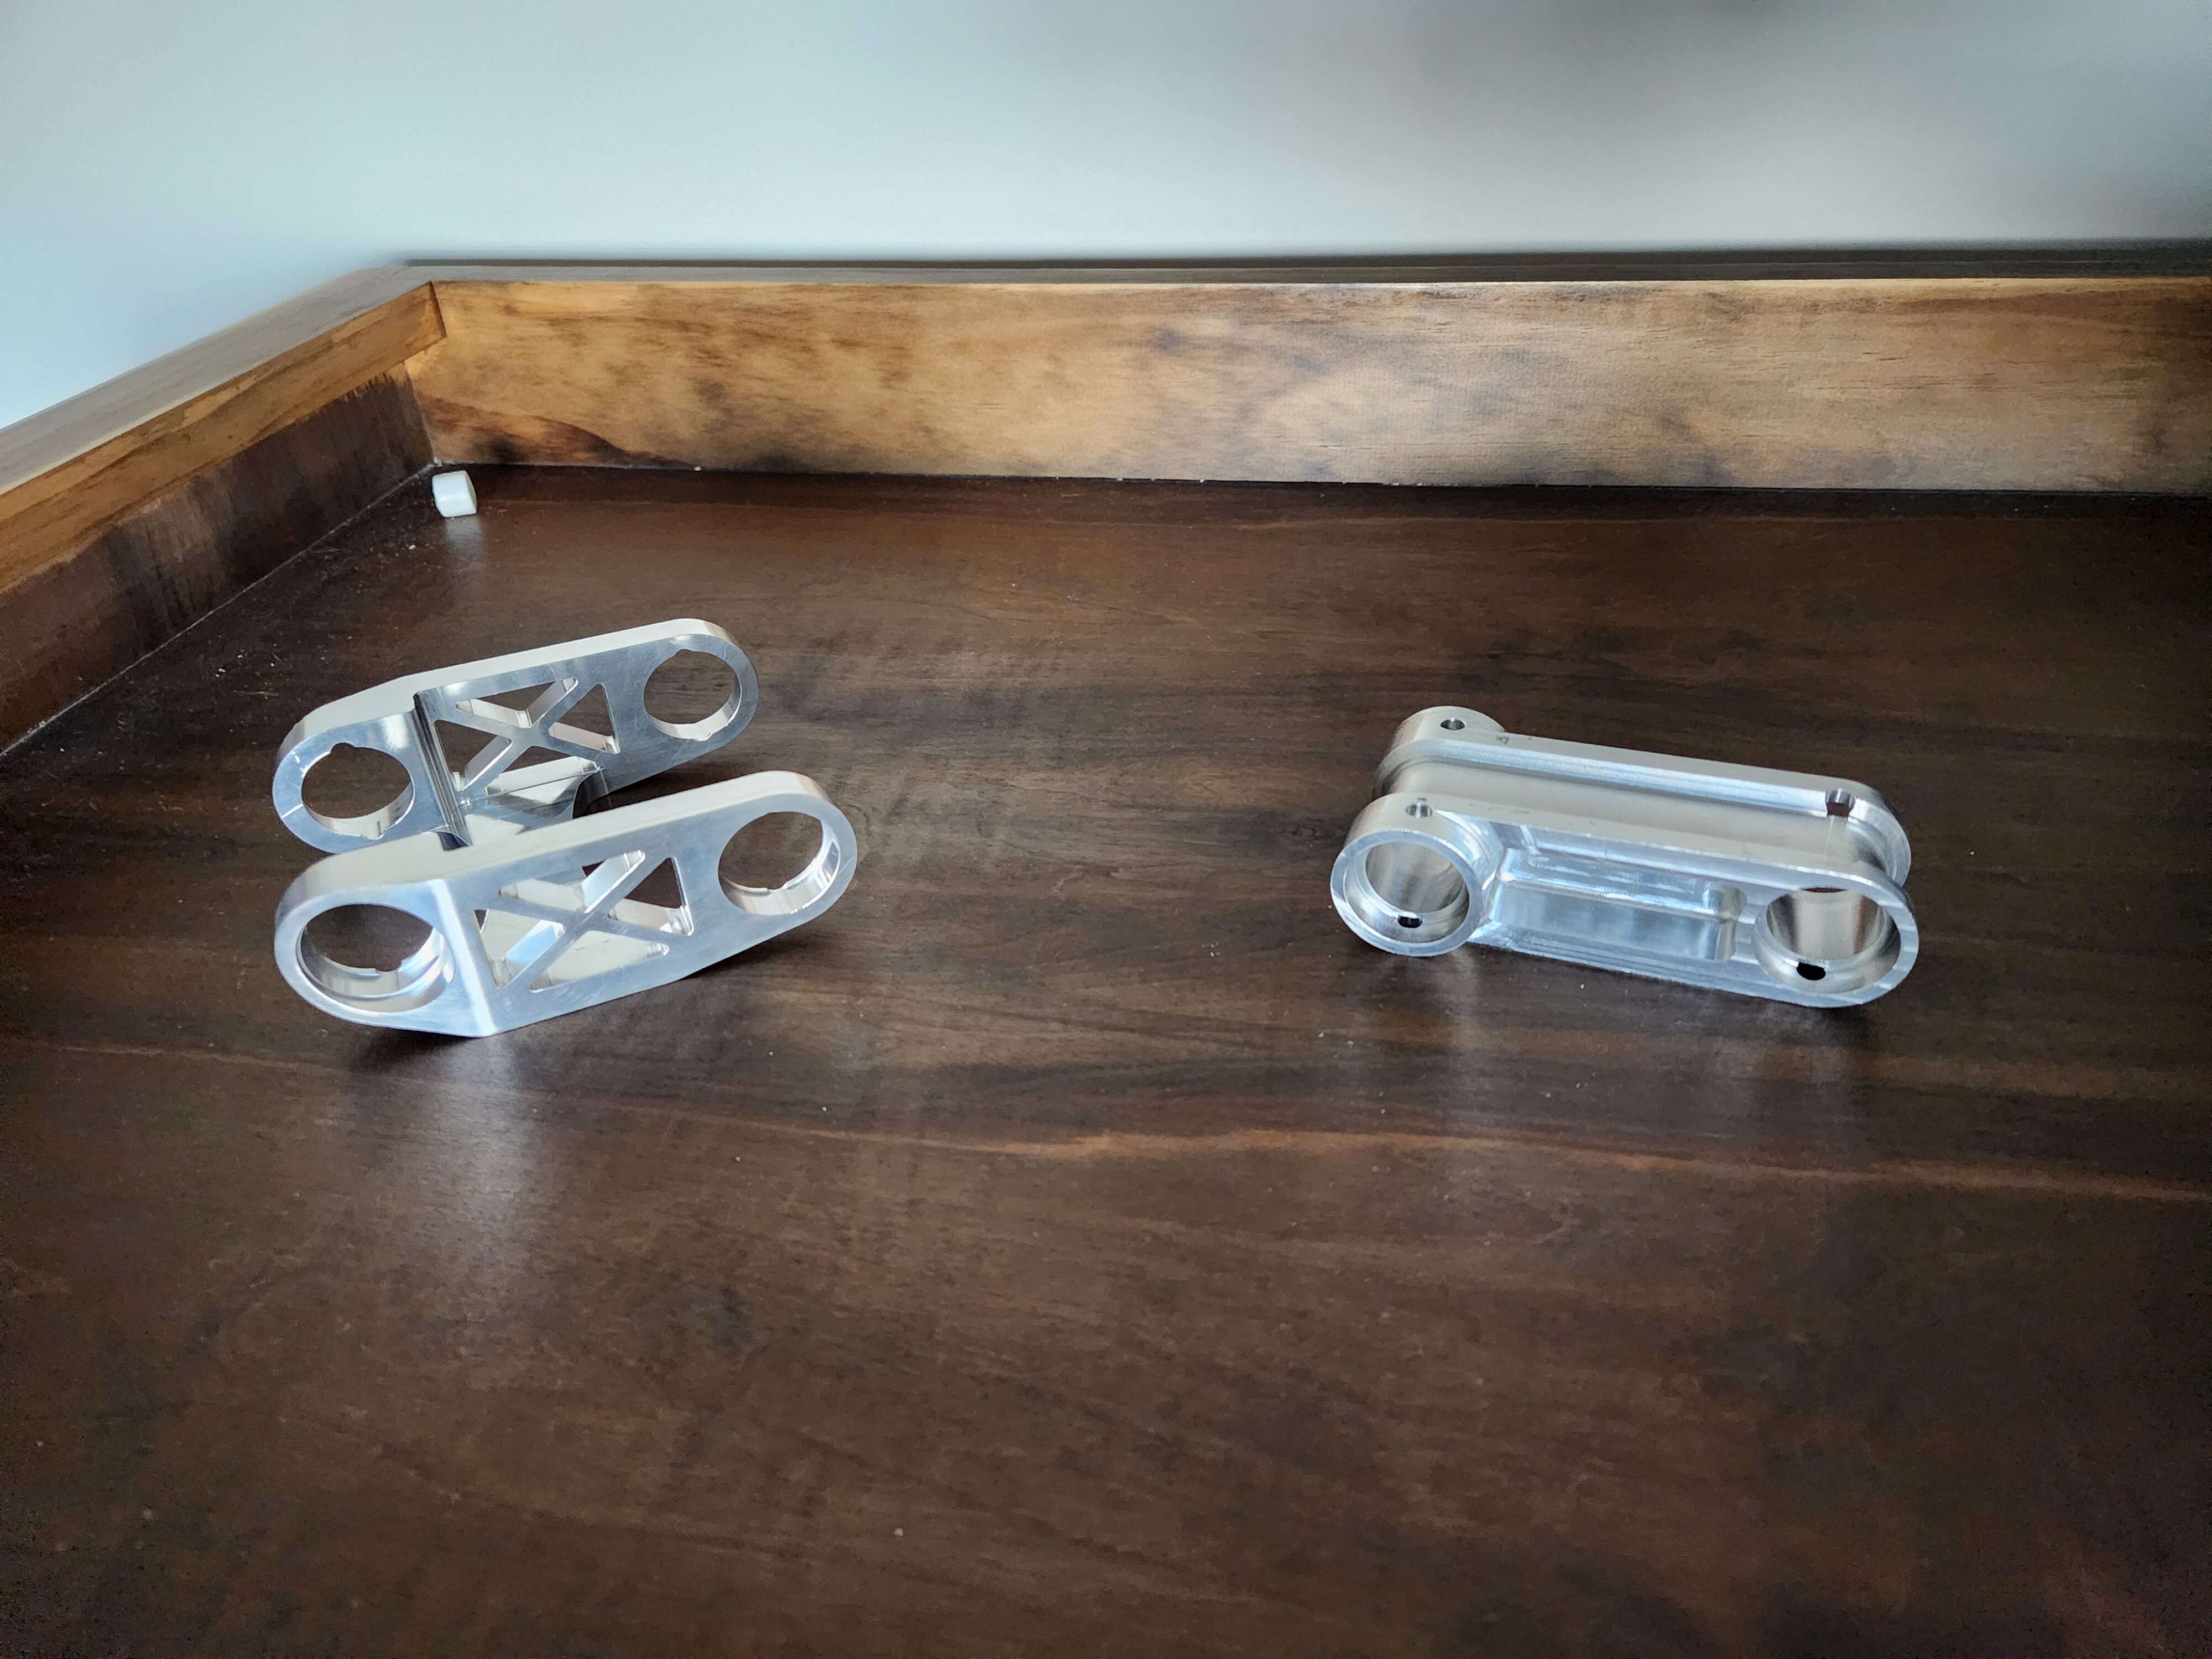
I decided to make a dual link for my first bike chiefly because I like how they ride but also you have all the bearings in the links which are much easier to machine than frame pieces in my guesstimation. I tried to have no threaded bits in the frame except water bottle bosses as well.
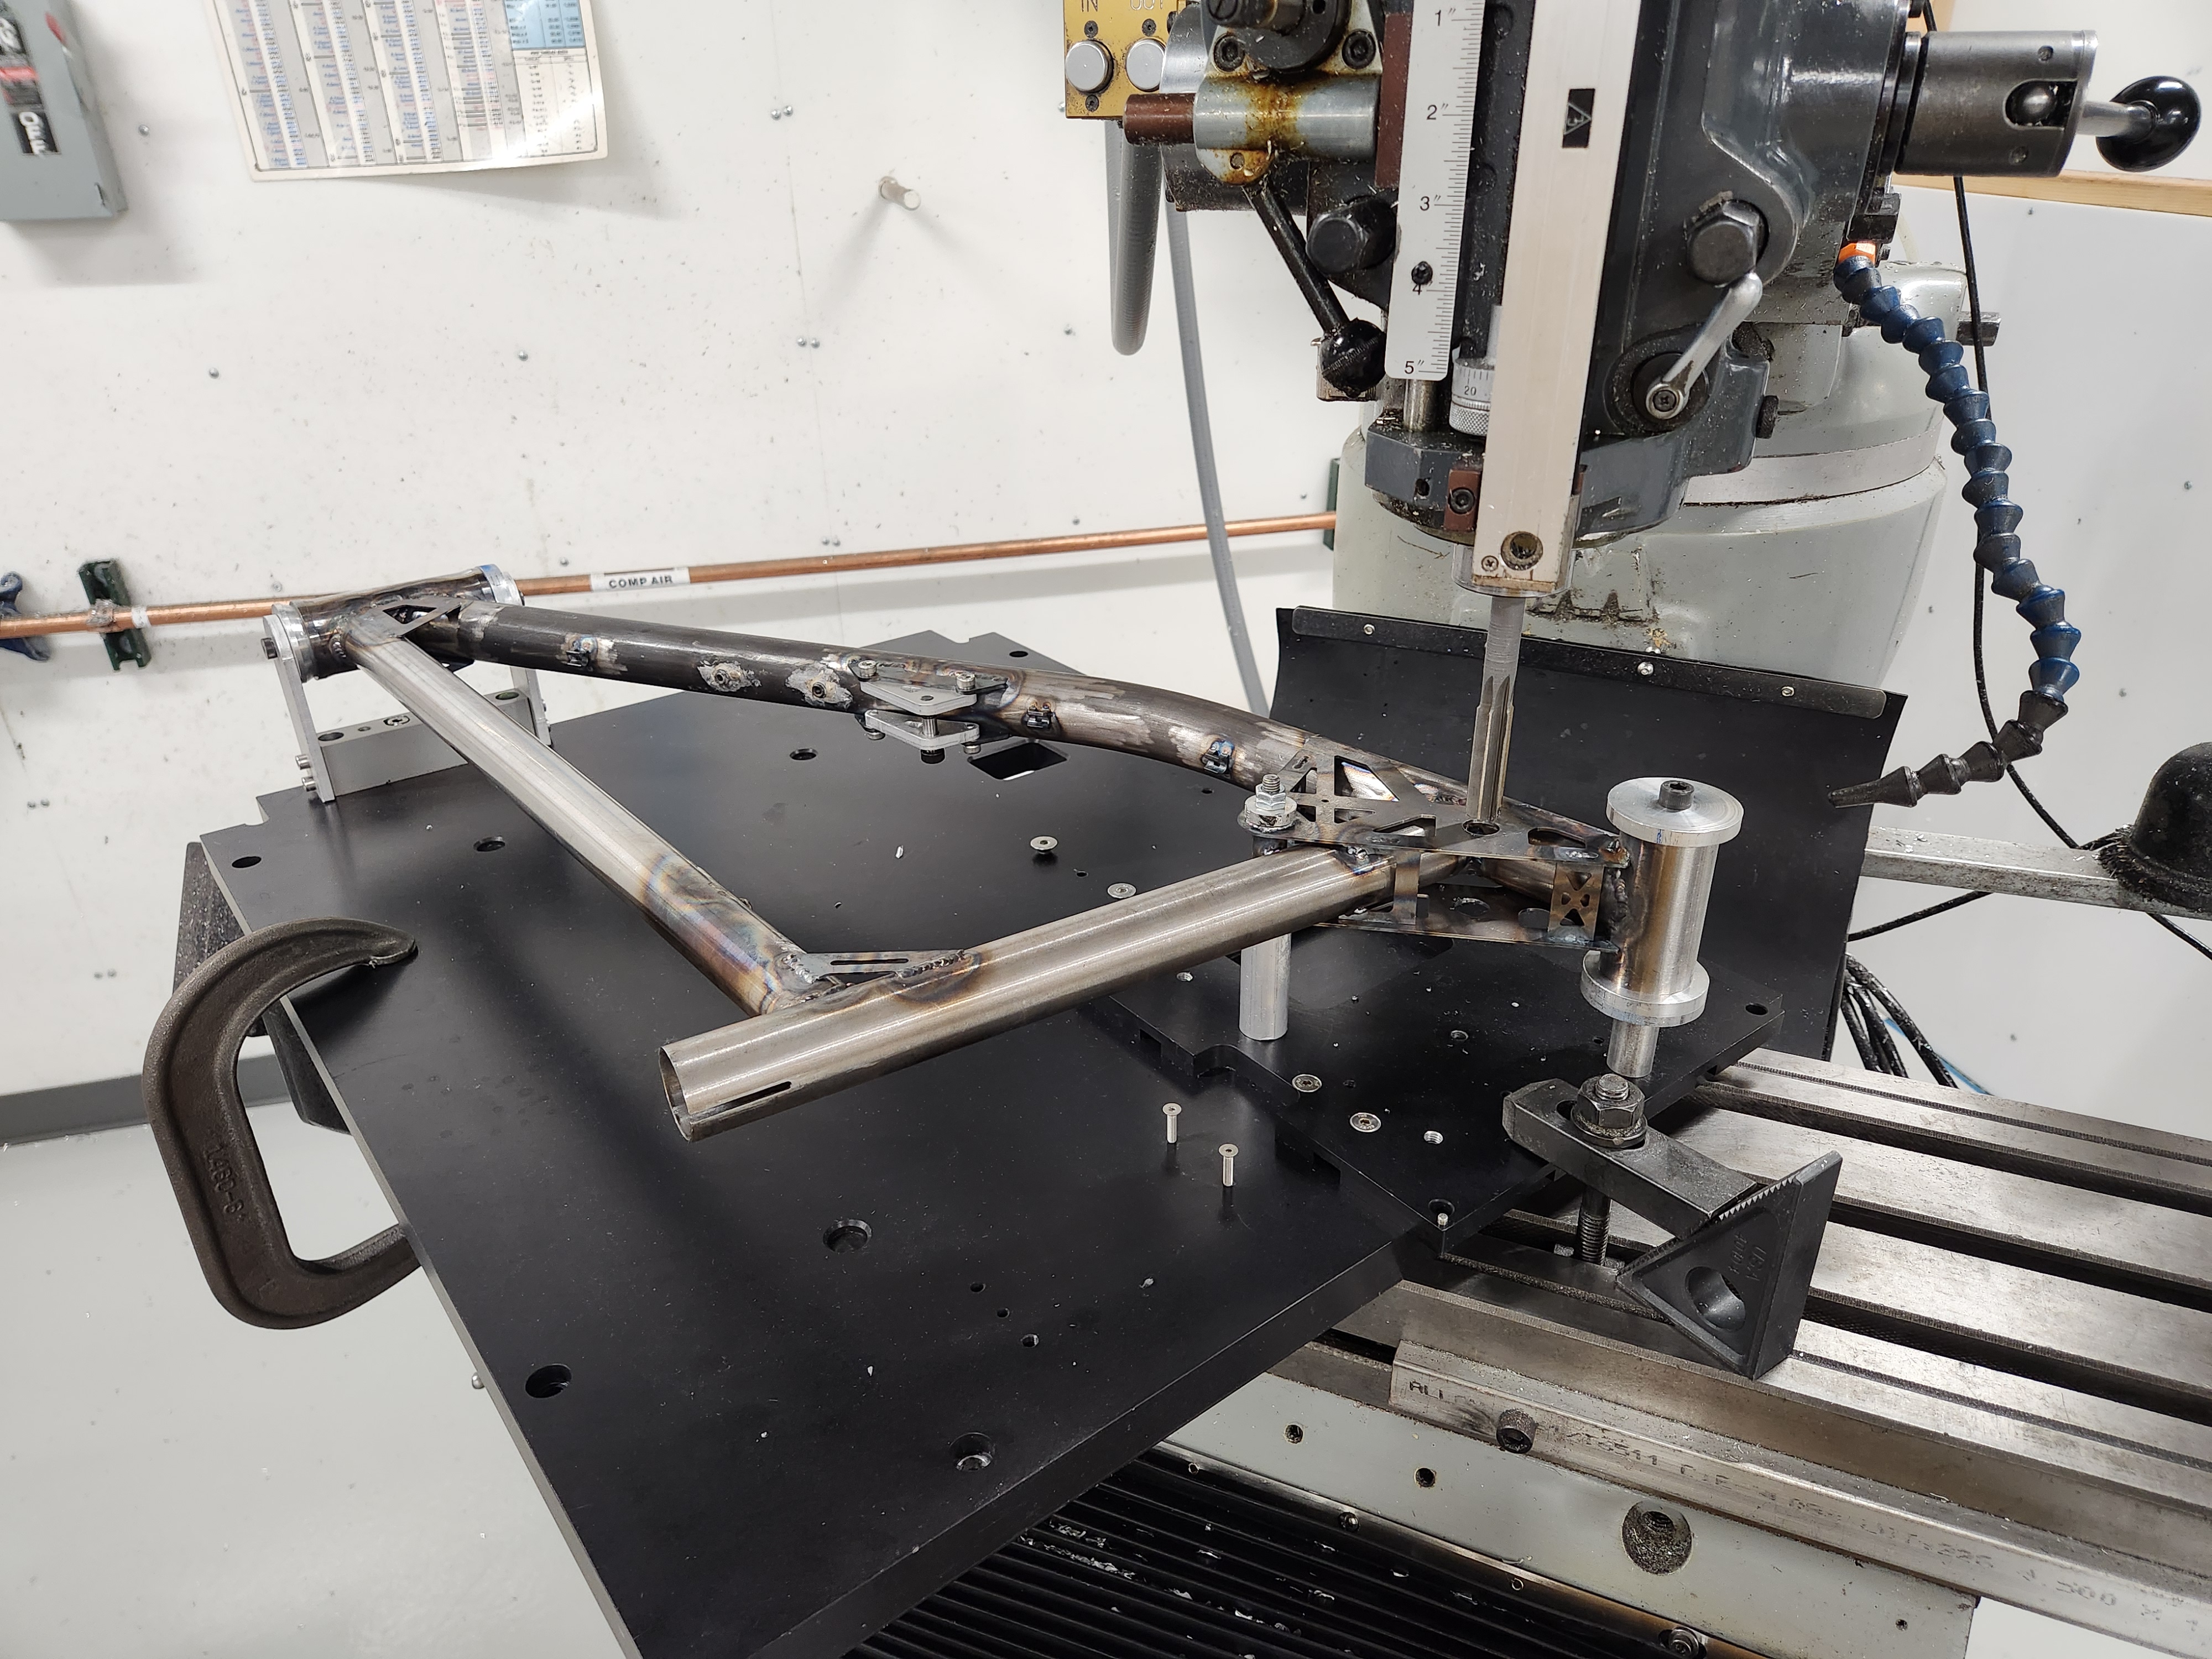
Fabrication took place at my place of work which let me use the knee mill, manual lathe, tig welder after hours. After some course work at Youtube University I got after it.
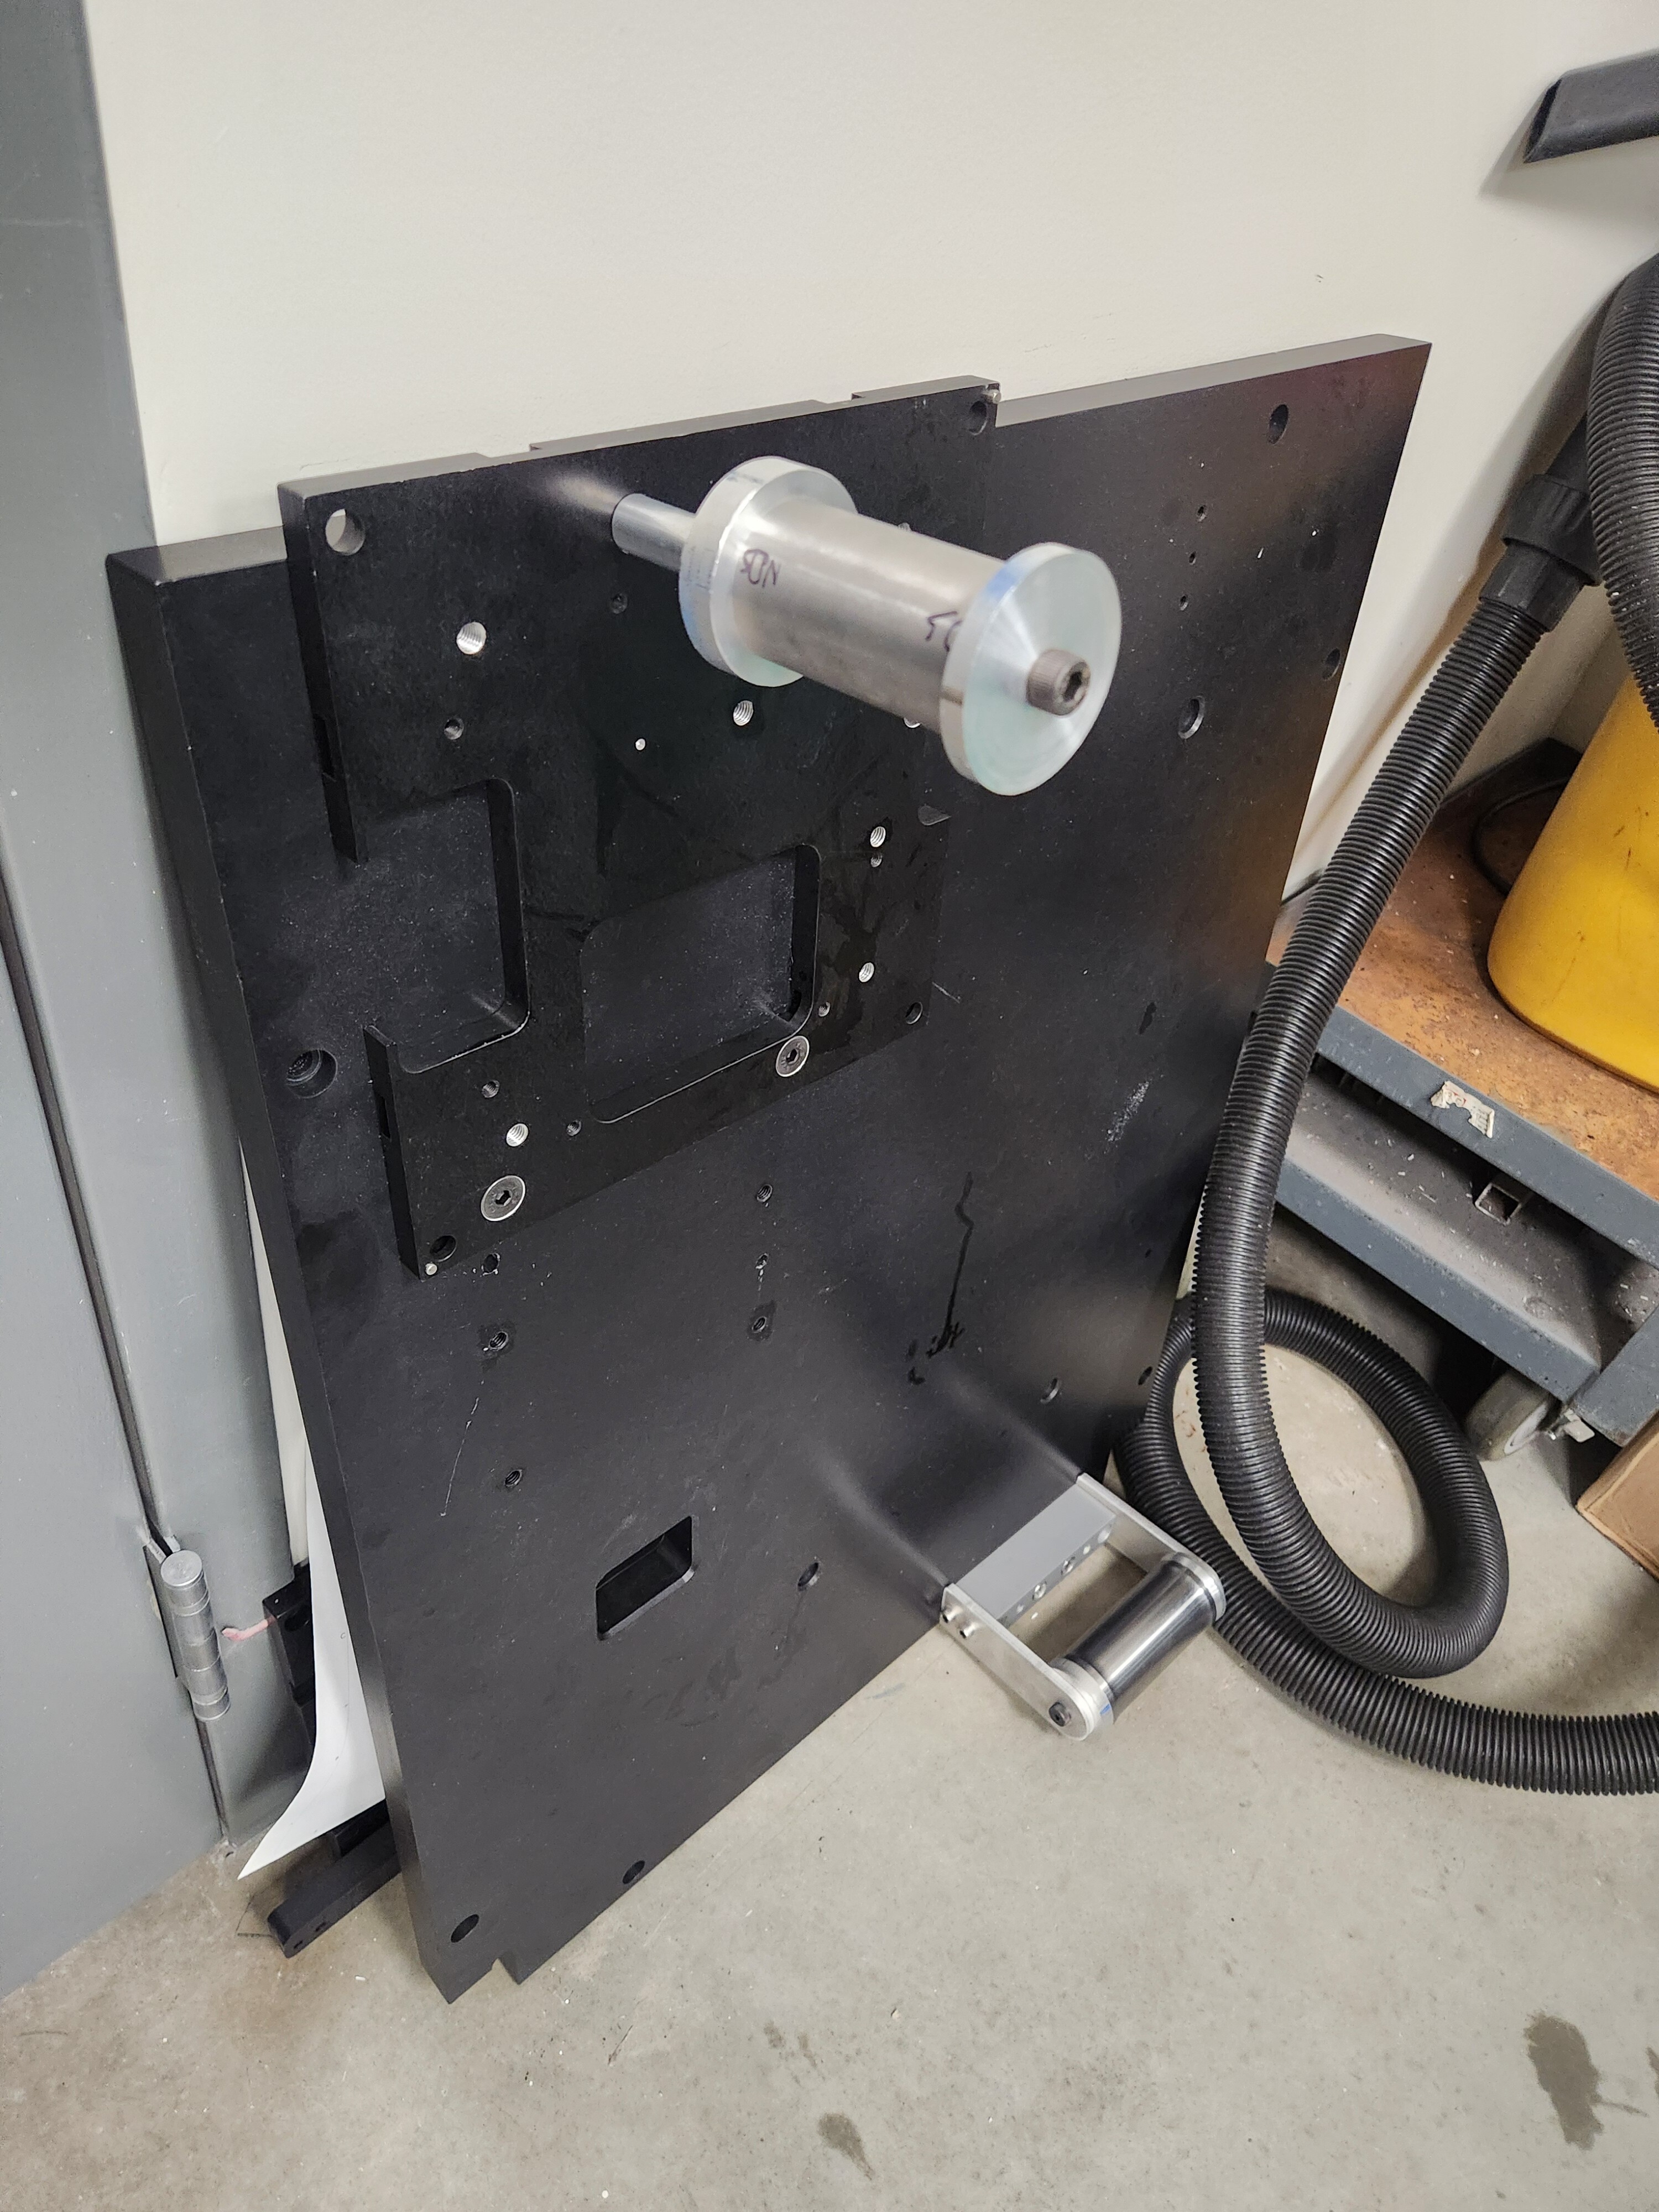
I made the front and rear triangle jigs out of some Mic6 and aluminum extrusion my work was recycling. The mic6 was really precise and flat but my skill with welding is low enough that it made the tacks really hard to do. I will have to account for that in the future.
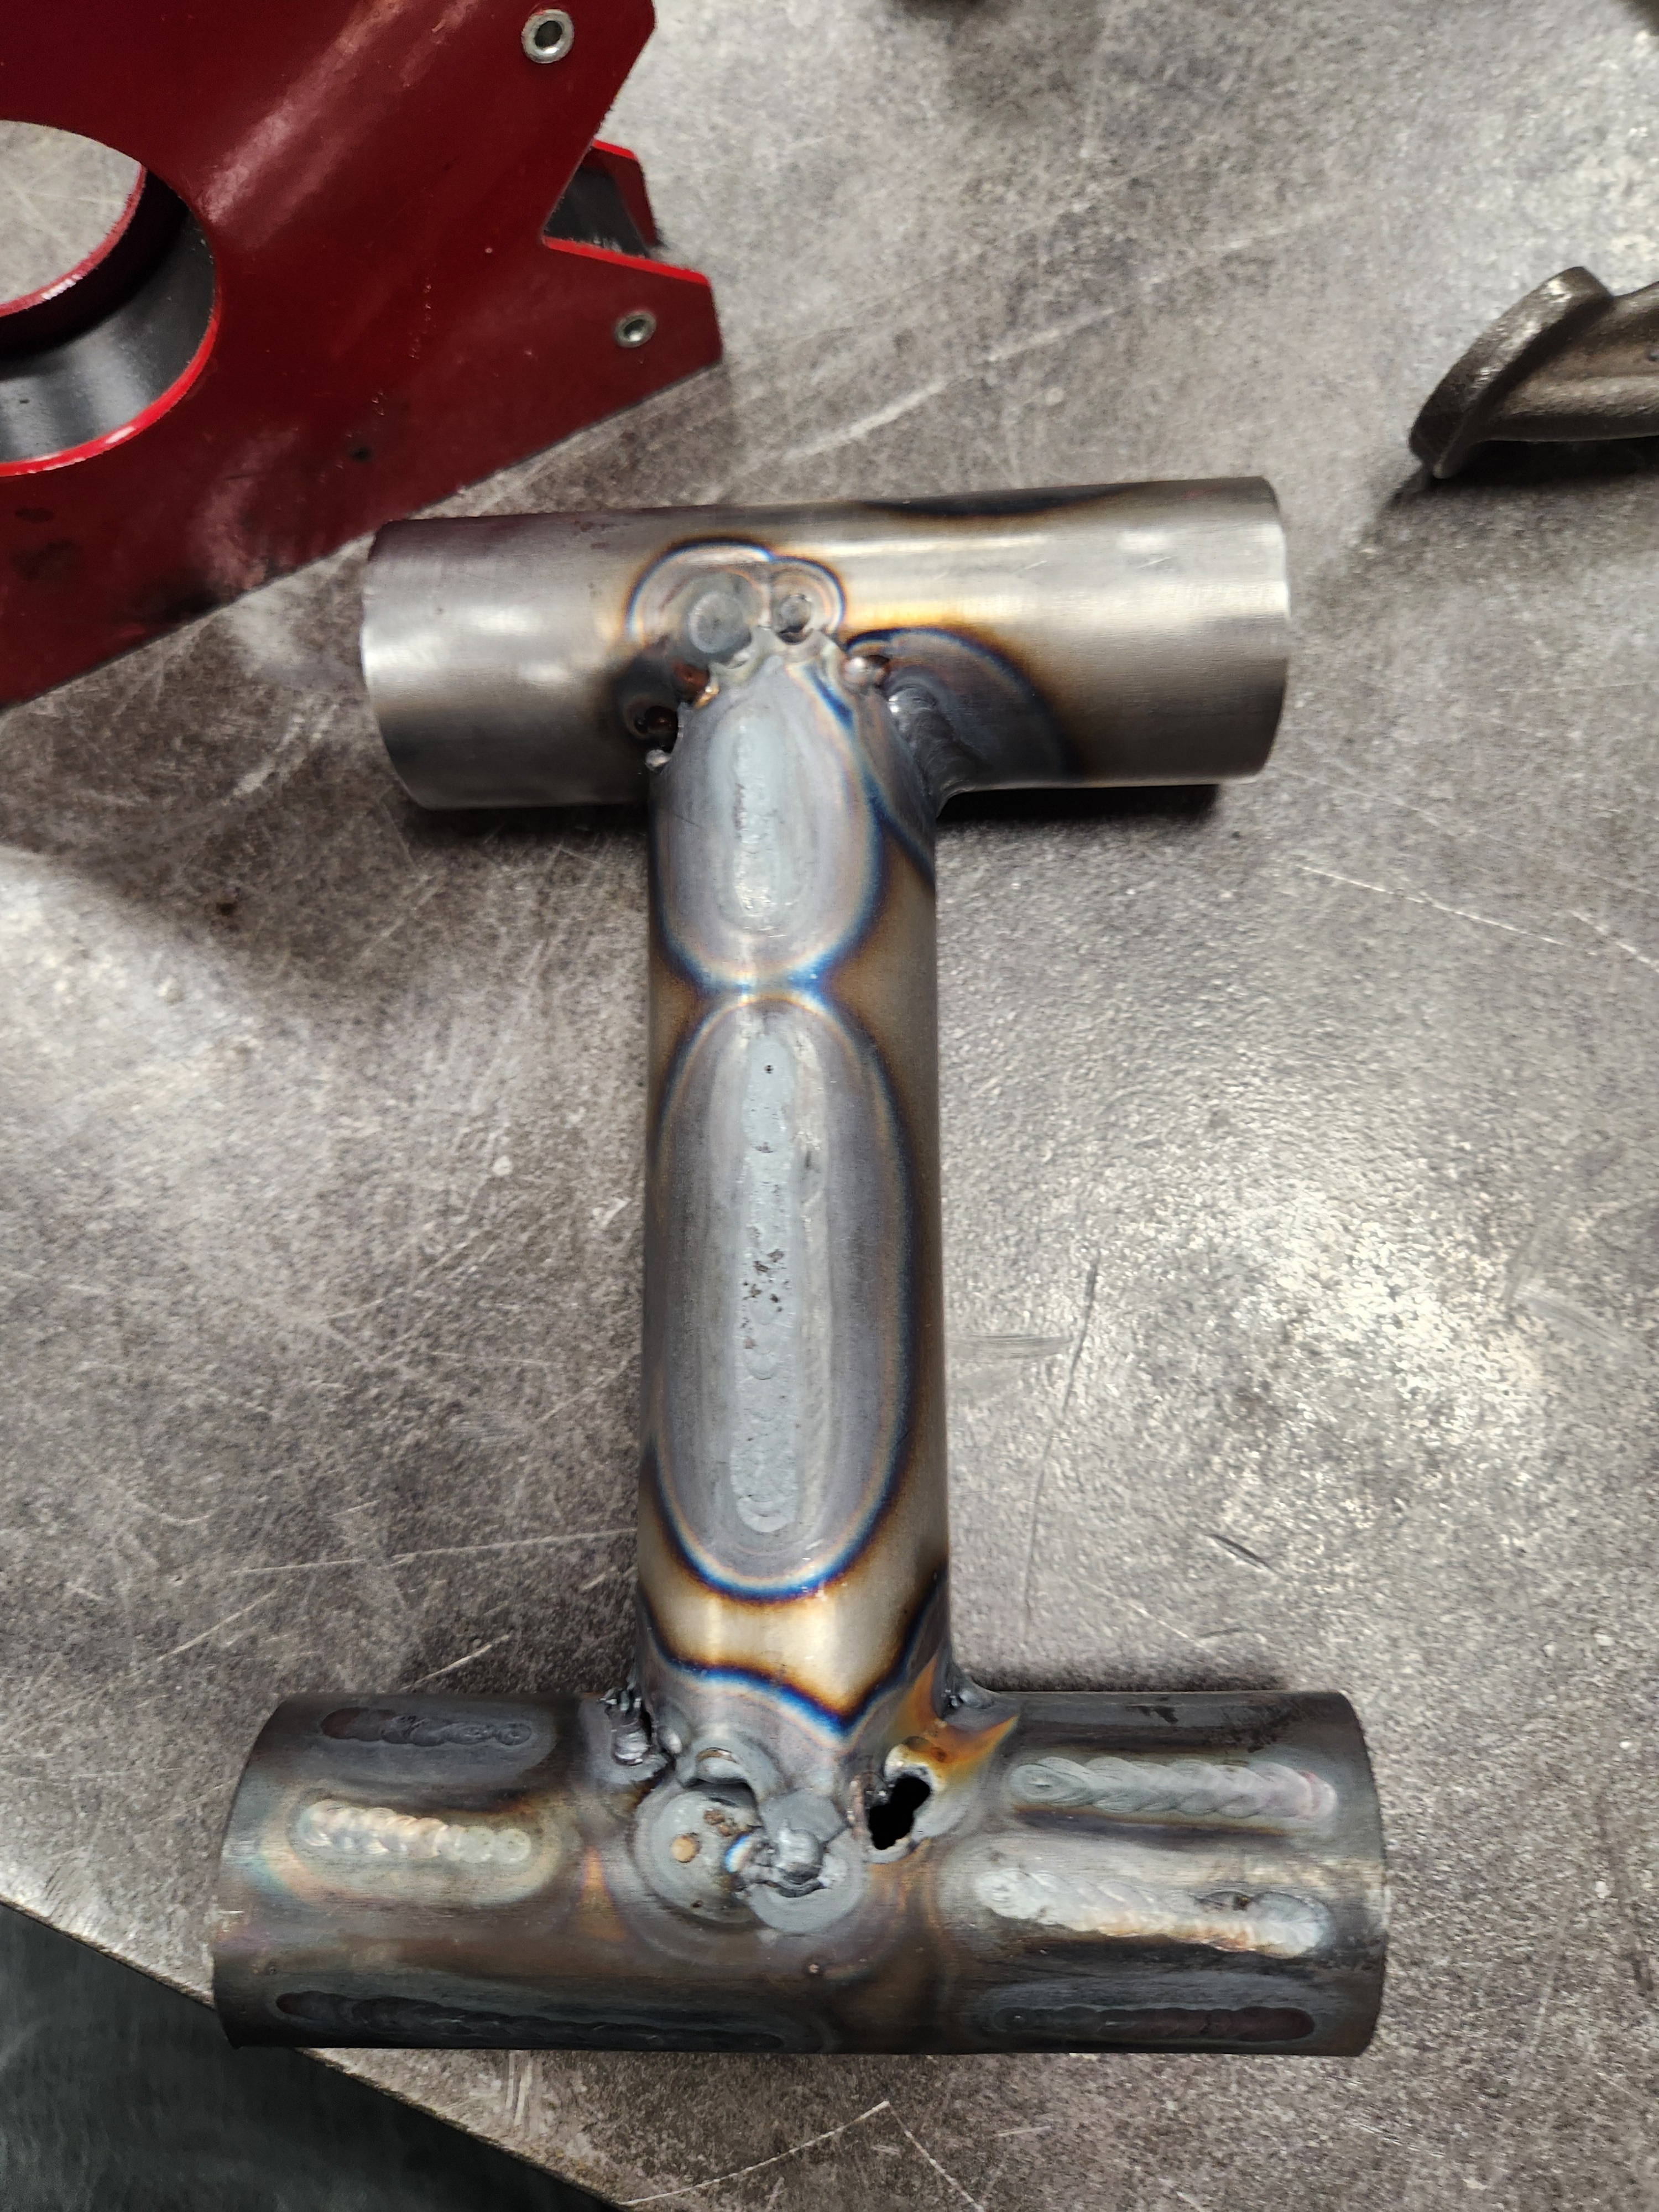
In design, I spent about 10 times the time designing the rear triangle compared to the front. And I still designed a rear that was hard to make. It took me about 4x the time to weld up the rear and it was sloppier than I would have liked.
I would like to use Oshcut instead of Sendcutsend for some of the 4130 plate. I sized down to 1.6mm on some plate that I wanted to have at 2mm but SCS didn’t carry the thickness I wanted at the time. I didn’t know about Oshcut and would have rather used their 2mm plate. Hopefully my bike doesn’t break too soon.
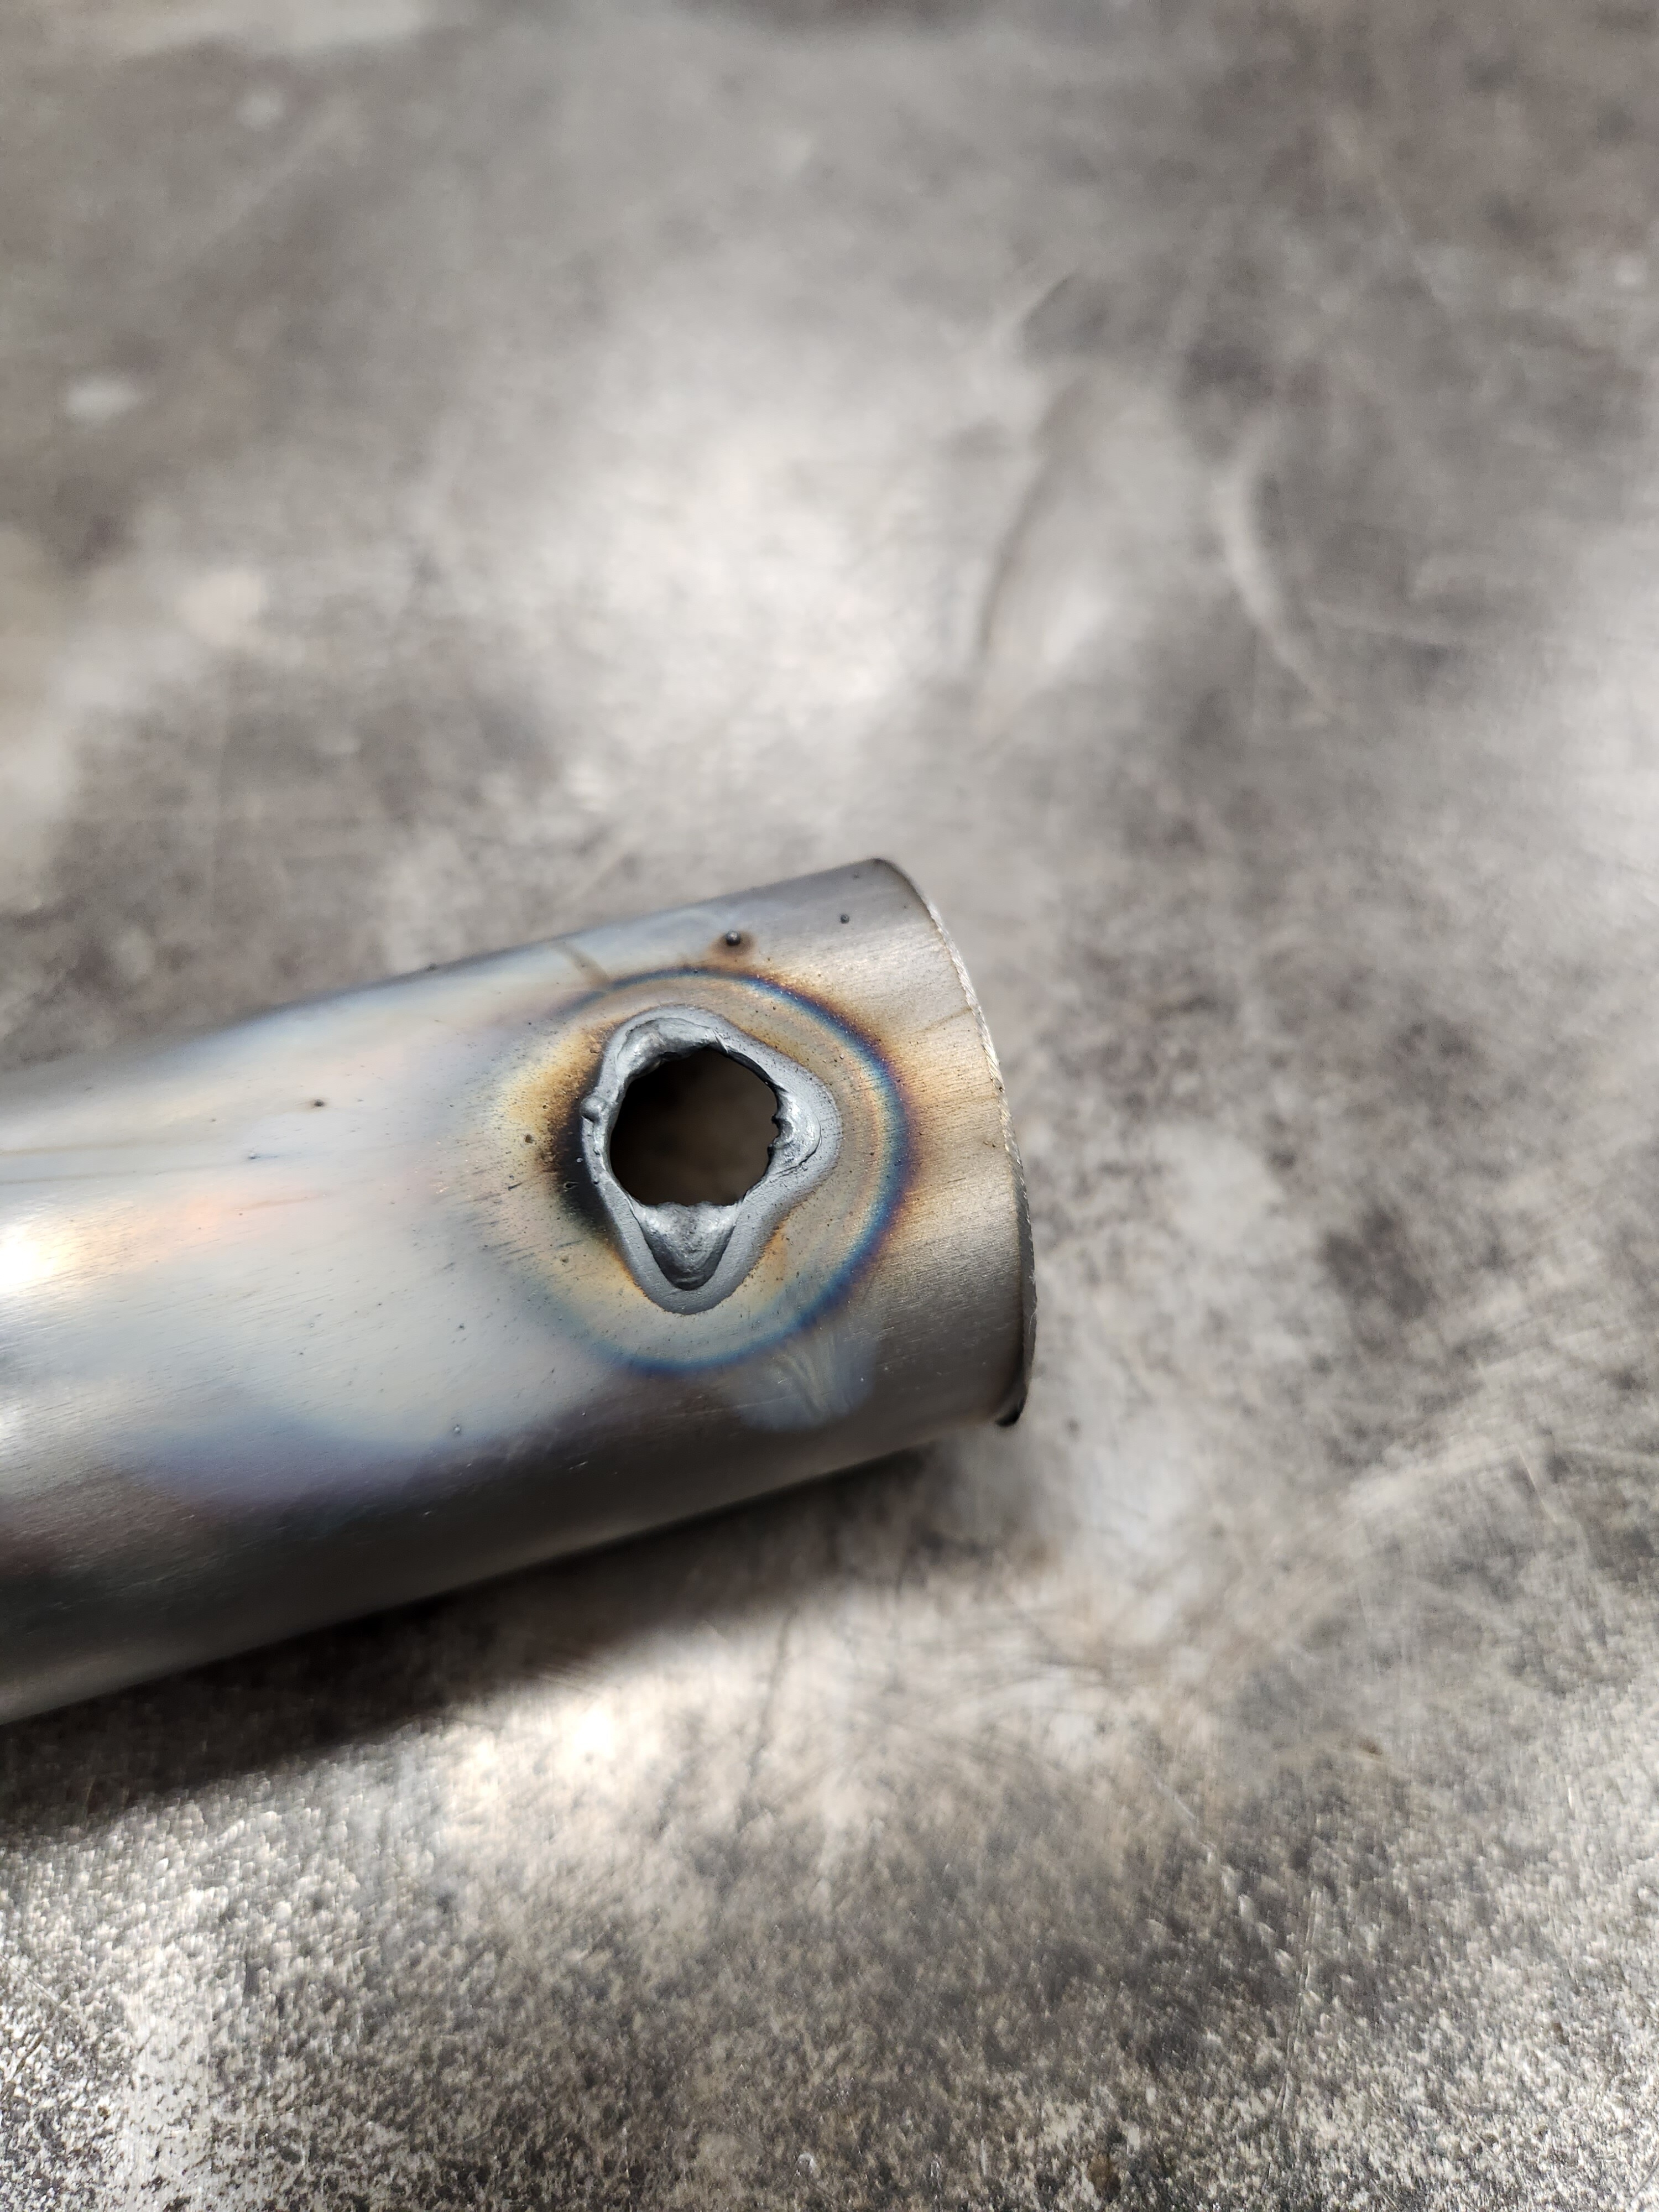
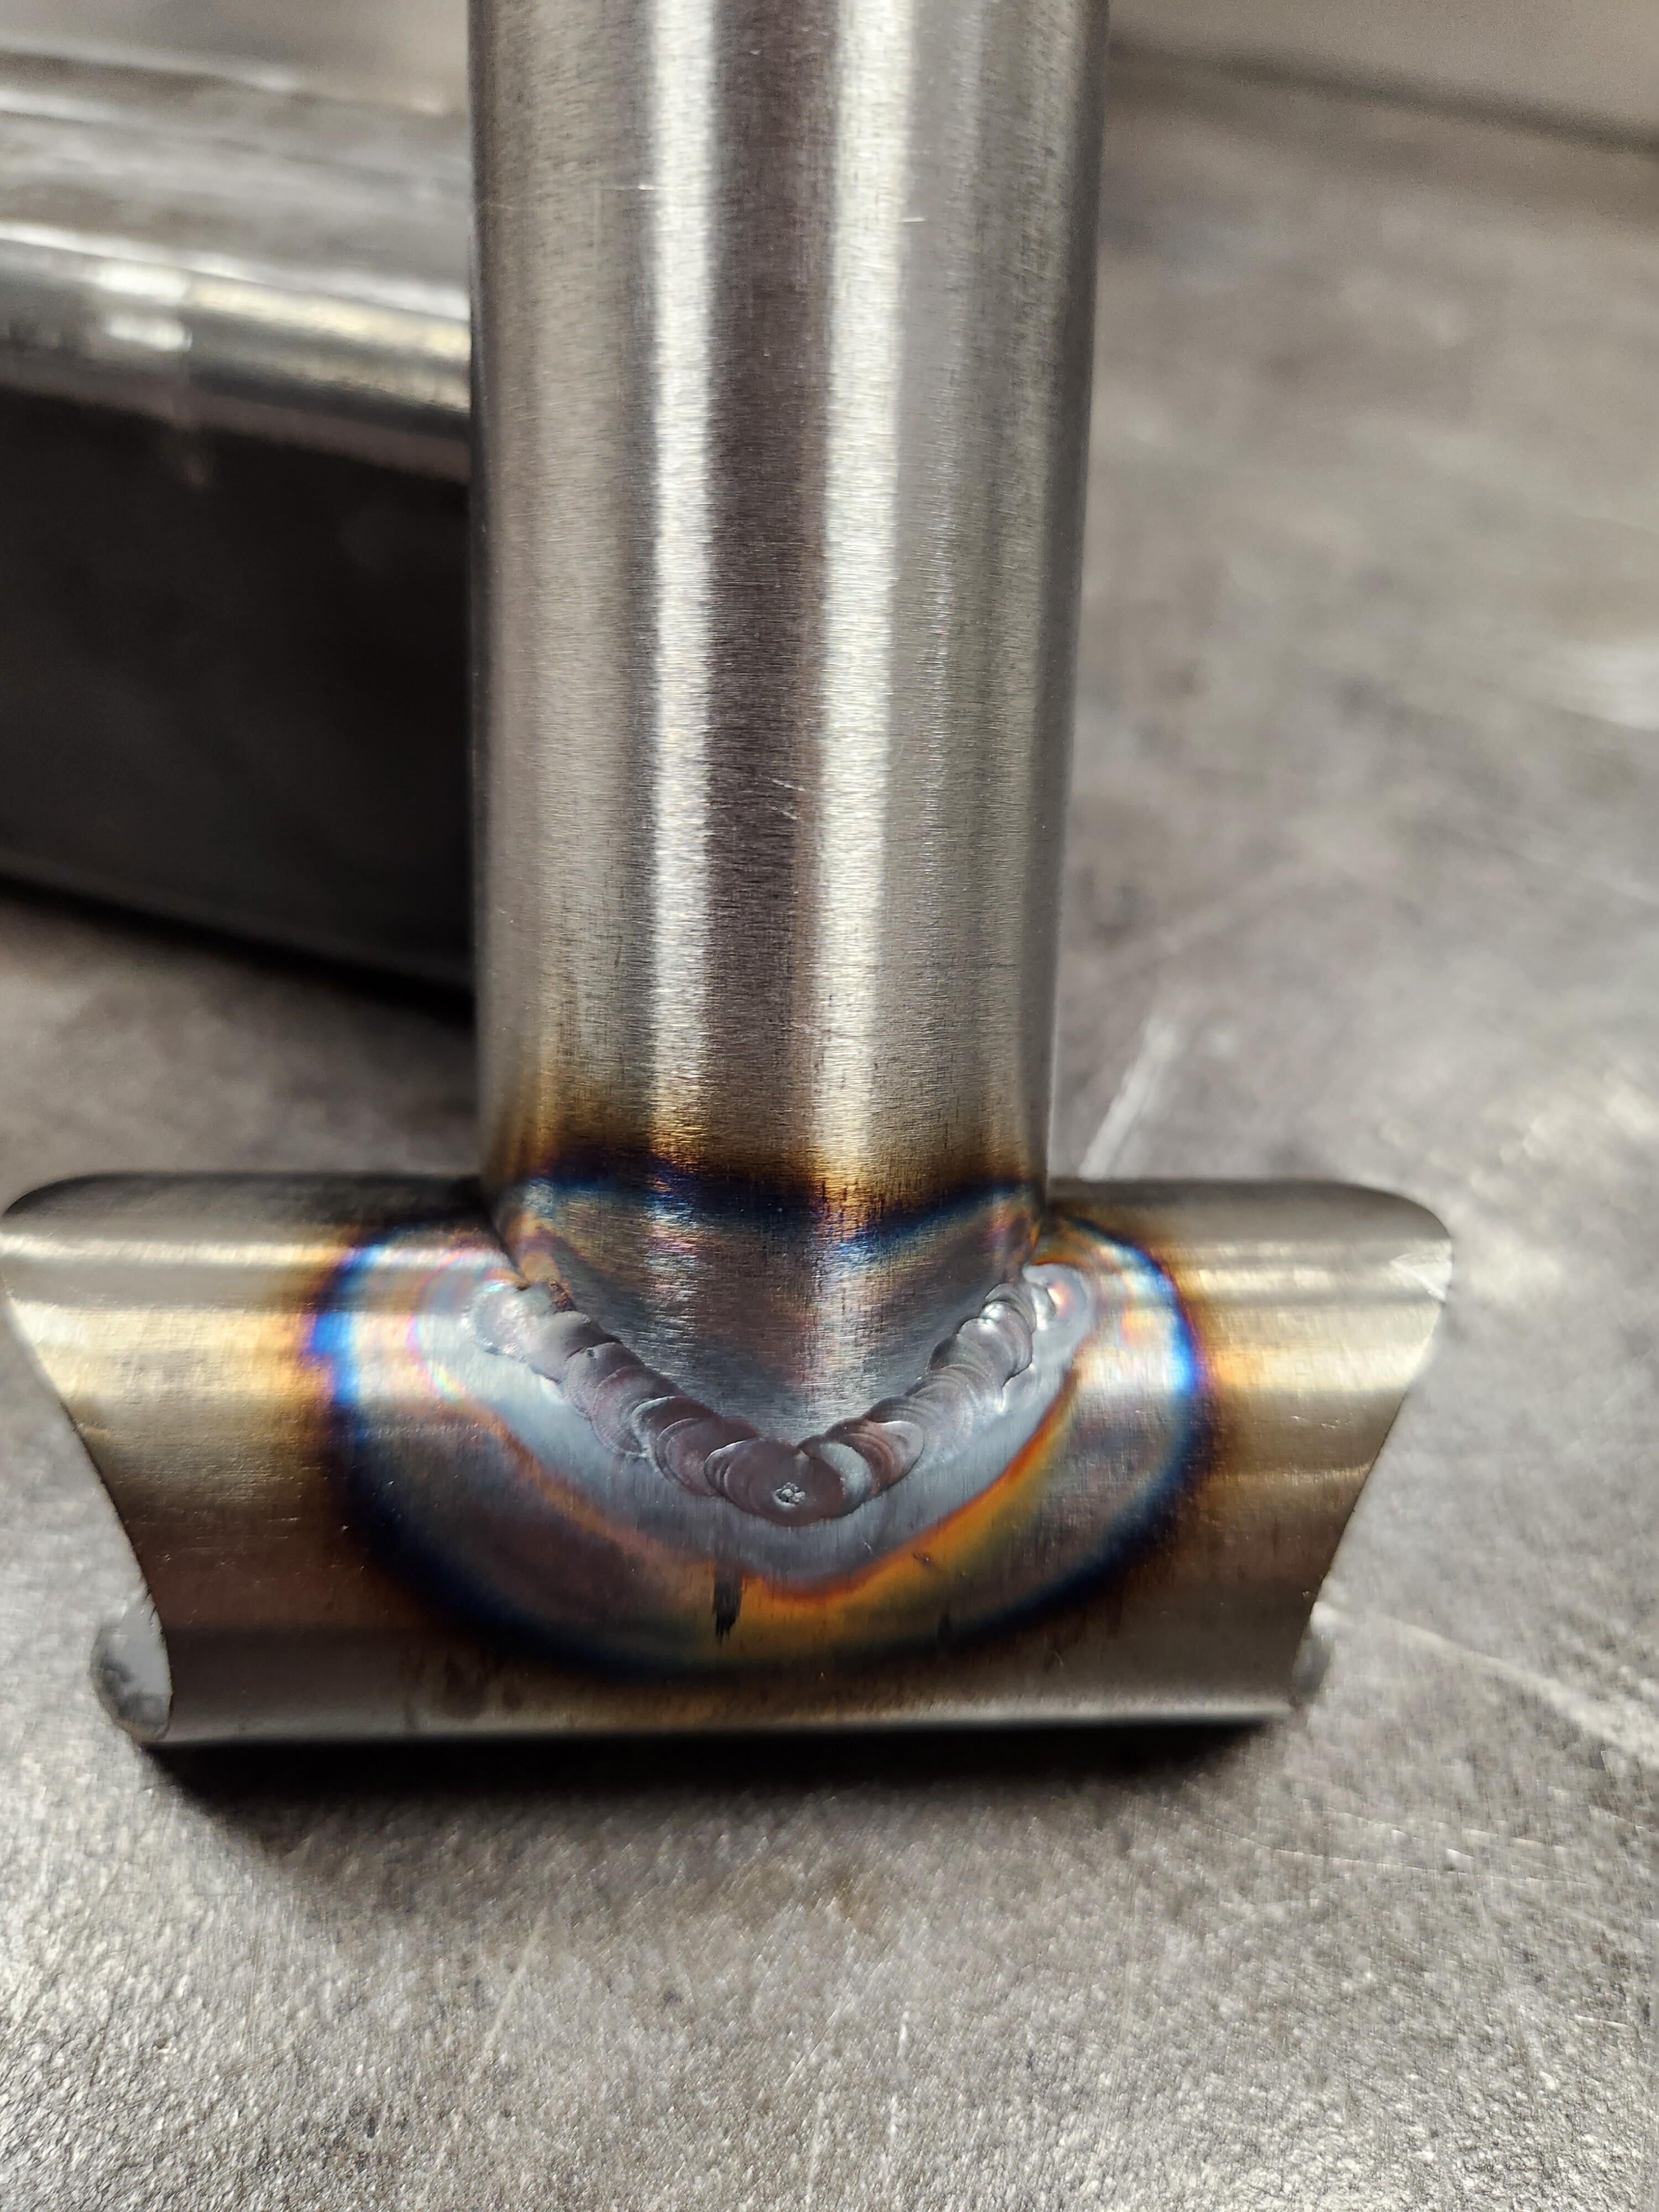
I need to practice a bunch more with welding. If I had to give myself a welding nickname it would be “The Big Dipper” or “Hot Hot Heat”. I did a lot of tungsten grinding and lot of overcooking joints.
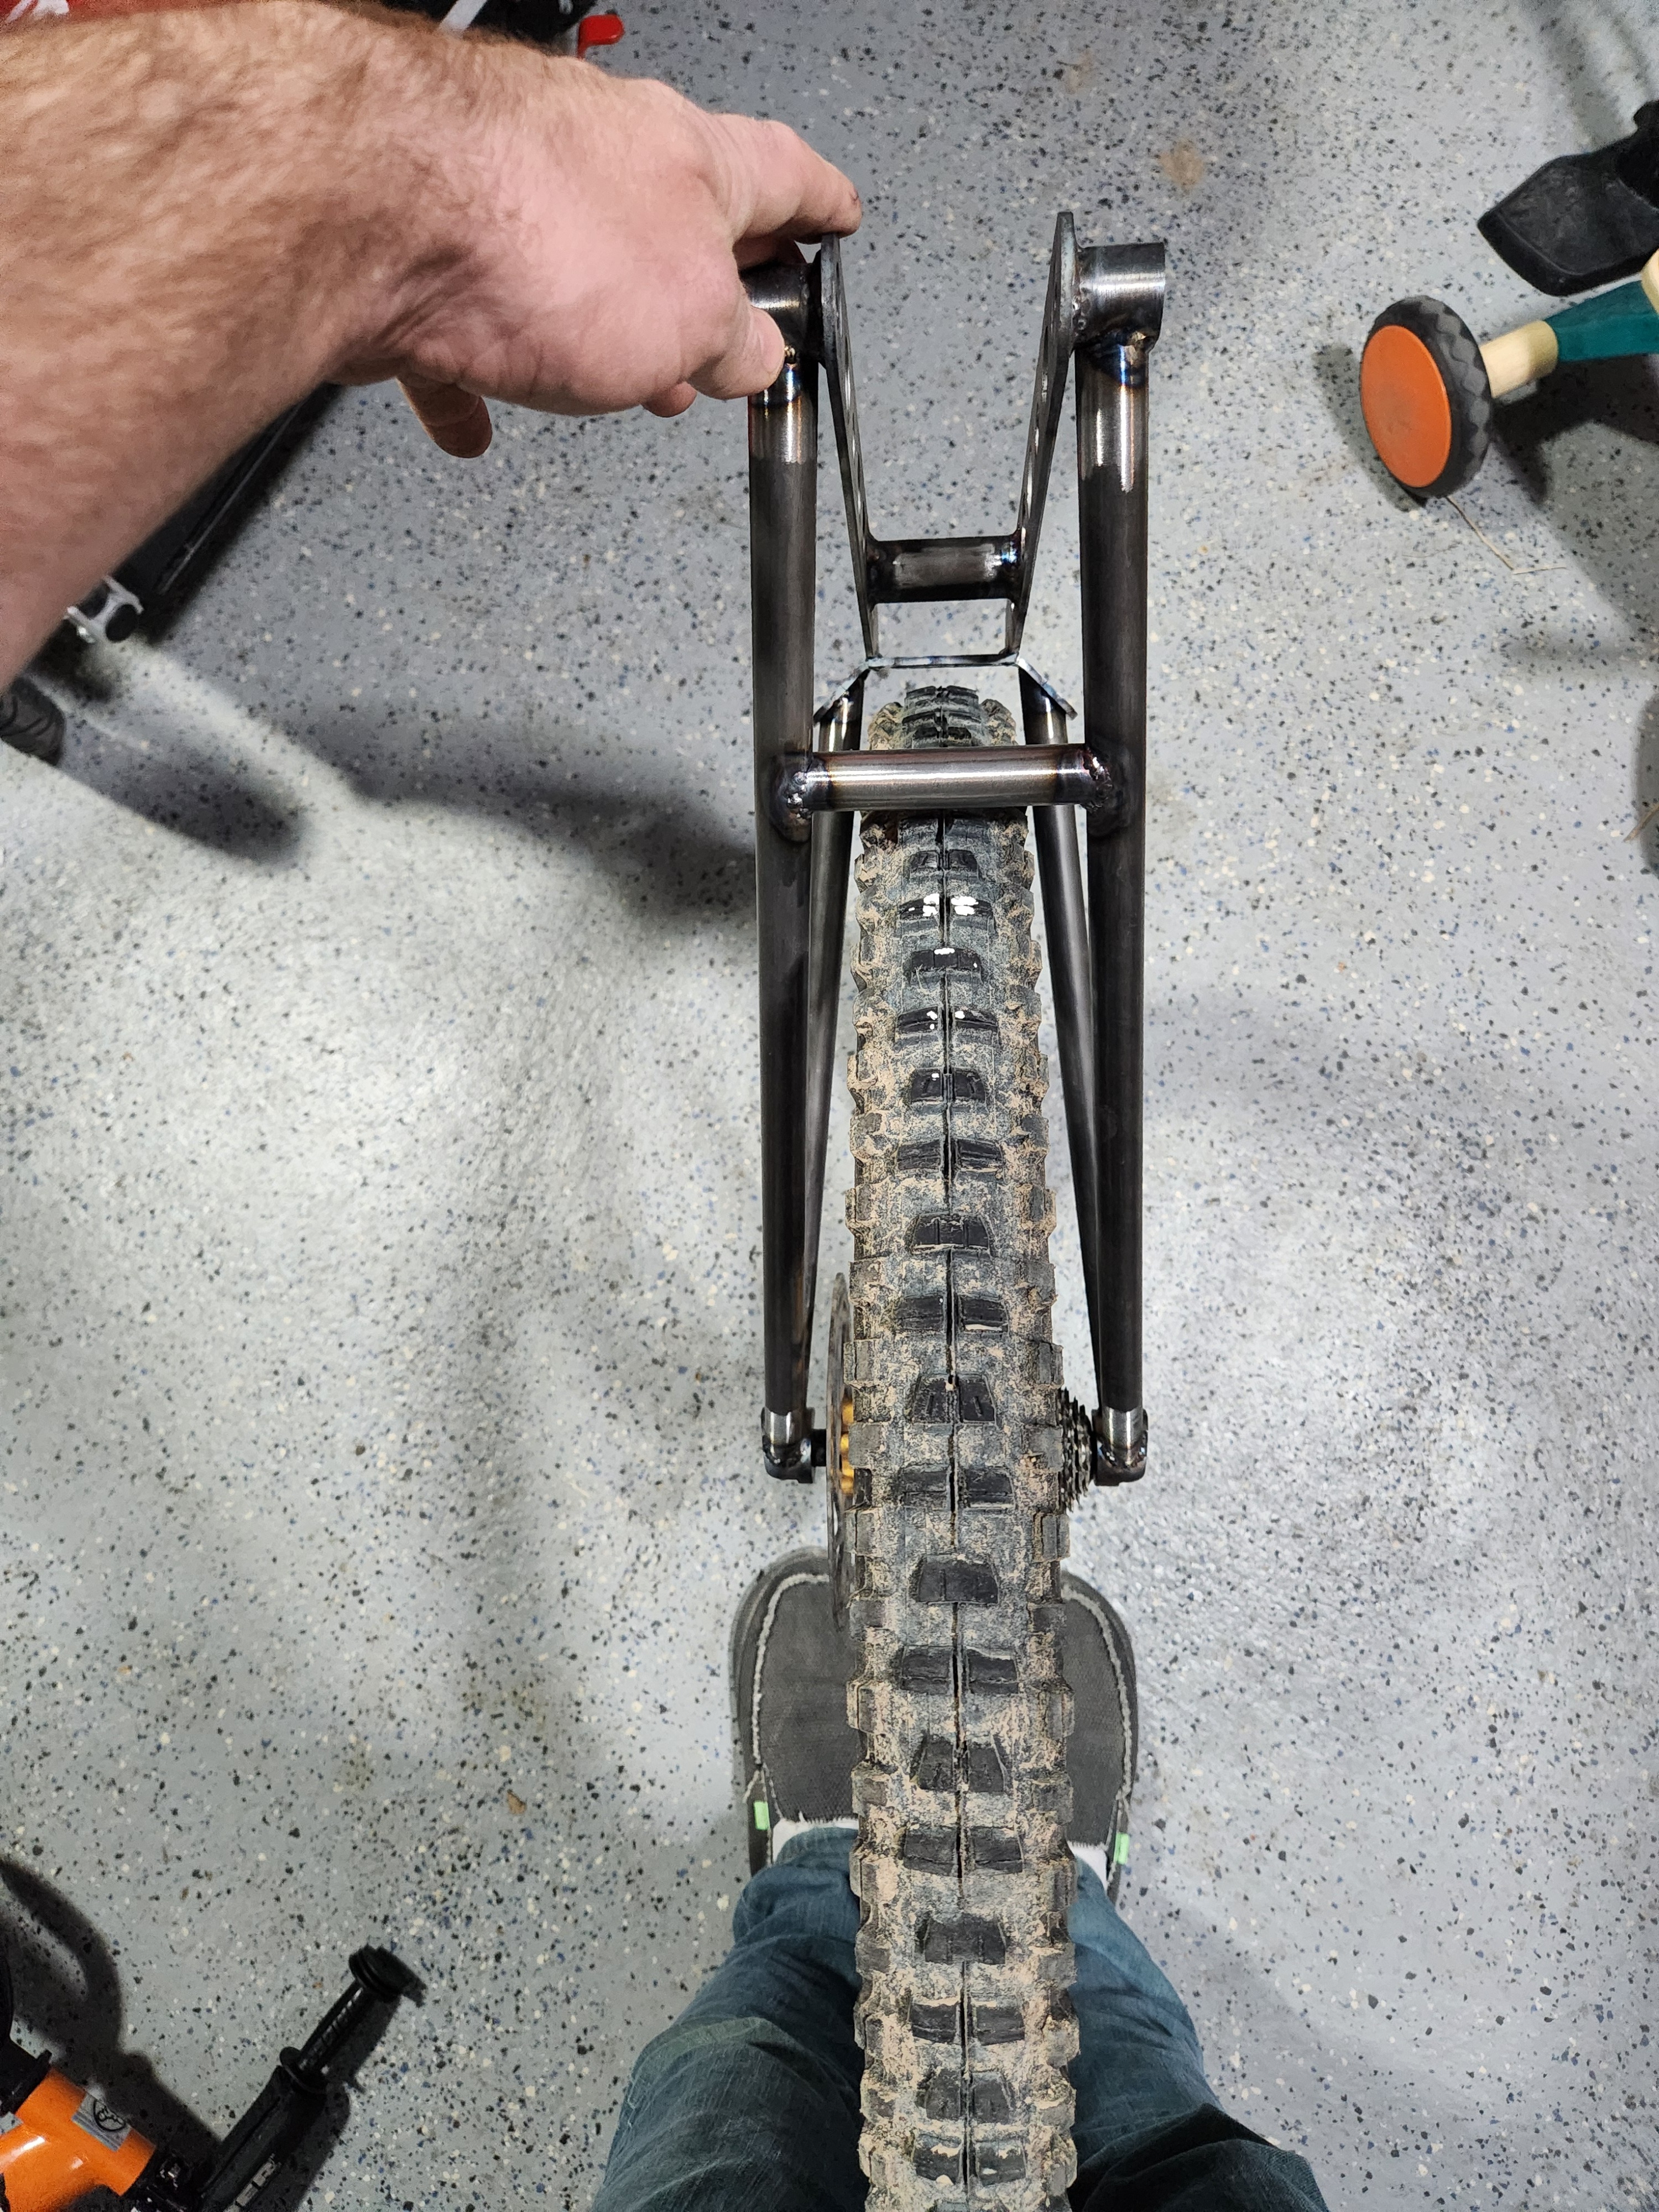
I need to limit tight angles. I made a bunch of really tight angles in the rear triangle and it just made things hard.
Fixture every floating point in your jig when you tack
Practice brazing. I made a real mess of the 4 water bottle bosses I brazed. I did like one practice braze and I should have done more. A lot more.
This thing is pretty rad! Dual link bikes are where its at. I wouldn’t worry too much about the 1.6mm plate, just keep an eye on it. It should let you know if its about to go.
Thanks! DT is 38.1x1.2, TT is a butted tube. 31.6x(.9x.7x.9). ST is 35mm butted to 1.6 at the top and .9 at the bottom. CS and SS are 19x.9. The rear triangle big plates are 4130 .125" thickness.
That is one hell of a first bike! I like the use of plates for the pivot mounts. Similar to the last bike I built. I’ve started learning tig several months ago and I can relate to the troubles you come across. Someone else said this before me but sometimes I need to sharpen my tungsten again before my bench grinder even stops spinning. All part of the process.
I love your build- it’s awesome! Thanks for sharing what you learned; I didn’t know about OSH cut, and I had never thought of using plate for pivot architecture. It makes a ton of sense; Rocky Mountain used it to good effect for a long time!
Thanks! Time will tell if it holds up. If it doesn’t, I’ll replace the plate with thicker stuff. The plate pivot points were easy to fixture, and it was nice having them a little undersize then reaming after it was welded.
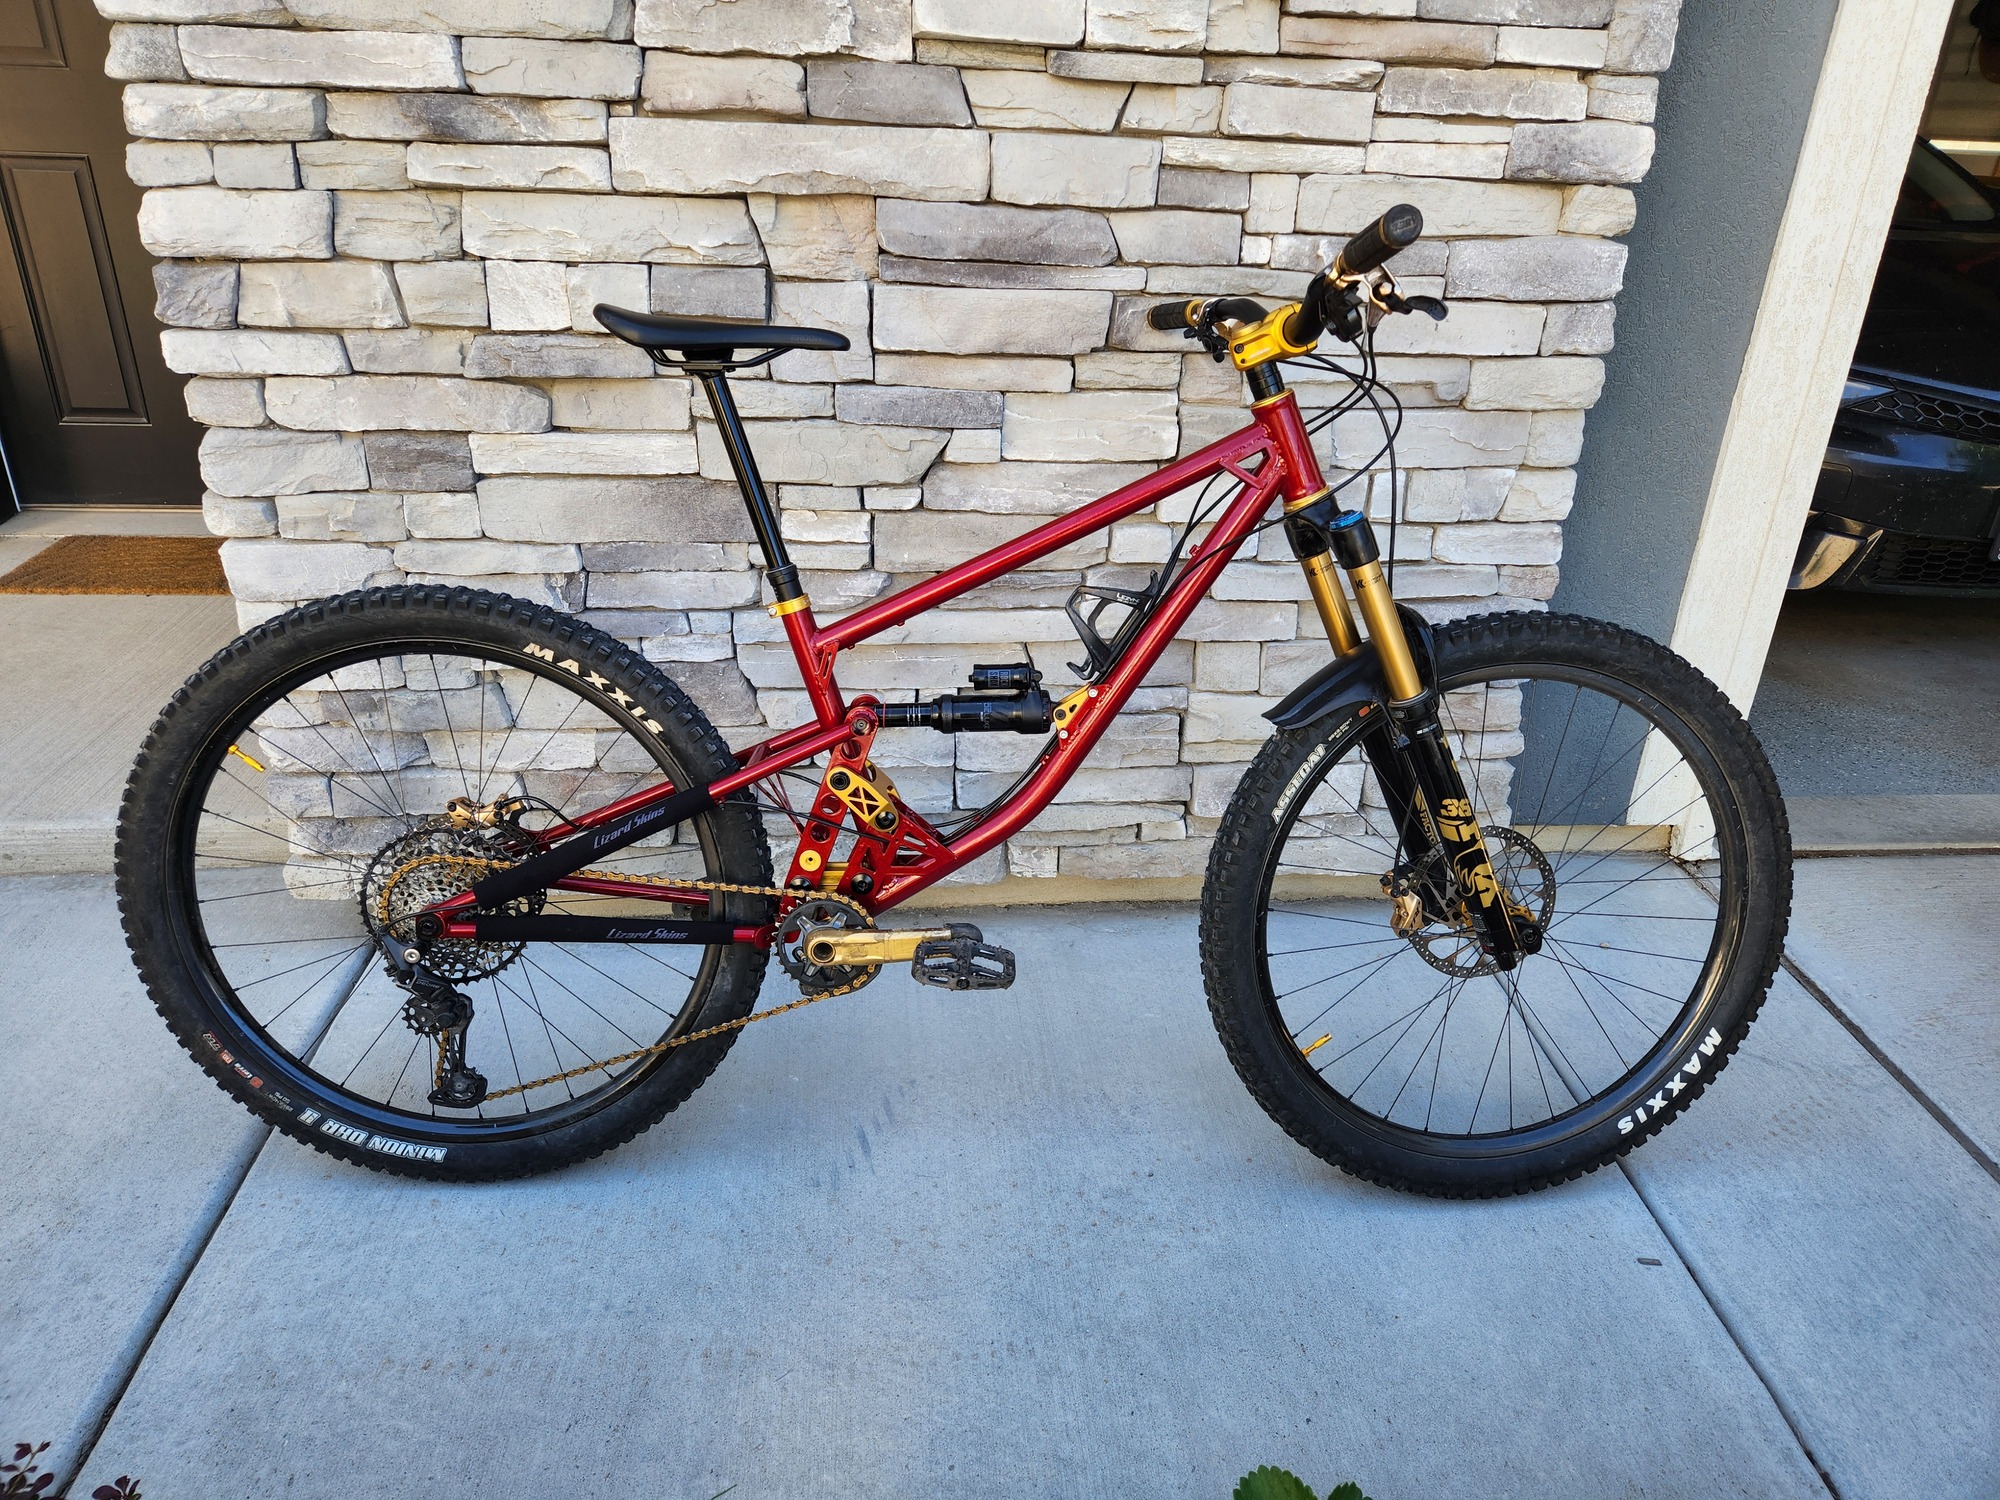
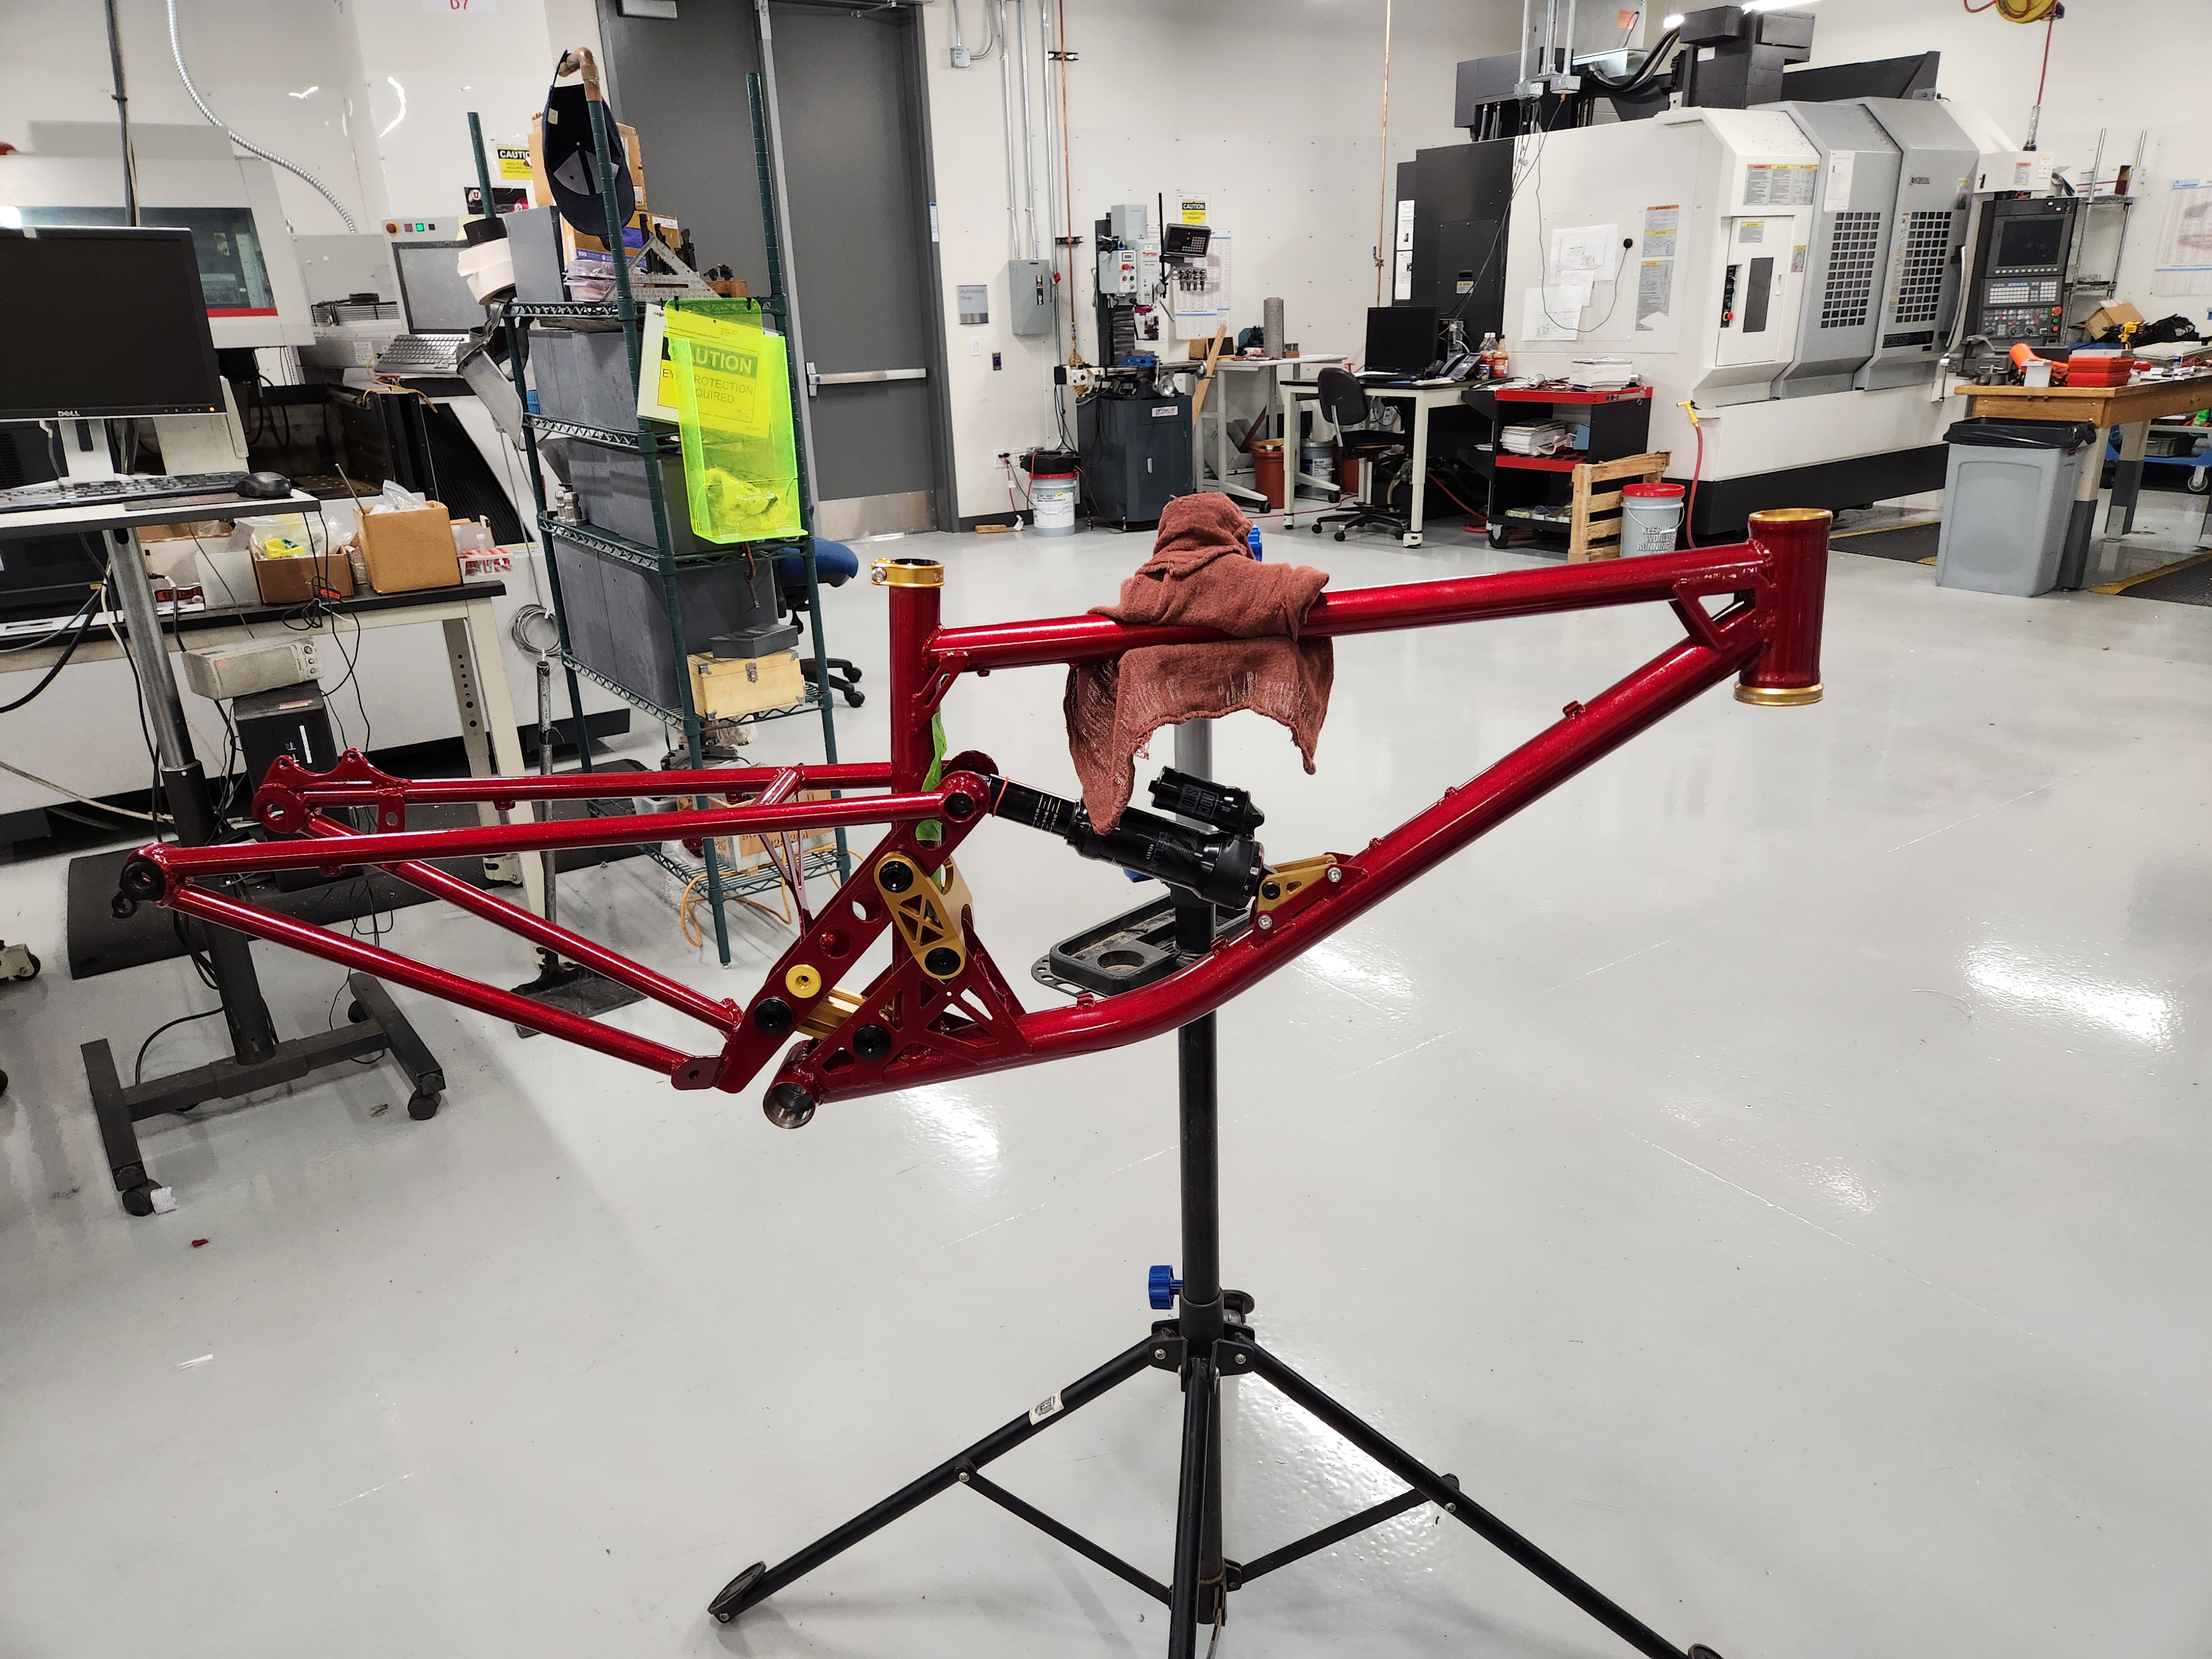
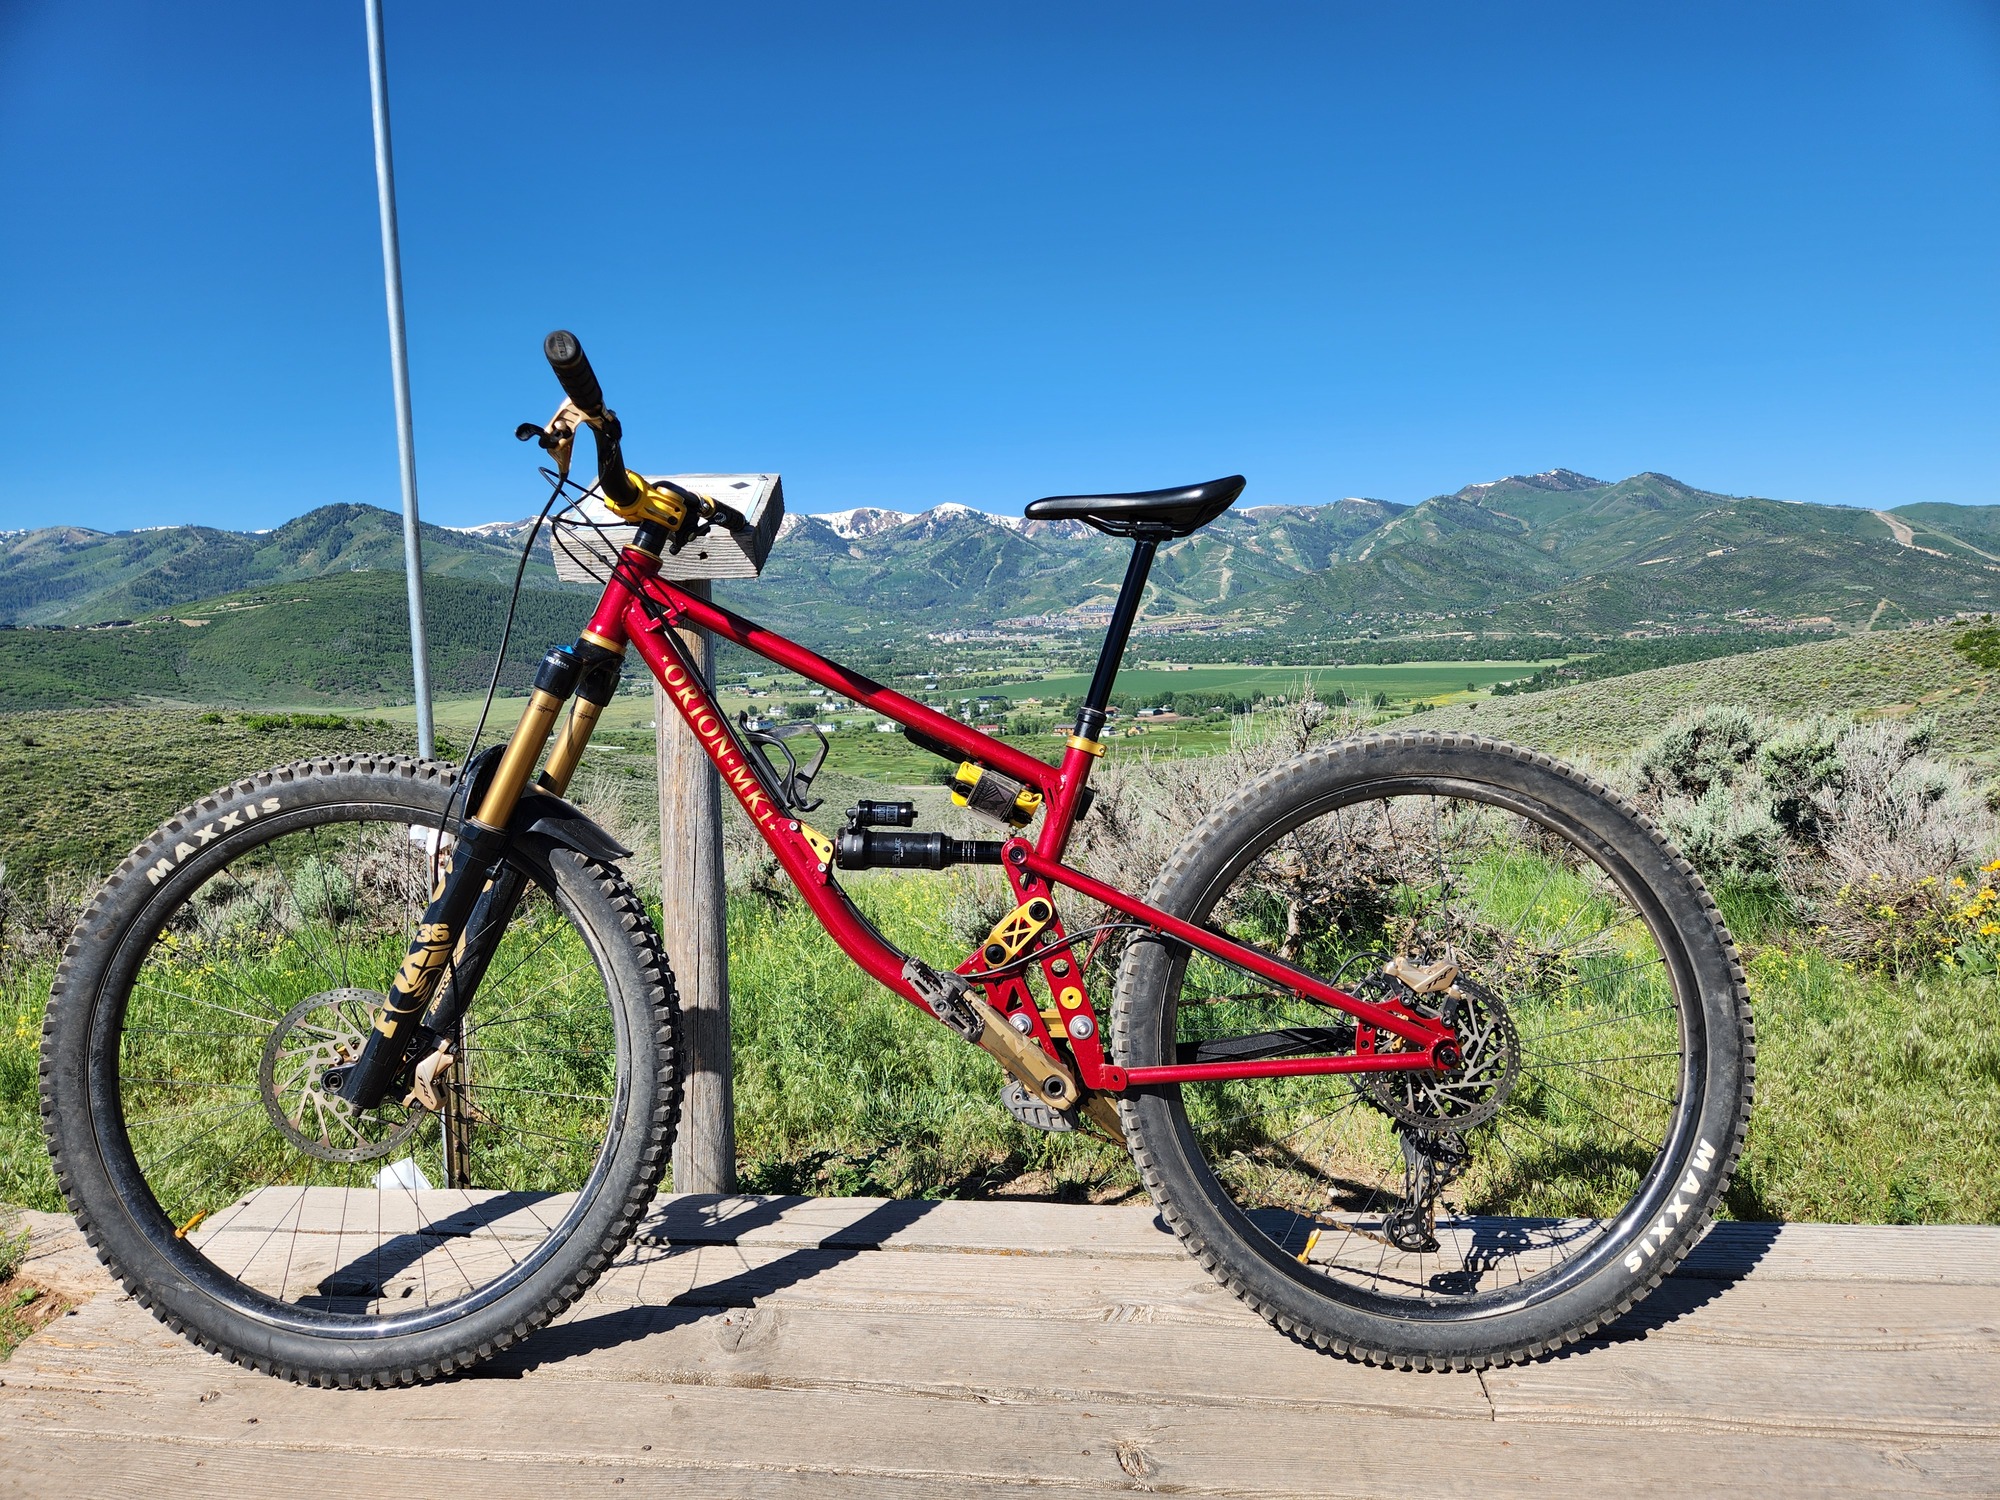
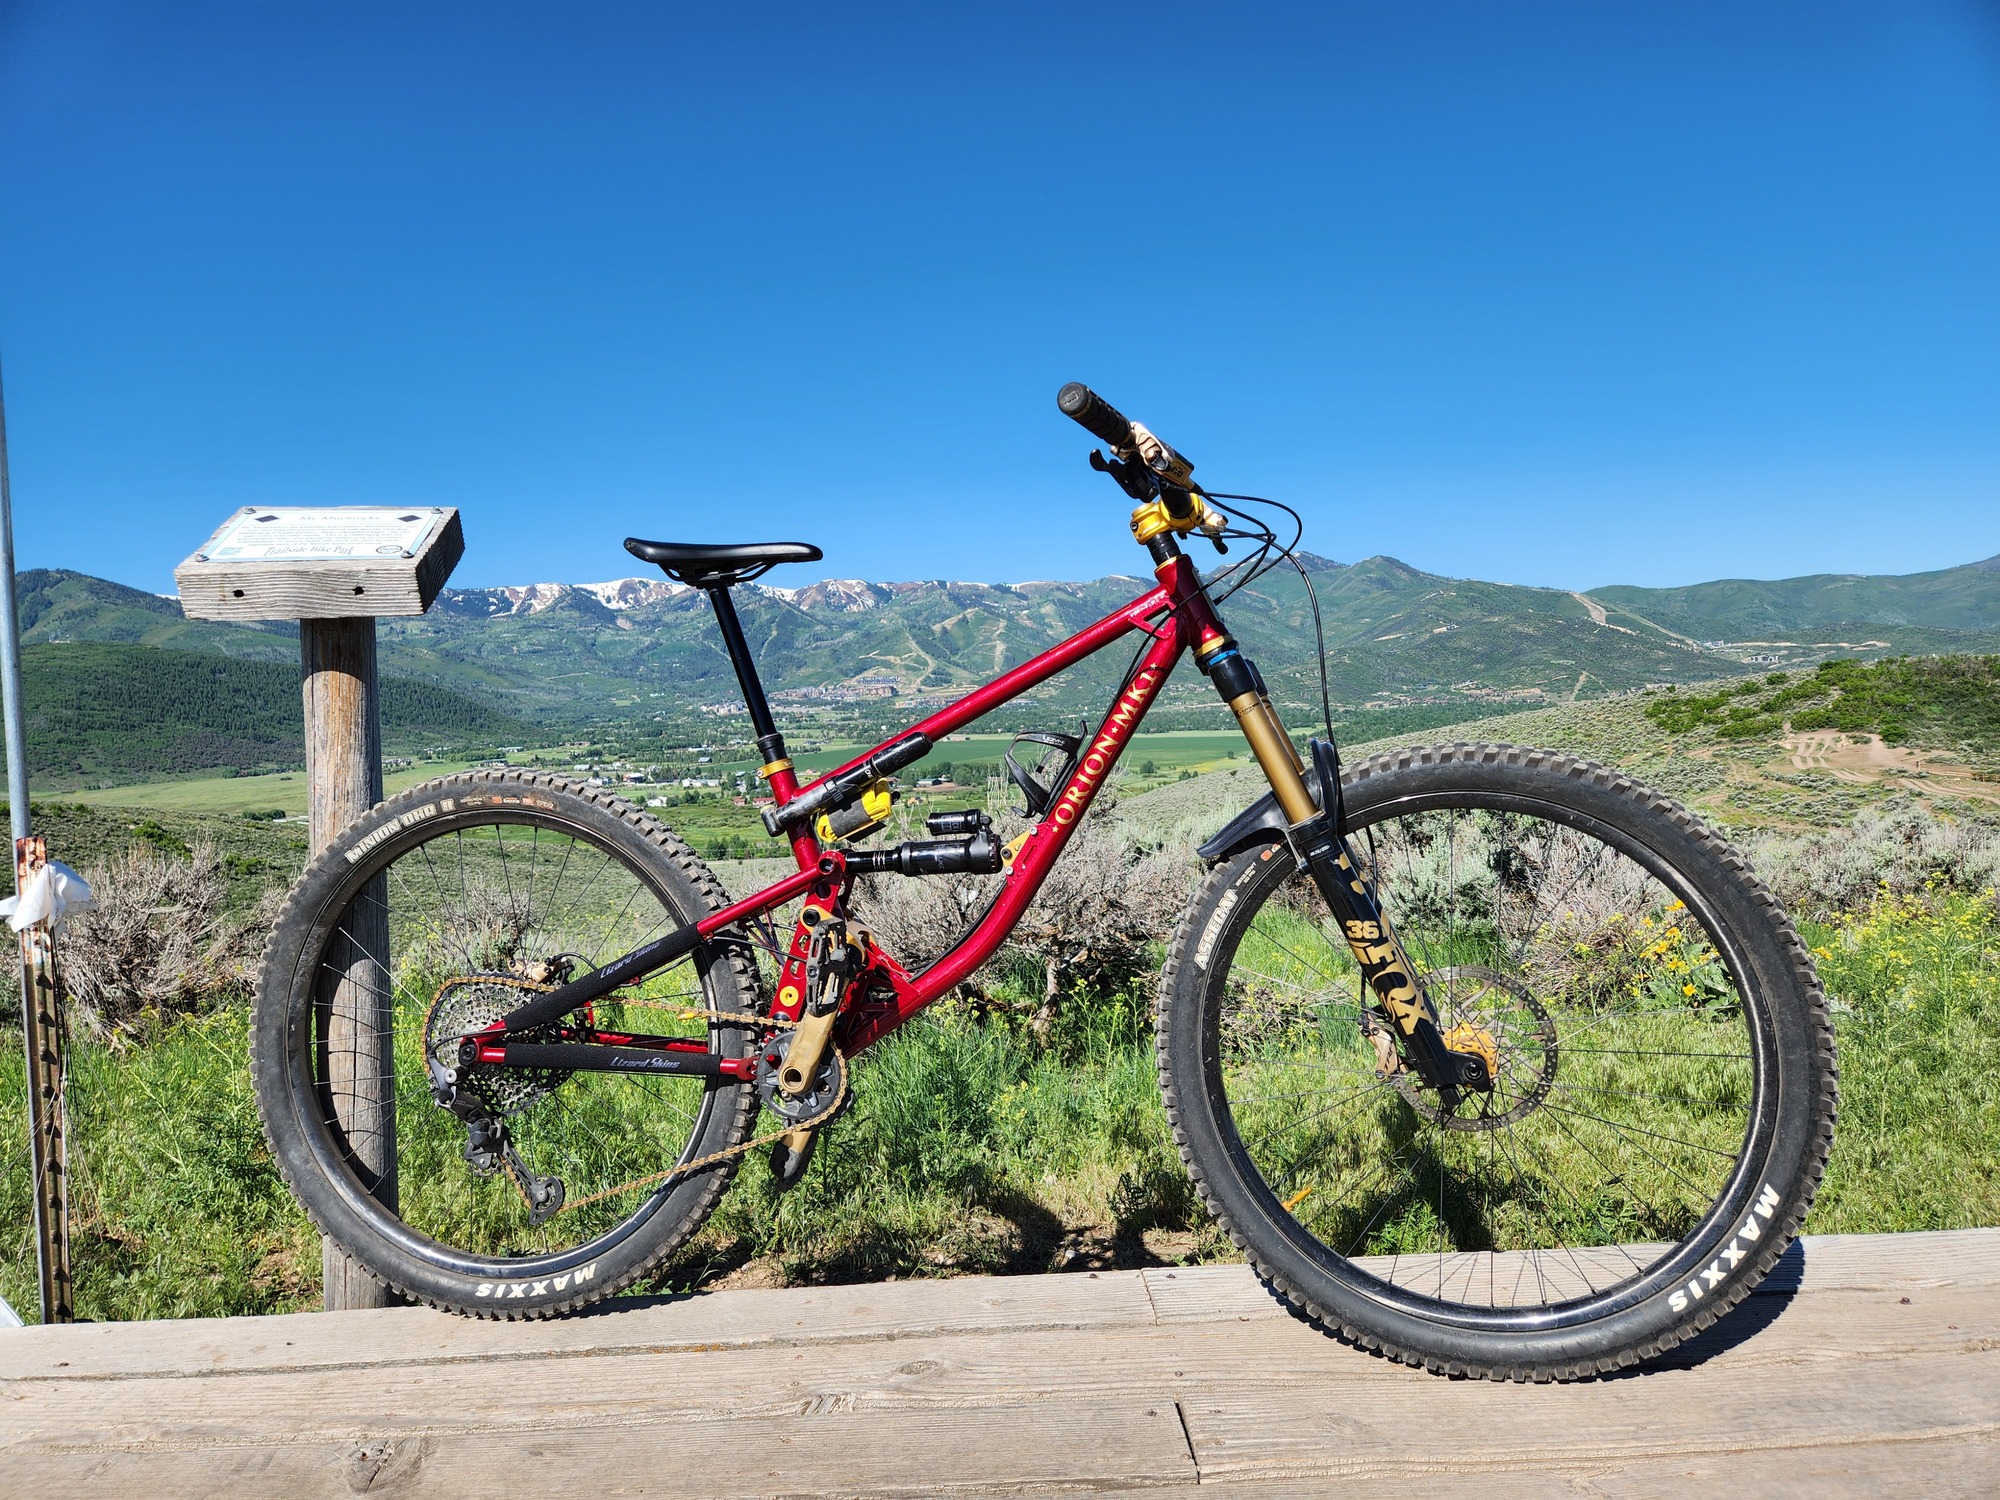
Got it back from powder and I thought it turned out great (thanks @UtahPowderWerks )
It went together pretty well. I had to shave a couple spacers to account for the thickness of the powder, but nothing too bad. Excited to get some dirt on it!
That Is a really good looking bike,
how much smaller are the holes for the bearings, how big are the axles and wich size reamer did you use?
Thanks for sharing!
Thanks! My pivot axles are off the shelf Norco 15mm axles. I used a 15mm on-size reamer for the frame holes. Before powder coat I reamed everything on a mill. After powder I just used the reamer with my hand to remove the plastic then coated the holes with marine grease. We’ll see if that keeps the rust out. As for the spacers, I had to take about .015-.02“ a side (.5mm) to account for the thickness of the powder coat between the pivot holes.
My wife was nice enough to make some decals for me. They turned out pretty great I think. Please excuse some of the strange cable routing. Still dialling that in. Also forgive the broken spoke on the rear wheel. Maintenance is not as exciting as building up a new bike.
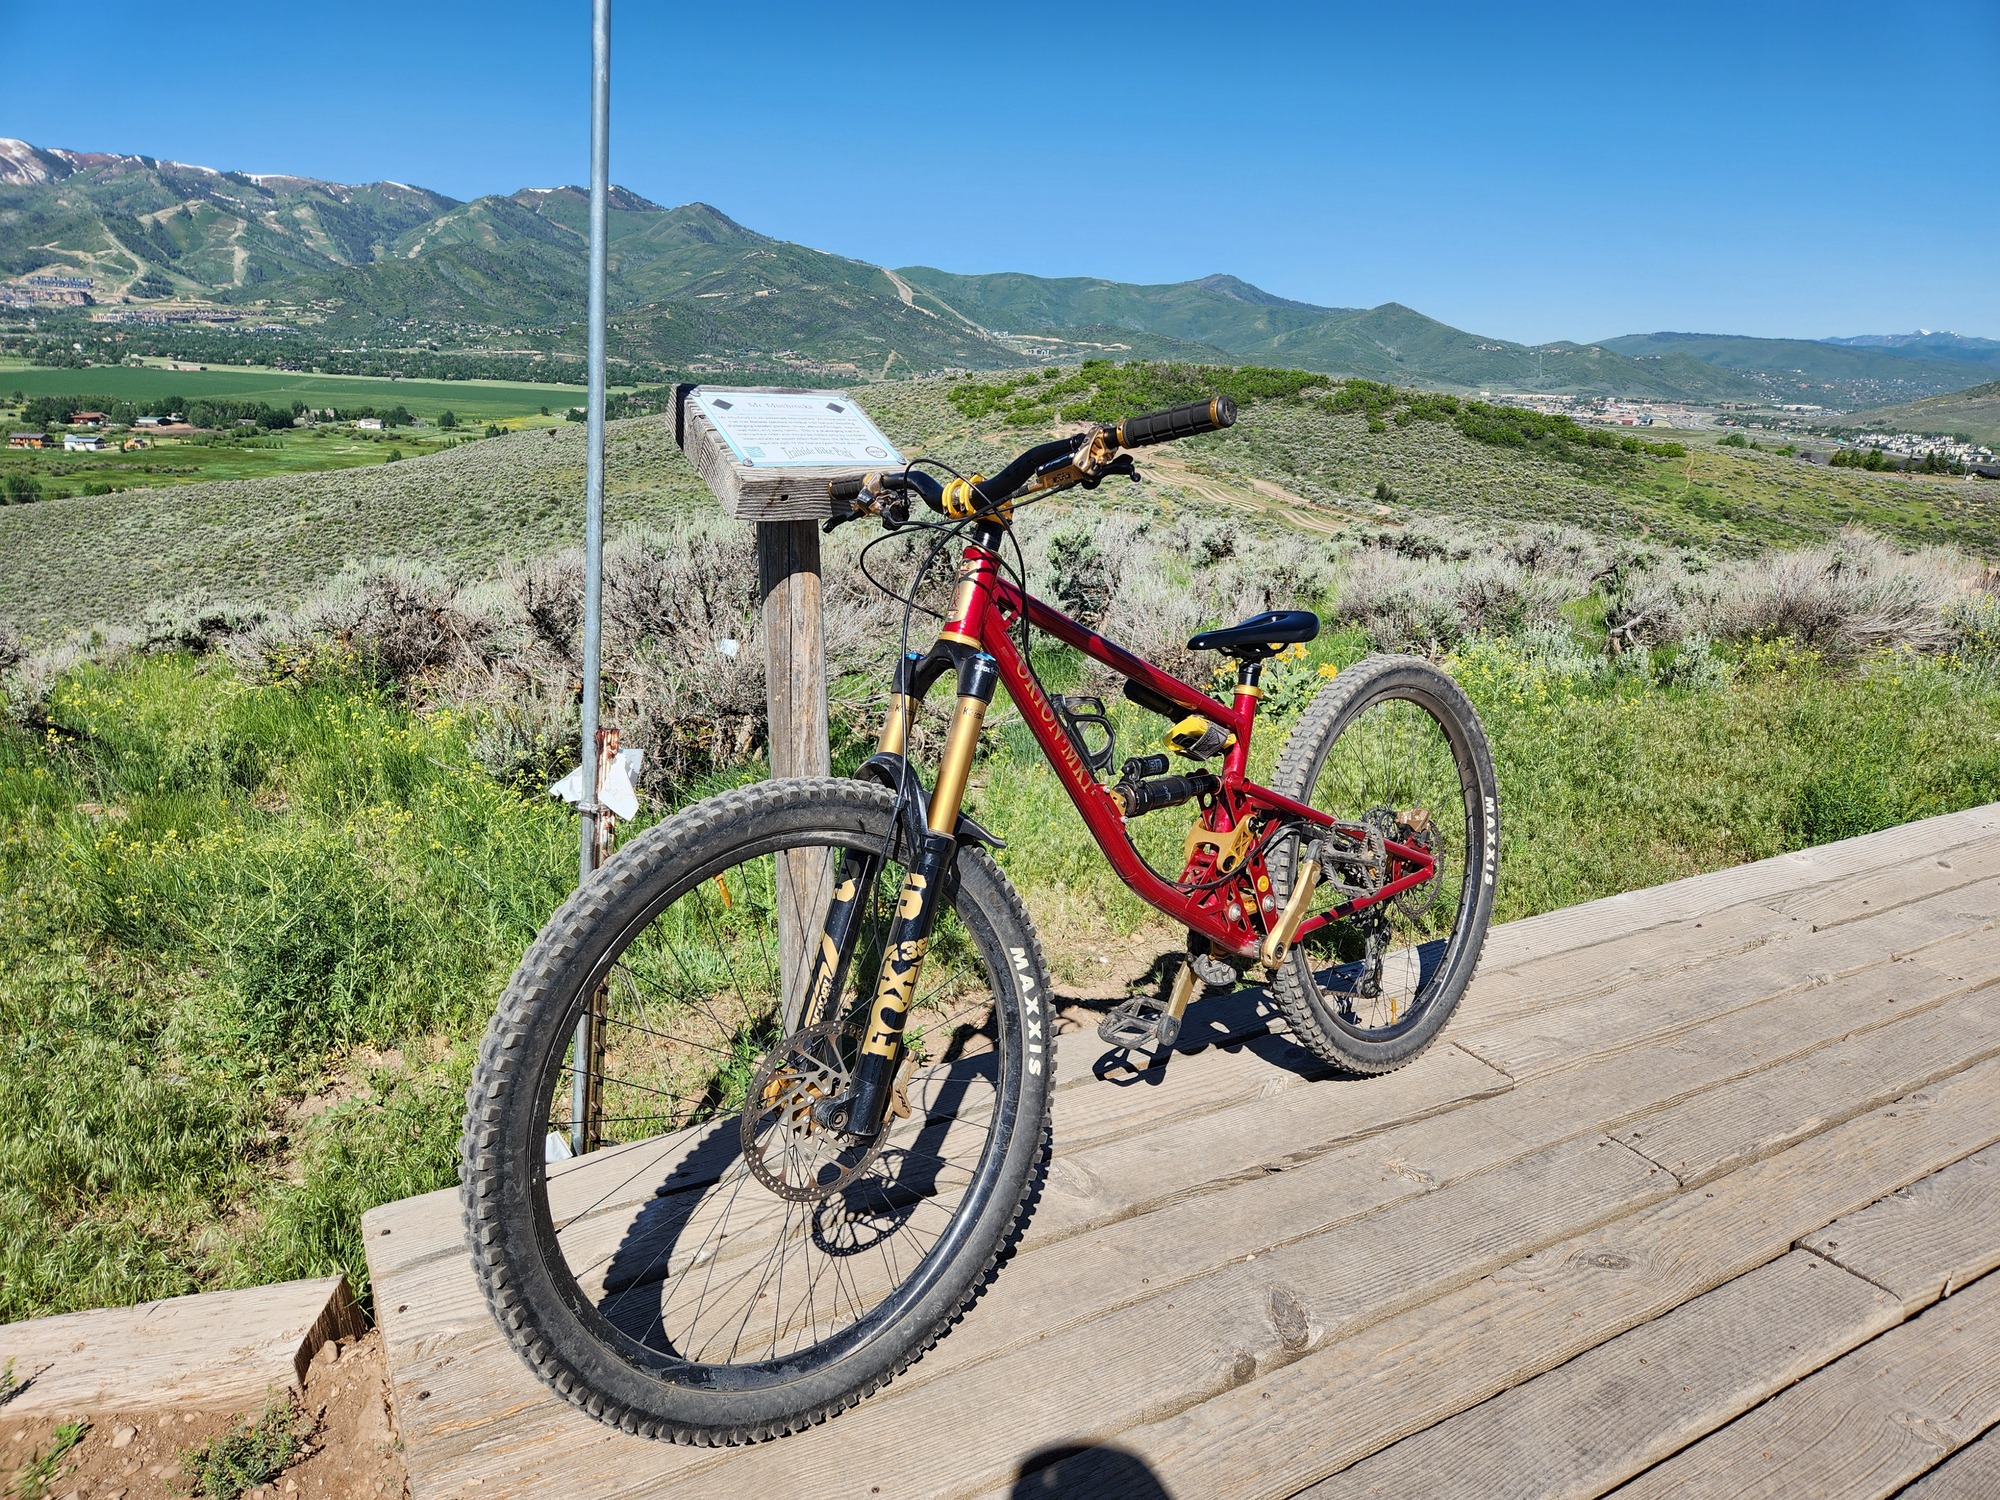
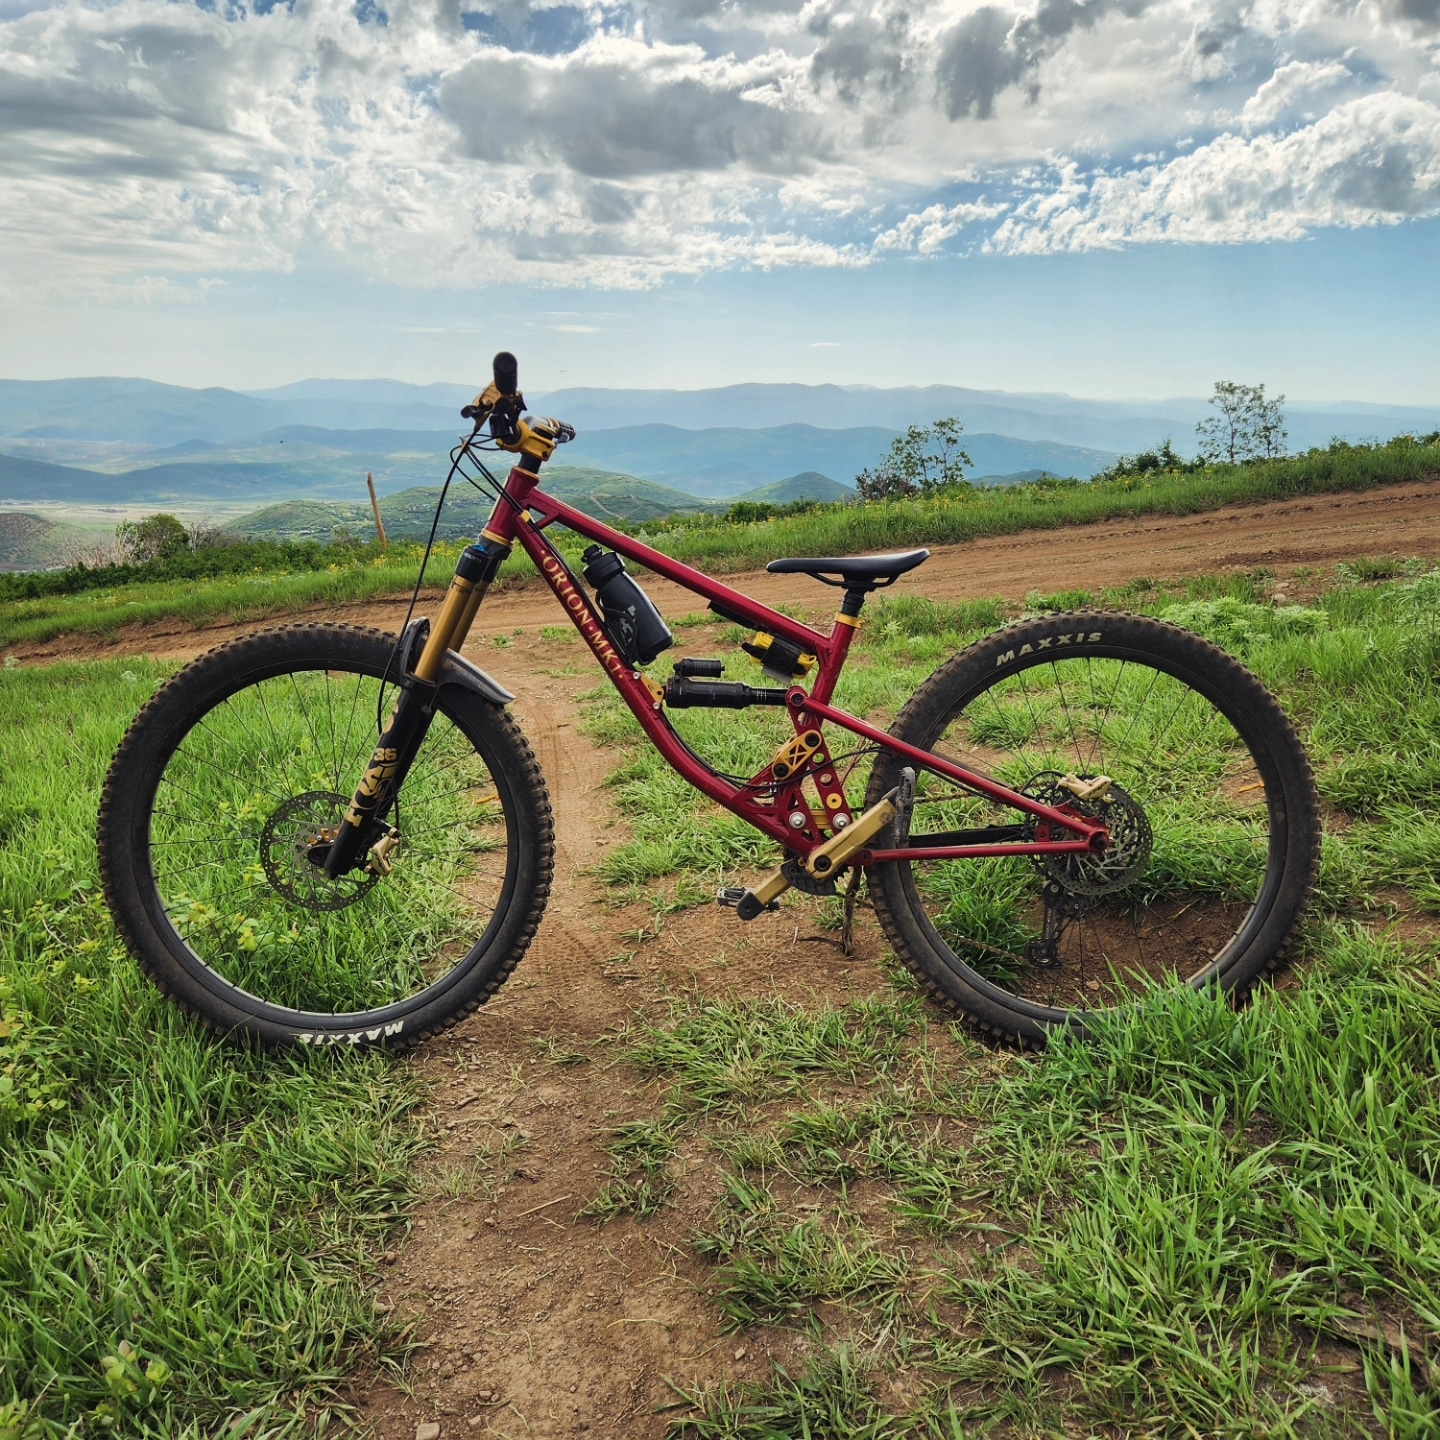
Ride impressions: so far so good! I didn’t get much riding in but what I did do was better than I expected. I spent some time at a small trail center doing green laps then checking for cracks then blue laps etc etc. it pedals like well and is quite comfortable. No cracks yet, though I need to tune up my drivetrain a little bit. The descending is really nice so far although I need to put time in on my favorite trails to really tell the tale there.
Update: 50 miles and about 15000 feet of vert and I really like it! I’ve taken this down everything I had intended it for and I have been very pleased. I’ve cased some good jumps (as I normally do) and picked some pretty poor lines and it has held together great so far. This is by far the longest dropper I have been able to run and that is the biggest positive so far. It climbs about as well as my previous bike (GG smash RIP) and descends much better, especially in chunk. The front end comes up a lot easier so I’m still getting used to that on jumps (see earlier comments about casing). It’s a pretty nice feeling riding a bike you made.