Heavily modifying an old frame vs building from scratch

hi all, first post here! i have a silly question and i hope it’s not too ridiculous.

i’ve done some light frame modding now, brazing on disc tabs and bottle cage mounts to old steel frames, etc, but i’m curious about taking it further.

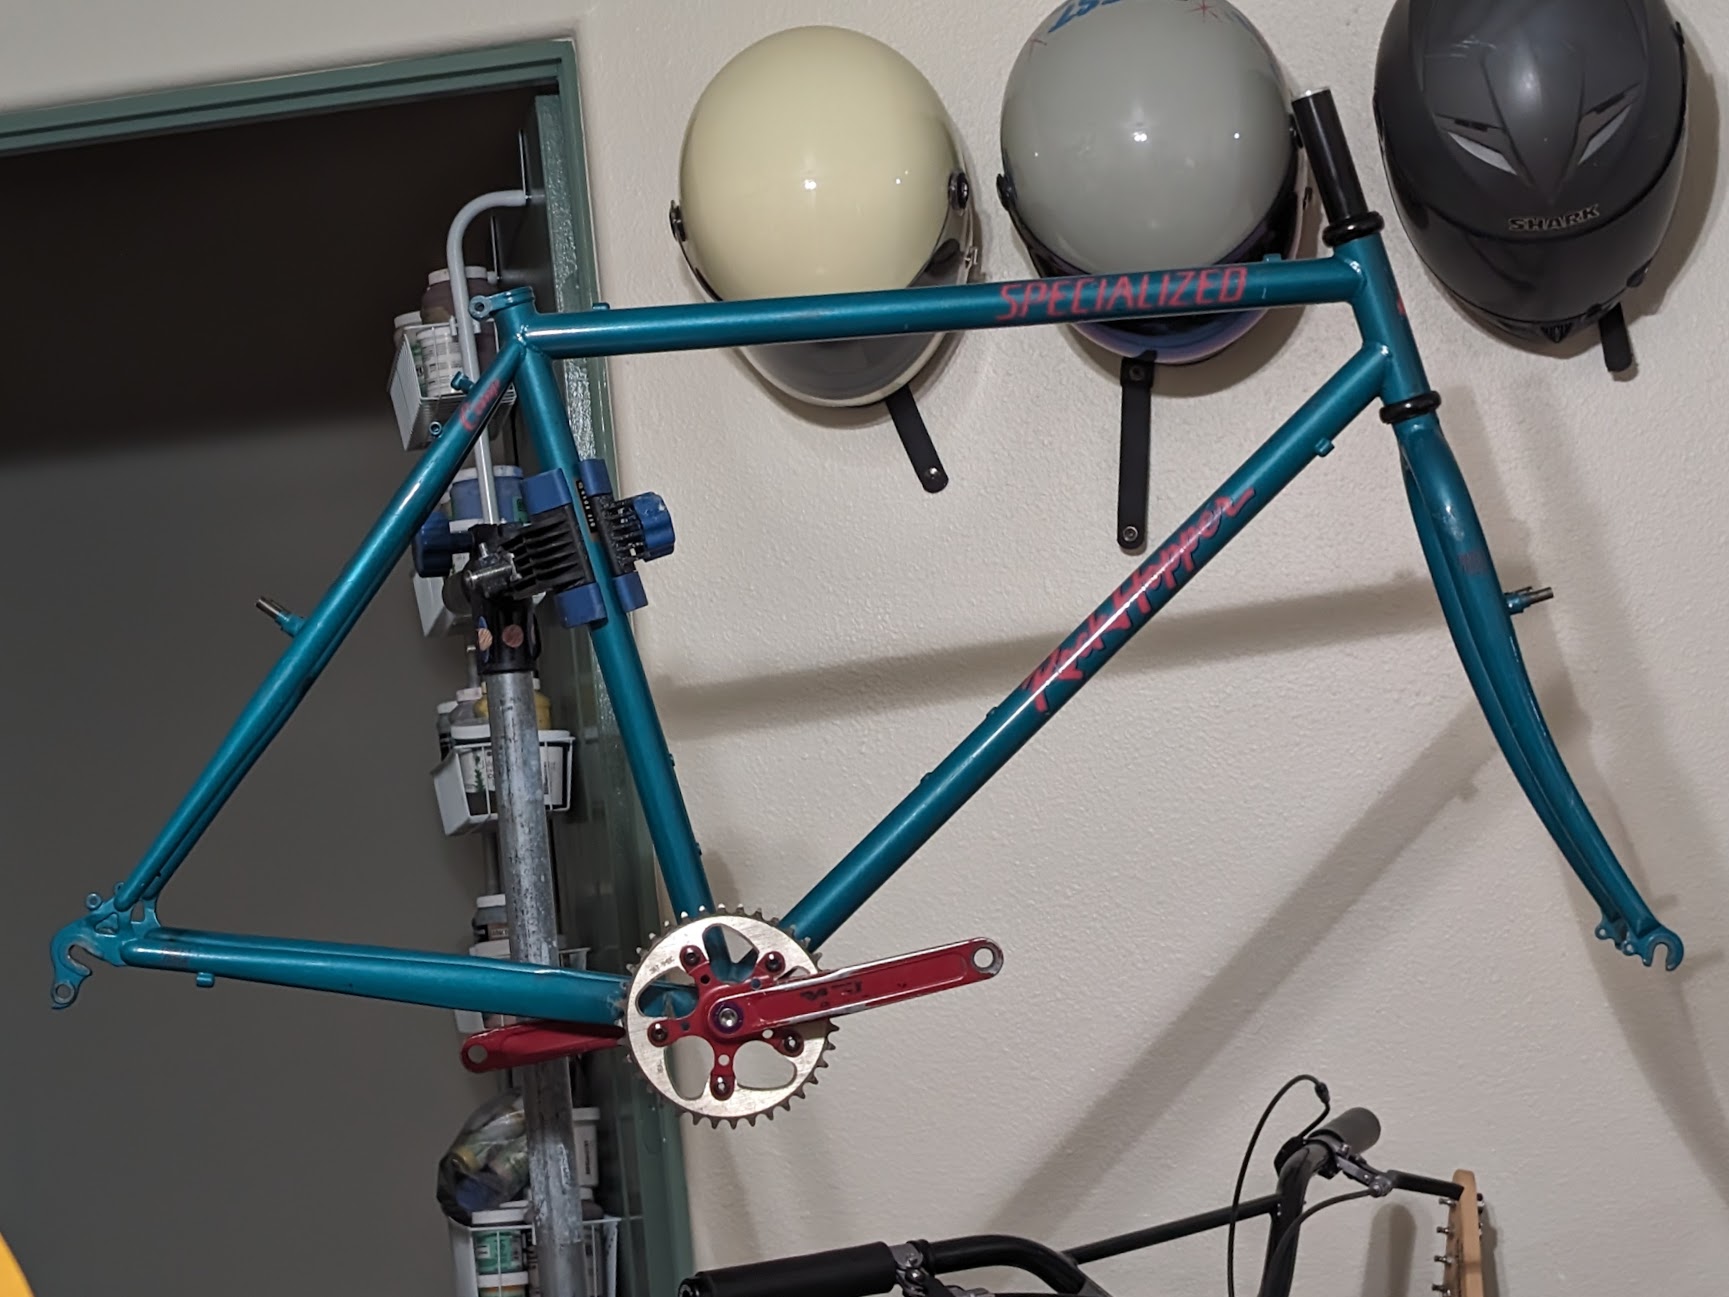
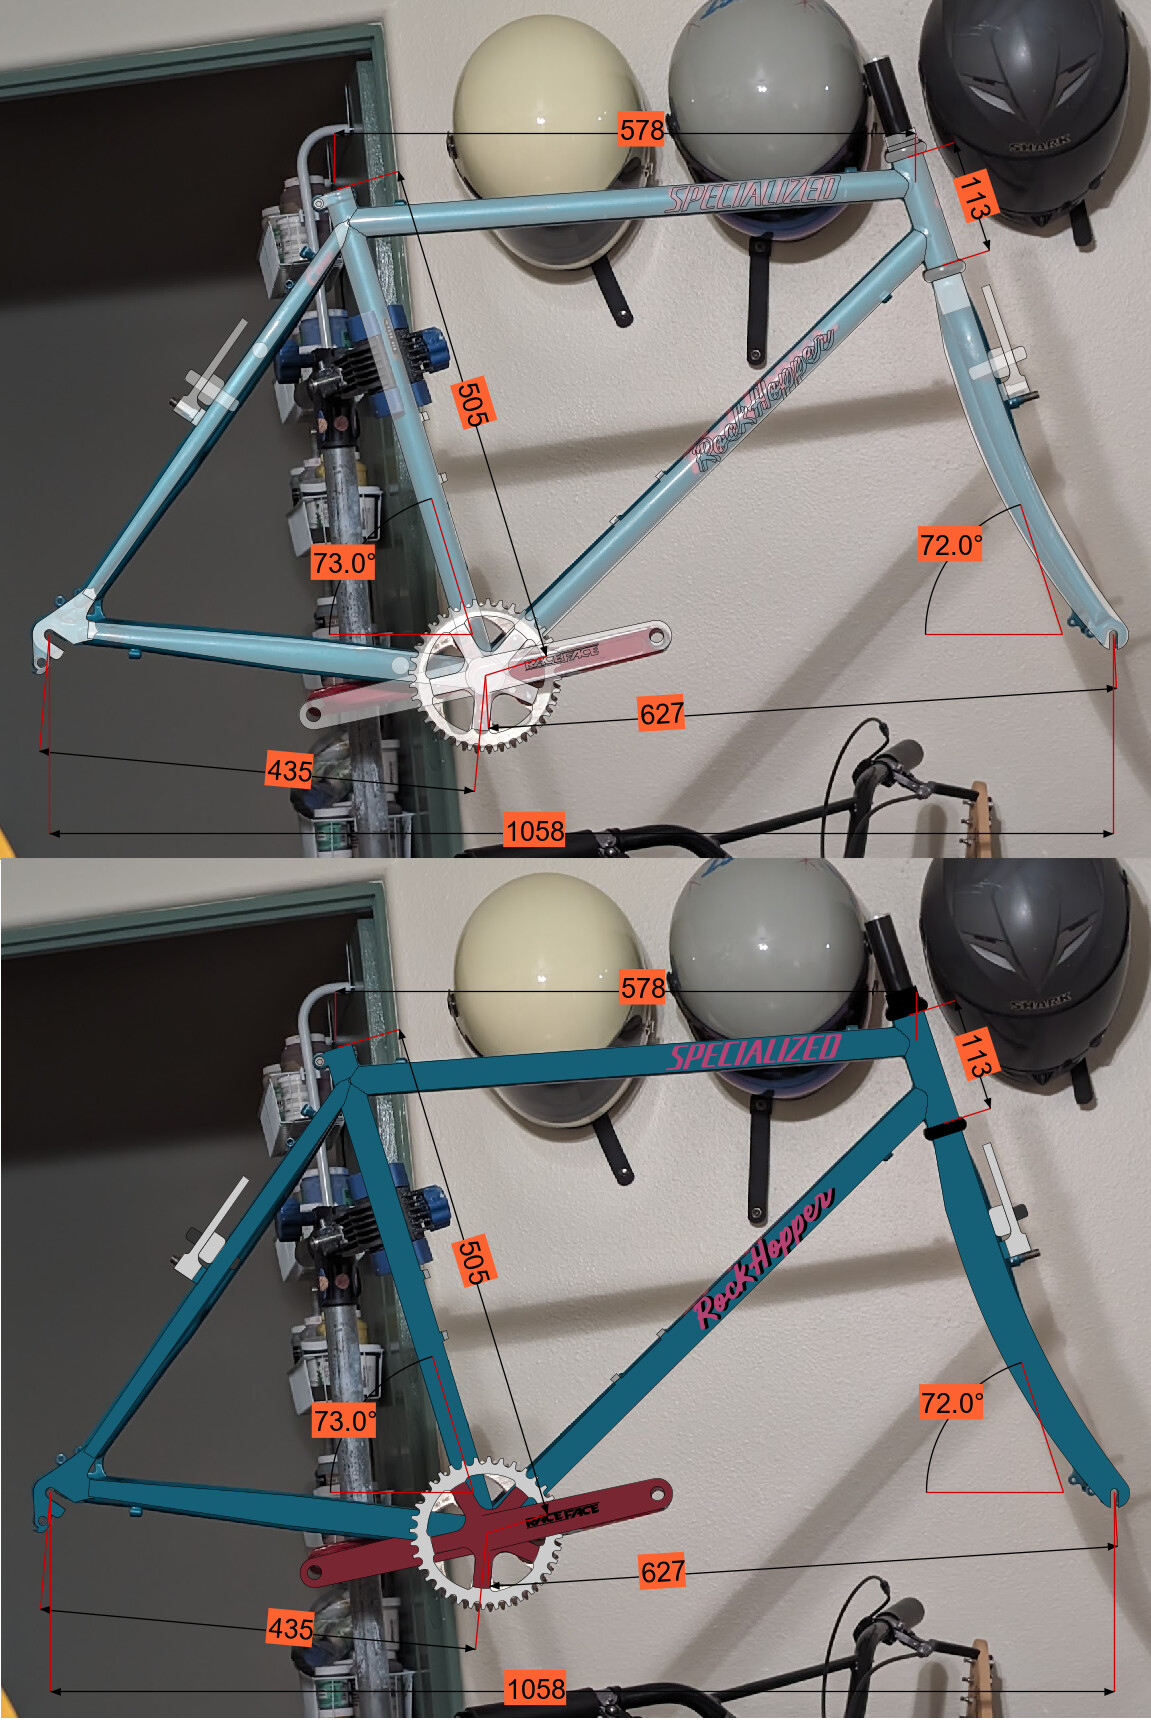
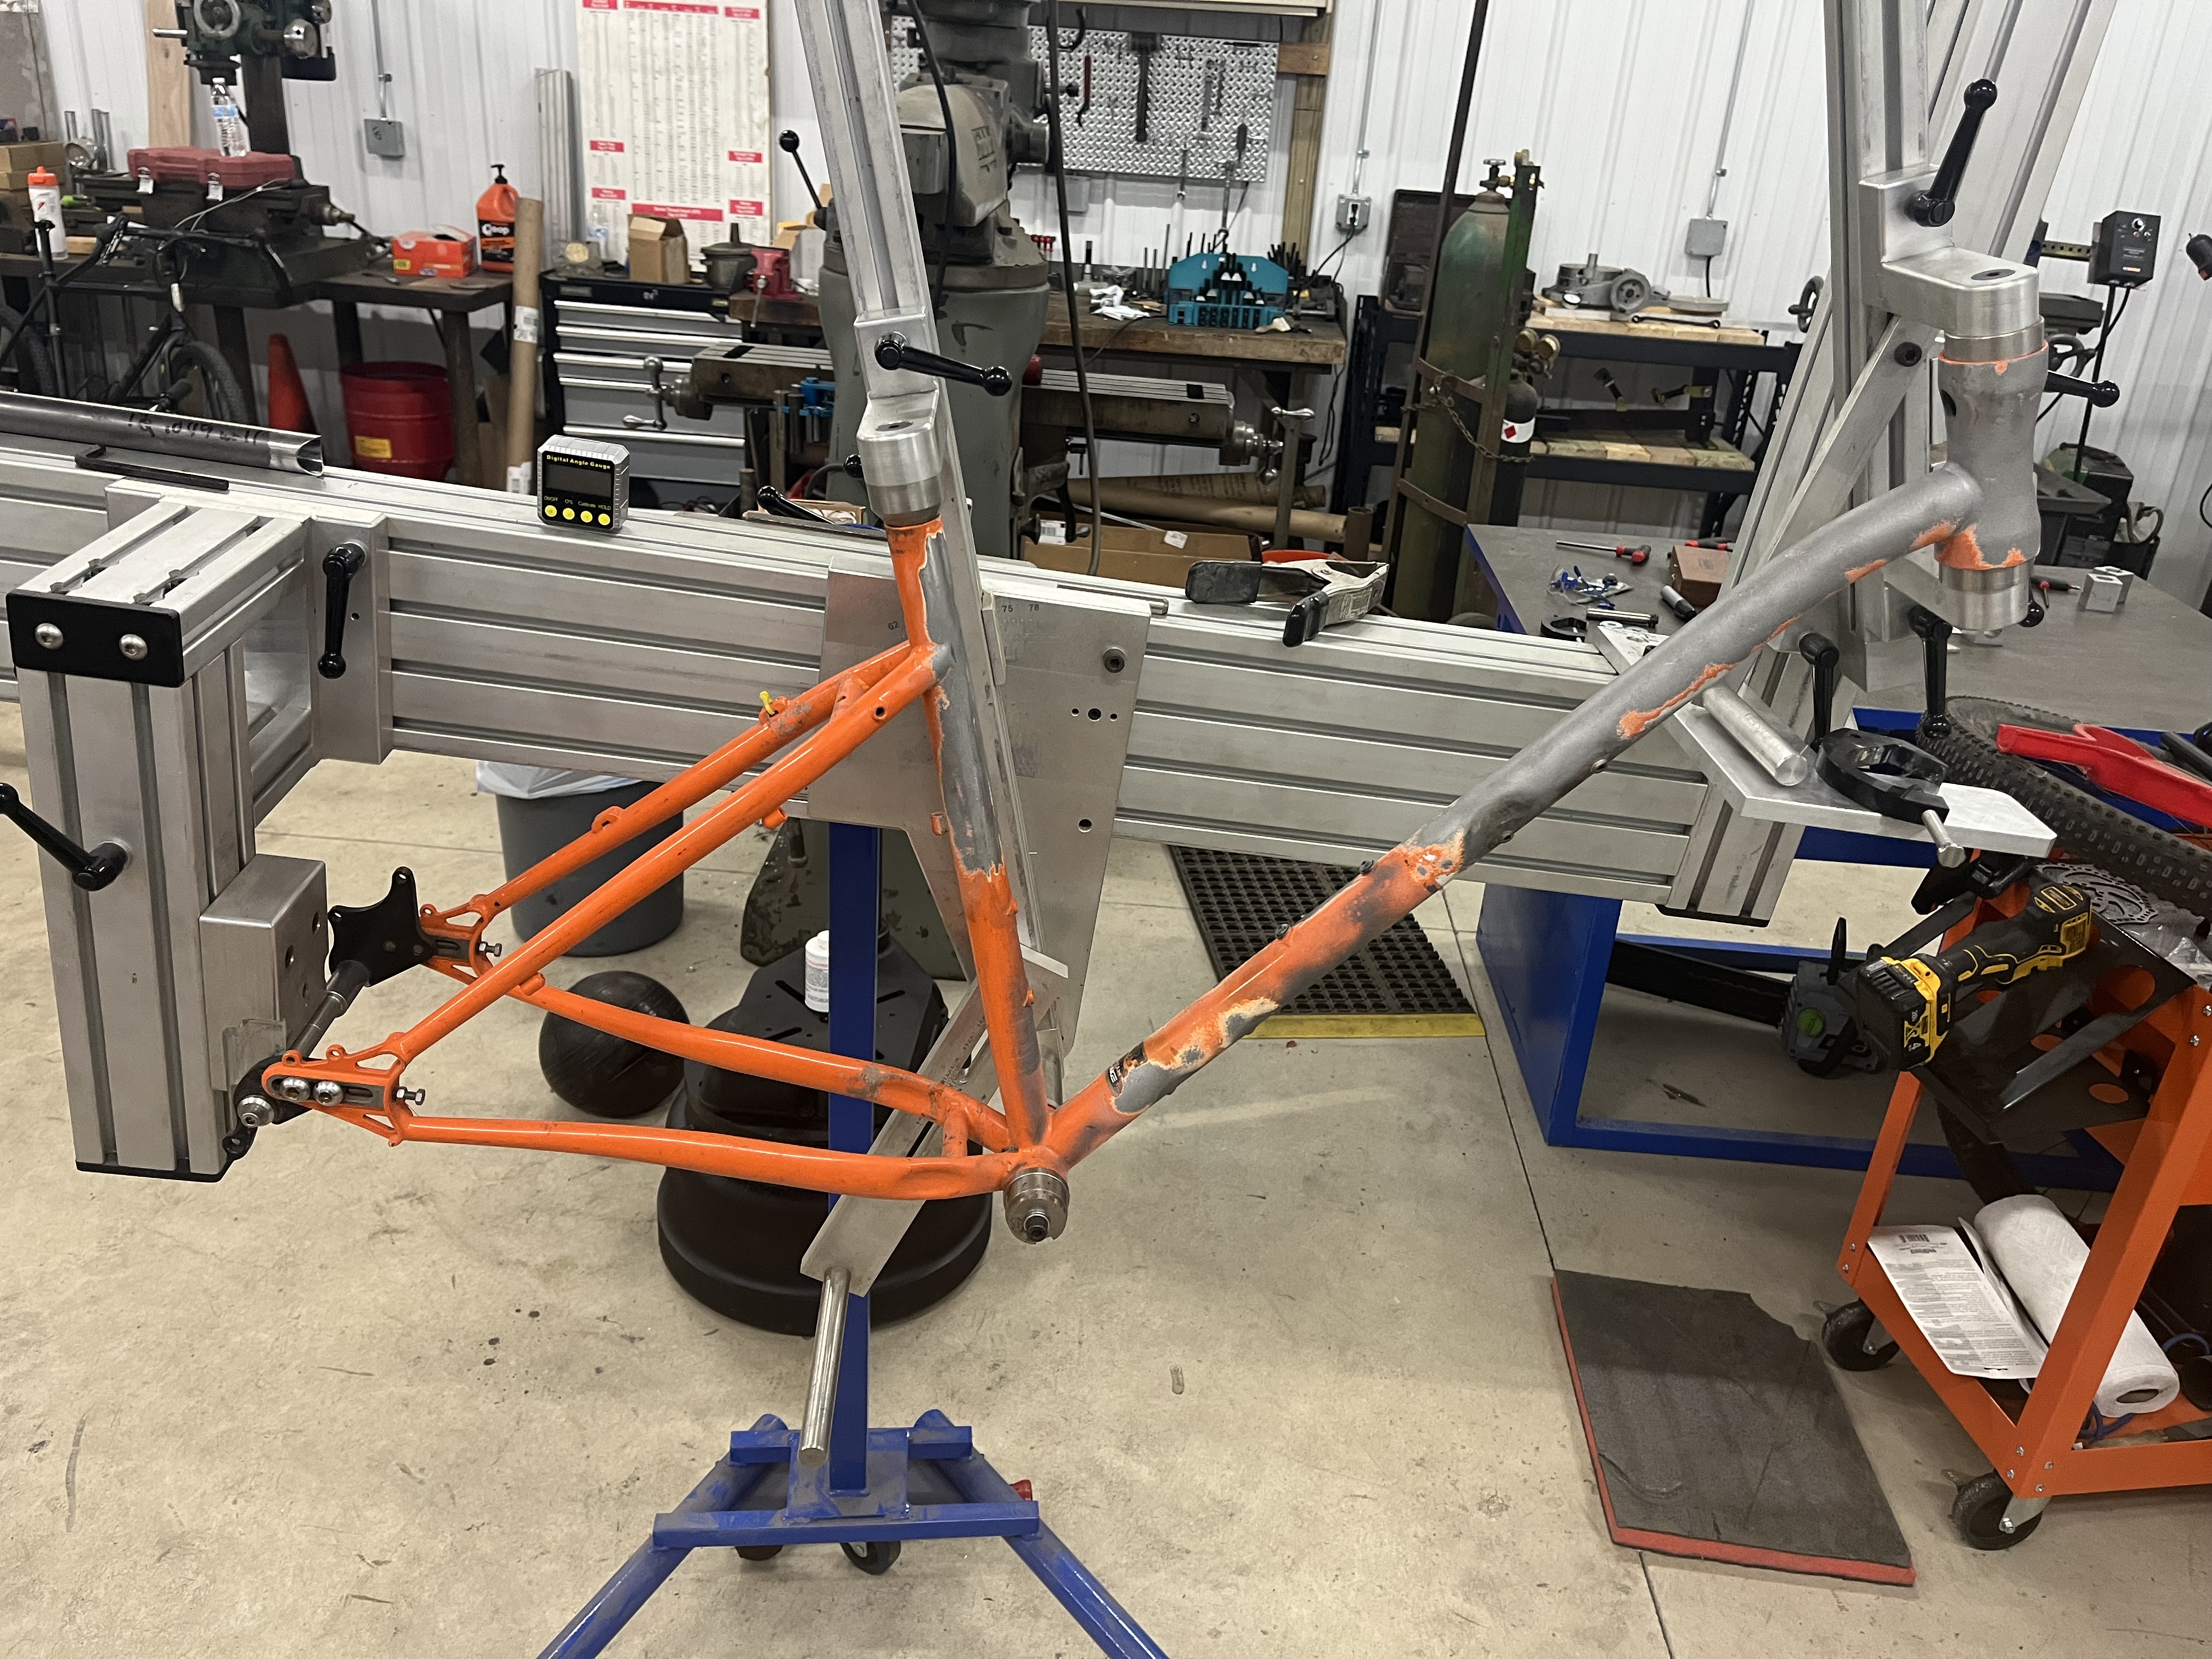
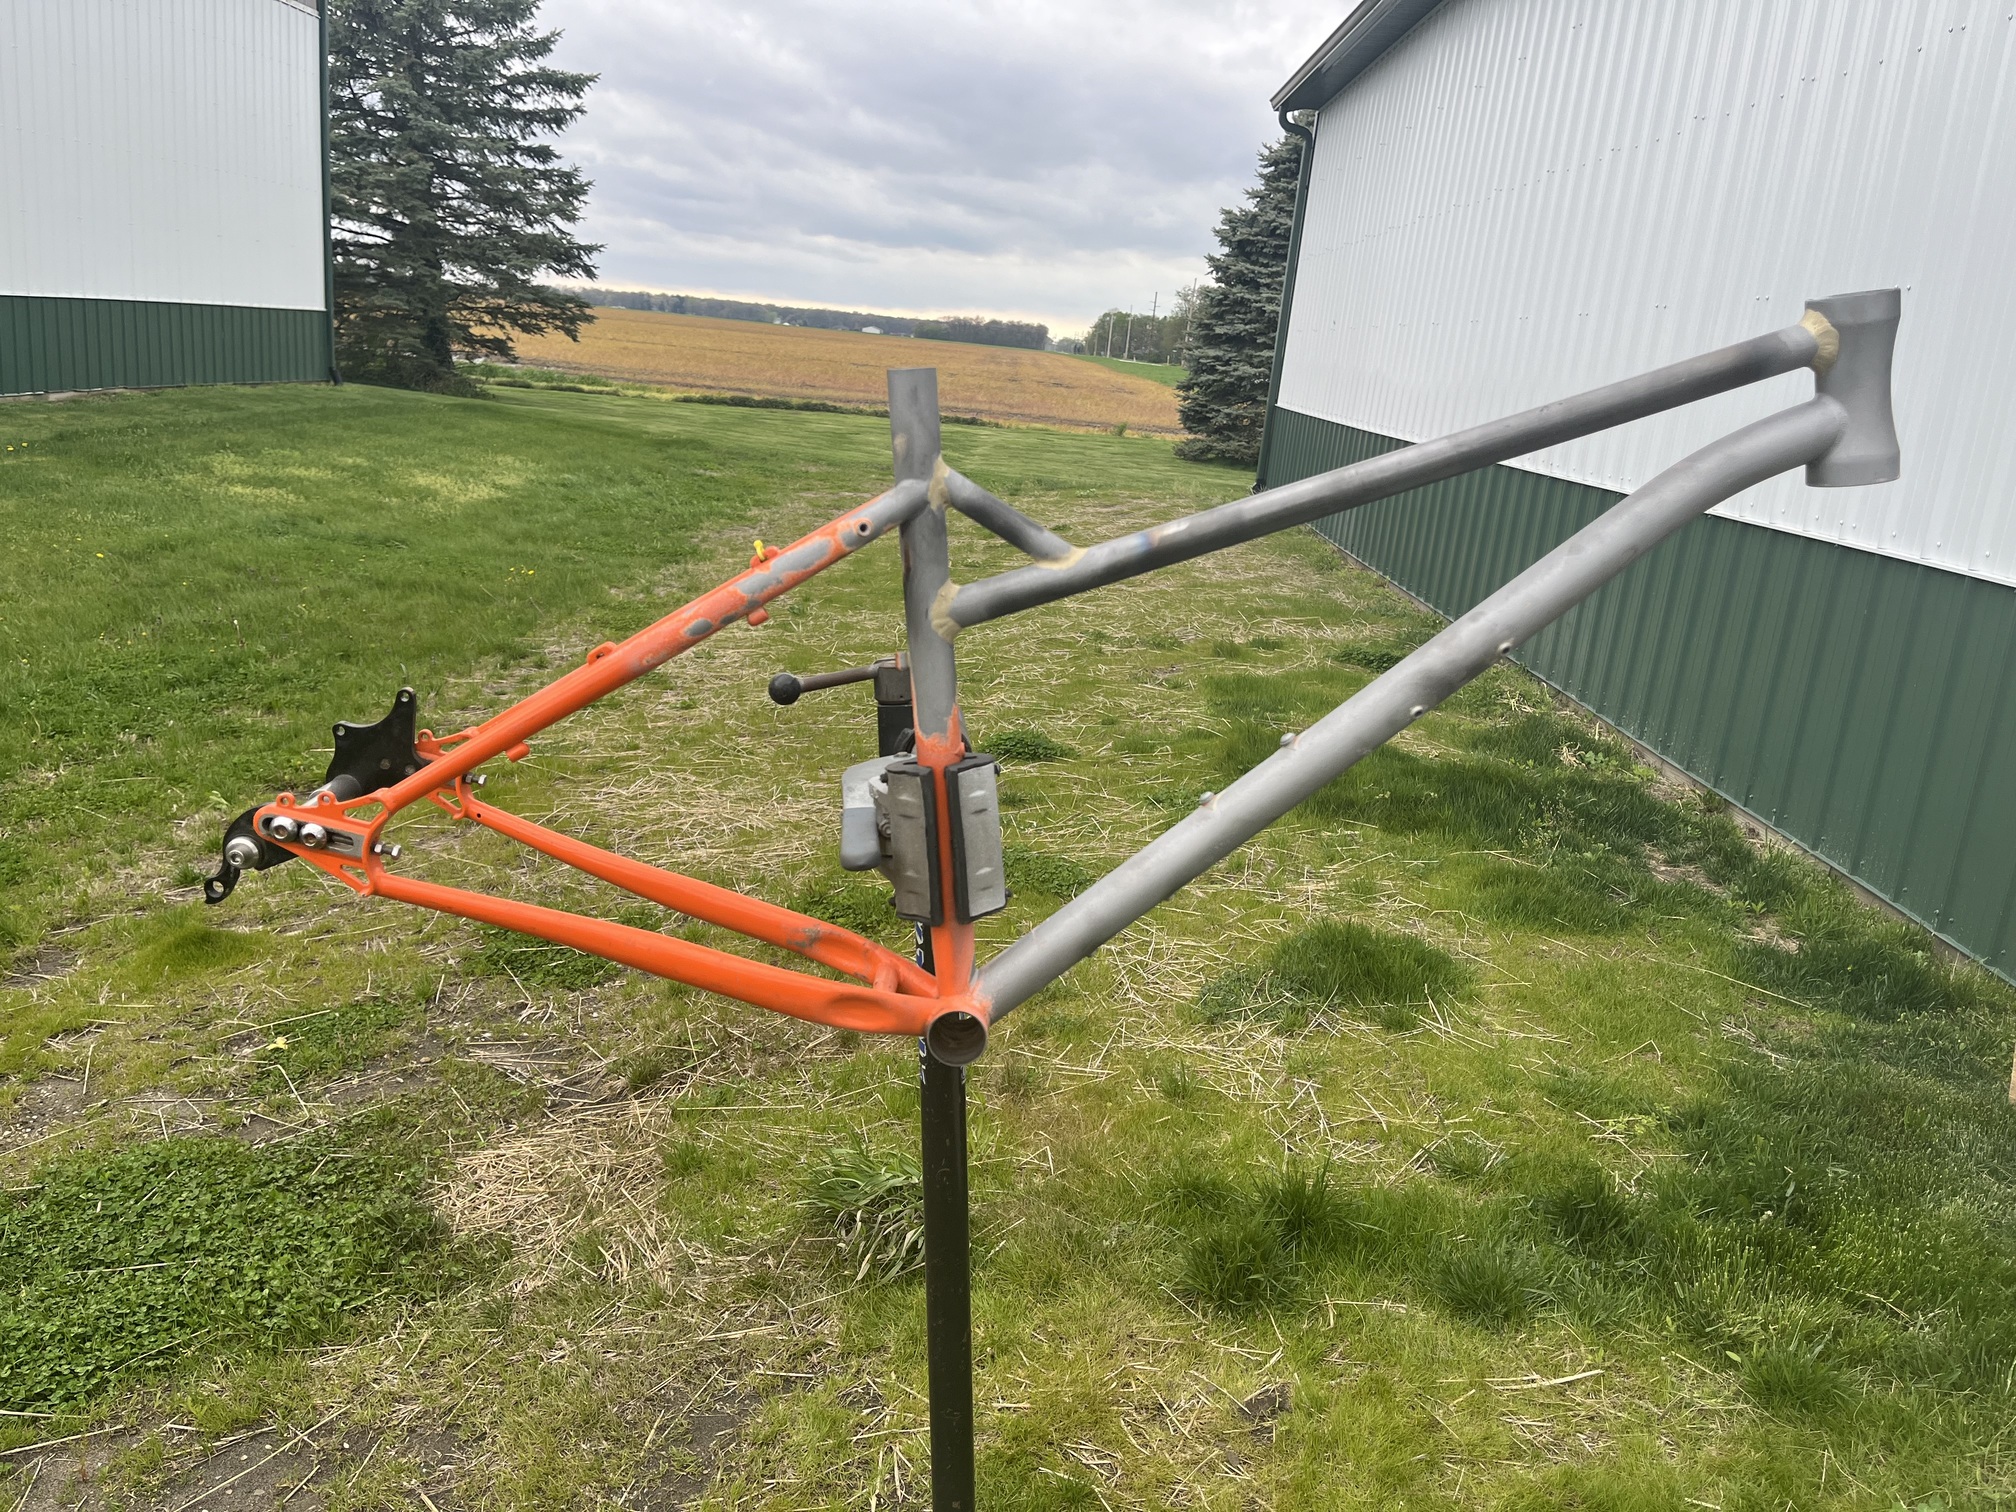
would it be worth the time/effort to take an old steel frame, say the old rockhopper sitting in my closet, and put it in a jig and replacing the 1" head tube with an 1 1/8" tube, adjust the ht angle, maybe adding a gusset or two, replacing dropouts, etc. mostly as a learning experience in fillet brazing as well as making the frame more useful for what i want out of it?

or would it be better to just buy a stack of tubes and build something from scratch?

my main goal here is to get better with my brazing but i also love the idea of taking an old frame and adjusting the geo to work for me.

some insight on what i want out of this project - i play bike polo and i prefer to use 26" wheels vs 700c. a lot of players will use track bike frames for the aggressive geo and replace the fork with one with a disc tab (we primarily play on single speed bikes with only a front brake) but most of what you’ll find out there is 700c.

there are some companies out there selling 26" track geo frames specifically for polo but they are either expensive, or known to break, or both in some cases. 26" steel mountain bikes are everywhere and can be had for next to nothing but the geometry is all wrong for polo.

is modifying a frame in this way a viable way to gain experience as well as end up with a unique bike polo frame, or is it a fool’s errand that will just leave me with wasted time and a ruined rockhopper?

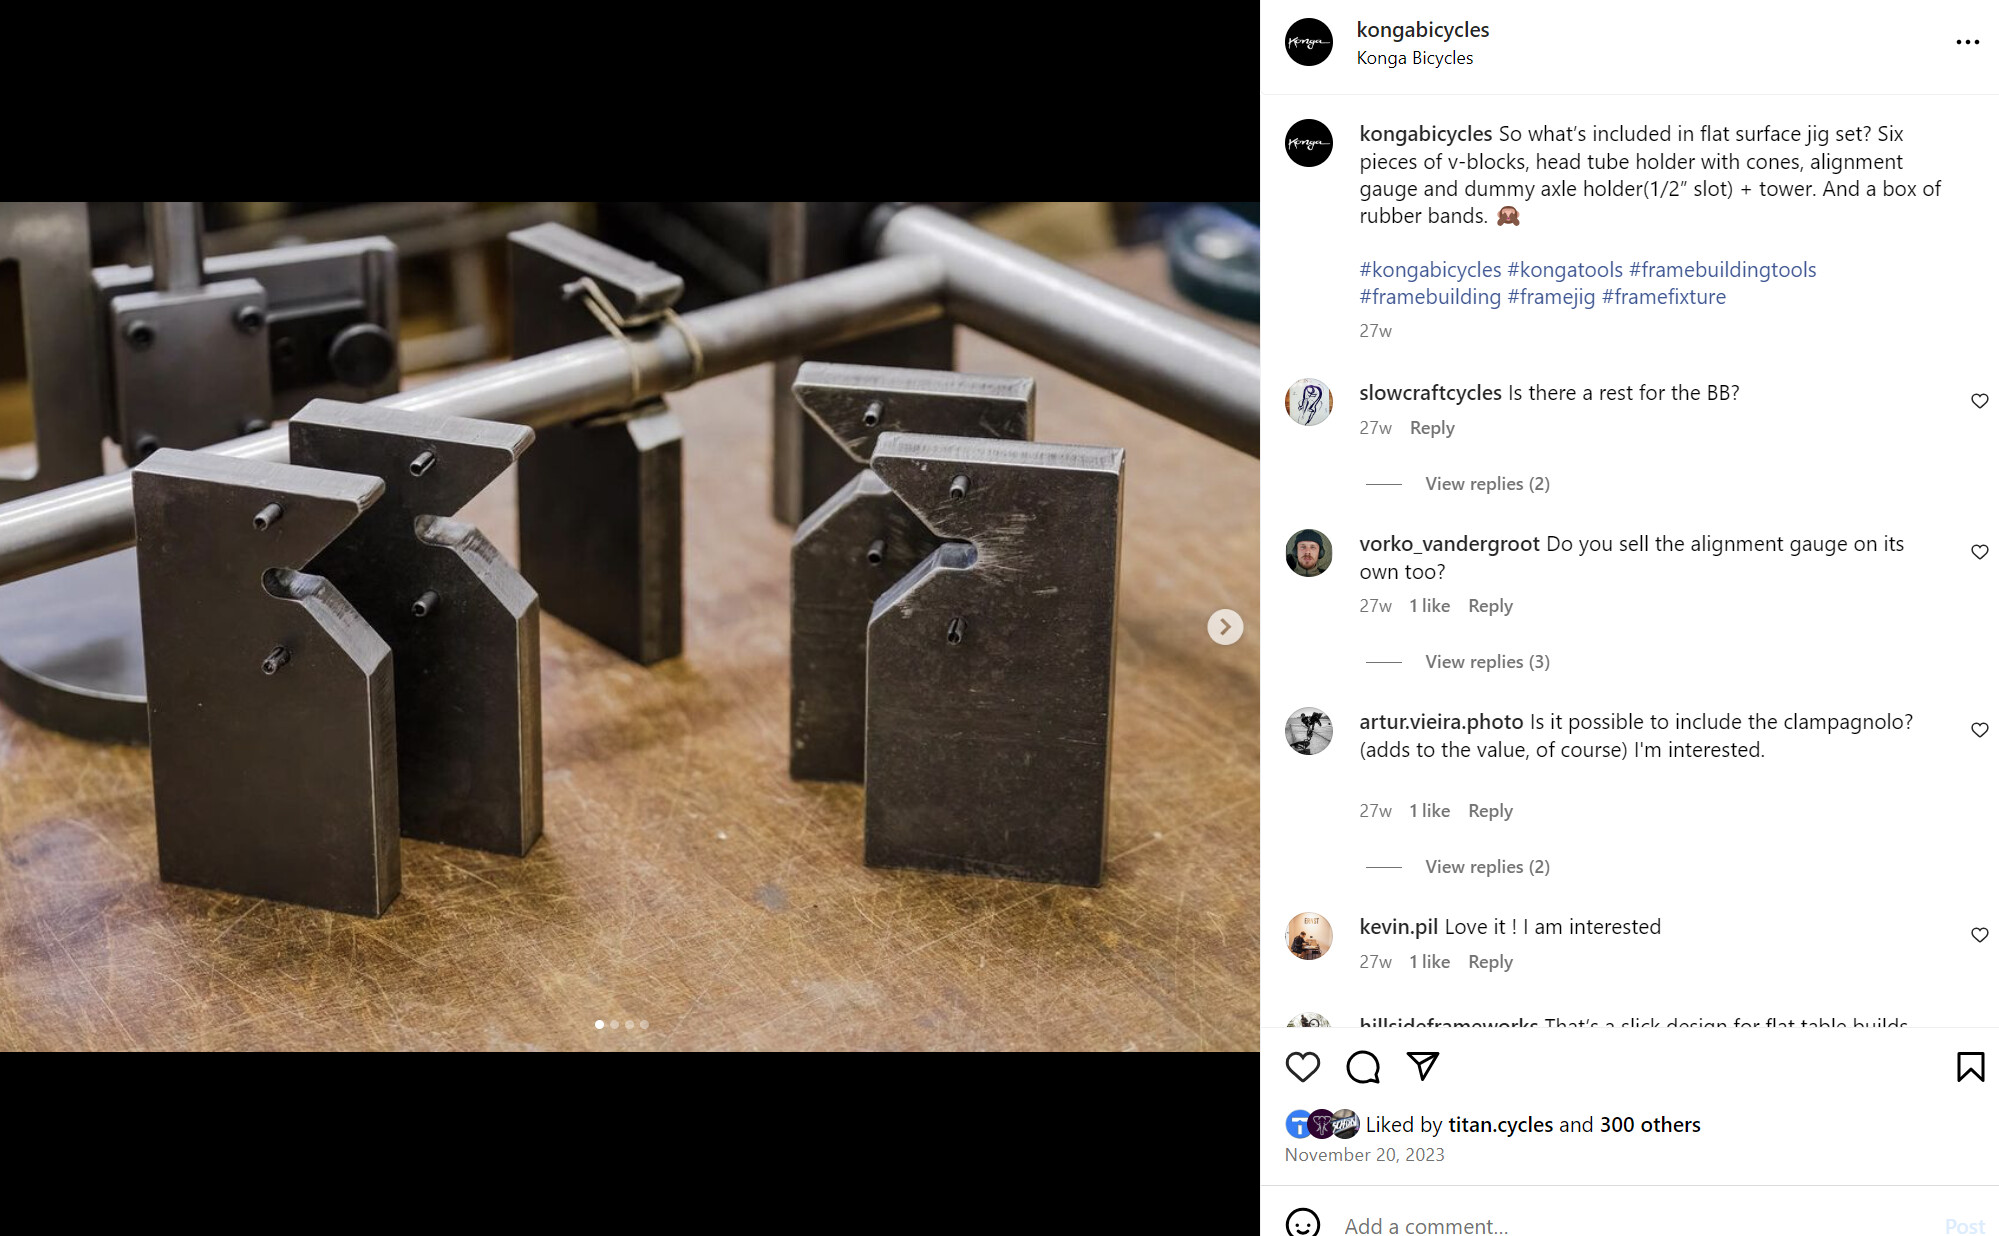
some other considerations - i don’t own all of the tools needed, reamers, taps, etc. which might be a point from building from scratch and towards modifying an existing frame. i do have a 1" headtube reamer that i believe i can source the 1 1/8" cutting parts for, but that’s kinda it at the moment. whatever route i take i will be picking up a frame jig.

thank you for any insight!

3 Likes

I say go for it! I think there’s a lot to learn by modding an old frame to your liking.

Here’s some inspiration!

-Jim G

3 Likes

Plenty of people have done this and considering the end use is a bike you’re going to abuse I reckon it’s a good way to go!

Also if you don’t have a 1-1/8 reamer and want to do it on the cheap then you could always use an integrated head tube. These IS42/42 ones from Bike Fab Supply are super heavy duty (1.5mm wall thickness) and stand up to brazing temps well without ovalising. BMX style headsets are cheap too!

3 Likes

hell yeah, thanks for this recommendation!

1 Like

Reusing old frames is a great way to learn and practice especially if you’re on a budget. You will spend a lot of time removing paint and filing down welds though!
Remember to check for butt length when reusing tubes, especially if you’re working with a higher end frame that has a thinner wall section.
There’s usually plenty of length to cut off the existing weld and re-miter the tube but it’s good to check that you’re not making your new joint in the thinner wall section. A bunch of people (including myself) have pictures of easy to make homemade butt checking tools in the diy tools thread.
Also, most bike shops can ream a head tube or chase bb threads for you. It’s usually not too expensive or perhaps you’ve got a DIY/community shop in your area where you can use the tools. Bike specific reaming tools are very expensive, the one area you can get away with a cheap adjustable reamer is the seatpost, though that can be a little difficult on a frame that has already had the seat binder slot cut.

3 Likes

no kidding about reaming tools being expensive, i think i paid somewhere around $400 for my 1" reamer like 15 years ago.
good call on checking the butted tubing! i’m mostly done with my workshop (flimsy metal shed in the back yard), i’ll be scouring the diy tools thread very soon.

Welcome @floppywonka !

Sounds like a fun project.

  • Do you have access to a frame fixture? Or would you be flat-surfacing the build?
  • Do you use bikeCAD or some other CAD package?

Personally, I would re-use the rear triangle and replace the front triangle (TT, DT, HT). That will give you more flexibility when changing the front-end geo. Vintage MTB’s have low front ends, so you may need a much taller headtube. Mitering a front triangle is pretty straightforward and rewarding, I would not be too intimidated by it!

Yes! do it! The best bike designs start with a need that is not met. Go for it, and let me know if you need any help. We can get crazy, like lasercutting a front triangle to match your rear triangle.

2 Likes

thanks for the welcome!

i don’t have a fixture or access to one but i’m planning on getting my hands on one or making something. my shed is 10’ x 10’ and will be doubling as storage so i think a fixture will be best for my space vs a flat surface table.

i have used bikecad in the past, just played around in it really. a while back i had marino out of peru build me a mini velo frameset and he uses bikecad and it inspired me to poke around in it. no idea what i’m doing in there really. i know my way around fusion360 but haven’t used it for anything like this before.

i was planning on figuring out the geometry of the rockhopper (it’s a 92 if anyone happens to know where i can easily find that info) and comparing it to the geo of my current polo bike (an enforcer 13) to see just how far off it is. quite a bit, i know, but it would be nice to be able to reuse at least the down tube and keep the steezy pink ROCKHOPPER on teal paint haha. i’d like to leave whatever paint survives all of this alone and not bother covering up whatever work i do to it.

my bike packer is an old univega and i know what you mean about the low fronts on old mtbs, it needs a high rise stem to be anything resembling comfortable. if i end up having the replace the whole front triangle, so be it!

and thank you for offering to help! i might have to take you up on it! your bikes are beautiful, by the way

2 Likes

Fusion is really good at is reverse engineering geometries and fits from photos:

Depending how good the photo is, you can get pretty accurate results this way (+/-2mm and +/- .5 deg). BikeCAD can do it as well, but not as quickly and accurately. The key is to take a photo from far away with the camera at bike height ( 2ft off the ground). Doing these two things reduces the perspective distortion.

4 Likes

i tried getting a good side shot of it in my house but i don’t think i have enough room to back up. it’s just a frameset, so i can’t easily park it somewhere to get a good shot but i suppose i could take my stand outside and try to get a shot from further away.

i’ll put this in fusion and see if i can get it to scale as it is. i know the crank arm is 175mm so that should be a decent point of reference since i don’t have wheels or anything on it. or i suppose i could just lay a measuring tape on it haha.

1 Like

should be ok but a further away shot will work to flatten things better like @Daniel_Y suggested. also you only need one dimension to scale the bike. crank lenght is ok but hard to trace from c-c. personally i would use a tape to measure the wheelbase as that’s an easy one to do and a longer distance will make for more accurate scaling.

1 Like

Great tip, and additionally if you have access to Photoshop or similar photo editing software (Gimp can do it, but Photoshop has a bunch of presets for common cameras that makes it easier) you can use a Lens Distortion/Correction tool to improve the image further (by removing the slight spherical warp that a lens introduces) before referencing it.

Usually when I do this, I also place a reference object in the same plane as the focus of the object. A 24in carpenter’s square works great on larger items like a bike frame. Taping on an accurate yardstick also works well.

2 Likes

I agree with @Daniel_Y that the accuracy of this whole process is going to depend on the quality of the photo and the amount of perspective distortion. I take issue with the suggestion that Fusion would somehow be more accurate than BikeCAD. Both are CAD programs so they are going to be 100% accurate. As for which is quicker, since the annual cost of Fusion is almost twice the price of a lifetime copy of BikeCAD Pro, one might just blindly assume that Fusion will be faster. But will it really? In BikeCAD, you’re starting with a full bike and it’s very easy to tweak the geometry of that bike to match the photo. You could argue that in Fusion, you might start with some other model you’ve already made, but what if some details like the dropouts don’t match? In BikeCAD, you can pick from a menu of over 140 standard dropouts. If you can’t find a match, you can quickly mock one up with BikeCAD’s dropout specific dialog box. In Fusion, you’ll need to draw that from scratch.

Here’s a BikeCAD model I made based on your photo. I agree with @bushtrucker that my model would be more accurate if I could start with some known dimensions such as the wheelbase. But you can tweak the model more based on what measurements you’re able to take.
bikecad.ca/1716393208946

5 Likes

Modifying old free/cheap frames is an excellent way to learn. One of my lessons (after the bike in the photo below) is that a powdercoating place can probably sandblast the old paint off for you cheaply. It’s well worth the $50 or whatever compared to removing paint yourself.

I got started with a used ($100 15 years ago) milling machine table that could be both the backbone of my fixture and an alignment table:


That thing provides a lot of utility in about 4sqft.

I modified a couple of classic mountain bikes into cycle trucks as my path into framebuilding.

7 Likes

I just did it to an old frame for my son. It was a great learning experience. Good luck to you.


5 Likes

thanks for the encouragement everyone! i’m excited to jump into this project.

i have my shed built now, just working on getting it set up. got the lights in this morning.

i gotta get my hands on a frame jig. anyone have recommendations for something to get started with? it obviously doesn’t need to be professional quality, especially since i’m modifying existing frames. i’m not opposed to diy’ing an extruded aluminum jig but i’d love some recommendations if anyone has any.

1 Like

what size is your milling table?

36x10 inches. It’s the minimum size that works, but it has done everything that I’ve needed.

2 Likes

After many designs and back and forth in my head, I think the best point of entry is a 1:1 print out and a flat surface with tube blocks for the front triangle. A chainstay fixture helps with the rear triangle.

Konga’s design is very accessible: Konga Bicycles on Instagram: "So what’s included in flat surface jig set? Six pieces of v-blocks, head tube holder with cones, alignment gauge and dummy axle holder(1/2” slot) + tower. And a box of rubber bands. 🙈 #kongabicycles #kongatools #framebuildingtools #framebuilding #framejig #framefixture"

1 Like

huh, i hadn’t considered a flat surface with tube blocks. the shed i’ll be working out of is pretty limited on space, i’m not sure i could get away with a table/flat surface big enough. definitely something for me to consider though.

i’ll need a rear triangle fixture for sure, i want to shorten up the wheelbase and replace the dropouts with track ends.

1 Like