https://ceeway.com/Framesaver.htm
Peter at ceeway has a god selection of bronze and fluxes to match. Shipping to the Netherlands was cheap and quick.
Hahn Rossman
https://ceeway.com/Framesaver.htm
Peter at ceeway has a god selection of bronze and fluxes to match. Shipping to the Netherlands was cheap and quick.
Hahn Rossman
I have wanted to order from ceeway before but the inport costs worry more, how much did you have to pay or was this before brexit?
You can get this flux, it works perfect for bronze. But I’m not sure if they will ship to Netherlands, but at least they are EU. Shipping will cost you probably 5x more than the flux itself ![]()
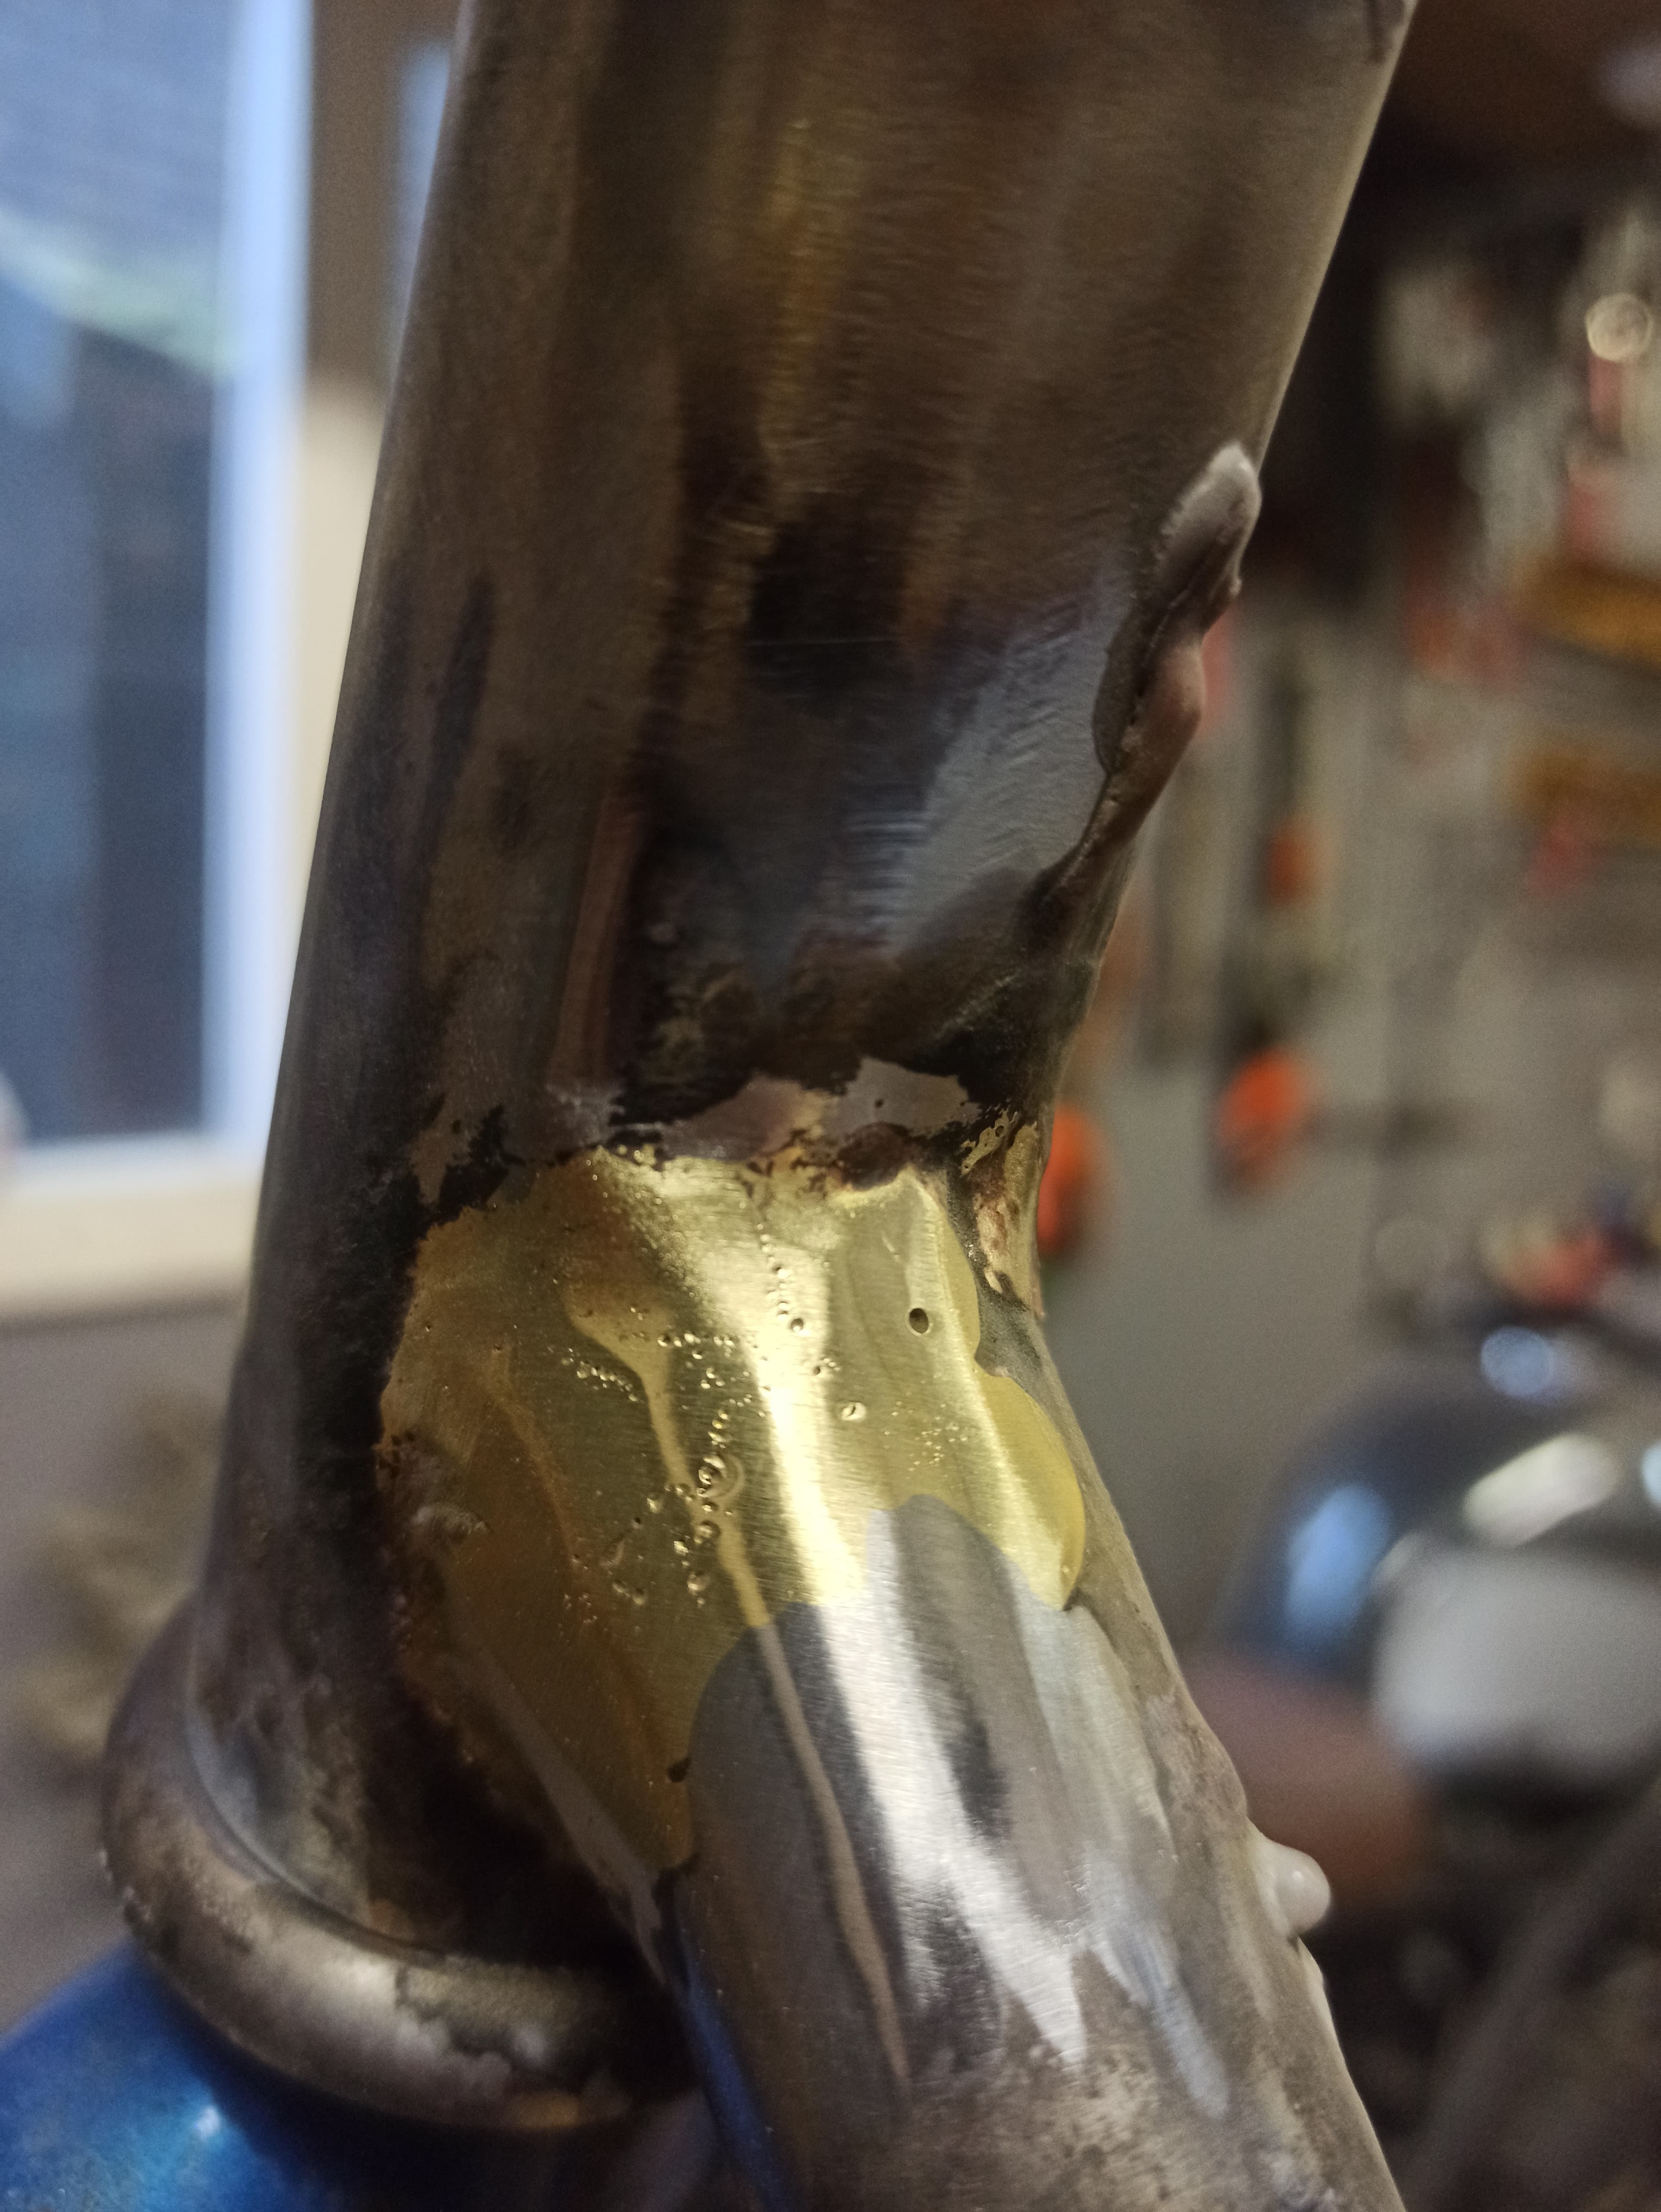
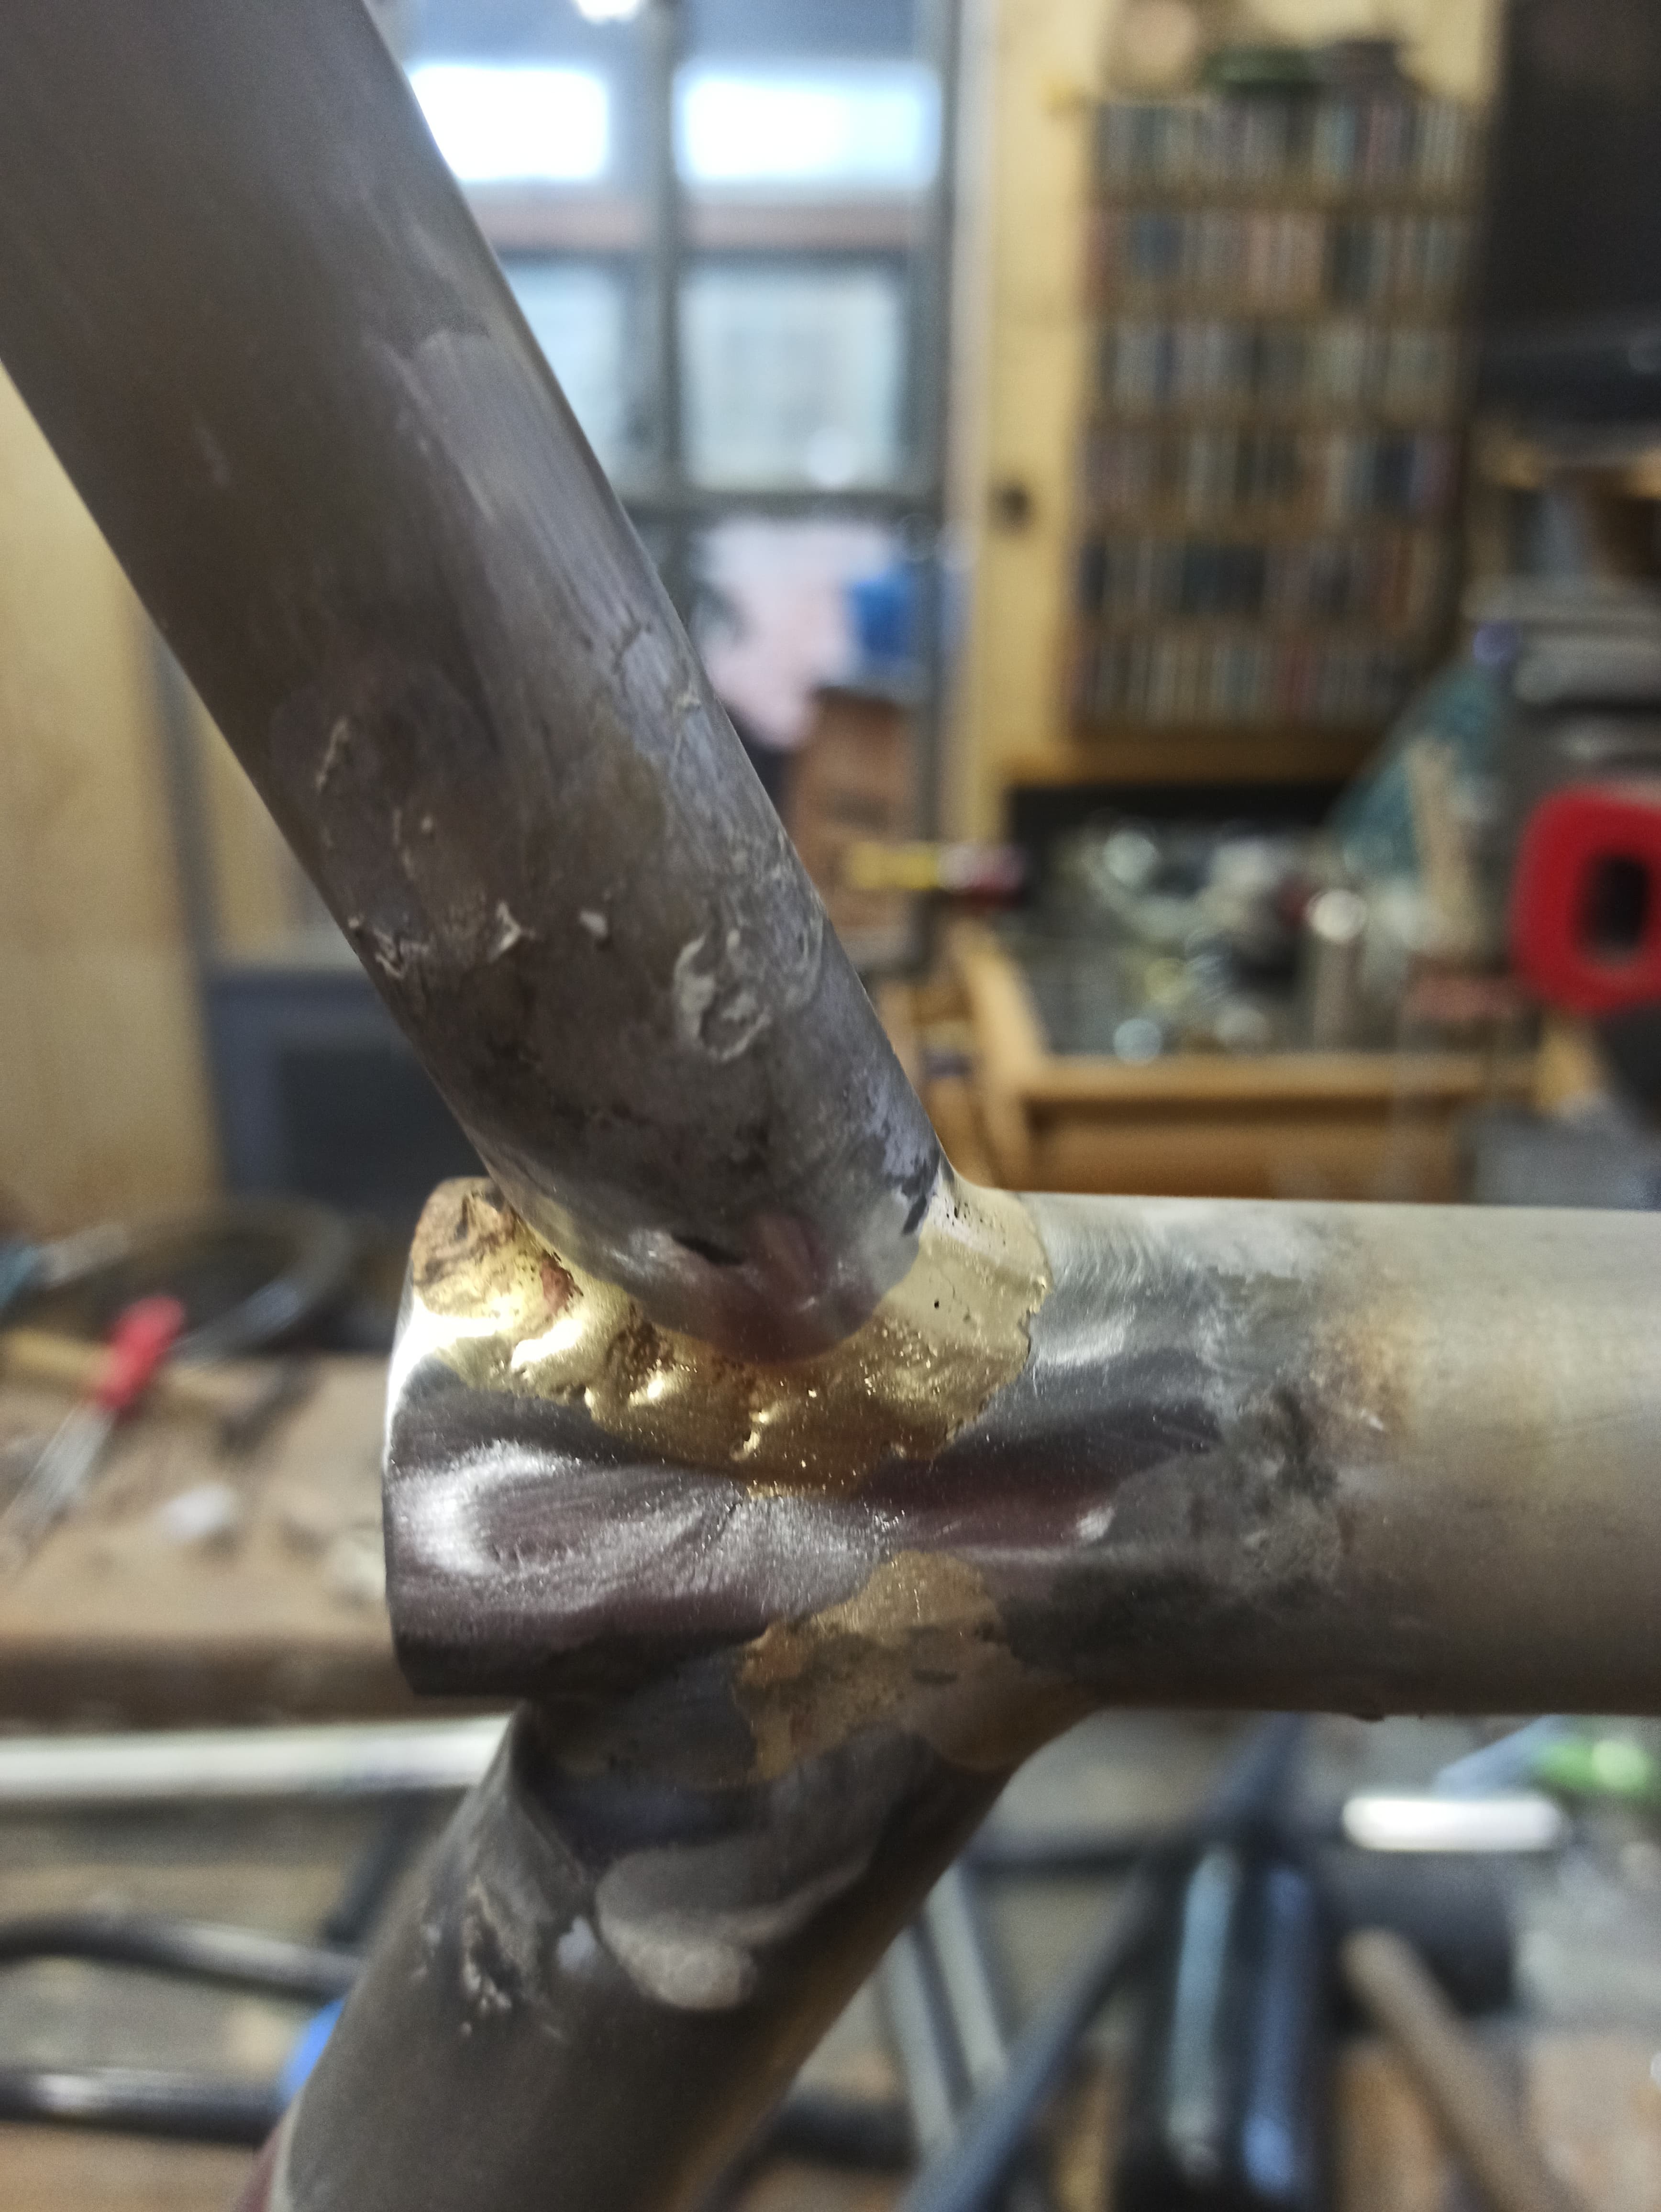
Here i am again, some updates, some issues resolved some new ones arose.
These are some of my latest brazing attemts, i still get burned flux if i am not carefull but it is going a bit better, using a bigger torch tip and a bigger flame, closer to the metal and taking away the flame longer to let cool. I now get a lot of tiny holes, and a few bigger ones. Is this because the bronze gets too hot? Most of the bigger ones are in the middle of a pool
Only time I got huge holes was when things were dirty. Did you clean everything with acetone after sanding?
Are you sure you get the flame right? I had similar issues when moving from propane to acetylene, and that was because I sort of copied the flame looks from the propane setup. However with propane you have 2 cones where the bigger cone is much more visible. If you get this with acetylene you get a carburizing flame, and you burn too much acetylene and are contaminating your stuff. I found that for me it only the big outer cone almost invisible and a tiny very bright one. I believe that the “Shadow” that Brodie mentions is the middle cone that you don’t want.
With the propane setup I also use the color of the flame as an indication of a neutral mix, while with the acetylene it is the shape of the flame that shows the mixture I think.
I am using a 1mm/0 tip on both setups and have no problem getting BB’s and other heavy stuff up to temperature.
Hard to explain in text… So I took some photos:
My propane flame that works:
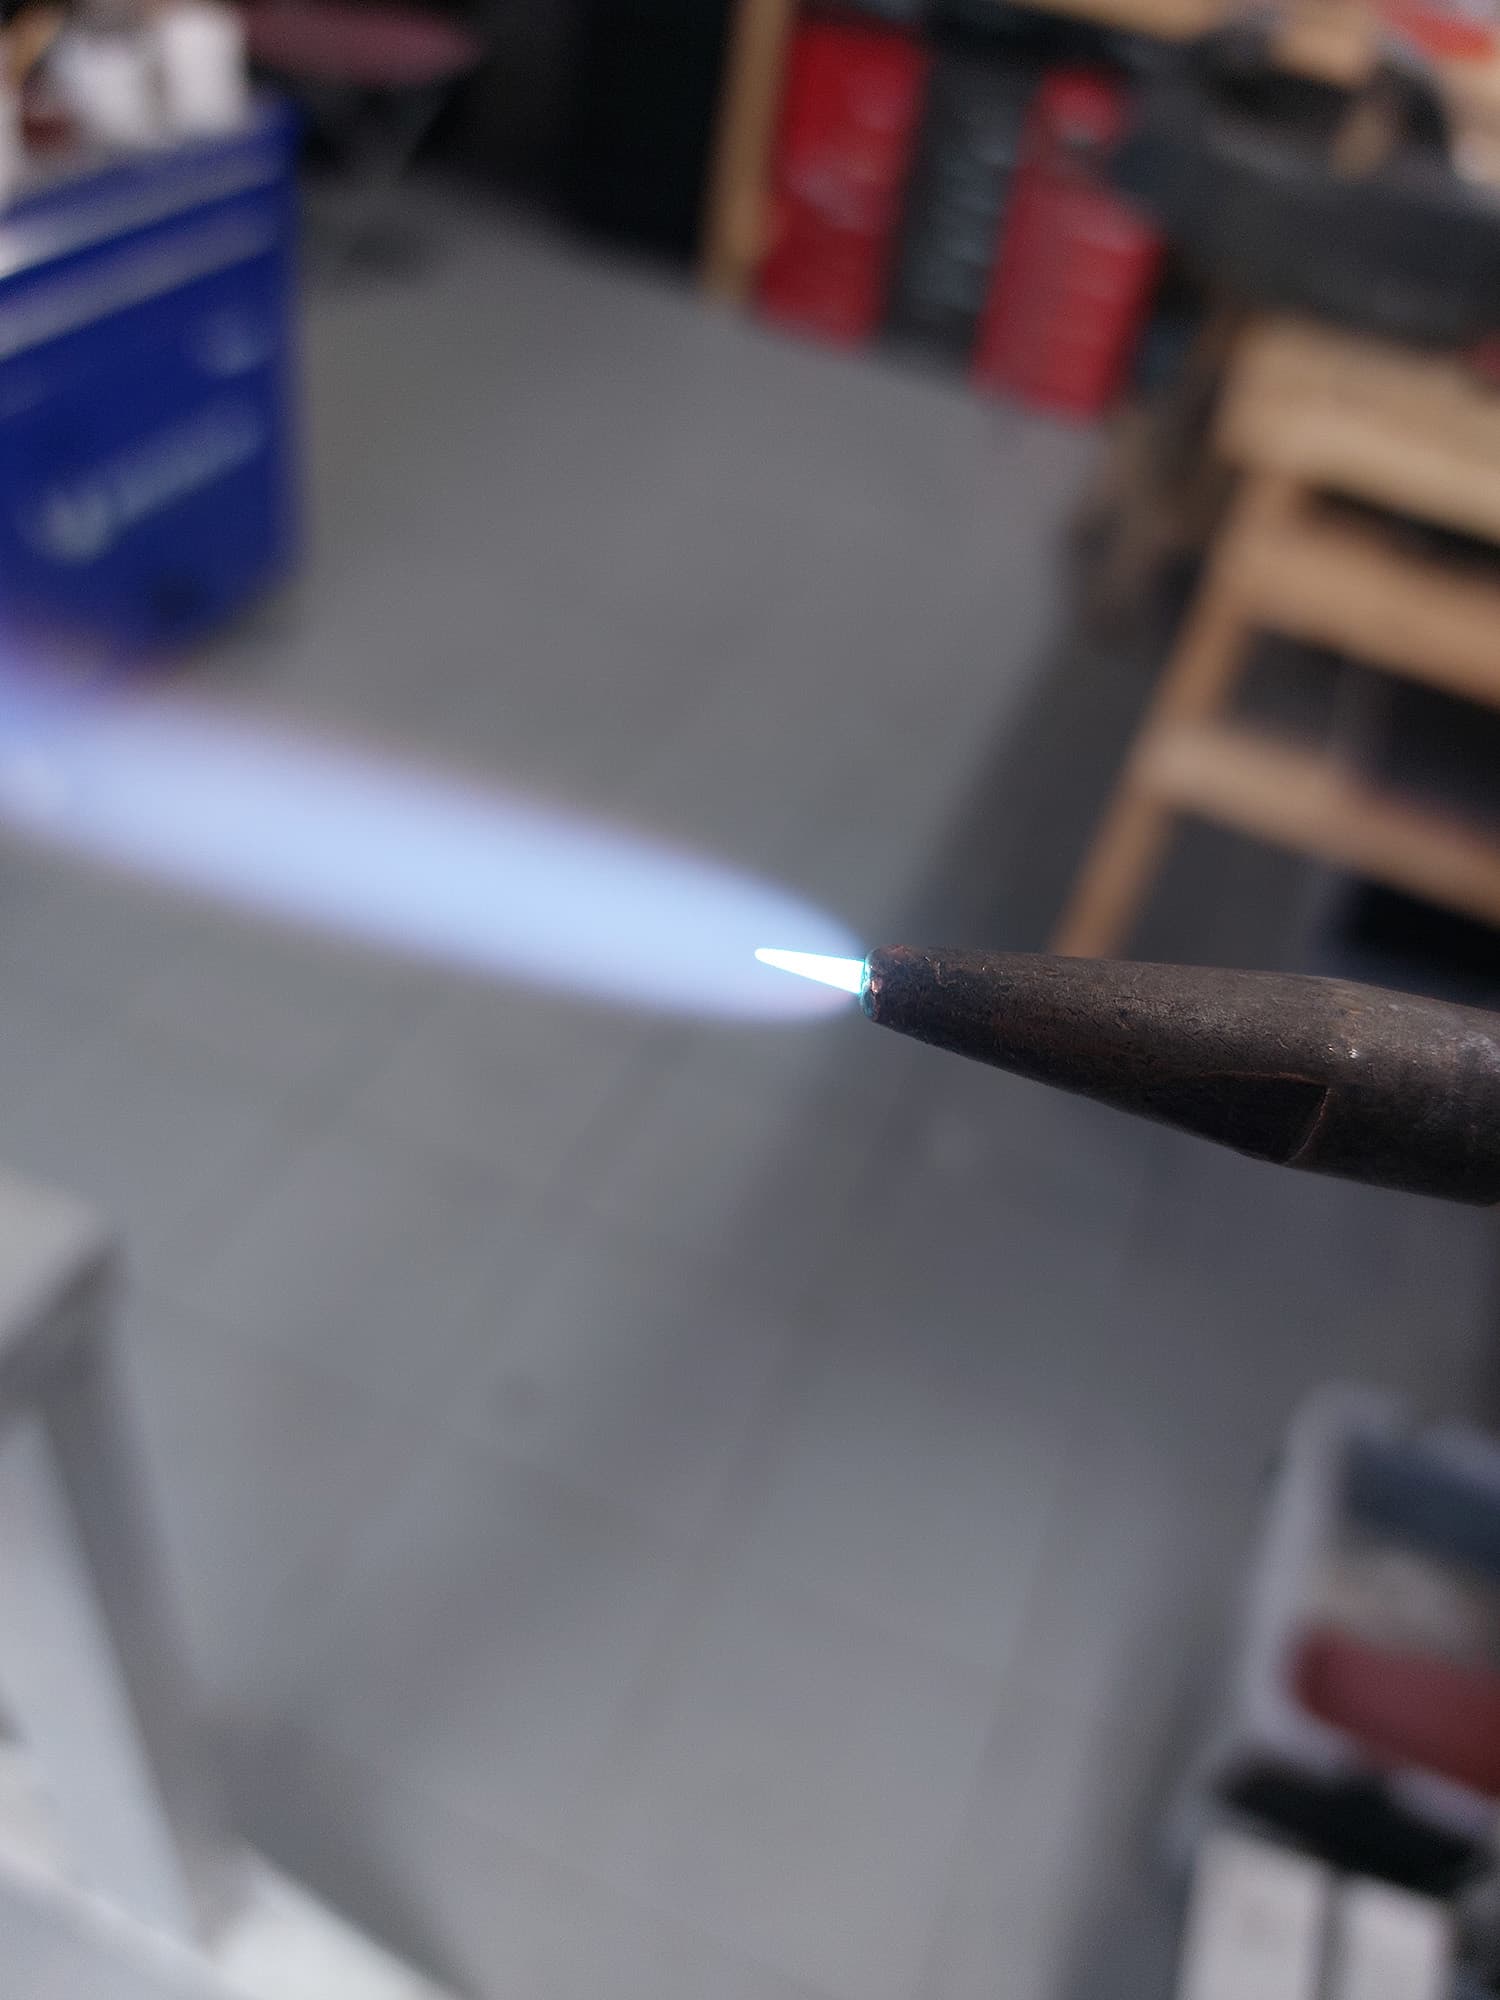
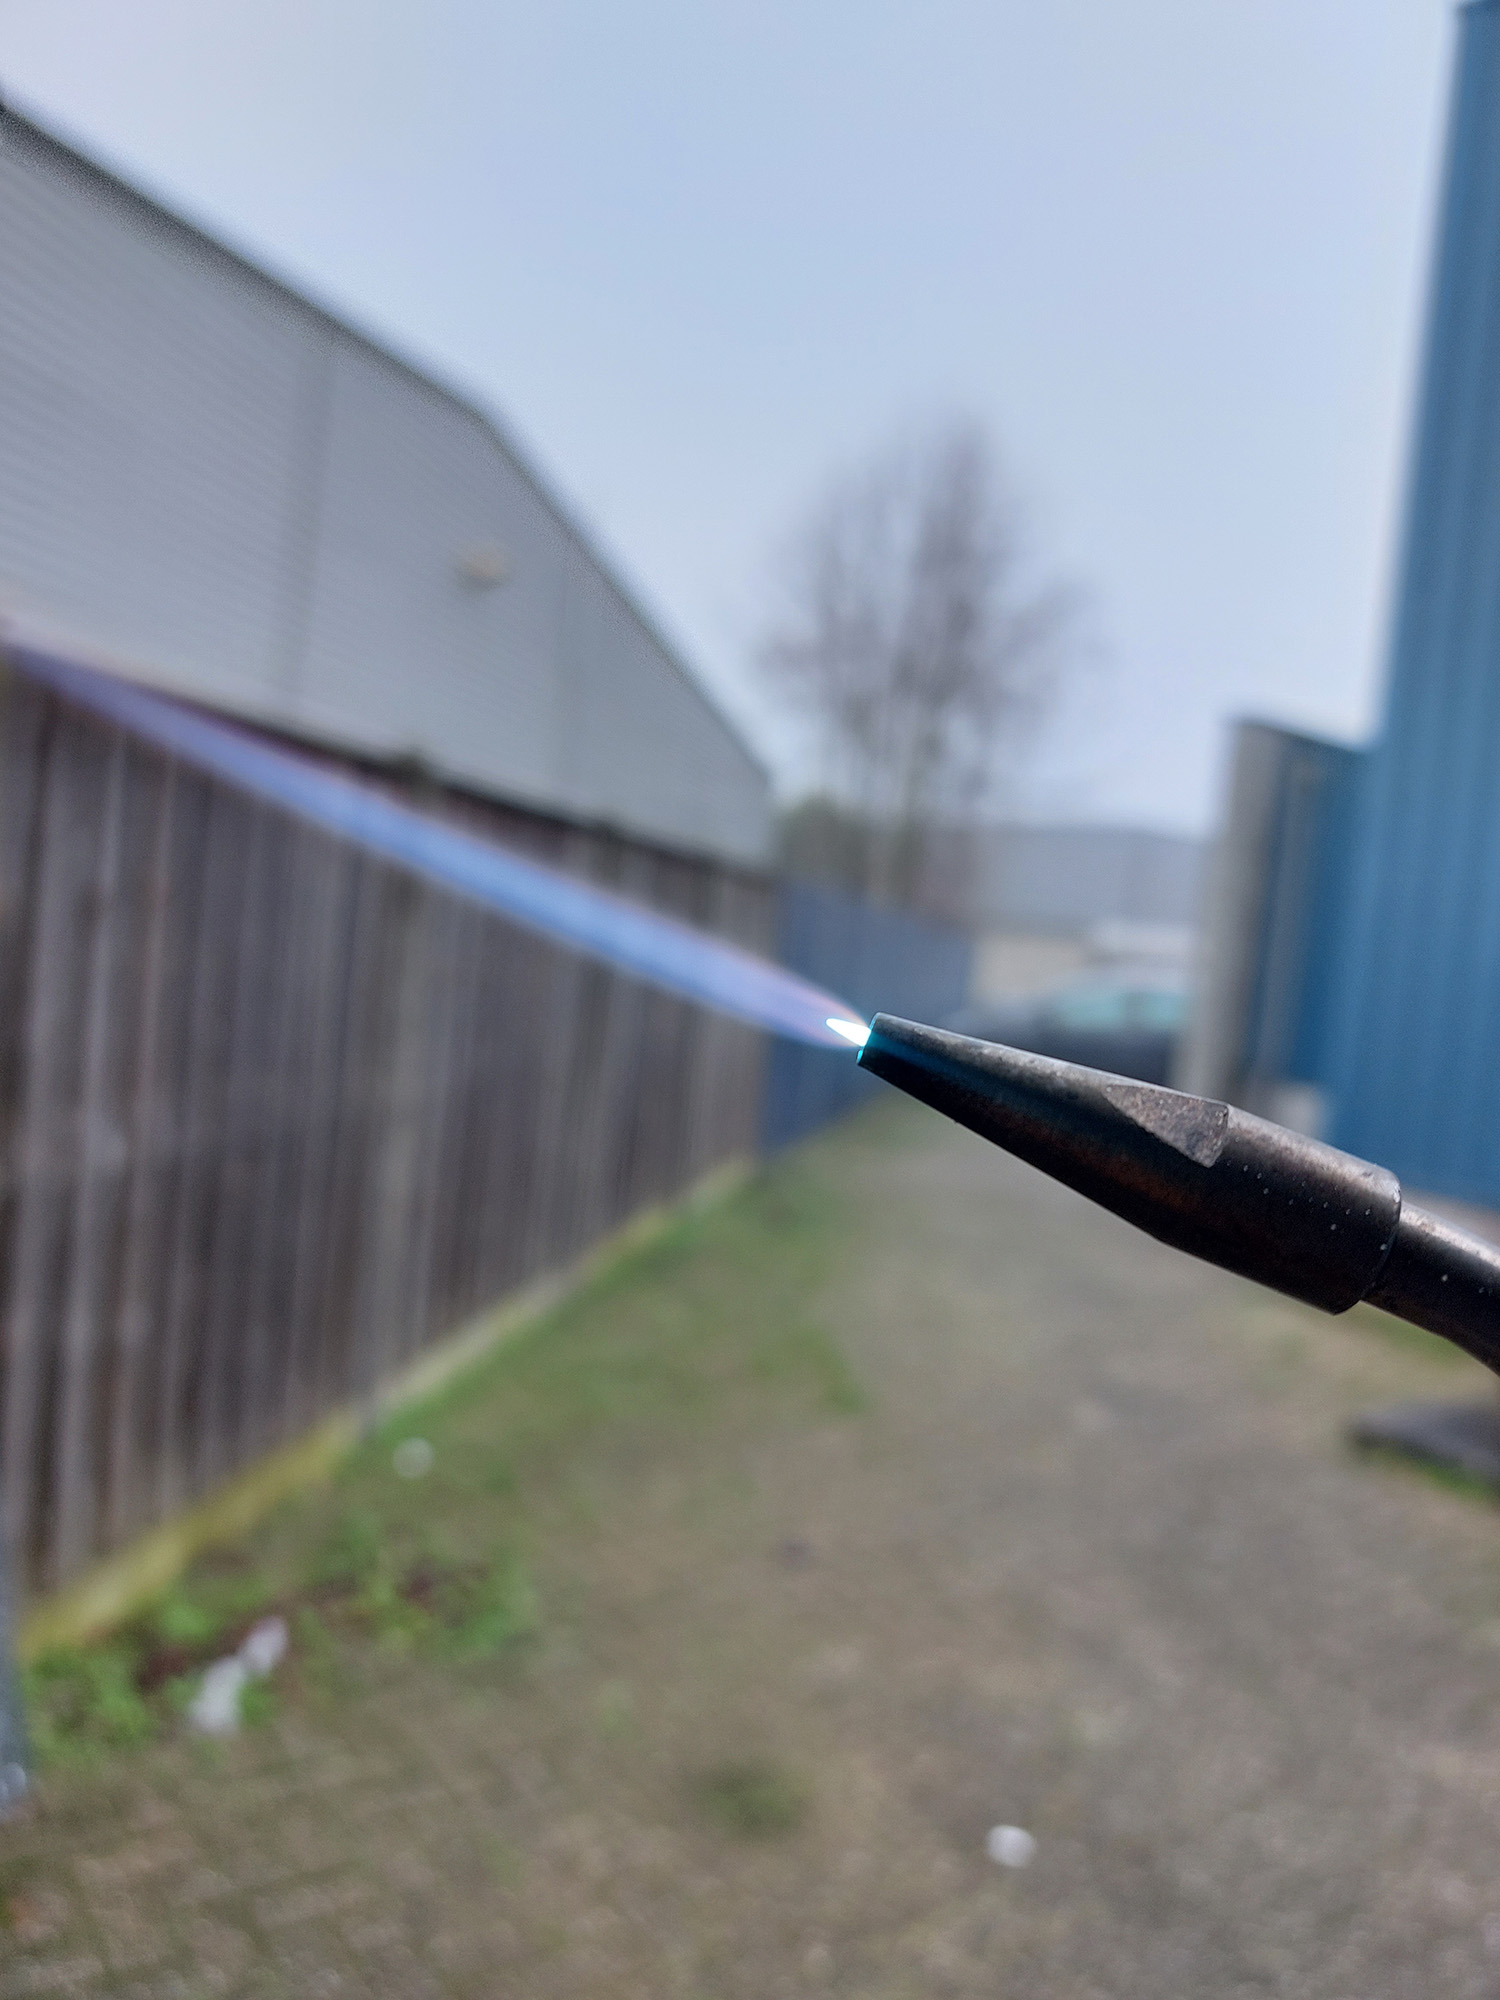
My acetylene flame that works (hard to get a good photo as it is really bright, much more than with propane)
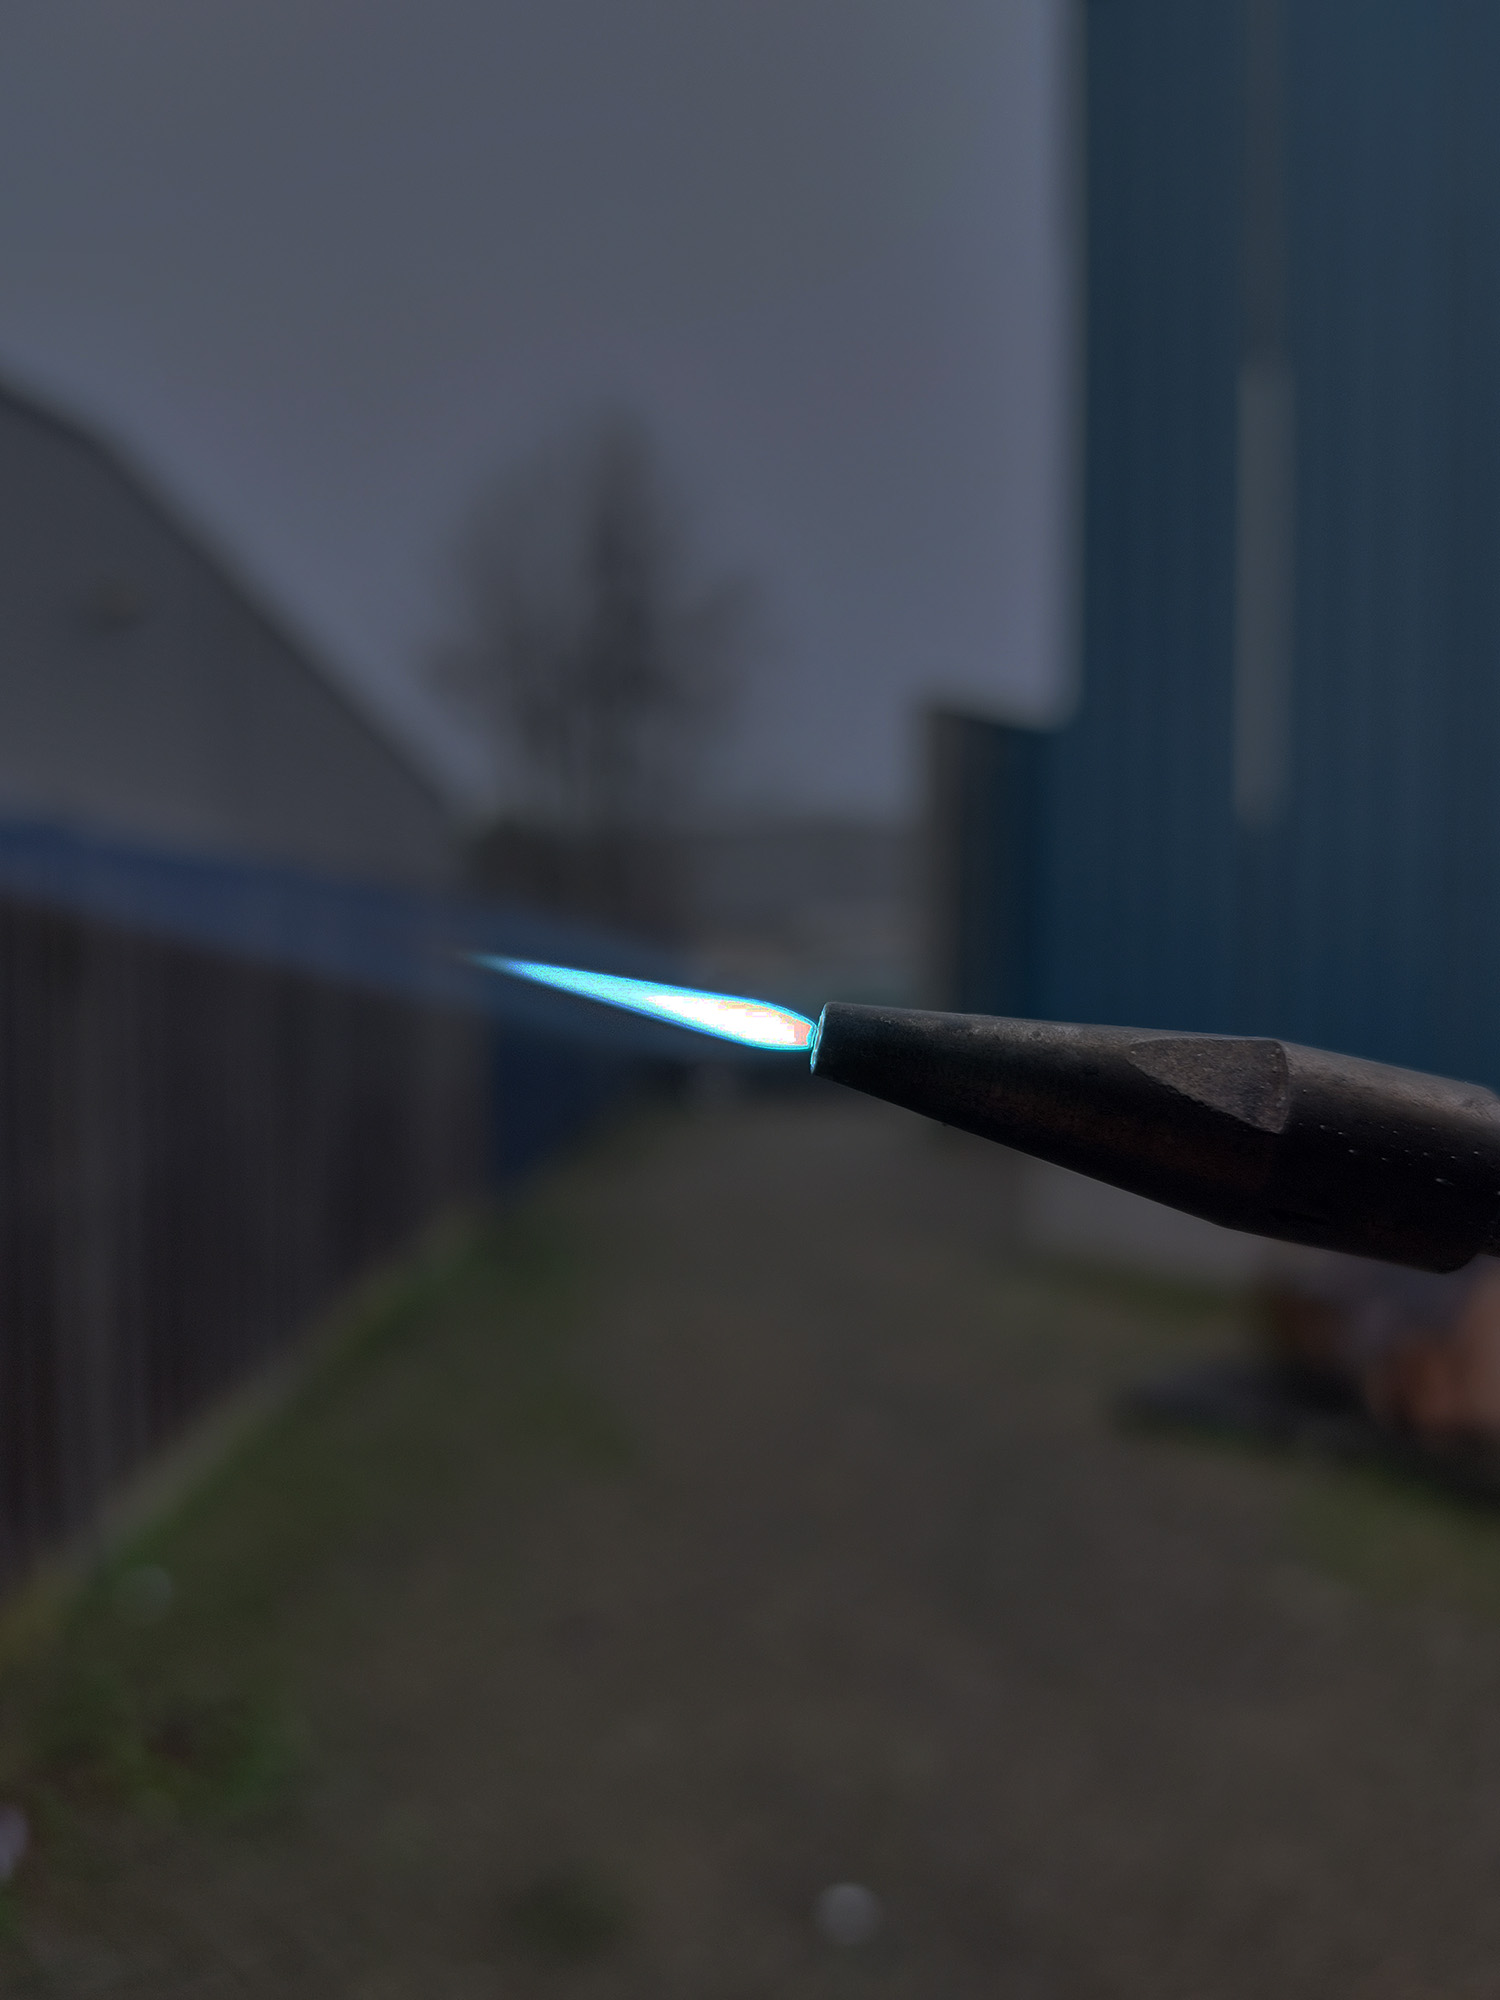
And the acetylene flame that sort of looked like my propane flame, but that burnt all my stuff. I adjusted the brightness so you can sort of see the tiny bright cone inside the “shadow”
Hope this helps!
I mostly use Cycledesign flux paste, but even when using generic powdered flux from the local welding store I can braze fine, so I wonder if that’s the problem. But like Hahn said: Just email Peter at Ceeway and he can get you all you need pretty quickly. Just check your email for the DHL import invoice. ![]()
And if I am getting this all wrong I’ll gladly get learnt by the experts here, but this is what works for me.
Double checking that you’re actually using a neutral flame like @project12 suggests is really important.
It also looks like you’re not applying enough heat to the tubes, probably because you’re worried about burning the flux. Once you get better flux, you should be able to put more heat into the tubes so when you dab your rod it melts and flows.
I have been using a neutral flame, have also tried out with a slightly carburising flame, because it says on the flux that is what it need (which i find Strange). I think im using a flame which is lightly too big maybe… I tried preheating the tubes more but i had to be super carefull because the moment the tube got the slightly reddish glow the flux also burns. Anyway i ran out of acetylene so ill have to refill first before i can do any more practicing
I would say don’t try more brazing until you get better flux. The flux shouldn’t be burning when the tubes are just starting to glow. Start with a small flame so the process happens slower even if it’s not ideal technique for later once you’re comfortable.
not brazing is not really an option sadly since I need to do stuff for school, but ill definitely order sif101 from peter
I don’t know if you’ve seen this video? He explains is nicely and does beautiful work. I don’t know how to braze, btw.

yeah ive seen that one, amazing looking fillets! looks so much easier than it is
Bloke makes it look so easy!
I’ll add that it’s important to ensure that each added fillet wets out at the root of the join, I.e. right down at the juncture between the two parent parts. Easy for this to not happen if you don’t control the heat properly.
It’s probably been mentioned though.
I’d like to see a video of someone doing fillets with flux or flux coated rod for even the hardcore DIY’er. lol. The majority of these videos like Brodie and one posted above were done with inline fluxers.
Plus is laying down a root pass of silver neccessary that I’ve heard some folks doing before puting down their fillets?
Paul Brodie does a tinning pass of nickel silver, which doesn’t have any silver in it, for strength, and to ensure a good internal fillet. It’s not necessary, but it’s a good practice until the skill is there to get on without it.
Bronze works just as well for a root, or tinning pass
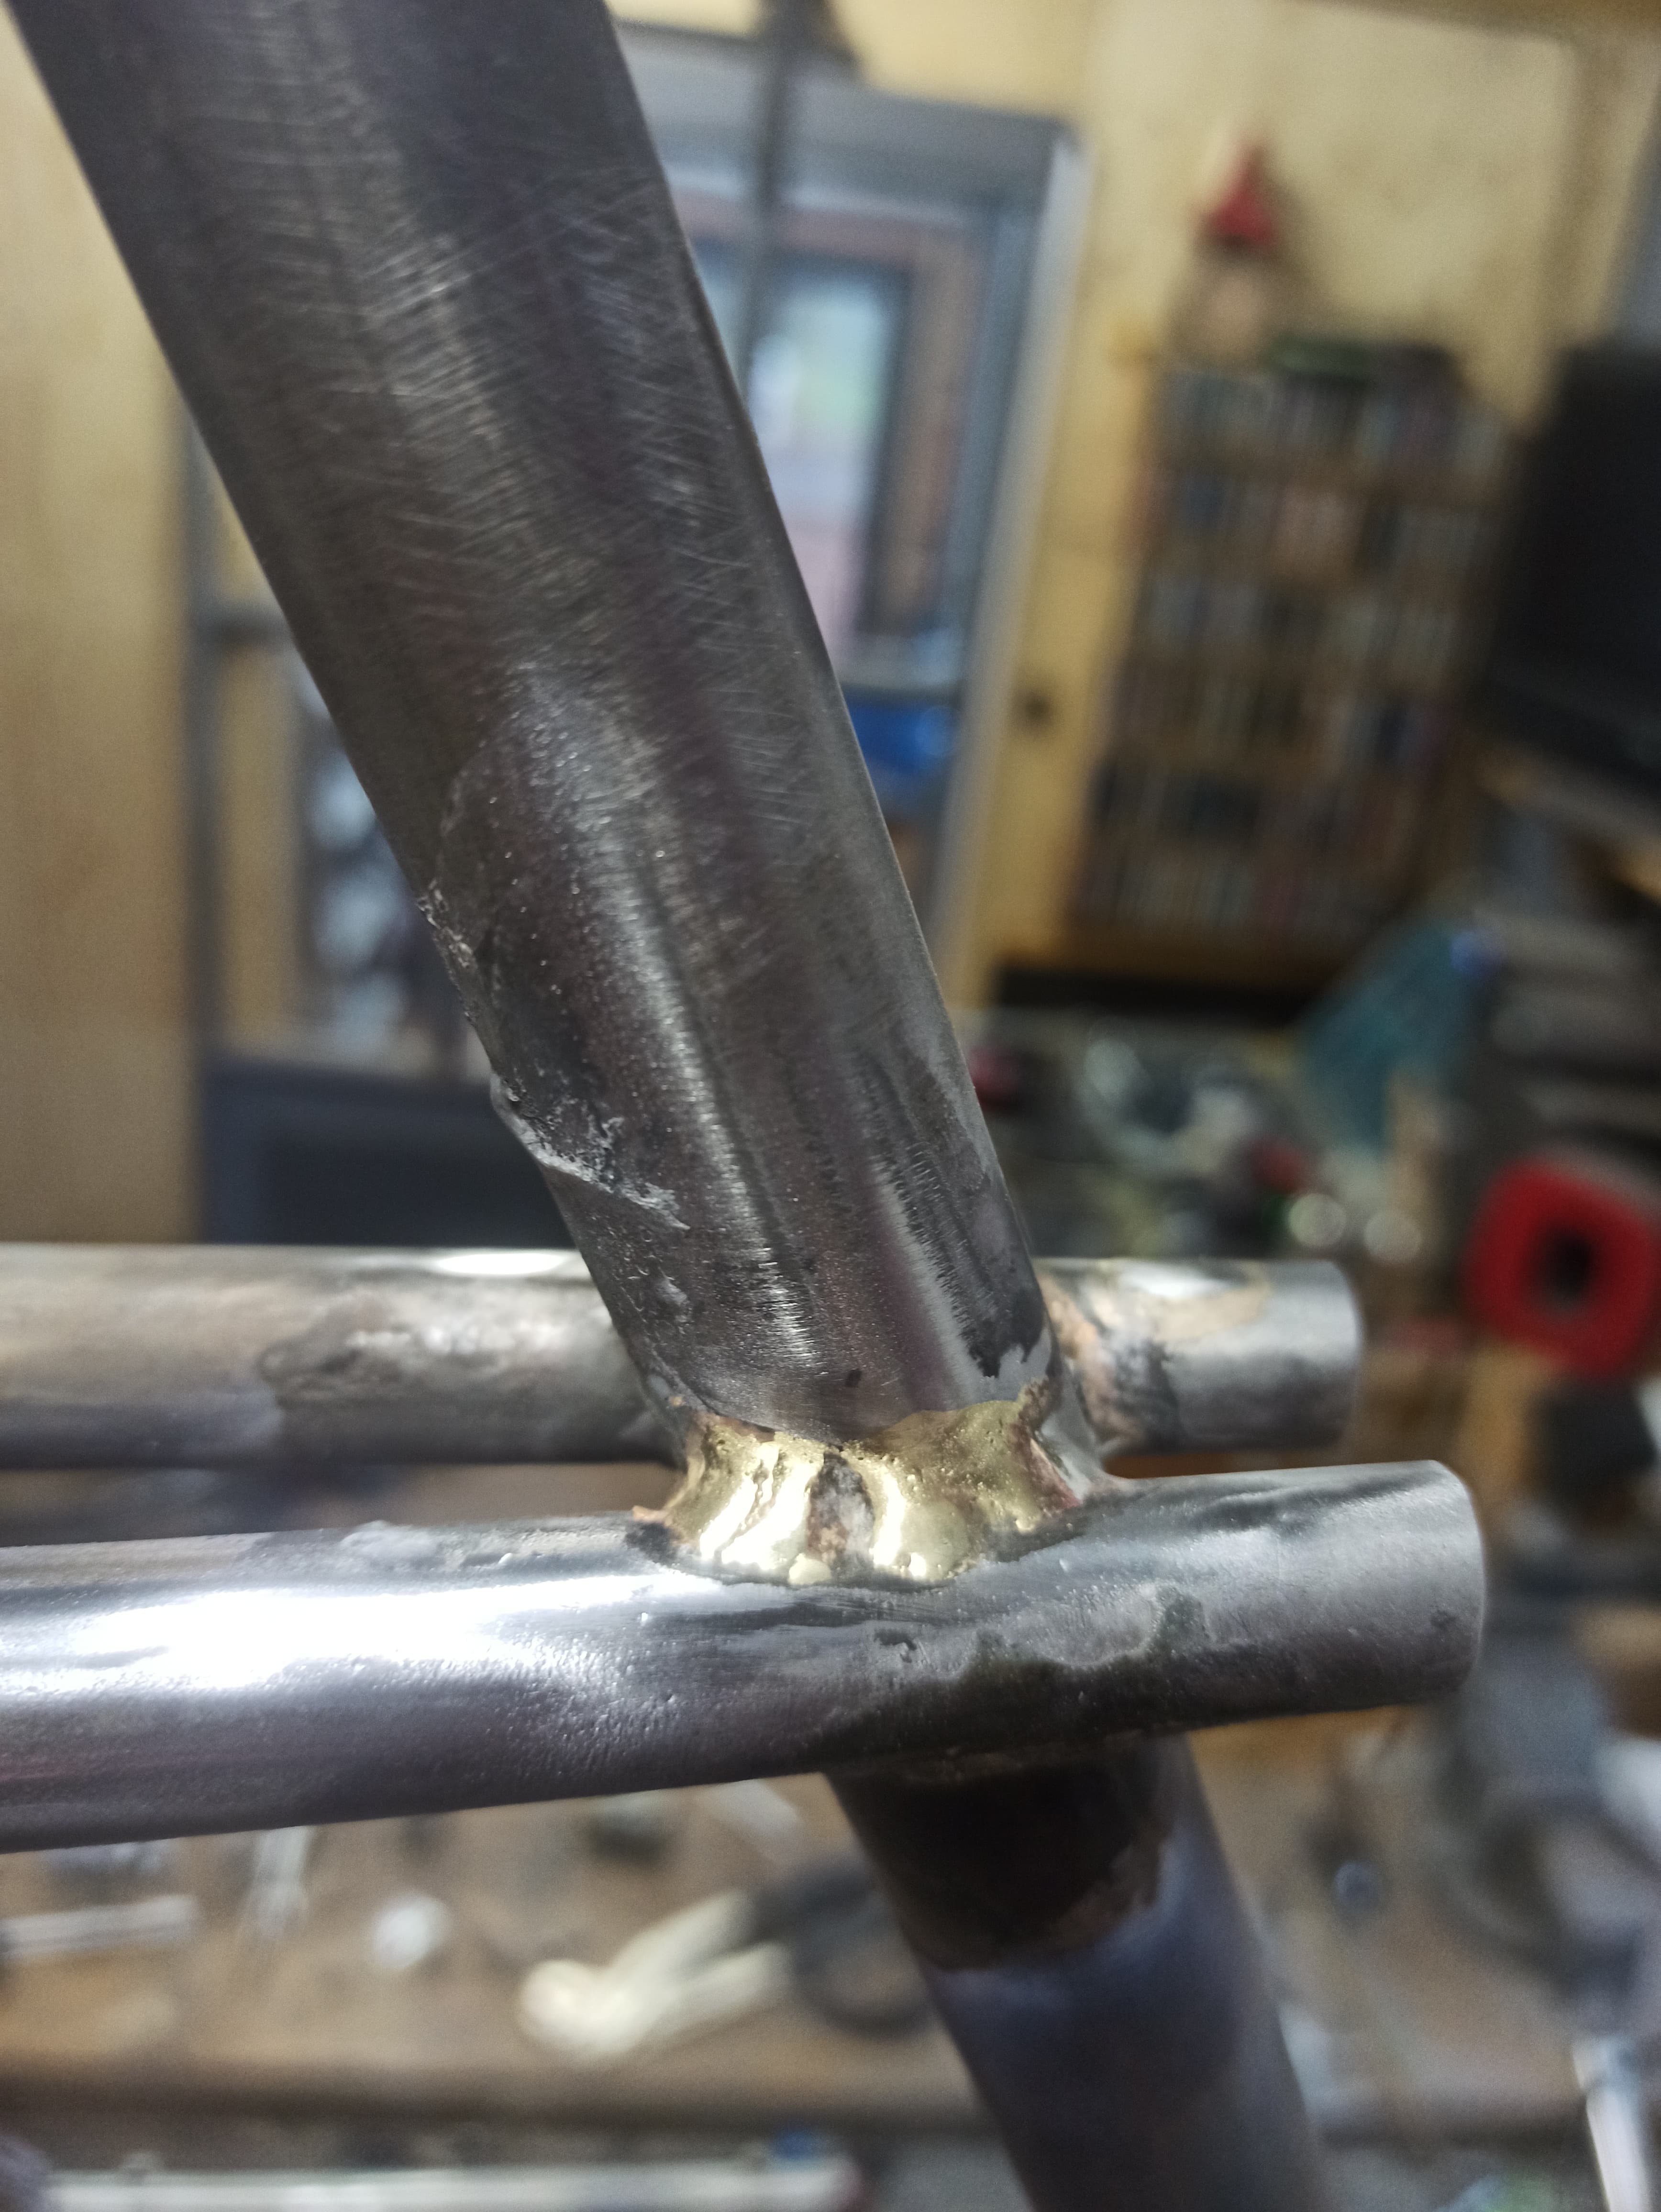
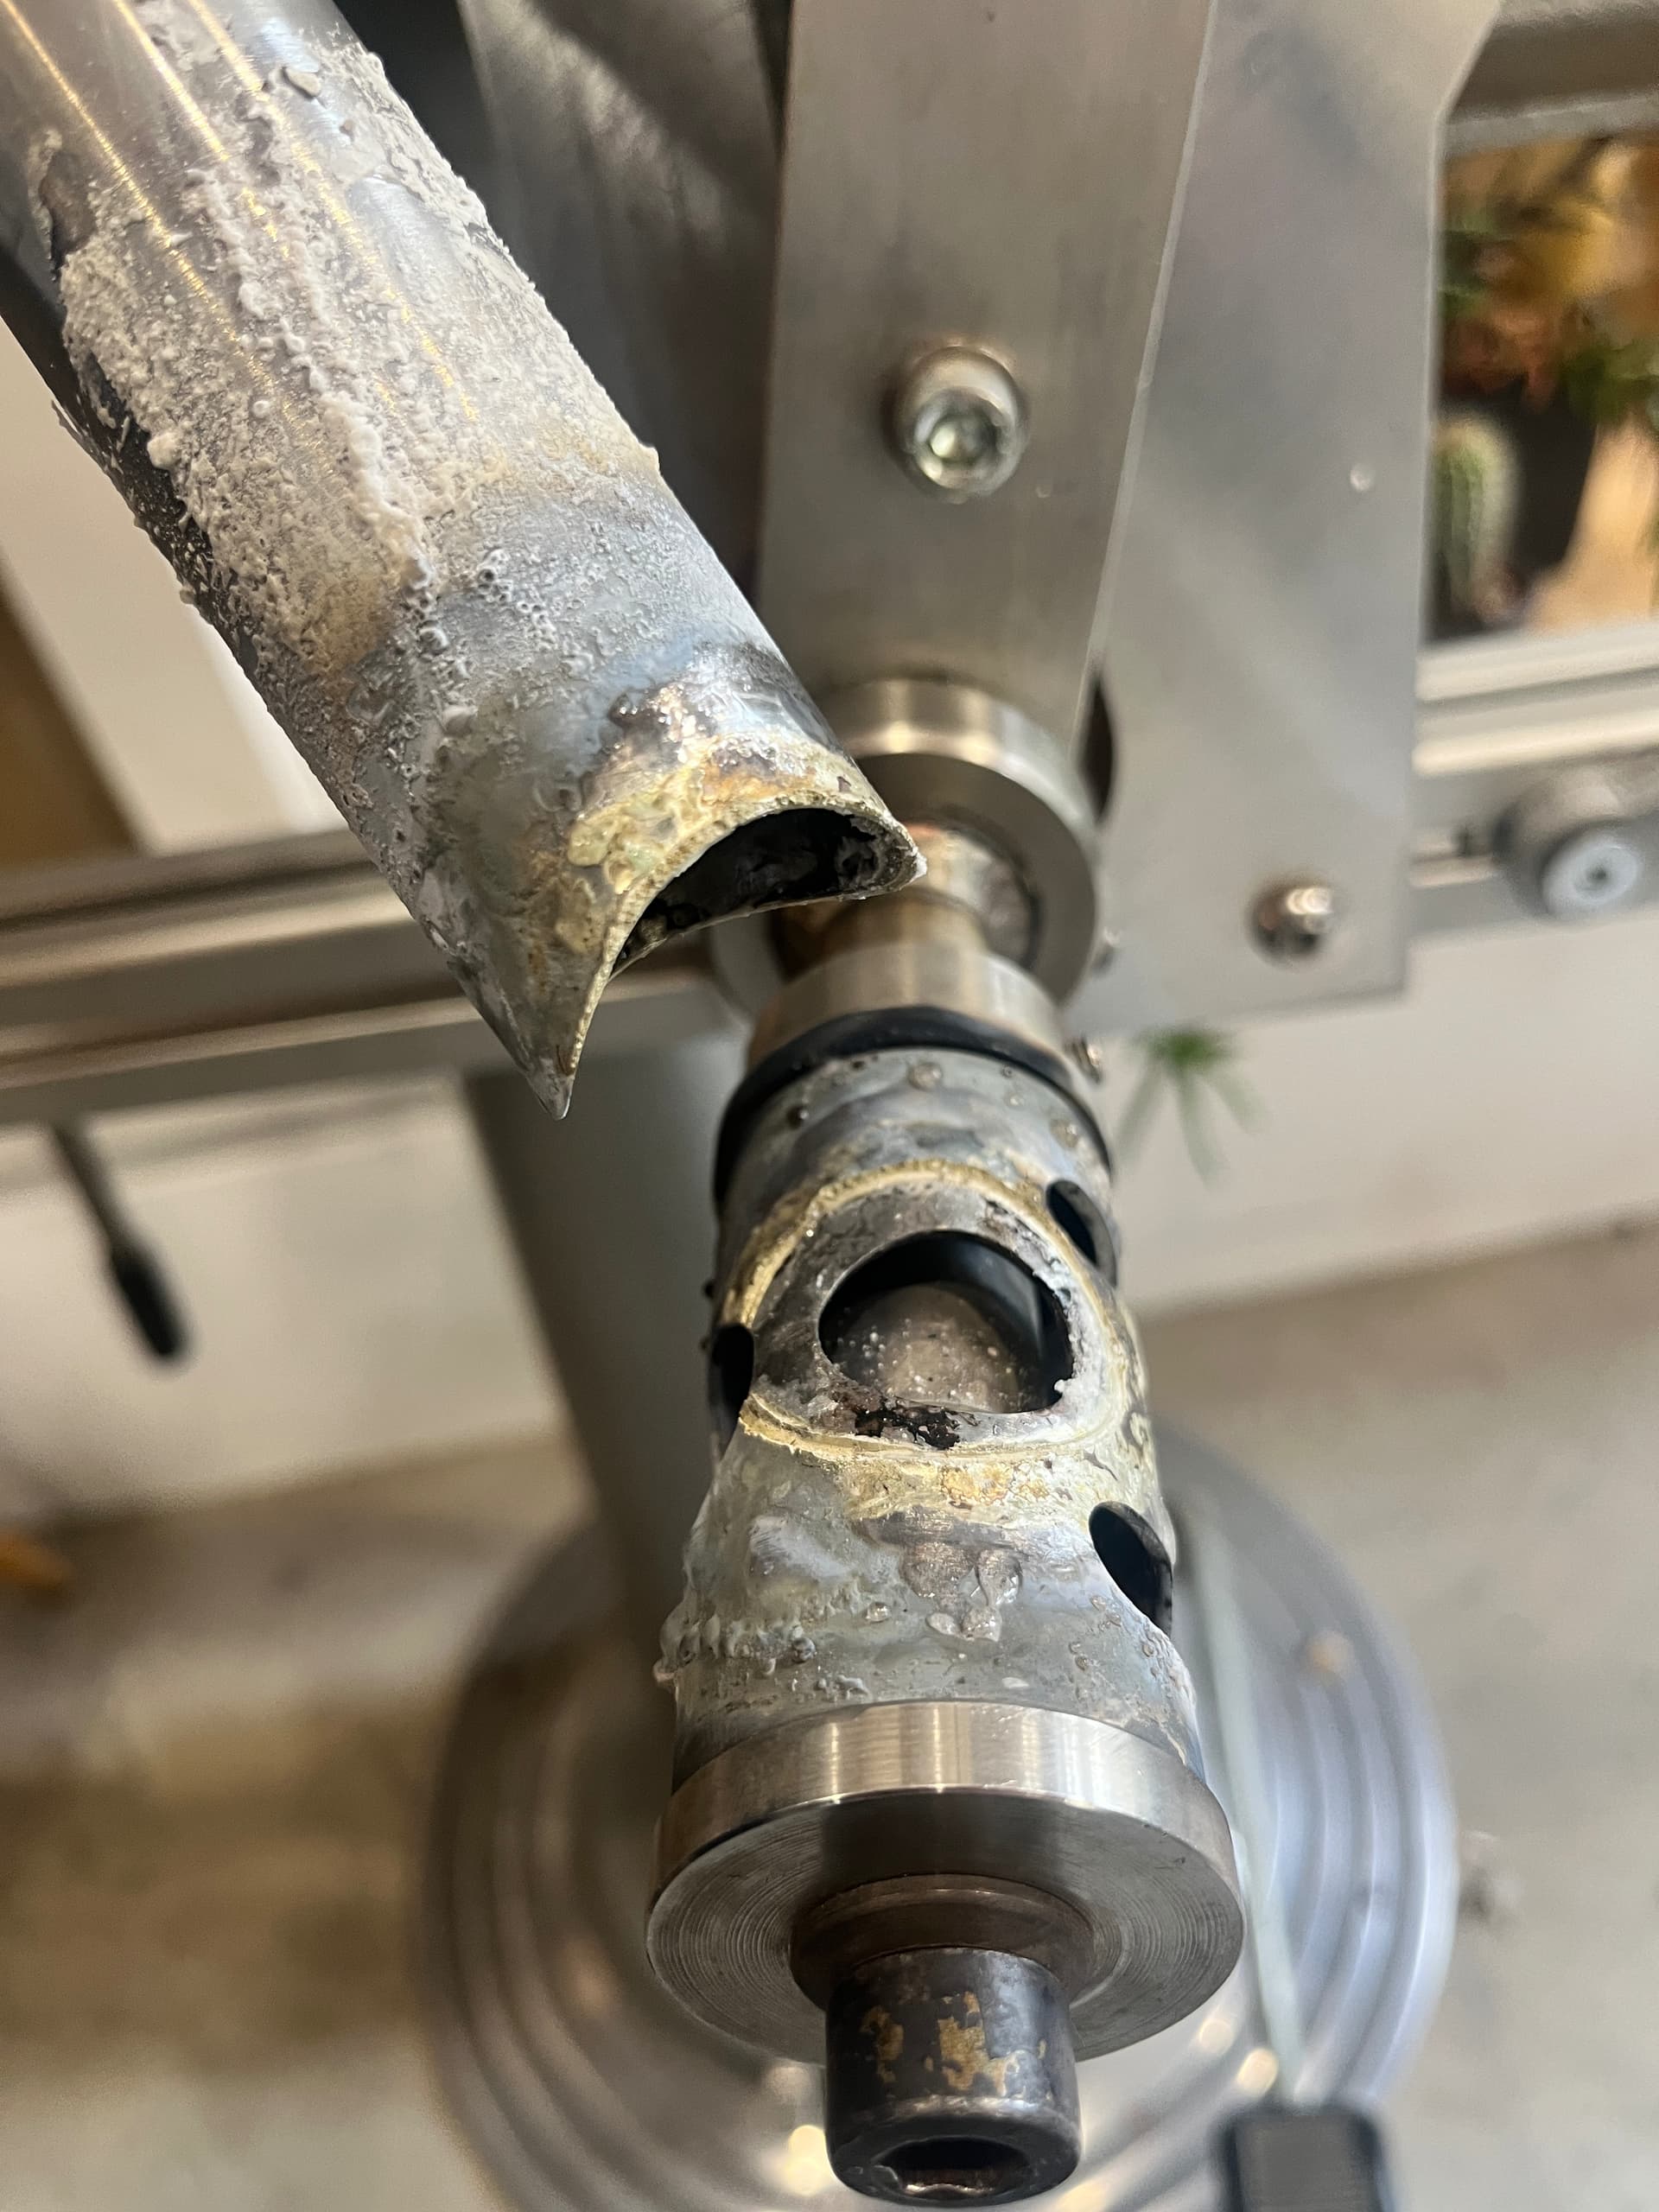
hei everybody! today i tried to braze the bb to the st… I want to place a little nickel silver fillet under the bronze one. But the connection broke after alighnment. any help…? to cold? to less filler? i also plan to use the same technic with the dt and tt. make it sense?
The nickel silver “tinning” pass isn’t necessary.
It looks like you have an OK amount of material down, so if you broke the fillet, you probably used too much force.
Personally, I think it is better to do a couple bronze tacks, check alignment (but not do alignment…) and braze accordingly to where it’s pulling. It’s a good idea to braze in opposite 1/4 sections, and check alignment as you go. IMO, it’s generally better to align while welding than by brute force. Chances are, when aliging by brute force (“cold-setting”) you are just ovalizing the HT or BB, whichever you use as a datum.
Also, if aligning from the BB, after you’ve welded something to it, how can you trust the face of the BB to be flat? Maybe there is some flux on it, or it is already distorted from your tinning pass. So the BB is not a correct datum.
I only use the BB as a datum once I’ve joined the bb / dt and cstays because I have faced and chased the BB. So I check alignment in the jig as I go through my tacking + fillet process, and once I’ve finished all welding at the bb junction, then I can use the BB face as a datum.
I also see that the ear of your miters passes the dt vent hole? This may be an issue later.
Be careful with the size of your vent holes. The bigger they are the more the tube will distort. Start with small vent holes until you get better at brazing.
Don’t forget that the straightness of your frame is directly related to the tightness of your miters. And don’t get too fussy about alignment, major manufacturers have a tolerance of ~5mm. If you’re just starting, do your best, but don’t worry about it too much. Frame straightness is super hard to feel and as you ride the bike is flexxing anyways.
Everything that @terraformbicycles said is spot on.
IMO, tinning passes just add more distortion. And using nickel silver is an unneeded extra step. A few bronze tacks are enough to keep the seat tube in place.
Each builder seems to arrive at a different build sequence based on their equipment and personal preferences. I like to tack the seat tube to the BB shell, then load up the rest of the frame in the jig and tack the whole thing together. I let the frame cool to room temperature, remove it from the jig, put it in the brazing stand, and braze away.
I prefer this method over doing the front triangle first then the rear triangle to reduce the amount of heat cycles in the frame, especially at the BB shell and seat tube. This has greatly improved overall frame alignment.
Echoing both comments above from my experience as well.
^ agreed
Here is a great resource thread: Frame Verification and Alignment Surface
The consensus from that thread was: with modern-sized tubes, it’s not feasible to make big alignment adjustments through cold setting.