Disclaimer: if you are under 40 years old this may be of little interest to you. But hey you may learn some history.
My latest personal frame is one i’ve dreamed about having for a long long time and never thought i’d have the opportunity to build it myself. In the late 90’s I always swooned over simple pivotless titanium softail suspension frames like the Moots YBB and later the Ibis SilkTi. I actually owned a YBB for a few years while racing on their grassroots team (i paid cost, which was still not cheap!) and it seemed pretty high tech at the time but did have a ‘springy’ feel to it since it was an undamped spring and at the start it felt like I had a rear flat tire. I believe they said it got 3/4" of rear wheel travel? Since then, they’ve added an elastomer damper i believe in the center of the spring, but the overall design hasn’t changed all that much and is still used a lot for good reason! For gravel bikes i think softail’s make a ton of sense too.
The YBB started in steel before it was made in Ti and predates the Ibis SilkTi by several years. The SilkTi is a unique take on the same idea but has a very different design. John Castellano is a legend in the early suspension world, having designed bikes for Ibis and Steve Potts, like the BowTi, SilkTi, and AL version of the SilkTi the Ripley. He designed and patented the Sweet Spot URT that was used by several companies at the dawn of full suspension including Schwinn and Klein, and copied by others such as Trek and Rocky Mountain.
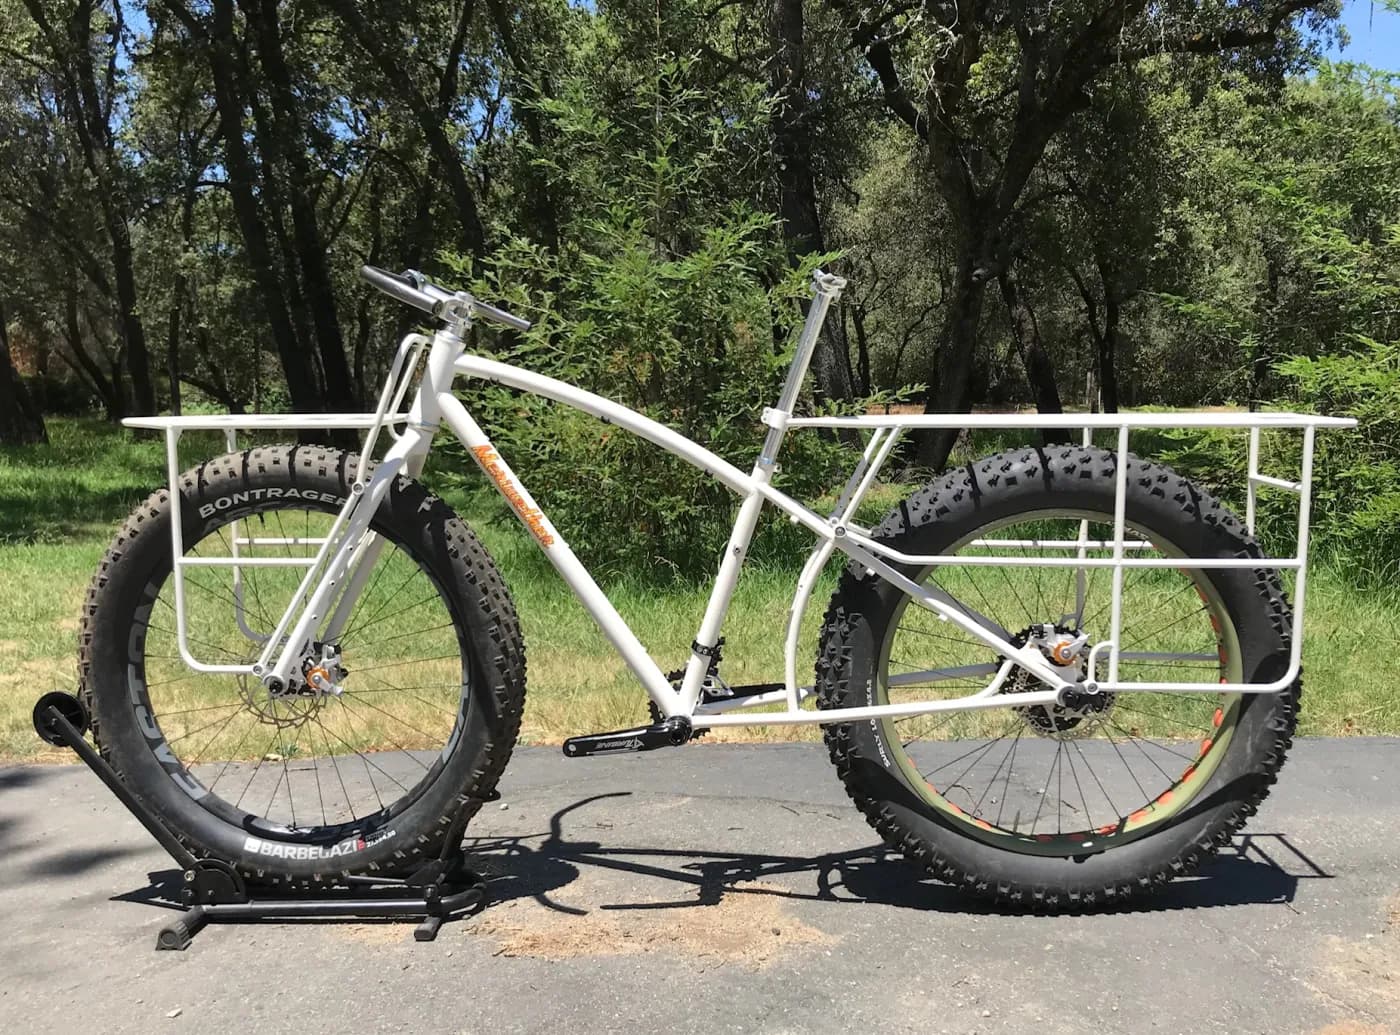
Since the Ibis days, he’s worked mostly on his own bikes and a lot with Steve Potts. Check out this bike they displayed at the handmade show with an integrated flex stay rack! Amazing.
At the 2016(?) NAHBS in Sacramento i attended a Ti framebuilding seminar given by Steve Potts and John was there. I asked if i could check out the chainstay plate he had brought with him. He told me all about it with enthusiasm and about the new version that fits 27.5x3 and 29x2.5" tires that he had developed with Dave Levy of Ti Cycles. My interest was again peaked and once I had John’s business card I started crafting an email asking for help in building my own softail frame. Problem was, i hadn’t started welding Ti at this point.
Fast-forward to two years later, I had built myself two frames and had started making friends Ti frames as well. I had soft-launched Ti frames to customers and kept thinking about my next mountain frame, hoping i could make it a softail. I didn’t think i’d be able to, or worthy of, using John’s design in a frame so i just put off contacting him.
A friend sent me a Trek IsoStrut from their Supercaliber to use on a frame but that seemed (and is) much more difficult to produce with any precision, at least with my abilities. A pivotless design is really what I wanted anyways. It’s all i need…i just cruise trails, stop, see the sights, take a lot of photos, go bikepacking when there’s time, and i know a softail would make an awesome bikepacking rig. The CDE shock is said to offer 1.75" (<44mm) of rear wheel travel compared to the 65mm of the Fox Isostrut on the Supercaliber, or 80mm with the Castellano plate, some pivots and a swingarm.
Email was finally sent last summer (2022) and by last fall John had met me for coffee, a bike ride, and a couple beers. He brought his singlespeed Szazbo mullet bike. He’s a true tinkerer, engineer, and long time bike nerd, and it was a ton of fun to hear his history and talk shop.
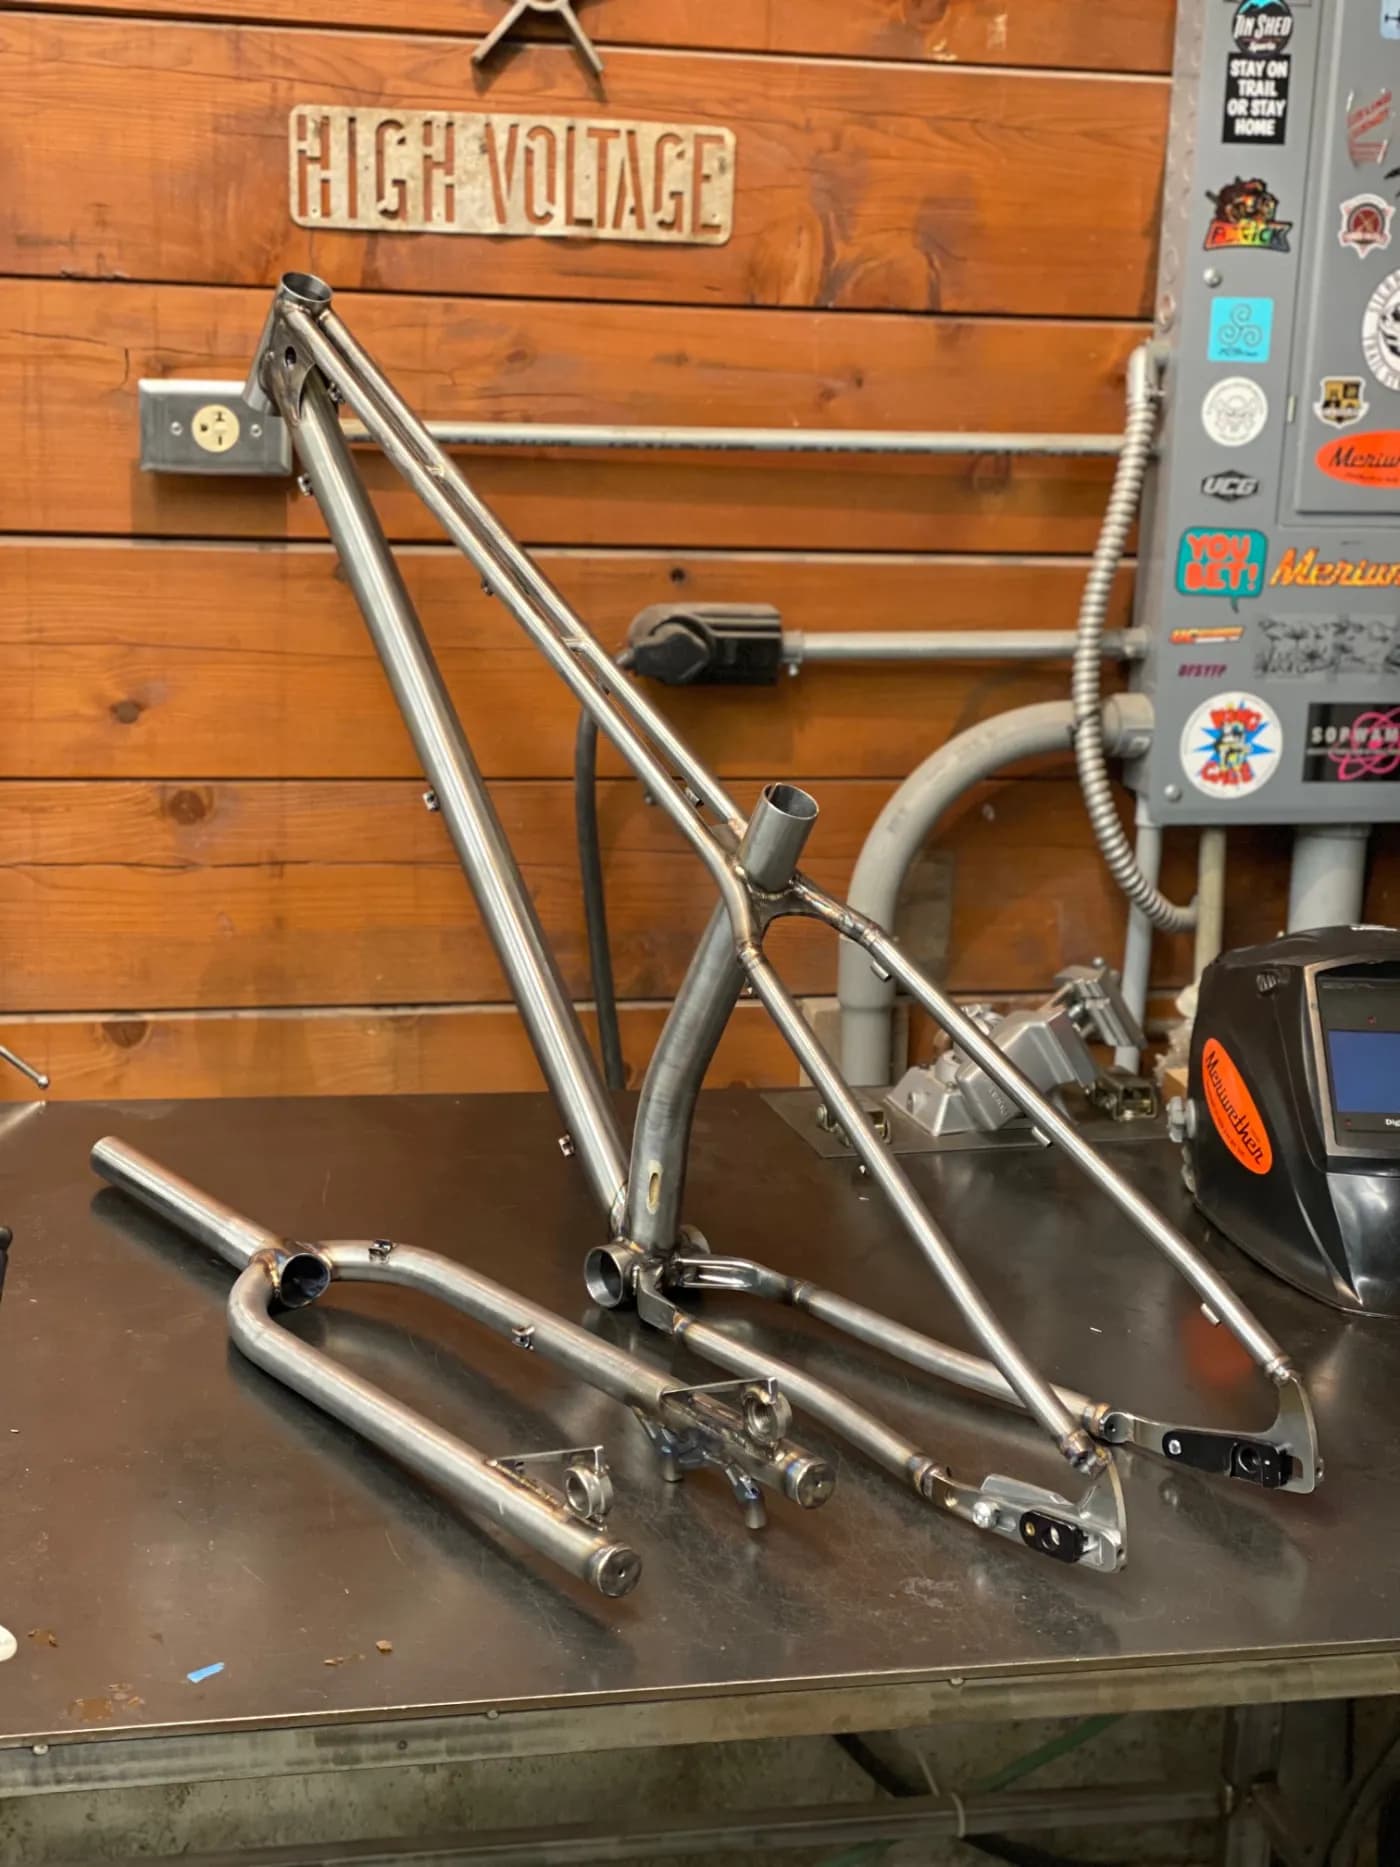
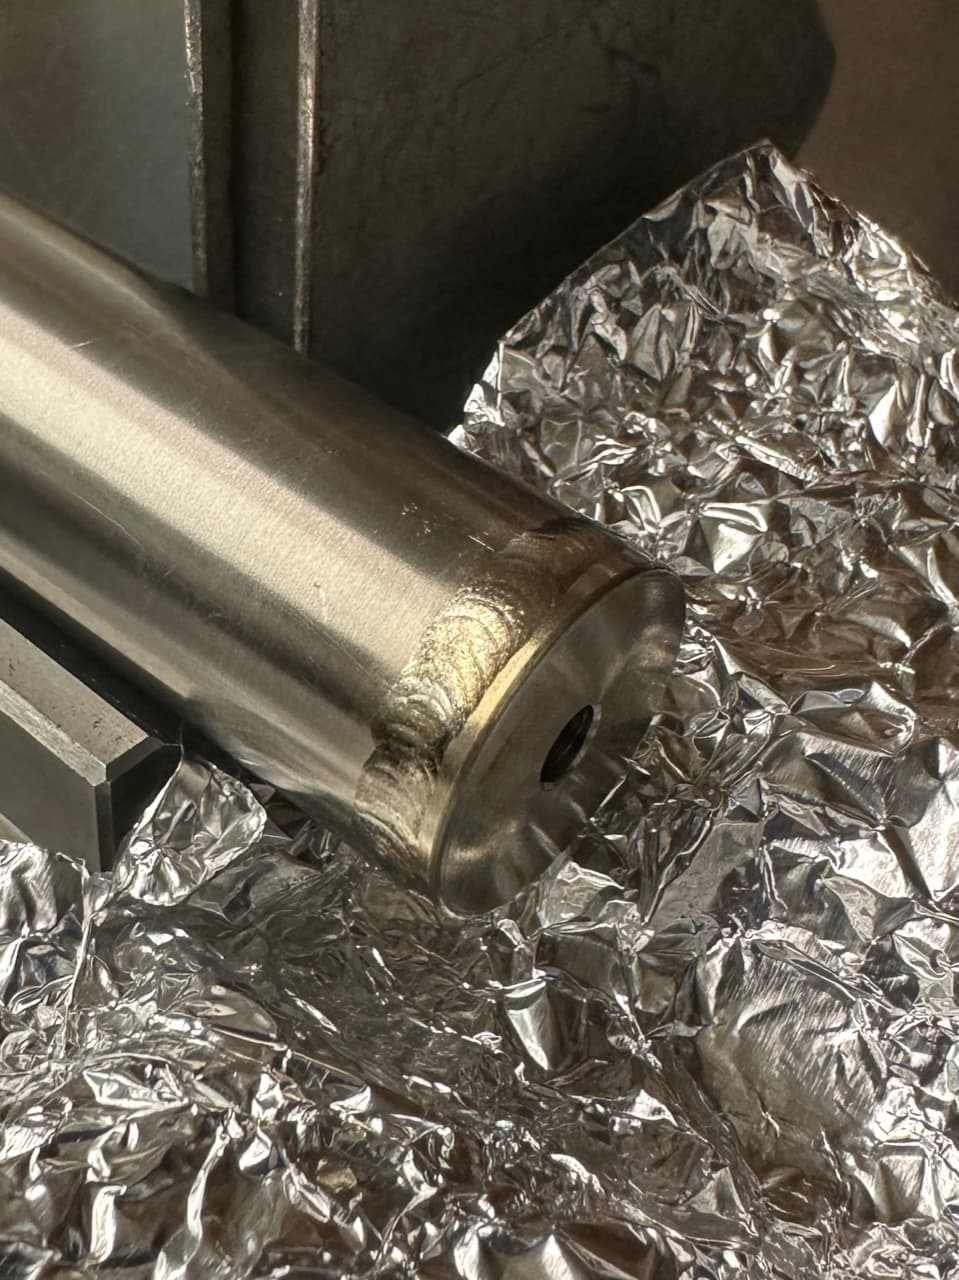
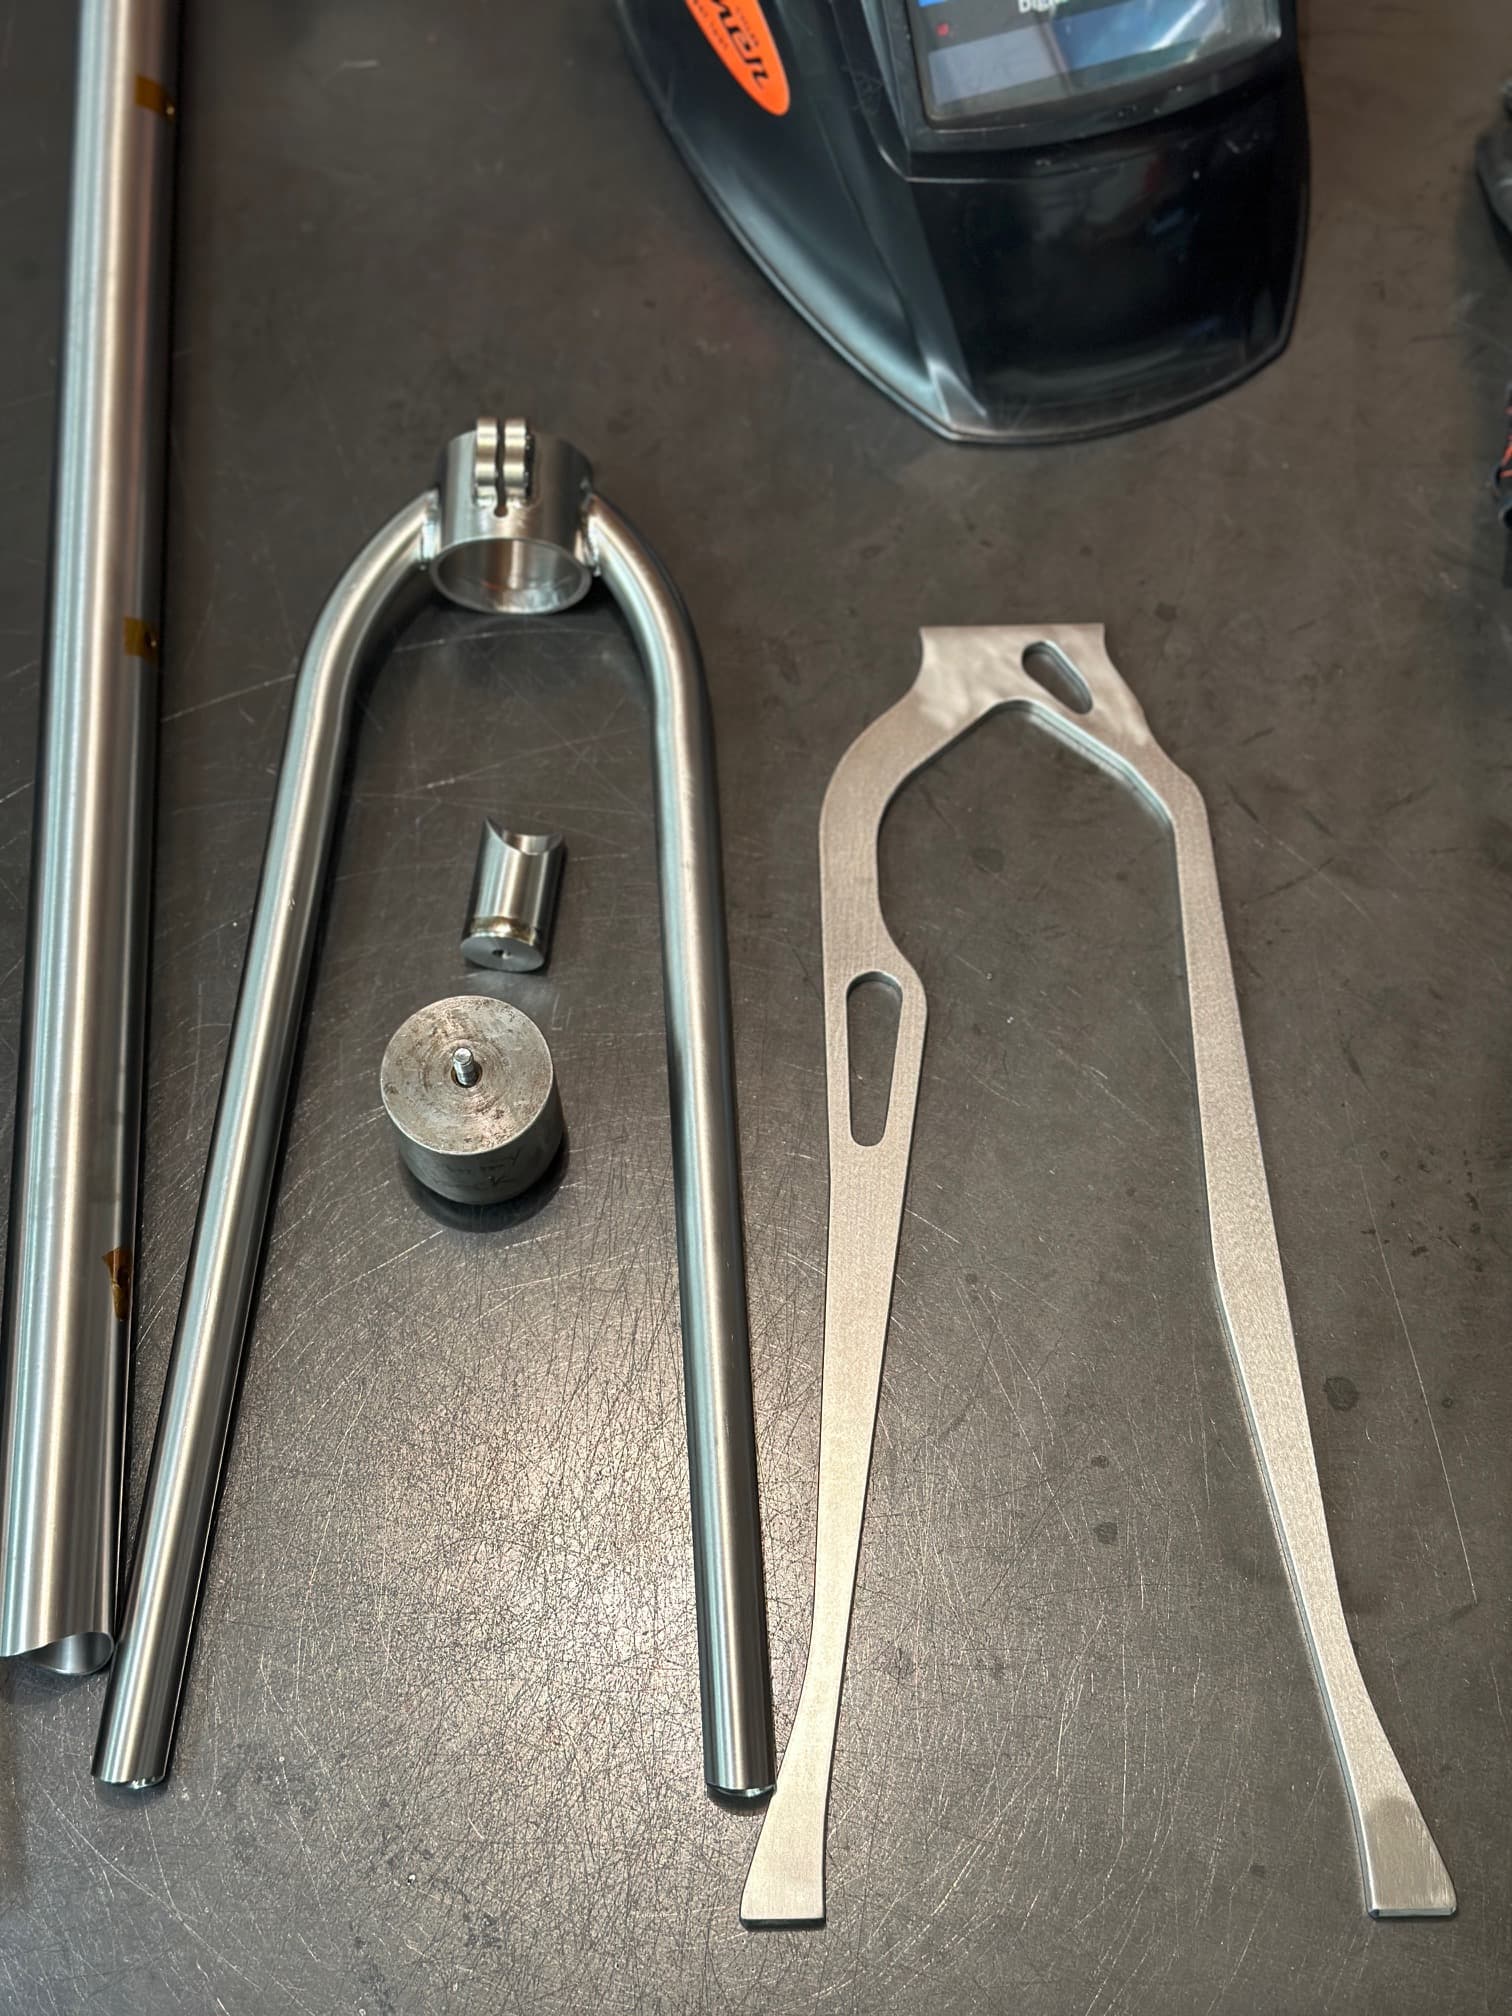
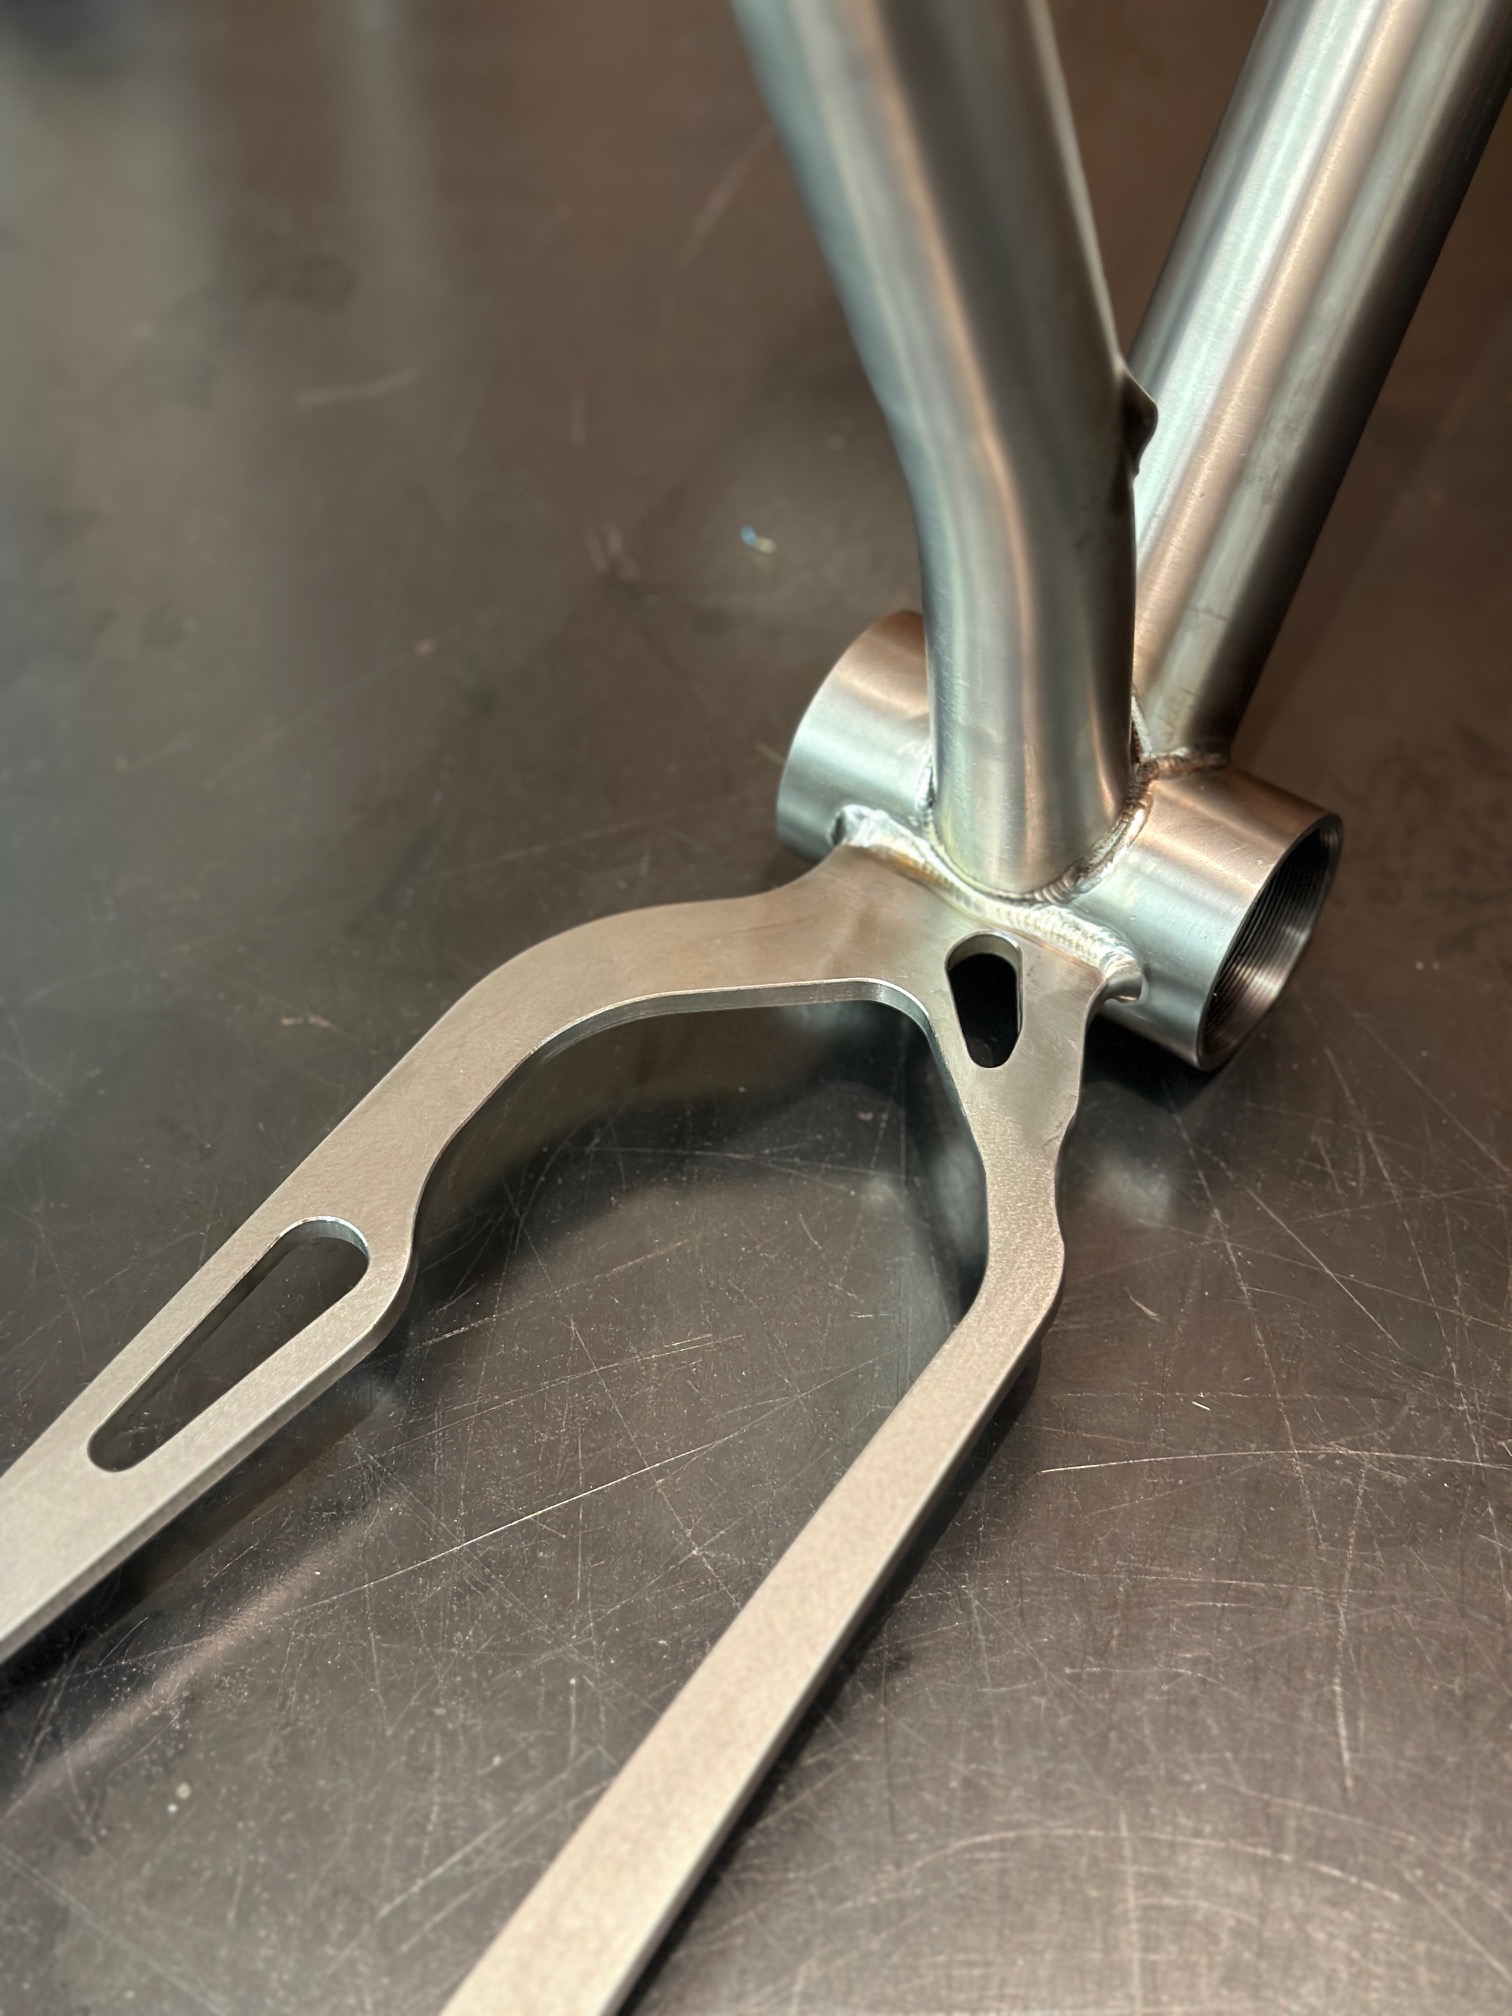
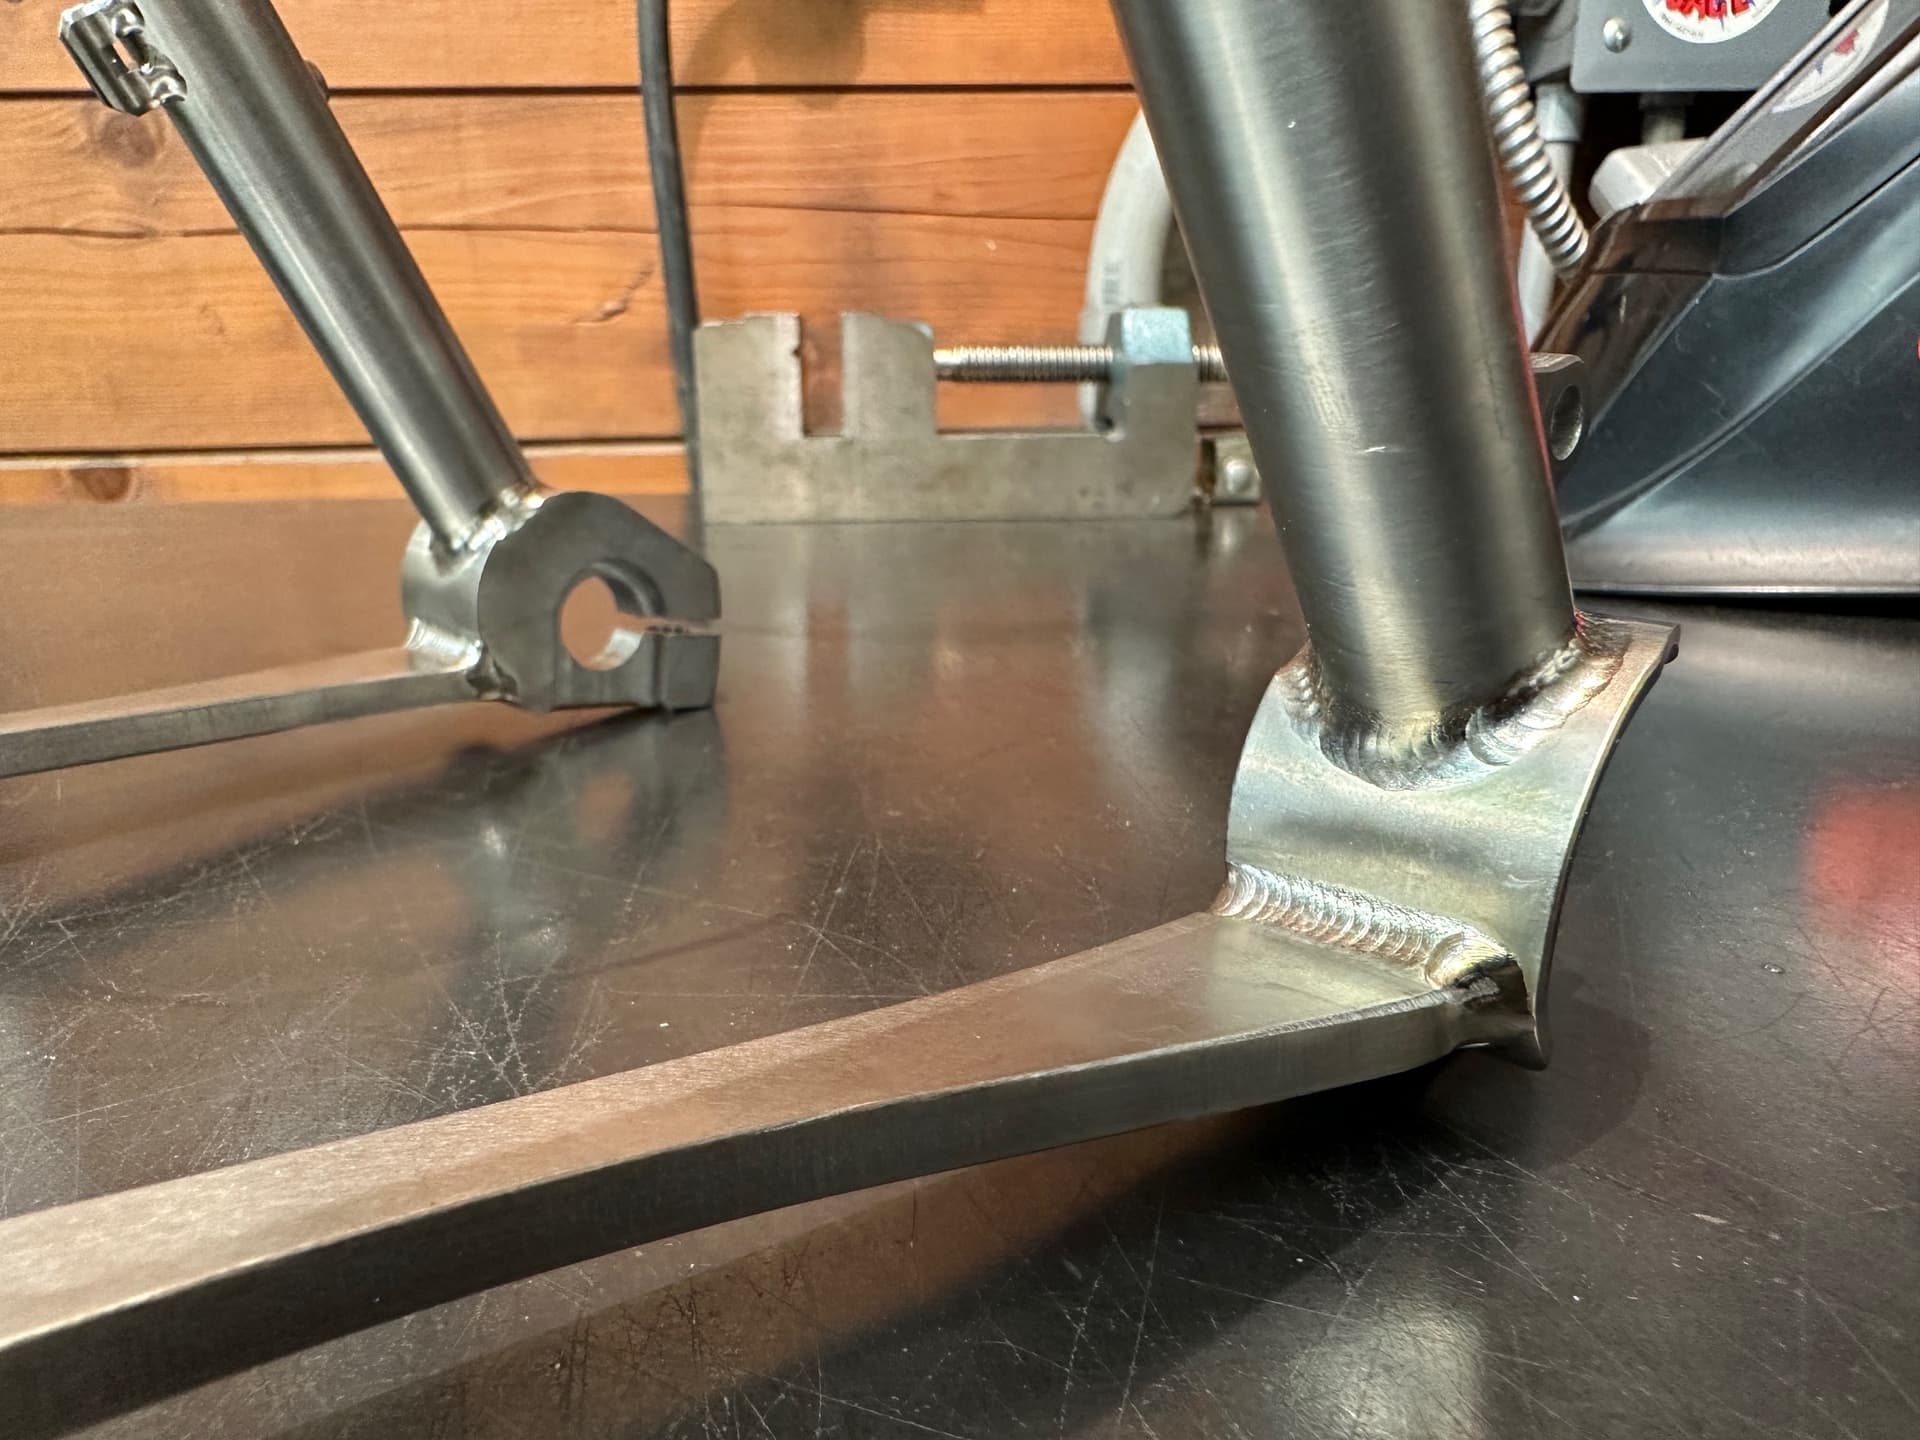
He received a patent for the plate CS and suspension design using his CDE shock (a two stage elastomer damper) in 2002. Compared to building a full suspension frame this is very simple, though in Titanium there are several considerations. The first was needing at least three passes on the chainstay plate at the BB and dropouts since it’s so thick (0.25") and the material needs no air gap between those interfaces. The initial fusion/root pass needs to close any air gap, and the two following passes need to bridge more material with sufficient penetration. He sent me a few test pieces to practice on which helped a lot with dialing in the machine settings.
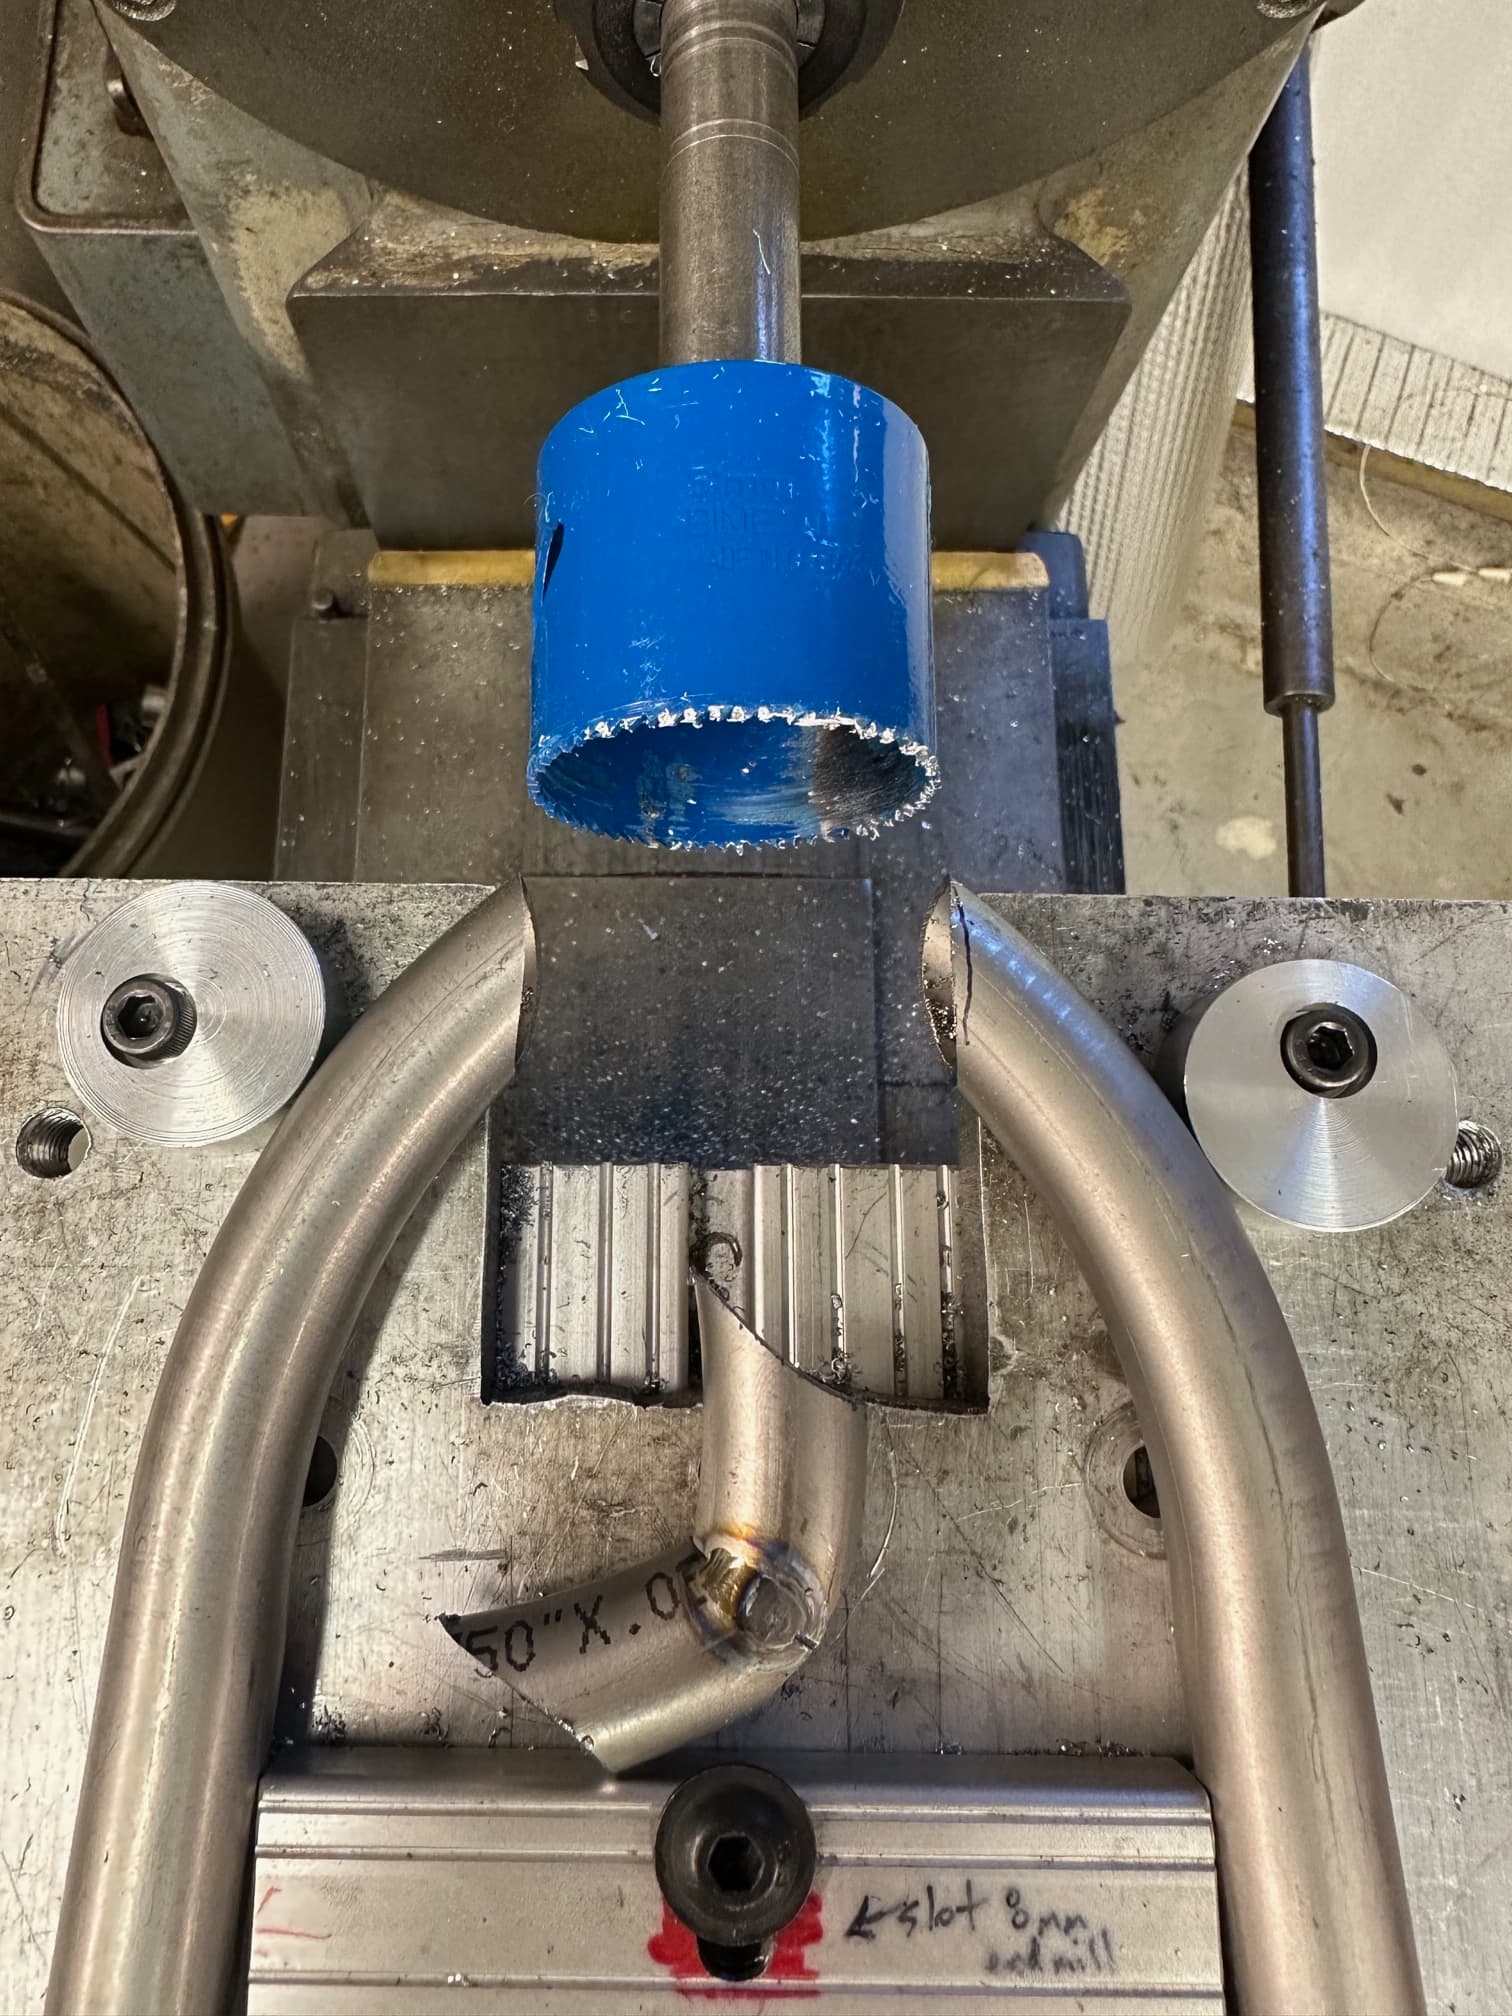
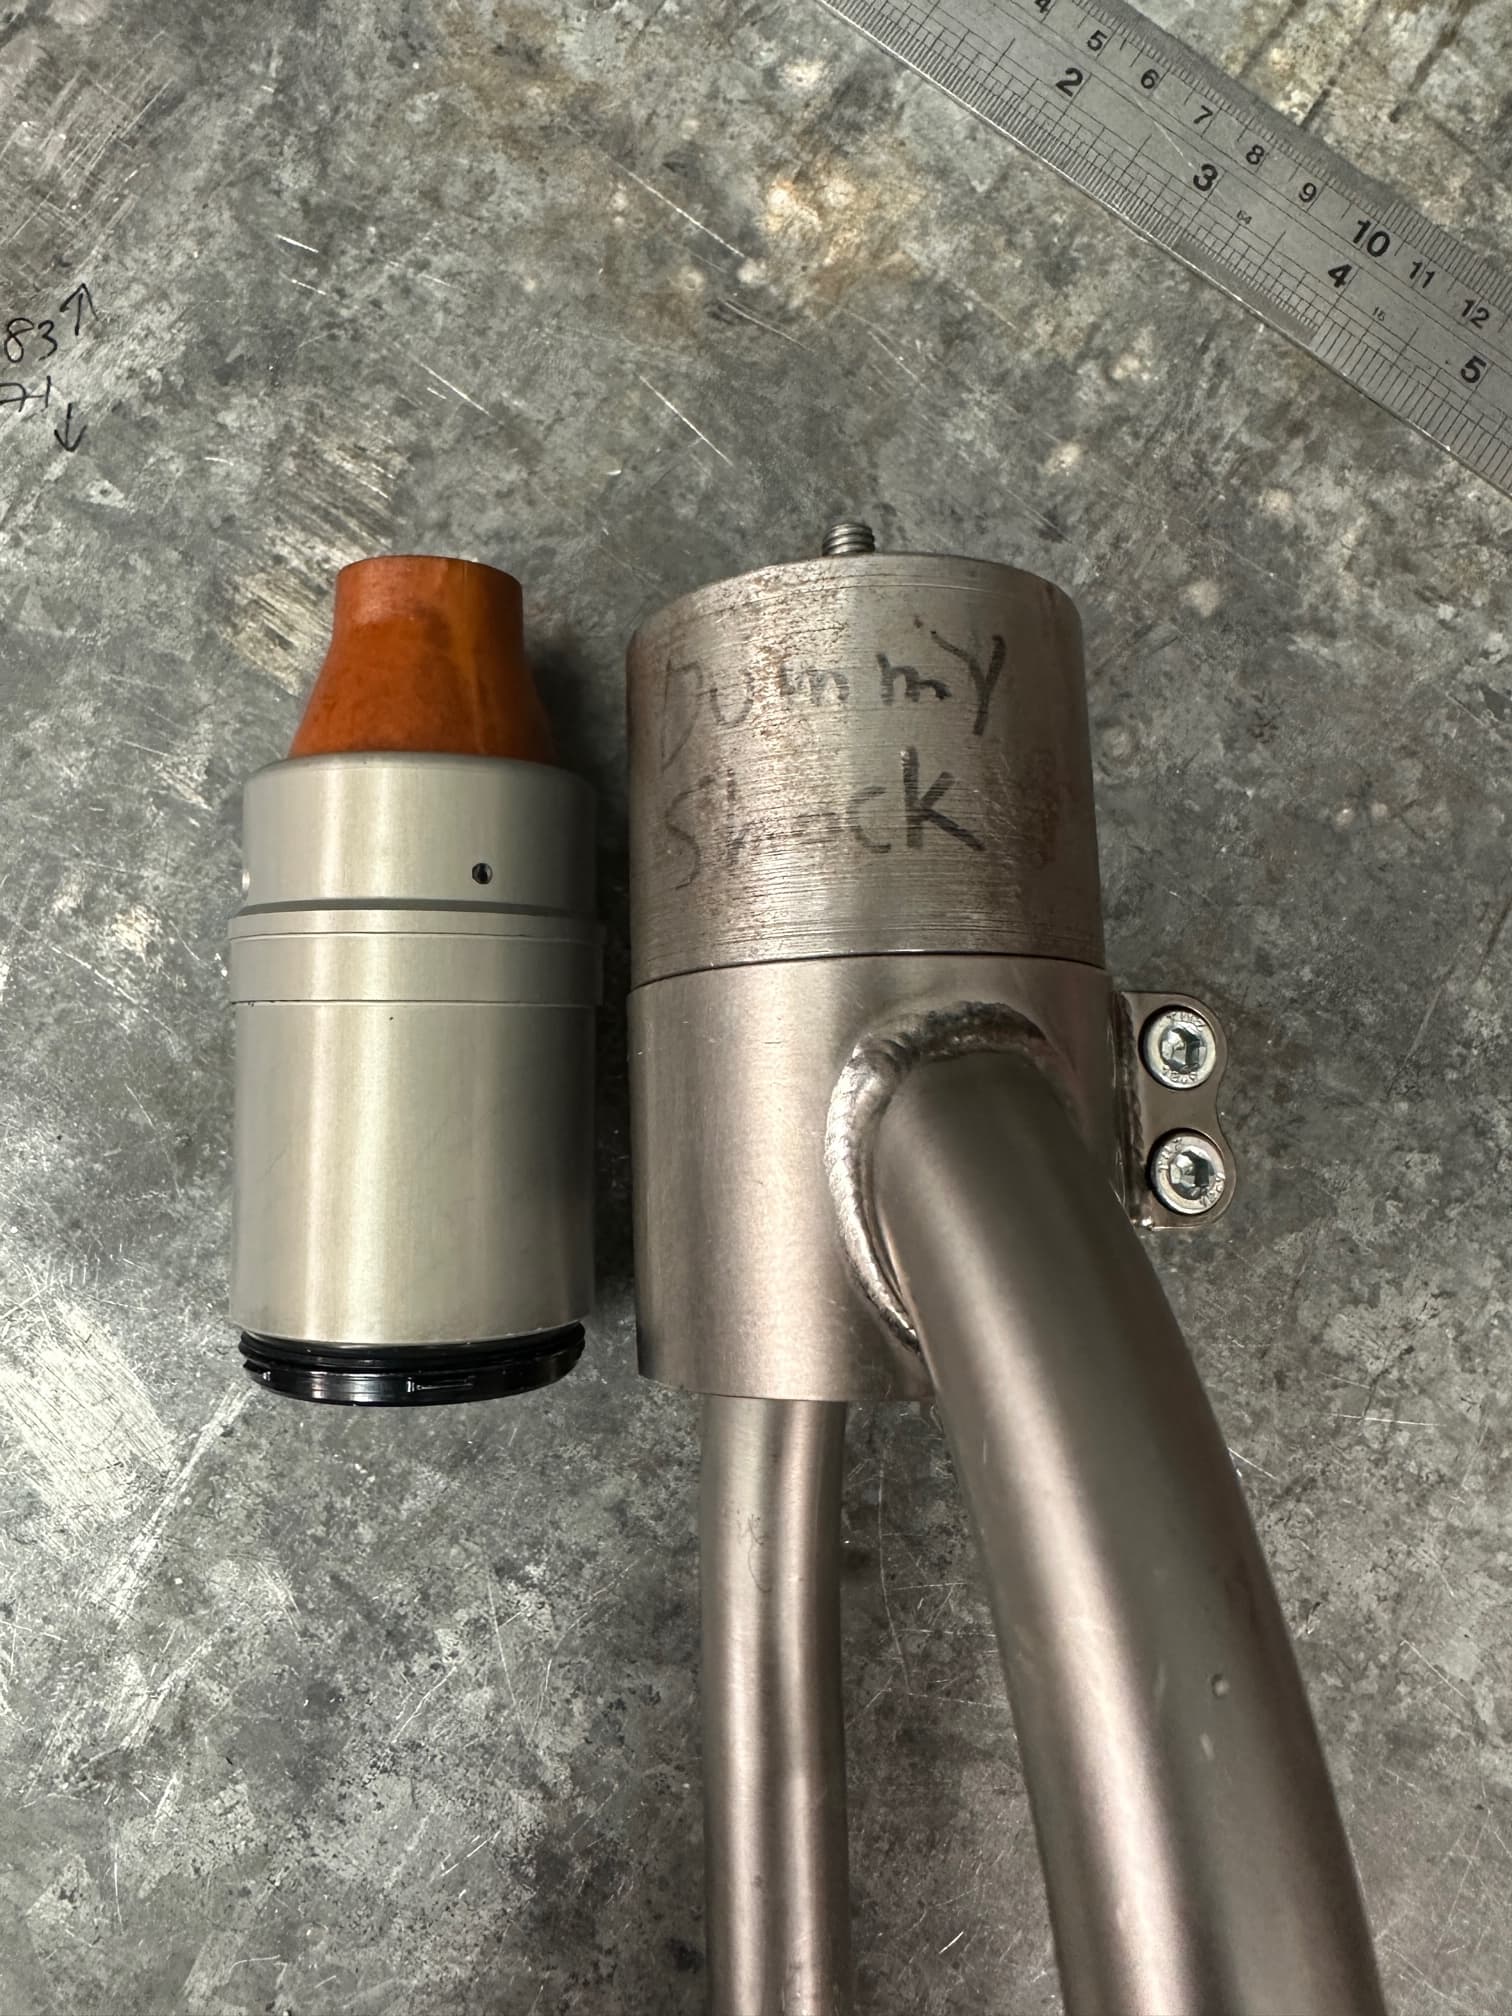
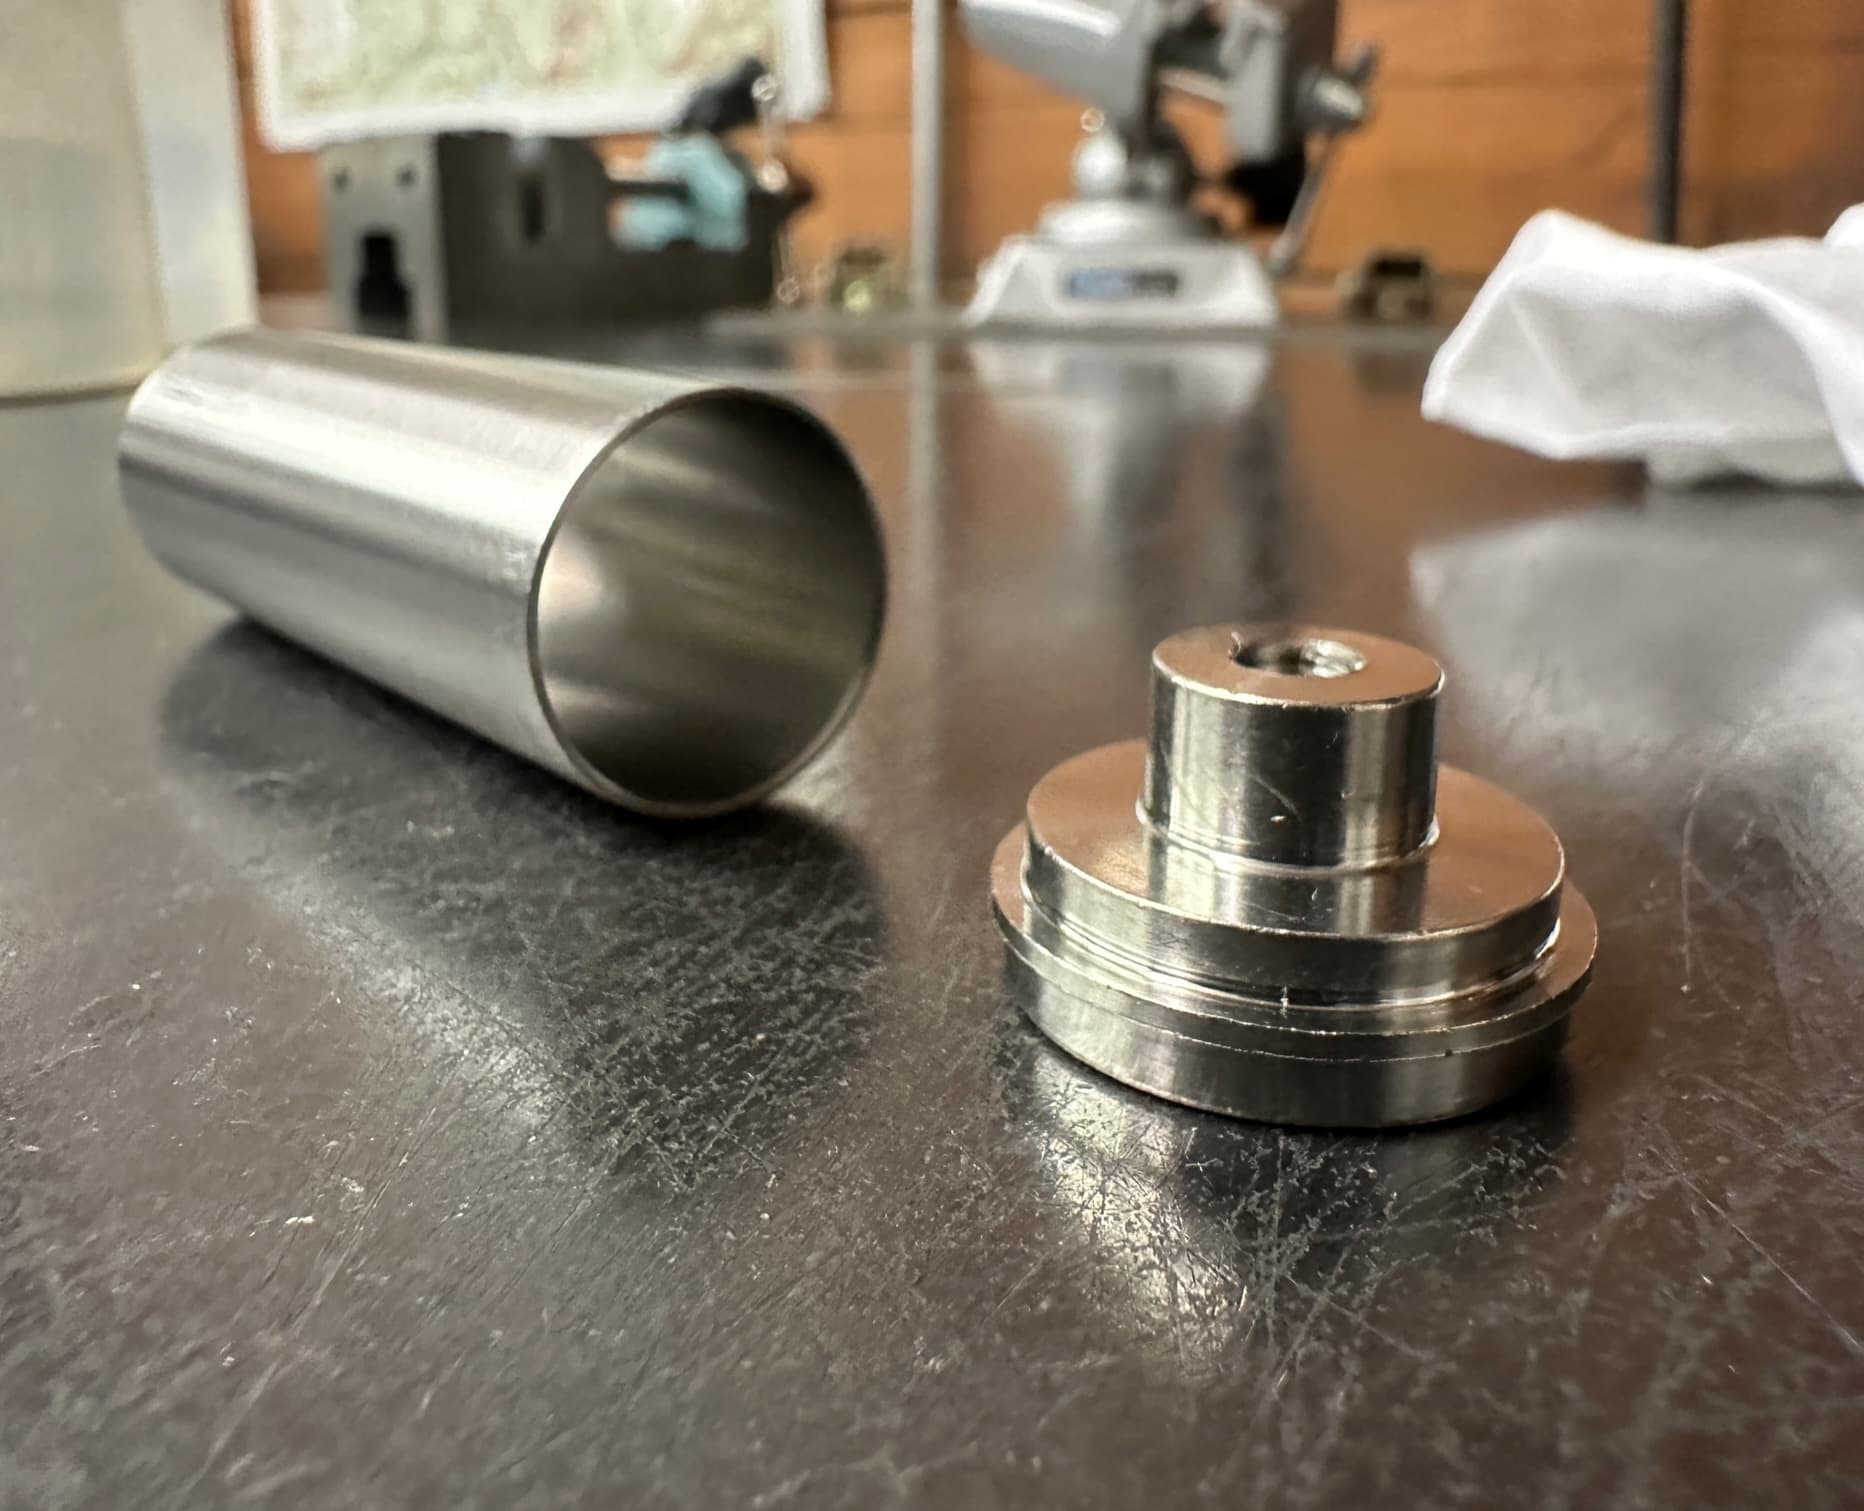
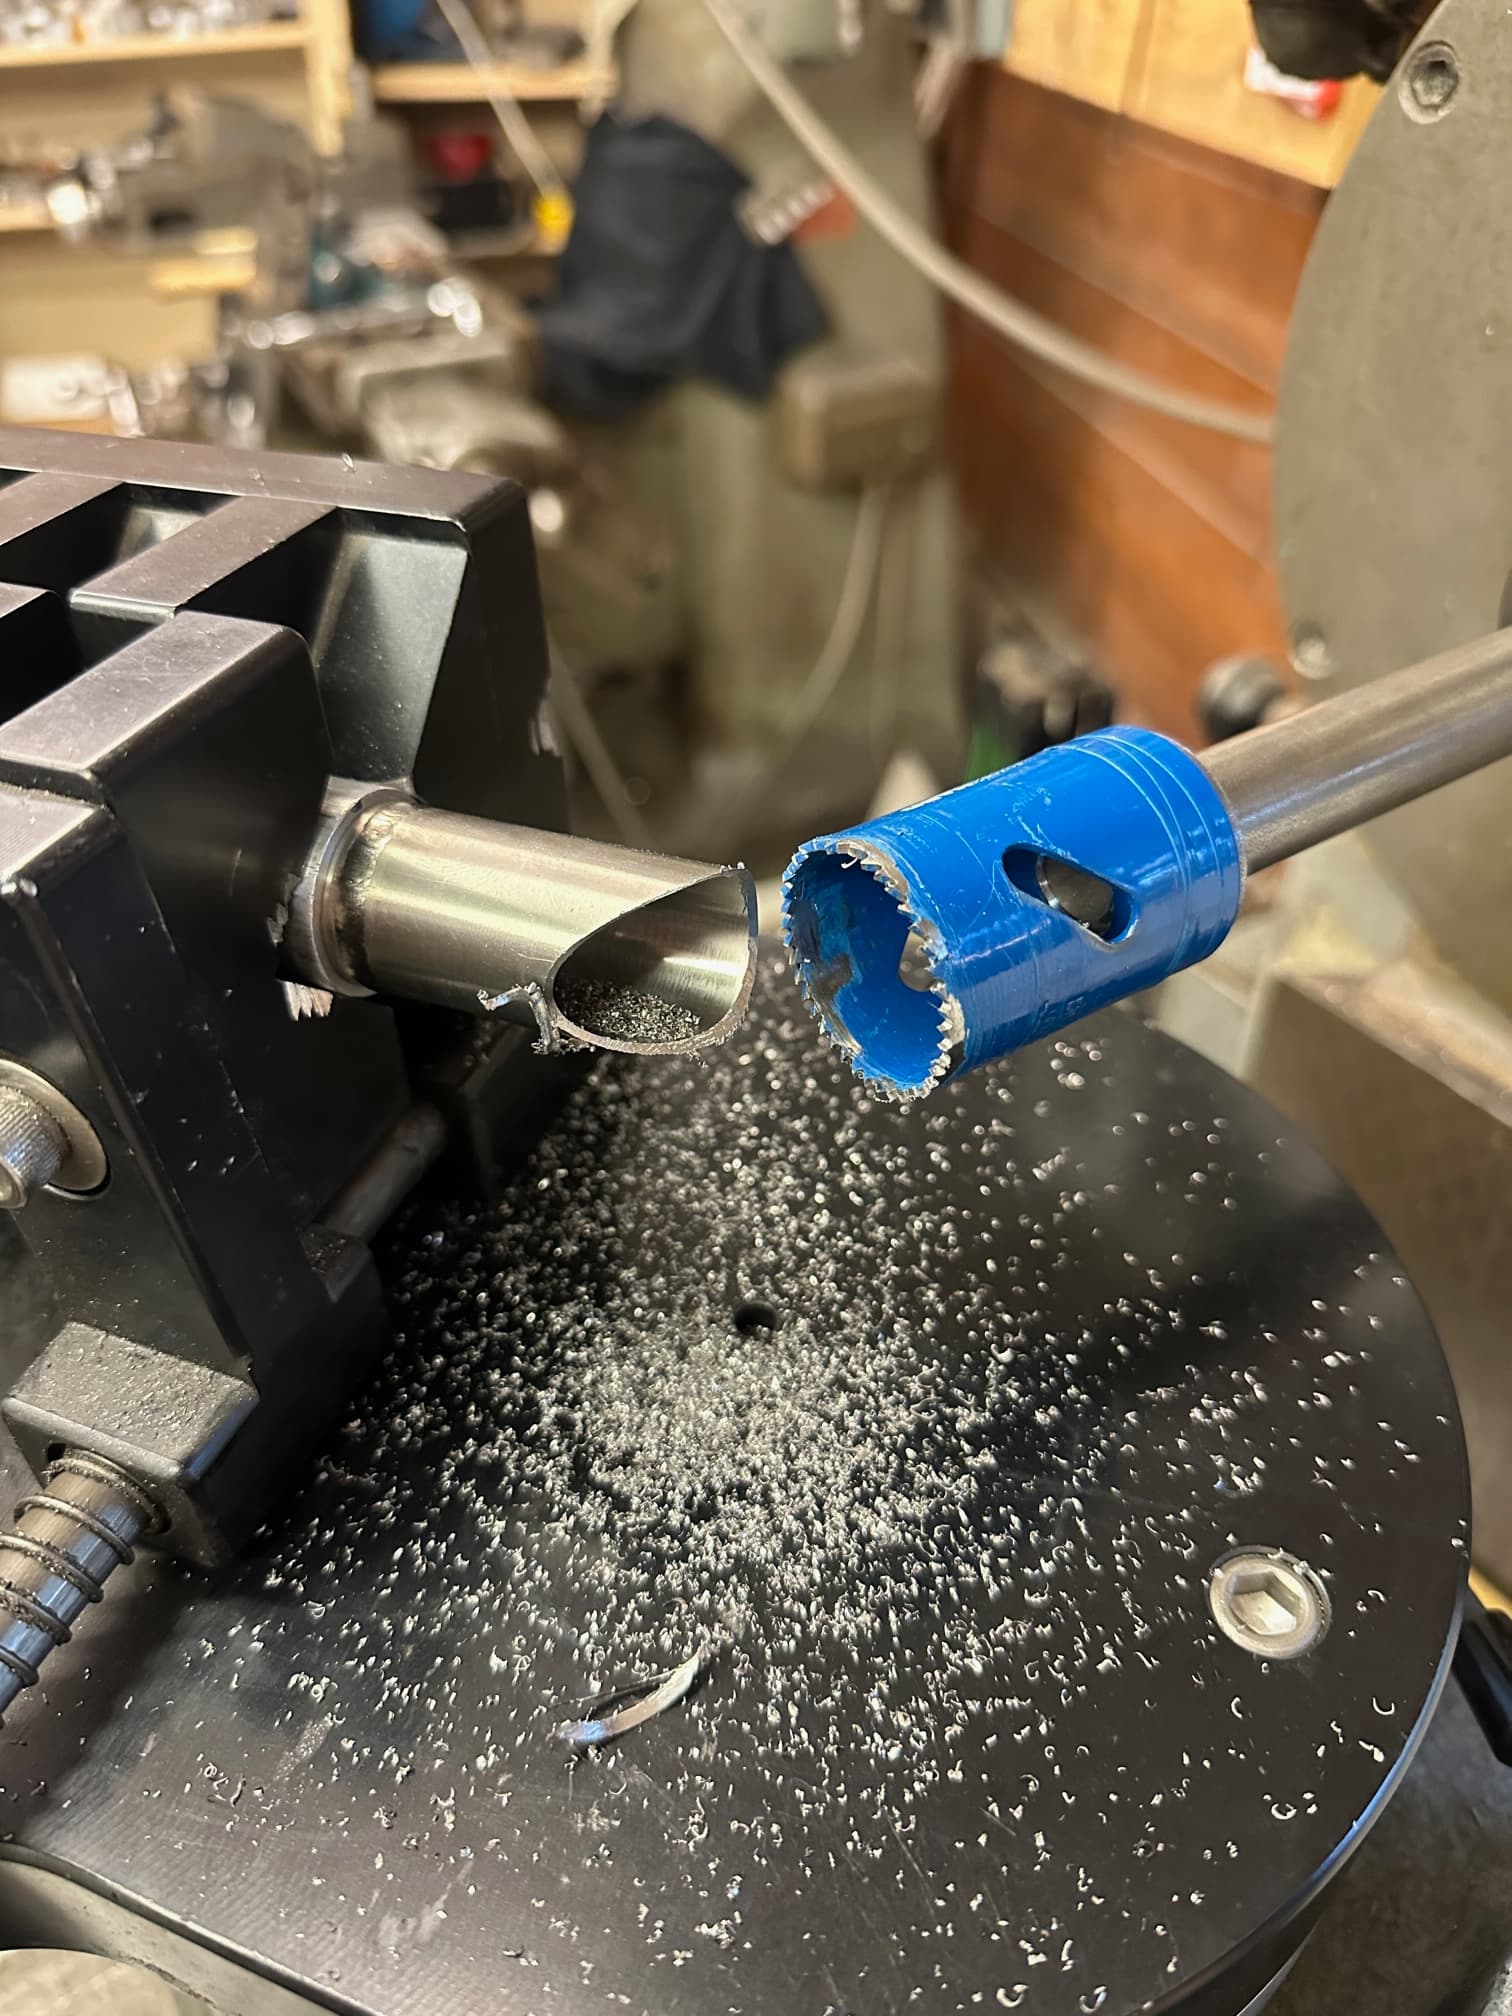
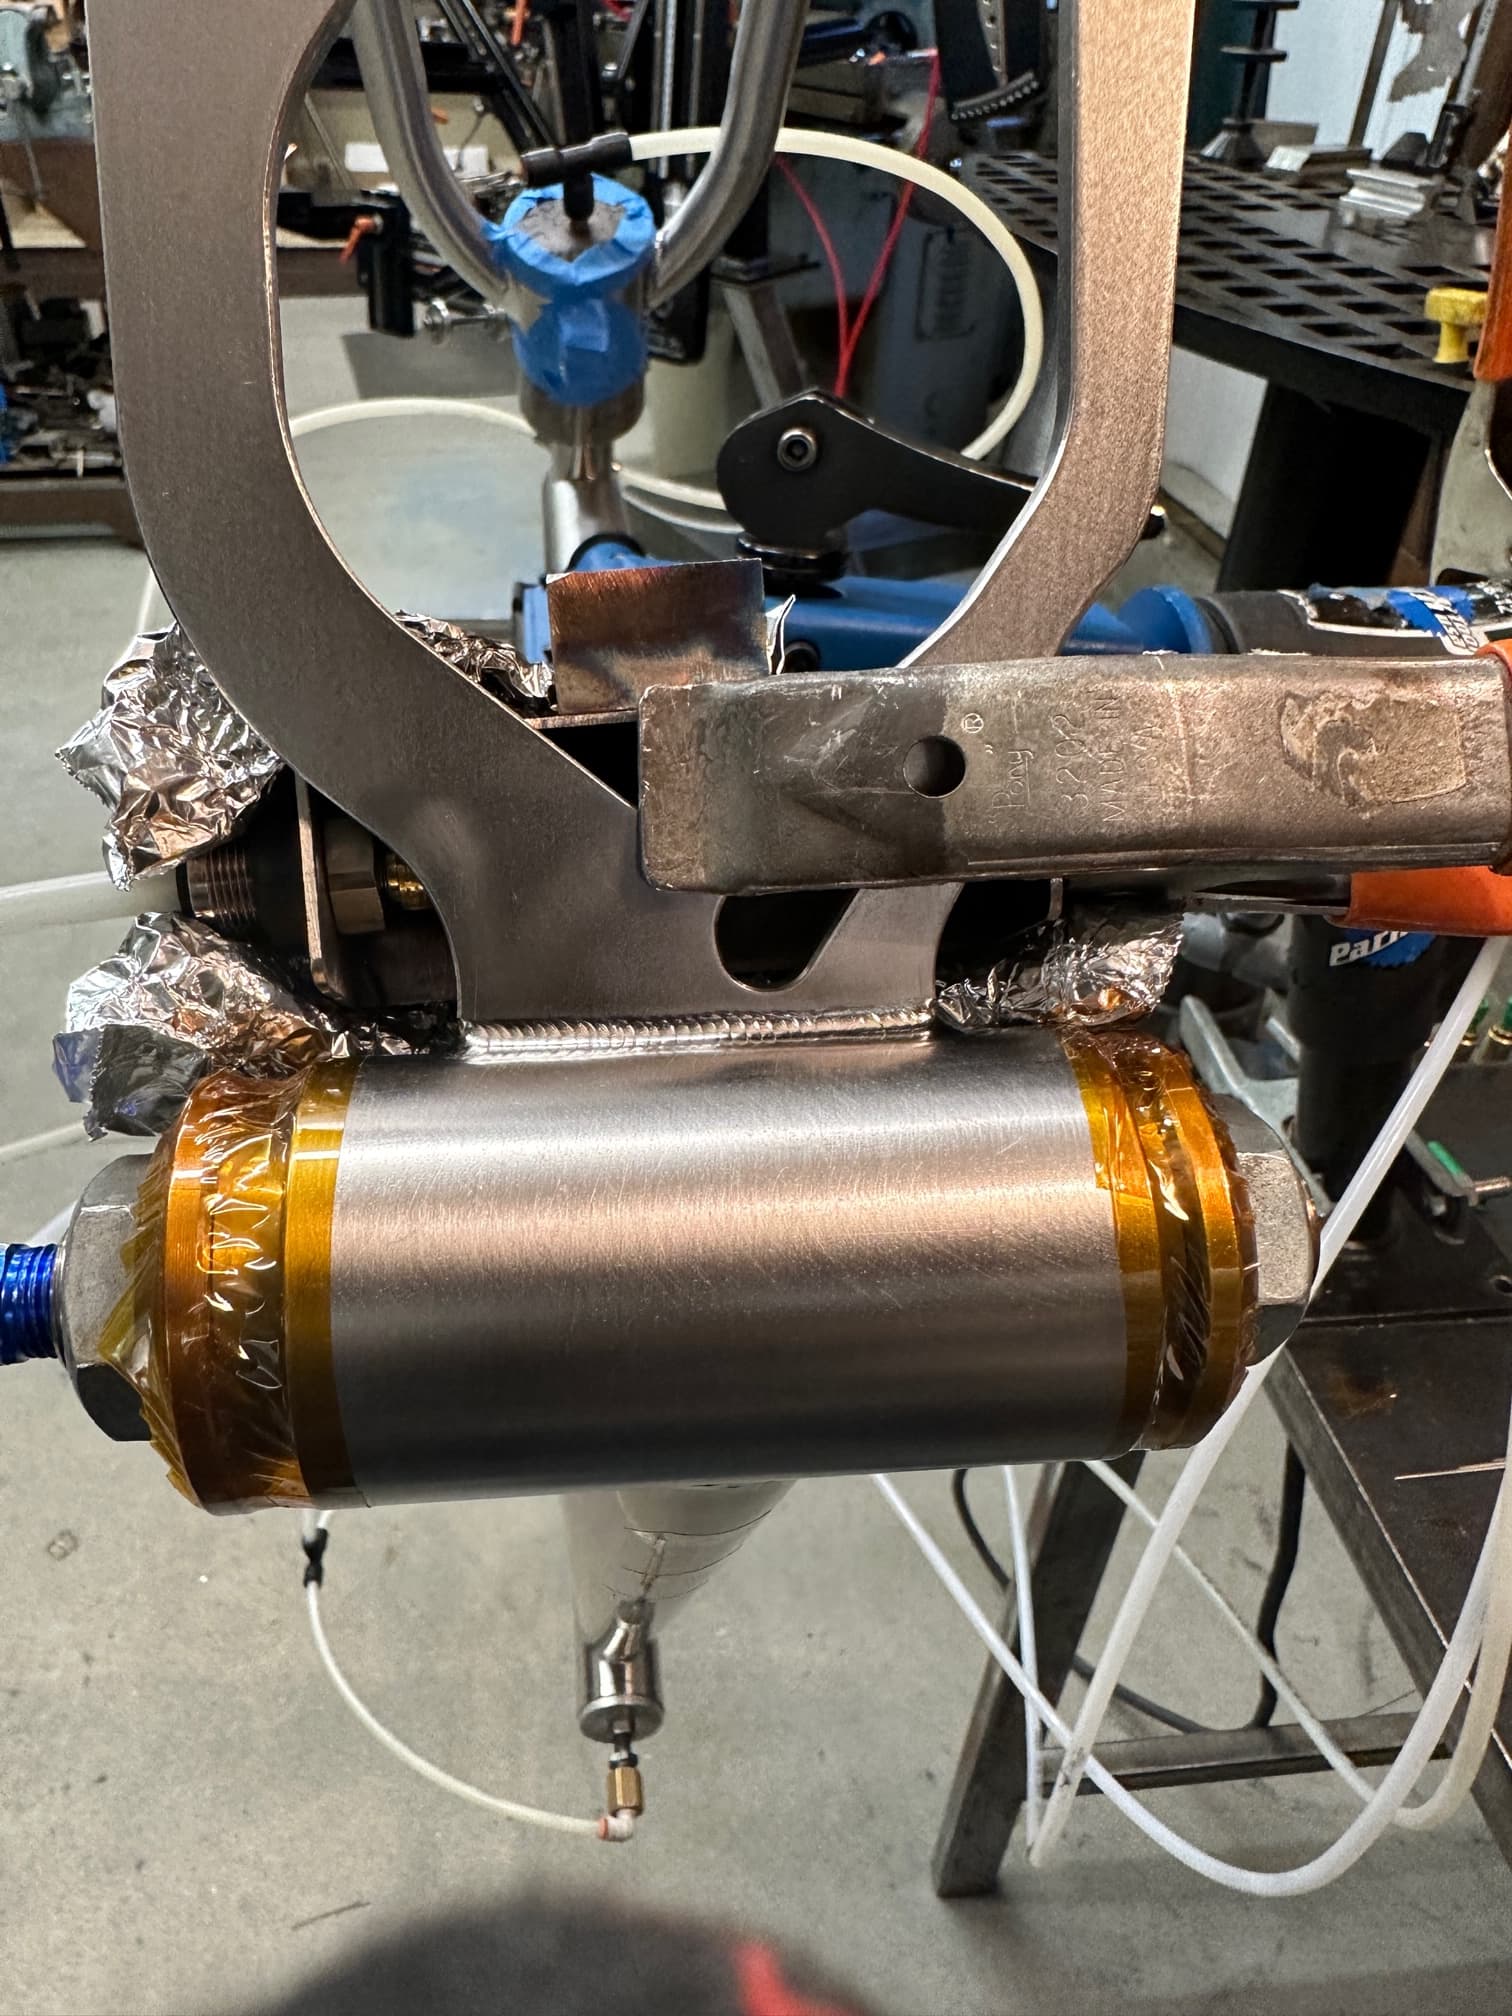
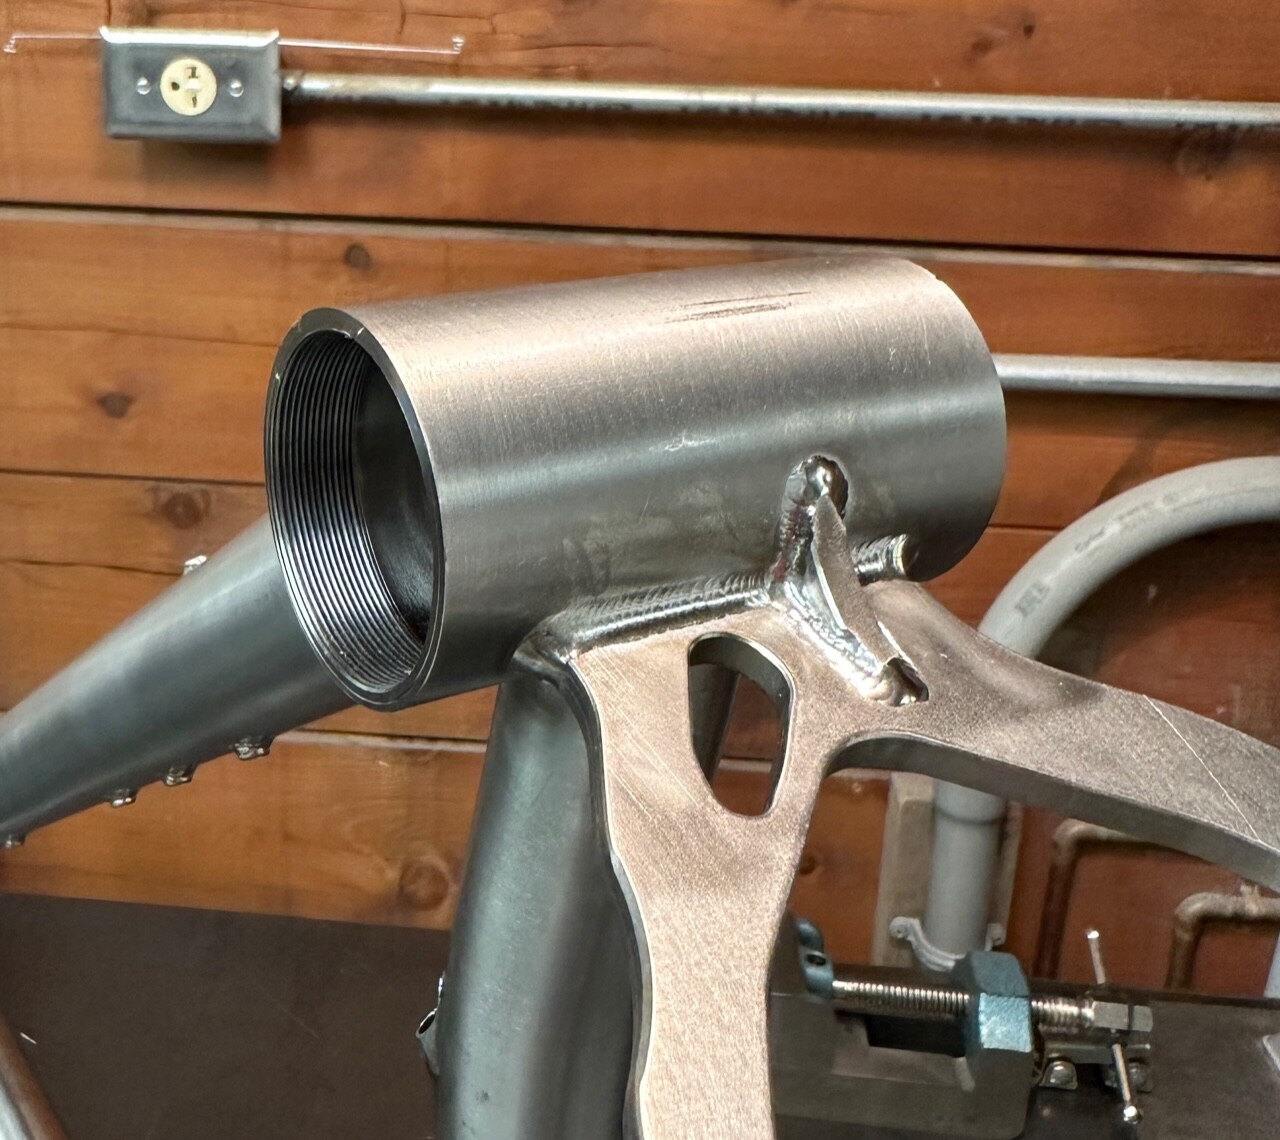
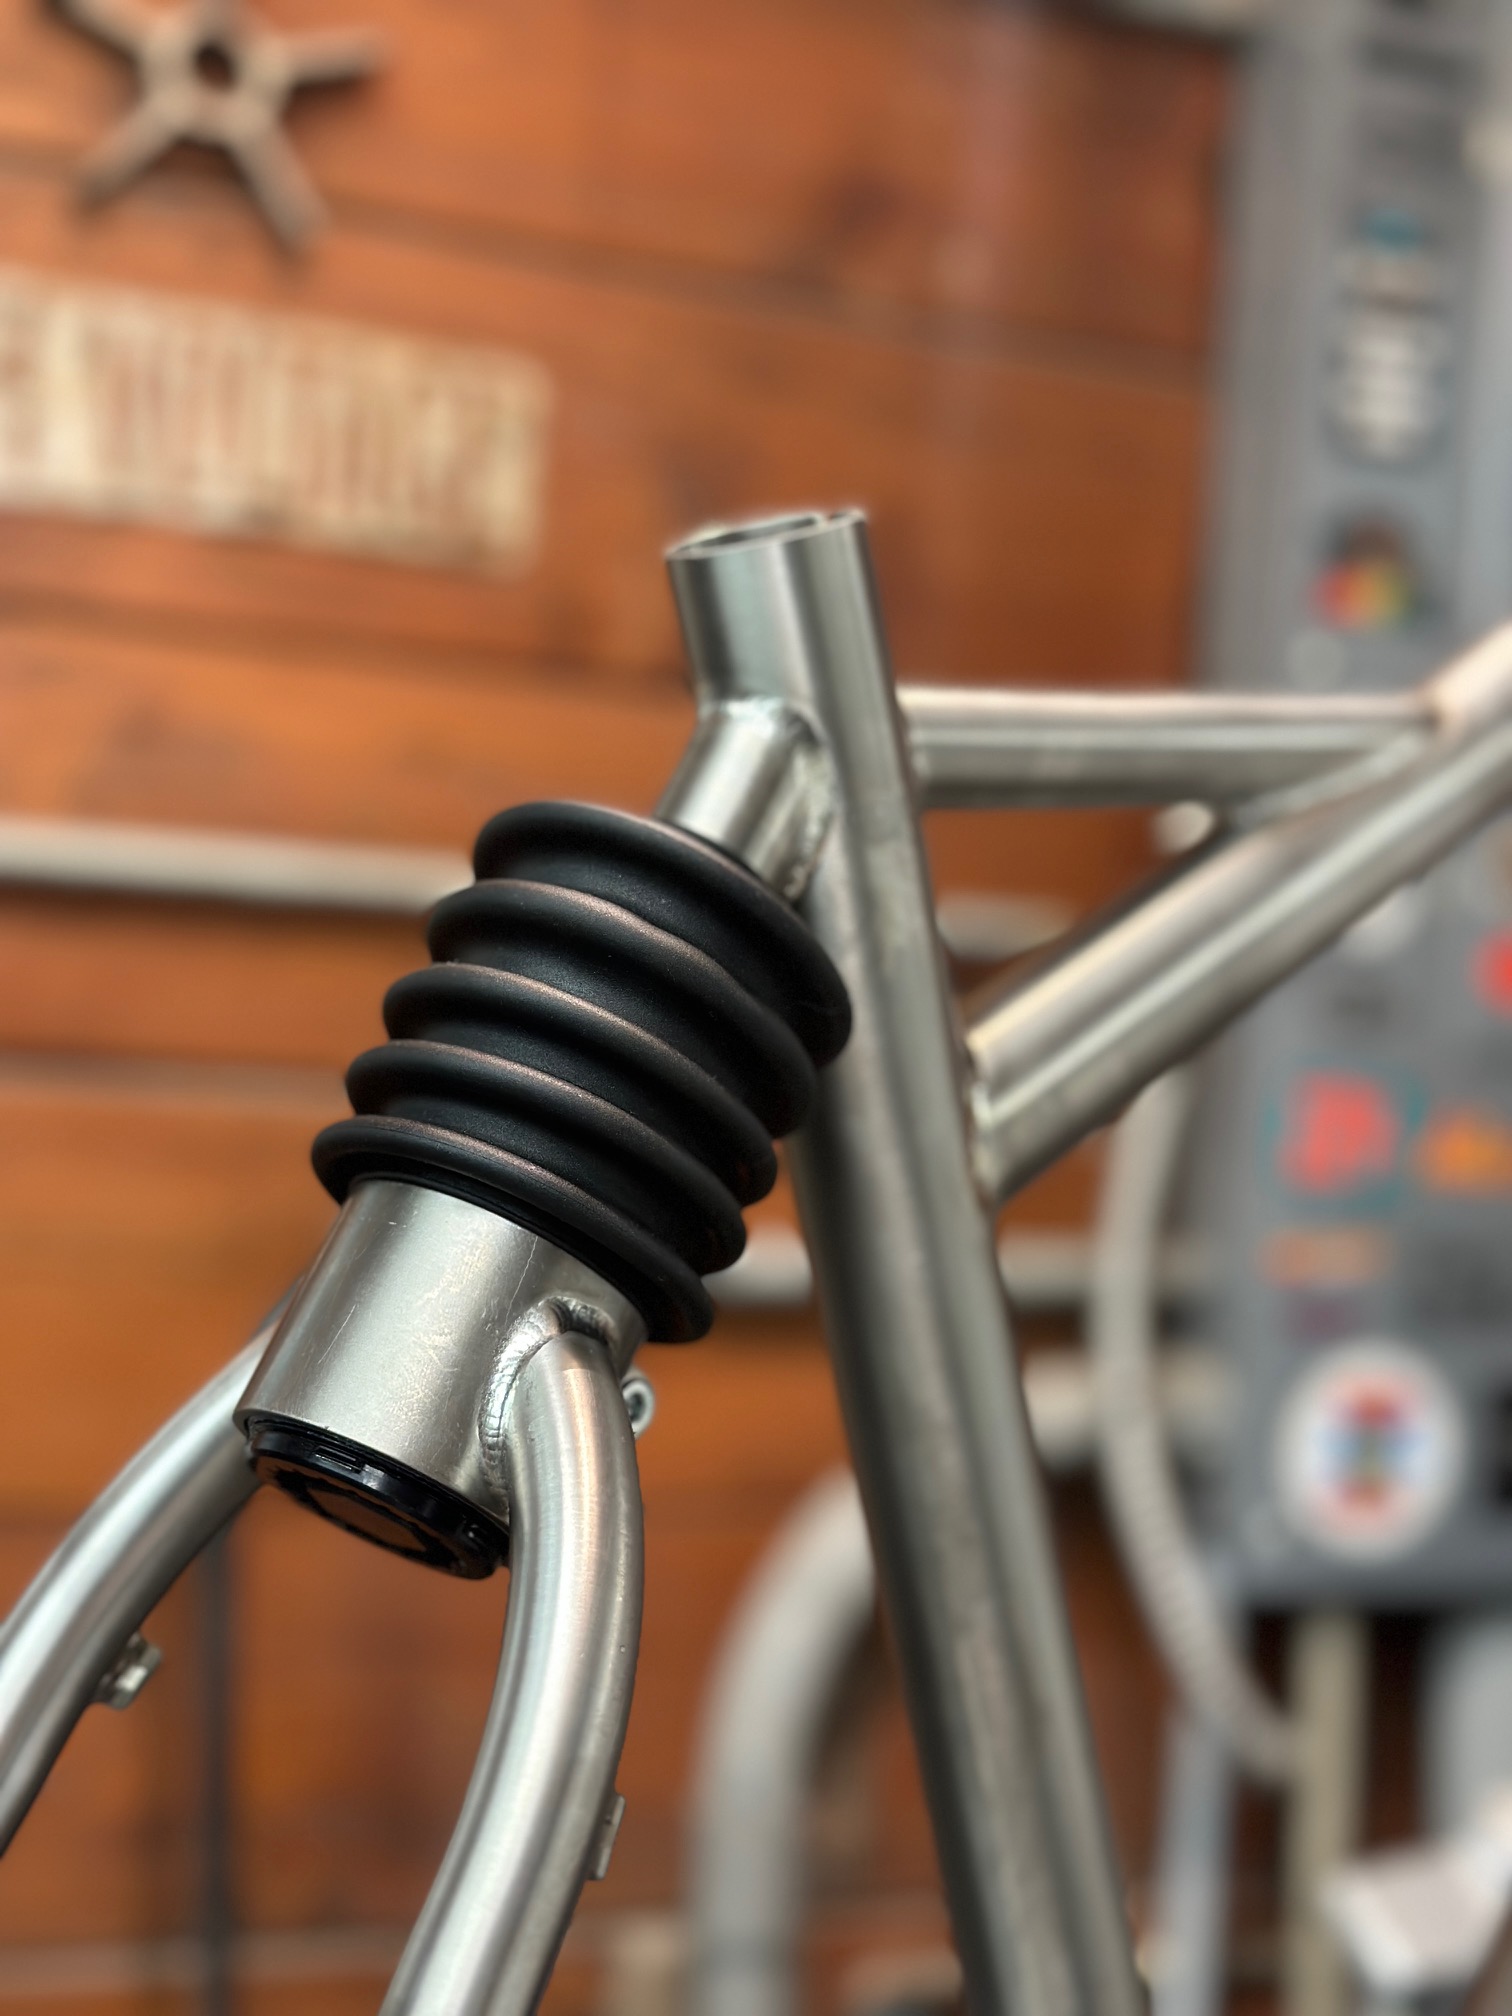
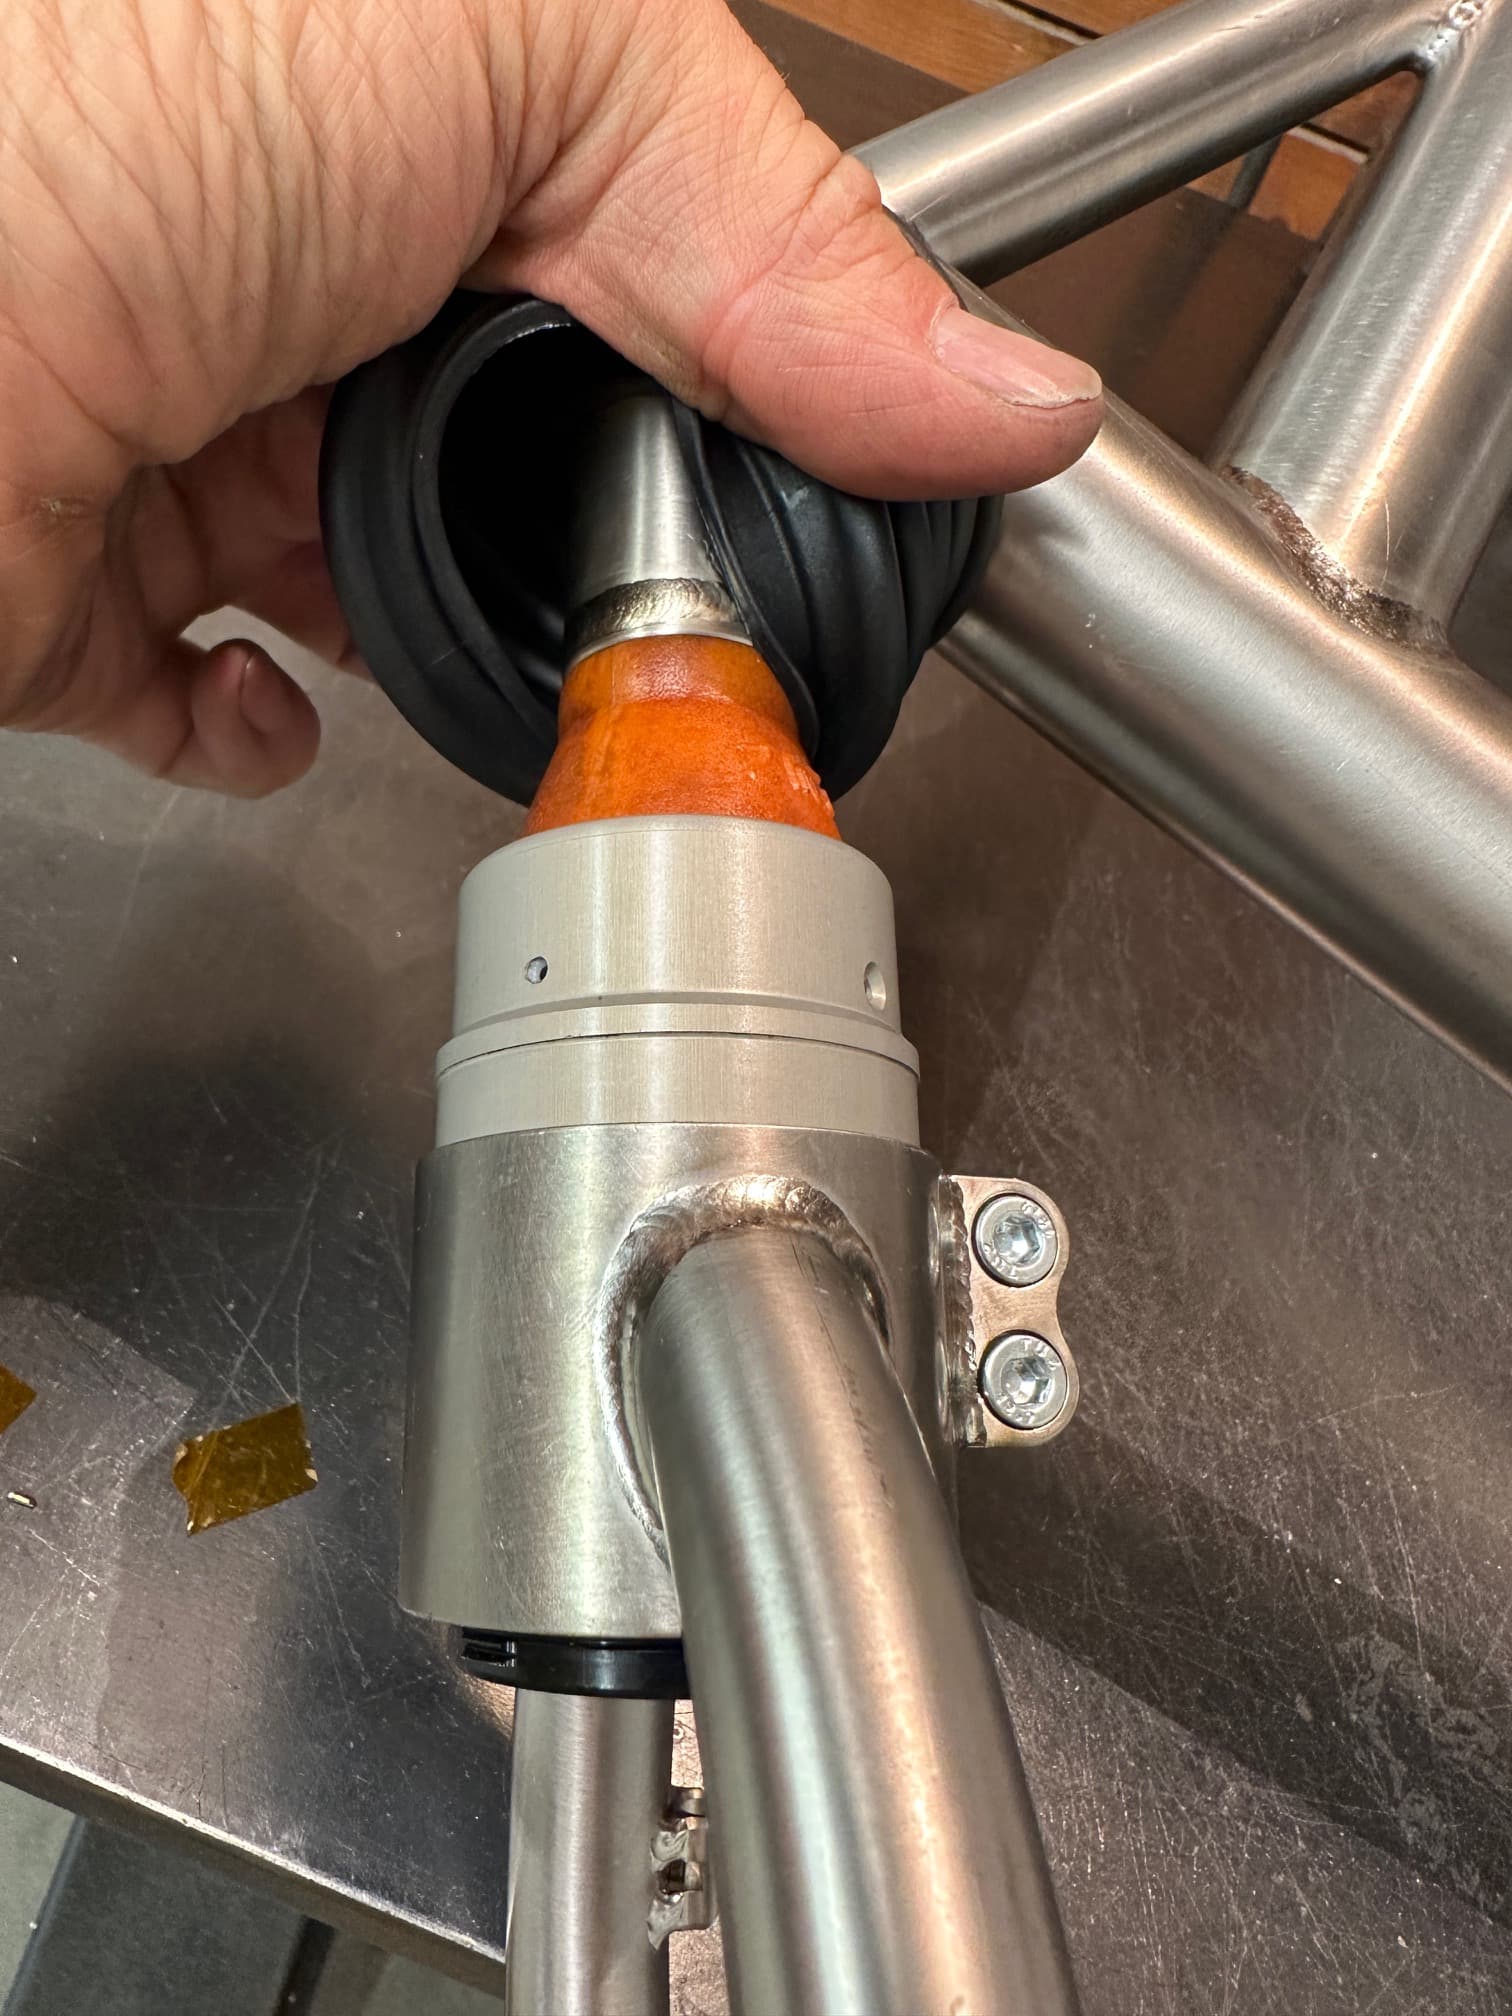
The next step was adapting my fixtures to make the seatstay subassembly. John sells the shock collar which is 2" OD and internally relieved for the expansion of the first elastomer within as it compresses. A binder bolt has to be added and a slot, after welding the seatstays on, so the shock has a slip fit in the collar. The pics below should illustrate all this.
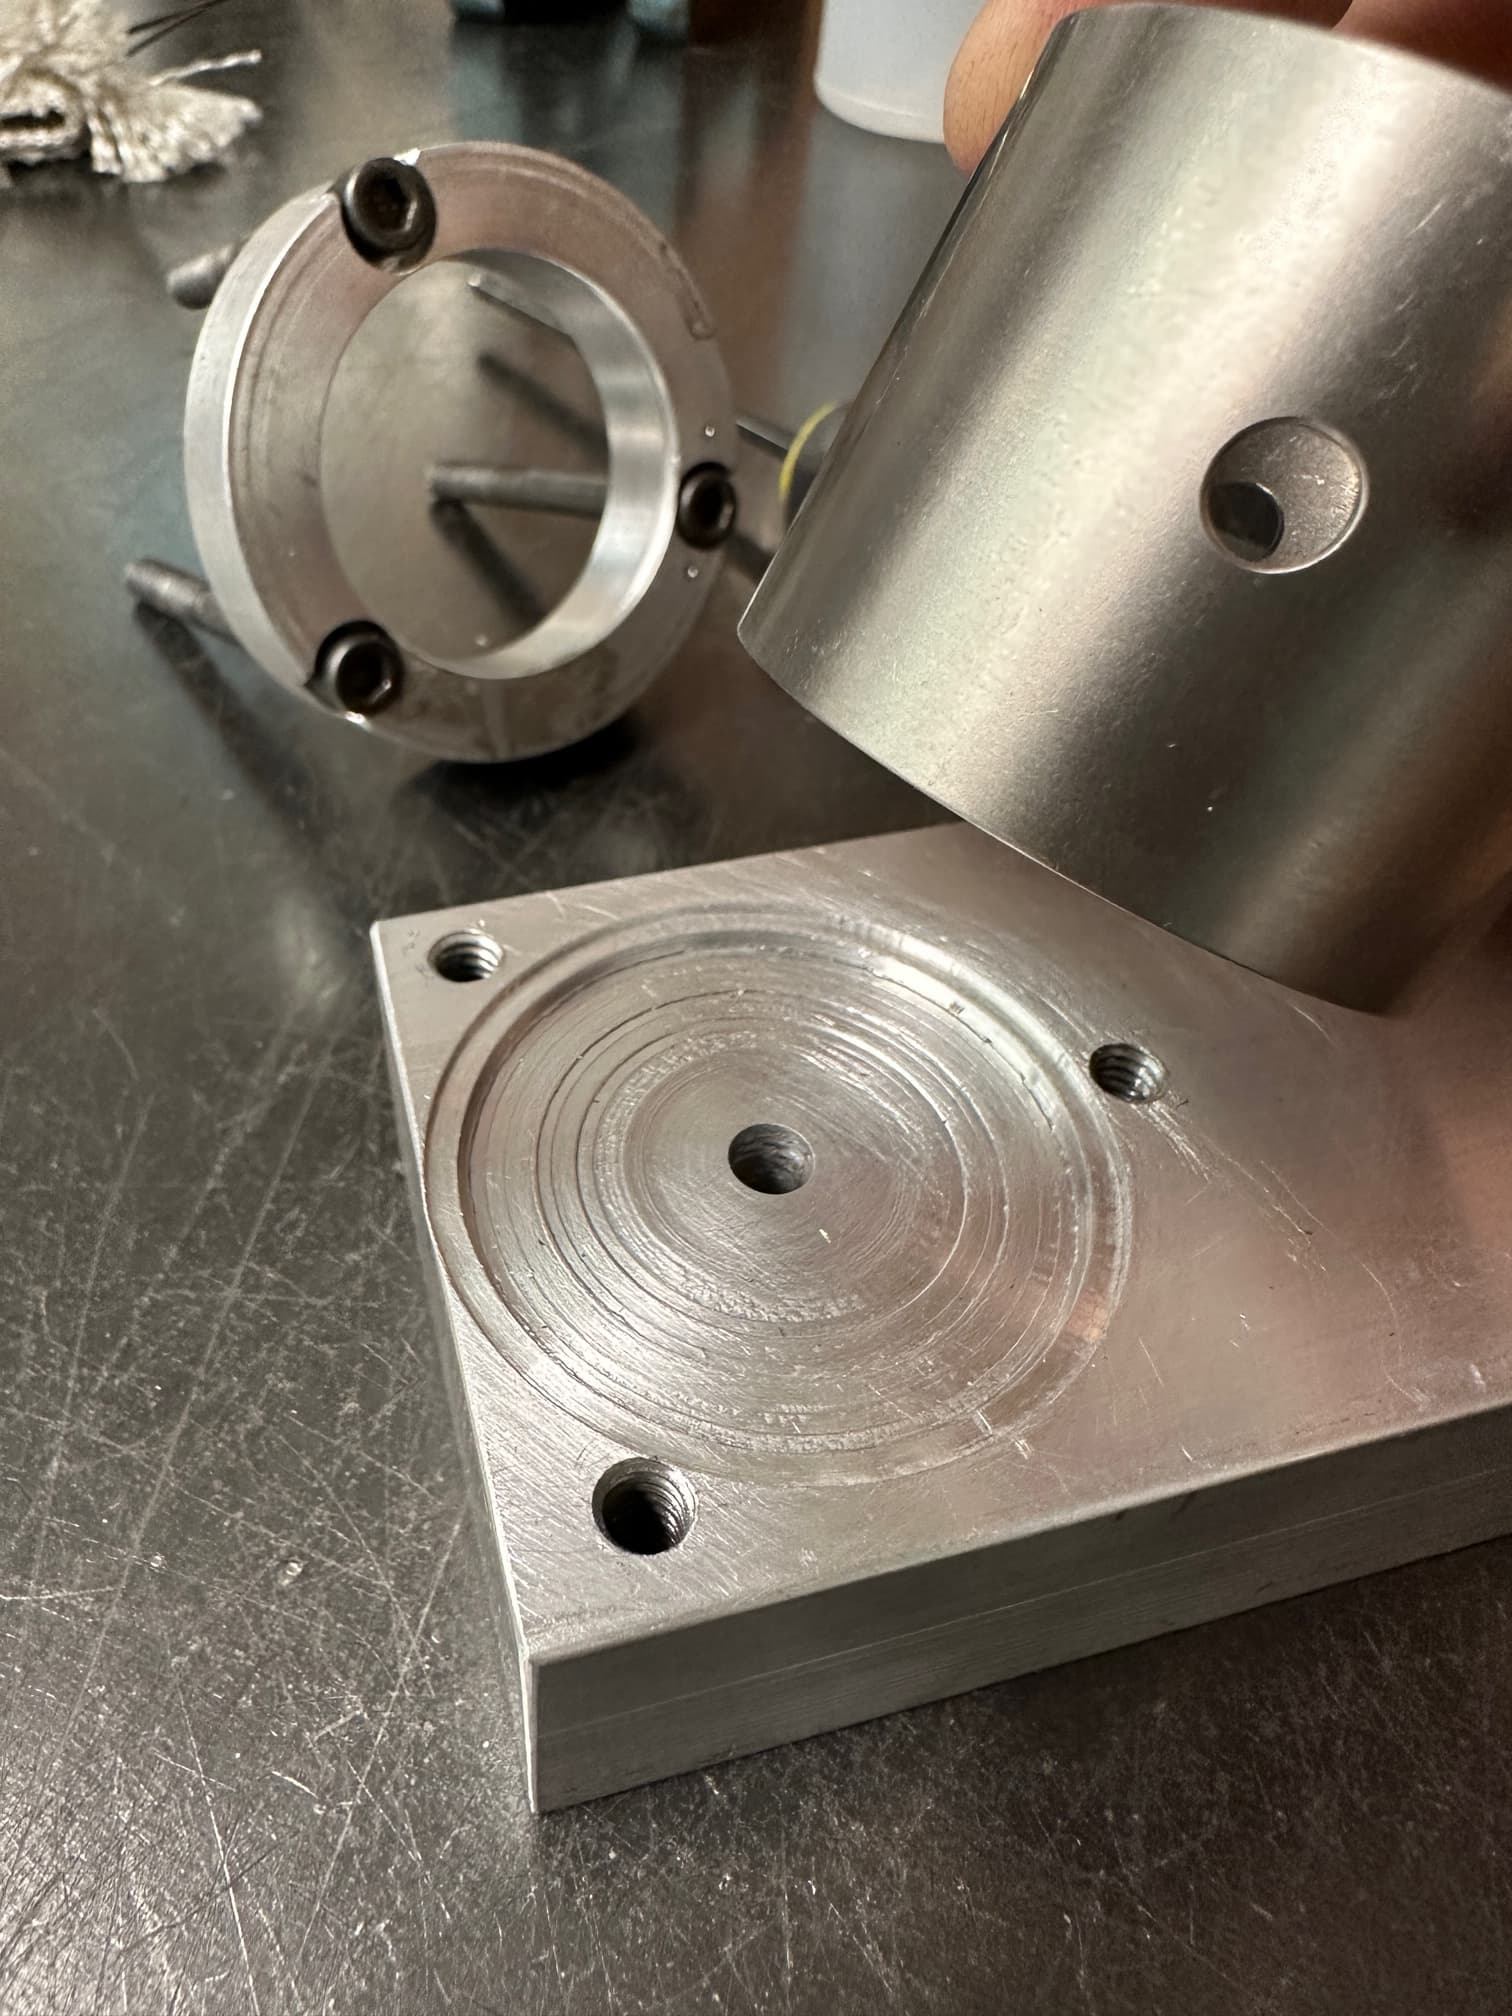
John sent me the tooling Potts had made for these builds but the box had split open when shipped and the heaviest fixture, and hardest to make, had fallen out and was lost forever. It was the fixture used to bore out the center of the shock collar which needs to be mounted on a vertical mill. The collar is secured with the seatstays off the side of the table. I made a new version of it based on the photo i had of the one Steve made.
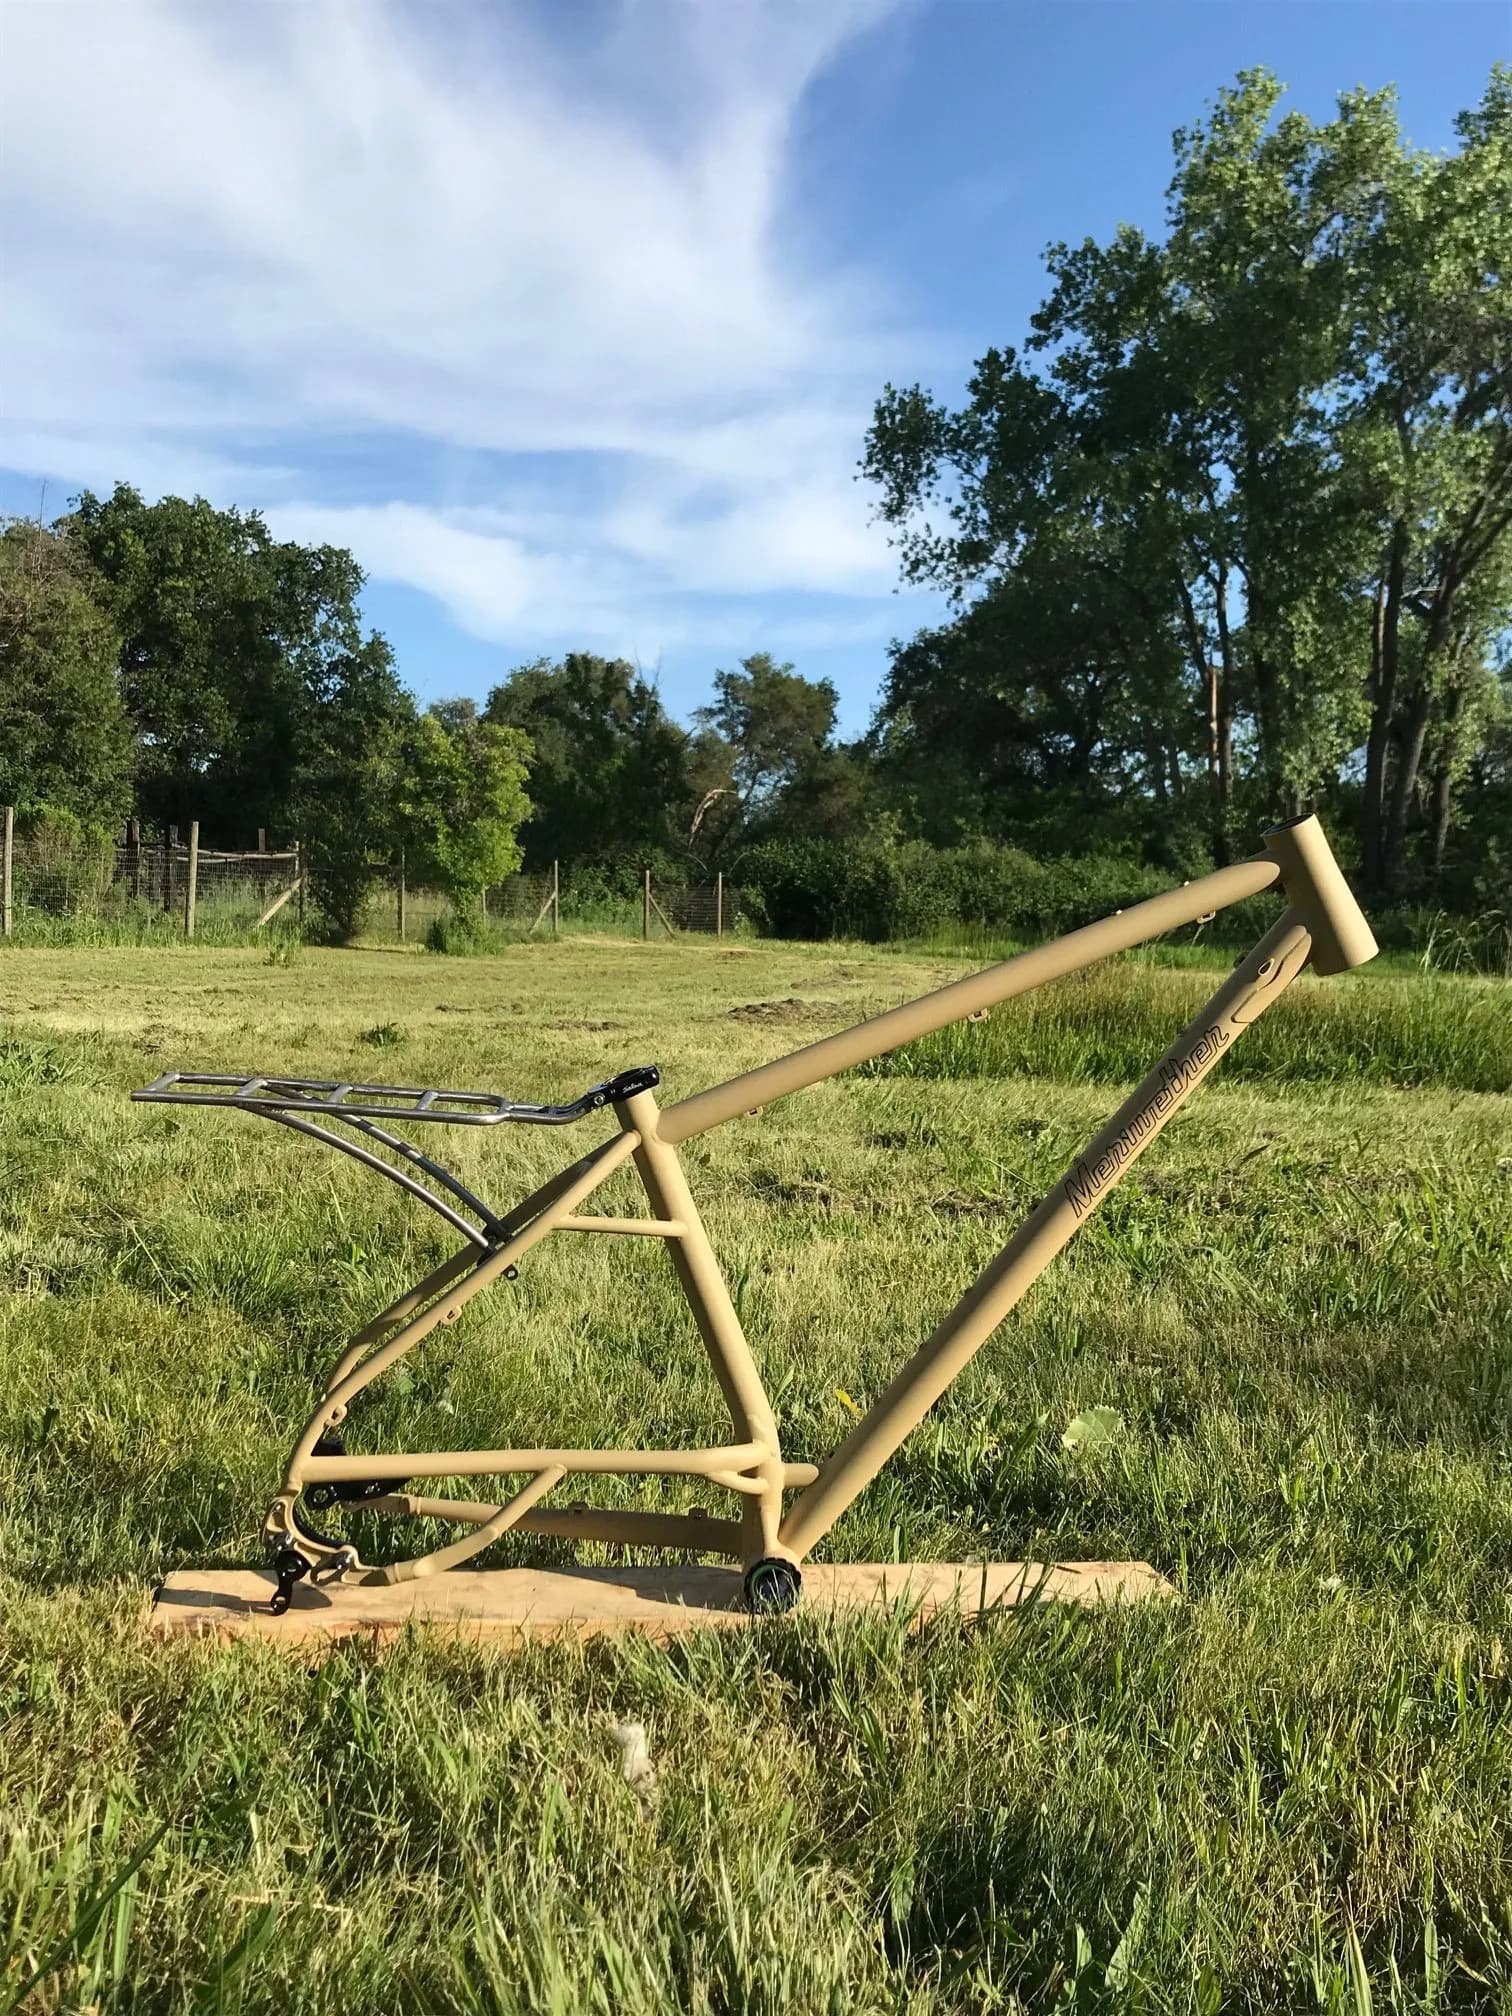
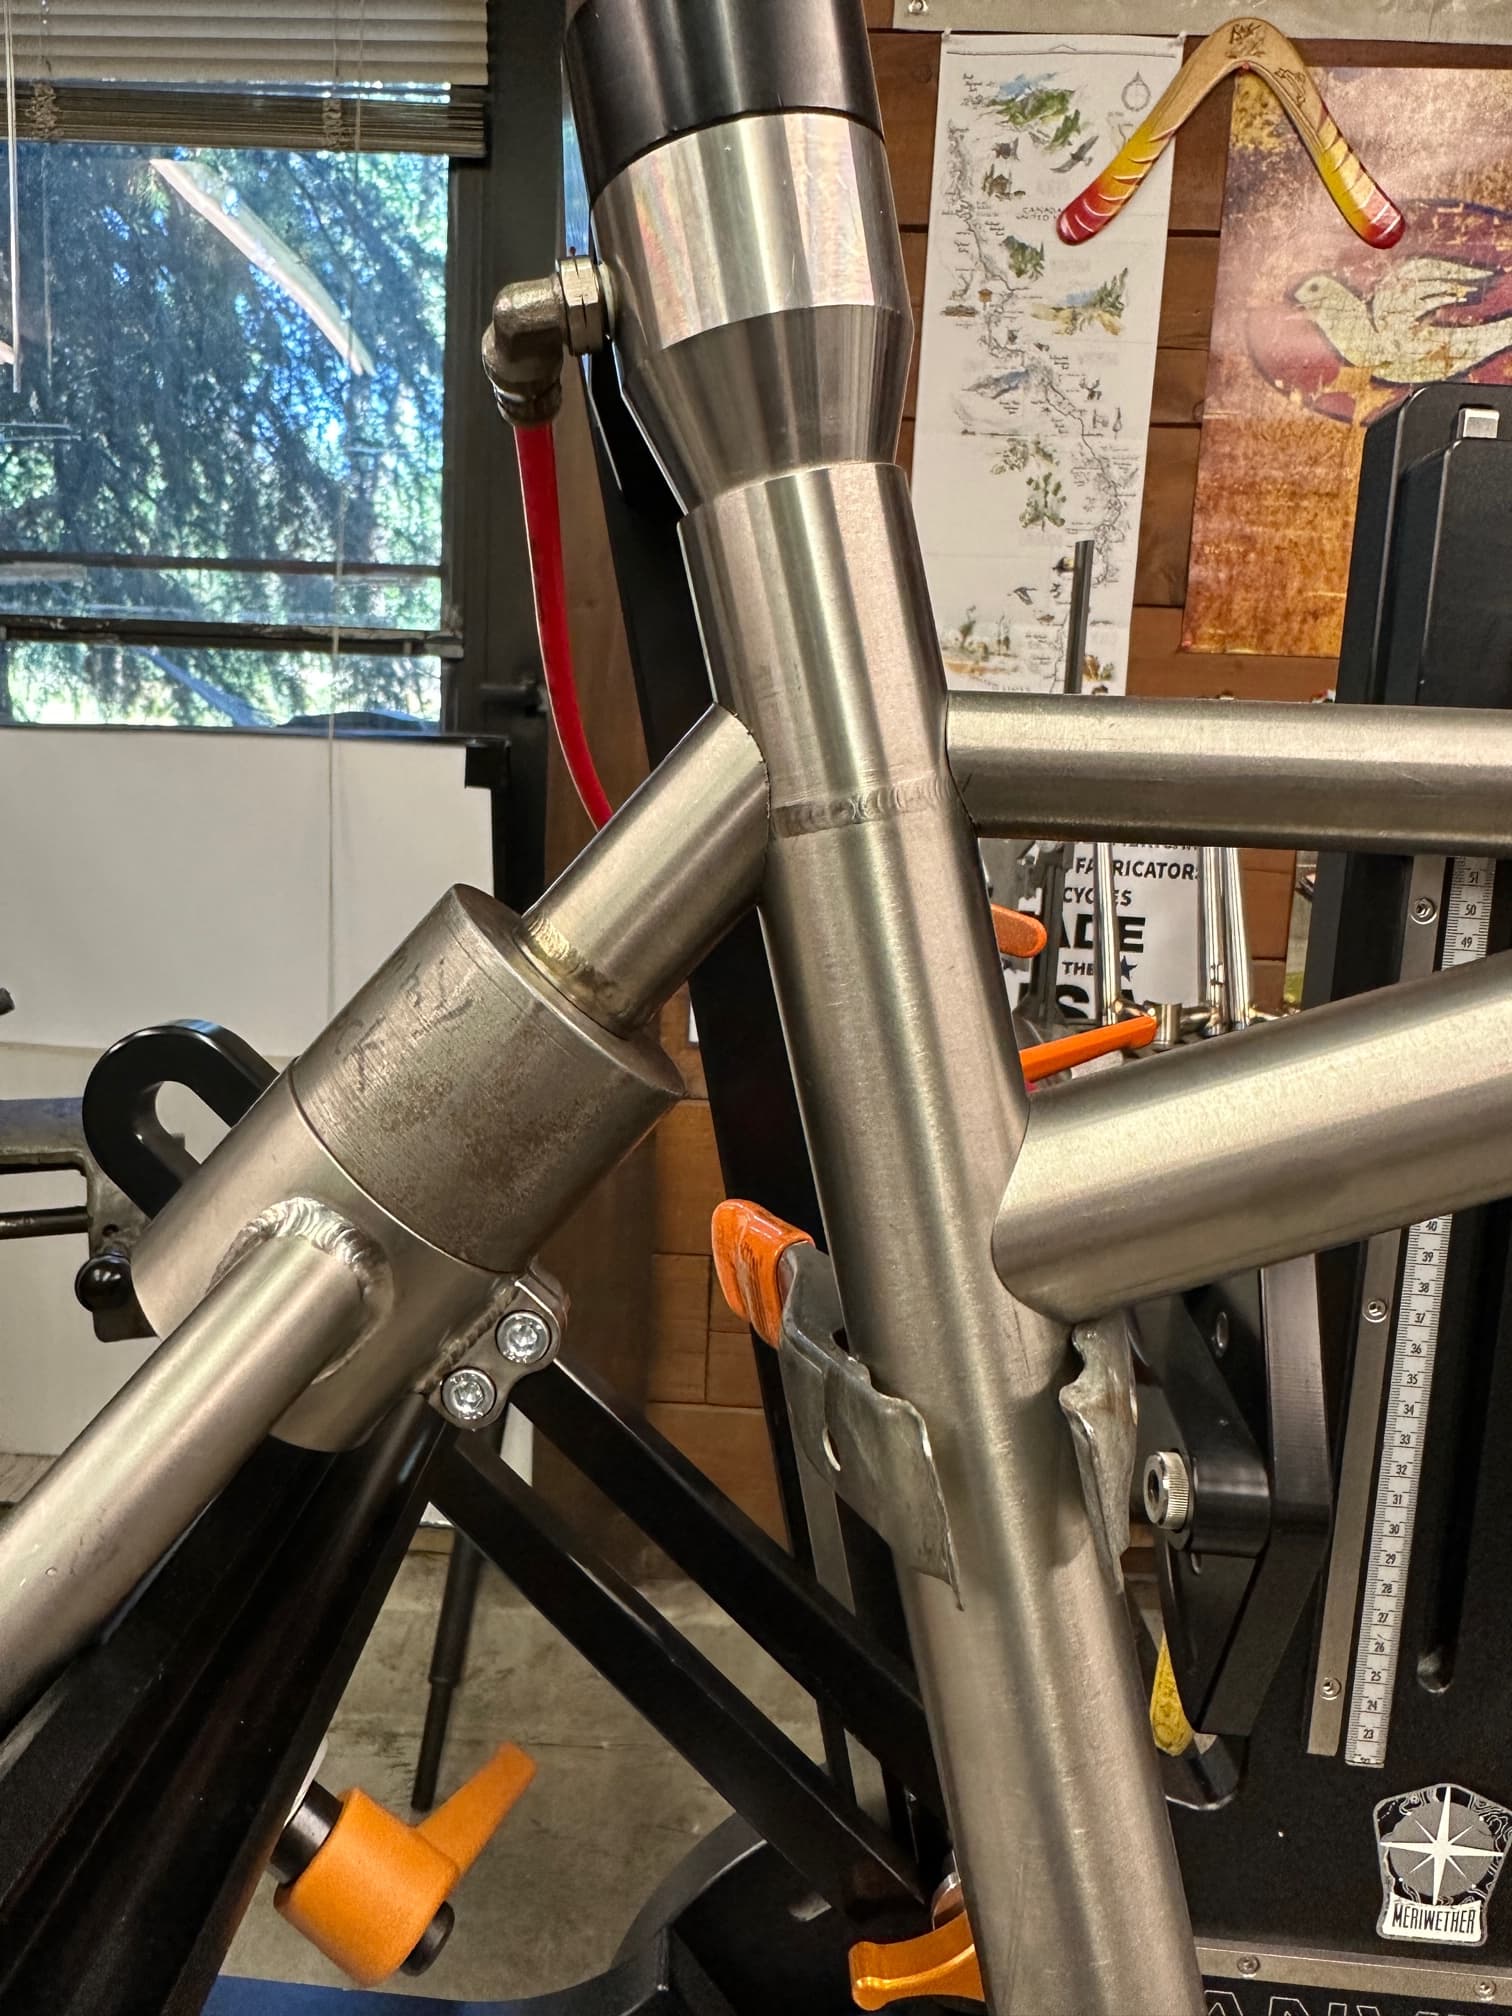
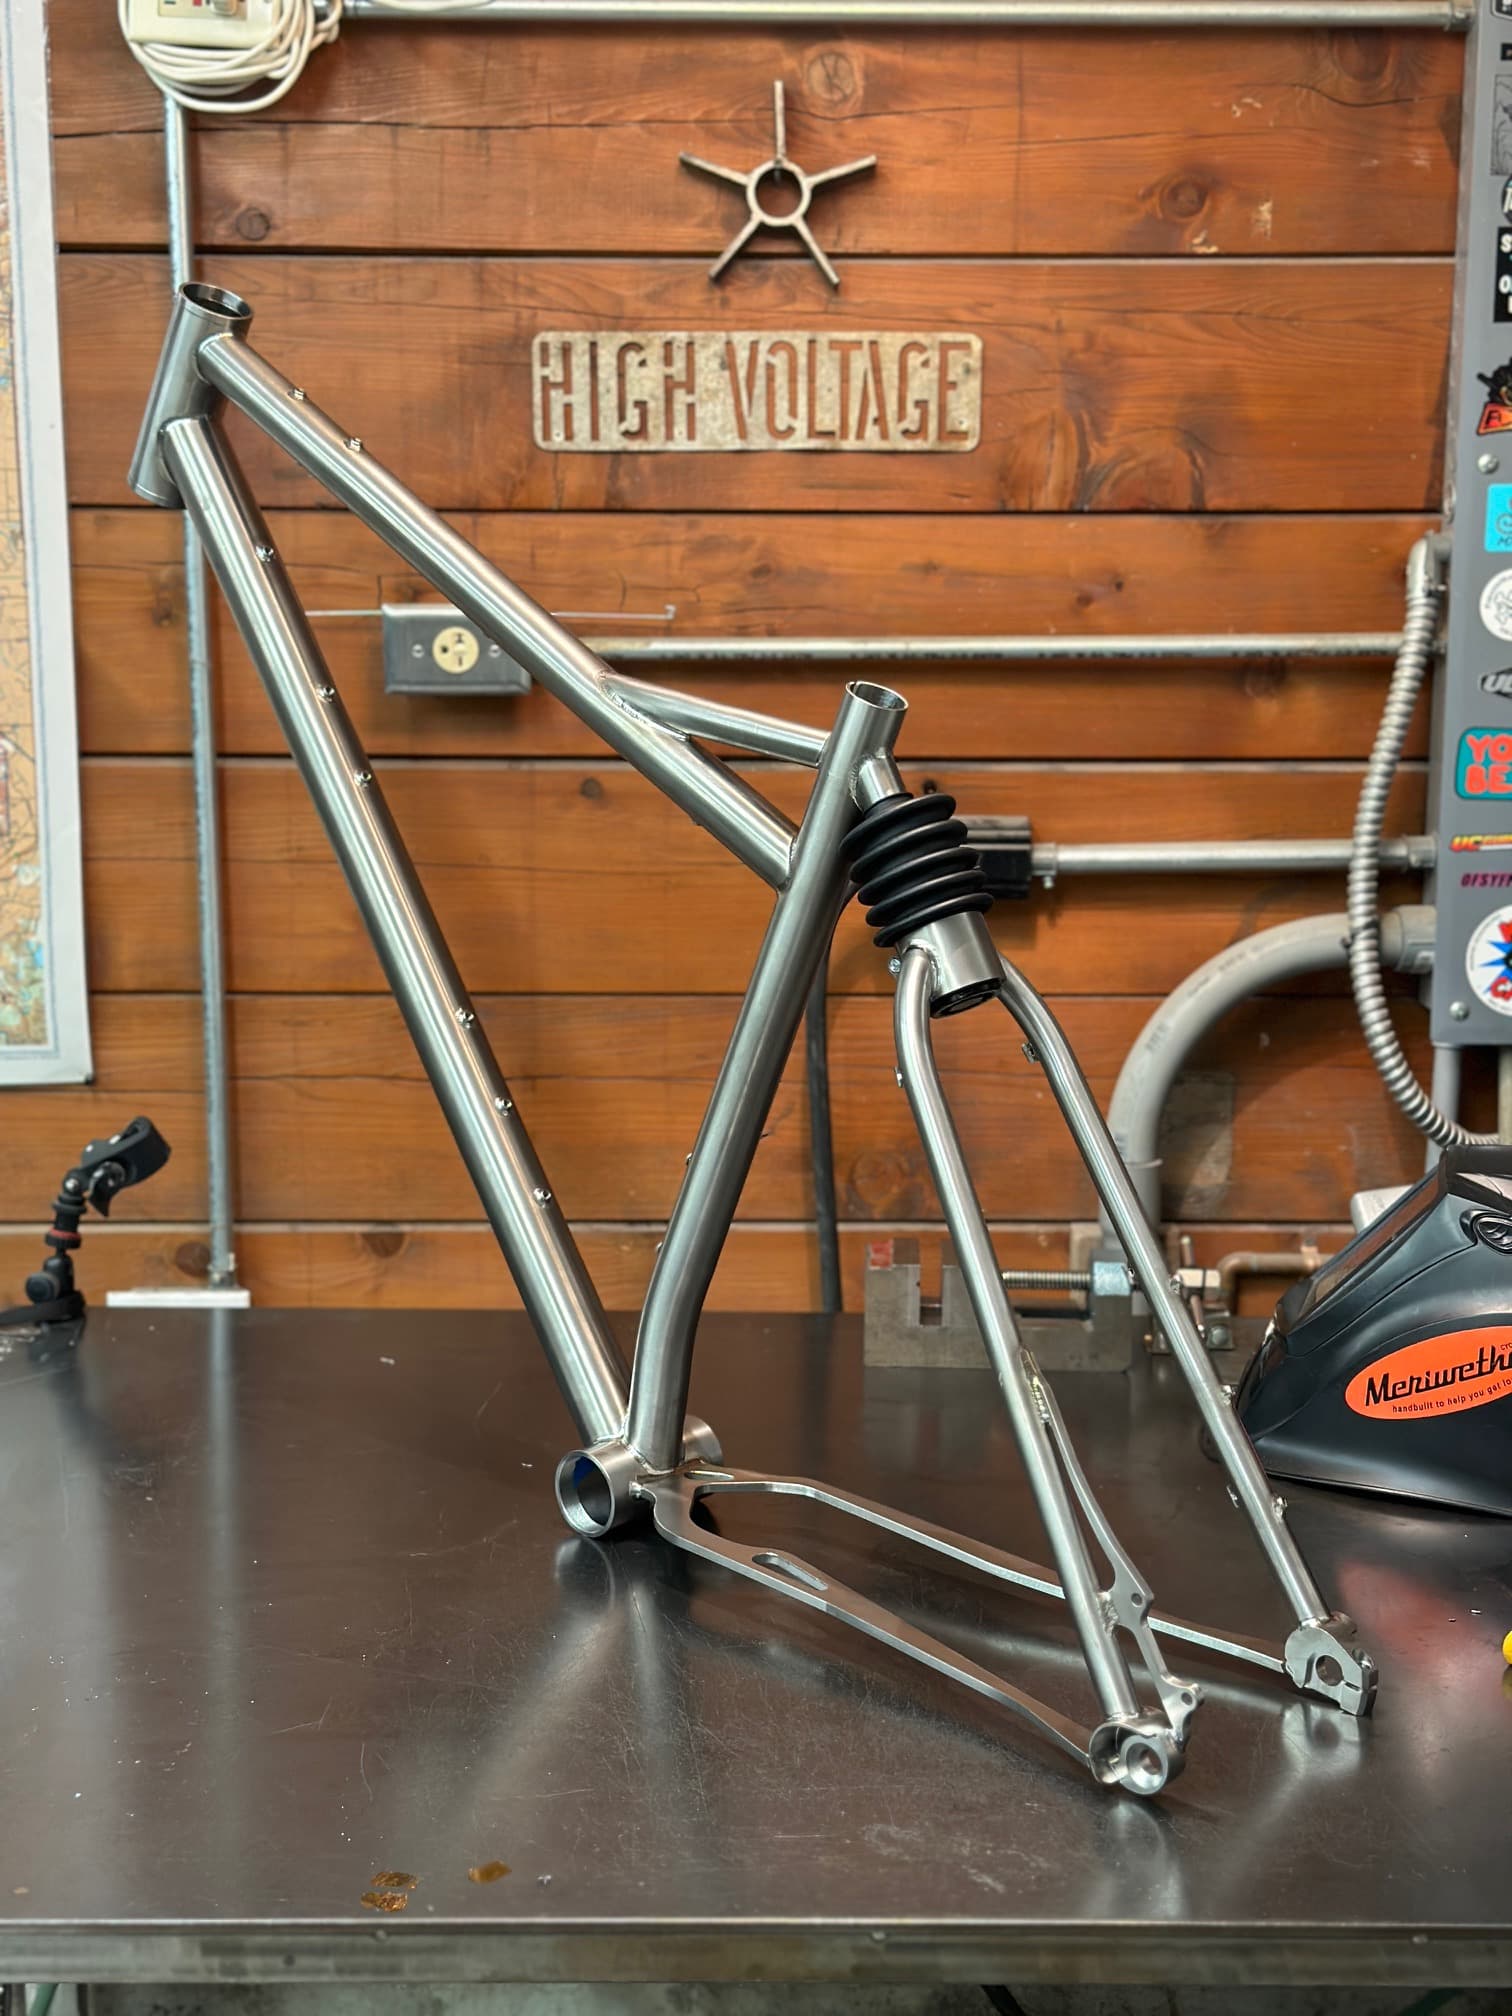
Being my everyday MTB and bikepacker i wanted the front triangle as large as possible, but having relatively short legs for my height i needed some standover. I would have loved to add a portage handle but that’s not possible with this design so a ‘brace’ handle would have to do. I don’t like adding these unless absolutely needed because they are a pain to weld and also push/pull on the seatstay, and without the right sequence you can have issues with seatpost insertion. Don’t ask how i know that…
The CDE shock needs at least 483mm from axle to the back of the seat tube to fit. Tire radius of a 29x2.4 is around 370, plus tire clearance to the bottom of the shock collar/wishbone. The shock is about half the length of the shortest air shock but it still won’t fit on some frames with short seat tubes. There is the option to put the CDE shock in the front triangle but that would take up space i’d rather have for gear. This meant a long seat tube length of 525mm and the brace handle to lower the standover and be a handle. Were i just using 27.5 tires it wouldn’t be as tight a fit, so with mullet or dedicated 27.5" wheeled frames the CDE would fit more frame sizes.
Geometry:
This is my first not-short CS frame in years, the plate is set at about 440mm with a T47 BB shell. I try new geometry each frame but nothing super crazy for a bike that’ll mainly be my XC bikepacking rig. I’m 6’ 1" tall and have shorter legs than I should so i went with a reach of 480, 655 effective TT, 67 HTA with a sagged 140 fork, and a effective seat tube angle of 75 and a sagged BB drop of 60mm which feels pretty high. I’ll use a 50mm stem with my double-bend Ti bars with 20 deg sweep that bring my grips back almost to the center of the steerer.
It all turned out well except for the surface finish after boring the shock collar. It chattered more than i would have liked and I’m not sure why since I was removing very little material each pass. The other mistake i made was using a two-bolt binder instead of the one bolt it’s designed to have to cinch the shock into the collar. Not a big deal, it still works, just a little more effort when setting it up and removing the shock (which will be very infrequent, it may need some grease every year or so but will last your lifetime otherwise). The lower bolt does need to be un-tensioned to adjust the preload damper (helps small bump compliance) or to change that lower elastomer if one gains or looses weight (I’m using the first stage elastomer for 180lb people but when i tour i may swap to the 200).
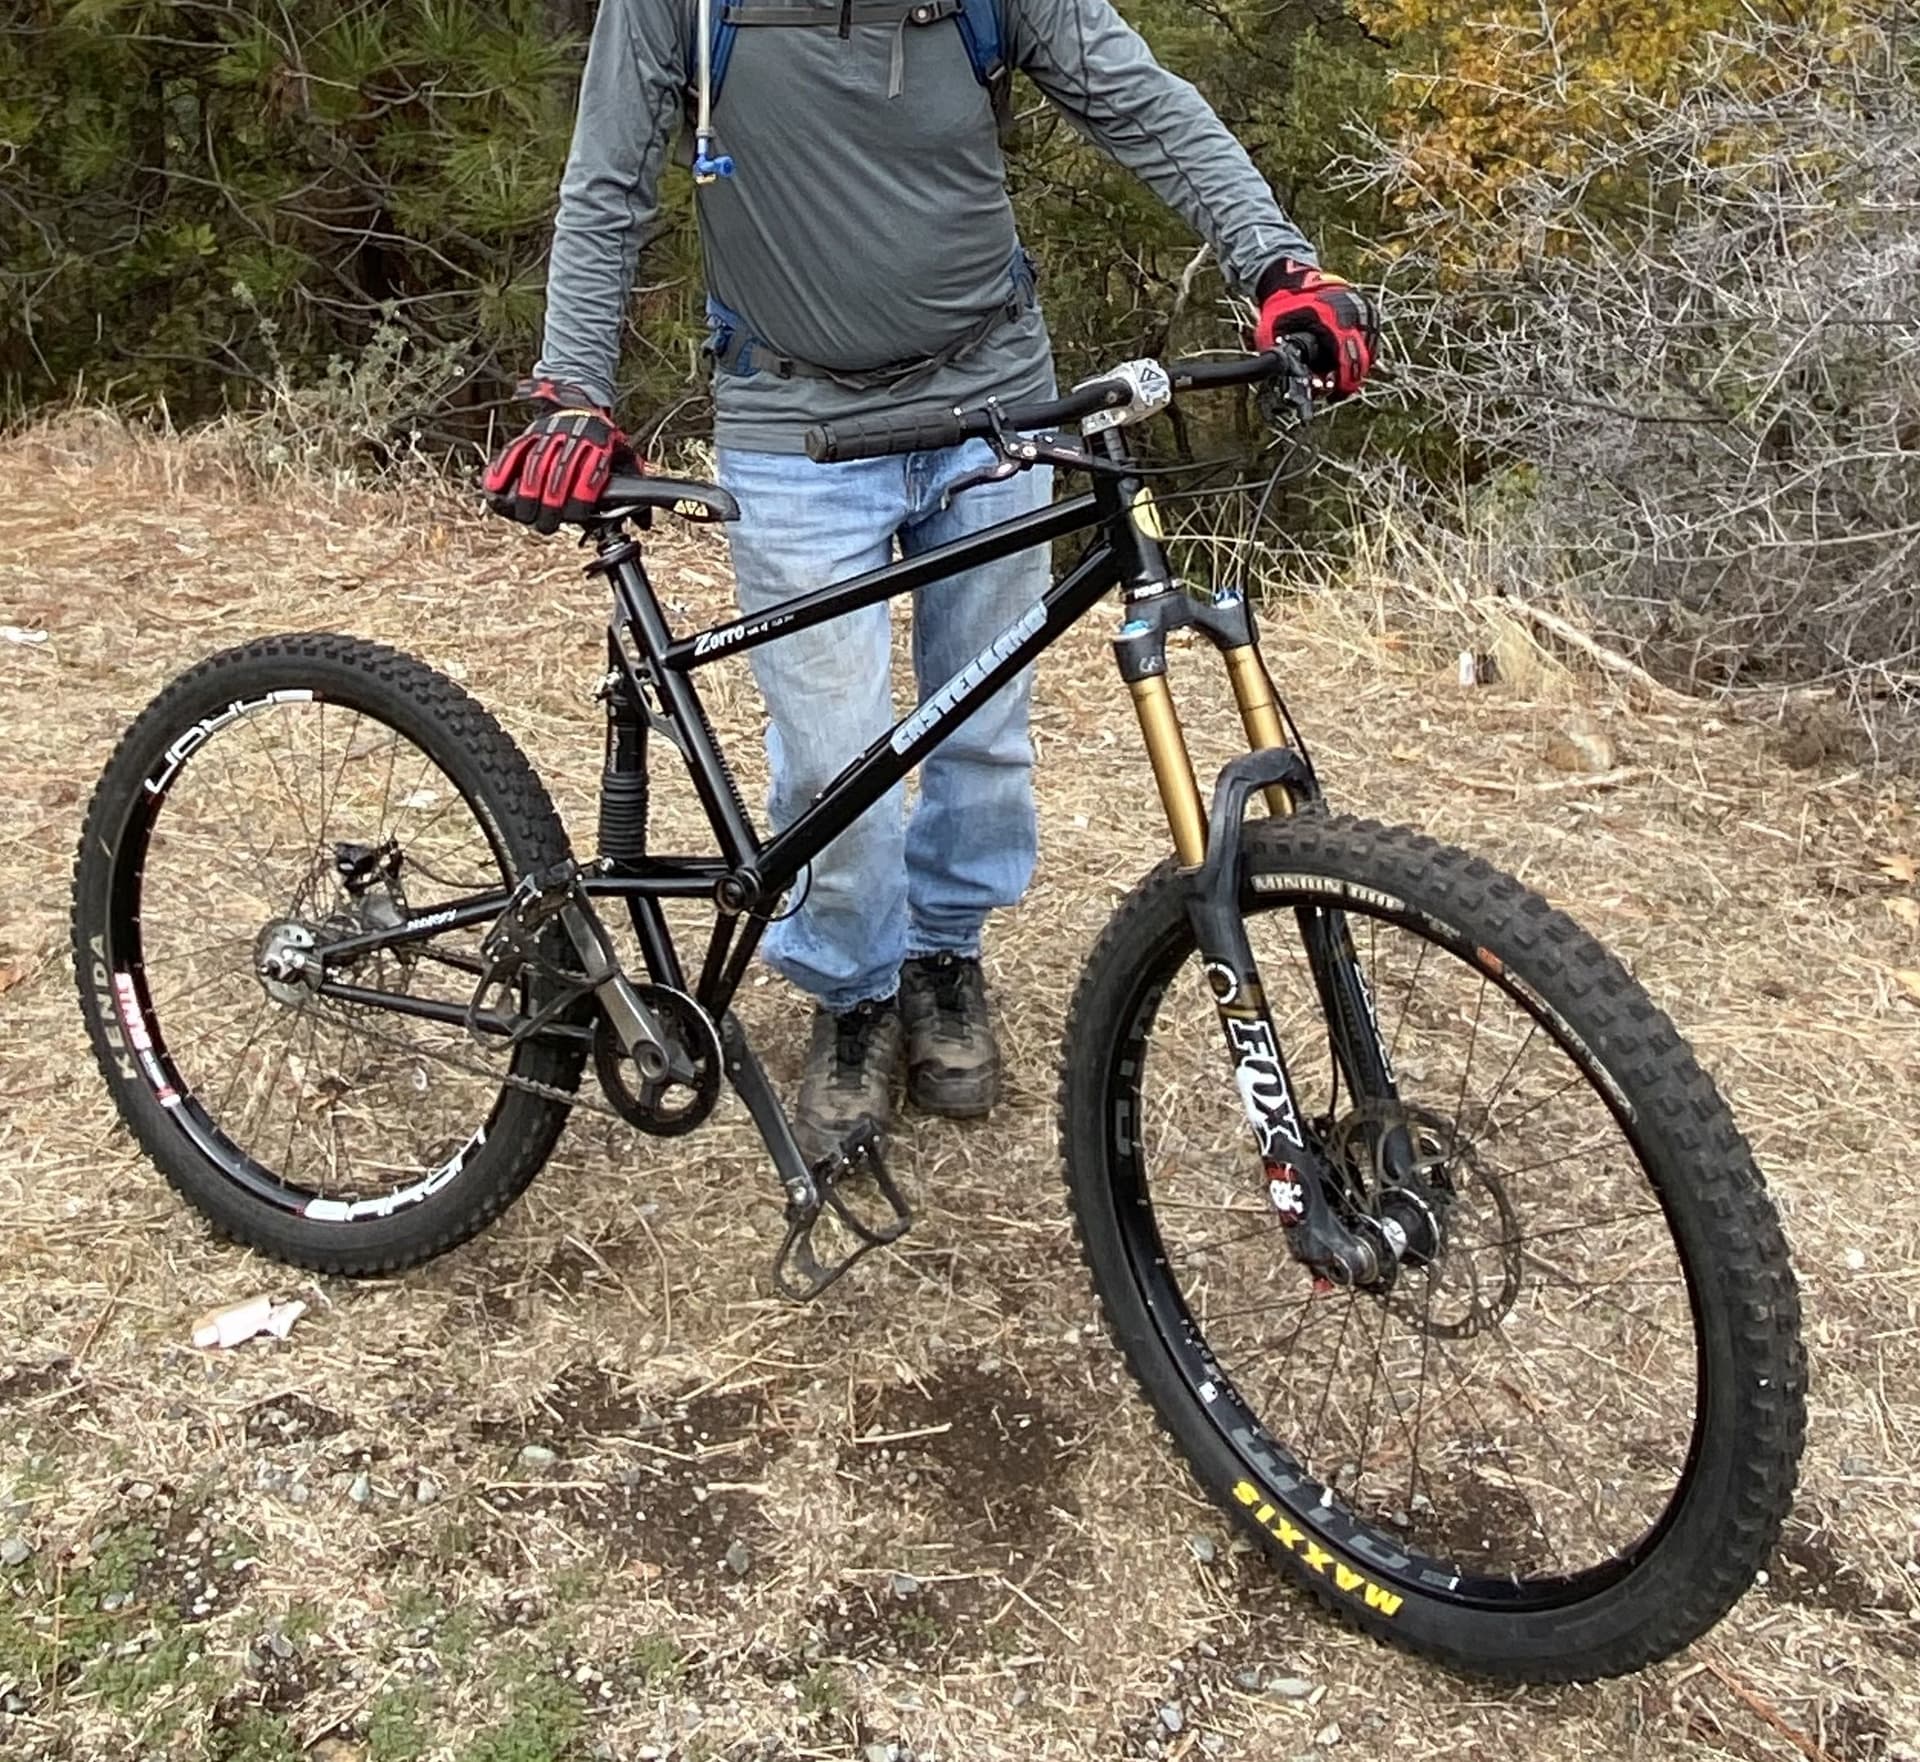
First ride was eye-opening and smile producing. I have ridden a couple of “real” dual suspension bikes but being me, i had the same feeling towards them as many have towards E-bikes. Do you really need to go that fast and not steer and feel the ground beneath you? I’m sure i’ll ‘go there’ someday, but i’ve lasted this long…
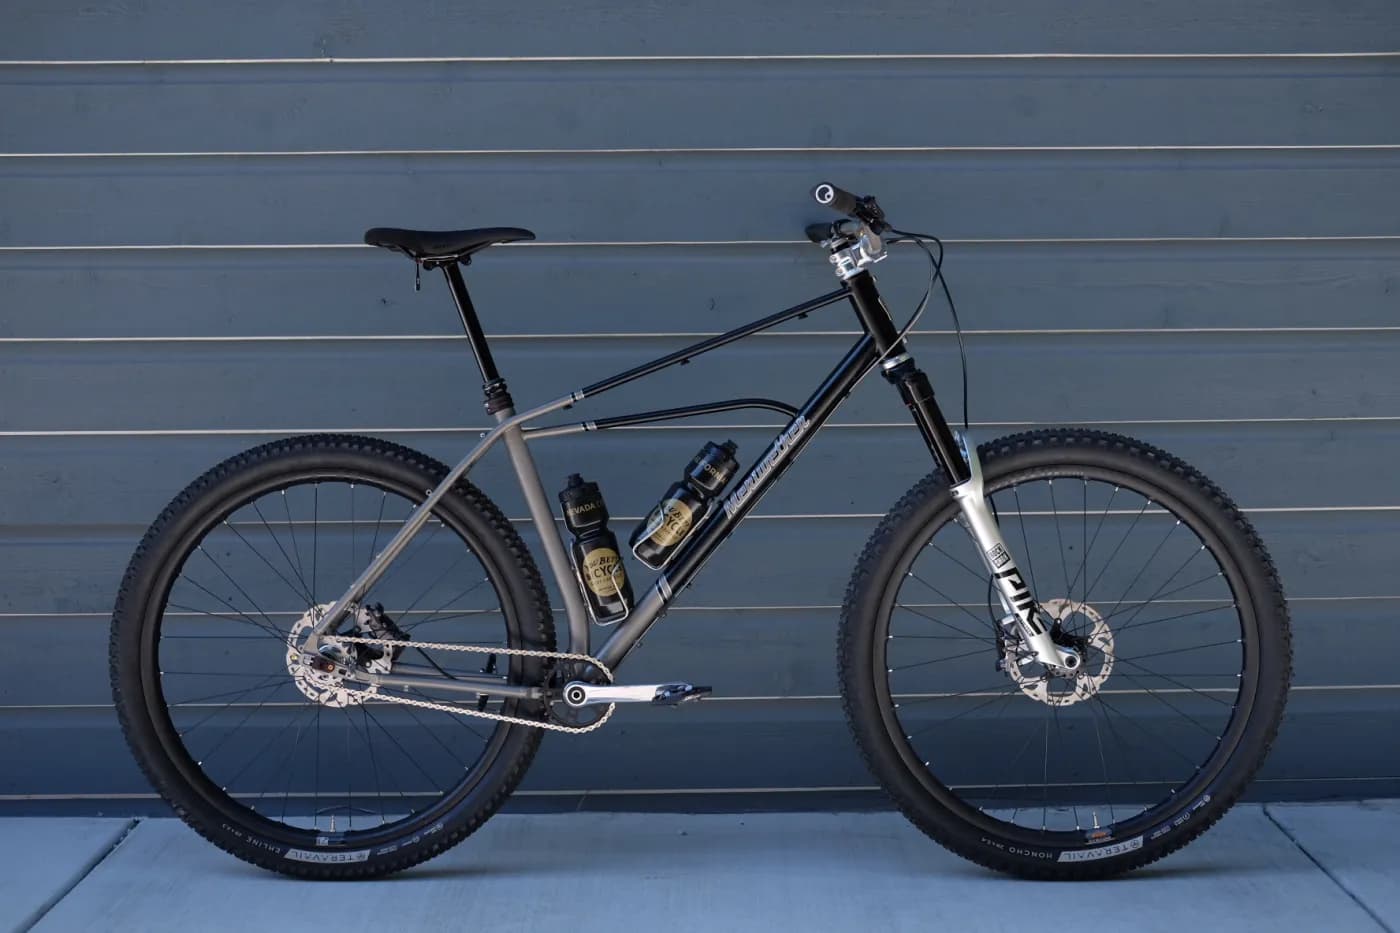
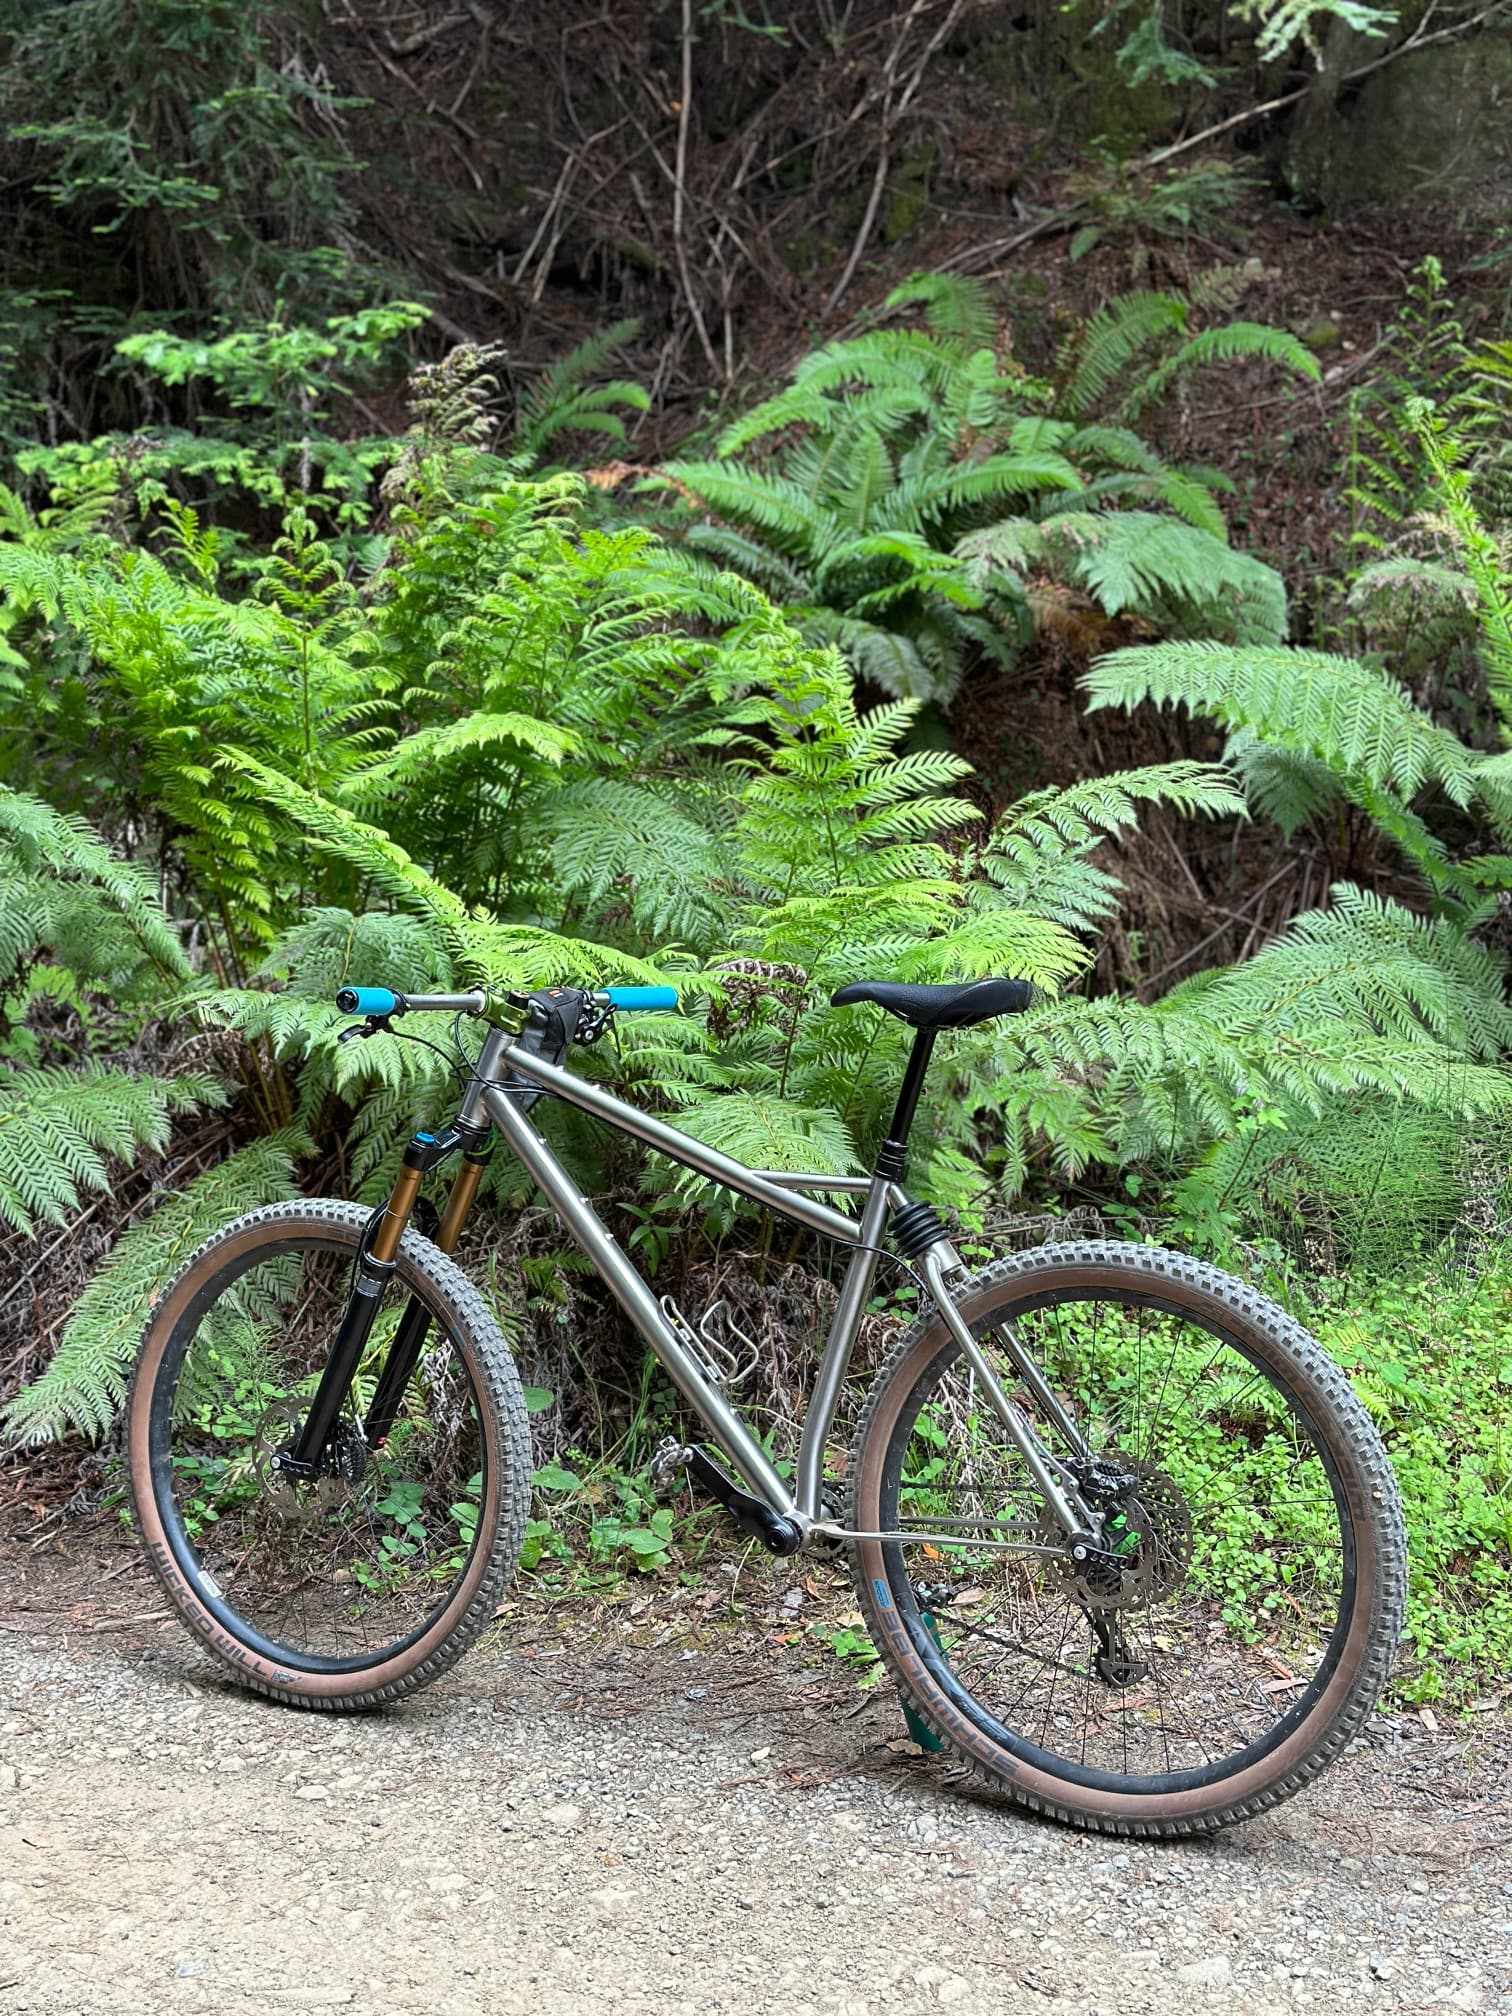
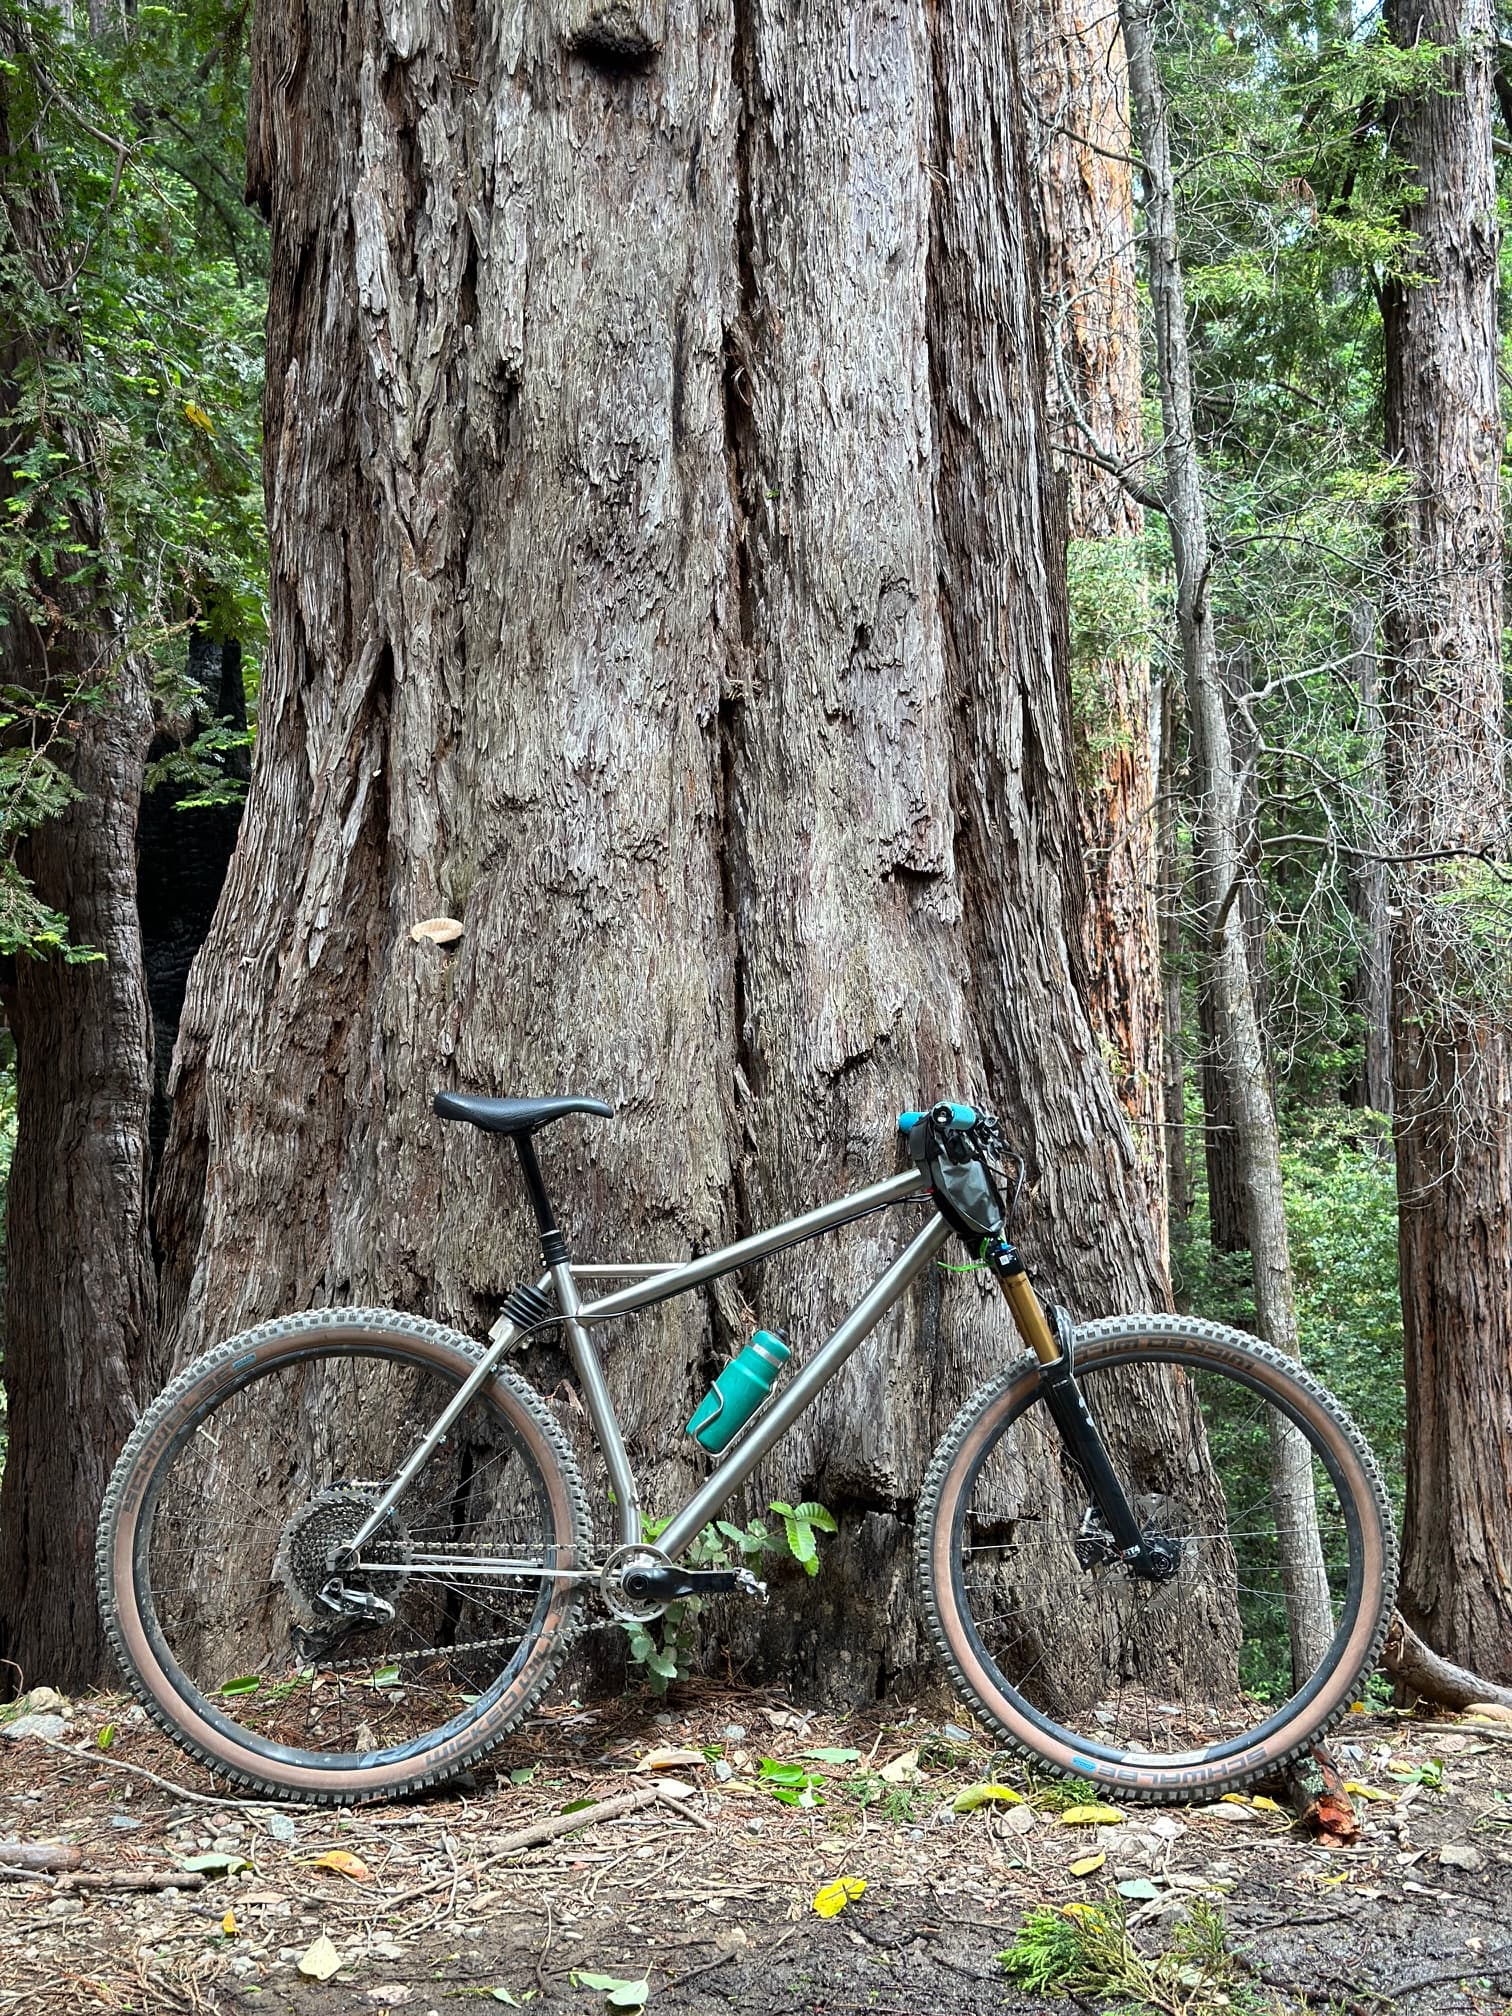
I saw all the growing pains of suspension frames first hand, creaking, cracking, poor performance, all of it and never seemed worth it. I could ride all the same trails on a hardtail and have no maintenance issues, I’d just go a bit slower or a bit more out of control. On the other hand the Castellano design is so simple, quiet, and maintenance free. My type of suspension. It’s very subtle but noticeable, especially on seated climbs. It tracked very well on the downhill and added a lot more compliance than what I’m used to with a hardtail. I’m sure it’s a bit of a self-fulfilling prophecy but it’s all i expected and more since…i was the one who built it! I’m calling it the Meriwether Luddite for now.
Frame weight ended up at 5.25lbs. I built it with a 44x.039 downtube, 3/4x0.039" seatstay tubes bent on a diacro with a 3.5" radius. 35x.039 top tube, Syntace 1.5" dropouts, 140mm Paragon head tube, 22mm handle/brace, LOTS of bottle bosses for a future bolt-on framebag and clamp on cable guides. Fits a slammed 150mm OneUp dropper with my saddle height, I sent it off to Agave Finishworks for a blast and some ano, first time i’ve done that for myself…it’s a special occasion 
More photos when it’s back from finishwork and built up. Thanks for reading…