On frame assembly, with Fil

I was fully expecting to be a lurker and only occasional commenter.

However, given that I’m getting so much valuable entertainment and information from the forum, perhaps sharing my own bodgy efforts is the right thing to do. I’m not on insta or any other social media outlet, and have not genuinely shared on a forum in a long time.

Who am I? Short answer: Nobody special, currently residing somewhere in Australia.

Framebuilding was something I wanted to do for a long time, but money, time and lack of local resources limited any progress beyond fascination.
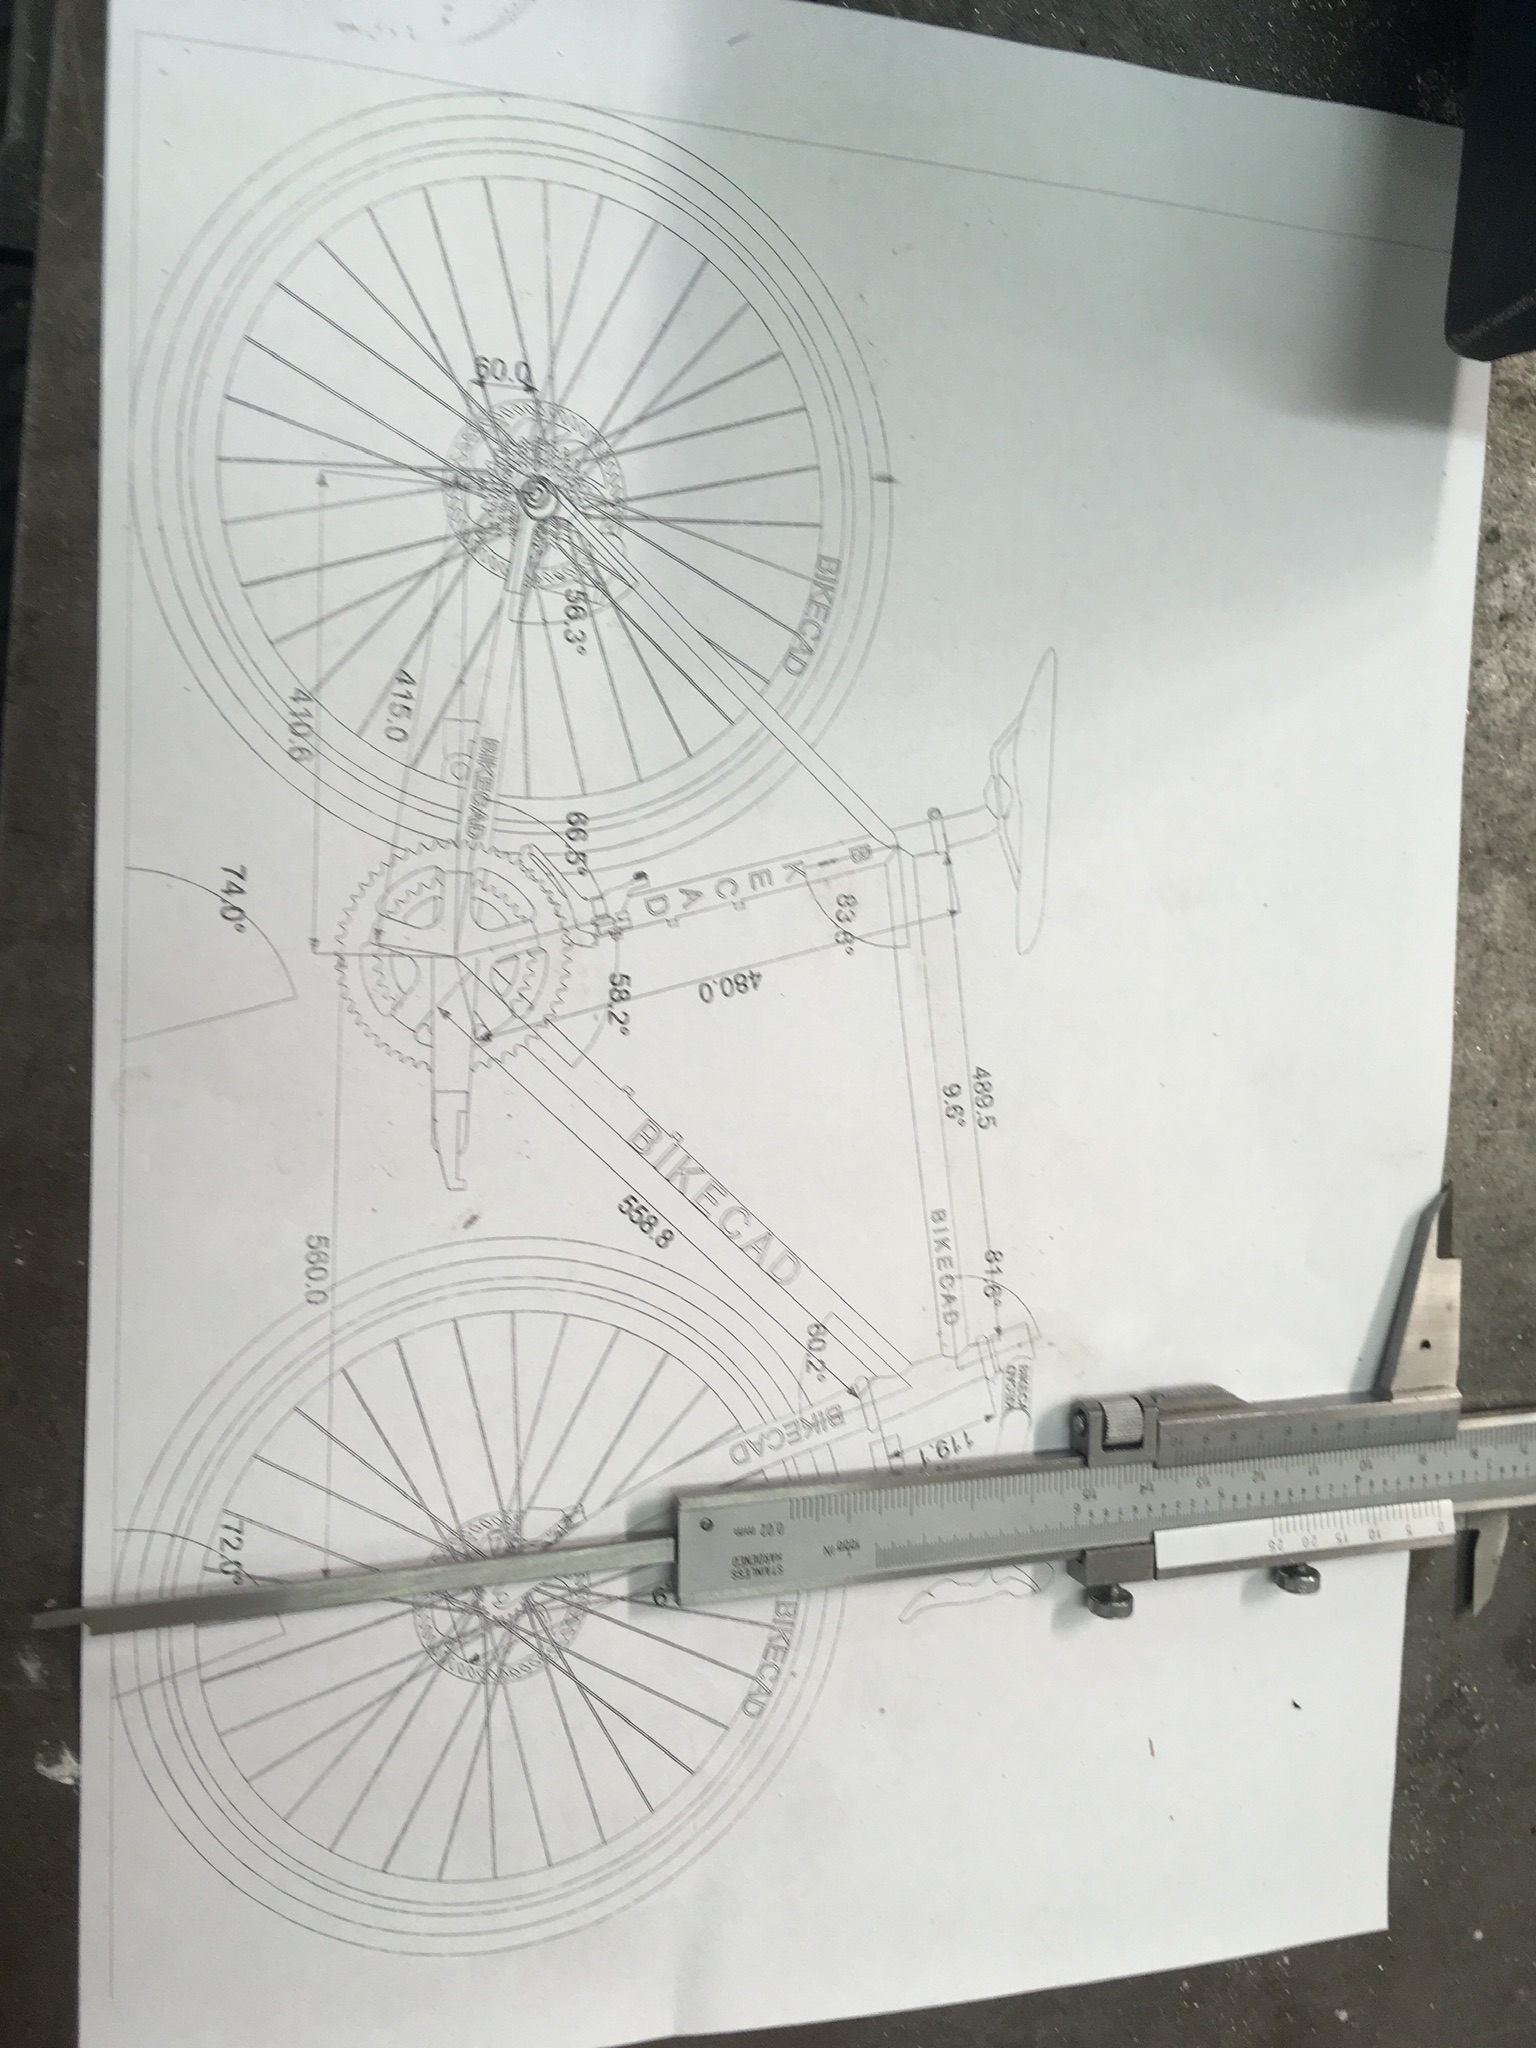
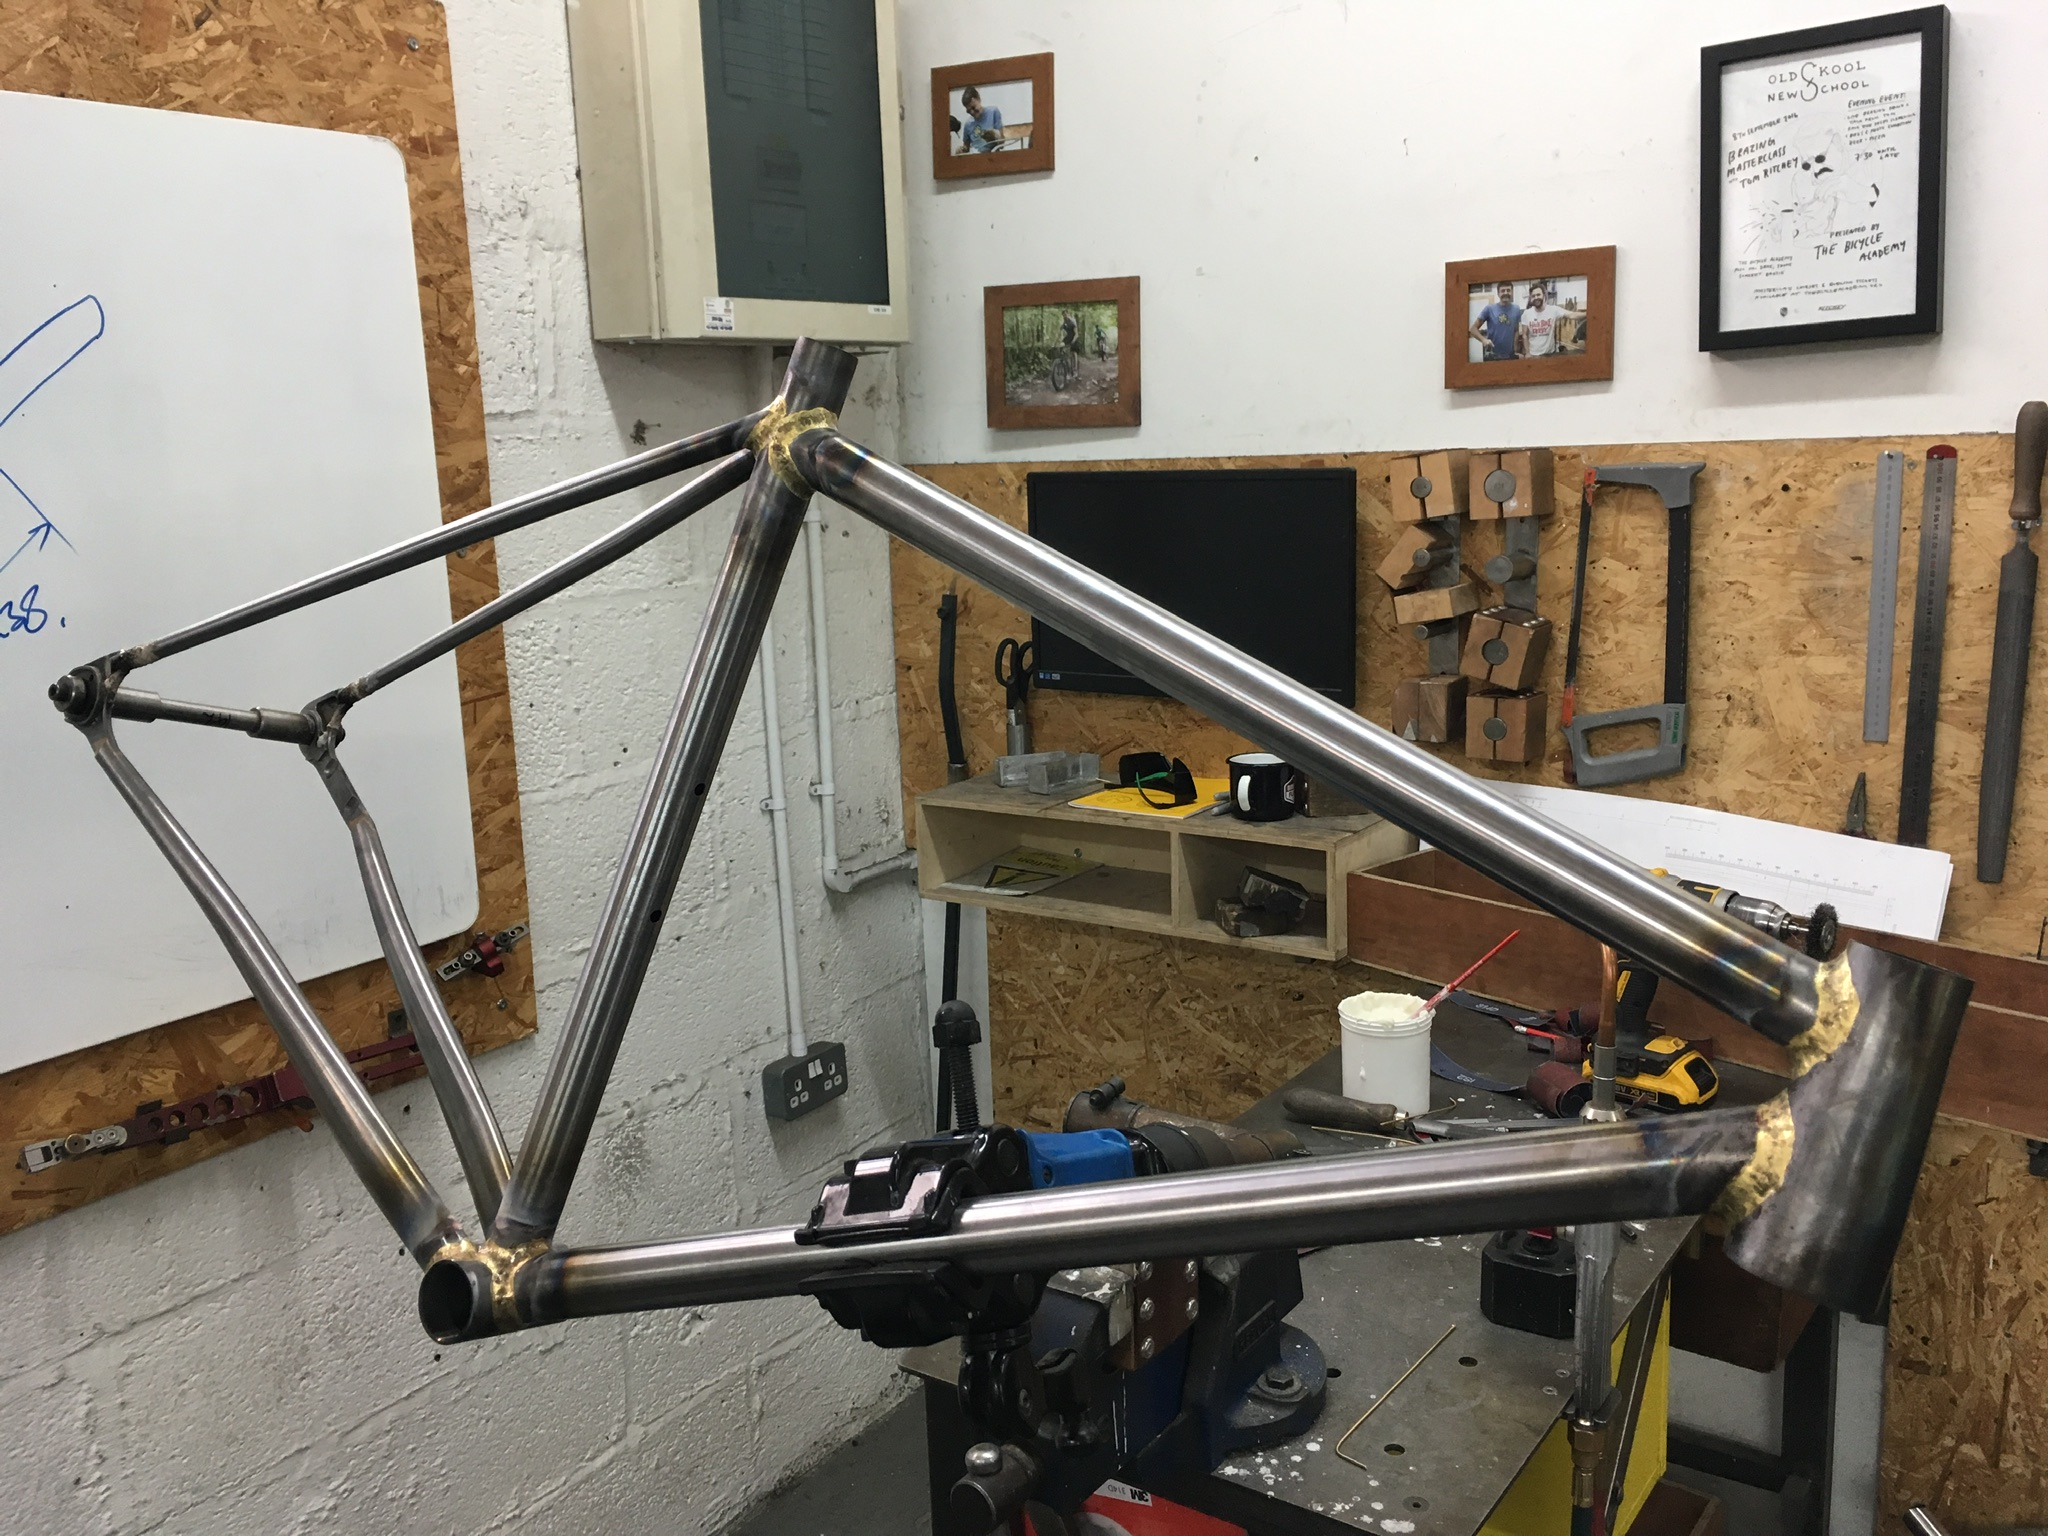
Then around 5 or so years ago, the stars lined up and I took a course at ‘The Bicycle Academy’ (RIP). That is the extent of my formal ‘frame building’ knowledge, but I’ve picked up some general workshop and machining tidbits from friends along the way.

I do NOT want to do this for a job, perhaps not even as a side job. There are many reasons, but most of them are pretty obvious. I do this out of curiosity and to keep my hands busy.

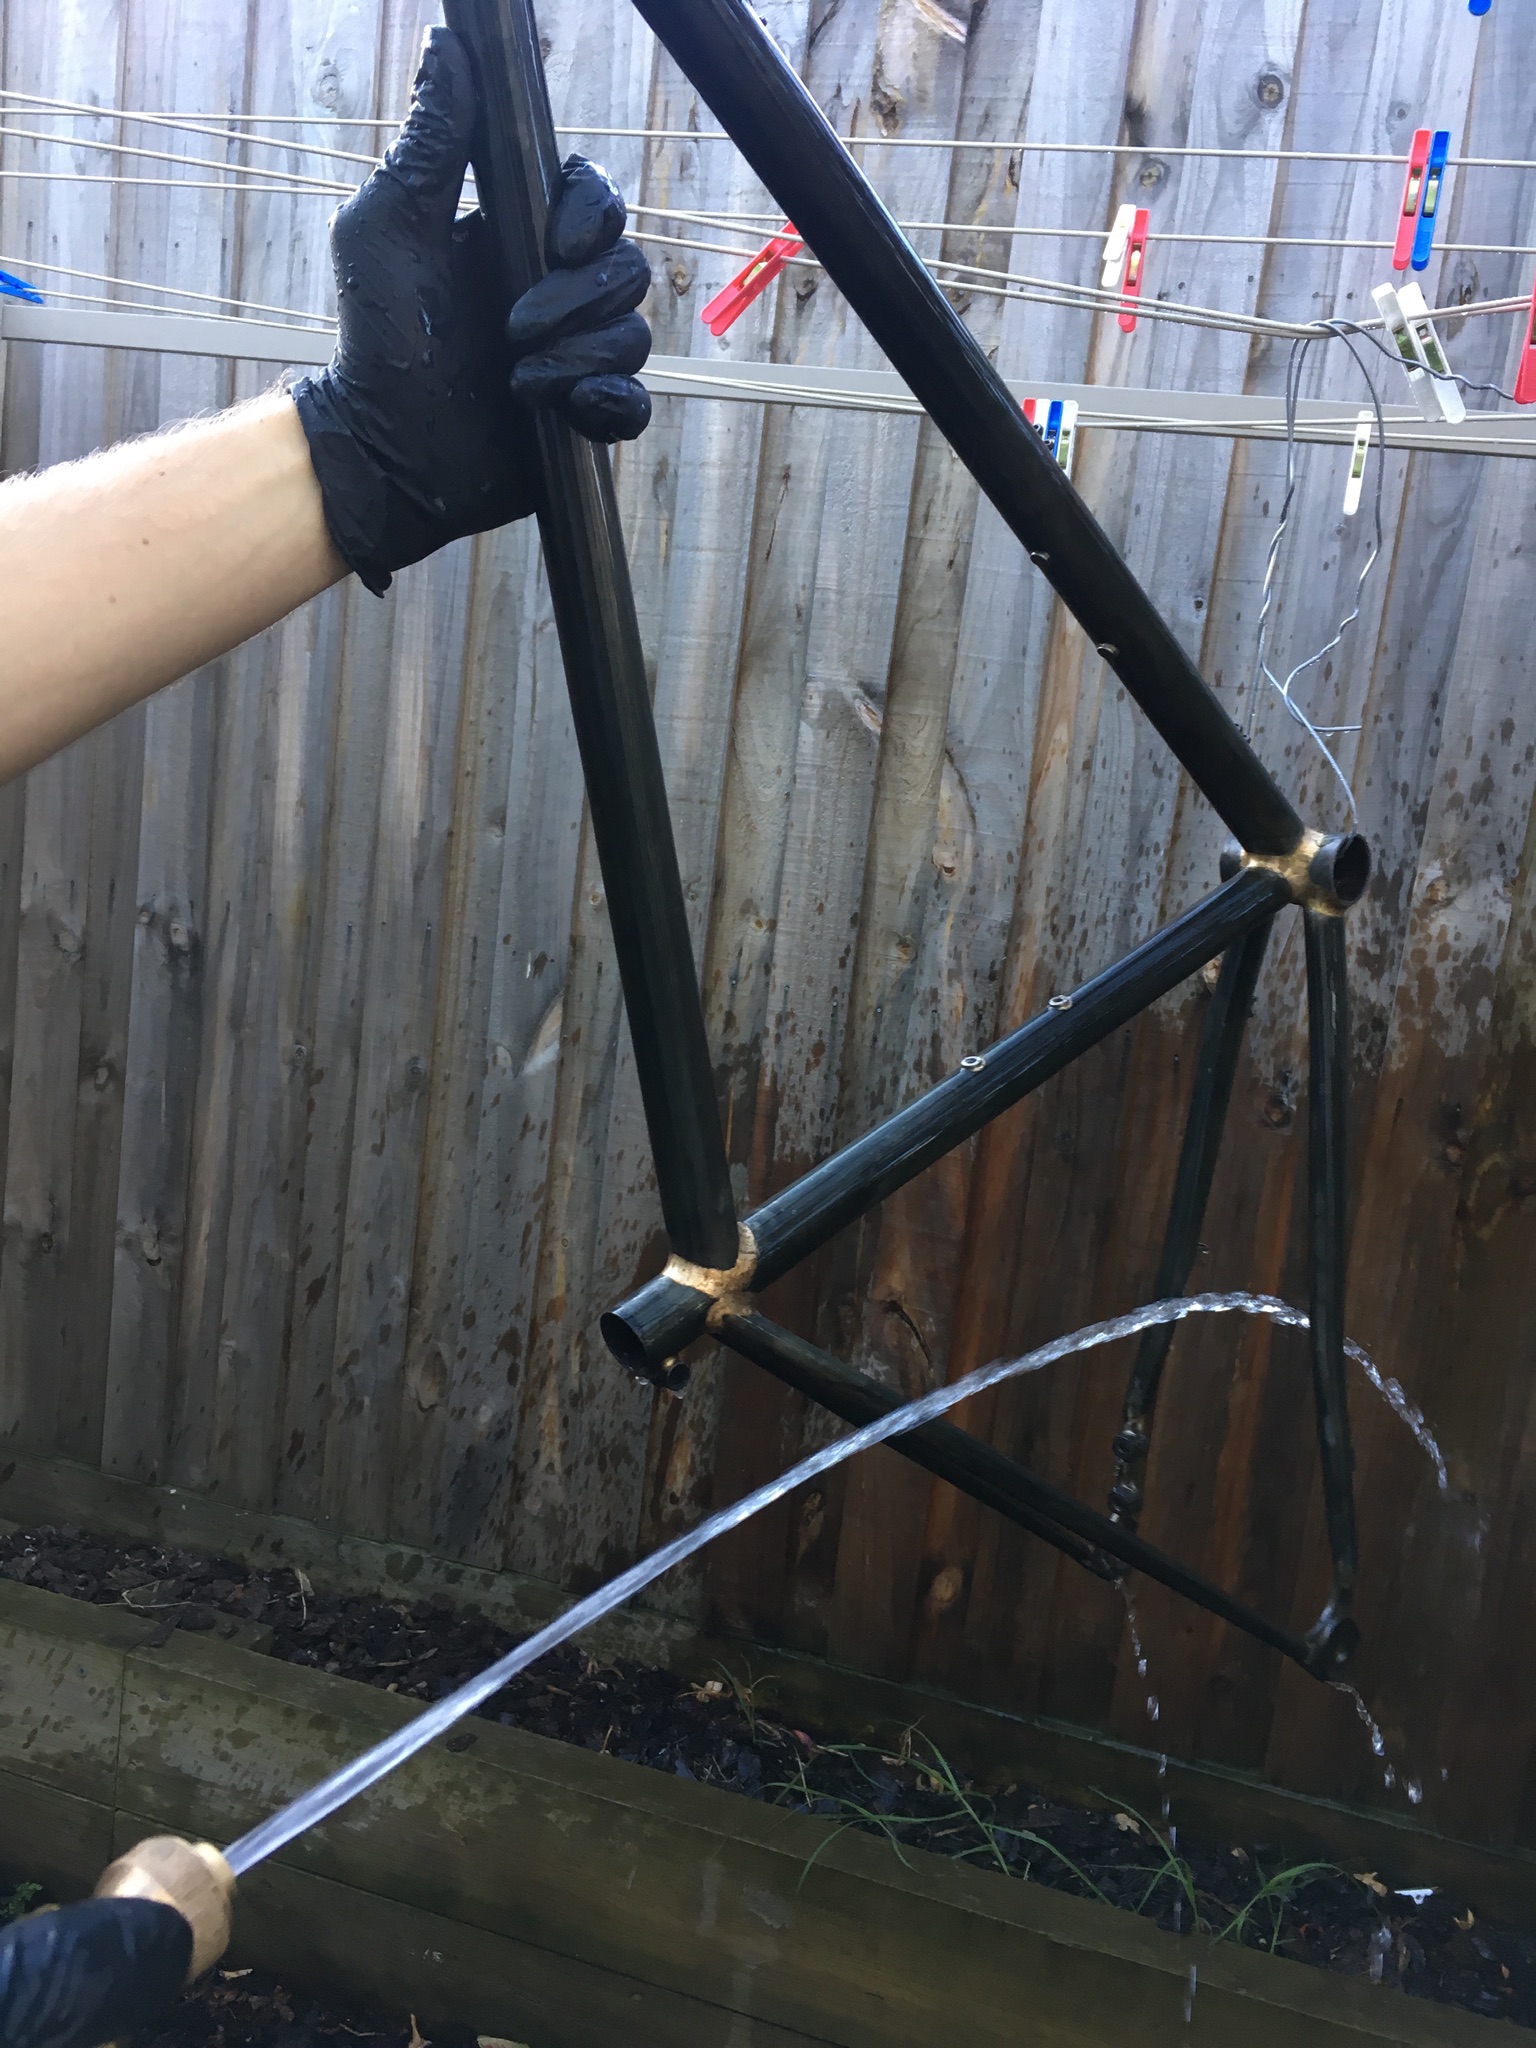
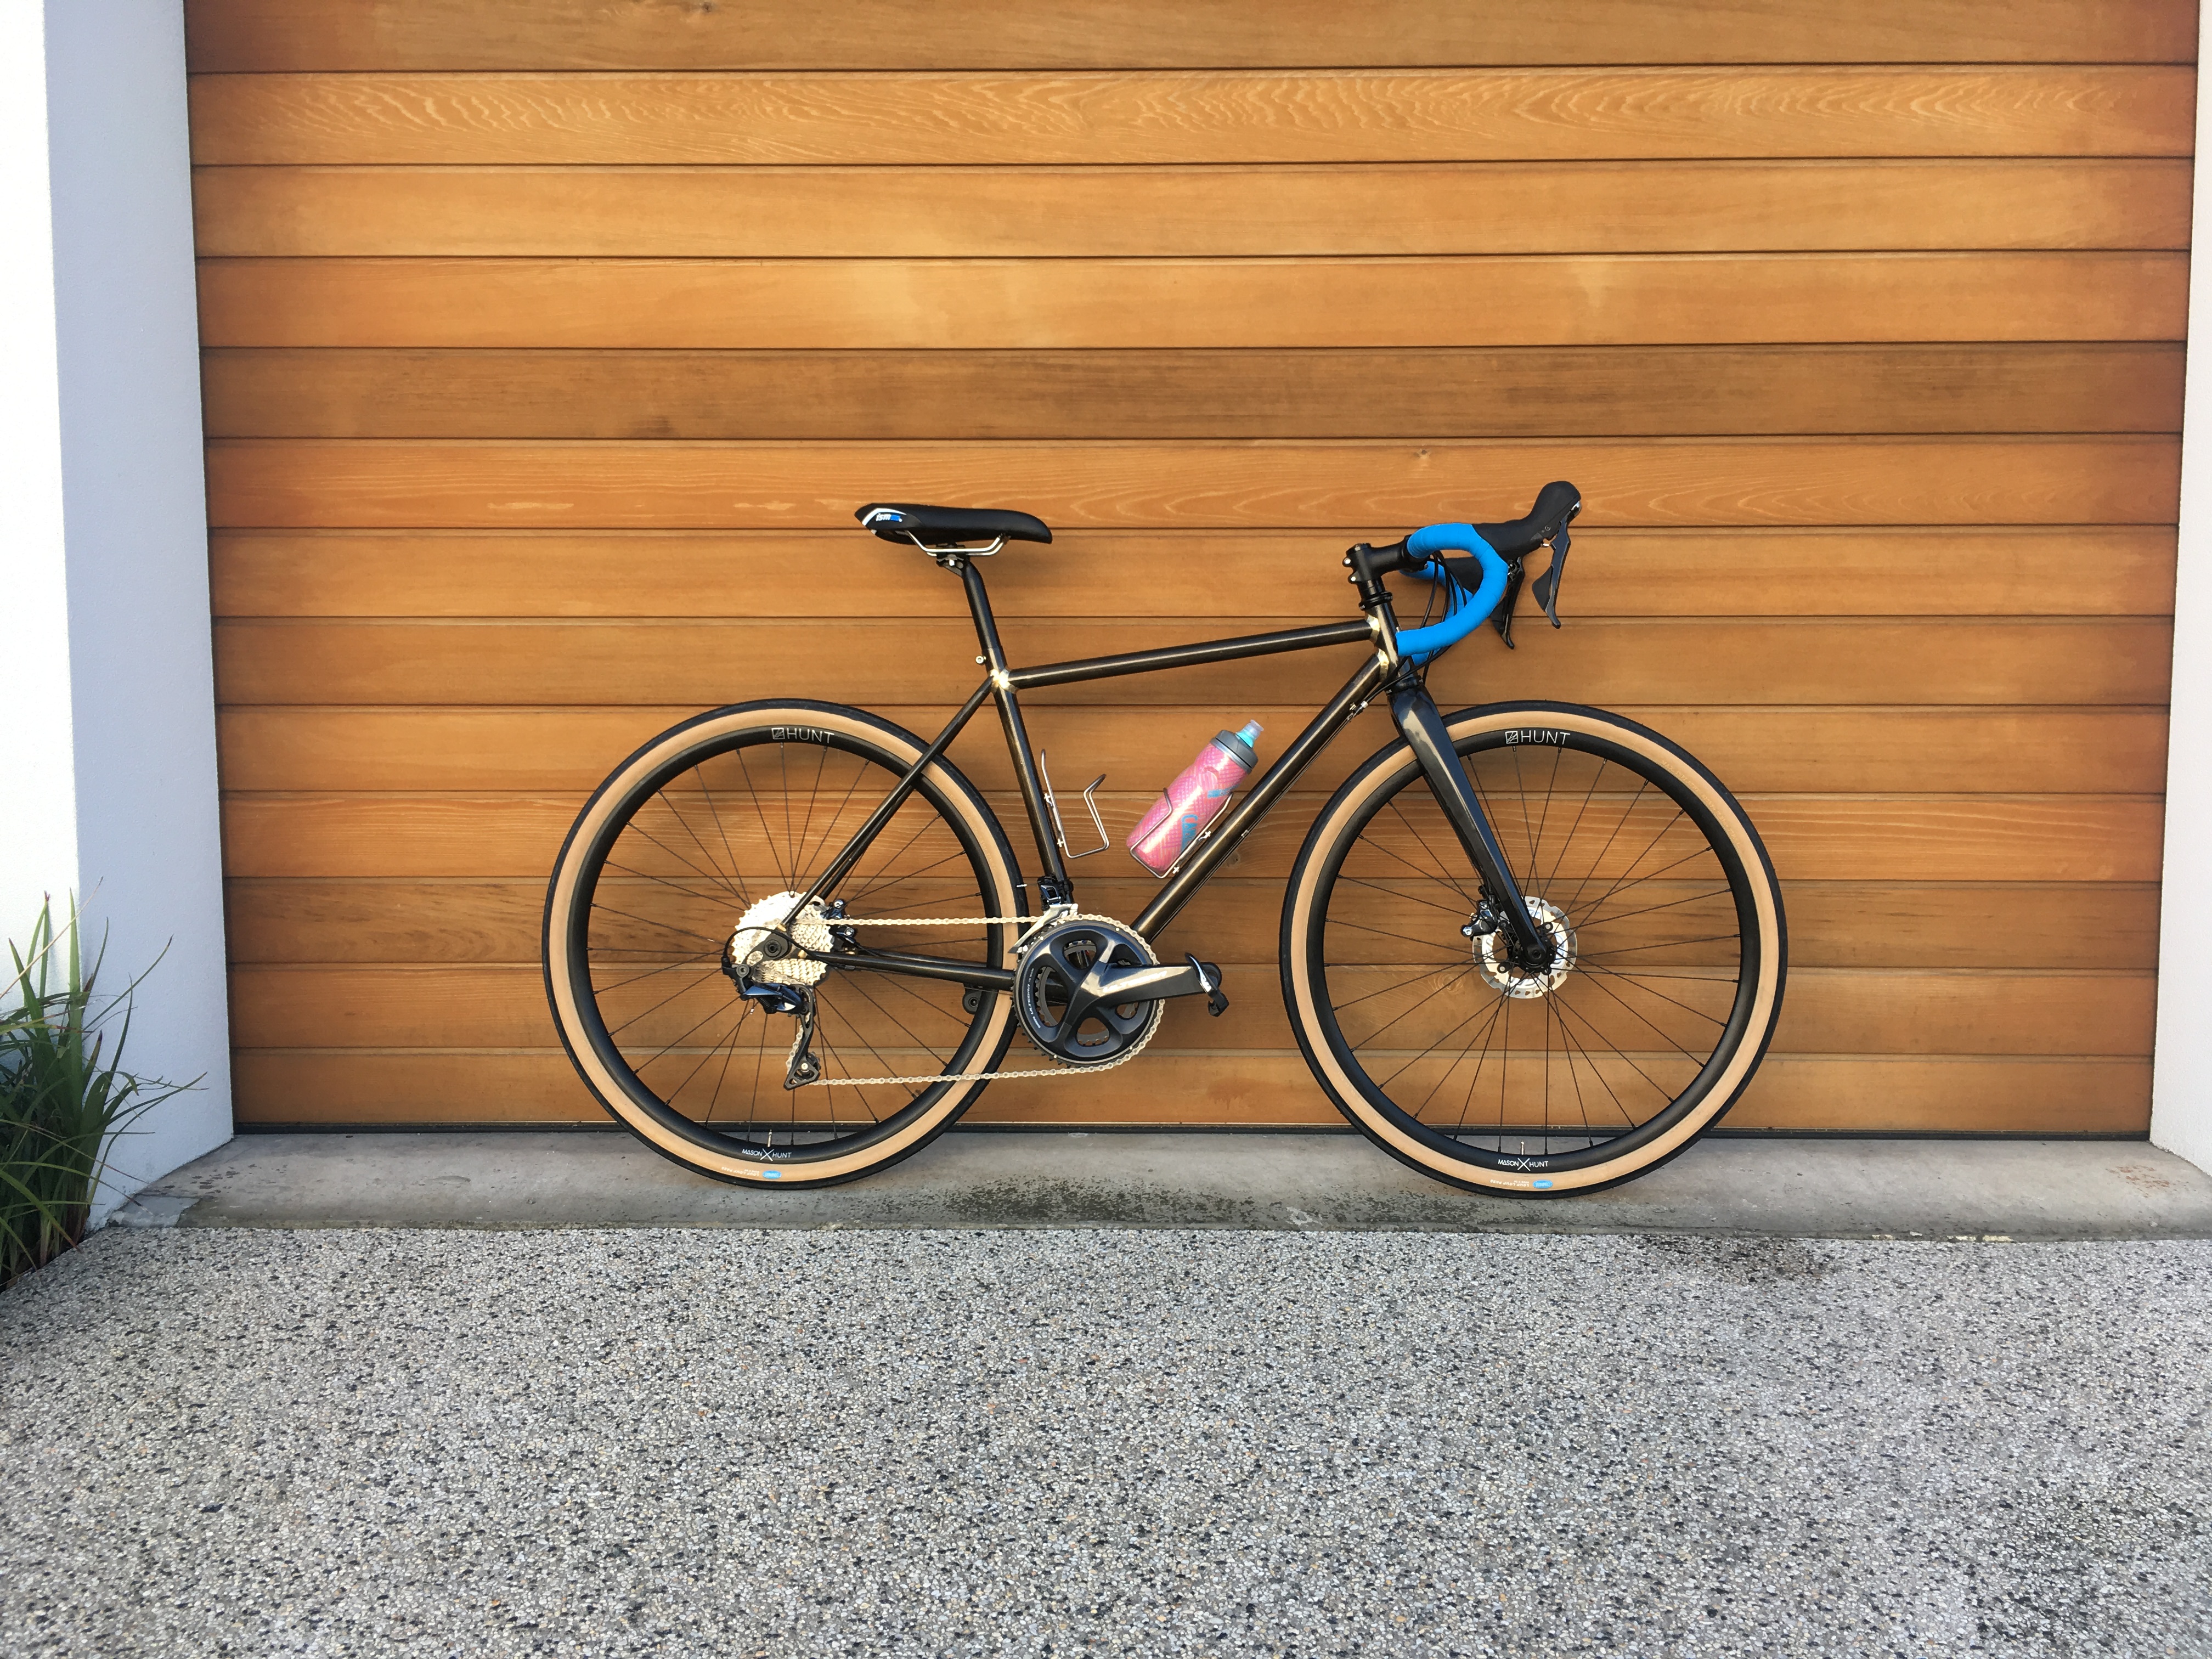
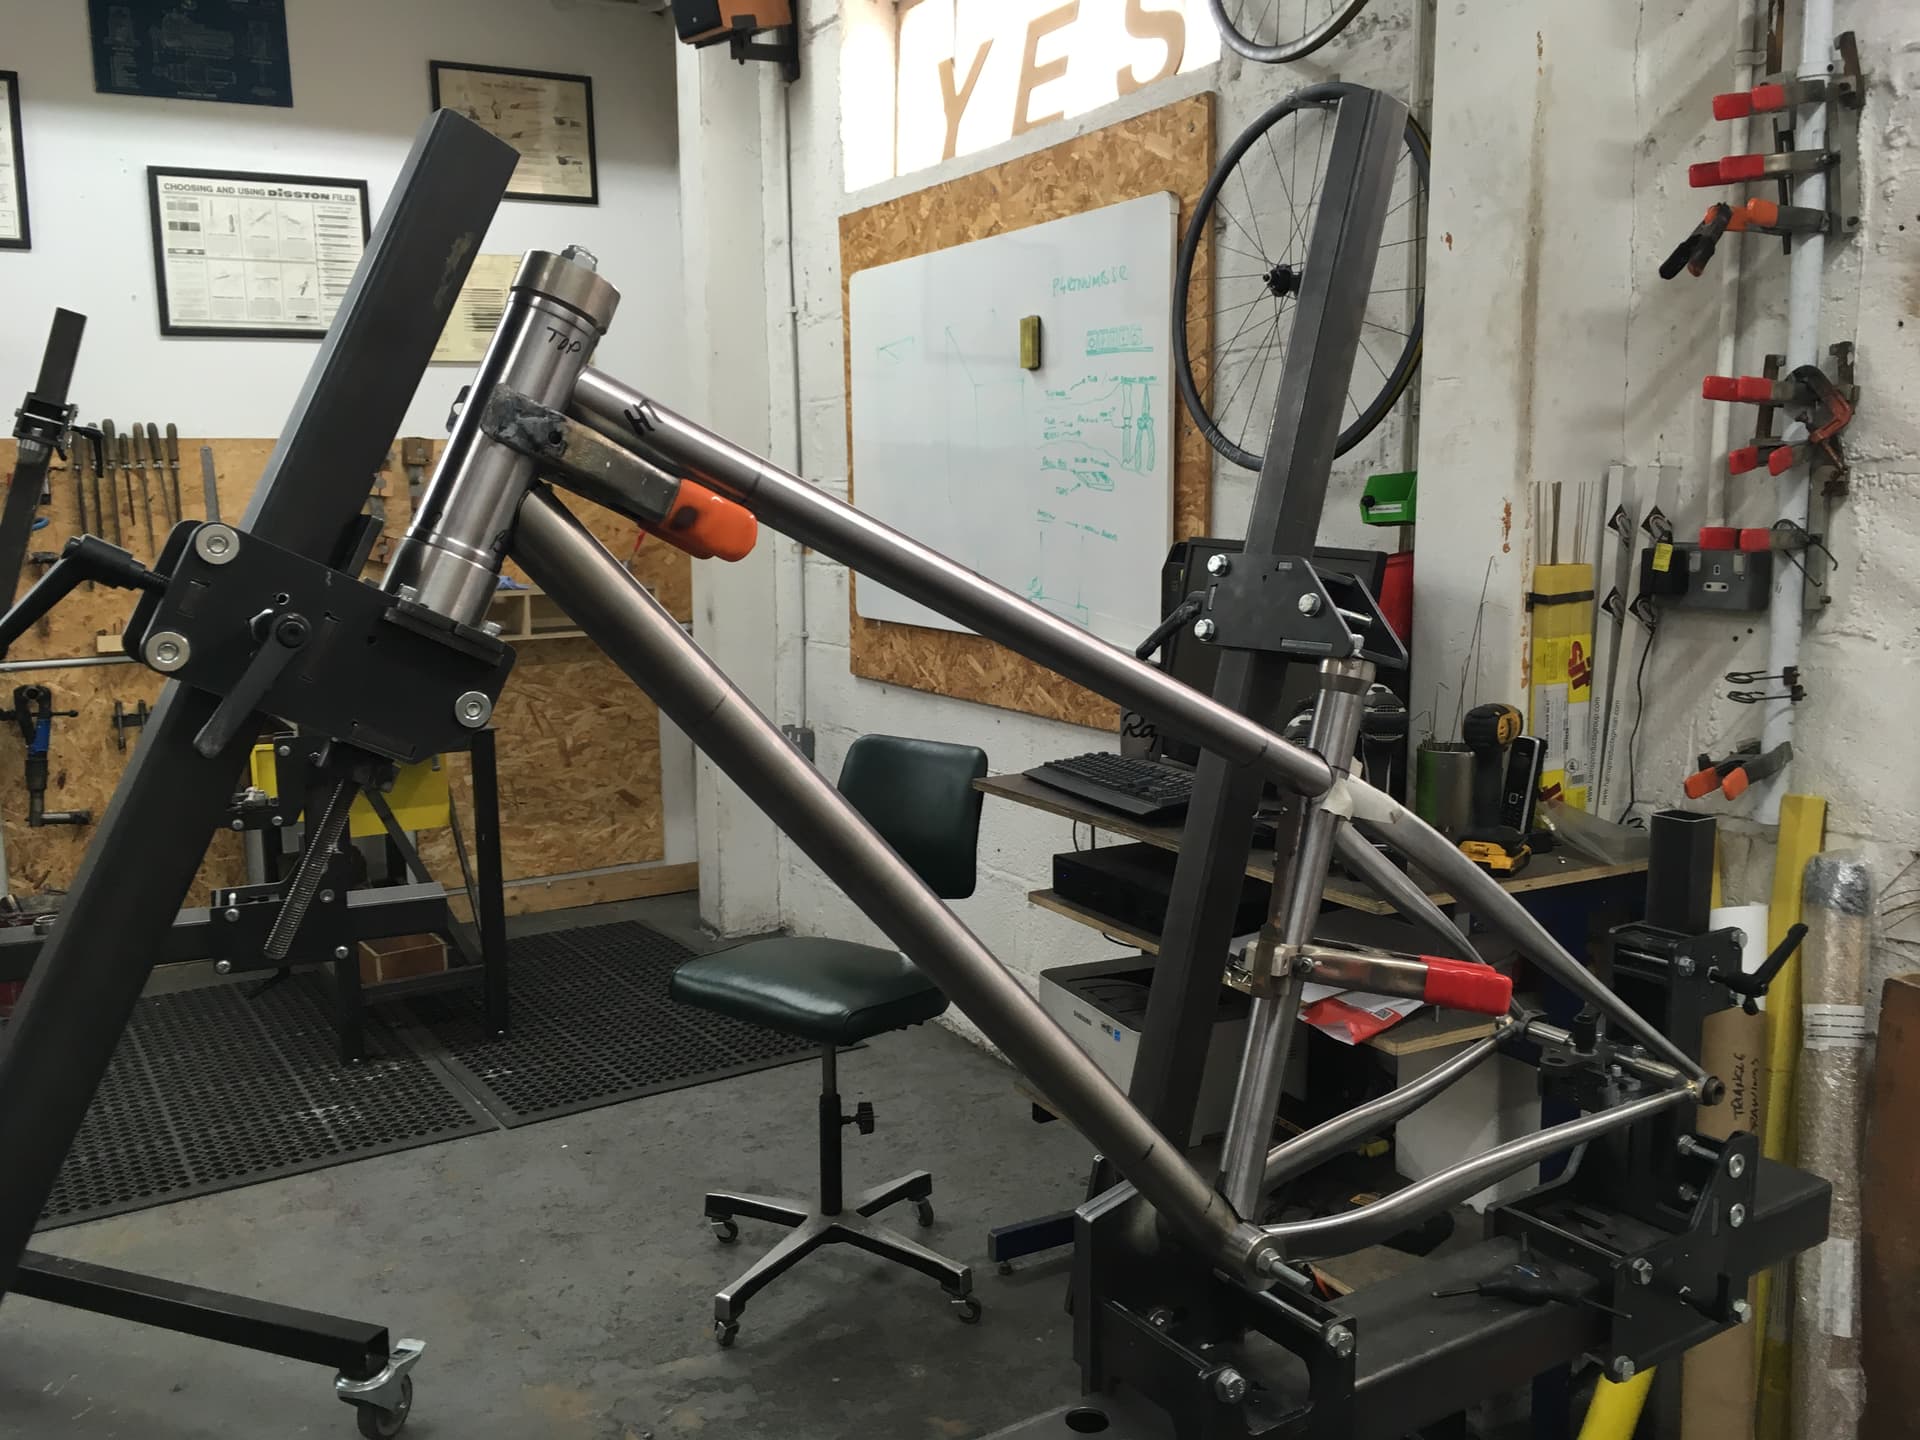
Currently I’m using an oxygen/LPG setup torch setup with an oxygen concentrator (thanks to Doug Fattic for all that juicy info from back on the velocipede salon forum). Unfortunately, unstable living circumstances (moving around a bit) and finite disposable income have limited the build count to just three frames so far. Things should change this year though after what could be another big move, but I hope to explore some ideas in the coming future.

-Fil

5 Likes

First two frames were completed during a brief stint learning the basics at TBA. These were fillet brazed using an oxy-acetylene torch with an inline gas fluxer. Luxury.
I hand filed the mitres and still do.

Frame 0.1

It turns out my lady partner is probably one of the few people that actually would benefit from custom frames, not-so-tall with long legs and short arms. Kinda like a T-Rex.

So for her we designed (we is generous here, a lot of guidance from the very knowledgeable folk at TBA) an all-road type bike that’s a bit of a gravel thing, but not too modern gravel. I really like the idea of making proportional bikes, small and very large bikes are just kinda ugly, sorry. Not to mention all the design compromises that come up due to standard sized components e.g. wheels, and the (I’m assuming) changes in handling dynamics of extreme sizes that are available off the rack…

As she’s not racing UCI events, the design was driven by 650b wheels with max ~45mm wide tyres. Pretty standard roadish angles and disc brakes was the go, featuring a tapered HT with a nice Columbus carbon fibre reinforced polymer fork. She’s light, and light riders get more out of gram counting than others.
Tubing was a mixed bag, and rather dainty. I have the specs somewhere but not at hand. Through axles are important for me.

Essentially, this bike was mostly designed by Tom Sturdy interpreting some of my ideas, I think it turned out okay.

Some build snaps:


The finish was applied maybe a year or more later, and was a chemical “gun blueing” treatment that results in a stable blue oxide surface. Sealed it with some rattle can clear gloss which has not held up. Might redo it with clear cerakote sometime.


Sometimes it wears smooth tyres for pavement and sometimes a nice pair of knobbies for rougher paths. Ride reports seem pretty positive.


Some takeaways:

  • Going with more aggressive gravel or mtb tyres would have been a mistake, limiting the bike by tyre spec keeps the the bike in terrain where the geo works best.
  • I think the proportional build philosophy worked well, at least according to rider feedback. This extended to the finishing kit.
  • Flat mount rear drops used incorrect brake calliper mount spec, almost impossible to avoid rear rotor rub as the calliper is on the edge of the adjustment range.
  • Goes orright.

There’s probably more I could say but I’ll leave it there.

6 Likes

Thanks for sharing, nothing beats a classic fillet-brazed drop bar bike.

I am curious. Was this a user error, or was there something wrong with the dropout spec?

I seem to recall the infamous PVD writing something about an incorrect published flat-mount spec around about that time.

I’m hoping it’s wasn’t user error, it’s all rather simple to set-up and assemble and I didn’t stray beyond the specified use case for the dropout. So I’ve just sort of connected the issue I’m experiencing to my vague memory of what some guy on the Internet might have said… probably not best practice but here we are.

Either way, the new style 3D printed flat-mount through axle dropouts look much better visually. Would probably use these for the next ‘road-ish’ bike I’d like to do, got some ideas floating around for one where the aesthetic details would ‘make or brake’ the concept.

1 Like

hrm, you were not kidding:

the black lines are the official spec.

This is the confusing part:

the .344 might be in spec, but it still seems like an error because the boss is not centered. I’ll DM Paragon and see whats up.

1 Like

I’d be interested to see what they say.

PMW don’t seem to sell the same dropout anymore.

The one I used was steel, with a single piece that had both of the brake bosses which is then supposed to be attached to the flat portion of the dropout plate.

Like this but not Ti:

1 Like

Frame 0.2

So the other frame that was made at TBA was for me. Gravity MTB is what I like to ride, so I wanted a hardtail to do just that.

I had some ideas, and they were tempered by the wise boys of BTR fabrications who worked from the same building as TBA, Burf and Tam. They really know their stuff, and I learned a lot talking with them. These guys were on the slack DH hardtail train quite early on, certainly before they became mainstream. In the end, I wound up building something similar to what they offered, but sort of in-between two different models. It was a lot less… errr ‘polished’ mind.


Thanks Burf.


If you know, you know. If you don’t then you probably get more vitamin D then those that do.

So… when it came to tacking up the junctions, I think I forgot to snug up the BB mount on the jig. Whatever happened, the ST was slightly out of plane. I think it was ~5mm? can’t remember. Either way, a bit of cold setting was attempted.

Didn’t realise till I got to my new home and finally started to build it up (thanks to a mate for the SRAM hookup), that the ST had a tiny bulge at the BB junction just above the braze. I didn’t care, still rode great.

I wanted to go longer in the fork initially, but after speaking with Burf and Tam I was convinced to just used a shorter HT to try a range starting at 140mm. In the end, I ran it 130mm and preferred it there. Might be interesting to discuss if people care about it, but my opinion is now that longer forks on a hardtail don’t ride well.


Made a little bag for it too.

Anyway, It was retired maybe two years ago after I noticed the TT-ST braze was starting to crack.


Assuming the braze was fine, I think the cold setting induced some stress that ultimately manifested in a cracked braze.
I could fix it up, but I think I’ll just leave it be and hang her up.


:saluting_face:

Gave it a pretty hard life and learned heaps building and riding it. Some key points of the top of my head:

  • For the Pike, 130mm was the sweet spot, I run it super stiff, spacers, and with a Lufftekappe (spelling?). But that is how the rear rides, bouncy and stiff, so matching the fork to this characteristic worked for me. Anything more feels like riding a stapler, and that sucked. Keeping this symmetry between front and rear kinda forces you to not just plow with the front and then face ankle hell to get through lines.
  • It destroyed wheels. To mitigate I’d run DH case tyre, insert and at ~35psi in the rear. Still munched rims for breakfast. That got annoying.
  • Really made trails that had got stale fun again. I don’t think riding hardtail makes you better at MTB, it just makes you better at finding ‘hardtail’ lines. Usually skipping across rocks or gap lines make things go smoother.

I’d like to do another sometime, with some changes.

4 Likes

Right, we no longer offer that dropout in steel. We changed the design to have less manufacturing time, so we wouldn’t have to raise the price. These are the drawings @Daniel_Y is referring to, and we were out of spec on those, but have gotten them in spec. However, that’s not important for the older dropout you have. We strive hard to meet Shimano’s specs on all of our components, and we get these specs directly from Shimano. I doubt that these are the incorrectly published specs that PVD mentioned. The dropout you have meets the specs for flat mount. When this dropout was first introduced, we did have a few riders with the same problem you’re having. We isolated it to some very early versions of SRAM and TRP calipers. We never heard of a problem with Shimano calipers. So, assuming the caliper mount was put on correctly, (your earlier comment about it being a simple assembly is correct, it was designed to be self-locating and easy to do), I’d like to know what caliper you are using. If it is SRAM or TRP, a solution may be to file the slot a bit larger, and reduce the diameter of the head of the mounting bolt so it has room to move. If it’s a Shimano caliper, then I’m stumped. Filing the slot will help, but that’s never been a Shimano problem that I’m aware of. Please respond, I’d like to know if you get a solution. Nice looking bikes, keep up the good work!

5 Likes

Oh dear. I feel like I perhaps ran my mouth without thinking. I really should not have said anything was ‘out of spec’ without doing the proper checks. Furthermore, I should not have even mentioned PVDs name given how vague that memory was. Apologies to both PMW and PVD.

Sigh, this is why I was so hesitant to post.

I’ll respond when I have a chance to have a proper look at the frame, but yes it is the standard Shimano ultegra calliper (I think they were all the same in this generation of Shimano road groupsets?). I could well have just cocked it up!

Yes, I agree filing out the hole or turning down the bolt head may fix it, but this bike was built up at a time when I had no access to the proper tools (in-between moves). I think I may have even done something to make it work better, but I can’t quite recall now…:thinking:

Cheers for reaching out Mark. I’ll get back to you about it.

1 Like

Don’t worry, no offense! I’d much rather have a dialog with our customers than not know! Please do keep posting, and let me know how things turn out.

2 Likes

I love discussing this topic haha

90% of the hardtails I have built have been 120mm, with the occasional 140 and 100 thrown in for fun. I think long forks on hardtails have been a crutch for outdated geometry, but now with long and slack hardtails - 120-140mm will get through just about anything.

Like you mentioned, the rear wheel becomes the only limiting factor even on a short travel hardtail. My 61 degree hta / 140mm Lyrik bike eats rear rims even with dh casing and cushcore.

5 Likes

Totally agreed! I also think fork air springs and dampers have improved so much since the mid 2010’s. You get way more controlled and useful travel out of a 120-130mm fork.

I feel like it’s always good to go back and evaluate assumptions. Tires, forks, and geometry slowly creep better every year.

2 Likes

You can have my Manitou 1 when you pry it out of my cold dead hands.

Humorously enough, my first DH bike had a Judy XL (the long travel one!) on it. 80mm of travel. AND hydraulic rim brakes!

Back on topic, I think over about 130-140 is kinda silly for a hardtail. Front end writing checks the rear can’t cash and all that. But I would have said that about 80mm travel forks 20 years ago, probably.

-Walt

6 Likes

I think appropriate fork travel is dependent on bike size/length and also to some extent, system weight. A bike with 450 stays and an 880 FC at 28 percent sag will need more travel than a bike with 420 stays and an 800 FC at 25 percent sag.

2 Likes

Front end writing checks the rear can’t cash and all that

Agree with this even if I love a 130mm hard tail and owned a few of them.

I wonder when soft-tails will come back into existence now that “gravel” is a thing and we have even seen FS road bikes.
I remember when I dreamed about a Salsa Dos Niner.

1 Like

The kinematics on pivotless/soft tail frames are… very not good.

I mean, if you want them to ride ok when pedaling, you have to basically tune them (assuming you can find an old Relish or AD-5 shock somewhere) so that they basically only are active for big hucks to flat. In terms of actual trail obstacles, you might as well just throw a thudbuster on your hardtail.

-Walt

3 Likes

I’m not really keen to on the soft tail thing, but it already is back in MTB land with the Trek super calibre. Compliant tyres seem like an easy way of achieving the same result with minimal fuss.

I actually would really to explore a short travel design for a xc/distance style full sus bike that has a separate damper (positioned for a linear and constant lev ratio), and a super progressive carbon leaf spring. Similar to the proto cannondale DH bike from a couple years ago.

I’d also like to include permanent pannier mounts on the front triangle, but I haven’t drawn it out yet so not sure on the feasibility ¯_(ツ)_/¯.

All just a pipe dream right now so no use keeping it a secret haha.

The Supercaliper is NOT a soft-tail, it uses a legitimate main pivot located quite reasonably to make the suspension actually work/pedal well.

It’s short travel, but it’s absolutely nothing like a YBB or an old Trek STP (and it’s got way more travel, even at 60mm).

-Walt

2 Likes

Ah indeed! I never noticed the pivot and trek themselves describe it as ‘structural suspension’.

I genuinely thought it was built around a flex point in the frame structure.

Oh nice, haha. I had a Judy XL on a GTS LTS 1000 with a Rock Shox cable actuated hydro disc brake. The caliper was always dragging.