Hello,
I am planing to use the DR1065 dropouts on my next build. They are having a 3.5mm offset and the stays not connecting to the center of the axle. What is your efficient procedure with your jig and machinery to handle the offset? Spending hours on my model and I am sure there must be an easier solution.
Thank you ![]()
2 Likes
@Neuhaus_Metalworks and I go through tons of these dropouts. They are my favorite dropout!
- looks great
- Matching brake tabs are easy to design (or just buy)
- field serviceable hanger
- easy to work with
- plenty of space to land the stays
- a lot of design freedom
- translates from steel to titanium designs really well
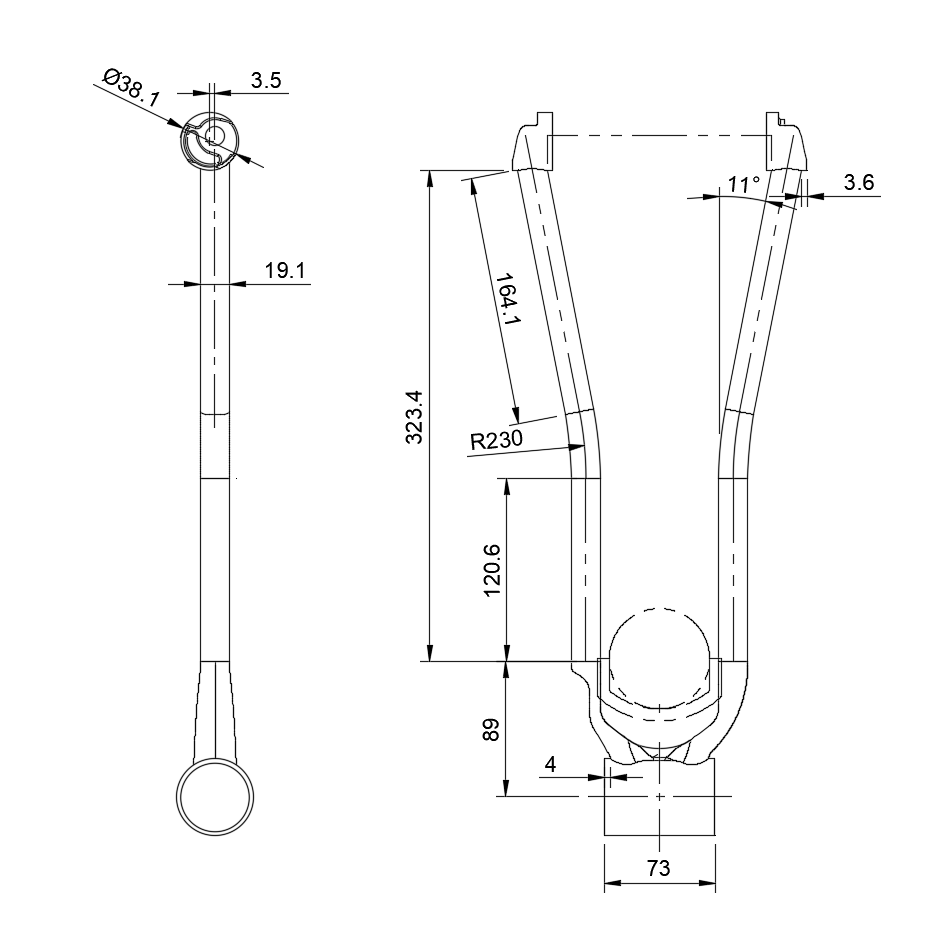
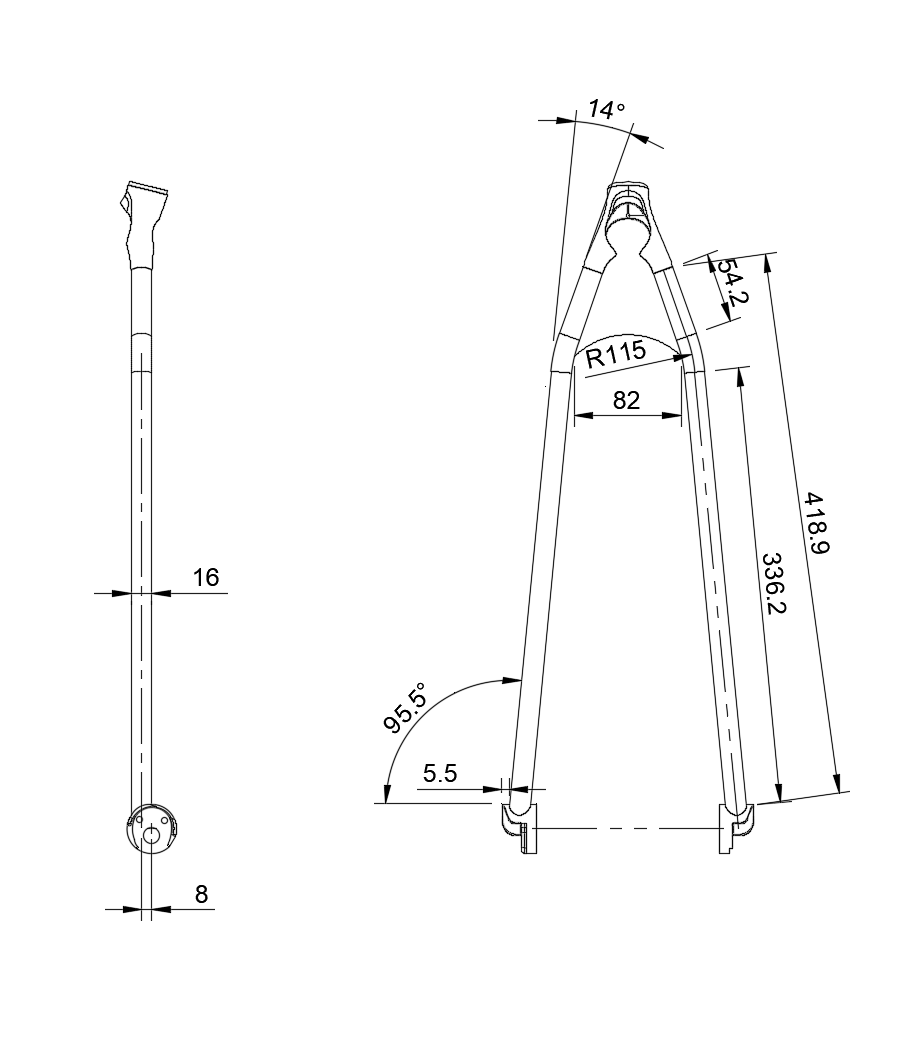
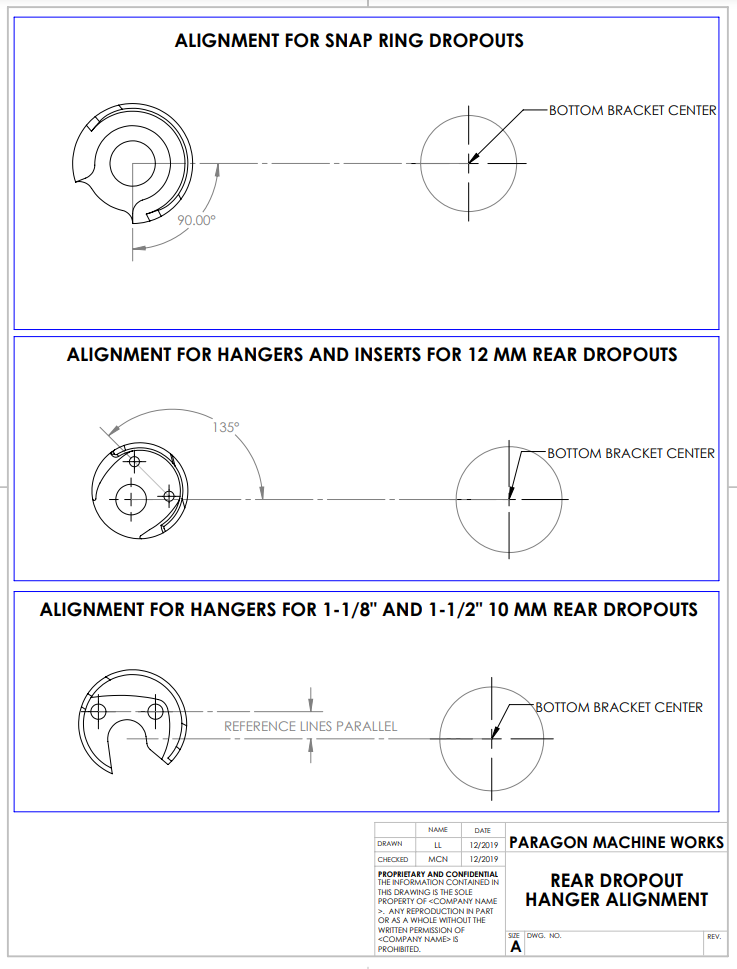
We offset the chainstay hole saw 3.5mm and the SS hole saw 8mm (see drawings)
A few questions:
- What chainstays are you using?
- What seat stays are you using?
- How are you planning to miter the tubes? (drill press, files, mill, etc…)
2 Likes
Miters are done on a mill with hole saws, seat stays are straight gauge non tapered tubes, chainstays are going to be oval/tapered and bent.
I find the hardest bits are to index the dropouts to one another correctly on the dummy axle and then to insert them in the correct angle into the stay slayer…
Order if operations would be:
- miter Cs/do, tack/weld in th fixture
- cut flatmount and internal routing into non drive side C’s, weld together
- correct any excessive warpage from welding, reposition in fixture
- cut Cs/BB miter, fit to front triangle
- cut ss/do miter in vise
- put another set of dropouts into the stay slayer fixture to align ss phase correctly
- cut st/ss miter in stay slayer
The correct orientation of the dropouts in the fixture is both critical and tricky, since it affects both offset and length of the cut and there is not really a lot to align off at the dropouts. But maybe we’re missing something?
Btw I’m at @HILITE at the moment, trying to figure out things…
3 Likes
I am assuming you are using a non-indexed version of the dummy? The indexed version would help eliminate a lot of the variables and give you an angular reference.
Regarding the fit-up, the notch-to-notch miter distances are not very sensitive to the angular clocking of the DR1065 dropout. A 3° angular misalignment only results in a .2mm length change:
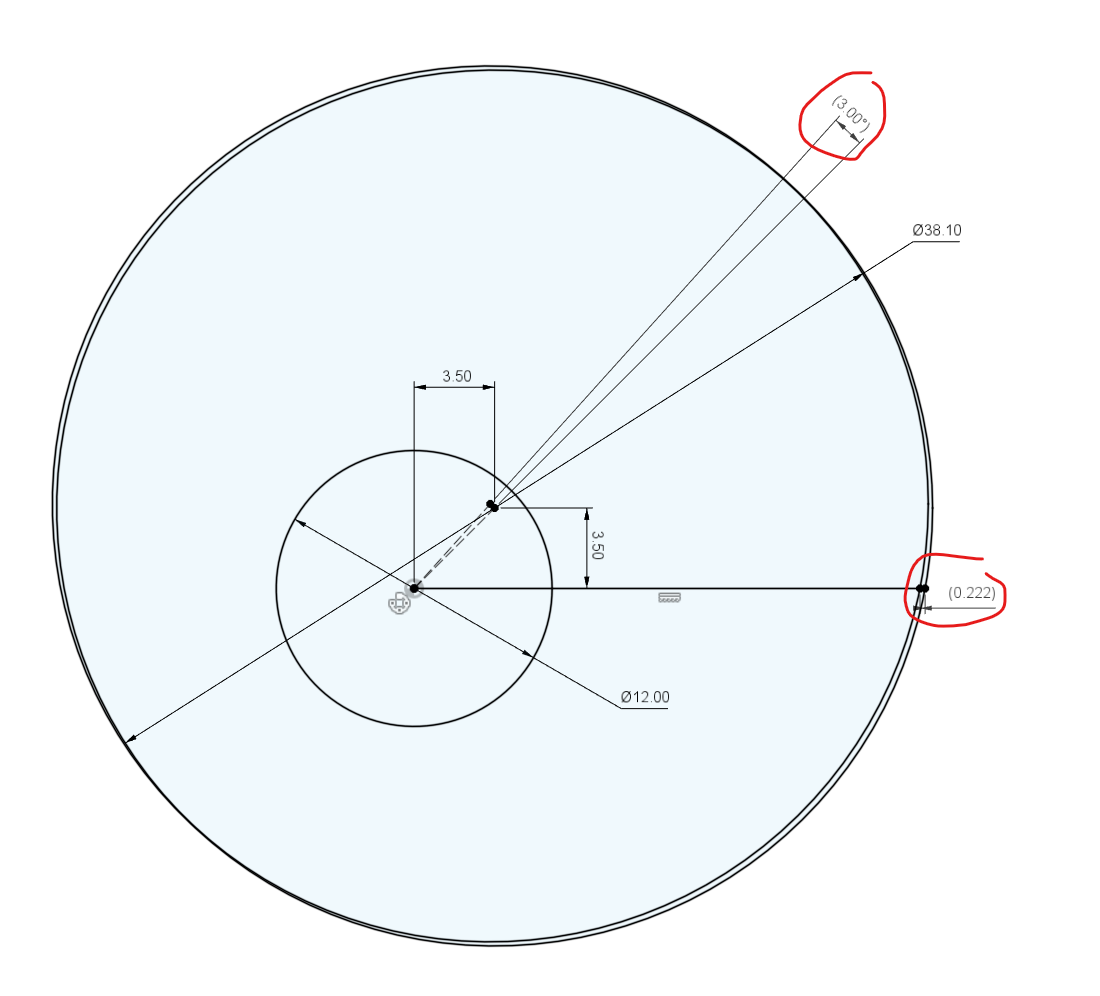
Since you have a pretty solid fixturing and miterling setup, I think you can trust the indexing of your fixture and mill to miter the dropouts. Then use a combination of eyeballing the clocking of the dropout and matching the fit-up to the miter.
In the end, the tightness of the miter will matter more than +/-3° of angular alignment. However, the more everything matches up, the better.
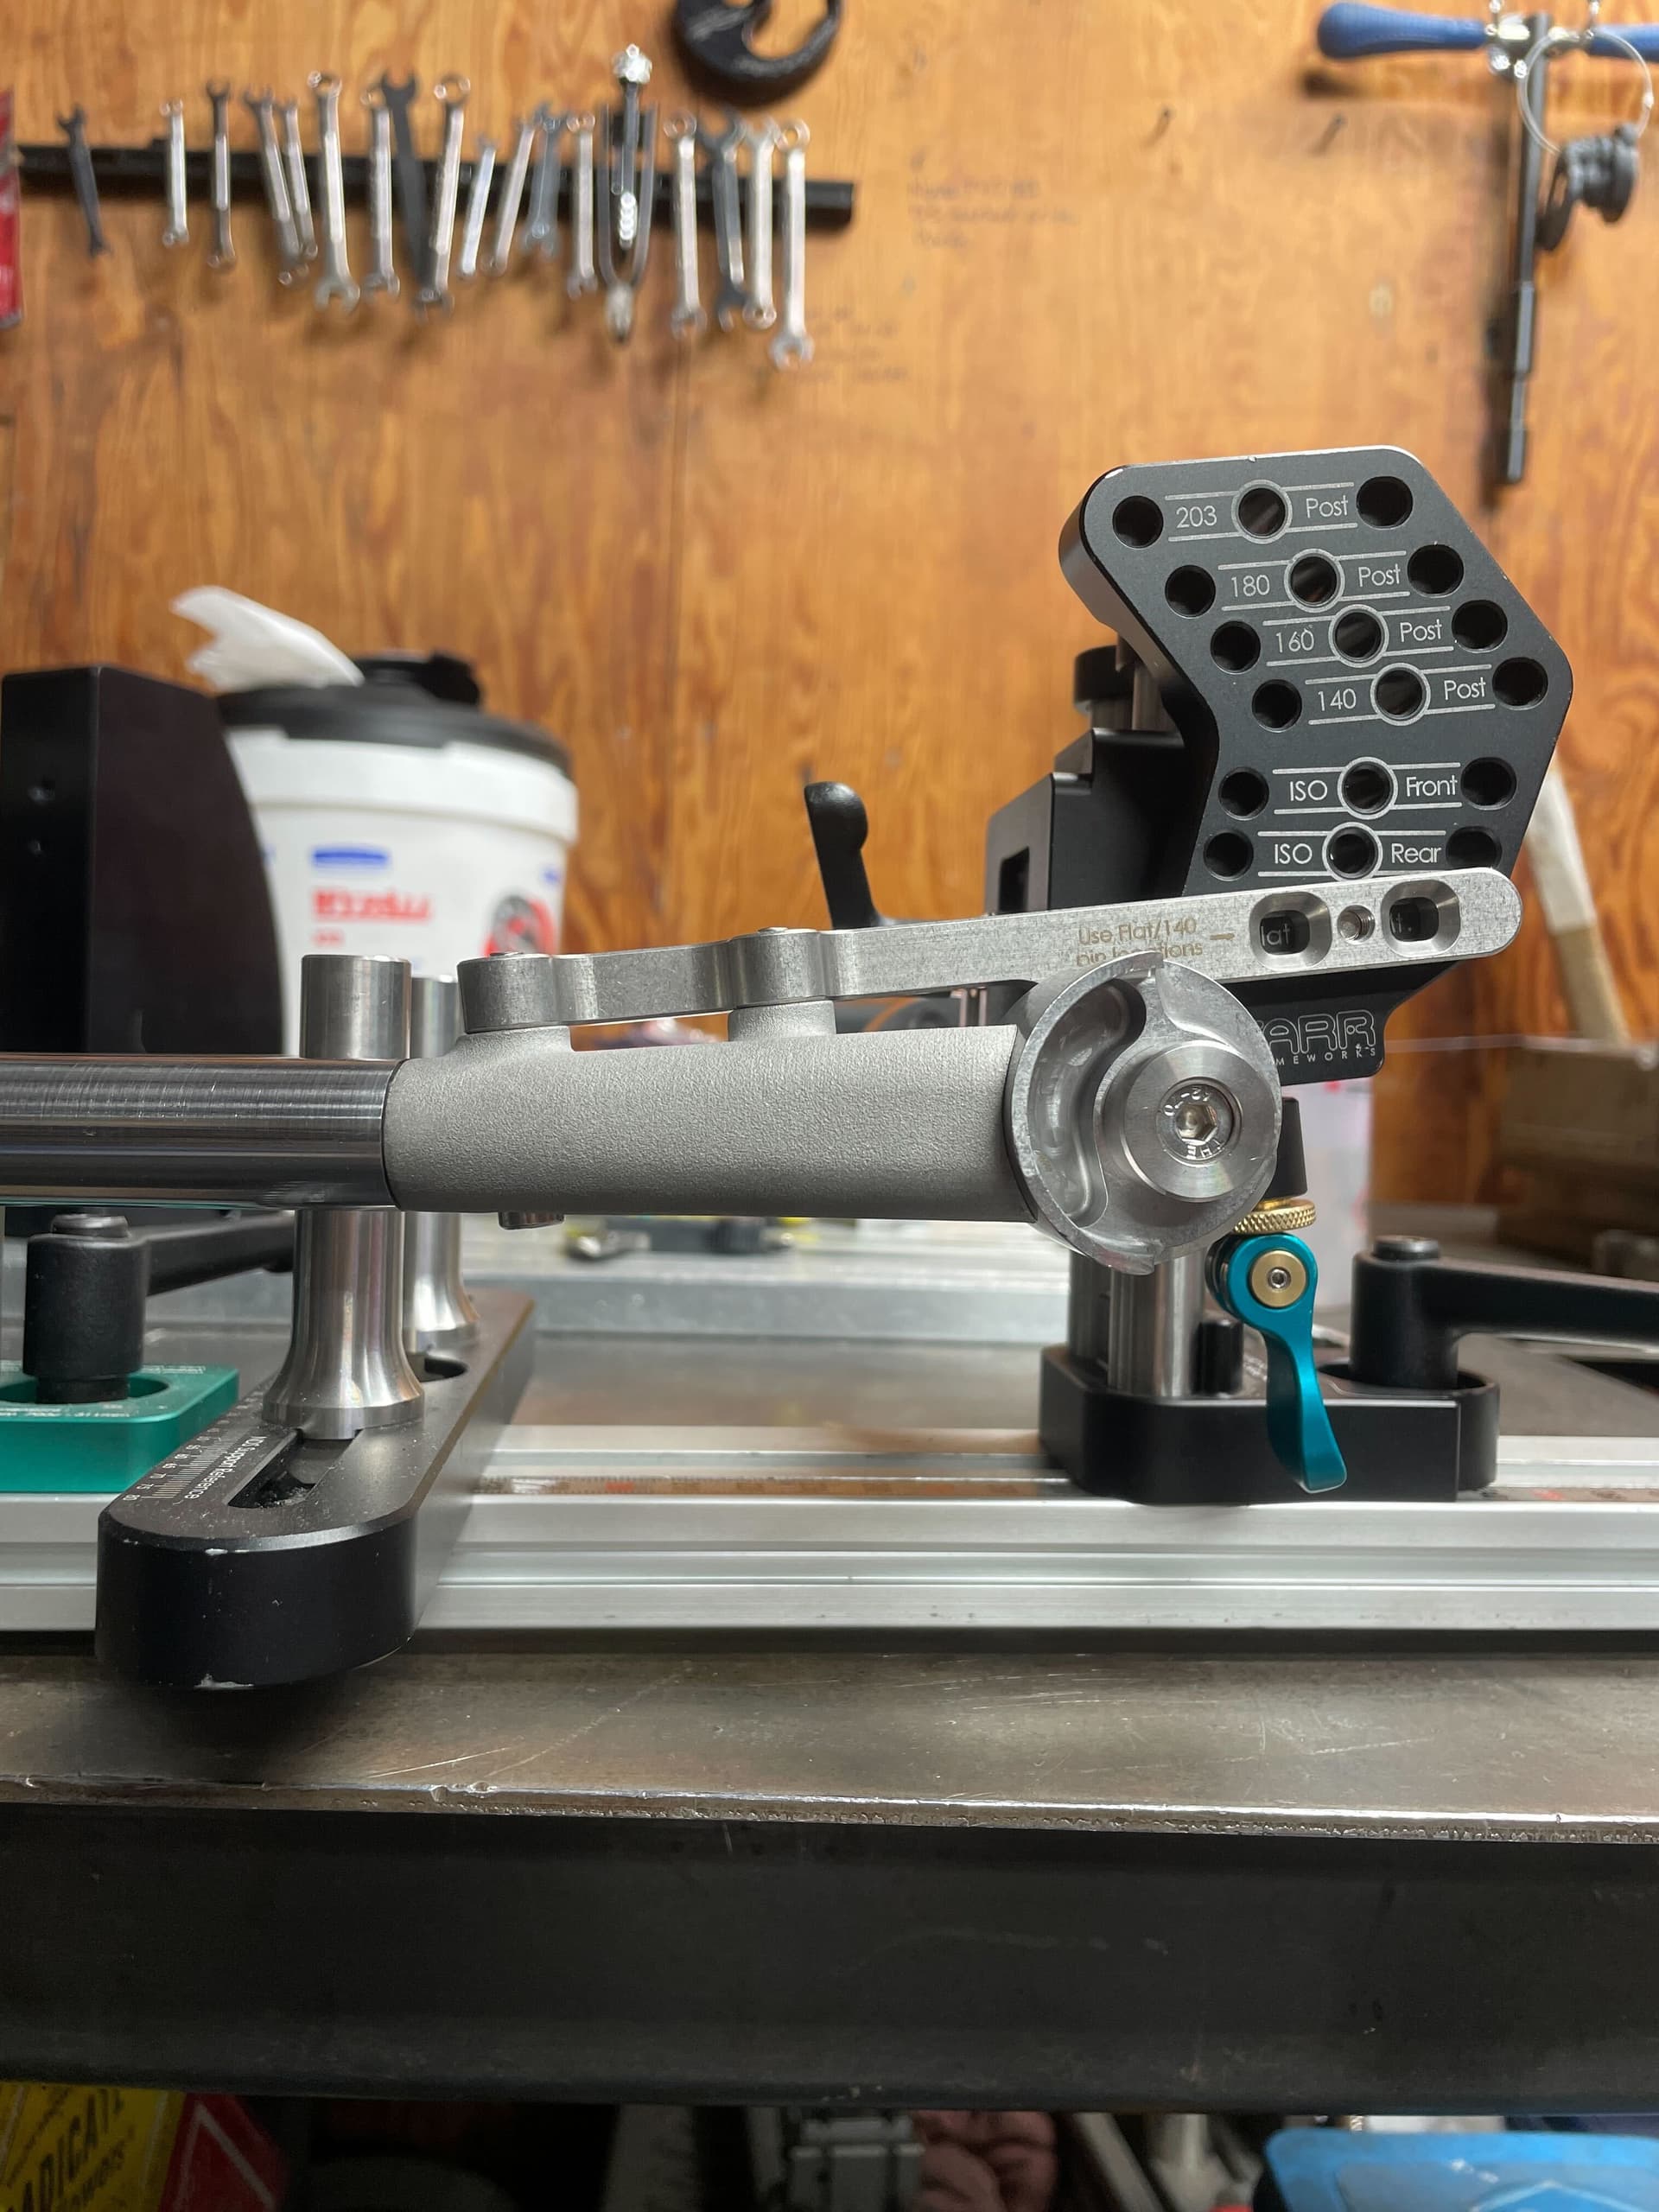
Hopefully, @Neuhaus_Metalworks can jump in with some more hands-on advice, but our process is different because we use the Farr fixture, batch out like 10 chainstays at once, and mate to a 3D printed yoke.
3 Likes
Two questions so two answers here.
First, mitering the offset. Align the centerline of your spindle to the center line of your cutter then just offset in the desired direction by 3.5mm or .187”
Second, aligning the dropouts. The easiest way is to use indexed dummy axles. If you are trying to do things in a quick and repeatable manner this is the best way and a worthwhile investment. Below I will show and explain how it can be done with non-indexed dummy axles. As @Daniel_Y mentioned, a little misalignment isn’t the end of the world, just keep in mind the clocking will affect the derailleur hanger offset so it’s best to set the drive side then adjust the non-drive side if needed. In theory if you are working from back to front you can correct any misalignment of the dropouts with the cs/bb miter but you also shouldn’t have to do that as the dropouts should self-locate. With the stay slayer or similar you could set get both mitered chaistays perfectly even then use the miters to create the reference for the dropouts. At that point they should roll right into place and correctly oriented.
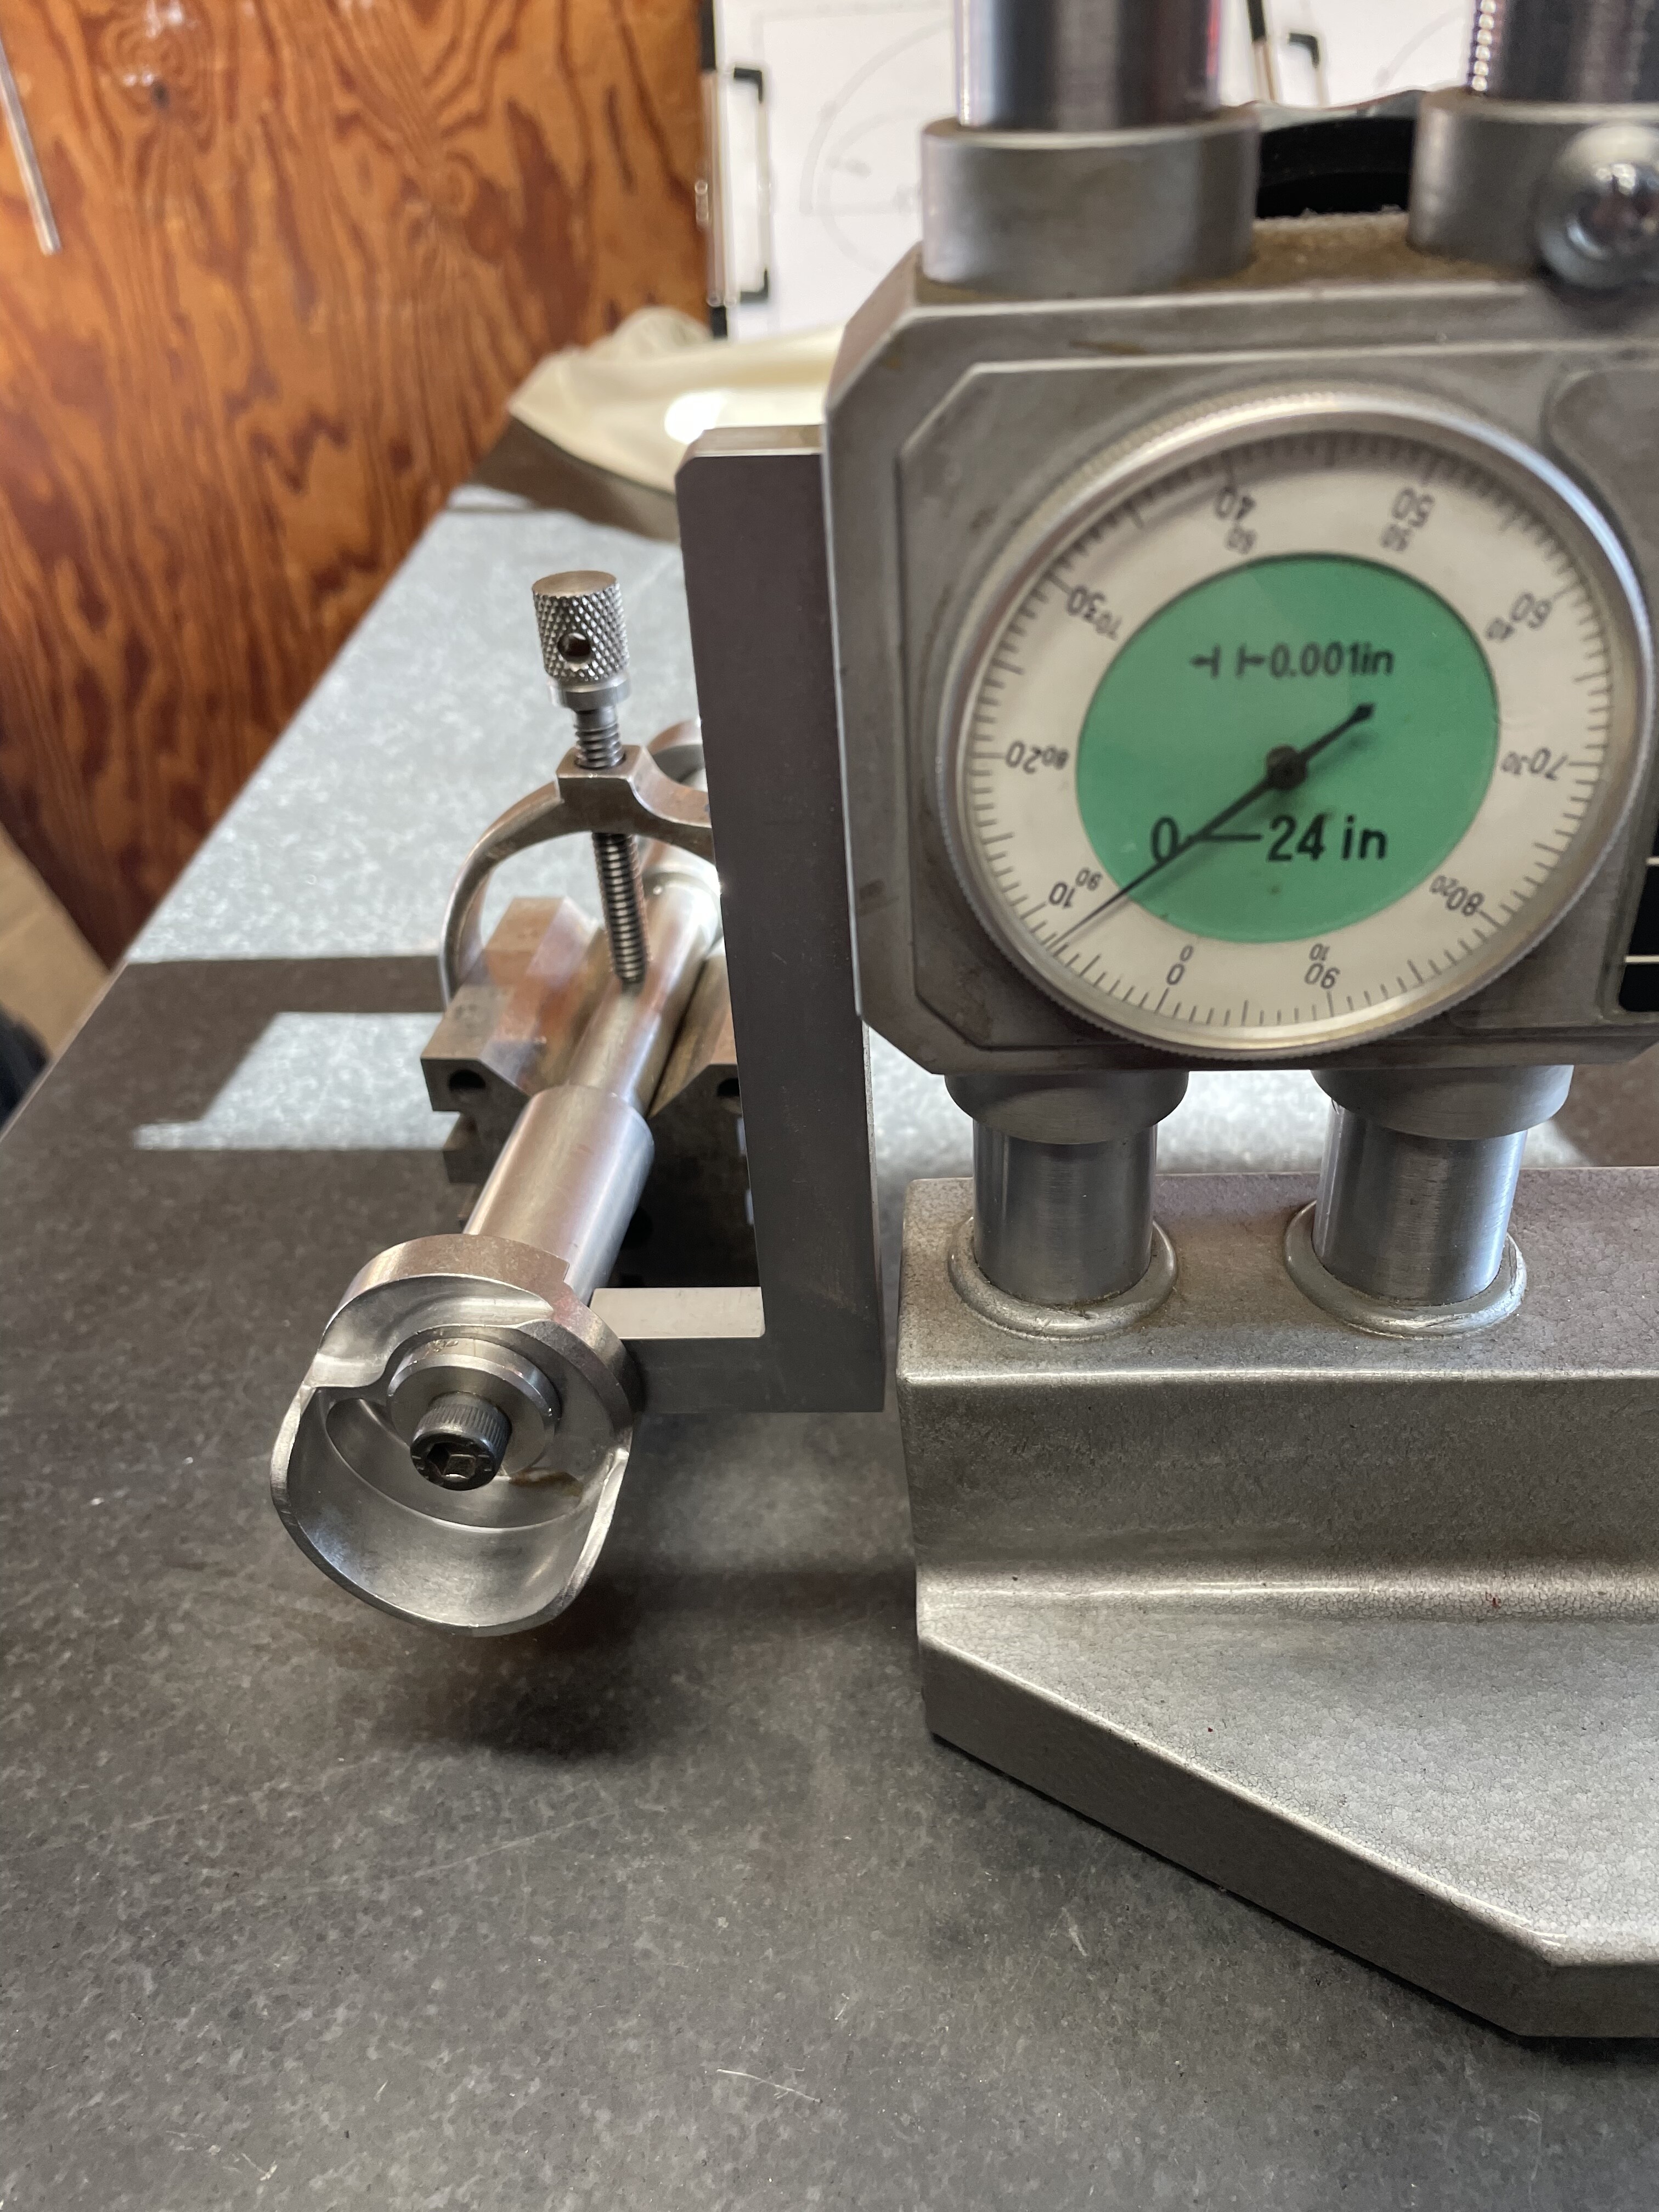
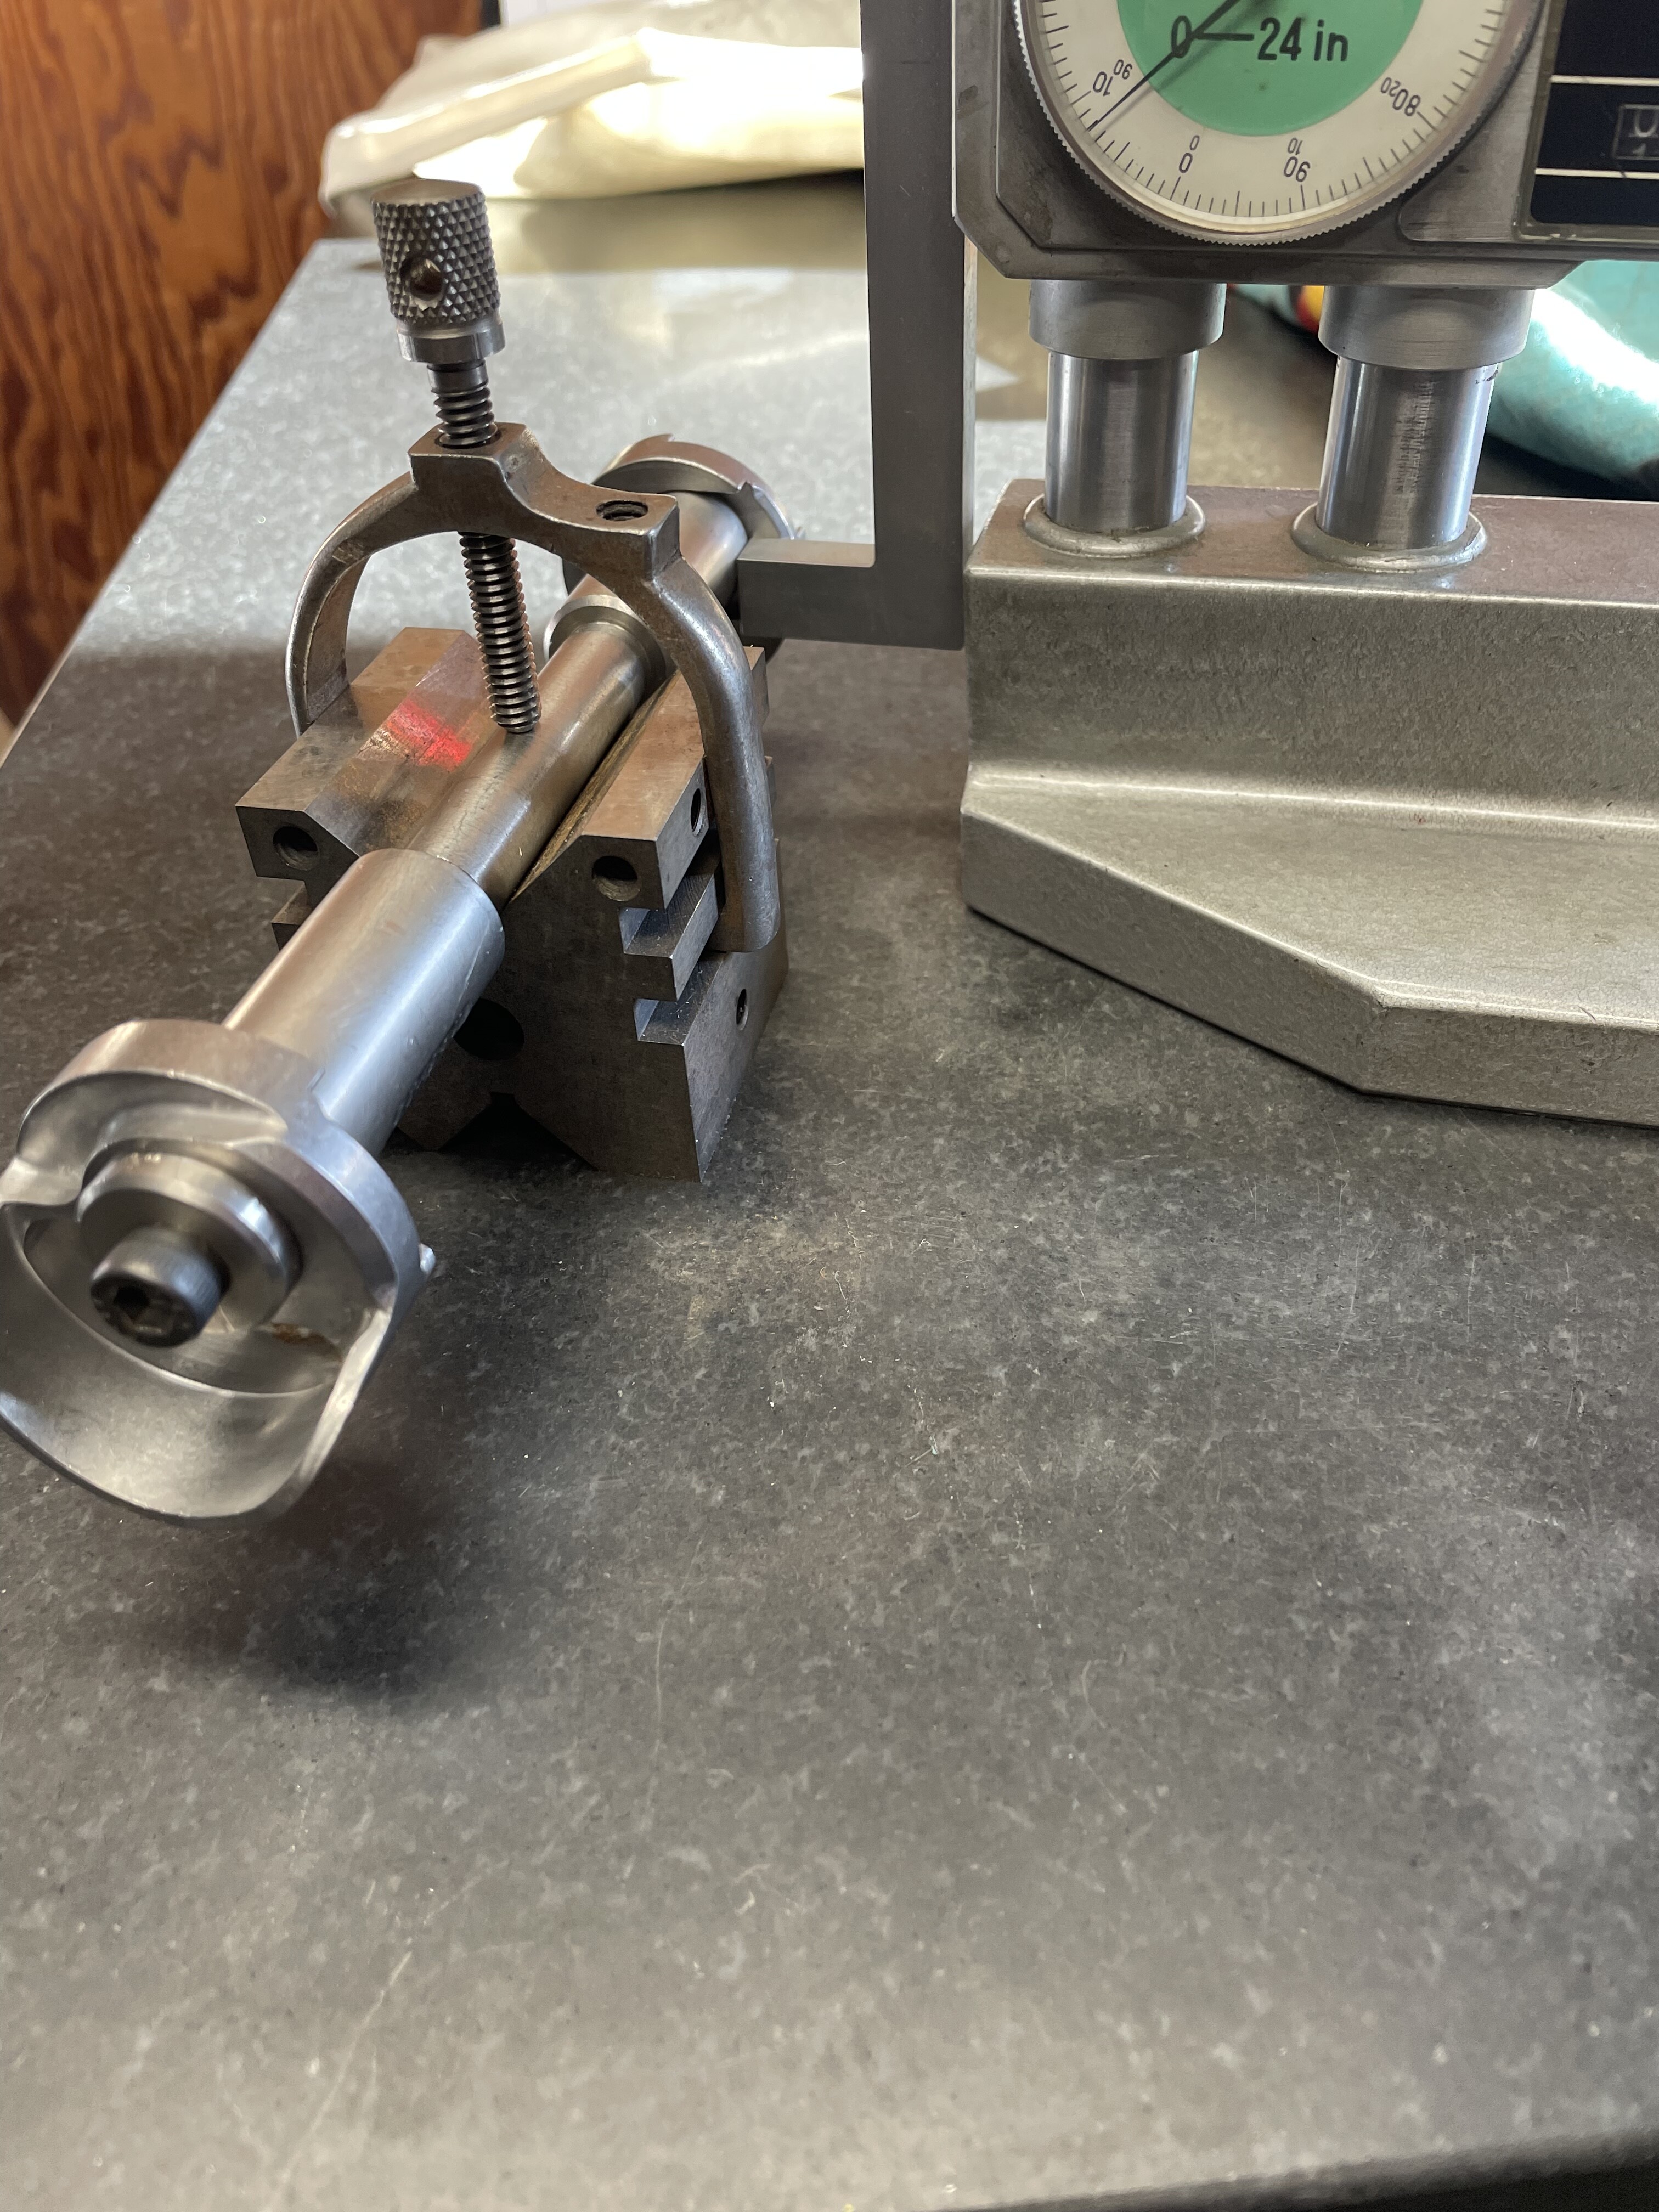
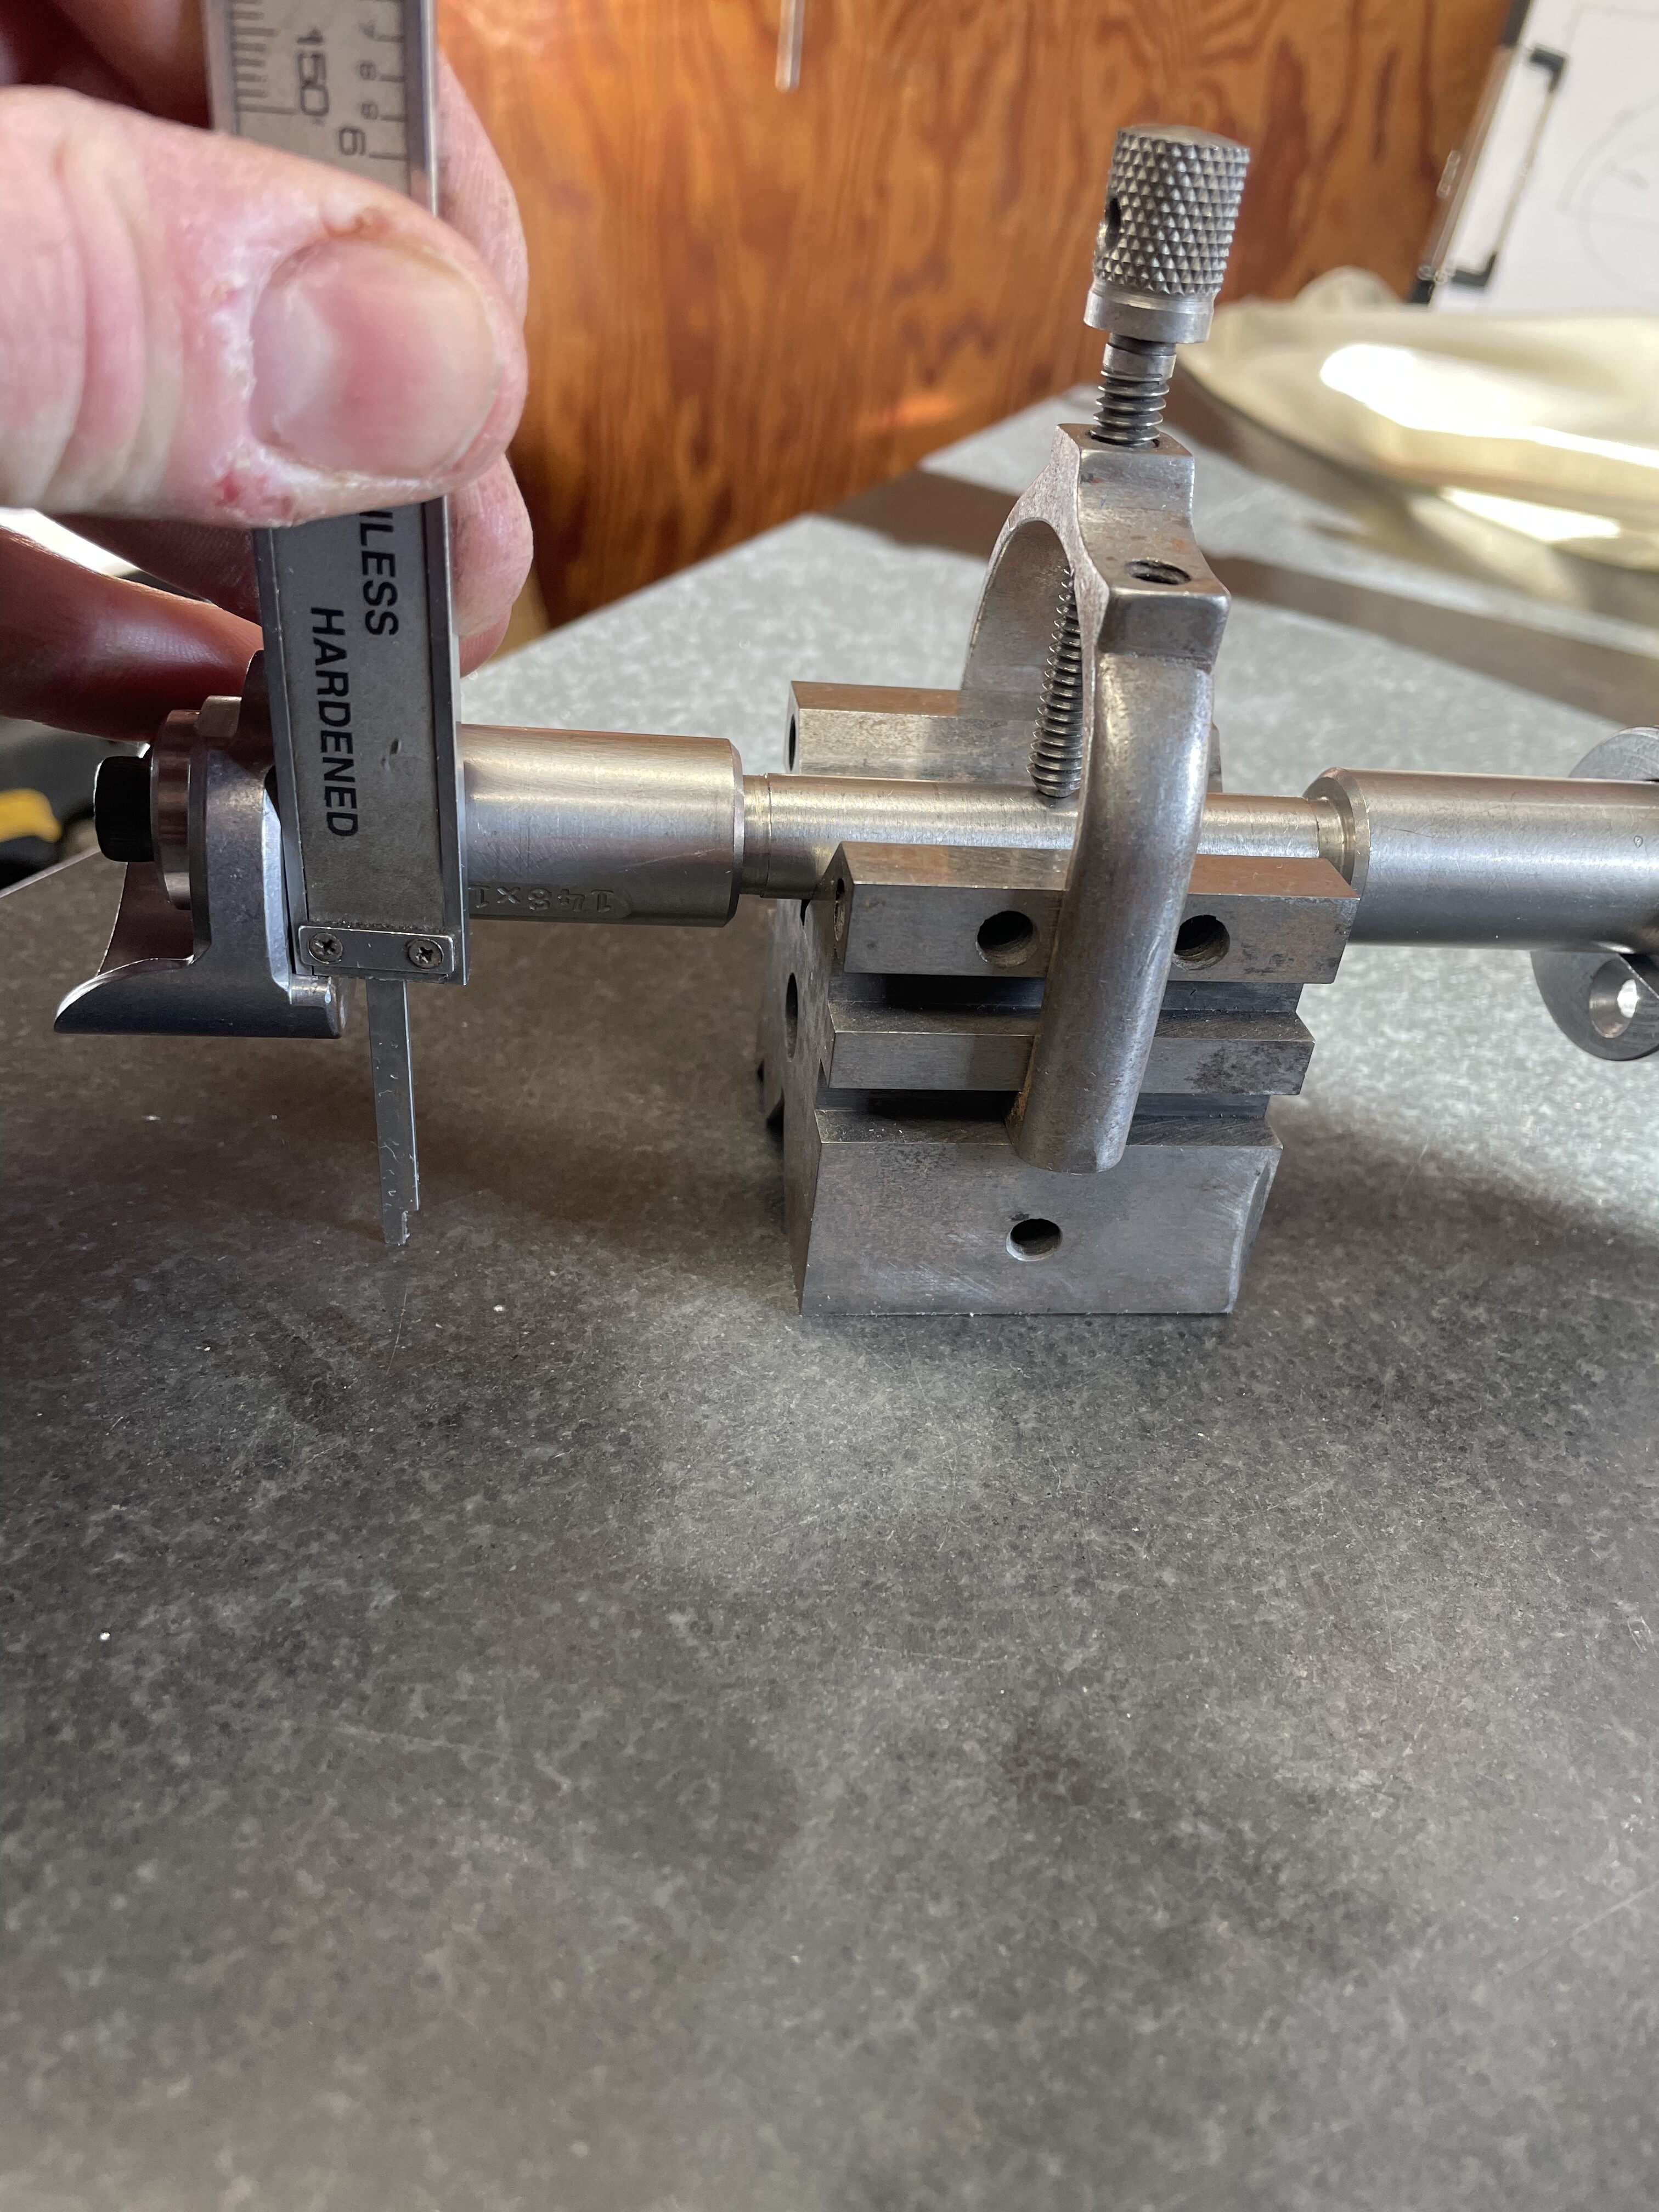
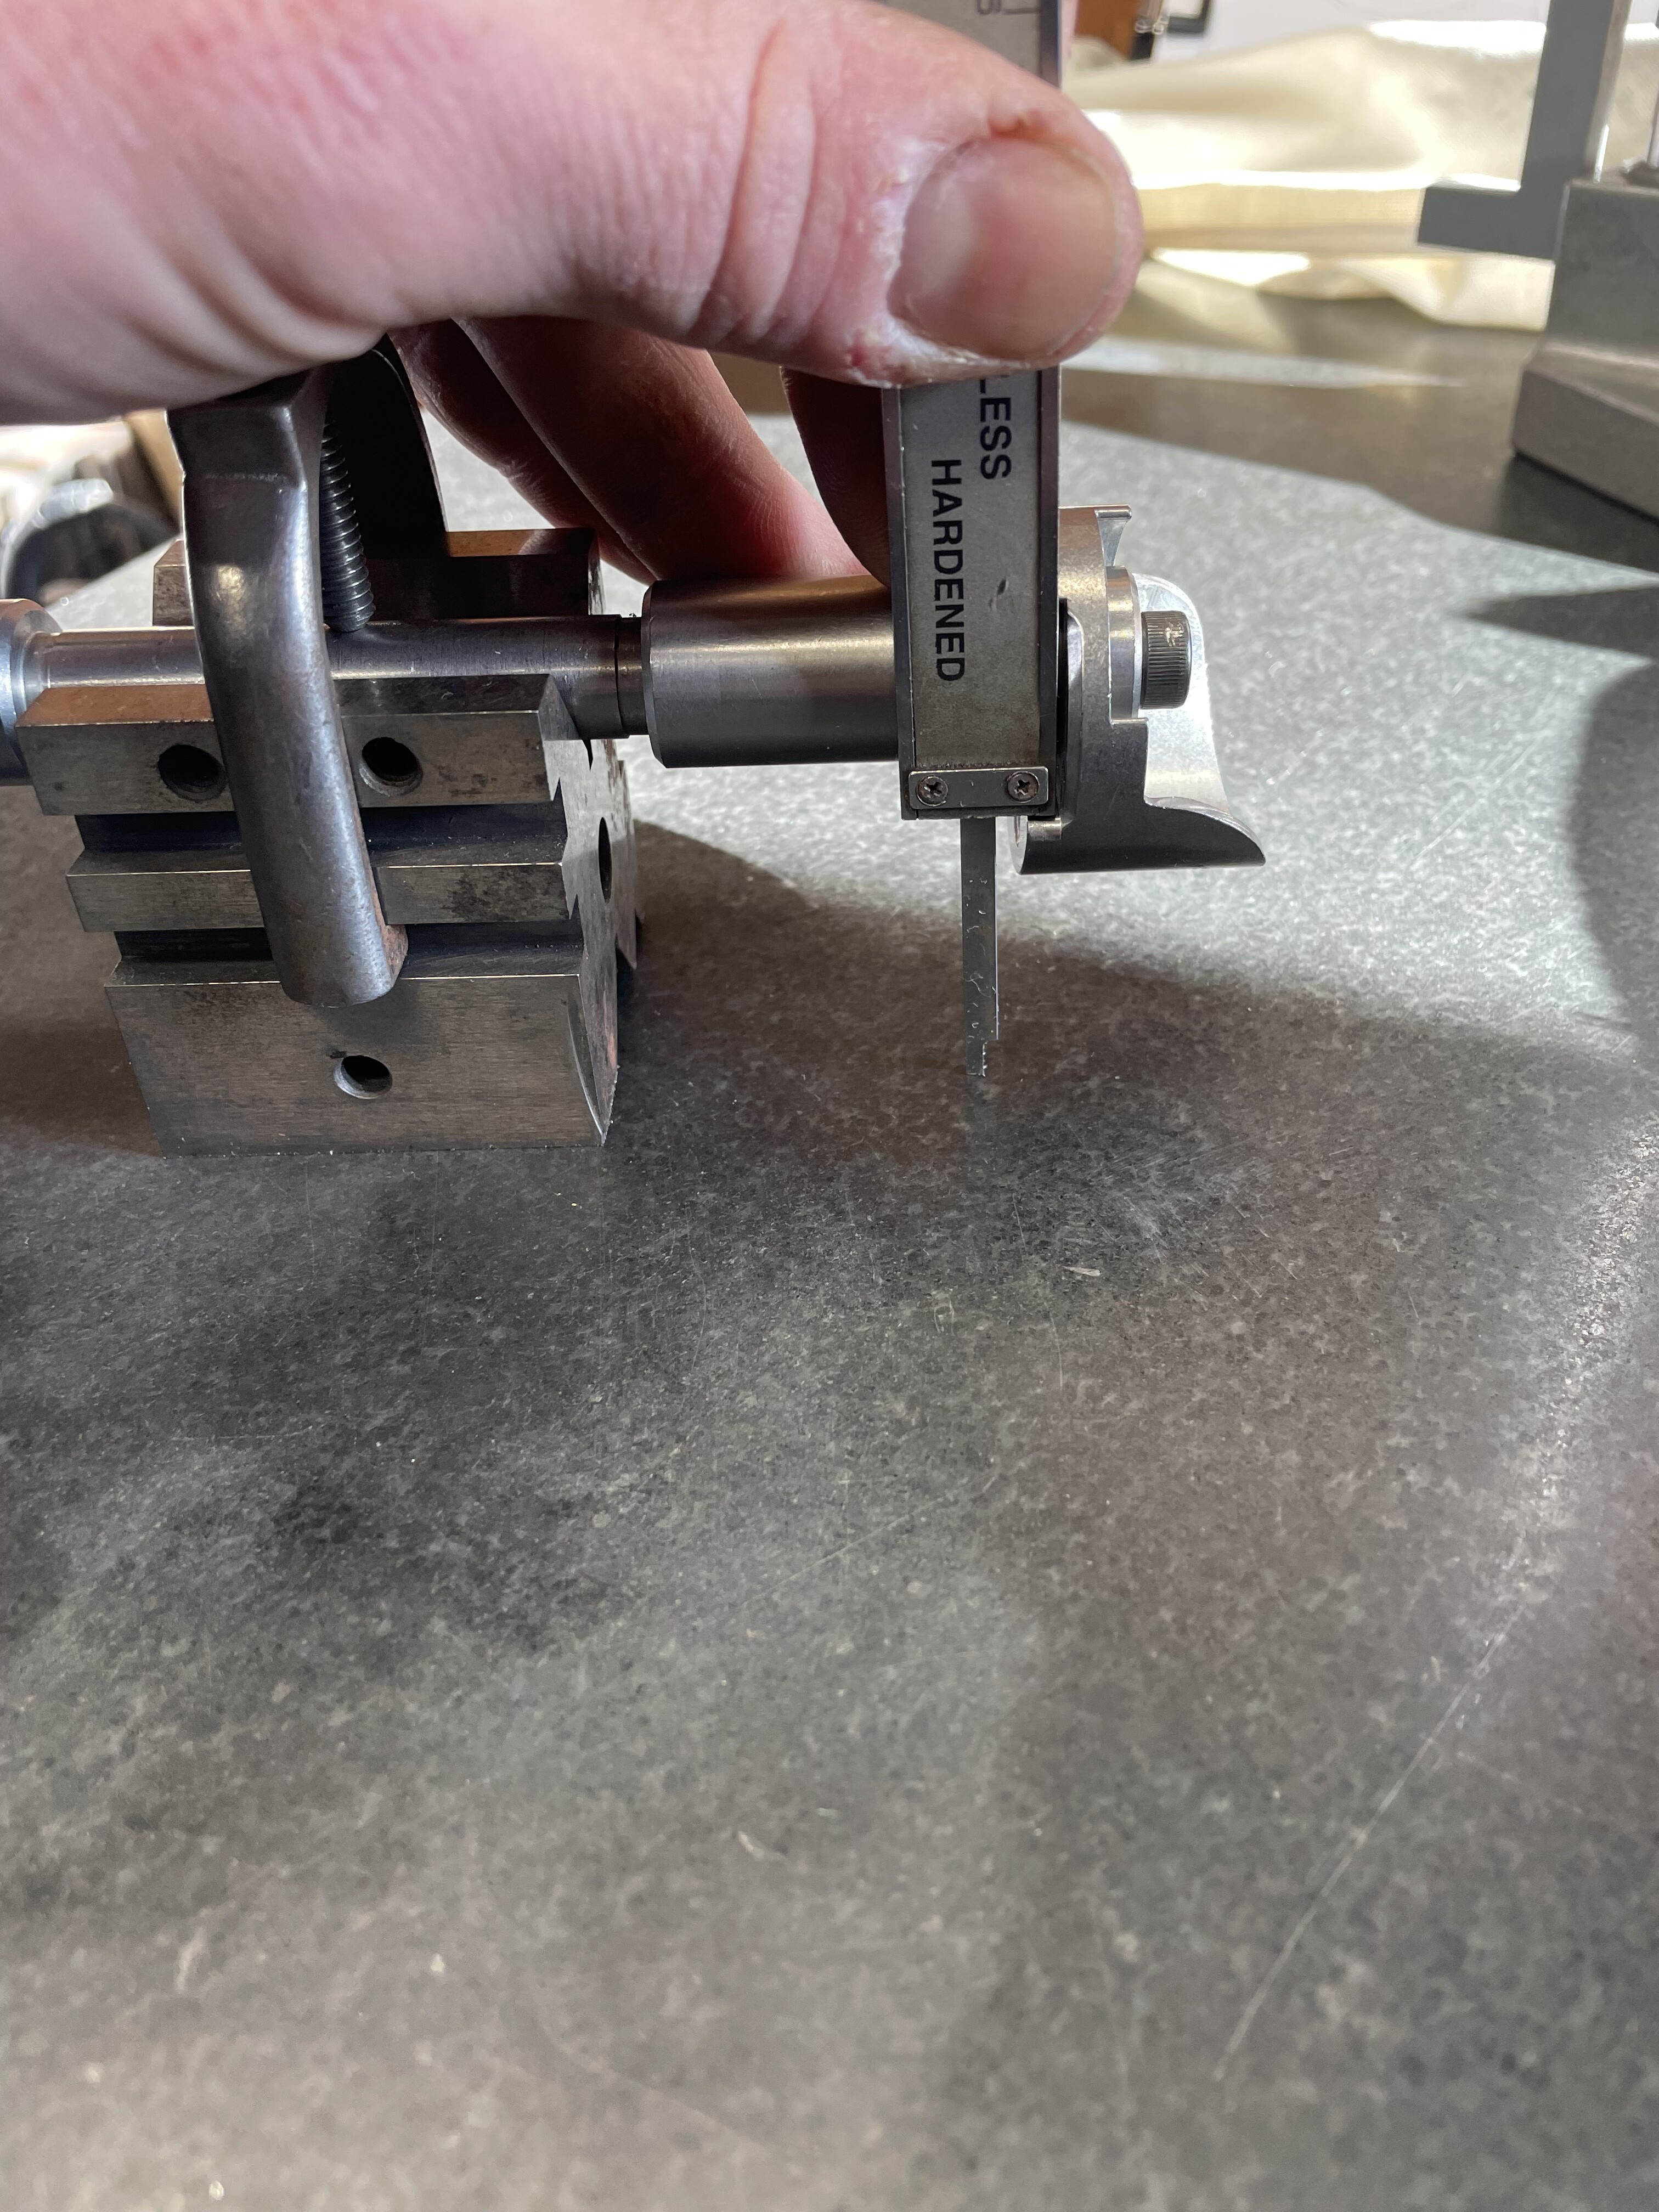
If wanting to align the dropouts on a non-indexed dummy axle you can just use a flat surface and a measuring device.
4 Likes
Ah thanks for the suggestion! You’re totally right, I totally forgot about the existence of the indexed dummy axles (also have never worked with them but I’ve seen them elsewhere before…)
Also thanks @Neuhaus_Metalworks for sharing your process. We were struggeling a bit on a test piece yesterday but I think this can be managed to a achieve satisfactory tightness.
3 Likes
Full disclosure, my process involves indexed dummy axles. I have done it the way I described in the past in instances where I didn’t think I’d be building with a specific standard more than a handful of times, but for 142x12 and 148x12 I have a pile of indexed dummy axles.
2 Likes
It’s worth considering getting an indexed dummy, especially with flat-mount. The margin for rotor rub is very small. The more variables you can control the better.
Sometimes frame building methods, fixtures, and conventional wisdom don’t keep up with the tolerances required for new standards like flat-mount.
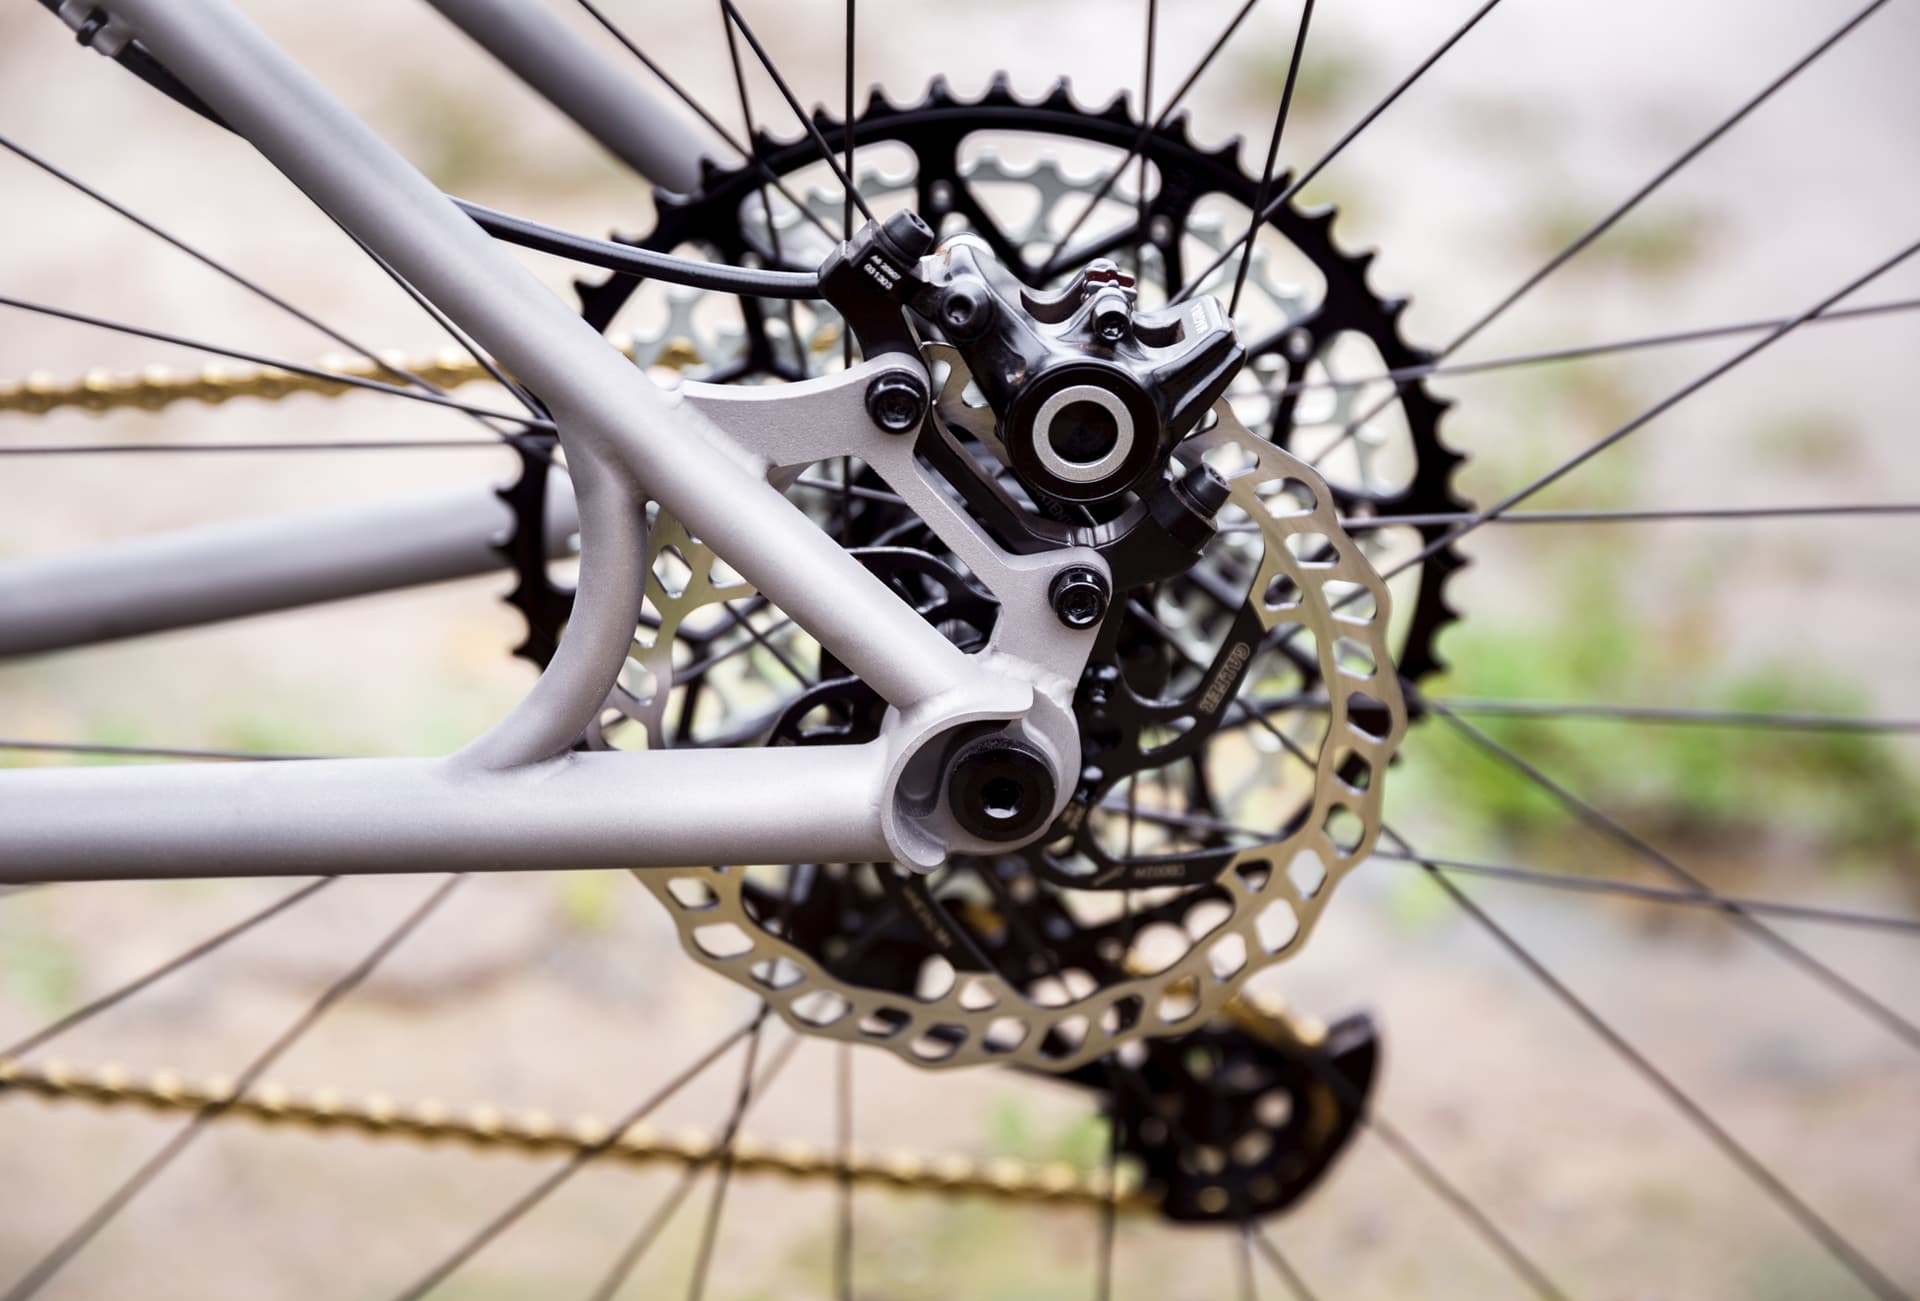
We have had great results with DR1065 dropouts and a 3D printed FM160 nub. The flatmount bosses are angled to give more caliper clearance, but the chainstay is still only offset 3.5mm below the centerline of the dropout.
4 Likes
Thanks for the heads up concerning the tolerances! Haven’t really thought about that yet to be honest. But I like to keep control over as many parameters as I possibly can, so generally I think this is a manageable task. Maybe not so much if you’re building with a 1:1 printout and a file, but that’s not what I’m aiming for ![]() I’m much more of a CAD and fixture person!
I’m much more of a CAD and fixture person!
2 Likes
To address this, I was asked to add a dimension to BikeCAD which would show the offset from the rear axle to the centerline of the stays. I did this for both the seat stays and chain stays.
These dimensions will be available in the next update of BikeCAD. I think this will be a valuable dimension to have for any dropout. Below, we can see how this dimension would change with changes in seat stay angle in a different style of dropout.
Although I was asked to add this dimension because of a challenge presented by the Paragon DR1065 dropout, it doesn’t completely address the unique issue with that dropout which is that it has a cylindrical shape but the axle is offset from the center of the cylinder. I could potentially add another dimension to account for this, but the dimension would only be relevant to a certain subset of dropouts.
8 Likes