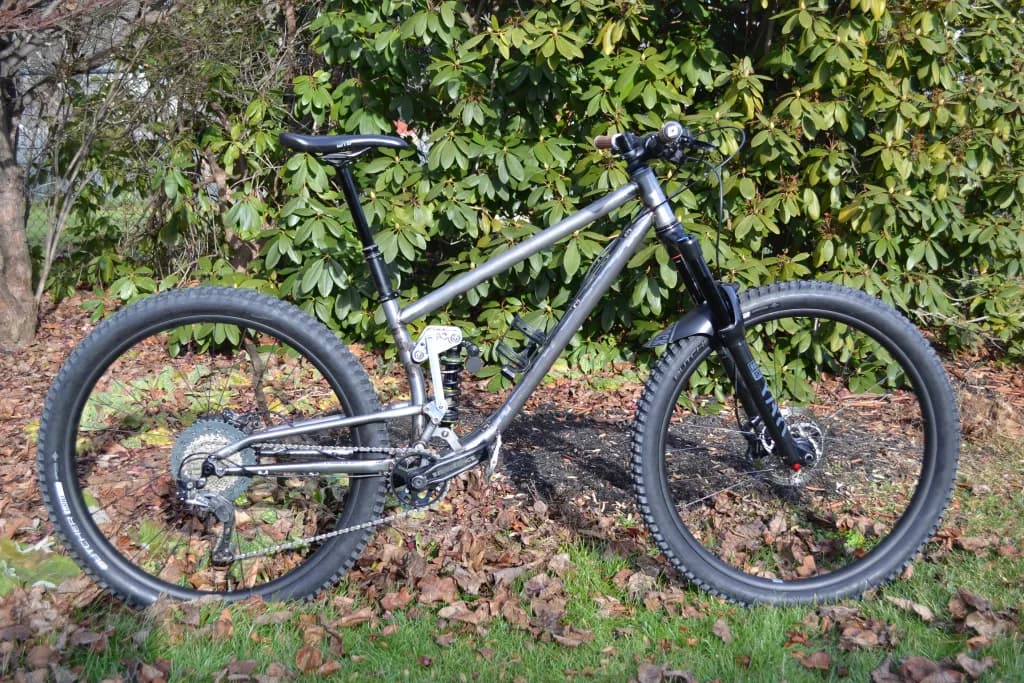
Since it’s been a year now since I built this bike, here’s a log of my first full suspension frame for those interested. This bike was far from perfect, but I learned a ton from the fabrication process and field failures. I’m more than satisfied that this bike is still in one piece and rideable after a ton of bike park days and trail riding.
Specs:
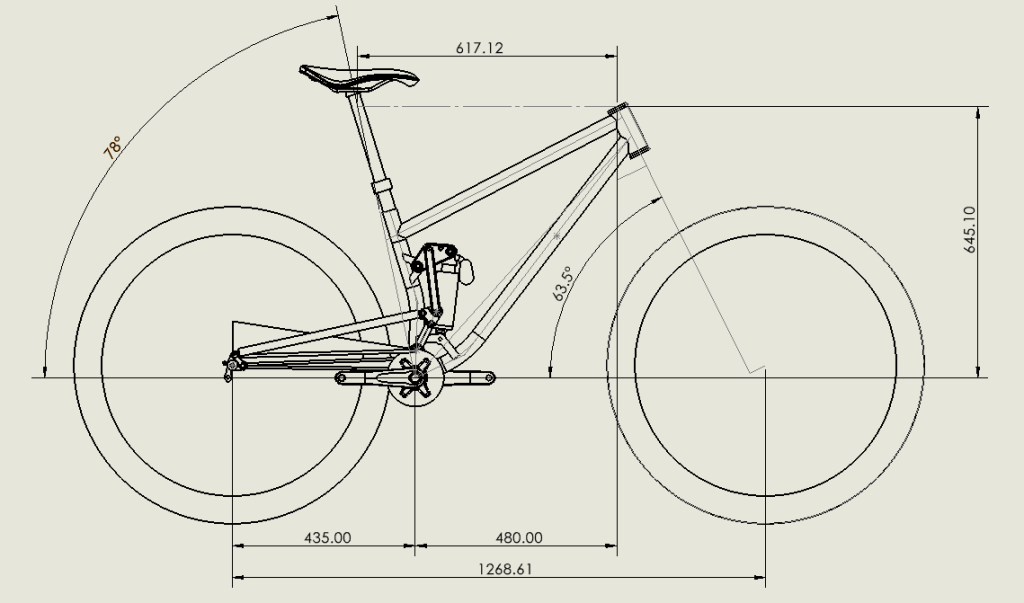
-160/160 travel 29er
-12×148 Rear
-Threaded BB
-180mm post mount brake
-HTA: 63.5 deg
-STA (eff): 78 deg
-Reach: 480mm
-Stack: 645mm
-Rear Center: 435mm
-Eff. TT: 617mm
-Wheelbase: 1269mm
The suspension design is a linkage driven single pivot, very similar to an evil but the shock is vertical and attached to the seattube. From what I can tell evil still owns the patent on this style suspension so unfortunately I won’t be making any for anyone else. The leverage curve is heavily progressive, since I wanted to run a coil. I aimed to get the anti squat set up right around 100% at sag using a 32t chainring.
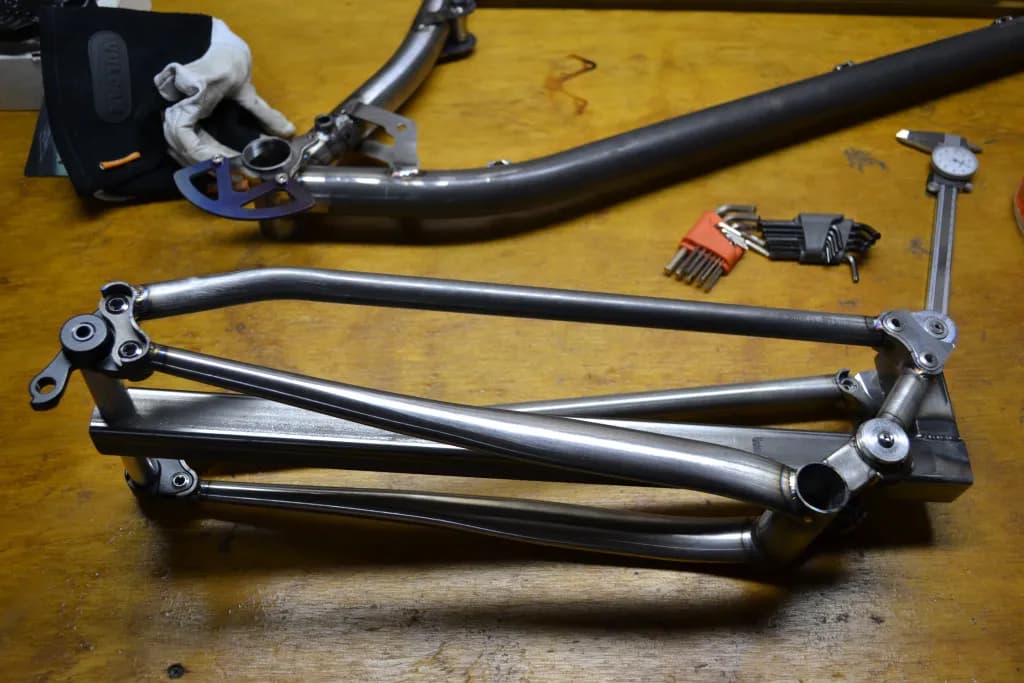
All the tubing is .032” straight gage 4130 wall with the exception of the downtube, chainstays, and chainstay bridge tube. The downtube is .049 bent by @BikeFabSupply. That tube alone weighs probably a pound, I just keep telling myself it keeps the center of mass low. I wanted to be sure that I don’t rip the frame in half when it bottoms out. I used a paragon stem cut in half for the main pivot, and welded some cromo laser cut washers on the backs of them as bearing seats. Paragon post mount brake tab for a 180 rotor, laser cut suspension mounting points and brake bridge. I used two sets of dropouts, one for the rear wheel and one for the rear triangle bearing housing. I saw Zoceli bikes do this and really liked the simplicity of it. I will say that using ¾” tubing on the rear triangle sections was a serious headache since the droupout hoods are around ¾” wide themselves.
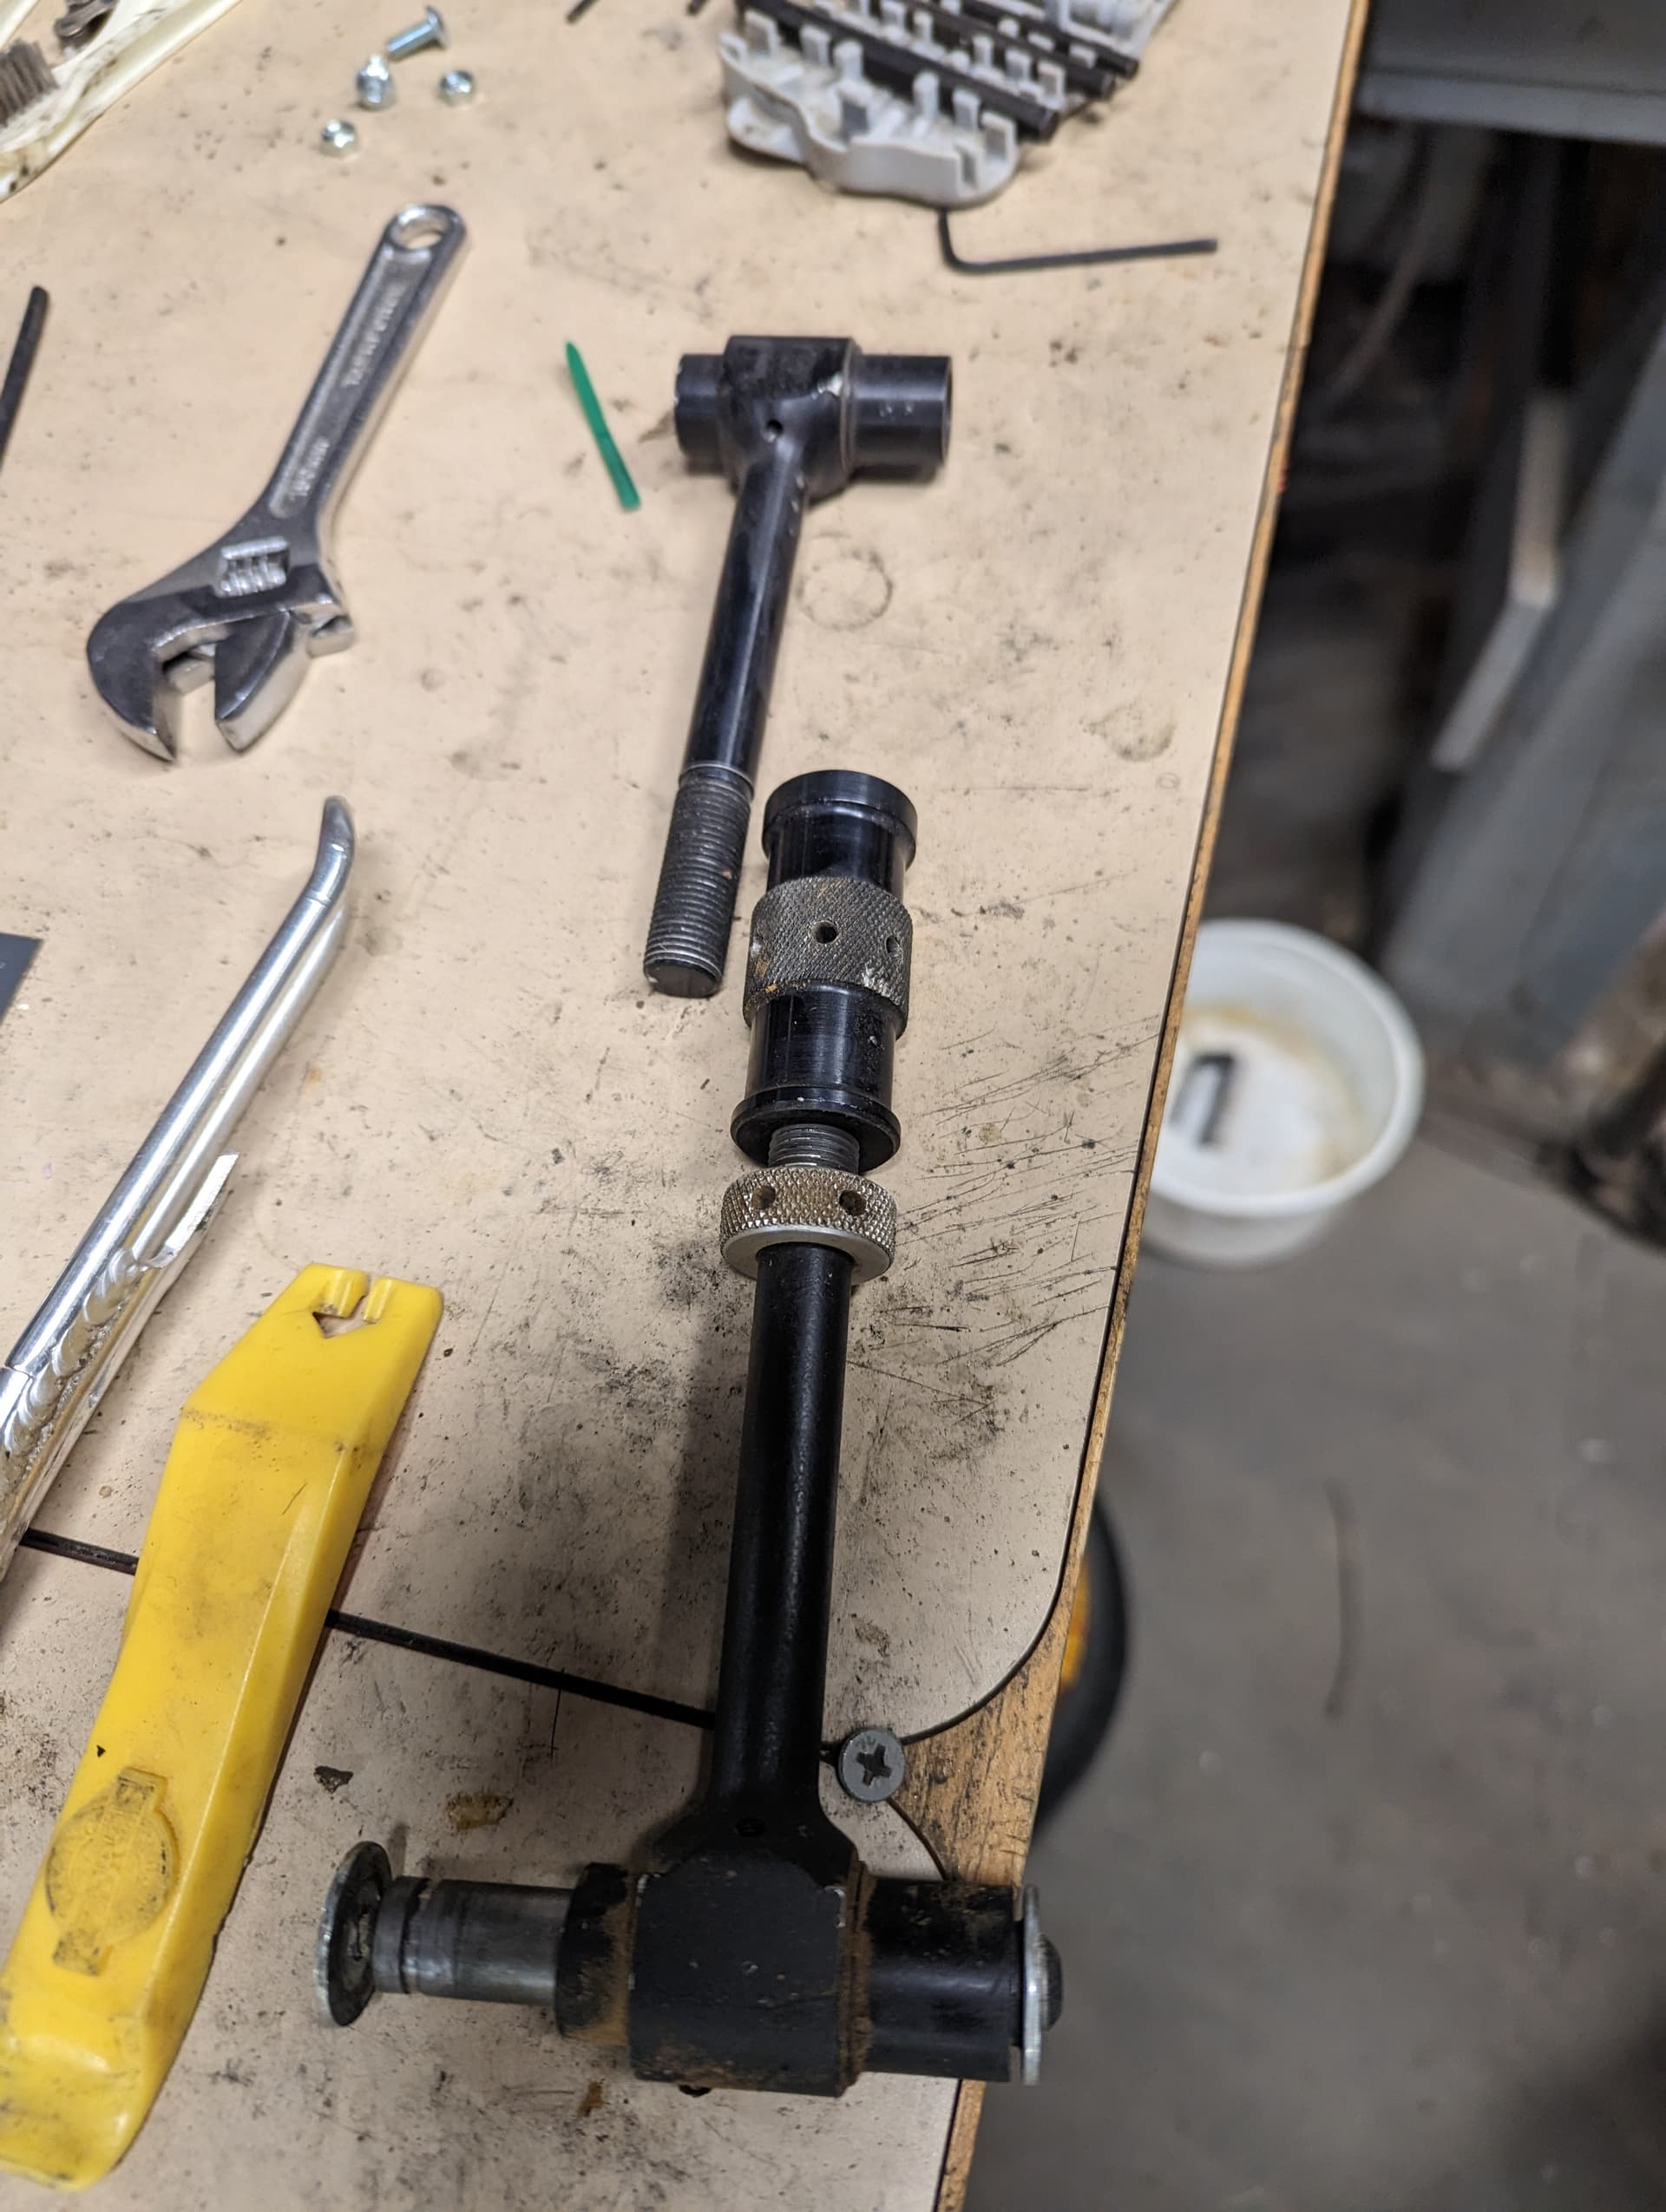
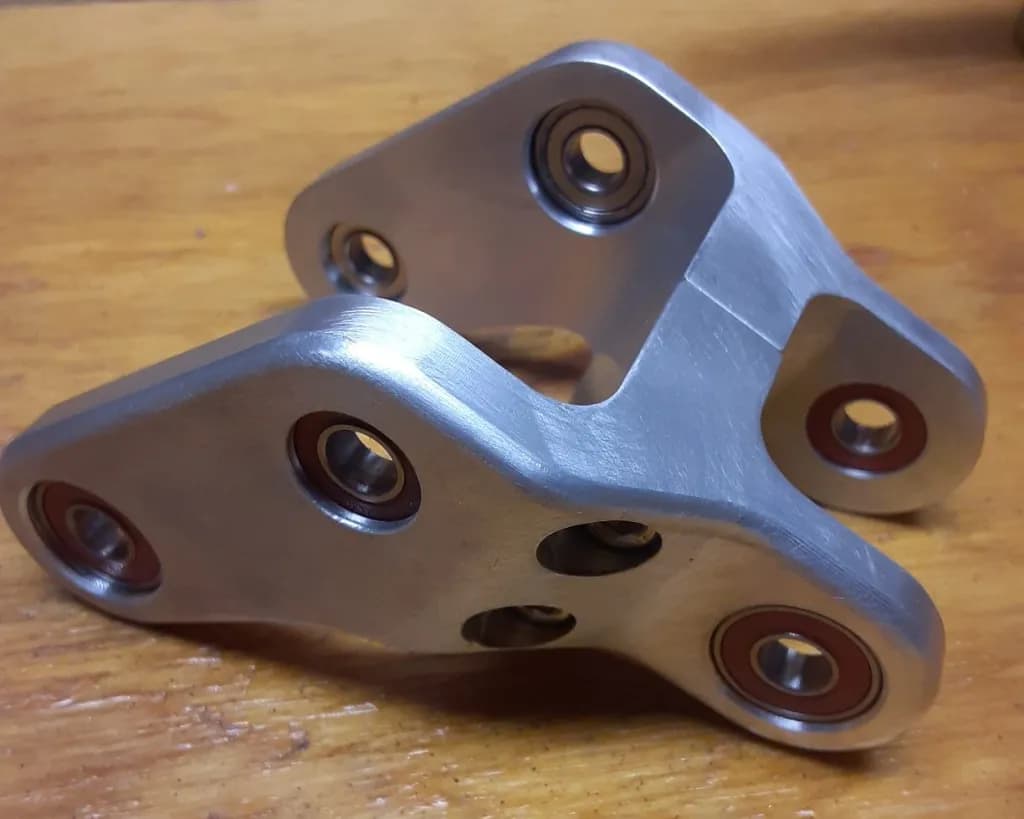
The fabrication of this bike was way more of an undertaking than I expected. I welded up the front triangle, got all excited that it was bike shaped and realized I was about 10% there. I welded in the main pivot to the seat tube before I did the front triangle and it seemed to work well. I stole the idea from Kris Henry and made a similar jig plate that located the 3 frame pivot points in relation to my main frame jig. I machined a bunch of aluminum spacers to get everything as close to centerline as I could when I was tacking the laser cut mounts to the main tubes. From what I can tell things stayed in line where I wanted, and I luckily didn’t have to ream any of the pivot mounts post welding. On the rear triangle I made a simple jig out of square tube with the pivot locations drilled/reamed through. Then used another handful of spacers to set up the pivots where they need to be and connect the dots with tubing. Luckily I have a good friend with access to a CNC machine for the main links and rear triangle bearing housings. I made the pull links, which is why they look like hot garbage. Finding the right hardware to tie everything together was a major PITA and something I should have figured out ahead of time.
The first set of rockers were not nearly rigid enough, and were too far apart causing the shock bolts to bend and yield over time. I redesigned the rocker as a bolted together piece and used a solid shoulder screw as a shock mount. This took care of most of the issues, but I had to adjust how the hardware held the pull links together as well. The way I initially put things together left the pull link bearings loaded/supported only on one side which was a terrible design, so I redid the pull links to wrap around the bearings.
Here it is as it sits now. I’m working on a flex stay design for this spring so that bike will likely take the parts from this bike. Happy to answer any questions and would like to hear how others go about building full suspension frames. Cheers!