I’m wondering what people are doing to prevent water from entering the seat tube through the dropper post “hole”. I’m using a hard-ish plastic type grommet that doesn’t fit the frame nor the cable super tightly, so when washing the bike water definitely gets into the seat tube. Not having treated the inside of the seat tube this results in some rusting (at least the presence of rusty water). Are other grommets better?
I’ve seen heat shrink used where the internal guiding tube extends out from the main tube just a little bit. Can’t comment on the waterproof-ness.
3 Likes
My experience with “waterproofing” is that is it does a darn good job of keeping the water inside where it sits and ruins things. This is true of bikes, electrical cabinets and anywhere else you don’t want water. I think it’s better to know the water is going getting in and then give it a good path to drain out.
With that said, I use some rubber grommets from Yeti for my dropper ports. Not water proof, but keeps the muck out. Good drain holes are a must.
6 Likes
Water always gets into seattubes. The key is providing a way for water to drain/evaporate out.
I use a fairly large 3/8"-1/2" vent holes in the shell for each tube and then put holes in the bottom for it to drain out. In addition to the BB shell, I aim to have all tubes vented at each end. This helps water get out but also helps soak the flux out - which won’t matter if you’re TIG’ing.
Then use rust preventative on the insides of the tubes after paint.
1 Like
I have a 3D-printed port design that has a really tight hole. We don’t use this design because our dropper cable is run fully internally. I sell these ports to people if they need them. I also encourage people to design and print their own. It is a pretty simple design with low consequences.

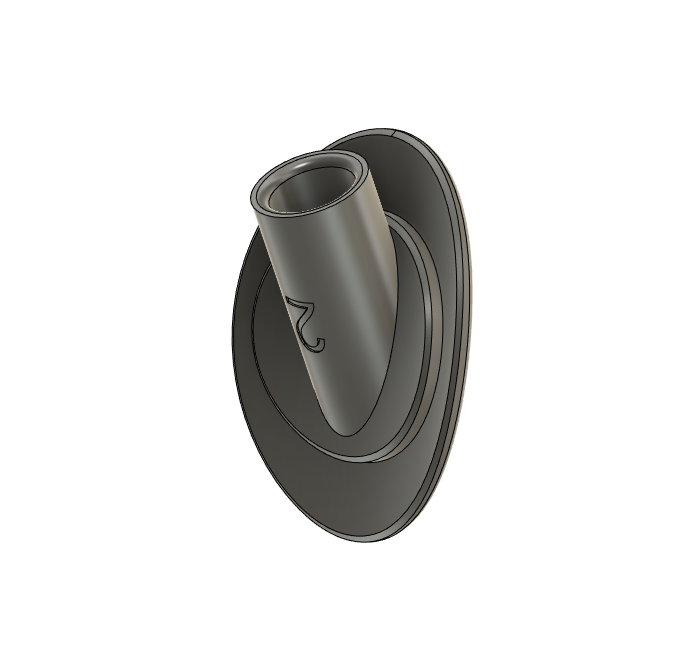
We use a 3D printed urethane seal that indexes into a 3D printed port that I would call “weather resistant”:
I agree with this sentiment. I feel like rust inside frames comes from water vapor in the air. When moist air inside the frame heats up, the water vapor condenses into liquid.
4 Likes
Especially when they go from warm garages to cold wet trails in the rain. It’s fairly well known that big hubs contract and expand and will suck moisture into bearings (SON dyno hubs are a great example). Sealed up BB or seattube wouldn’t be any different.
Also, we put the slot in the back of the seattube and the clamp is above the pucker hole - which ‘puckers’ so it creates a little funnel of sorts. That funnel pulls water down into the ‘not-clamped’ section of the seattube where there is clearance.
Airflow is key in wet, cold climates.
2 Likes
Those of you who use drain holes (I’m guessing in the bottom of the BB shell), what size hole do you use? What do you do if/when mud makes it into the hole?
We put an 1/8" drain hole in every bb shell. If mud clogs it up just poke it out, people should be servicing their bb’s often enough that a little dirt in the shell won’t hurt for a few months.
2 Likes
Rather then water proofing, I make my frames nice and breezy so they can dry out quickly.
1/4” hole in the bb, wide open internal routing ports, big slot connecting the seat tube and down tube to the bottom bracket, and 1/8” holes from the dropouts into the seat stays and chain stays.
Sitting flat on the ground or hanging from the front wheel, any water in the frame will be able to find an easy exit from any tube.
5 Likes
Wow, that’s pretty significant. Do you guys treat the inside of the tubes at all?
Yeah I spray the inside with fluid film or similar and ask my customers to do the same every year or so. It rains a lot here - like almost everyday between October and May.
3 Likes
I’ve been using the Salsa grommets:
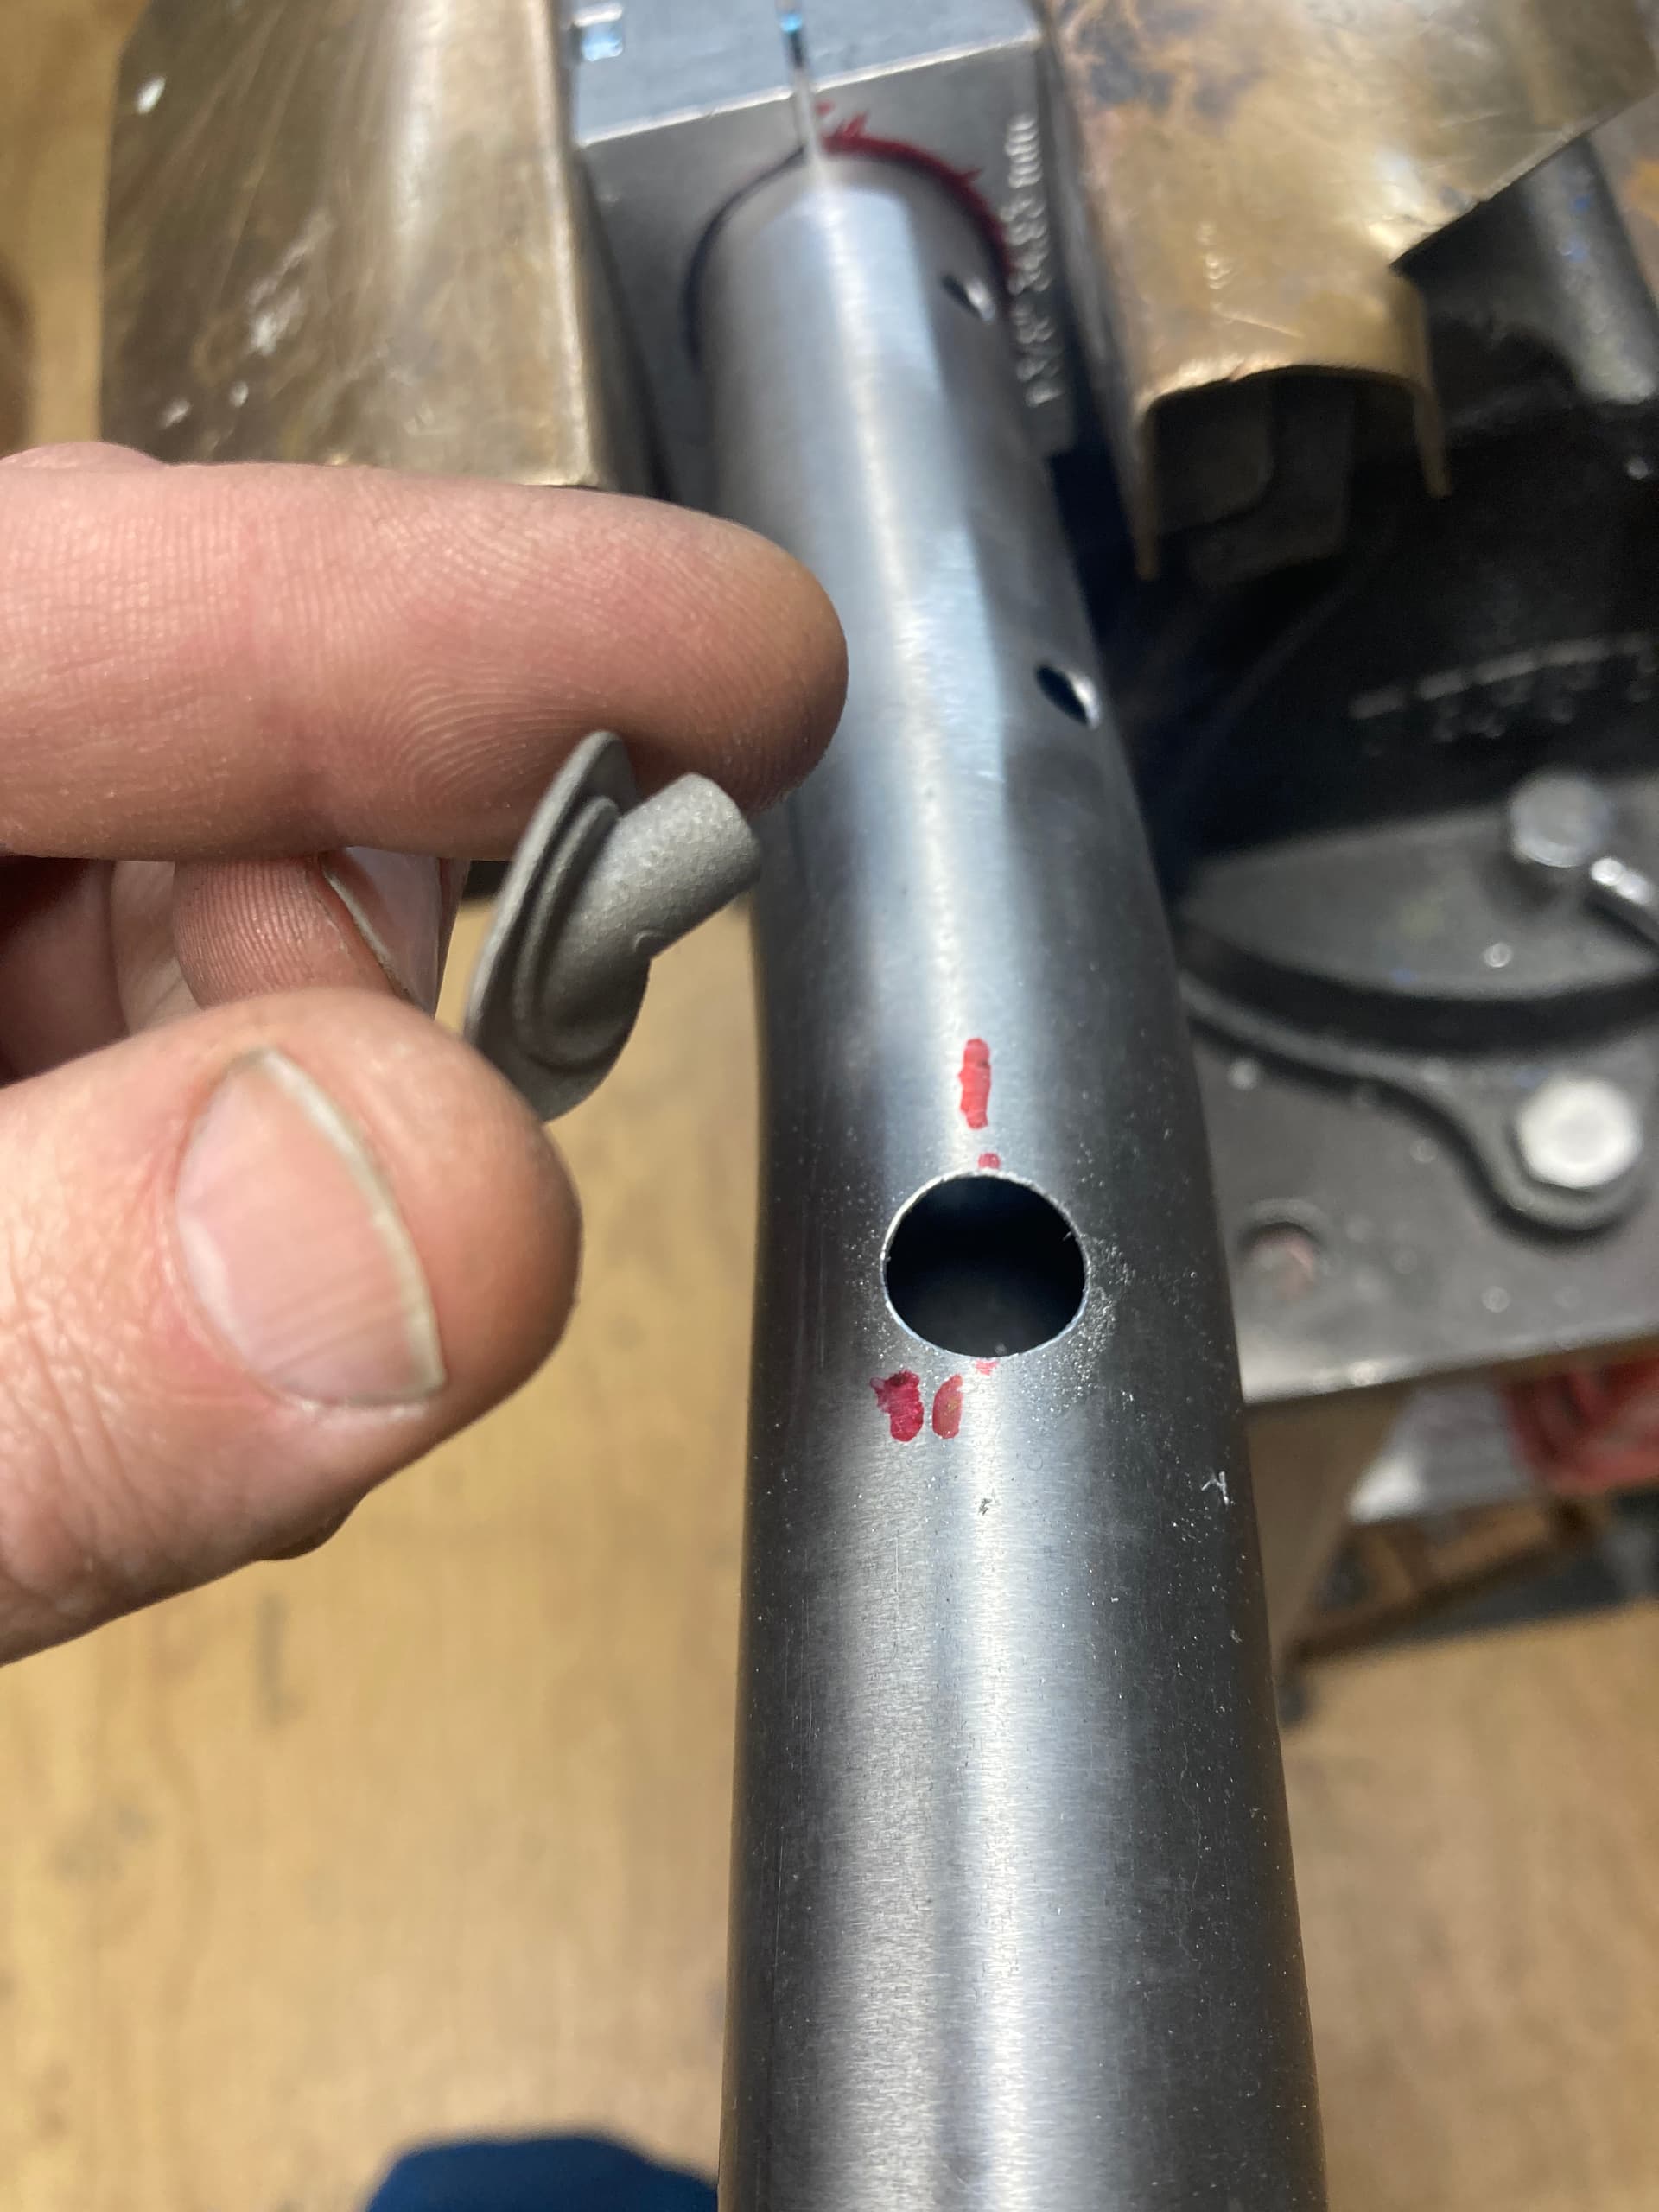
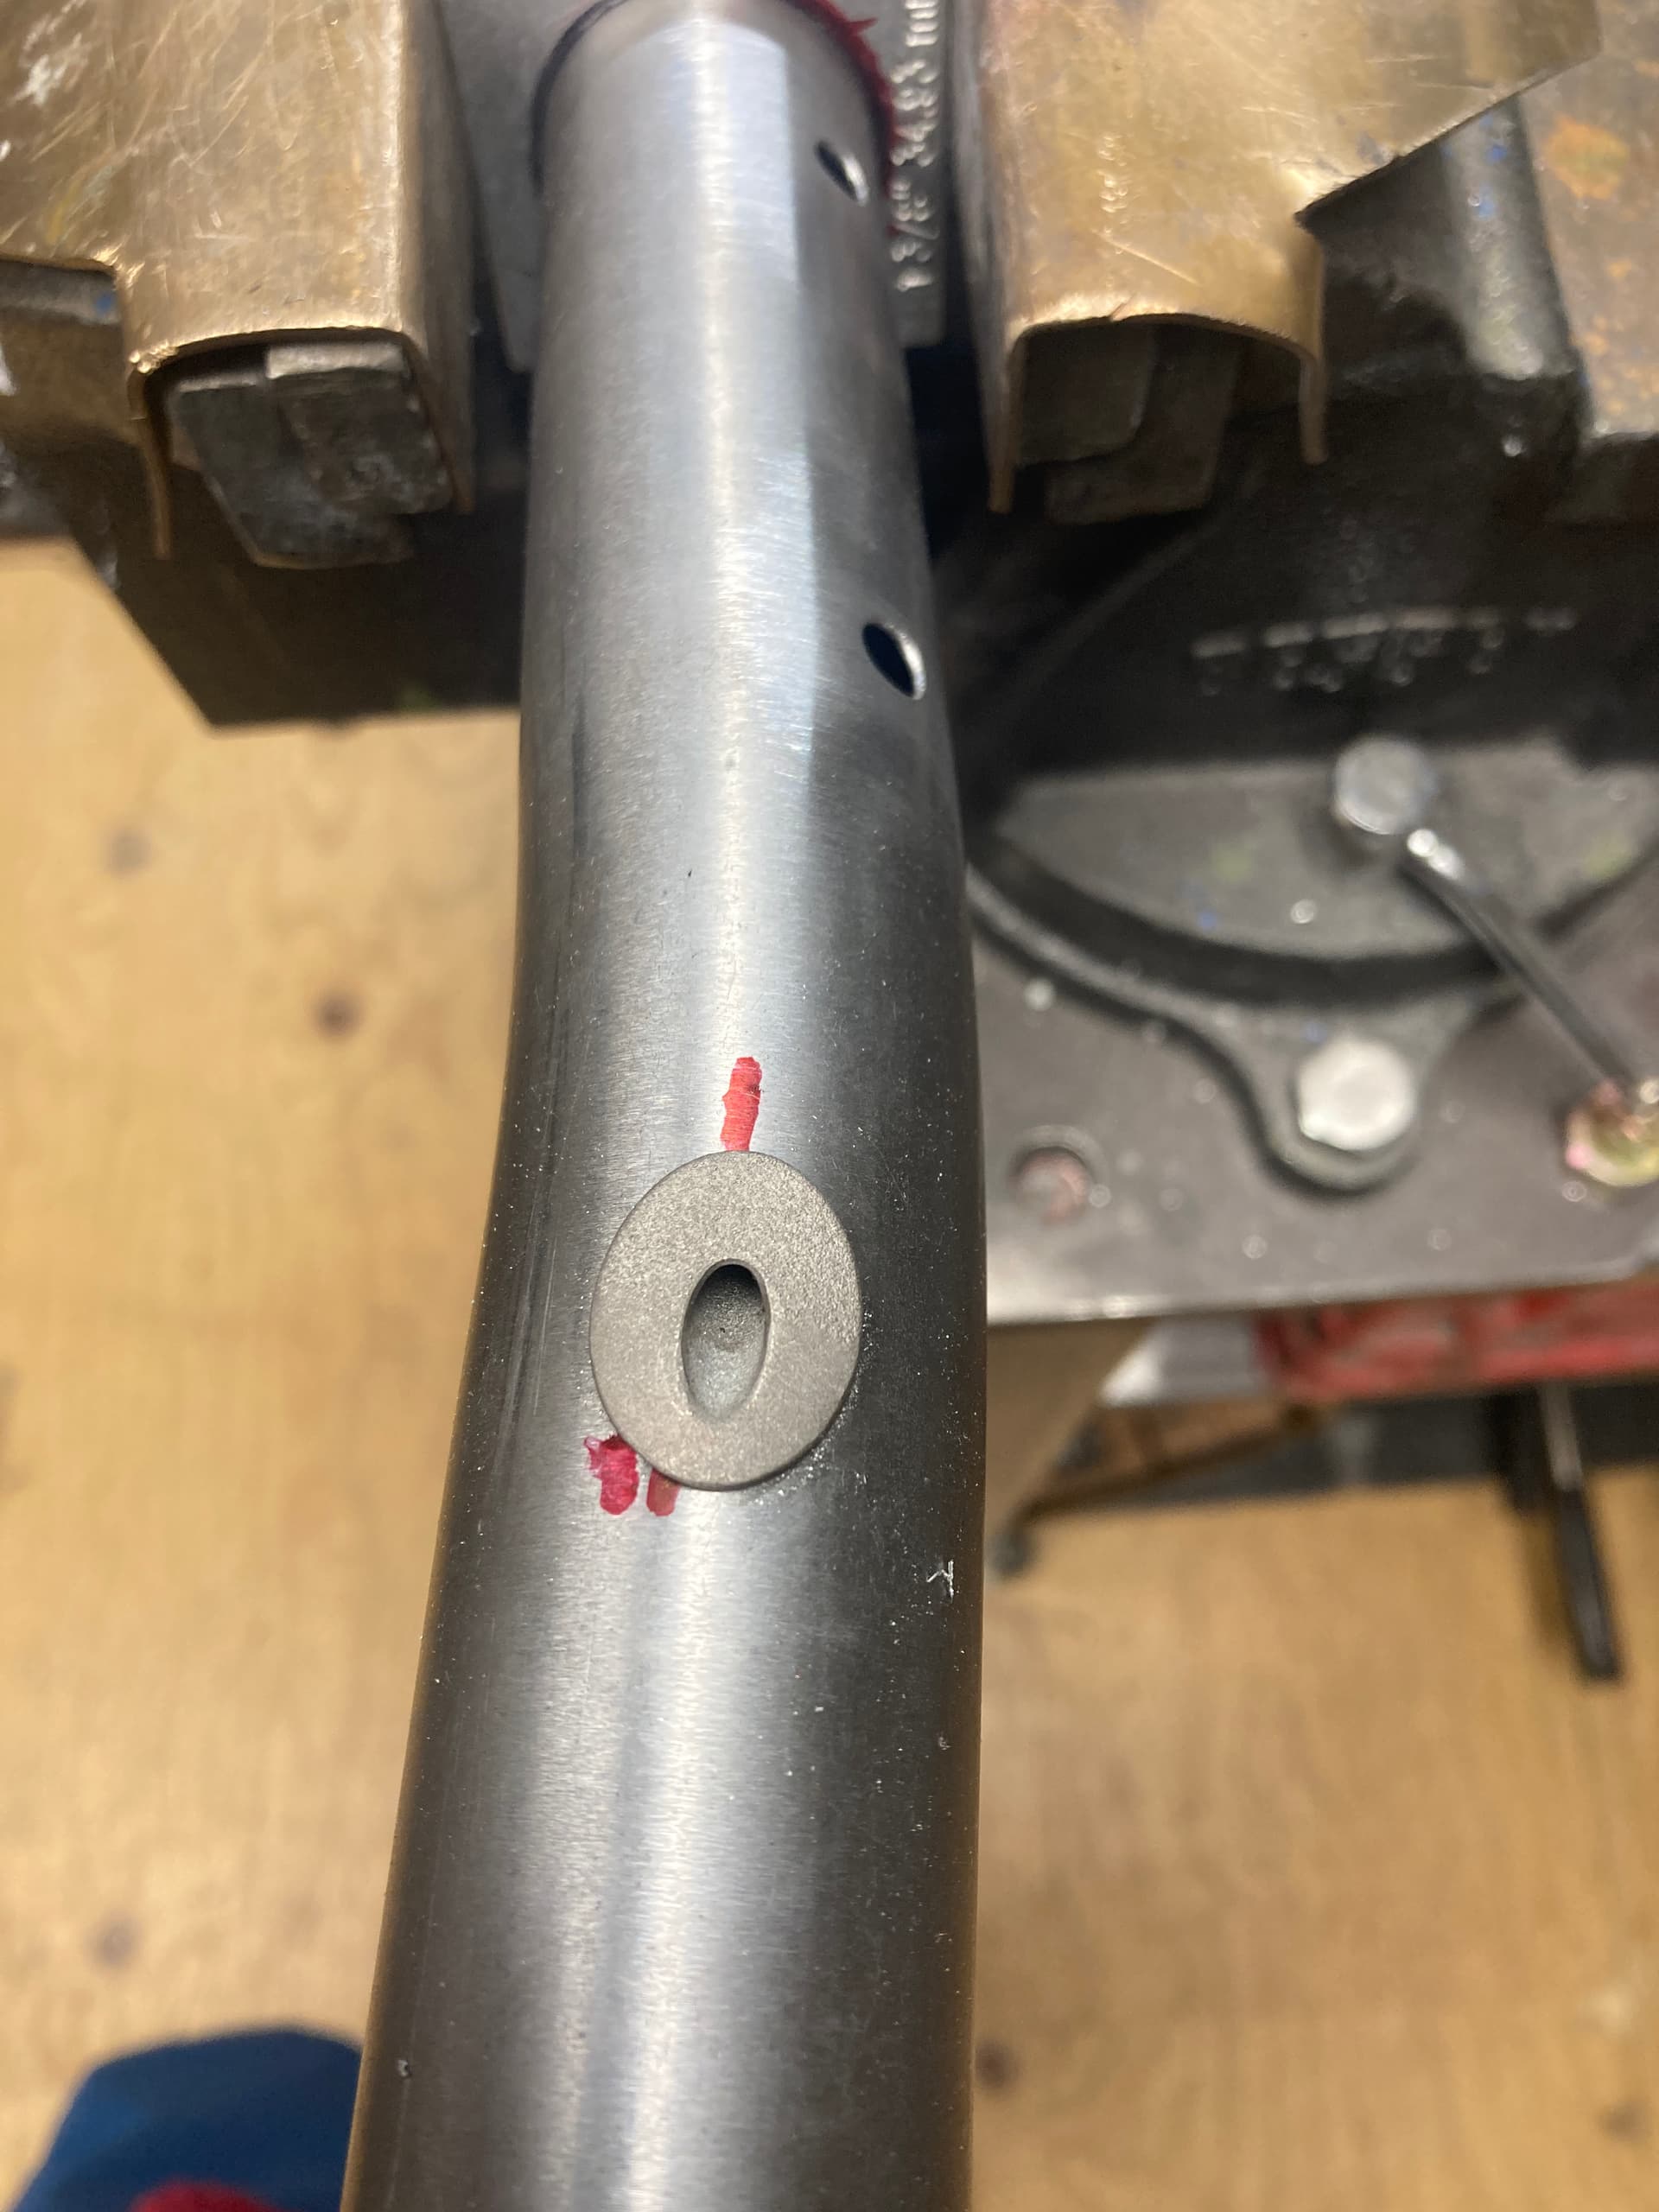
I silver braze on an additional piece of tubing cut to a shape a bit larger than the grommet. Then mill a slot to fit. It’s pretty easy and could be done with a drill and file also. They seem to seal well.
4 Likes
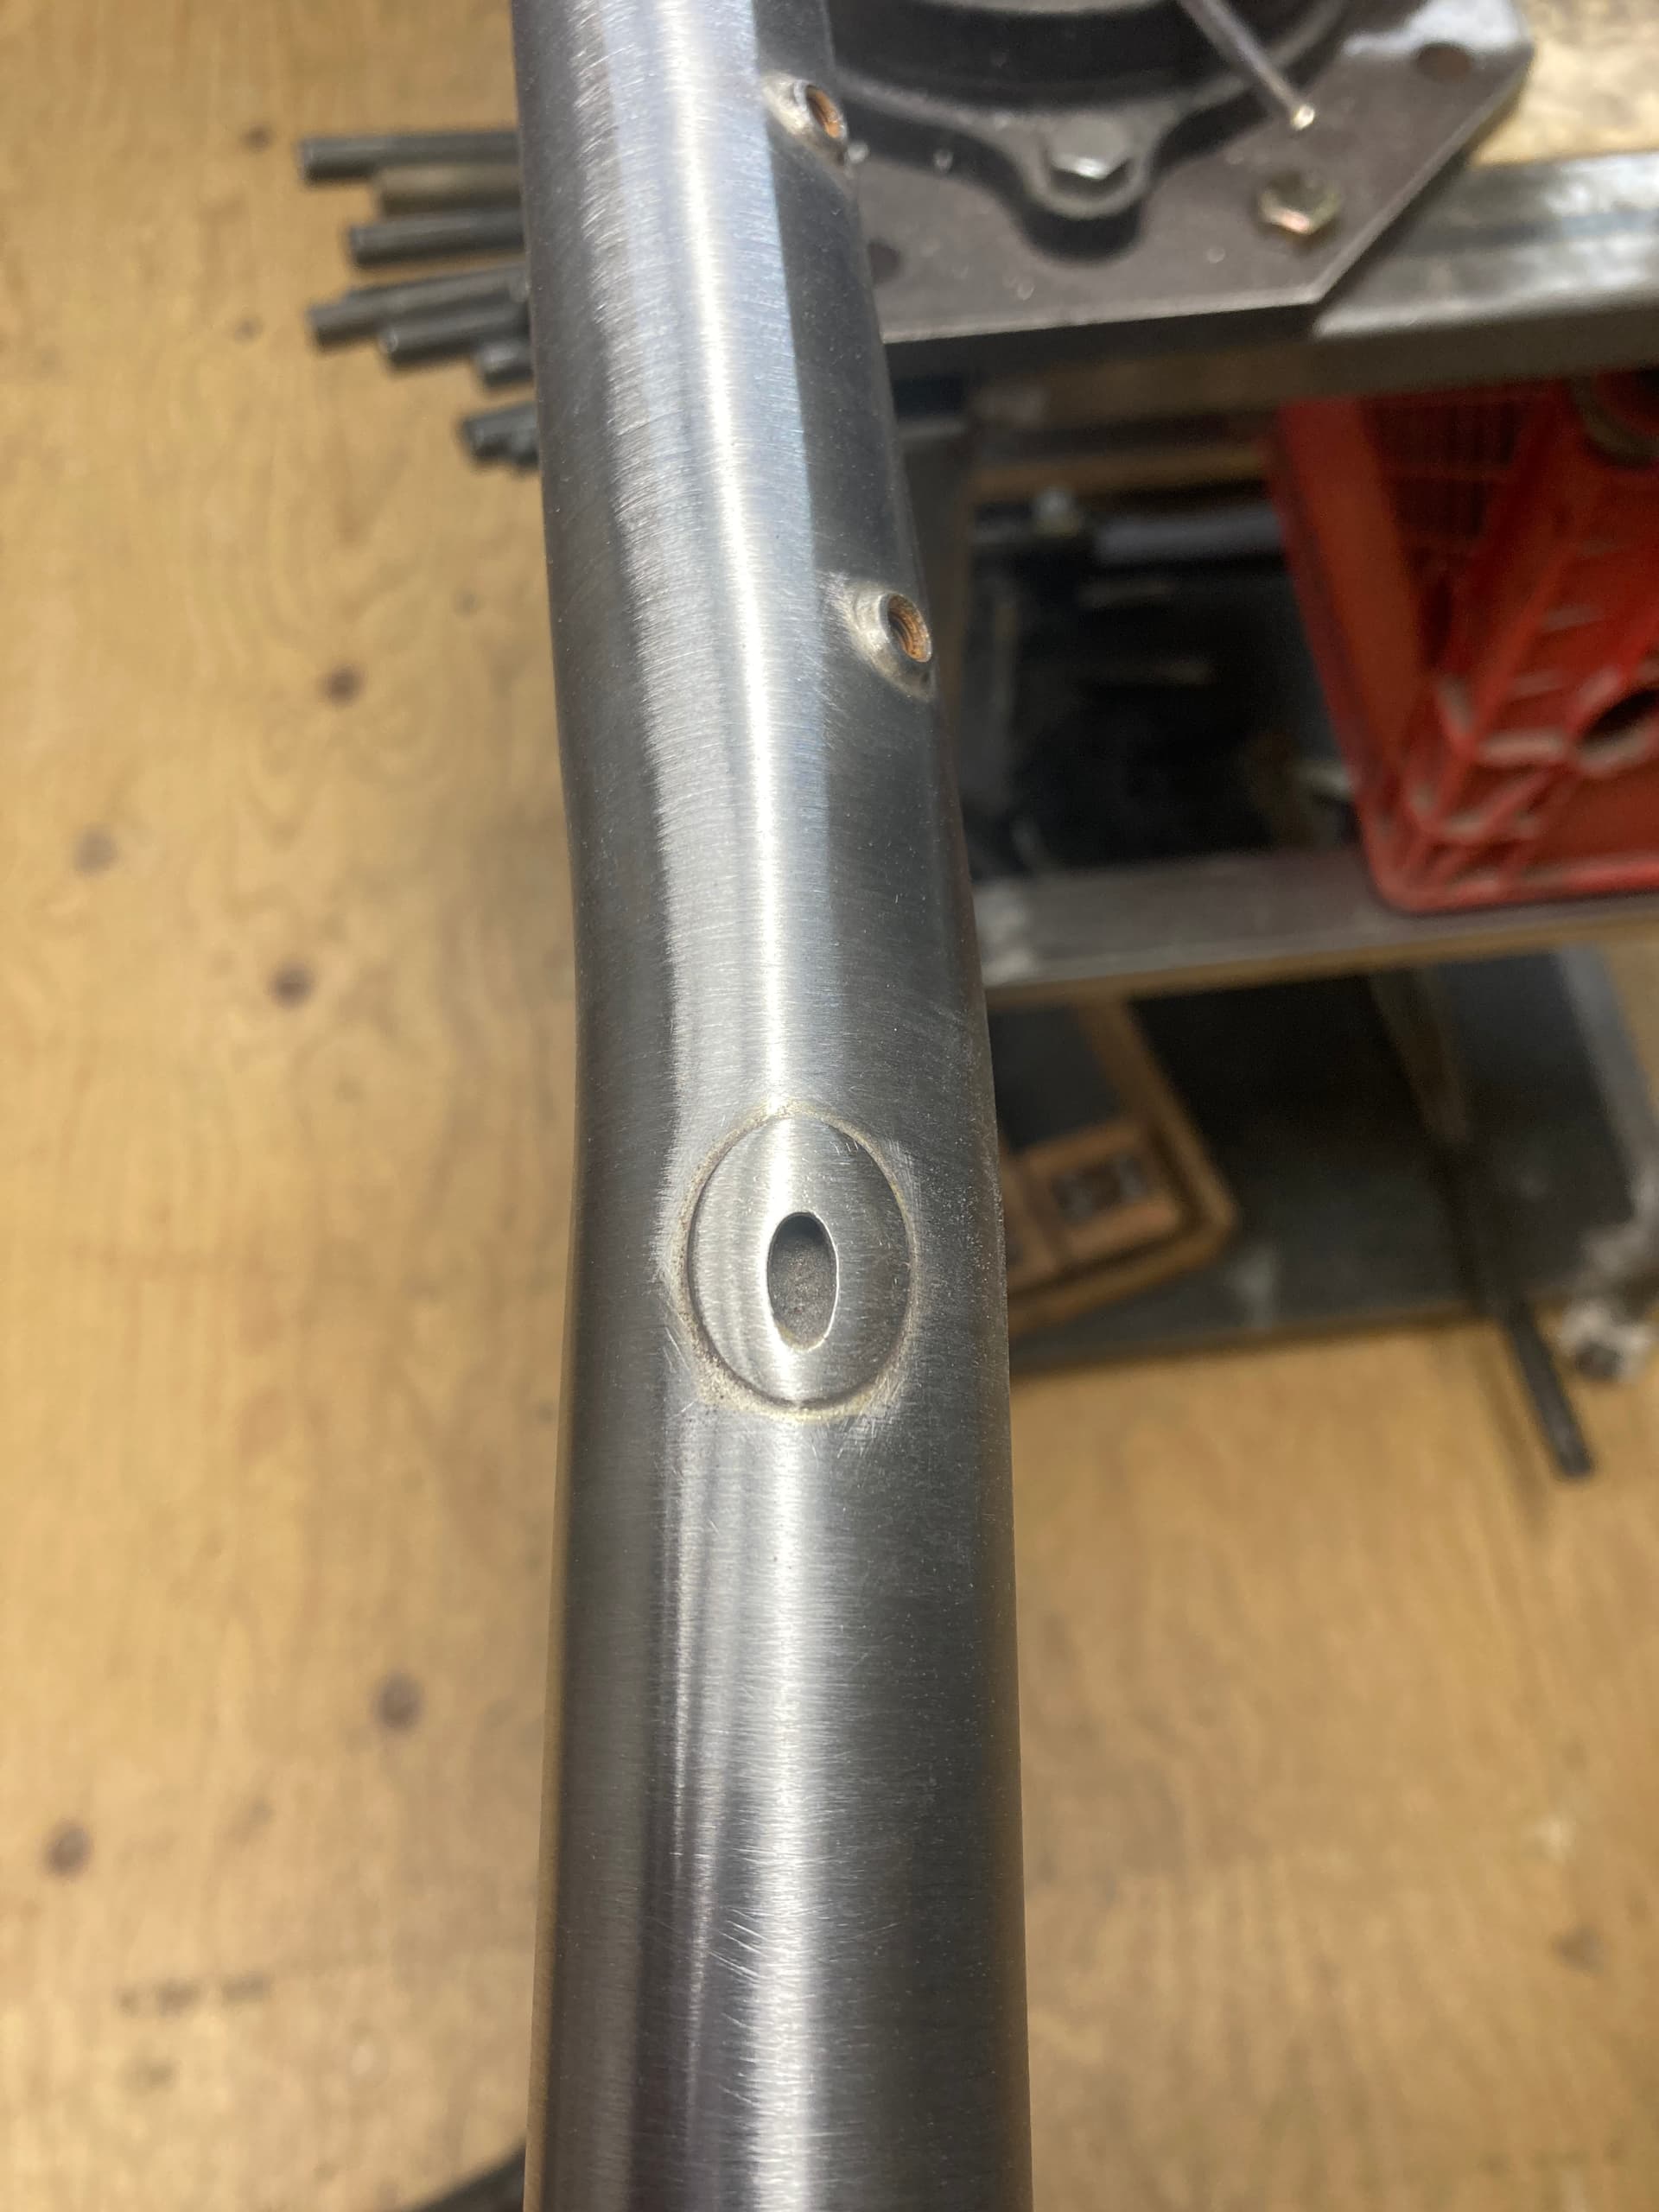
Here are some pictures of the dropper port @Daniel_Y designed. The hole required is quite large, I used a step drill bit to carve the opening. The cable fits quite snugly, very nice design.
7 Likes