Why?:
I never felt comfortable dimpling chainstays. Sure you can just crank on them with a round object, but it’s not repeatable and I worry it adds stress risers to the tube.
- If chainstays fail, they usually crack at the dimple.
- I wanted to come up with a mathematical-ish way to support the tube to help it ovalize and dimple.
- I wanted to test PCBway for quick turnaround on CNC parts
After months of thinking and a few 3D-printed dies, I finally gave in and decided 80% is good enough and ordered some machined aluminum dies to experiment.
The Results:
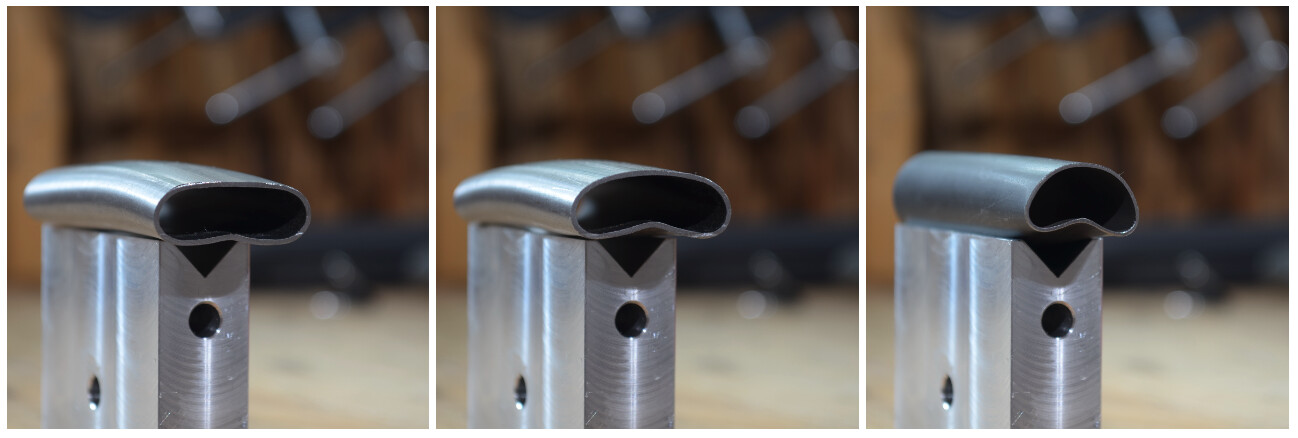
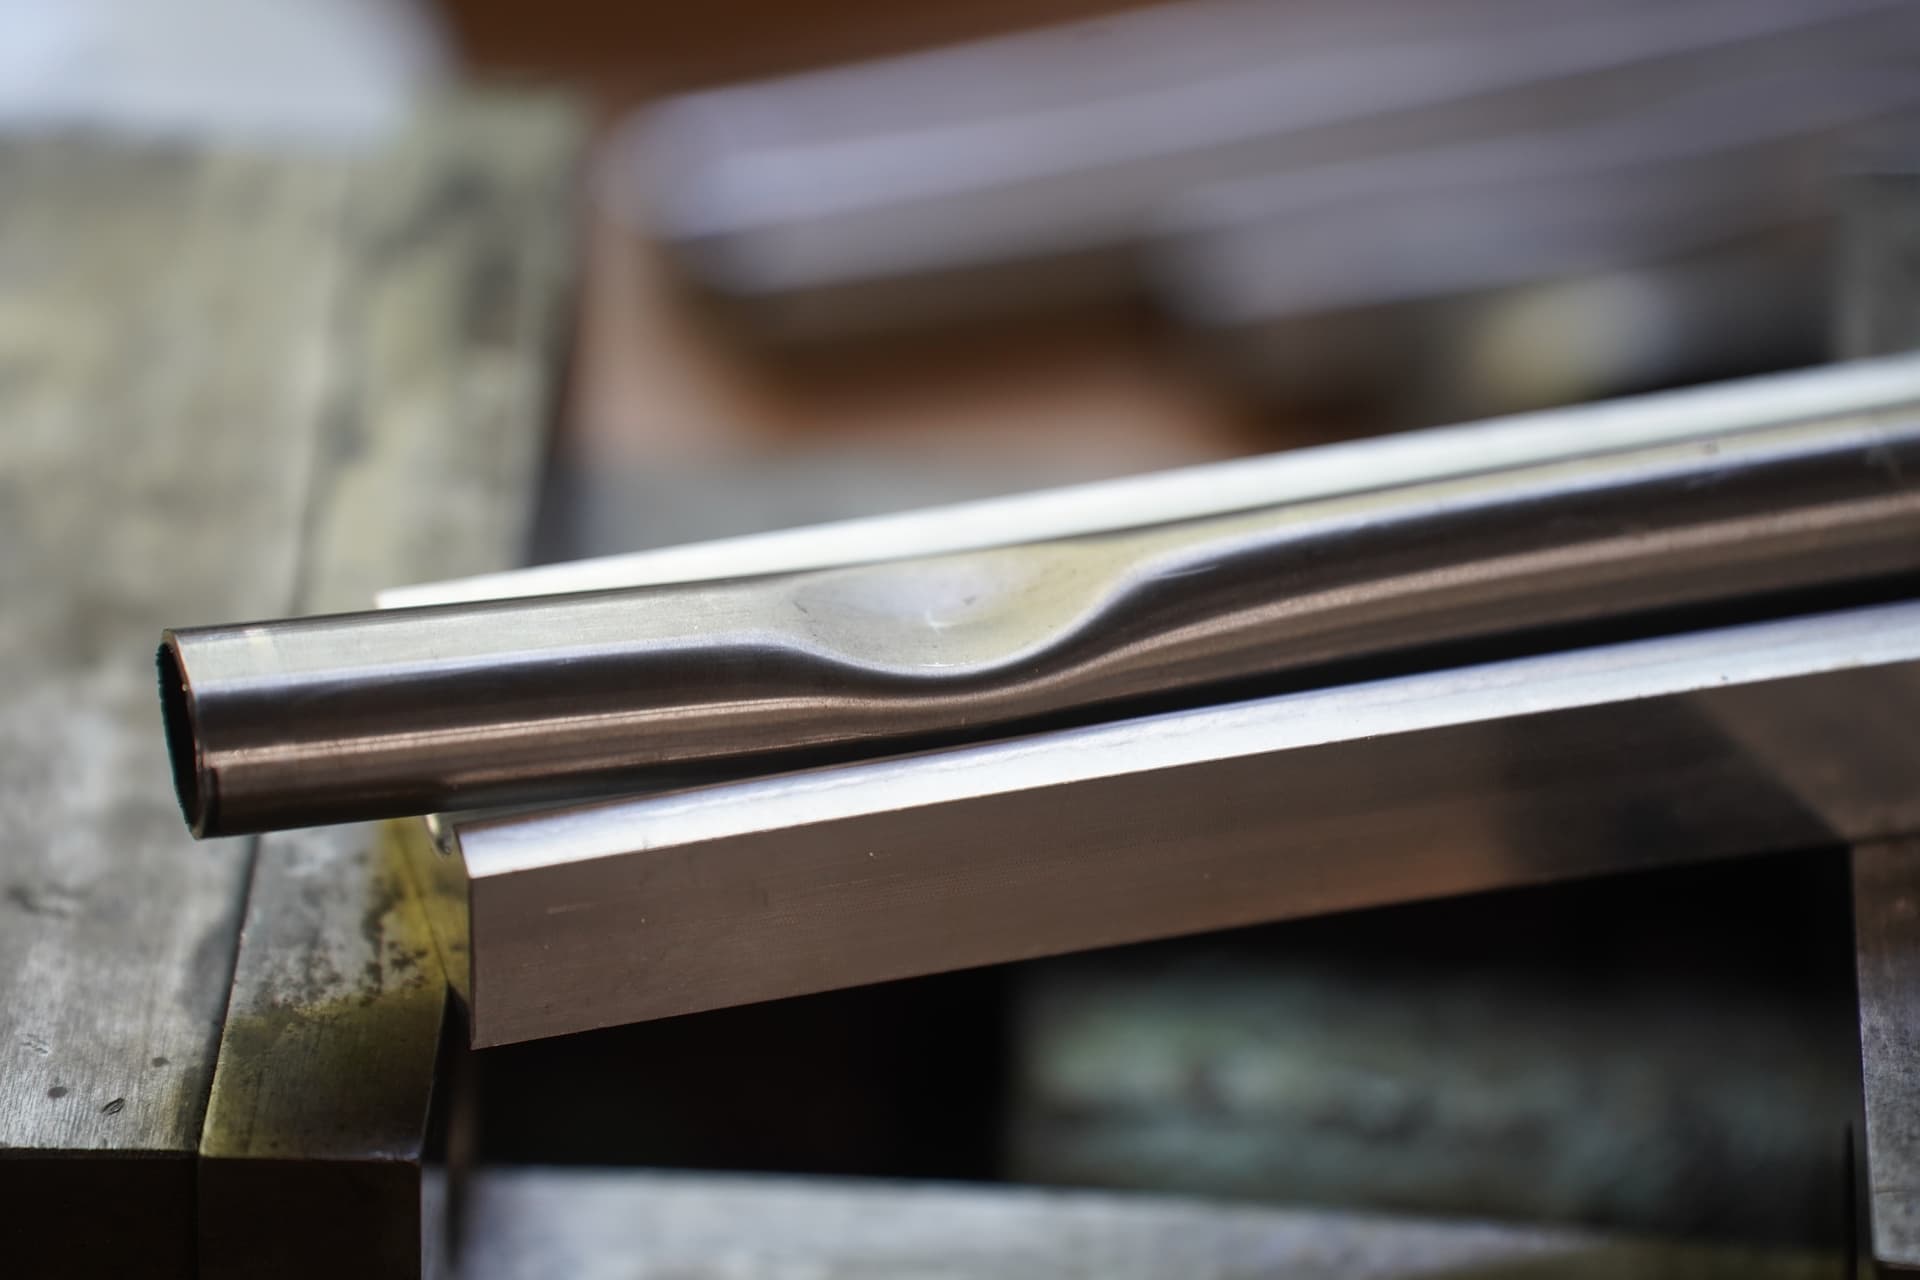
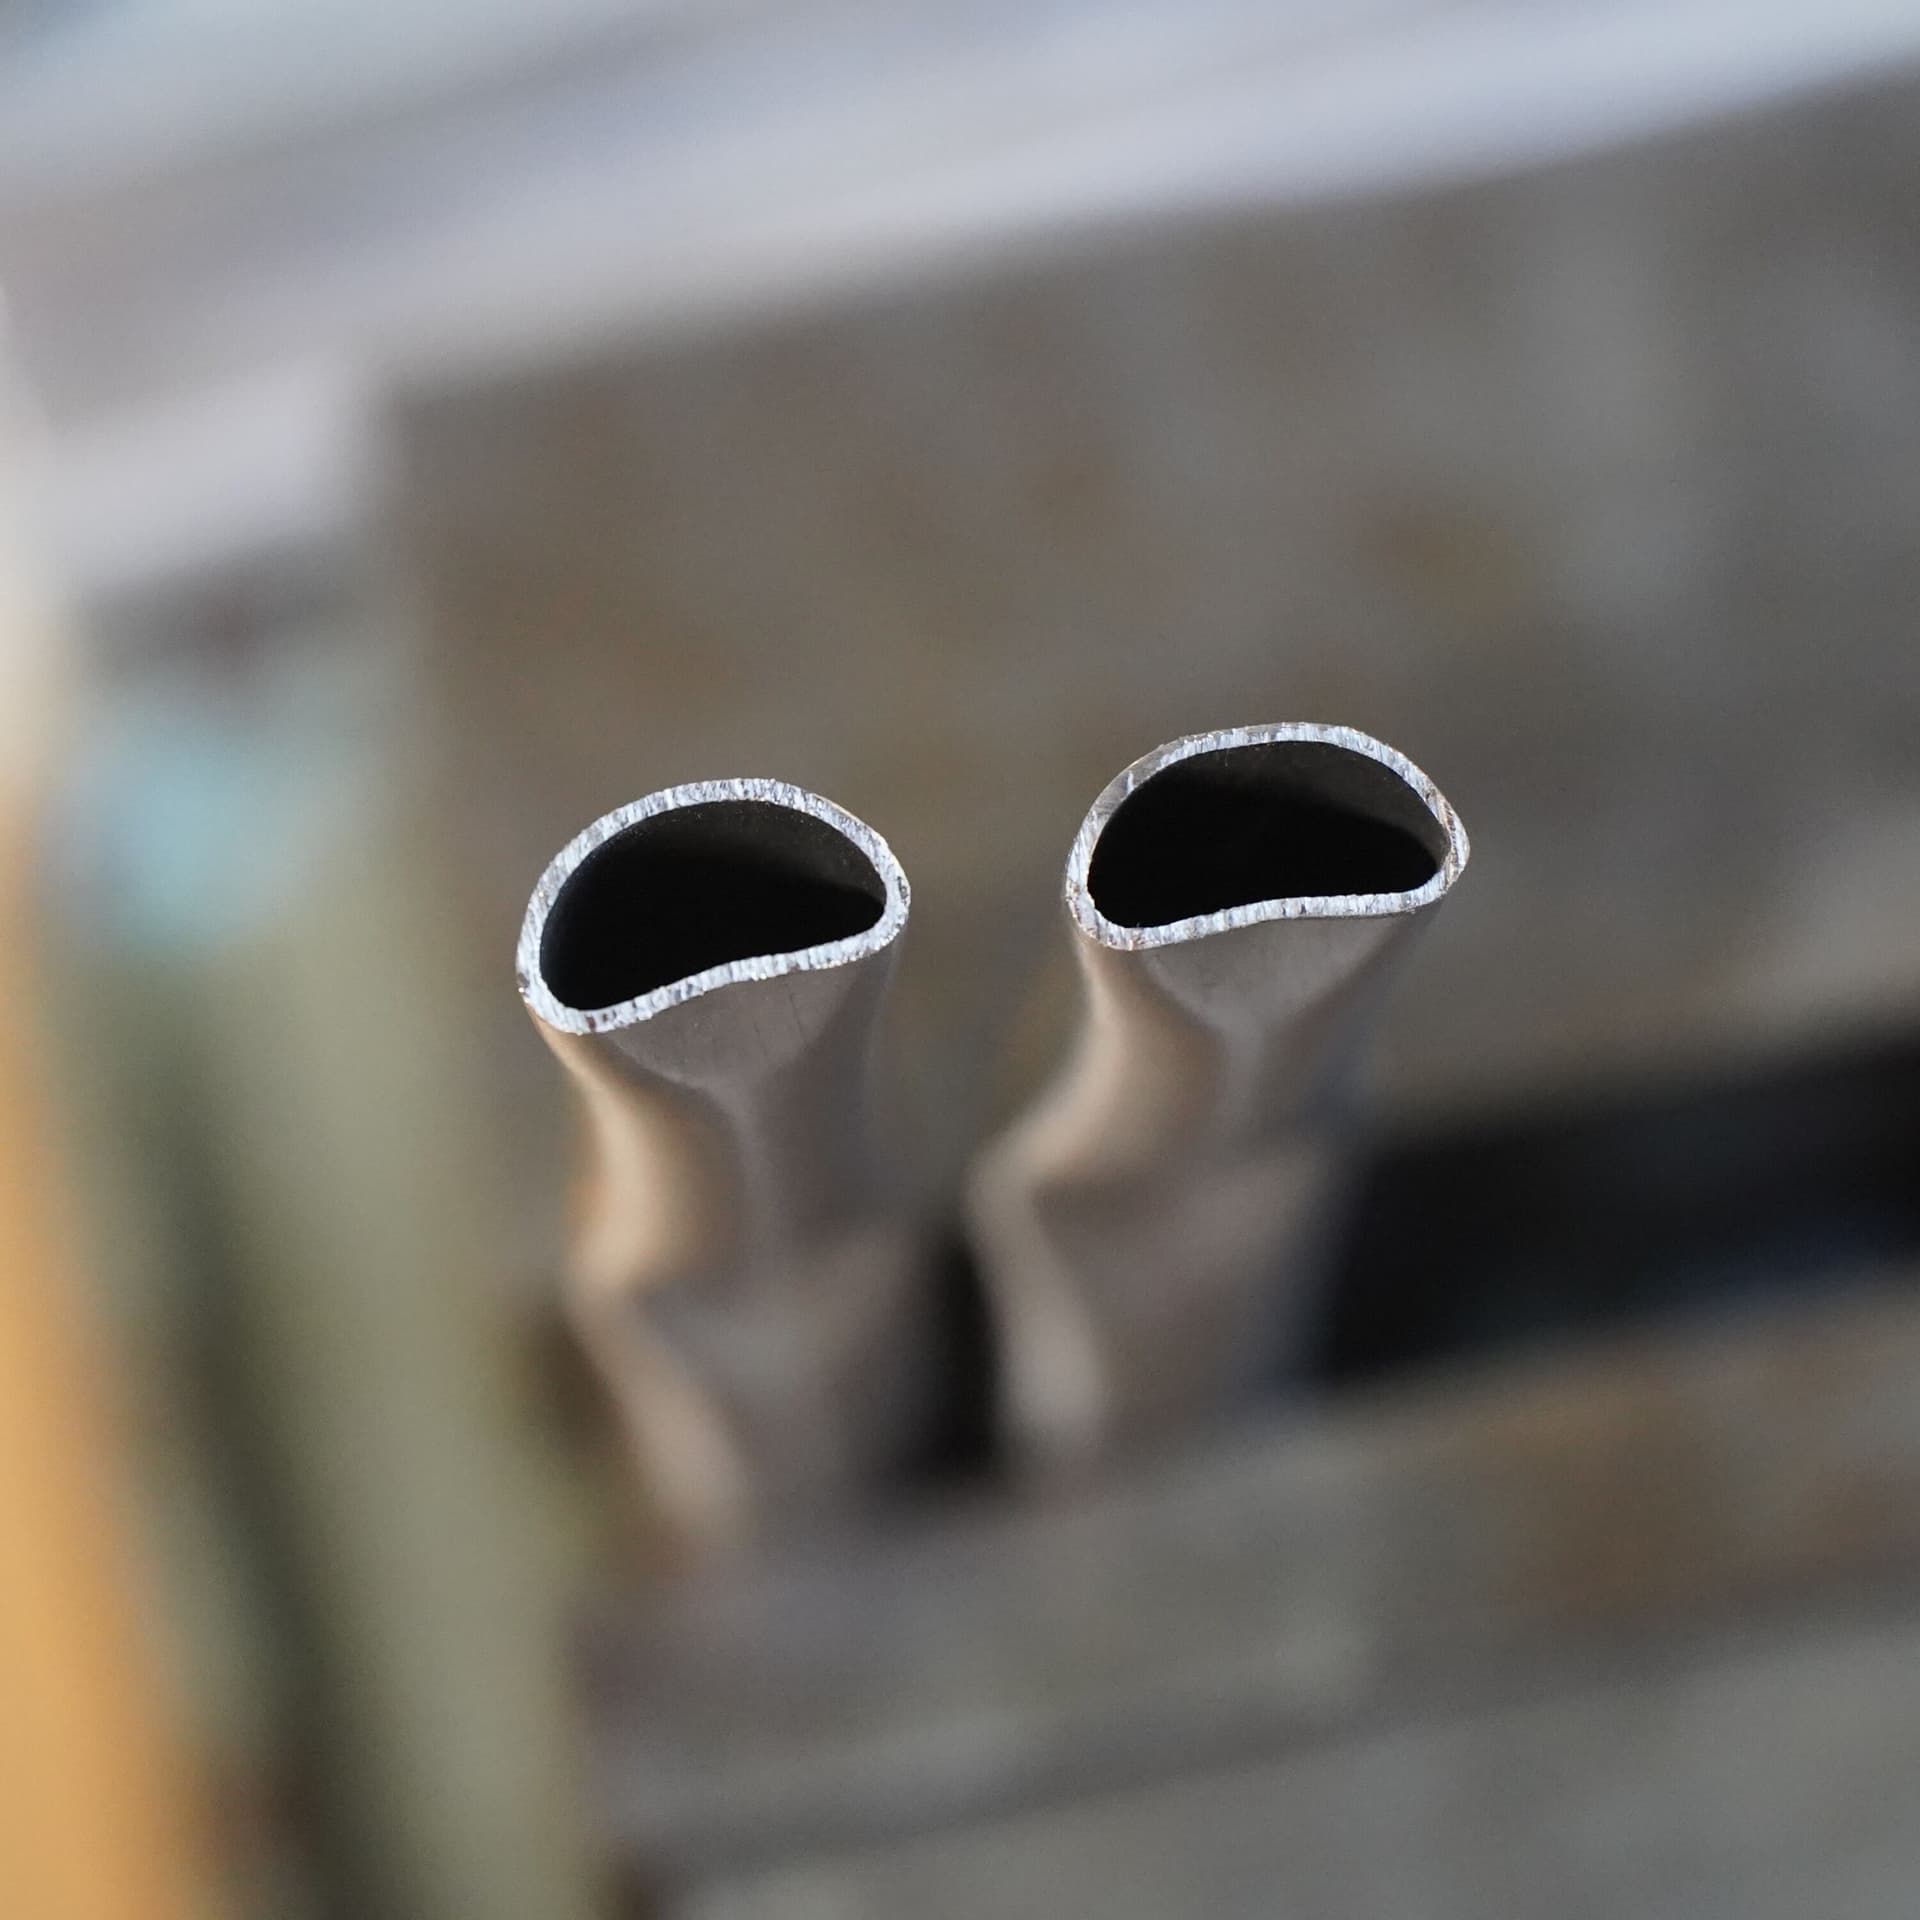
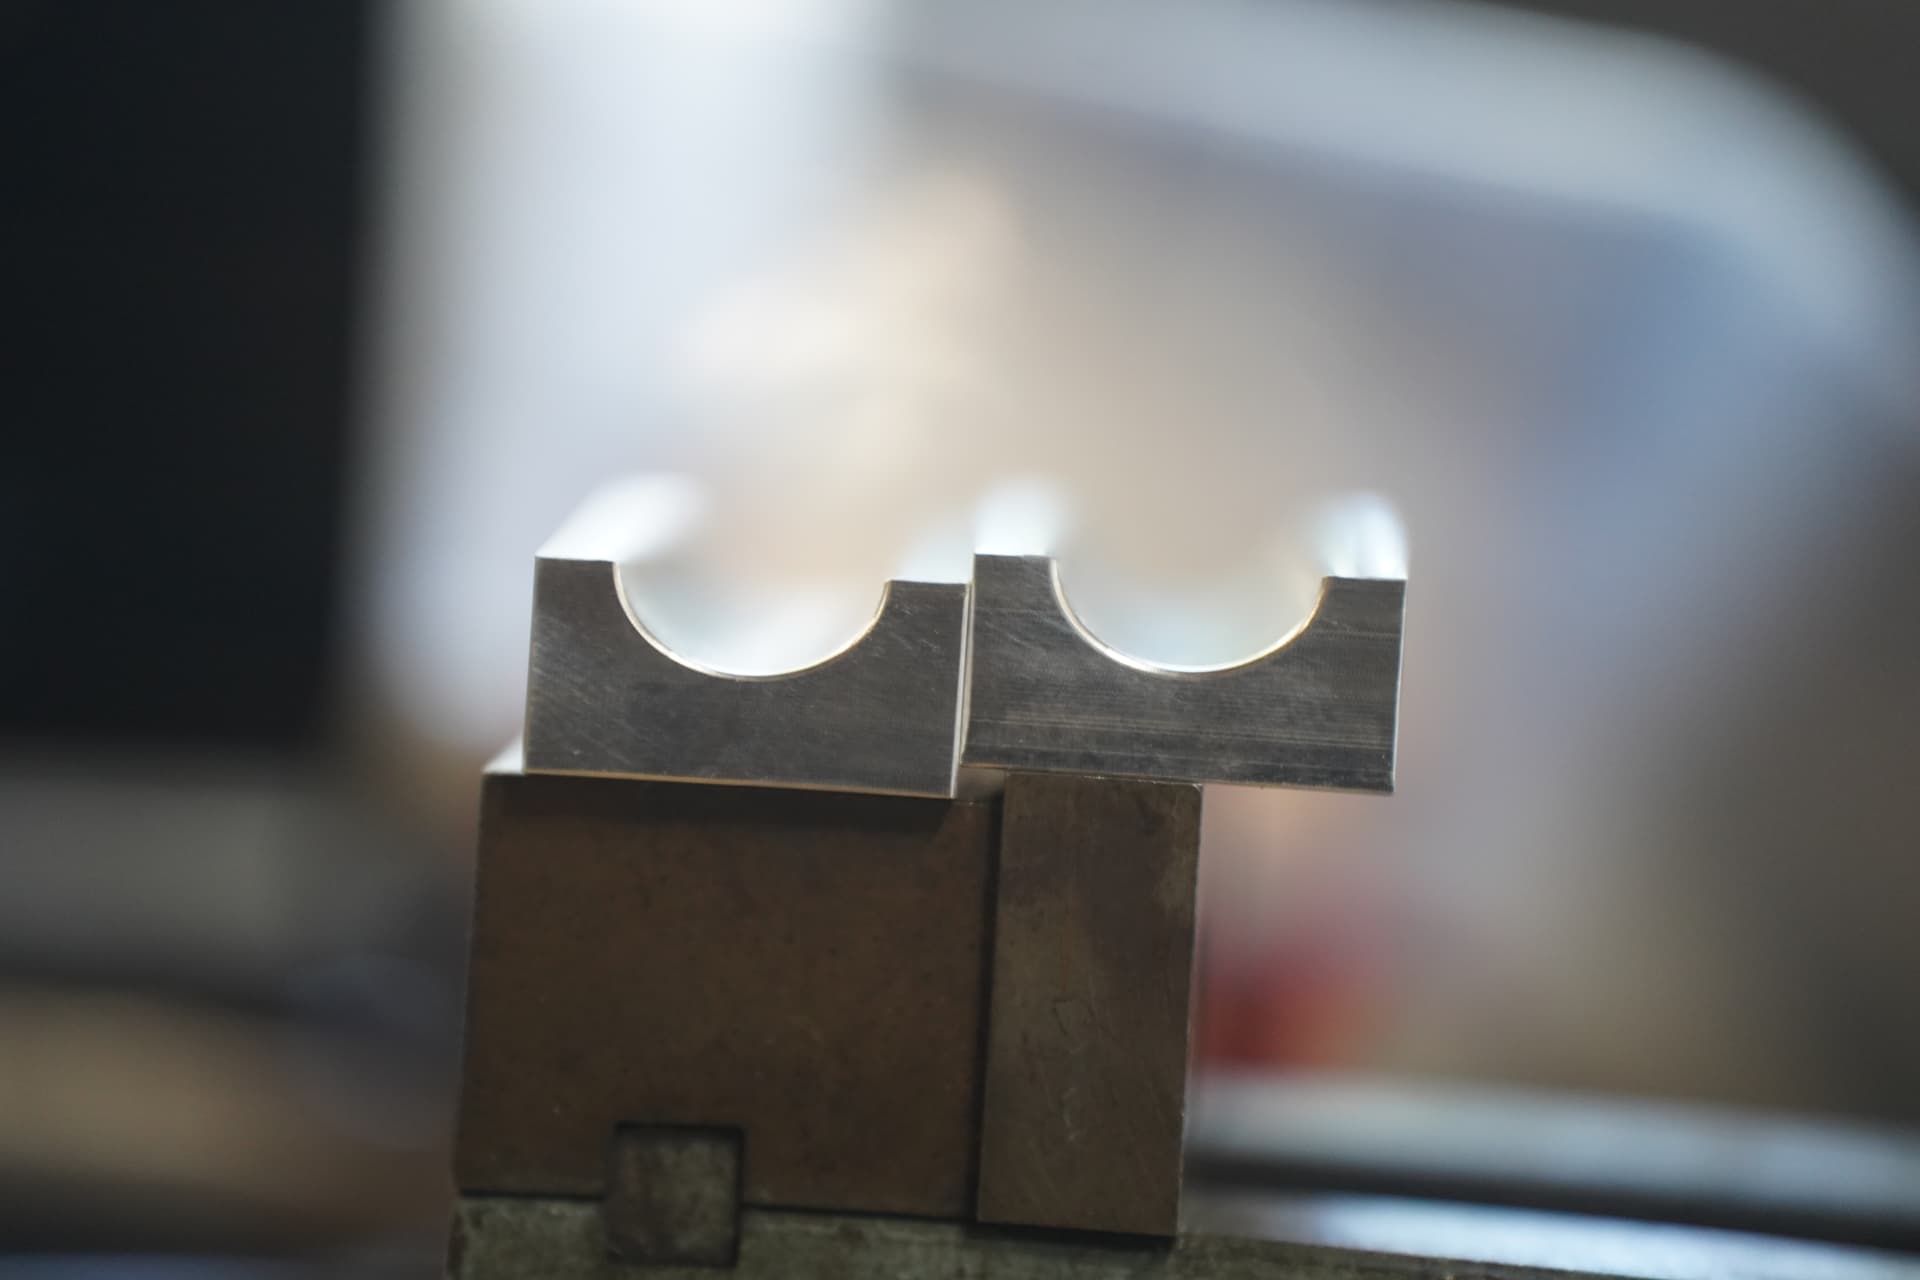
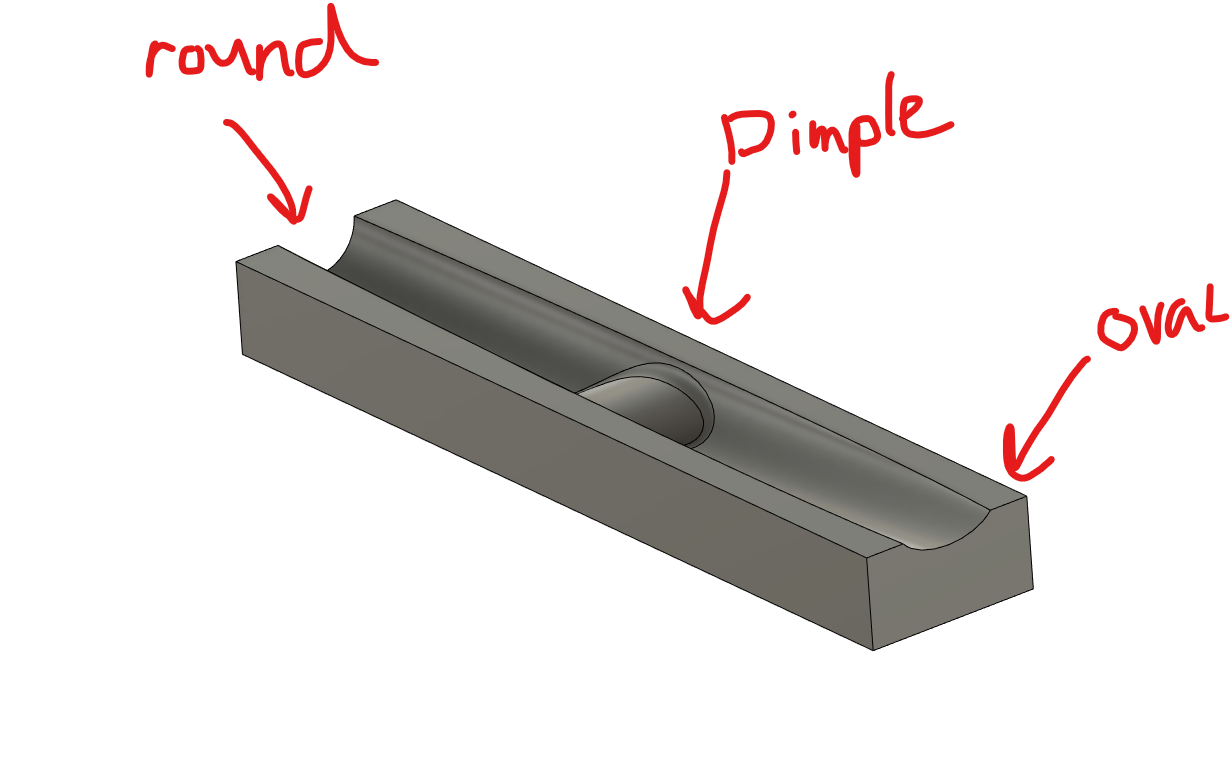
I am really happy with the results. The dimple squished the cross-section to 13mm wide (from 19mm) and added a 2.8deg bend. I estimate the dimple is 25mm in radius.
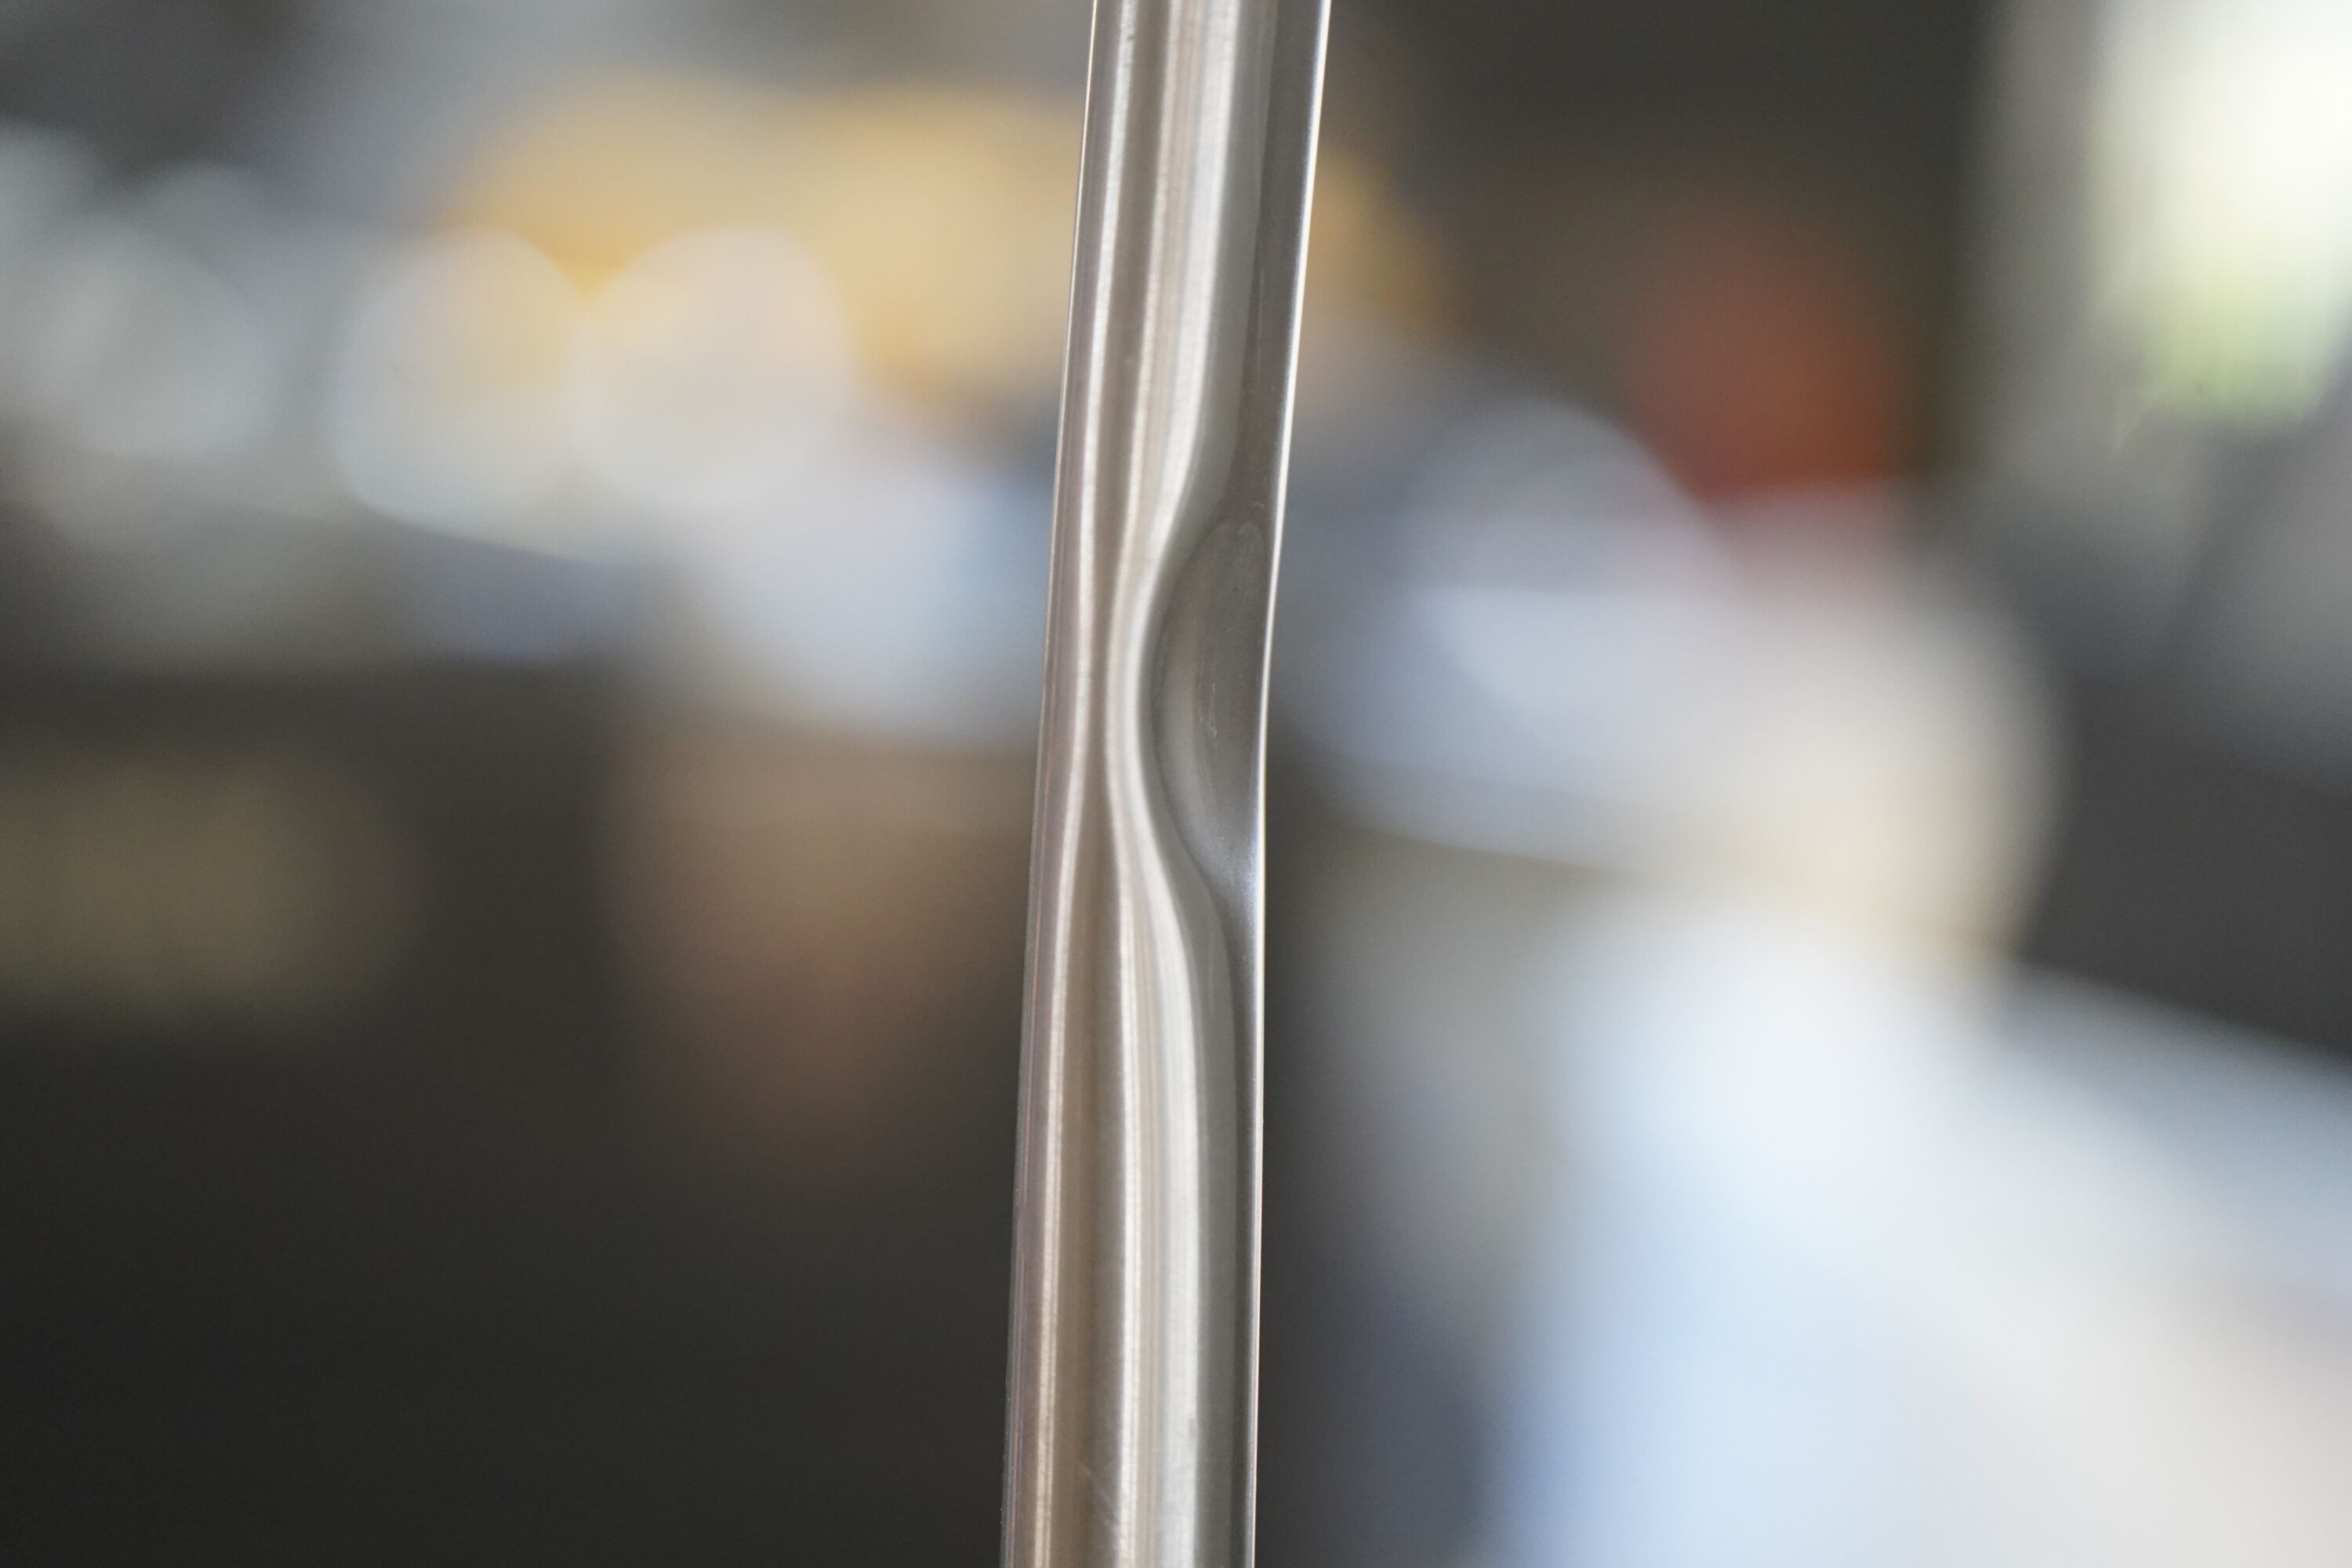
I cut the tube in half at the “sharpest point”. You can see how chill the radius of the bend is. I think a lot of that can be contributed to the sidewall support that die offers.
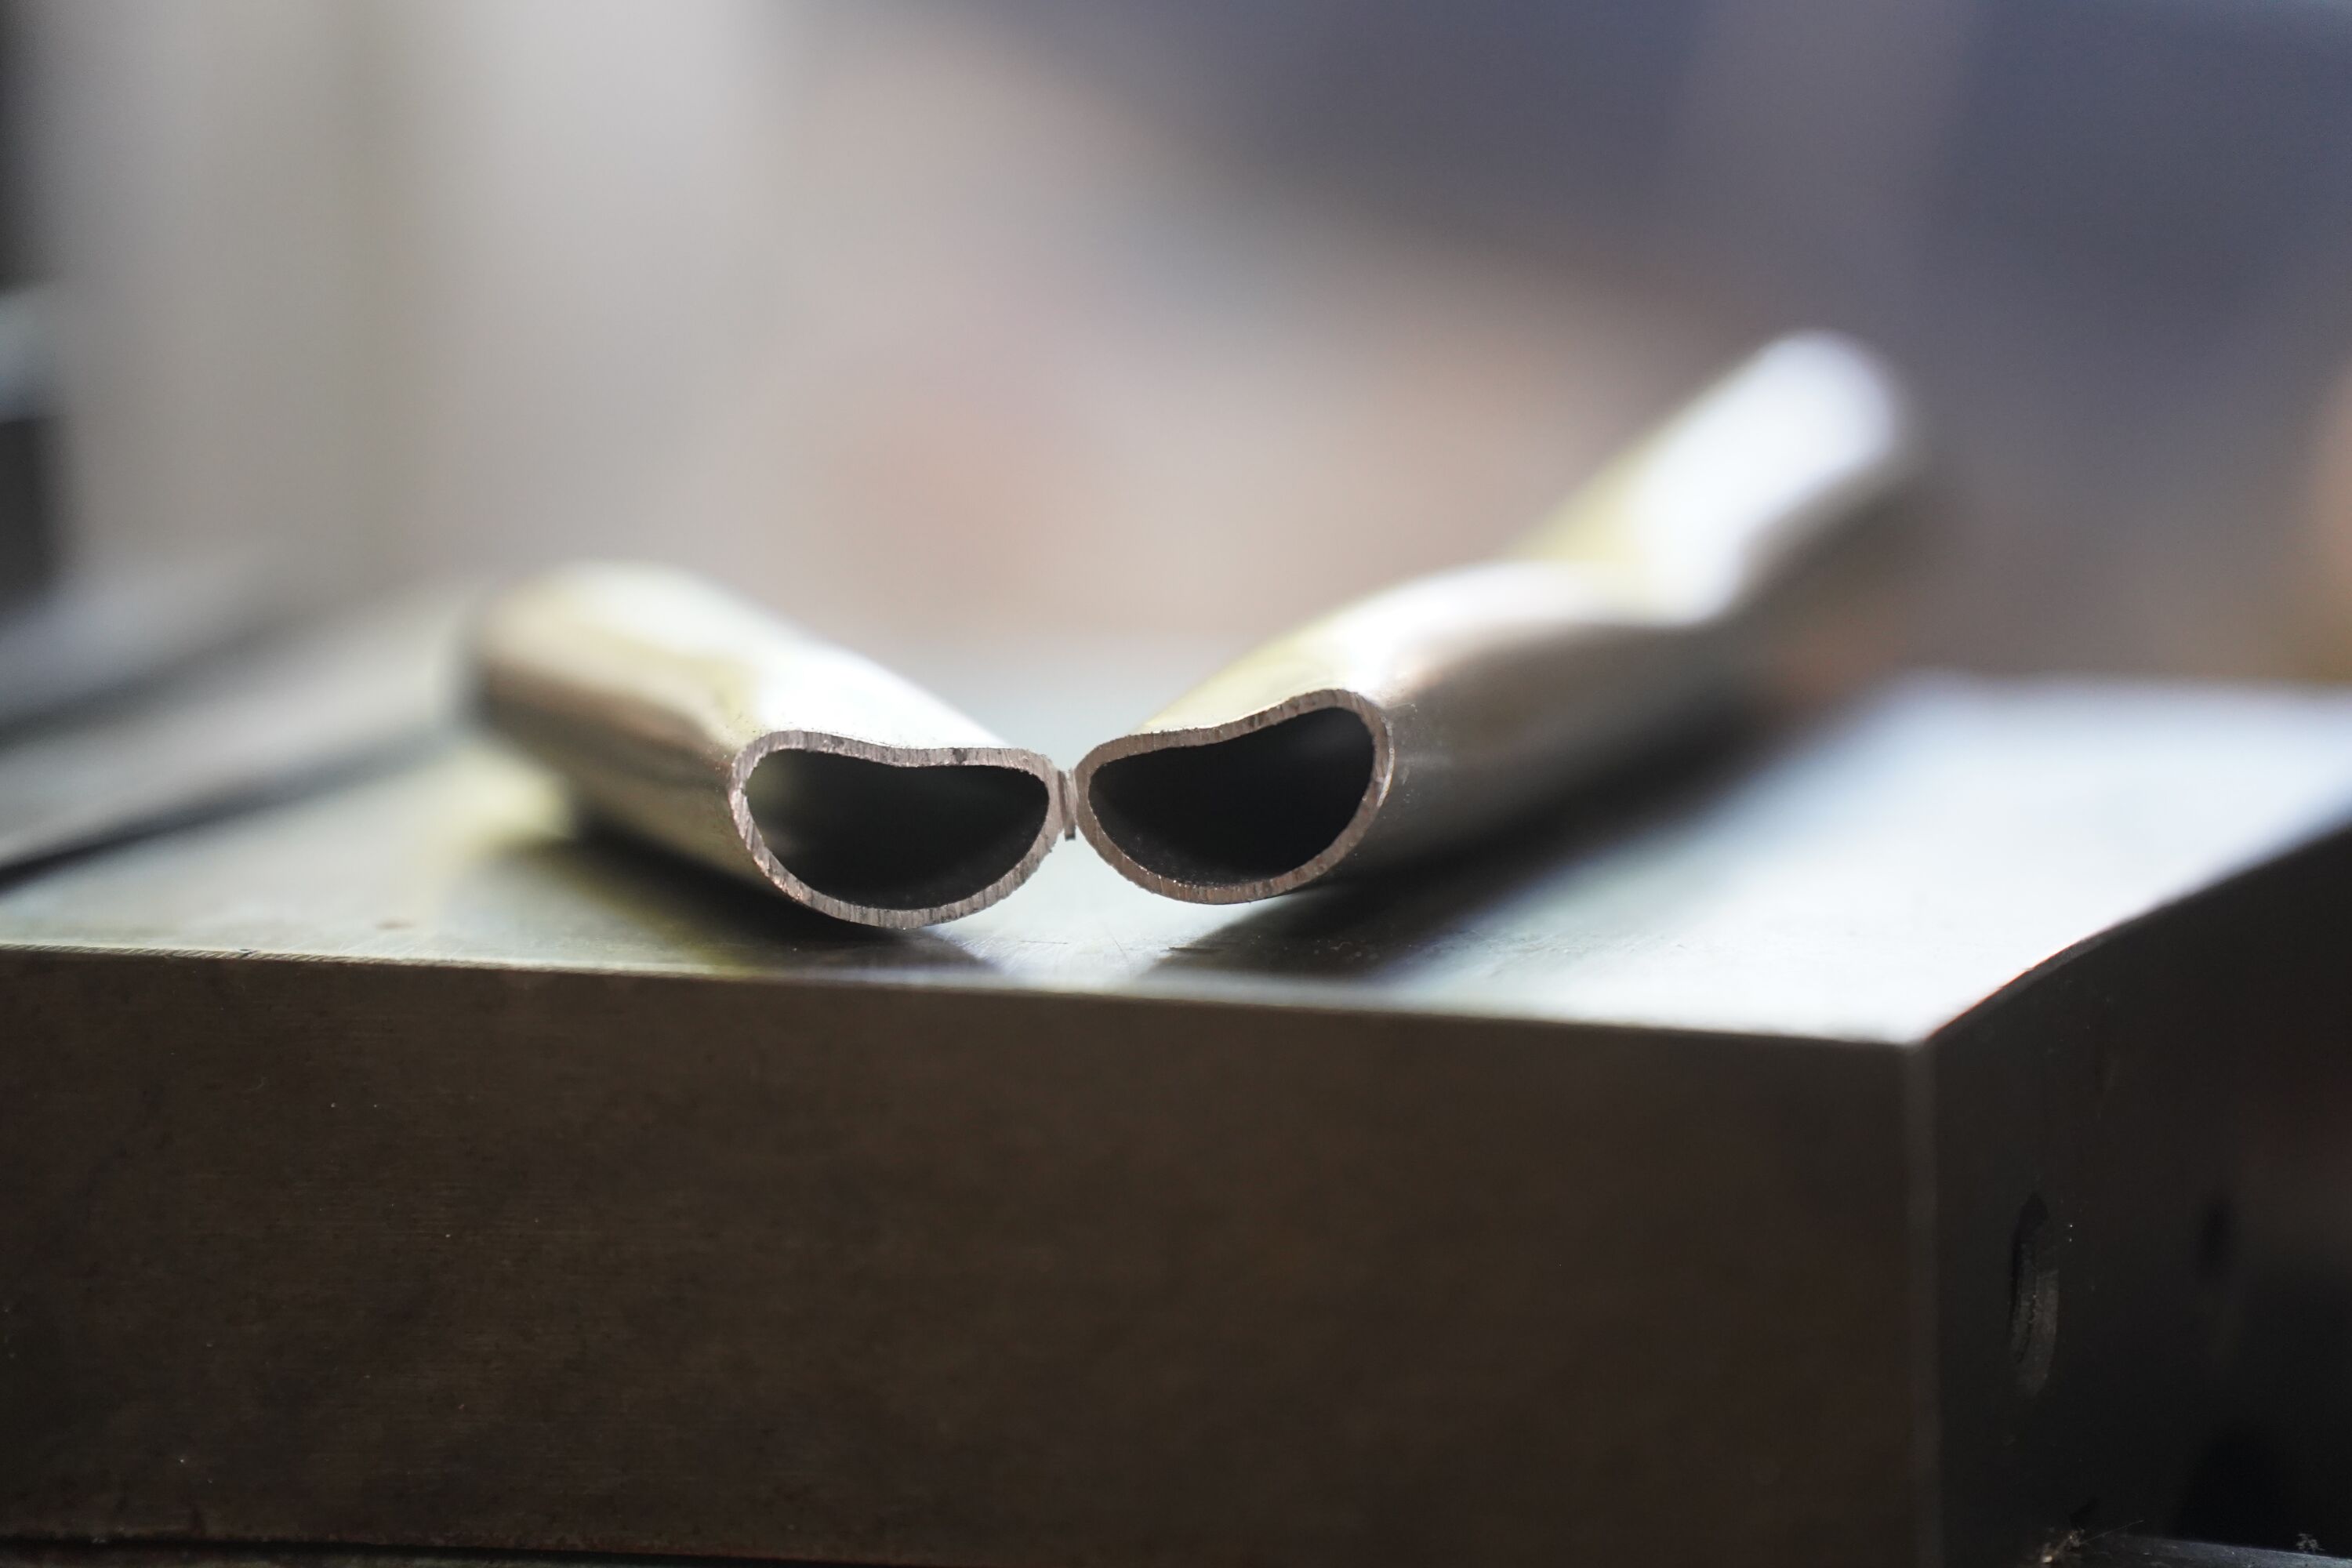
Now the big question is, how does it compare to squishing it against the flat vice jaws?
There is a subtle difference. The flat-plate squished chainstay (right) has a flat spot and sharper corners. Is it worth the price of the dies? Depends on your standards. On a titanium bike with a raw finish, flat spots are noticeable.
Regardless of the result, this project was a quick and dirty way to test the PCBway services, which was a great success.
The Setup:
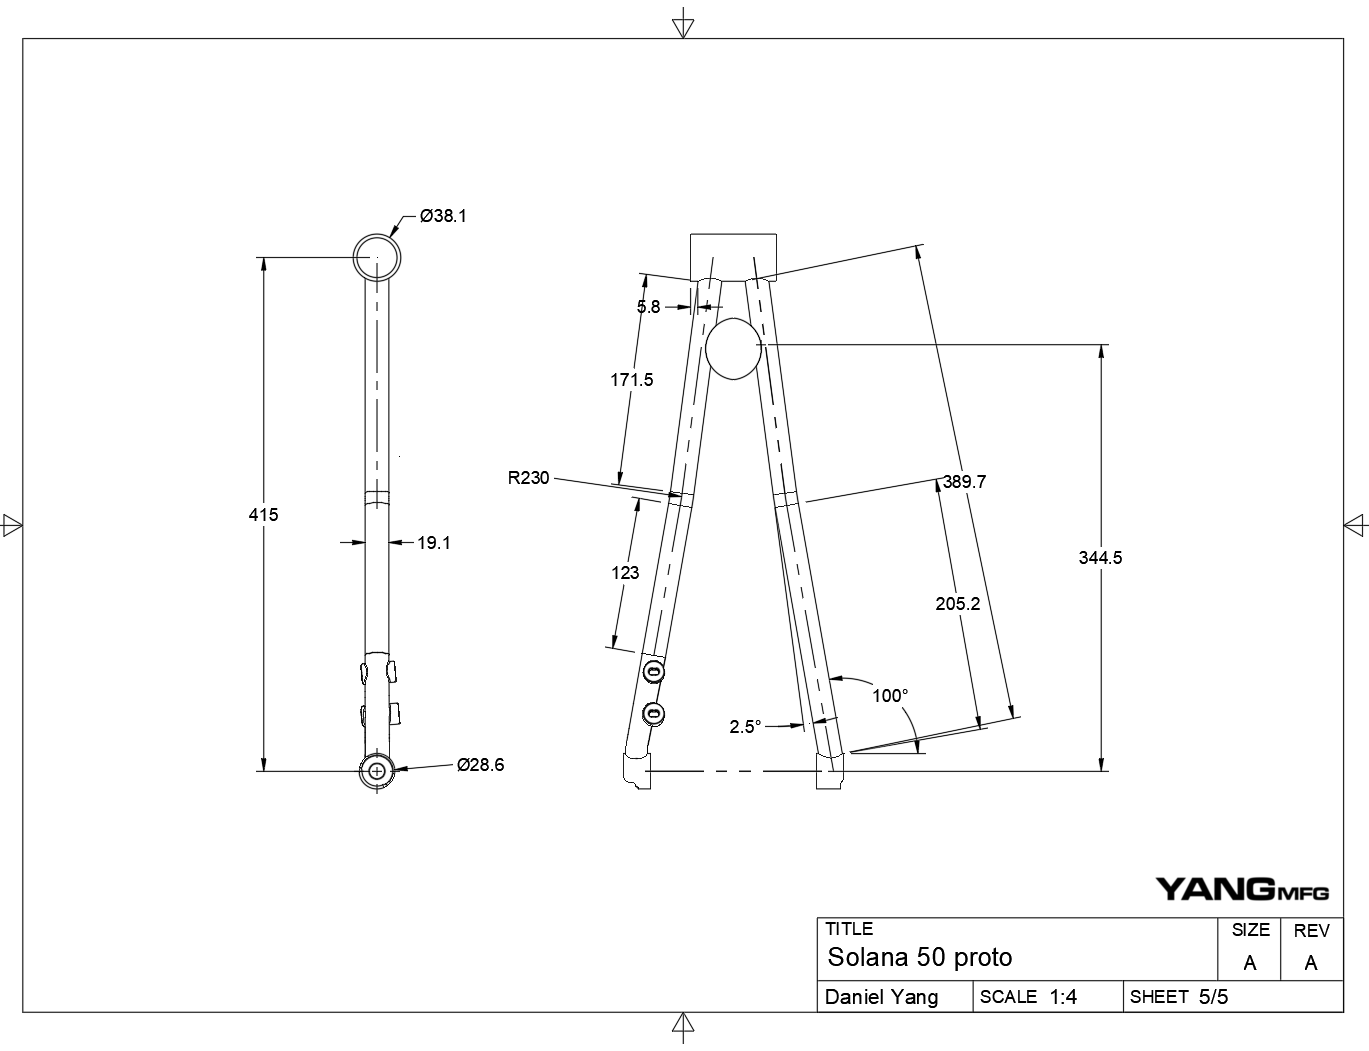
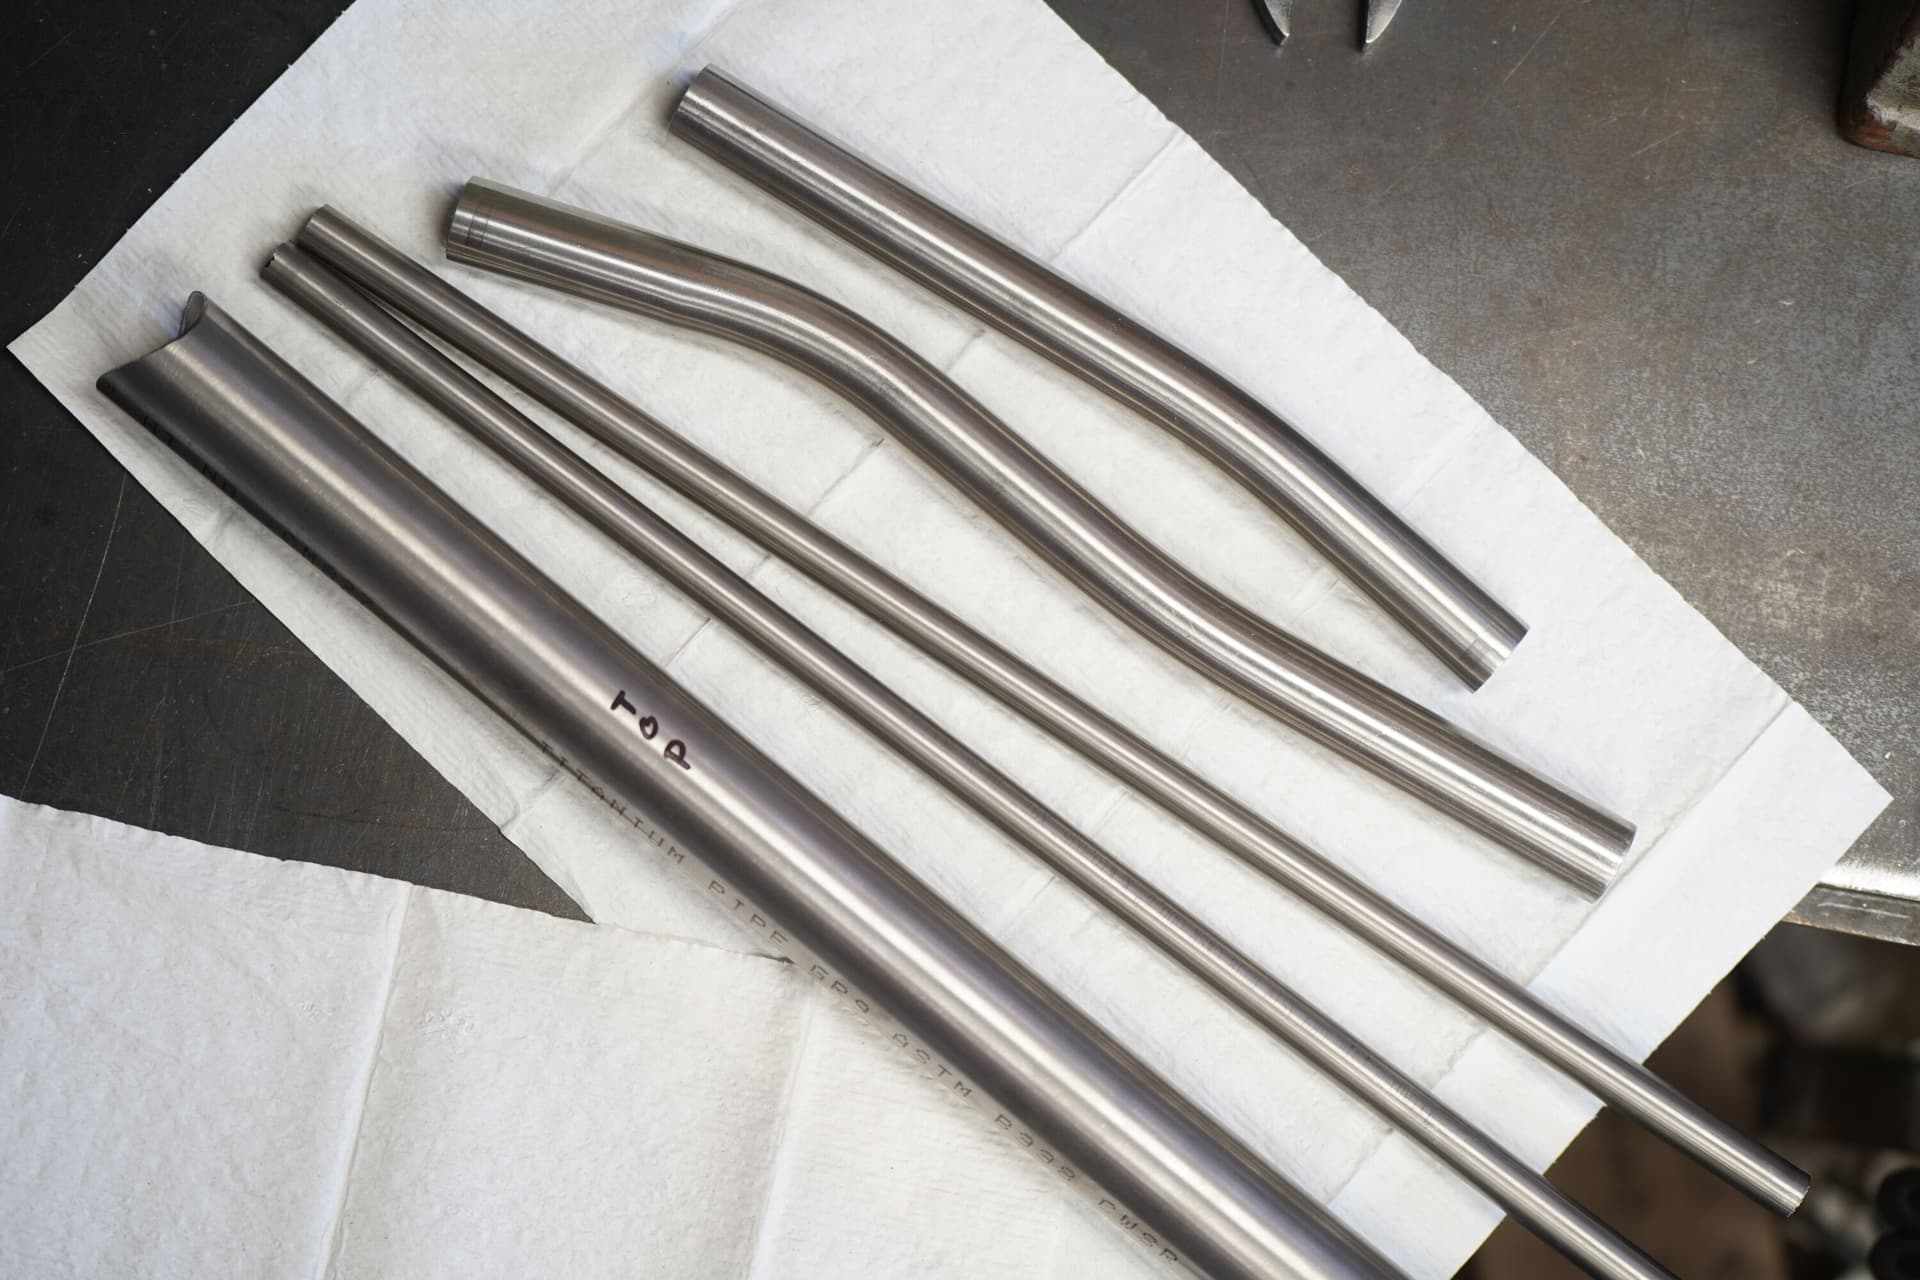
We needed a road bike CS sub-assembly for:
- 19mm chainstays
- 700x32c tires
- 415CS
- BSA 68mm BB
- Road mid-compact 52-36
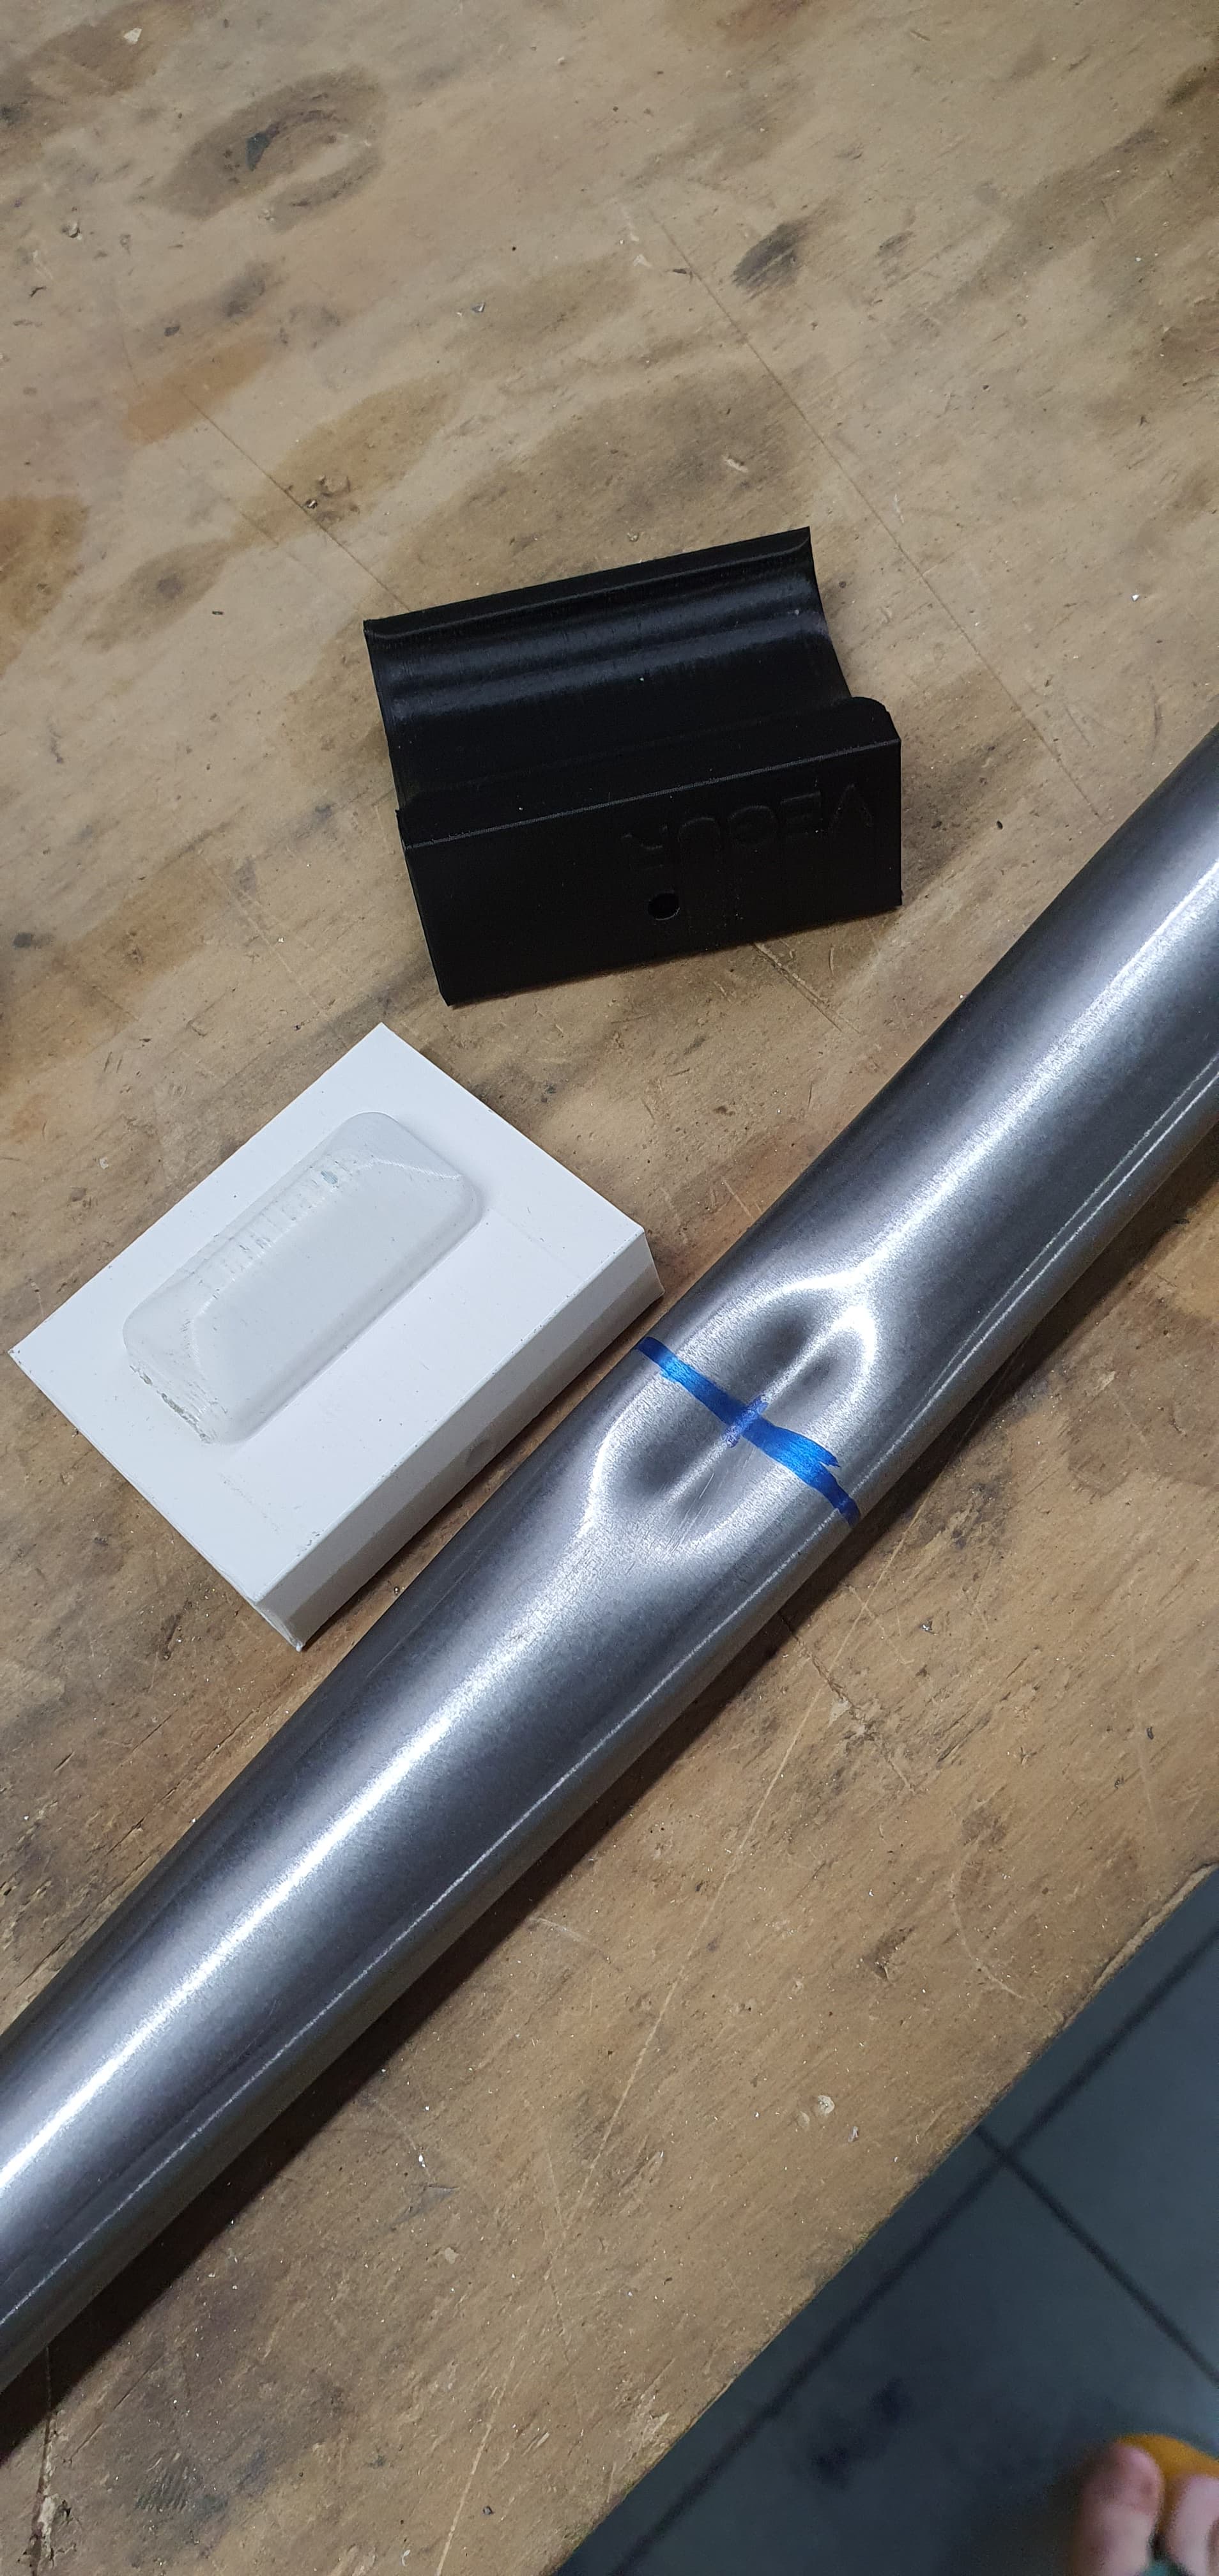
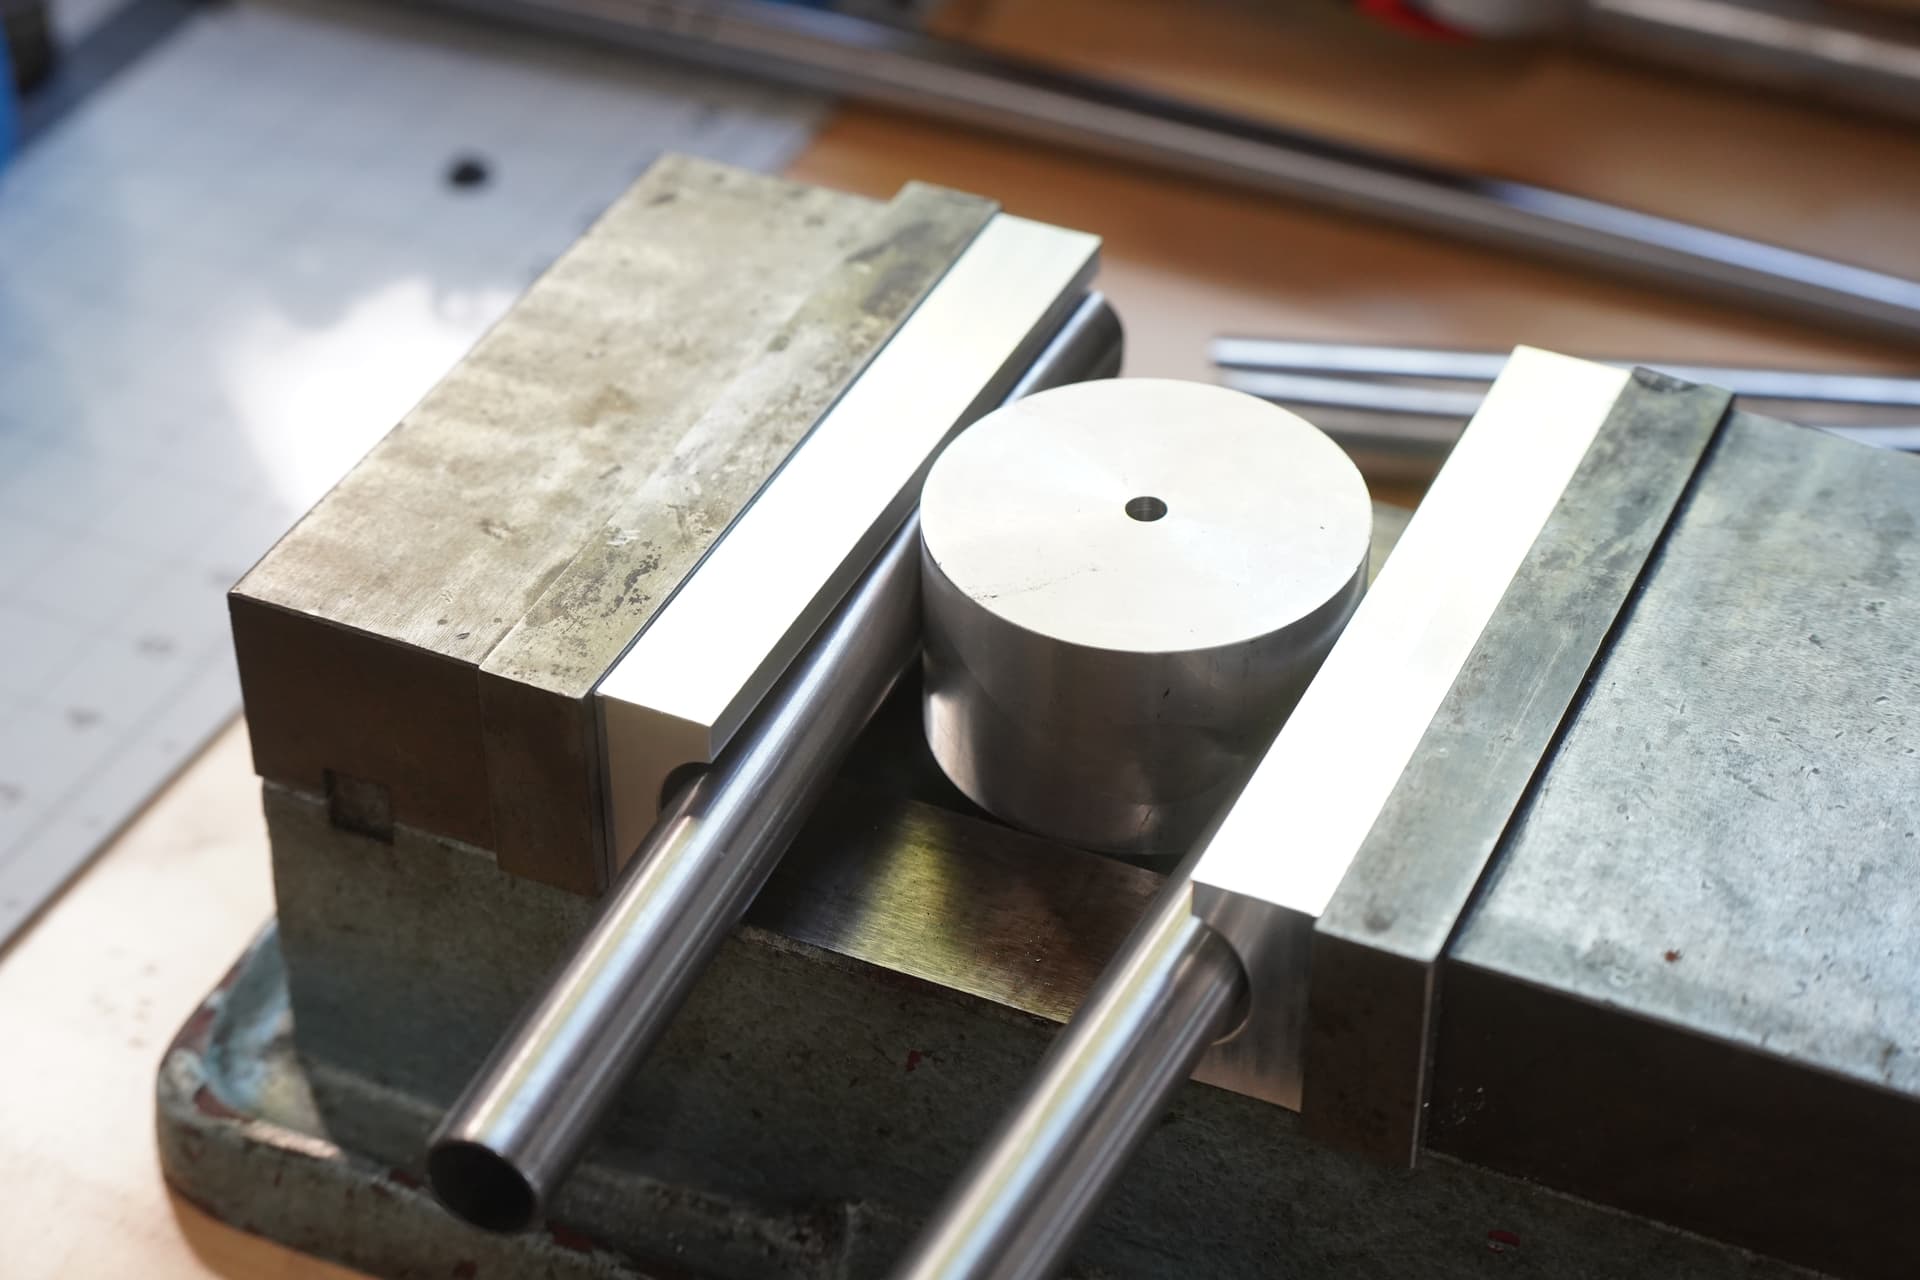
The die in the middle was a piece of scrap 2.5in diameter aluminum. Bigger might work better. It was all clamped together in a used $40 vice.

Squished in tandem:
The Die:
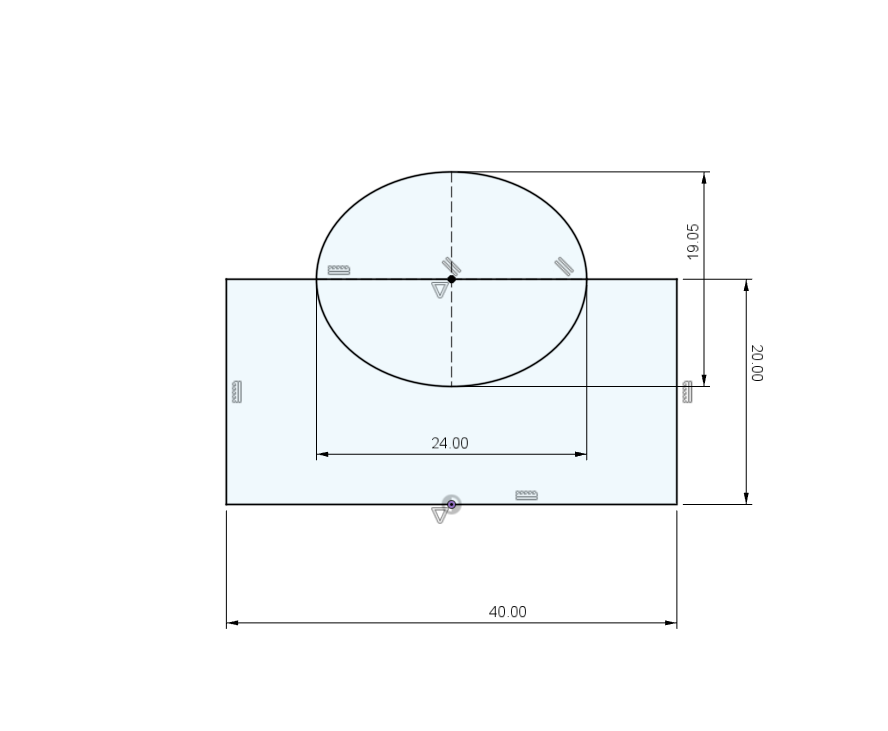
I wanted to use some mathematics to squish the tube in the most gentle way. I knew I needed a dimpled cross-section of 13-14mm to get the clearance required.
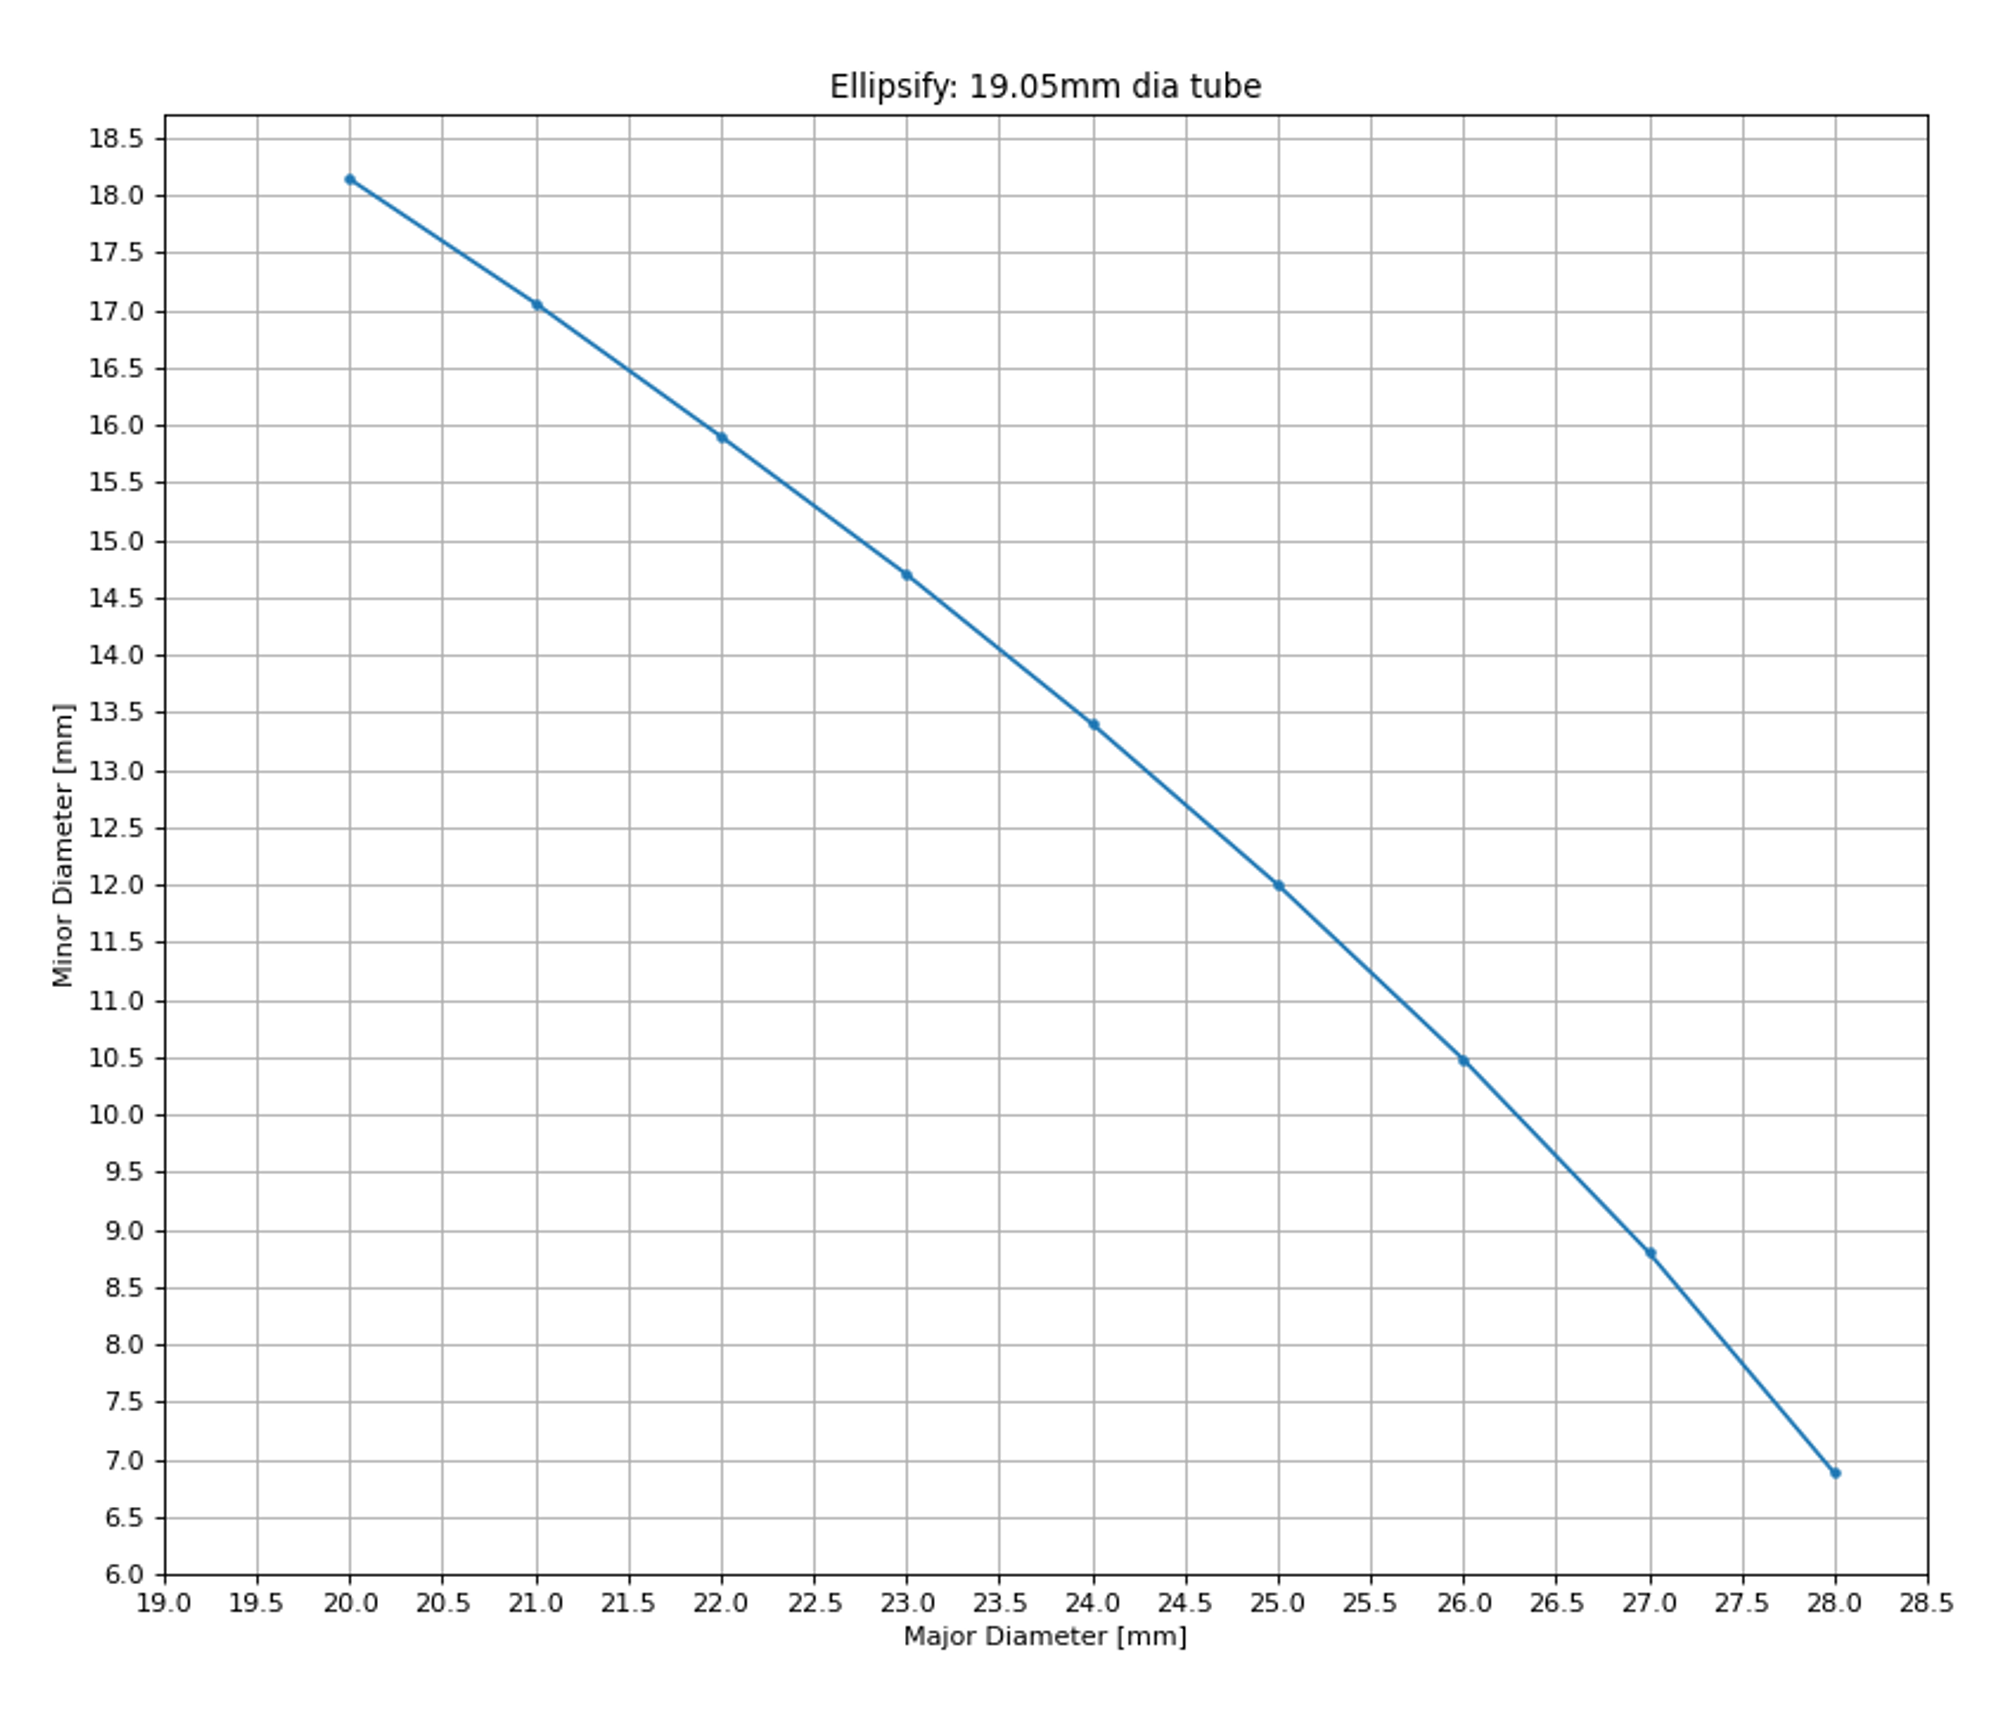
Using a numerical approximation of the perimeter of an ellipse (above), I estimated that it would bulge out to ~24mm. I set the depth of the ellipse to 19.05mm so that the walls would “constrain the bulge”
Did this math matter? Probably not. But having some mathematical model is better than guessing and checking.
Finally, I uploaded the .STEP file (no PDF drawing) to PCBway, and the parts arrived a week later. The cost was $120 total. On one hand, it’s expensive for a simple tool. On the other hand, for a two-of cnc’ed part delivered in a week, its pretty awesome.
Next Steps:
You may be thinking, what was the point, the result is marginally better than squishing it with flat plates! And you are right, but I learned a few things
- The mathematically derived ellipse die shape is a stepping stone for more complex dies
- PCBway workflow was great. No BS, parts arrived on time.
The more important application is Titanium chainstays
- They have a ton of spring back
- they are known to fail if you dimple them too much
- Imperfections are easily visible with raw finishes
Now I need a 22.2mm version to experiment with titanium!