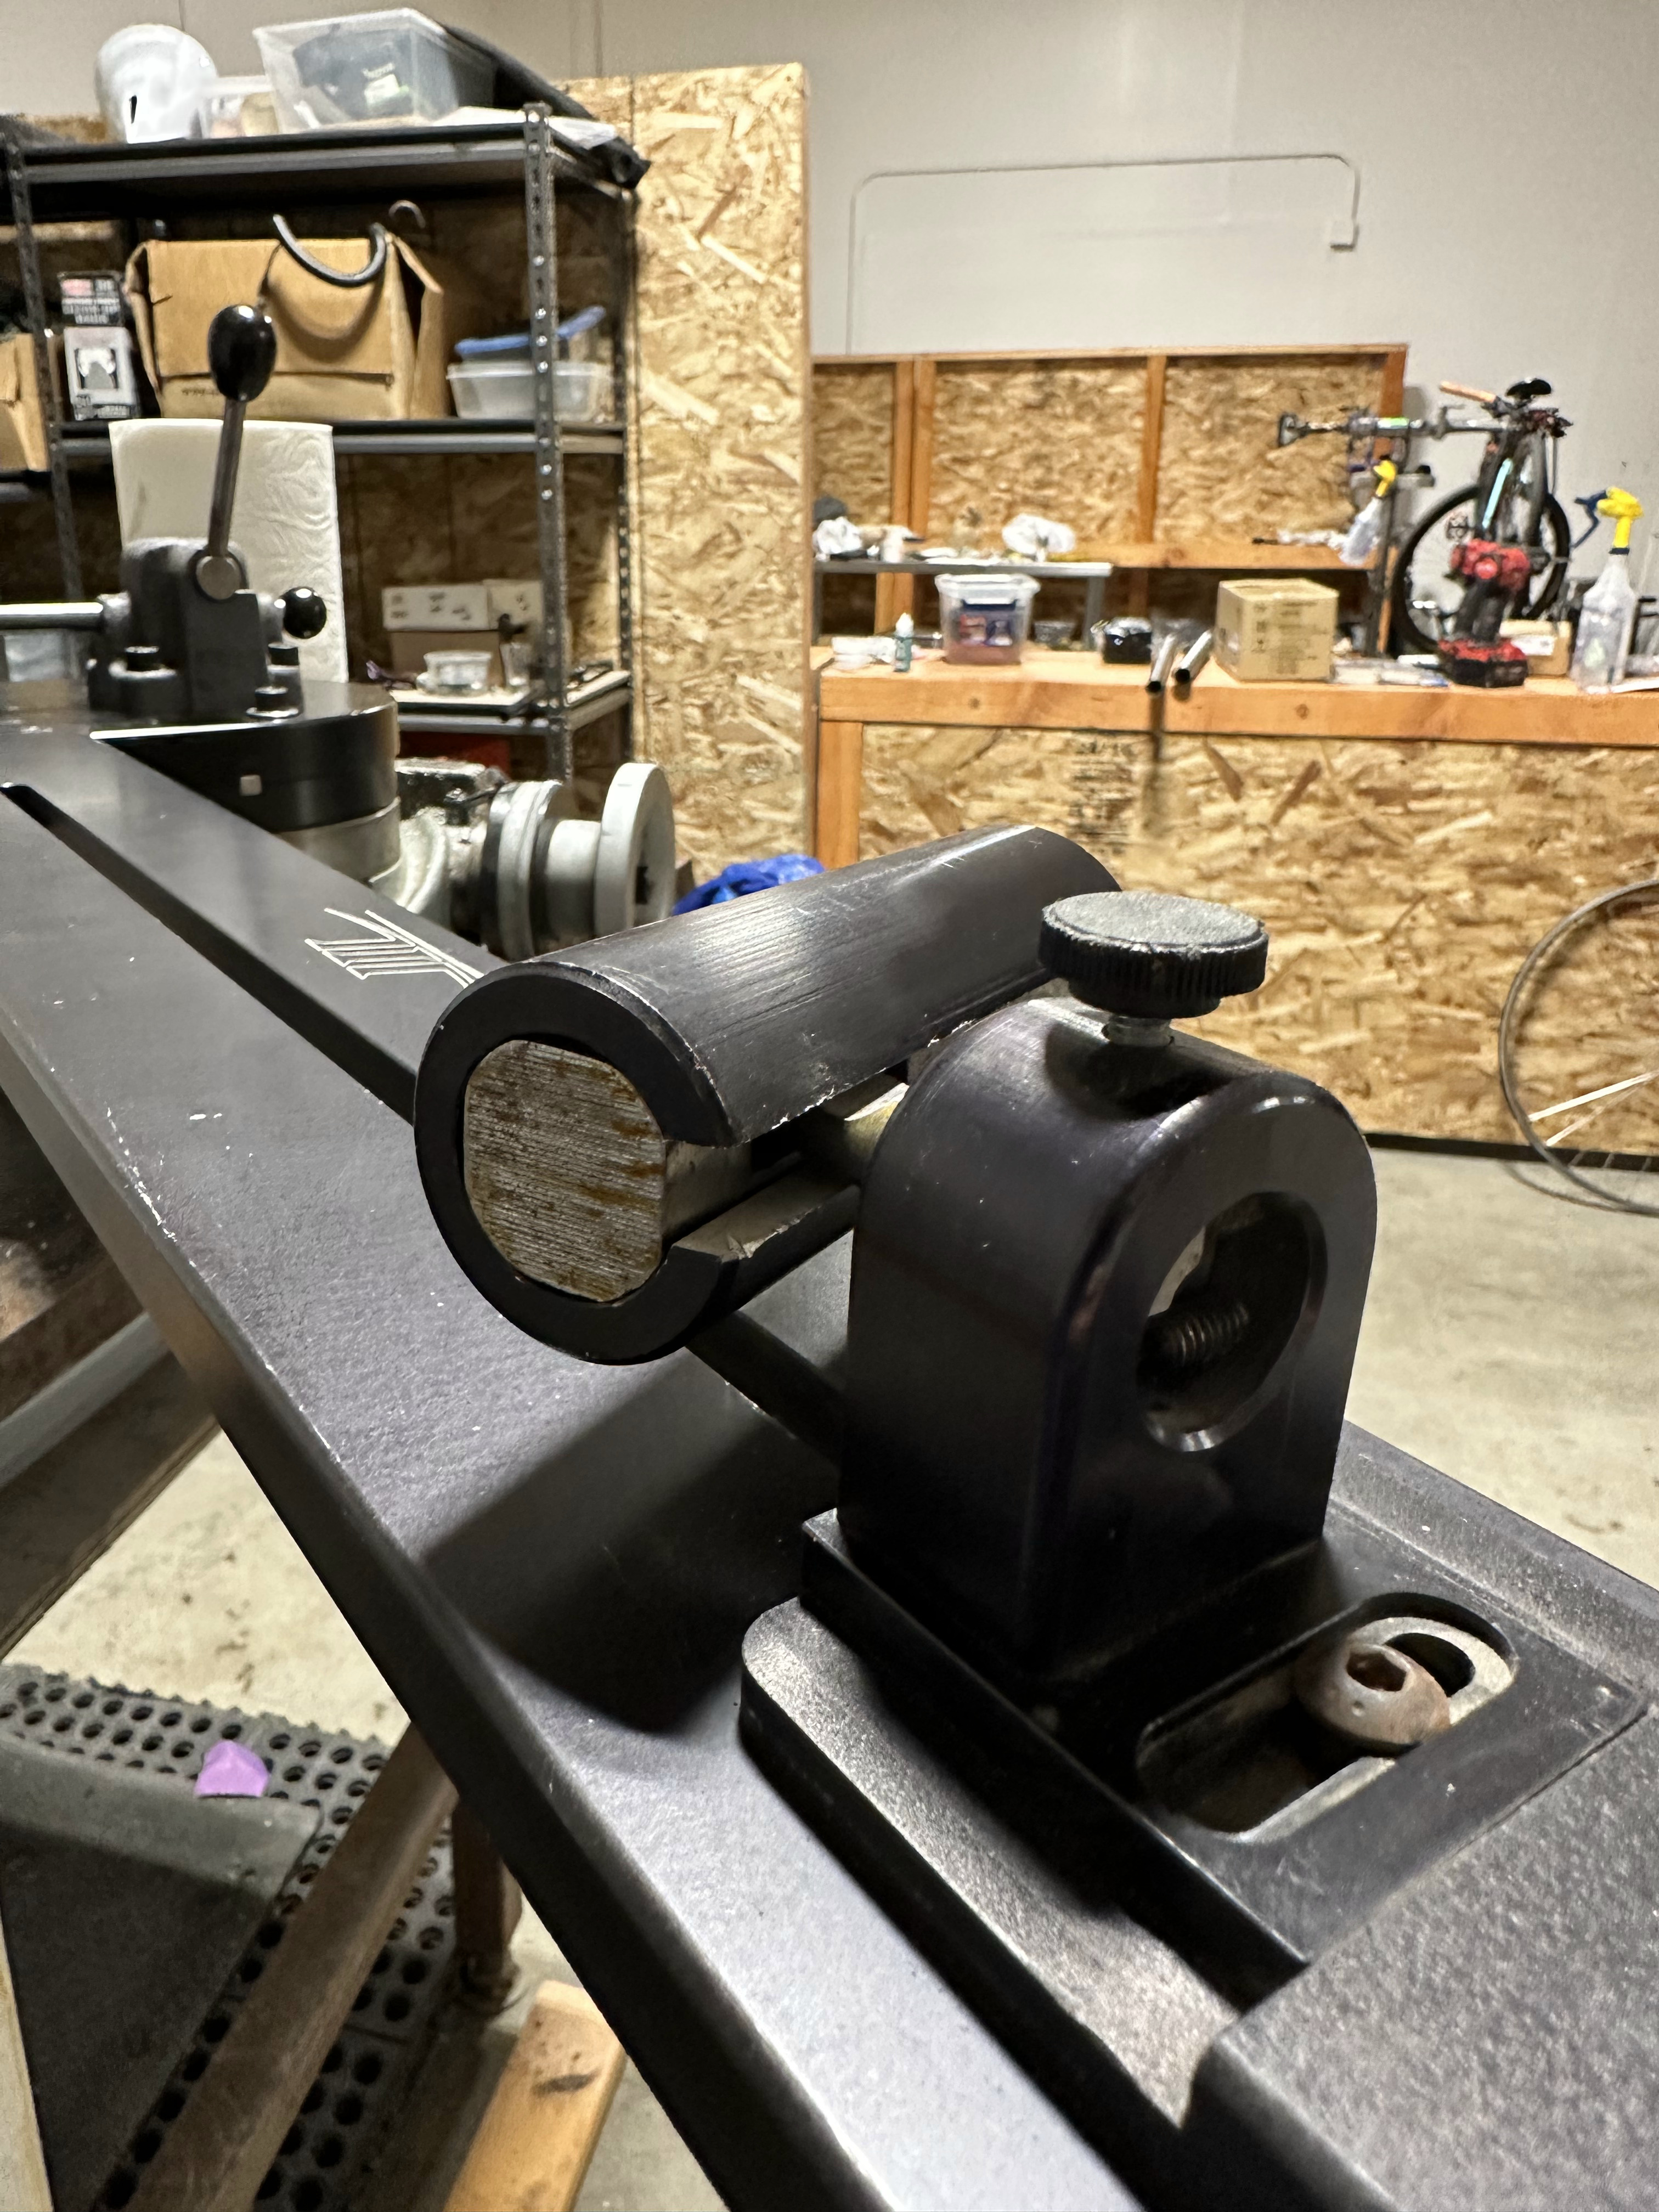
I’ve inherited most of my tooling from other framebuilders who have been active in town, and just recently saw a video that made me realize two tools that I had were components of the Anvil mitering jig. I was able to assemble it and mount it on my rotary table, but was wondering if anyone could tell me a little about it? Or if anyone has a manual or any documentation. I understand that the rotating post on the far end of the fixture is used to hold a tube in phase, but I’m wondering if I’ll need different diameters of sleeves to fit different miters? And if anyone has any advice on how to make sure it’s set to the right angle and squareness. Thanks so much in advance!
A lot of my gear has been packed up for the past few years and I was really pysched to put these pieces together and discover I have such a cool tool.
3 Likes
What a beauty to inherit. Do you know if this can be mounted both horizontally and vertically?
@Neuhaus_Metalworks do you have one of these? Can you comment?
2 Likes
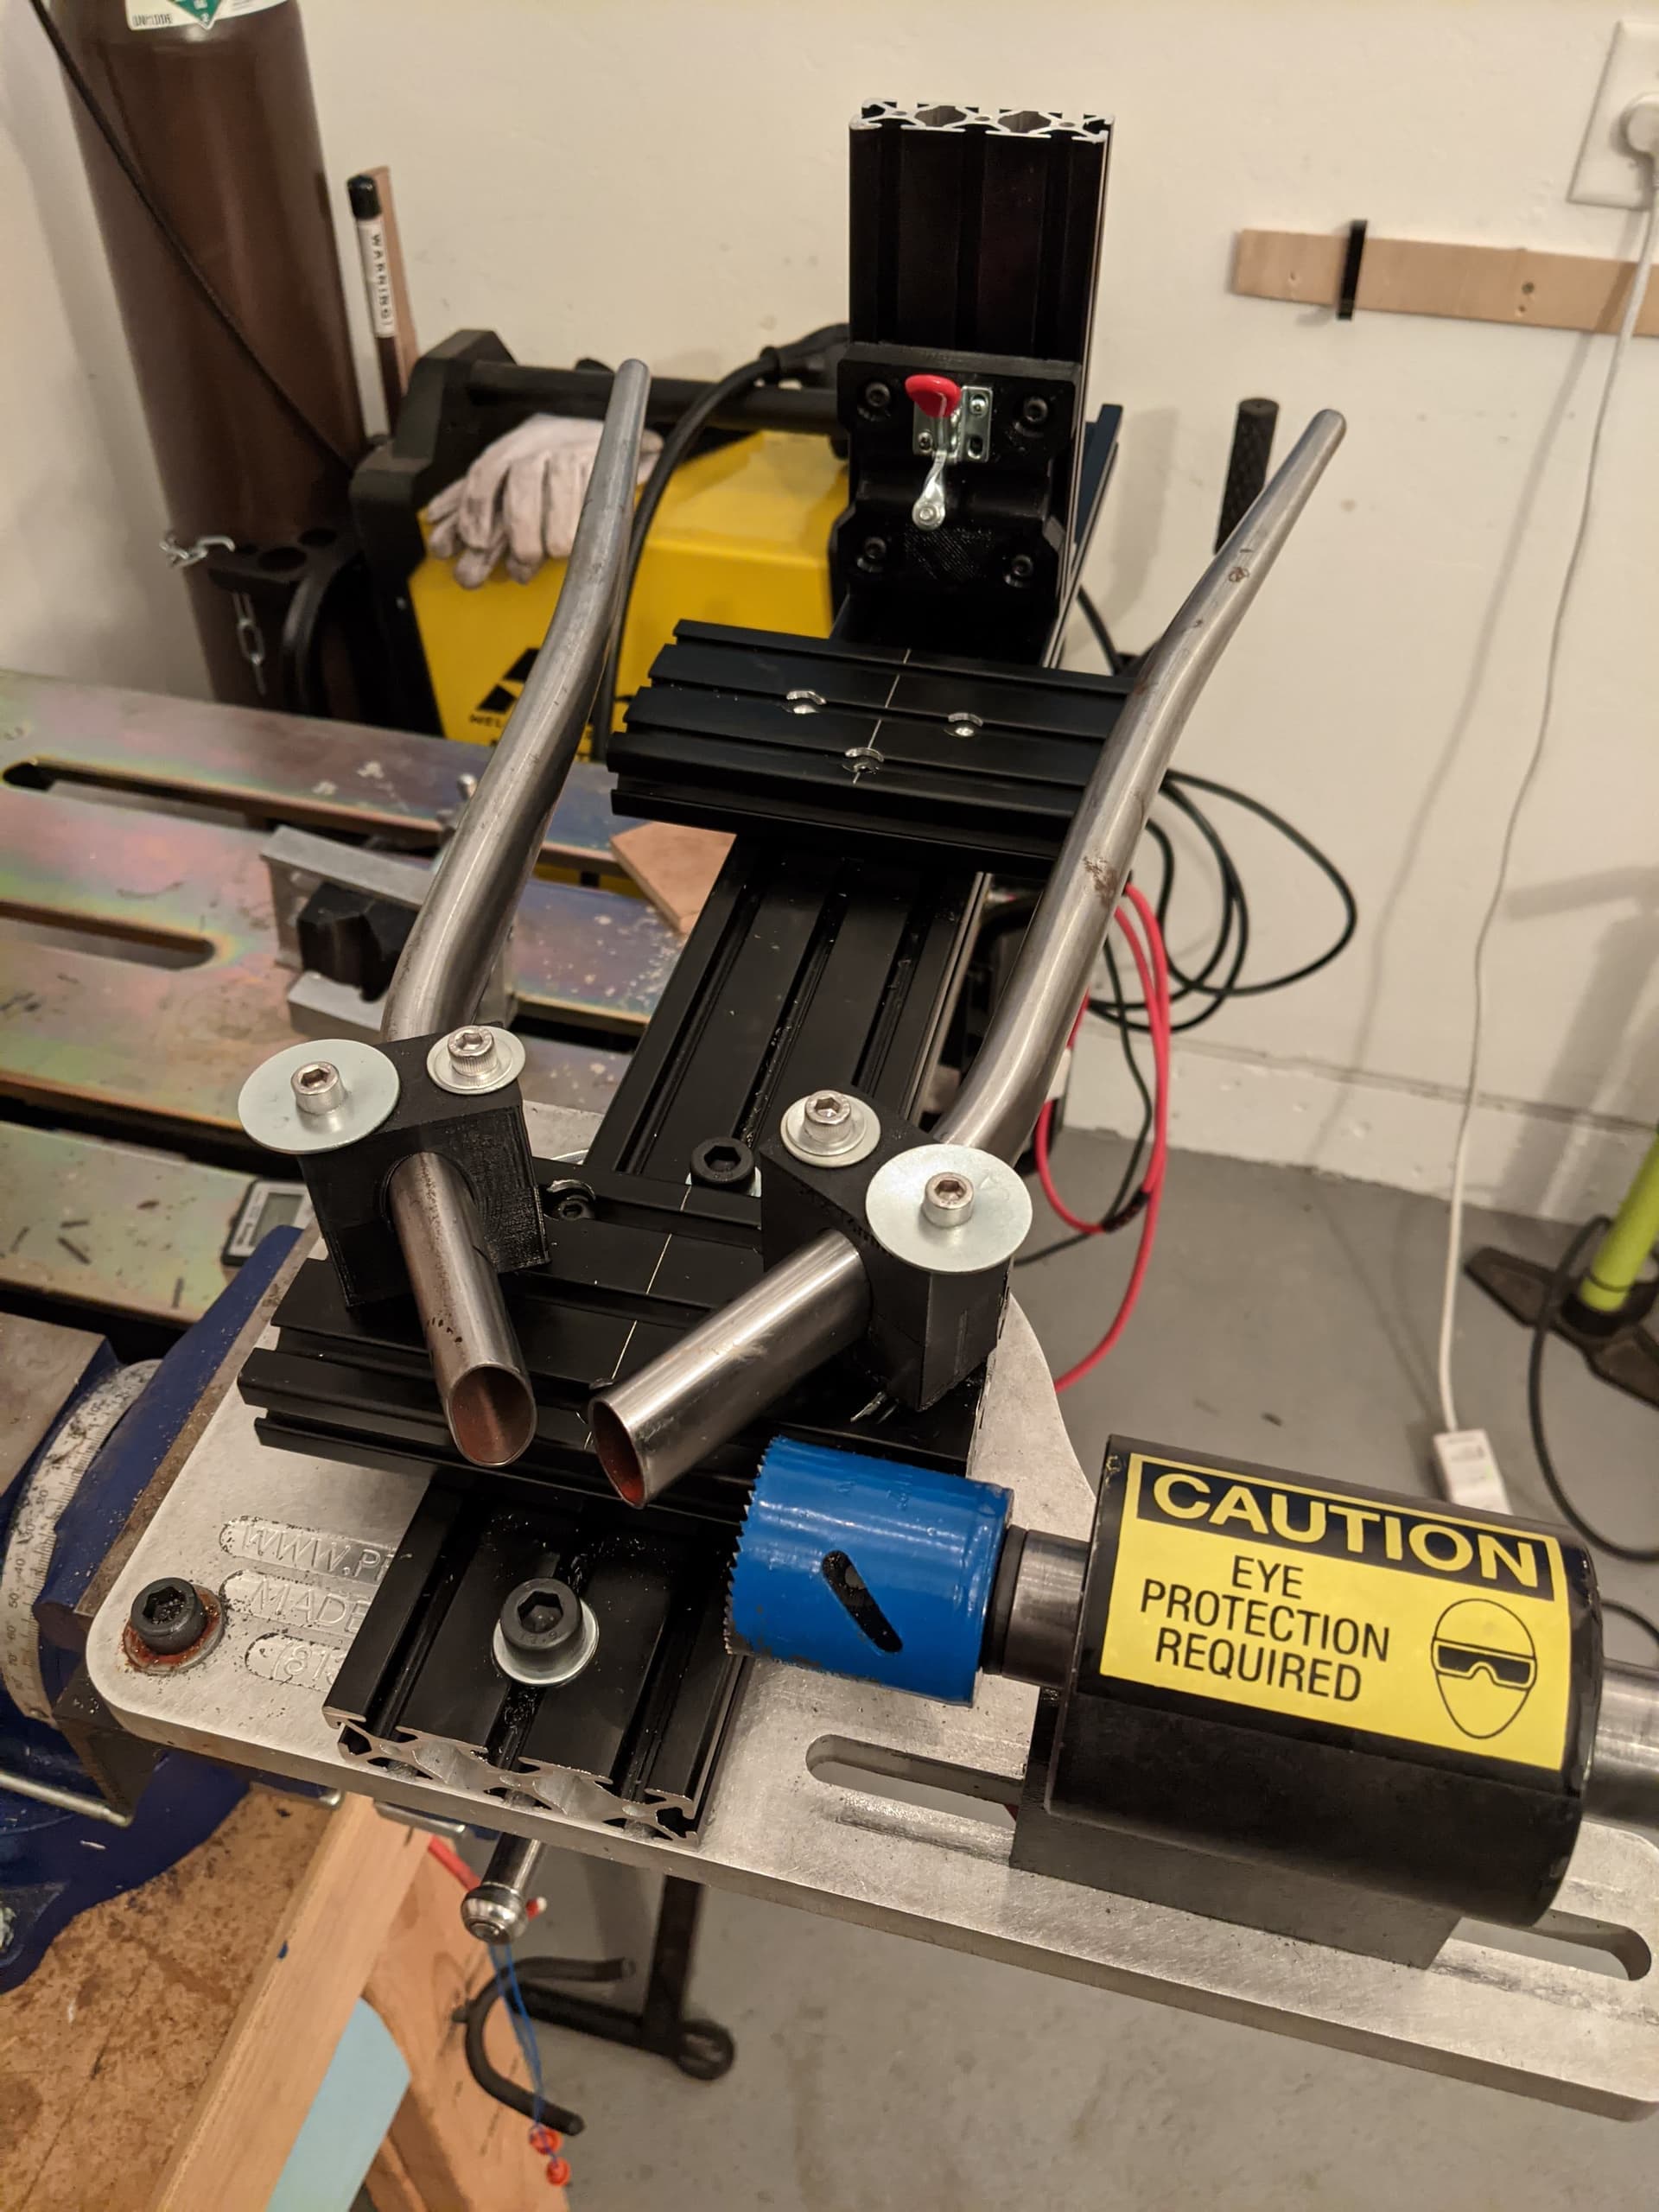
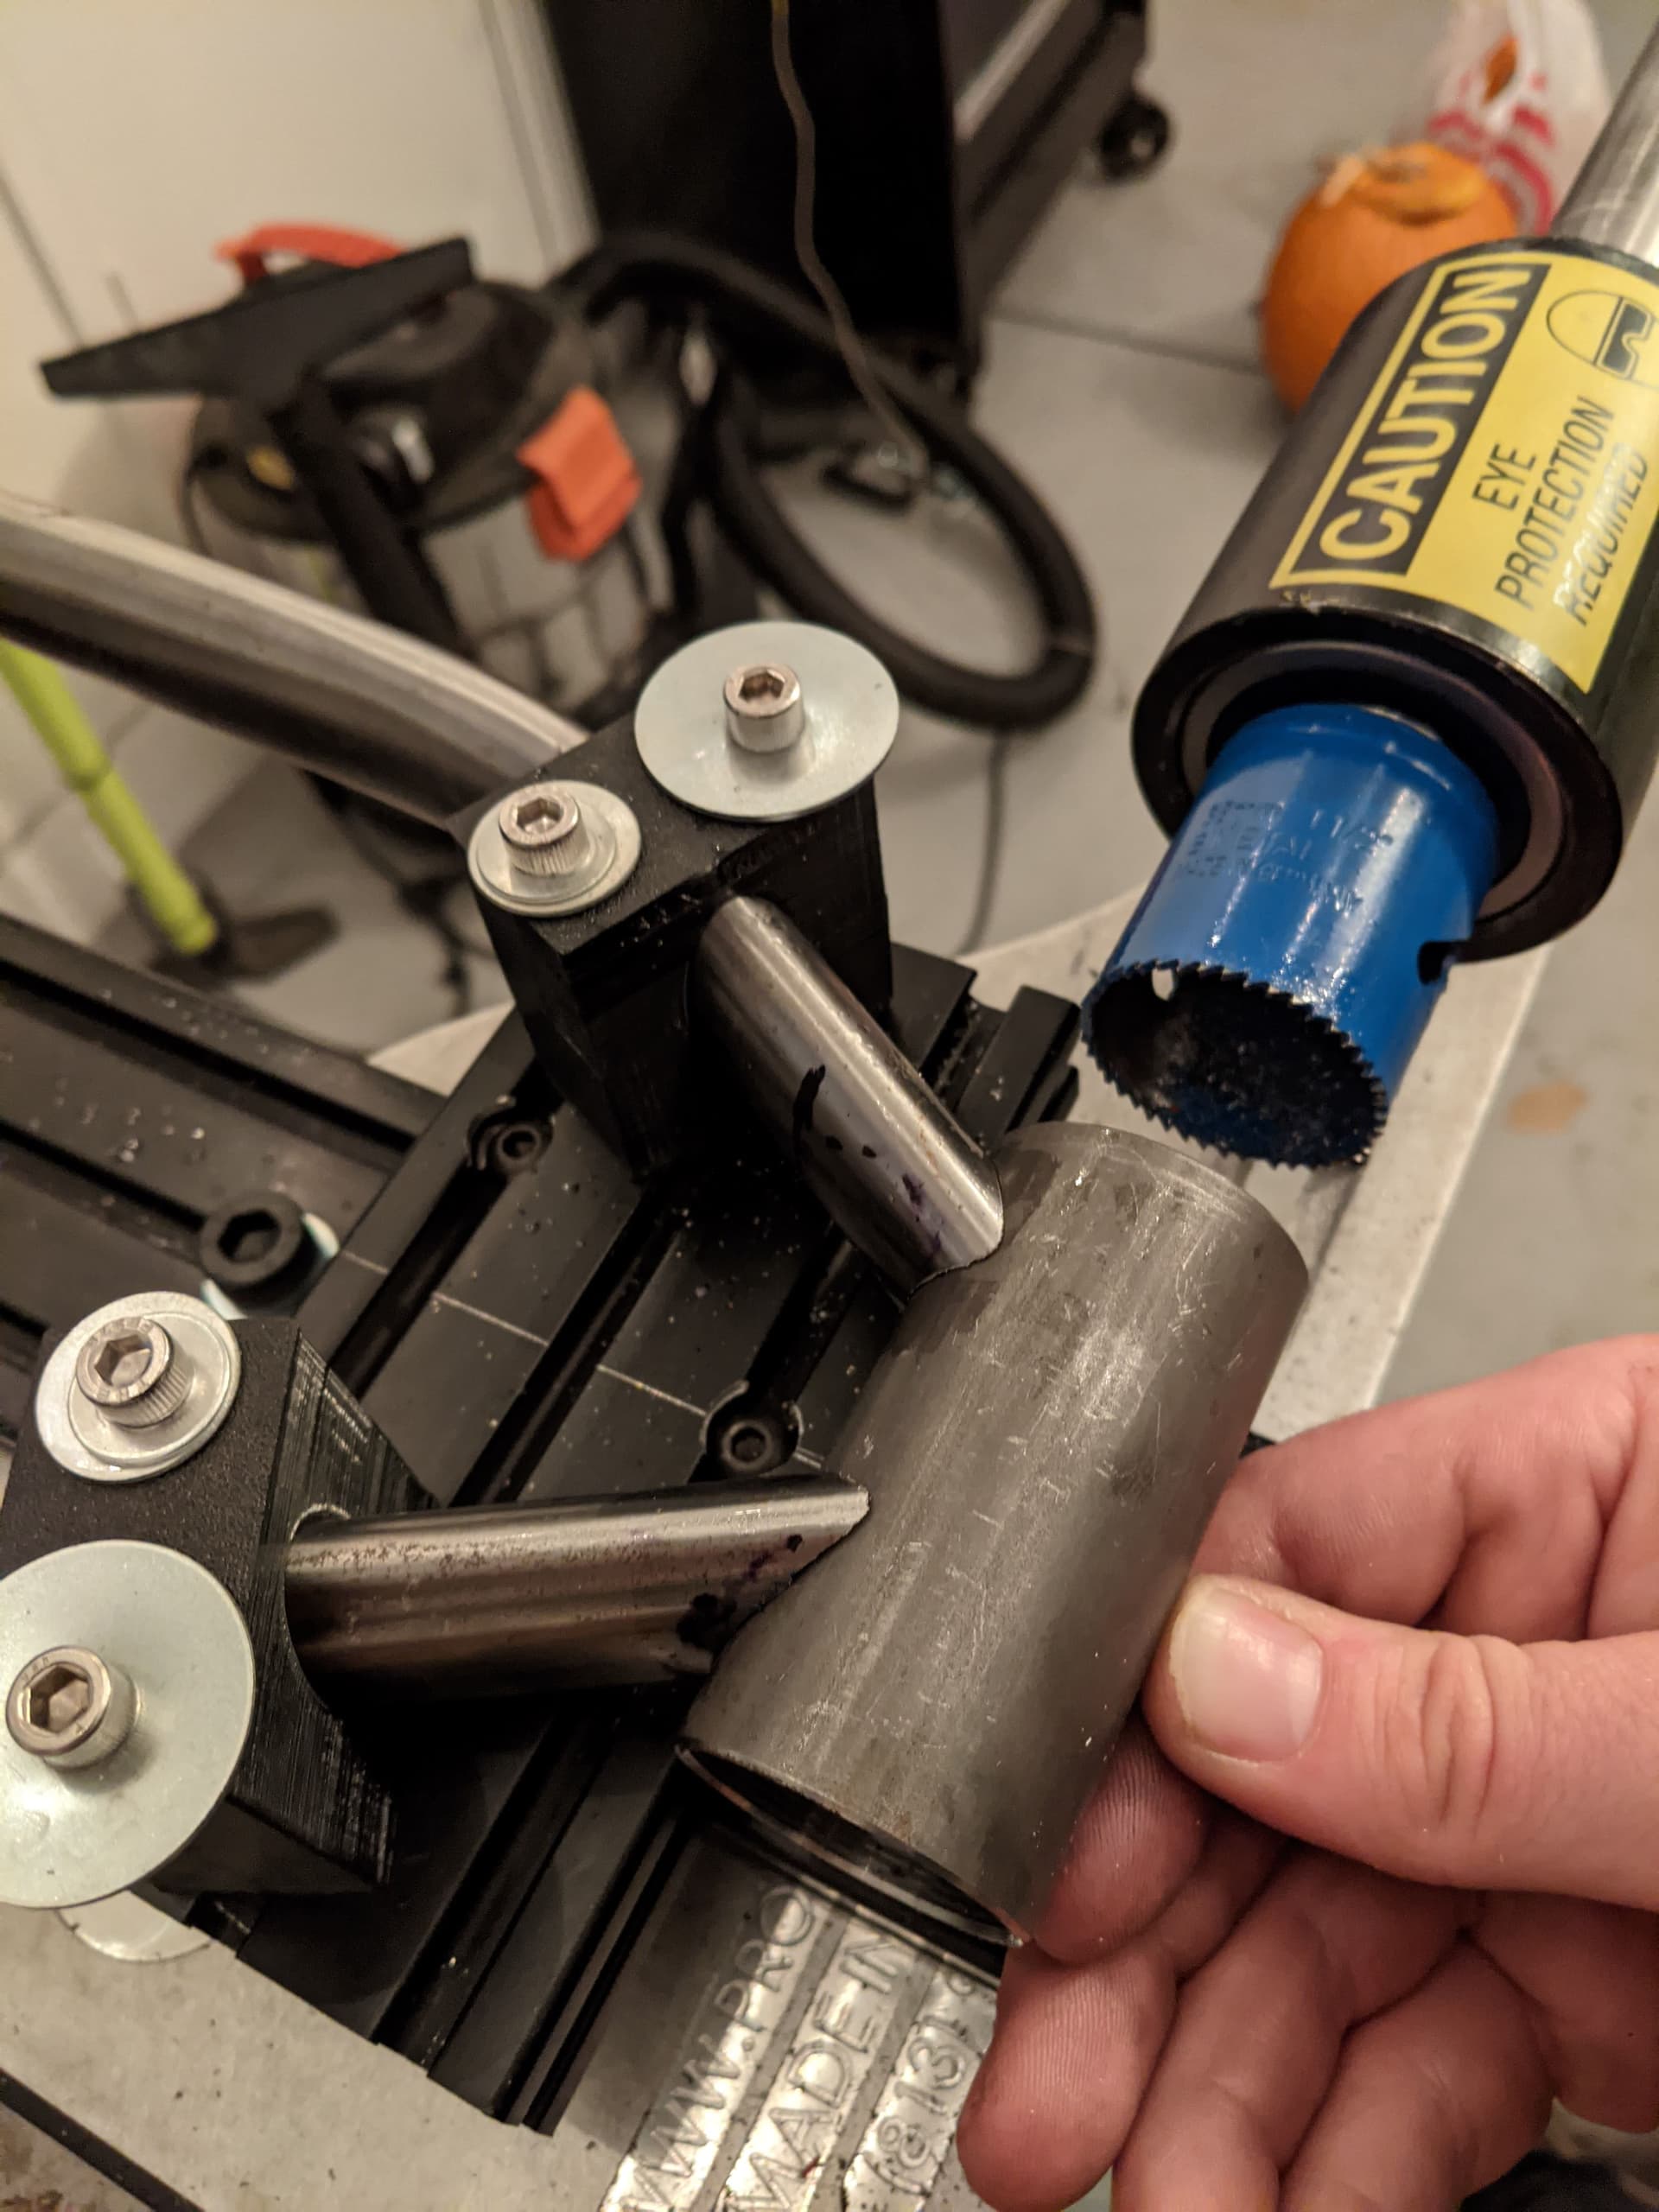
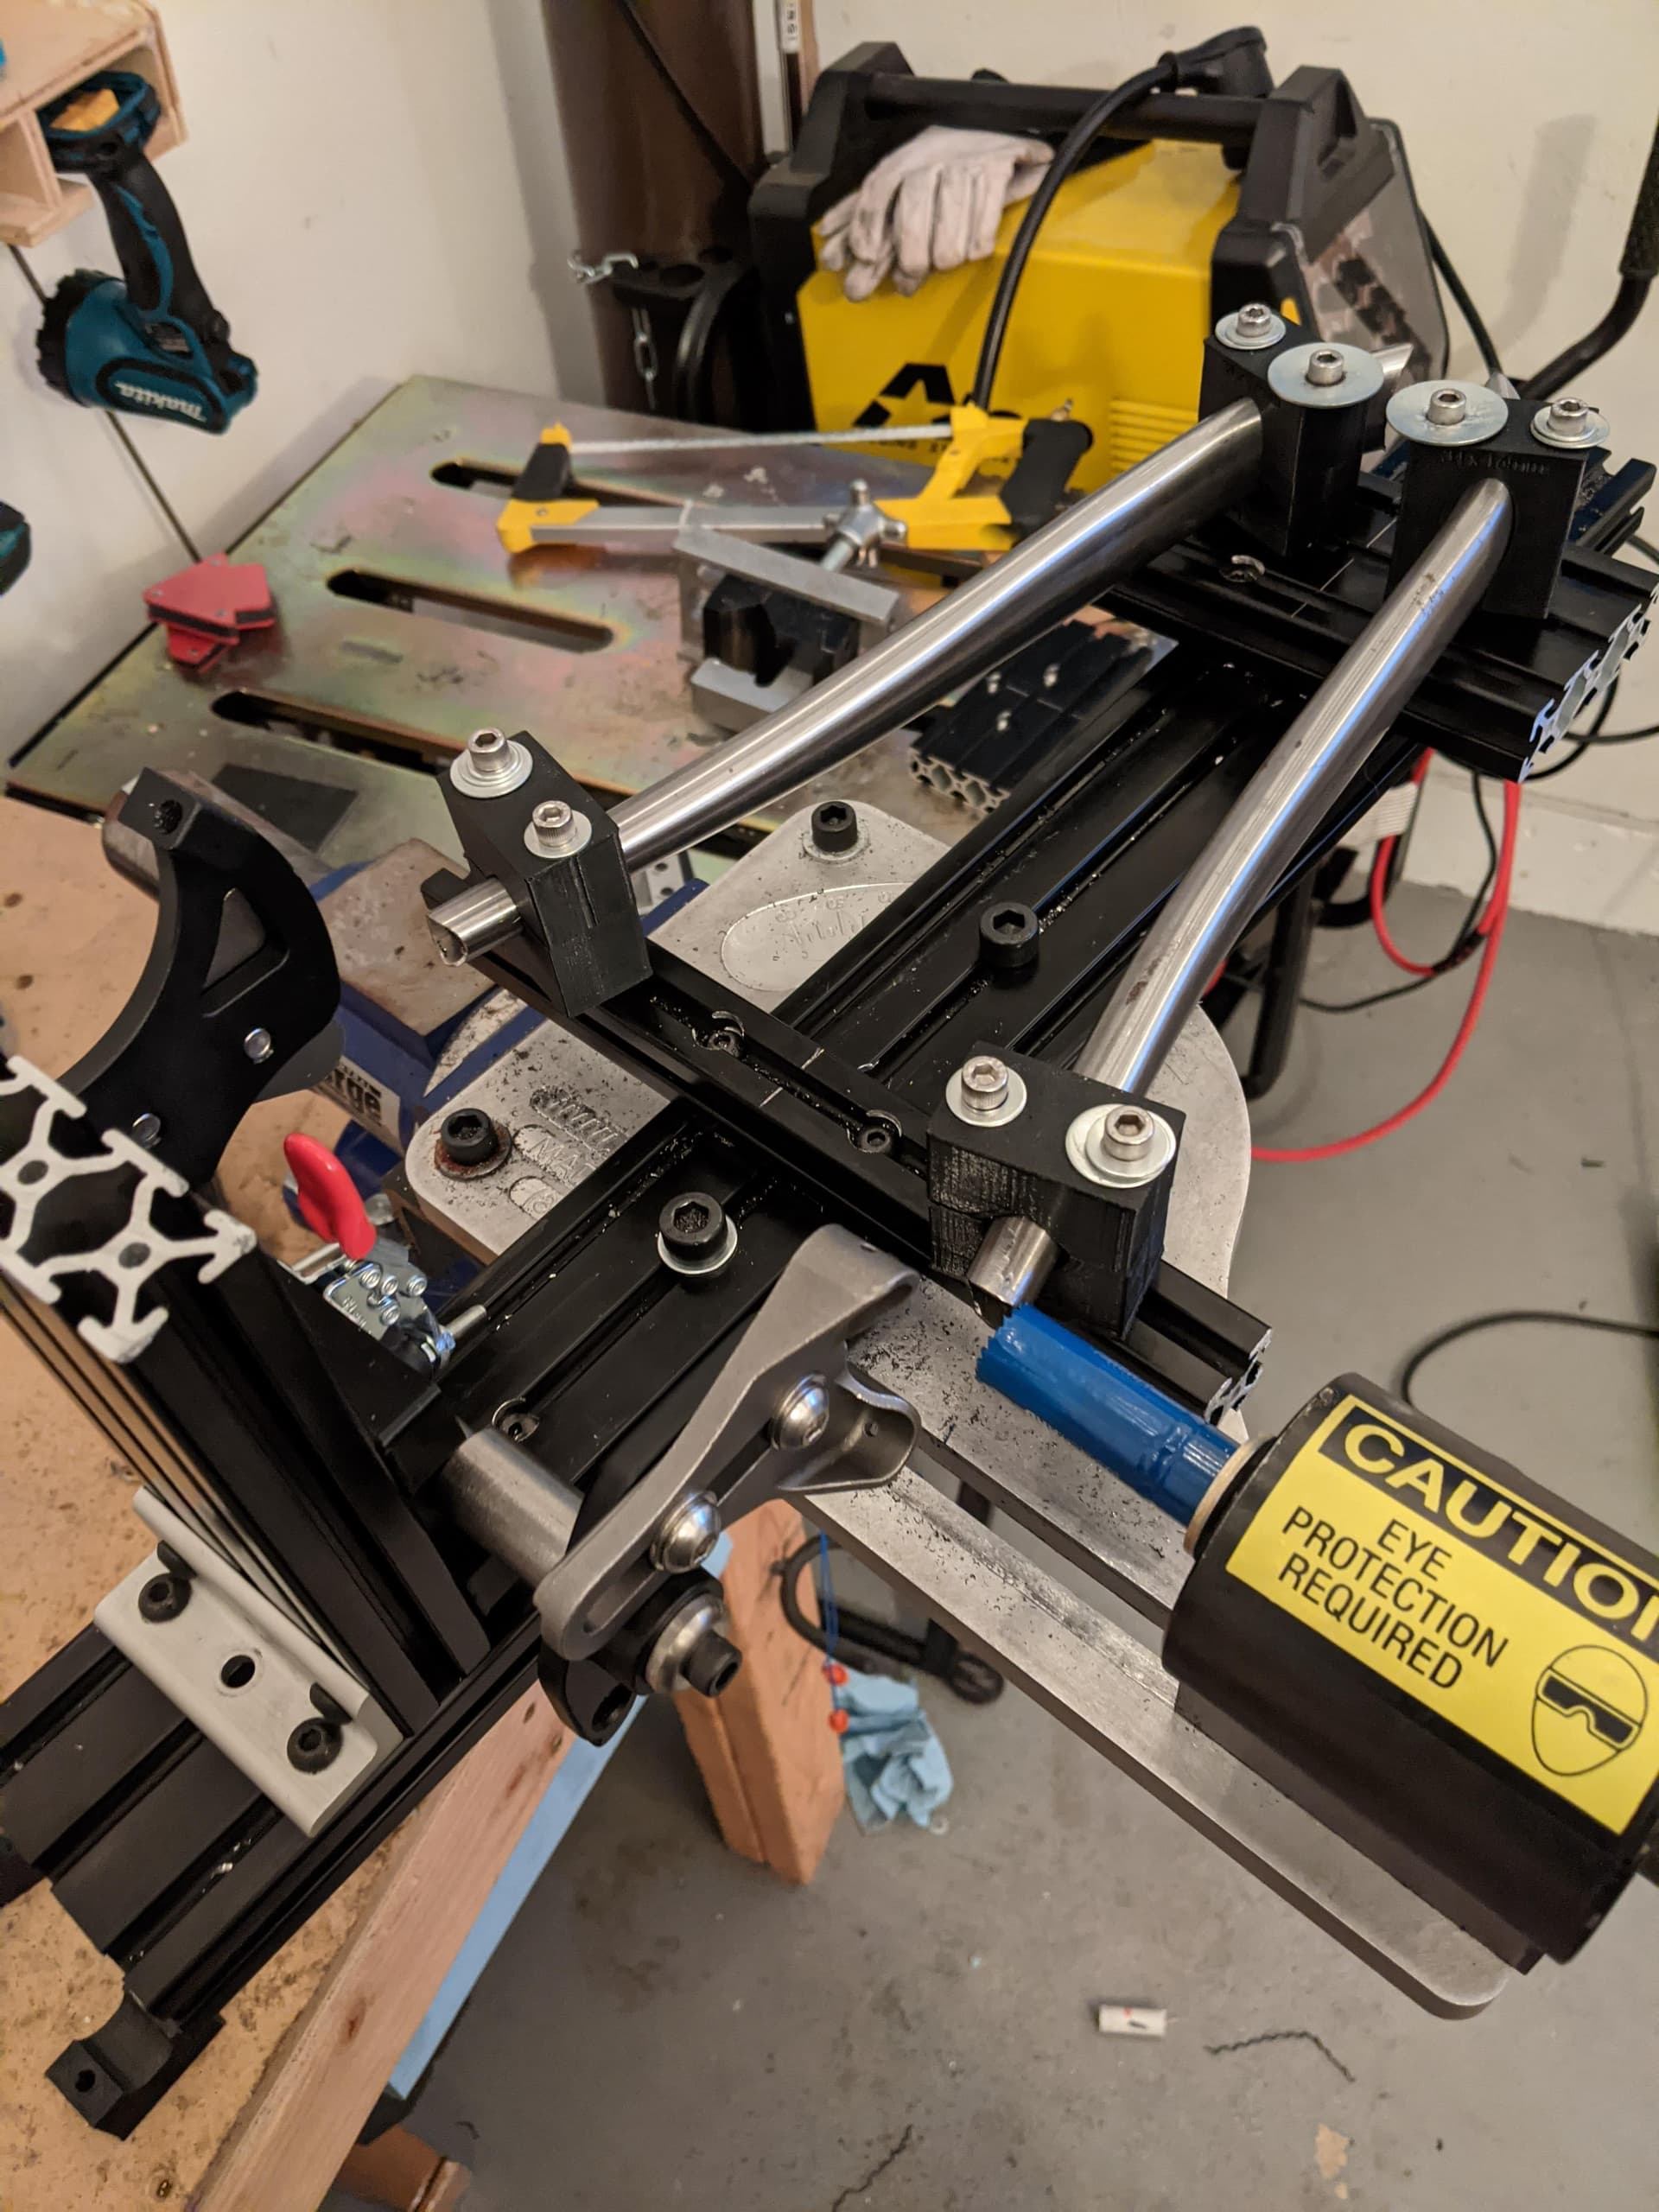
I had one, I personally am not a fan of the V block for tube holding, later versions had fitted tube blocks. These would be fairly easy to make for this version and I would have if I didn’t already have a Sputnik.
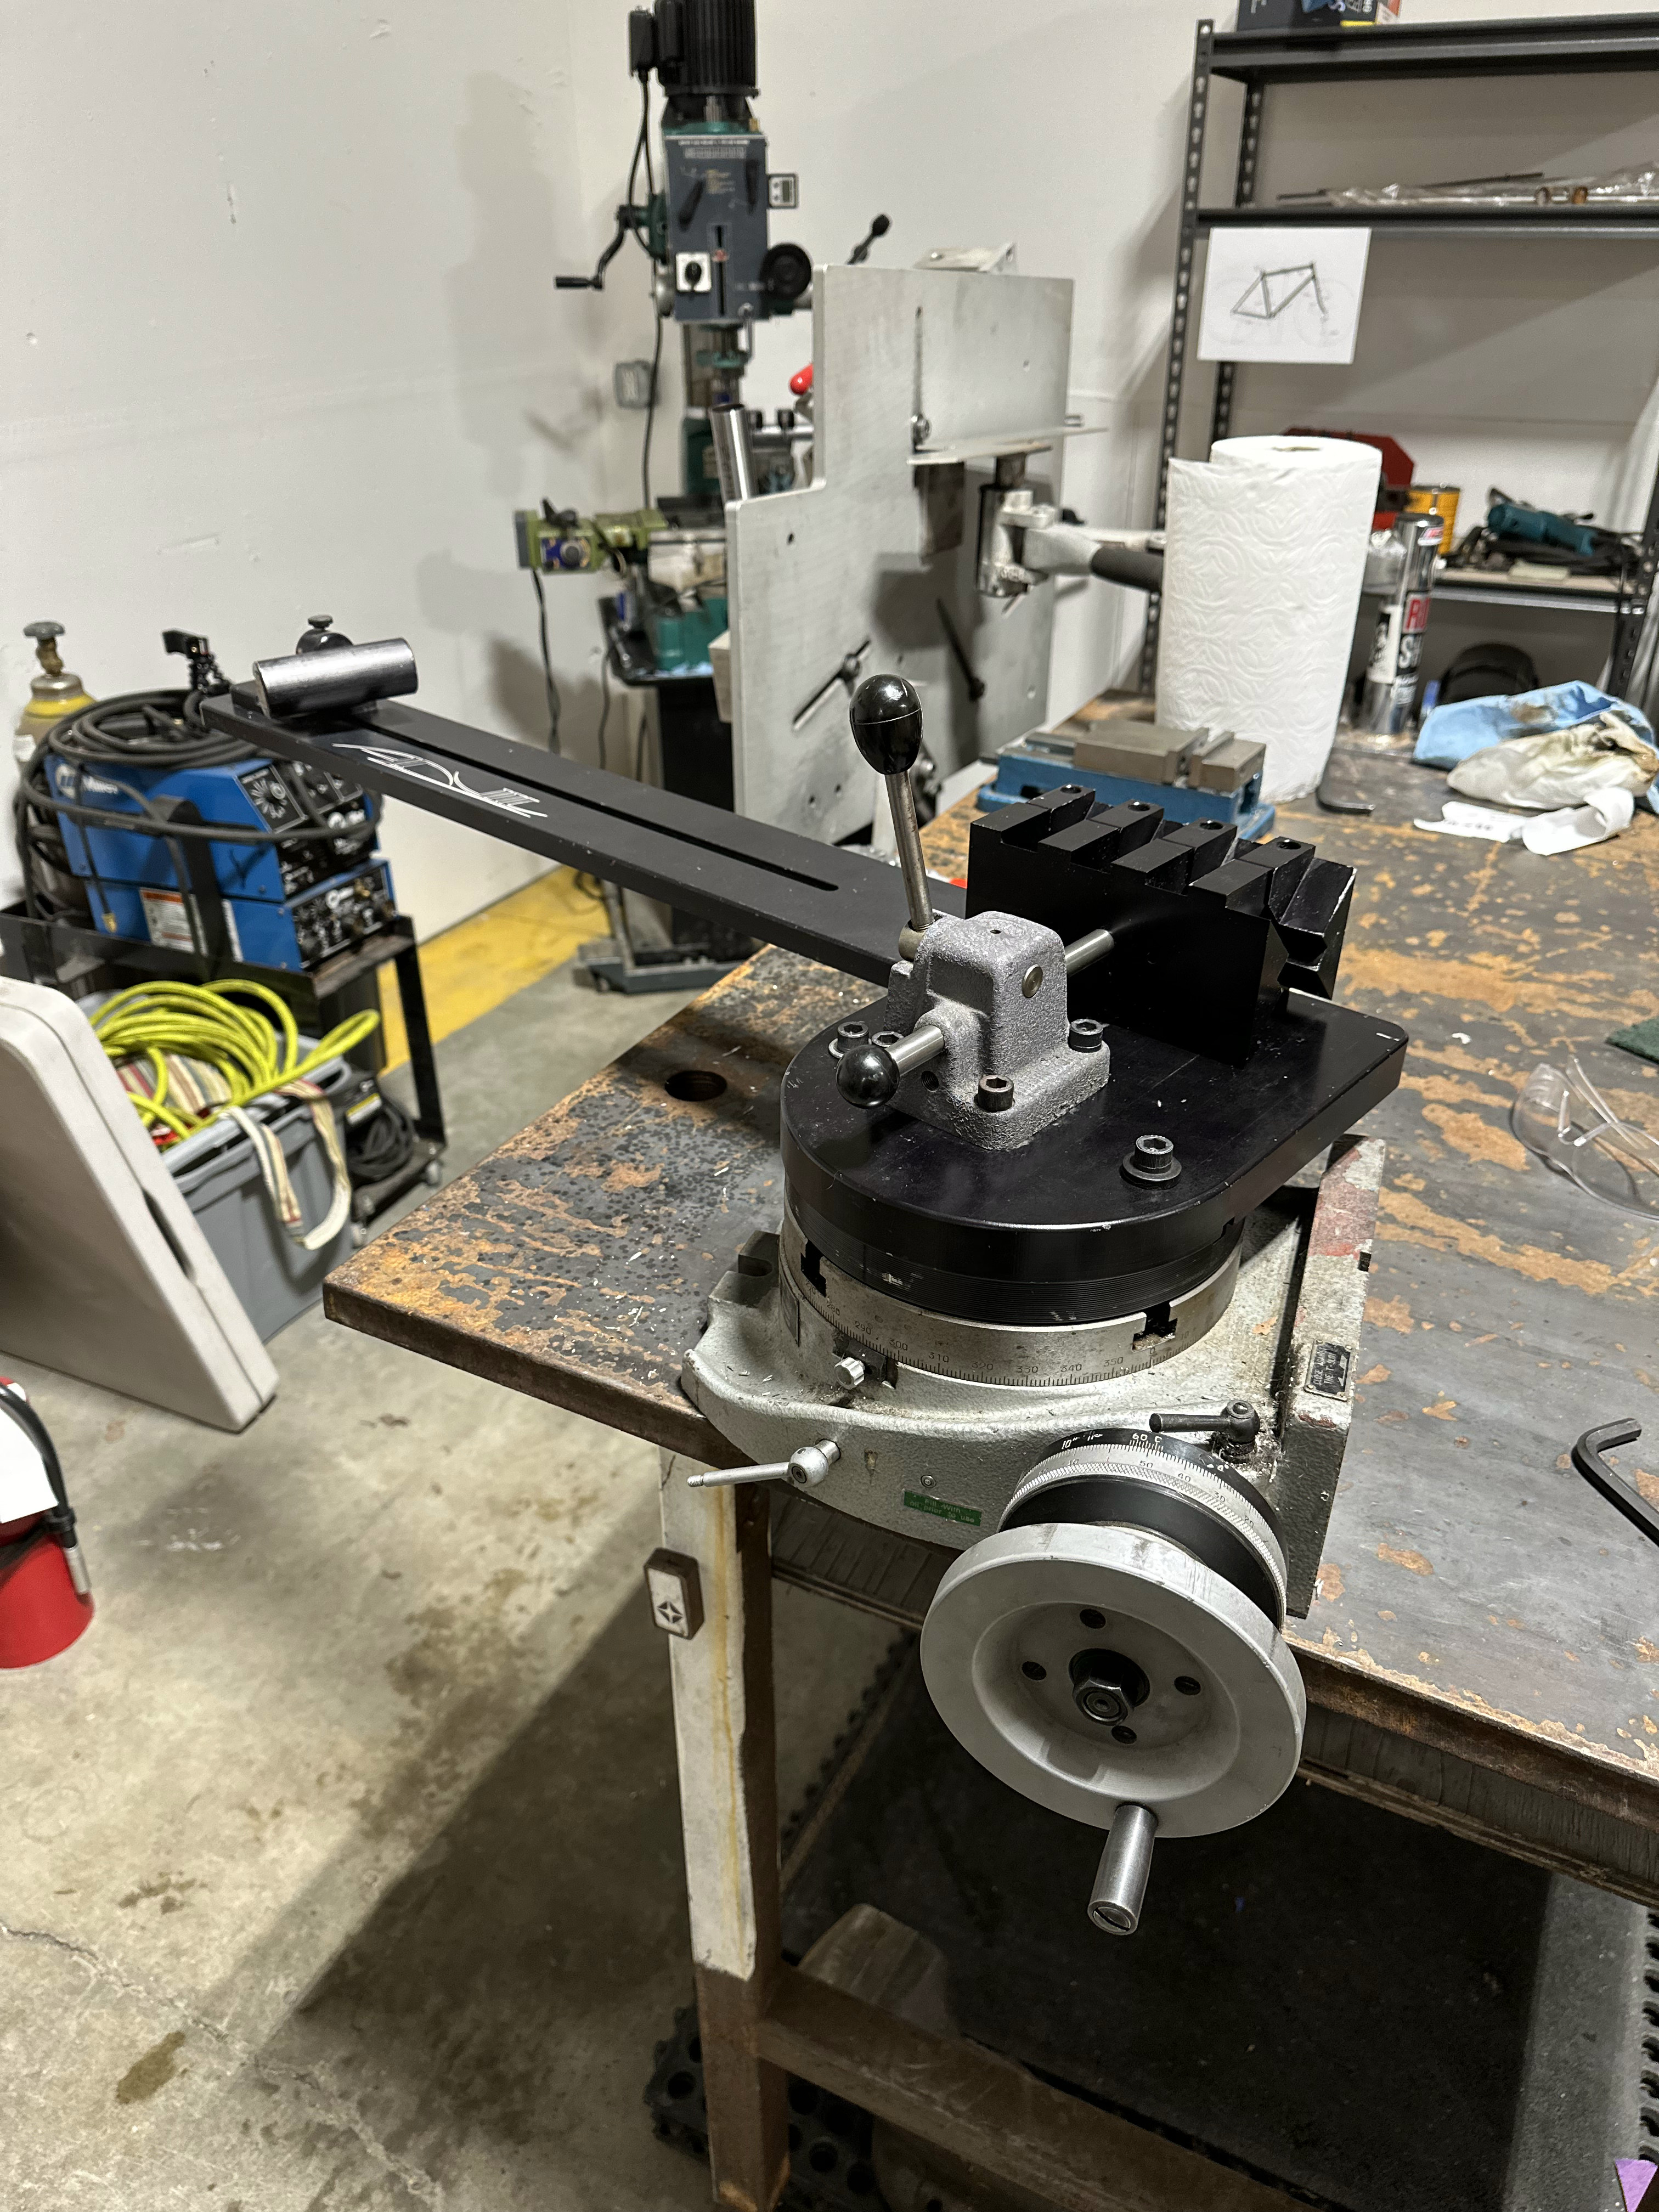
These can be used in either vertical or horizontal orientation provided the rotary table can be used in either. The preferred orientation is horizontal on a horizontal mill but you work with what you’ve got. They do require a fairly large work envelope.
When I mounted mine to my Bridgeport these were the steps:
-Mount rotary table to mill table and tram to parallel with Y axis
-Mount fixture to rotary table, at this point if you have a precision bar you can verify alignment of the jaws but that’s not totally necessary, it is nice to know where you stand in case you need to start troubleshooting unexpected results.
-Identify 90* from spindle, write it down or mark it, you’ll use this as “0” when mitering.
It is best to make adapters for each miter size you need to index. If you are doing tapered headtubes you can go through the trouble of making tapered dummies or just not. I only use tapered headtubes and bever bothered.
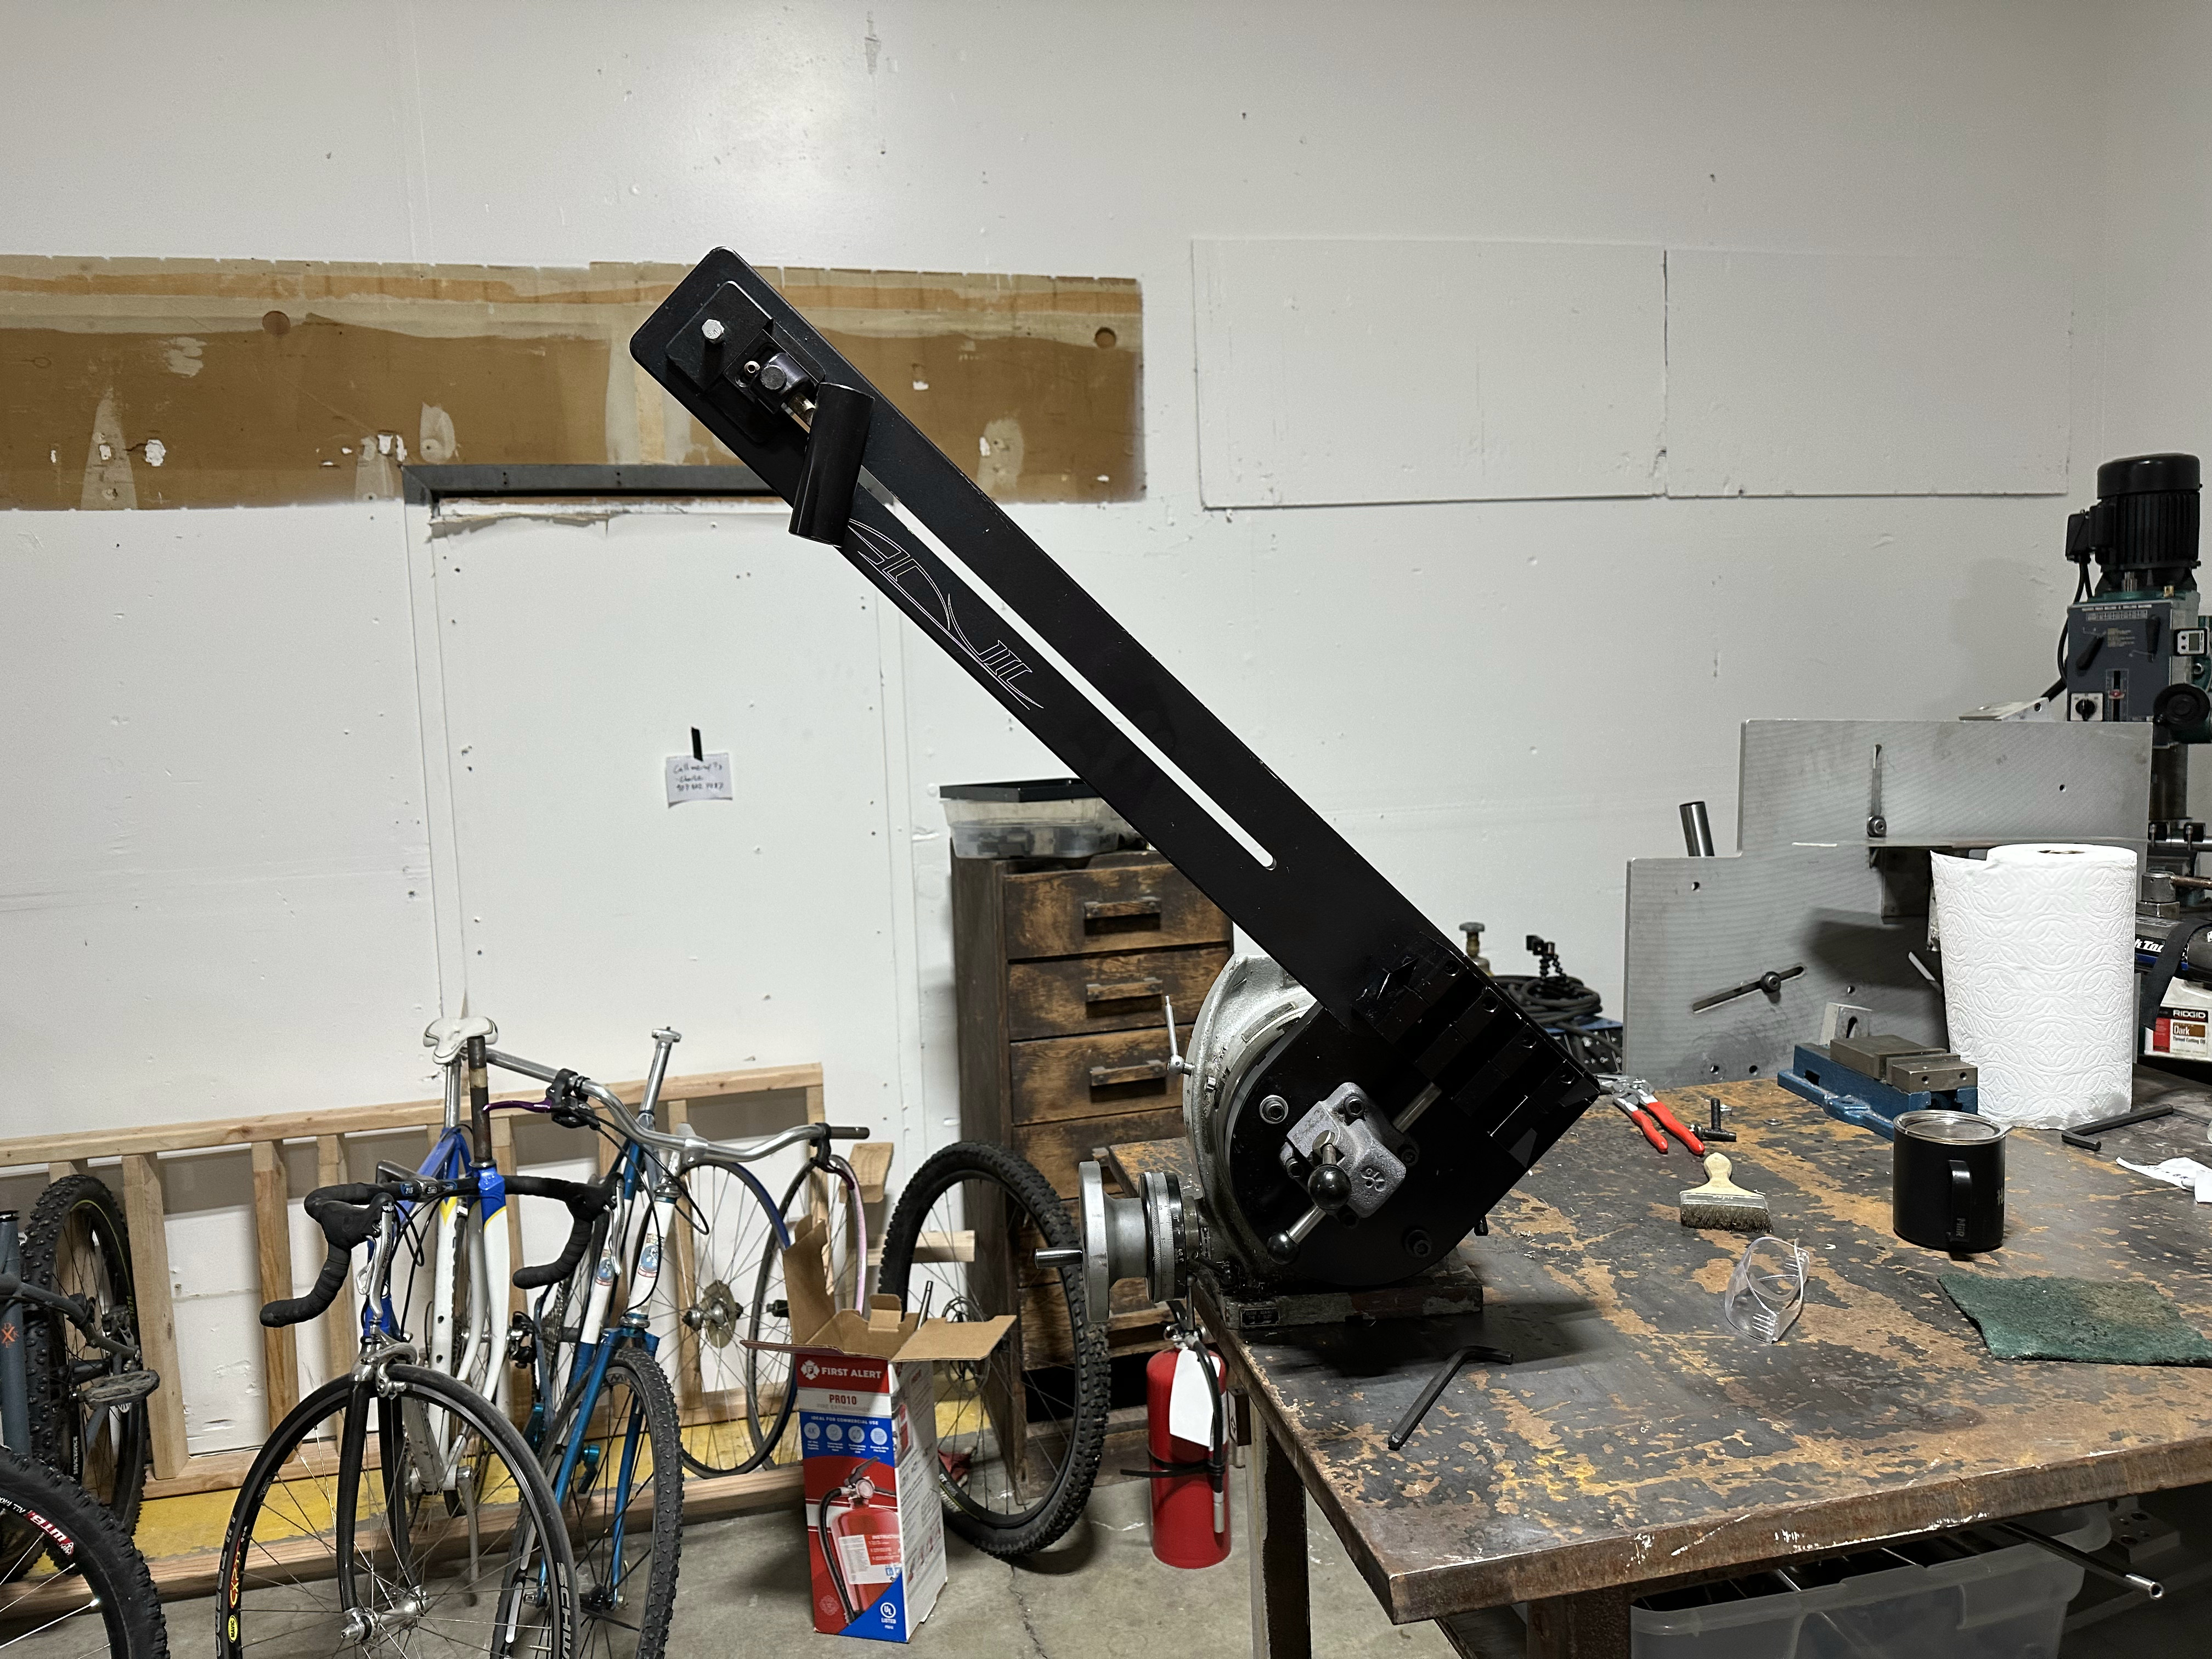
This is a super versatile set up, I can’t even begin to count how many frames these fixtures have made. I will say that I think this particular fixture works best on a horizontal mill as you can get some pretty extreme angles if you’re careful about how you position it.
I’ll see if I can dig up some pictures of mine all set up before I sold it.
2 Likes
Wow thank you so much for the advice! I can see how the tube blocks would be more ideal. I just set it up on my table and am trying to figure out how to fit everything in there with proper clearance and everything. Currently cutting the dt-ht miter and it seems ideal for that. I’ve been using the Cobra frames Miter Daddy in a 3-axis vise so far, but would love to figure out how to use this to make that cut.
And that totally makes sense for the miter adaptors. Machines are hard to come by up here but I’m keeping my eye out for a decent lathe! I’m pretty sure the head of my mill has some rotation but I’m not sure I’d be able to get it to turn a full 90* or if that would even be possible/appropriate to try and do with that machine.
1 Like
I have the first one of these made. I use it with a vertical mill and have never had any real trouble with it. The clamping force has declined over the years so now I back it up with a c-clamp like a redneck, but after what has to be at least 20,000 miters over the years I’m not holding that against it.
Neuhaus, can you explain what you mean when you say that you need to tram the fixture for each tube diameter? On mine, the big v-block clamp holds any size tube (down to 1/2", up to 2.5" or so) at the same centerline.
-Walt
2 Likes
Oh, and if you want to do more extreme angles with less stickout of the tube, you can go after the top set of jaws with a big hole saw at a ~45 degree angle to make yourself more room.
-Walt
1 Like
It was a dumb comment and just goes to show that I never used the one I had. The V blocks make it self centering regardless of tube diameter. I was thinking of it like the fixed jaw on a vise.
2 Likes
That’s a helpful suggestion Walt, thank you! I was screwing around with placement today and have my table almost all the way out in the y axis to get it to fit. Do you have any photos of it in action? I’m not sure the best way to get it set up
Are you running it on that little mill/drill in the background or something else?
It’s going to take up so much space on that machine that it’s probably not worth it to use it, honestly, unless that’s just going to be a dedicated main tube mitering machine at all times.
If on a normal sized knee mill, you have a lot of options, though it’s still going to use a lot of real estate. If you have the Anvil chainstay fixture as well, you can mount that to the rotary table too, so that you’ve got a little more functionality in that space.
1 Like
Hahaha yes that grizzly mill is my only mitering situation. May have to return to the 3 axis vise for now, I’m struggling to get clearance with the anvil jig.
Honestly a joint jigger type device is IMO a better mitering setup than a mill/drill like that. But yeah, don’t even bother trying to use the Anvil stuff on there.
-W
2 Likes
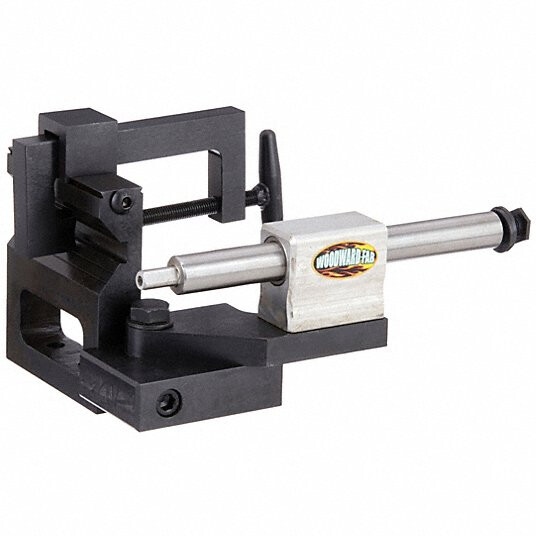
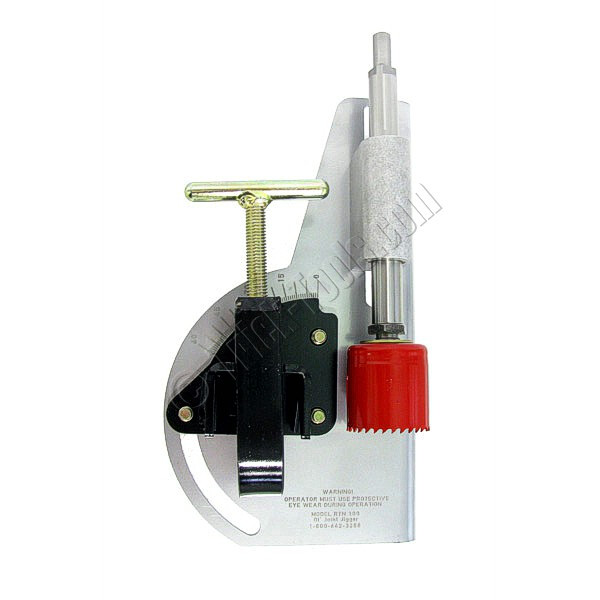
Walt, always swooping in with practical advice. Much appreciated. For clarity, what were you referring to by joint jigger? One of these?
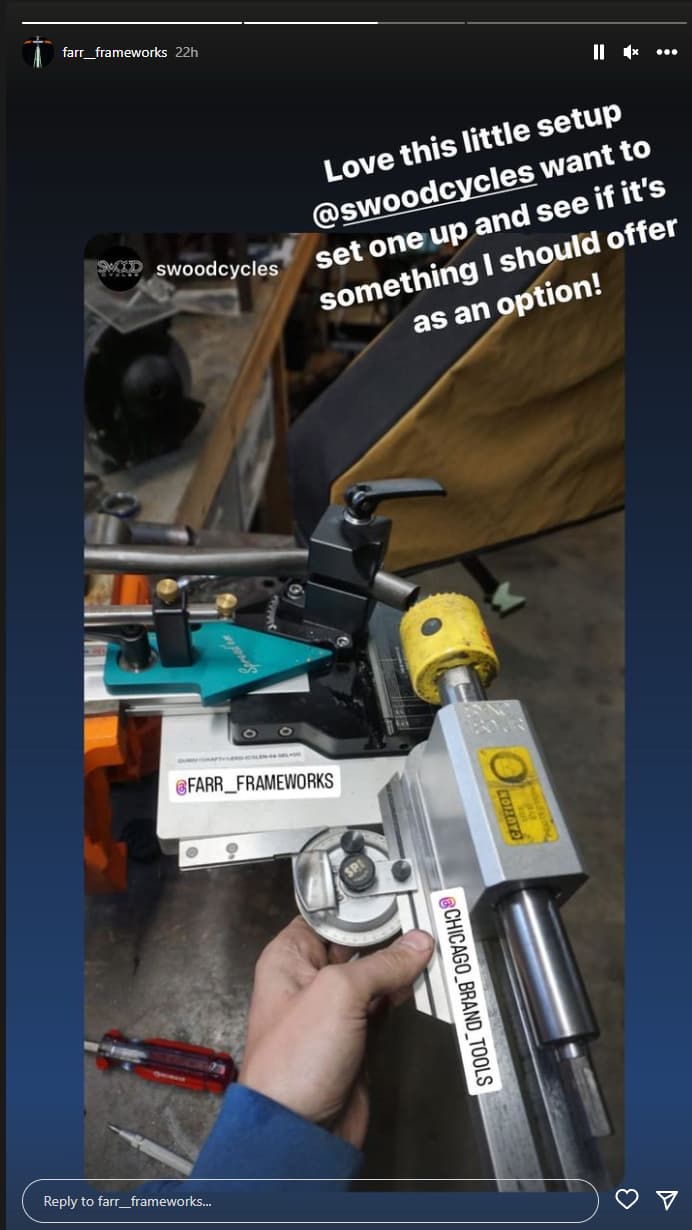
I saw this sweet setup from Todd Farr and Swood Cycles:
Ill try to get Todd on the forum to comment.
2 Likes
Yes, there are million versions of it, but they’re usually called either tube notchers or joint jiggers.
They work great if:
-You have limited space/money but don’t want to spend all day filing.
-You’re ok manually feeding the hole saw (can be done with a hand drill or drill press).
-You’re using relatively softer/thicker tubing (ie 4130 rather than heat treated stuff).
-You are not super hung up on accuracy beyond 1 degree or maybe in some cases 1/2 degree.
The tube clamp is typically the Achilles heel of this tool. Typically they don’t have enough surface area to fully hold a thin tube without damaging it. You can solve this by making yourself a set of tube shims from tubing 1/8" bigger in .058" wall, though. Or you can replace the entire clamp if you’re handy and creative. Which if you’re reading this, you are.
If you’re trying to work fast/efficiently as a full time pro and have the space/money, you’re best off spending the $ on a big machine that can autofeed your cutter and hold everything really well/precisely so you can be doing something else while the miters get cut. But that doesn’t describe most builders, really.
IMO where you don’t want to be is in the middle ground between filing/joint jigger and full mills/lathes. The little multipurpose machines are neat and have small footprints but they don’t do anything (for building bikes) better than a tube notcher for a much higher price.
-Walt
3 Likes
We used to have a drill press with an awful tube notching jig on it, then someone donated this little mill. The goal is to level up into a proper mill but for now I’m just working with what I’ve got. Writing some equipment grants to hopefully get some proper machines. Always need more space, always need more machines haha.
1 Like
IMO the tube notchers actually work best bolted to a sturdy workbench with a variable speed hand drill. Low tech but effective.
-Walt
3 Likes
@anon91558591 I agree, space is a real consideration! I have the time, skills, and brainpower to build frames, but no space! I am in the process of setting up a TINY workspace, and thanks to your recommendation I will look into tube notchers.
Good advice on the considerations of pro vs amateur. All the pro builders I have seen put fixtures on a dedicated machine. Once you start moving fixtures around, squaring them up, tramming your mill, you lose all the time savings and open up room for mistakes.
I am still in the process of testing this, but I think you could 3D-printed soft jaws for fixturing. A printed die is really cheap (<$5) so you could print a die for every tube size.
Questions:
- Is there a tube notcher you recommend to your students?
- Do you think its possible to design a framebuilder specific notcher?
This one looks really sturdy:
These tube notchers also generally hang the tube way out from the clamp, this causes deflection and snagging.
1 Like
They all work about equally well in my experience but I don’t use them on a day to day basis (or even own one) so take anything I recommend with a grain of salt. Even the General Machinery/Harbor Freight ones will basically work if you improve the clamping situation, and yes, 3d printed shims could work great for that. Cutting up some cheap 4130 to make shims works too.
I’ve used this one and it was fine:
https://www.trick-tools.com/Joint_Jigger_Hole_Saw_Tube_Notcher_RTN_100_3876
Yes, the tool’s not super stiff, and yes, you’ll run into more problems than with a full mill type setup. That said, it’s a ~$100 tool that will cut non heat treated tubing pretty well if you spend a little time modifying and learning the quirks. I wouldn’t run out and buy one to run a professional shop, but it’s a great alternative to having to file all your miters.
-Walt
1 Like
Thanks for the recommendation. That one is cheap enough to mess around with and easy to modify.
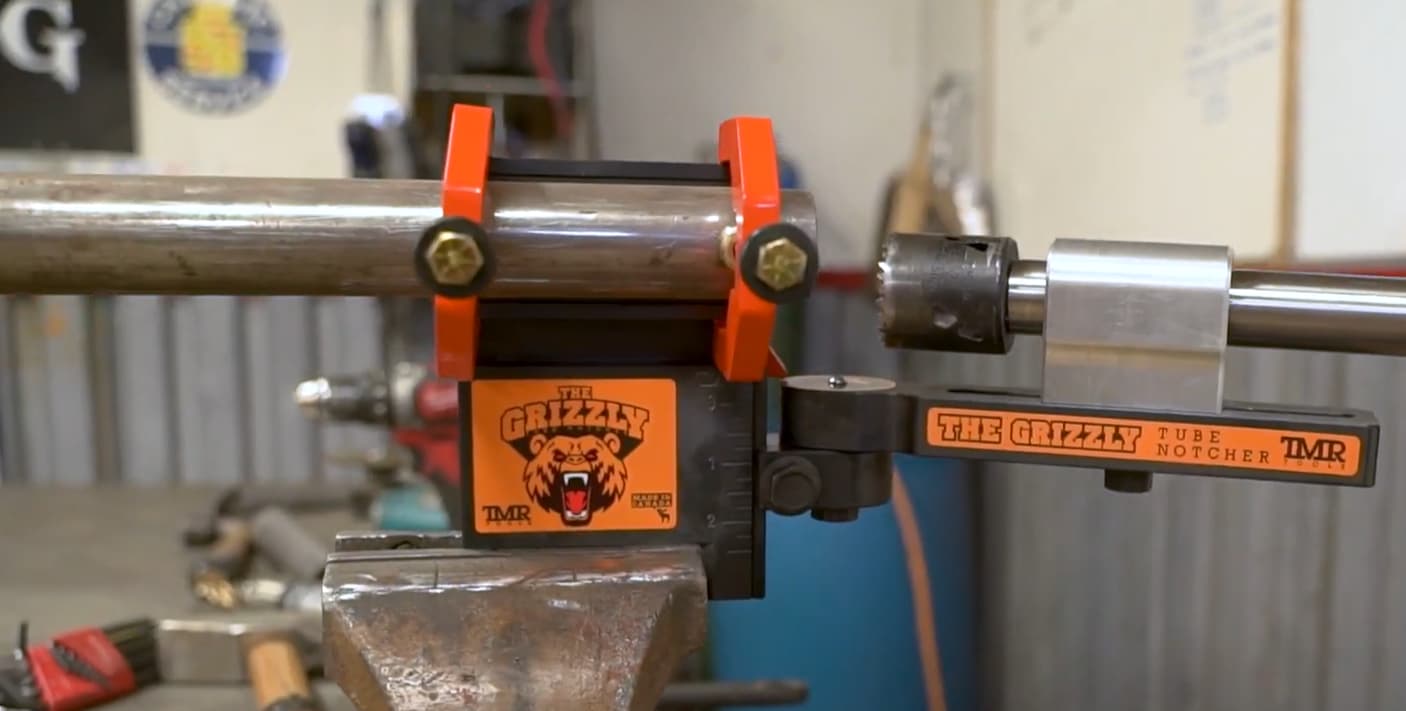
Doing a deep dive into tube notchers, I stumbled across this style of notcher:
link: https://buildpro.stronghandtools.com/product/notcher/
It’s practically begging for 3D-printed tube blocks with locator pins! It is not perfect though, it only cuts up to 50deg.
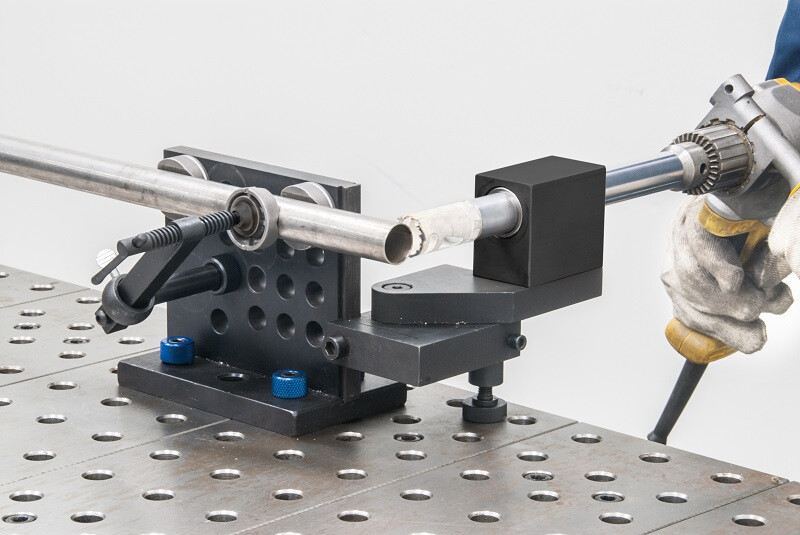
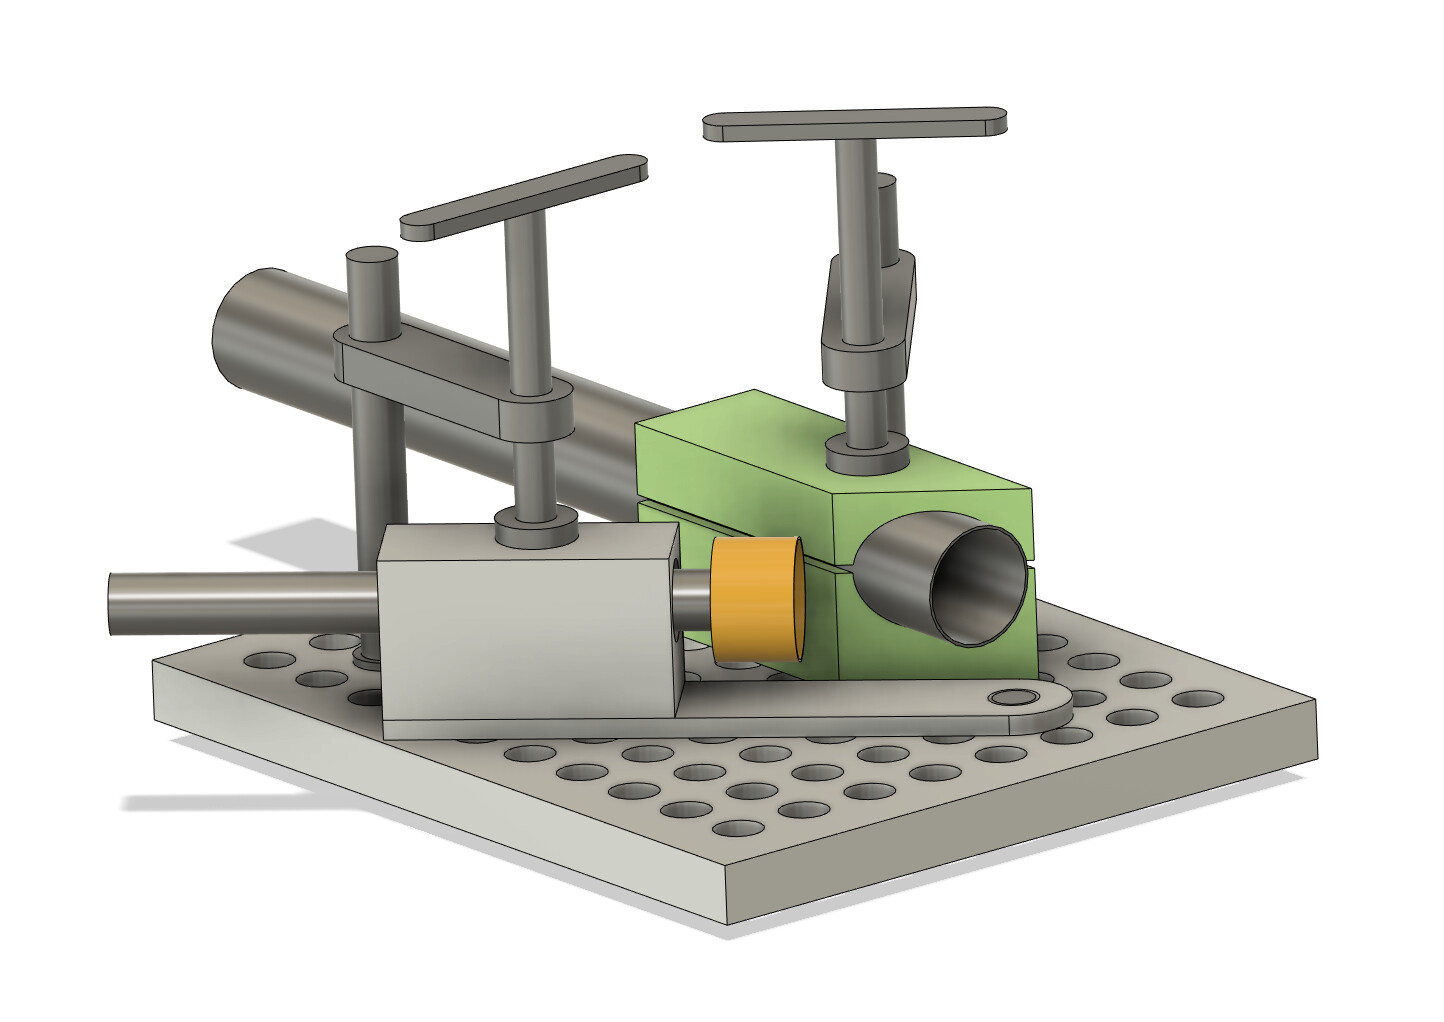
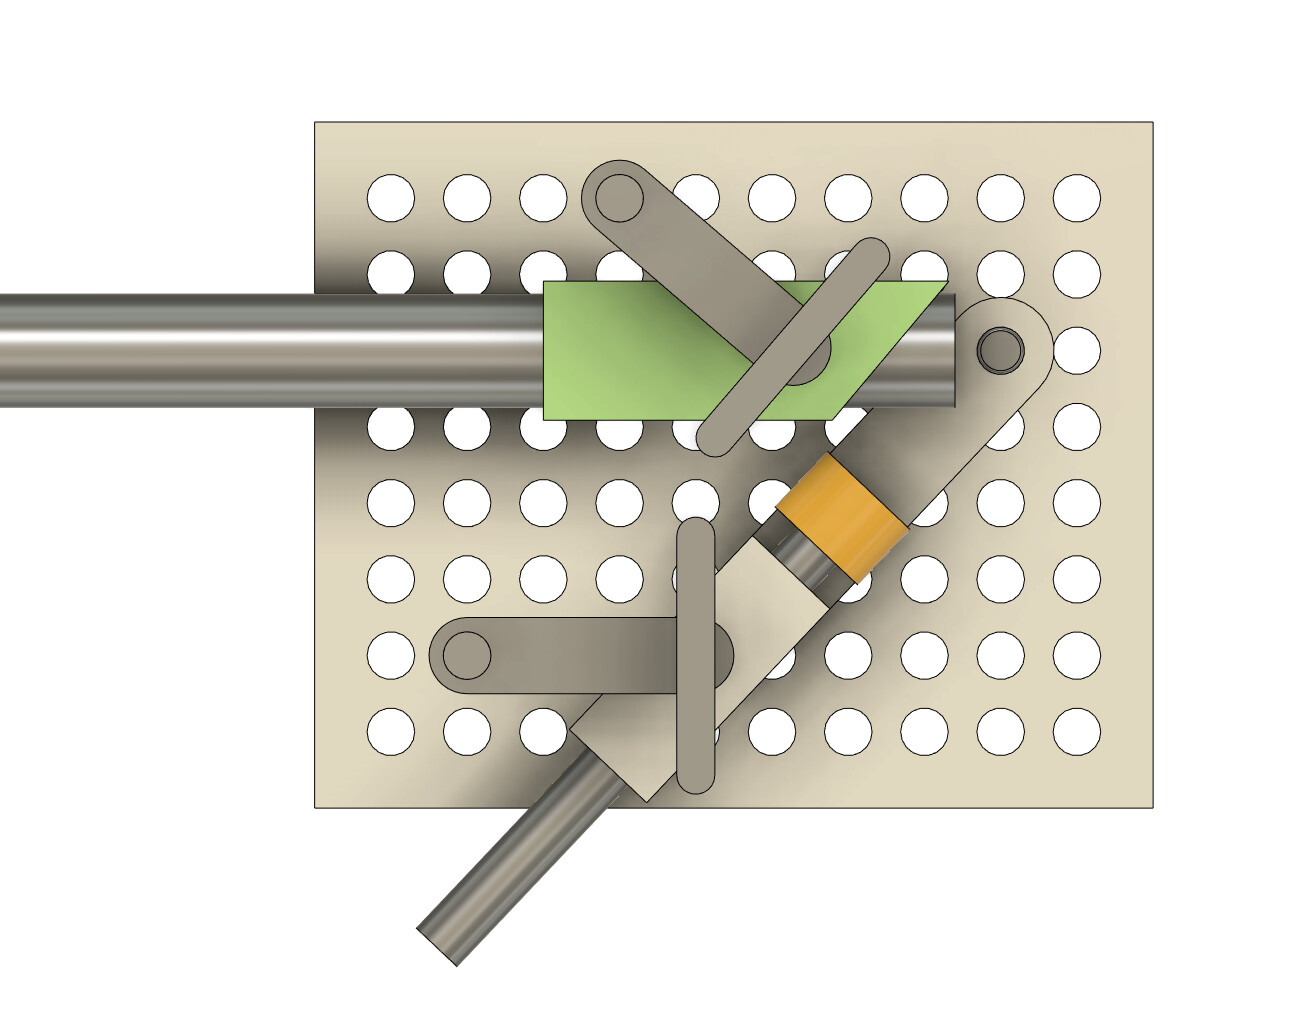
I went on a bike ride, got inspired by both styles, tried to combine them, and got carried away in CAD:
The idea is to leverage the 5/8in welding table standard. By using 5/8in dowel pins, I can index the 3D prints and the hole saw arm’s pivot:
The clamps are readily available. Since you are clamping everything directly to a plate, things should be more rigid (?).
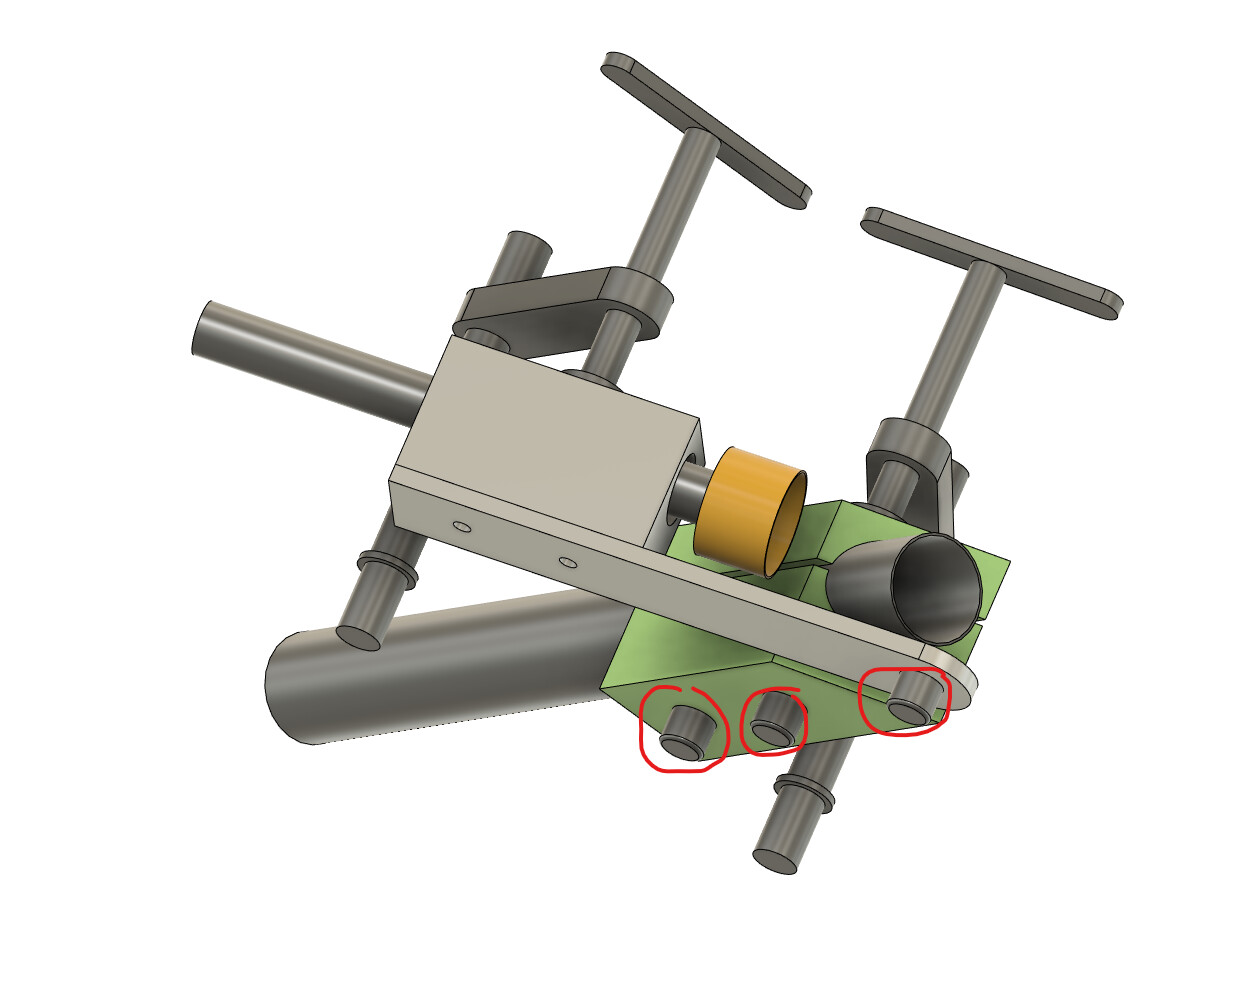
Some limitations:
- printed plastic is always going to be questionable. Won’t know till someone tries.
- 5/8in hole tables/plates are surprisingly expensive. Might be cheaper to just machine this plate.
- You would probably need an external angle meter or figure out some way to print and calibrate an angle scale
2 Likes
This might be relevant to the discussion. I modified a Pro-Tools notcher to use with a jig I made. The jig used 3d printed tube blocks and worked great. Bit cumbersome to setup but worked for the first couple frames until I got a mini mill.
3 Likes