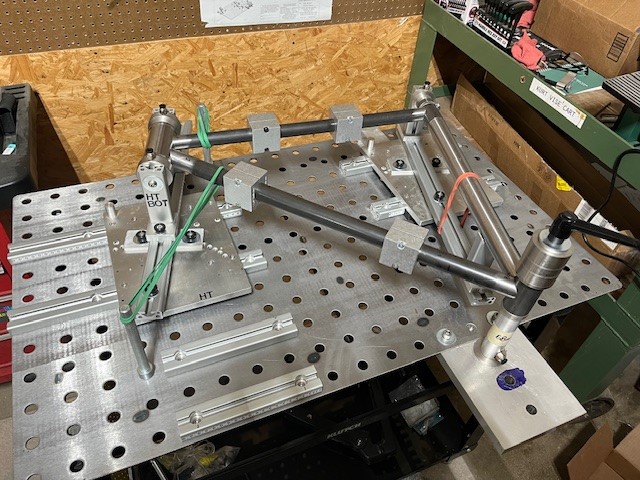
It looks something like this.
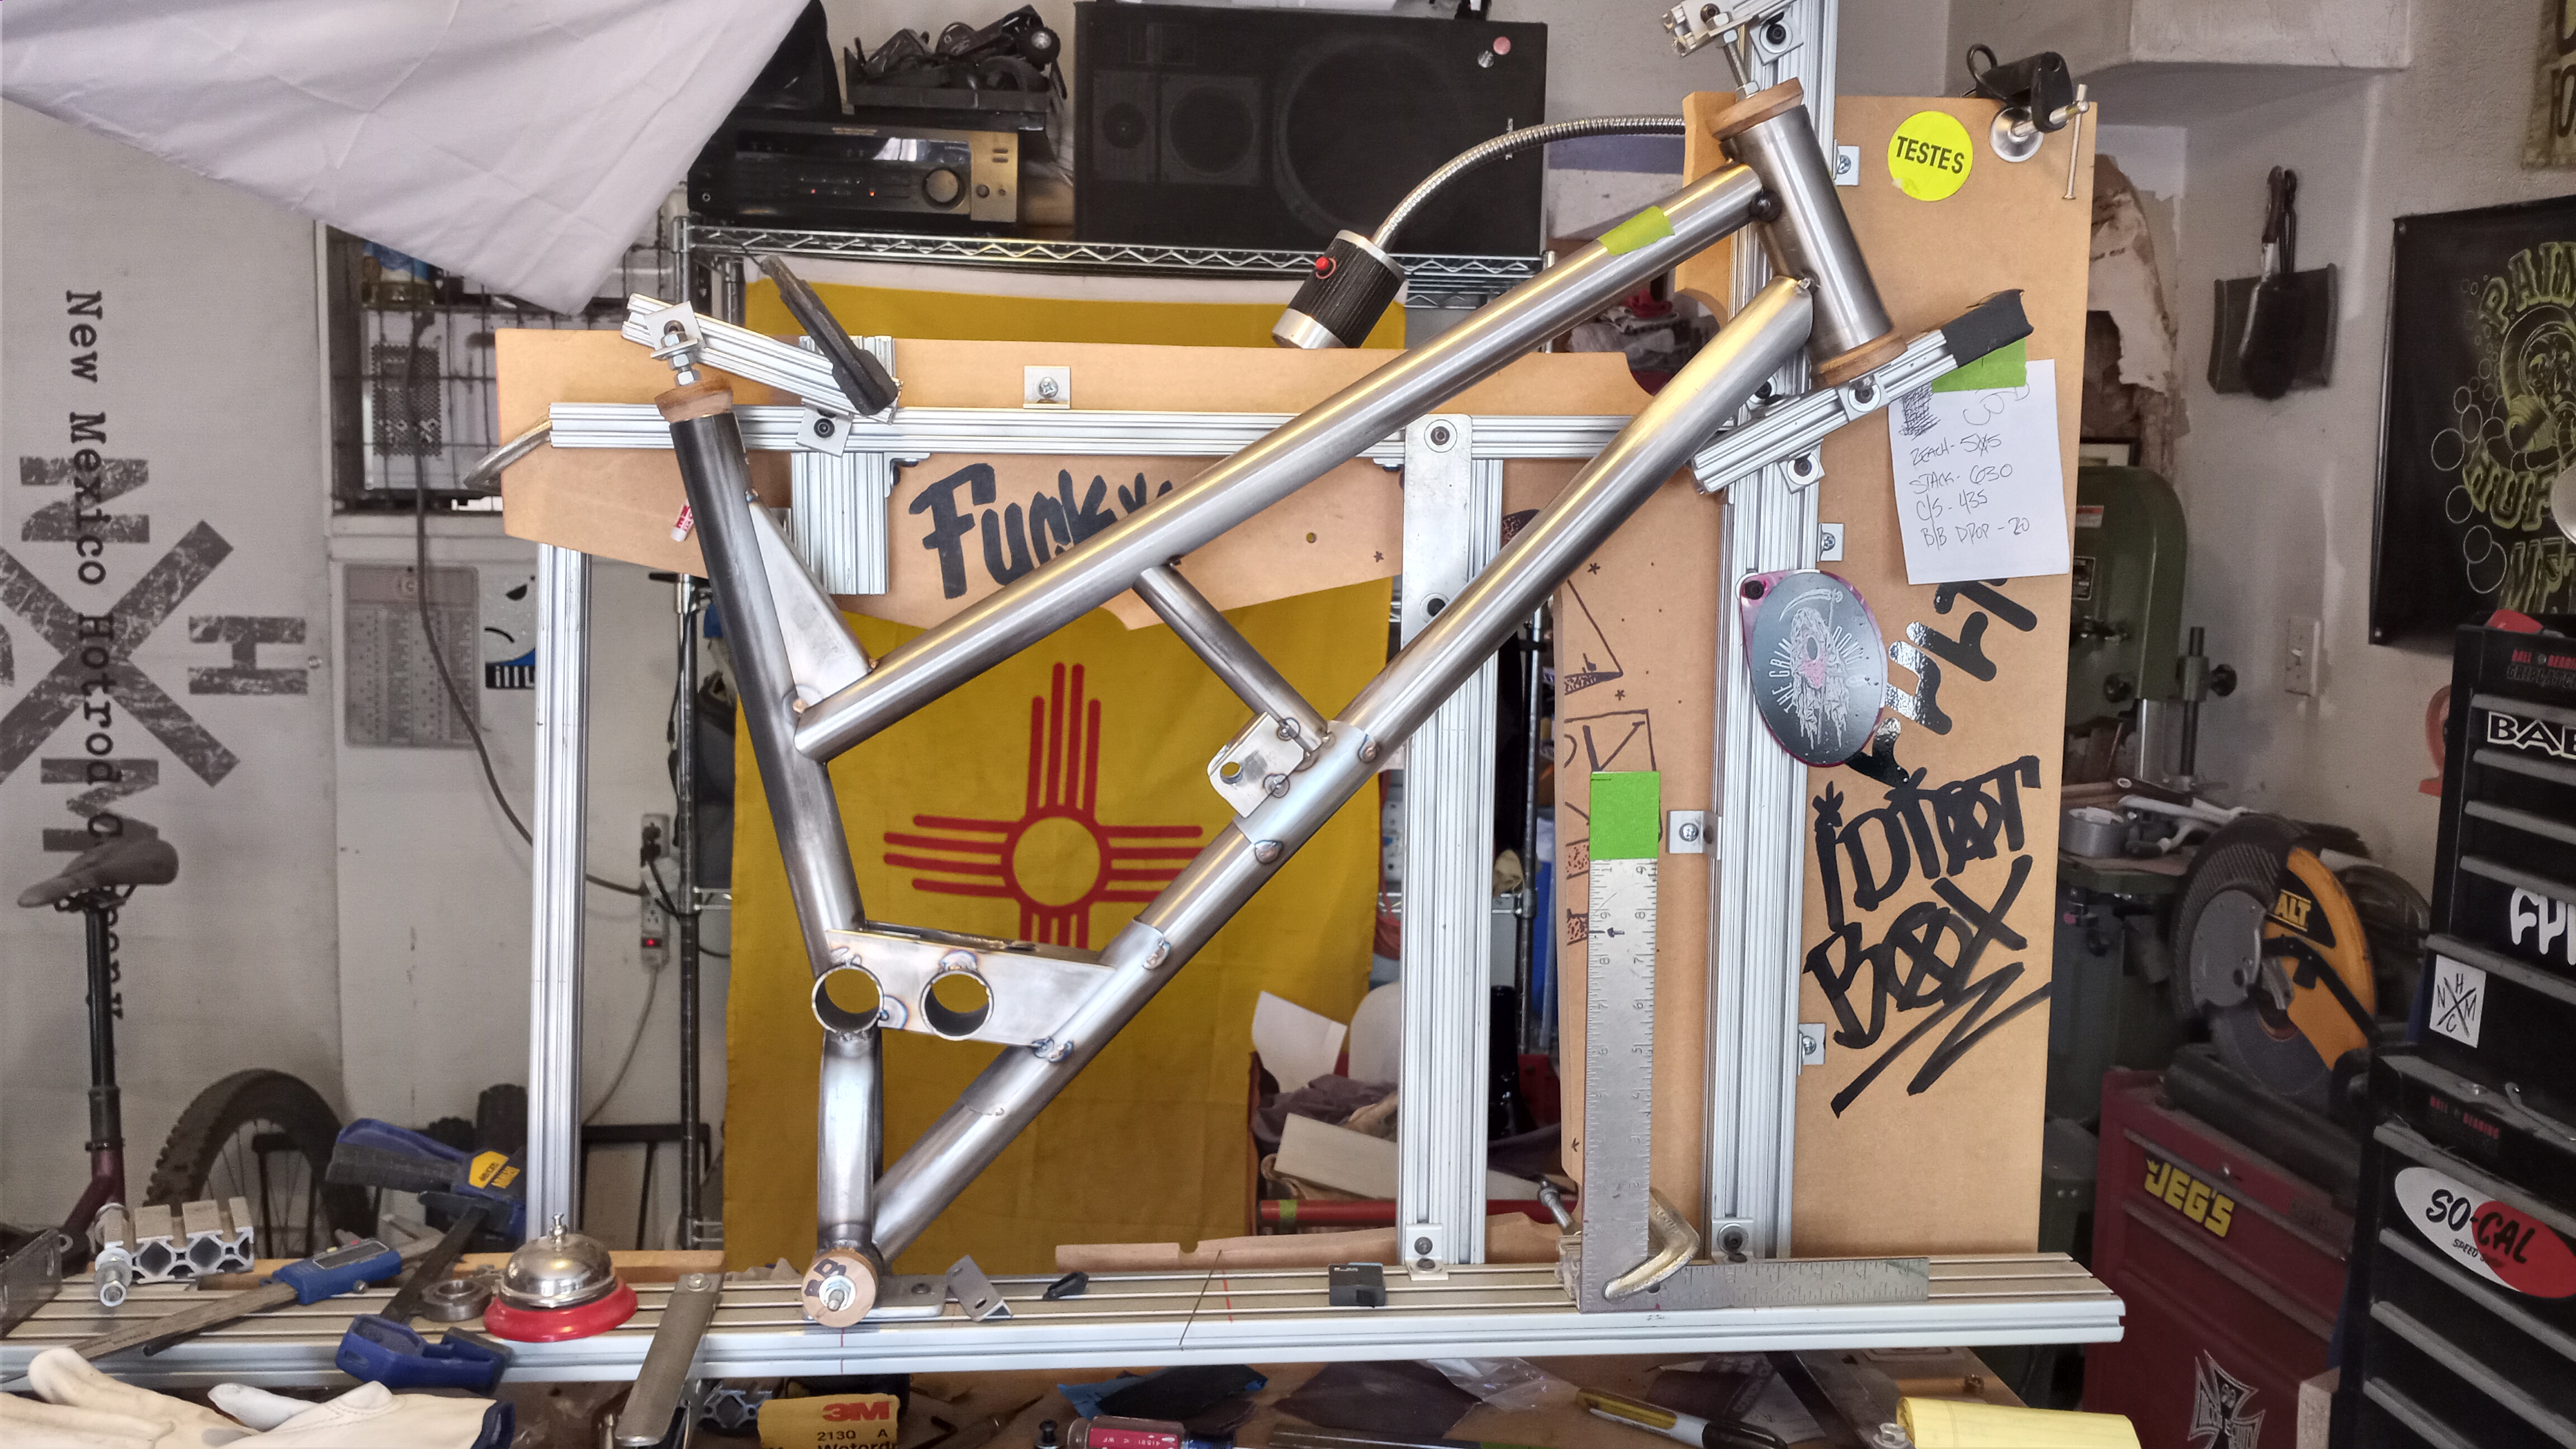
It’s some 1" mdf that I scrounged from a place I used to work. It’s more of help just keeping stuff better aligned. I like to say, it’s good enough for who it’s for.
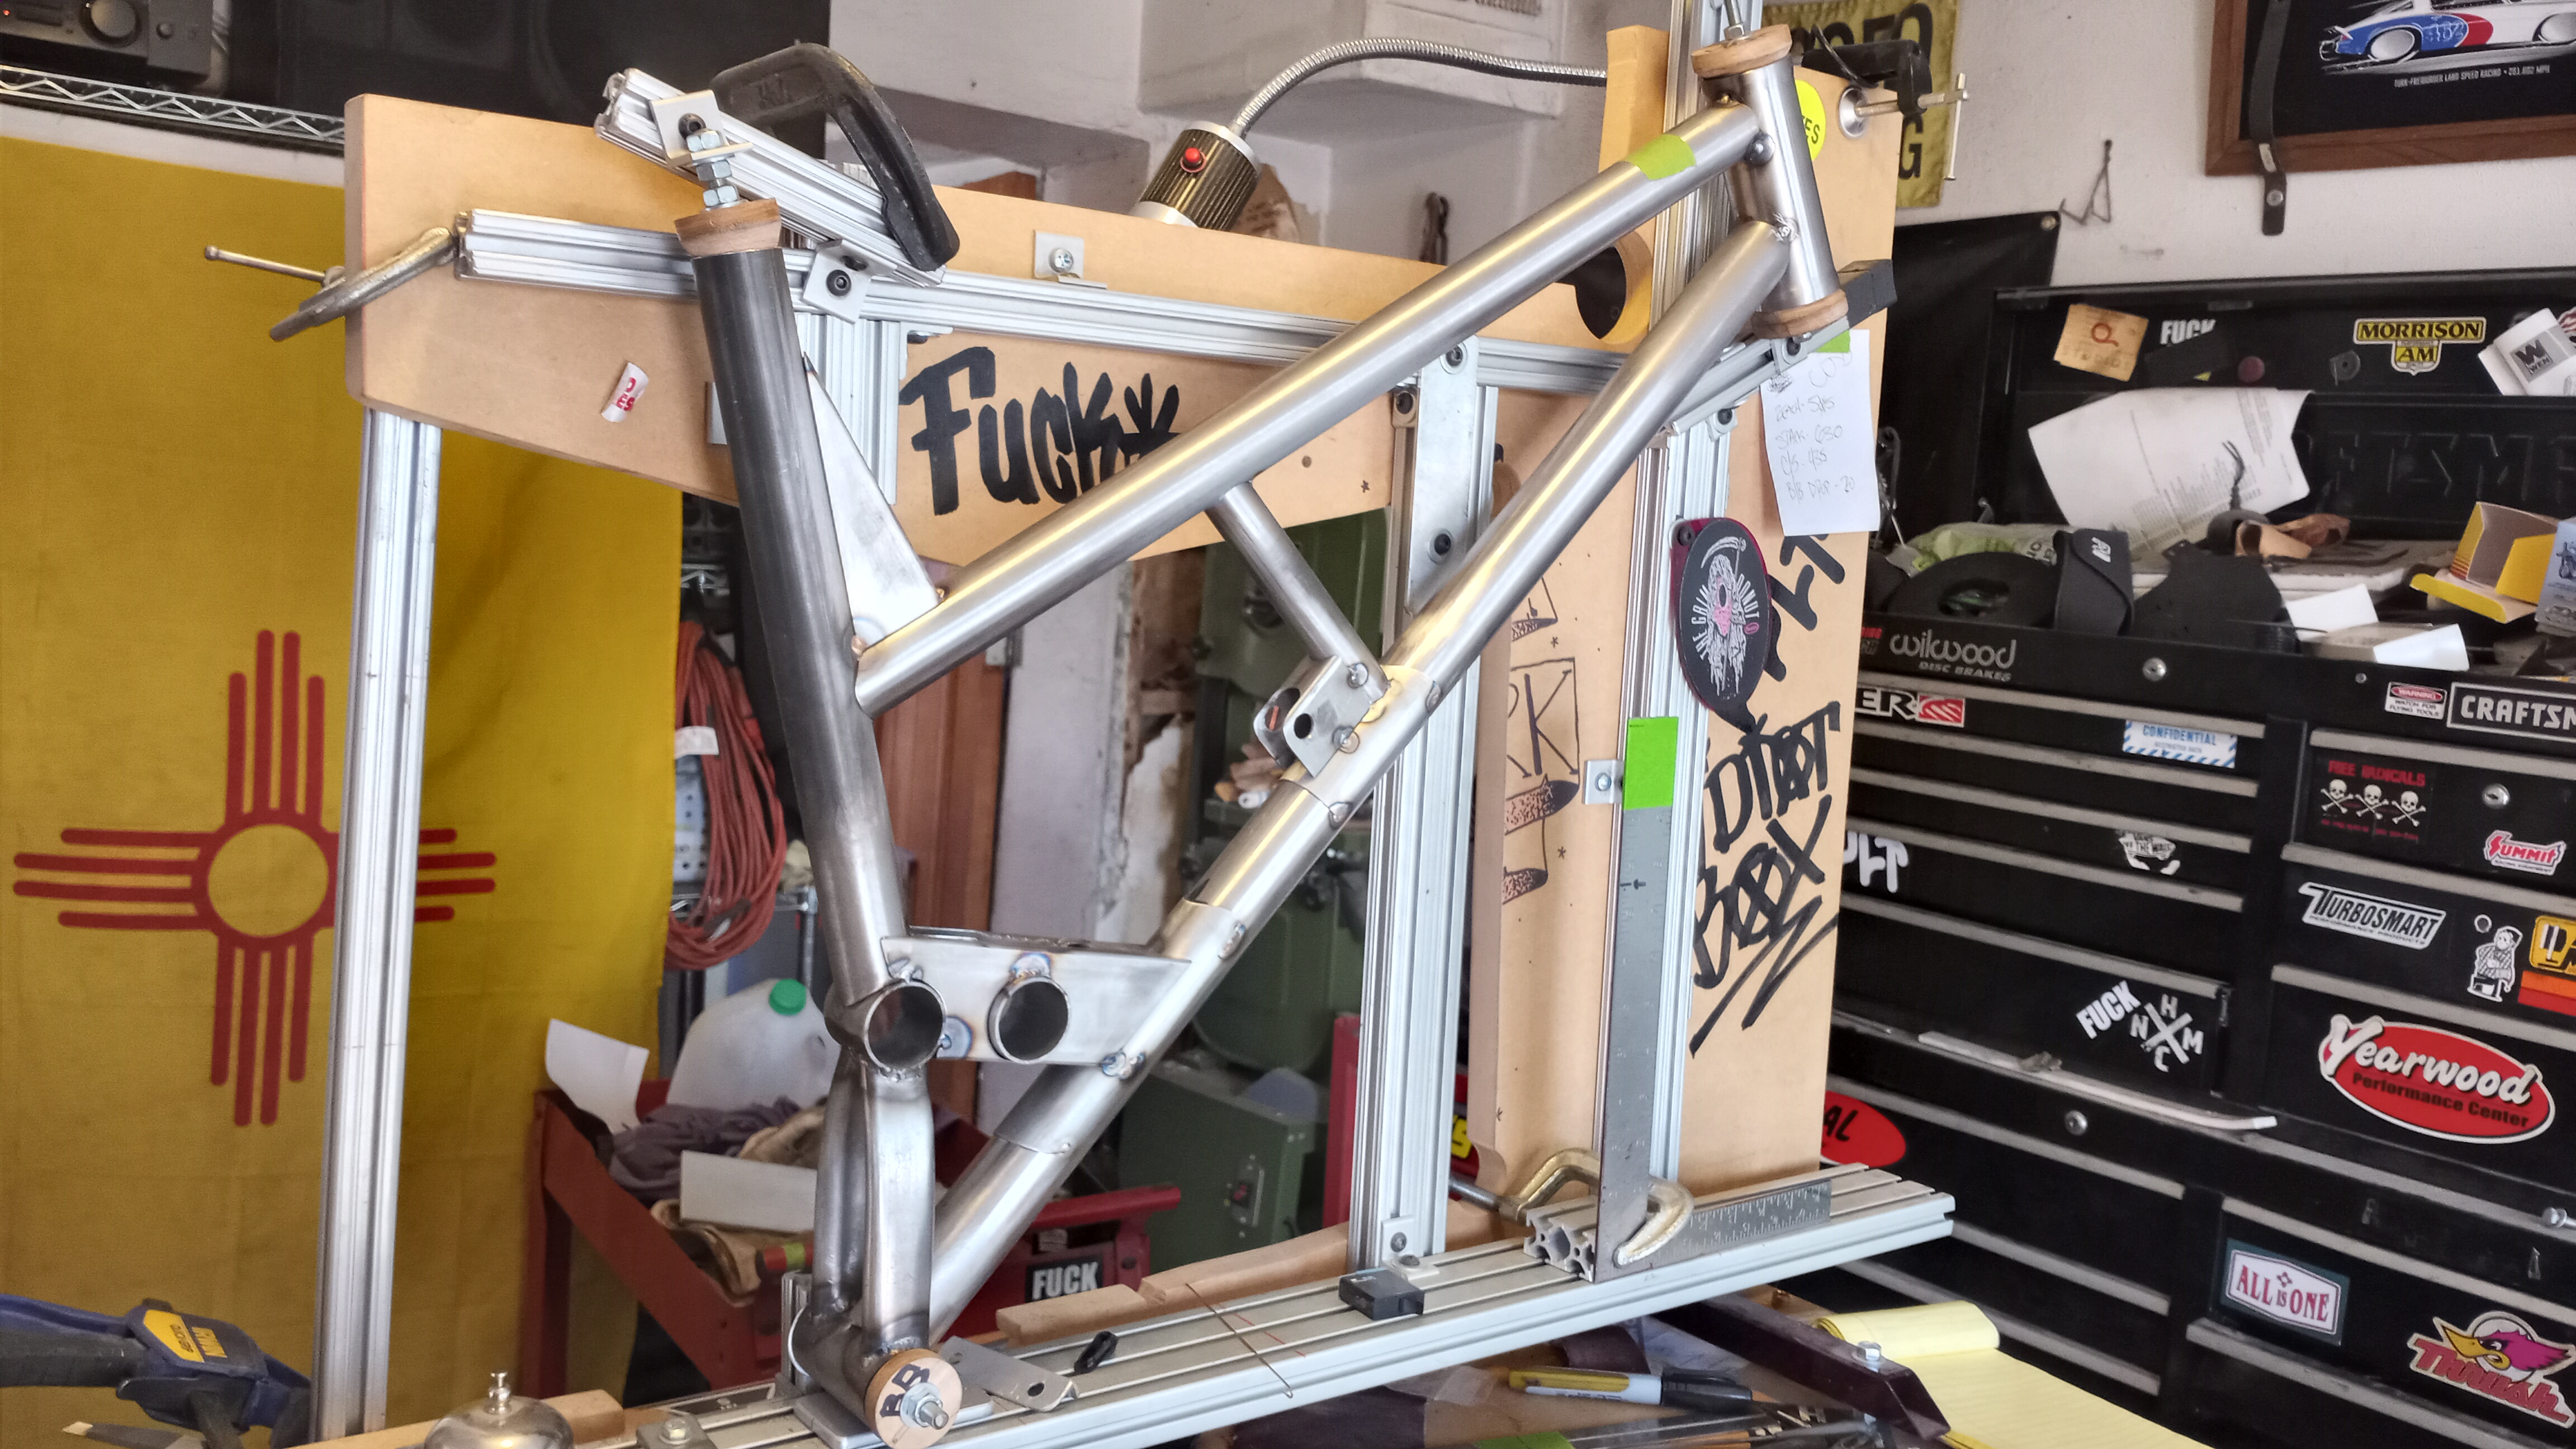
It looks something like this.
It’s some 1" mdf that I scrounged from a place I used to work. It’s more of help just keeping stuff better aligned. I like to say, it’s good enough for who it’s for.
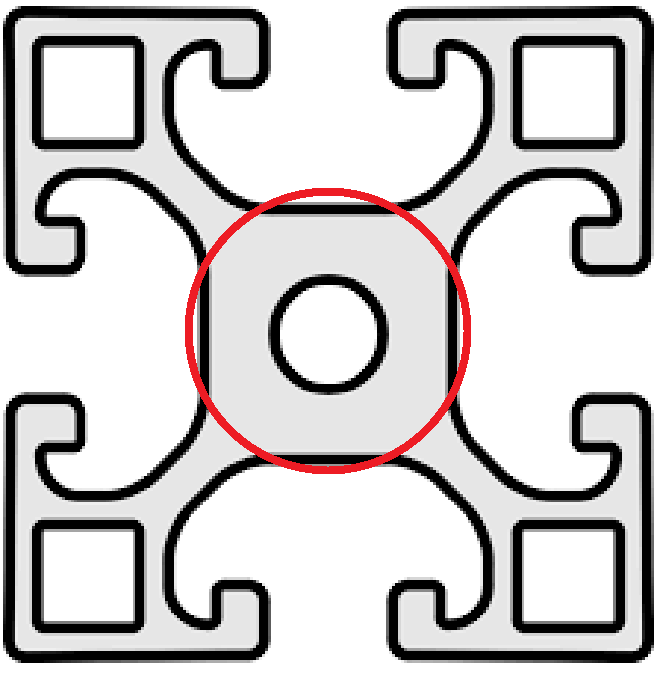
The thing with these extrusions is that they look a lot more rigid than they are, especially torsionally. The torsional stiffness is largely only provided by that small part of the cross section in the middle of the profile, the extensions that form the T-slots do next to nothing to contribute, since they are “open profiles”.
The polar moment of inertia of a 40x40x3mm box section is about 10 times higher than that of a 40x40 T-Slot profile
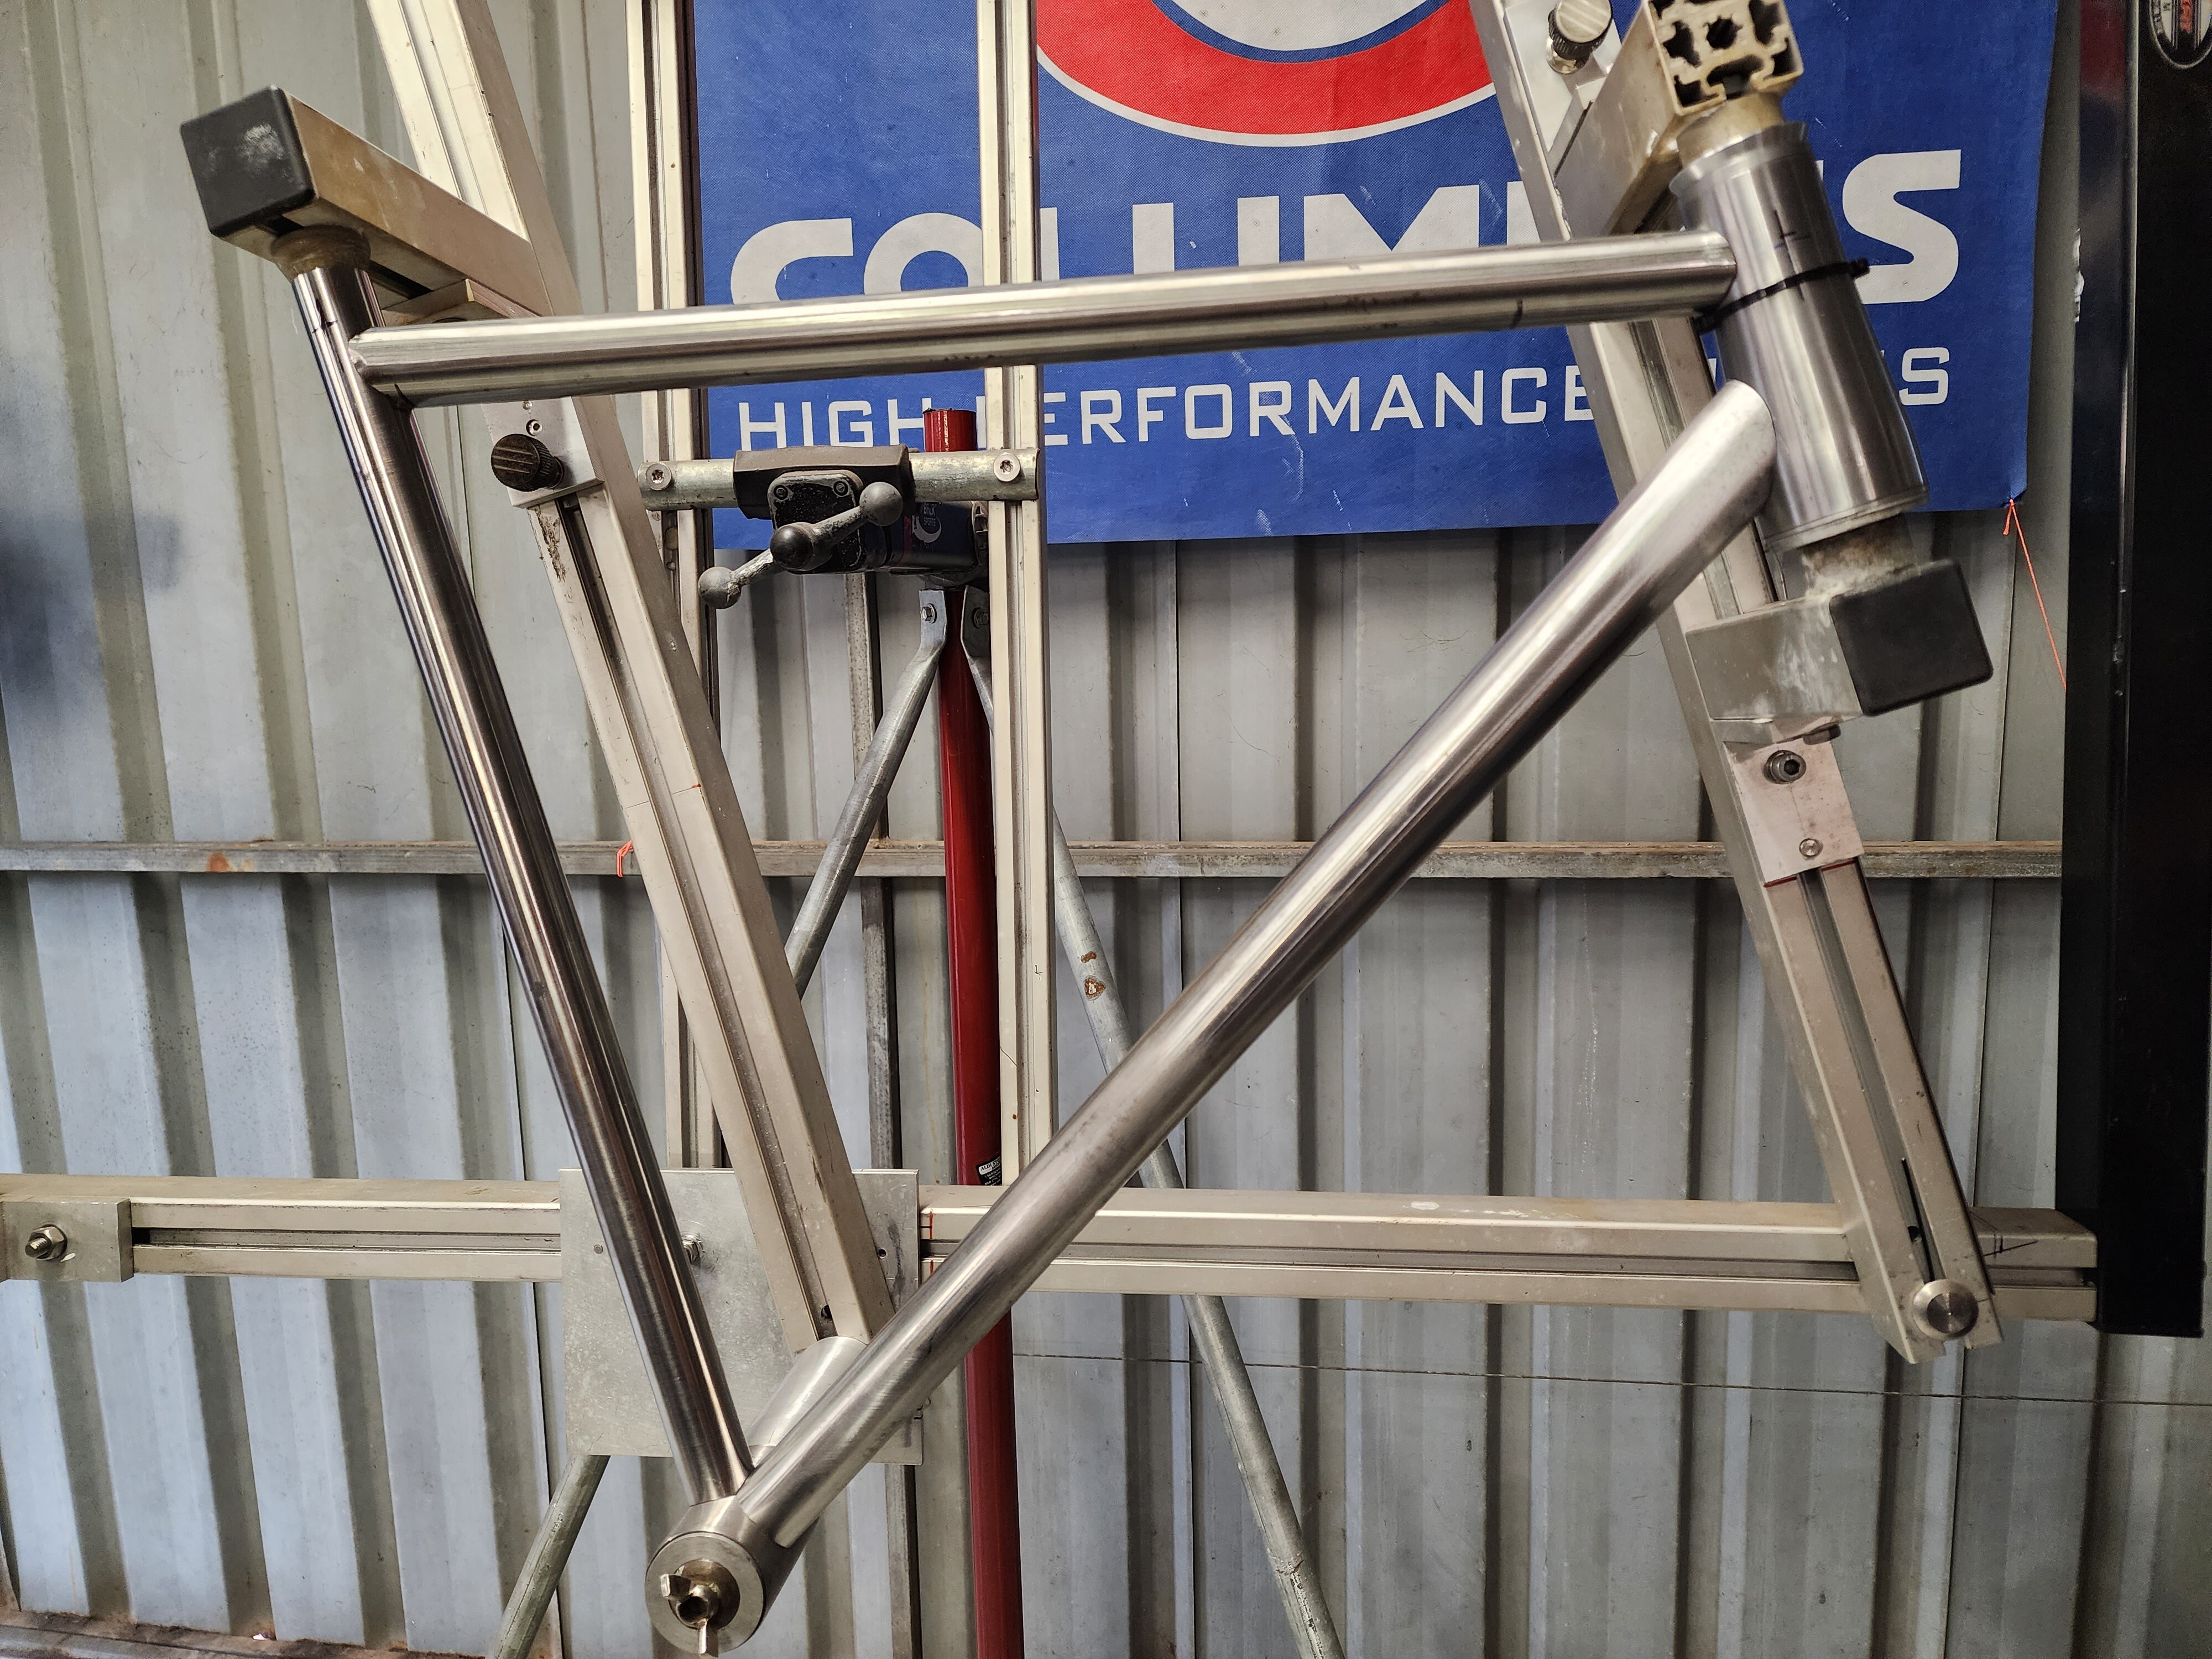
As Luniz explained above. Just use plain aluminium or steel SHS and have external slide fixings. T slots are nice and neet but you can achieve exactly the same adjustment using an external fixing to the section. I used the slotted extrusion in mine because it was given to me. It’s not super stiff and that’s good. No tube is ever forced into position it just sits there. Tack in jig and braze in stand. If I force a tube it flexes the jig so it’s a good way of keeping my build quality in check.
The last couple of posts made me worry about my extrusion choices ![]()
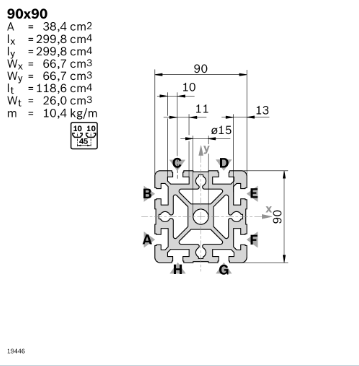
My basic fixture design is the same as Daniels but instead of 140x40 and 40x40 I went for Bosch Type 90x90 for the main beam and 45x45 for the rest.
Was 90x90 a bad choice? ![]()
Should I go for the heavy option for more rigidity?
I am also currently designing my own jig and thought I had made my decision before seeing the last few posts.
I got curious about optimizing extrusion selection. I downloaded some common choices off of the 8020 website and used the power of Solidworks to calculate Polar moment of inertia or a section’s resistance to torsion.
Here is what I got:
| Profile | Polar Moment of Inertia (resistance to twisting In^4) |
|---|---|
| 80-80 | 8.25 |
| 40-120 | 8.12 |
| 120-120 (haluminum) | 36.38 |
| 80-160 | 34.05 |
I was originally going to go with 40-120 because it is so much cheaper but I am now convinced I need a larger option. I can see why most people gravitate towards the 80-160 extrusion for the main beam on a fixture.
8020 does not have an 80-120 profile which I think would be perfect.
Not all profiles are the same so I would only trust these numbers for this brand.
@BS_Industries thanks for the reply!
I wish I knew how to read these numbers ![]()
this is the extrusion I wanted to buy, it’s quite massive:
It should also really depend on how and what I mount it to, right?
Has anyone used a profile with similar dimensions and found that it is not staying straight?
Maybe this calculator may help you Registrierung | BSO Montagetechnik GmbH
Only German, but you will understand ![]()
This particular profile seems to be a copy of the original Bosch Rexroth profile found here: Bosch 90x90
They specify a polar MOI of 118cm^4…
Generally in Europe there are two systems of profiles that are not cross compatible with their slot spacings, the Bosch and the Item system, mostly referred to B and I type.
I also had same idea of using a cheaper steel beam and save money. It should be cheaper, but not totally sure.
The idea would be to use a Blanchard ground C-channel similar to Joe Bringheli’s jigs as the main horizontal piece instead of a more expensive aluminum 80 x 160 extrusion. I would bolt the seat tube and head tube aluminum extrusions to the steel C-channel. It should be fairly accurate since the C-channel would be Blanchard ground. Also, it should be fairly rigid due to it being a c-channel. Thoughts anyone?
Thanks for pointing that out! Compared to the 40x120 the heavy 90x90 doesn’t seem so bad anymore except that it really is heavy ![]()
I still don’t understand the real life consequences of those values though ![]()
That is, what extrusion would be to flimsy for a frame fixture and when does it become overbuilt.
I think I will move along with the 90x90 extrusion and find out! Unless someone would strongly advise against that ![]()
@Johannes Thank you for the link, I will try to create a „business“ account to check it out.
3 posts were merged into an existing topic: OPEN CONE [DUE DEC 31st]
4 posts were merged into an existing topic: OPEN CONE [DUE DEC 31st]
A bit of housekeeping, see Open cone thread for cone discussion!
A really good look at PVD’s MDF “raster” frame fixture and the methodology behind it. It seems like “beam” style fixtures seem to have preference in this thread but still worth a look for anyone going the DIY route.
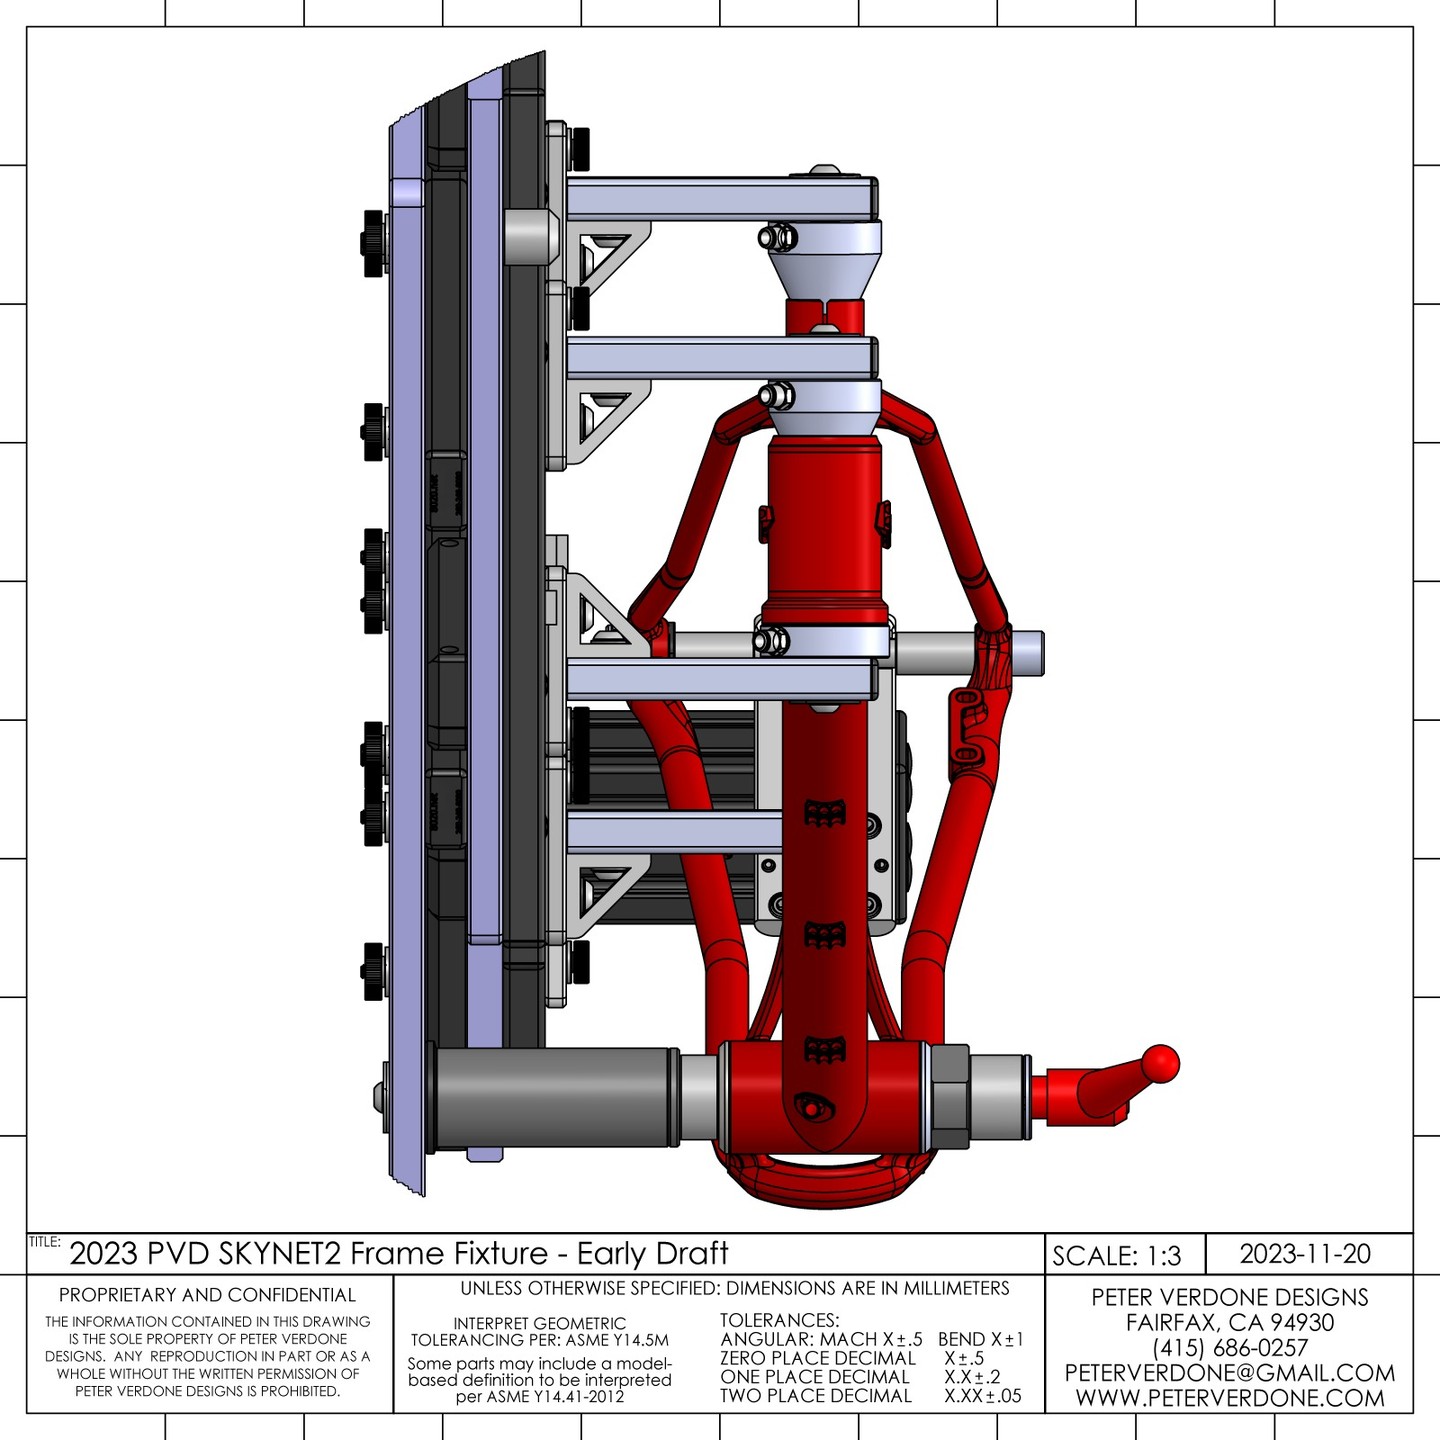
It was good to see PVD put some time into making his recent series of videos about his frame fixtures. He’s hinted that there’s a “huge improvement” coming to his Cyberdyne fixture soon, although I’ve found there can be quite a large gap between PVD’s meaning of “huge improvement” and most other peoples’.
Looking at that render, could he be moving to a vertical head tube with the seat tube being the only angular adjustment (same as Cobra, etc)? His previous comments on the matter suggest he doesn’t like this approach but you can never tell with PVD ![]()
The new PVD jig is out: “Samantha”. Headlines: no longer focused on low cost or ease of manufacturing; all-in on the welding fixture table ecosystem.
I think I like the increase in centreline height (Cyberdyne: 140mm → Skynet: 160mm → WOPR: 180mm → Samantha: 200mm). I’m not 100% sure 200mm is right as I haven’t tried 180mm and there’s always a trade off of rigidity as height increases, but Skynet’s 160mm is too short and it makes sense using a multiple of the 25mm/50mm (or 1"/2") grid size from standard fixture tooling. I like the increase in BB tower lower shell diameter. I like the consistent use of 16mm (or imperial equivalent) shoulder bolts for all the fittings. I don’t like the move to more expensive fixture plates for the sliding HT/ST platforms. I’m ambivalent on the ‘improvements’ to the axle tower, standardized slide thingies and custom hold-downs.
I’m definitely disappointed about the move away from low cost and ease of manufacture ![]() I think there was a sweet spot somewhere between Skynet and WOPR which he could have aimed for with this design but it feels like he turned around and fired in a different direction. Maybe there are some things from all of his designs which could help inform designs here though?
I think there was a sweet spot somewhere between Skynet and WOPR which he could have aimed for with this design but it feels like he turned around and fired in a different direction. Maybe there are some things from all of his designs which could help inform designs here though?
I believe the welding-table approach is the most flexible for the garage builder, a welding table is always handy.
That said, I believe the “The Bicycle Academy” jig approach is the best so far if price is #1 concern.
Depends on the welding table. I’ve been using a 16mm laminated chipboard panel with my Skynet jig in place of a welding table so far. This has allowed me to invest in the jig components with the aim of upgrading to a proper welding table at a later date if it works for me. I’m finally looking to get a welding table next month - laser cut from 6mm steel with reinforcing ribs for a few hundred £s - because it will help to realise the full potential of the Skynet jig and because it will indeed be ‘handy’. However, if my only option was a multiple-£1000s welding table as espoused by PVD then the whole thing would have been a non-starter.
As for price, even with the welding table my Skynet jig will still be cheaper than a Bicycle Academy jig … the caveat being that Skynet required access to a milling machine and lathe ![]()
Going back to the original topic of this thread, I reckon the best outcome of any “Open Source Fixture” wouldn’t necessarily be a single, cheap frame fixture of a specific type which can get you started building bikes but a collection of standards and conventions which allow new builders to start cheap (or moderately cheap) and develop their tooling as they go, even allowing changing between jig styles as time goes on, without sacrificing everything you’ve bought. A new builder could start with, say, a simple Brew-style jig (or even a hockey stick-style!) using a few cones and pucks, some lengths of 8020 and a bag of standard fittings, then upgrade to a beam style or welding table-style jig without needing to discard the cones, 8020 and other hardware. There’s even a lot of overlap between the beam-style and table-style so no reason why a well-designed fixture ‘system’ couldn’t allow switching between those without needing to start from scratch.
I’ve recently been curious about how the XY layout (Cobra style) could be laid out on a welding table and thinking about how much of my Skynet jig could be repurposed to test it. It would be awesome if I could do that, or switch to/from a beam jig with fairly minimal extra financial outlay. I’ll try to post something when I’ve had time to put some ideas together in a coherent way.
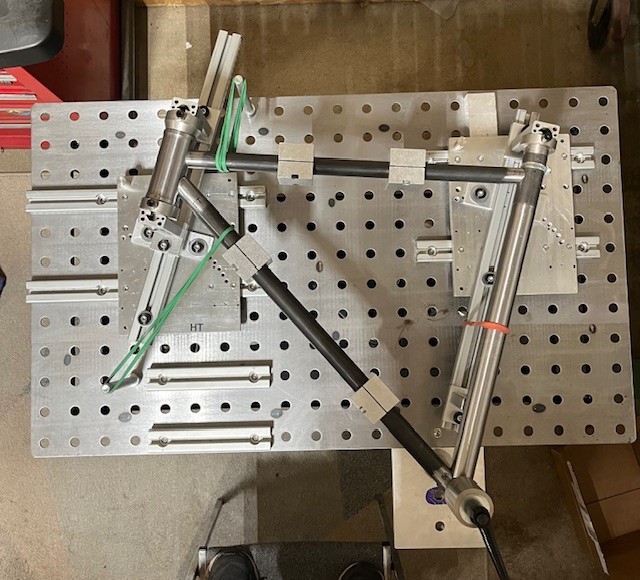
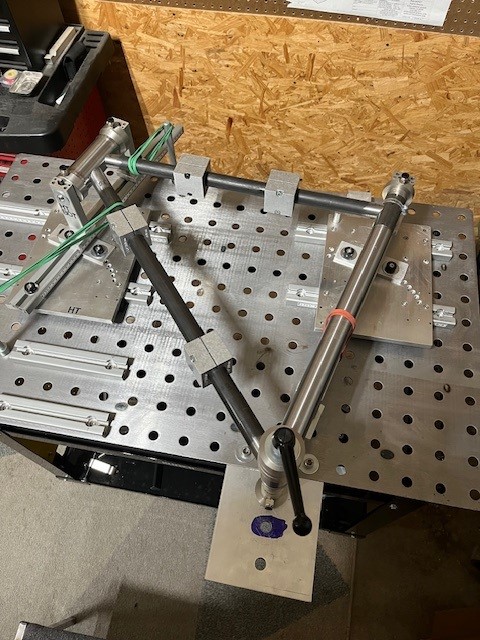
There are some ways to save a little money with the Skynet (and Samantha) jigs. Attached is my Skynet jig on a Klutch Welding Table ($300).
You could use this for Samantha too. The size of the welding table is smaller than the RhinoCart, etc., but I added an extension plate at the BB post. The table plate thickness is 4mm, so it is probably too thin to use for alignment, but I have not made it to that point in the process yet.
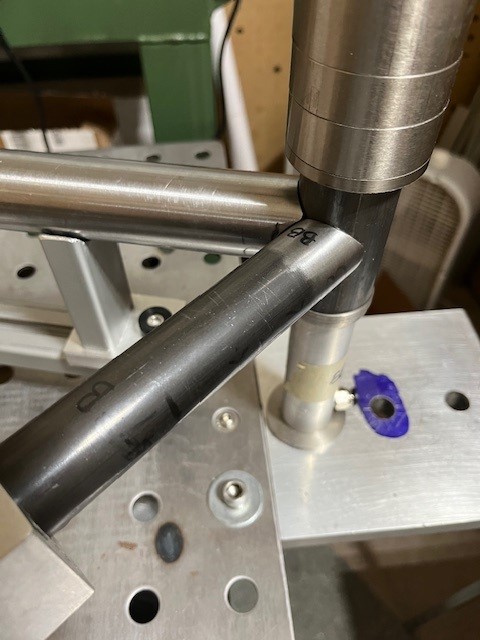
Also, you will need to do a “2-step” process with the chain stay / seat stays (or have a really big extension). I plan to do the chain stay assembly first and then just let it “hang off” the BB when I transfer over to the Skynet to tack up the front triangle.
Here is some pics if you are thinking about either the Skynet (or Samantha) jig.