I have a client here with a 1" steerer that came loose from the crown of his classic Vittorio. I have a bunch of old stuff including a threaded 1" steerer. Only issues I come across is the lack of the “ridge” where the baseplate sits against. I seem to remember seeing in a youtube video (probably Chapman) that a separate ring is made for this purpose but I can’t find it anymore…
Anyone care to educate a builder that lacks some classic knowledge on how to make/fix a classic fork?
Further inspection makes me think the ring was part of the crown. I am now thinking to clean the fork, braze a steerer in with brass and then add a ring with silver.
It can be done, but the chrome will be an issue.
The fork is painted black, no chrome on it as far as I can see.
2 Likes
Must be the angle, the view on my PC looks like chrome! Should be an easy fix, then…
1 Like
Thanks! But my plan to braze in the steerer and then add a ring after is legit?
1 Like
No reason you couldn’t do it all at once.
2 Likes
I’d file off the remnants of the crown race seat square to the top of the crown, then put one of these on top when the steerer is being brazed in. Crown race seats – Framebuilder Supply
1 Like
I agree, file the top flat and then I think I’d just put a small sleeve of 1-1/8" tubing with .058" walls on there for the crown race. However you do it, you’ll need to turn the seat down to the right diameter with a lathe or cutter.
2 Likes
Like @KPacenti said do it all at once. Repeated heat cycling of the steertube is bad practice, and by the time you get the crown hot enough to braze the ring will have been hot enough for quite a while! Do it with brass or nickel silver and a big torch. The reason that fork failed was poor penetration not getting it hot enough.
@bulgie taught me years ago to use a big rose bud and it was one of the best things!
Hahn Rossman
4 Likes
i’ve only ever brazed two forks, but I did as Hahn says and it went very well. flux it like you’re being paid to use the stuff up because its might be pretty hot for quite a while.
Or two rosebuds! I’m not joking, one in each hand gets the job done quicker, and quick is good. So if you have two torches, might as well use both. Maybe one with a Gasaver, the switch you hang the torch on to shut it off when the crown is hot enough to start feeding in rod.
Another option is one rosebud and one regular single-flame torch, for detail work and reviewing all your shorelines before calling it good. With the rosebud being the one on the Gasaver.
At Davidson, we used three rosebuds on crowns! Sort of… On the fork-brazing carousel there was a pre-warming station with two rosebuds pointed that the crown so that by the time the fork got to the human, it was pretty much at brazing temperature already, I just had to add a bit more heat to get the pre-placed brass inside to melt and flow everywhere. 50 forks in under an hour, basically one fork a minute. With two heating stations, that makes it about 2 minutes that they had torches pointed at them.
That’s not something most people should try for unless you have hundreds of forks to braze. But if you’re spending 15 minutes brazing a crown, I’d think about how to get that down to more like 5 minutes. More for the health of the steel than just the time saved.
Propane if possible, gives a better flame for soaking in tons of BTUs as fast as possible without any local hot spots. Also because acetylene isn’t safe to use in big rosebuds unless you have really BIG acetylene bottles. A big flame will exceed the maximum safe withdrawal rate of a small bottle, because the withdrawal rate is proportional to bottle size.
3 Likes
That’s why I like a brazing jig that can pivot 360°. Well, among other reasons. But you can start warming with the tips down, then when you get to brazing temp, flip it, and now the flux that had been running down from gravity is above the braze area and starting to come down. A sort of reservoir of extra flux in case you need it.
Though I’d still try to get the brazing time as short as you can, consistent with full penetration. Full penetration is the top goal, but speed is a close second.
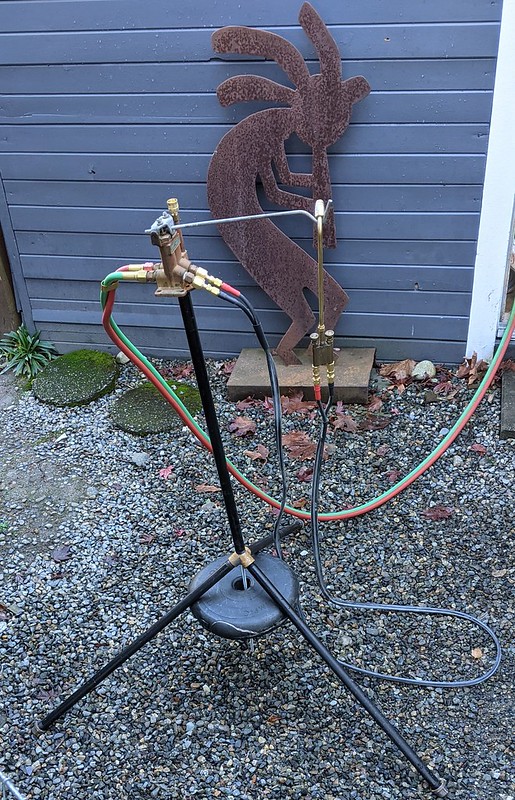
Here’s my Alex Wetmore jig, plugged into a Park stand in the orientation I recommend. It can be handy to rotate it 90° to horizontal sometimes too, like for brazing long tangs.
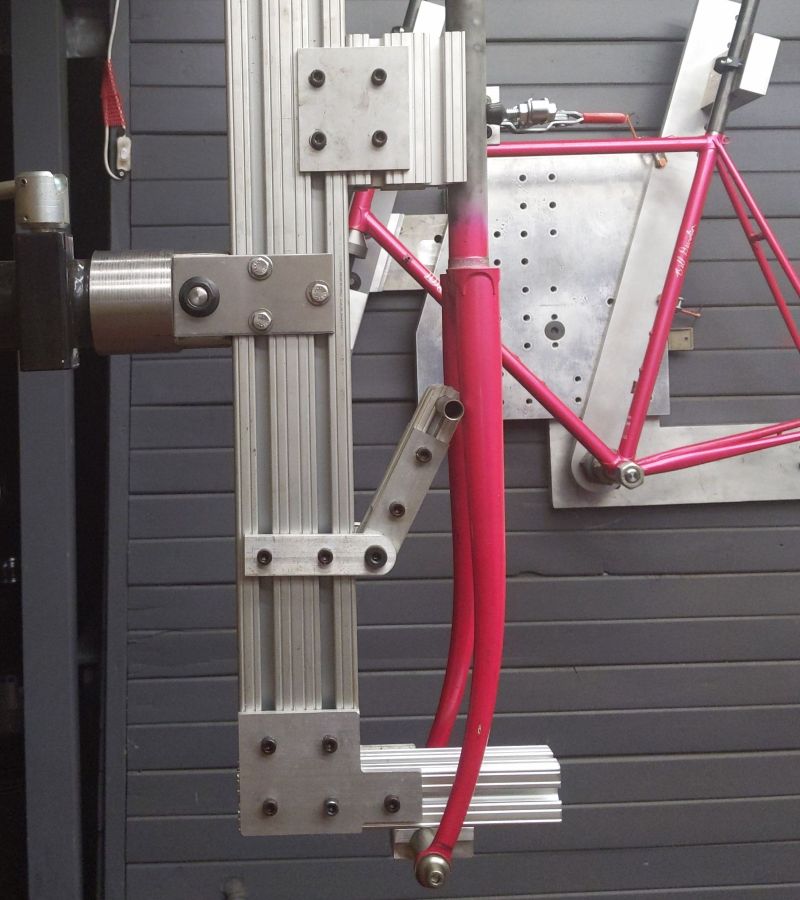
4 Likes
So, how safe is it for a complete beginner like myself to try to braze a new steerer into an old fork?
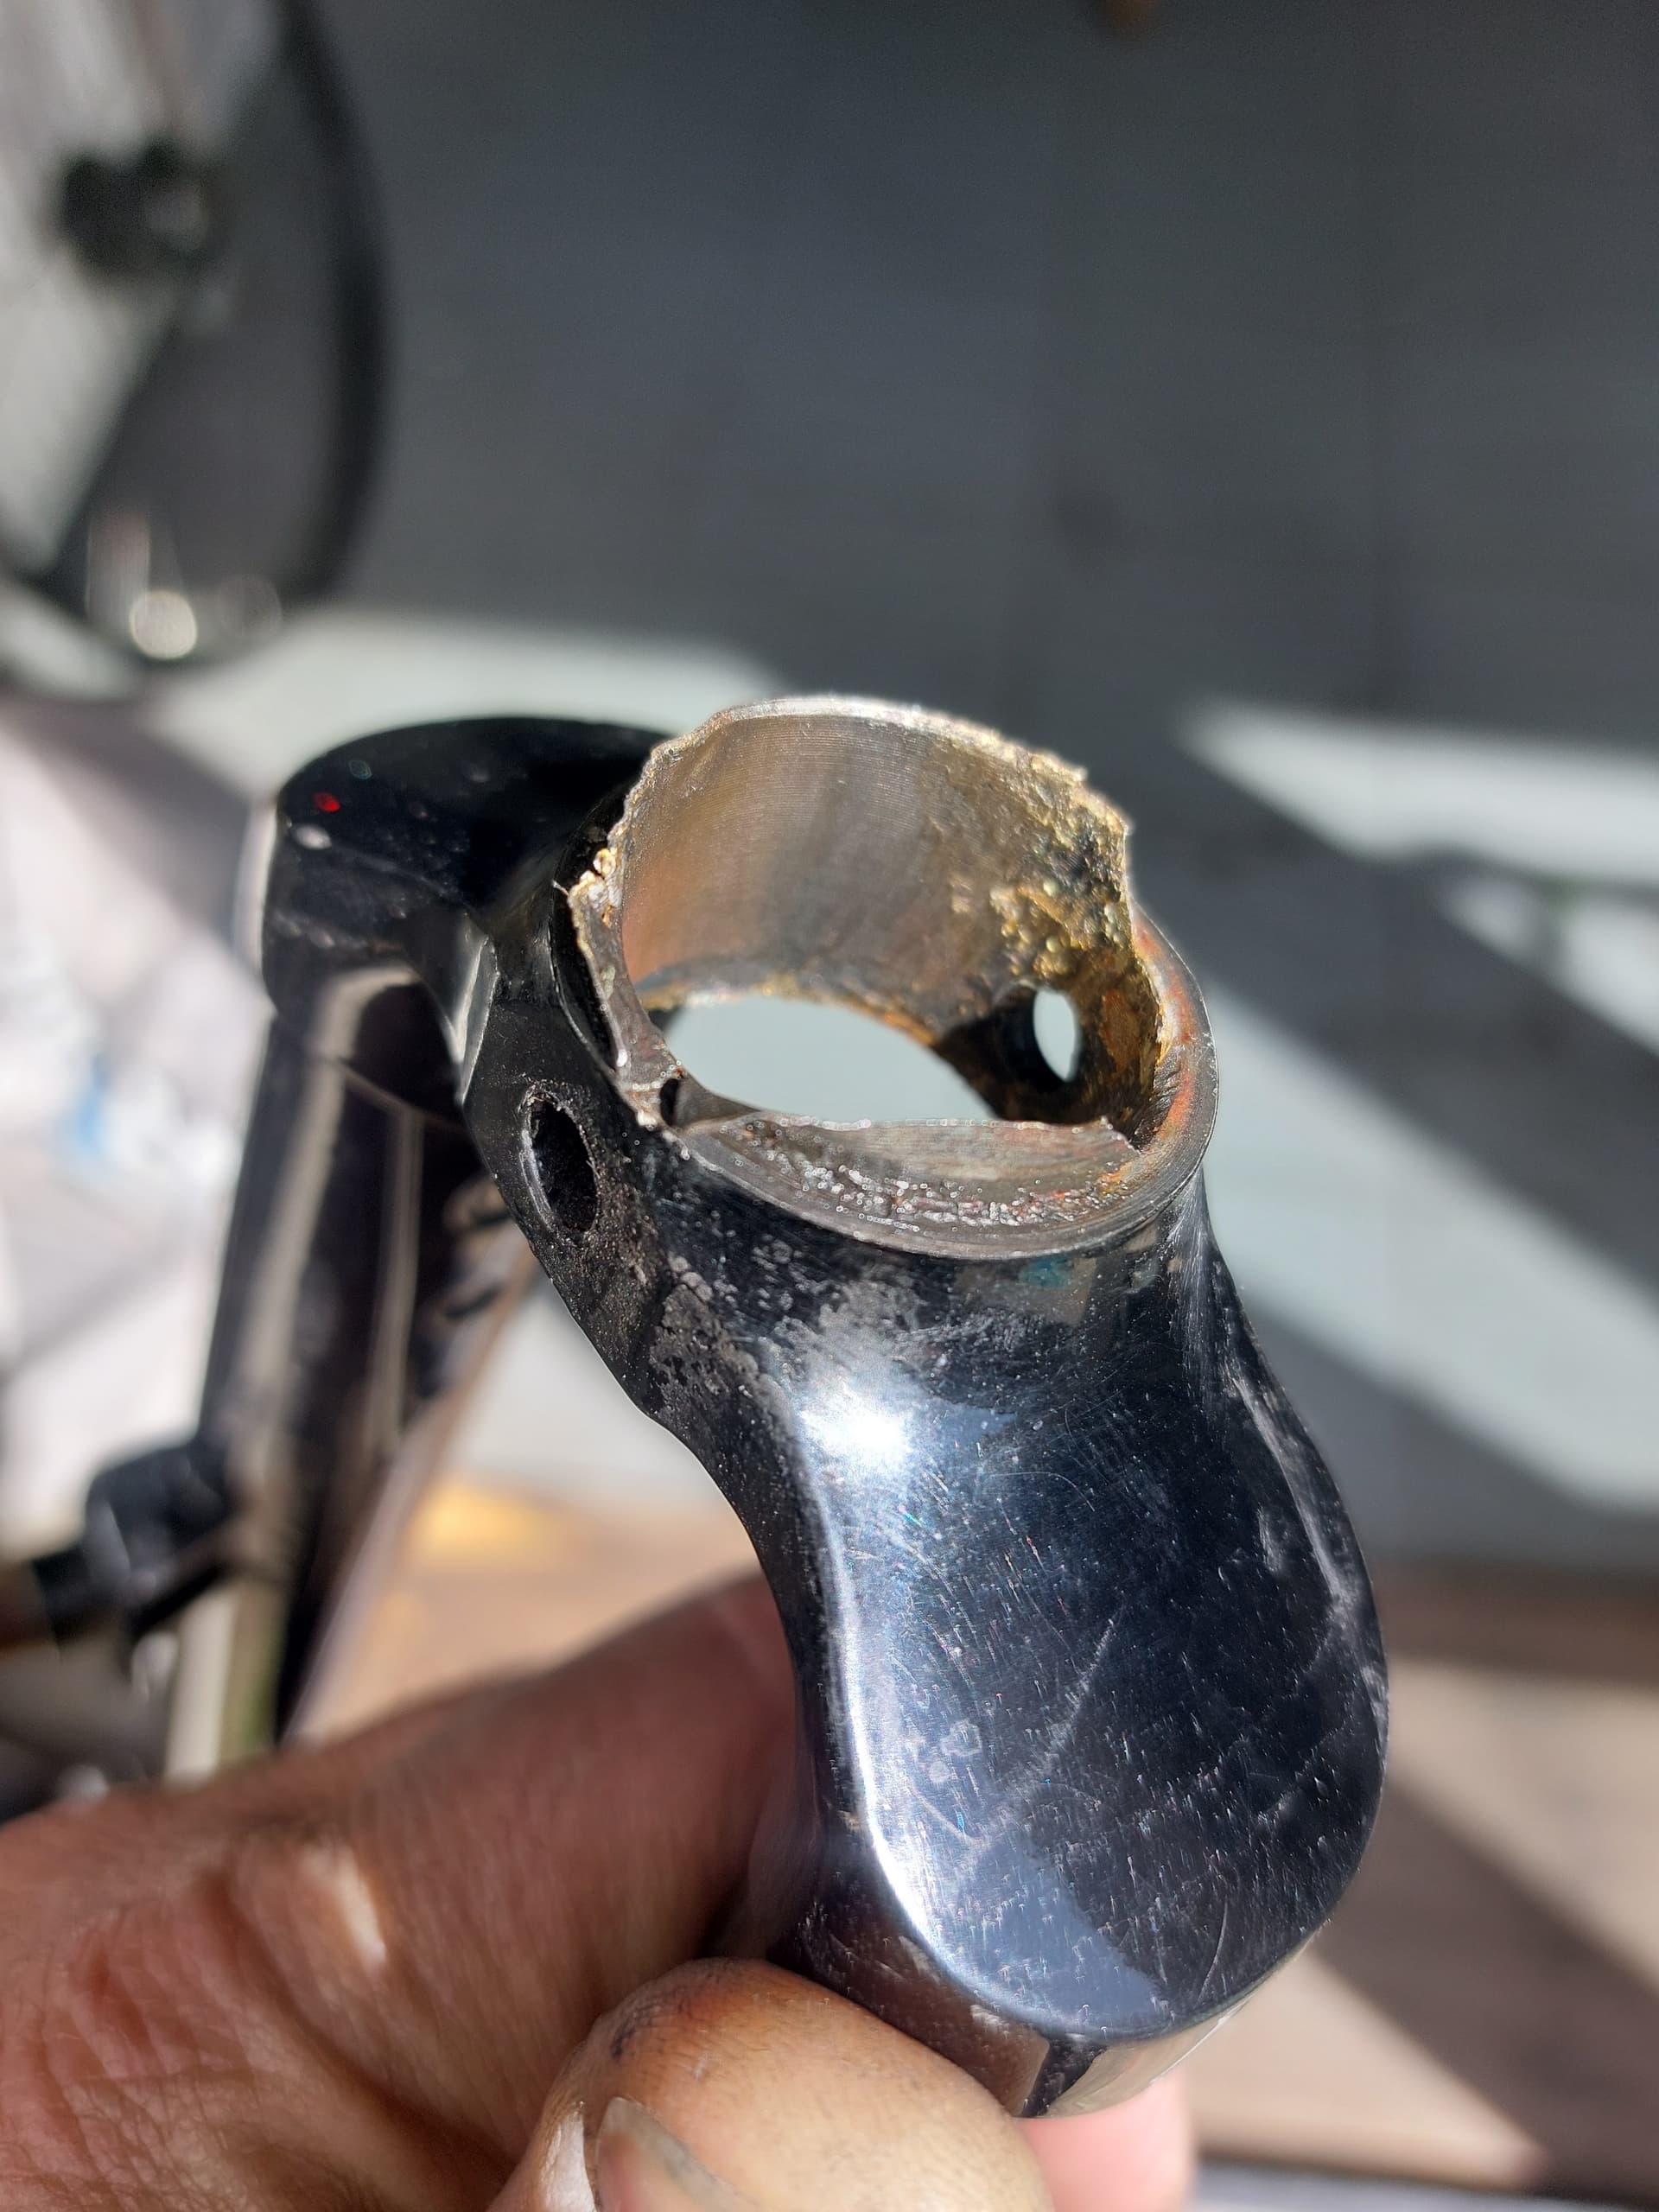
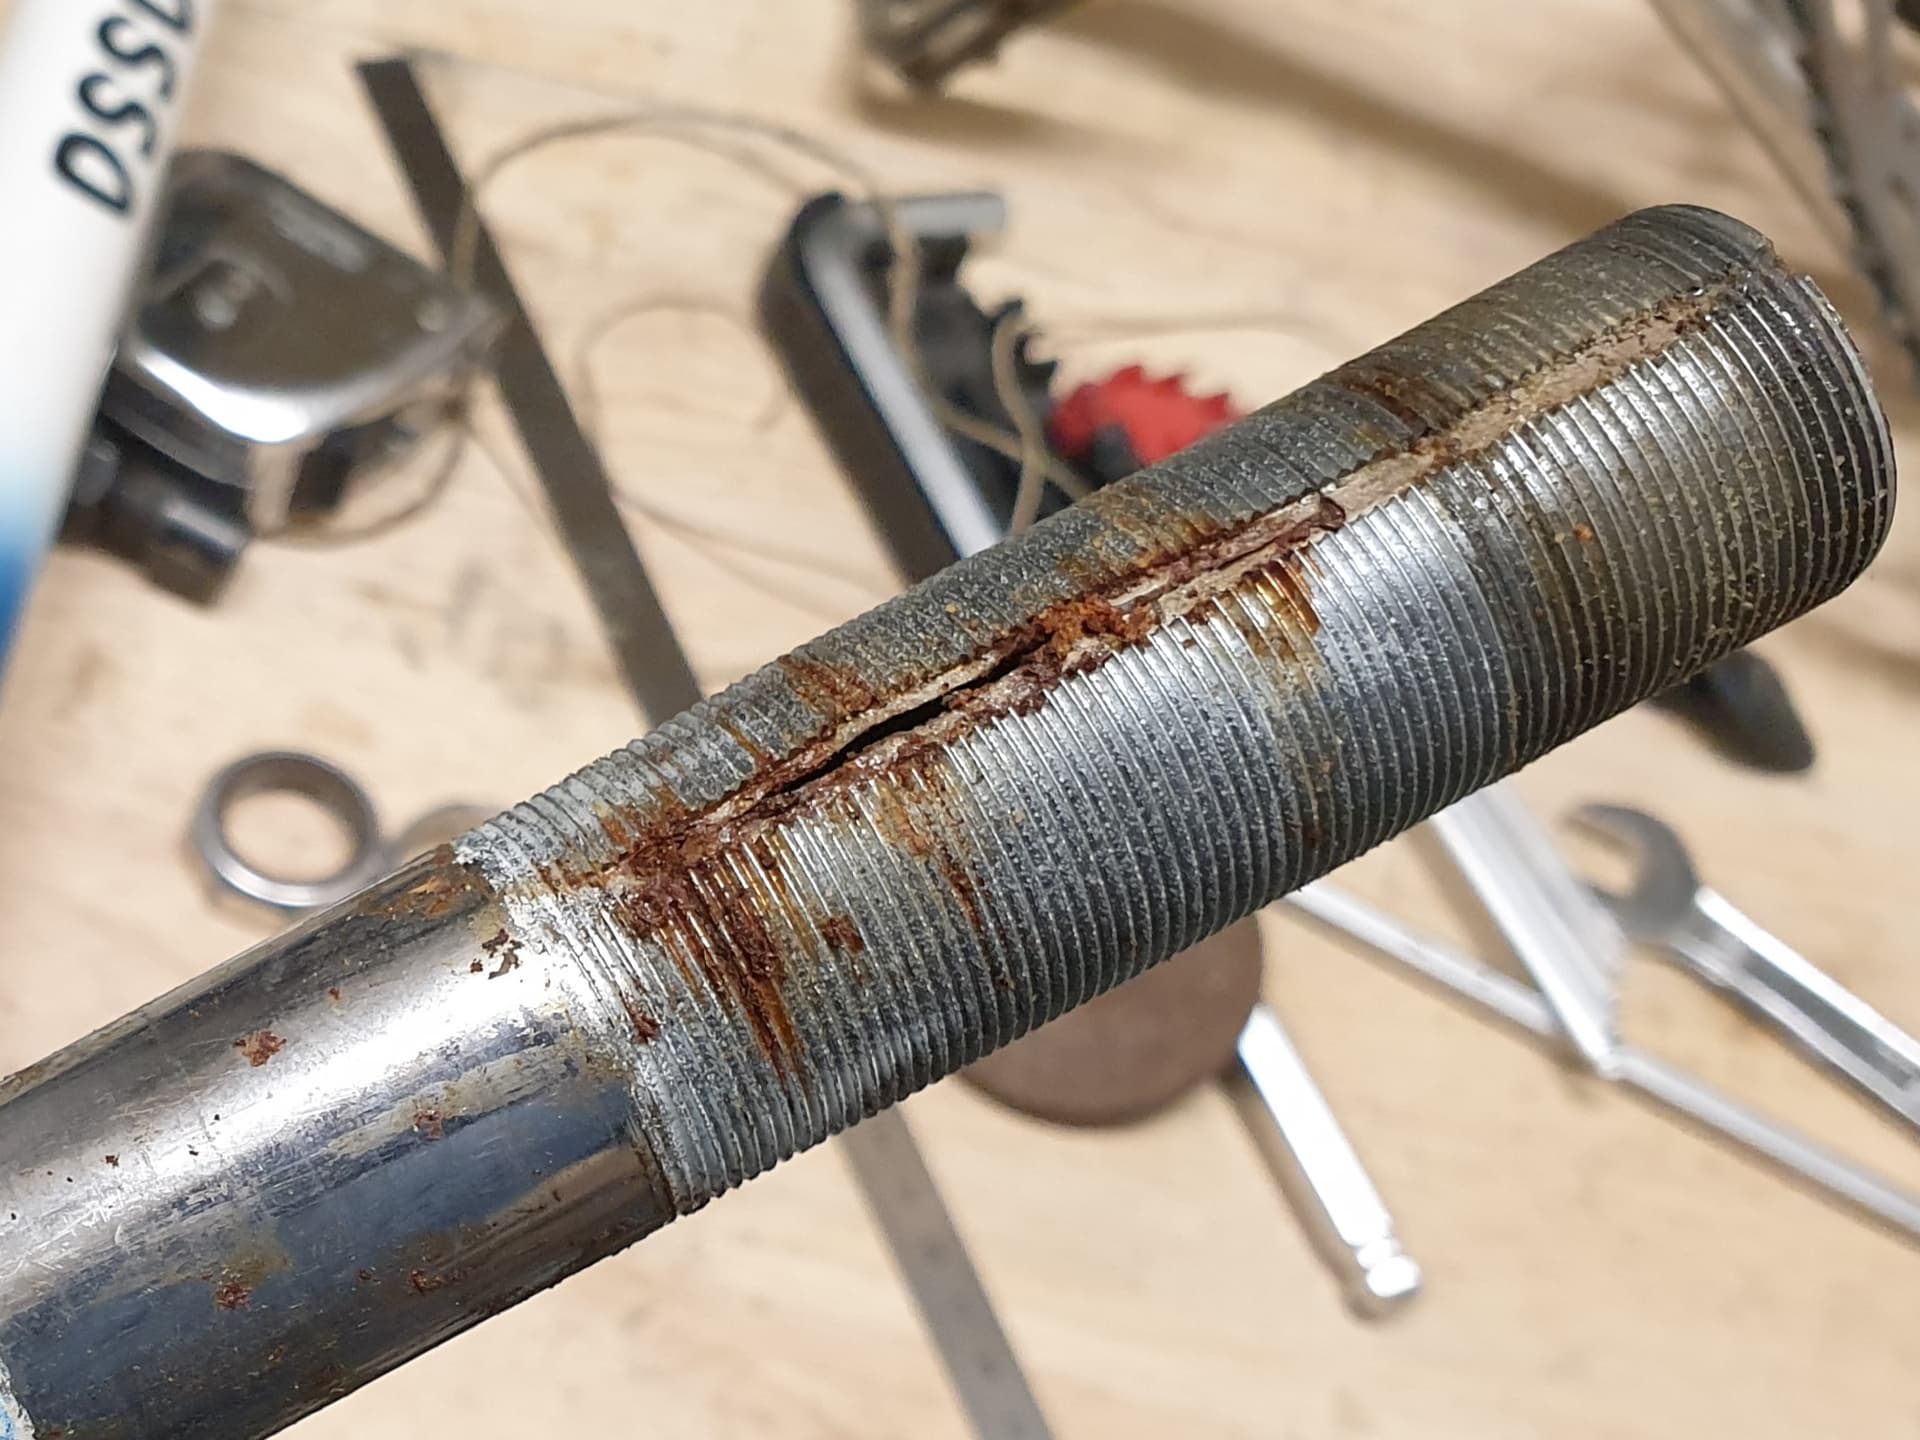
This happened last night to my sister in law’s bike:
It’s a Reynolds 531 fork on a bike from the late 70s that originally belonged to her grandfather.
The fork failed because the stem was raised too high in the steerer, exceeding the minimum insert line (which didn’t actually exist back in those days) so the fork failed at the first thread where the stem’s expander was causing stress.
Replacing the steerer shouldn’t be much of a job for an experienced framebuilder but a novice should research what needs to happen here. These old school forks were brass brazed so heating up the crown to free the old steerer may affect the brazing of the fork legs. I’ve done several cut-and-splice steerer transplants, mainly to convert old forks from threaded to threadless, but the principle is the same. See Paul Brodie’s video on the subject https://www.youtube.com/watch?v=TtOeCtNBUwg
If returning to a threaded steerer, one must place the splice joint in a position that allows full insertion of the quill stem, which can be difficult on a smaller frame where the steerer tube’s butt becomes involved.
4 Likes
That fork was a ticking time bomb from the moment it was made. I think making a fork with that many threads is criminally negligent, as in literally should lead to jail time.
ALL the threads visible in the photo are unnecessary and a potentially life-threatening weakness, with zero upside* (to the rider). Steerers should have enough thread for the headset and no more.
*Fucking bean counters decided they’d save a dime if they made one size of fork fit multiple frame sizes, and the result is people getting hurt.
Yeah I know, mostly a moot point for framebuilders now, since no one builds forks with threaded steerers anymore. But those old ticking time bombs are still out there, so I would recommend taking the fork out of the frame on any old bike you own or work on, to see how far down the threads go. No “minimum insertion” line on the stem can save you if the steerer has more threads than whatever amount of quill you have buried.
Don’t get me started! (oops too late)
7 Likes
Thanks for the feedback Mark and Mark,
Yeah… this isn’t the first time I’ve had a threaded fork fail because the threads (or groove for the notched ring that goes with it) went too far down the steerer.
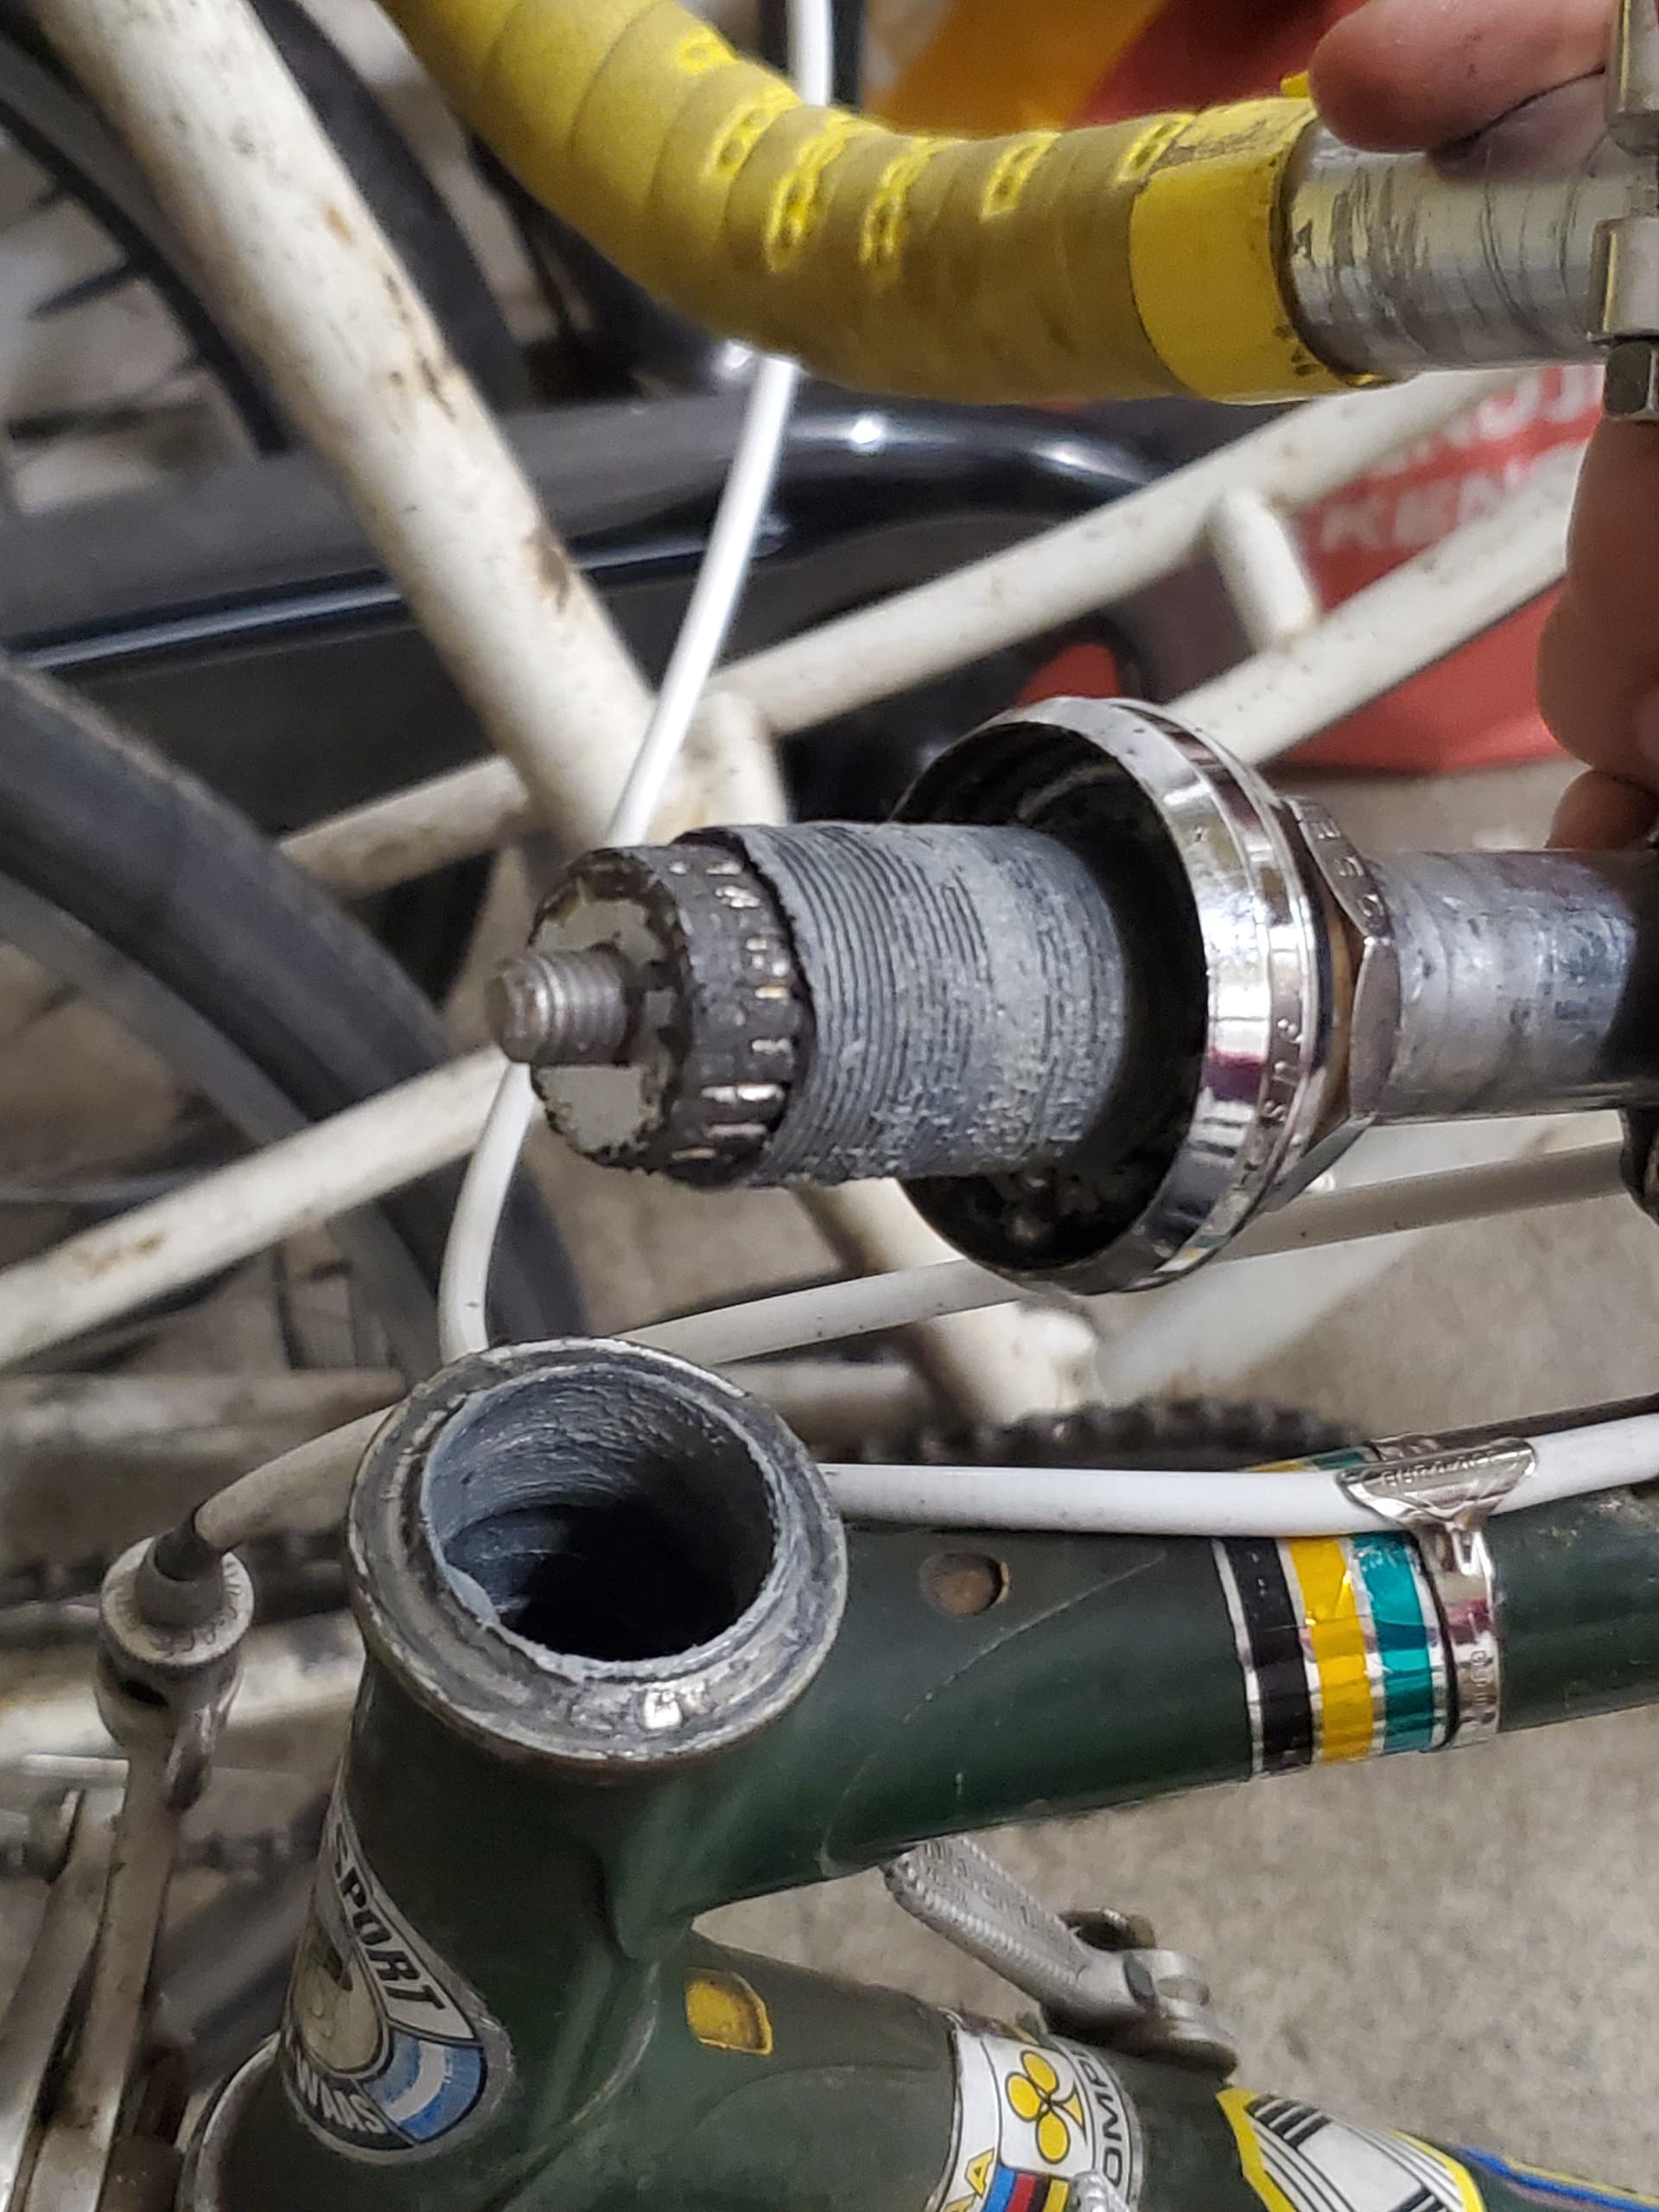
I had this one a couple of years ago:
The one that broke off now on the green bike is in a relatively small frame so I’ll have to see how much room there woud be for a sleeved splice, or I’ll sand away some paint near the joint to see if there’s any chance it’s silver brazed anyway.
In hindsight indeed I should’ve checked how far the threads go to see how far I can raise the stem, but like @bulgie says the threads go way too far down for anything reasonable.
It’s insane to me that this failure actually happened because I see no rust, that stem is only 70mm long and I’d be surprised if my sister in law weighs more than 50kg. And she just uses it for getting around town, that’s why the stem needed to be on the higher side.
Oh and I’m pretty sure this stem does have a minimum insertion line which I didn’t exceed when rebuilding the bike.
I’ll be checking my other threaded forks now…
2 Likes
Pretty much guaranteed to fail like that, likely right away on being assembled for the first time, or first ride maybe. In a place that you can’t inspect without a major disassembly, and that can definitely cause a crash. How stupid or uncaring do you have to be to sign off on that? Ugh.
4 Likes
Surprisingly it survived from the mid 90s to 2021! I guess the original stem must’ve sat deep enough to be below the threaded/grooved section. Same with the green bike.
Maybe it’s not a bad thing that not every Jan & Dirk (common Belgian names for older guys) has a bike shop with in house framebuilding anymore. Both of these failed steerers are from local Belgian bike shop brands from back in the day.
2 Likes