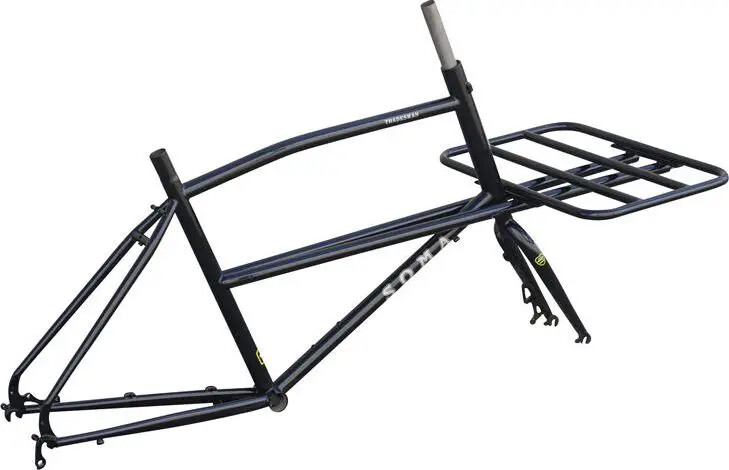
I am building a cargo bike for my partner and our dog. Its a cycle truck (pretty similar in design to a Soma Tradesman) build from a mid 90s Rocky Mountain Equipe. 26" rear wheel and 20" front wheel. It’ll have a mid drive TongShen TSDZ2 motor on it. I figure we’ll use a tote bin for the dog as the standard Wald 157 is too small for him. I havn’t ruled out the idea of making a bigger basket eventually.
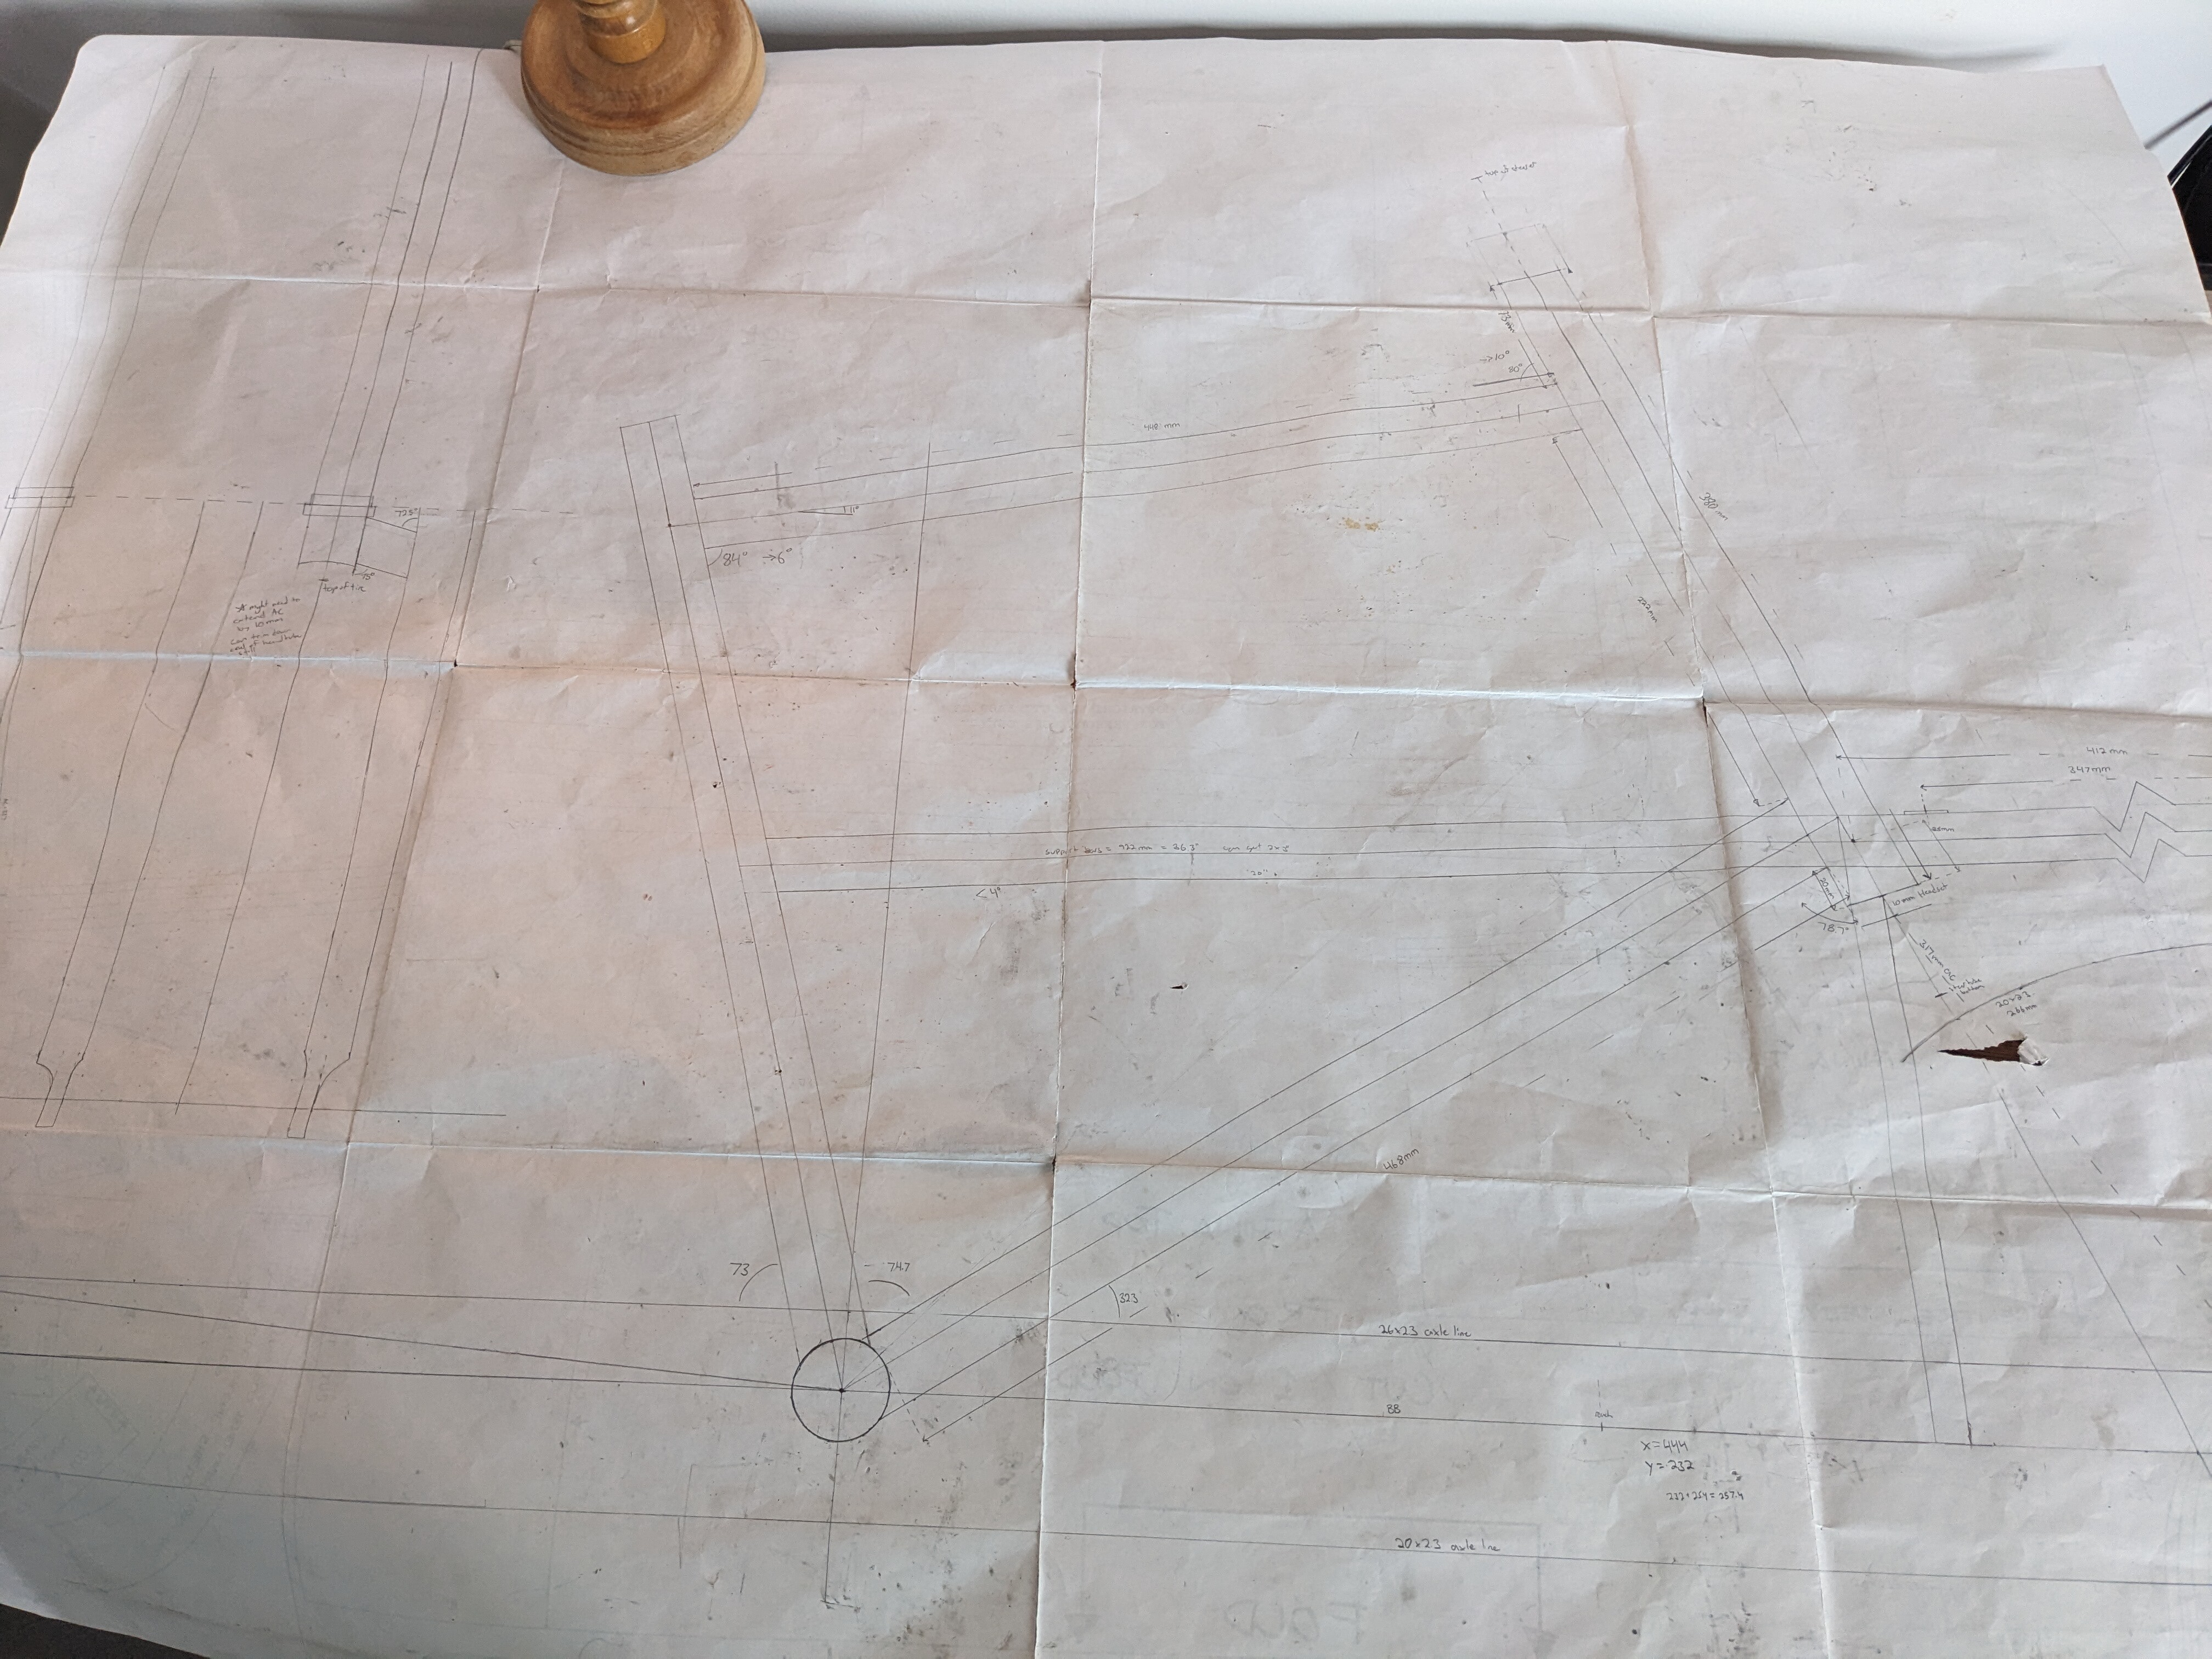
I got lots of inspiration and geometry tips from @Alex 's blog with his many cargo bike builds. I feel good about the geometry. Its got a short reach and tall stack for my partners long legs and short upperbody. The HTA is 69 and the rake is 55mm for 40mm of trail.
I’m planning to build a segmented fork using a 500mm steerer and cutting down the legs from a 26" unicrown mountain bike fork (also a Rocky coincidentally). I have measured it up and I will be able to cut the legs just below where they begin to bend. They are a round 1 1/8" at this point. I will make sure they have sufficient wall thickness after cutting them but I’m pretty sure they will.
We’re shortening the reach considerably from the original frame and therefore I feel confident that we can reuse the top tube and downtube with out any worry about brazing in the old weld zone. I’m a little less sure about what to use for the cargo support bars. I want to do double bars like the tradesman rather than a single one like Alex Wetmore did on his bikes. I dusted off my old engineering text books and tried to figure out the stress on these tubes. I figured out the beam bending stress and deflection. I reckon a good ball park would be that I should be able to stand on the end of the rack without it deflecting too badly (say 1/2" max) and without reaching half of the yield stess (safety factor of 2). Seems pretty arbitrary, I weigh 4 times that of our dog (50lbs) and his weight will be centered halfway along the cantilever, not at the end of it so I think this should leave plently of room for safety. I’d prefer aesthetically to use thinner tubes but they seem too bendy, with two 1" tubes I would need to use either 0.058" or 0.065" wall thickness. 65 thou seems like overkill but for some reason is half the price of 58 from air craft spruce so I am leaning towards this. I bet I could get away with 49 but I care about my sweetheart and my dog and don’t want either to lose their teeth! Has any one built this kind of bike who can offer their expiereince on what tubing they used? Does anyone know what the tradesman uses? I figure I can use the extra length from these tubes to make the crown segments for the fork, which is another reason to go with 1" tubing.
I am aware that a single tube would be sturdier but I do prefer the classic look of the double tubes.
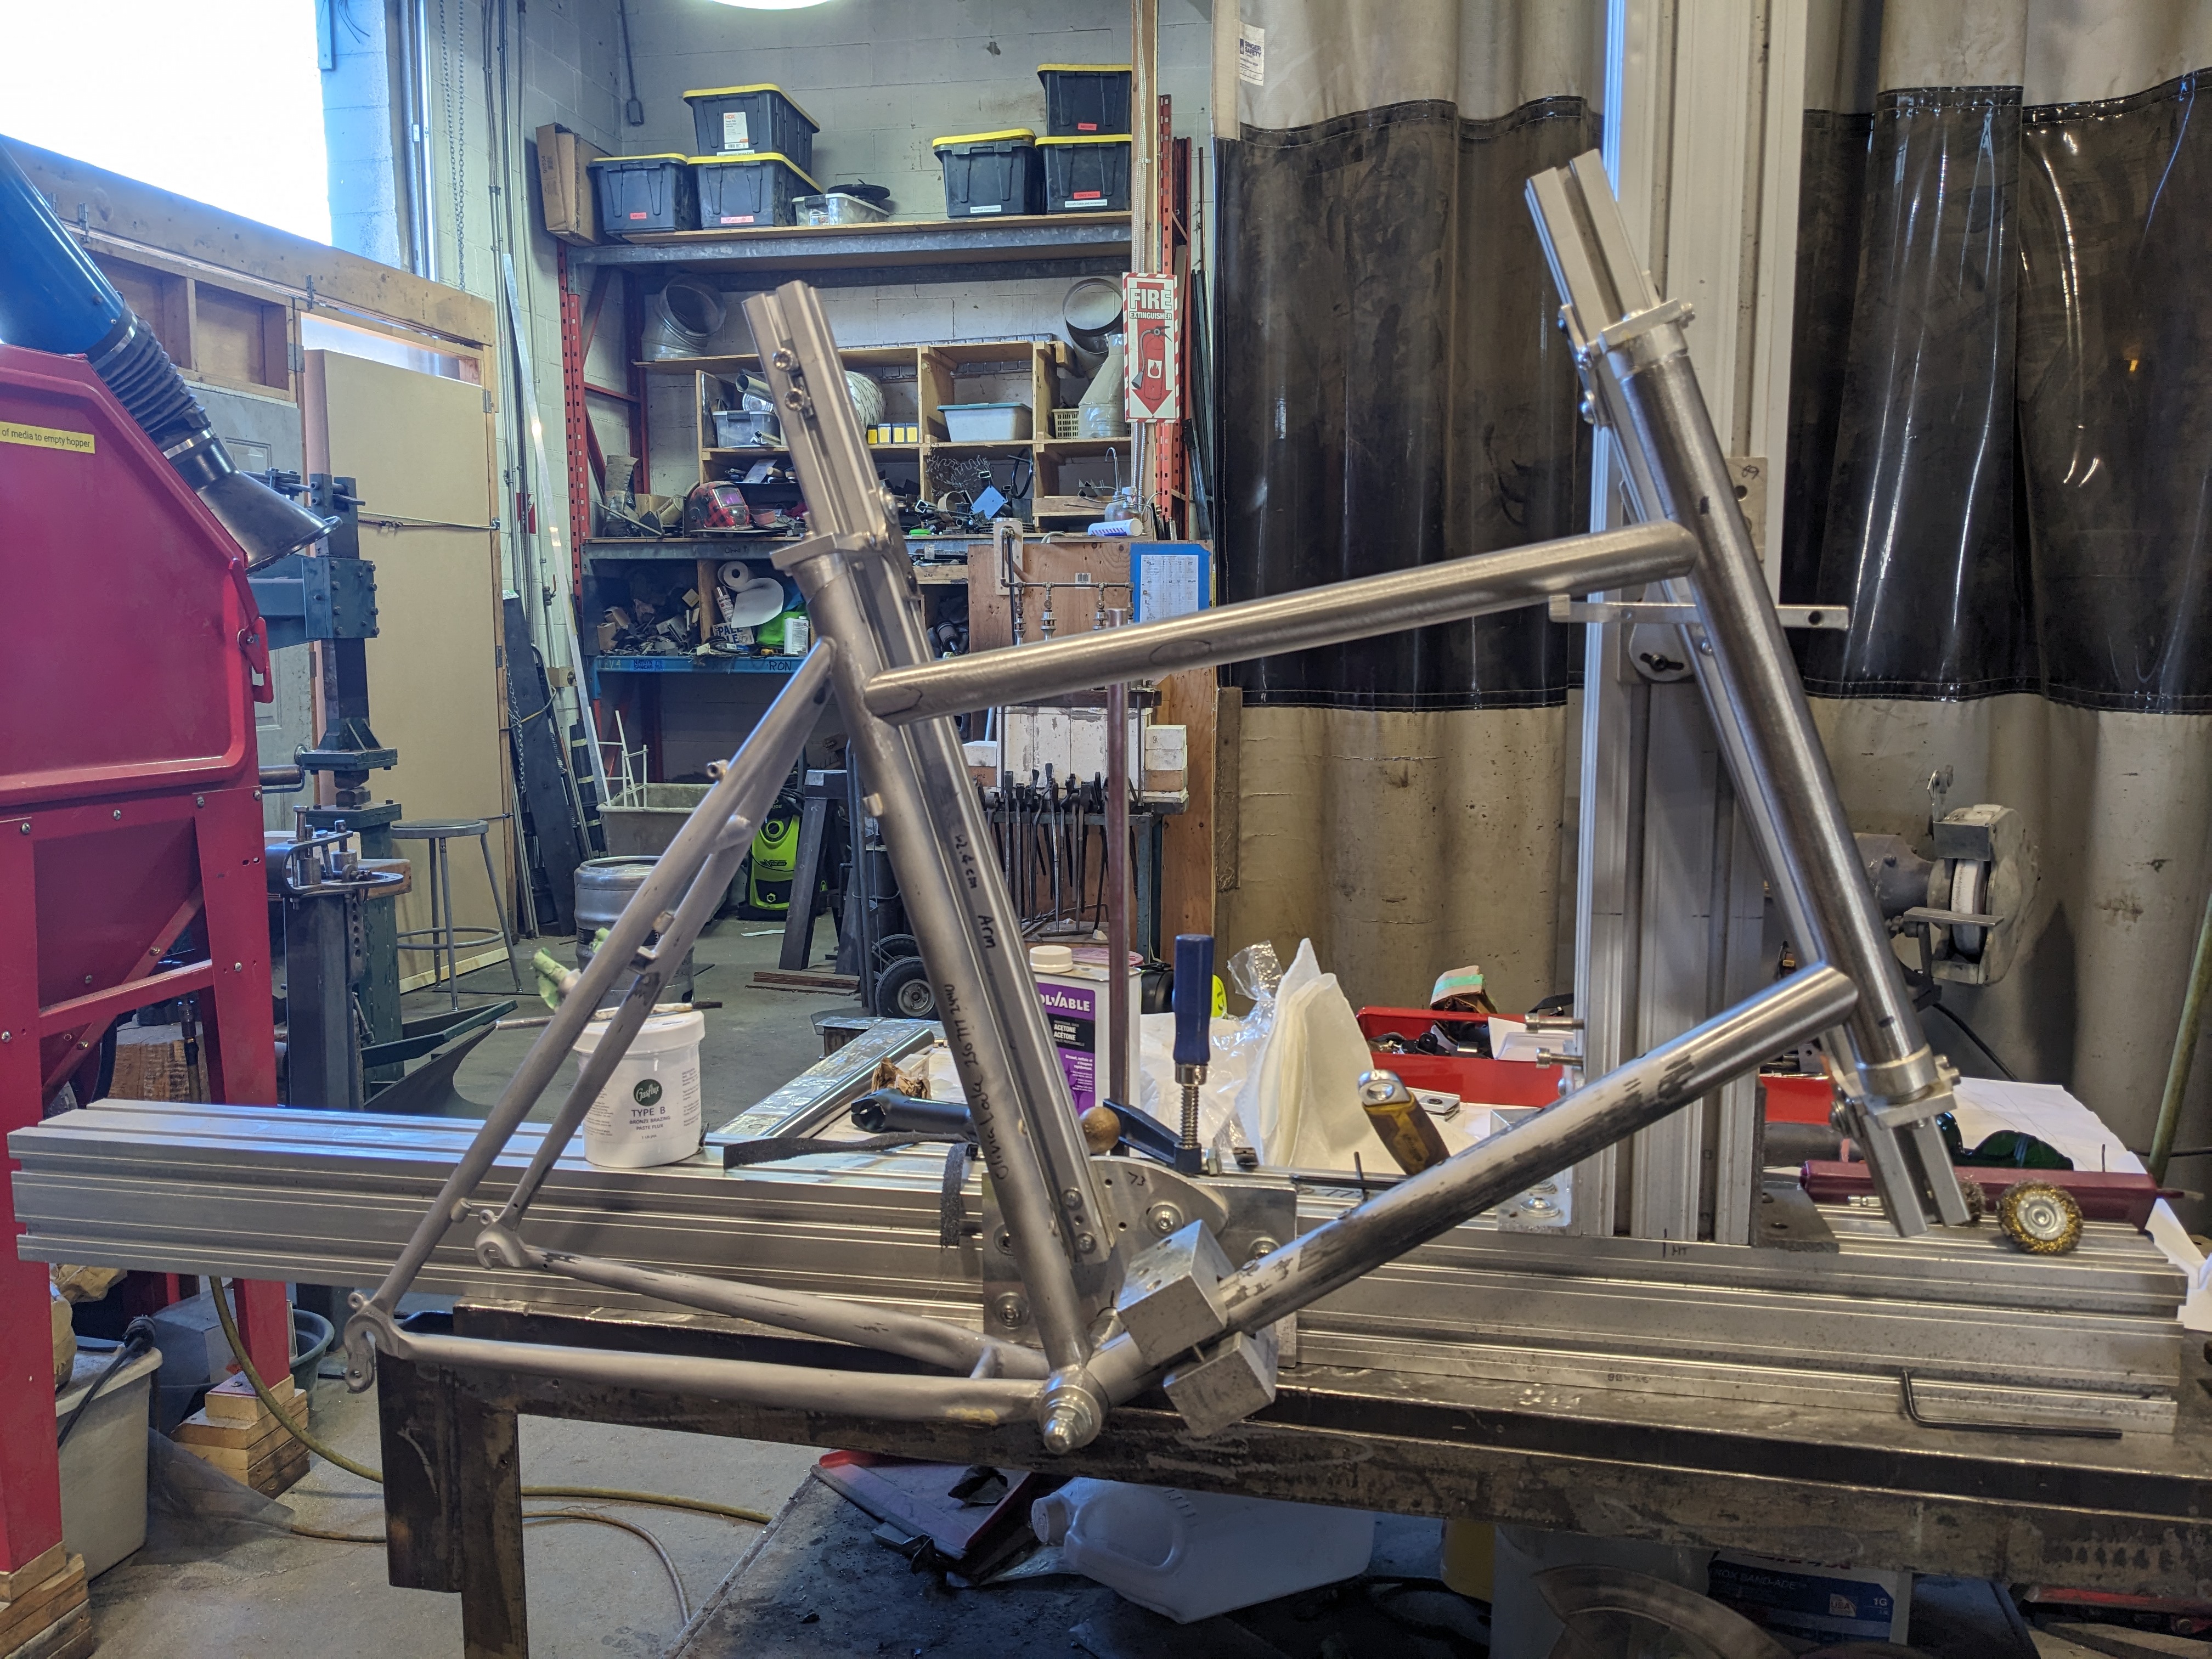
Heres the frame fit up in my fixture. I plan to assemble the regular frame first and then add the support bars.
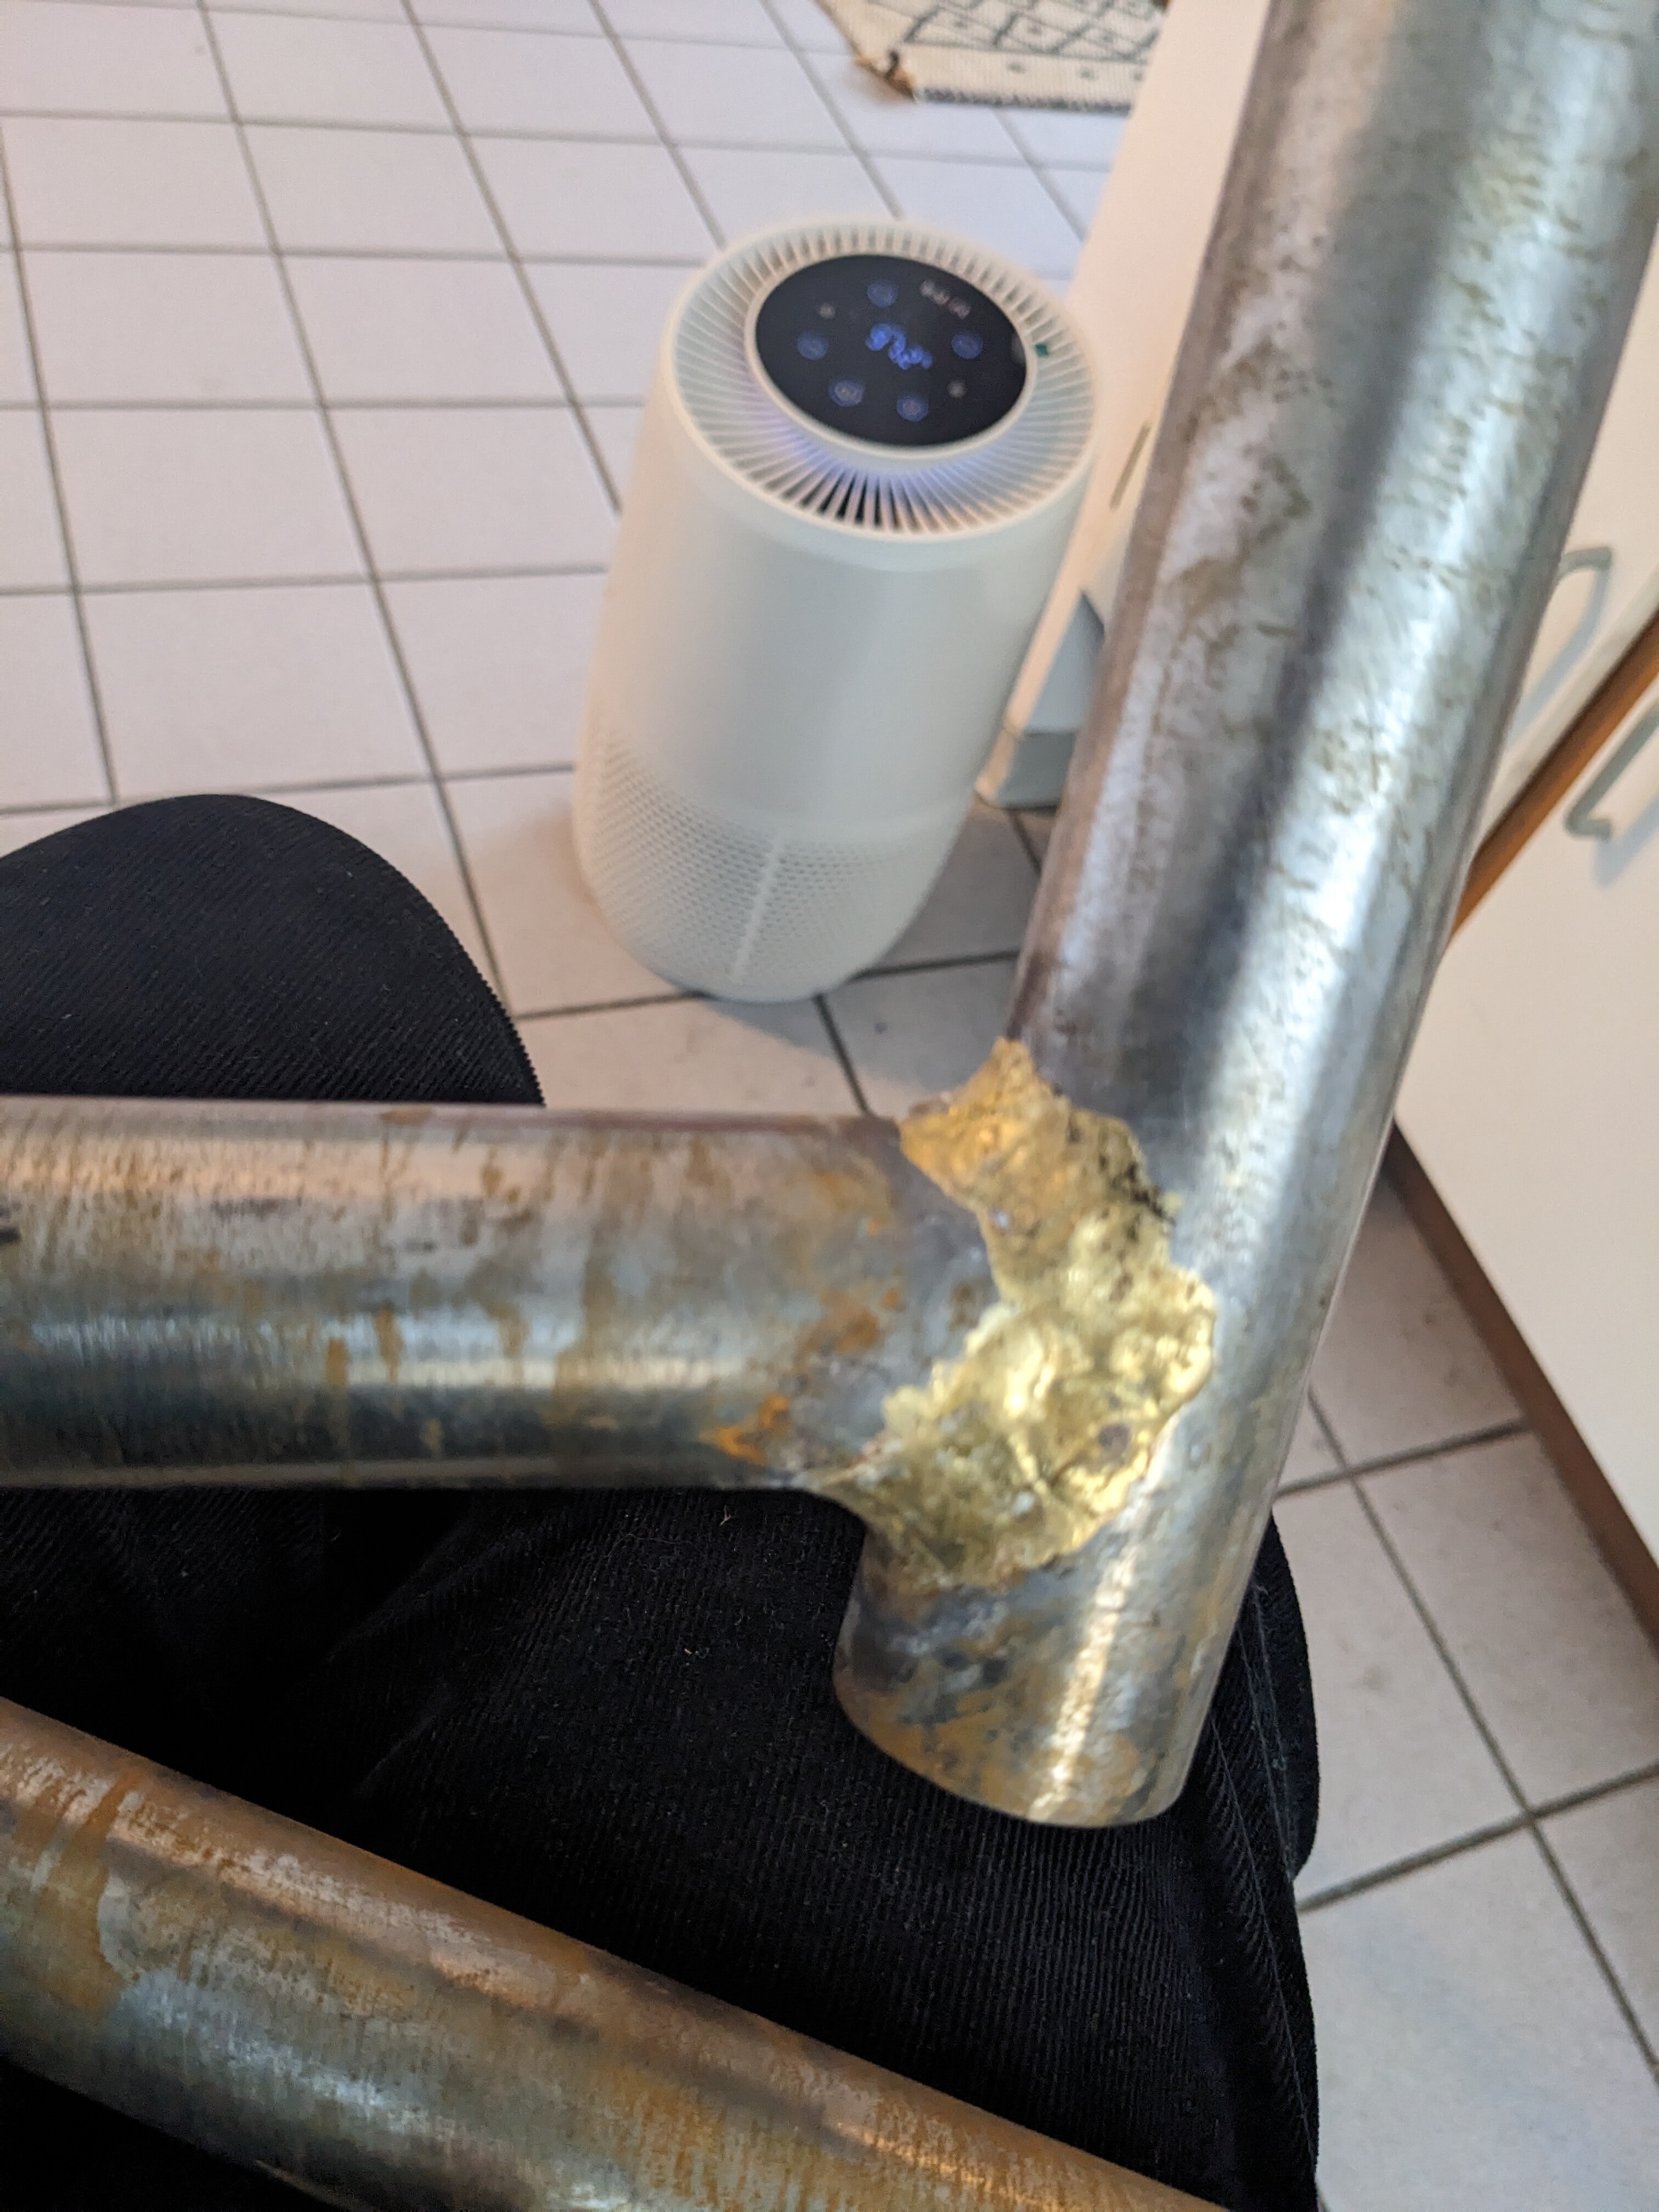
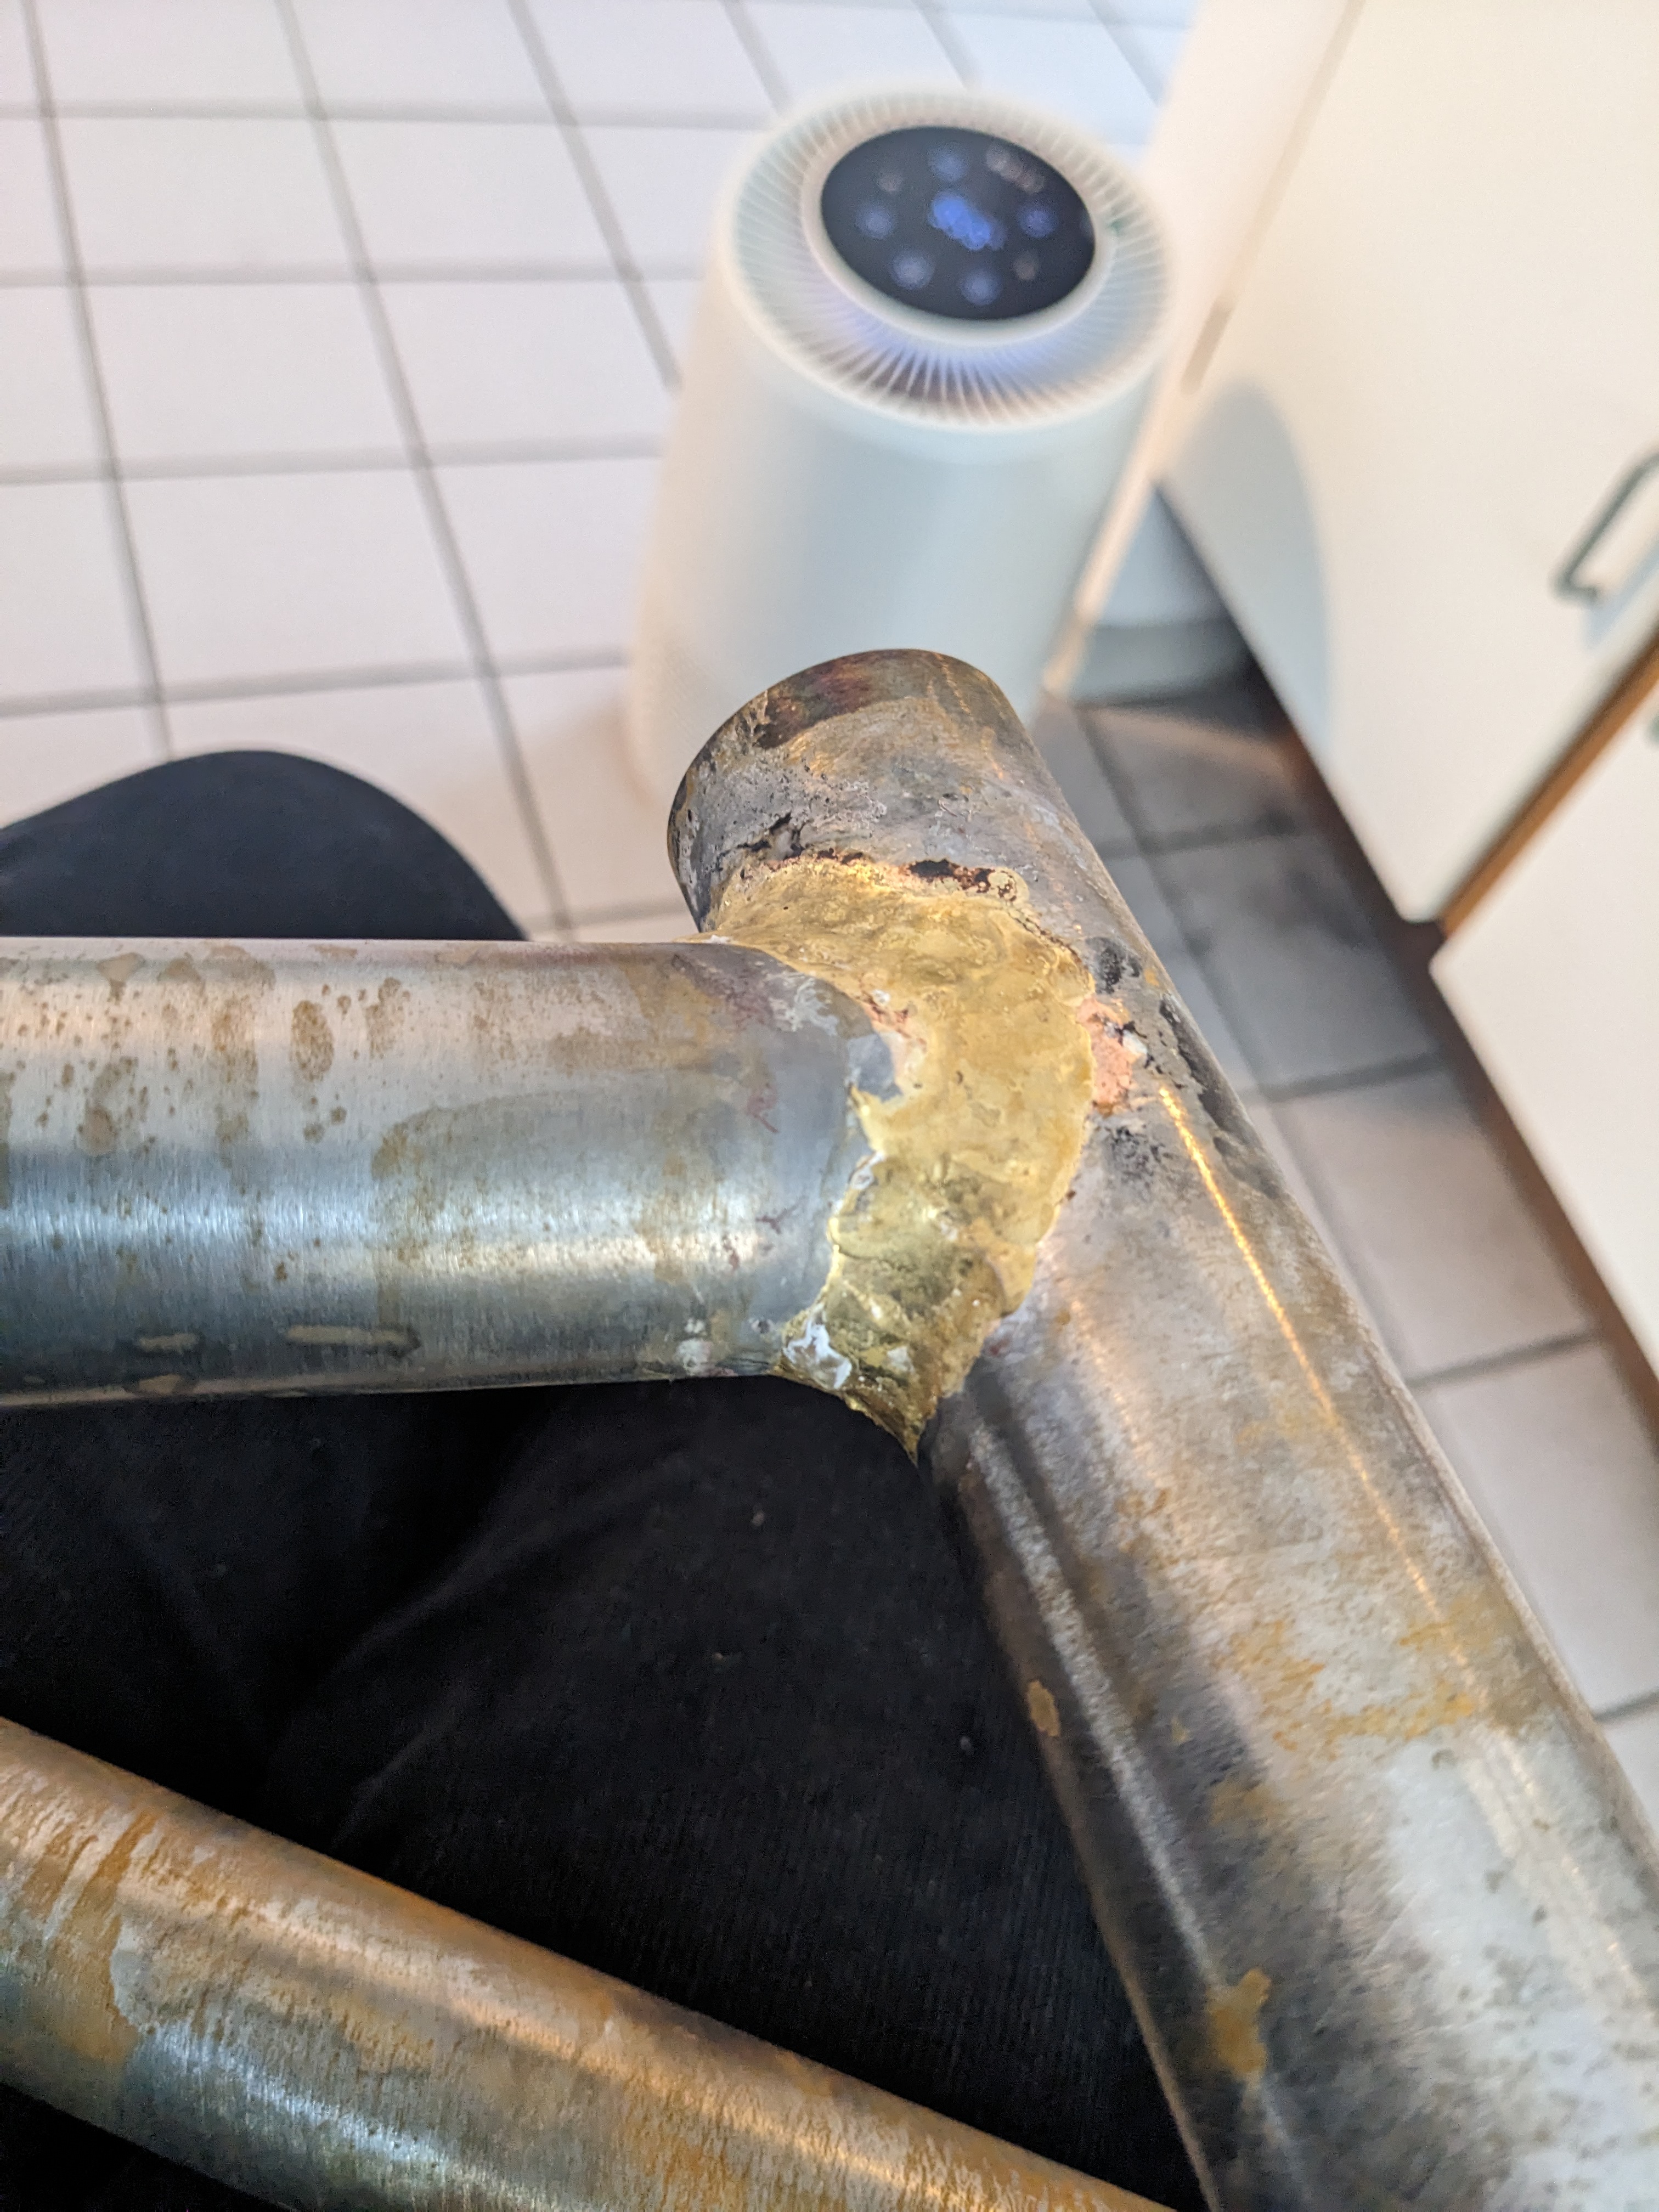
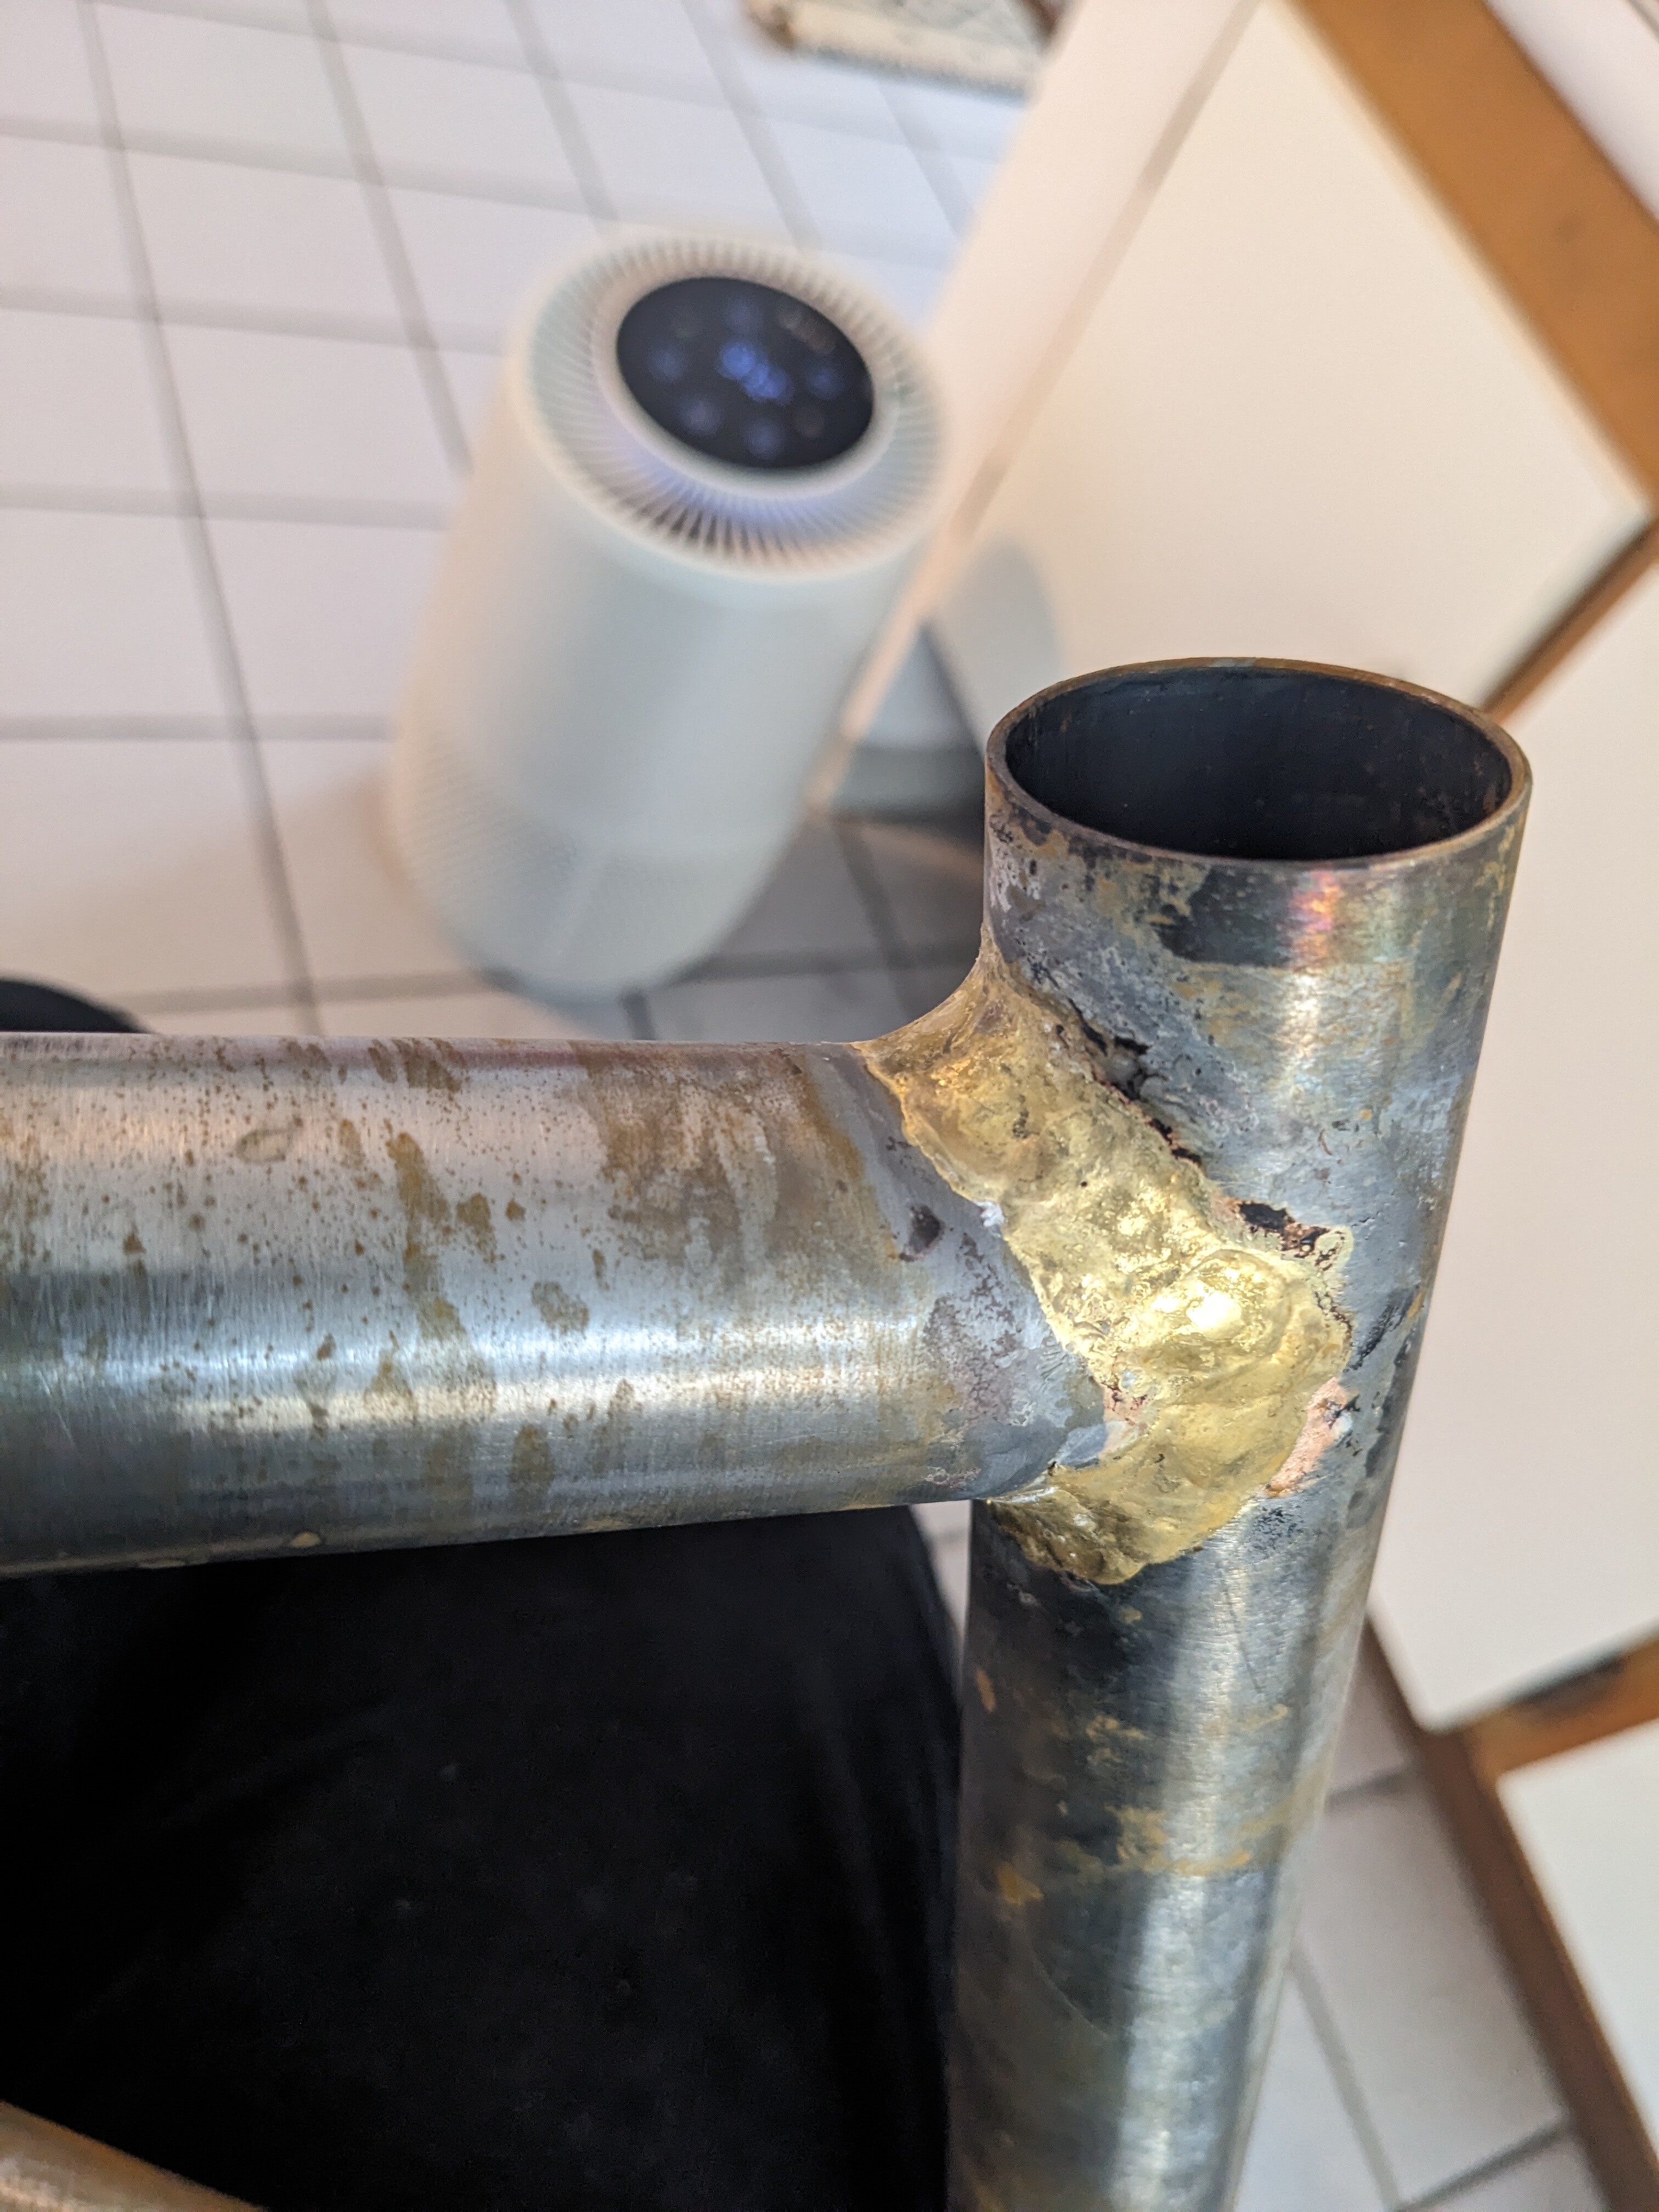
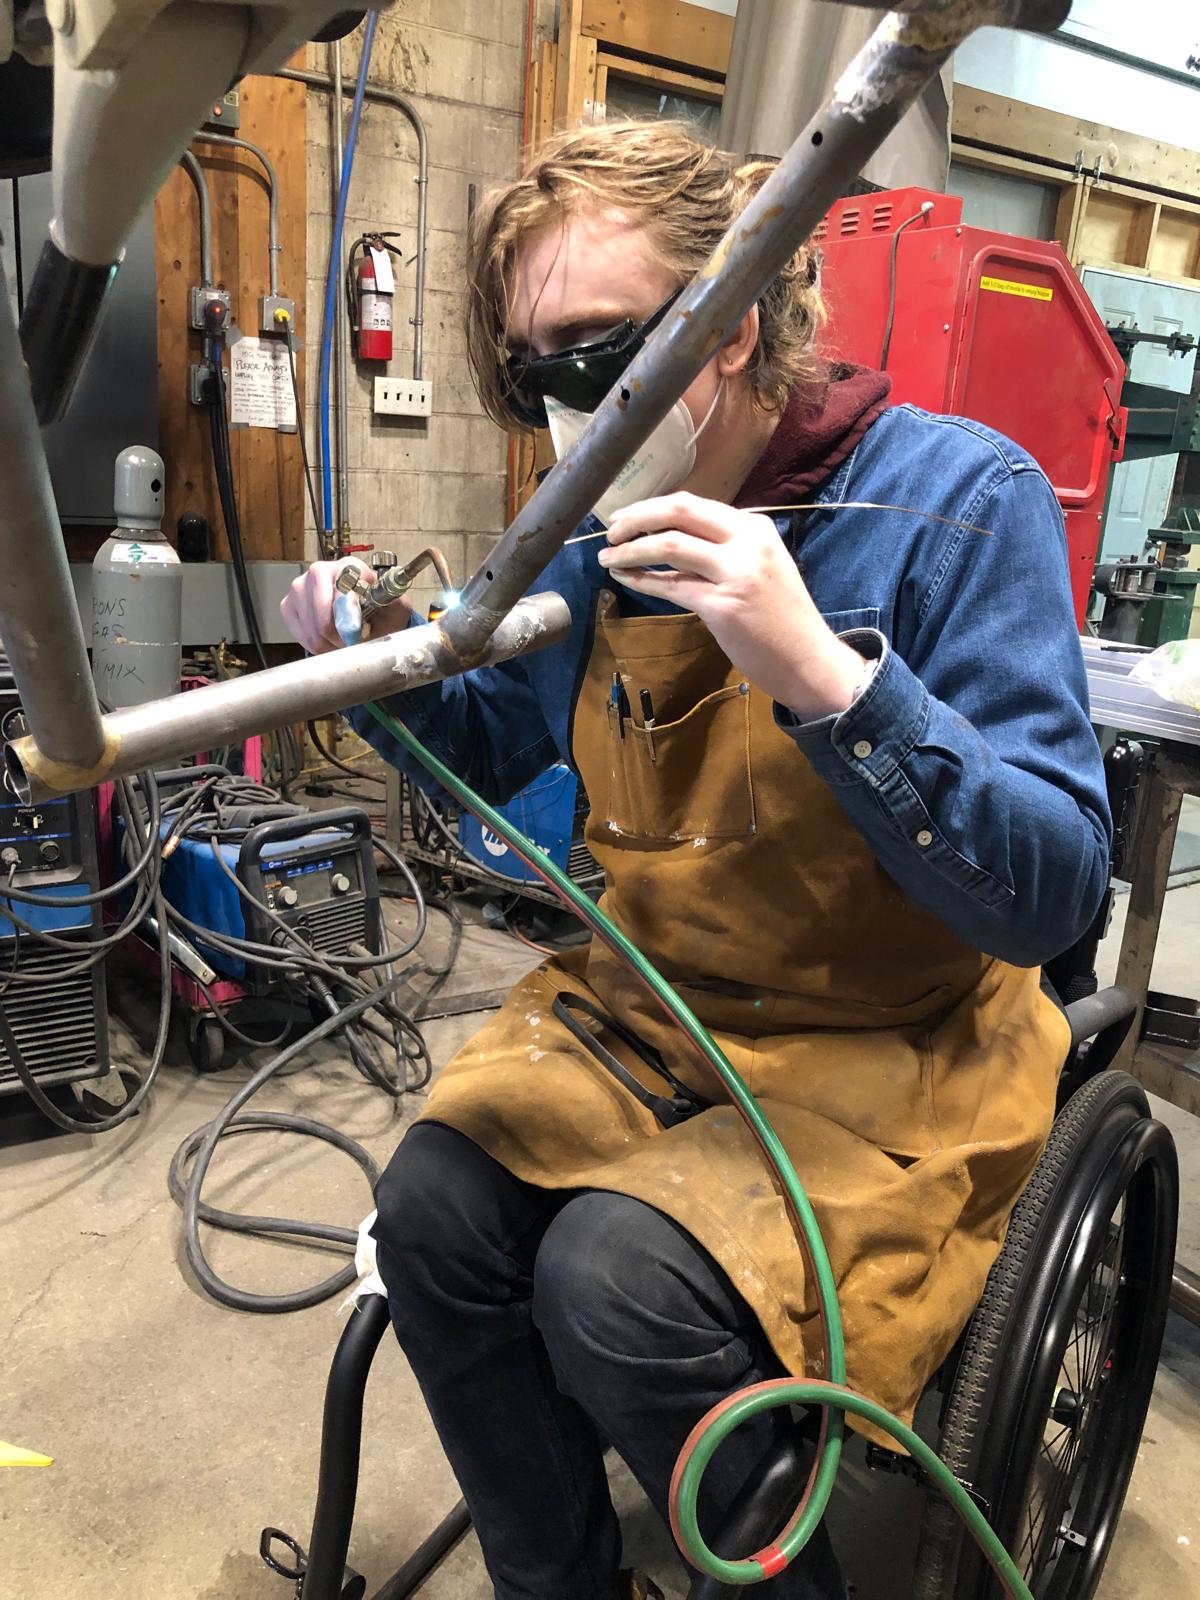
This is my first fillet brazed frame, I’ve built a couple stems and done lots of practice joints but any feedback would be appreciated! I’ve brazed the first join of the bike, downtube to headtube and included a few pictures. I will say, I haven’t brazed very much since I started using a wheelchair, its a lot harder to get a good position on the tube! I’m planning to file the fillets smooth.
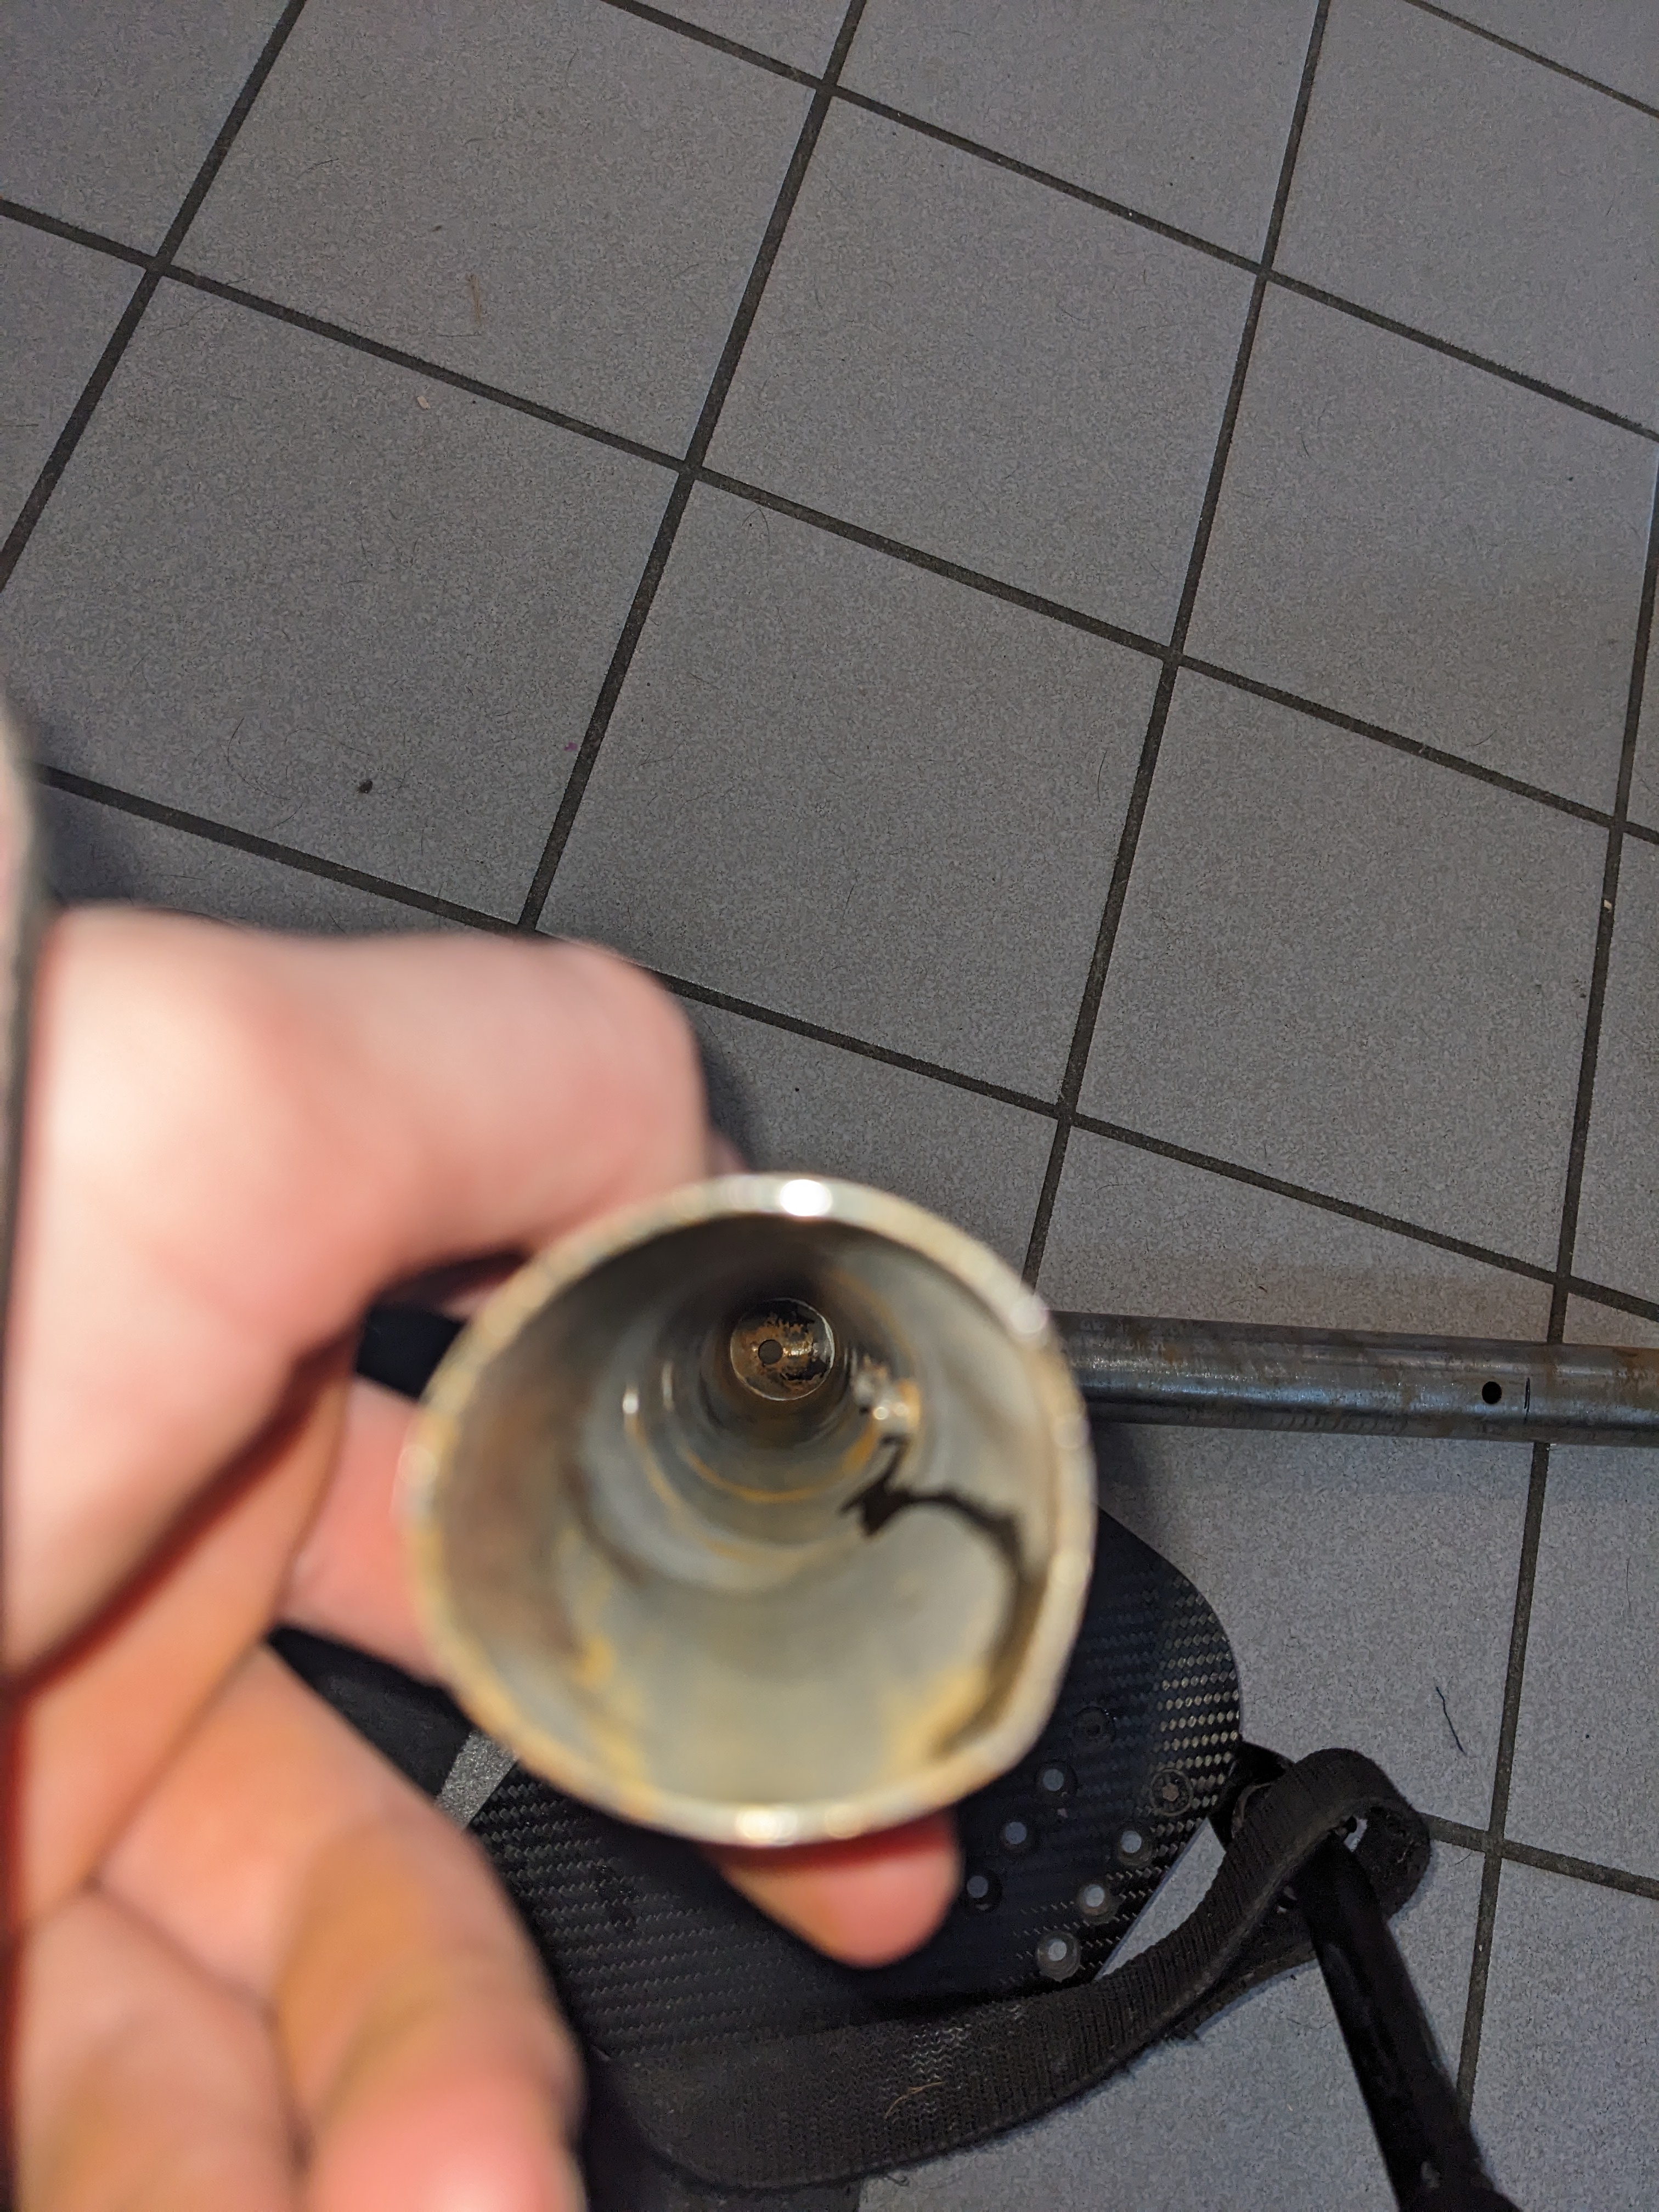
Yes! I’ve checked the butt lengths and have at about 1.5" of butt on each end (a little less at the seat tube, a little more at the headtube). Luckily they were pretty long butts
Interesting, they do look similar to the top tube. That could be a good option, a bit more expensive though. (tubing prices are so strange…) 1"x 49 or 65 are considerably cheaper than other options.
My reasoning against larger tubing was also to do with fitting it all against the seat tube which is also 1-1/8". It’s already going to require quite a bit of a squish.
Ahearne’s cycle truck defenitly appears to use narrower tubes.
Thats a cool design, thanks for sharing.
I want to have the full length tubes to hold the load quite ridgidly, it’s defenitly going to be loaded pretty heavily with our dog on it.
The front wheel will be a bmx sized 20"
Maybe reach out to @Woofcustommetal. I’m pretty sure I have seen cycle trucks in that style on his instagram and he also has experience with repurposing frames.
I guess the length of the tube behind the pivot point at the head tube doesn’t increase the strength a lot. Another guess: the tube diameter in front of the pivot point (cantilevered section) is most important as long as the length of the tube behind the pivot point is long enough (guess it doesn’t have to be long).
Great suggestion, he has some really cool cargo bikes! I actually did ask him on IG a little while back. Unfortunately he couldn’t remember what tubing he had used. He thought maybe 7/8" and that it was too skinny/flexy
The section right at the headtube is the highest stress. This is where all of the bending moment is acting. As you move forward the bending moment decreases linearly to zero at the end of tube. I guess ideally this would be done with a centrally butted tube with a thick wall at the headtube and thinner walls at each end.
You’re correct that the rearward end of the tubing is less important, but I’d be wary of introducing a stress concentration at this point with any attempt to use multiple sizes of tubing
I didn’t want to suggest to use different tubing sizes. I was just trying to say that the length behind the head tube rearwards probably doesn’t help much for rack strength. But making this tube all across the front triangle may have other benefits like making the front triangle stiffer and thus helping to avoid shimmy.
We externally butted the boom tube on my friend’s bike when he accidentally bought 075 instead of 058. We did exactly what you suggest of keeping it thick at the headtube.
The pierced boom tube is a little work to miter but I think it’s got to be stiffer than two smaller tubes. I mitered them on my lathe for both bikes. It’s also handy that it is basically self jigging.
If you attach the boom tubes to the downtube make sure that there is either a big gusset or a non-butted downtube. I don’t like putting that kind of load at the center of a long tube like that.
Interesting, thanks for the response! I hadn’t considered that the seat tube would get much loading. Since it has a separate top tube I don’t think the cargo tubes would cause the buckling forces that you can see on a step through and the double cargo bars I think would be pretty sturdy from a side to side perspective.
The seat tube is externally butted, above the point that the cargo tubes will attach which means the tube is fairly thin where they are attaching but not ultralight, maybe 0.8 or 0.9.
Externally butting the support tubes is an interesting idea, if I went with the thicker wall I could definitely turn down the ends of the tube to save some weight. I had previously only considered sleeving the tube to add thickness, not turning it down to remove it.
How long did you leave the butts when you did this? I guess you’d want to leave a pretty gentle taper between thick and thin?
Did you worry about work hardening when you did this?
Sorry, my concern is around designs like this that put a load at the center of the downtube. The DT is already stressed enough, it doesn’t need a point load halfway down:
I don’t have a lot of concern about the more common designs that put a boom tube through the head tube and to the seat tube, that’s probably putting 80% of the stress at the head tube and not much at the seat tube. I did gusset the ones that I built just to be careful though.
I didn’t worry about work hardening the 4130.
This is the one where we turned down the ID, mostly because my friend bought way too heavy of a tube. It is turned down between the seat tube and head tube. We ramped the ends of the butting and smoothed them with emory cloth:
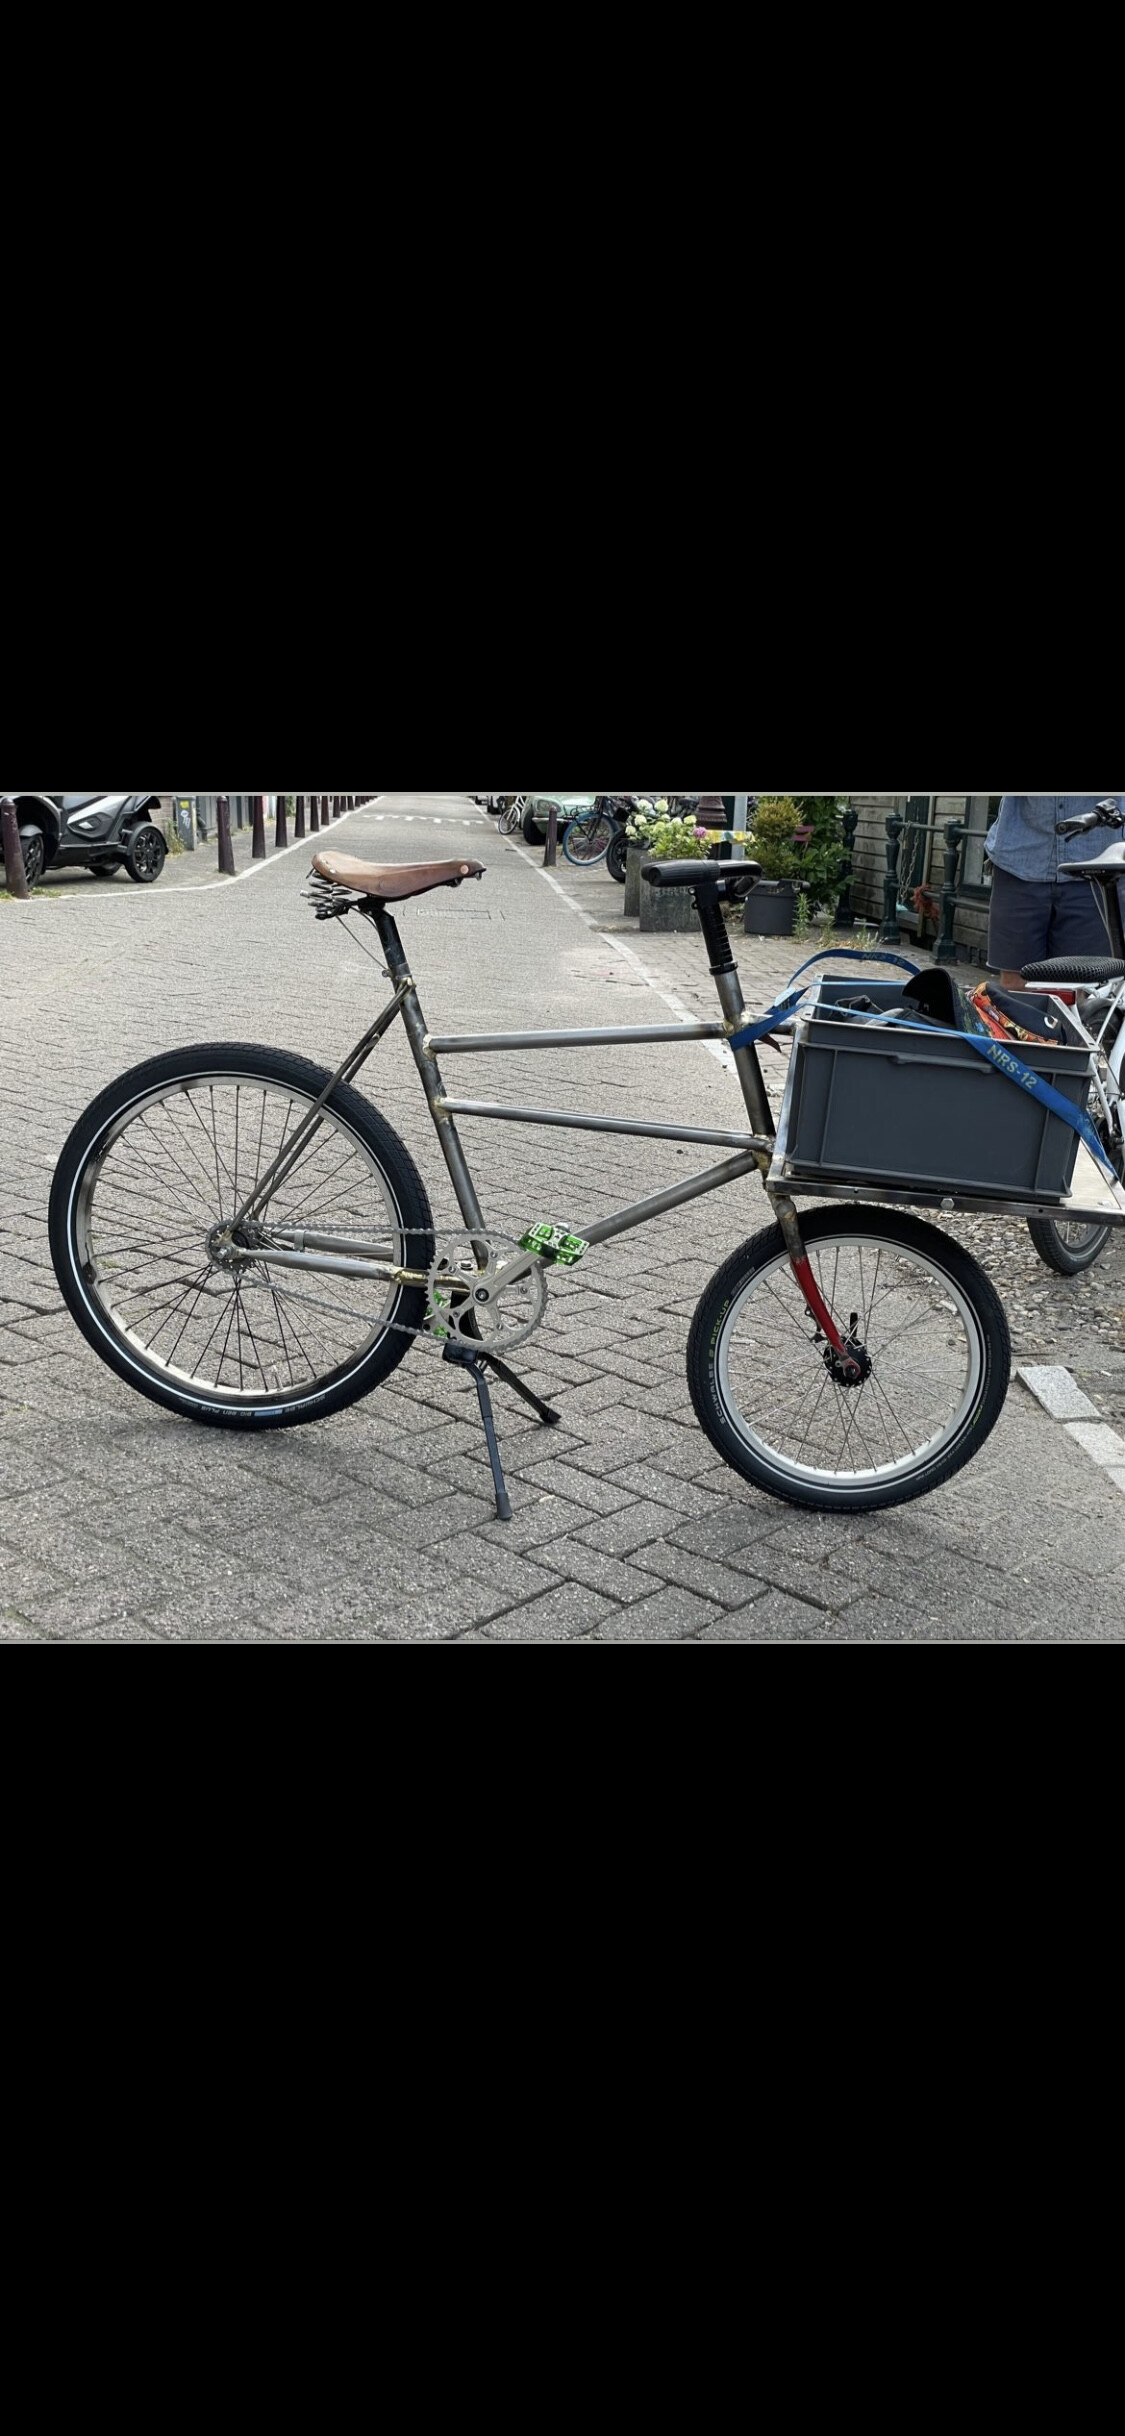
This bike is now a long-tail cycle-truck, with only the original seat and top tubes remaining. You can sort of see it in this photo (it’s the blue one):
Honestly I’m not totally sure that I’d take the time to butt the boom tubes. It’s a lot of work to save a little weight, and it’s hard to prove that you did it in a uniform way. We did it on this bike because the wrong tubing was purchased.
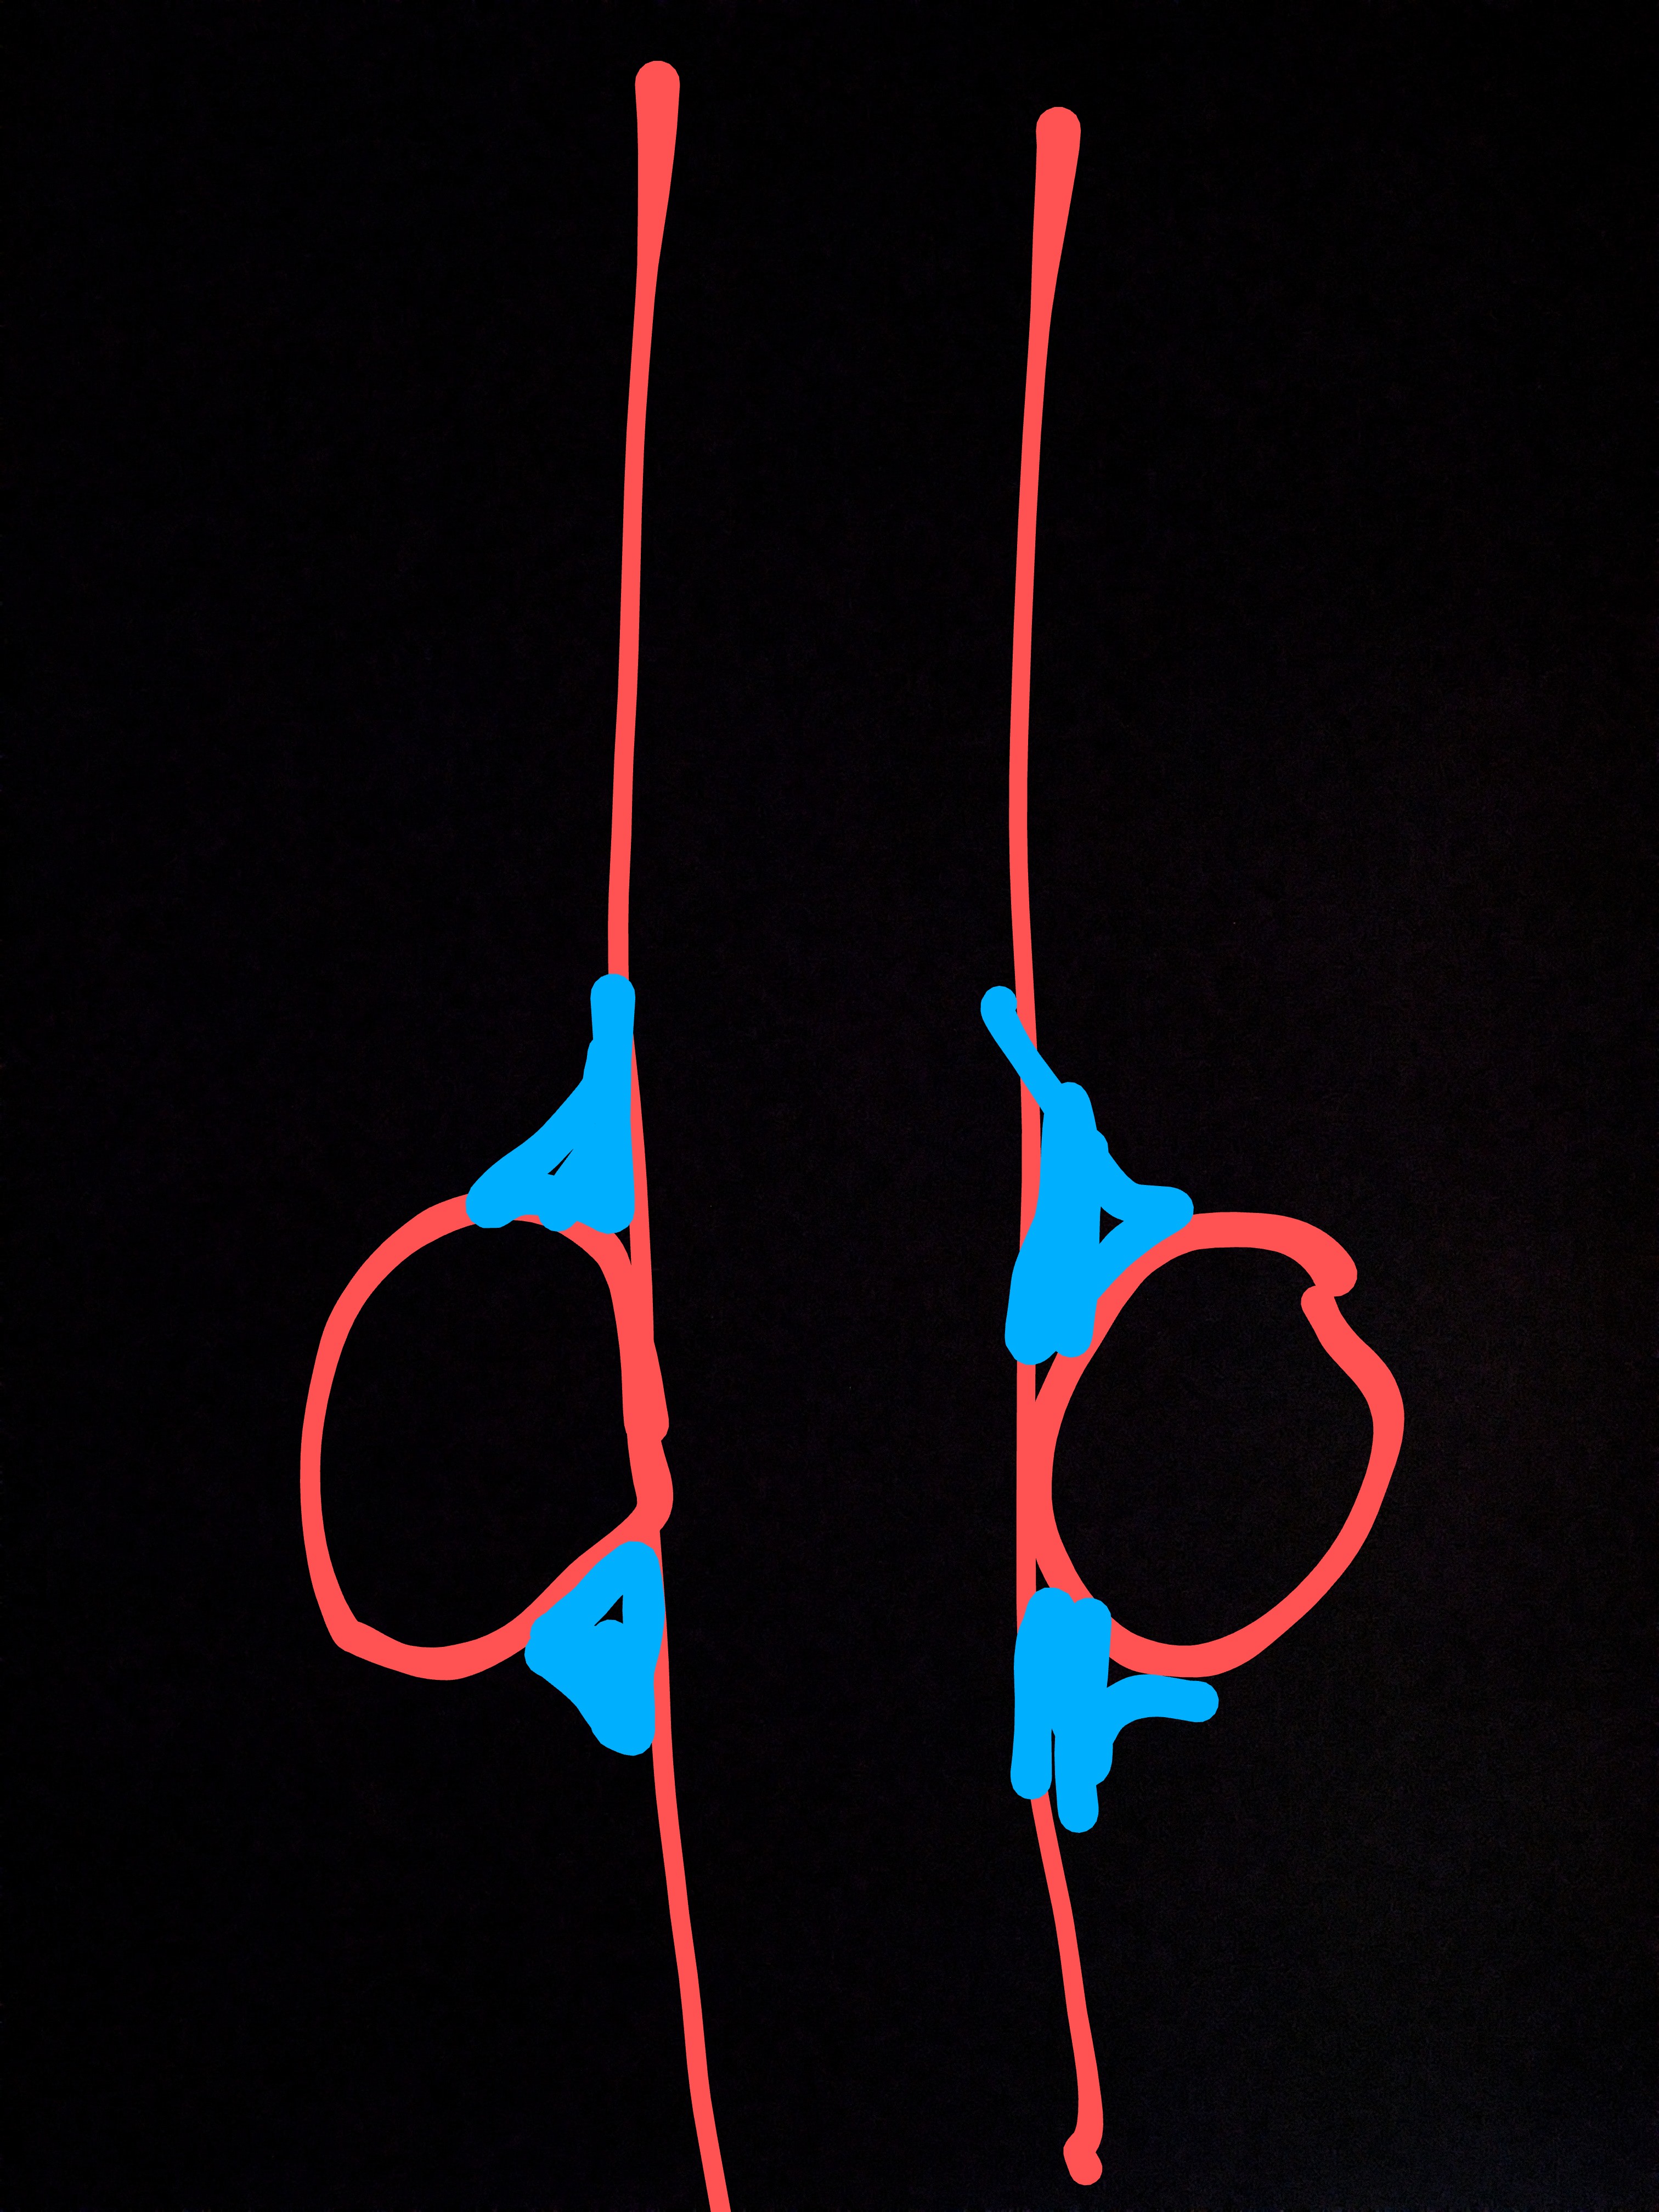
I’m looking for advice relating to the cargo tube / head tube junction.
My current plan is to have the two cargo tubes rest against the head tube and build up a big brass fillet around this. I figure this should be okay, it’s similar to how seat stays are done on lugged bikes.
Front view of head tube, fillet is blue (sorry for the poor quality drawings done on my phone)
Seat stays seem to be attached well enough without a mechanical interface and they are usually only attached with silver…
I do worry though that the joint is only supported by the fillet, there’s no miter to mechanically interface the cargo tubes to the head tube.
I have thought about doing a very shallow miter on the side of the head tube, probably barely going through the head tube wall. This would give a bit more surface area
The geometry of this joint is similar to a stem. With the head tube here being the steerer clamp on a stem and the cargo tube being the handlebar clamp on a stem.
I’ve never seen a short reach stem made without an extension tube. Is this something that people do? Would it be strong enough?
I’m sure I’m over thinking this but any advice or experience would be welcome.
Thanks!
Thanks, that’s a lovely bike!
I was worried about compromising the strength of the cargo tubes right at the point where they are under the most stress. I didn’t want to reduce their cross sectional area or create a stress concentration. We’re planning to put our 50lb dog in the front so it’s quite a large load.
It looks like you used pretty narrow tubes, do you know what diameter and wall thickness they are? How much weight do you reckon yours can carry?
Might have been 18mm, don’t remember exactly.
Doesn’t the same reasoning apply her as at the flatmount bosses at the chainstays?
To be honest I never thought about loosing strength at that point. Learned something tonight, thanks
I think it’s different, chainstays aren’t under the same sort of torsion and the thickness to diameter ratio is much higher. these tubes are experiencing a bending stress that is at its highest right at the headtube, the stress basically increases linearly up to the headtube from each side.
It’s kind of like when you bend an eraser and it’s fine but if you score a tiny little line then it will split really easily at that point. That’s the same effect that I worry the miter in the cargo tube could cause. Maybe the fillet would provide enough strength that it wouldn’t be an issue, I’m not sure. I’m sure that it’s possible to calculate it but I don’t know how
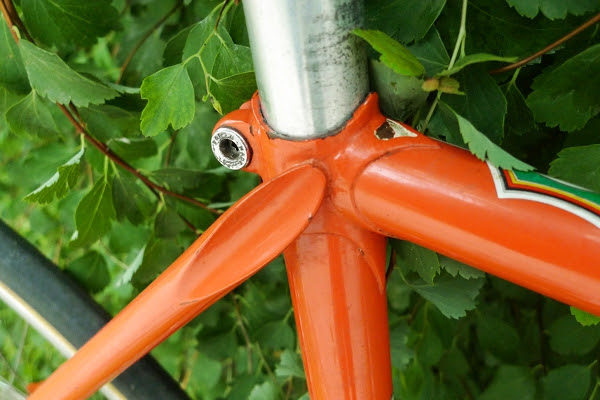
I got to try flame straightening which is very cool! I clamped the headtube in my frame fixture to limit heat expansion and then used the torch to heat the front of the headtube opposite the HT/TT joint. The heat causes the tubing to expand, but it can’t expand lengthwise because of the clamp, it still contracts lengthwise however as it cools which pulls the tube back in line. It pulled back to nearly straight, within .5mm for sure which is cool!
Any thoughts on why it warped so badly? I know the flux is a little dark around the edges but I don’t think I burned it. Is it just too hot? Maybe just too long with the heat? Or too big of a fillet? That one seems unlikely