1 Like
My friend popped round in his lunch break. We ‘oohed and aahed’ over the bike for a while, talked about how colour choice is even more important than geometry, and then he took it out for a short ride up and down the road. He reckons I’ve captured the essence of the 90s mountain bike ride feel I was looking for - it responded well to acceleration with no feeling of wasted effort and had that springy steel ‘feel’ which we both like. He also really liked the feel of the fit and geo, saying it felt stable and planted, but eager to go faster. He doesn’t have any experience of riding modern long/low/slack bikes so it was interesting to hear his thoughts. It looks like I’ve hit all the things I was hoping for, and at 28lb, it should be a fun bike to ride (until it snaps and I end up in hospital, of course ![]() ).
).
After he left, I took it out a little further and tried riding up and down a few small obstacles. I did notice some flexibility in the front end at this point although I couldn’t tell if it had a negative effect on handling or if any uncertainty was a result of the long wheelbase and lack of (functioning) dropper post. Having spotted it, I spent some time pushing and pulling at the bars some more. It’s most noticeable when seated but I don’t know what effect it’s going to have on handling when descending out of the saddle. I think that’s the only area where excessive flex will cause me real headaches.
Anyway, I’m going ahead with paint and look forward to riding this a lot more. I’ve got a month or two before I’ll be ready to start on the next build so I’ll make a decision by then on whether I proceed with the gravel/adventure bike as planned or whether I bring the re-build of this one forward with larger diameter tubing. Time will tell!
1 Like
Nice seeing it all built up. The bike looks really proportional.
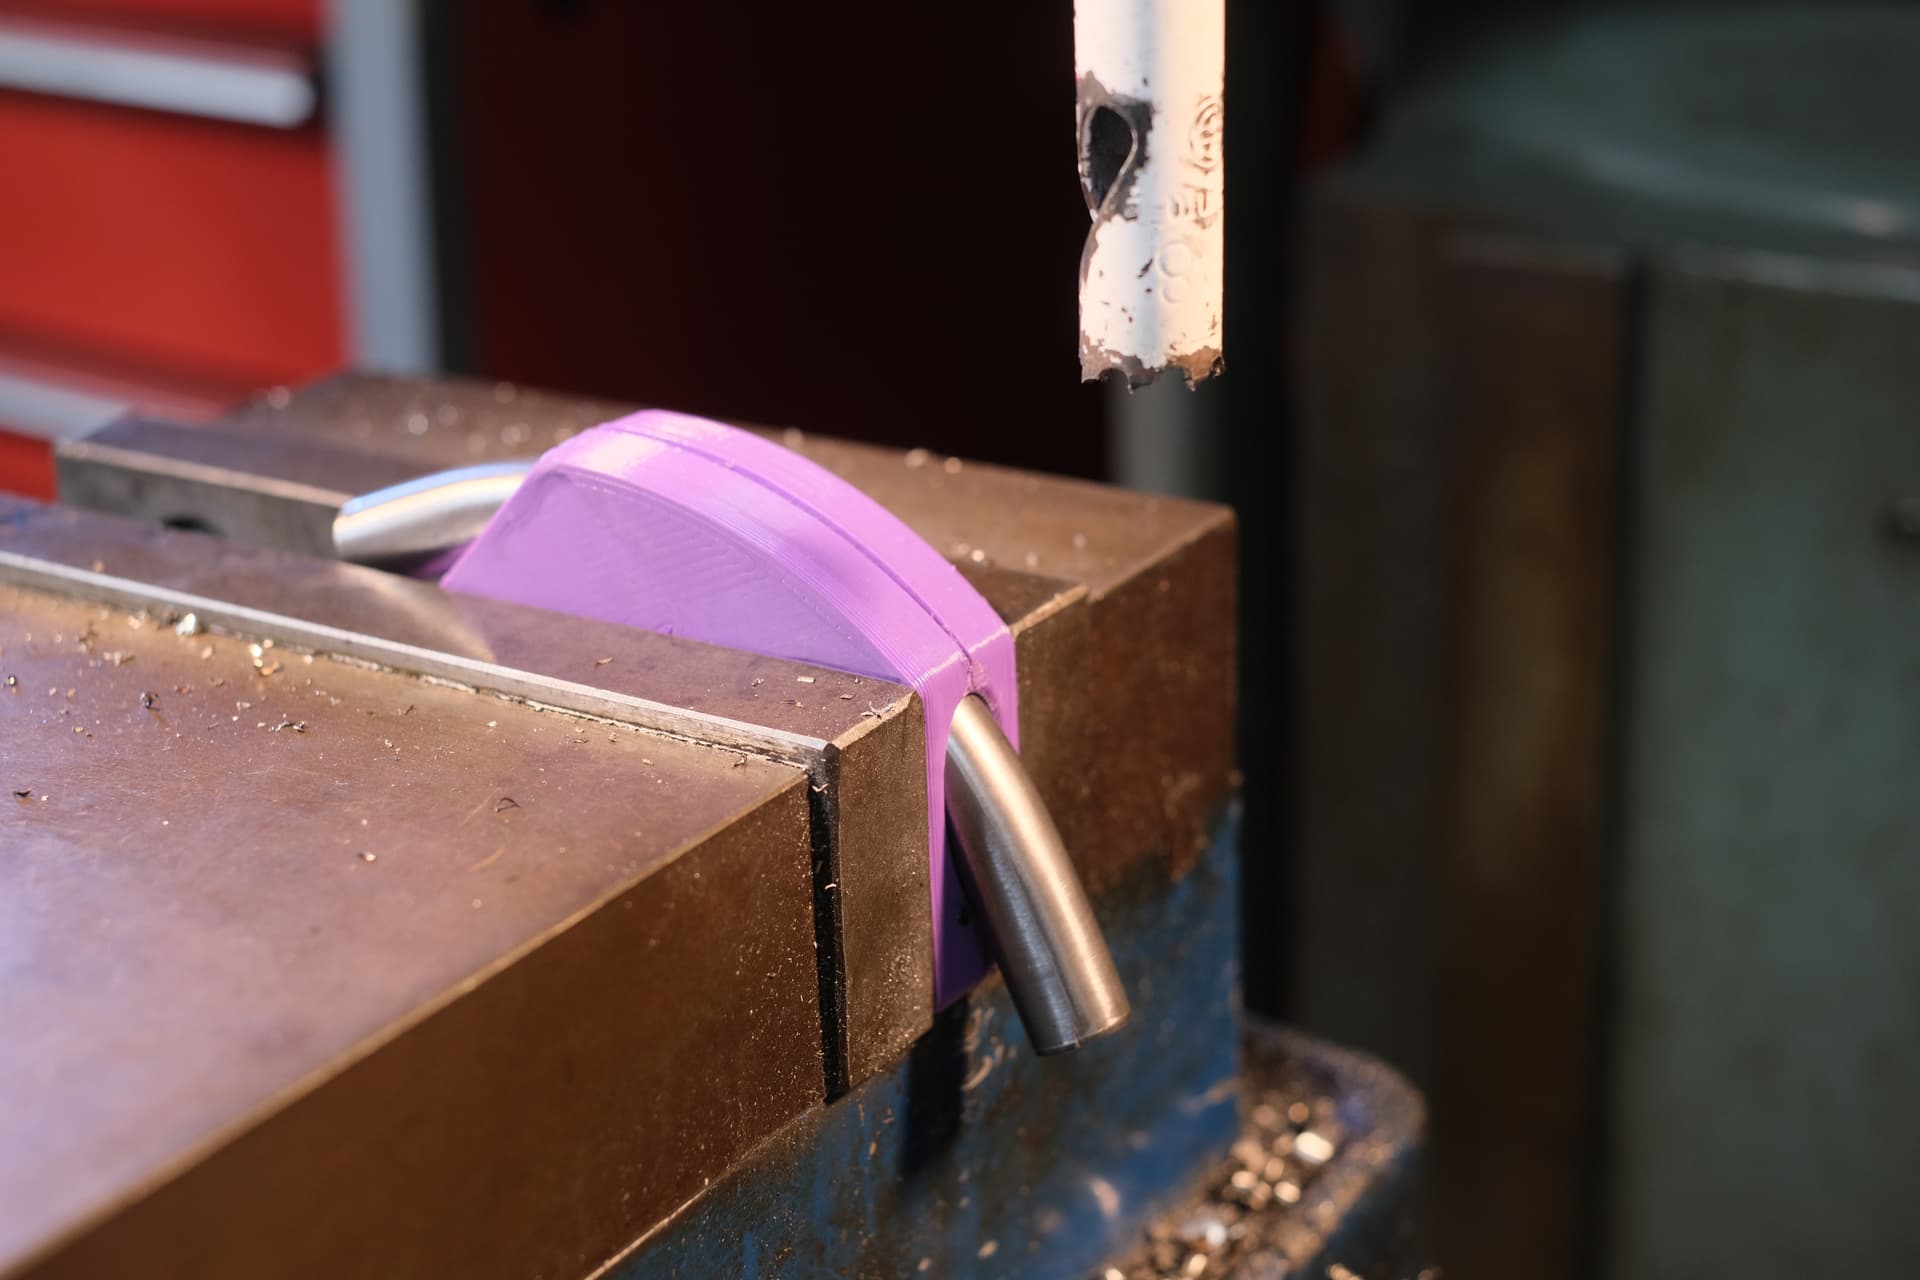
This is a small part, but notoriously difficult to fixture. It was nearly impossible without a 3D-printed die. If you have Fusion and a 3D printer, you could easily print the exact clamshell for your SS and CC miters.
this is a bit concerning. Did you ream the seat tube? Did the seatpost slip in very loosely? Or is the tube just too flexible?
Even though these 35mm seat tubes are heavy, I think they are the best choice for mountain bikes at the moment. Other seat tubes are either not strong enough or not short enough. It’s also nice to just use an off-the-shelf clamp. Brazing on sleeves or collars can distort the seat tube.
1 Like
That’s interesting. For some reason I was expecting the problem to be the thin wall tube distorting as the rivnut compressed but if it’s just providing extra throat depth for the rivnut then I understand why the washer doesn’t need to be shaped around the tube. Do you use washers with an OD to match the rivnut’s flange OD? And does that need drilling out at all to fit?
I see what you mean about the clamshell fixture. I’ll give it some more thought as to how it could work and may well try it out. That’ll be really useful if it works out.
On the dropper post knocking, the seat tube is reamed although as soon as I got past the ugly weld from filling a small burn-through, the reamer didn’t really do anything. I ordered the tube as a 30.9mm ID but it’s nominally 31.1mm according to the supplied drawings. The seatpost was a very loose fit - it’s not the tube flexing - and it’s pivoting around the seat clamp so what I need to do is either shim it for a couple of inches with some brass or aluminium stock, or put something on the end of the dropper to stop it flopping around. I suppose the other alternative is that the supplier accidentally sent me a 31.6 ID version of the tube and I just need to get the right sized reamer and swap the shim over from my old hardtail (31.6->30.9)!
Edit: I had to go out and check this just to be sure ![]() Turns out the tube measures 31.2mm ID (so a little generous) and the seatpost (Specialized Command Post) measures 30.7mm OD (I bought it used but there are no signs of wear or distortion - it measures 30.7mm consistently around the diameter even though it’s nominally a 30.9mm post). So I guess this might just be a case of both sides playing it safe and assuming the other side will build to spec?
Turns out the tube measures 31.2mm ID (so a little generous) and the seatpost (Specialized Command Post) measures 30.7mm OD (I bought it used but there are no signs of wear or distortion - it measures 30.7mm consistently around the diameter even though it’s nominally a 30.9mm post). So I guess this might just be a case of both sides playing it safe and assuming the other side will build to spec? ![]()
Looks like I have a few options for the seatpost in the next build so I’ll weigh them up and pick the one which I think is most suitable to my circumstances at the time. I bought a dummy axle from BFS recently and didn’t have any issues so happy to use him again, although shipping to the UK obviously bumps the price up a fair bit.
1 Like
2 Likes
Nice! I’m going to order some stainless rivnuts and have a play with some tubing scraps to see how I like them
1 Like
yikes, that definitely does not seem right. Do you have a link to the exact tube you use?
We have found PNW Seatposts to be .1mm undersized. This caused it to slip with Fairing 35mm seat tubes. No problems with Tange 35mm seat tubes. We solved the slipping issue with a 2 bolt clamp.
1 Like
1 Like
No link - it was from Ceeway so I emailed with the sizes I wanted and they replied with my choices.
In this case, I asked for “1x 30.9mm (internal) x 400mm (min) butted (for seat tube - will be running a long dropper)”. I was offered Columbus Zona ZON113550002, the invoice states “1x ZON113550002 SEAT TUBE EXT. BUTT 30.9ID” and the supplied drawing shows the ID is 31.1mm so I assumed this was the correct size for a 30.9 seat post with the appropriate clearance.
1 Like
ya… you are right, that seat tube is totally weird:
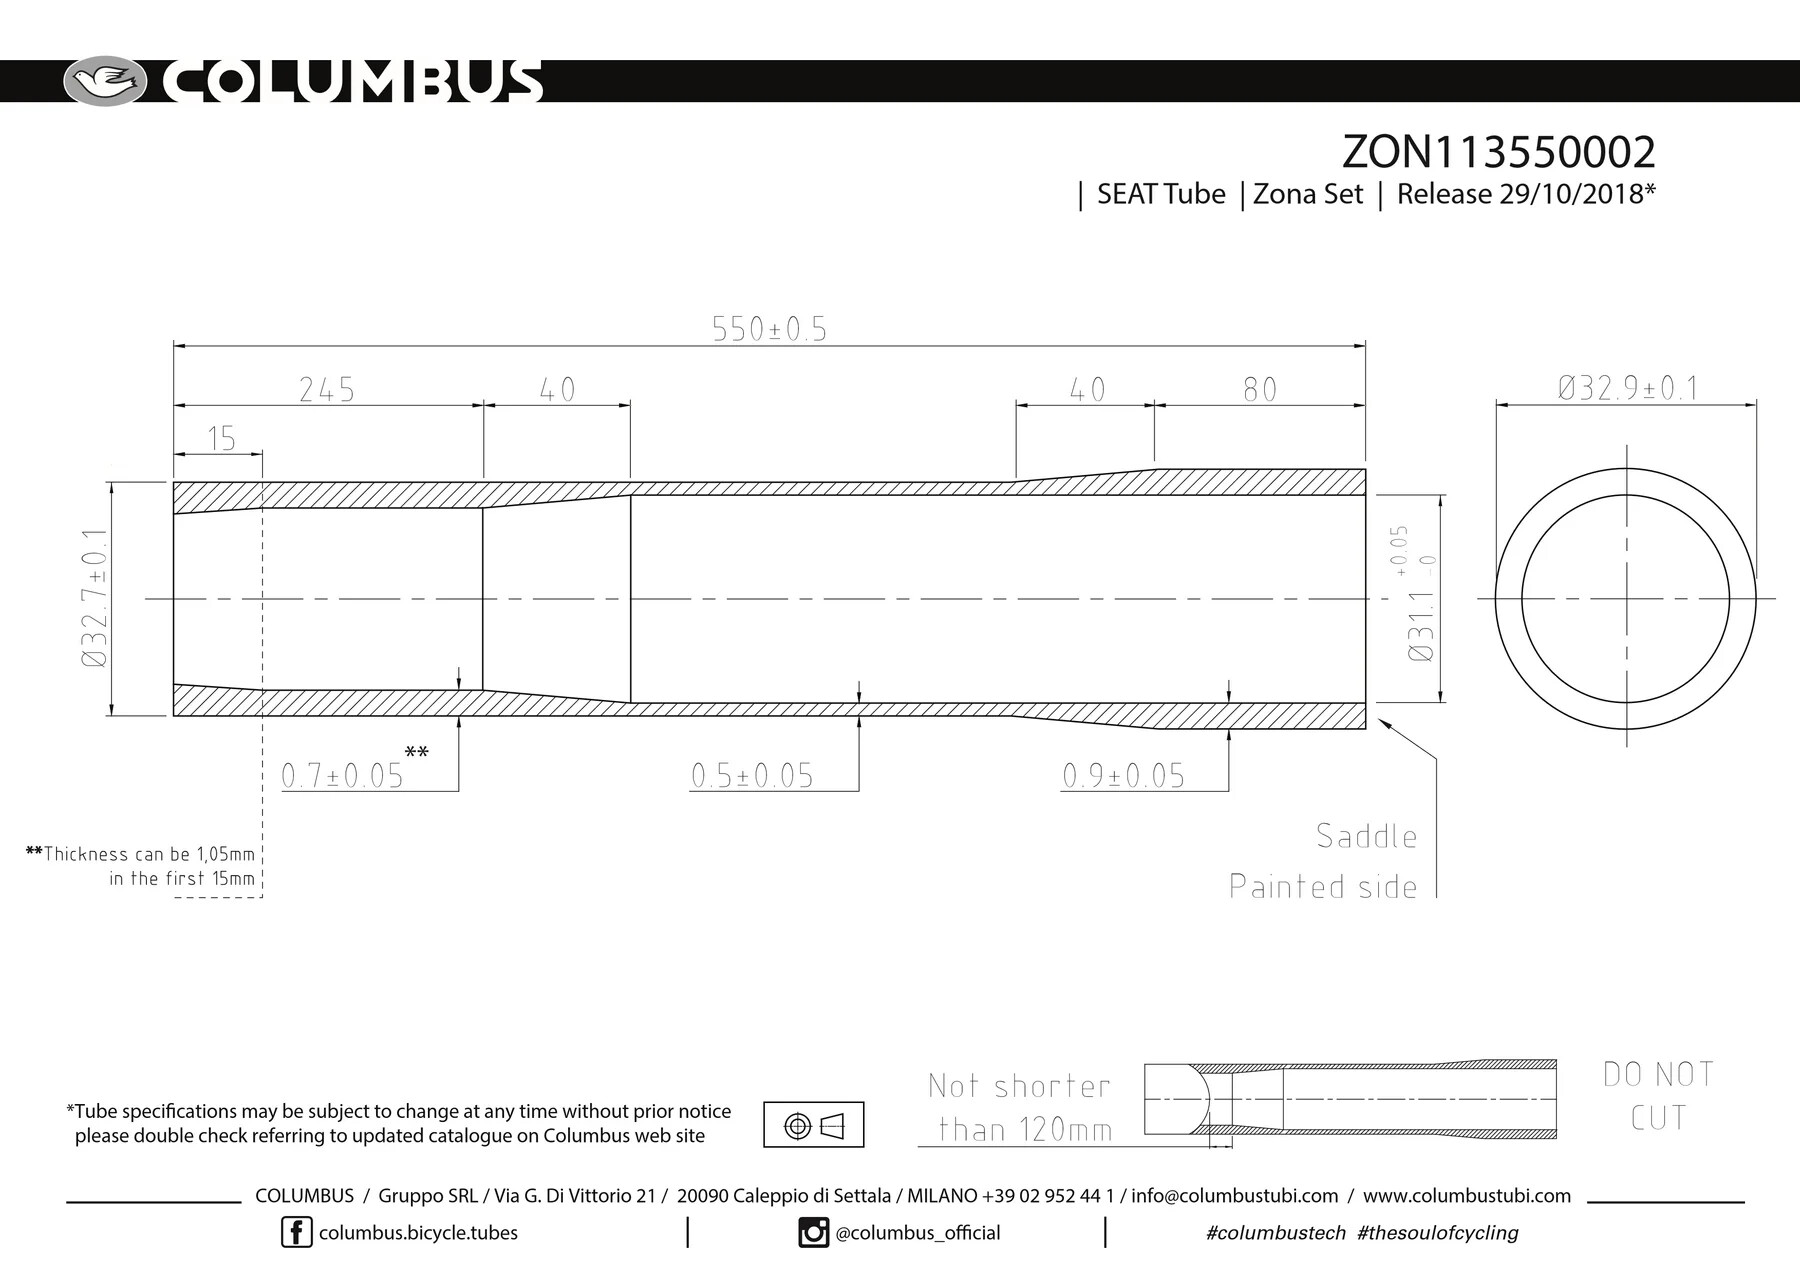
I have no idea what that would be used for… For reference, Columbus’ 31.6 seat tube is 31.7mm nominal, so I have no idea what that 31.1 dimension is.
This is totally up to you, but I would give Ceeway some feedback on that seat post. I have found that frame builders could do a better job of communicating with suppliers. I wouldn’t blame Ceeway, but I would let them know for future reference. They might also know something about this seat tube that we don’t.
2 Likes
I agree. I’ll avoid that tube in the future and will feed back to Ceeway about the issues I’ve had with it. I doubt it’ll change much but he will at least be aware. I’ve been able to resolve my issue with a custom shim made from some 0.1mm brass sheet. Curled over a small flange so it sits neatly at the top of the tube under the clamp and the seatpost is now a firm but silky-smooth fit ![]()
The lesson for us newbs, I guess, is that the seat tube interfaces with 2 separate components: the seat post and the seat post clamp, and each of those has nominal dimensions with acceptable tolerances which can cause you varying degrees of headache which might require a little creative bodging until you figure out your own ‘system’. Oh, and “your first few frames are gonna suck” ![]()
2 Likes
1 Like
4 Likes
If you have a 100mm topper the weight difference between 1.2mm and 1.6mm wall thicknesses is 32grams. Seems like a non issue really, not worth trying to get a new standard manufactured
1 Like
3 Likes
Tange and a few others make internally butted 34.9 seattubes for 31.6 seat posts.
1 Like
2 Likes
The classic Northern California mountain bike of the 90s used a straight gauge seat tube. Among others, Ibis and Bontrager used this method, and helped reduce the weight of the frame a bit. Unless the rider was diligent and removed, cleaned and lubed the seat post occasionally, aluminum corrosion would cement the seat post into the seat tube. That’s a classic Northern California IG post, how to unstick one of these seat posts. If you’re building for a rider that rides year 'round and does no maintenance, a seat tube collar will go a long way towards long term happiness!
2 Likes
3 Likes