Carn Bikes frame #2 - the first proper one

Bike number 2 has been in the works for a while. It all started with the initial design back in late '21. A thread on the MTBR framebuilding forum in January '22 helped to advance the design, then things got crazy busy in the workshop. I finally got back to it last September and started by building a new frame jig (PVD’s Skynet) as my previous one was of my own design and not at all good.

With the jig finished in January, and with tubes in hand, I got down to the build. It went fairly well overall but wasn’t without a few dramas along the way.

Here’s the final design:
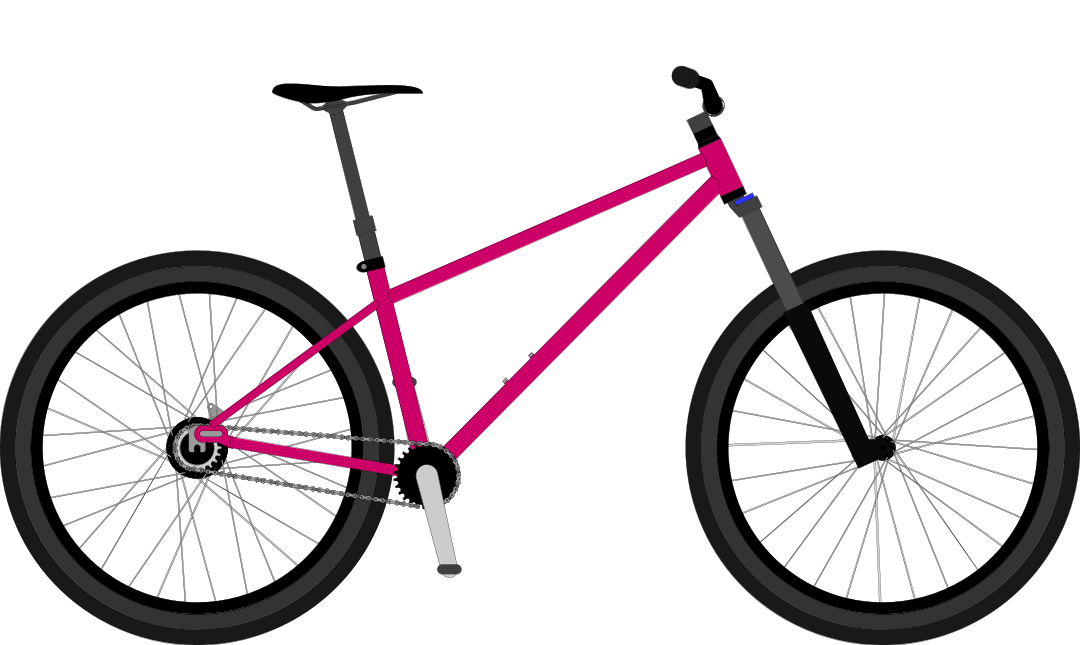
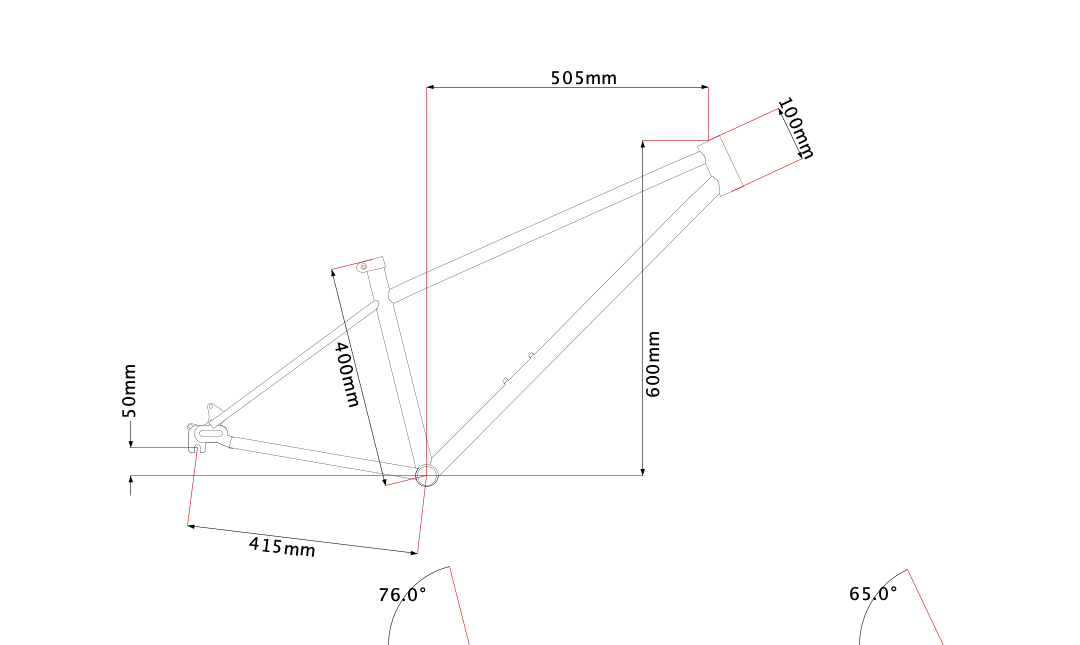

Tube specs:

  • HT: 100mm x 44mm ID cromo (not sure on brand - possibly PMW?)
  • DT: 31.8mm x 1.0mm 4130 plain guage
  • TT: 25.4mm x 0.8mm 4130 plain guage
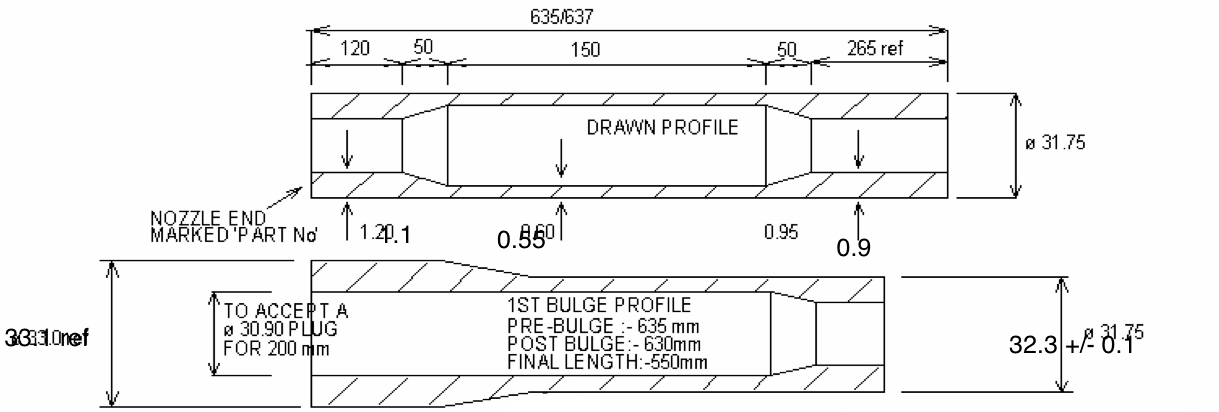
  • ST: 32.9mm (30.9mm ID) x 9/5/7 external butt, Columbus Zona
  • BB: 73mm x 40mm BSA cromo
  • CS: 19.0mm x 0.9mm 4130 plain guage
  • SS: 14.0mm x 0.9mm 4130 plain guage
  • DO: Sliding thru-axle, cast (not sure on brand)

I’d really like to hear opinions on the DT and TT diameters in particular. Too thin? Likely to break? Or will they offer a nice, compliant ride for a 150lb rider?

Order of operations:

  1. Cut & mitre main tubes
  2. Fit threaded fittings to DT+TT
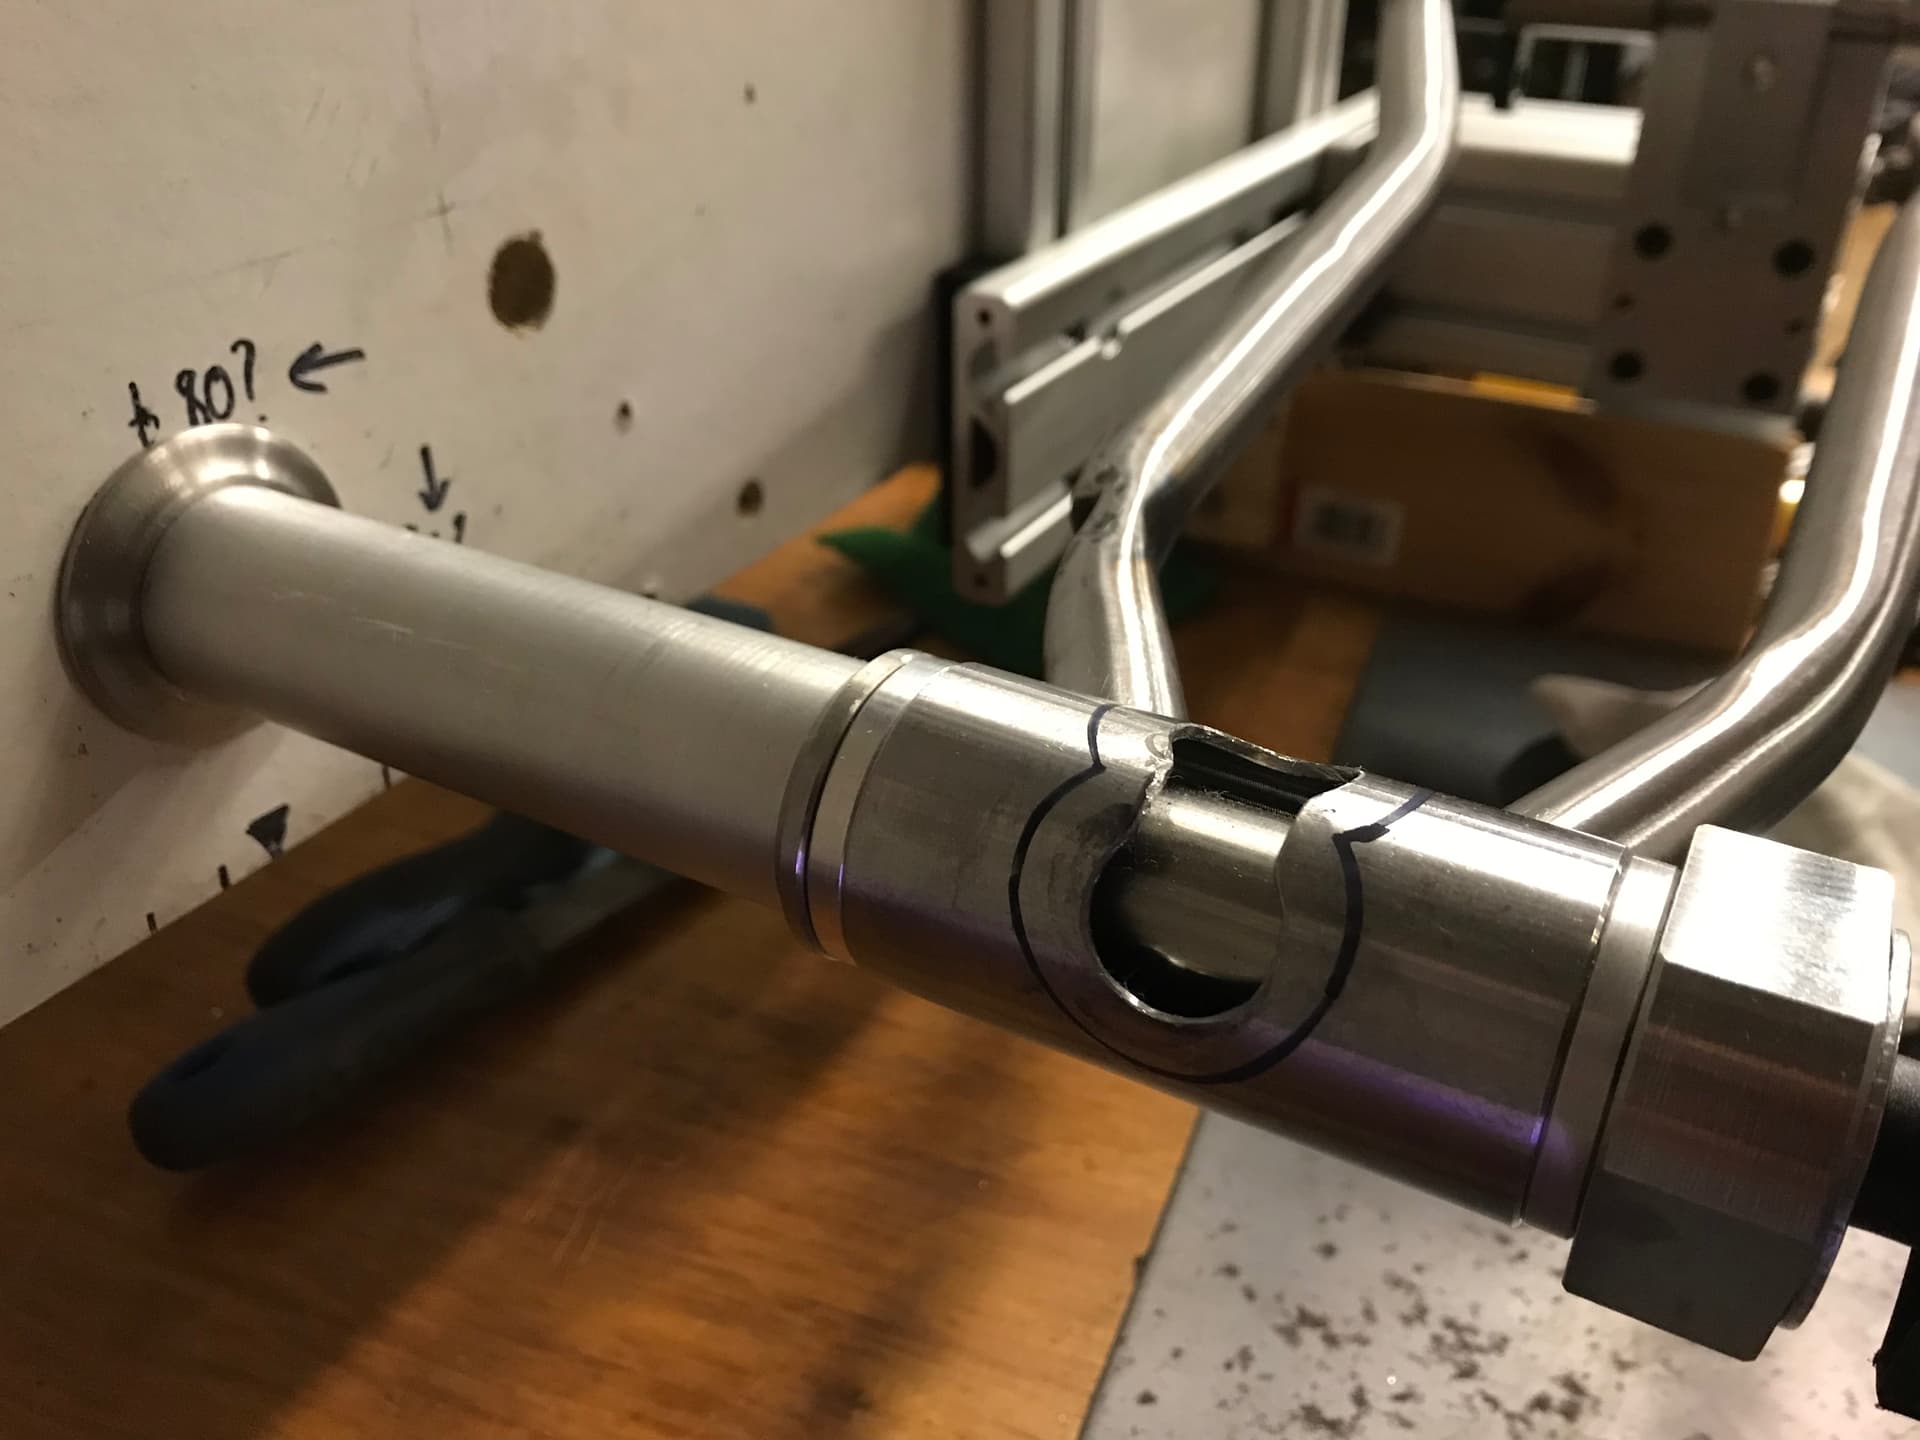
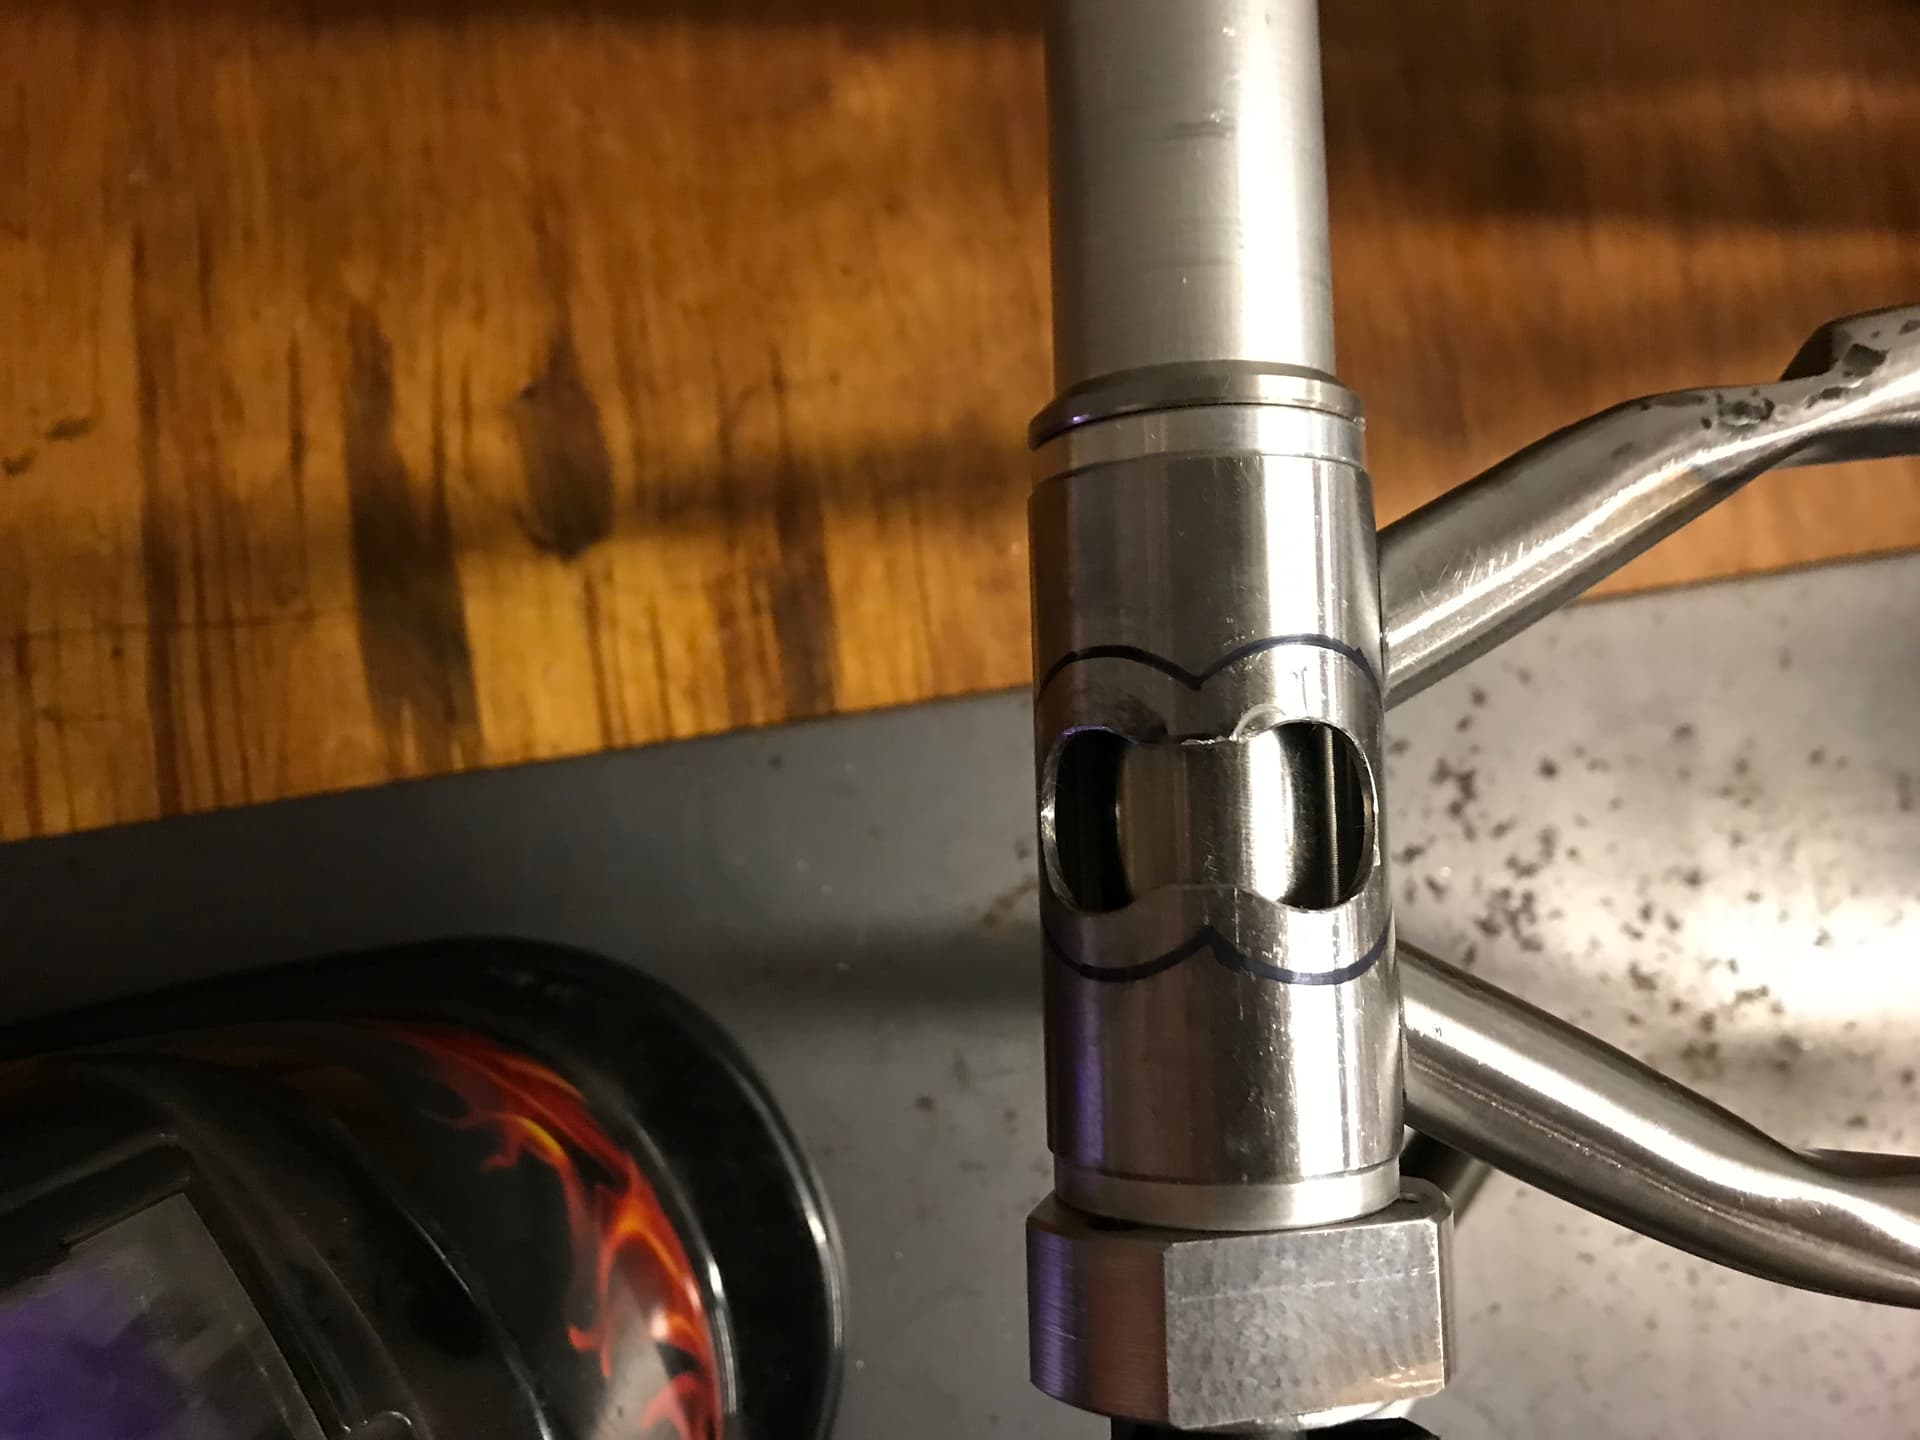
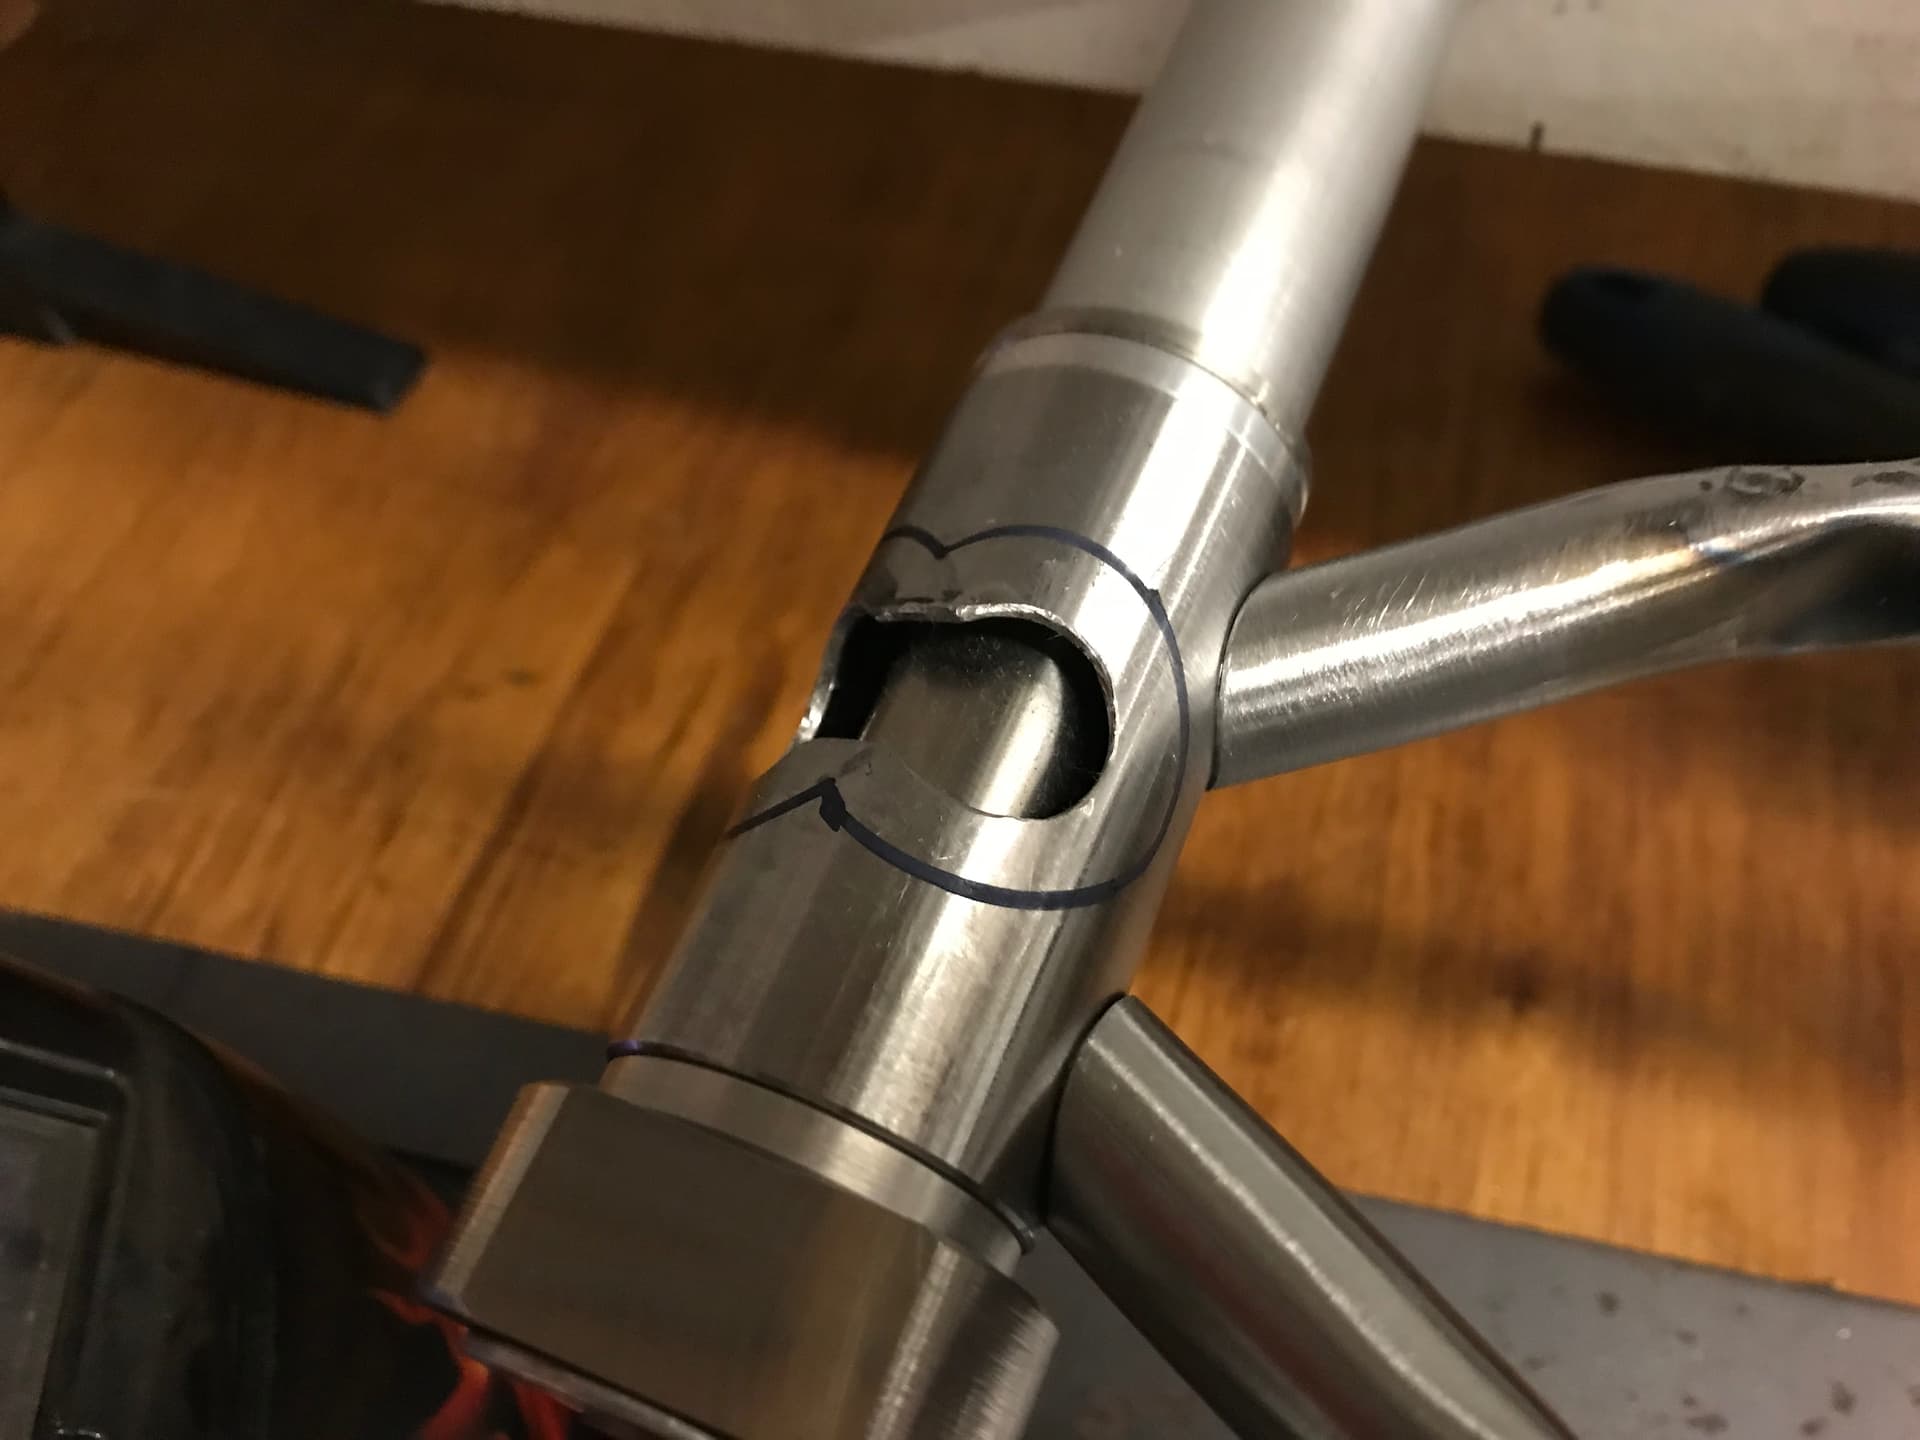
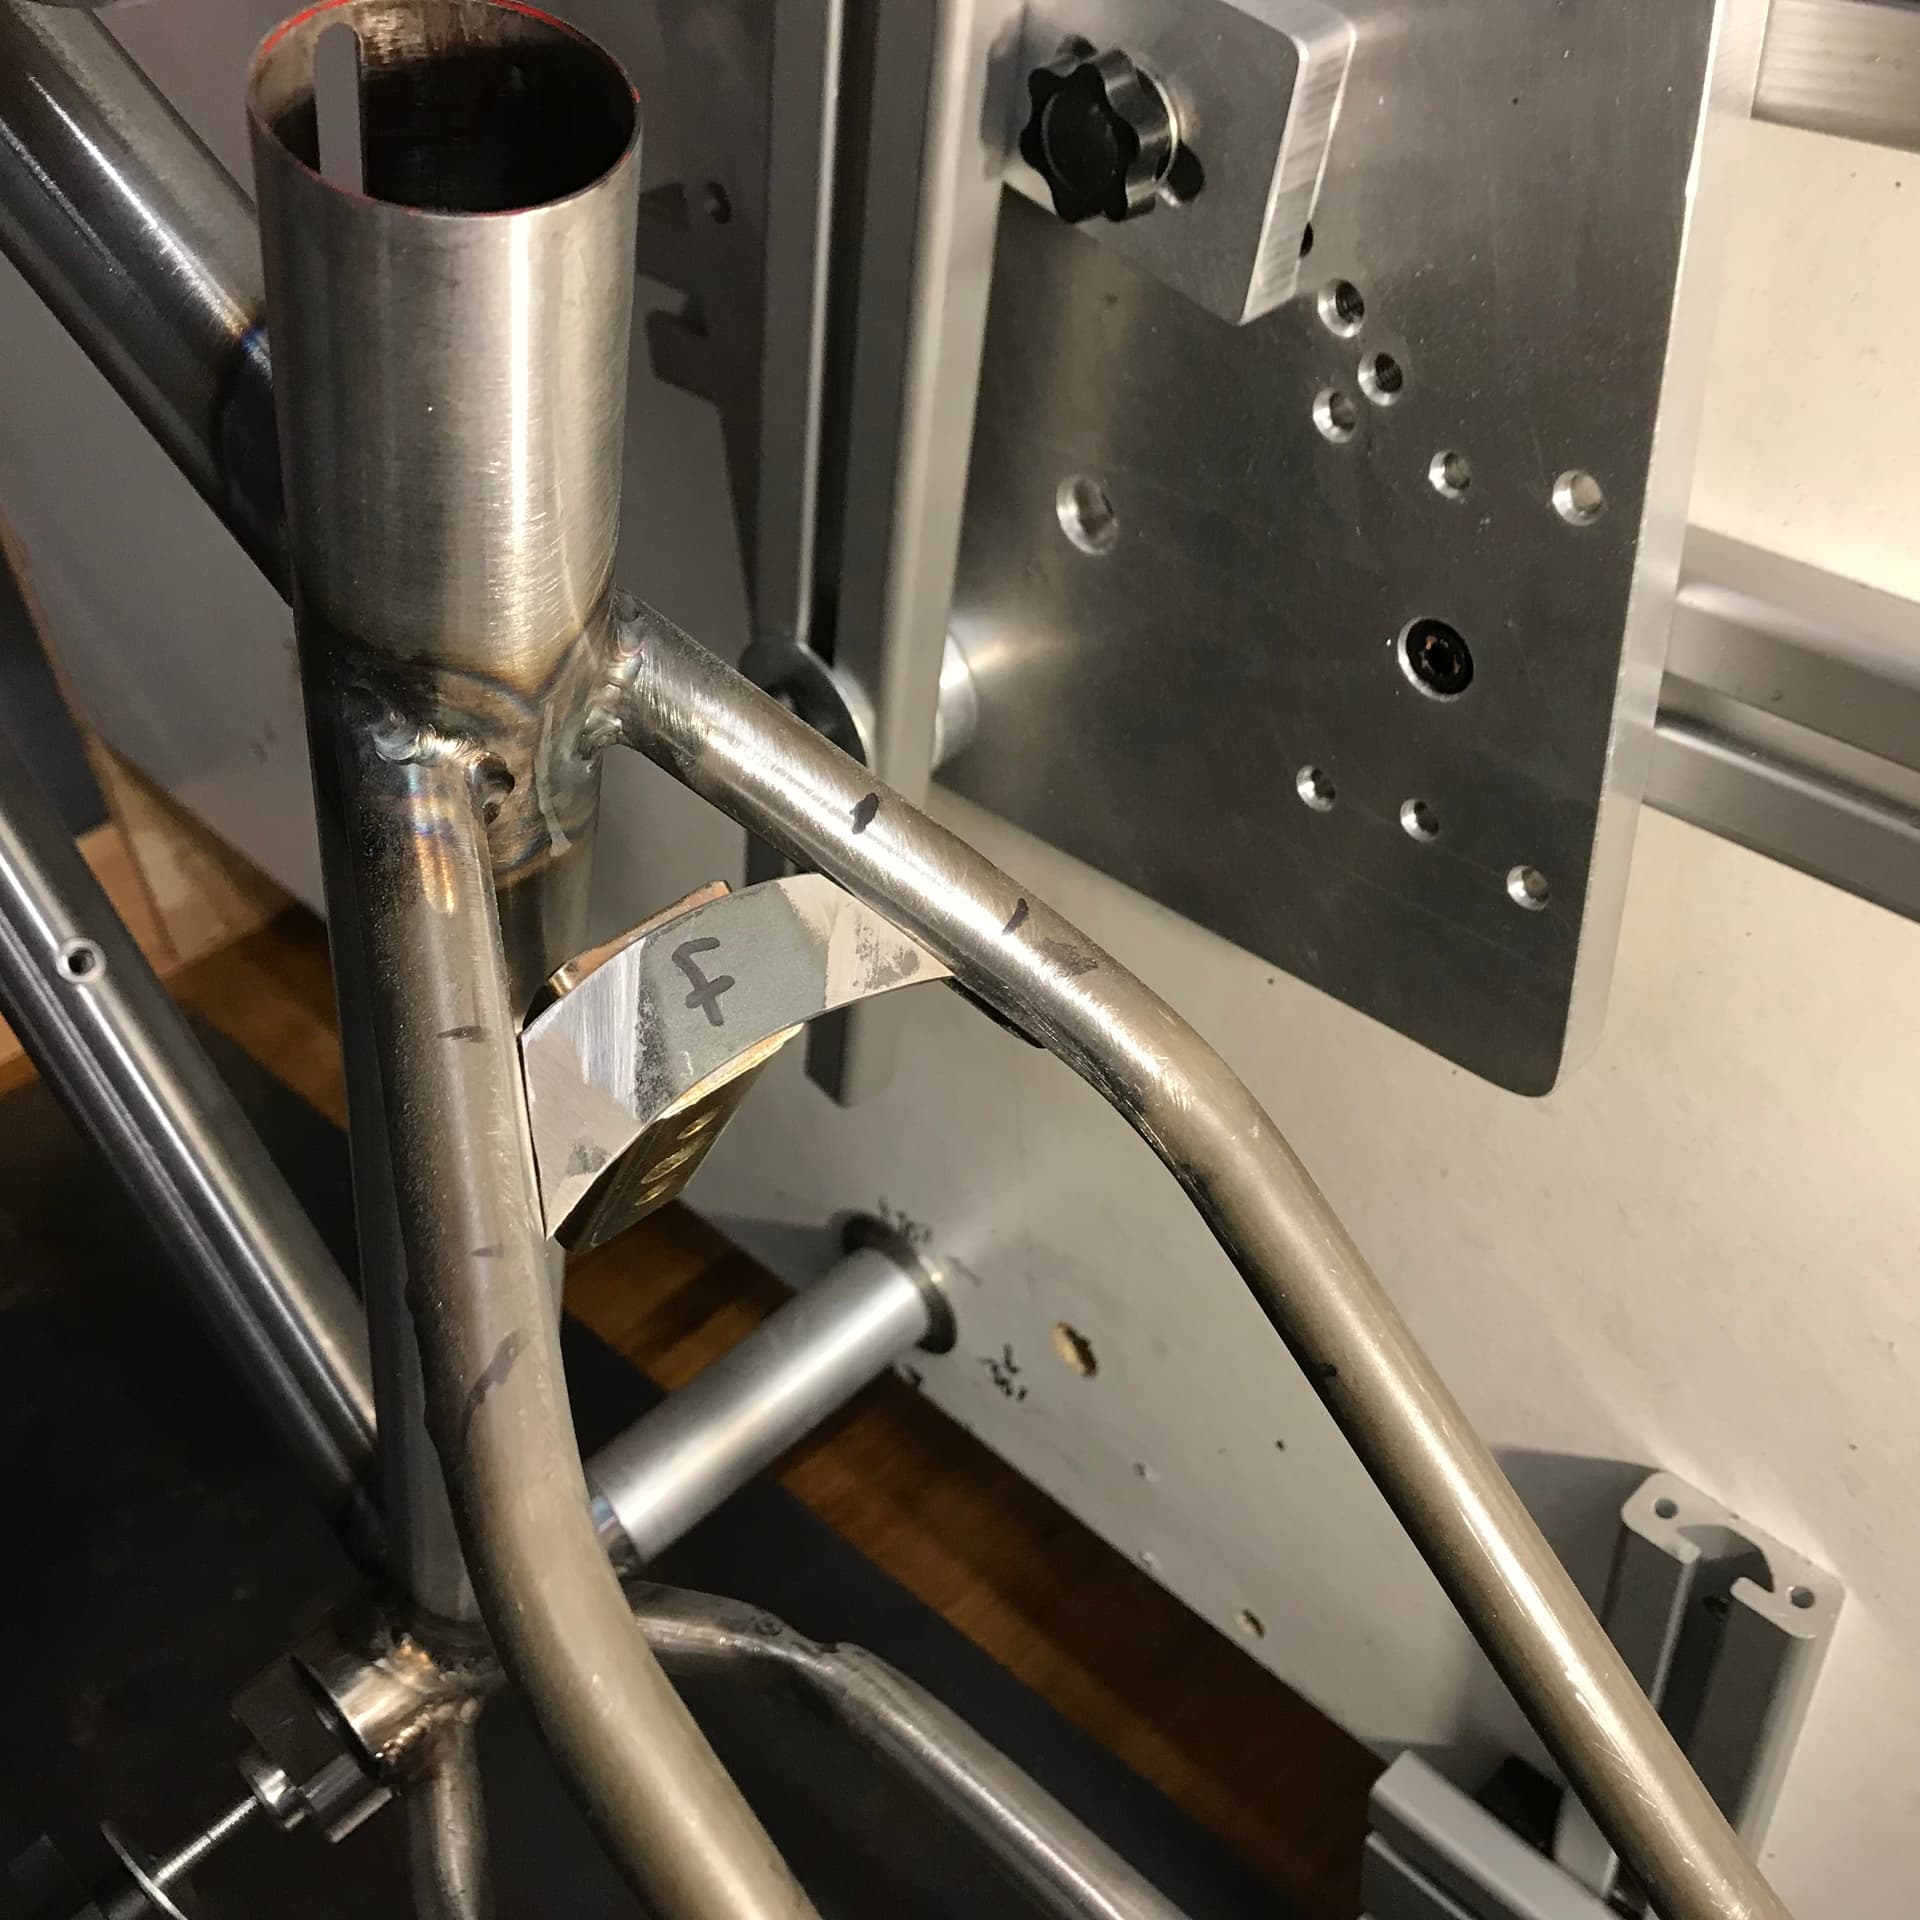
  3. Slot DT internal dropper entry port
  4. Slot ST top
  5. Cut & bend CS
  6. Mitre & weld CS/DO
  7. Cut & weld CS chainring notch
  8. Mitre CS/BB
  9. Drill breather holes
  10. Cut BB+DT slots for internal dropper cable
  11. Weld CS/BB
  12. Check CS alignment
  13. Cut, bend & mitre SS
  14. Weld DT to BB+HT
  15. Weld ST/BB
  16. Weld TT to HT+ST
  17. Check front triangle alignment
  18. Weld SS
  19. Weld cable guides to SS
  20. Cut & weld SS brace
  21. Final stay alignment
  22. Chase/face/ream & prep for paint

Noteworthy items:

I don’t have equipment for, or experience of, silver soldering and I didn’t want to gain those things as part of this build, so I used aluminium M5 rivnuts for the threaded fittings. Not that it’ll matter with this frame as I’m sure I’ll be building v2 within a couple of years, but does anyone have any thoughts on the suitability of these with the steel frame (especially re: galvanic corrosion)? I plan to start with silver soldering this summer and will probably do future builds with steel fittings but rivnuts were a great starter option and I wouldn’t be averse to using them again in the right circumstances.

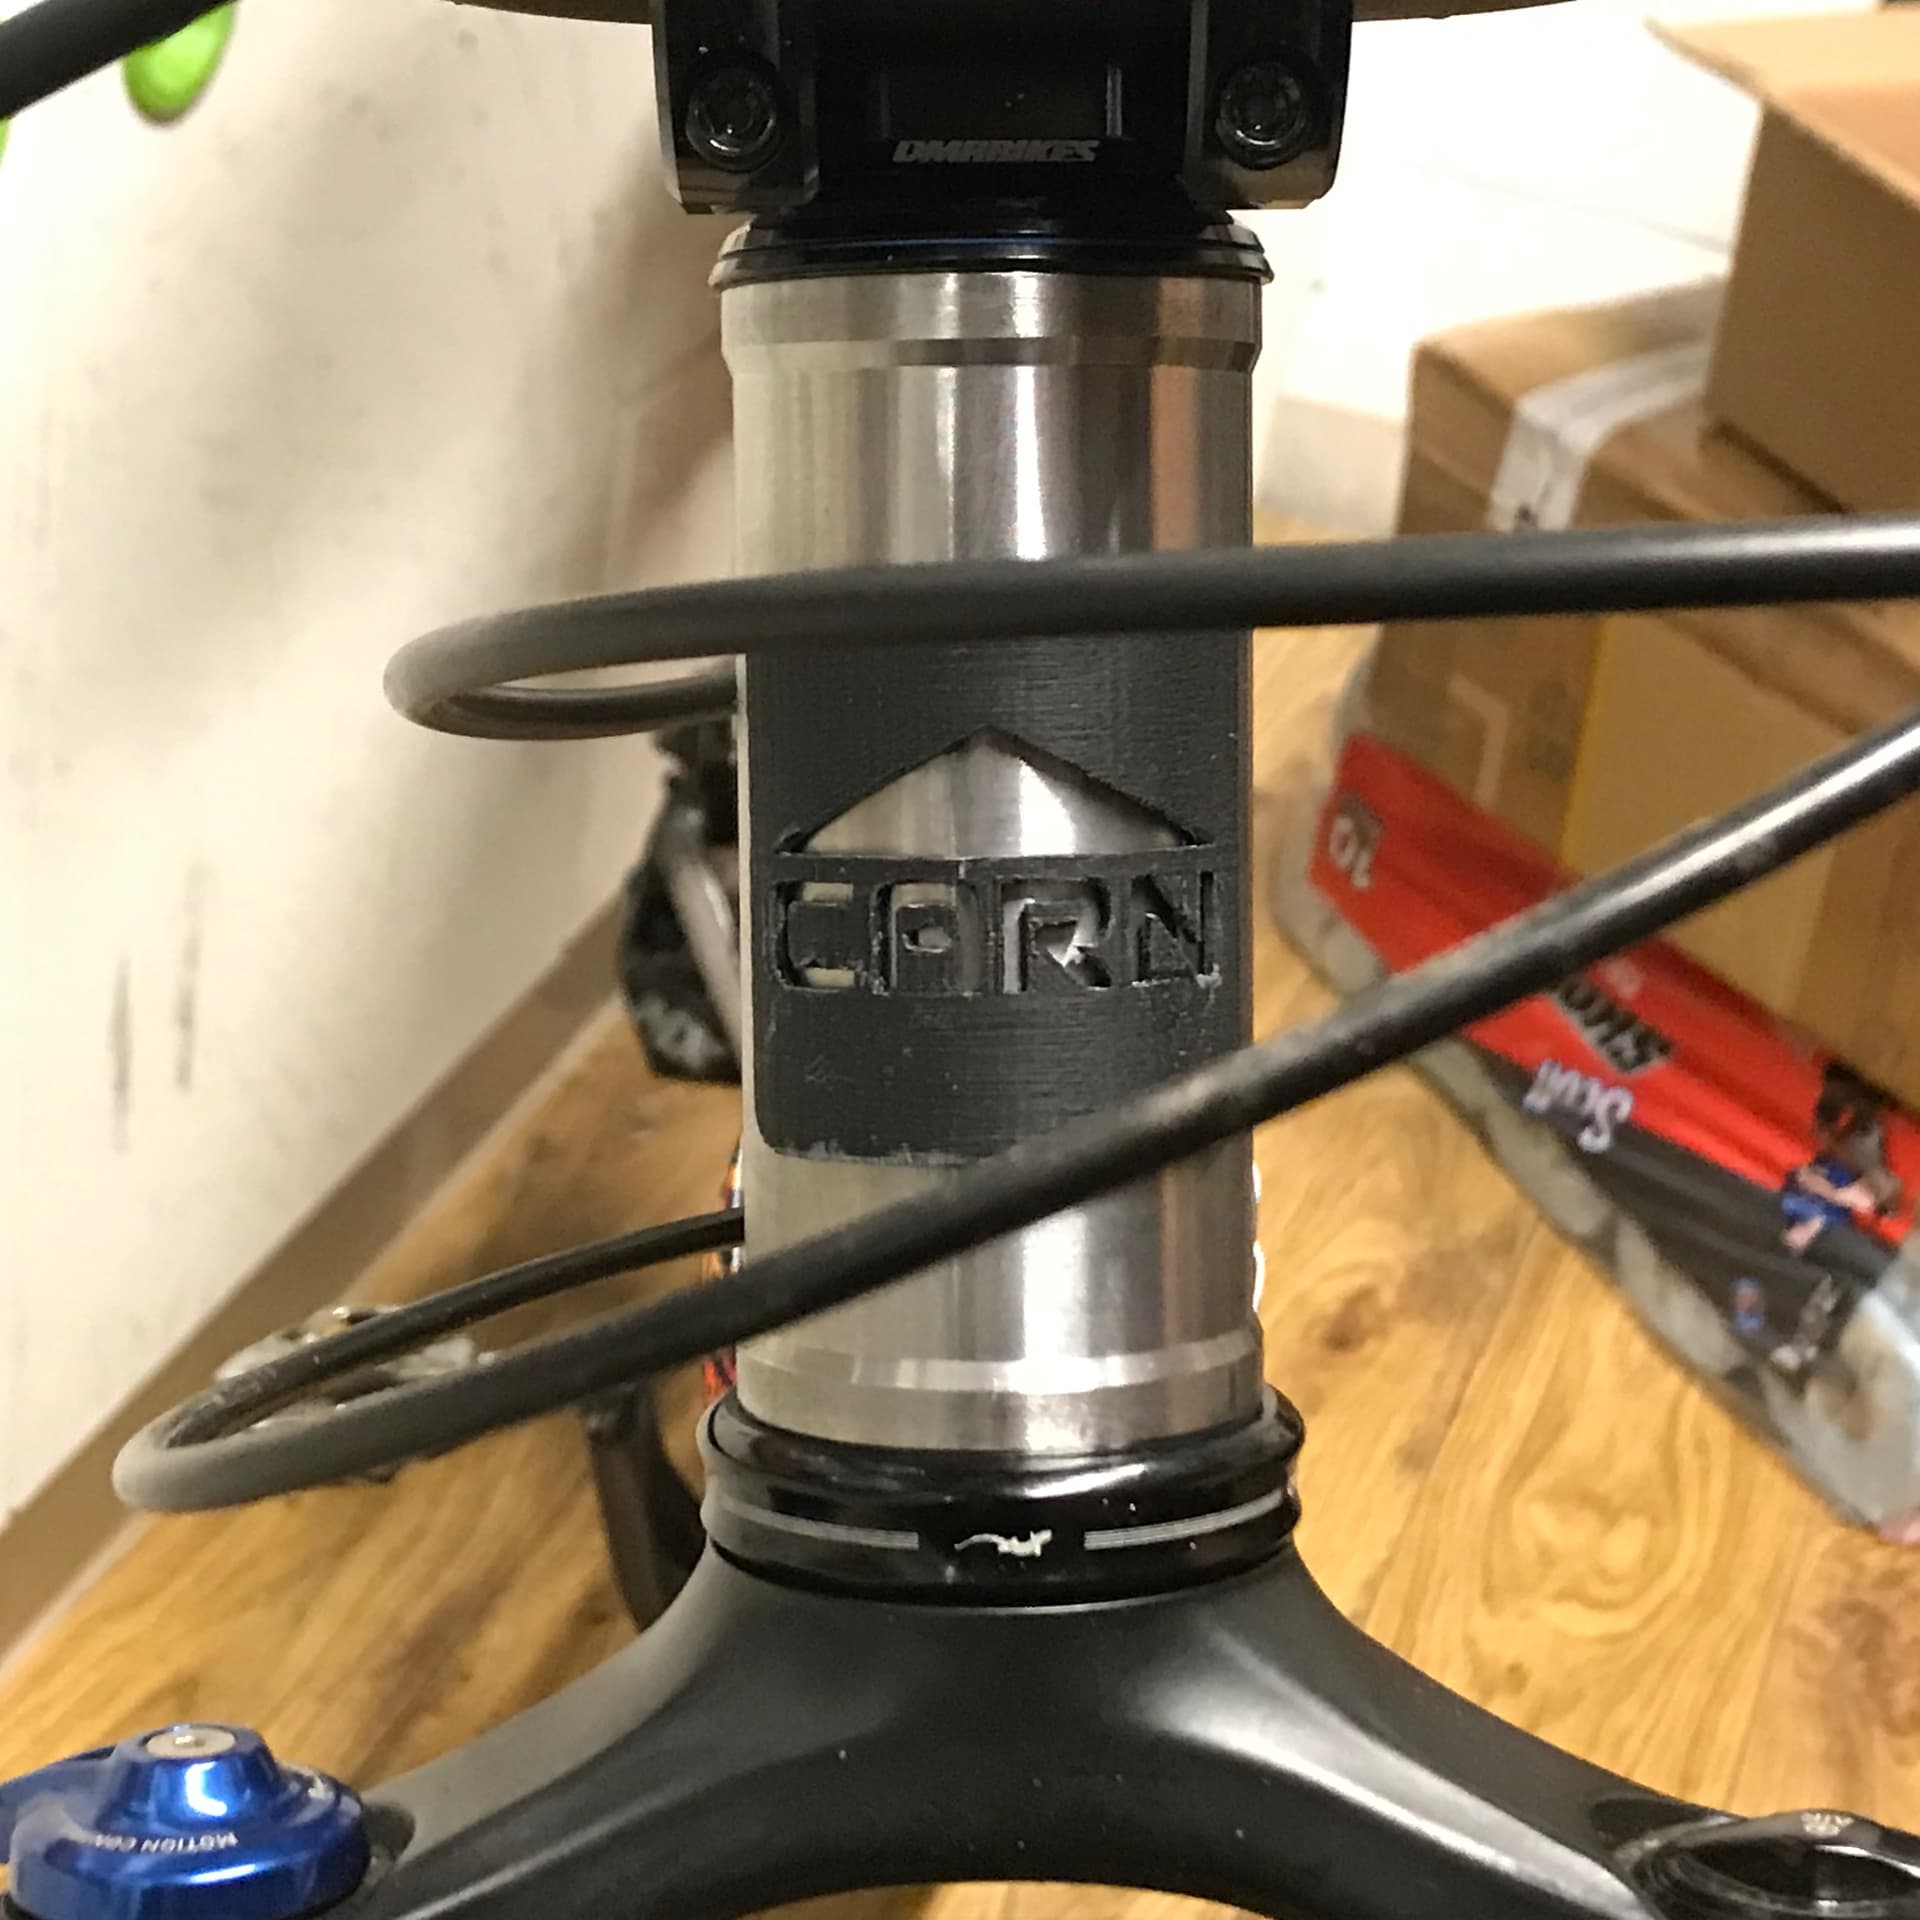
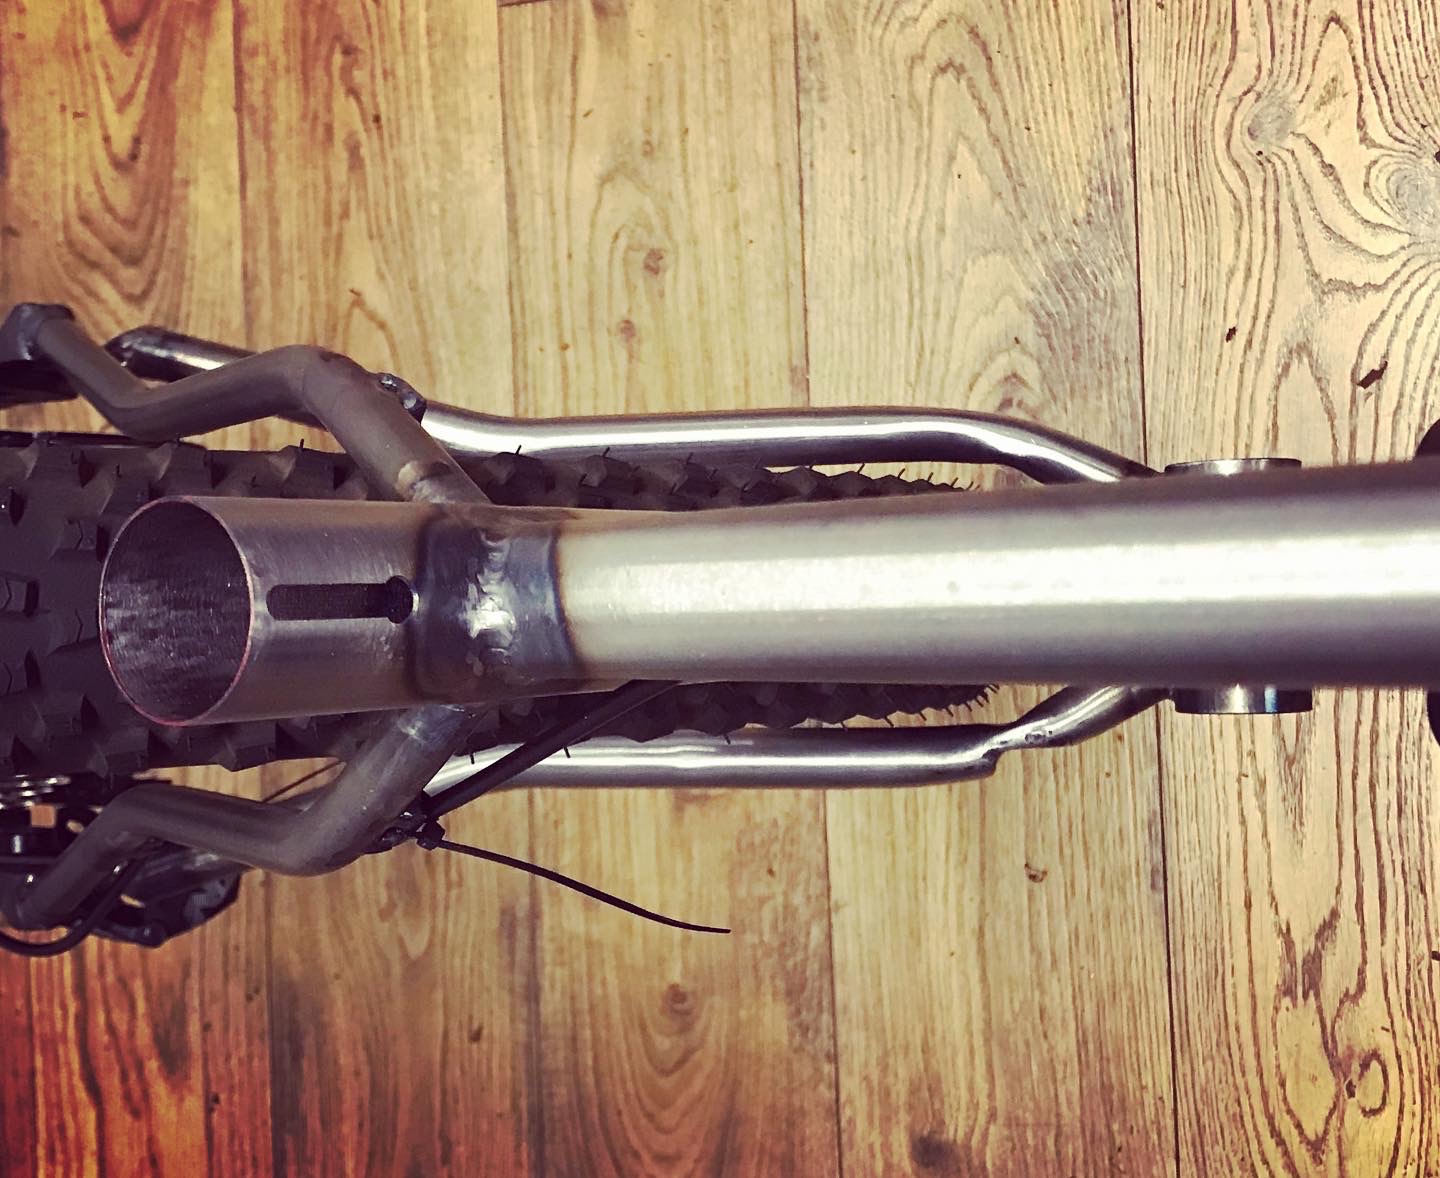
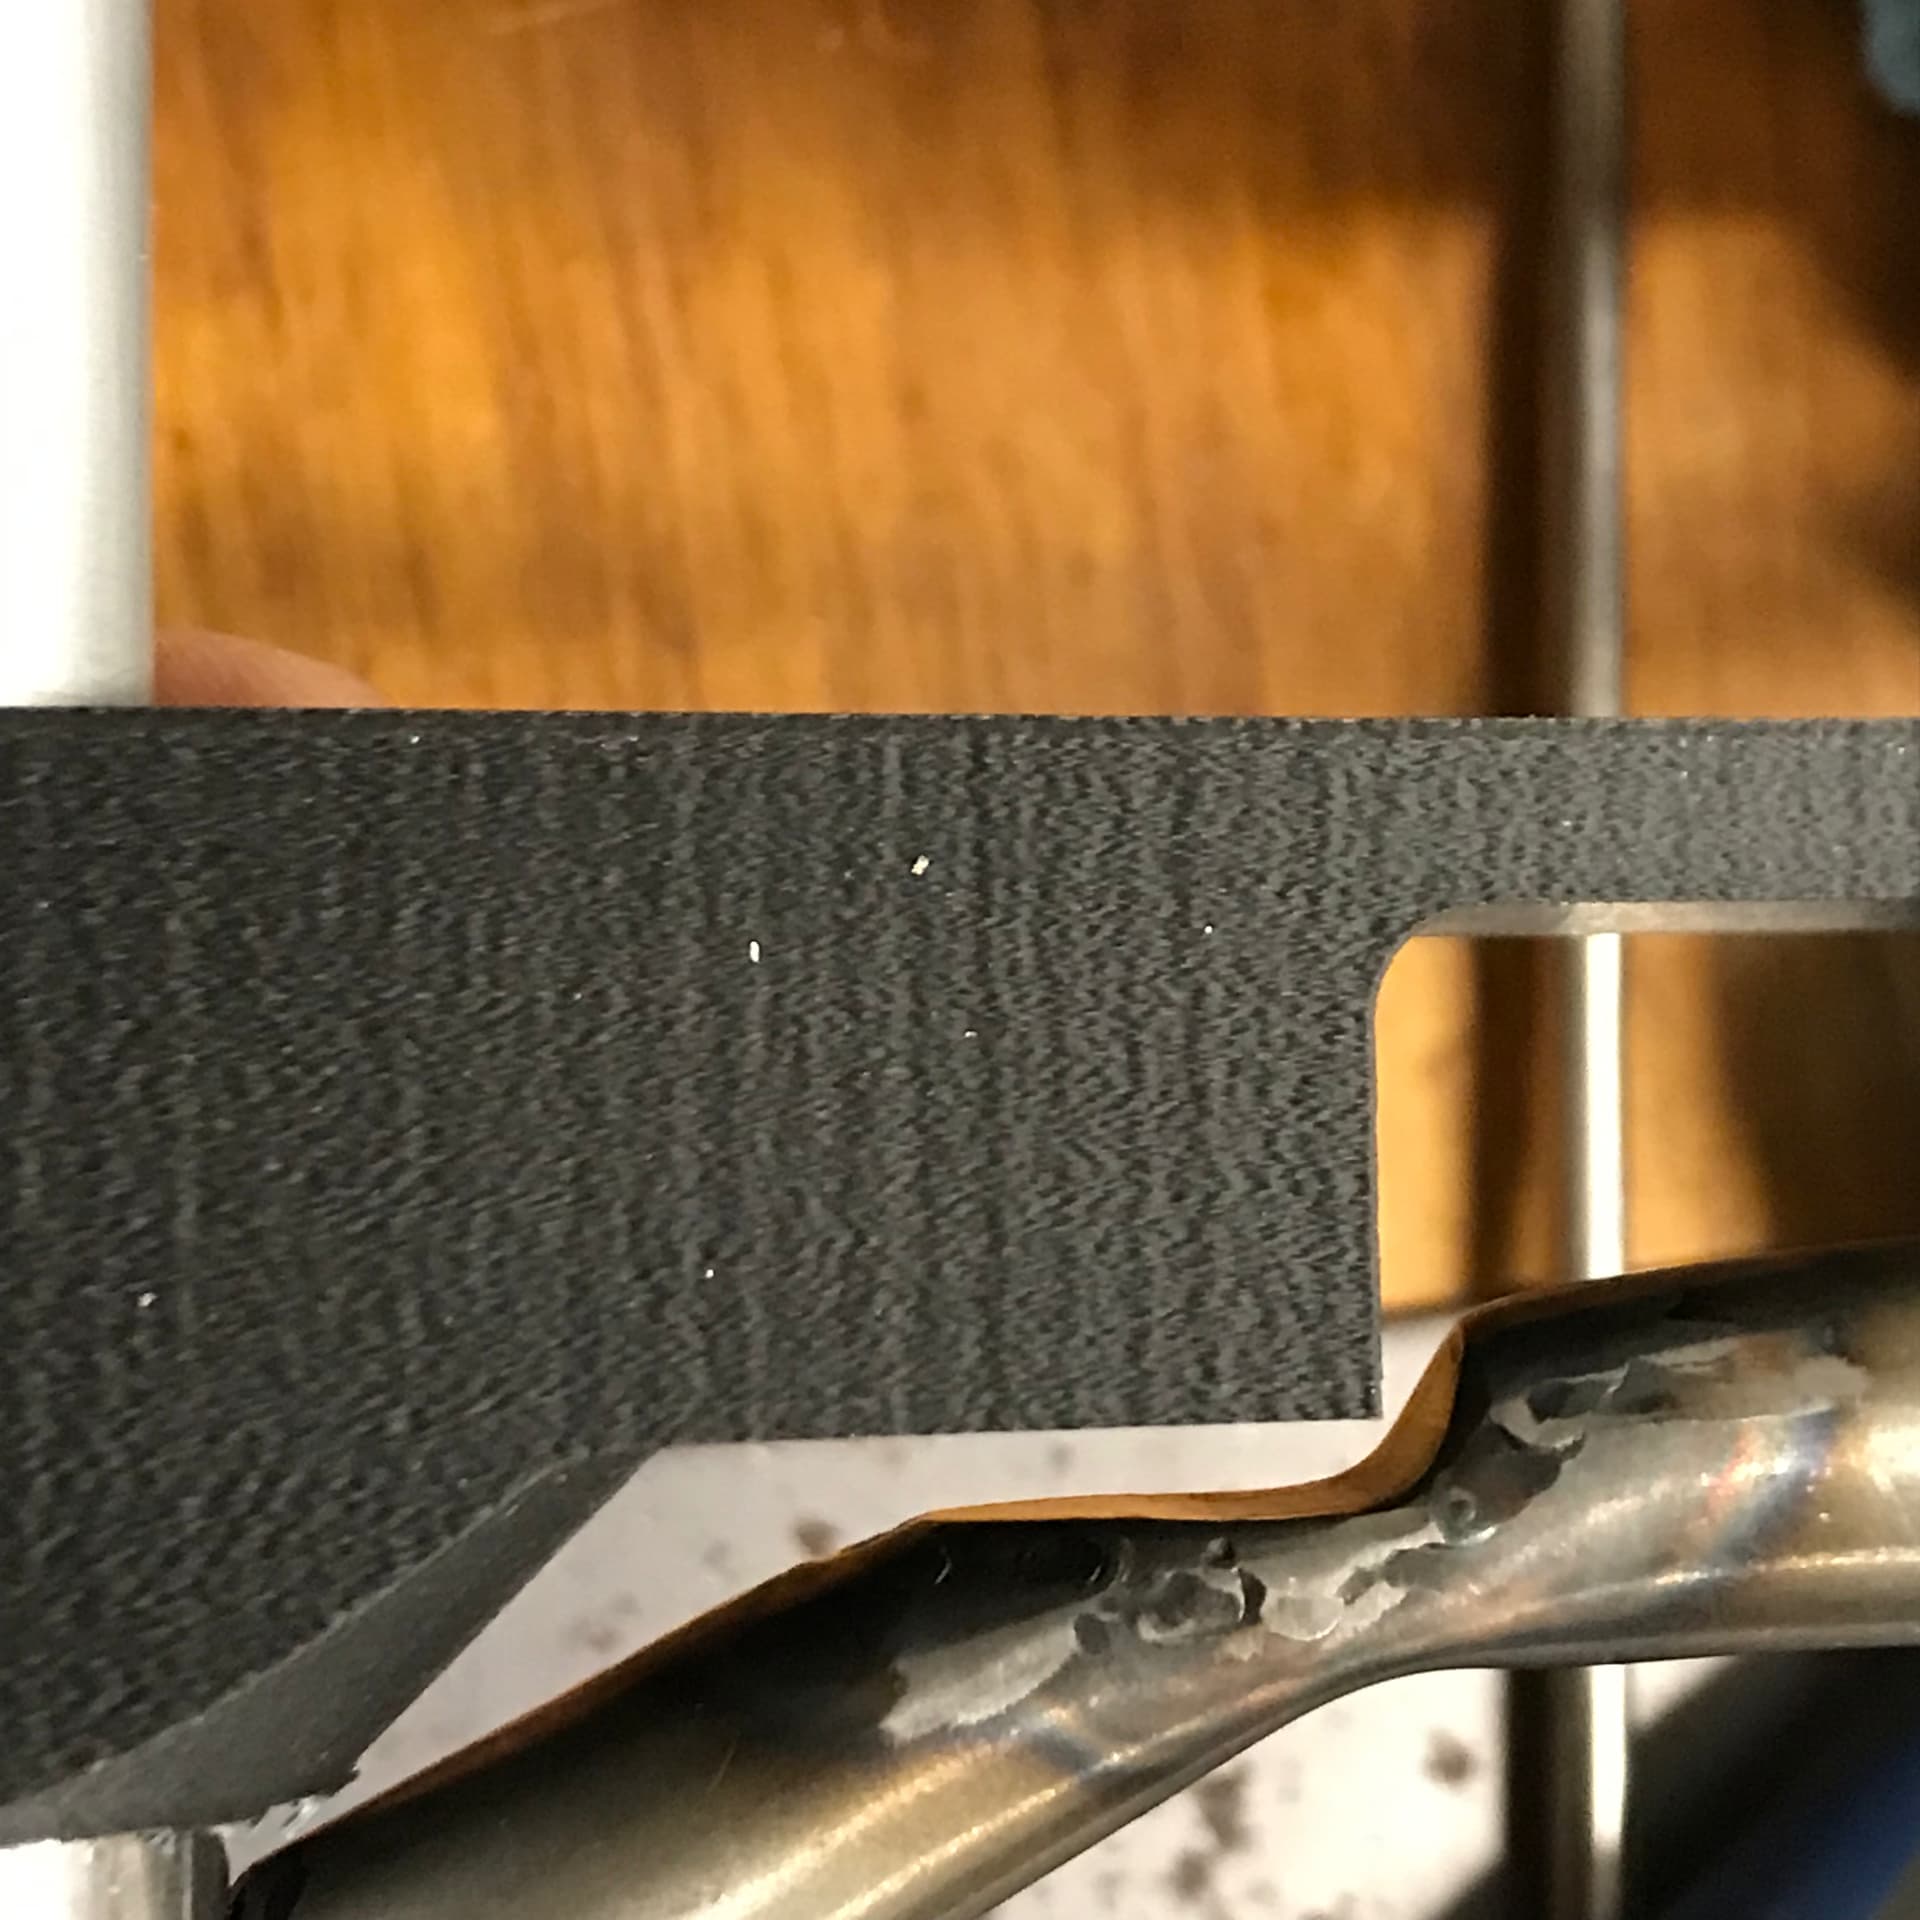
I decided on external routing for the rear brake and mech, but (against my better judgement!) internal for the dropper entering at the DT just behind the HT. I couldn’t find a plastic cable port cover I liked on eBay so ended up 3D-printing my own. I’ve since spotted some nice off-the-shelf ports and covers at Ceeway which I’d use if I went this route again (will require silver soldering). The cable will be unguided in the DT so will use a foam tube to prevent rattles. I’d be interested to hear thoughts about the big slot in the BB/DT to route the cable around the BB shaft. In hindsight, I think I’d like to try external routing of the dropper cable under the DT and then either entering through a guide tube before the BB and up into the ST (again, requires silver soldering), or under the BB shell and into the back of the ST like 44 Bikes does.

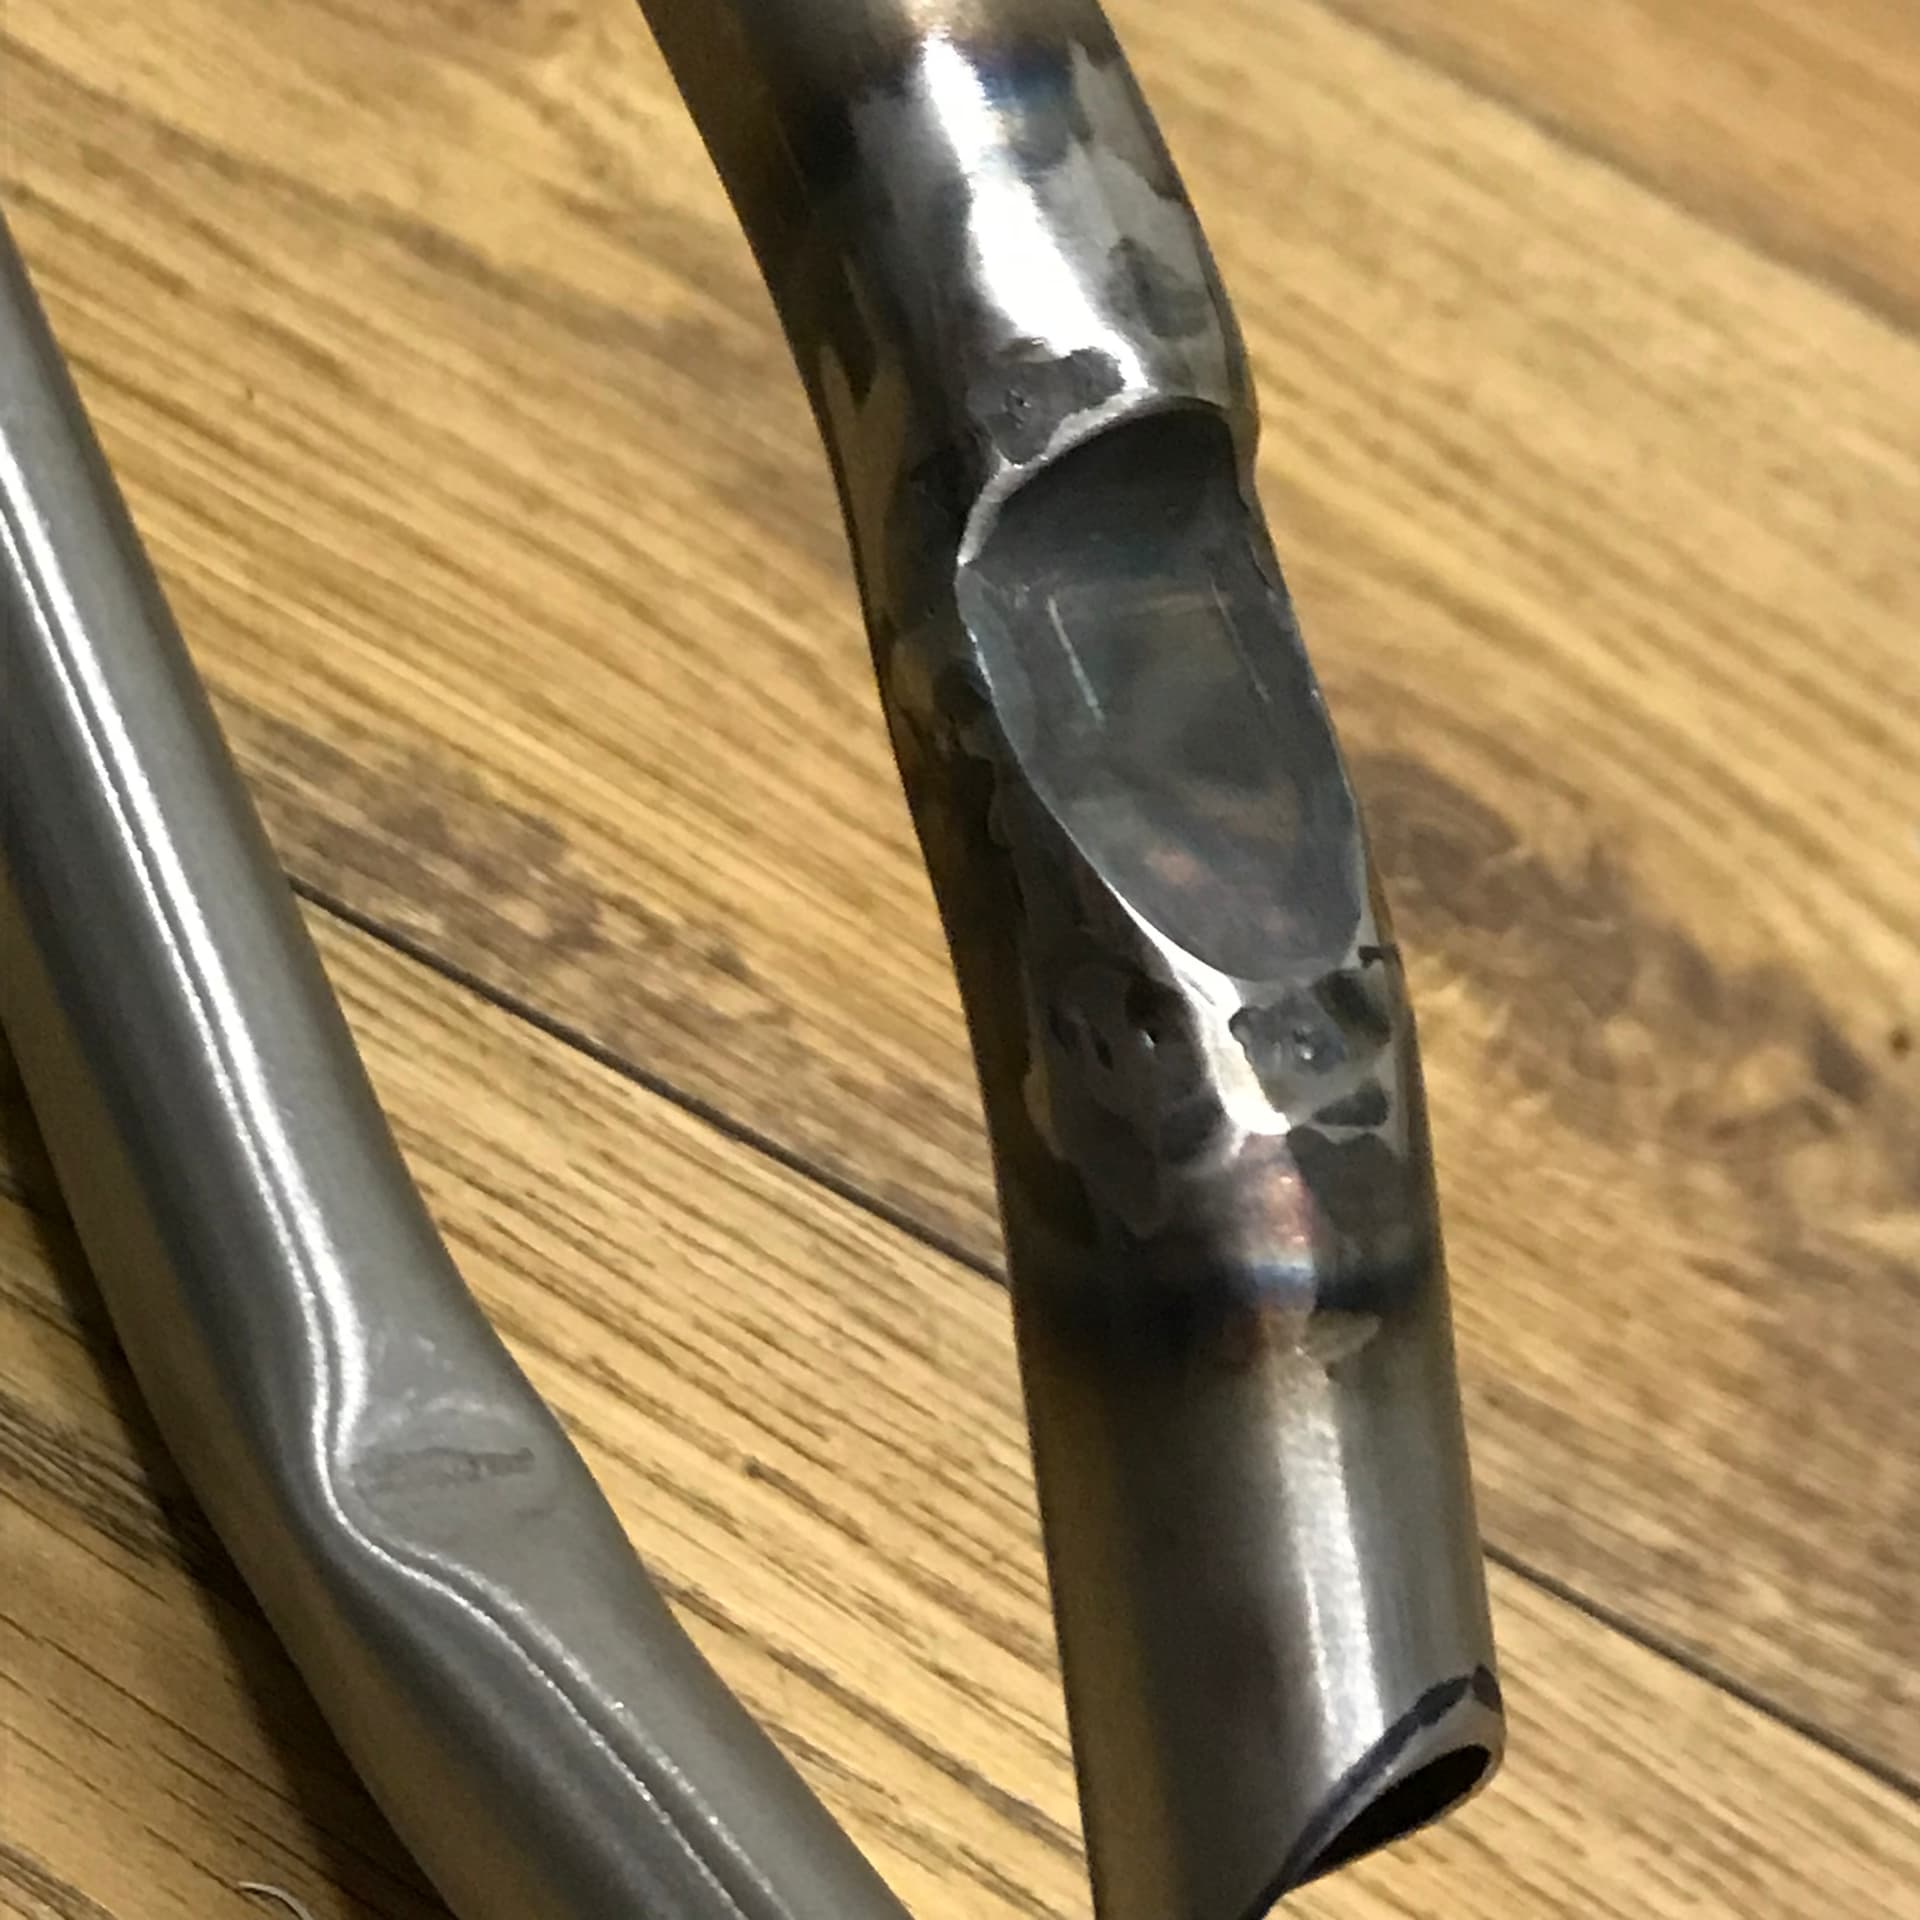
I slotted the top of the ST before welding but left a little cutaway tab to prevent the reamer from snagging on the opening. Any reasons why this isn’t a good idea for future builds? Anything to watch out for?

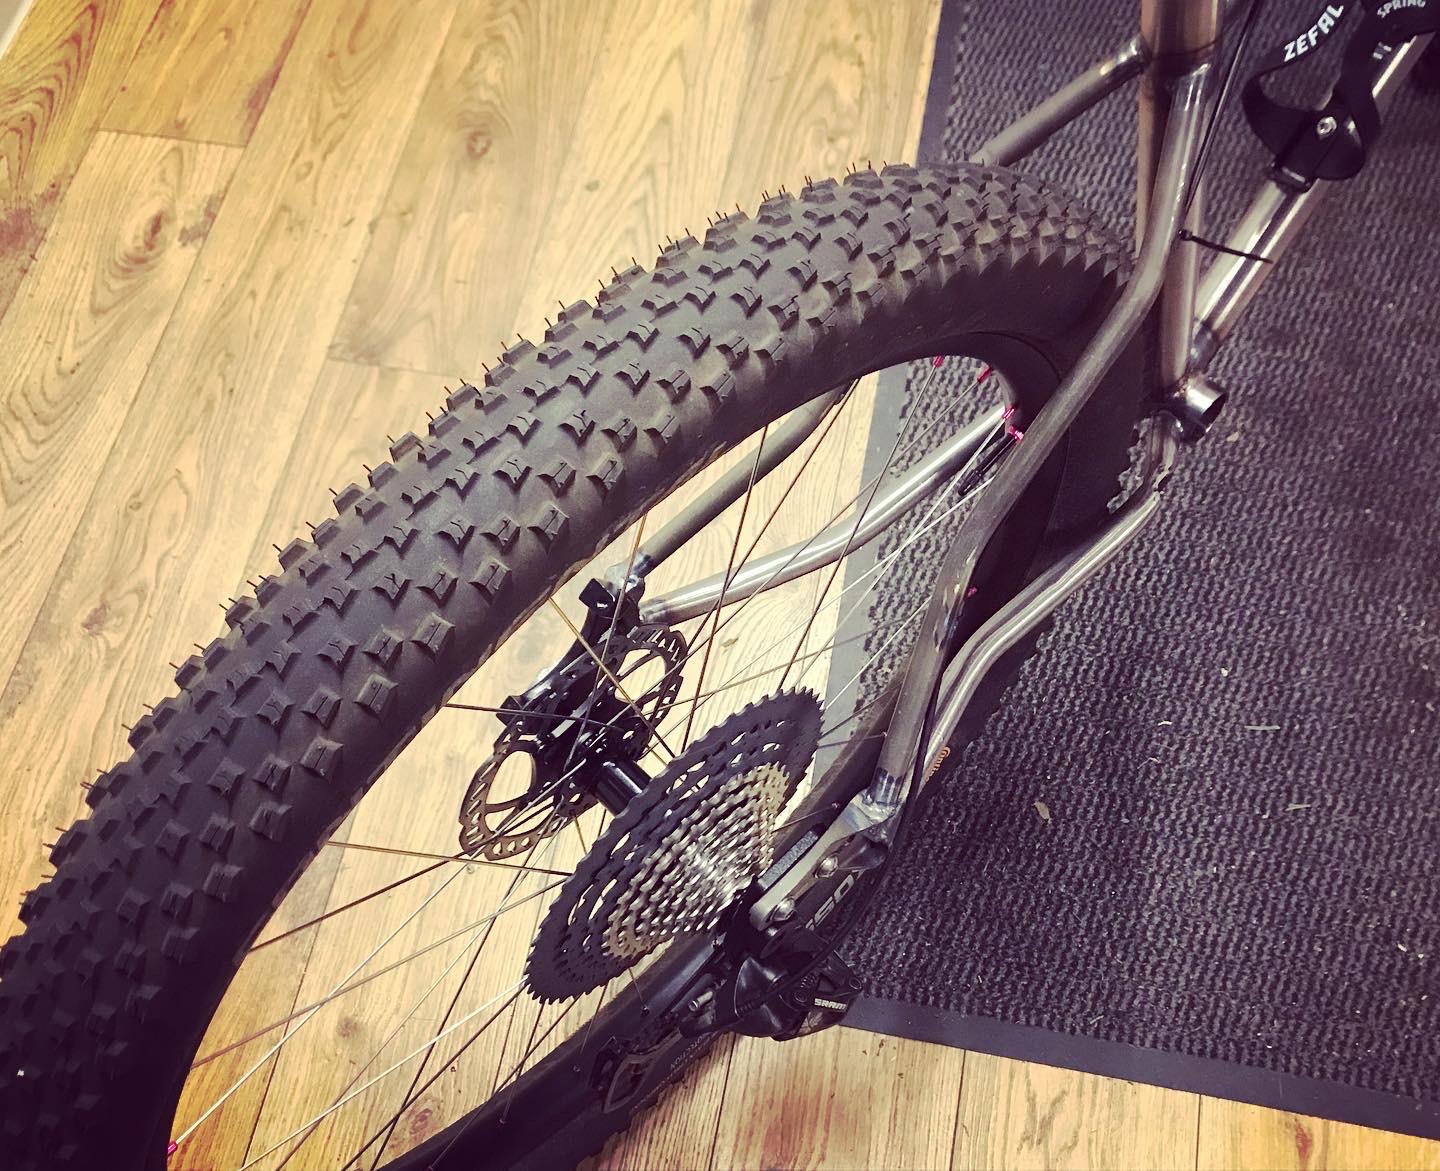
I’d welcome thoughts/feedback on the CS notch approach to chainring clearance. Good idea? Any gotchas I should be aware of?

The lack of vertical space in the mini mill, and lack of rigidity in my stay jig, caused some headaches with the CS/BB mitres. I need to make a decent stay jig before the next build and spend some time figuring out a good way to cut those.

The NDS CS was a bit too close to the edge of the BB shell and I got a little burn-through in one spot on the shell edge as a result. Not the end of the world for this build but one to avoid next time.

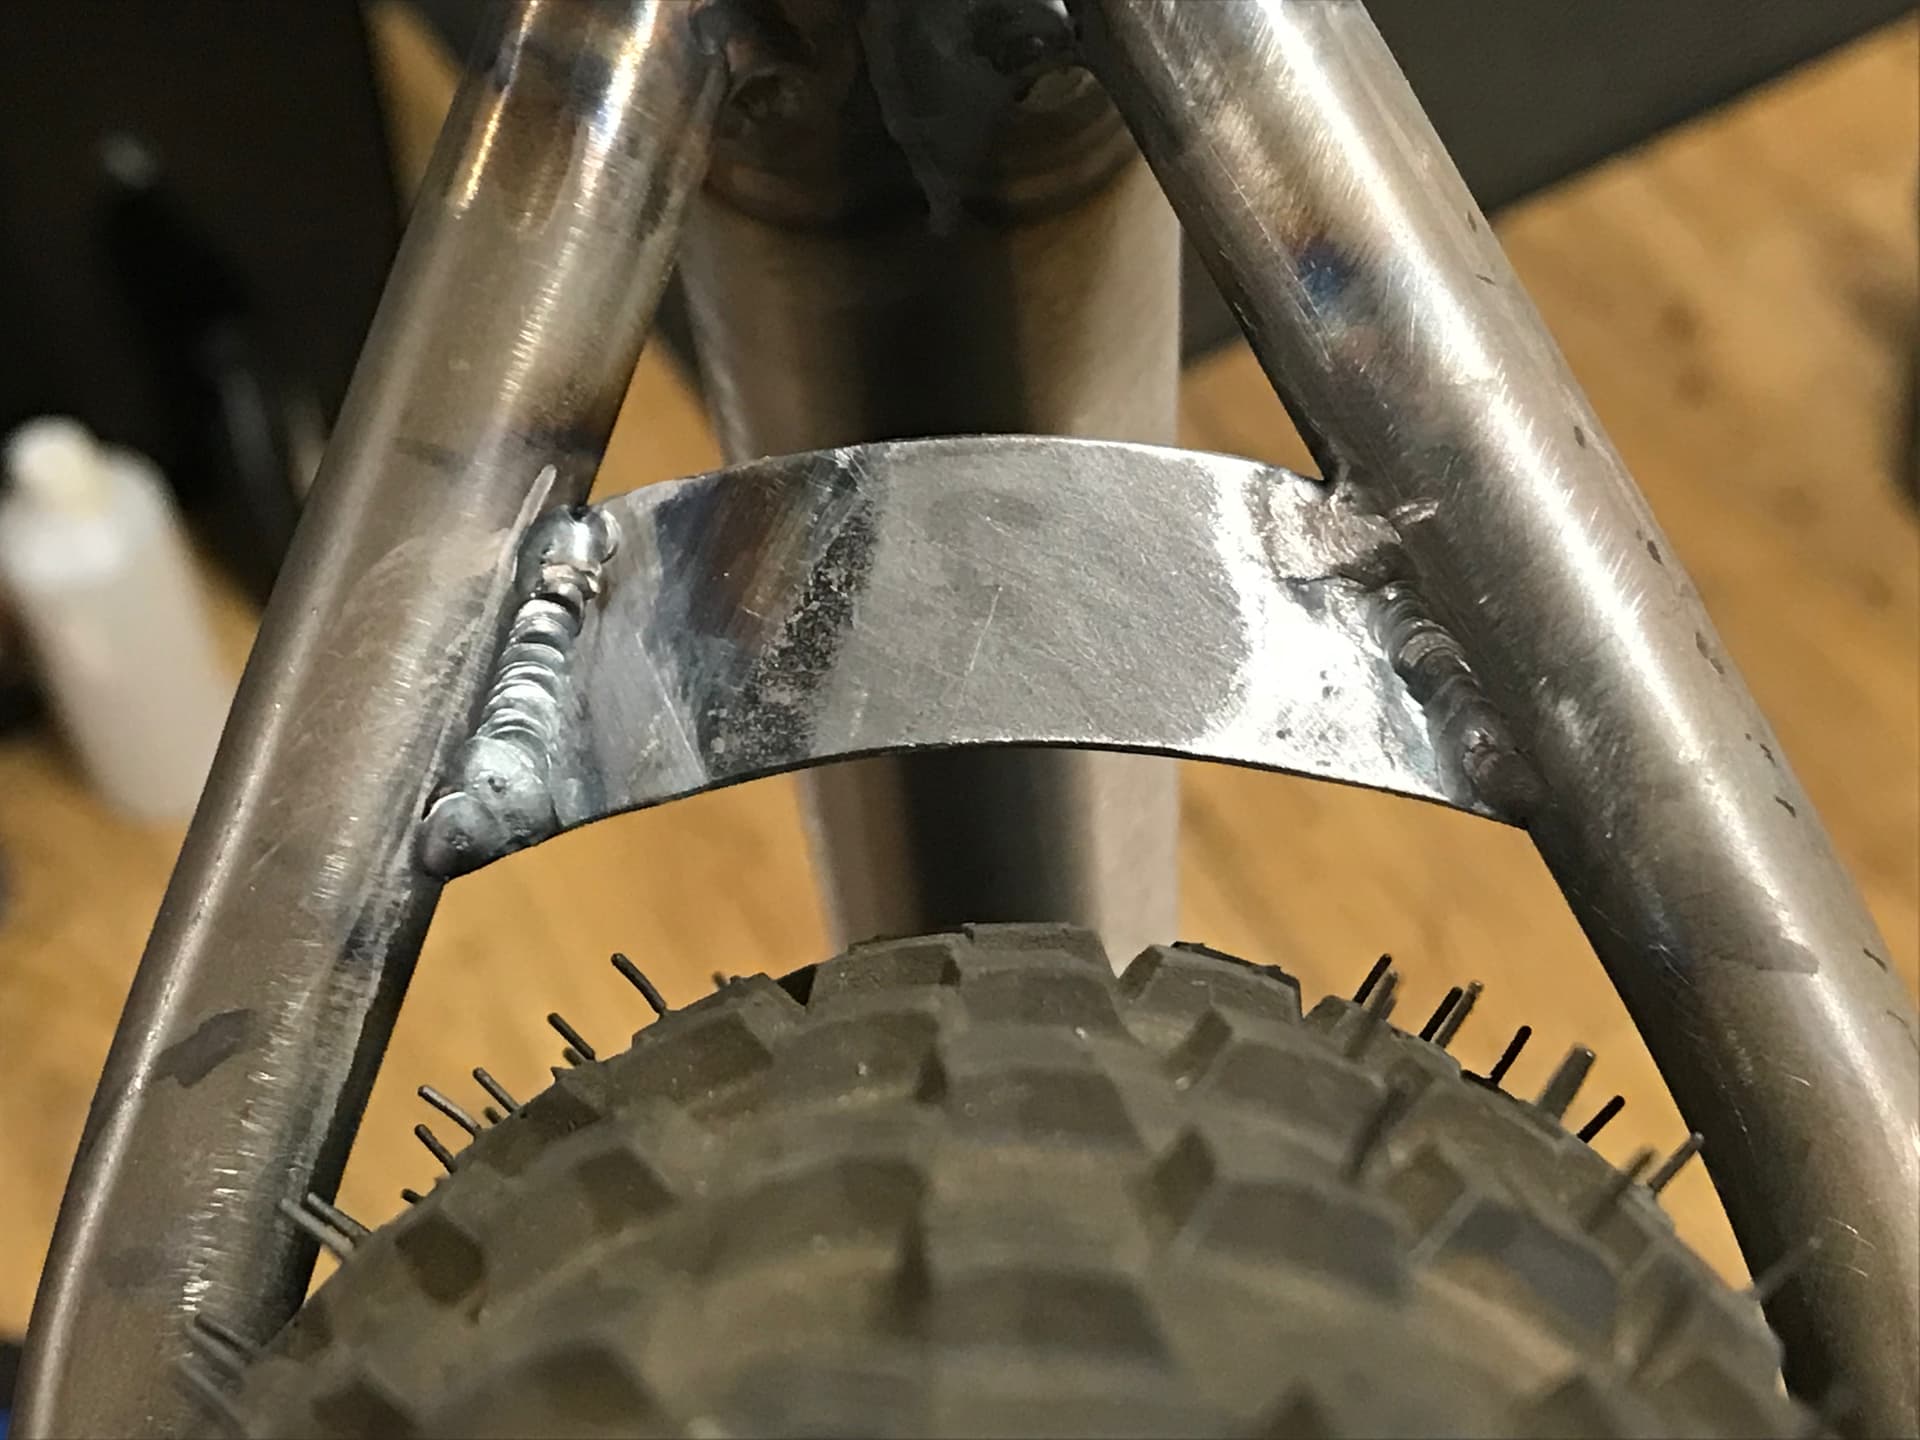
I decided not to fit a CS brace. Any thoughts on this? I was going to forego the SS brace too, but came back a few days after welding and added one as I was concerned the SS’s being joined to a 0.9mm ST wall was going to be a potential weak spot.

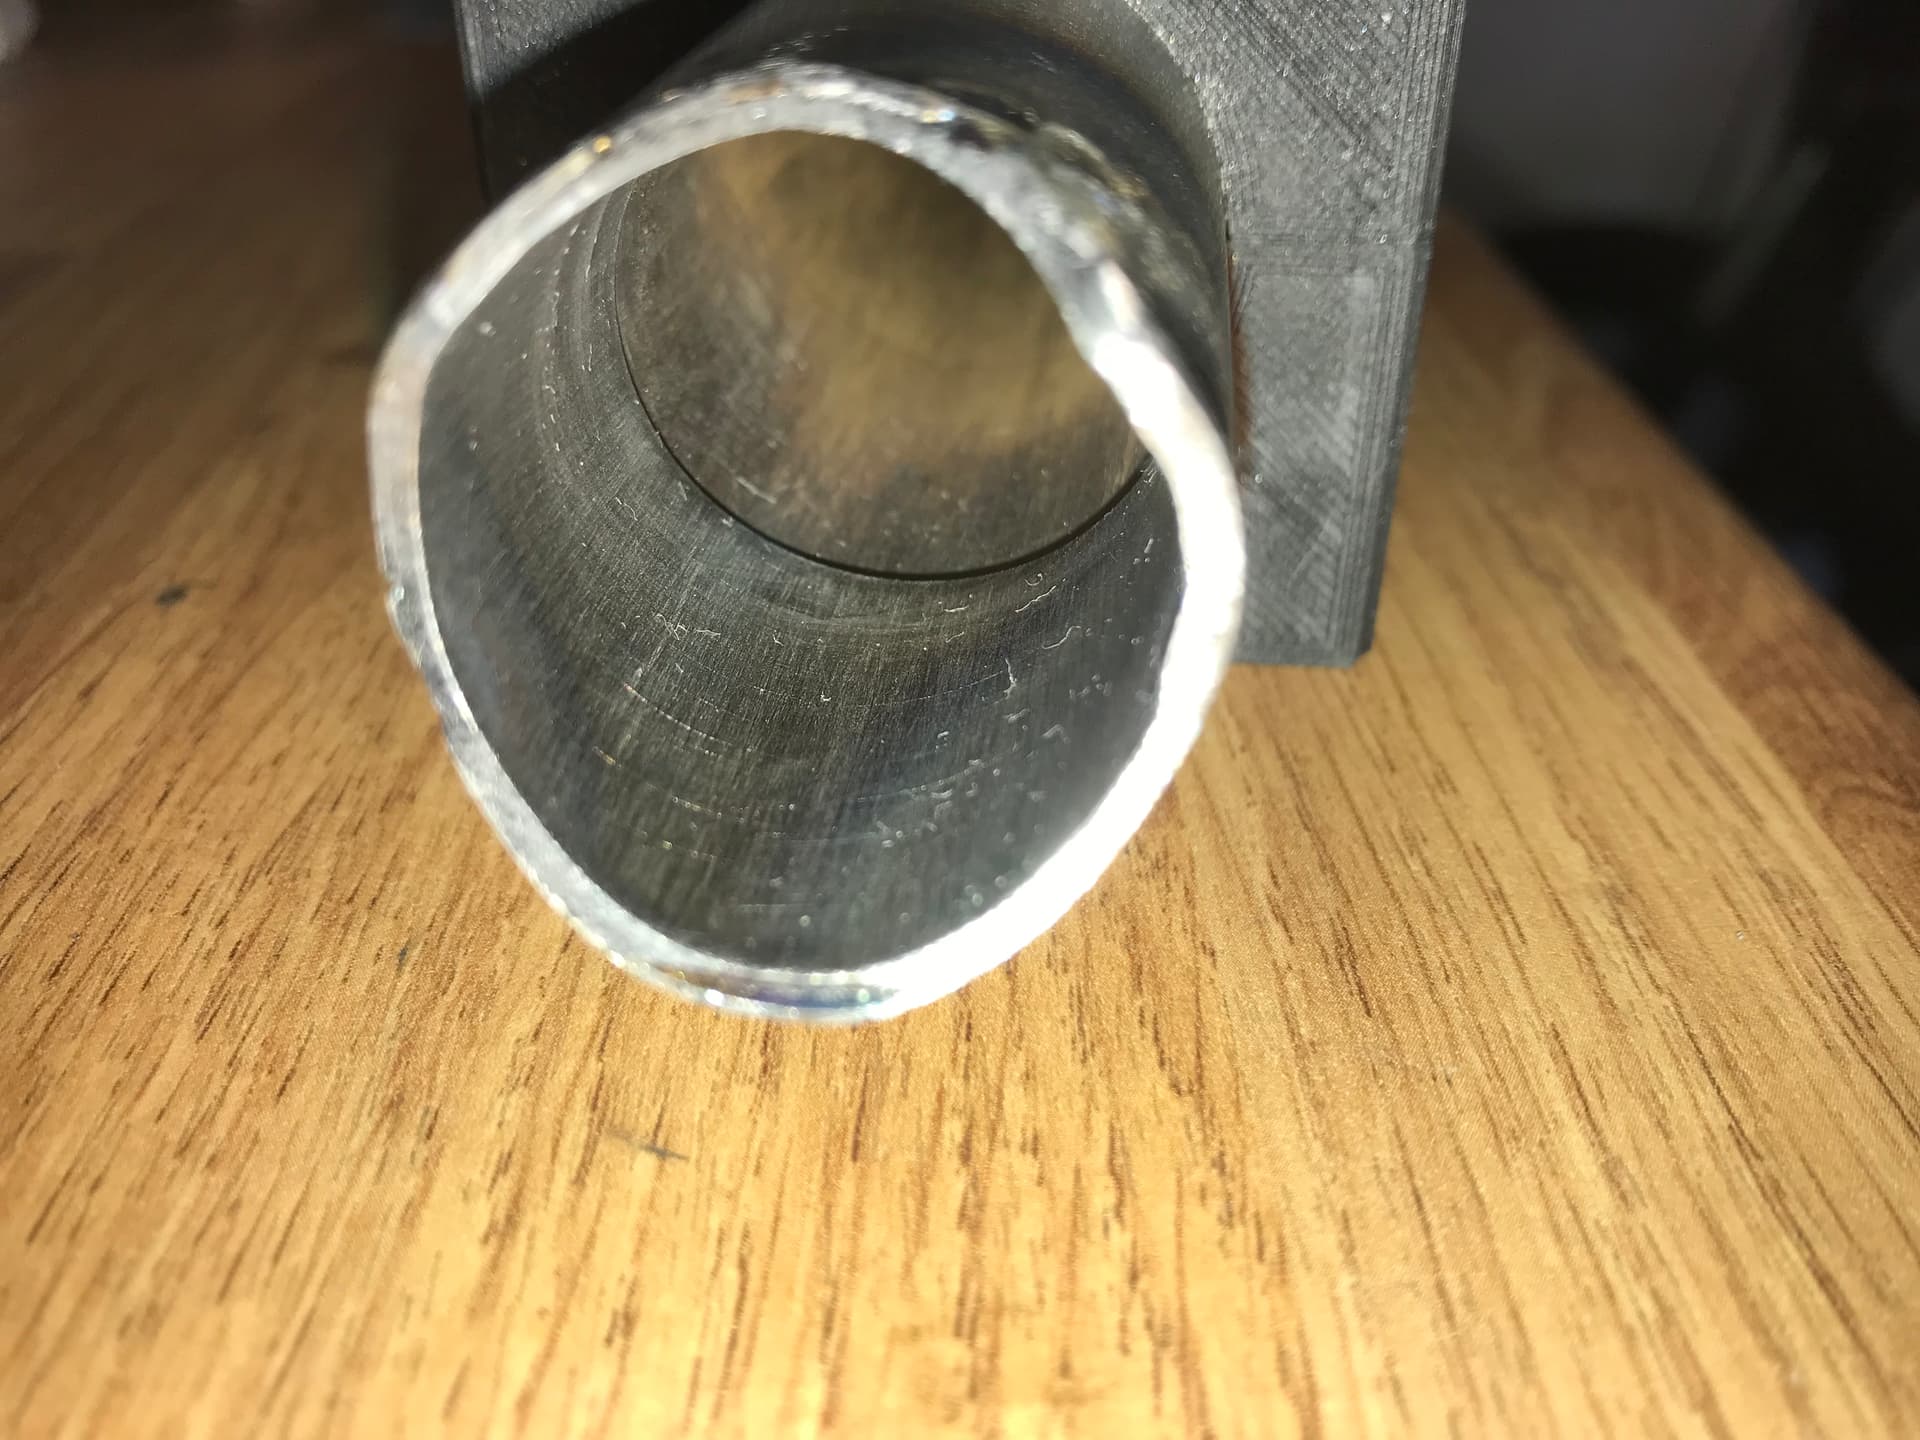
I had trouble with the ST/BB weld. I didn’t do a brilliant job of the ST miters and the 0.7mm wall kept burning up. I was at the point of scrapping the ST and ordering a thicker-walled one when I had a brainwave. I used a 30mm offcut from the DT which I slotted to a tight fit and pressed into the ST base to create an extra-thick wall at the joint. It also allowed me to build back the burned-away tube ends with weld - impossible to spot from the outside after sanding. It welded just fine after this modification. Anyone have any thoughts on whether this is going to cause problems with the finished frame?

I tacked the joints in the jig and then removed the frame to fully weld them. PVD recently updated his jig designs to move the frame out another 20mm to 180mm and I think that’s something I’ll do for the next build. I also had a lot of trouble getting into the tight gaps with the torch when welding away from the jig, especially around the SS’s, and really struggled with positioning the frame while I was welding it. I had it at all sorts of weird angles in the vice, the Park stand and balanced on my workbench. I’d be really interested to see how people hold their frames while welding to improve access for those awkward welds.

I don’t have an alignment table or anything, but putting the frame back in the jig after welding suggests the HT is out of plane by about 4mm toward the NDS and no visual sign of twisting. The rear end is spot-on and no visible misalignment in the ST either. Having read the recent thread on alignment, I decided to call that ‘good enough’ and left it alone :slight_smile:

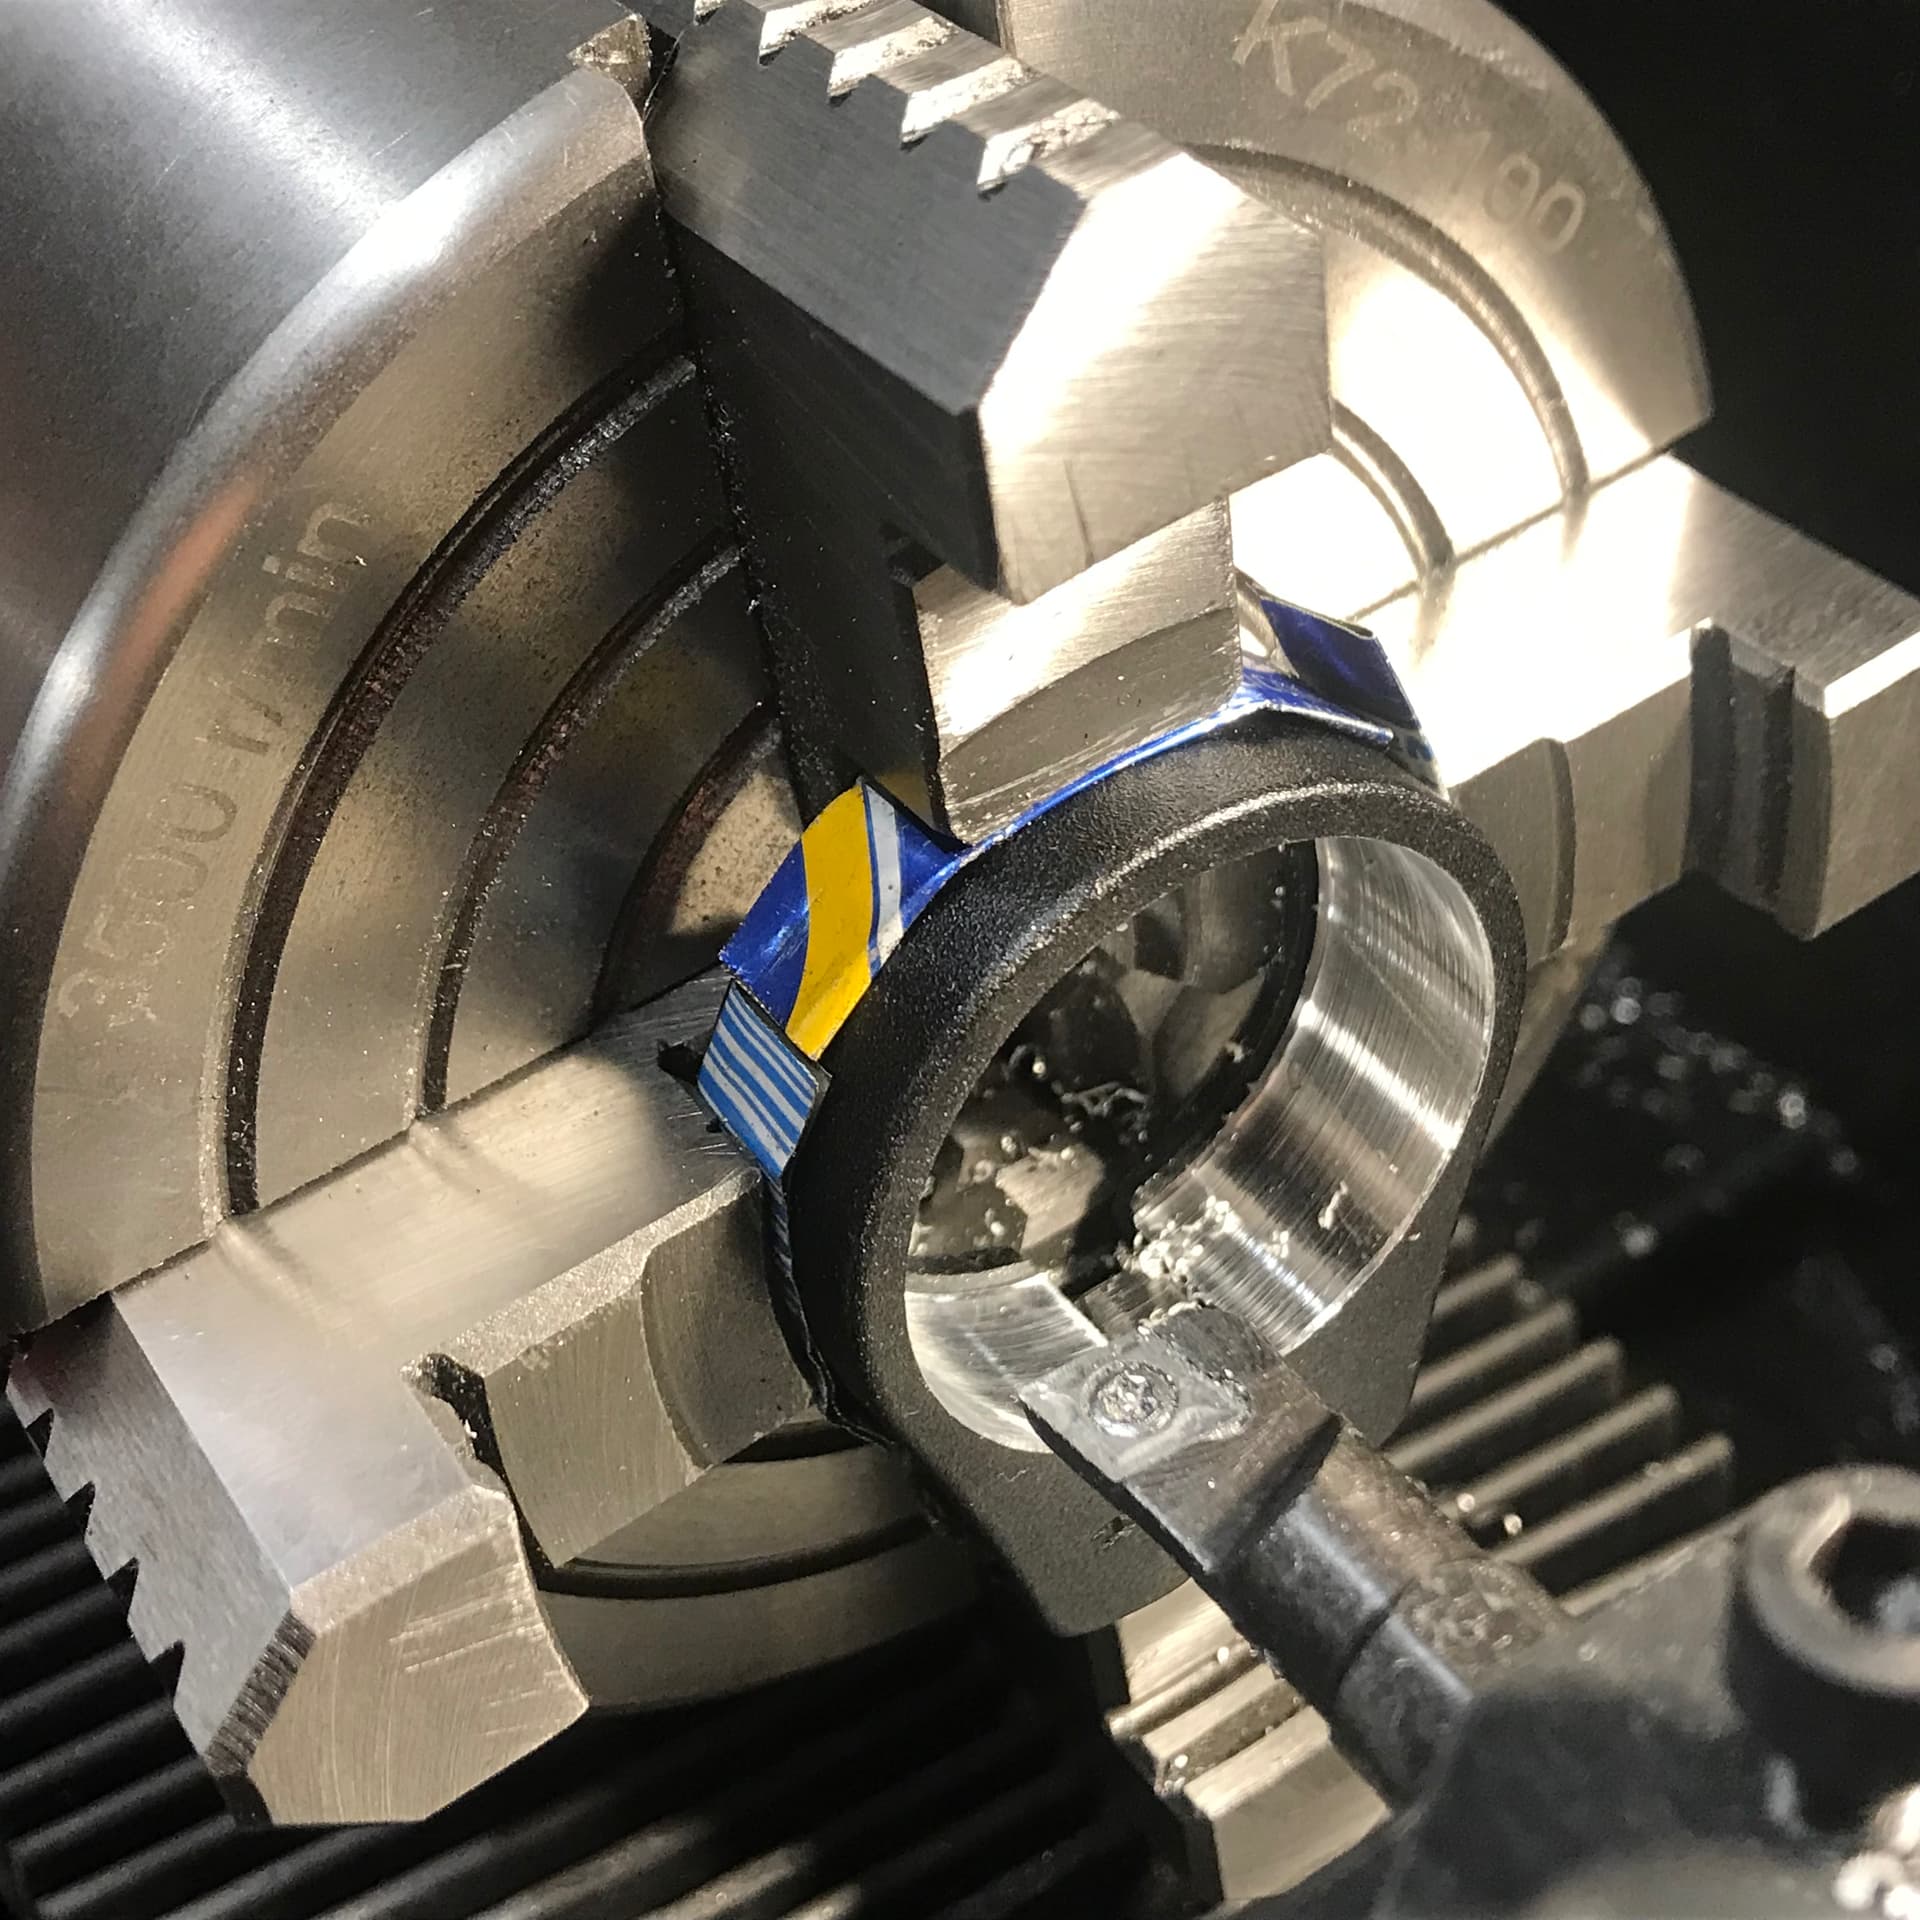
The ST is an odd one. I suspect it’s designed for a brazed collar/clamp. The nominal top outer diameter is 32.9mm and I couldn’t find an off-the-shelf collar to fit so I ended up sticking a 31.8mm collar in the lathe and machining it to size. I know a lot of people use ST toppers so I’ll look into that for the next build. Any other alternative approaches to seatpost clamping on steel frames (apart from brazing on a clamp)?

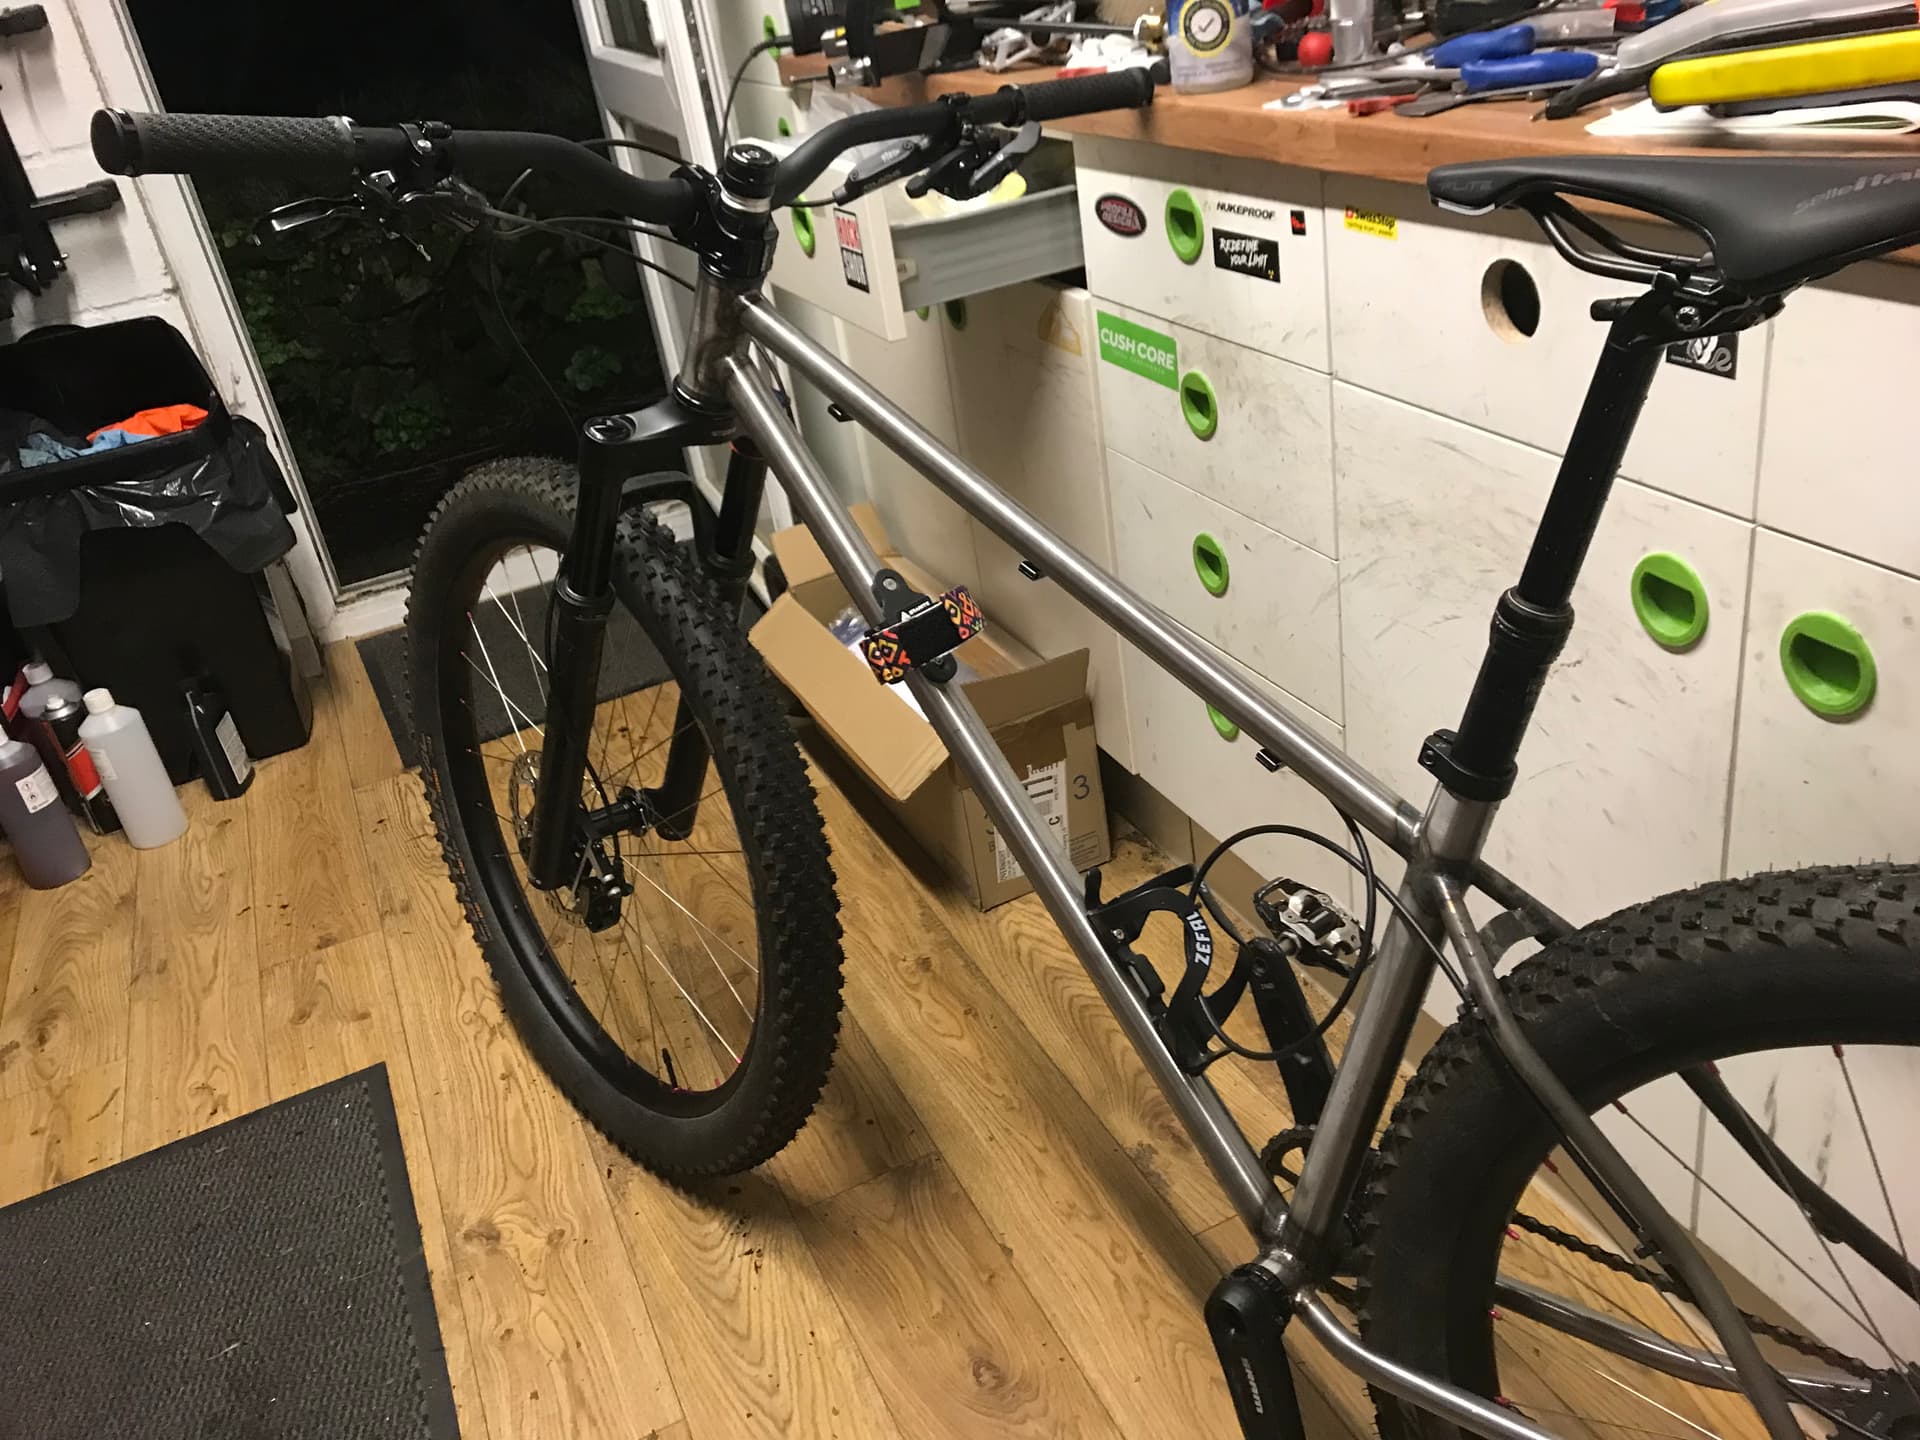
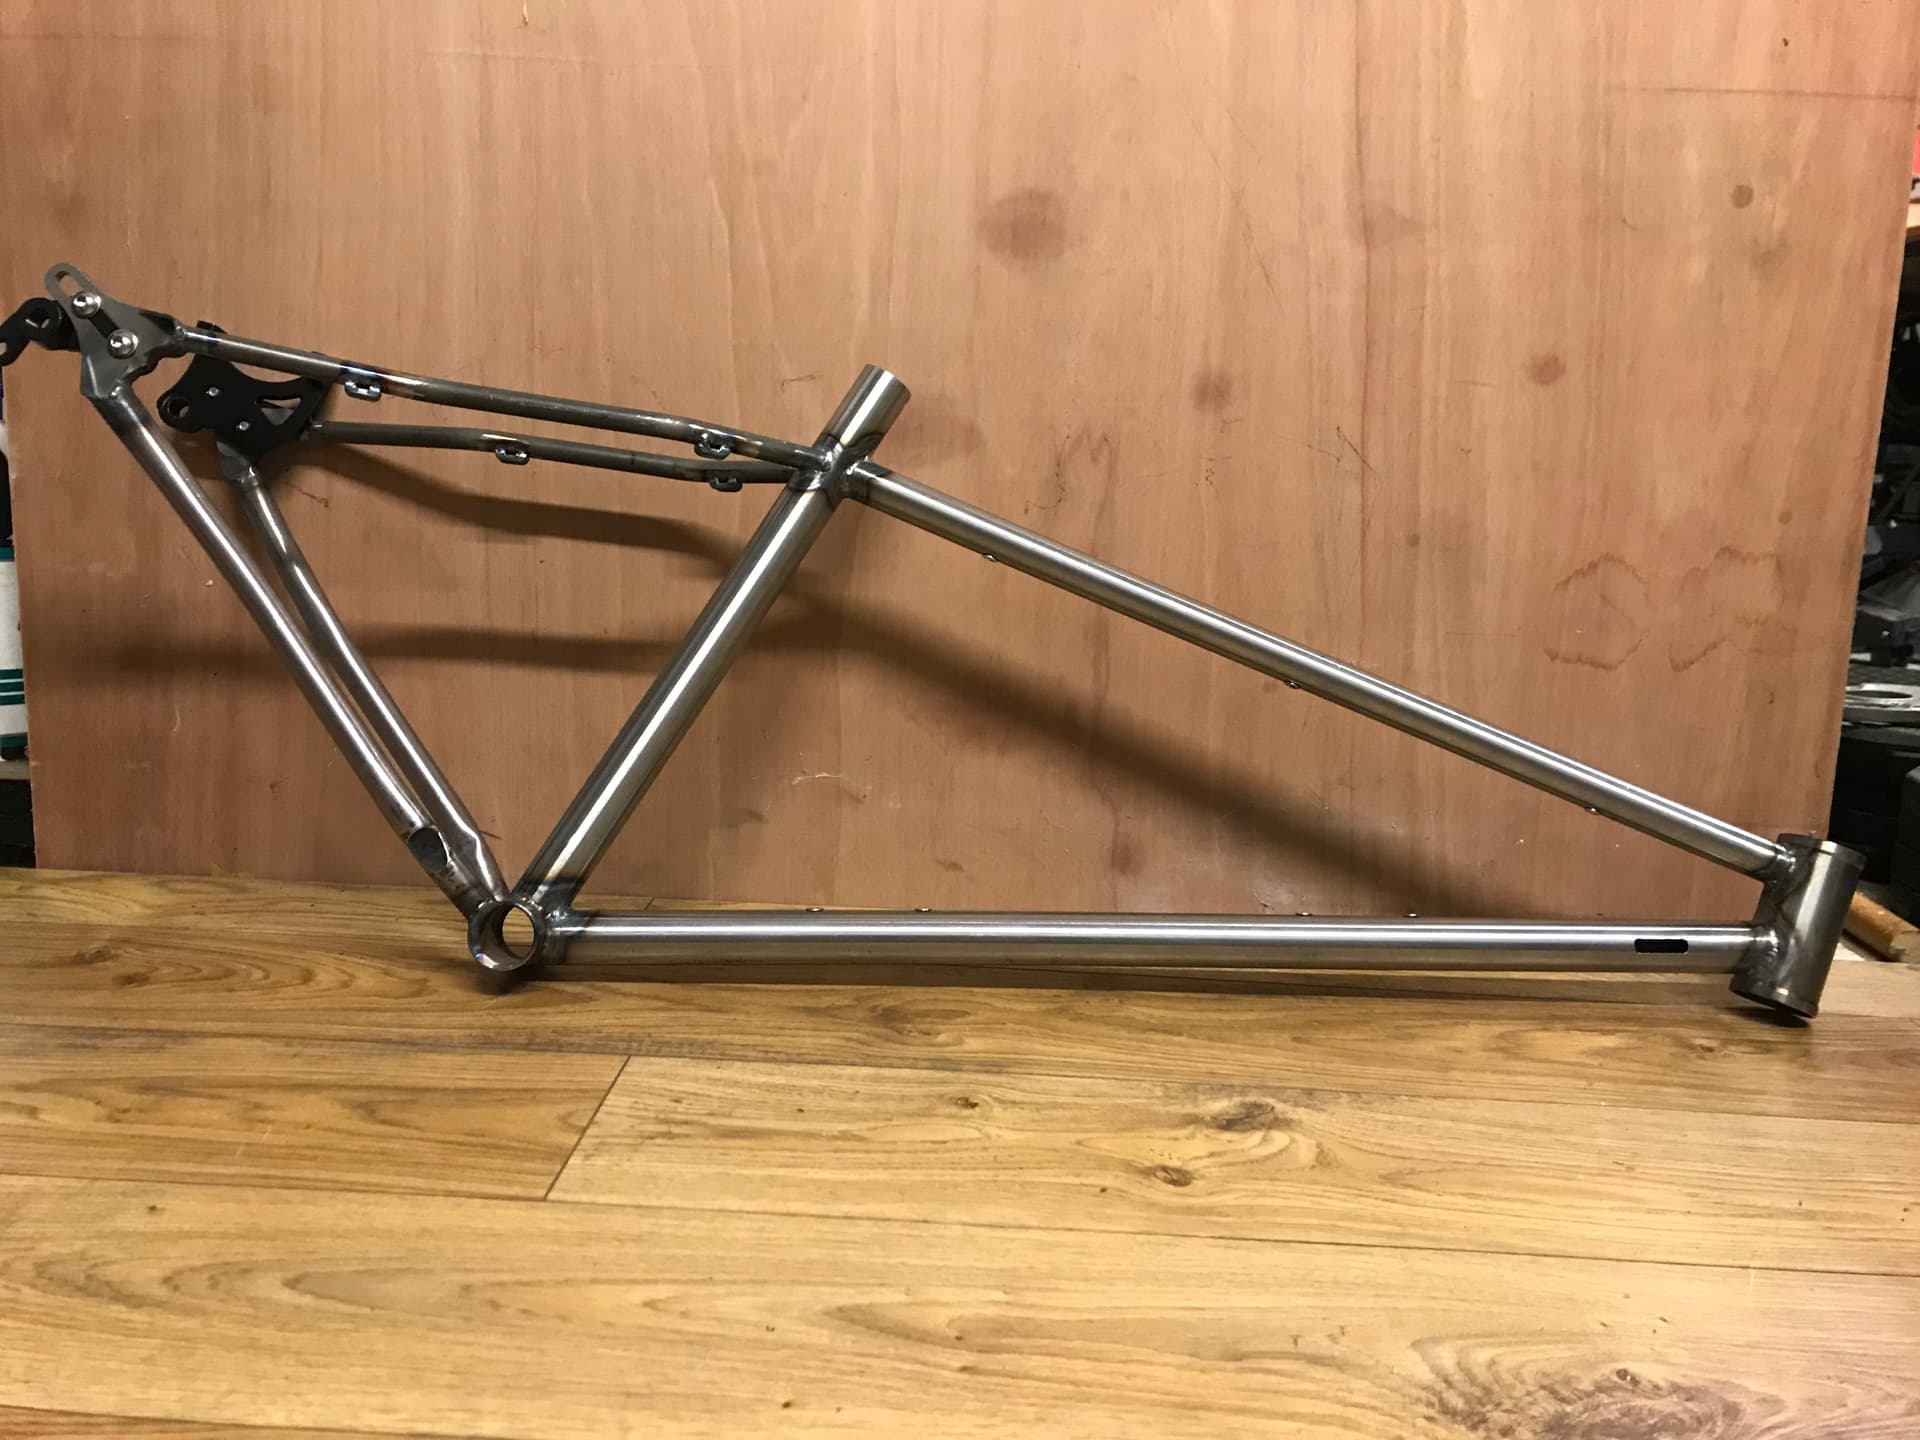
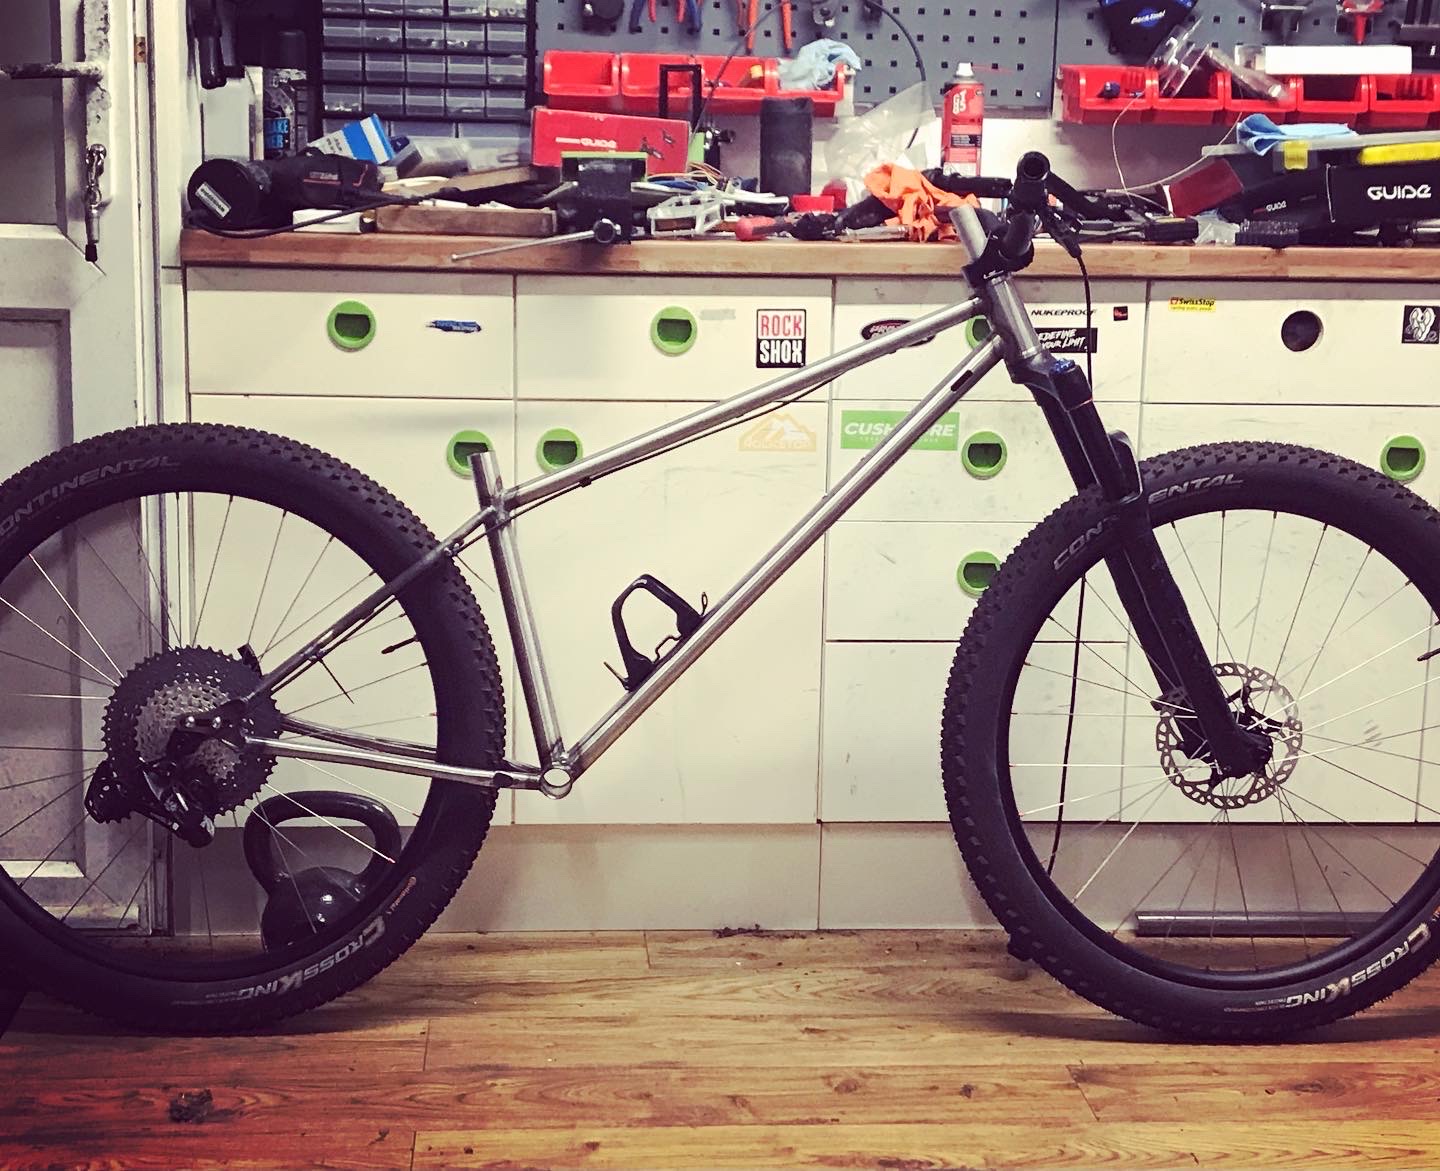
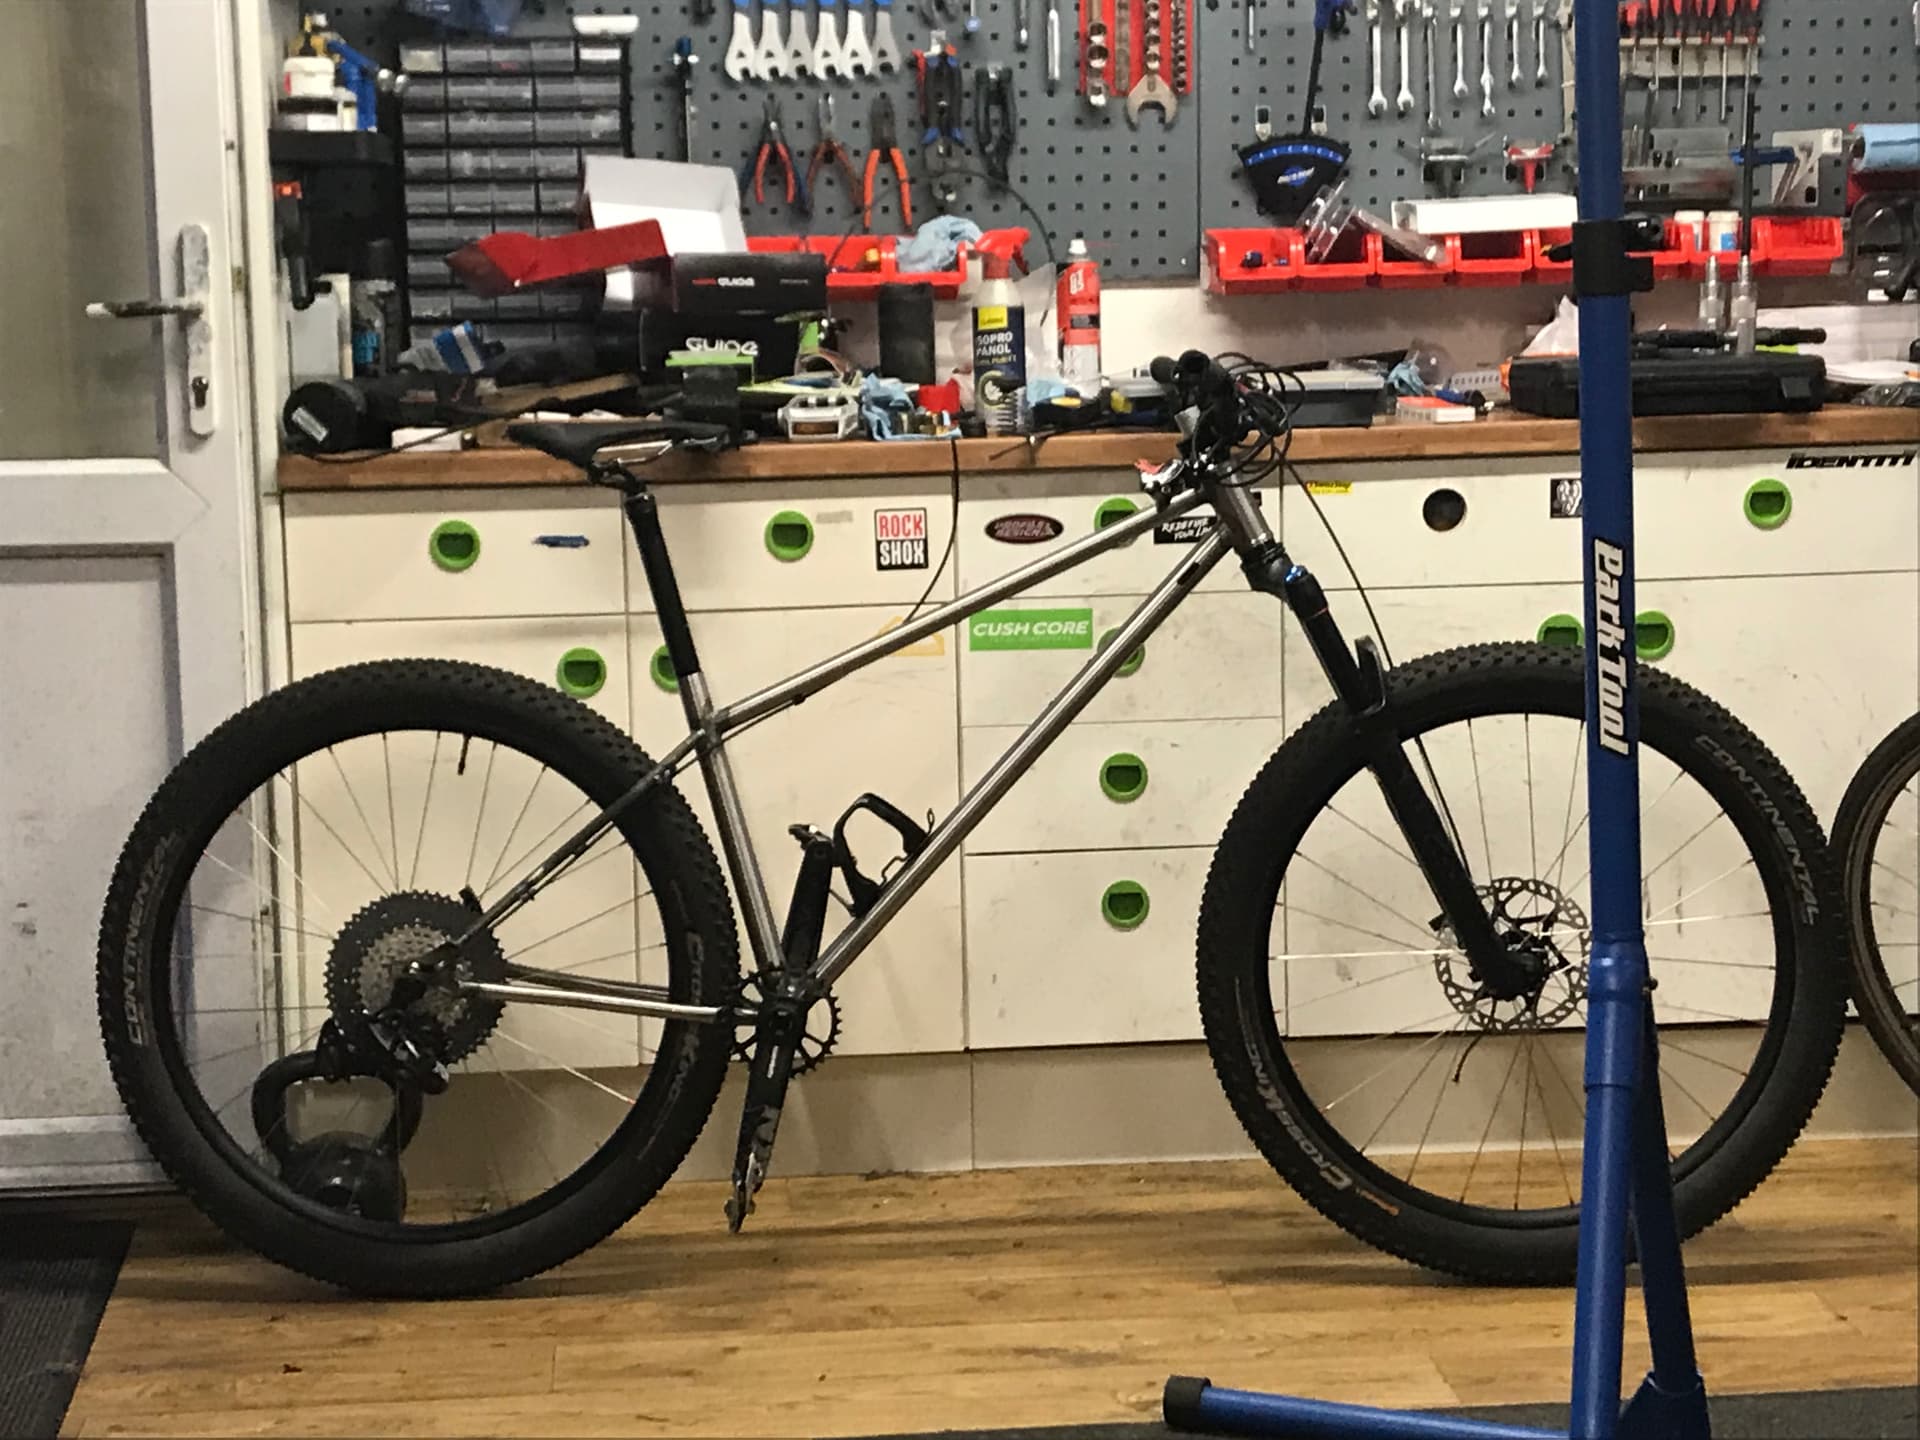
Here are some shots of the finished frame. It’s going to the powder coaters at the weekend so I’ll post final shots when it’s back and built.

Special thanks go to Daniel_Y for his excellent Fusion 360 modelling tutorials. Being able to model the chain and seat stays and tackle all the spacing issues before cutting any tubes was amazing. Also to PVD (I don’t think he’s on this forum is he?) for the inspiration in the design and for taking the time to publish his excellent jig designs. Honourary mentions to Ben Land and Pithy Bikes for their respective Youtube channels which have both informed and inspired over the past few years.

14 Likes

That bike looks super fun, and it’s gotta be a light frame with that tubeset!

My xc bike has undersized tubes as well and it smooths out a lot of trail chatter.

Keep an eye on that seat tube, I built my first 4 frames with it and all but one cracked between the seat stays and top tube. Though I suspect my segmented seat stays put more stress into the seat tube since normal seat stays wrap around the tube more.

Reynolds makes a 30.9 seat tube that’s 1.2mm at the top and .9 at the bottom. It also has a weird OD, but I’ve brazed little shims on the top for 34.9 collars.

4 Likes

For the seat tube clamp, I’d either do a braze-on or shim up to a bigger diameter like wzrd. Milling down the seatclamp might be fine though, as long as it’s thick enough to not lose significant strength (that’s not something I would want to risk breaking on me).

Did you braze in the sleeve at the ST/BB, or is it just welded with the main tube? Don’t be surprised if it cracks down there one day, and watch out for water ingress too. Nice save though.

2 Likes

Thanks, “light and fun” is what I was hoping for. That place where trail meets XC - I guess the cool kids would call it a downcountry hardtail :smiley: The finished bike is 12.6kg (28lb) including a rear Rockstop liner. The wheels are the only place I made a conscious effort to save weight so I’m happy with that.

I knew the ST was going to be a weak point in some way so I’ll check out that Reynolds seat tube for the inevitable re-make. I haven’t explored their range so far as they have a minimum order value which would require me doing some forward planning for the next build. I wonder if any other UK builders know of other ways to source individual Reynolds tubes?

The shim looks like a good solution. I assume it’s regular 0.8mm steel sheet? How do you hold it in place for brazing?

2 Likes

Thanks for the reply. I like wzrd’s shim approach so I’ll take a look at that for the next one. I’m not too worried about the seatclamp though - it’s cheap and chunky, and I’ve only removed 0.5mm from the radius, so it should be fine.

I didn’t braze in the sleeve as I don’t have brazing equipment at the moment. It was tacked in a few places at the bottom and will be joined where I re-built the burned-up areas. Looks like the ST is going to be the most likely point of failure though, at one end or the other!

1 Like

Live and learn! At least you’ve got yourself organised enough to build a frame, unlike muggins here who can barely manage enough time to ride :cry:

2 Likes

Well, it took me well over a year to get to this point. Lots of talk before I eventually got down to action! And I haven’t been out on a bike for over a month now, but I’m putting that down to the unusually cold weather and using the frame building as my excuse :wink:

34.9x.8 tubing slips right over the Reynolds seat tube

2 Likes

Looks great! Keep practicing the welds, undercuts can be a stress riser/weak point. Building frames is addictive, I’m sure you’re already thinking about #3, and what you’d do differently from this one.

3 Likes

Thanks! I confess, I am not a great welder, or even a competent one :rofl: It’s something I plan to practice soon, as well as experimenting with the pulse settings, and learning silver soldering … it’s going to be a busy year!

I’m already thinking about frame #4!!

2 Likes

Nice job! A really nice modern mtb build. Also, great job documenting the progress. I think it will help a lot of people tackle their first builds.

I am curious to hear how the front triangle compliance feels on this bike. Since it’s straight gauge, I think it will be strong enough. All the tubes are one step down in stiffness from the tubing we use on this size of bike:

  • TT: 28.6 858 or 31.8 858
  • DT: 38 1.0-5-9
  • ST: 35mm 1.6-9
  • CS: 19mm .9
  • SS 16mm .9

I have had good luck 3D printing clam shell soft jaws for weird bends and shaped tubes

Good advice to avoid that Columbus Zona seat tube. It seems like there are a few tube designs that are inherited from road bike knowledge which have issues when used in mountain bikes.

These are a few weird reynolds seat tubes I want to try. They could save quite a bit of weight compared to the 35mm seat tubes. Unfortunately, the lengths are more road/gravel focused. This one only goes down to 430mm due to the center butt

1 Like


1 Like


2 Likes

Thanks! I have to say (again) that your Fusion tutorials were a game-changer on this build, especially for the stays which I struggled with last time. I’d be interested to see some photos of those 3D-printed clam shells if you have any to share as printing is an option for me. I have a few ideas of my own but I’m open to outside inspiration.

Since my last comment, I finished the frame prep, did a quick dry build (1 gear; non-functioning dropper; forks need a full stripdown) and went out for a short ride (mix of light gravel and tarmac) before I lost the light.

First impressions were really good. The loop I rode is the one I take most customer MTBs and gravel bikes around after any major work on them, so I’ve ridden it lots on all sorts of bikes (full sus, hardtails, fully rigid, gravel bikes; alu, steel, carbon, even a ti) but I don’t recall any feeling quite like this does. I’ve owned a few 90s steel MTBs over the years, including my current '98 Cinder Cone beater, and they’ve all had a sort of firm twanginess, if that makes any sense? This bike doesn’t have that - it feels ‘plush’, like the ground was smoother than it is. I can’t quite describe it, but I like it!

Perhaps the plushness is a combination of the tyres, frame and wheels? They’ve all been designed/chosen to provide some degree of suppleness and comfort. I won’t take it out for a proper hammering until it’s been painted and properly assembled, and I guess that’s where any issues with over-flexiness are going to show up, but it felt comfortable and planted in the corners with no obvious signs of vagueness when turning, accelerating out of the saddle, or under hard braking.

A few immediate things I noticed:

The cockpit feels just right - I felt at home as soon as I got in the saddle - but I know the forks are running low in their travel and the stem is slammed, so I may have to swap the bars for something with a lower rise and fit a slightly longer stem to put the grips back where they need to be.

The dropper post knocks inside the seat tube when I sit down hard. That Zona seat tube really was a bad choice so I’m going to get in touch with Reynolds to see what they can offer for next time. In the meantime, I may try using some thin shim stock to take out some of the movement, or add some thin rubber to the end to mute the knocking, because I know it’ll really bug the hell out of me on a ride.

I think I’m going to have to get a front tyre with more aggressive side knobs. I knew the long front centre meant the front would be less weighted in the saddle but I hadn’t appreciated how much :smiley:

Some more photos for you to enjoy:

I have a mate coming round tomorrow and I’m sure he’ll want to take it for a spin. His stable is exclusively Kona, mostly 90s-era high-end steel except for the '21 Hei Hei CR … so his will be a very interesting perspective.

Next time you see it, it’ll be painted!

5 Likes

Not so much a ‘fear’ about galvanic corrosion, but I have seen bikes come through the workshop where aluminium corrosion has expanded and caused issues in the surrounding area. As I said, I’m not fussed with this frame as I didn’t expect it to be a ‘frame for life’ but I was curious if anyone had any experience of the use of rivnuts longer-term in steel frames.

1 Like


2 Likes

I didn’t realise they came in stainless! I’ve found a supplier in the UK who I’ve used before so I’ll look into that some more. They’re definitely quick and easy to fit. Thanks!

1 Like

I have used that Zona ST on a few gravel/CX frames but I always silver braze a sleeve onto the top. I turn a sleeve so it fits nicely around the outside and is about .040 thickness on the wall which turns it into 1.375" for which hole saws are readily available. The sleeve also allows me to add some detail onto the frame to make it stand out a bit. Generally it’s under-appreciated how much stress that joint sees when riding. Especially with a long seatpost.

1 Like

Any chance of seeing a photo of the sleeve? I think a 1mm wall steel tube is beyond the capacity of my little mini lathe and the flimsy boring bar but I’d be interested to see your approach to the problem.

How do you do the washers with thin wall tubing? I assume you bend them to suit the tube profile, but do you then fit them inside or outside?