Mentioned in a comment that I would share my first frame / framebuilding course experience. Well it’s happening. On Monday I start the course with Rob from Tempest Bicycles. The course is 10 days and costs AU$4,800. I checked with him and he’s happy for me to share my experience here.
As far as my background goes I’d consider myself an absolute amatueur. I have a little MMA/stick welding experience from growing up on a farm but have never picked up a brazing torch. I also don’t have a workshop that’s suitable for framebuilding which was the main reason I wanted to do the course. For me it’s very much a try before you buy. That and I feel like Rob will be able to help me avoid a lot of beginner type mistakes.
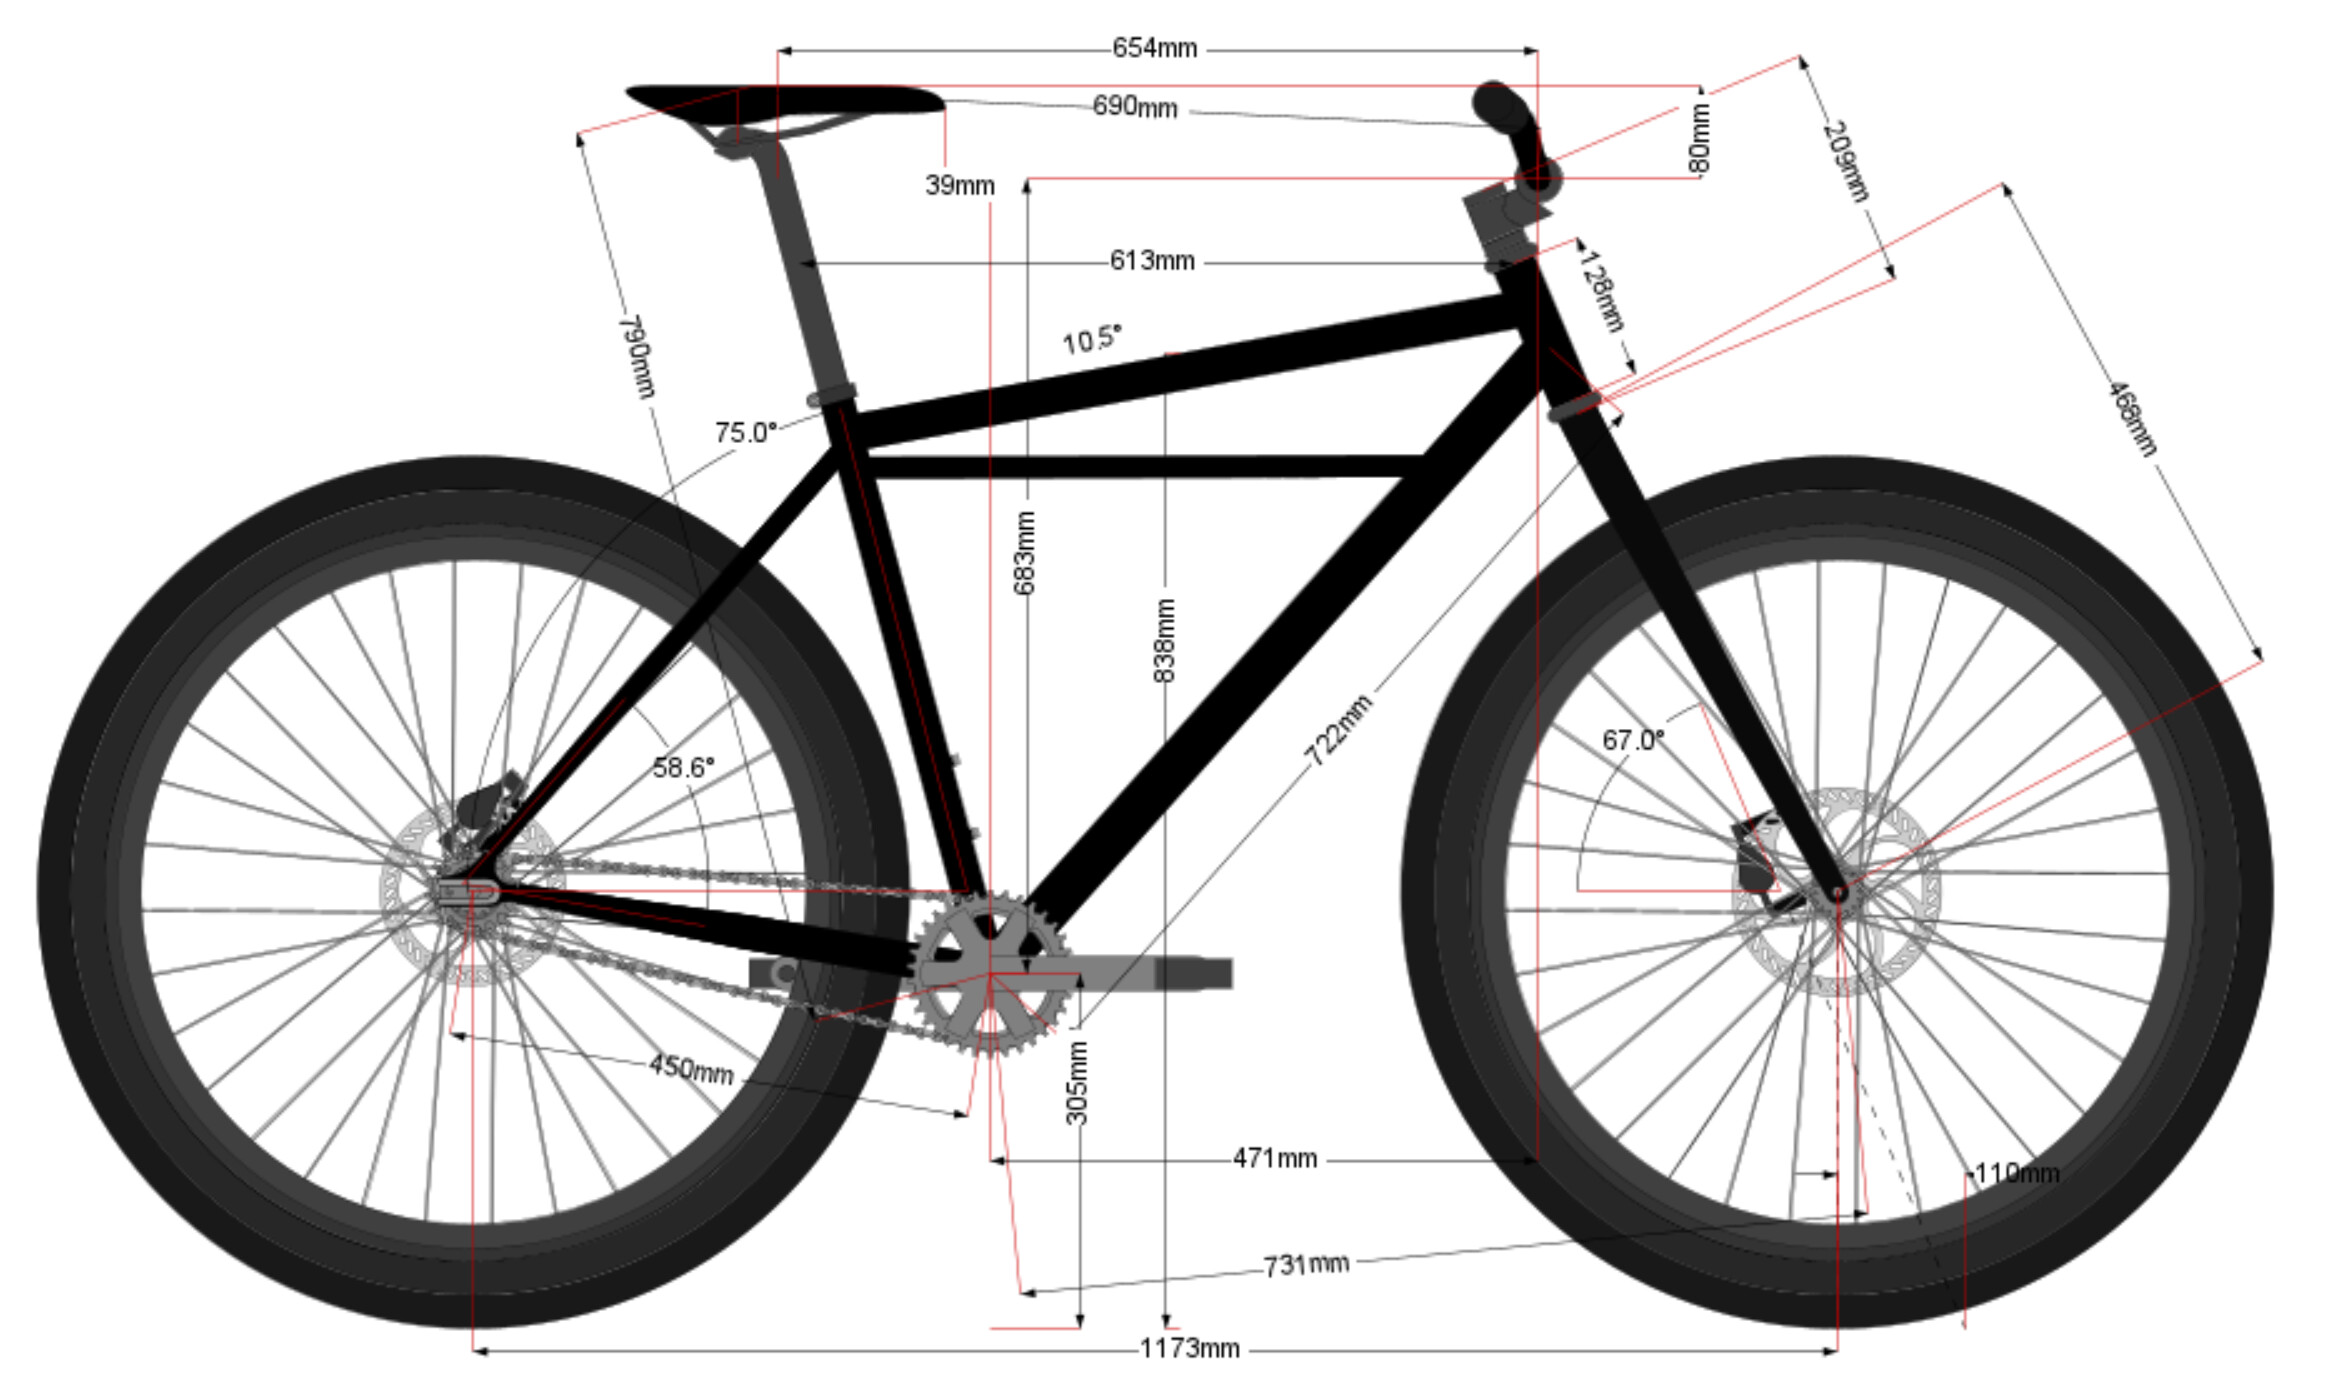
The frame I’m building is a rigid SS MTB/ATB kinda thing. The parts and fork for it are coming off an old Surly KM I have so it’s gonna be 29", QR, EC34 and 27.2 post. I figured since it’s a fillet brazed course it would be cool to build something a little old school. Geo below with some of my thoughts on tubing. The final tubing spec will will largely be determined by Rob and what he has in his shop at the time.
Headtube (130mm): [34mm for EC34] (Cane Creek 110)
Downtube (720mm c-c): 35mm straight gauge (0.9mm?) - Beefy to land the extra tube. I’d rather not go up to a 38mm OD tube since I think they look a bit weird hitting the 34mm headtube.
Seat tube (520mm c-t): 28.6 / 29.8 Externally Butted - for 27.2 post (30.0 Surly Clamp) - no plans to use a dropper on this bike
Top Tube (600mm c-c): 28.6 Externally Butted - Keen to keep it thin for that old school look so thinking an externally butted seat tube could work here a well. Could also use a 31.7mm if needed
Chainstays/Seatstays: 16mm SS and 19mm CS is what I was thinking. I do think a single bend stays would look better on this kinda bike but may go double bend if that’s what’s available/doable.
Brake Mount: IS tab - Shouldn’t need to be a slotted tab based on 45cm chain stay length with wheel at middle of dropouts and White Ind 34:16 / 31:19 gear ratios.
Extra cross tube: 19mm straight gauge (maybe 22.2mm) - I reckon it’ll look better a bit thinner than the main triangle tubing either way
That should cover the basics. Anyway this is less about the bike and more about what I learn and whether I find it to be a worthwhile experience. I’m pretty bad with writing stuff so this may end up as more of a photo dump. See how we go! Cheers
Your HT will be more like 36mm OD, 34mm is internal diameter. But for that style of bike, a 35mm DT will look better anyway plus it’ll save a bit of weight and give a tad more compliance. That’s my kinda mountain bike!
Looks fun!
I’m sure you’ll have heaps of fun and learn a ton w. Rob teaching you. Rob is a great guy and he knows his stuff. A few years ago, before the framebuilding school was a thing and before he ran his own bike shop, I was up there for a visit and spent a weekend “supervising” while a mate was building a track bike size XXL.
I’m beating myself up for not having visited his new space and his shop yet. Haven’t seen him since the handmade show here in Melbourne a few years ago.
First day in the shop today. Met Rob, had a tour of his shop and was given an overview of his process. We also went over the design in BikeCAD, finalised the tubing spec and ordered a few tubes he didn’t have in stock. Not much else to say other than that. Was kinda a short day since Rob usually does this course for 3-4 people and it takes a lot longer to get through the design stuff. I’m solo and was already up to speed on BikeCAD before starting. Tomorrow we’re cutting tubes so I guess that’s when the real fun starts. I will try to take some pics.
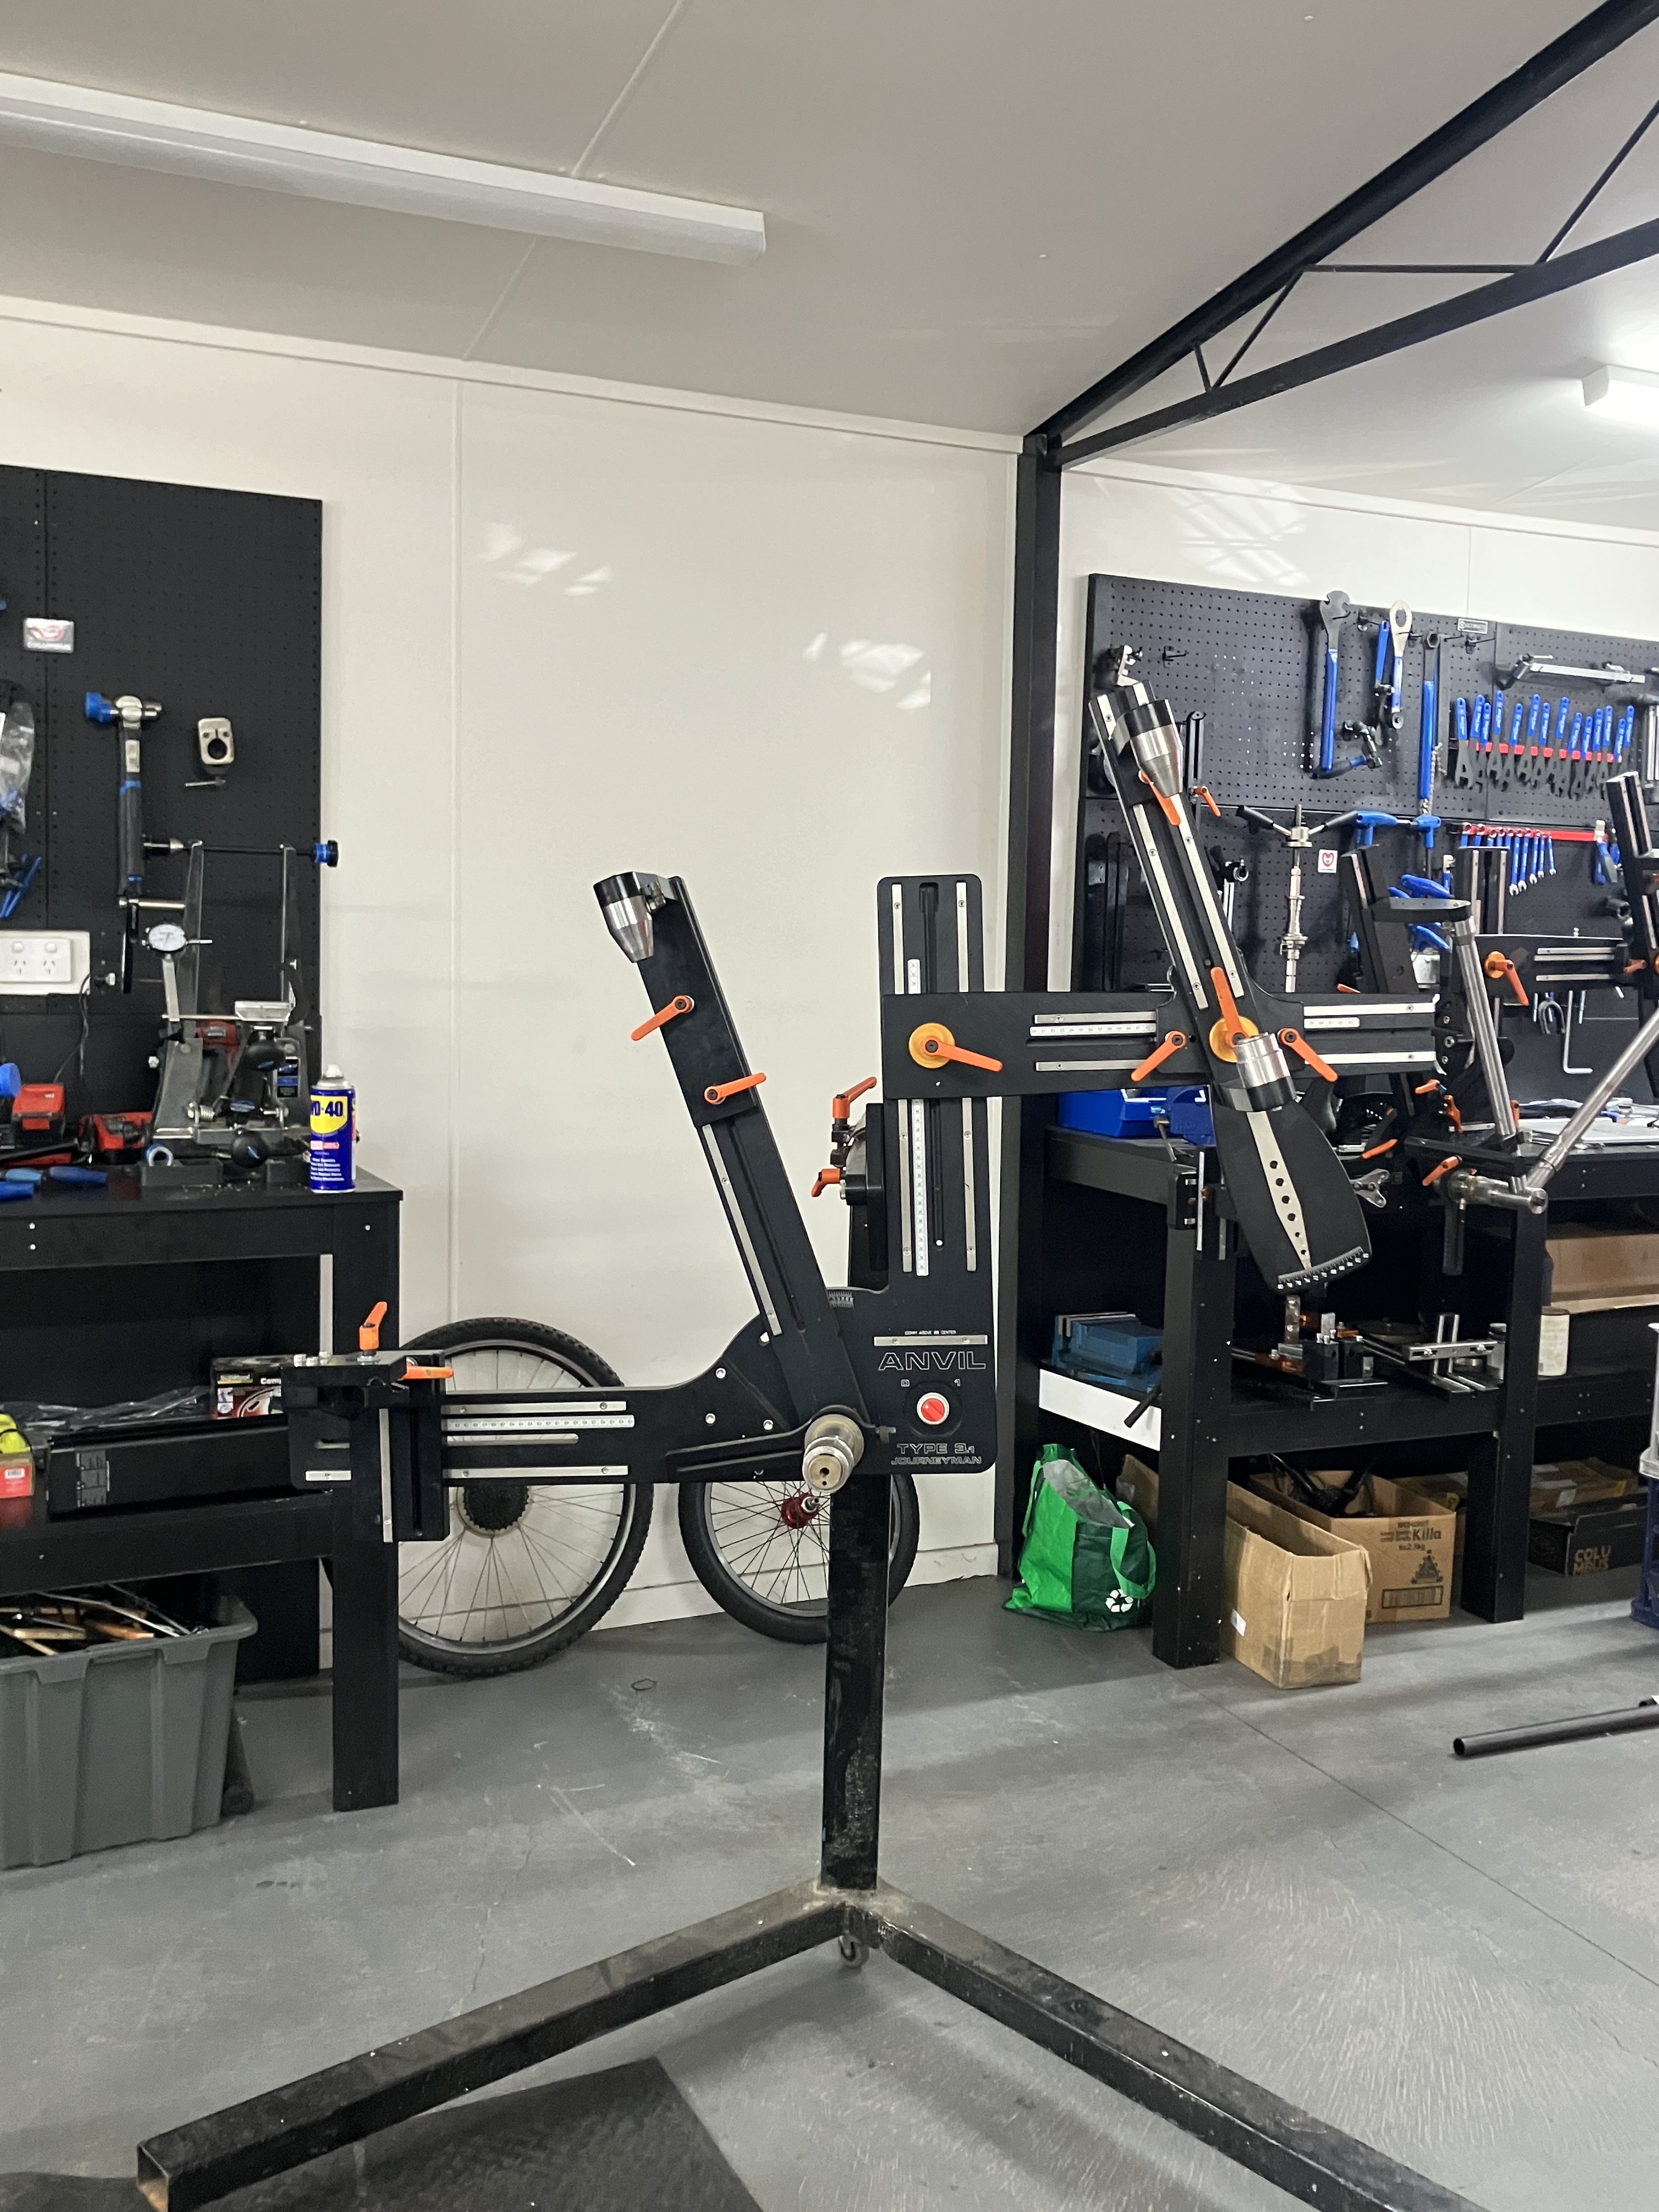
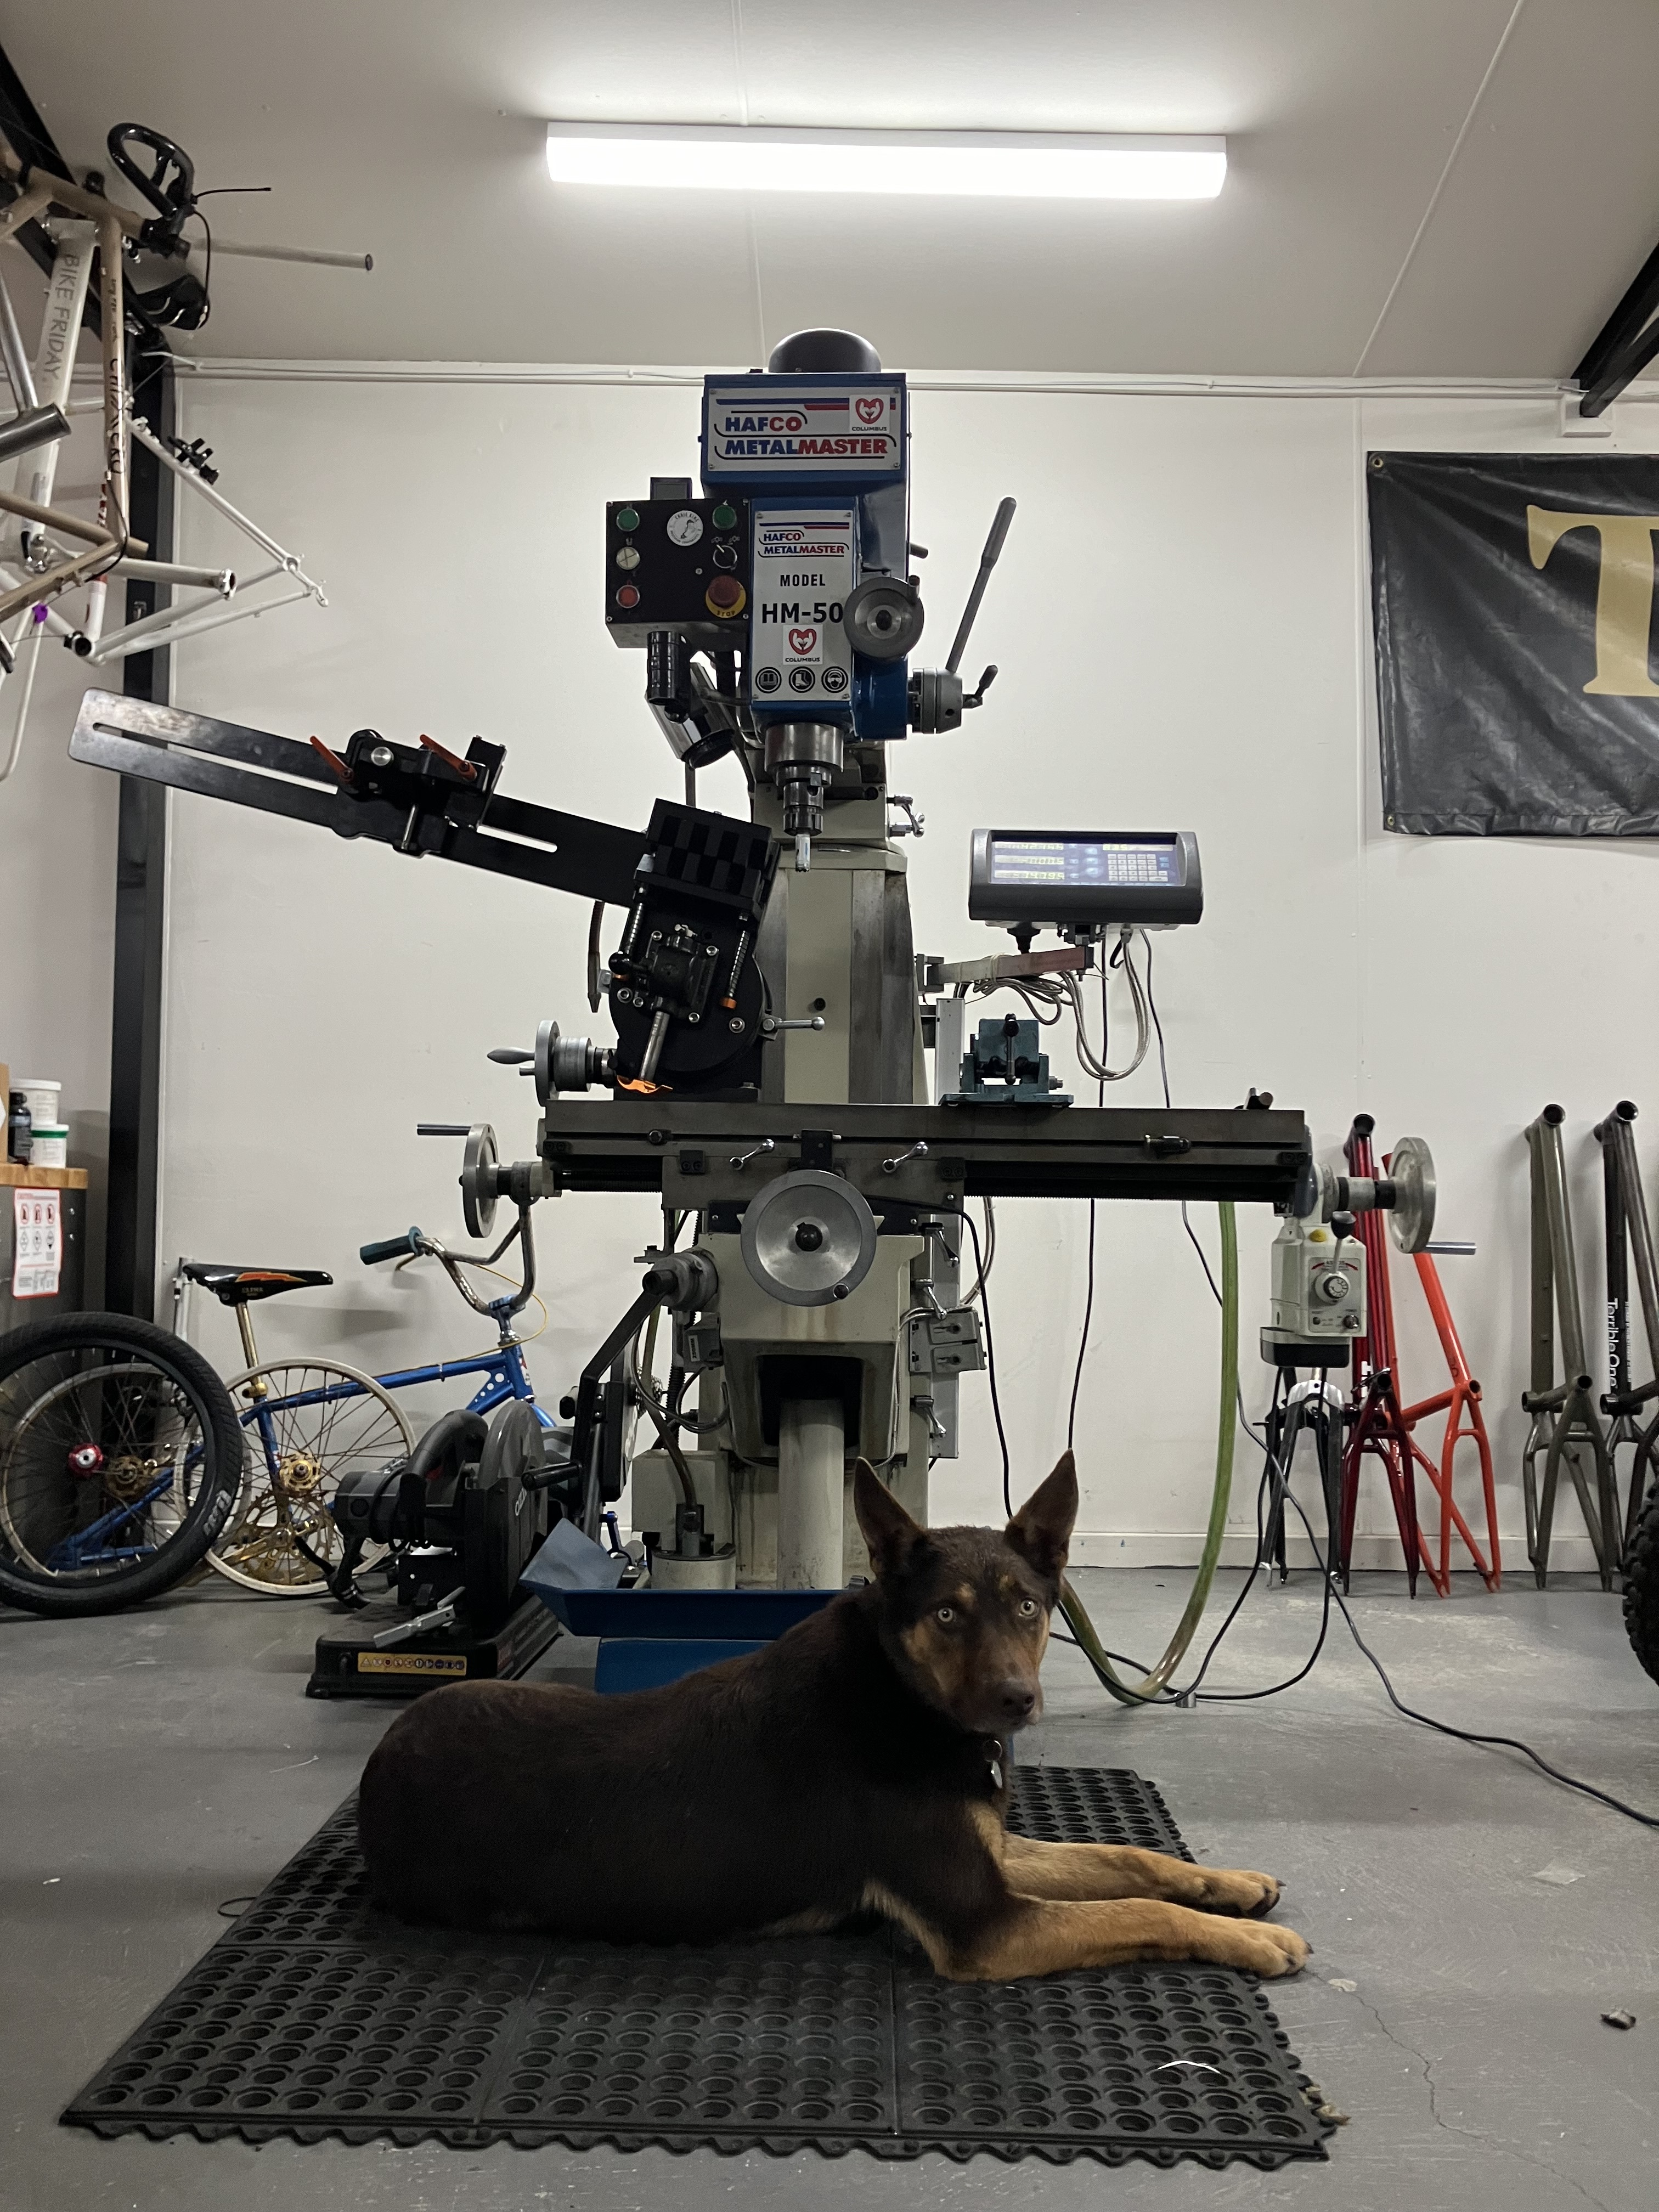
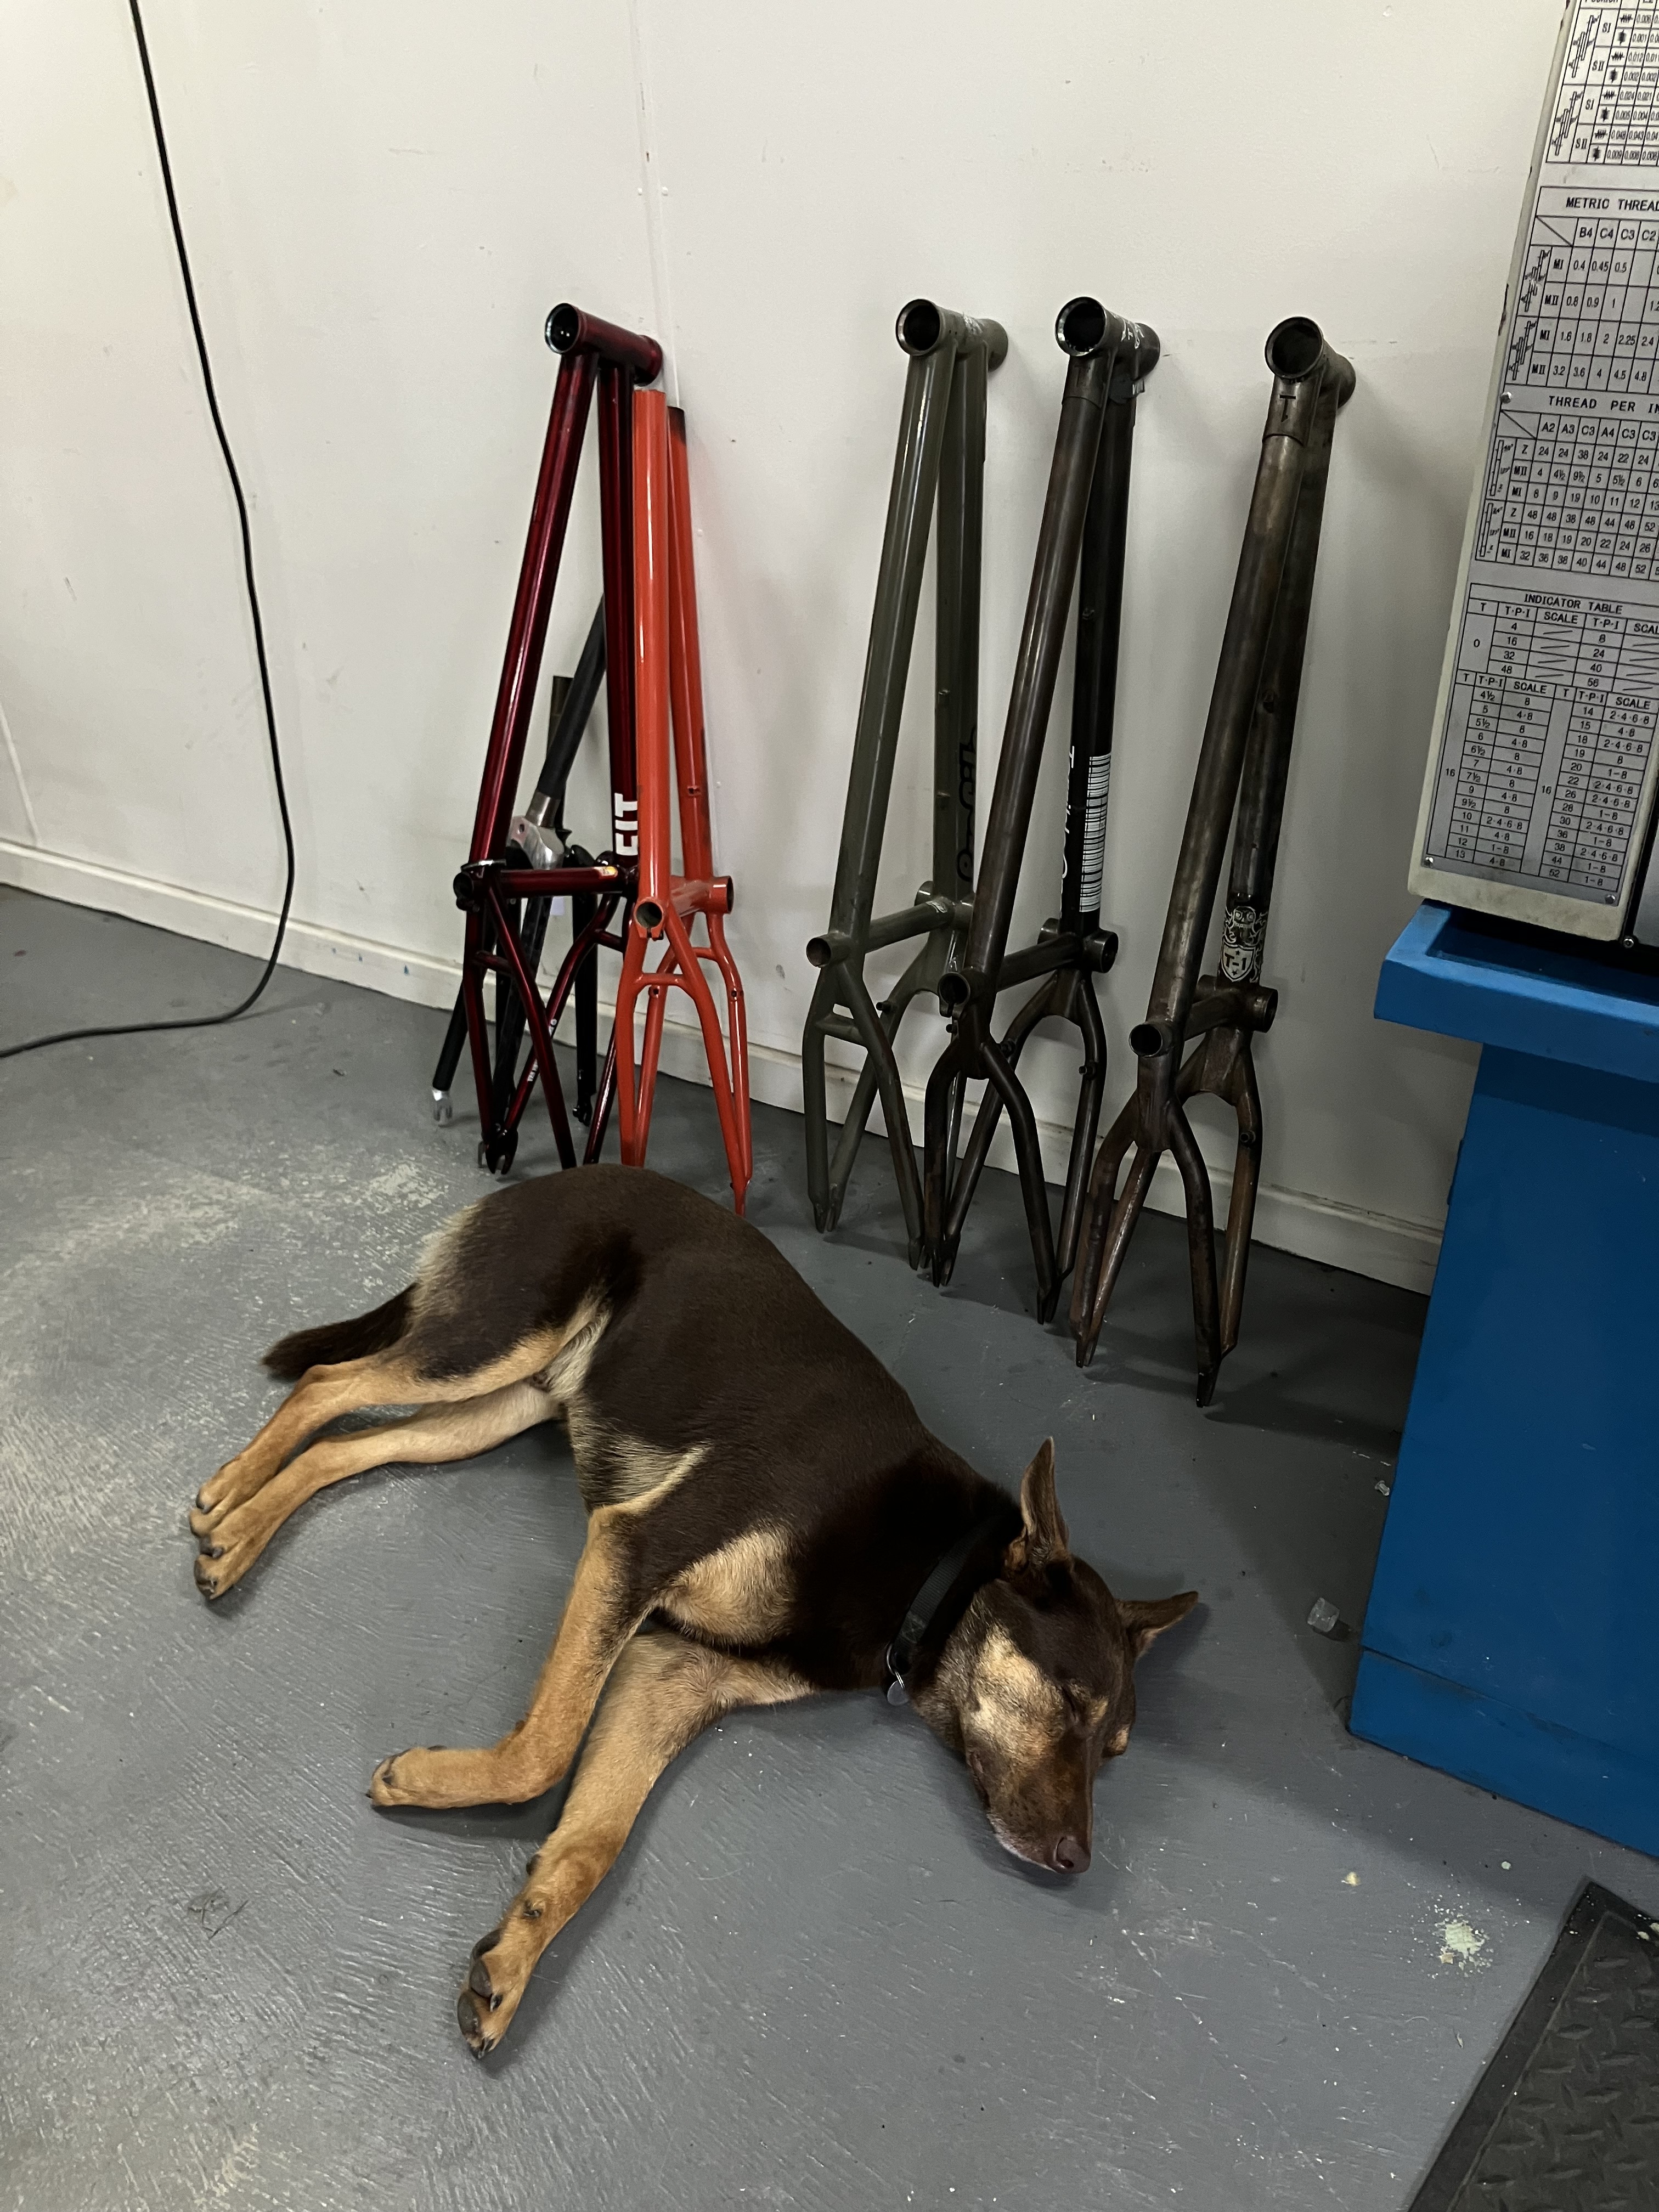
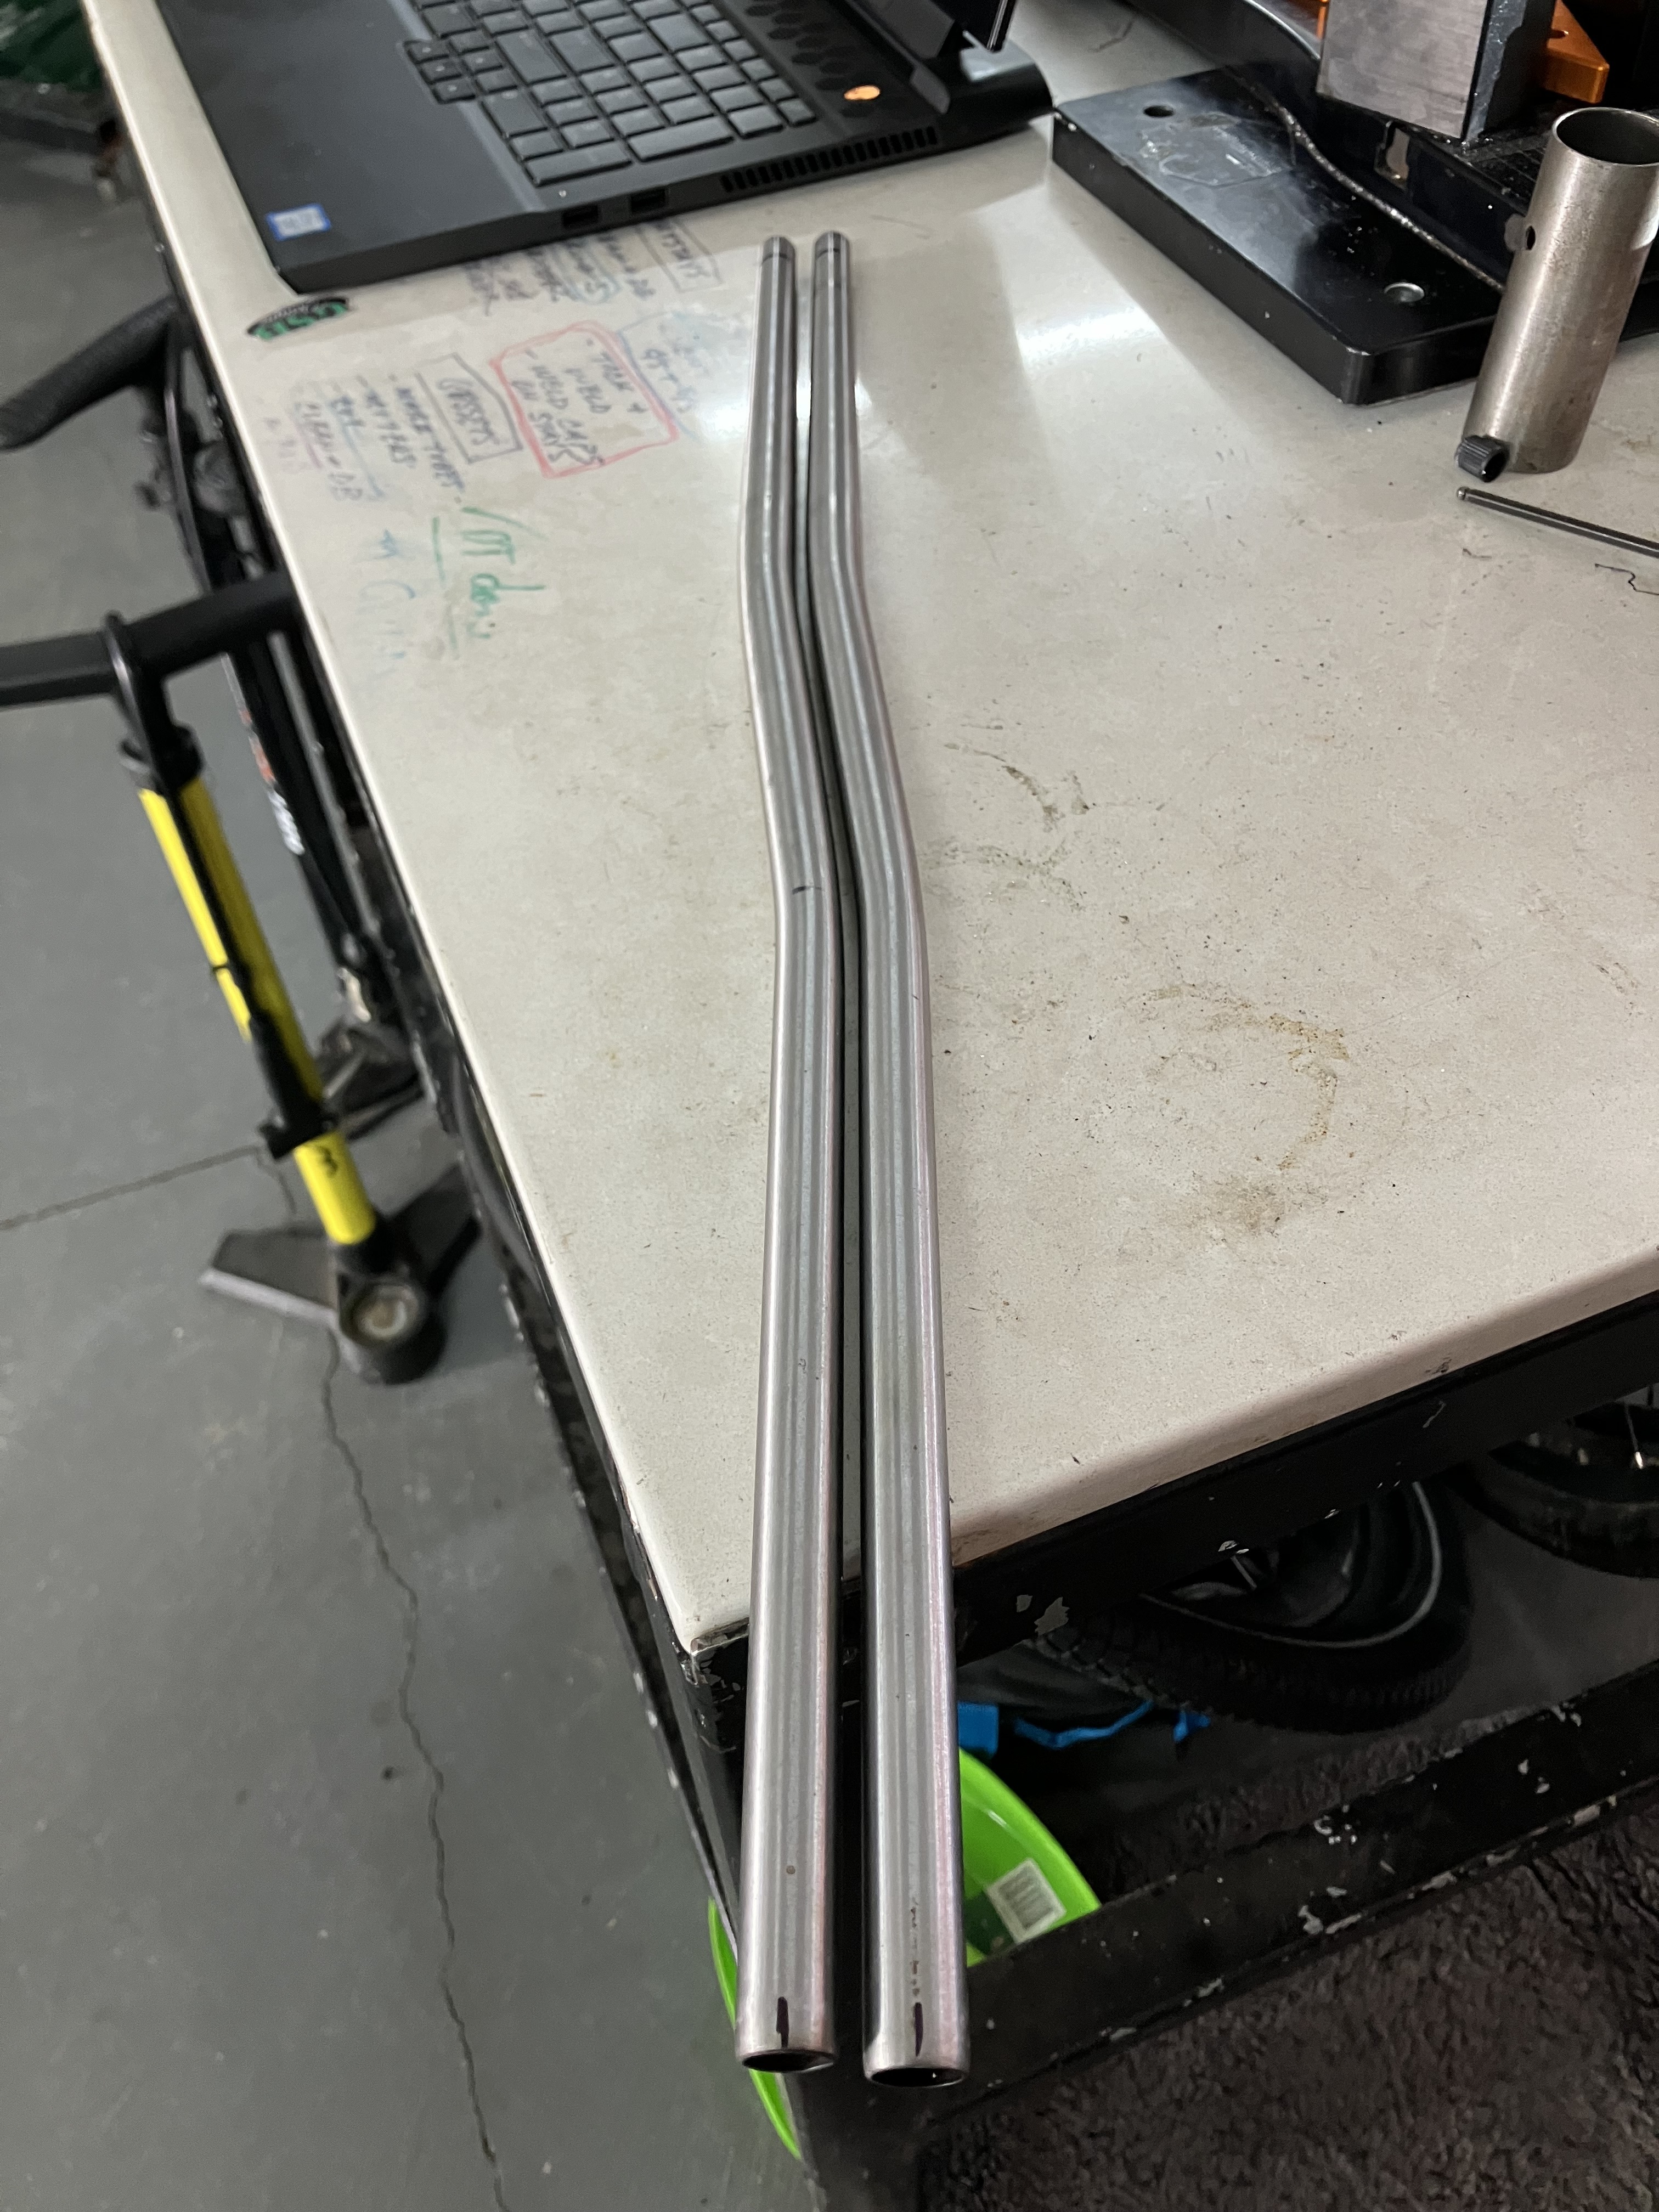
Today we got stuck straight in. First we setup the frame-jig (Anvil) using dimensions from BikeCAD and threw the BB and HT in there. We then went through each of the tubes, checked them for straightness (with a little help from Bill dog), identified the butt locations and confirmed how they would sit in the frame.
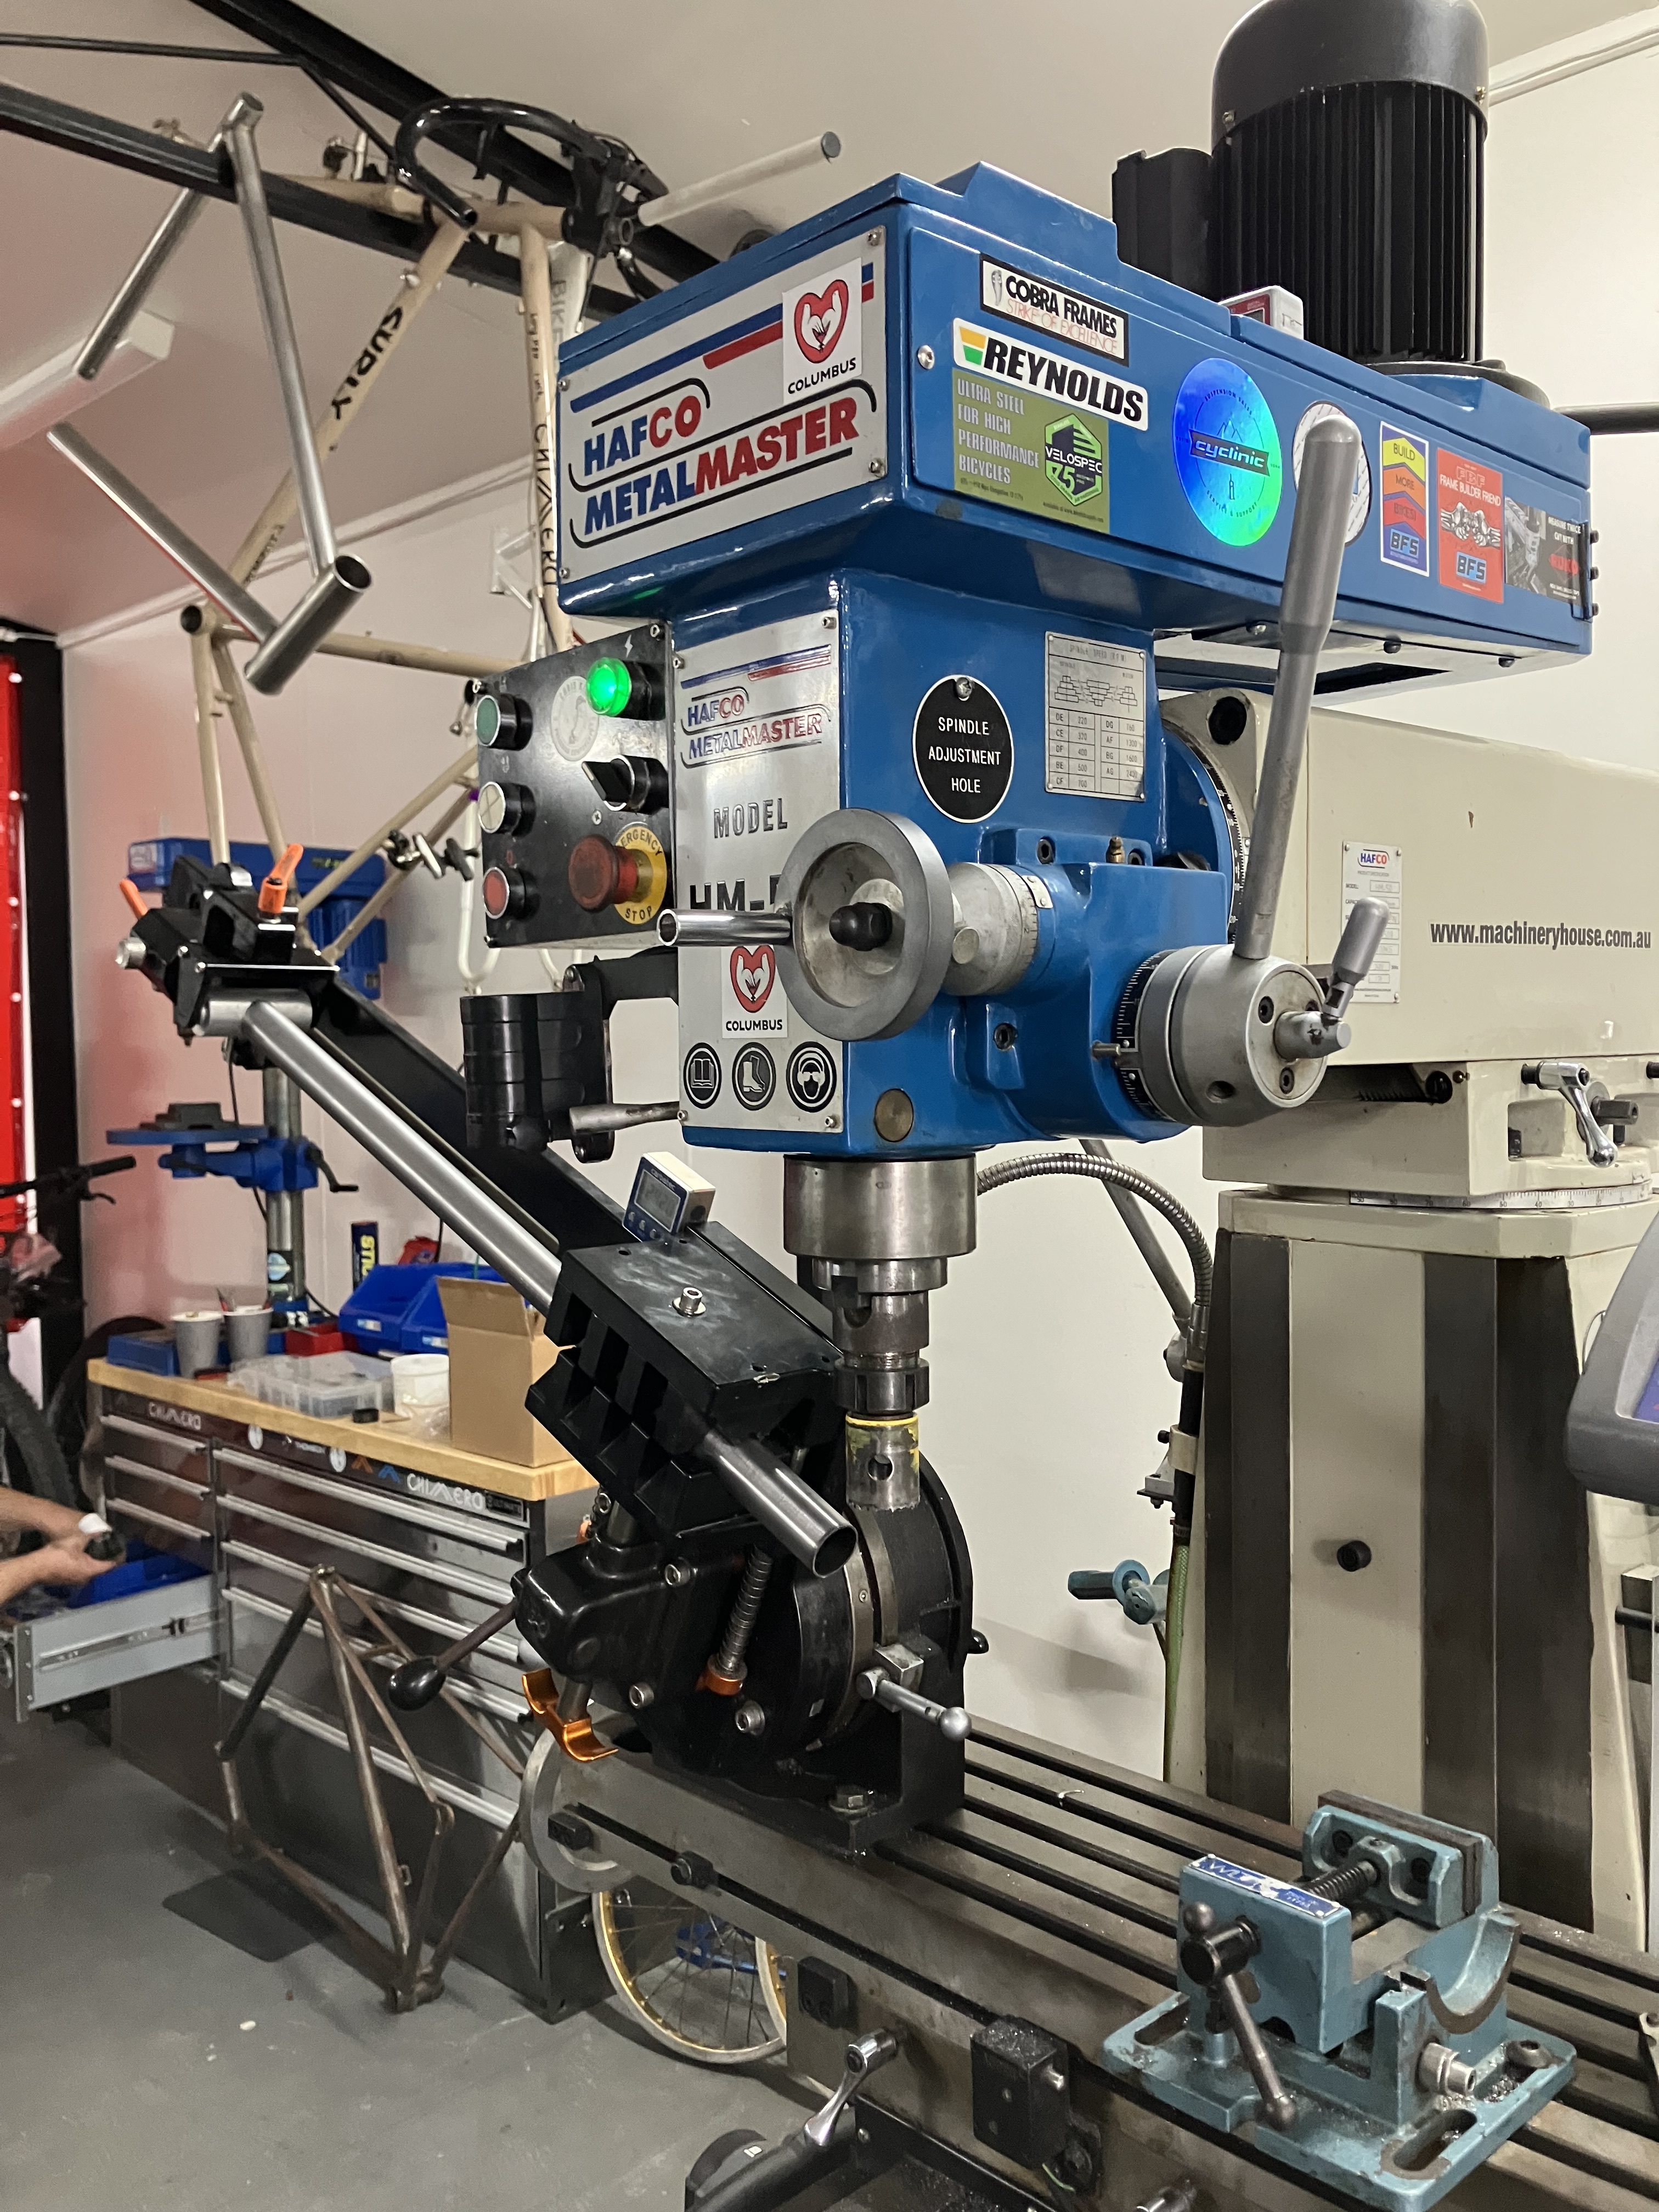
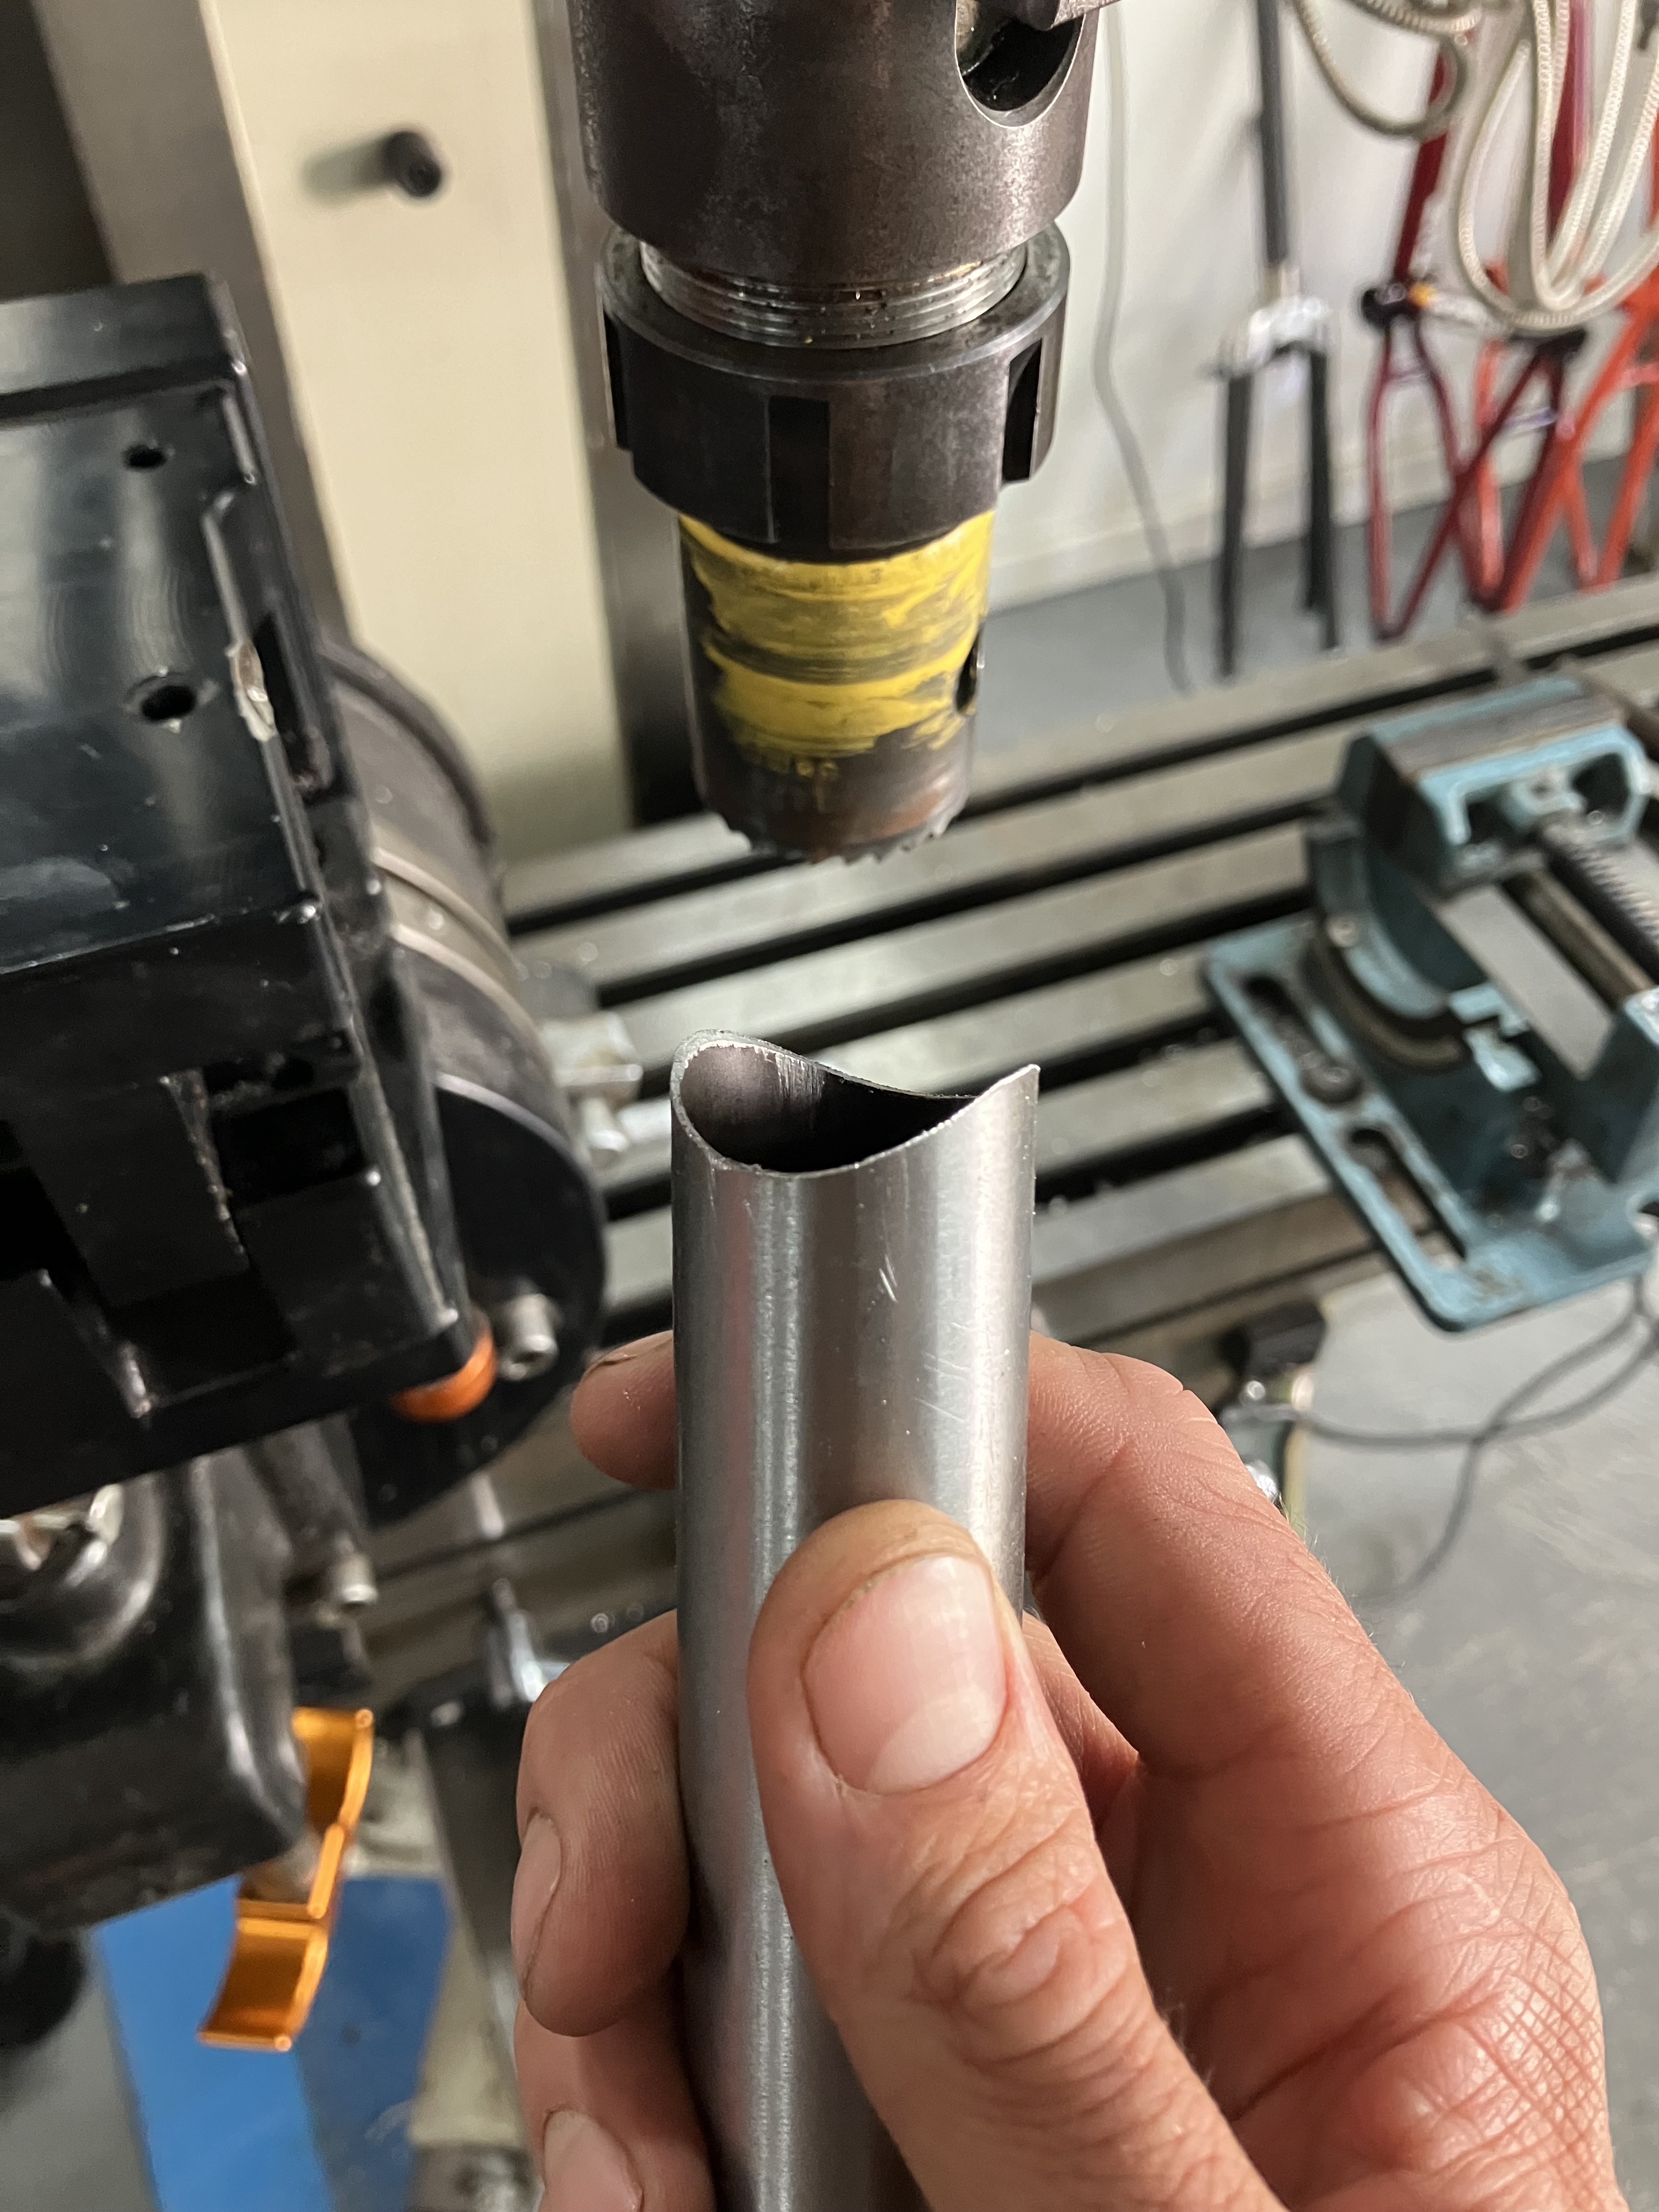
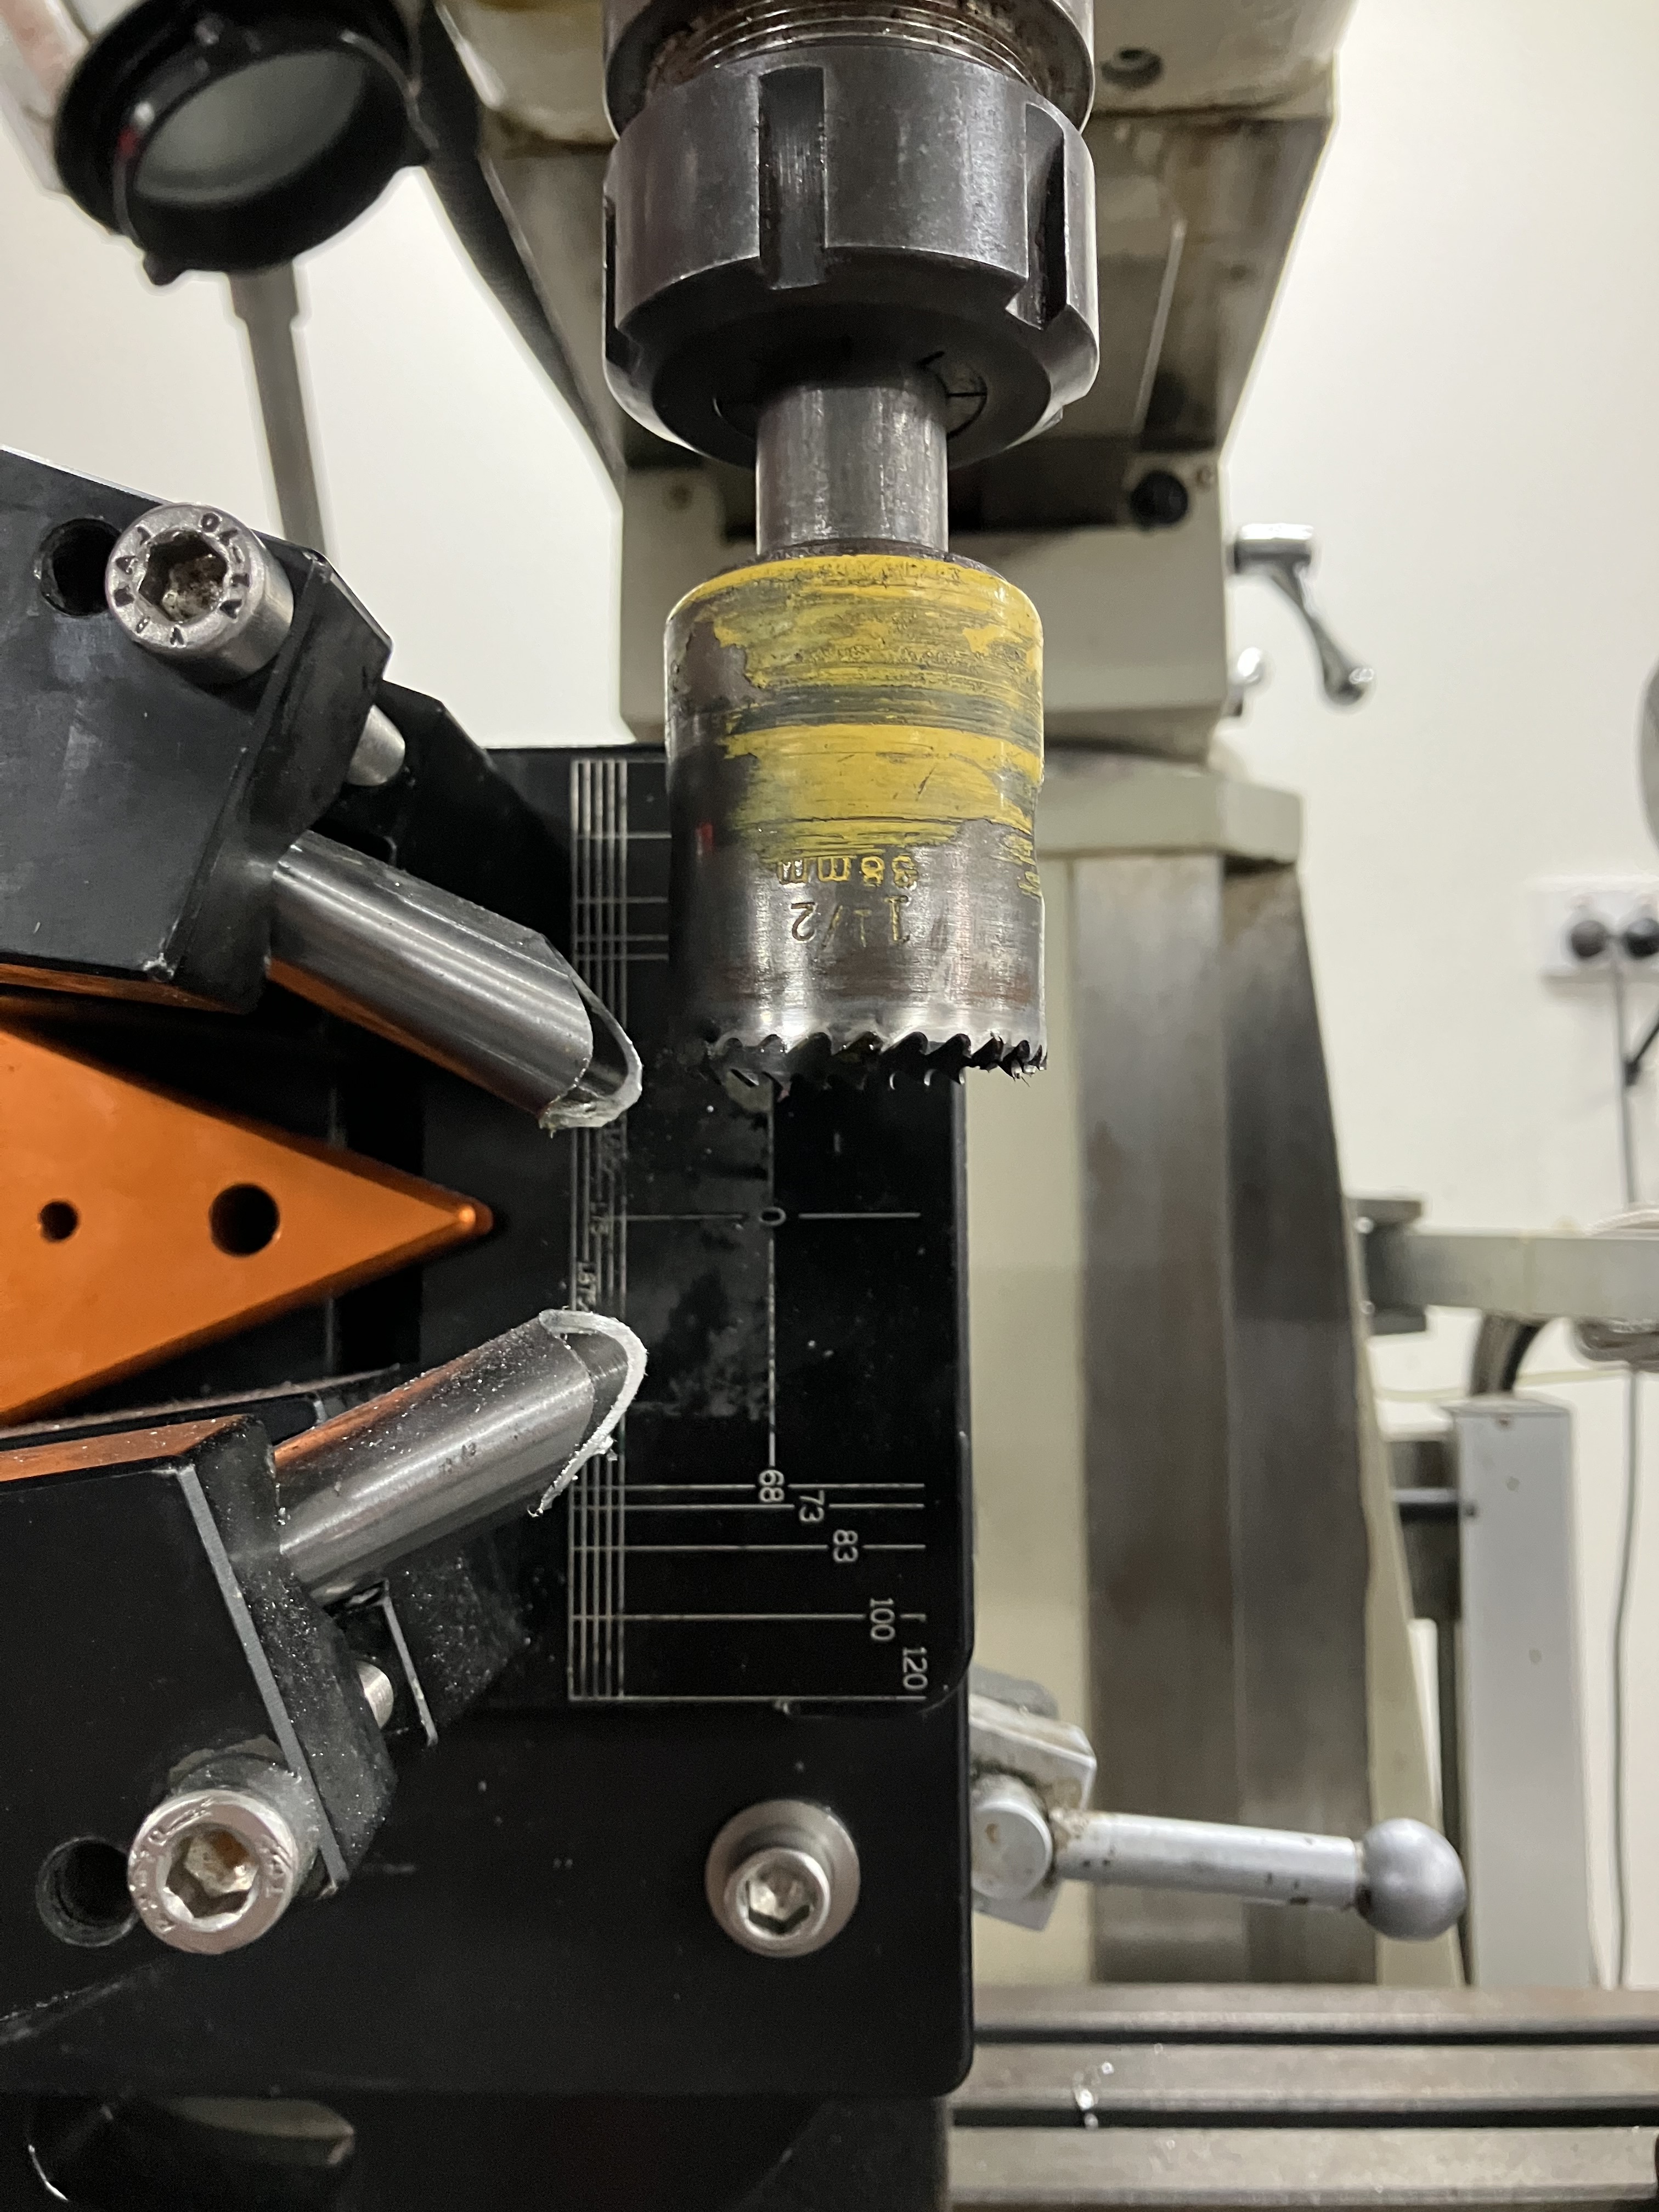
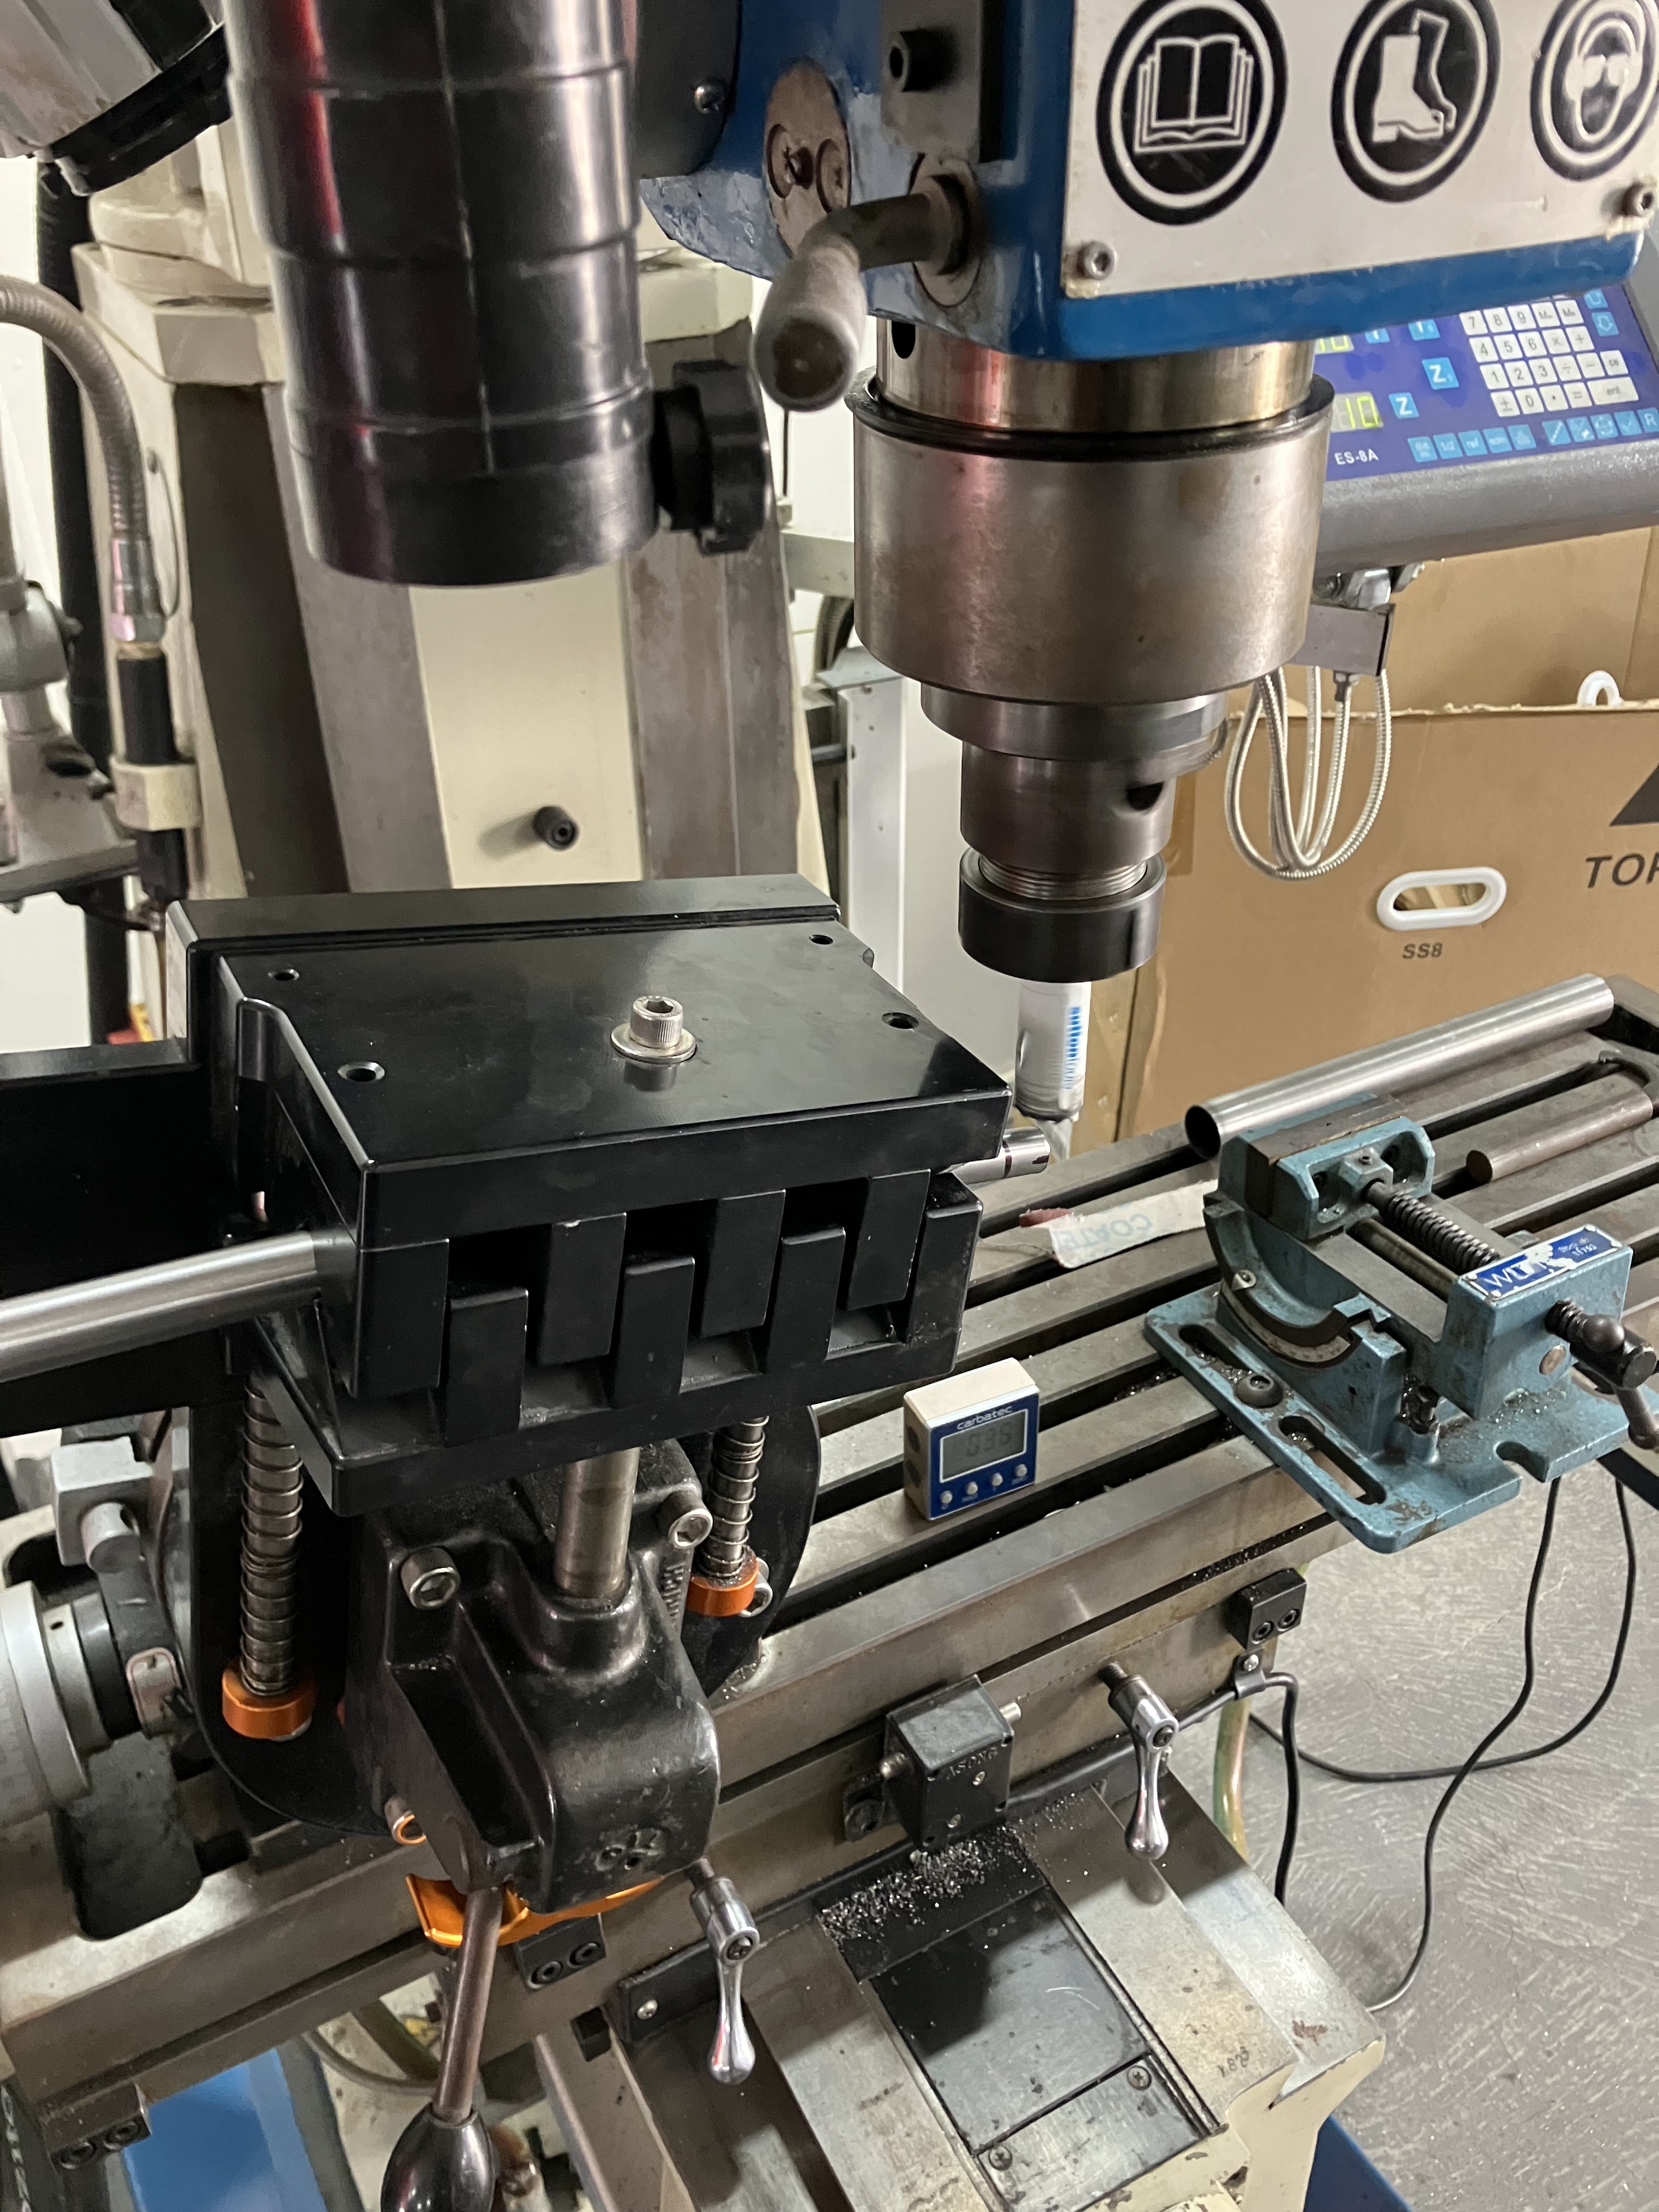
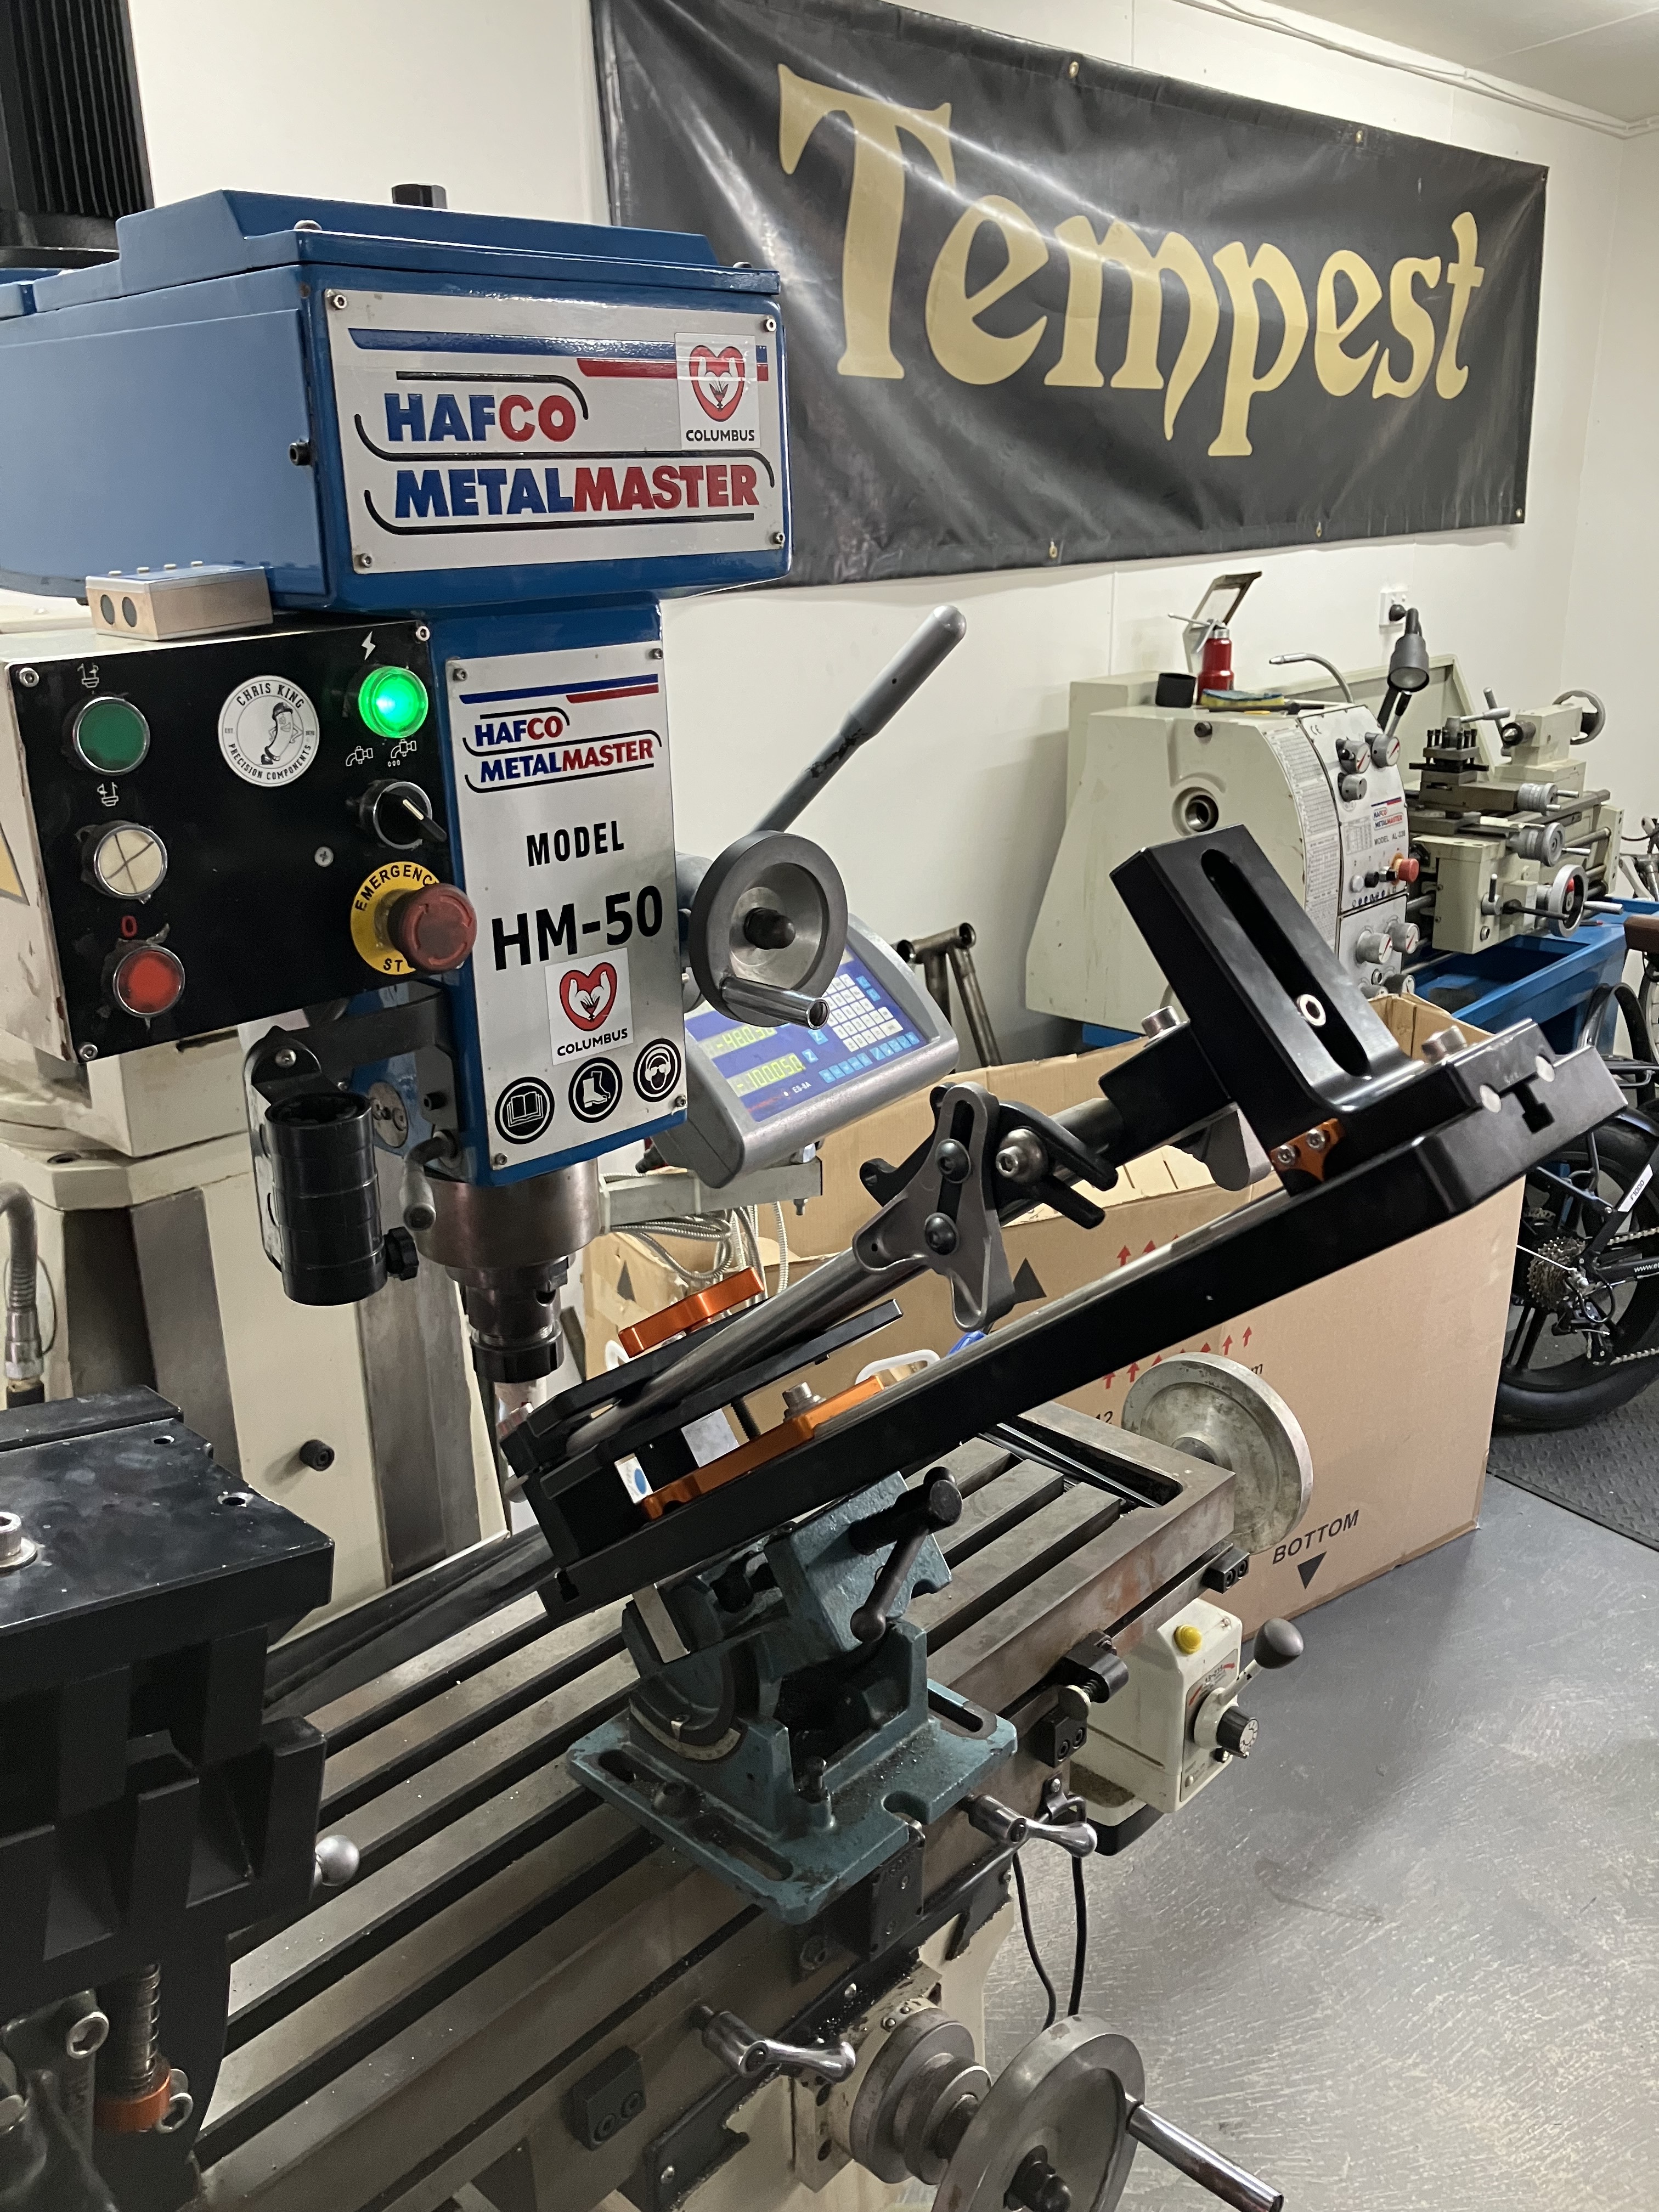
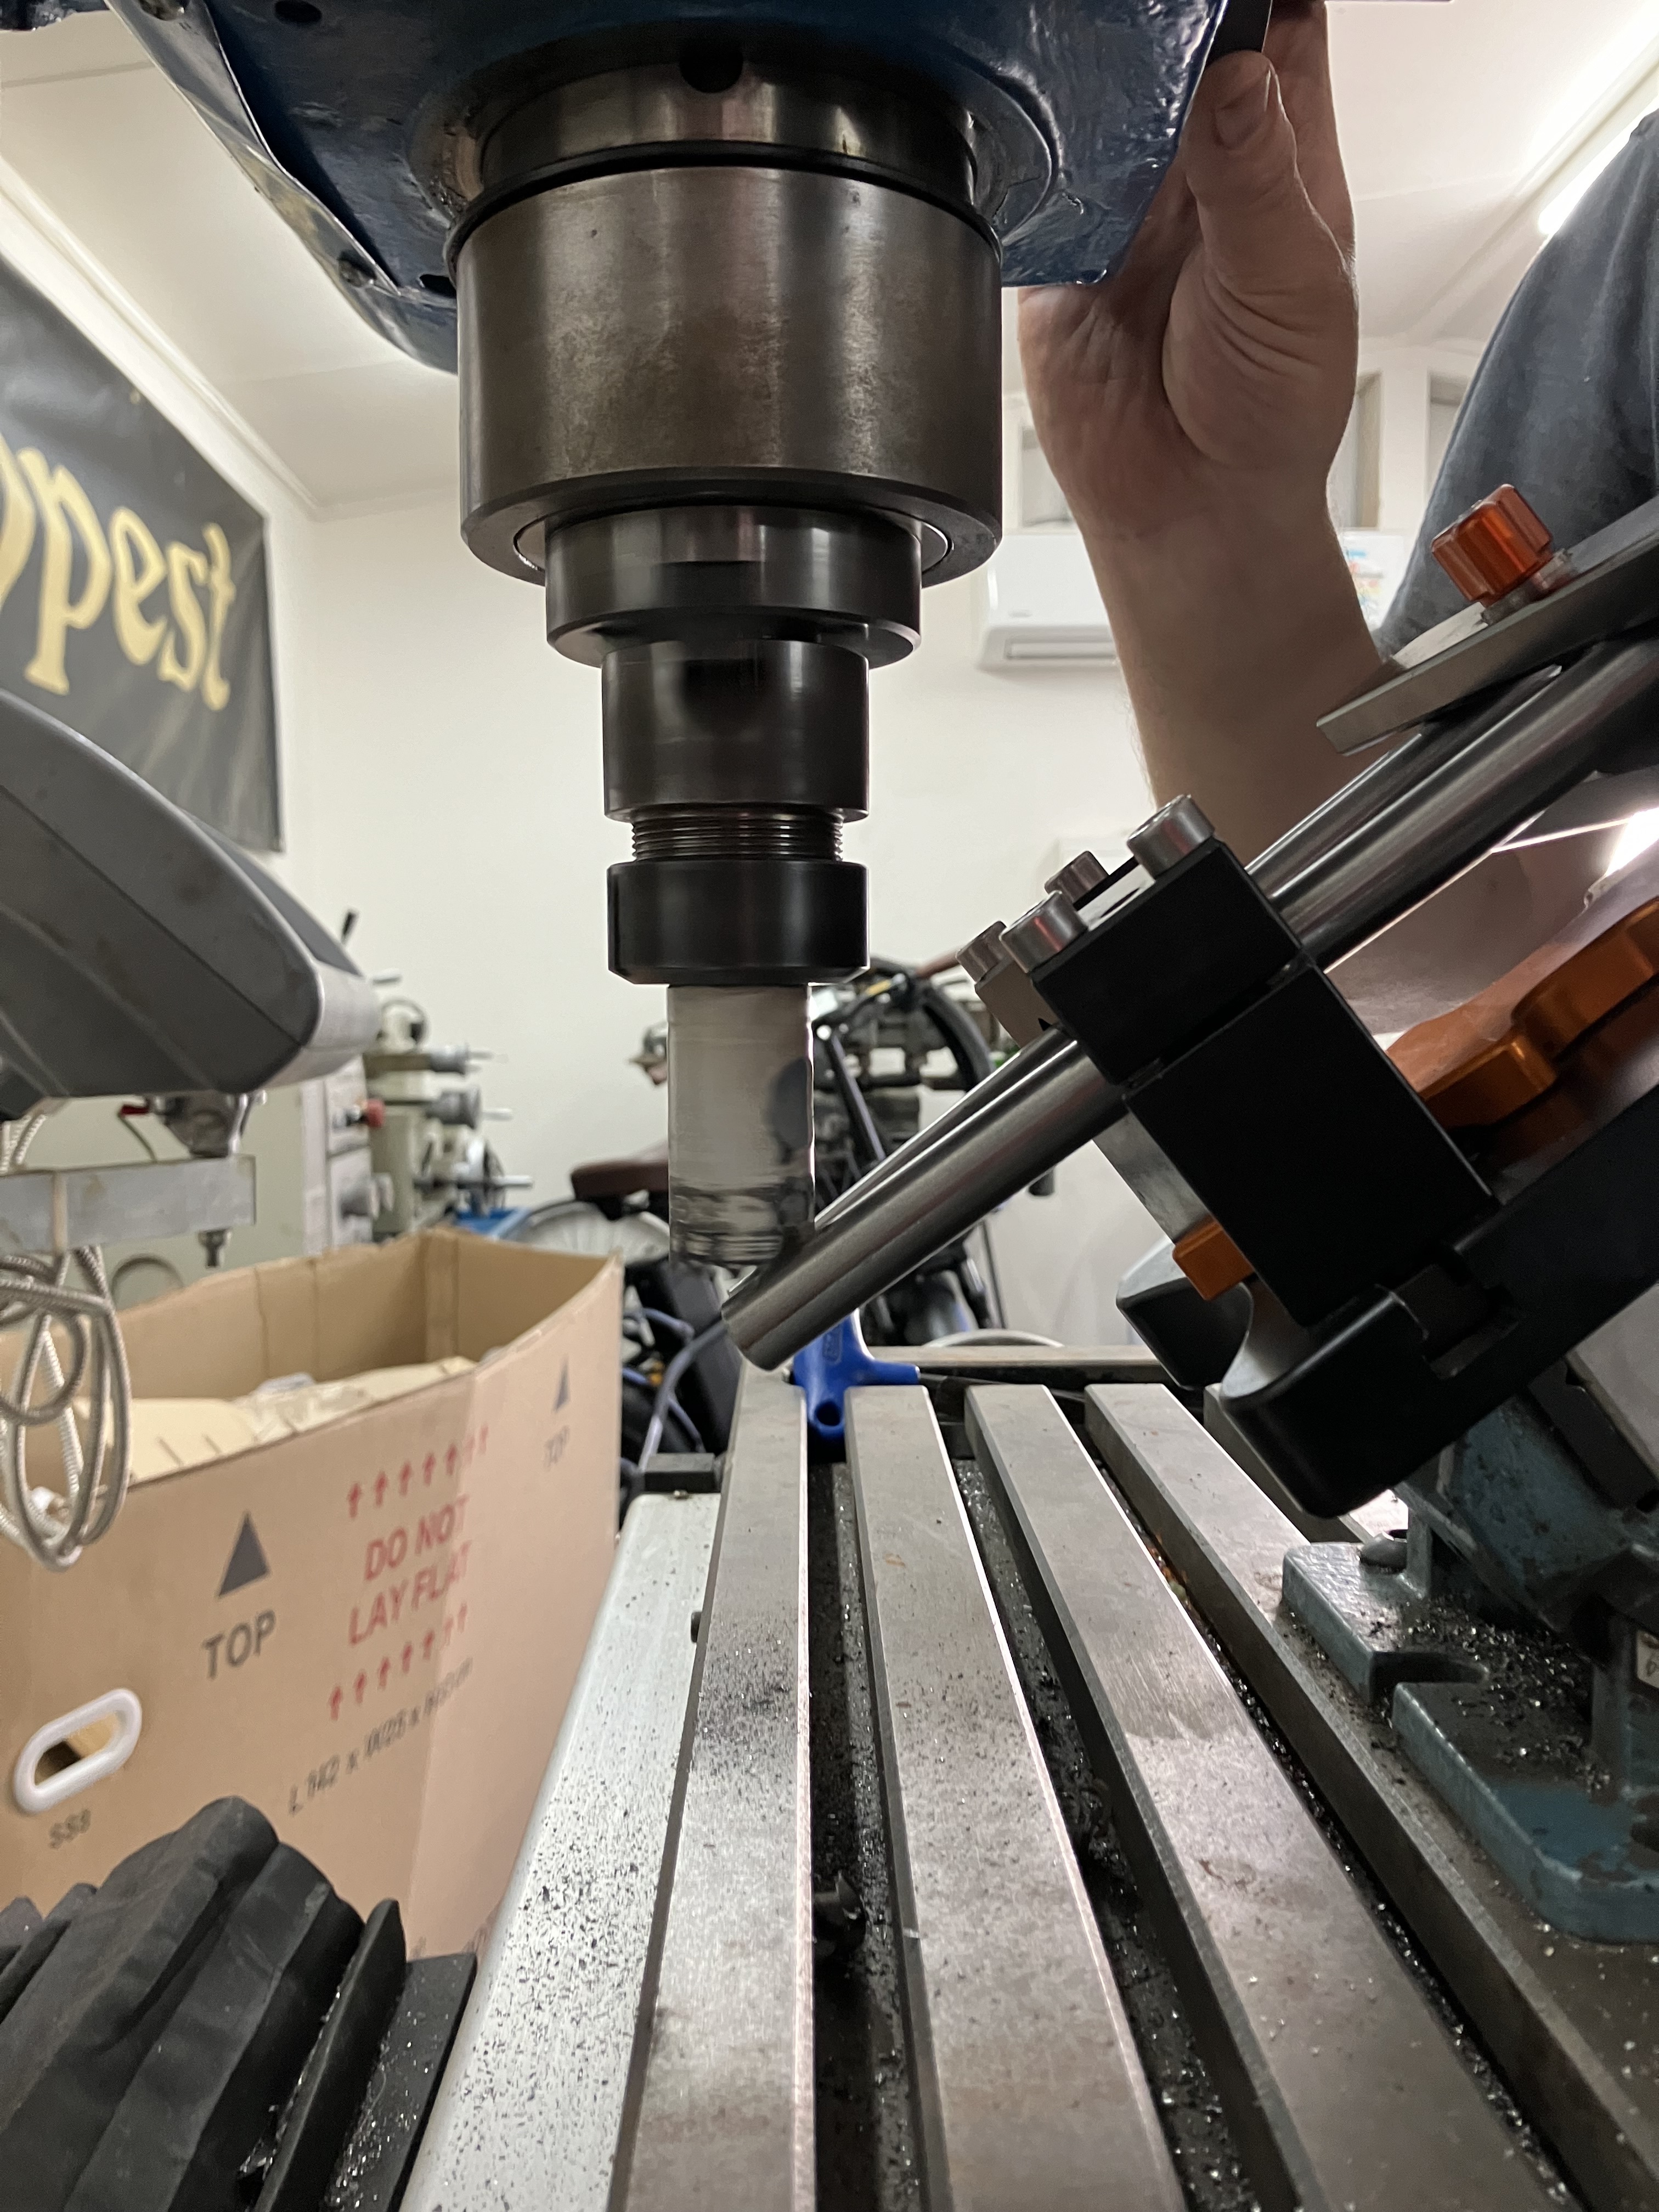
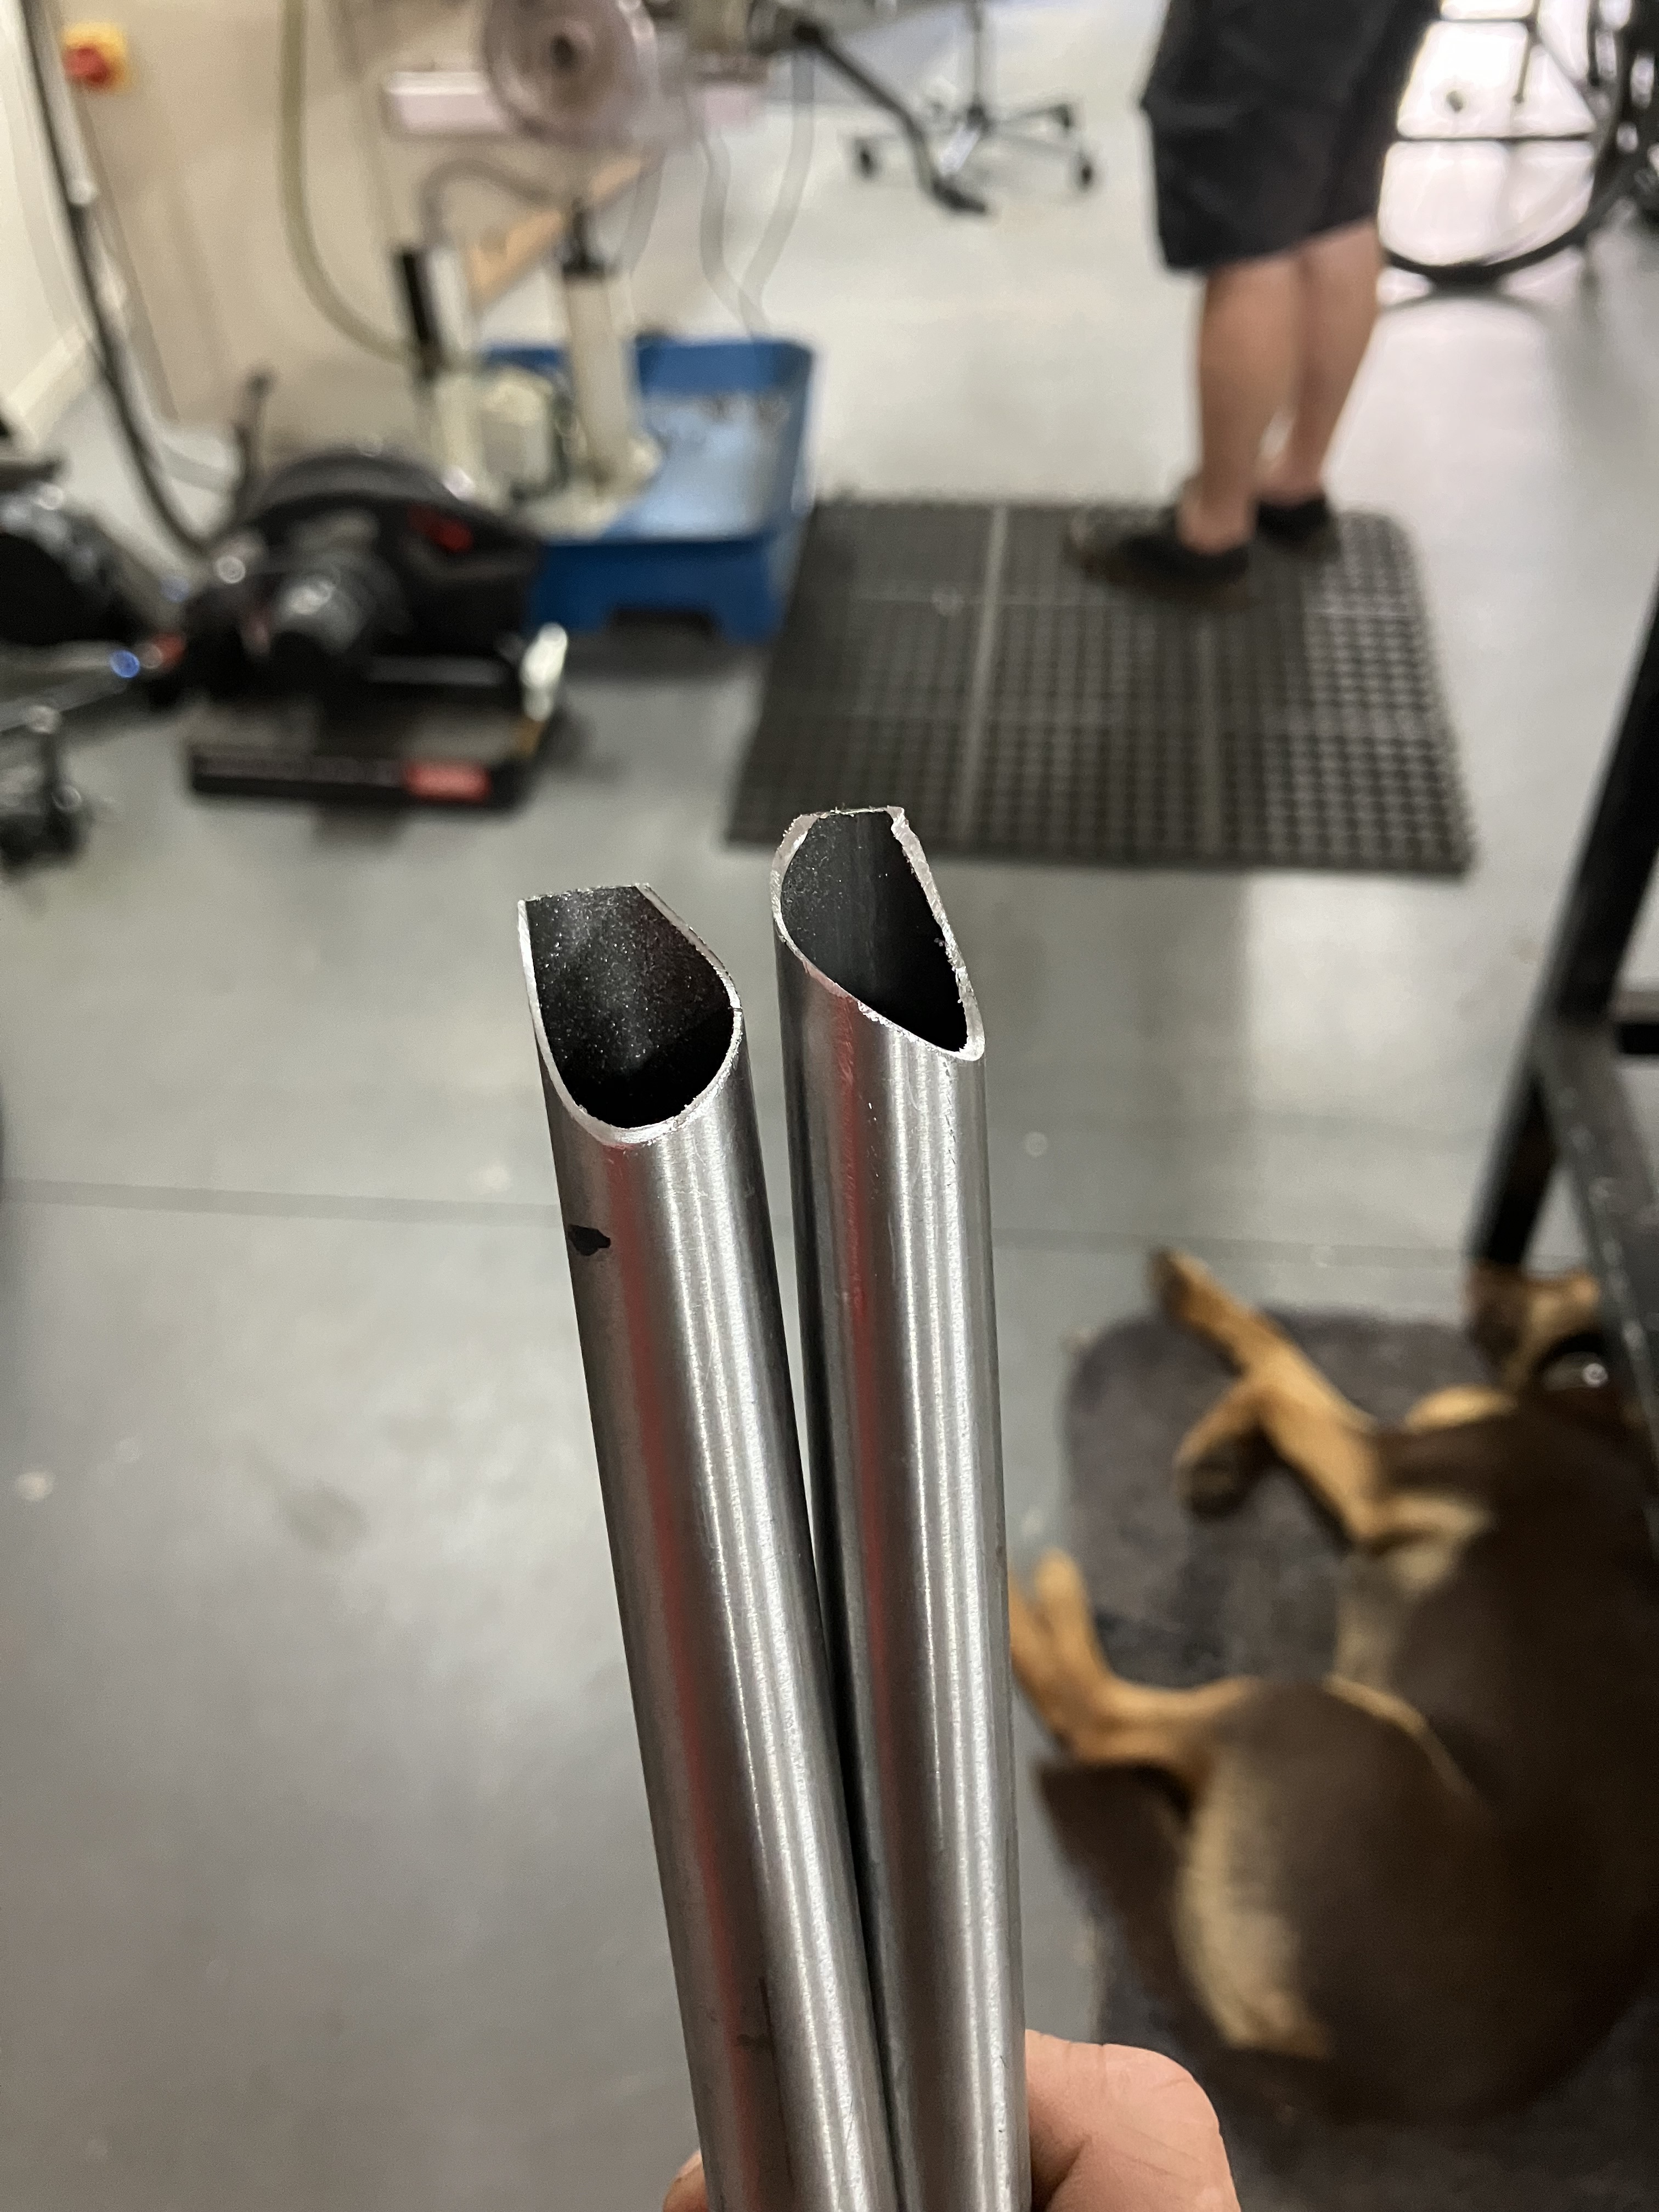
Tubes were mitred seat-tube, down-tube, top-tube, second/extra top-tube and placed in the jig. Rob has a Halfco Metalmaster HM50 Mill that’s setup with an Anvil mitring jig. Mitring was easy and very little filing took place to get everything sitting right. I do not look forward to building frames without this setup . Zip-ties were used to hold the tubes as we check everything.
Tomorrow we’ll work on vent holes, bottle bosses and then make a start on the rear end.
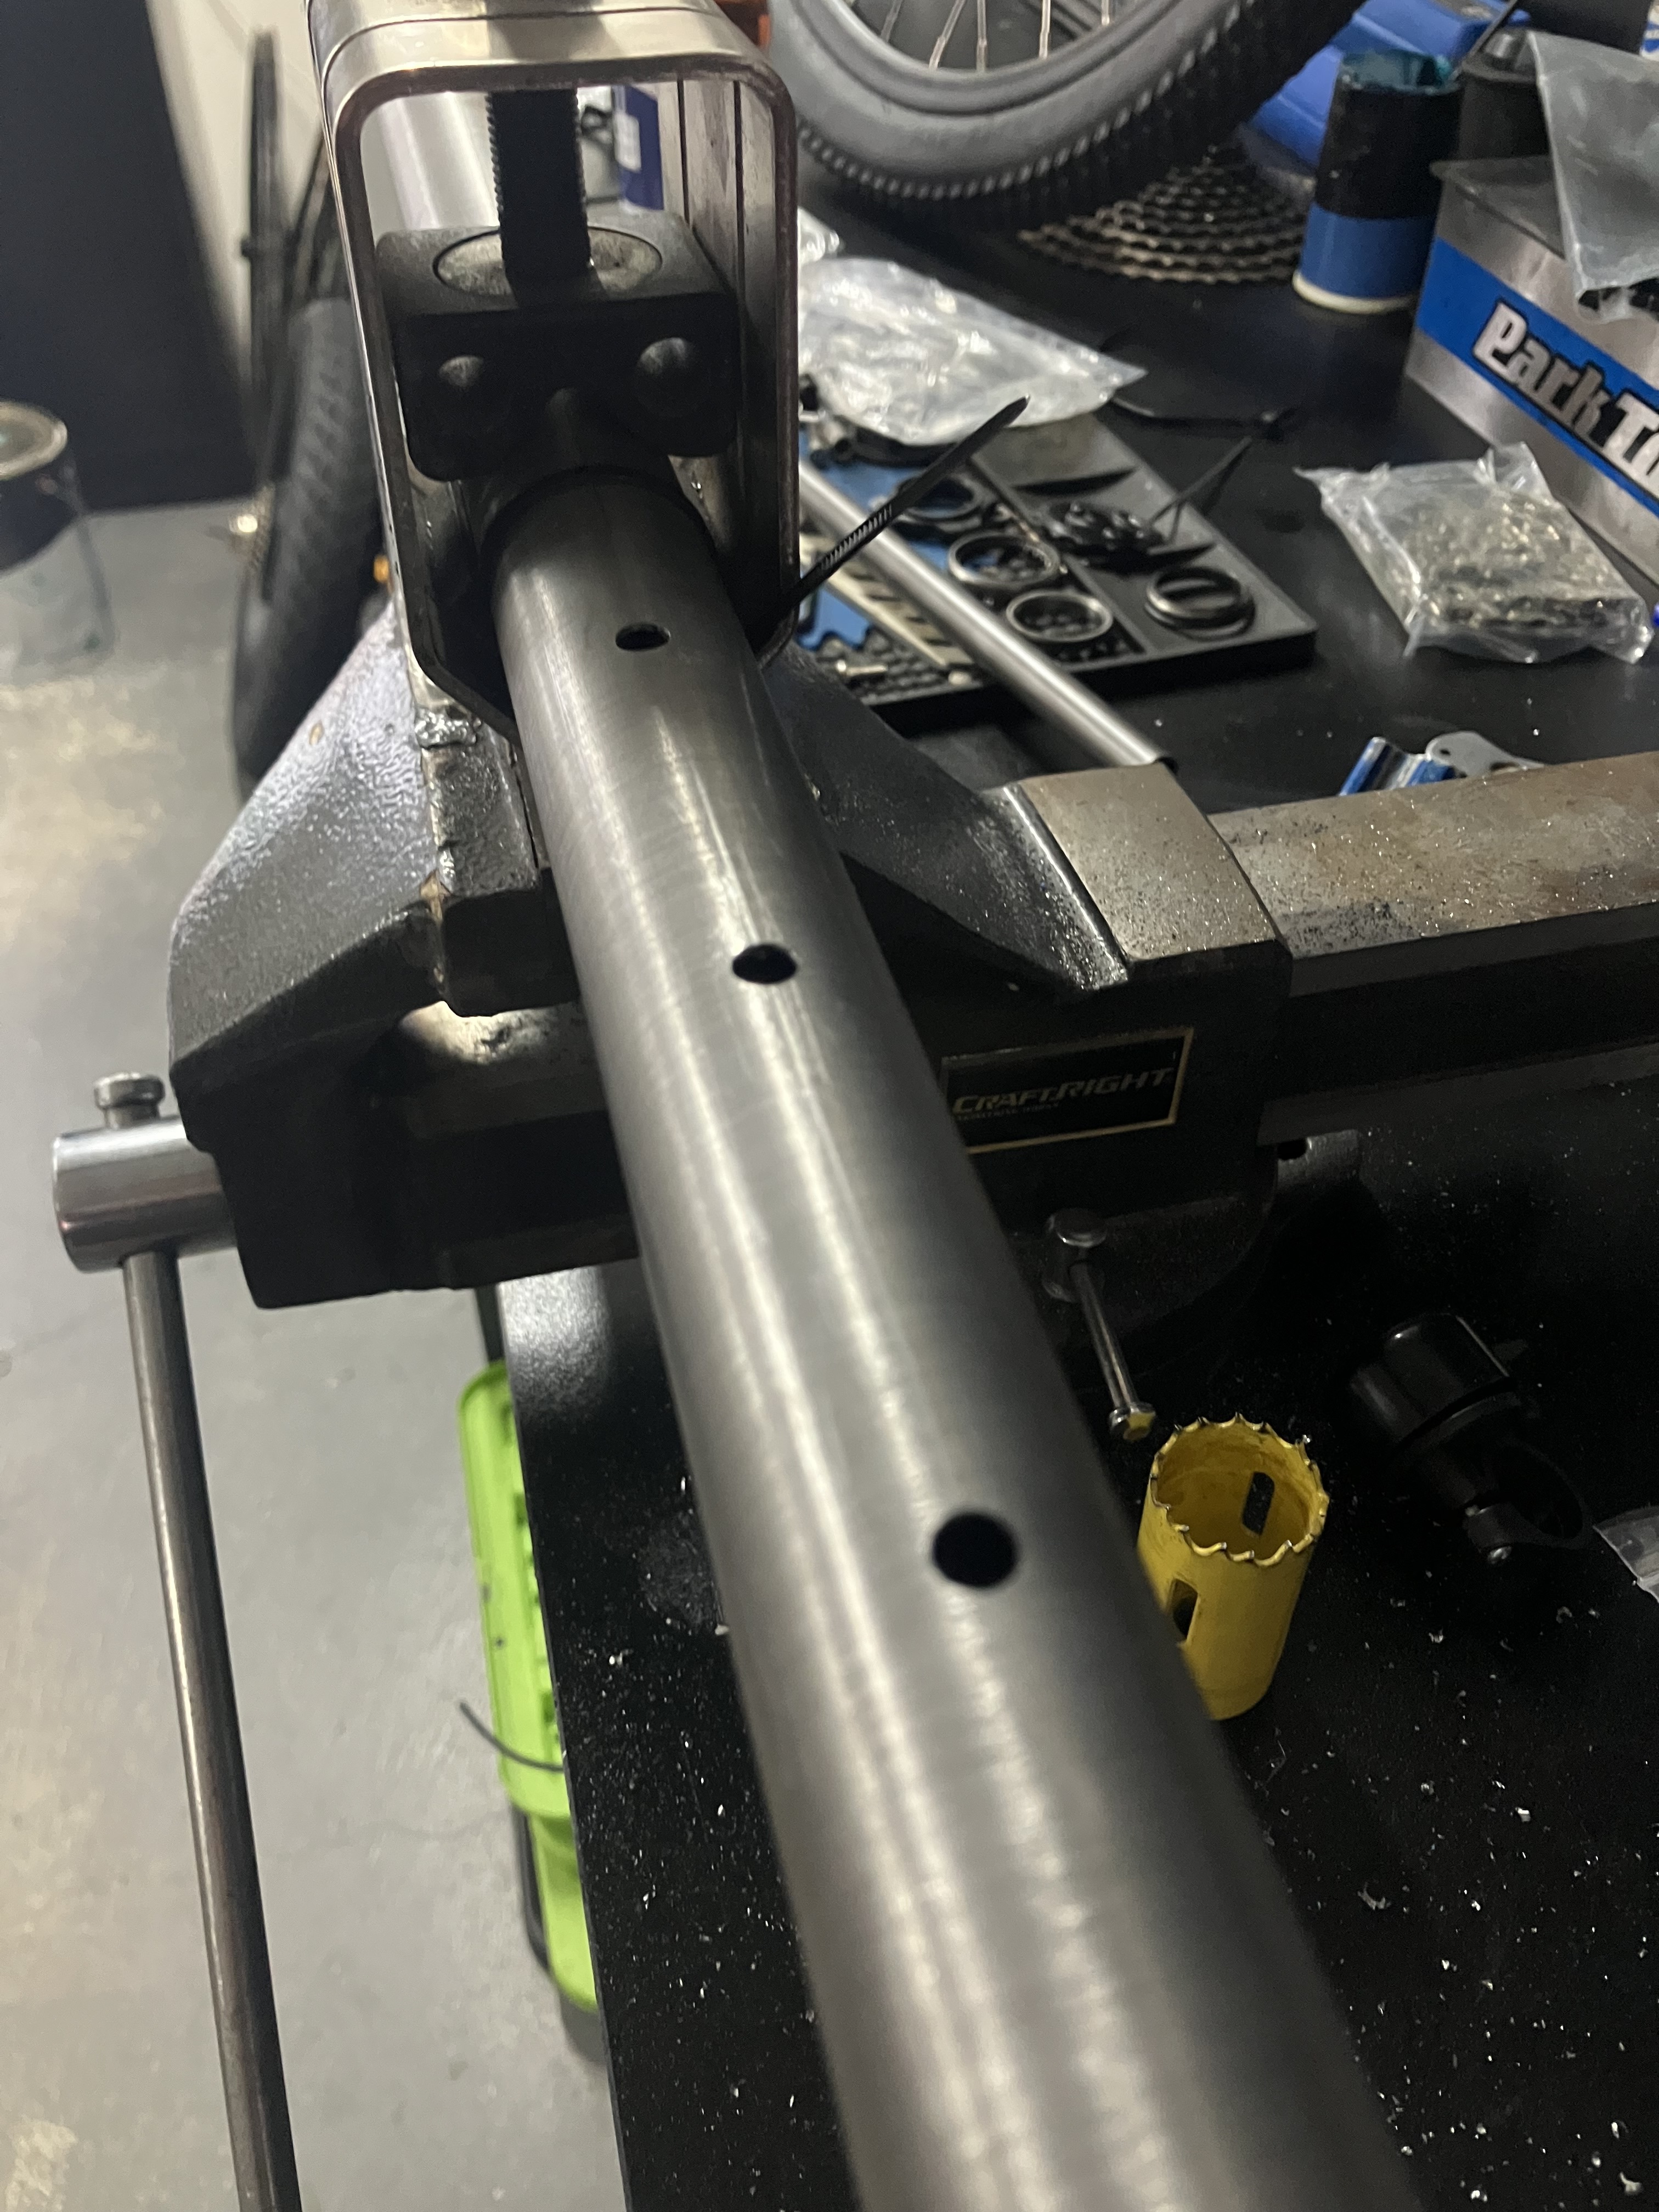
Today we finished the front triangle. First was marking and drilling all the vent and bottle boss holes and then giving everything a good clean ready for brazing. A few straight gauge tubes we used we filthy. The Columbus stuff was far cleaner.
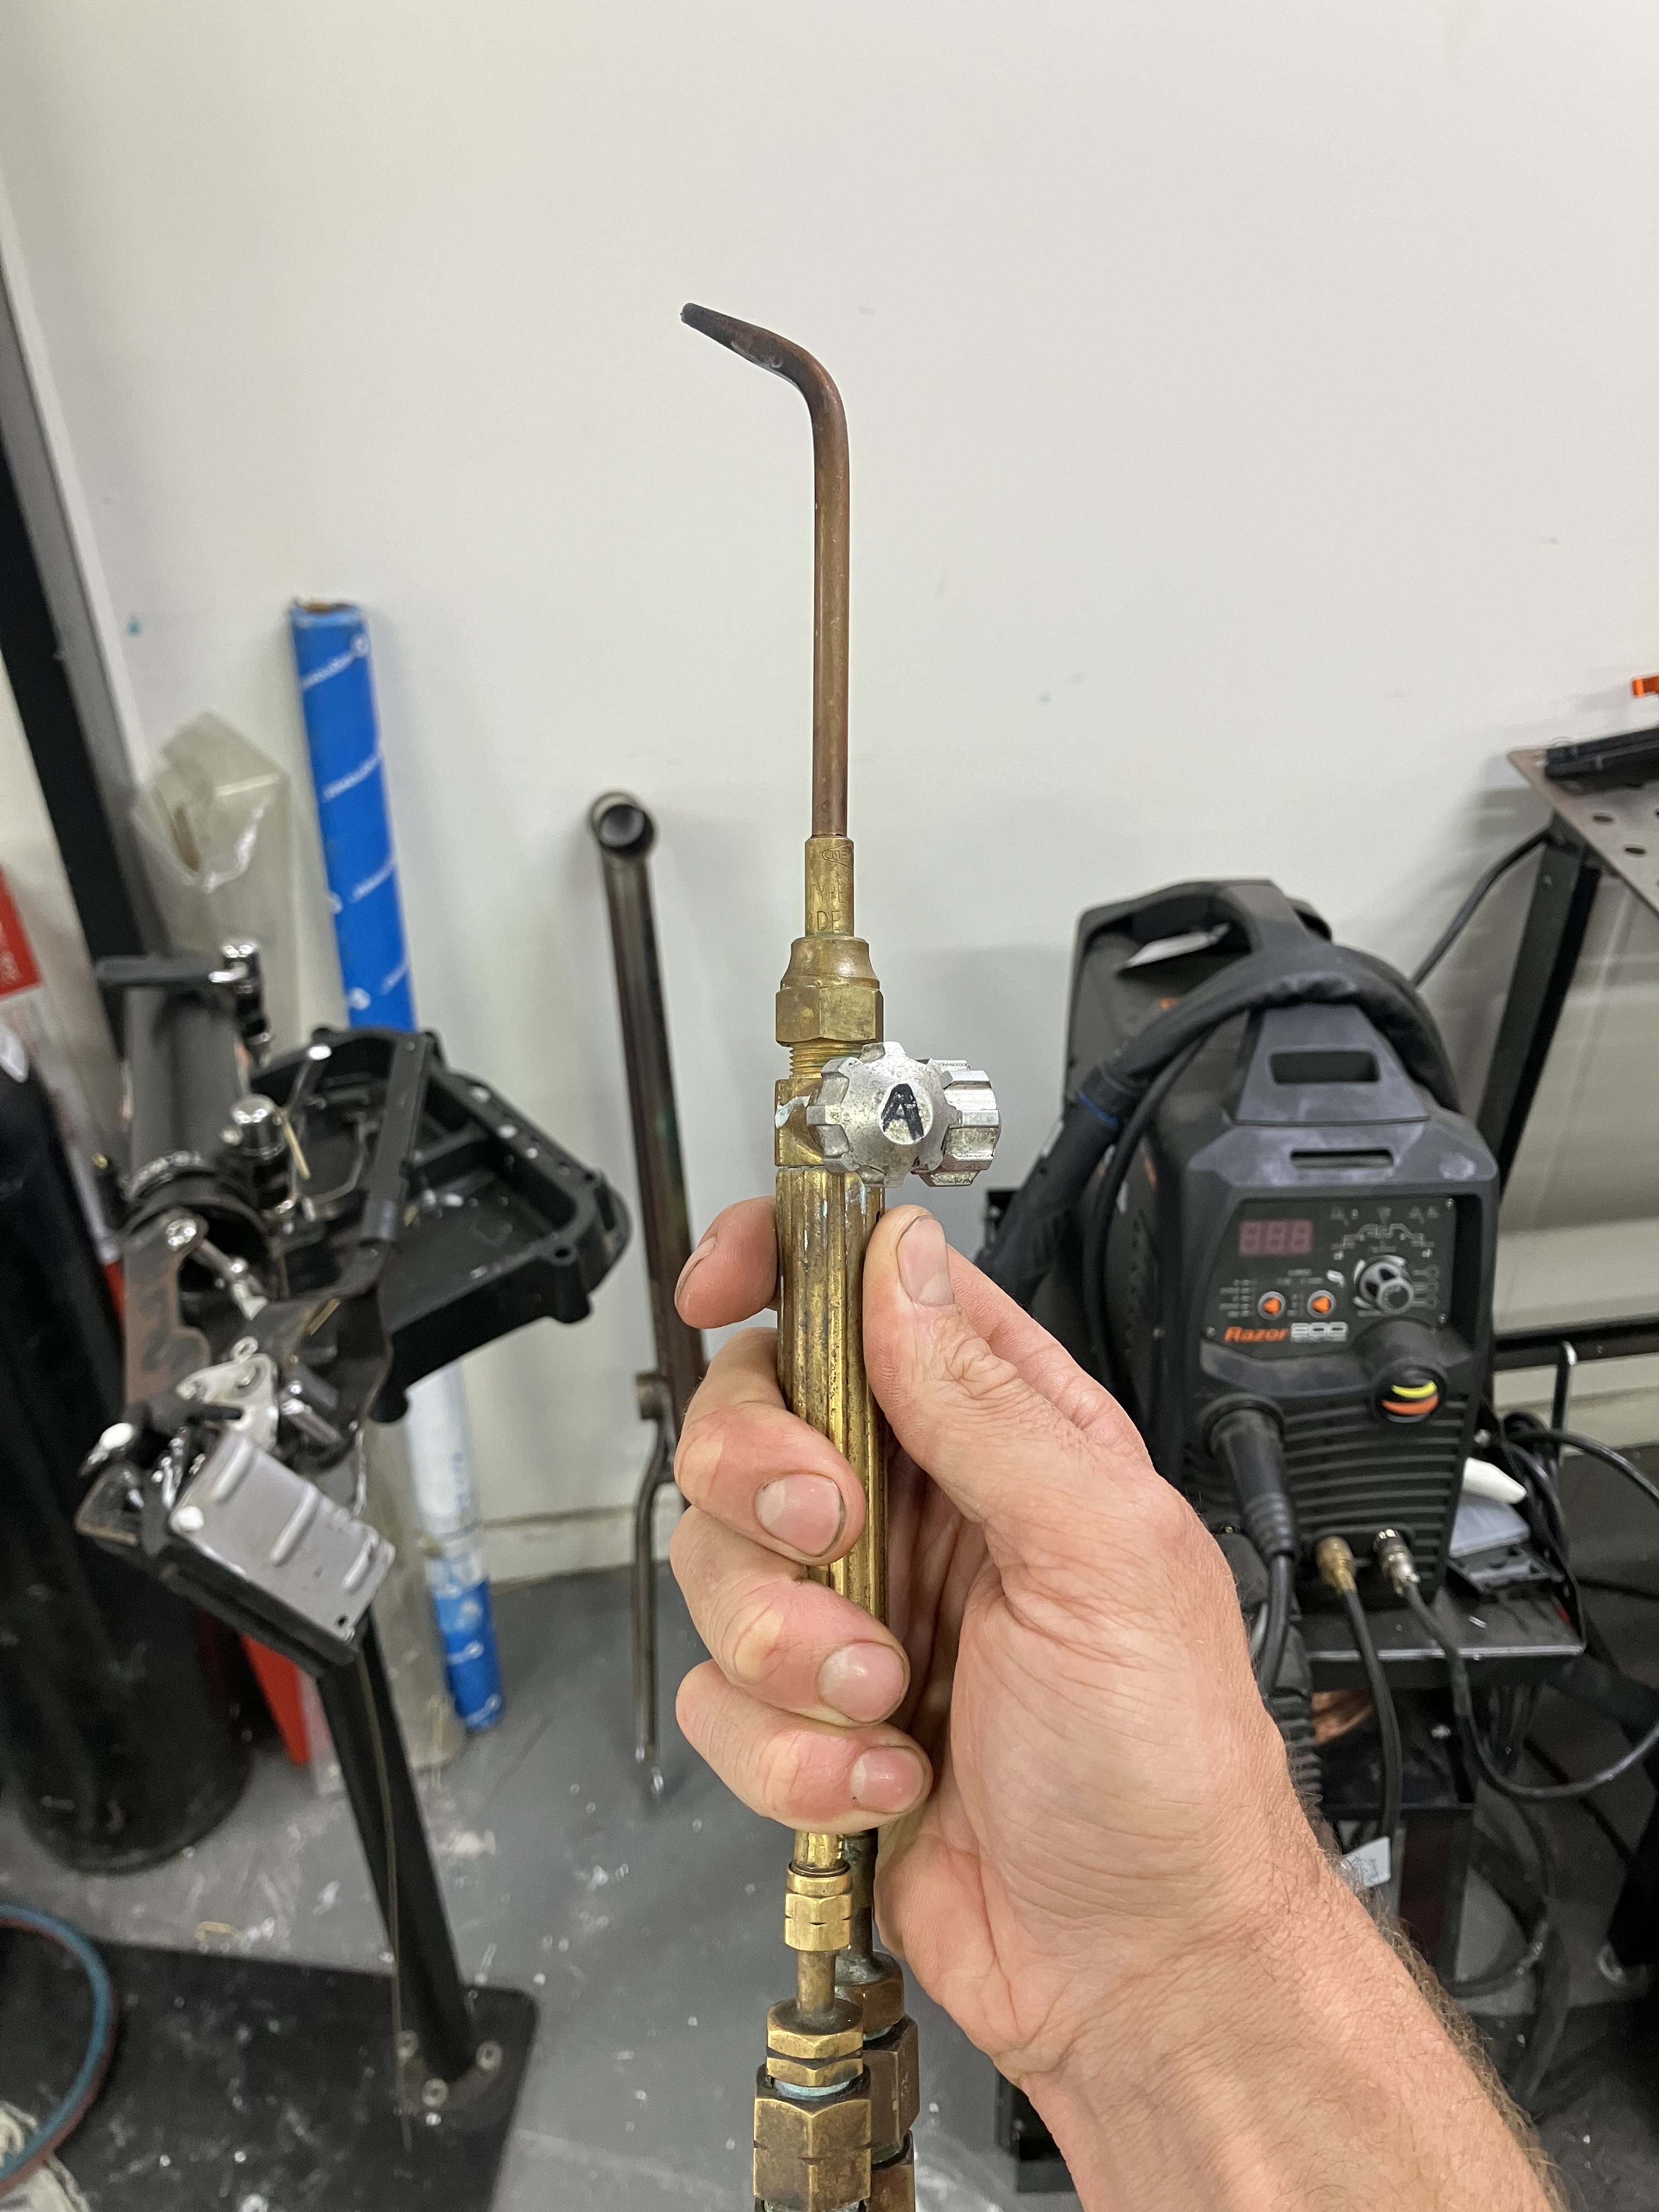
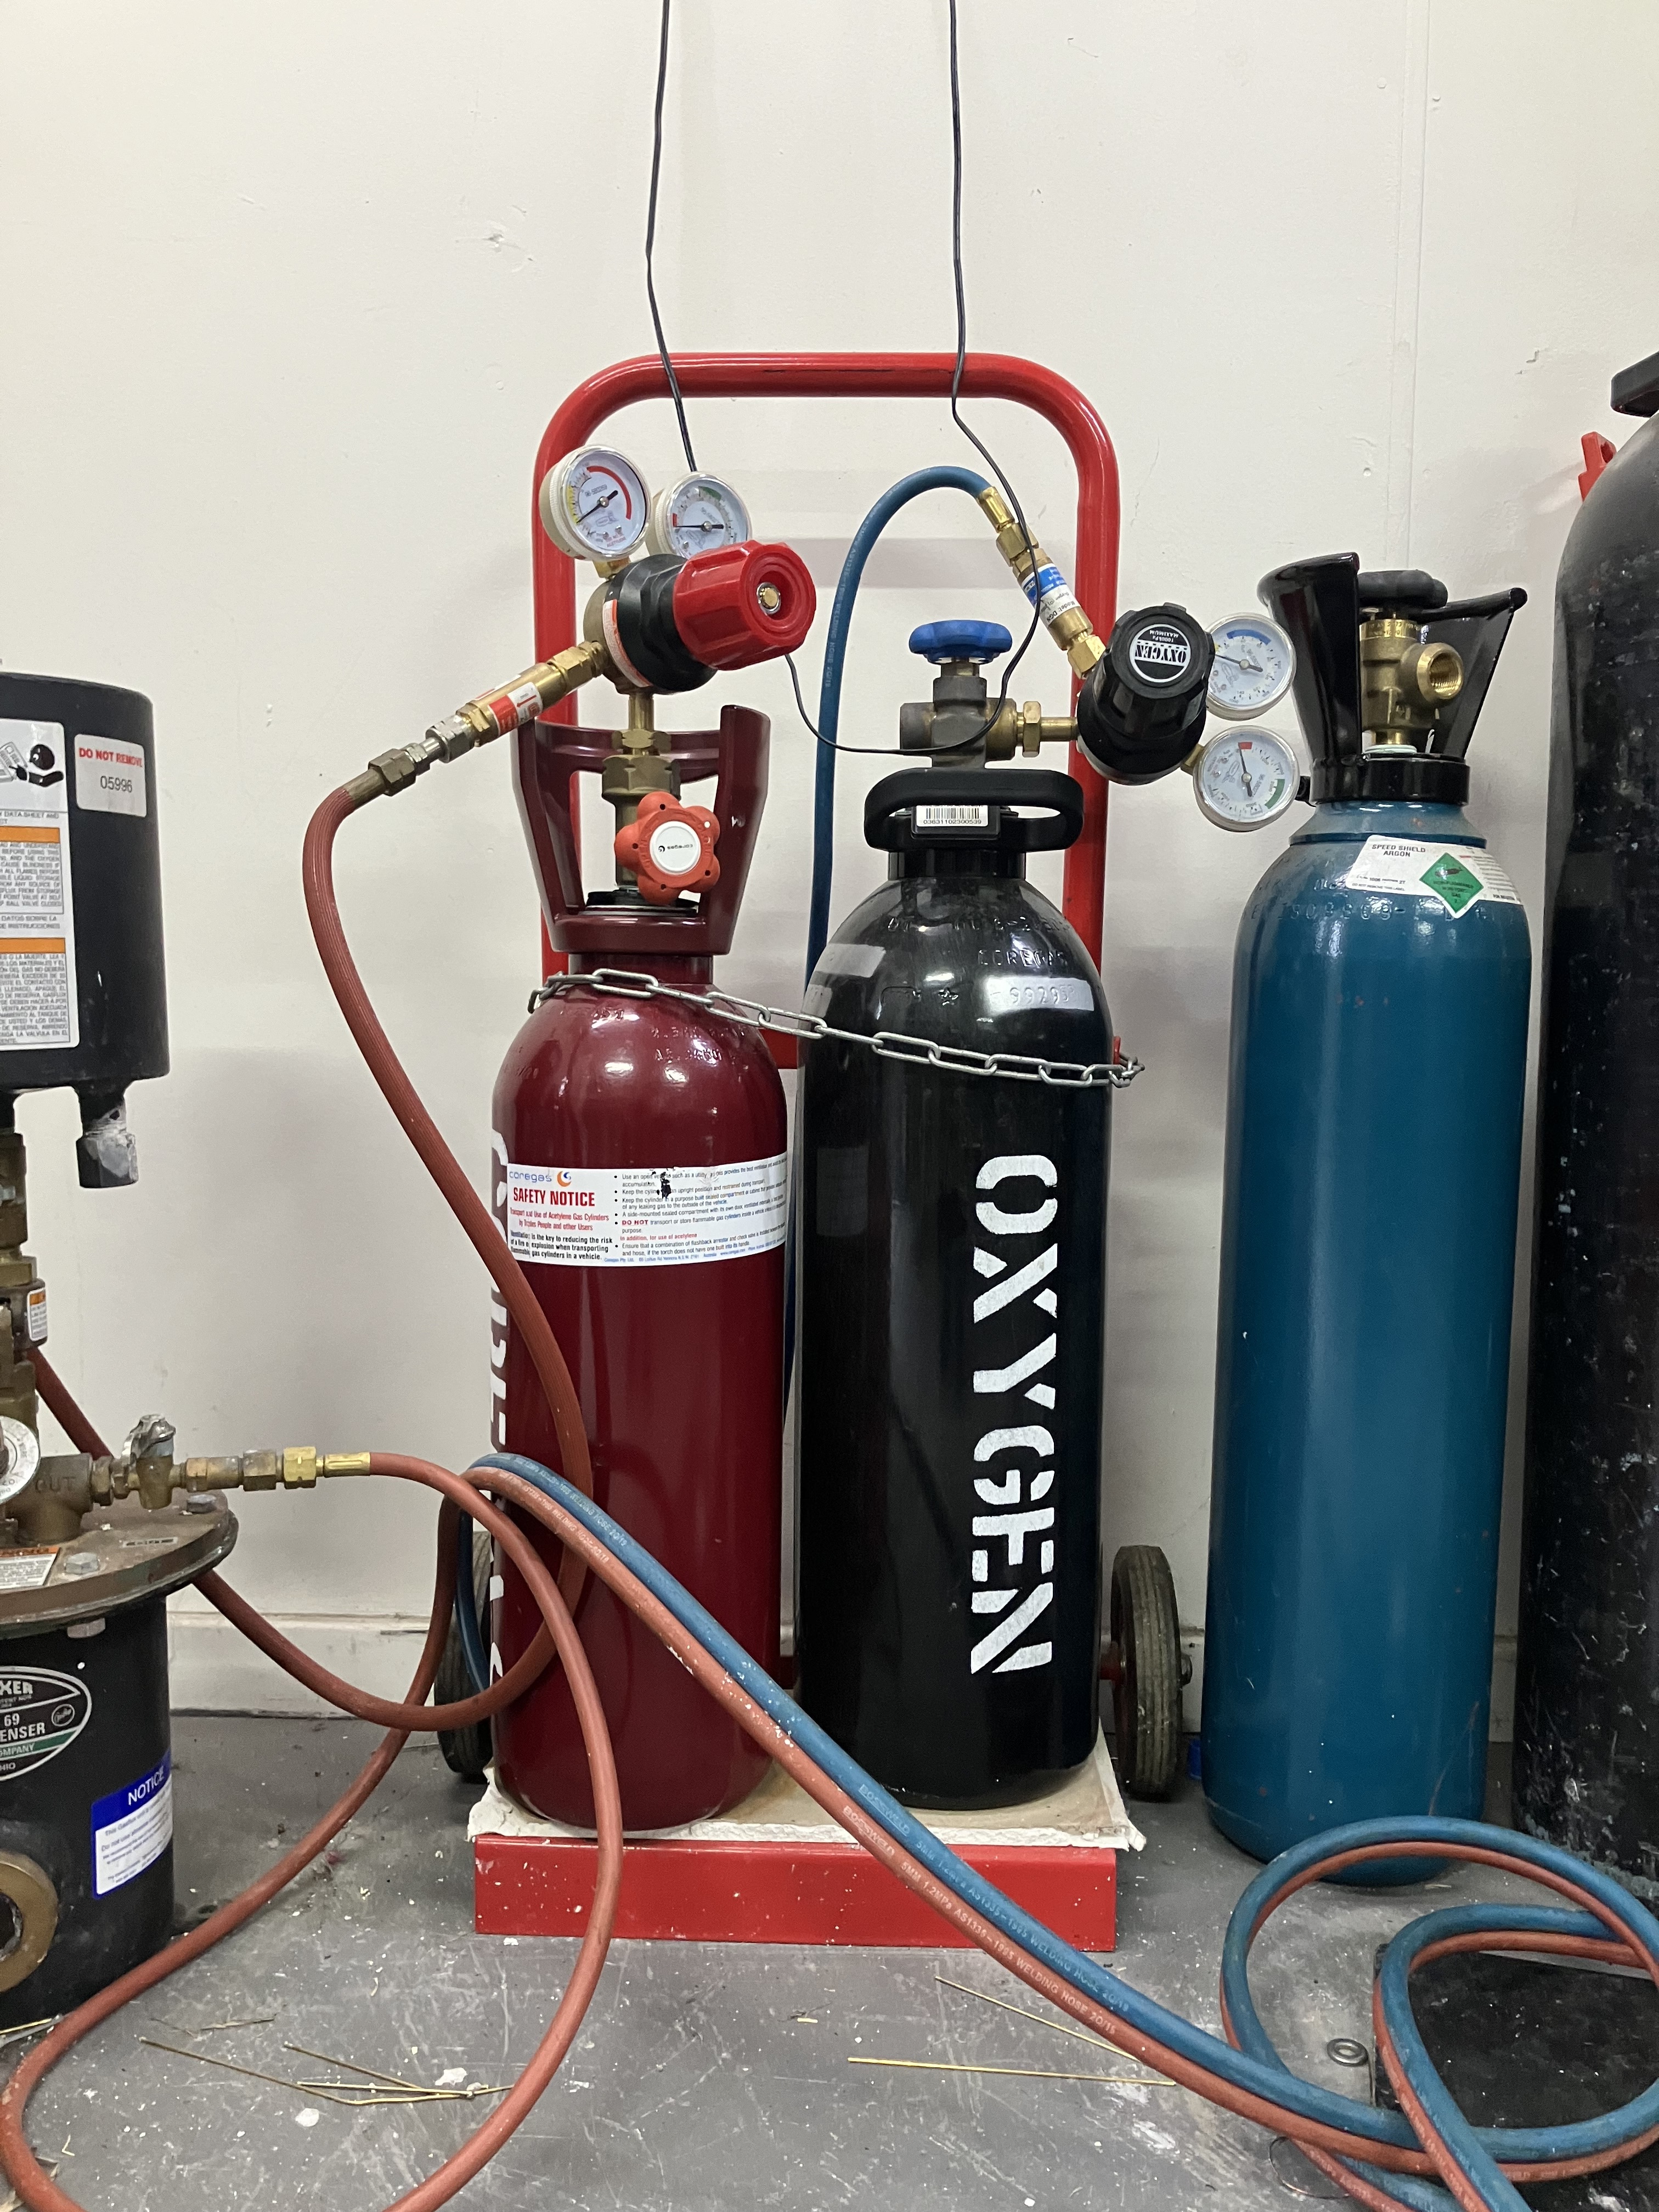
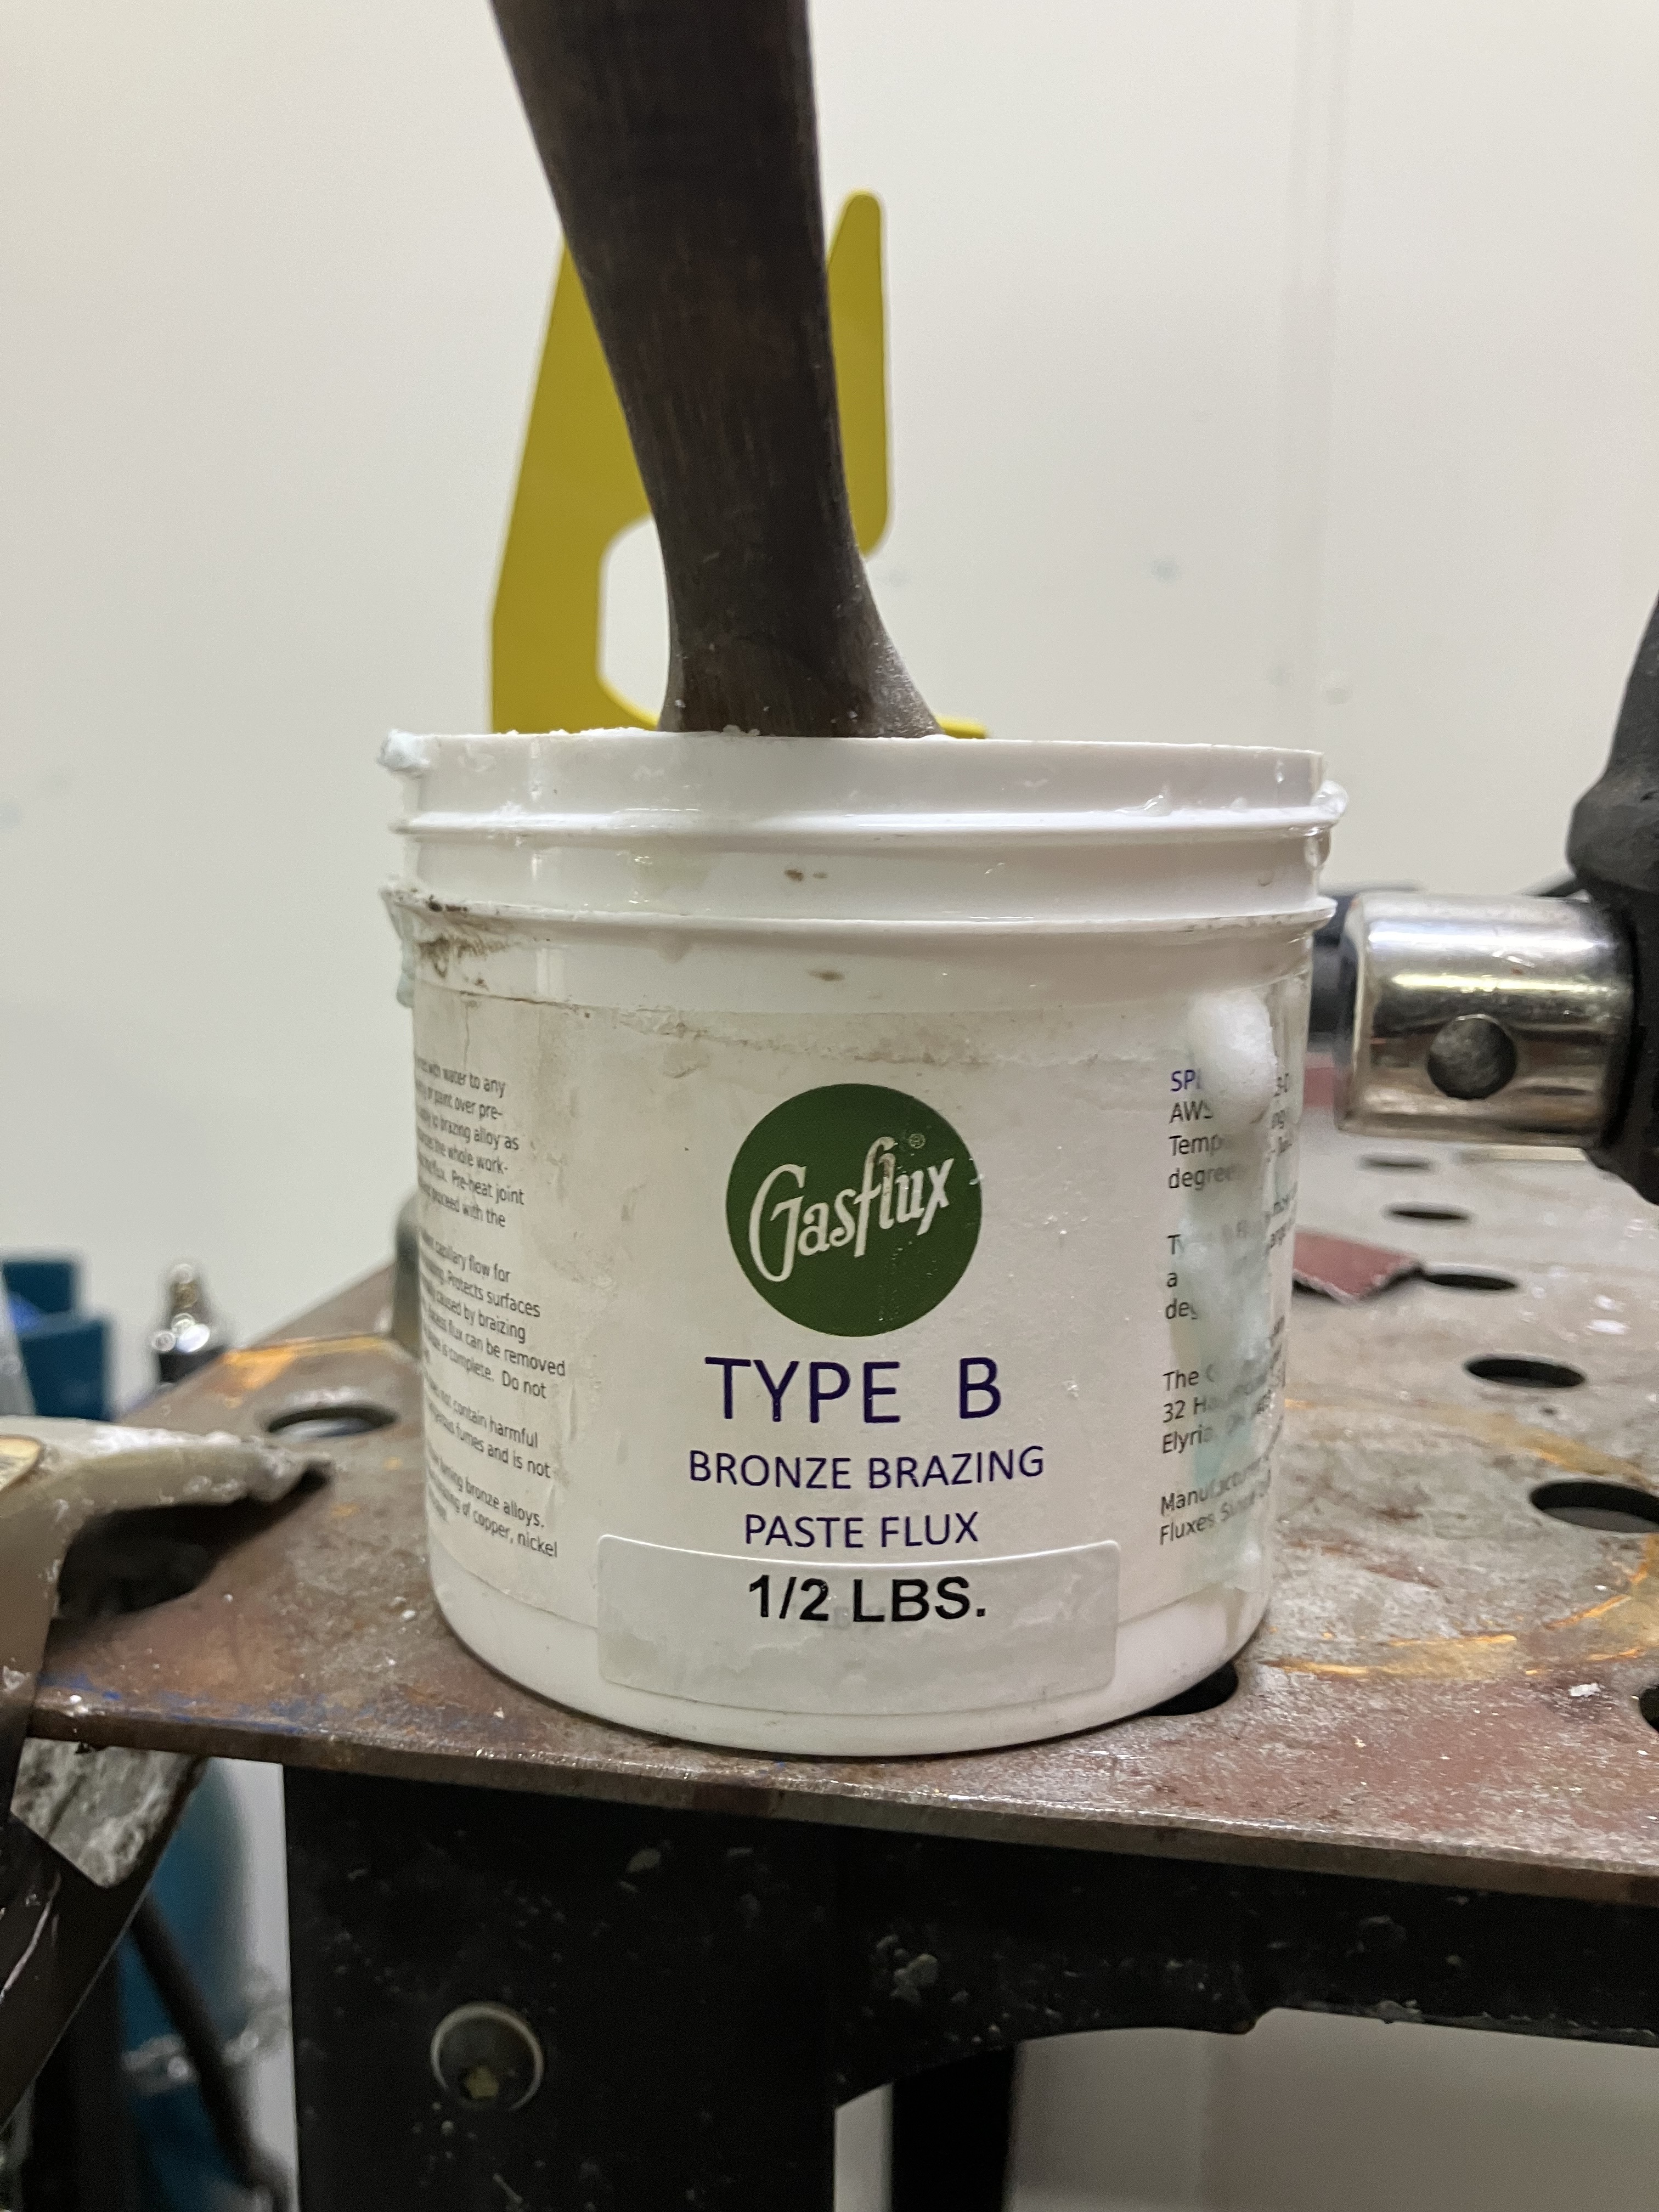
In the arvo Rob gave me an intro to brazing. He uses an OA setup with a Gas Fluxer. He used to work for Paul Brodie so what we went over was very reminiscent of his How to Braze - Tips and Tricks video. Even built a few stalagmites. We used a size 0 tip, Gasflux Type B flux paste and some rod but I forgot to ask what ones. It didn’t take long to get the hang of using the torch but I can tell it would take a while to have full control over where the brass ends up. Tomorrow we’ll tack the frame.
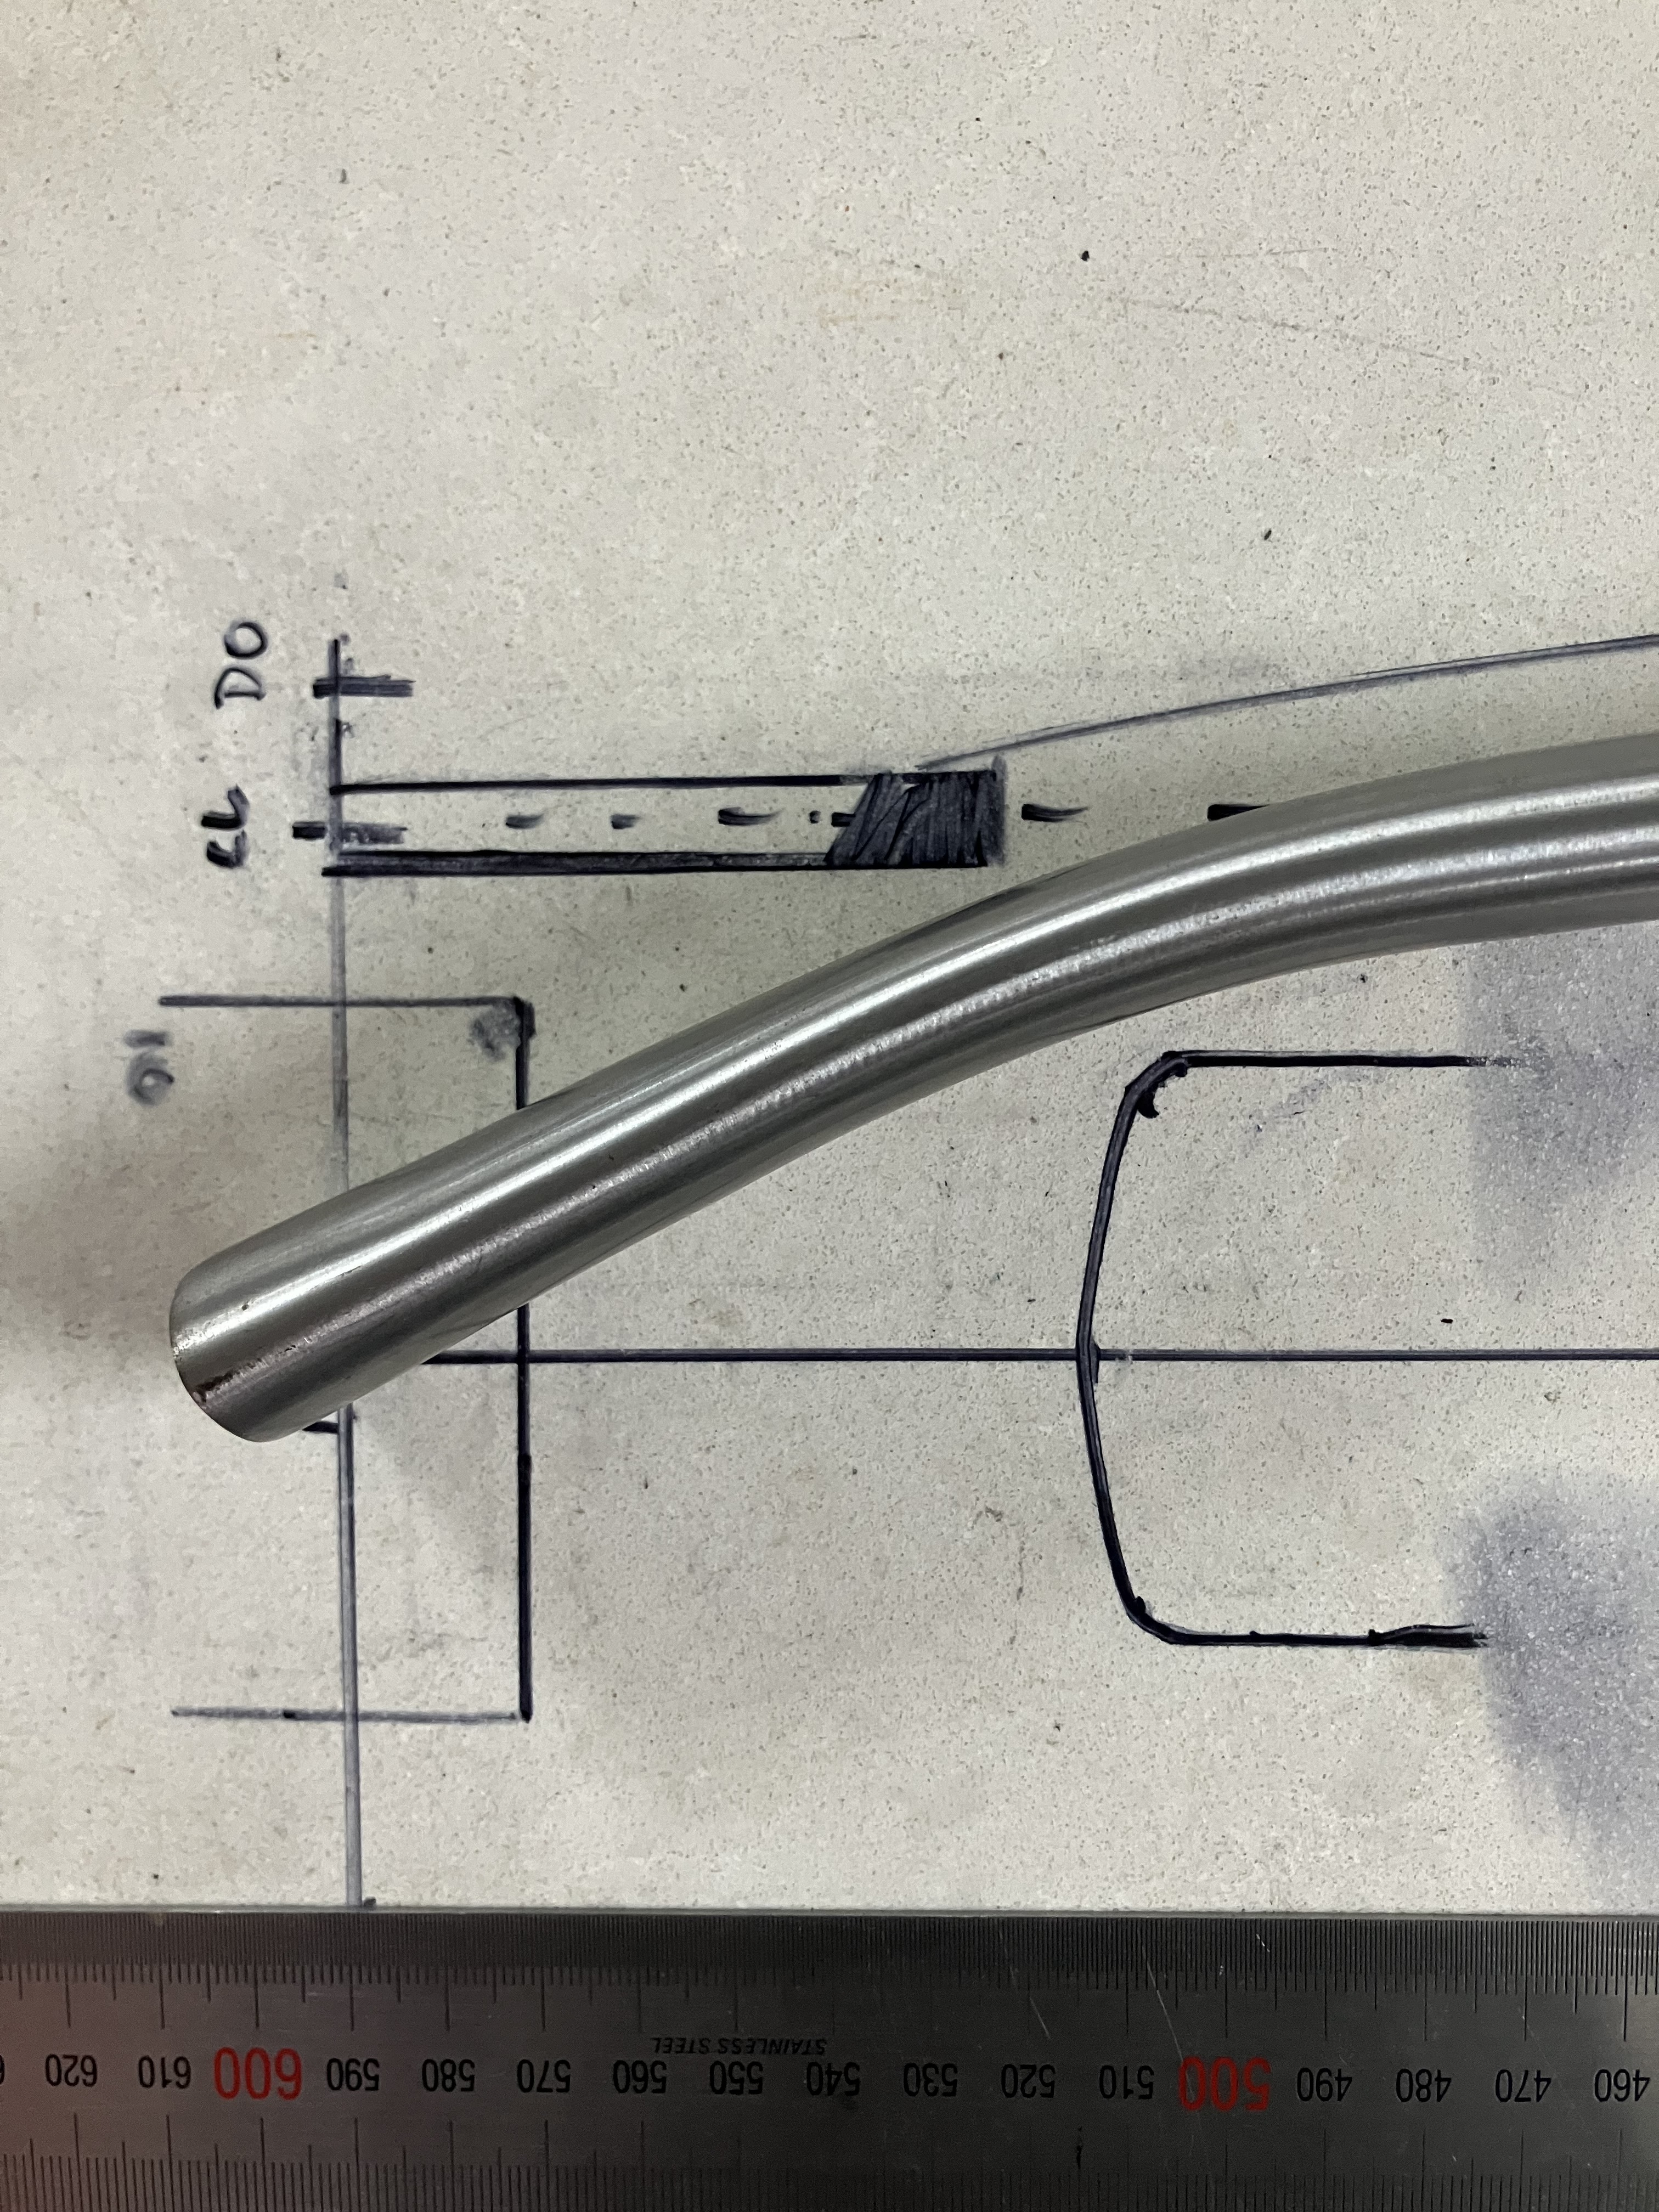
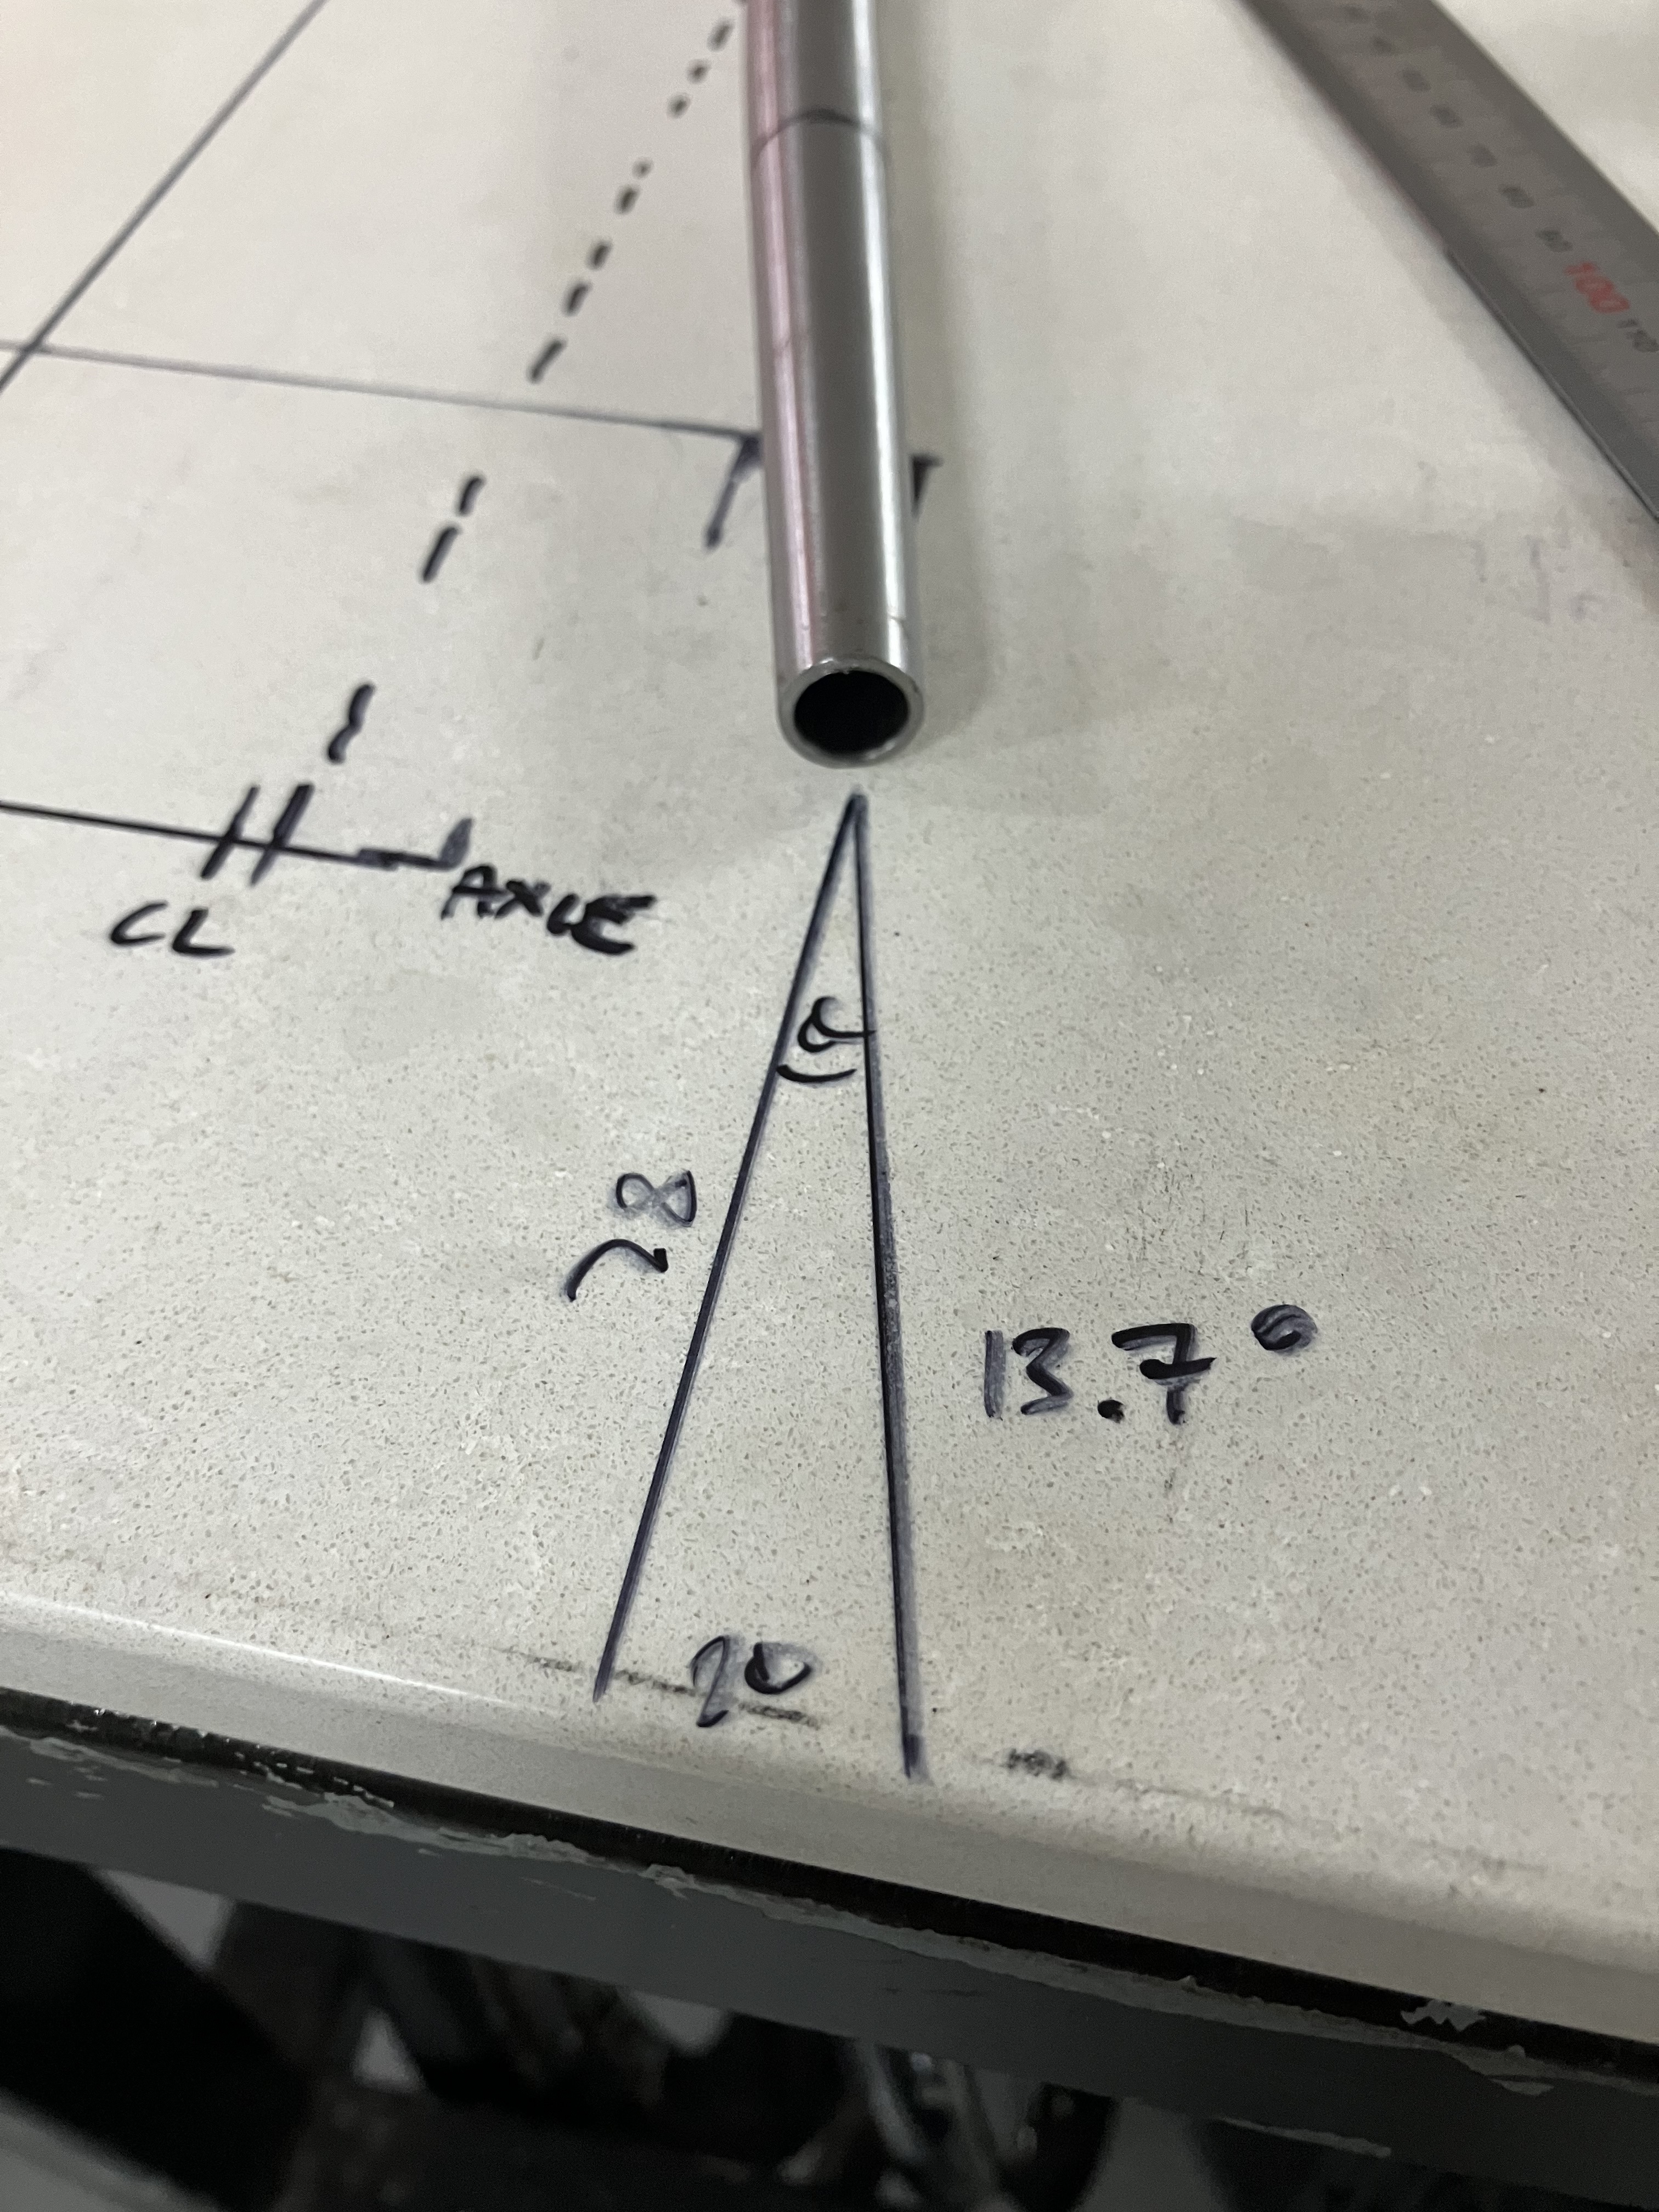
Started off today marking out the rear end on a table. Used this drawing to gauge the chainstay mitre angle. Can also be done in BikeCAD but Rob said it’s good to know how to find angles without always relying on CAD.
Cut the dropout end of the stays and fit them in the Anvil stay mitring fixture. Took a little filing to get them to sit properly since the dropout hoods are cast and not perfectly round.
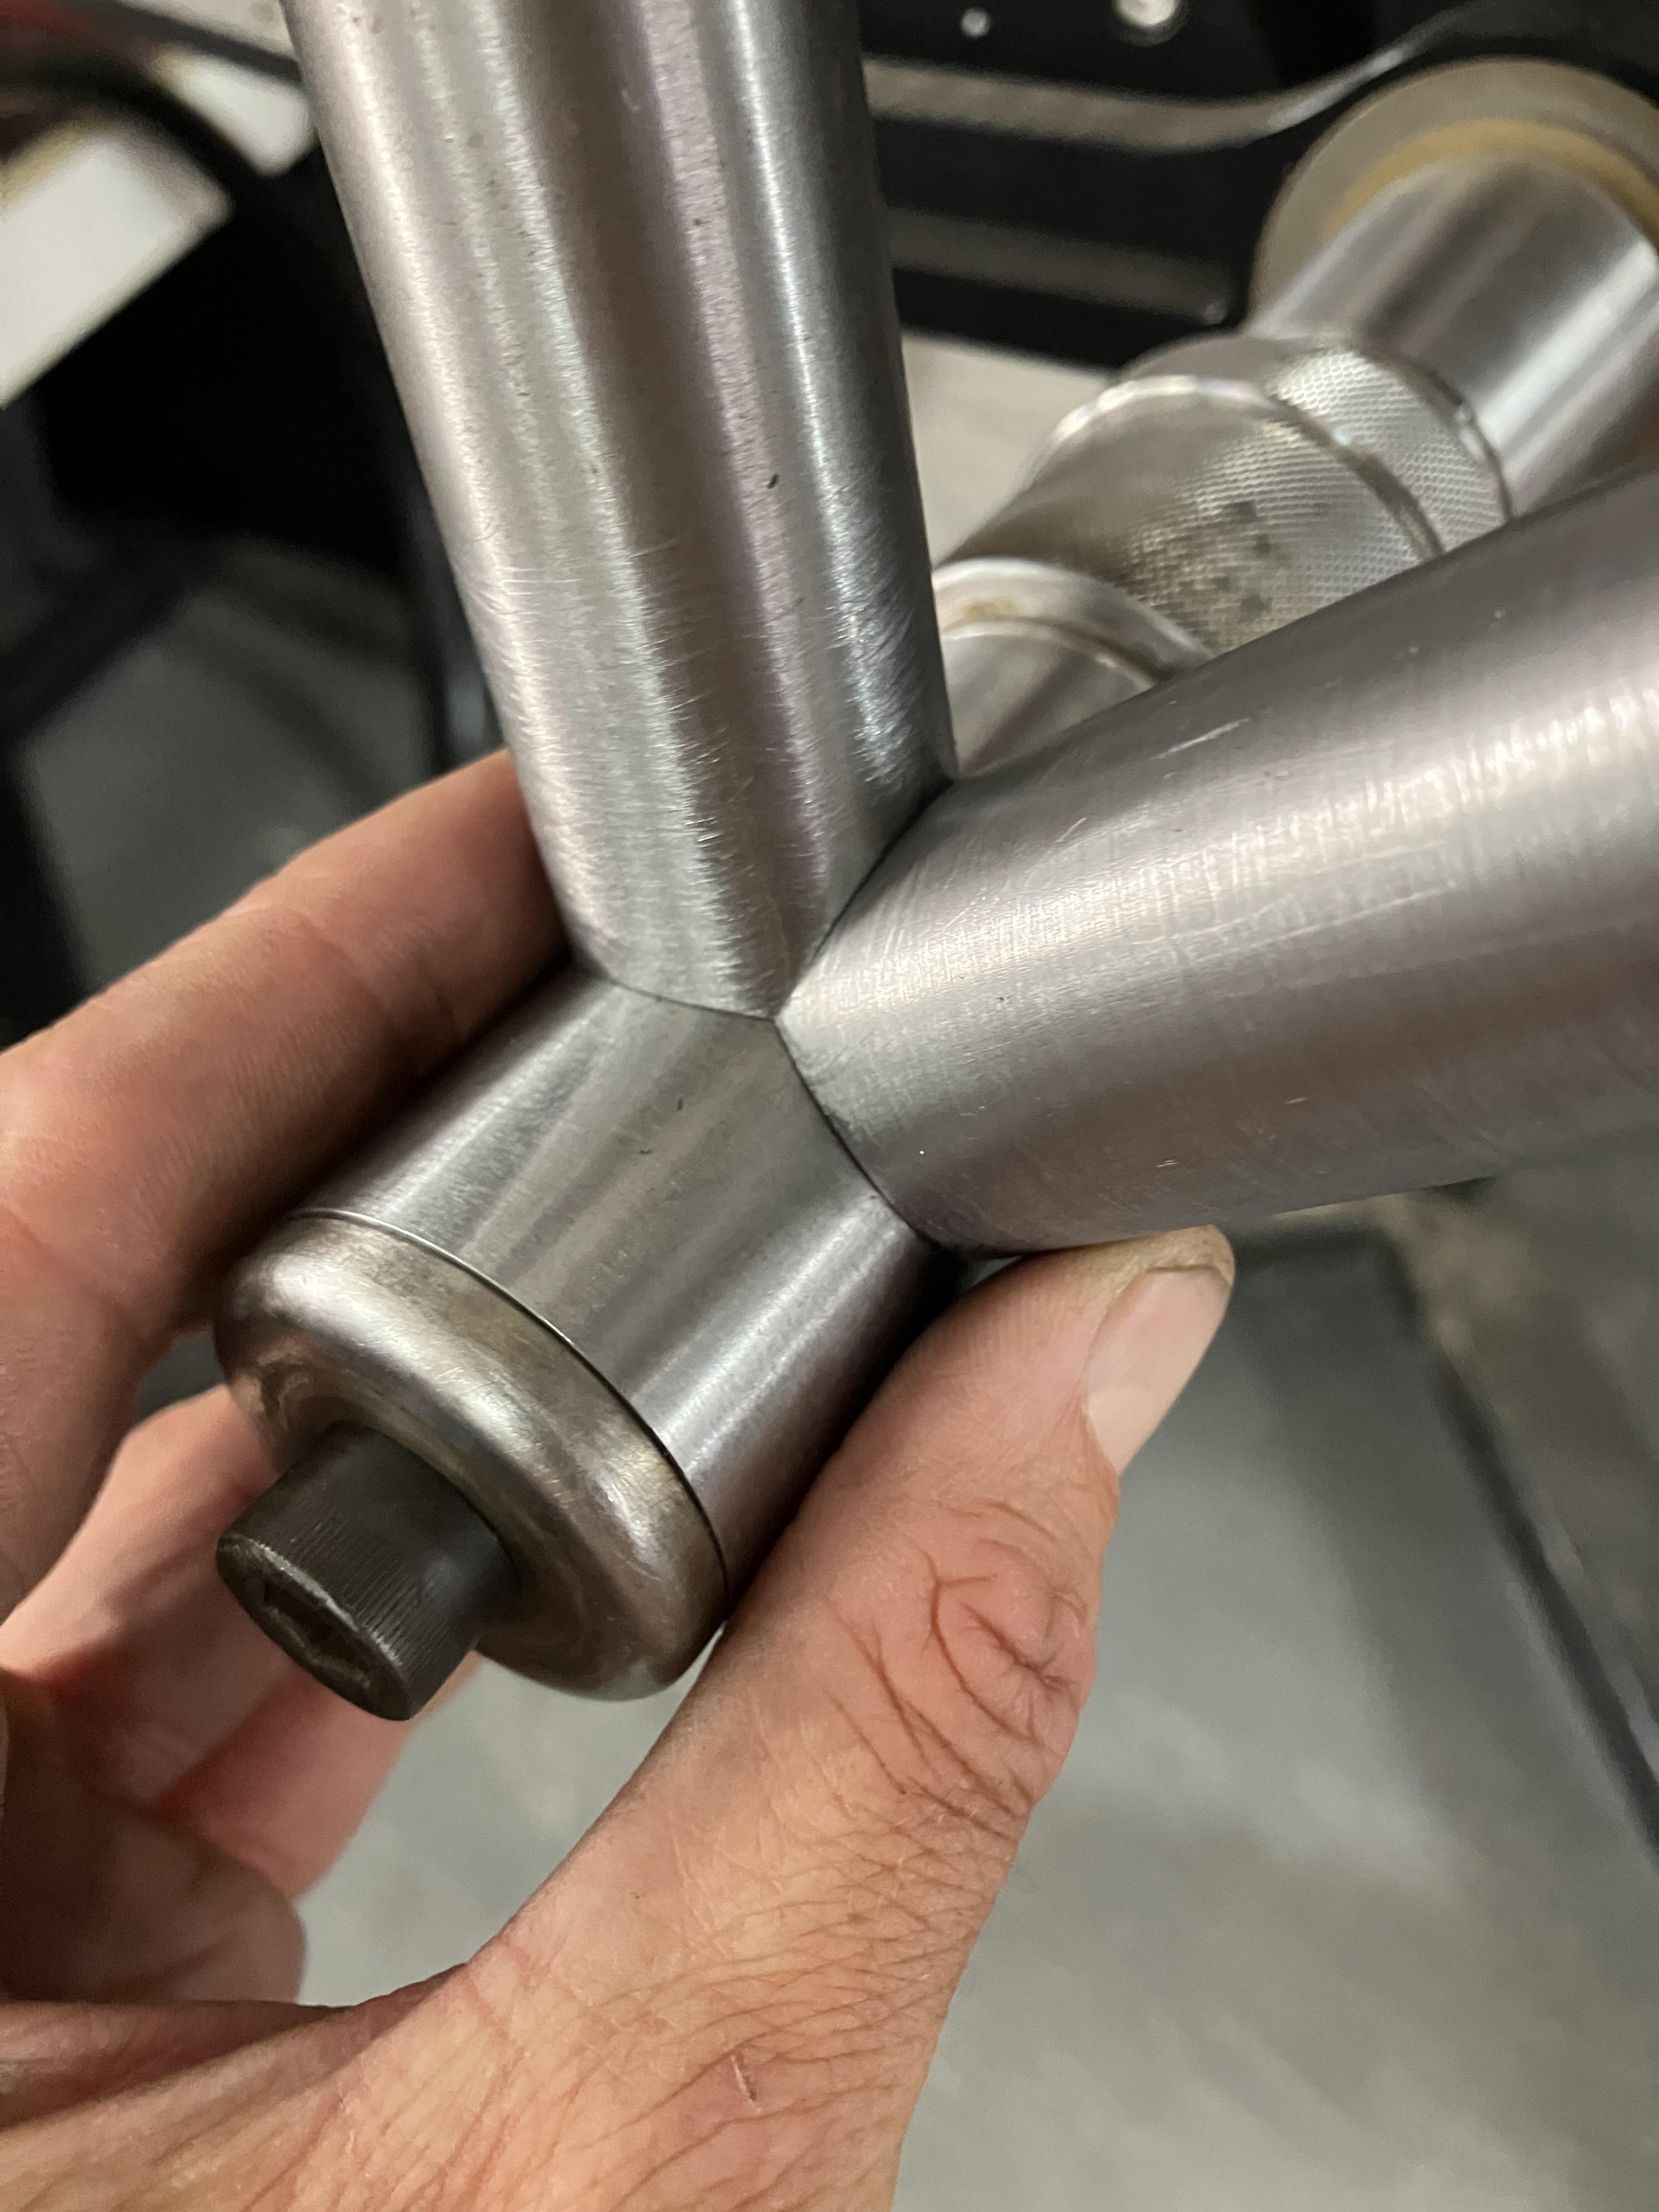
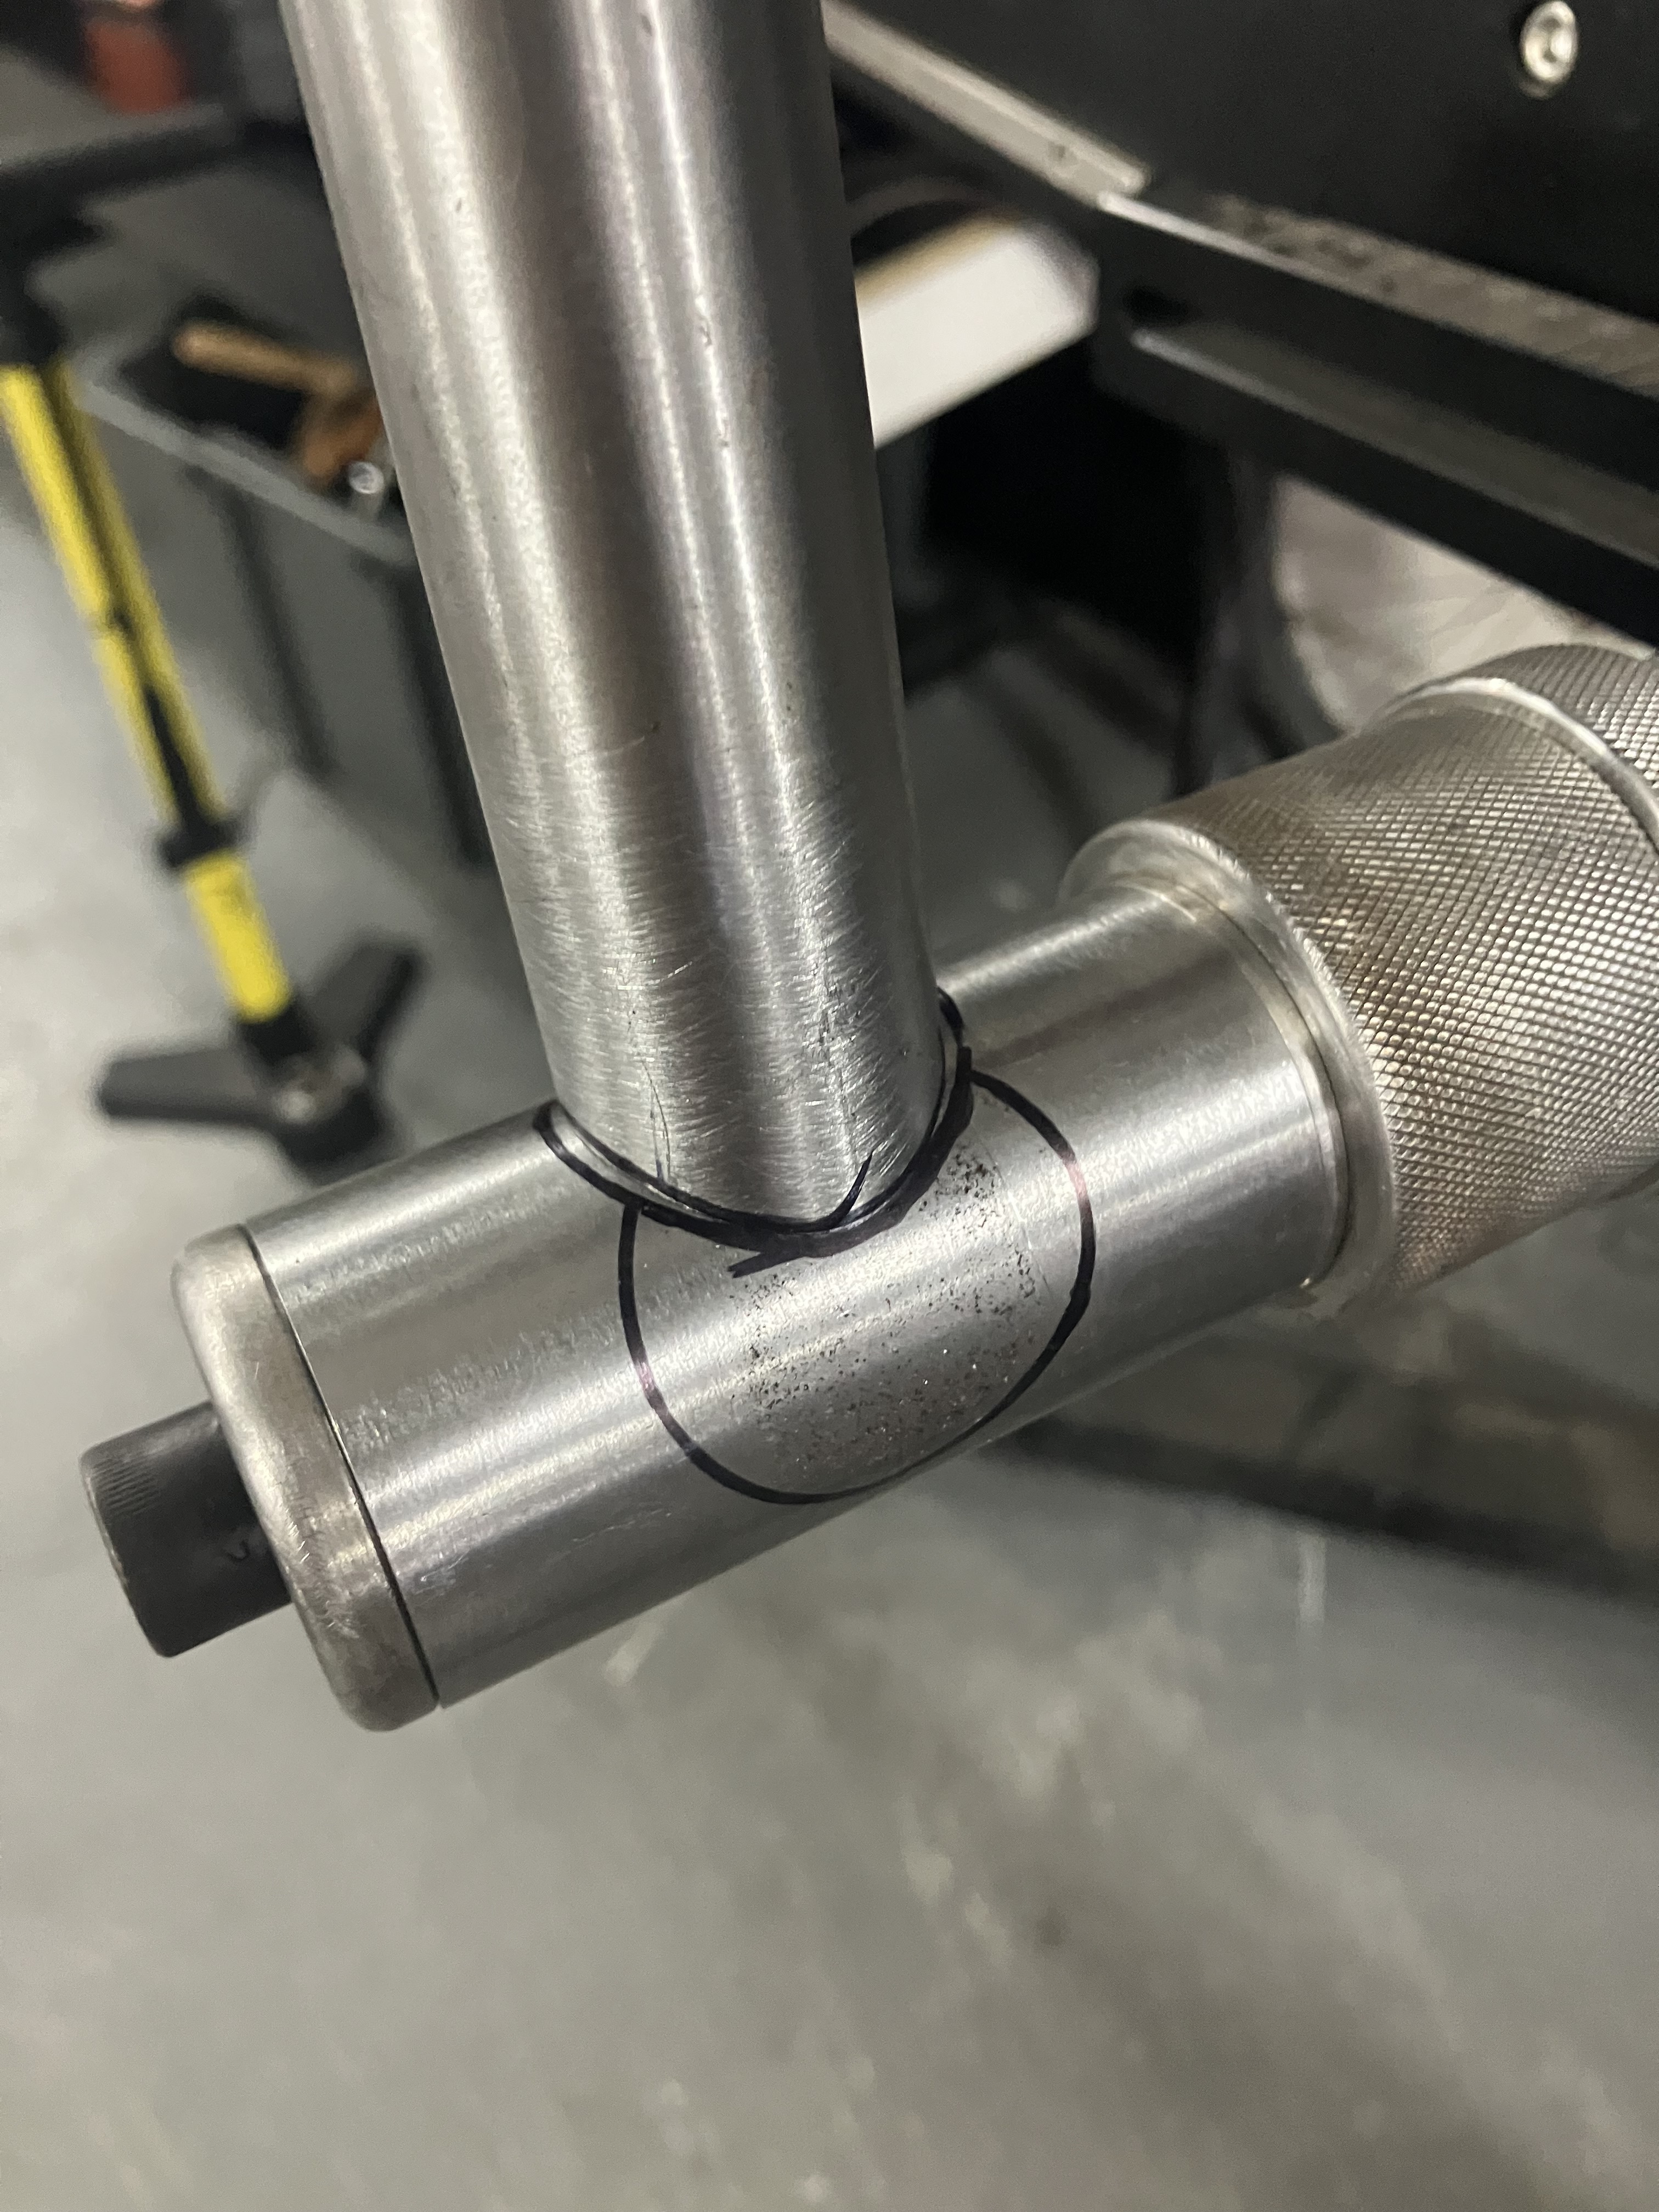
After lunch we tacked the stays to the dropouts and then tin them then fully brazed them. While these cool we tacked the main triangle. We used two tacks top and bottom of each tube with the obtuse angle done first. Getting more used to the torch.
After the chainstay assemble had cooled we took it over to the mill and did the BB shell mitre. Then loaded it into the jig to check it fit. Will need a bit of a clean up and adjustment before tacking. We’ll do that tomorrow. I’ll add photos of the fully tacked frame then.
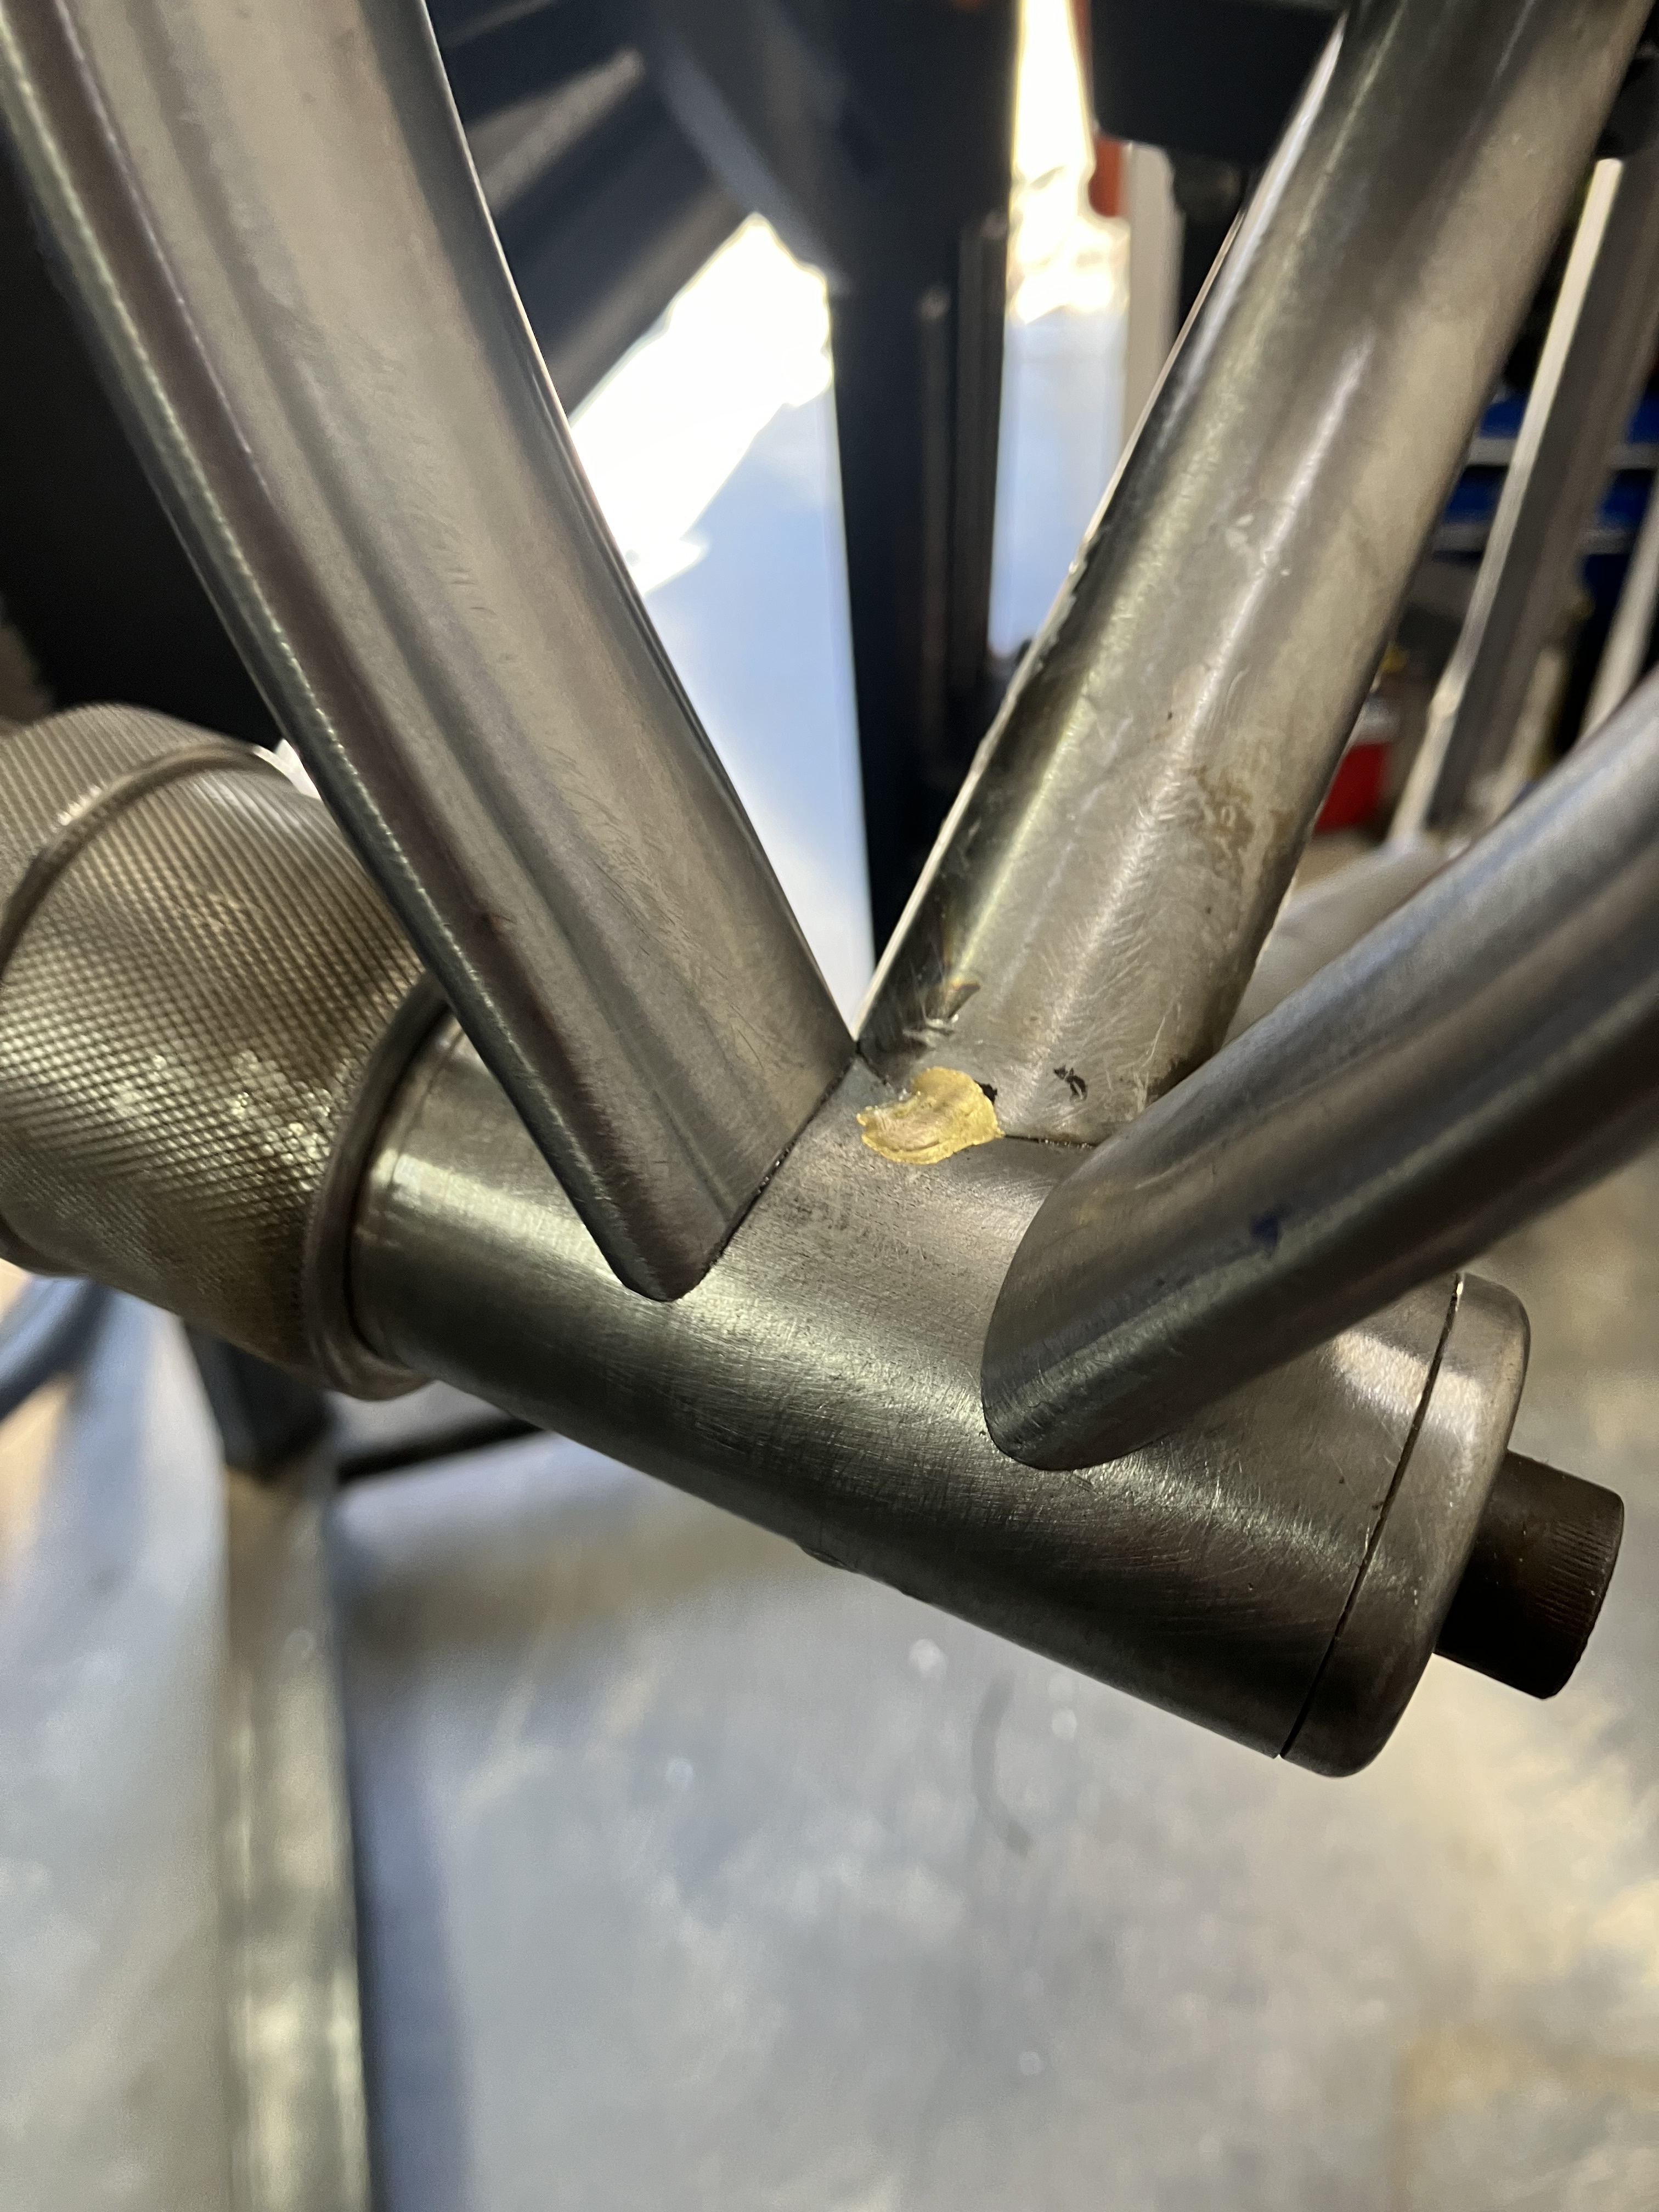
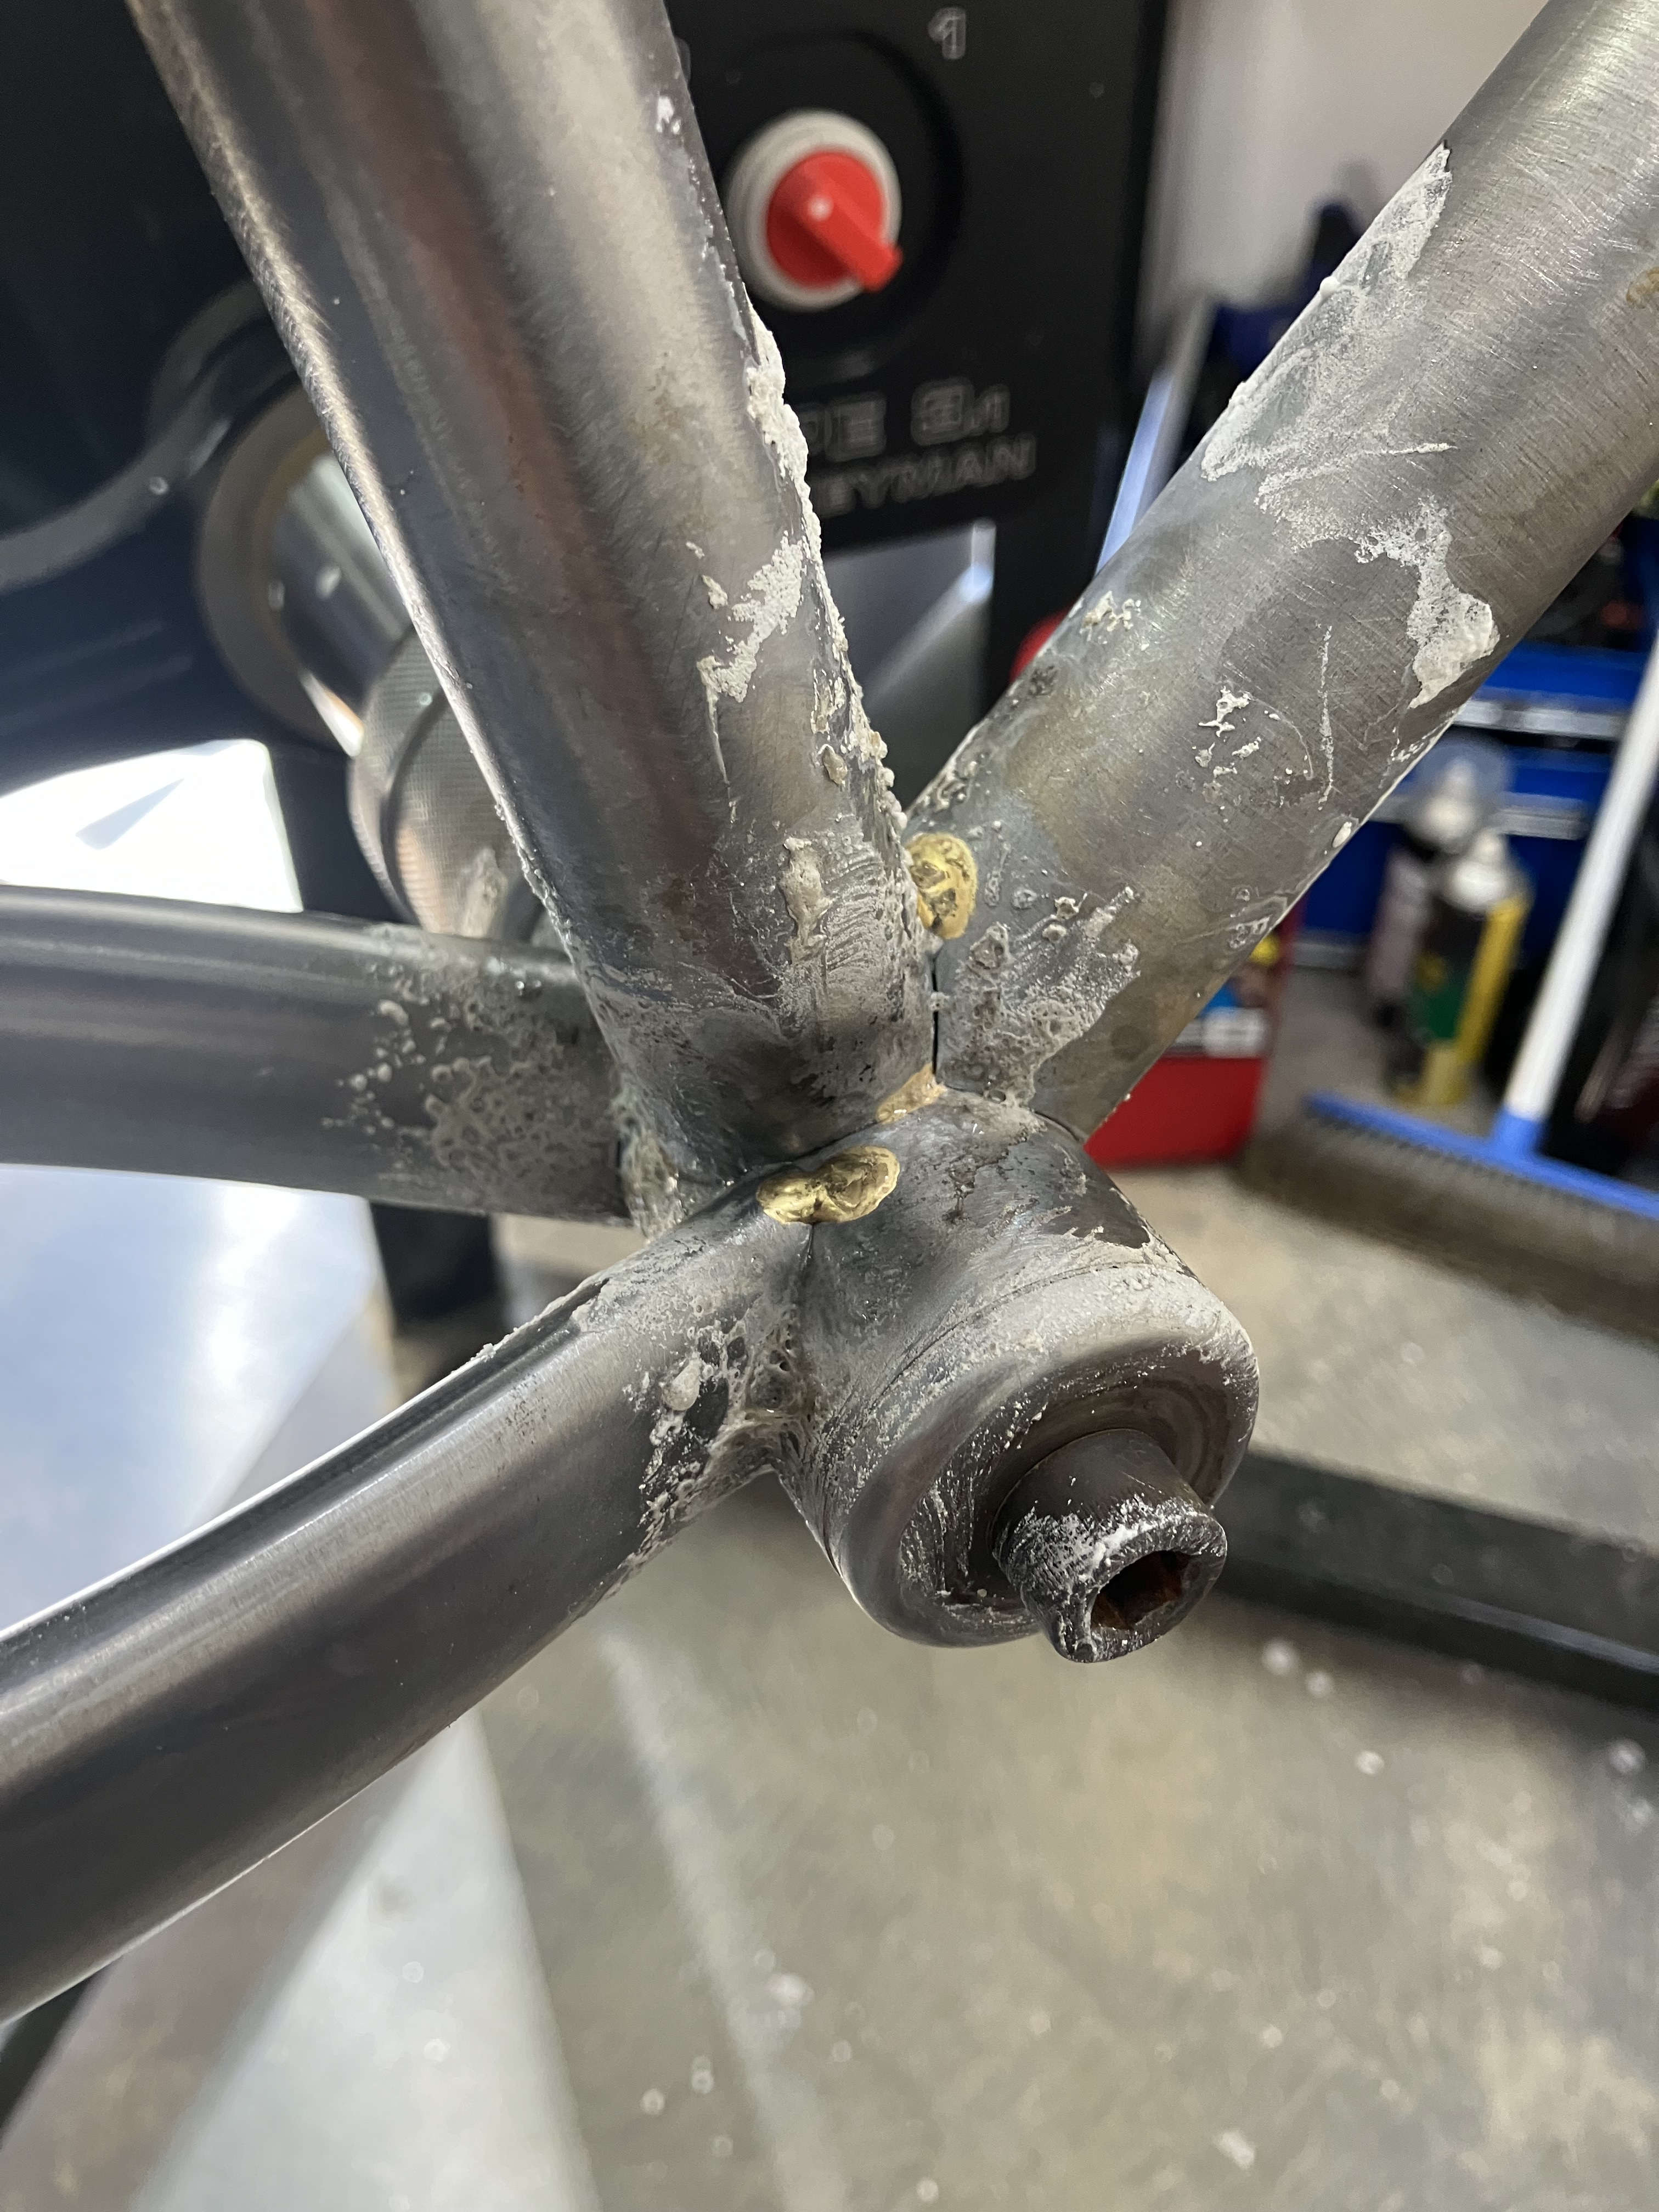
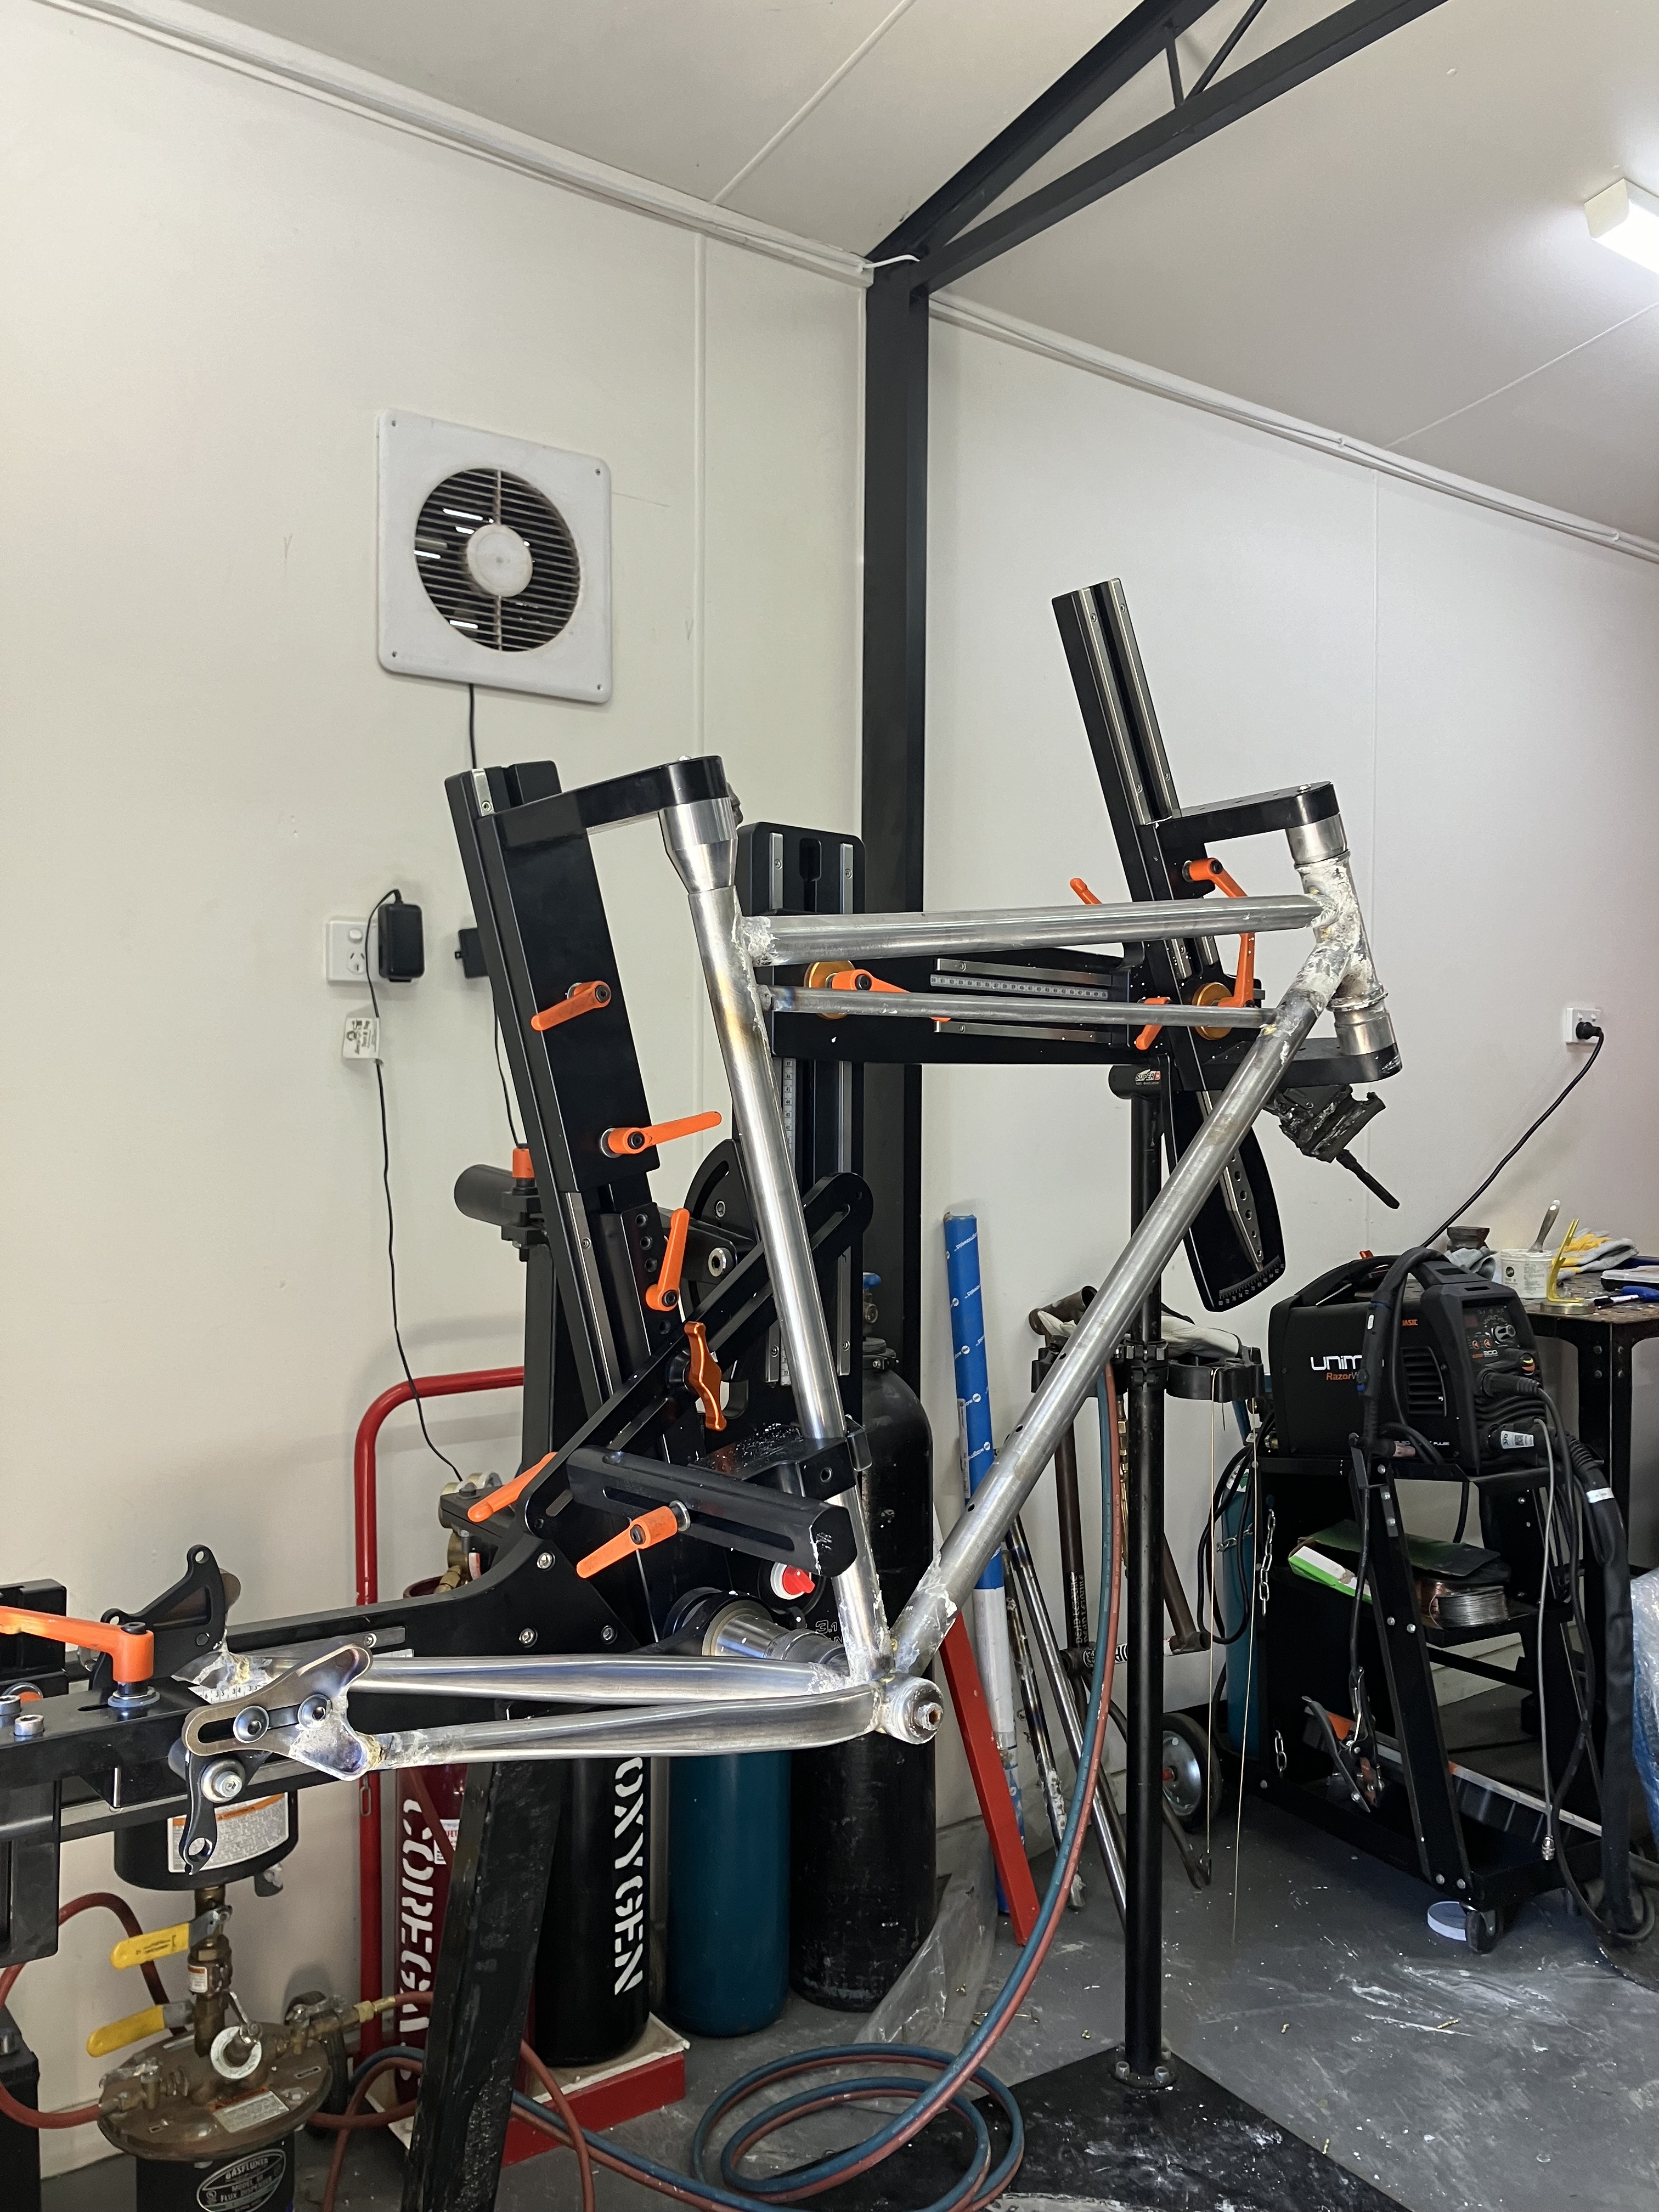
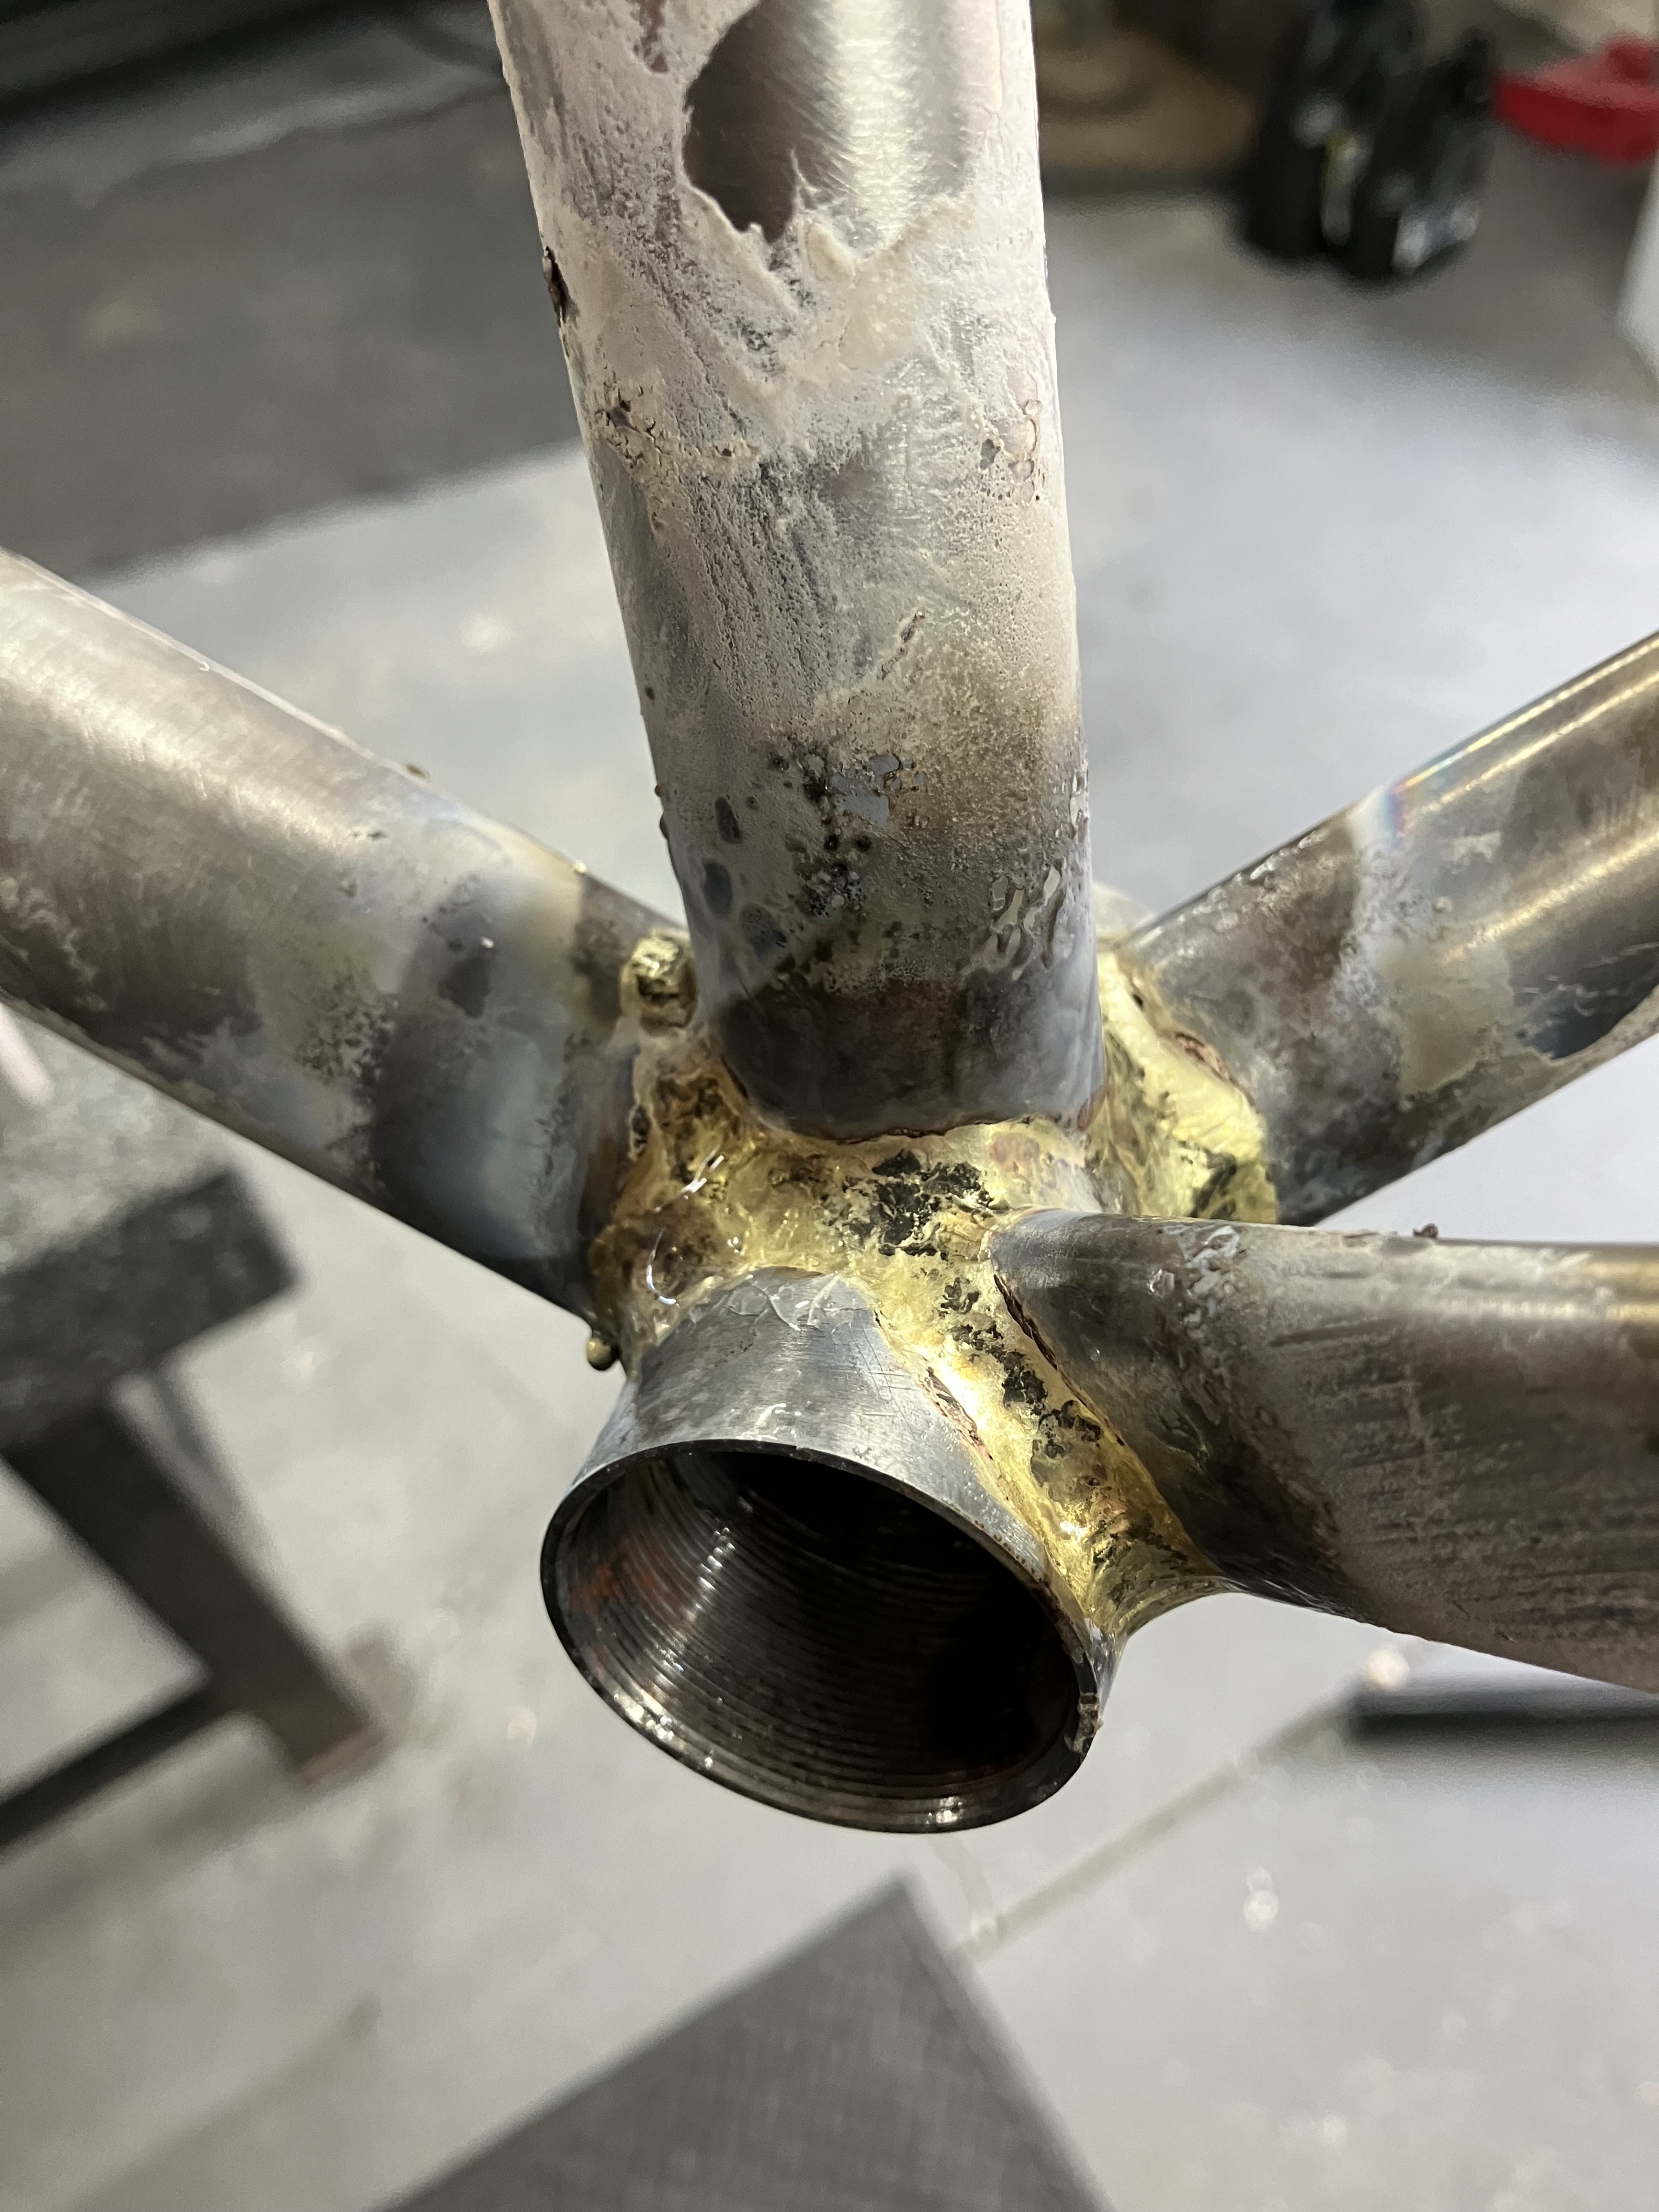
Snuck in a half day to make up for the lost day on Easter Monday. Cleaned up the chainstays mitres and tacked them on the frame. Really happy with the BB cluster. Plenty of room. A few pics are from yesty. Got a fully tacked front triangle now and ready for brazing next week.
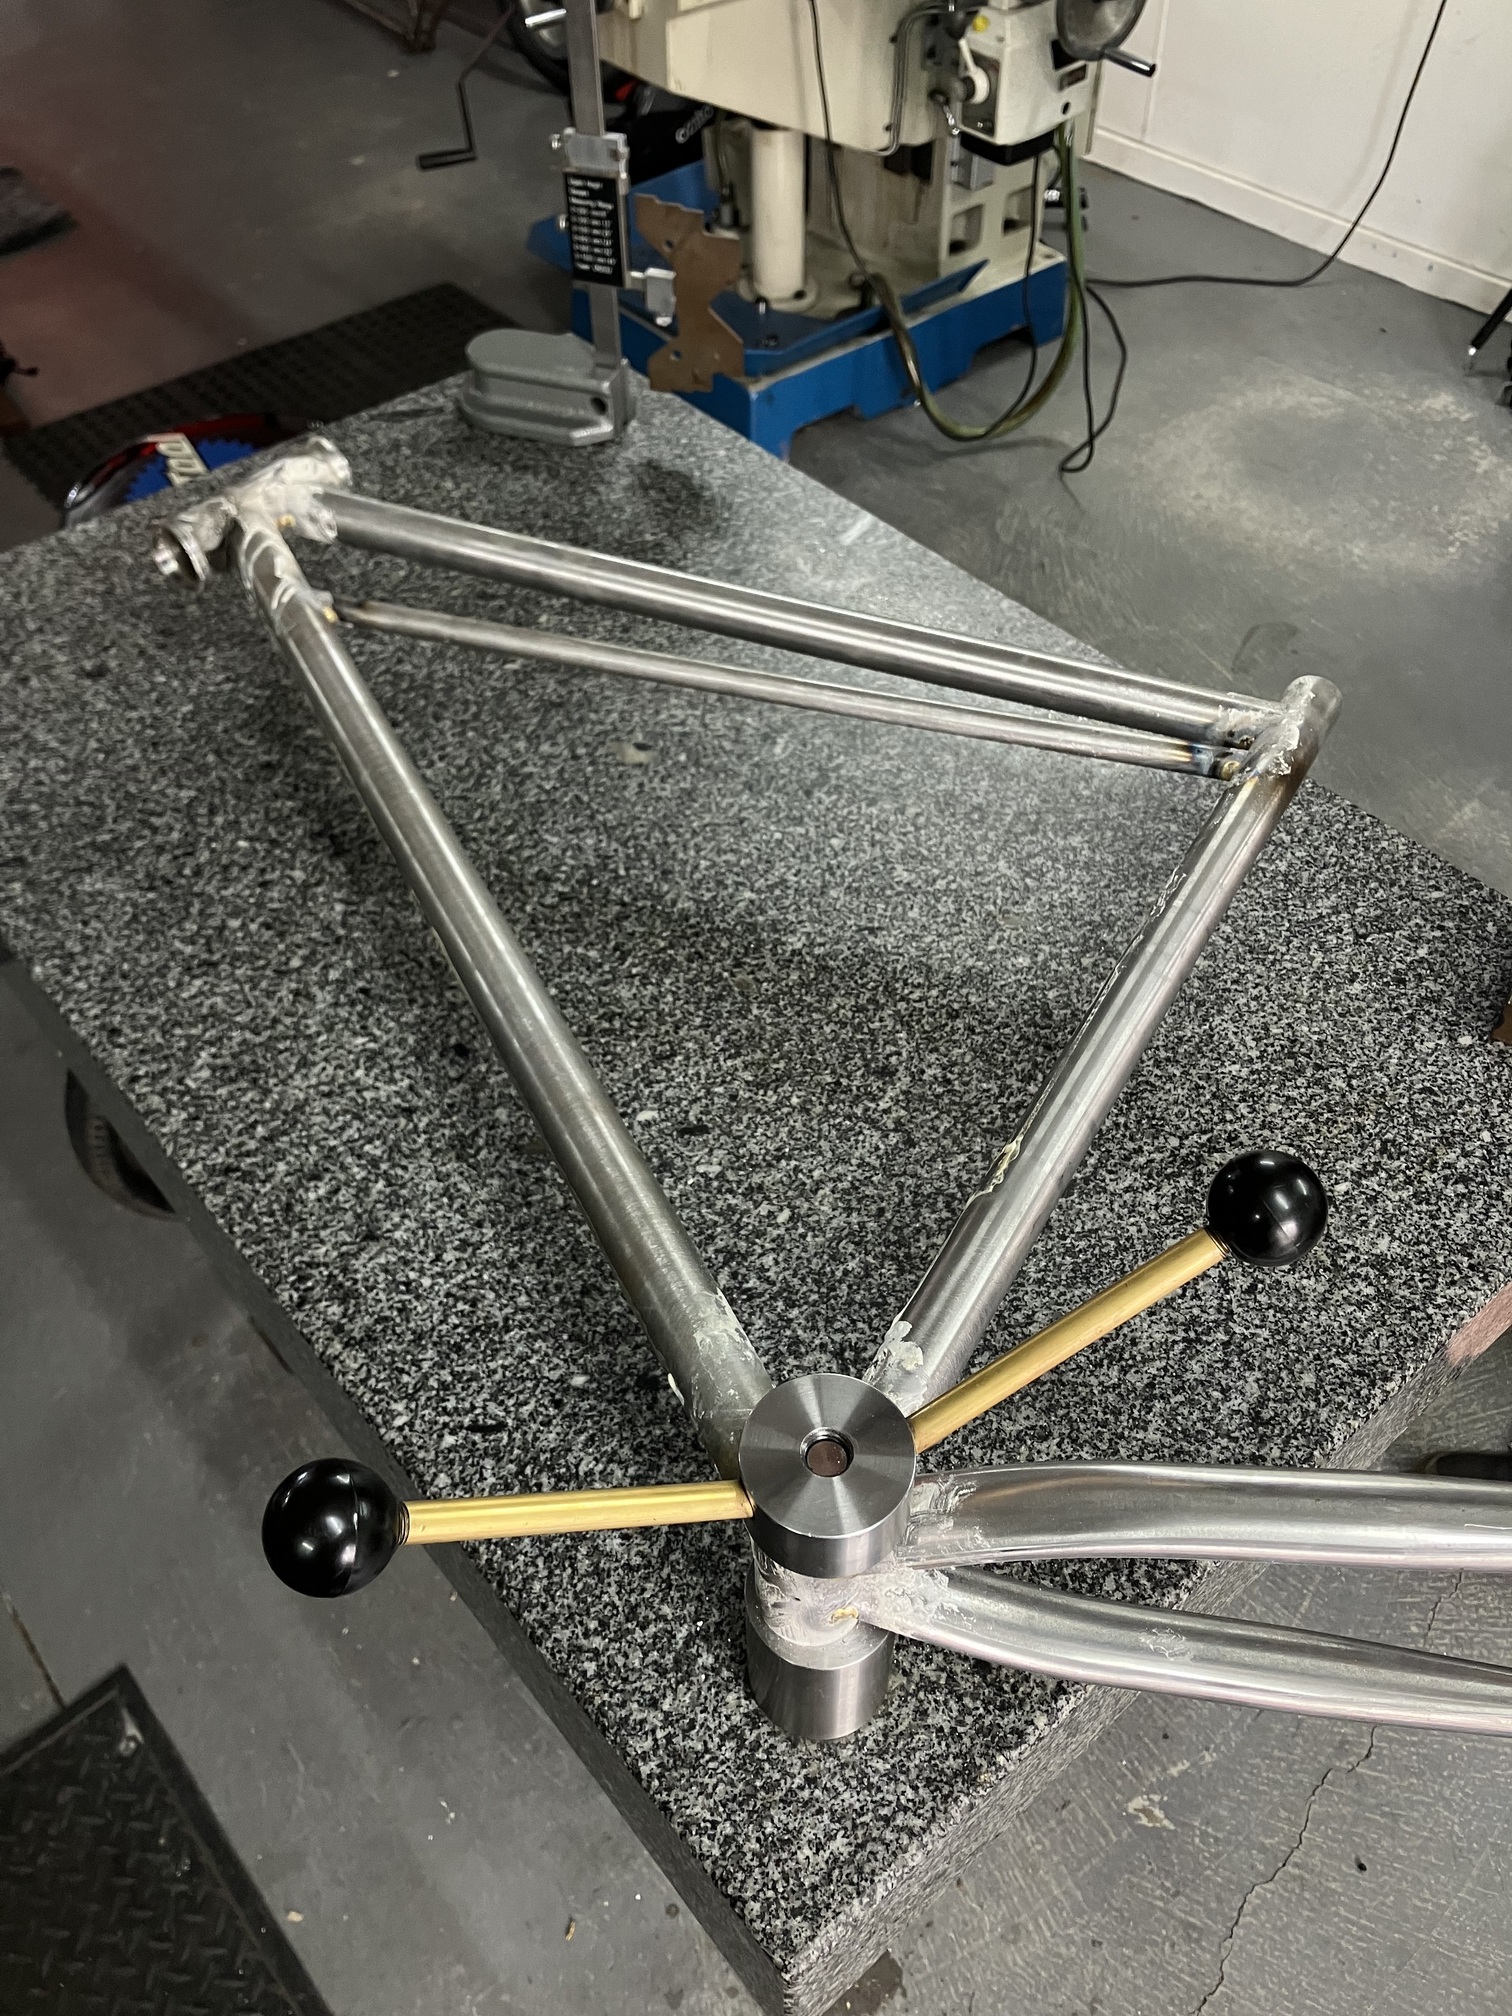
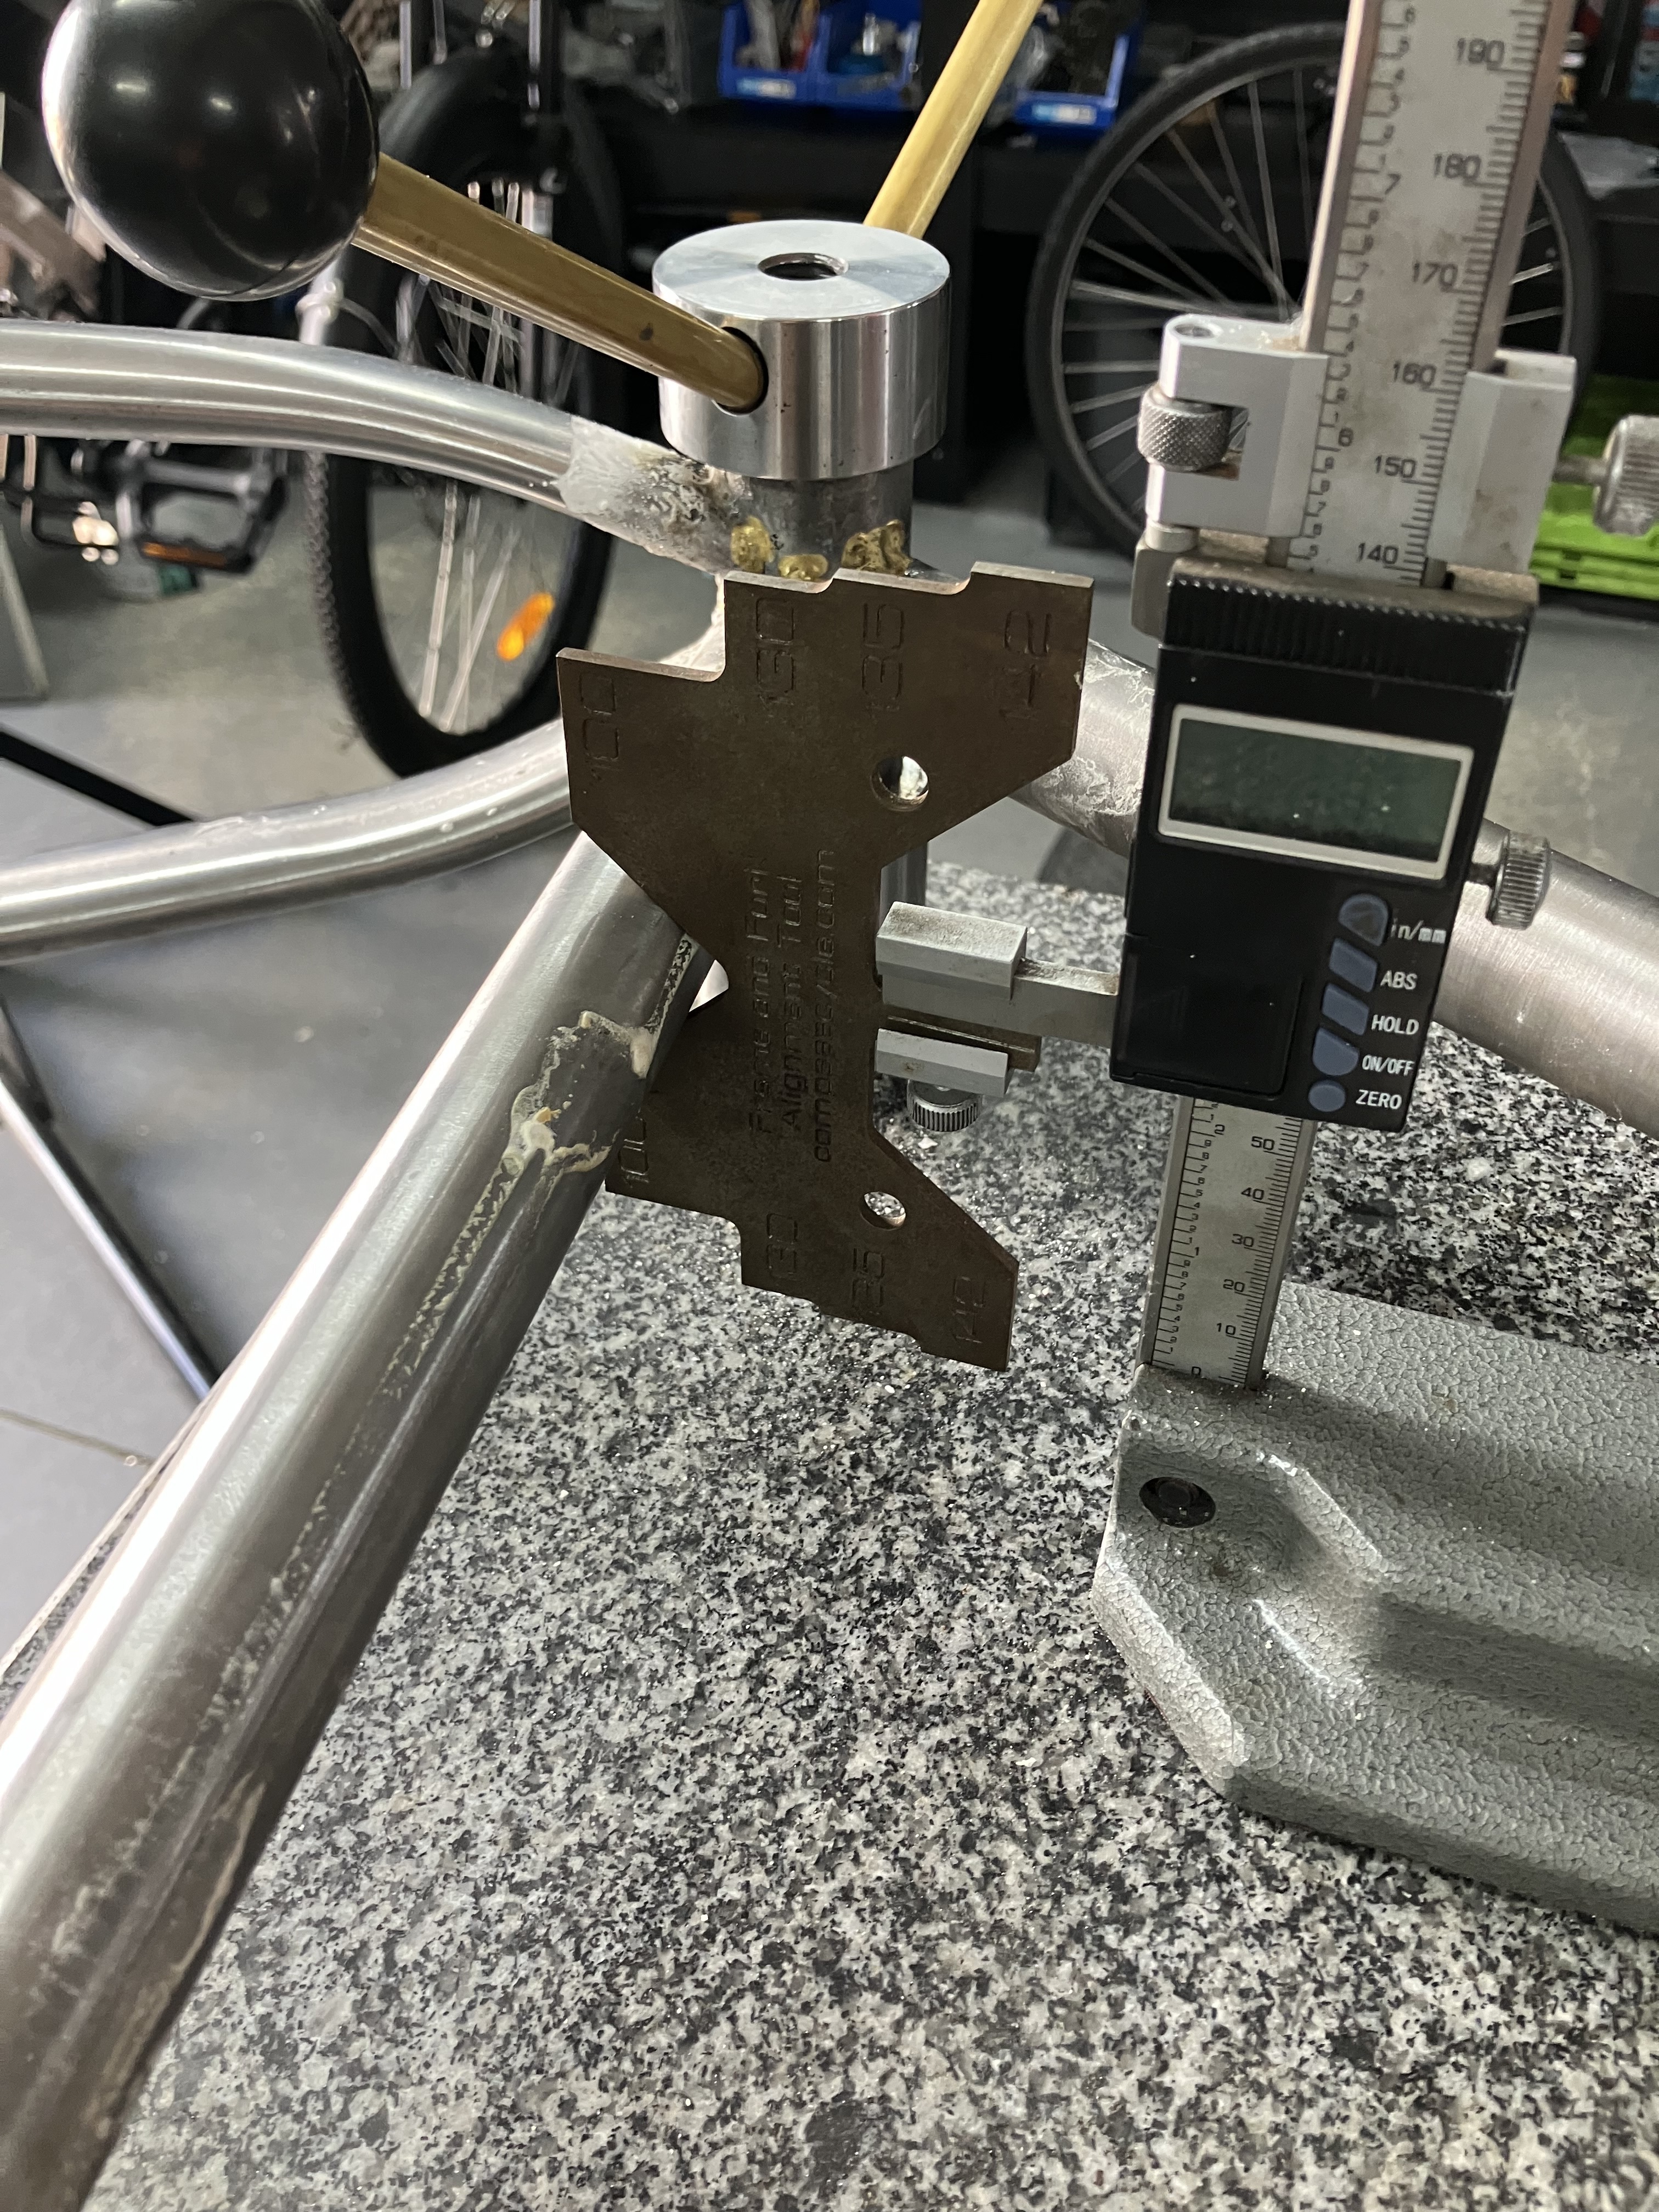
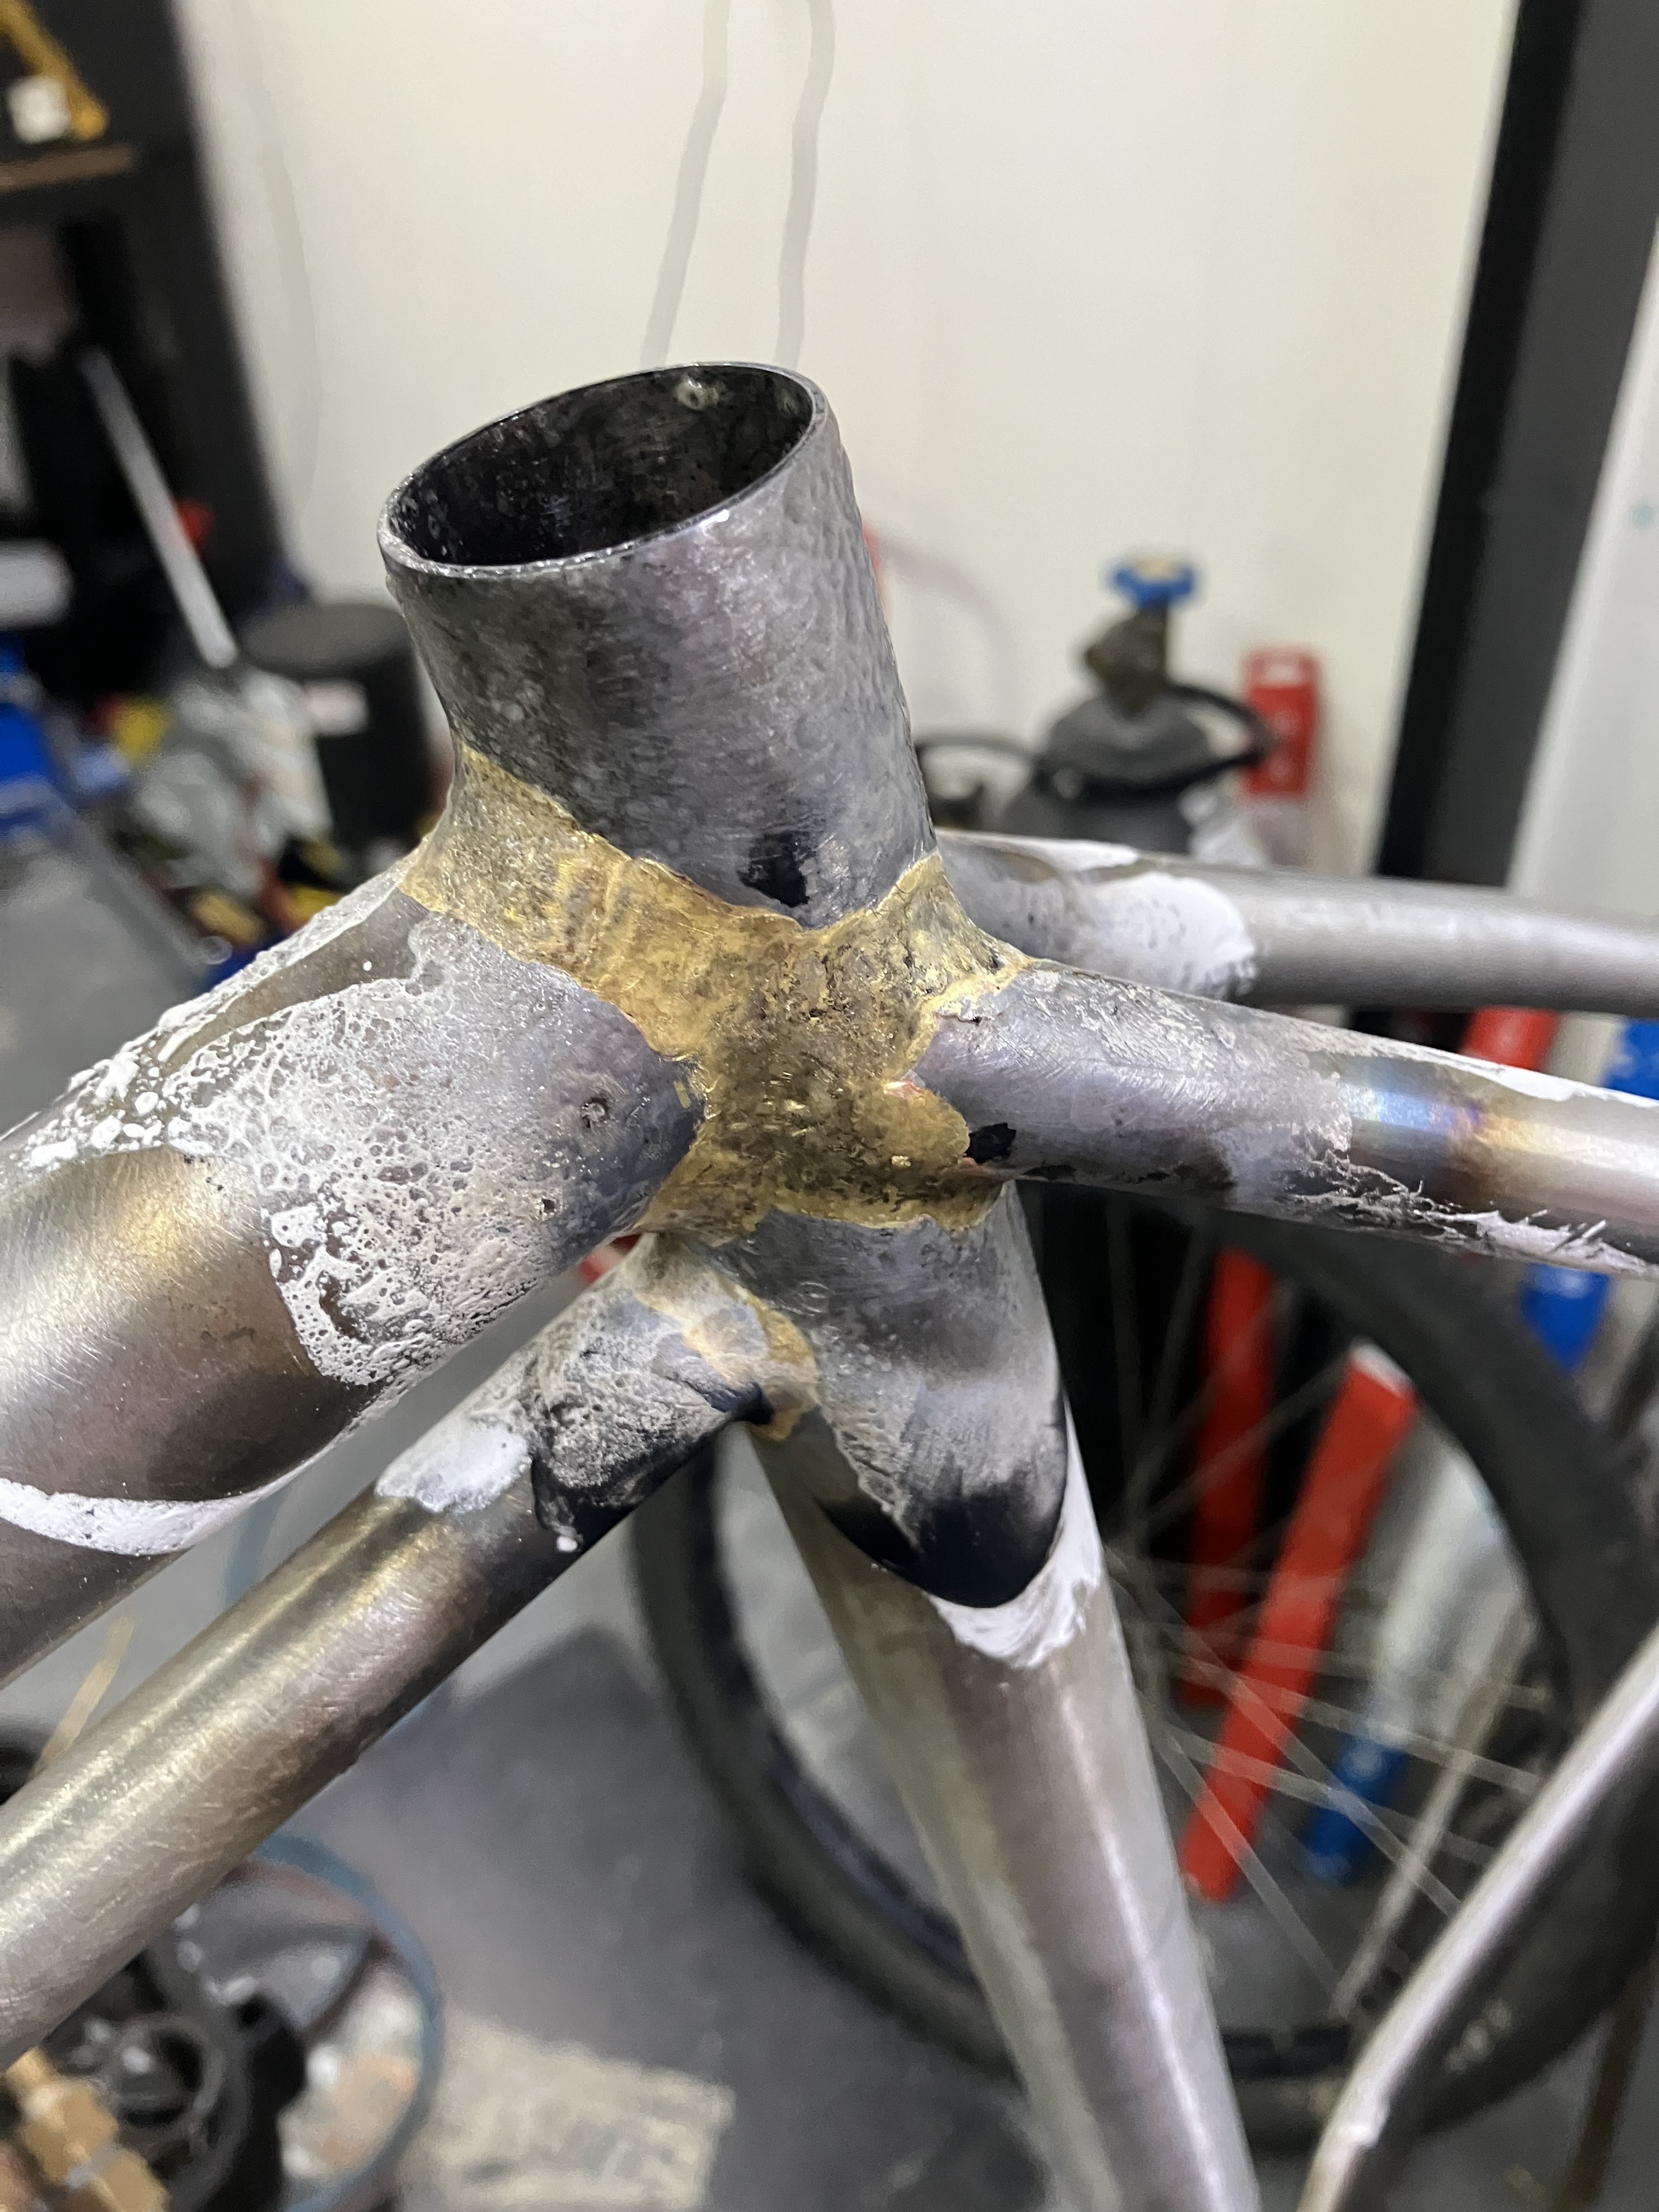
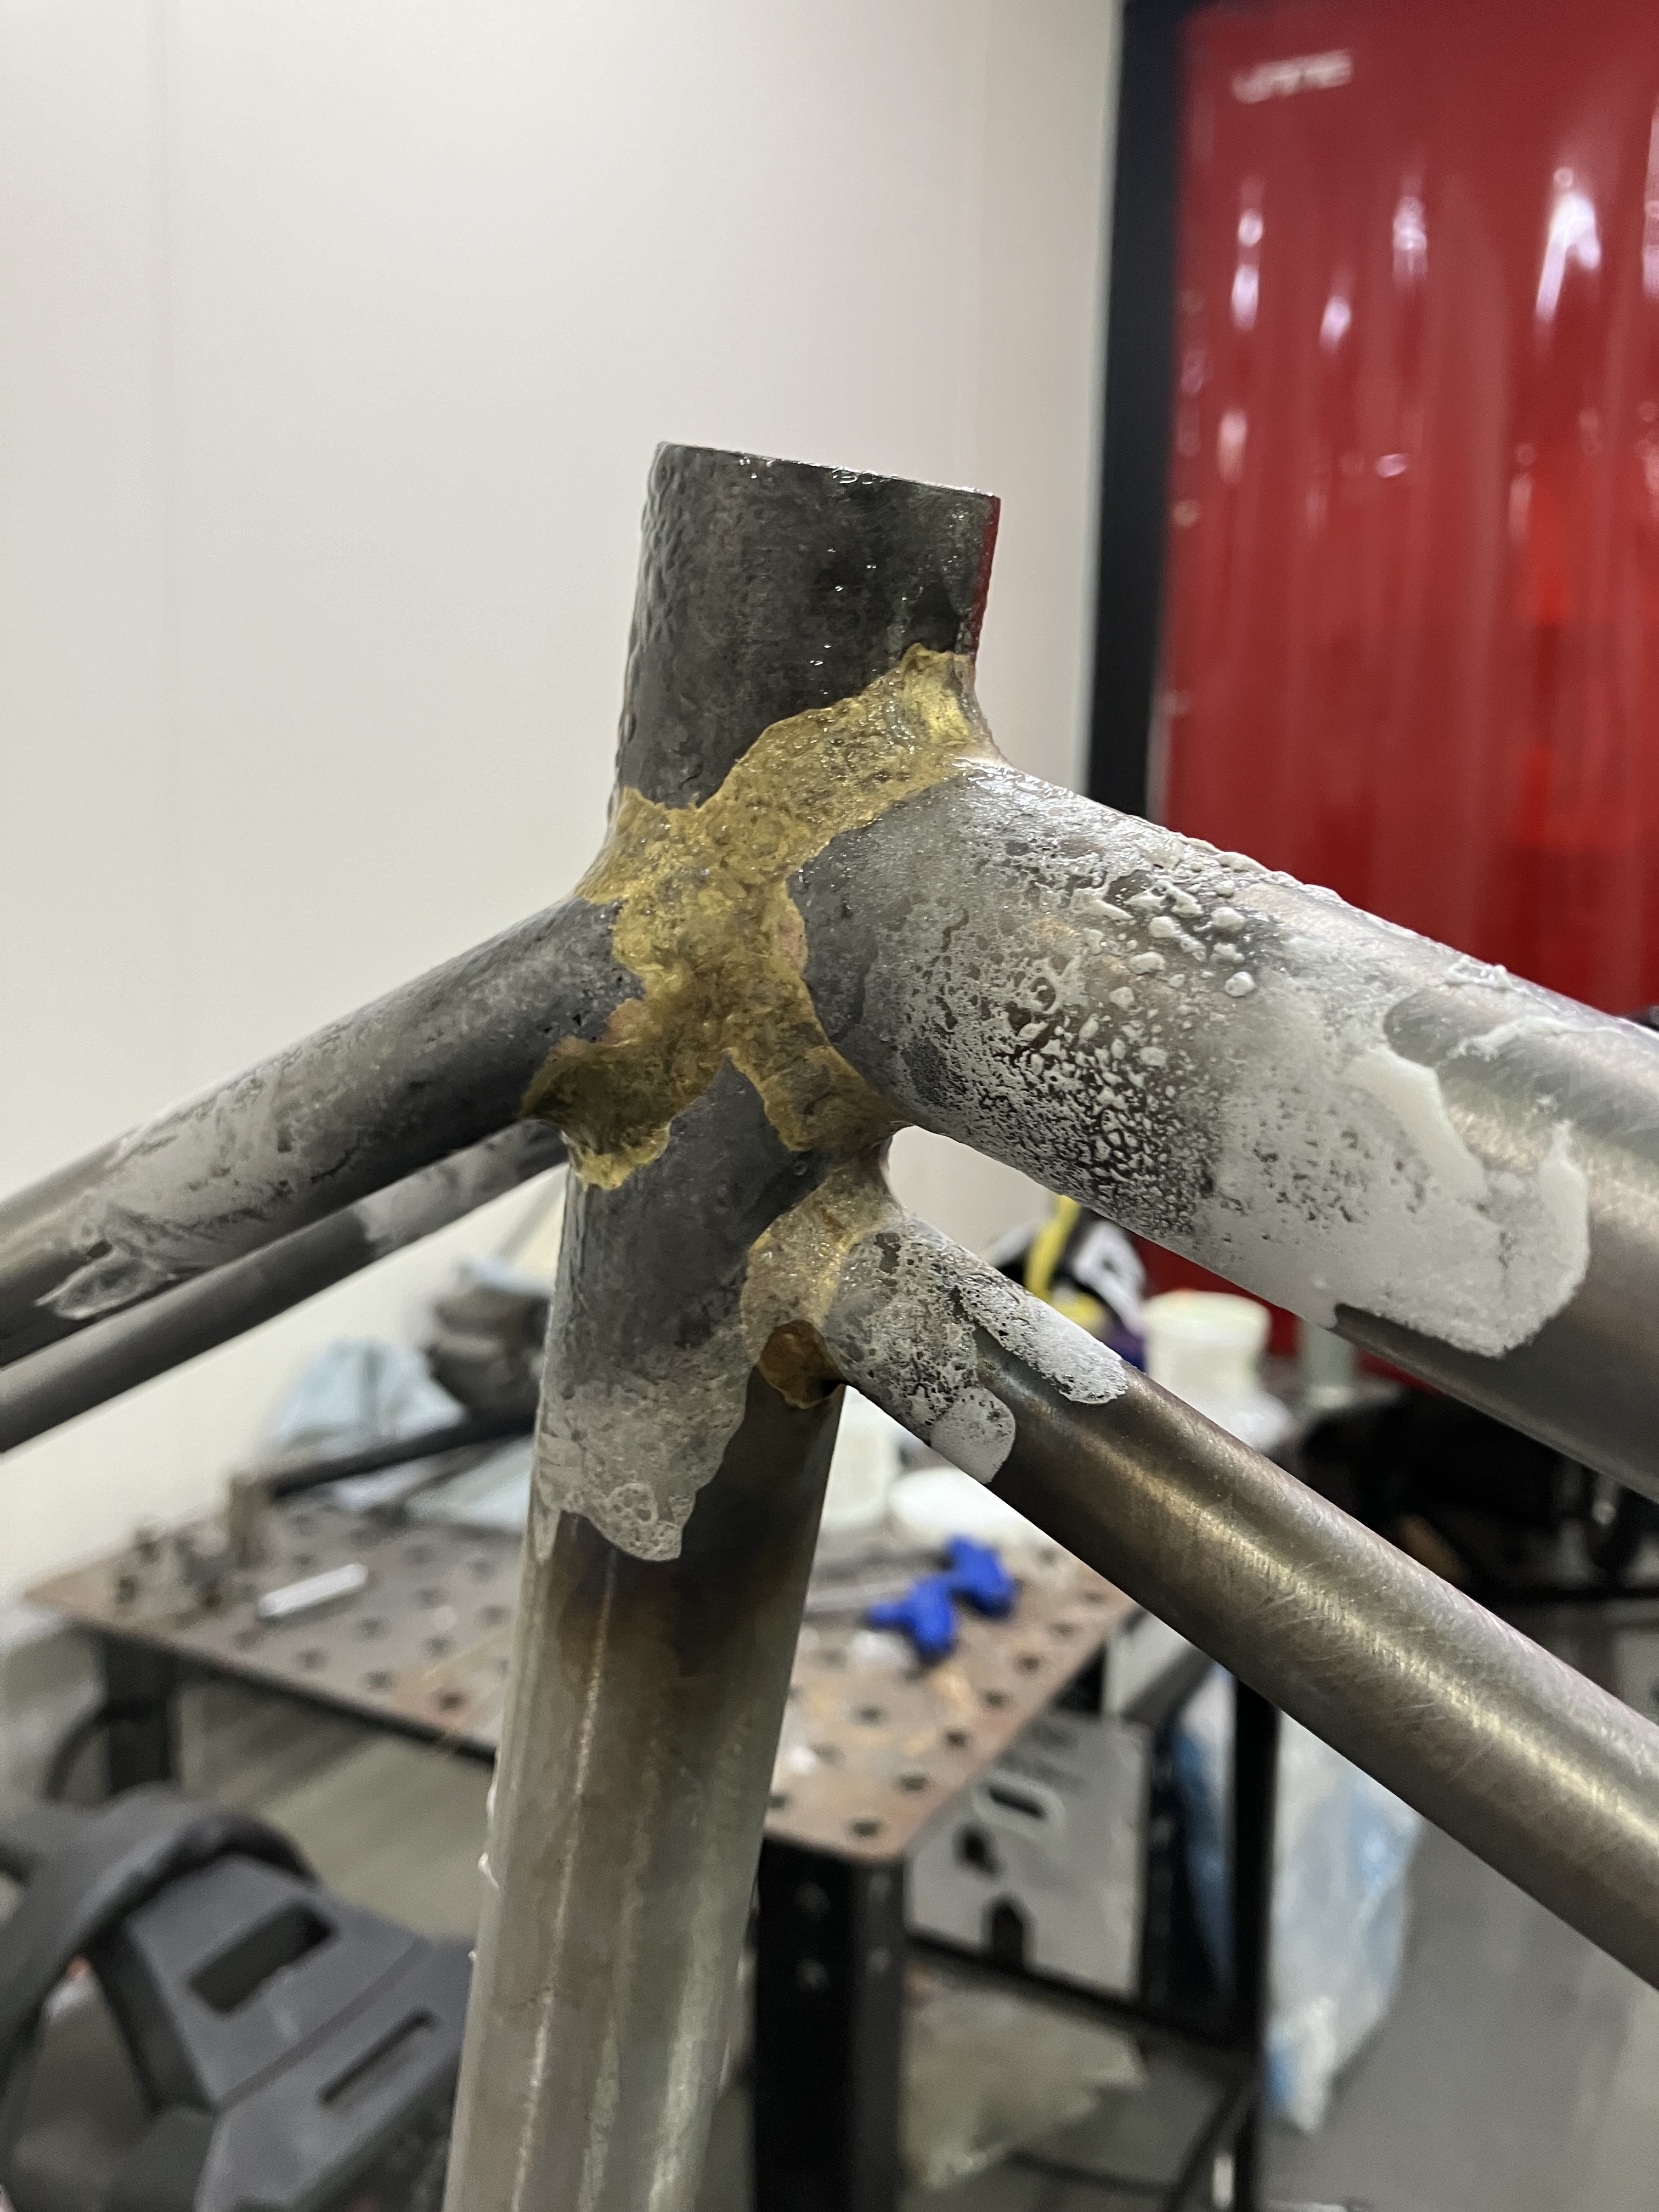
Today was all about brazing. First we checked the frame for alignment and squared it up with a tack on one side of the seat-tube to BB joint. Rob was happy enough with my torch handling to let me jump straight into the main tube brazing. No practice joints.
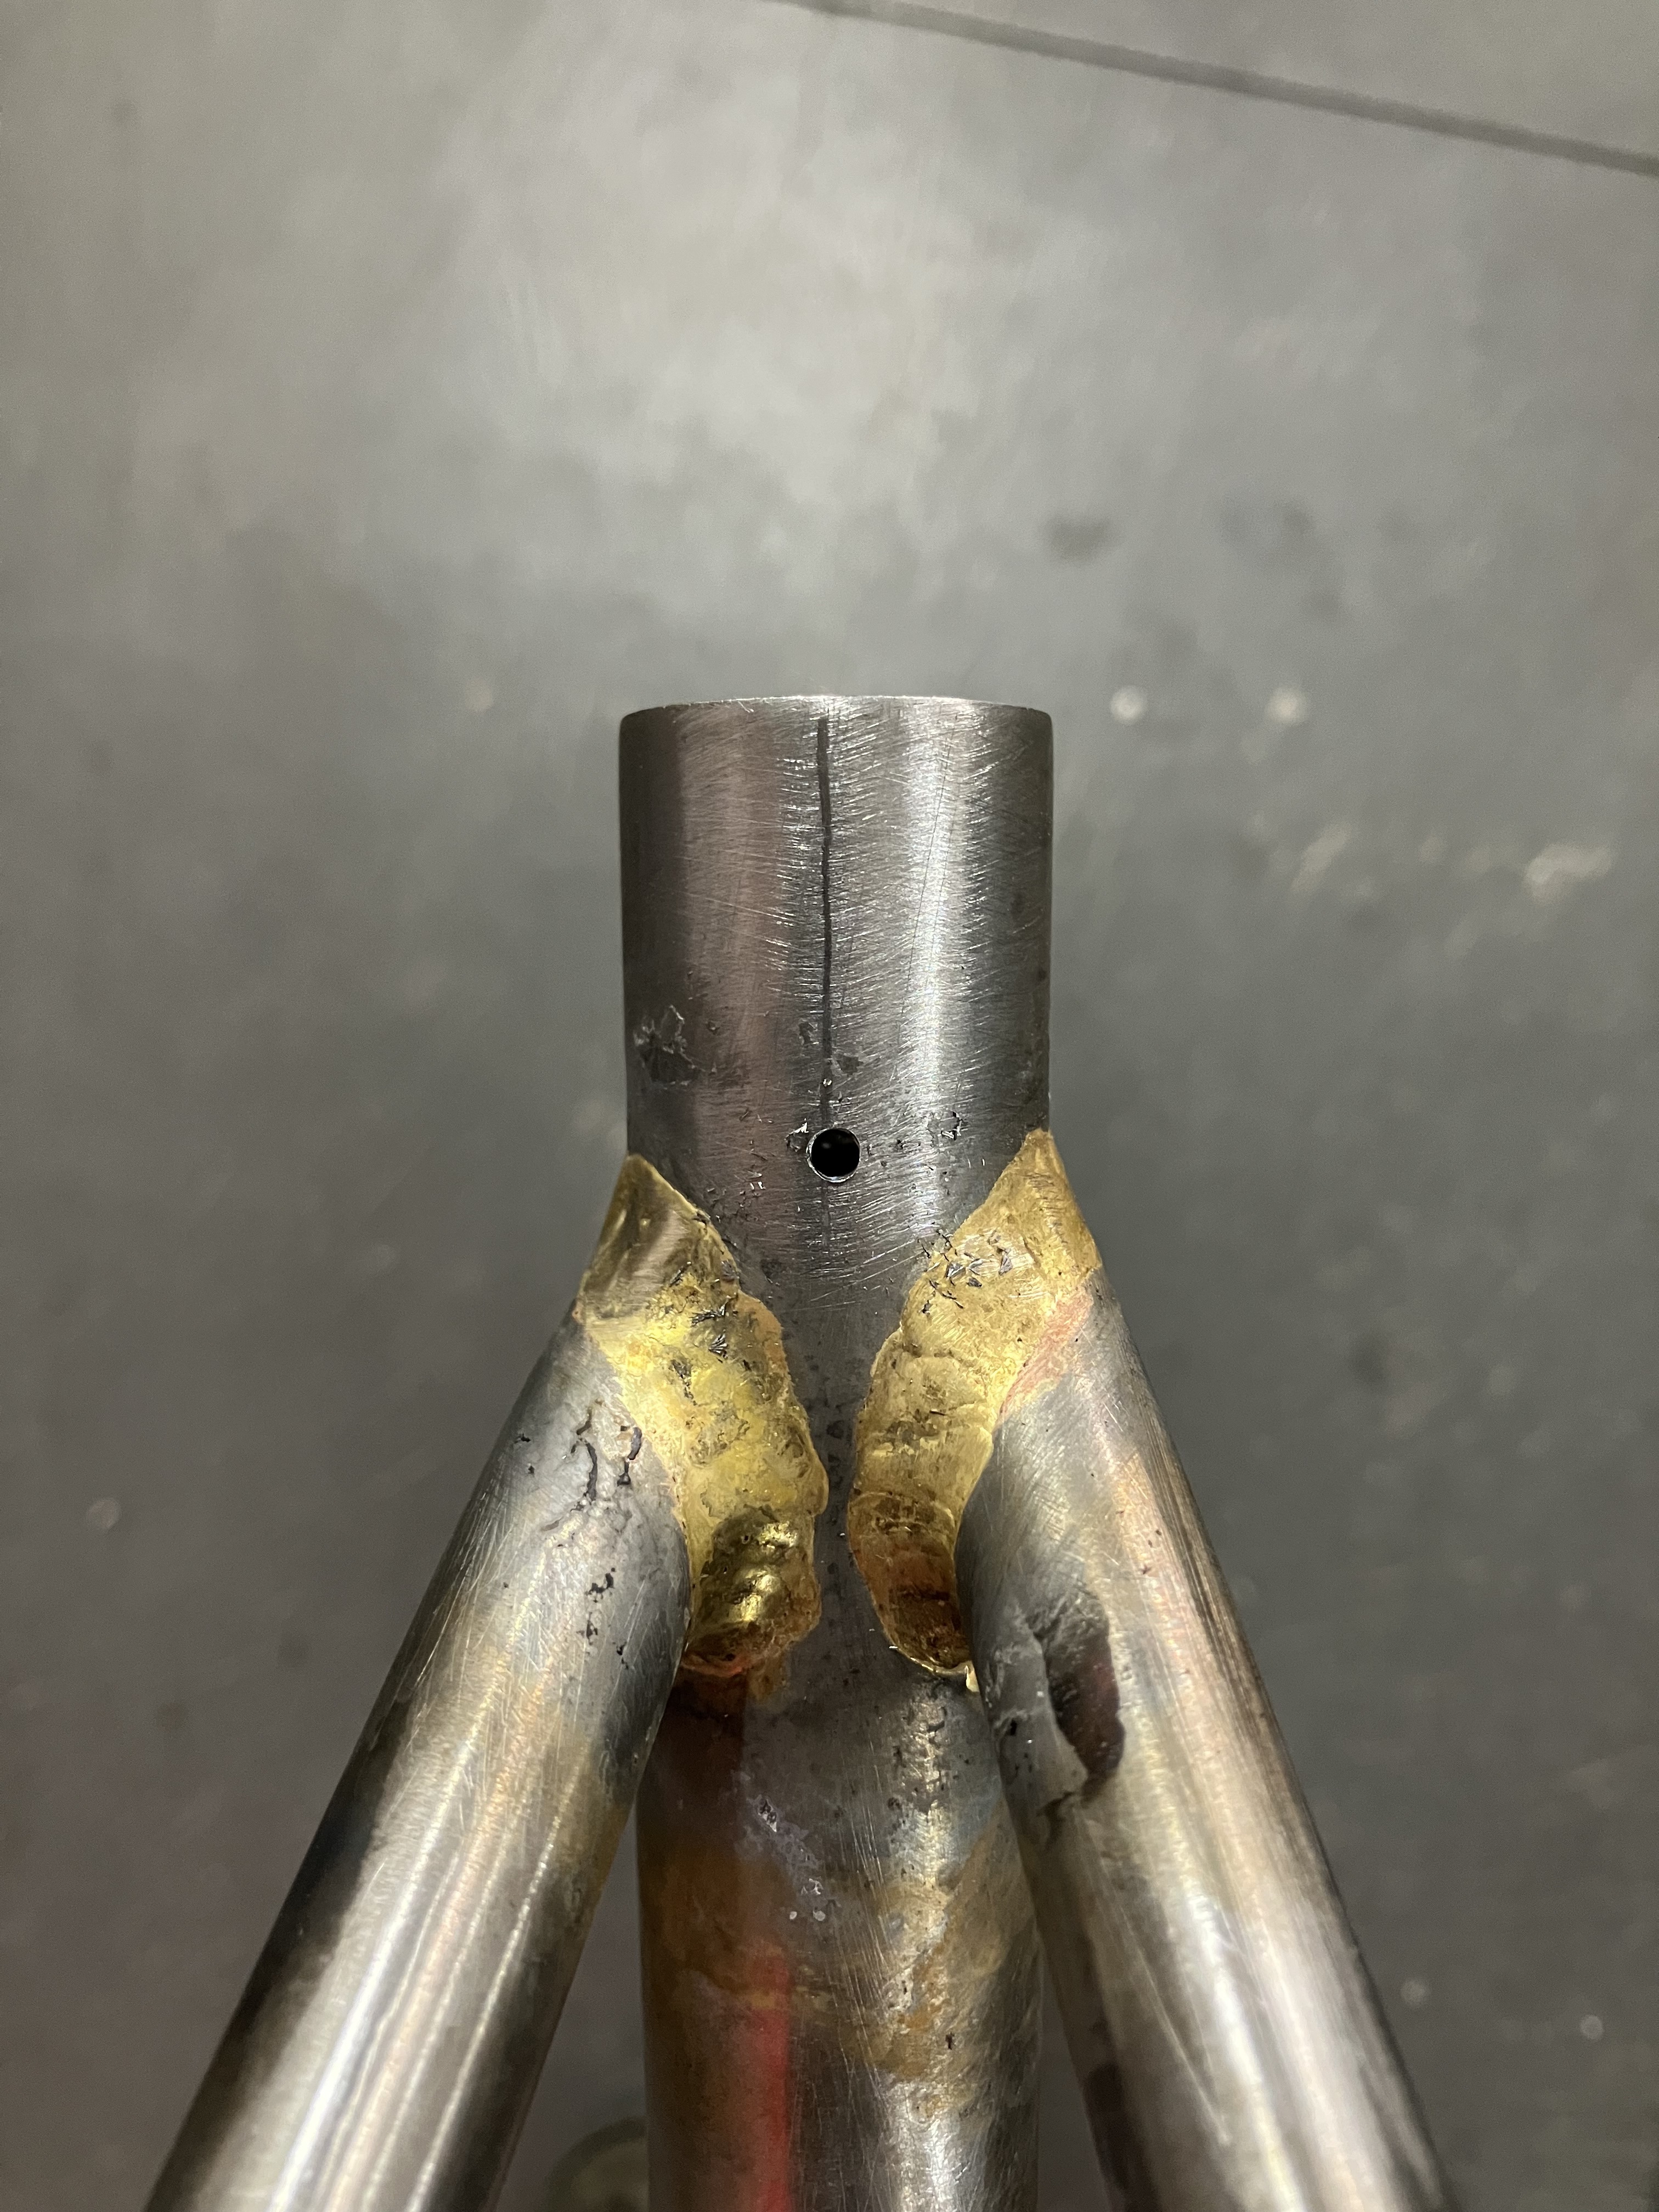
Rob did the first 1/4 of the first joint to show me how to build up the right size fillet then I did the rest. He’d also jump in whenever something looked not quite right. I ended up doing about 80% of the work which I was happy with. The biggest surprise was how long it took to get everything up to heat before filling the joint, especially around the HT and BB.
As far as I can remember the brazing order went TT-HT, cool, DT-BB, ST-BB, CS-BB, cool, check alignment, DT-HT, TT-ST. Always tinning the whole joint first then building up 1/4 at a time away from the centre of the frame. I also have an extra top-tube that we brazed at the seat-tube end while that joint was hot. It hits the DT about 100mm down from the HT so we’ll finish that tomorrow with the seat stays.
Defo the most tiring day in the shop standing at odd angles in front of the work stand but I also spent a lot of the weekend riding trail so that maybe didn’t help.
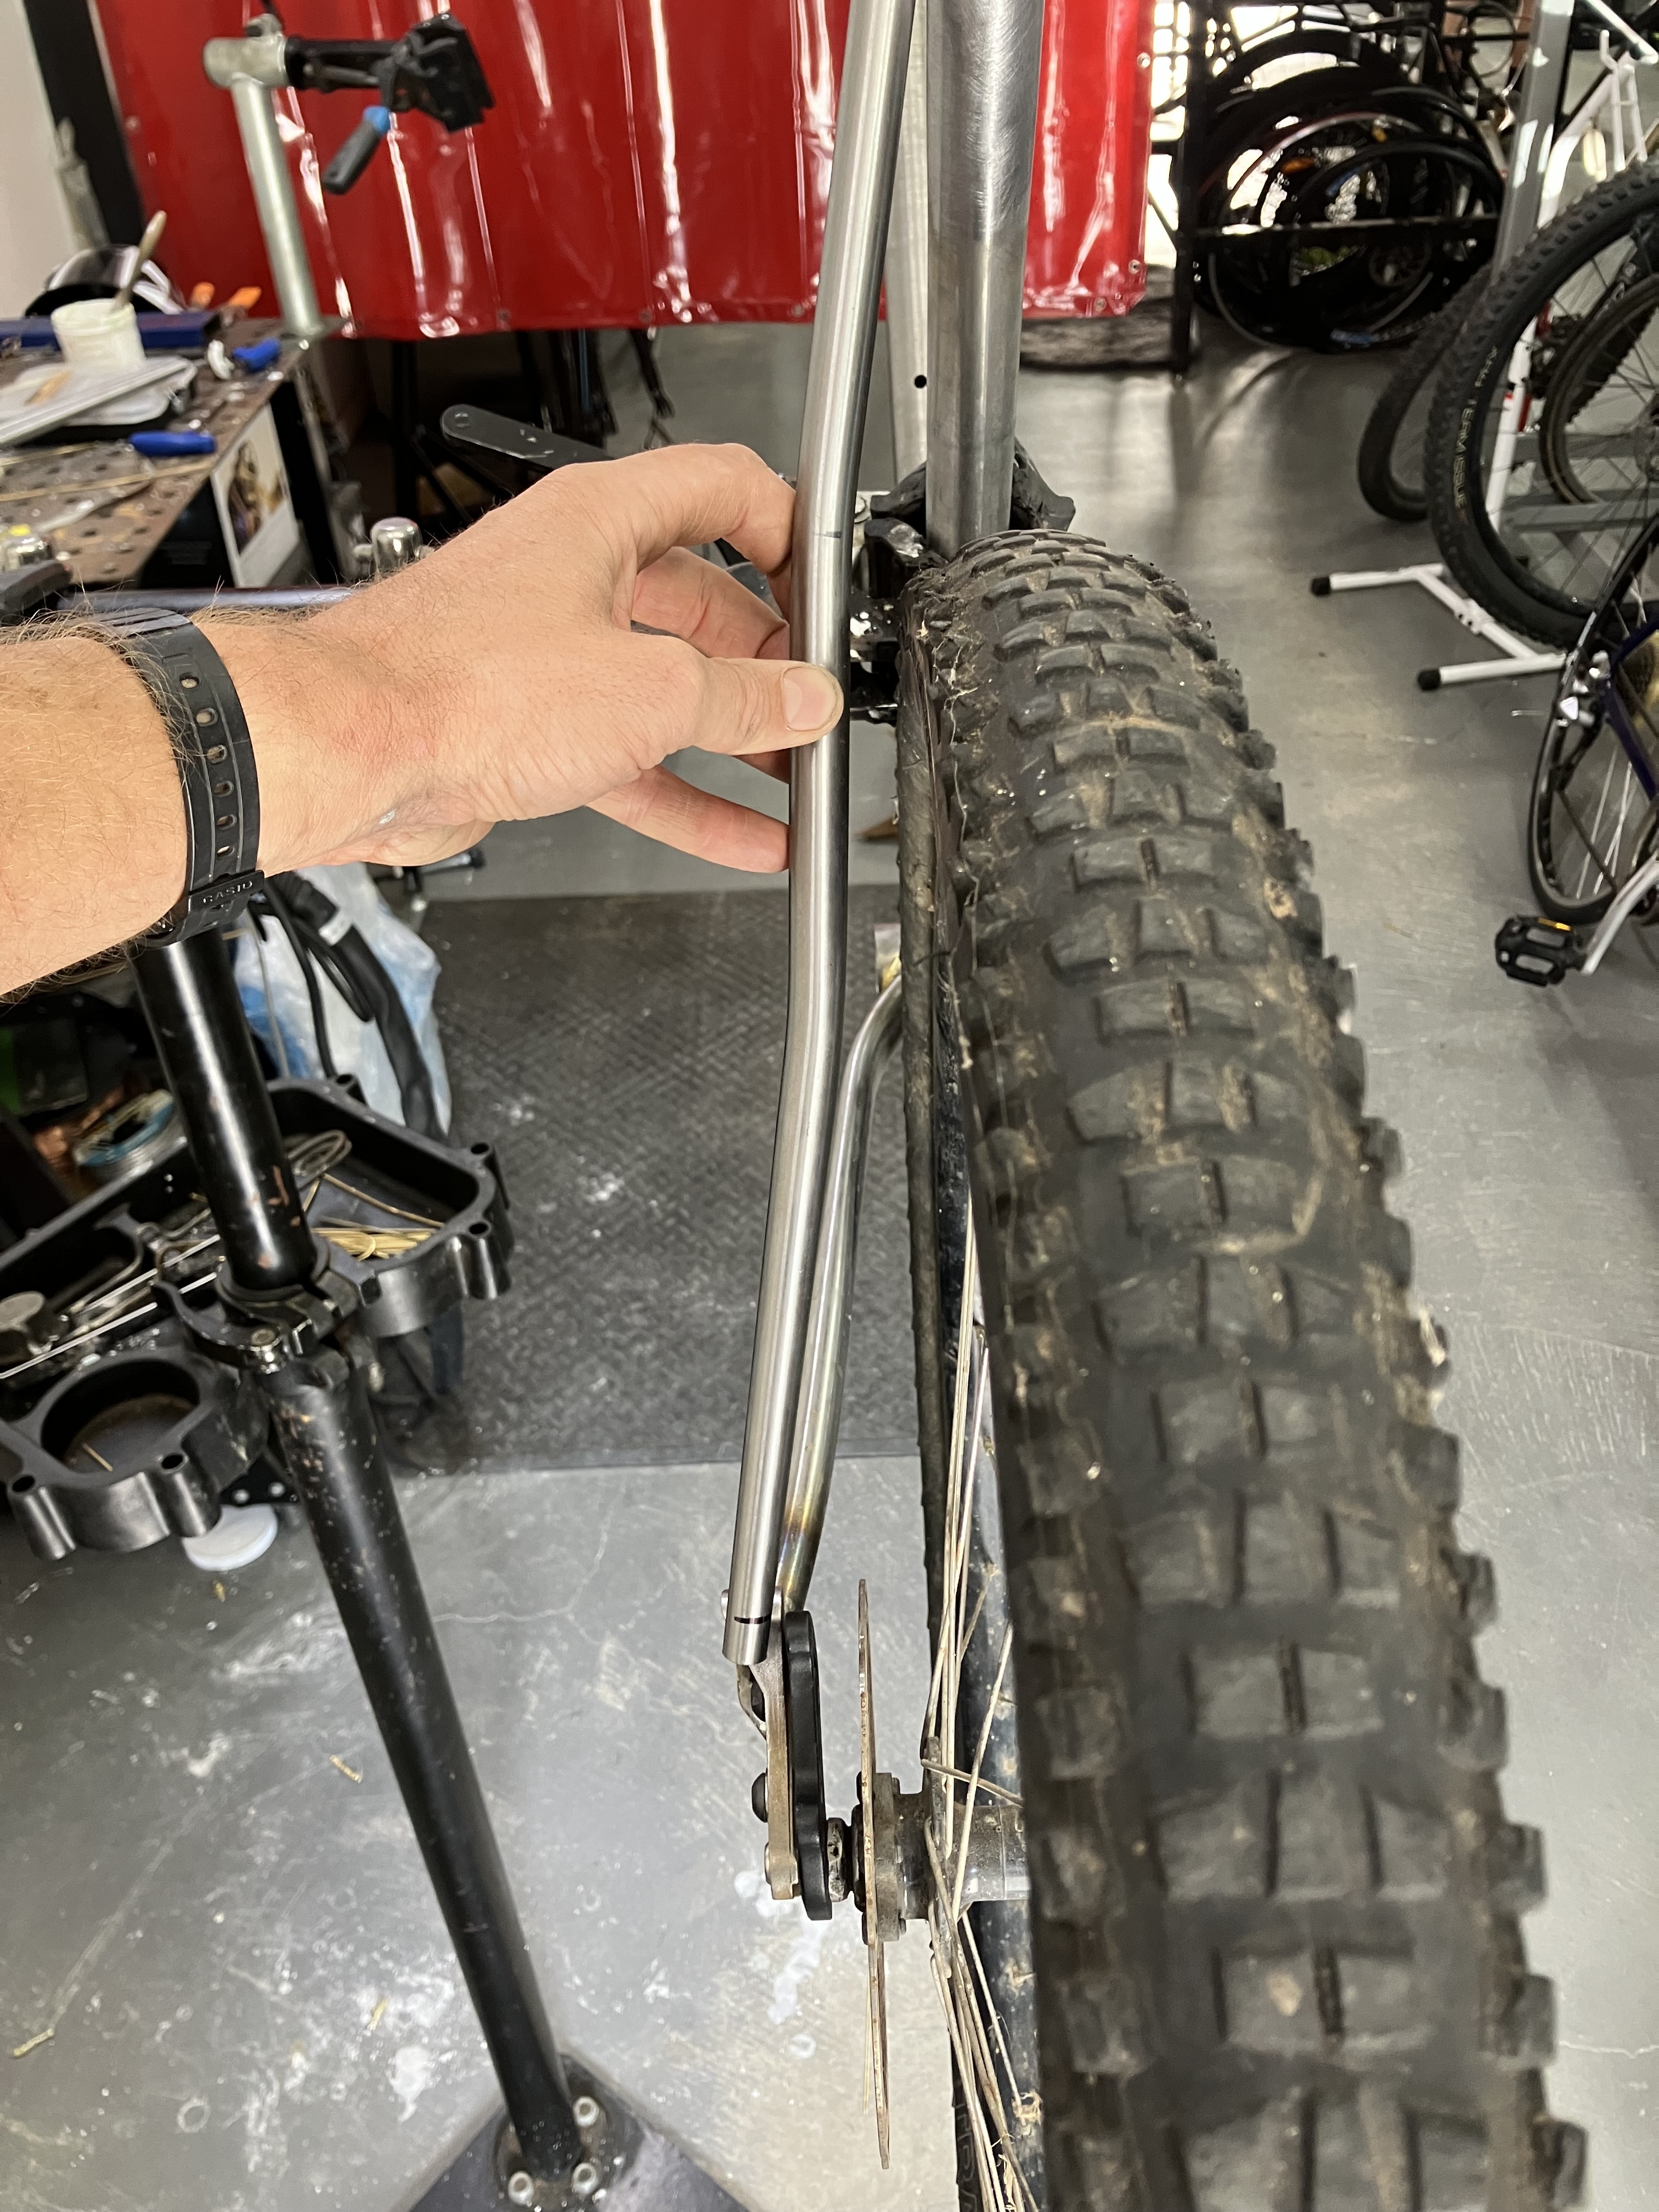
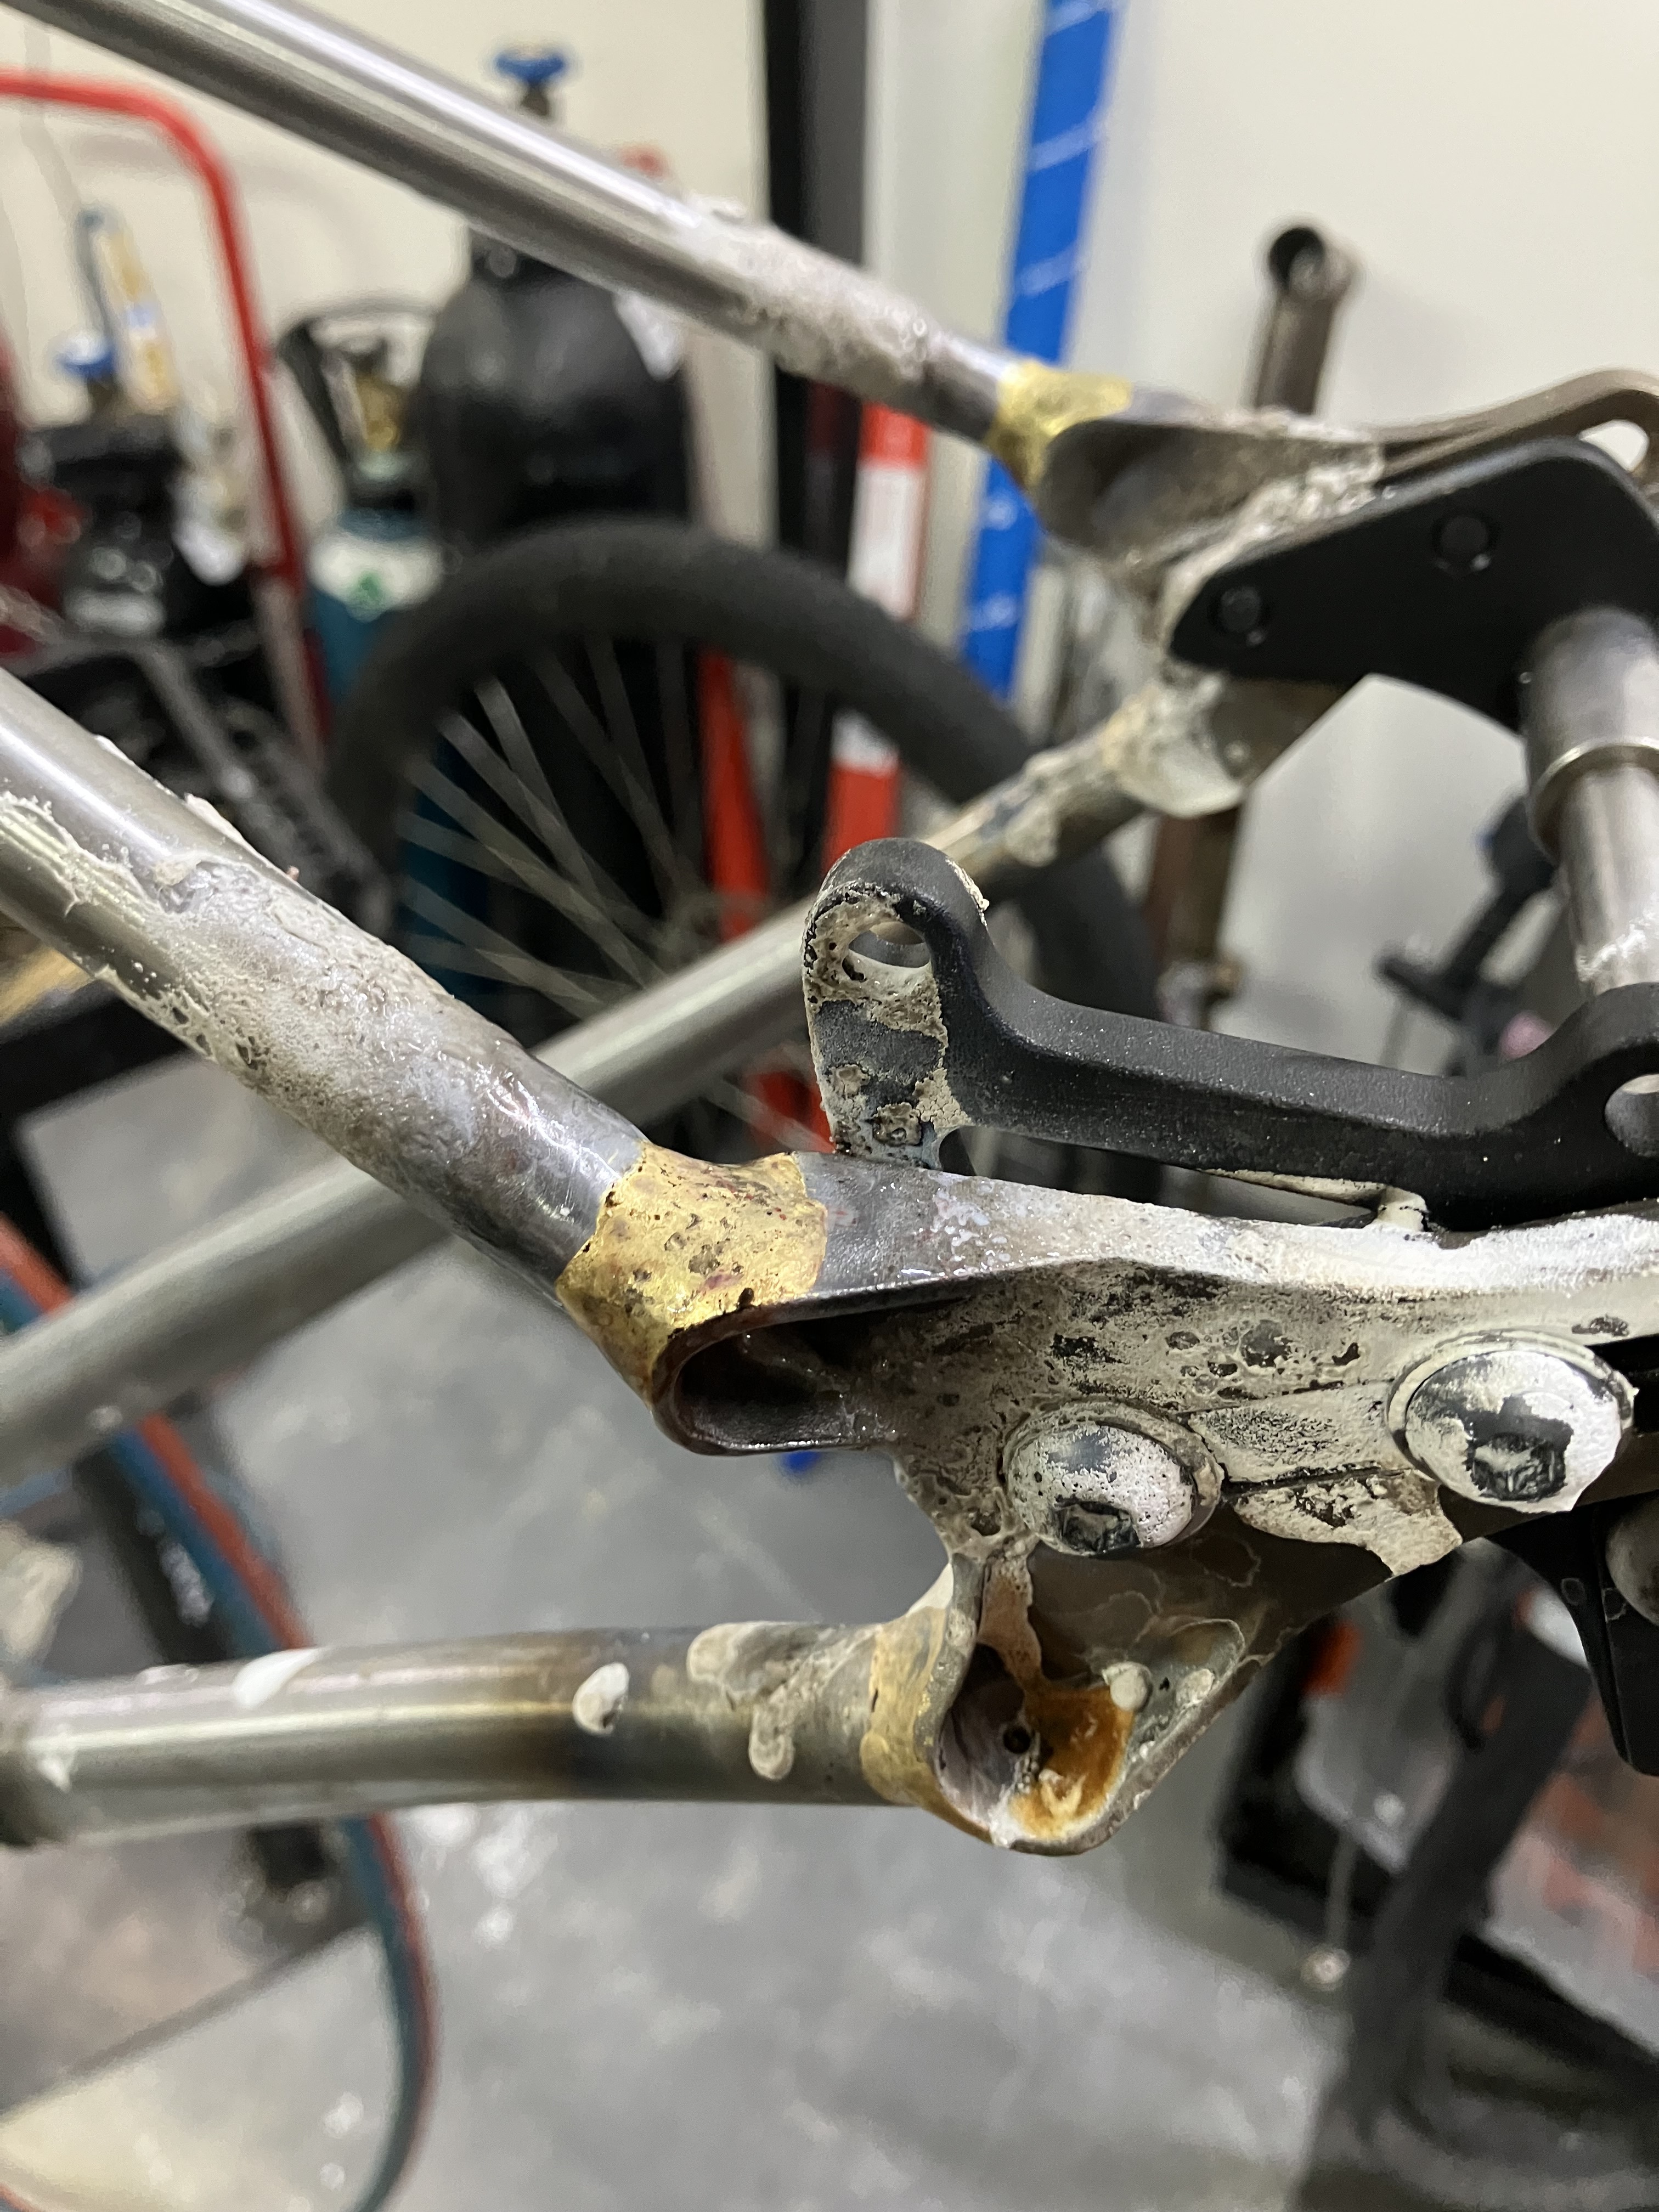
Today was a pain haha. Given the 135mm rear end and 29x2.4 tyre it was hard to find a pre-bent stay in the the shop that would work with adequate clearance. And Rob really isn’t set up to bend stays as part of the two week course. So we persevered with the stays he had and decided to land them about 3/4 on the seat tube with a slight ear that will be blended into the TT/ST fillet.
First cut on the stays was at the dropout, as measured from BikeCAD. We used the seat-stay jig to do the second cut which took a bit more guess work but we crept up on it nd on the third attempt we got it about right. Got them tacked and checked clearance with the rear wheel. 5mm all the way around which we were happy with. Spent the last hour hand filing the seat stay bridge out of a short piece of 16mm seat stay off cut. Got that fit so everything is ready to be fully brazed tomorrow. Getting close now.
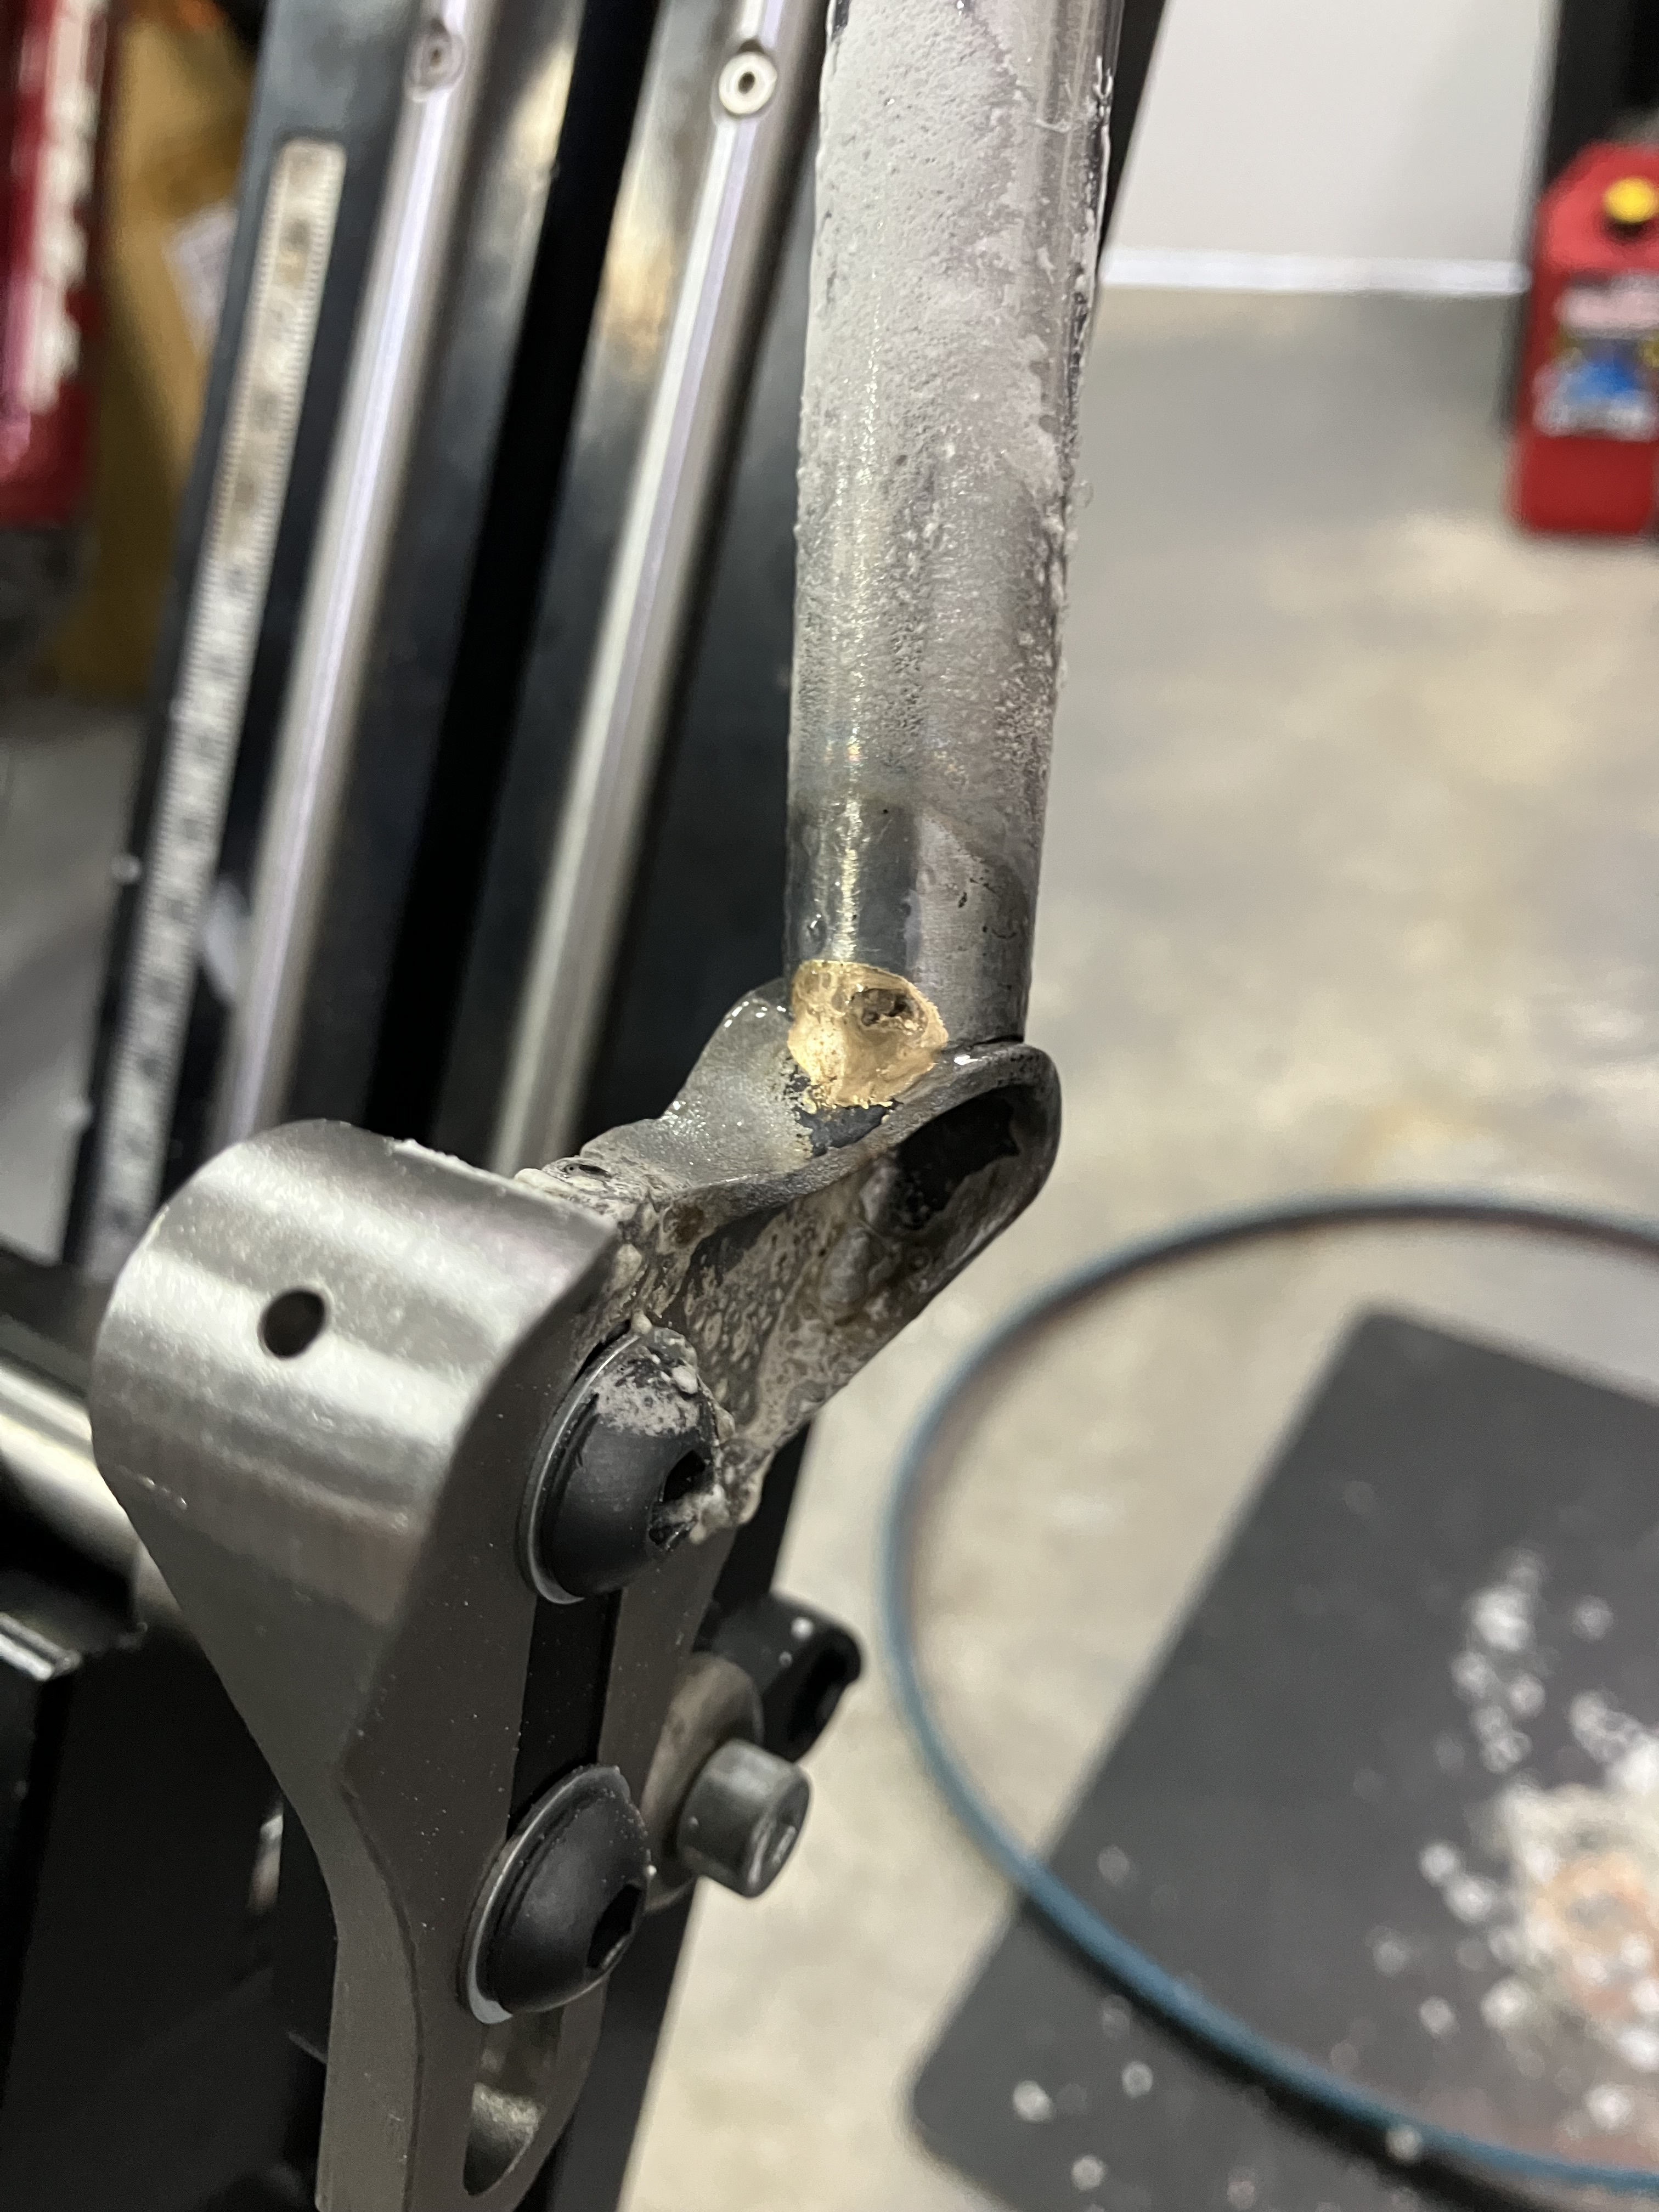
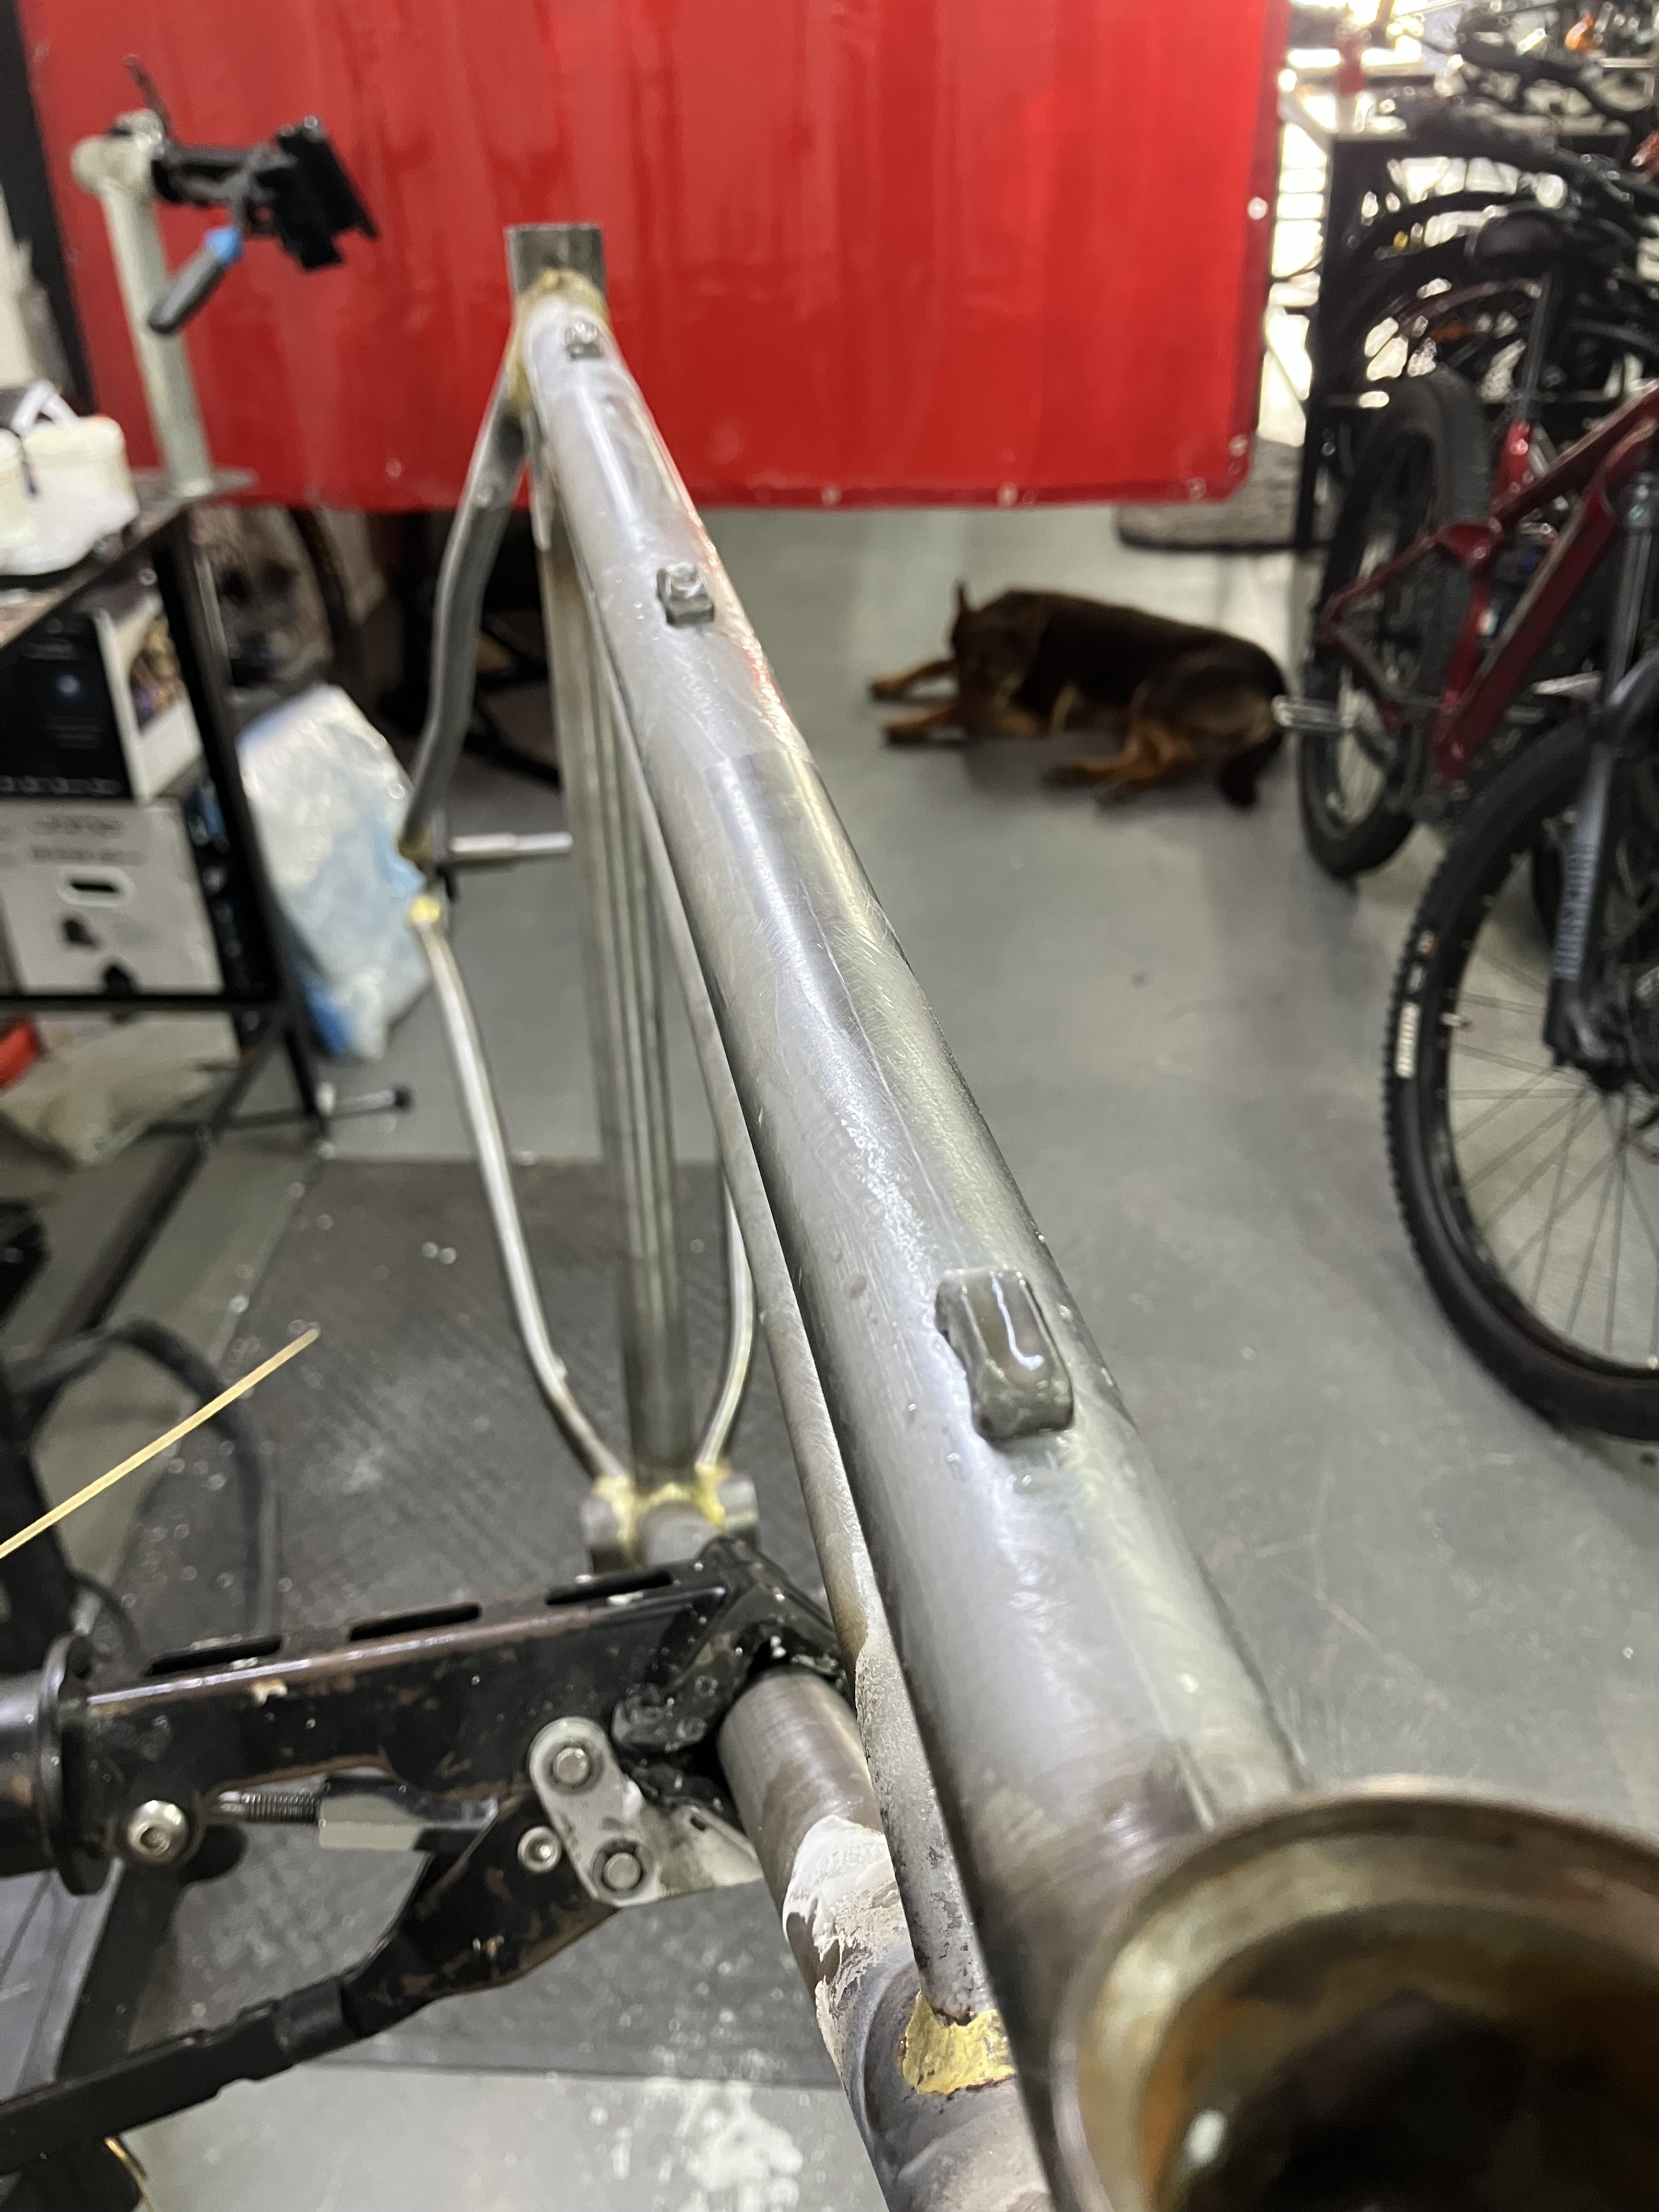
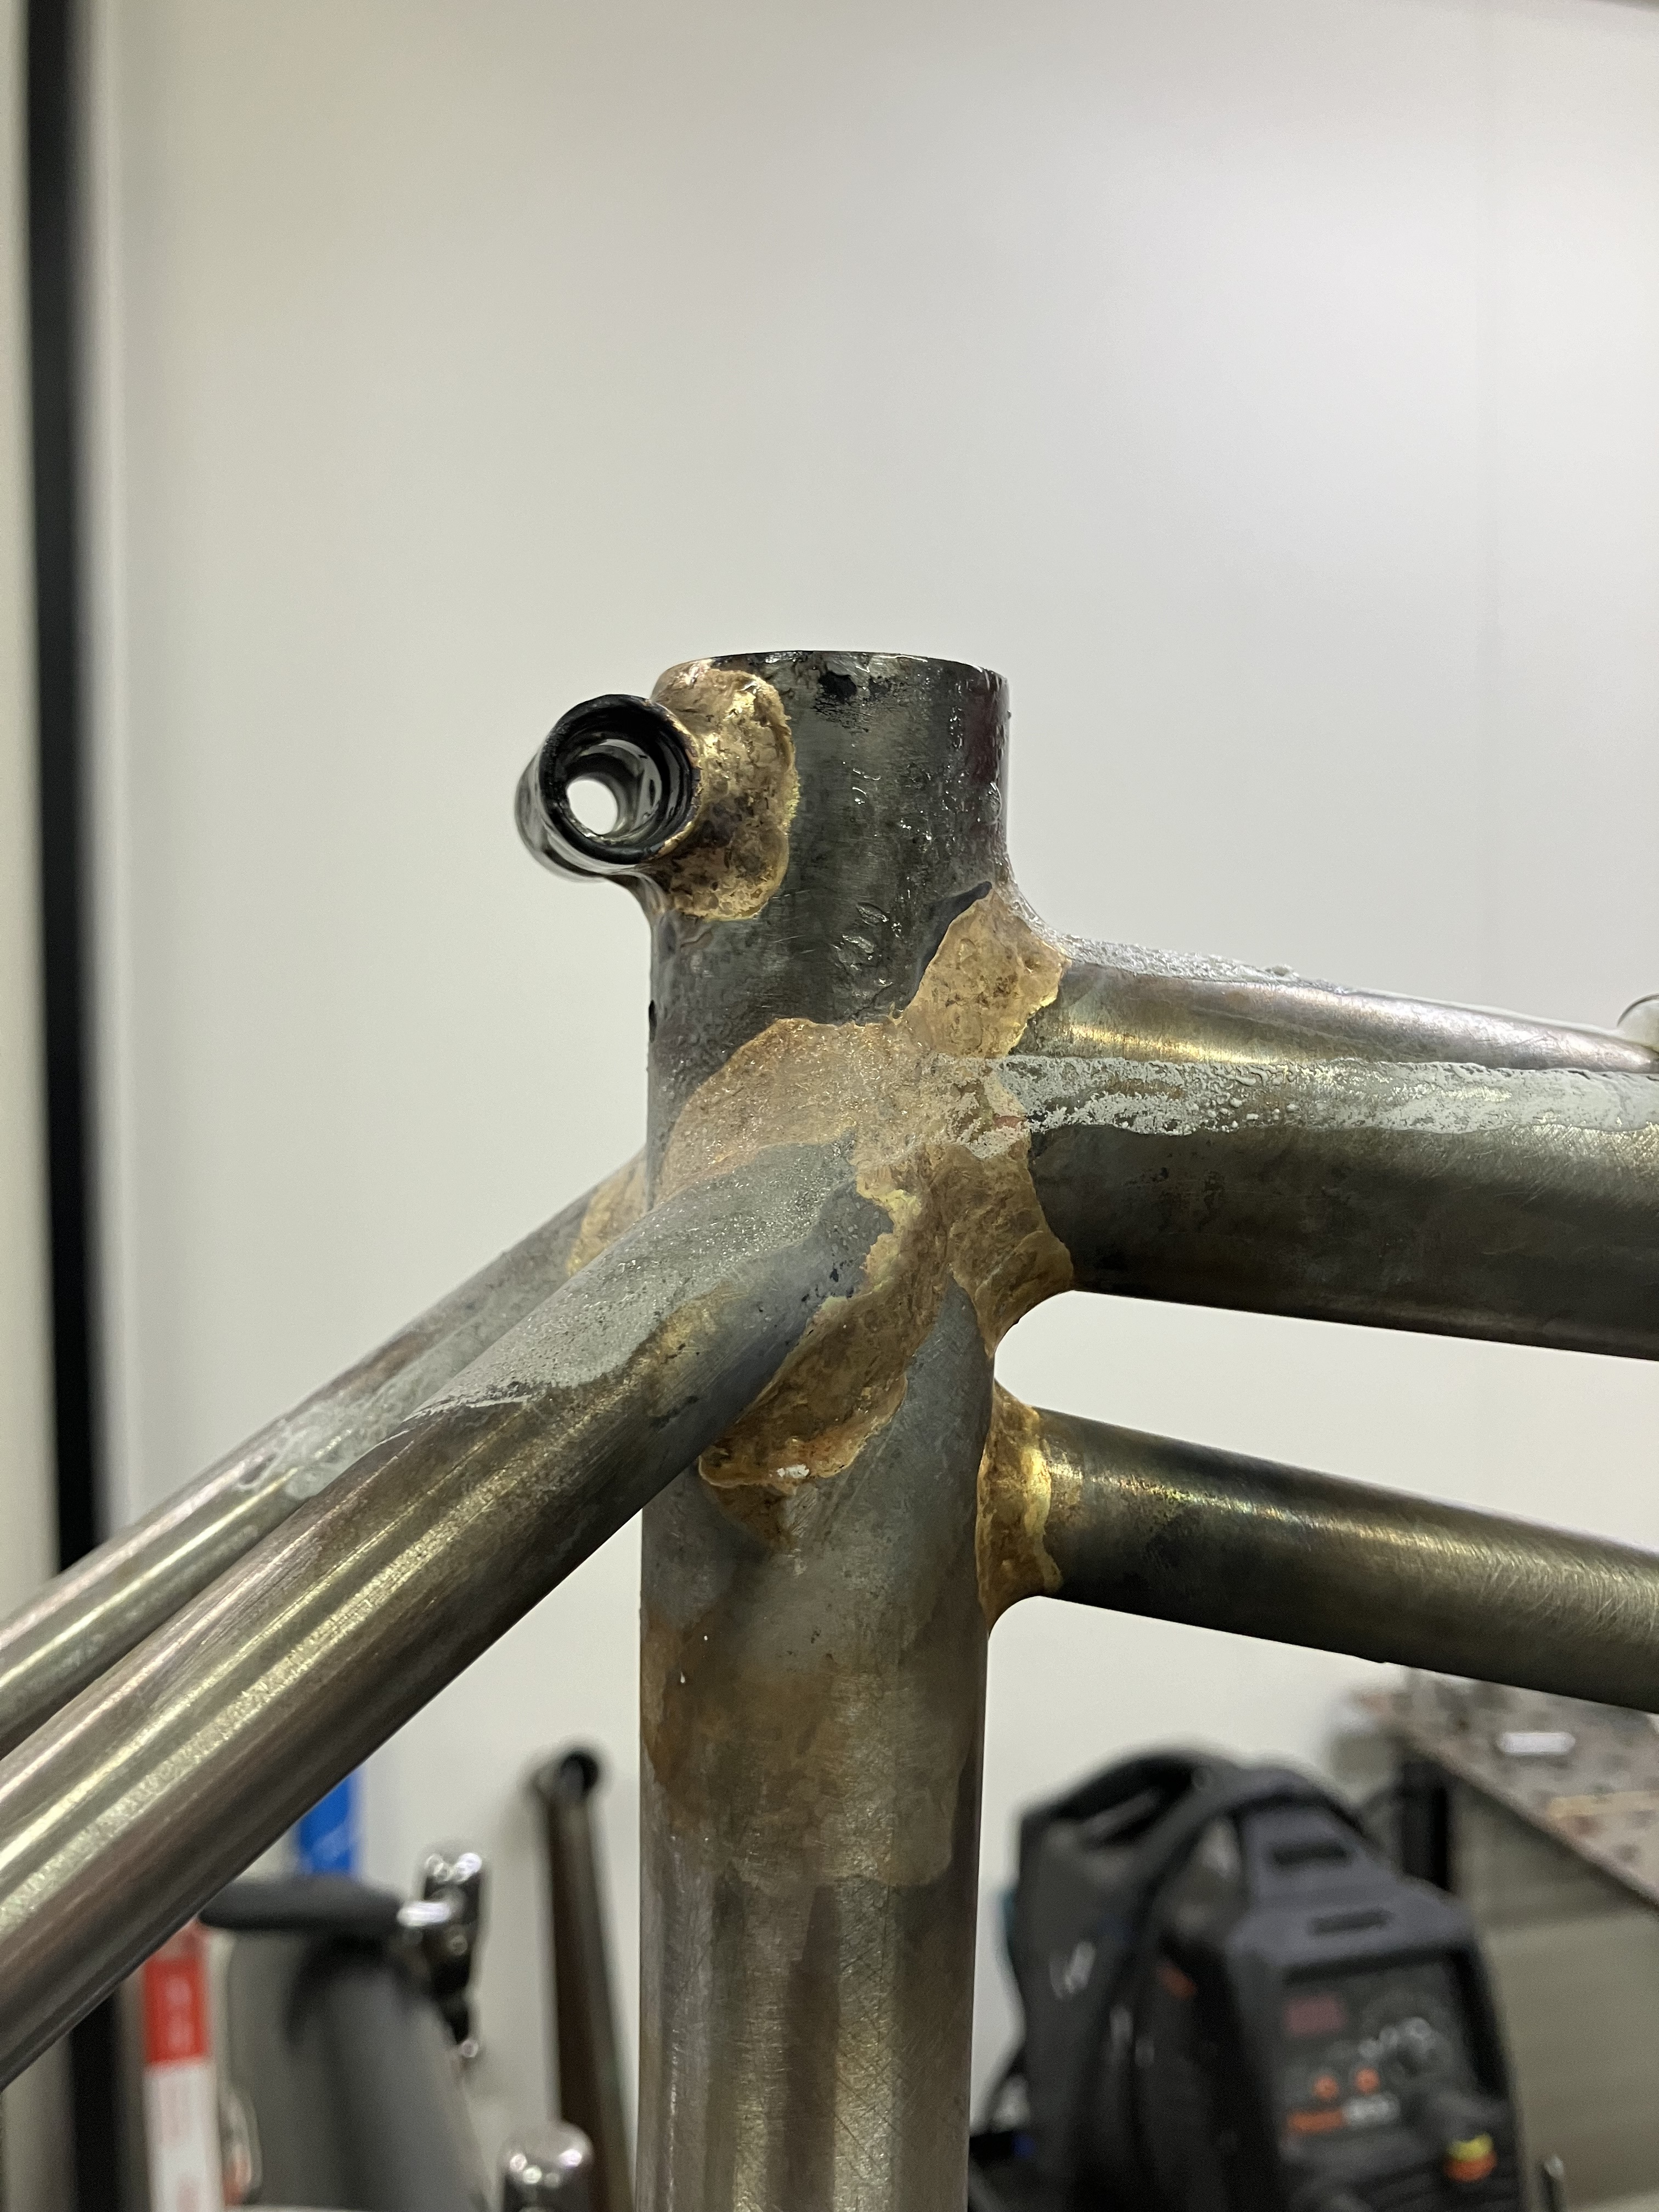
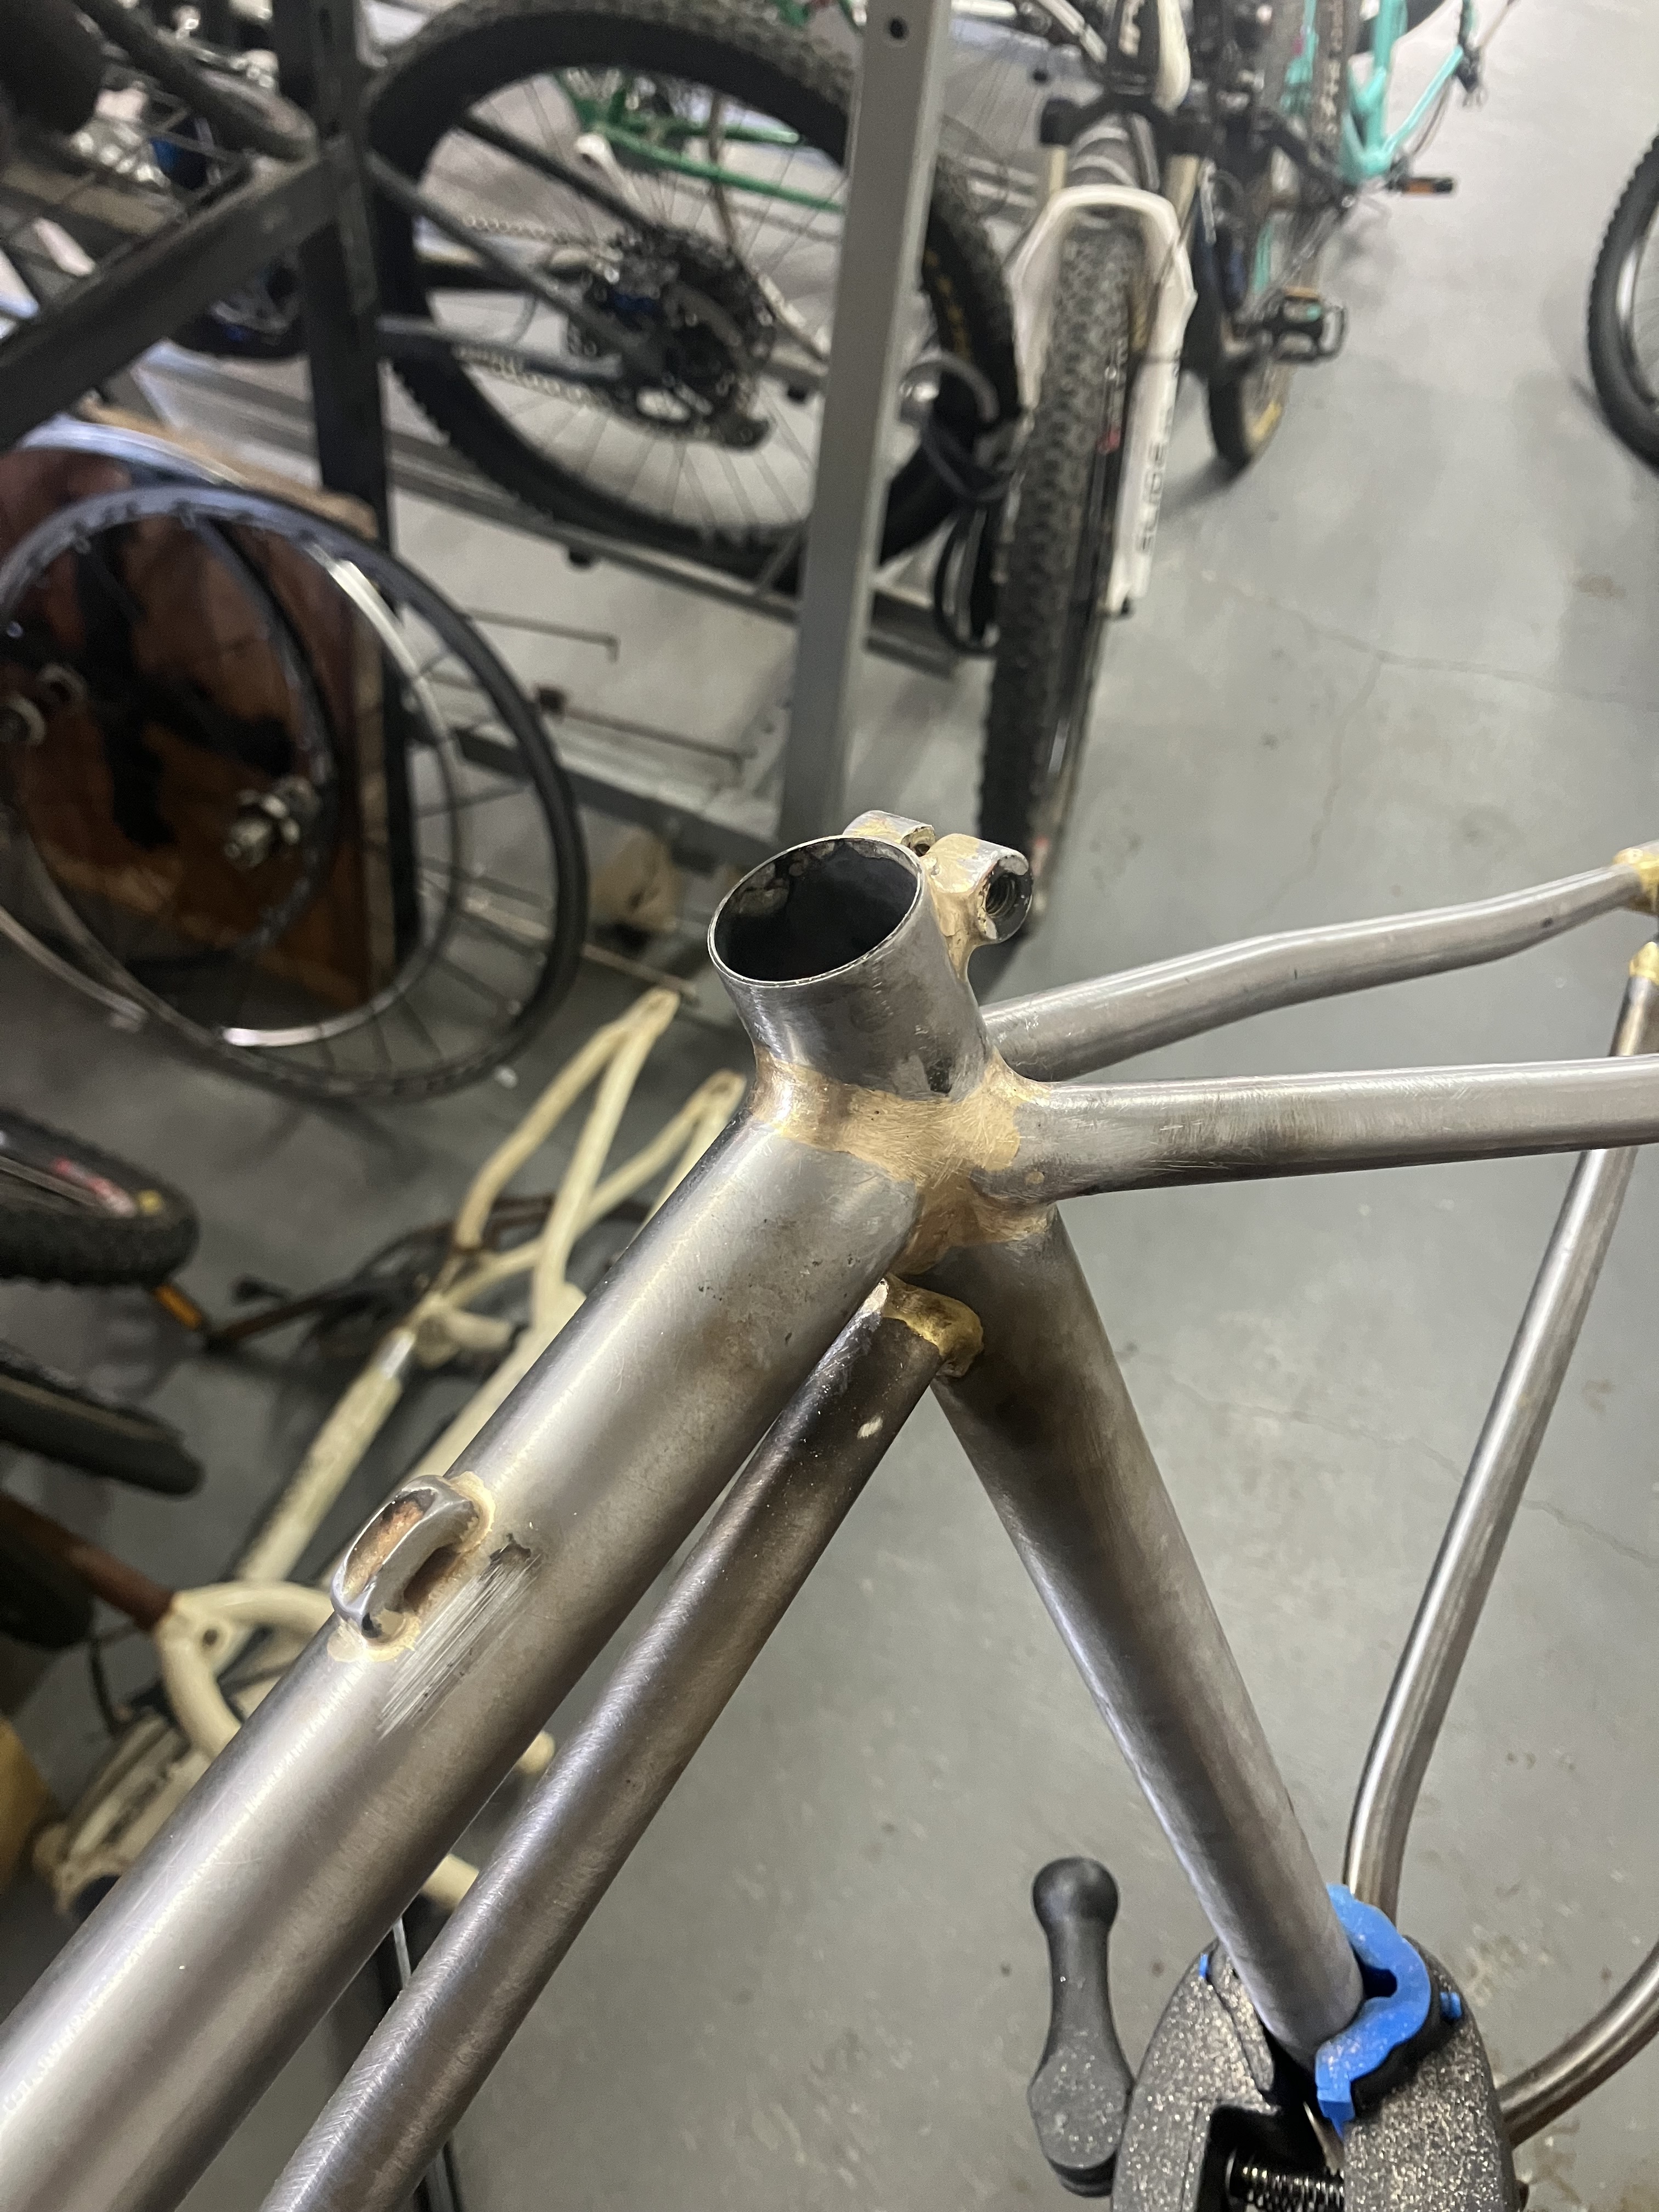
Started today by finishing the seat stay brazing. DO then ST. The seat tube had a slightly open end so it took a fair bit of brass to fill it and build up an even fillet. It should all clean up ok. Also brass brazed the DT end of the extra top tube and added an integrated seat post clamp. I’m not usually a fan of them but I reckon it’ll suit the retro style of the bike this time.
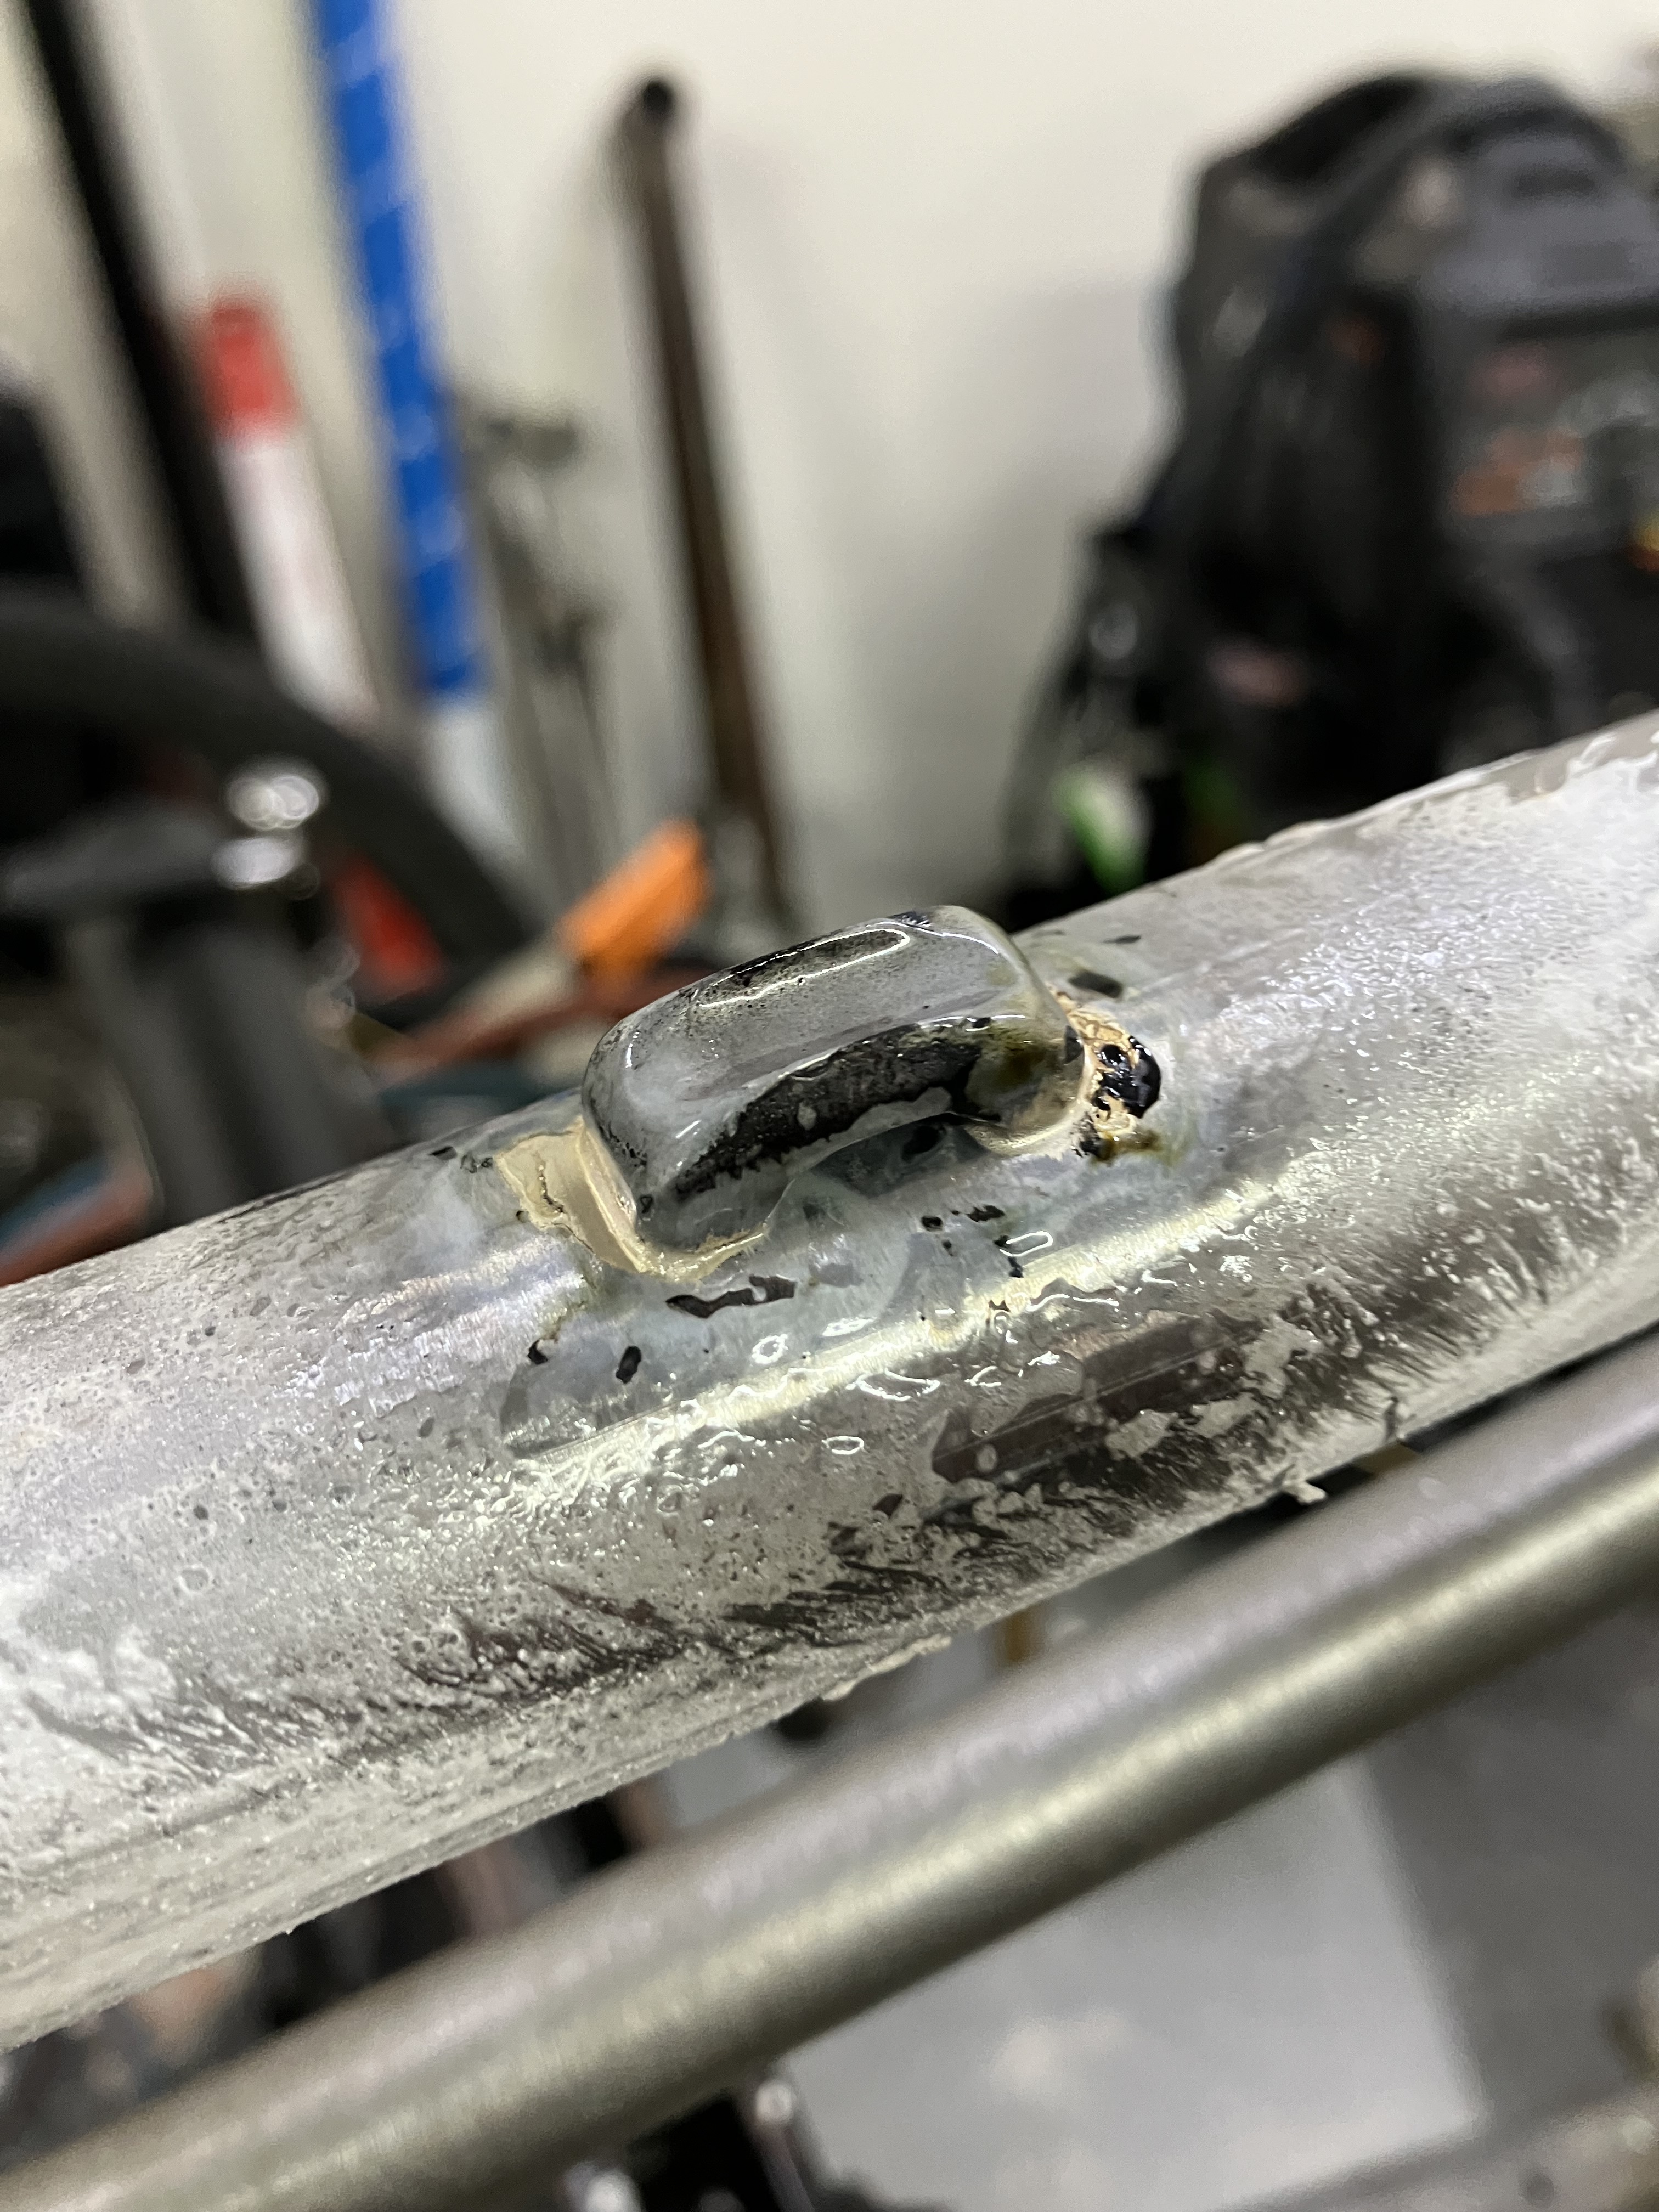
Did a little bit of silver brazing in the arvo. Brake guides on the top tube and a triple bottle cage on the top of down tube. Used a different flux for a lower temp since it takes less heat to get the silver flowing. It also moves a bit faster than the bronze so we used a much smaller flame. About 2-3mm long cone. Typical cone size for brass has been 4-6mm.
Still have a few brazeons and a bridge to go but Rob suggested I start the day with a bit of clean up work. This essentially became my whole day haha. Hand files first then I had a go on the Dynafile. Not the worst job and lucky to have Rob there to lend a hand but I can also see why folks get sick of it after a while. I prefer the look of a TIG frame so keen to give that a go eventually. Added a seat stay bridge to finish the day. Nice to using a torch again if only for 5 minutes. Frame will be completed tomorrow.
Nice work man. Rob is a great builder. You get proficient at brazing and clean up. Usually takes me an hour to finish off the front triangle joints before I attach the rear on the road bikes or the pivot points on the mtb.