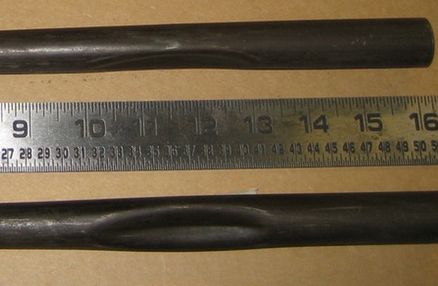
My recommendation is indent 'em with a sharp indenter, the kind that makes a line down the middle. Like old Columbus, before round-oval-round took over, mid-'70s? Example:
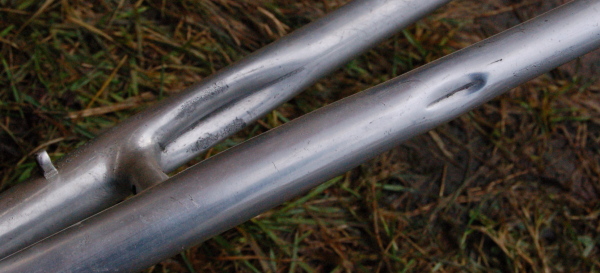
Another example, an aluminum Barra from the 1940s. If you can make this shape in Al and have it not crack in 80 years then it might be a good shape.
The shape you want to avoid is the one with a large radius, gradual curve at the bottom of the indent, like this:
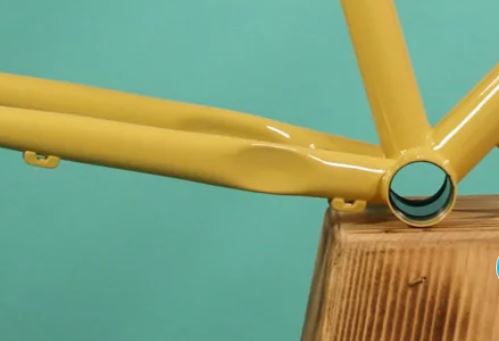
That shape (above) puts the tight radius curves, which you see above and below the indent, in a highly-stressed area. Contrast that to the sharp radius on the Columbus/Barra style being down in the bottom of the indent, which is closer to the neutral plane in bending or the neutral axis for twist, i.e. less-stressed metal. That’s my possibly-wrong explanation for the observed fact, that this shape lasts and never cracks, despite that sharp radius down in the bottom of the indent.
The other reason to use this type of indent is that if it does crack at the bottom while you’re indenting it, you can just braze or weld the crack shut, make a little fillet, paint it and forget about it, because it’ll never break there after being brazed or welded. I’d always braze it, if steel, but a top framebuilder I know, been in the biz since the '70s, tells me he’s done it with titanium at least a few times, just welded it after it cracked. And those bikes have been ridden a plenty in the years since those repairs were done. Sorry if “plenty” isn’t very, erm, numerical, it’s the best I can do. But I’m convinced.
And if the thing makes a liar out of me and does crack, you can still do the plunge-with-holesaw mod, right? You’ll be sawing away all the cracked metal. So trying it my way doesn’t keep you from doing it the other way later.
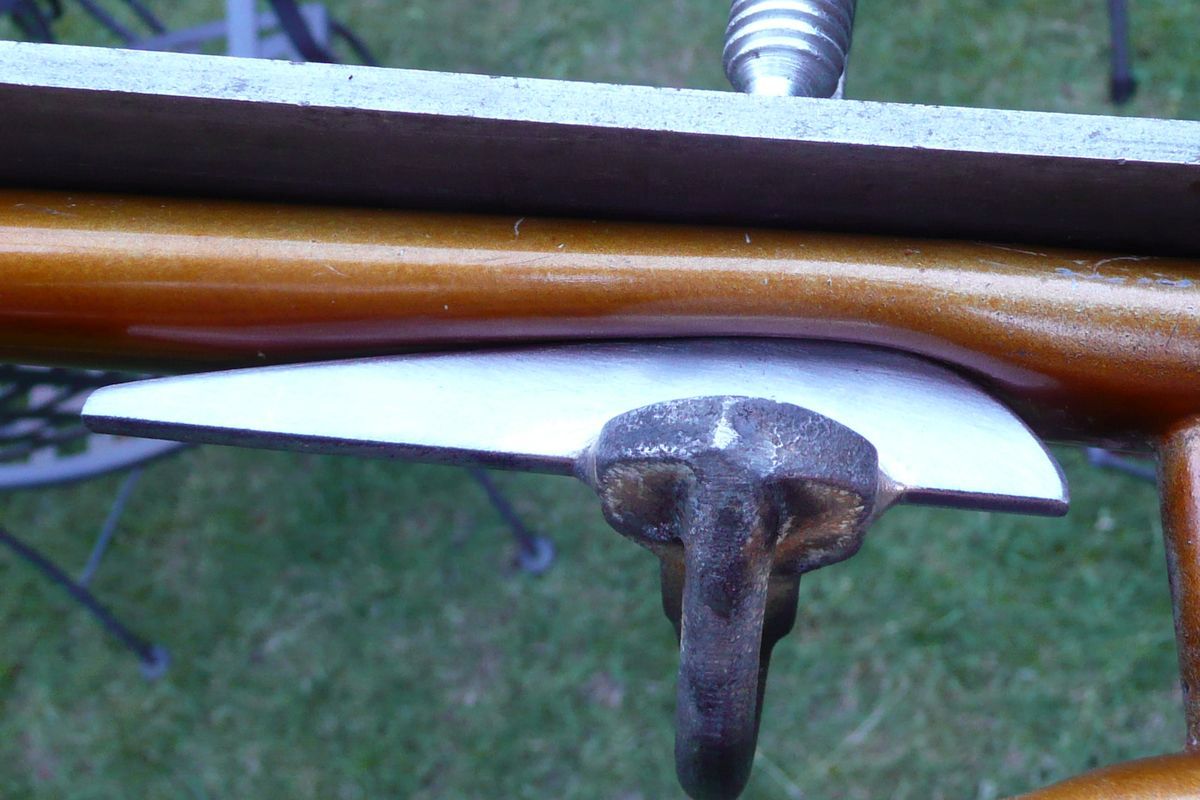
Yet another advantage of the Columbus/Barra type indent is the tool is so simple to make. Cut whatever curve you think looks nice out of a piece if steel maybe 3/16" thick, round the nose of it over so it doesn’t have two sharp edges, and weld that to something to do the pushing with. Common choices include a C-clamp, vise-grip pliers, or a vise jaw. (Resist the urge to do it with a hammer, that never ends really well.) I made mine with a cheap Chinese C-clamp and regret it, the threads started to feel grindy after just a few frames, and I don’t expect to get many more out of it. But it was super easy to make, well easy if you’re a framebuilder or a little bit less easy if you’re a home-handyman. Still I’ve seen “civilians” make these in their garages. My next one will use a high-quality C-clamp with proper acme thread in good steel.
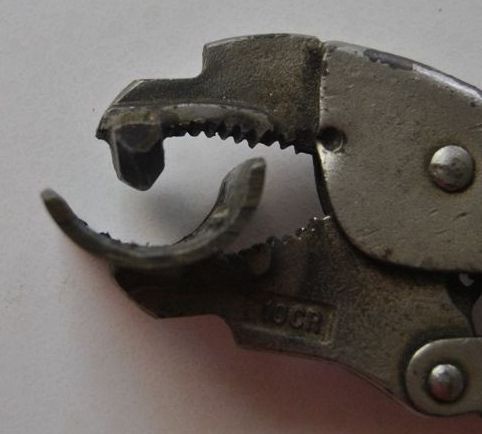
I’ve never tried the vise-grip kind but it might be even easier. This one’s by Curtis Odom: