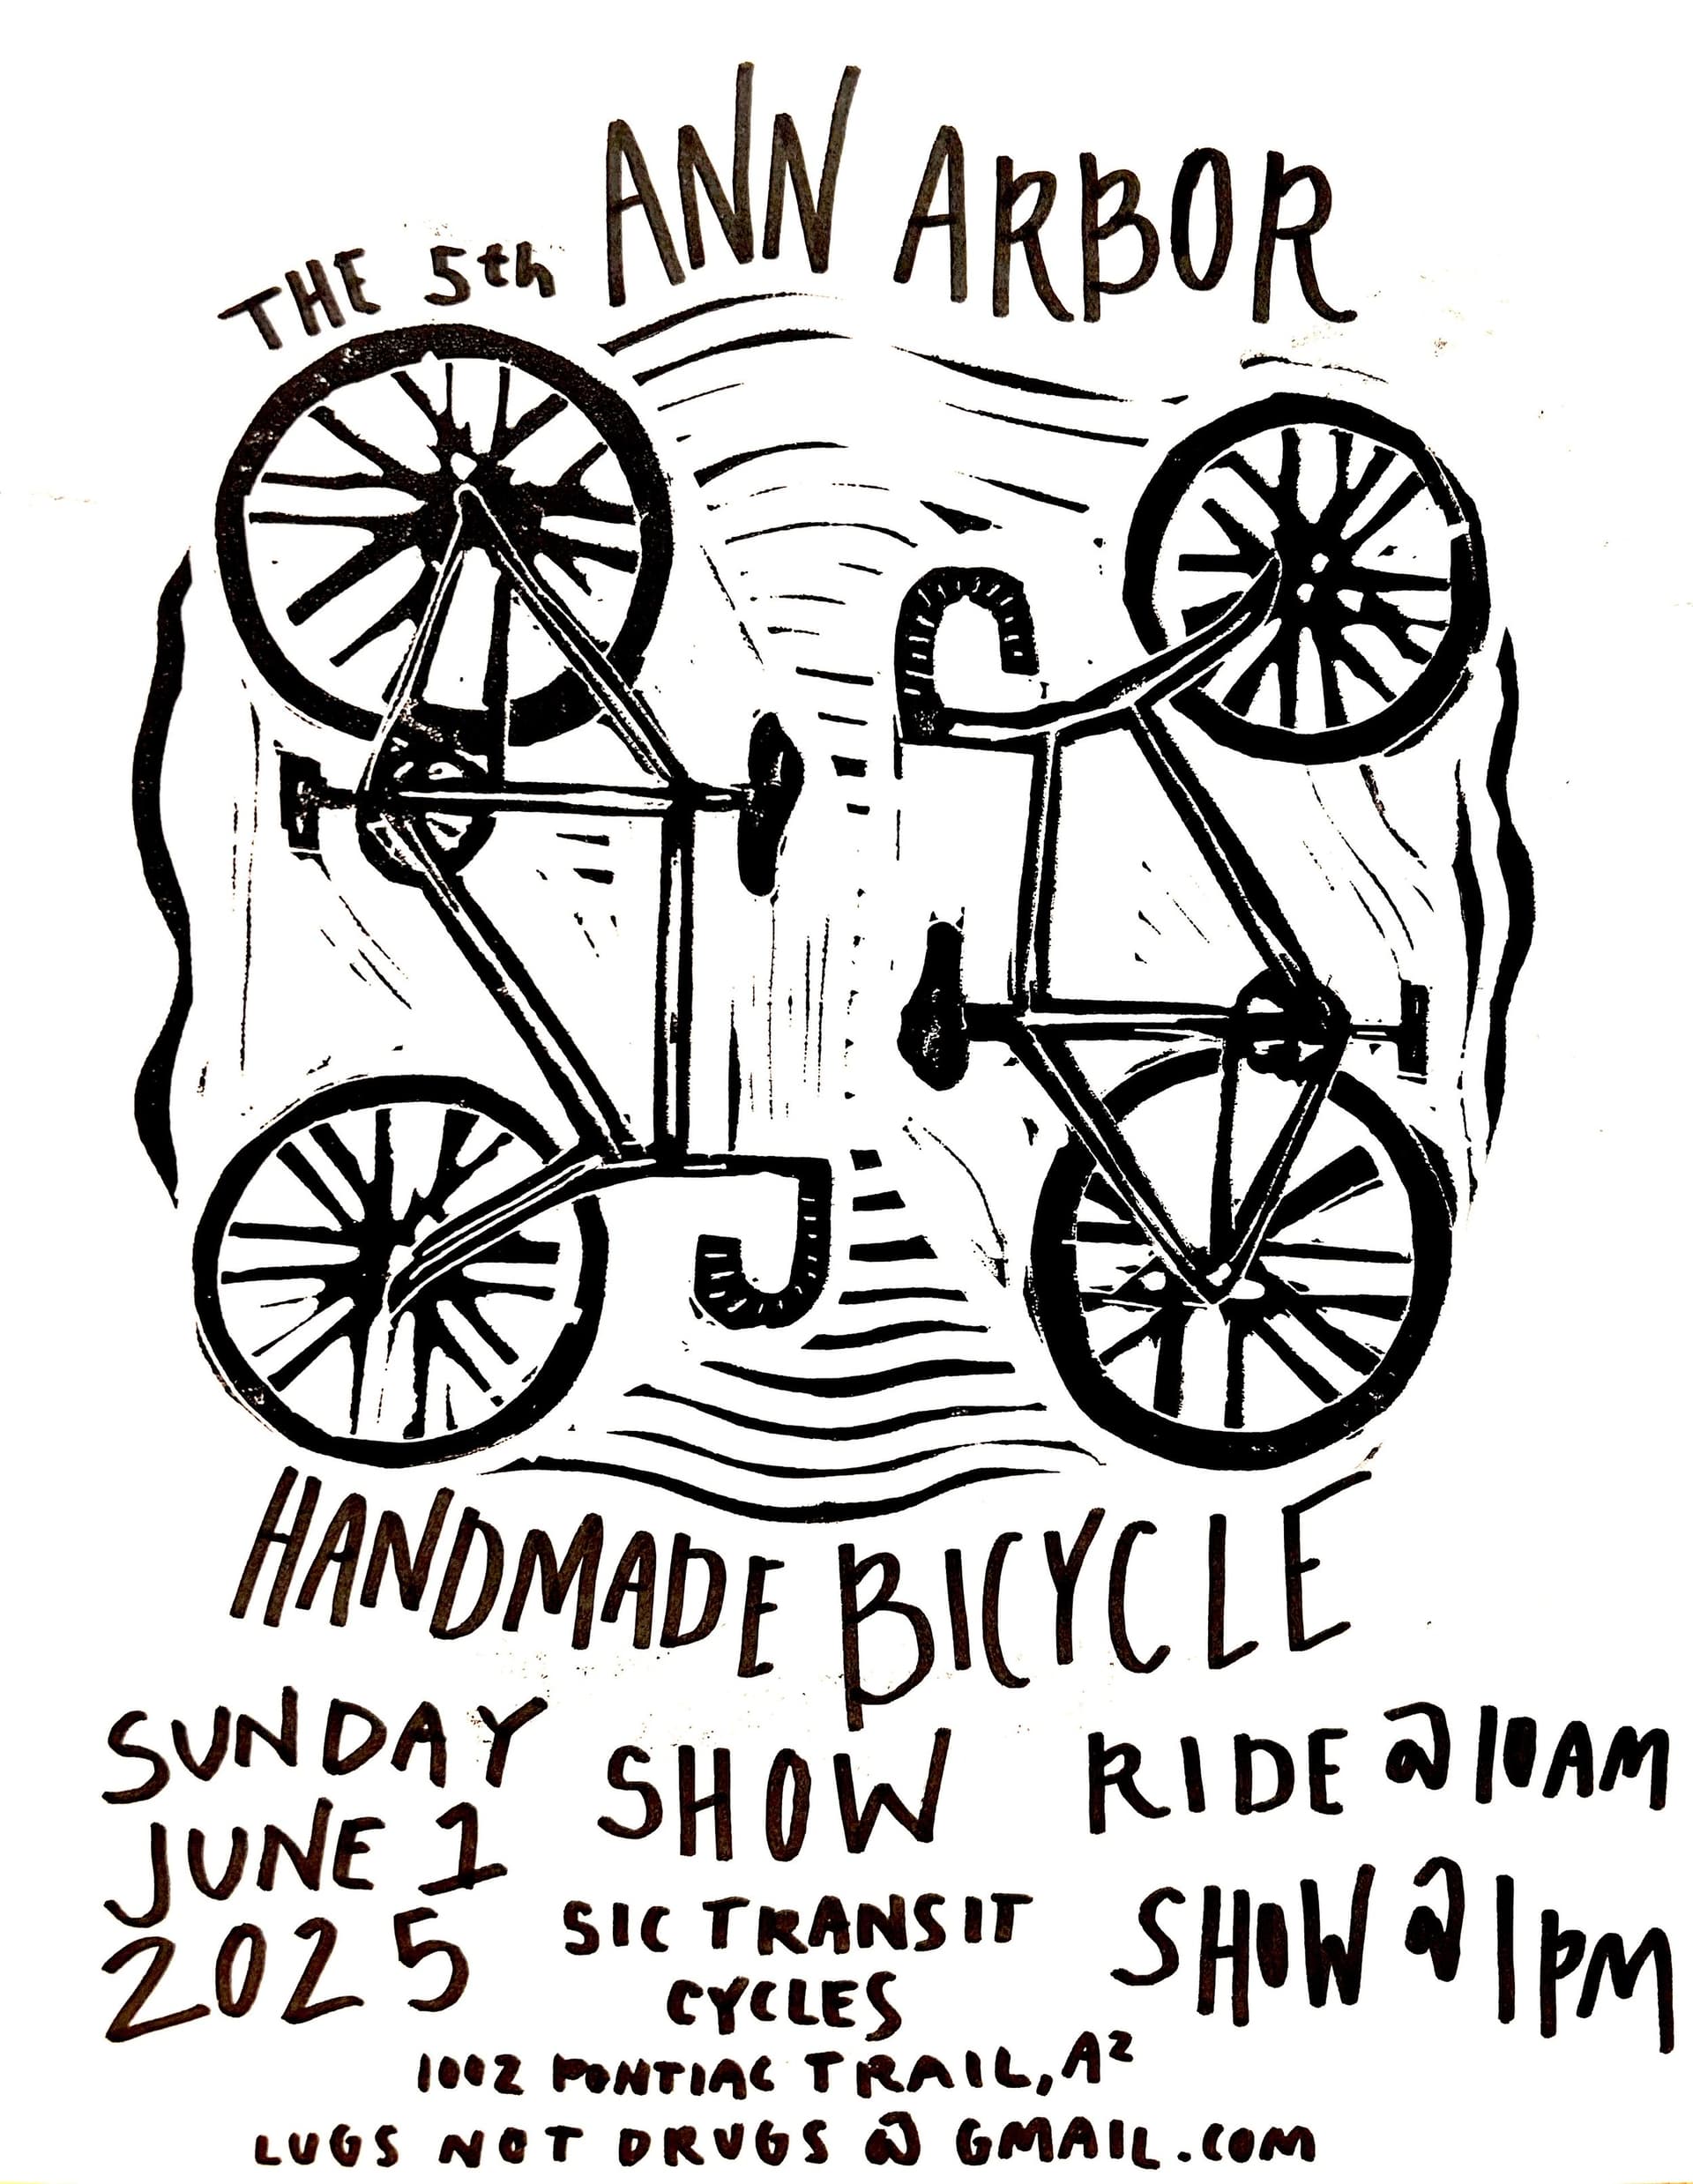
My wife ask me if I wanted to go to the handbuilt frame show in Ann Arbor. I was like I’ve seen it and always debated on building something to show off but just blew it off. She’s like you should do it and build a frame today. I knew it was coming up but when she told me it was the next day it killed my mojo instantly for building something. Apparently she doesn’t realize it’s 4pm on a Saturday and the show is at 1pm the next day and normally it not a few hour thing to build a frame and into a bike in just a few hours. LOL.
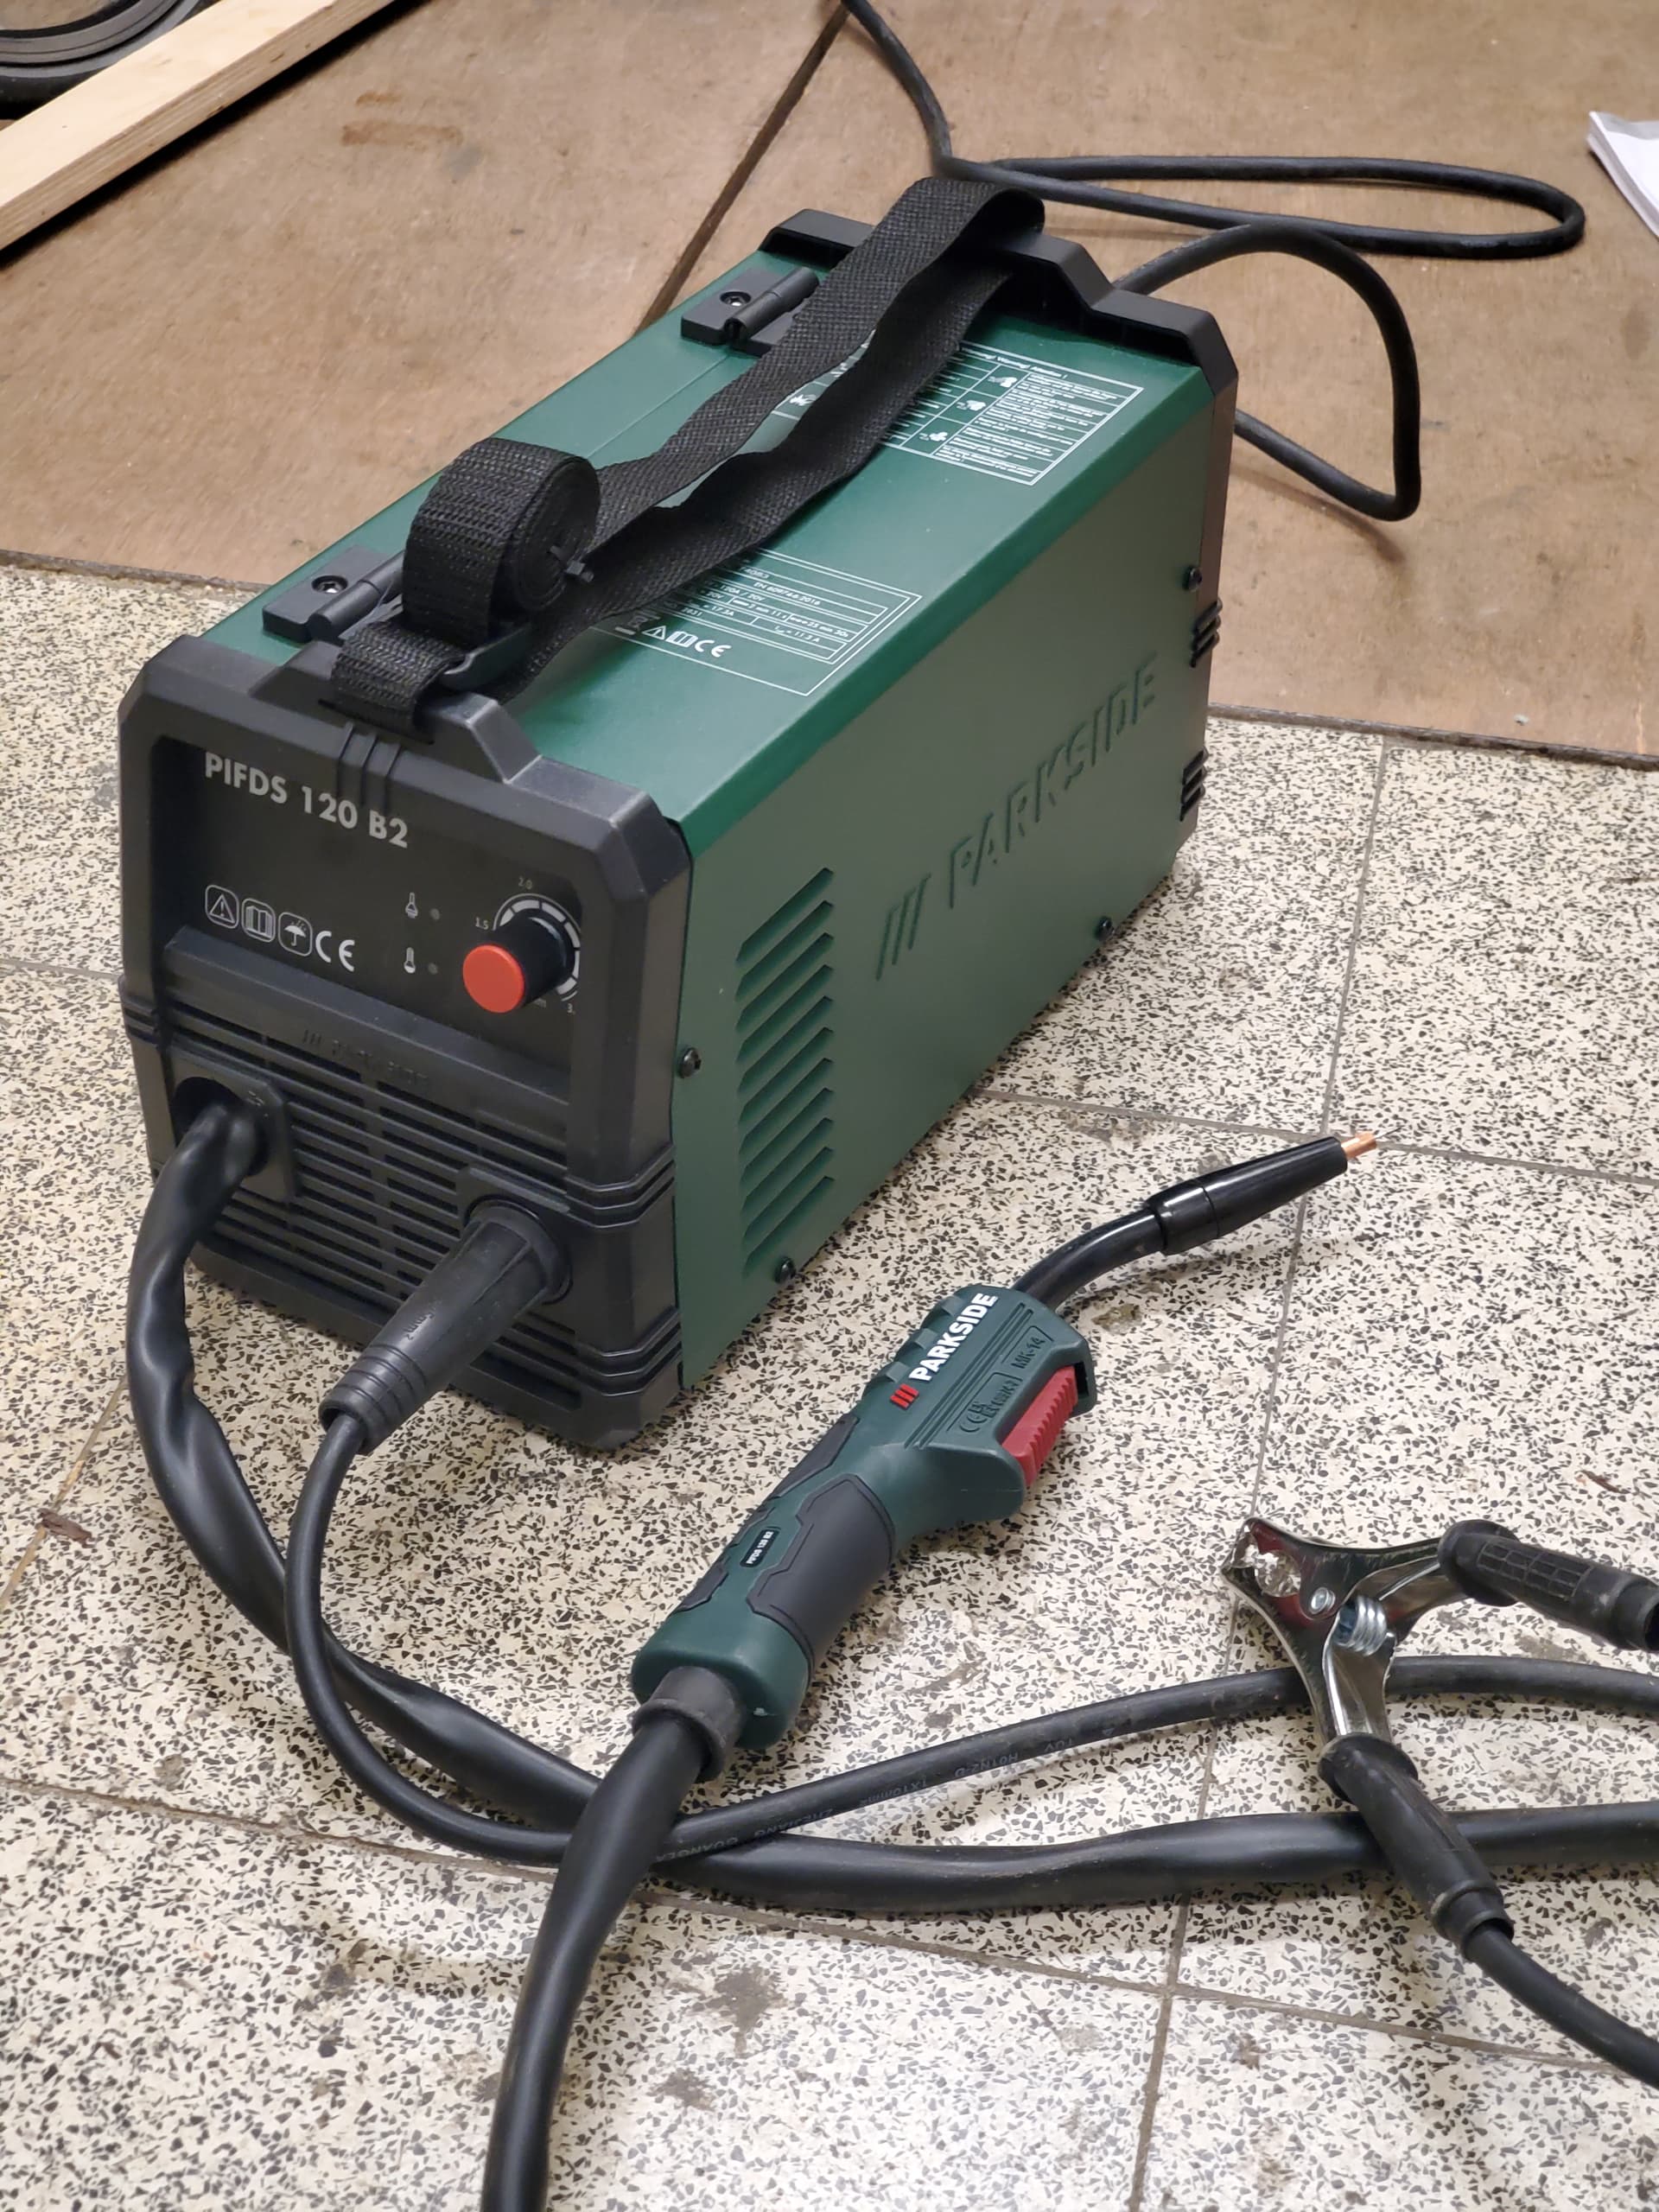
But I’ve been slacking on building and took on the challenge. So I walk into the shed and I have about two frame tube sets, a set of vintage 1" mtb lugs, then realizes the oxygen tank is pretty empty, Argon is empty for the TIG and my local welding shop isn’t open on the weekends. Boy this isn’t looking promising right off the start. I see my little Lincoln Flux Core 90i in the corner bouncing up and down like Horshack wanting Mr Kotter to call on him. Knowing it’s pretty much my only option and knowing I can’t use my real tubing it’s going to get REAL interesting.

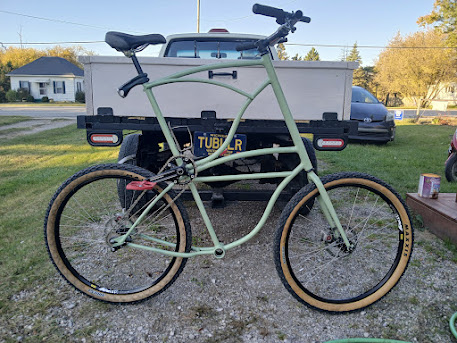
I figure with my options I’m going to build something people will stop and scratch their heads at but still be a completely trail’able steed. Questionable…definitely, fun…heck yes. I’m not a huckster, smash through rock gardens, send it and ask questions later type of rider so I wasn’t building something that needed to handle the Red Bull Rampage.
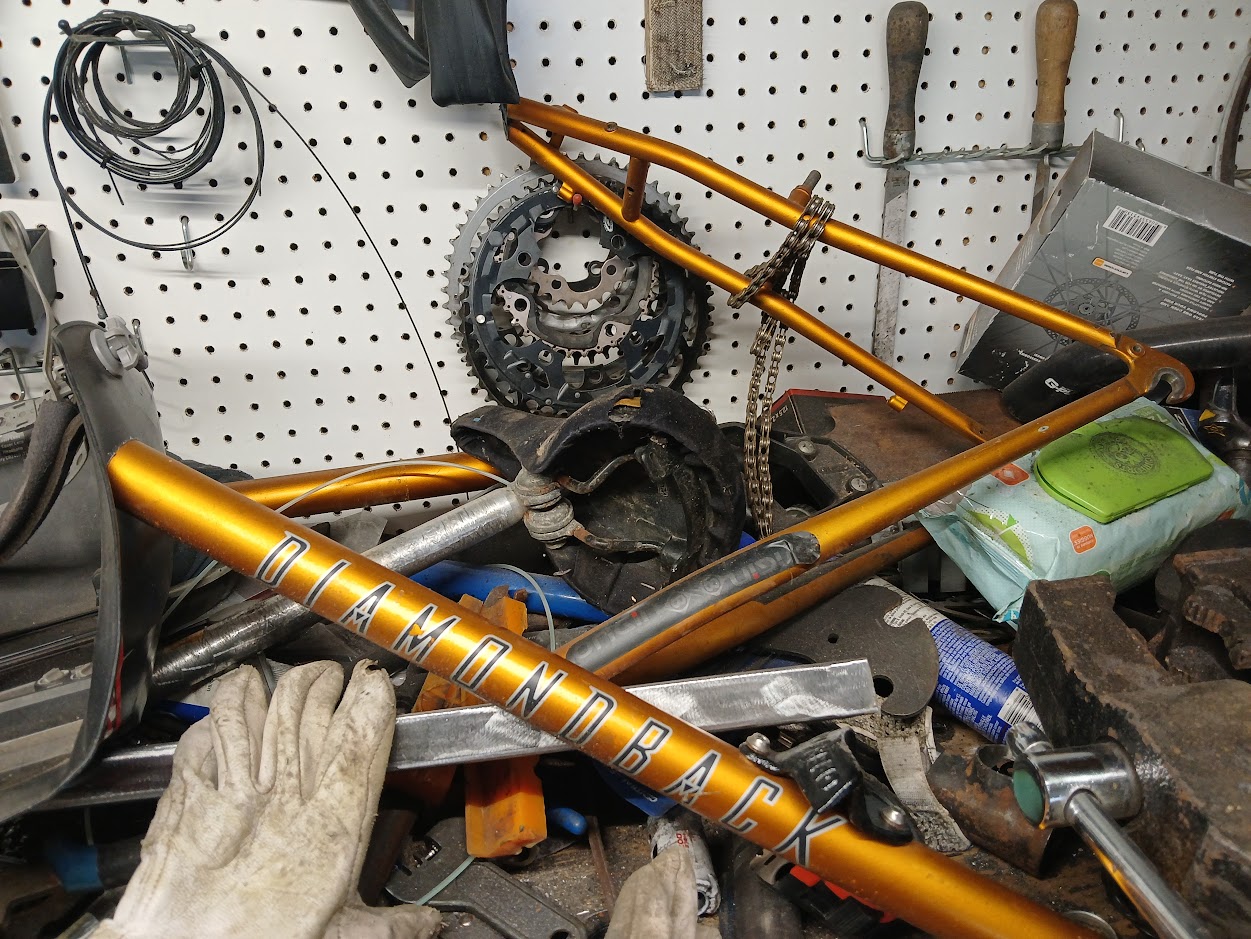
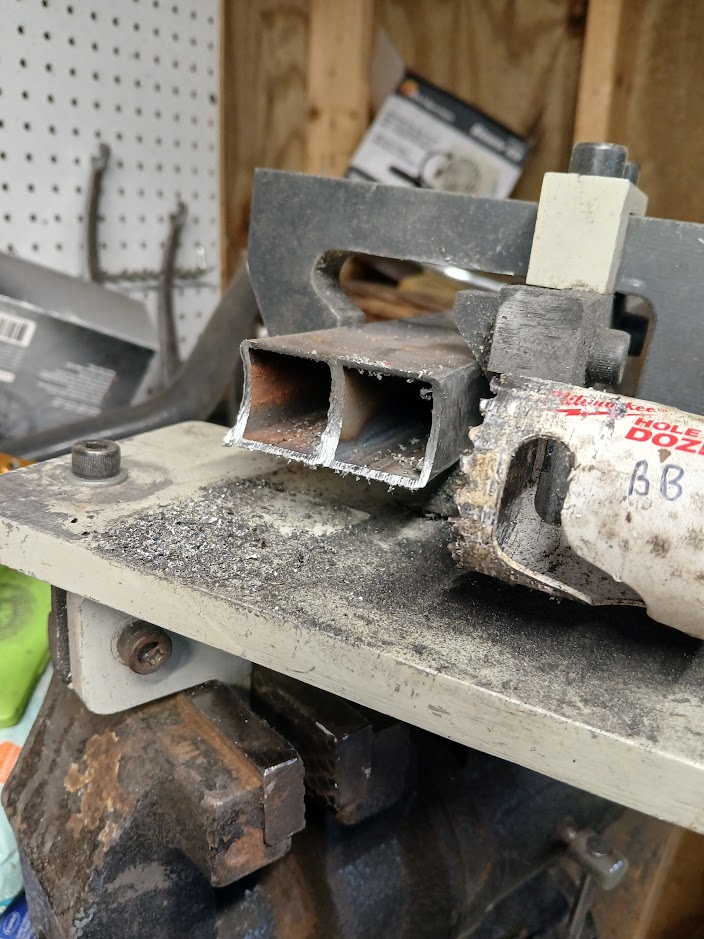
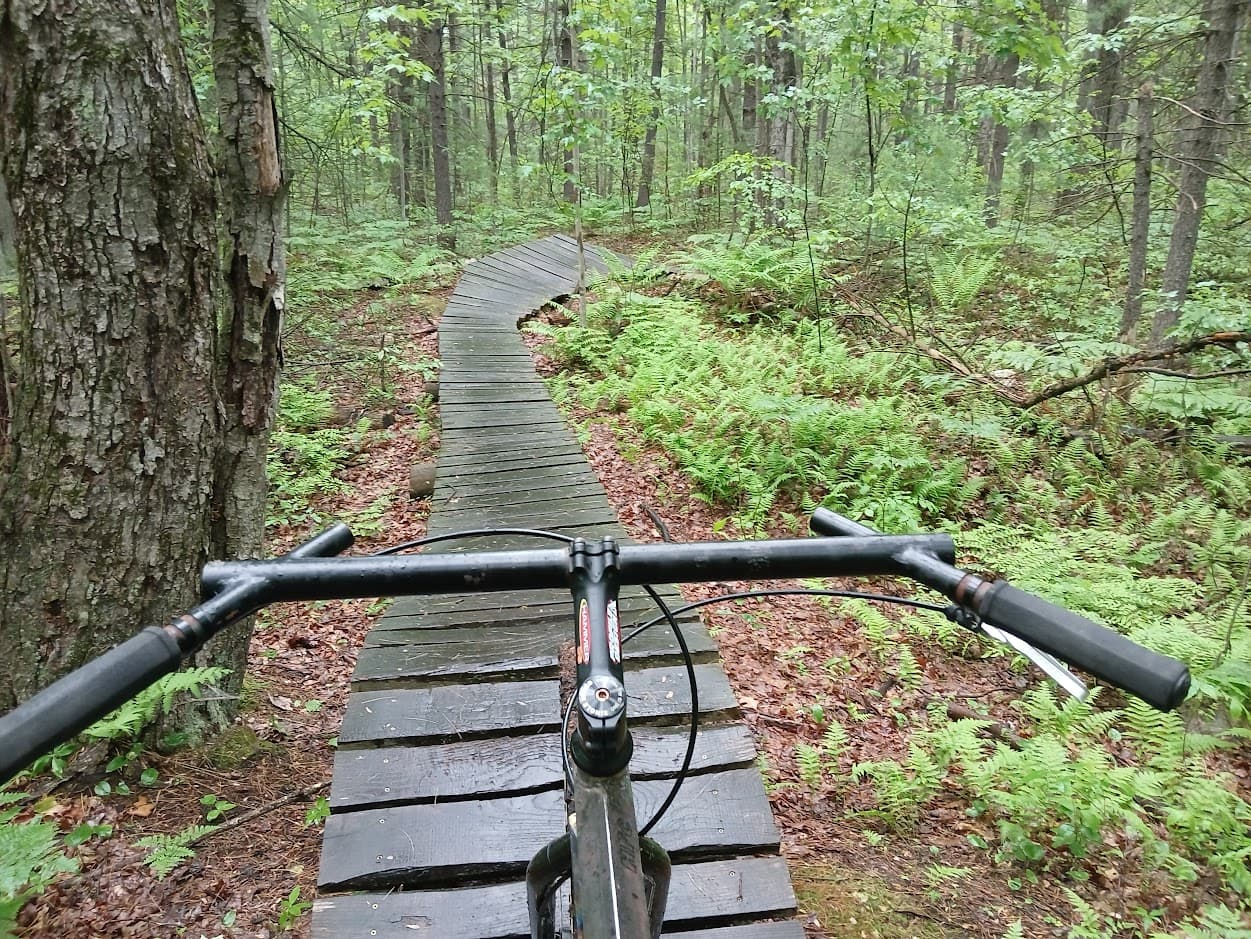
Sooo…I start scavenging my shed like the local metal scrap guy looking for suitable steel with the only requirements are to connect two points together. See how far my standards have dropped since this endeavor started. So I was able to source a piece of 1.25" perforated square steel tubing, a matching piece of 1" square aluminum tubing for a matching seat post. Then I was able to find four feet of 1" square steel tubing and a chunk of angle iron. Luckily I had a donor Diamond Back frame to use for the 36mm headtube and BB shell. Now it’s off to the races!
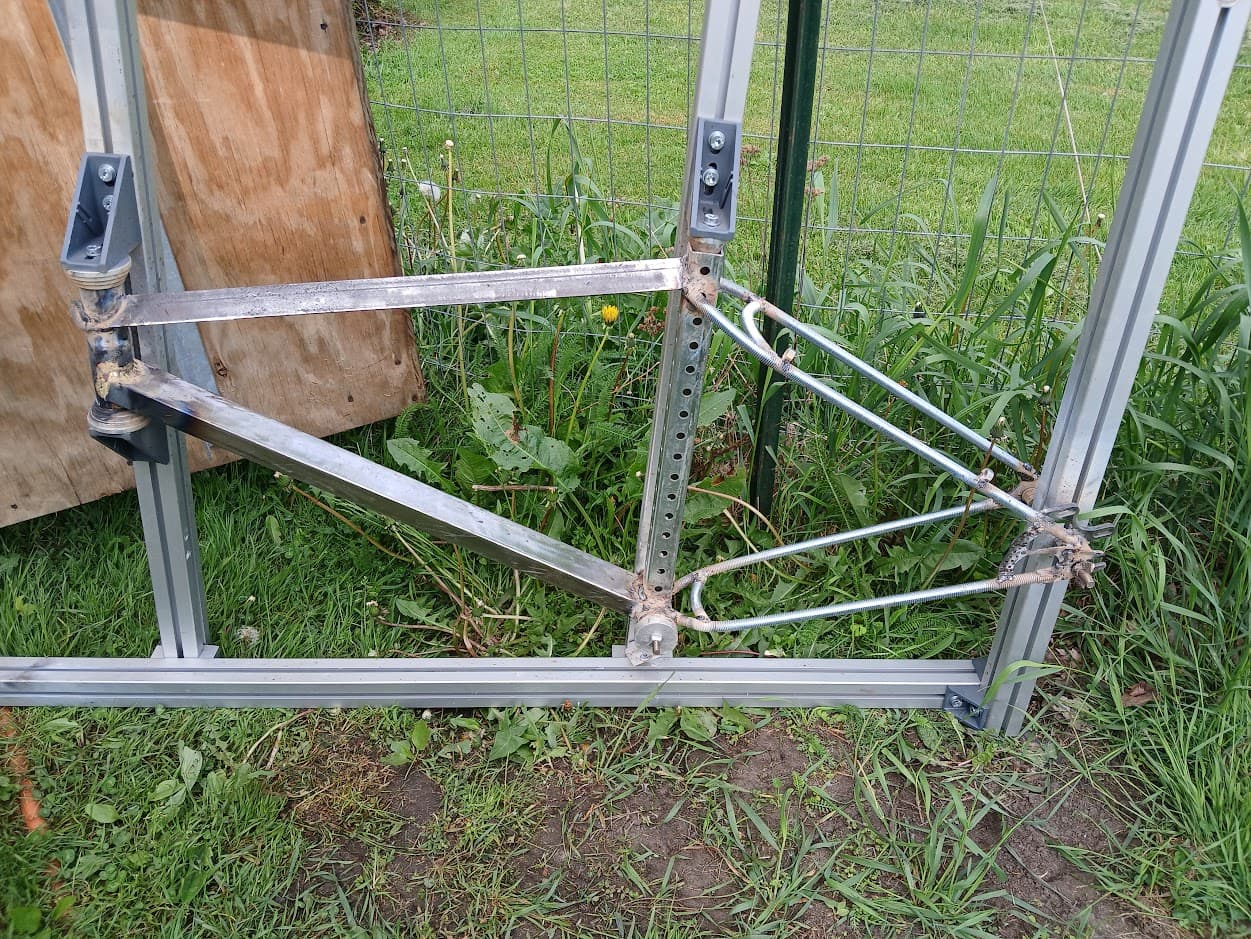
No design for this frame besides grabbing a frame that fit good and tossing it into my 8020 jig. Man if all builds were this quick and easy! The only adjustment I made was that I’ve been wanting to try a frame with a tall BB. I mean tall like the chainstays are parallel to the ground. No ruler just an eyeball and nudging of the BB cones up…up…nosebleed…that looks about right, I think?
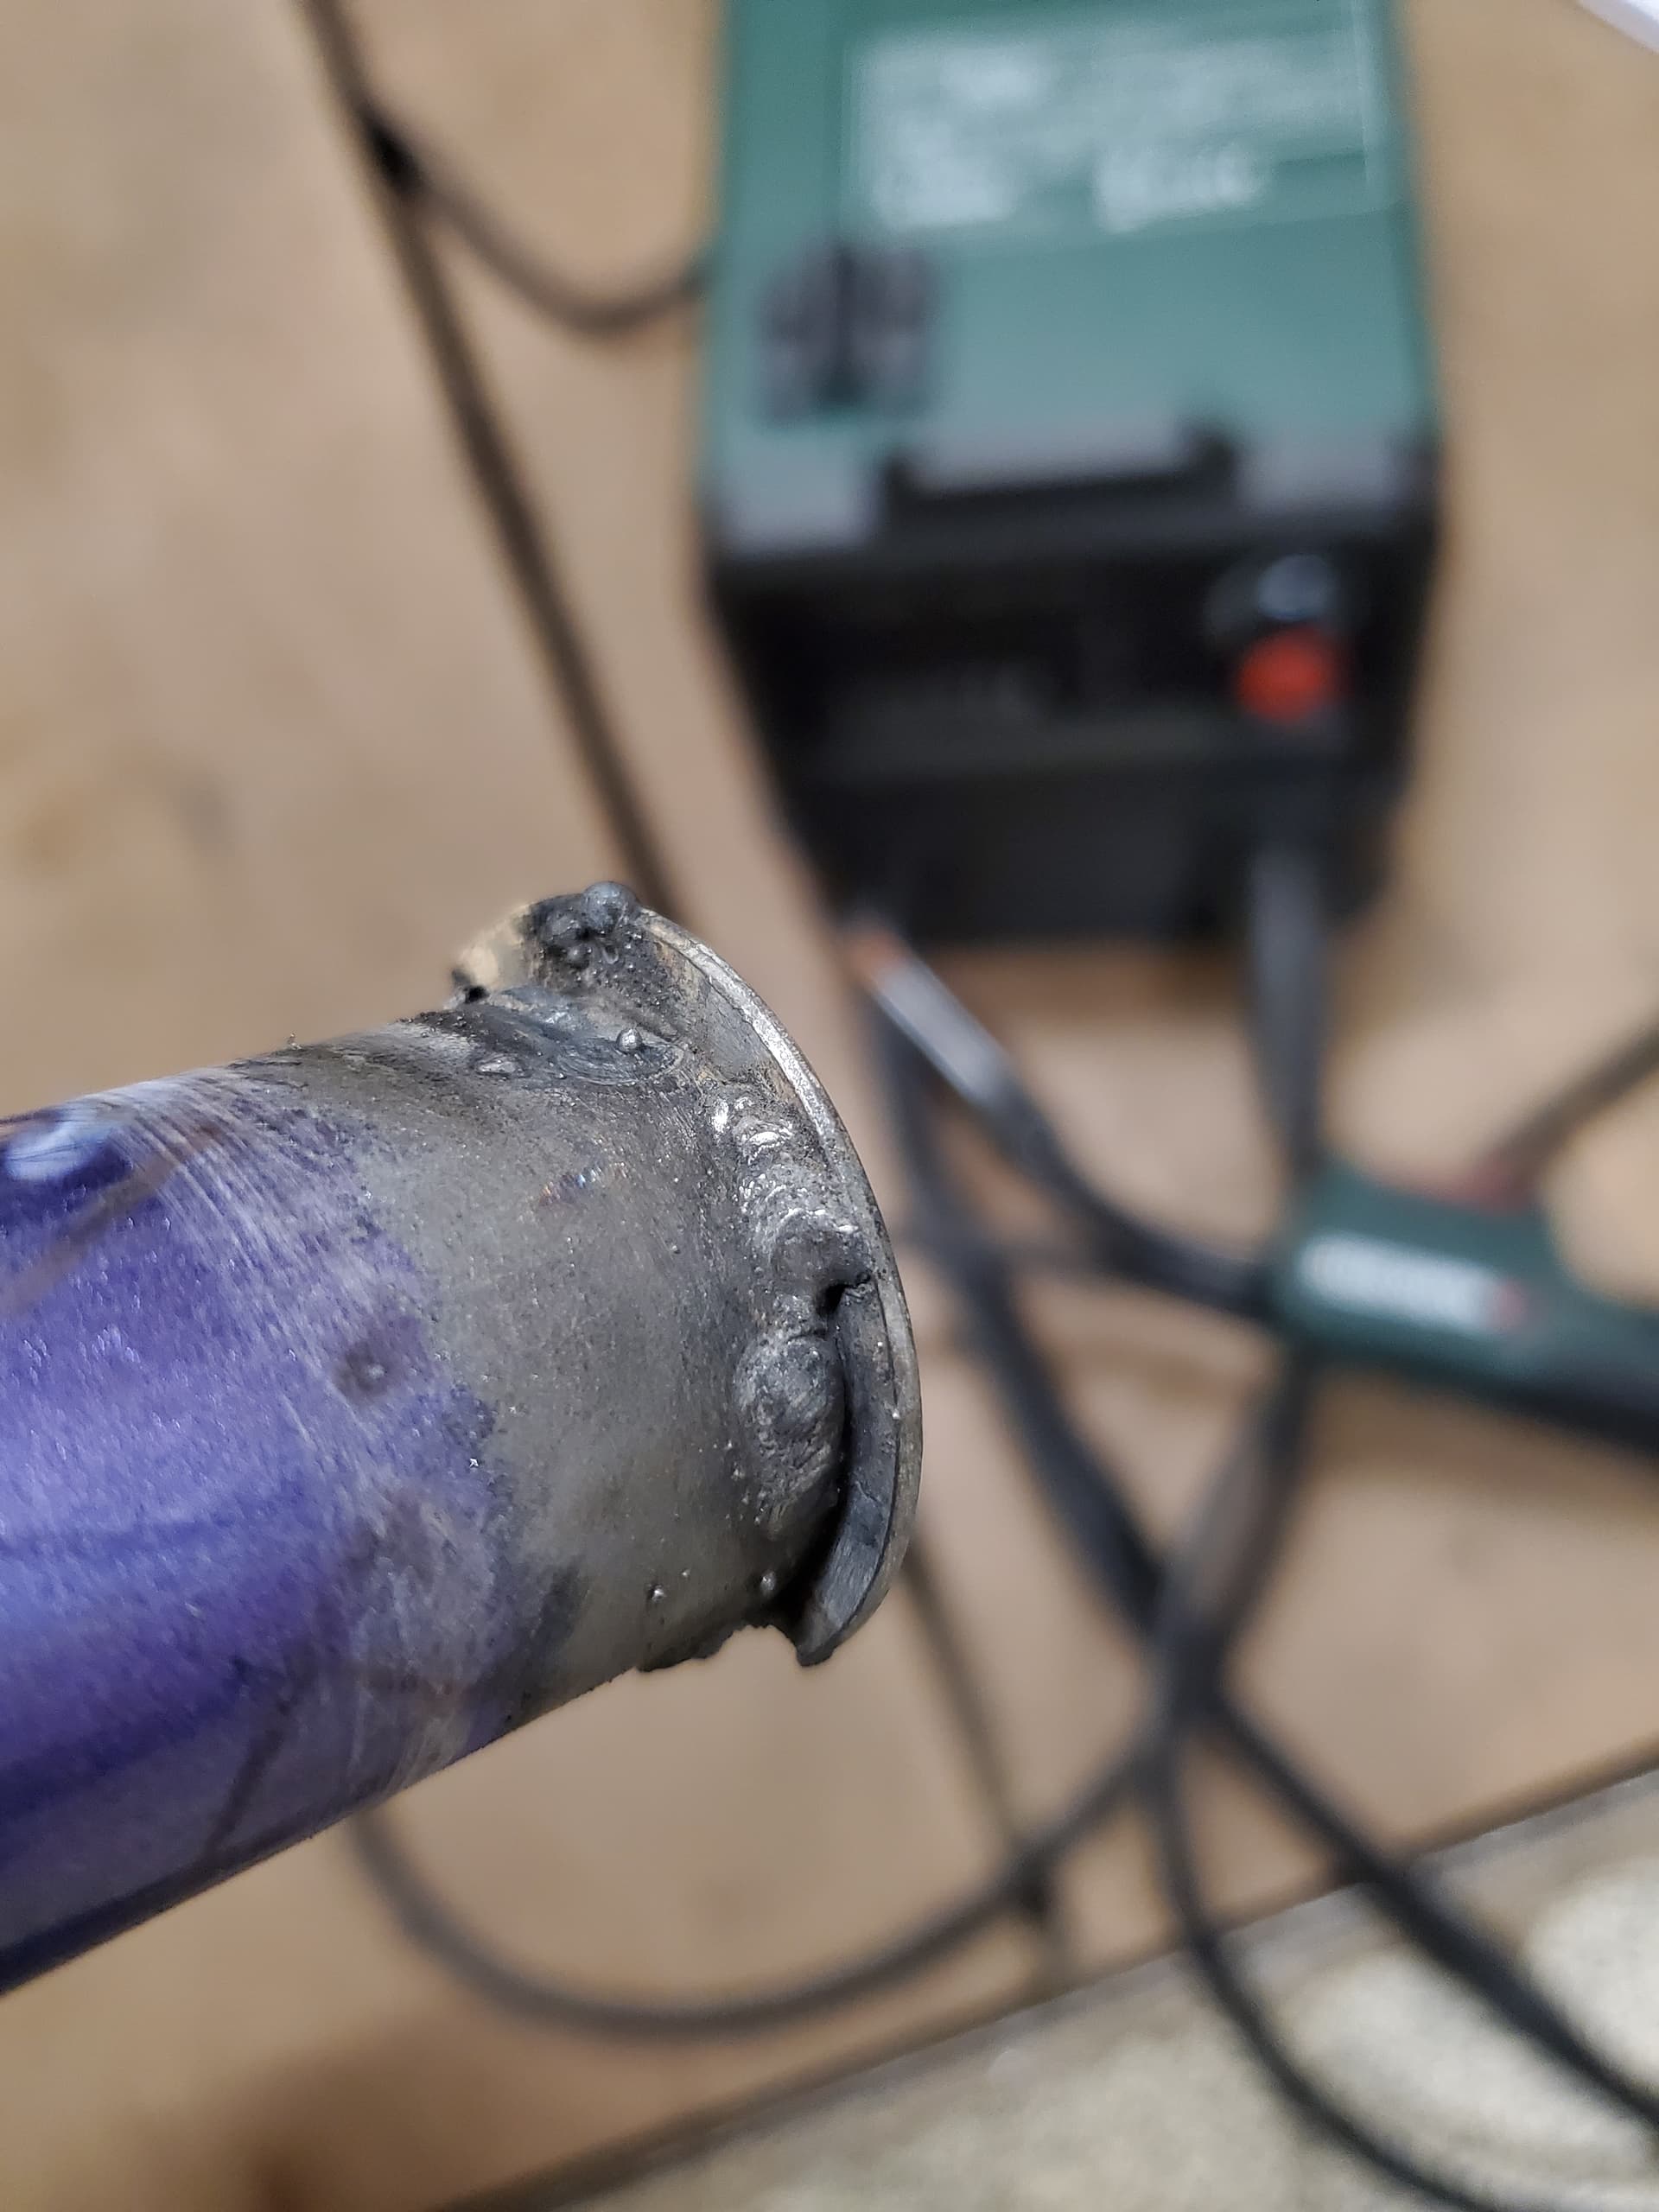
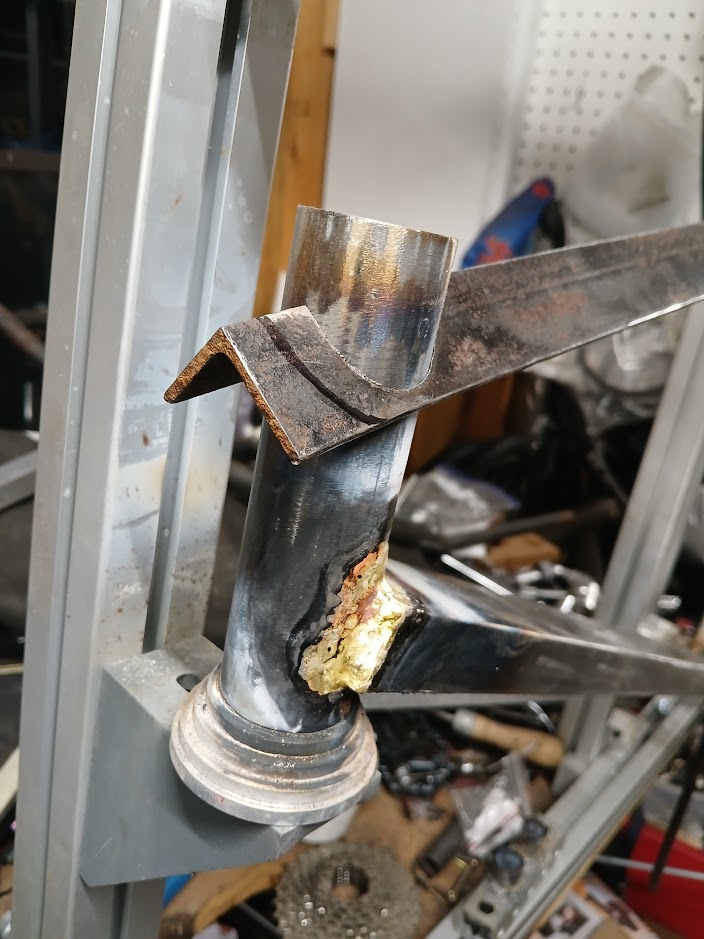
Next was something for the downtube. I decided a 1" piece of square tubing looked pretty paltry and noodley. So Pontiac’s old slogan in the 90’s that wider is better. I welded two pieces together and then sanded down for form a seamingless 1"x2" rectangular downtube. I had just enough oxygen to braze the headtube/downtube joint and fill in the openings. So that’s the only brazed part on the frame besides the handlebars.
Since I’ve got a thing for pierced tubes and only the angle iron was left for the top tube. I tossed the angle iron in my tube notcher and made a glory hole for the headtube to gloriously pass through! As I take a step back at the front triangle I’m thinking “this isn’t looking half bad” and I may just pull this off.

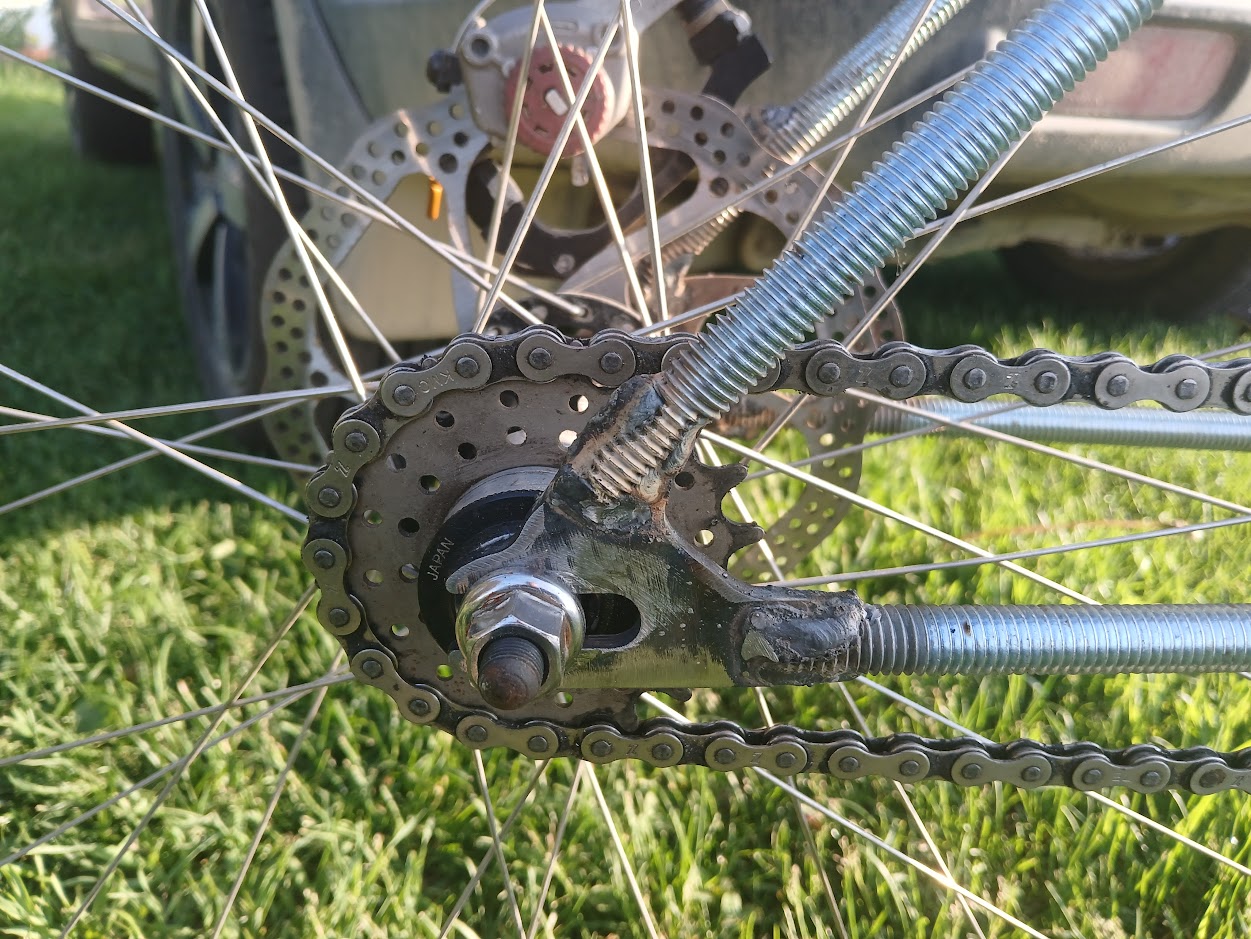
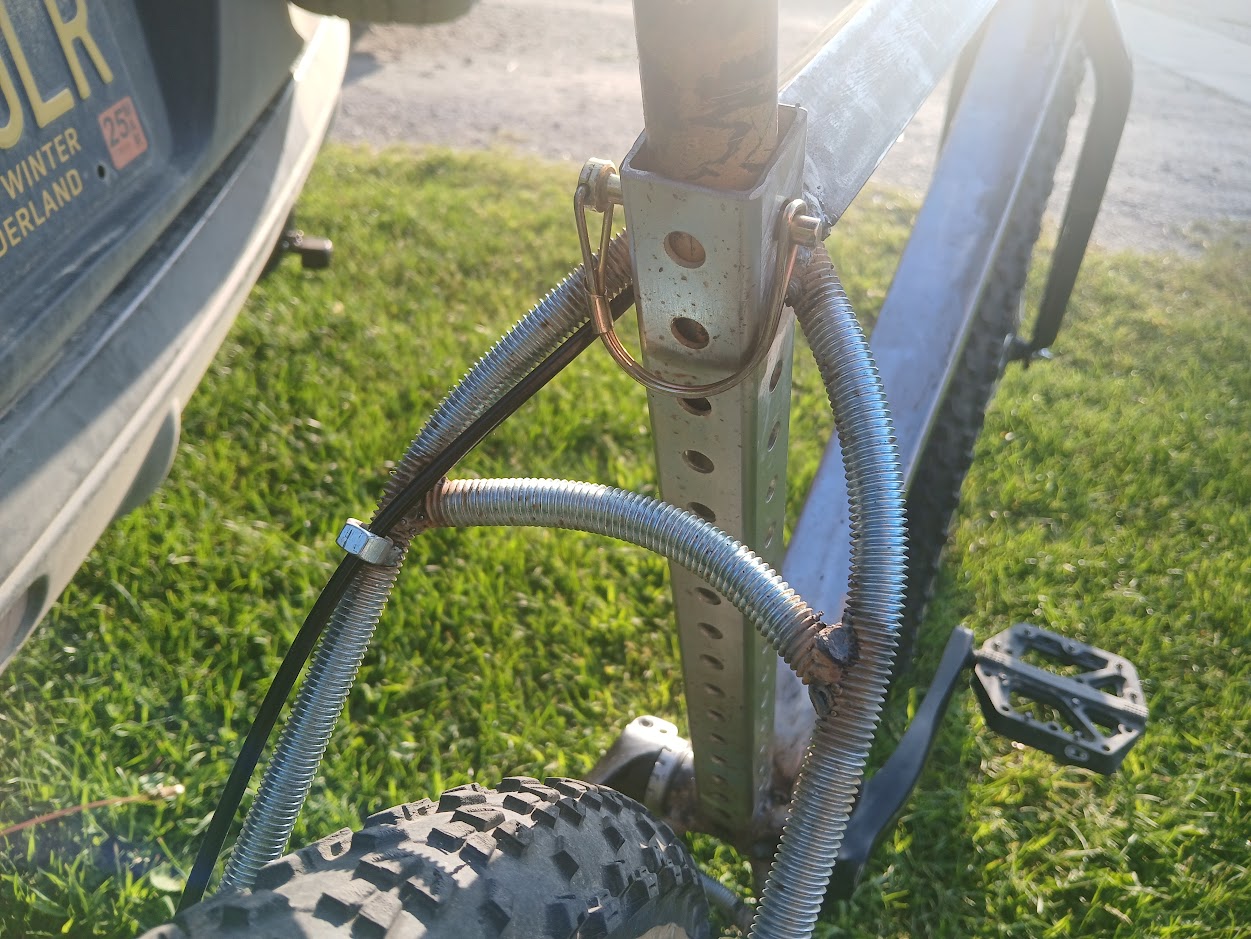
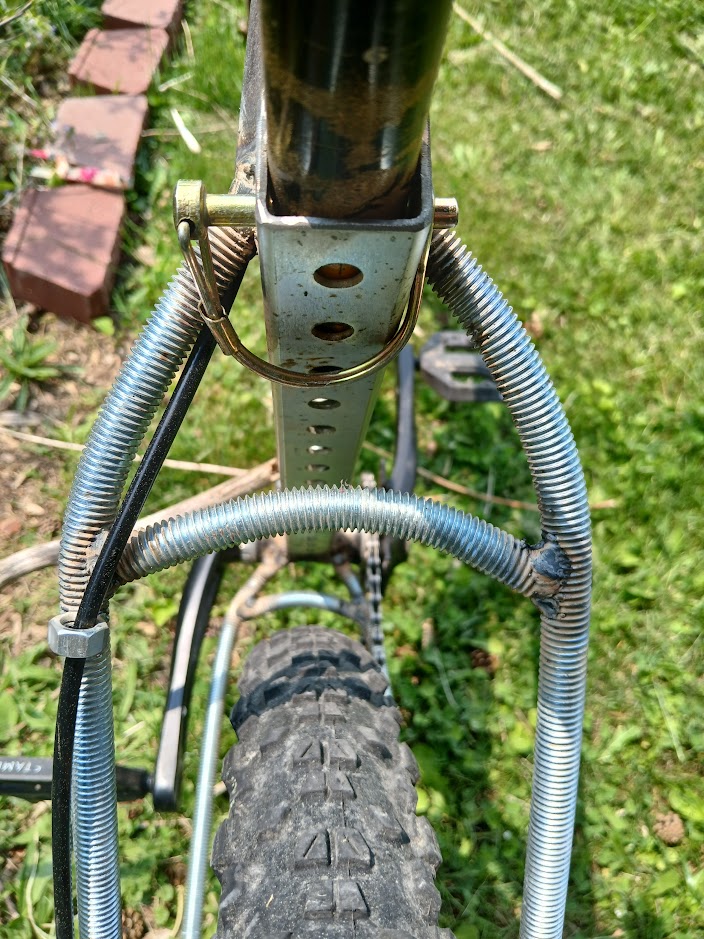
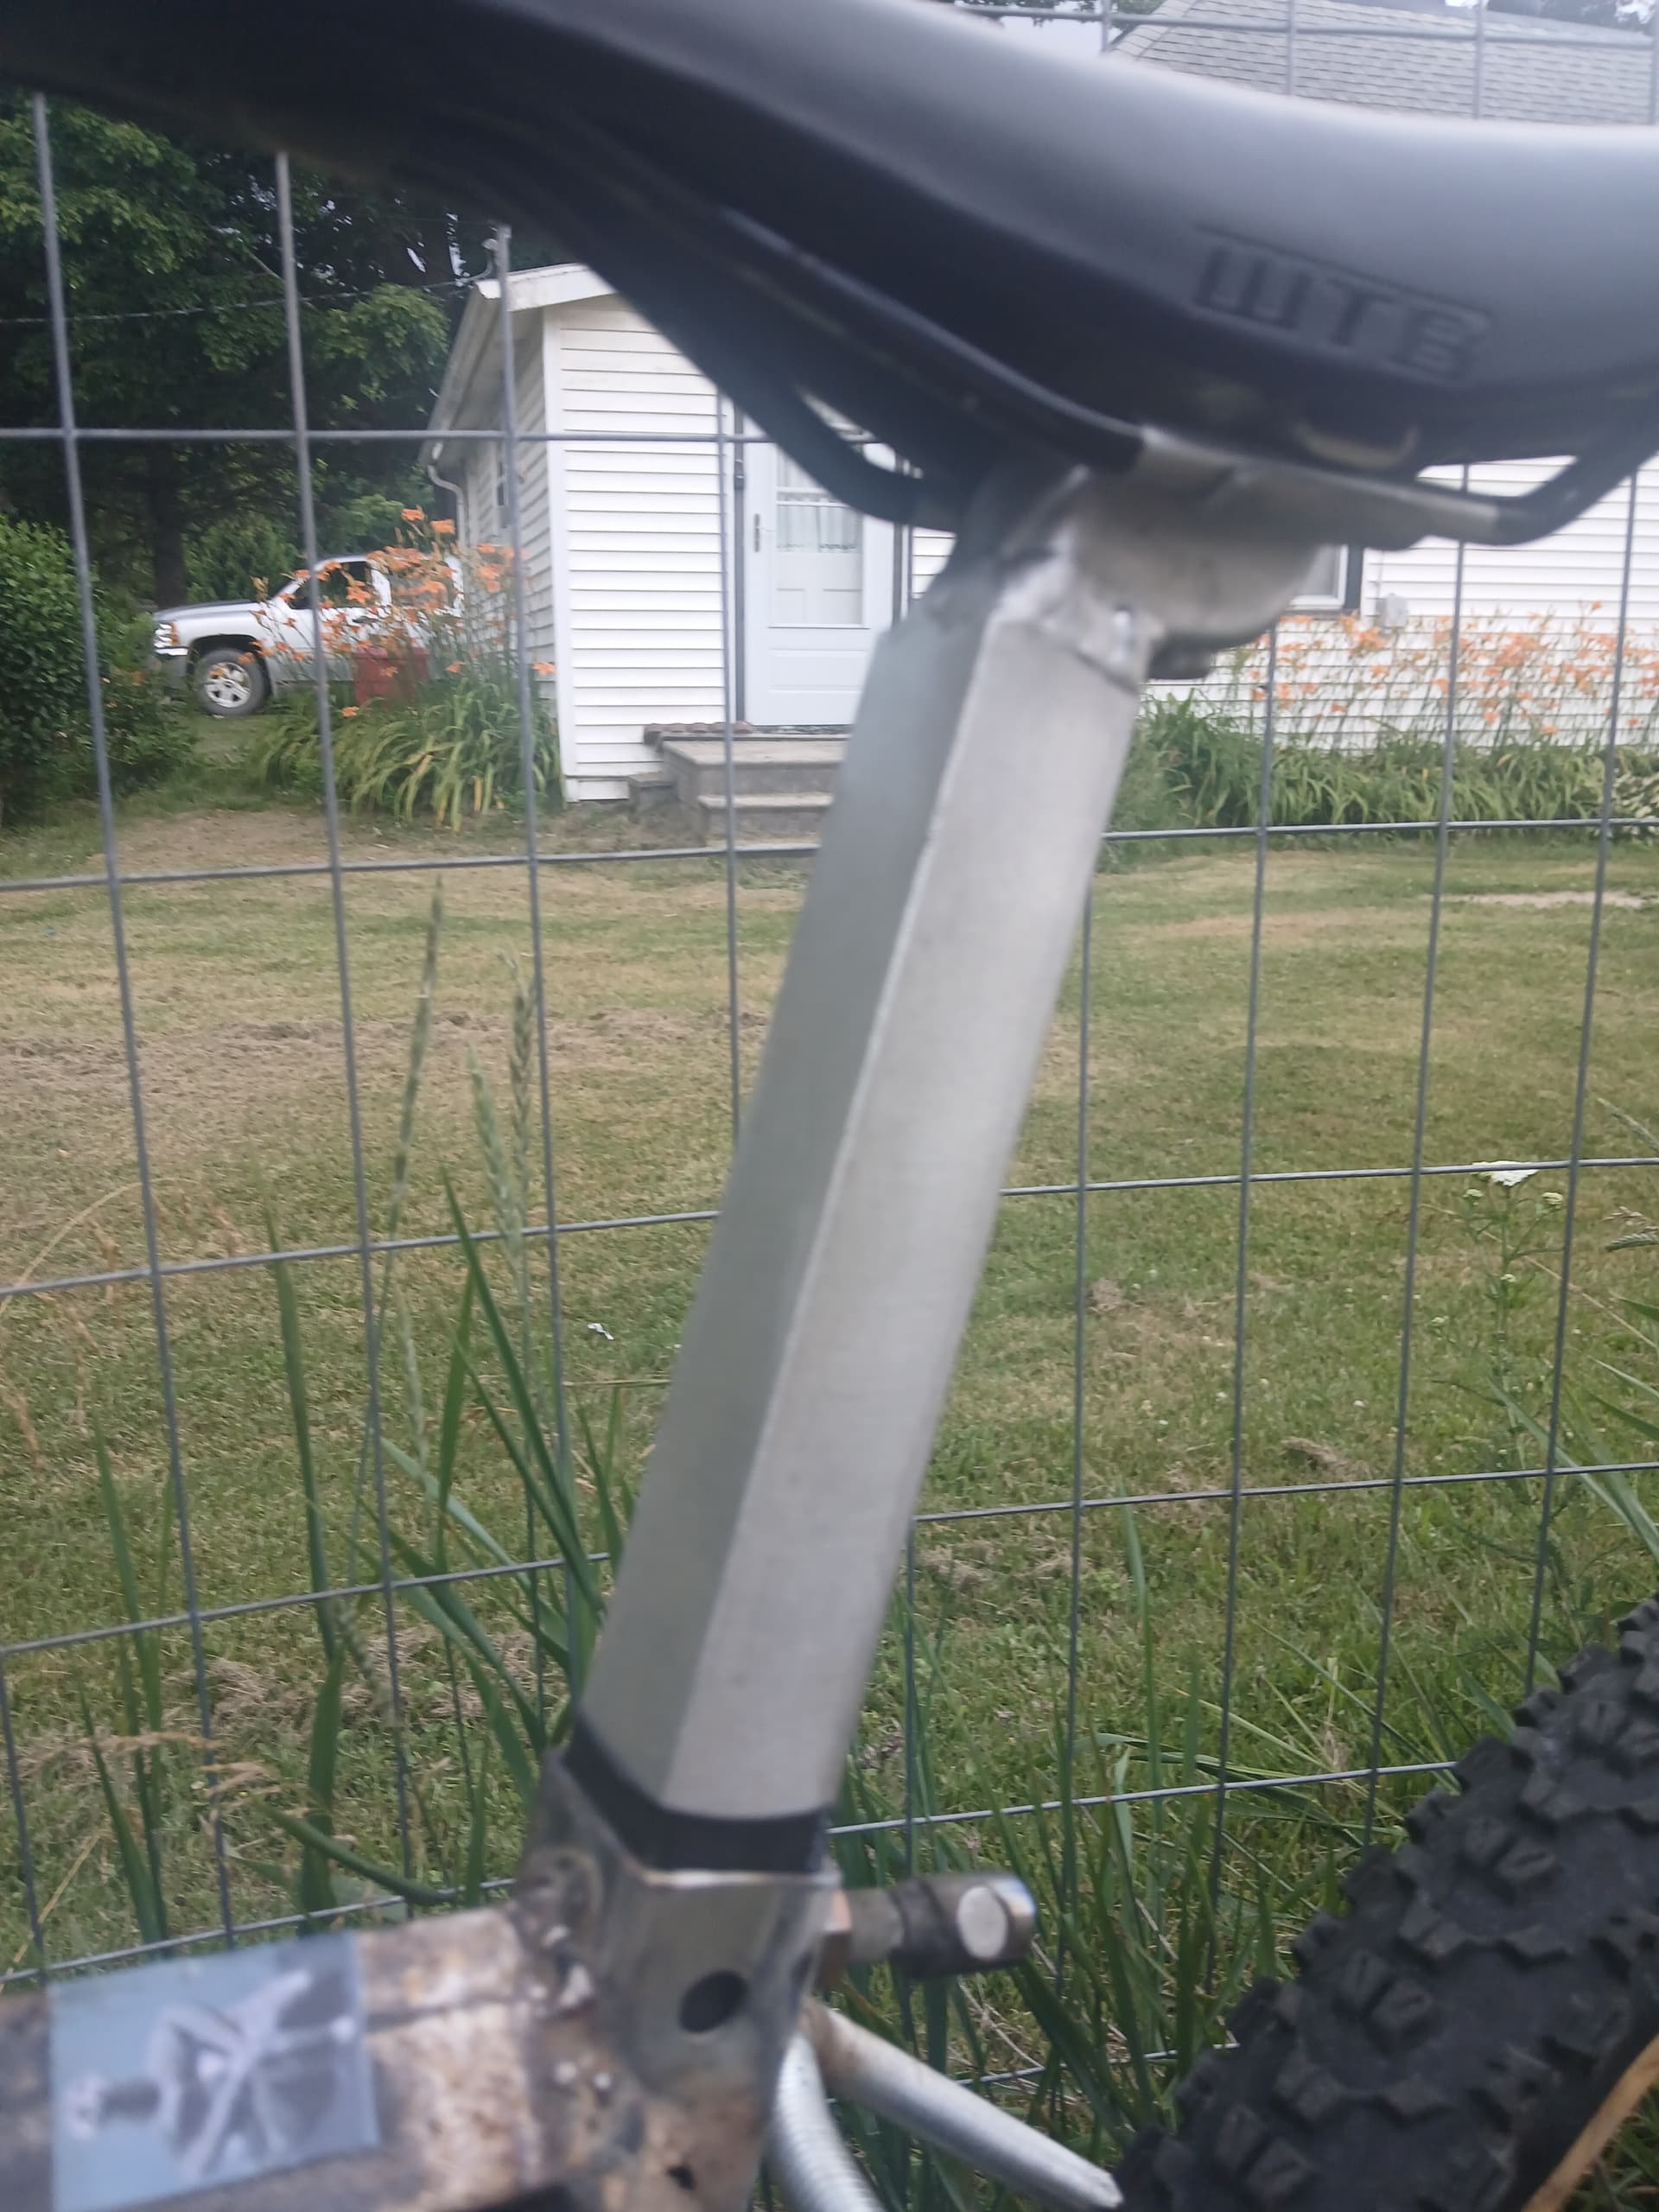
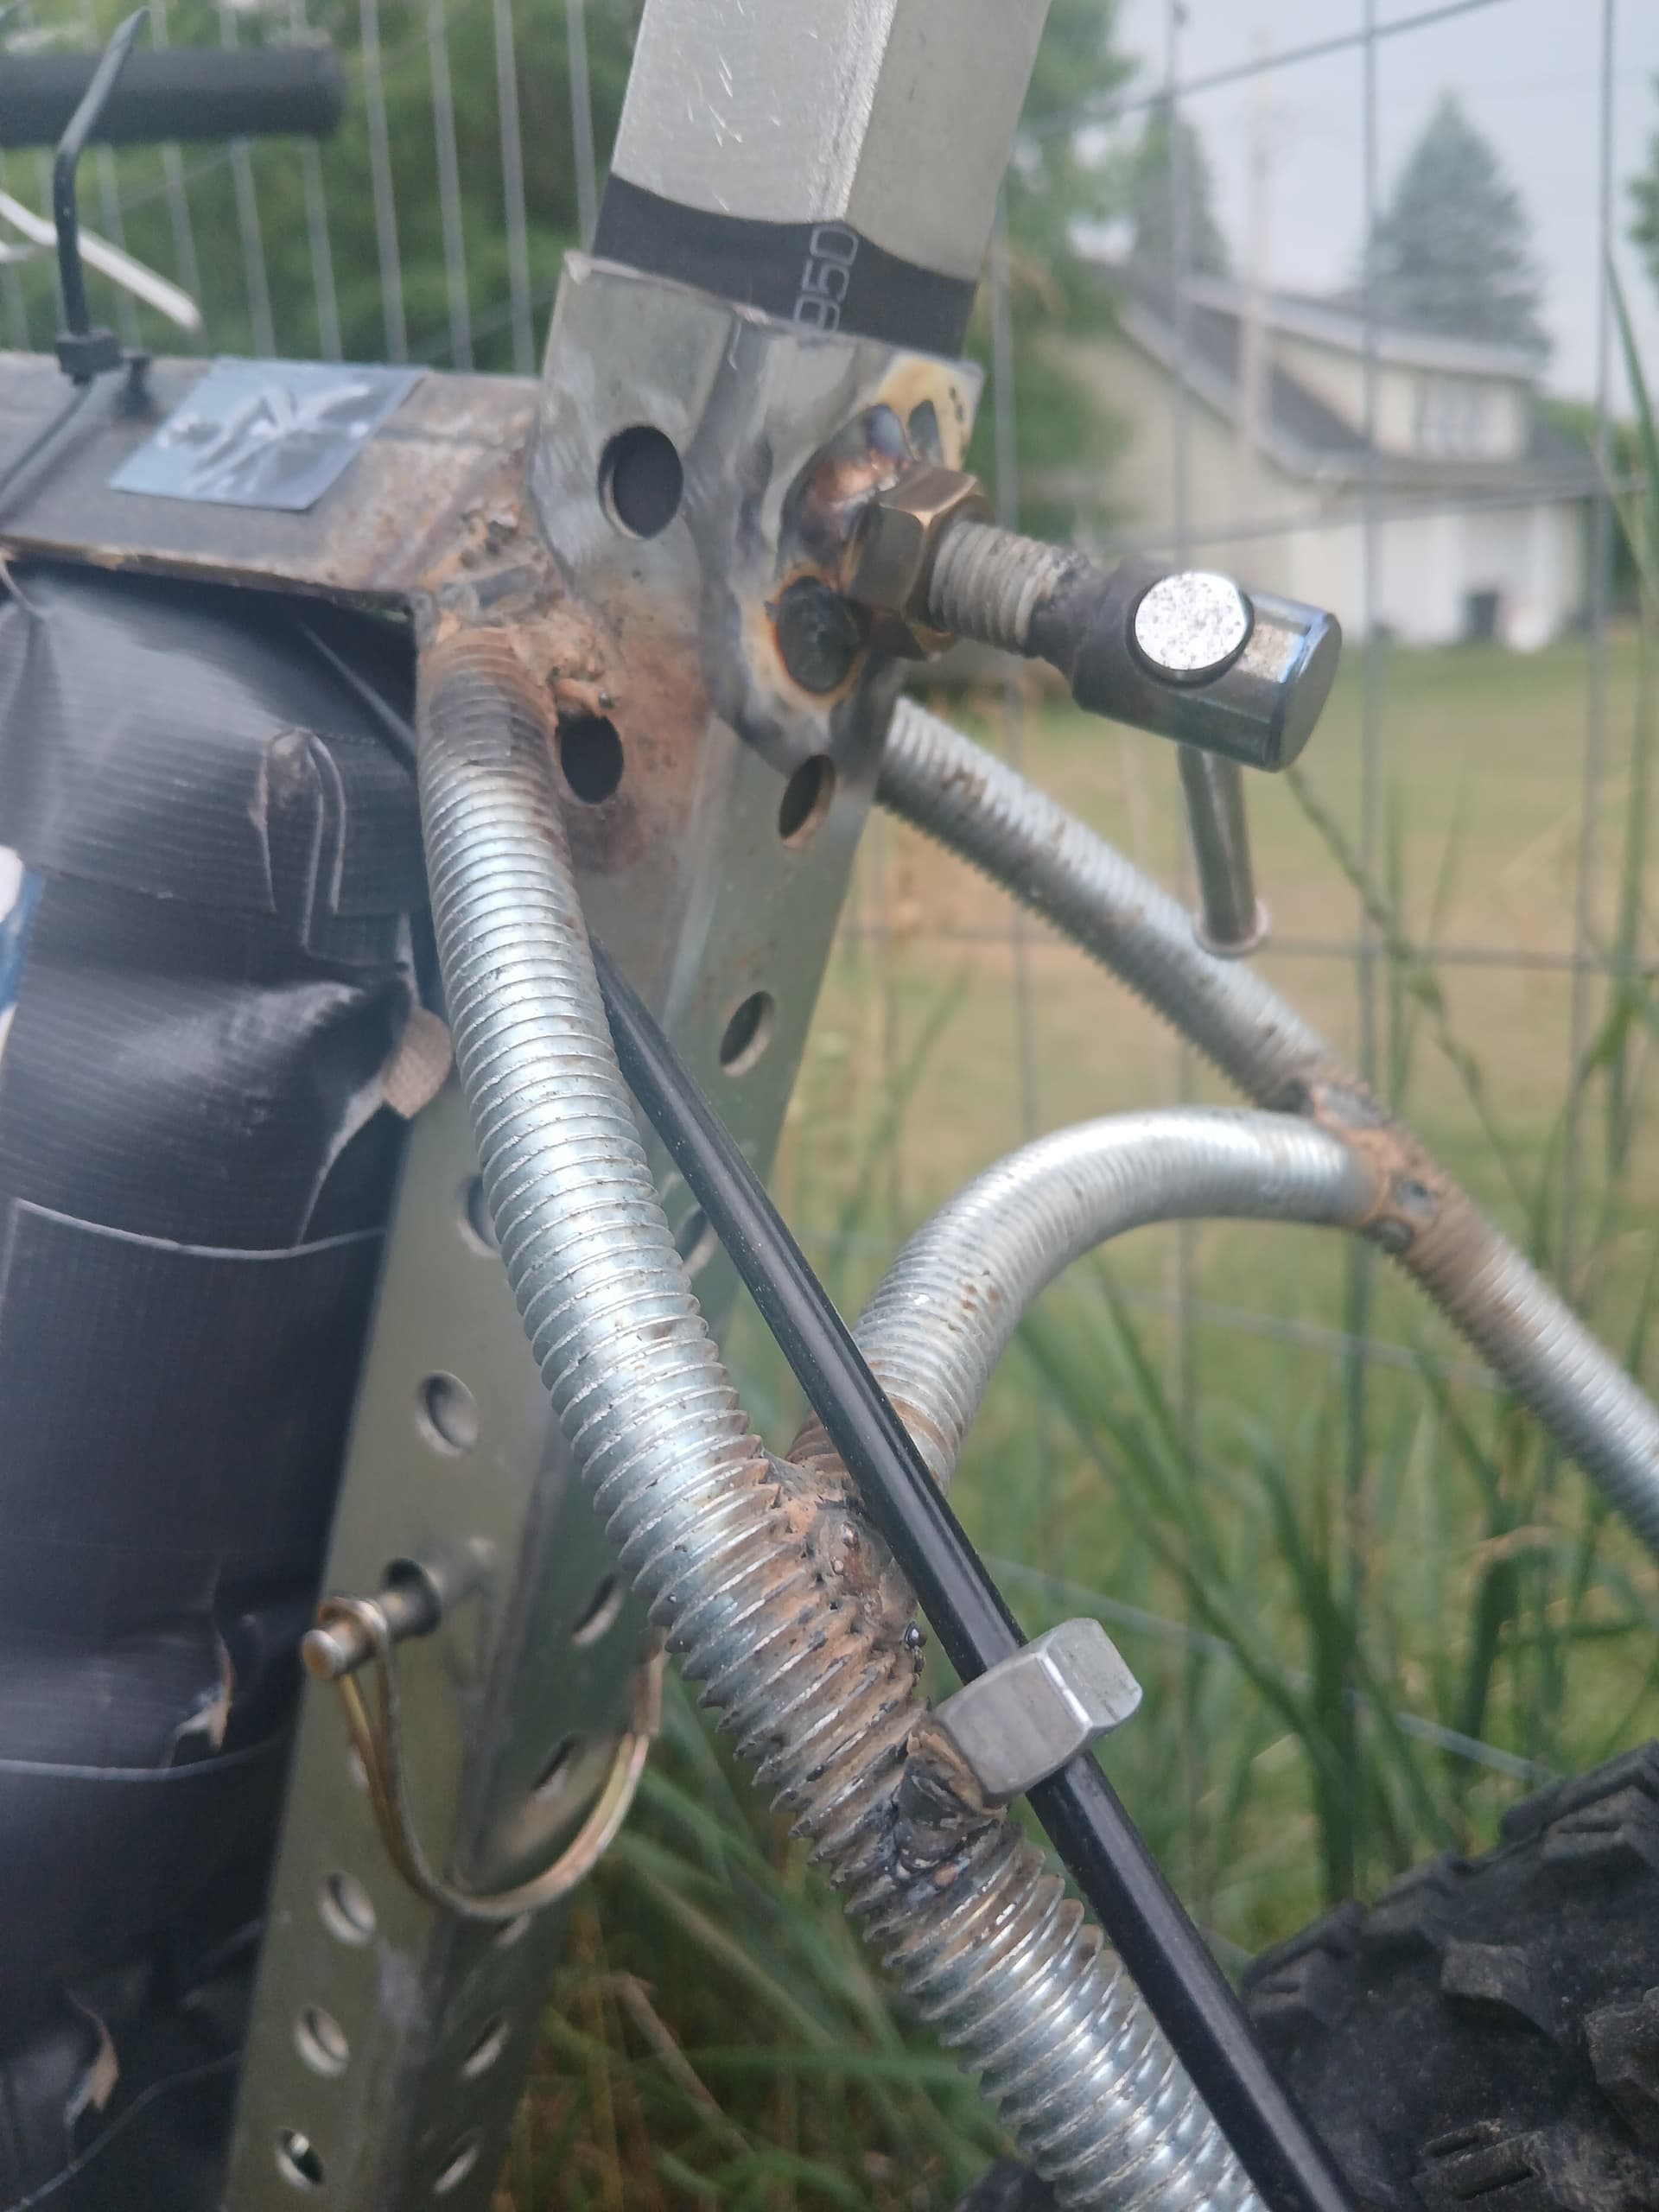
Now the rear triangle. I’m out of suitable material and head to the local bicycle frame building supply store…Tractor Supply. Isn’t that were everyone here goes for their material on the forum? Scrolling through their chain stay and seat stay material I found the perfect solution! Alas! 1/2" Threaded rod! I give it a the backyard FEA test and a couple of flexes over my knee and it passed with flying colors! The end is in site with this last piece of the puzzle. I also needed cable guides that fit with the theme this frame has gone down. I eyeballed the 3/8" nuts and looked suitable for housing to fit through and grabbed a handful. The vendors here need to keep their eye on their local hardware because I may have stumbled onto something with this build.
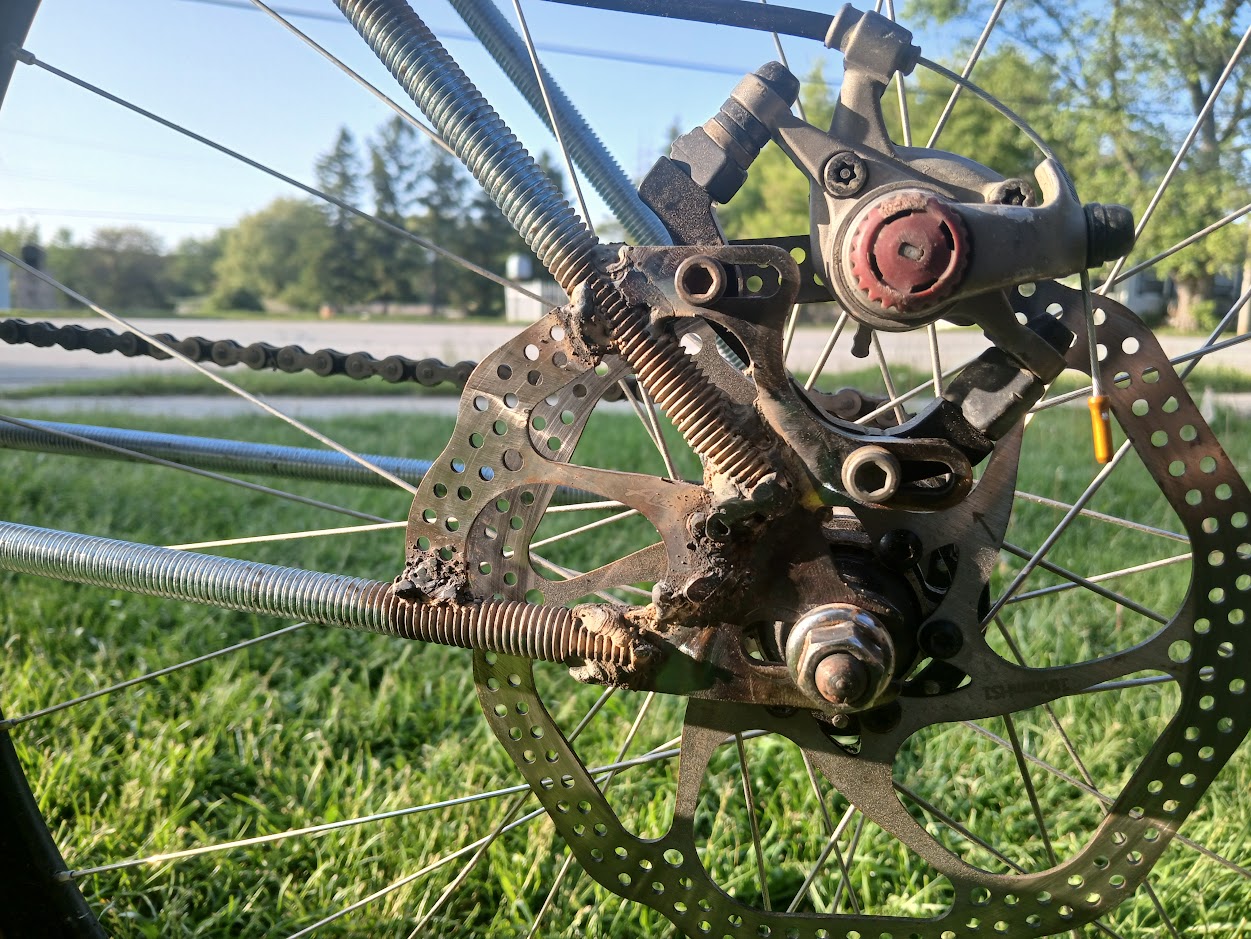
Dropouts were old track ends I got from Nova a few years ago and a slotted ISO disc bracket I also had laying around in my bin of frame bits and bobs. The brace for the caliper is an old Avid rotor and blends in with the matching rotor. Stealthy ![]()
Back home and hammering at the bit to finish this. I punched out at 12am mainly due to I didn’t want to wake up to my neighbors standing at my front door with pitchforks and molotov cocktails because my angle grinder is keeping them up.

Next morning I pull apart the double klunk tall bike for the wheels, bars, stem and brake. The end is in site and I can see the finish line! Holy crap I may just pull this off! Quick run my tap through the BB shell because we know how much of a mess fluxcore leaves behind. I put my hand over the shell when I was welding so not too much got inside. I’m on the “dont make it right, just make it ride” theme. Quick tack in the cable guides on the underside of the angle iron for that clean internal look. I was pretty surprised when I pulled the frame out of my jig as I was expecting it to be an absolute boat anchor. Holy smokes this feels like a six to seven pound frame honestly. Must be the drillium seat tube. Haha!

Then my first “oh crap” moment. My 30t chainring is seriously hitting the chainstays. Mind you the only thing I measured was the chainstay width to clear the arms…not the ring trying to get this done without any type of print to work off of. My solution was I saw a tiny granny ring laying on my bench and even then I still needed to notch the stay for it to clear. Death wheel to rescue while my wife is saying it’s go time. It’s a two hour drive from our house in the Thumb of Michigan to Ann Arbor so we had to be gone by 11 to make it on time. I still have to run housing, and figure out a seatpost solution since making a post from the square tubing I had planned wasn’t going to happen in time. I just measured my saddle height on my Kona Unit and steal the post and saddle, drill a hole and mount it with a quick release…AKA lock pin.
I also figured a nice touch would be my bars I made a few years ago to keep with the handmade parts. The gear ratio is almost 1:1 as it’s like 24-22. Surprisingly I wasn’t spinning that bad when I took it out to some trails a few day later for it’s first shakedown ride. Frame alignment surprisingly pretty good for not having done any alignment during the build. Just tacked everything in the jig and pulled it out and let the spatter fly! Dropouts needed very minimal work with the H tools and tracked down the road no handed with ease.
Overall it got a lot of questions, laughs and amazement that I started the build a few hours ago. I joked that it was probably still warm in a few spots. Being I got there late I just displayed my bike outside of the shop next to the folks of the Detroit Freak Bike crew instead of inside Sic Transit Cycles where the “proper” handbuilt bikes were displayed.


Overall it lit a fire back in me to get back into the shed and build bikes. I took Doug Fattics frame class back in 2012 so despite my backyard frame fabrication shananigans I actually do have some formal training and went to college for metal fabrication. LOL. Not sure Doug would approve of my build but it’s just a sign that literally you can use anything to build a working frame. Now you may say the stays are one big stress riser with all the hard edges from the threads but I’m not building and selling these. I’m not going to be hucking this thing down some trails in full beast mode with the bro meter cranked to 11 but I feel safe just cruising around our local trails. Plus with gearing like this your not going to be setting any FKT for anything, except maybe for FKT for fluxcore frame builds against yourself.

In the end it’s just a matter of going out and building something because you learn something either way…either how to or how not to do something, the right way…the not so right way. Your still having to know the angle of the miters your cutting, slotting stays for dropouts, not cutting your tubes too short, yada yada. It’s not rocket science because Huffy has been doing it for over a century and we know how sketchy some of their stuff is and it’s still getting people from point a to point a and a half. Long story short…you can’t make a frame if you don’t try and even bad bikes still ride decent and ugly welds still normally hold up.
The parts are nothing special but just stuff that works
-wheels are old XT high flange with chromo threaded axle swap I laced up a few years ago
-deore cranks
-Kona Project 2 fork
-Long Dong Profile stem
-Custom bars I made


")