I have used Createx (used to be Auto-Air) water based paints as graphics on powder coated bikes. Over the color coat and then powder clear. Worked very well although bleeding tint though light colored graphics was a problem. Wet clear for those.
2 Likes
Thank you!! I was deeply unsatisfied with my rattle can experience, even following all the best protocols. Had it media blasted, cleaned it ahead of time, got Spray.Bike stuff including the clear coat, and it just wasn’t great. I fully wanted to get into a proper spray gun but didn’t quite know where to start, so thank you!
Any tips about, well, tips? Thanks again!
1 Like
Ive found using the epoxy enamel rattle cans instead of acrylic to give a much harder wearing finish. Easily last a few years.
2 Likes
For tips I think my gun has a 1.6mm if I remember correctly, but just check the datasheet of the paint you are going to use and it will give you a size range.
If you are doing 2k clear make sure the paint shop that’s selling the paint knows that it’s a back yard paint job. They will give you a different speed catalyst than if you had a booth/oven setup.
Also, the data sheet will tell you the temperature and humidity range in which the paint will dry correctly. Basically the datasheet is your Bible, follow it to the letter and you will be saved (from crappy paint jobs)
1 Like
How are you all handling decals? Vinyl? Vinyl masks and painting them on? Is anyone doing anything like a waterslide decal buried under clear coat? Curious what methods you have all have success with.
1 Like
I have been using a positive mask. So I lay down a coat of the colour I want the lettering to be, wait the flash off time and apply the lettering, then go over with the top coat and remove the mask, then clear coat over the lot.
This does have limitations though because it gets very 3d if you put more than one coat over the mask which doesn’t look amazing. So it’s good for doing dark over light, for light over dark you you would need negative mask.
I have not done decals under clear coat so no comment there
1 Like
For my road and gravel frames my painter only does masks and lays every detail down in PPG epoxy. For the small batch mtb frames coming up we are going to go for a vinyl downtube sticker, but use the really thin masking vinyl and then clear over that. Purely to cut down on time and cost of paint and offset the other laborius parts of building them. We’ve found the PPG while really tough, isn’t a long term proposition for the mtbs. We have a industrial ultra tough paint we are going to use instead. Can’t remember teh product name off the top of my head at the moment though.
1 Like
Does anyone have any experience with cerakote finishes?
I’ve done a few decals as a favor to a friend. I found them to be frustrating. I bet if I did a dozen or two frames I’d feel different but TBH this isn’t a skill I want spend time practicing. I understood (and got the hang of) paint masking much faster.
If you’re going to do decals under clear and are a hobbyist I’d recommend the following:
- Water based base coat like Createx.
- Apply decals with water + soap for positioning help. Make sure you let the frame dry for a day or two before you go to clear.
- Adhesion promoter works really well as a solvent barrier.
- 2 light coats of 2k clear over the decals (with appropriate flash times) before you clear the entire frame.
Solvent based clear can melt your decals. Test before you spray.
I’ve had great luck with the Tamco high-impact clear. It’s expensive and a PITA to cut/buff but it holds up very well (esp to sweat + grease)
At this point, if I have someone who doesn’t want to pay for paint masking I will simply suggest that they go with exterior grade vinyl stickers. If you want something that is going to last, look at Nikkalite, 3M and gold/silver vinyl from Real Gold Inc. They’re expensive but rated for 10+ years.
2 Likes
I’ve had a few frames done for special projects/collaborations.
The process doesn’t seem to be more difficult but prep + cleanliness is very important. (The guy that did our frames normally does firearms and relayed a few stories about a variations in finish b/c he switched suppliers for blast media and b/c he used acetone to clean stuff as opposed to his normal degreaser.)
I’ll also add that flaws in the frame are much easier to spot b/c the coating is so thin. For one collaboration we were working with some medium quality frames from Asia and ended up coating 8 or 9 frames in order to have 4 for display. I’m not a newbie welder but I certainly don’t have the consistency that others have (Bingham, Mosaic, Firefly, etc). And for this reason I’ve never cerakoted one of my own frames.
3 Likes
That’s super awesome feedback, I didn’t think much about the cover-up factor! I have one seat tube lug, the rest is fillet brazed, it’s definitely be a good challenge to get it as smooth as possible!
2 Likes
I have also found rattle can paint including spraybike to be too fragile for bicycles. I couldn’t get the spraybike stuff to self level and the texture was not good. I did hold it close as recommended.
Having recently found out that you can get 2K paint in a spray can I decided to try it out. Not everyone seems to like my color choice but they’ll mix it to a paint code so don’t worry about that. You have to release a separate cartridge inside the can to mix the catalyst. The instructions did say to use a respirator. I can confirm that the can and nozzle sprayed very well and I was able to get a level coating. The primer can had a lot of paint in it. The color can only had half as much but was enough for me to finish the frame. I cannot comment on the durability as this paint is only a few hours old but surely it will be better than regular spray paint. The brand I used is Spraymax there are also Eastwood products but some of them say they are 2K because they react with water in the air. I am a bad photographer but the pictures are supposed to show that the paint is shiny without orange peel… I did not use a clearcoat but it is available.
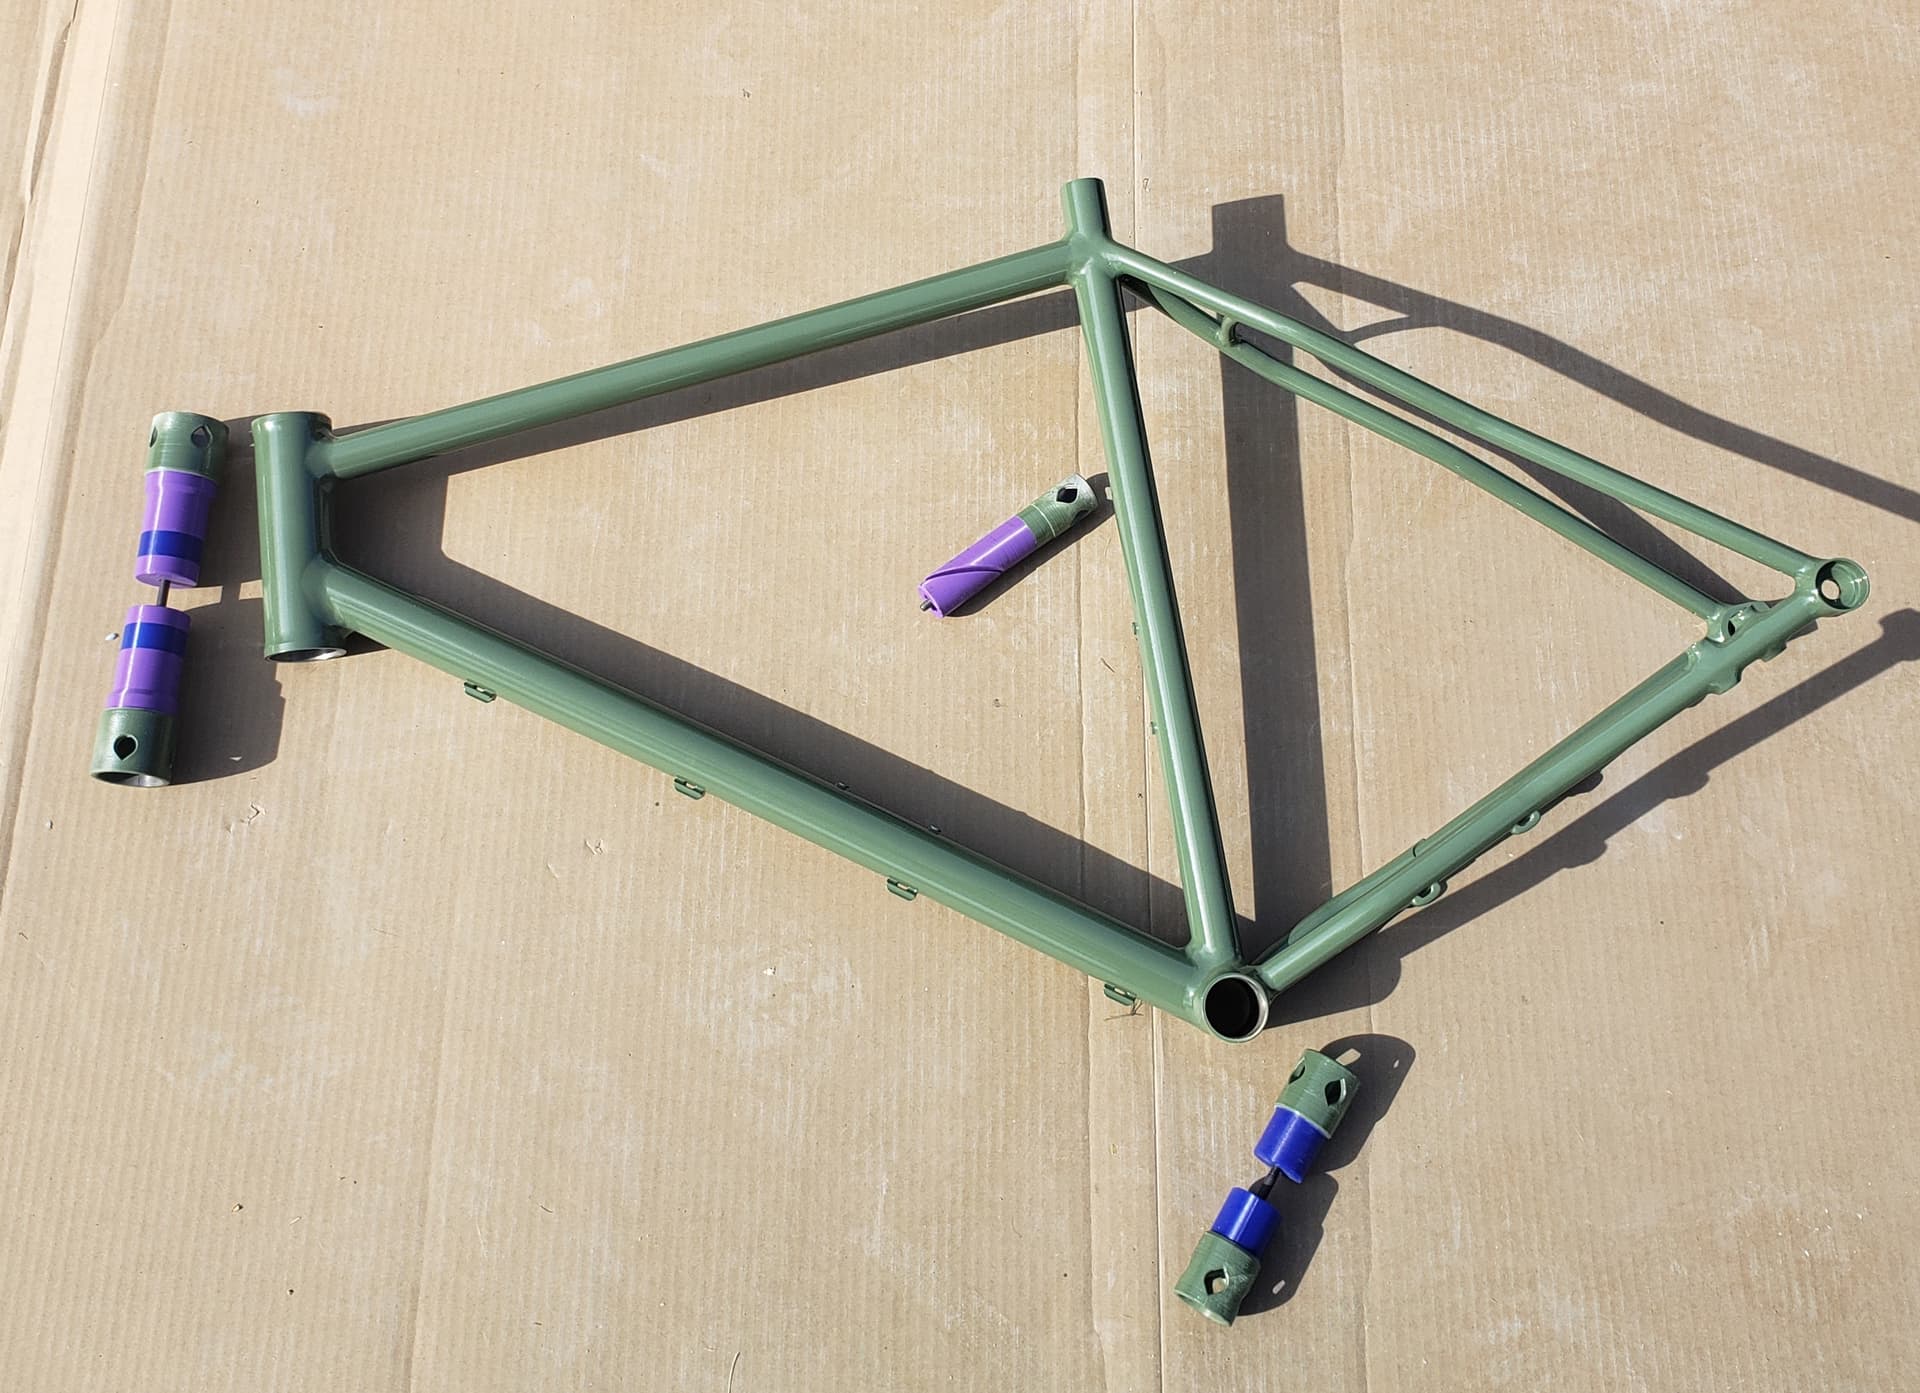
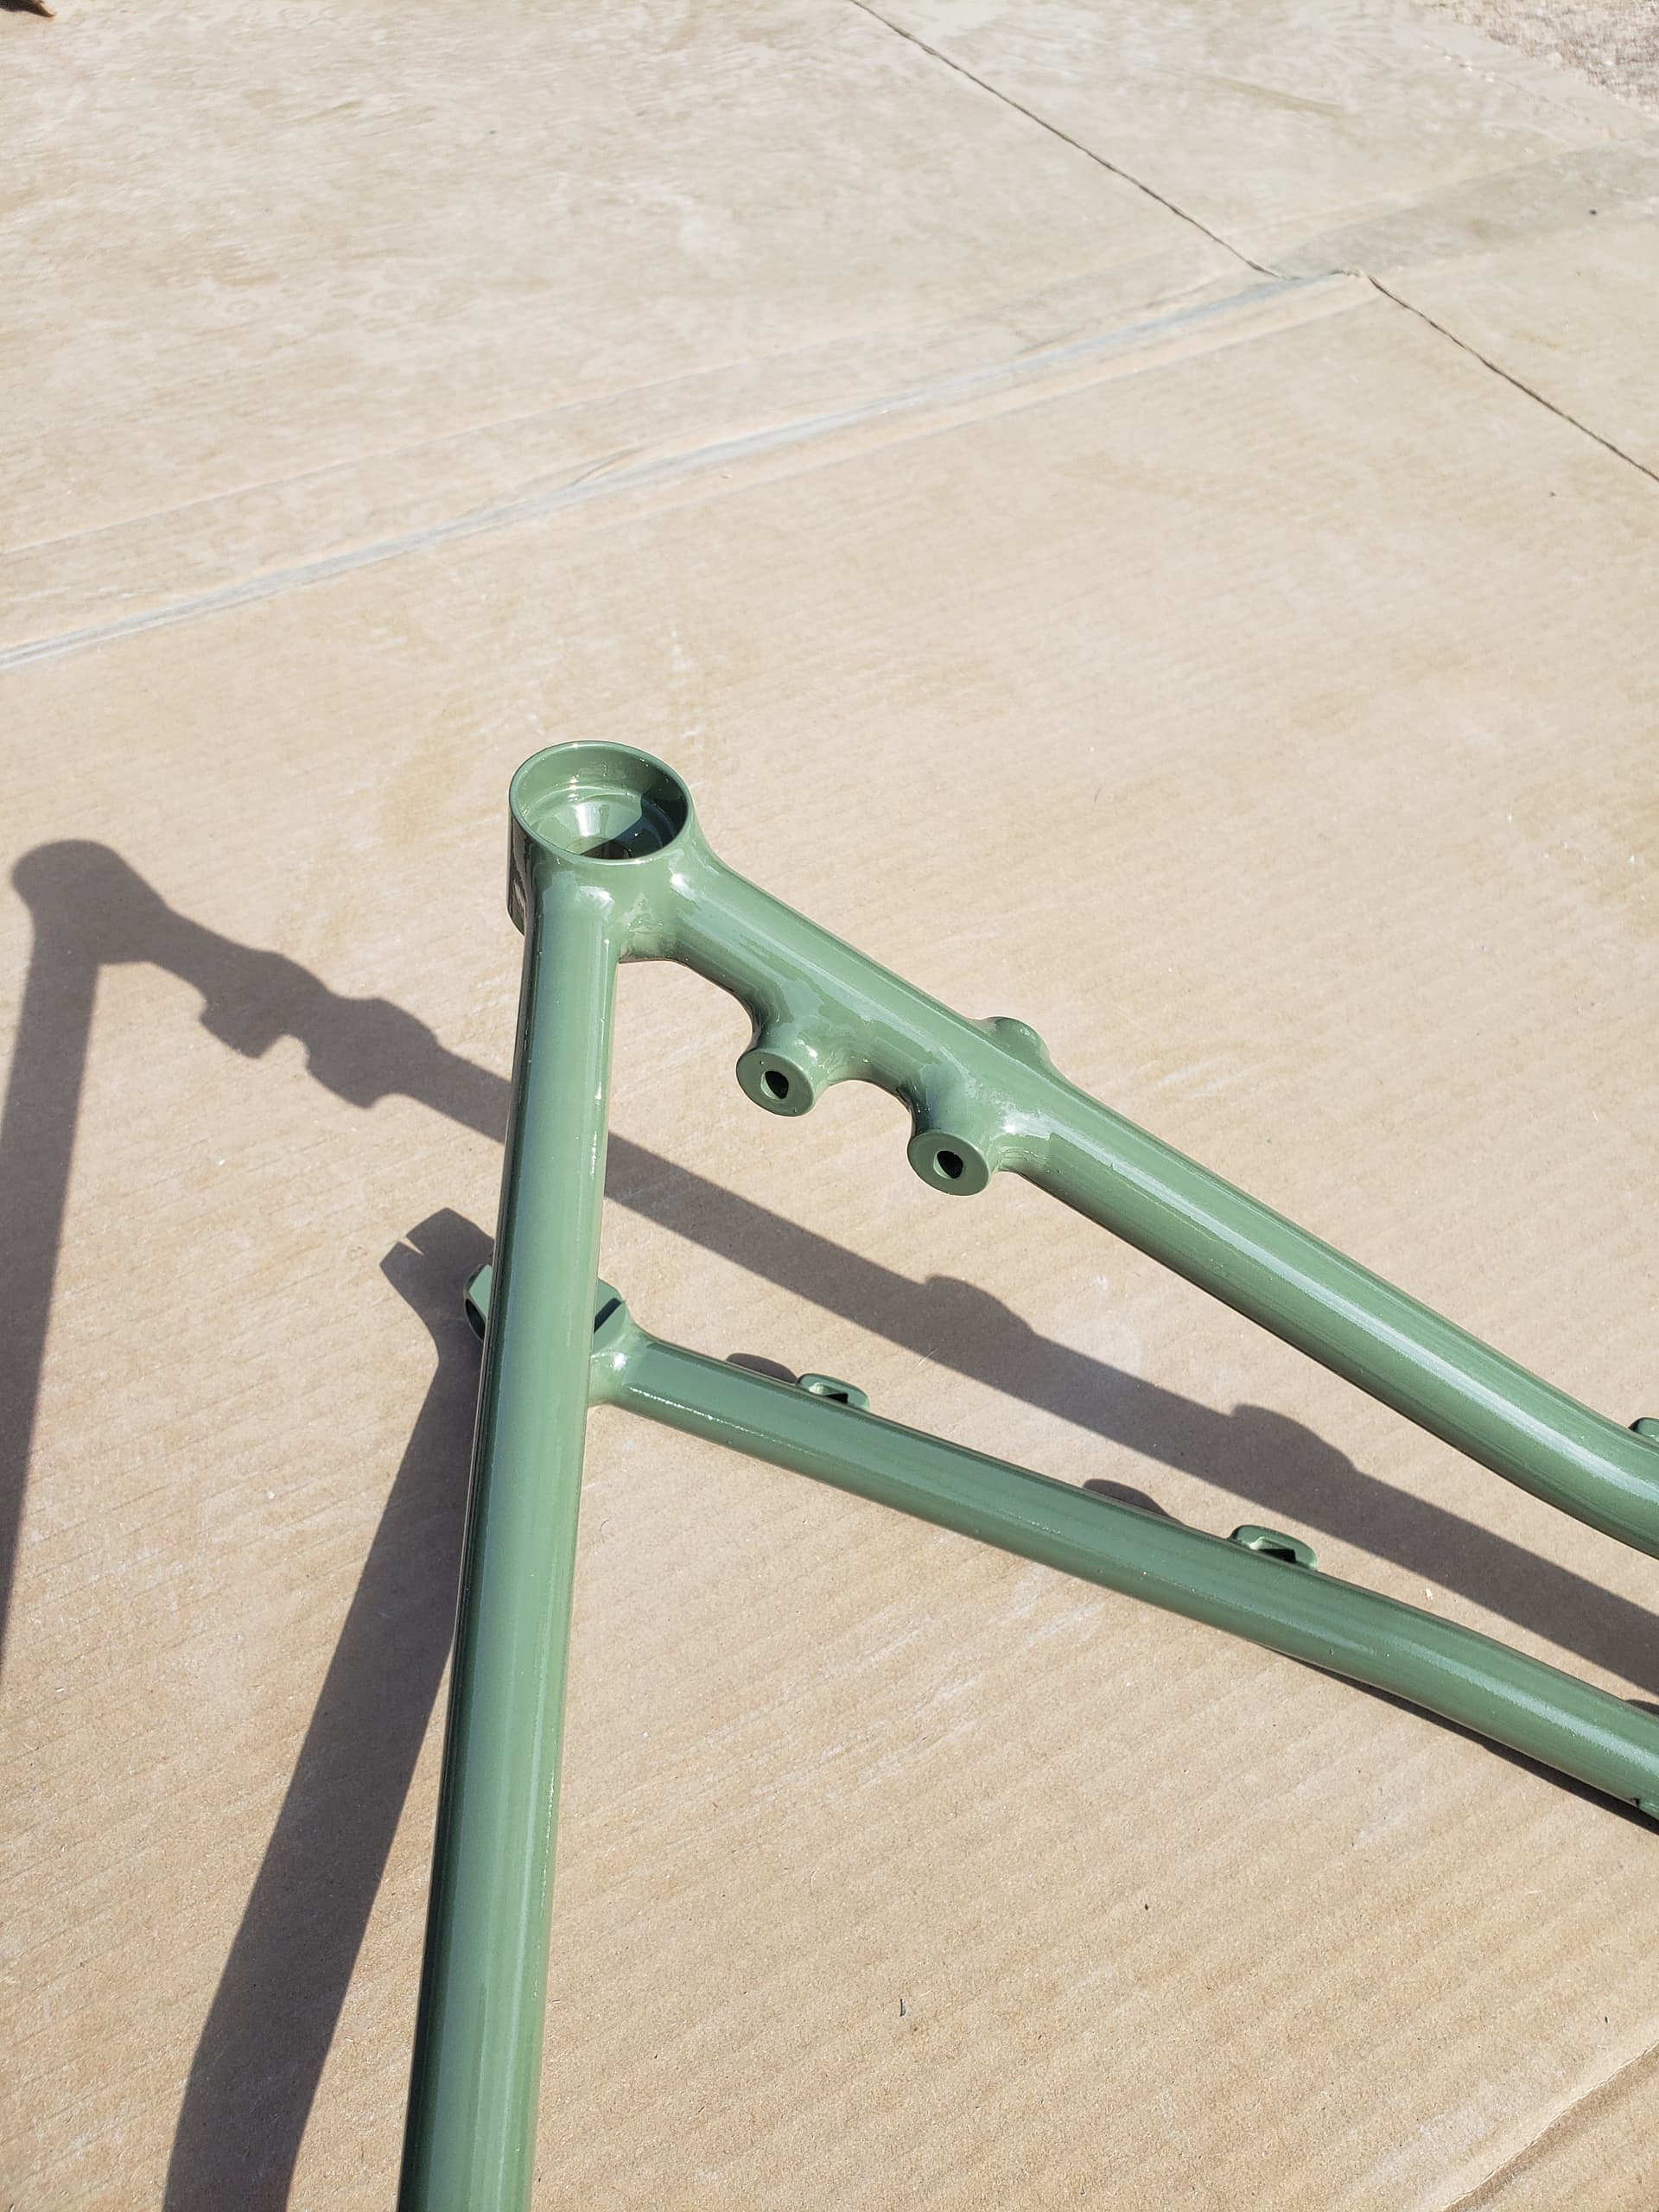
I also wanted to find a better way to hang the bike so I 3D printed some head tube, bb and seat tube plugs. The seat tube plug has a wedge like a quill stem and the others just bolt to each other. The parts that stick out are big enough to serve as handles for repositioning. No more masking!
11 Likes
Great tip on the 3D printed plugs. I’ve got access to a printer and will hopefully have a frame to paint in the next few weeks.
2 Likes
I did recently see that Metal Guru started stocking paint plugs. Of course after I ordered some generic ones elsewhere…
4 Likes
My personal experience with Montana paint, specifically the 94, is that it is extremely soft. Like, peel it off in great trenches with a fingernail soft. Granted, that was the translucent Shadow Black over bare steel, so maybe that had something to do with it. Everything I’ve used out of a spray can is temporary at best and I’ve painted both of my frames with rattle cans, only to hate it and sand it all down and use nice materials. One day I’ll learn to not do that, maybe.
Someone mentioned ghetto spray booth earlier, I use a 10x10 pop up canopy wrapped in painters plastic. Get yourself a couple of furnace filters and a box fan, and viola! temporary paint booth you can set up just about anywhere, by yourself. I even taped off a room in my house and painted with automotive paint.

Someone also mentioned getting “real” paint put into spray cans, that’s a really good compromise if you don’t want to screw around with the compressor and all that. Most auto paint stores that sell to body shops will put any base coat in a spray can for you, or the places I buy my metal flake from will do flake matched colors and several house of color base coats in spray cans. These guys will put any paint they make, pearl, candy, everything in a spray can
these guys will put a bunch of stuff in spray cans too
If you’re gonna use a base coat, you gotta clear it. Luckily you can get a 2k clear in a can, it’s a separate clear and hardener that mix in the can. I think someone mentioned that as well, there’s some available at the painthuffer link or google “2k clear can” don’t buy it on amazon. Don’t buy anything on amazon, matter of fact.
I’m pretty sure this will hold up better than regular rattle cans without bringing all of the pain in the ass of a full hvlp setup. I also put clear, glossy Bike Armor on the down tube and anywhere my feet might scuff, it basically disappears over a nice clear.
3 Likes
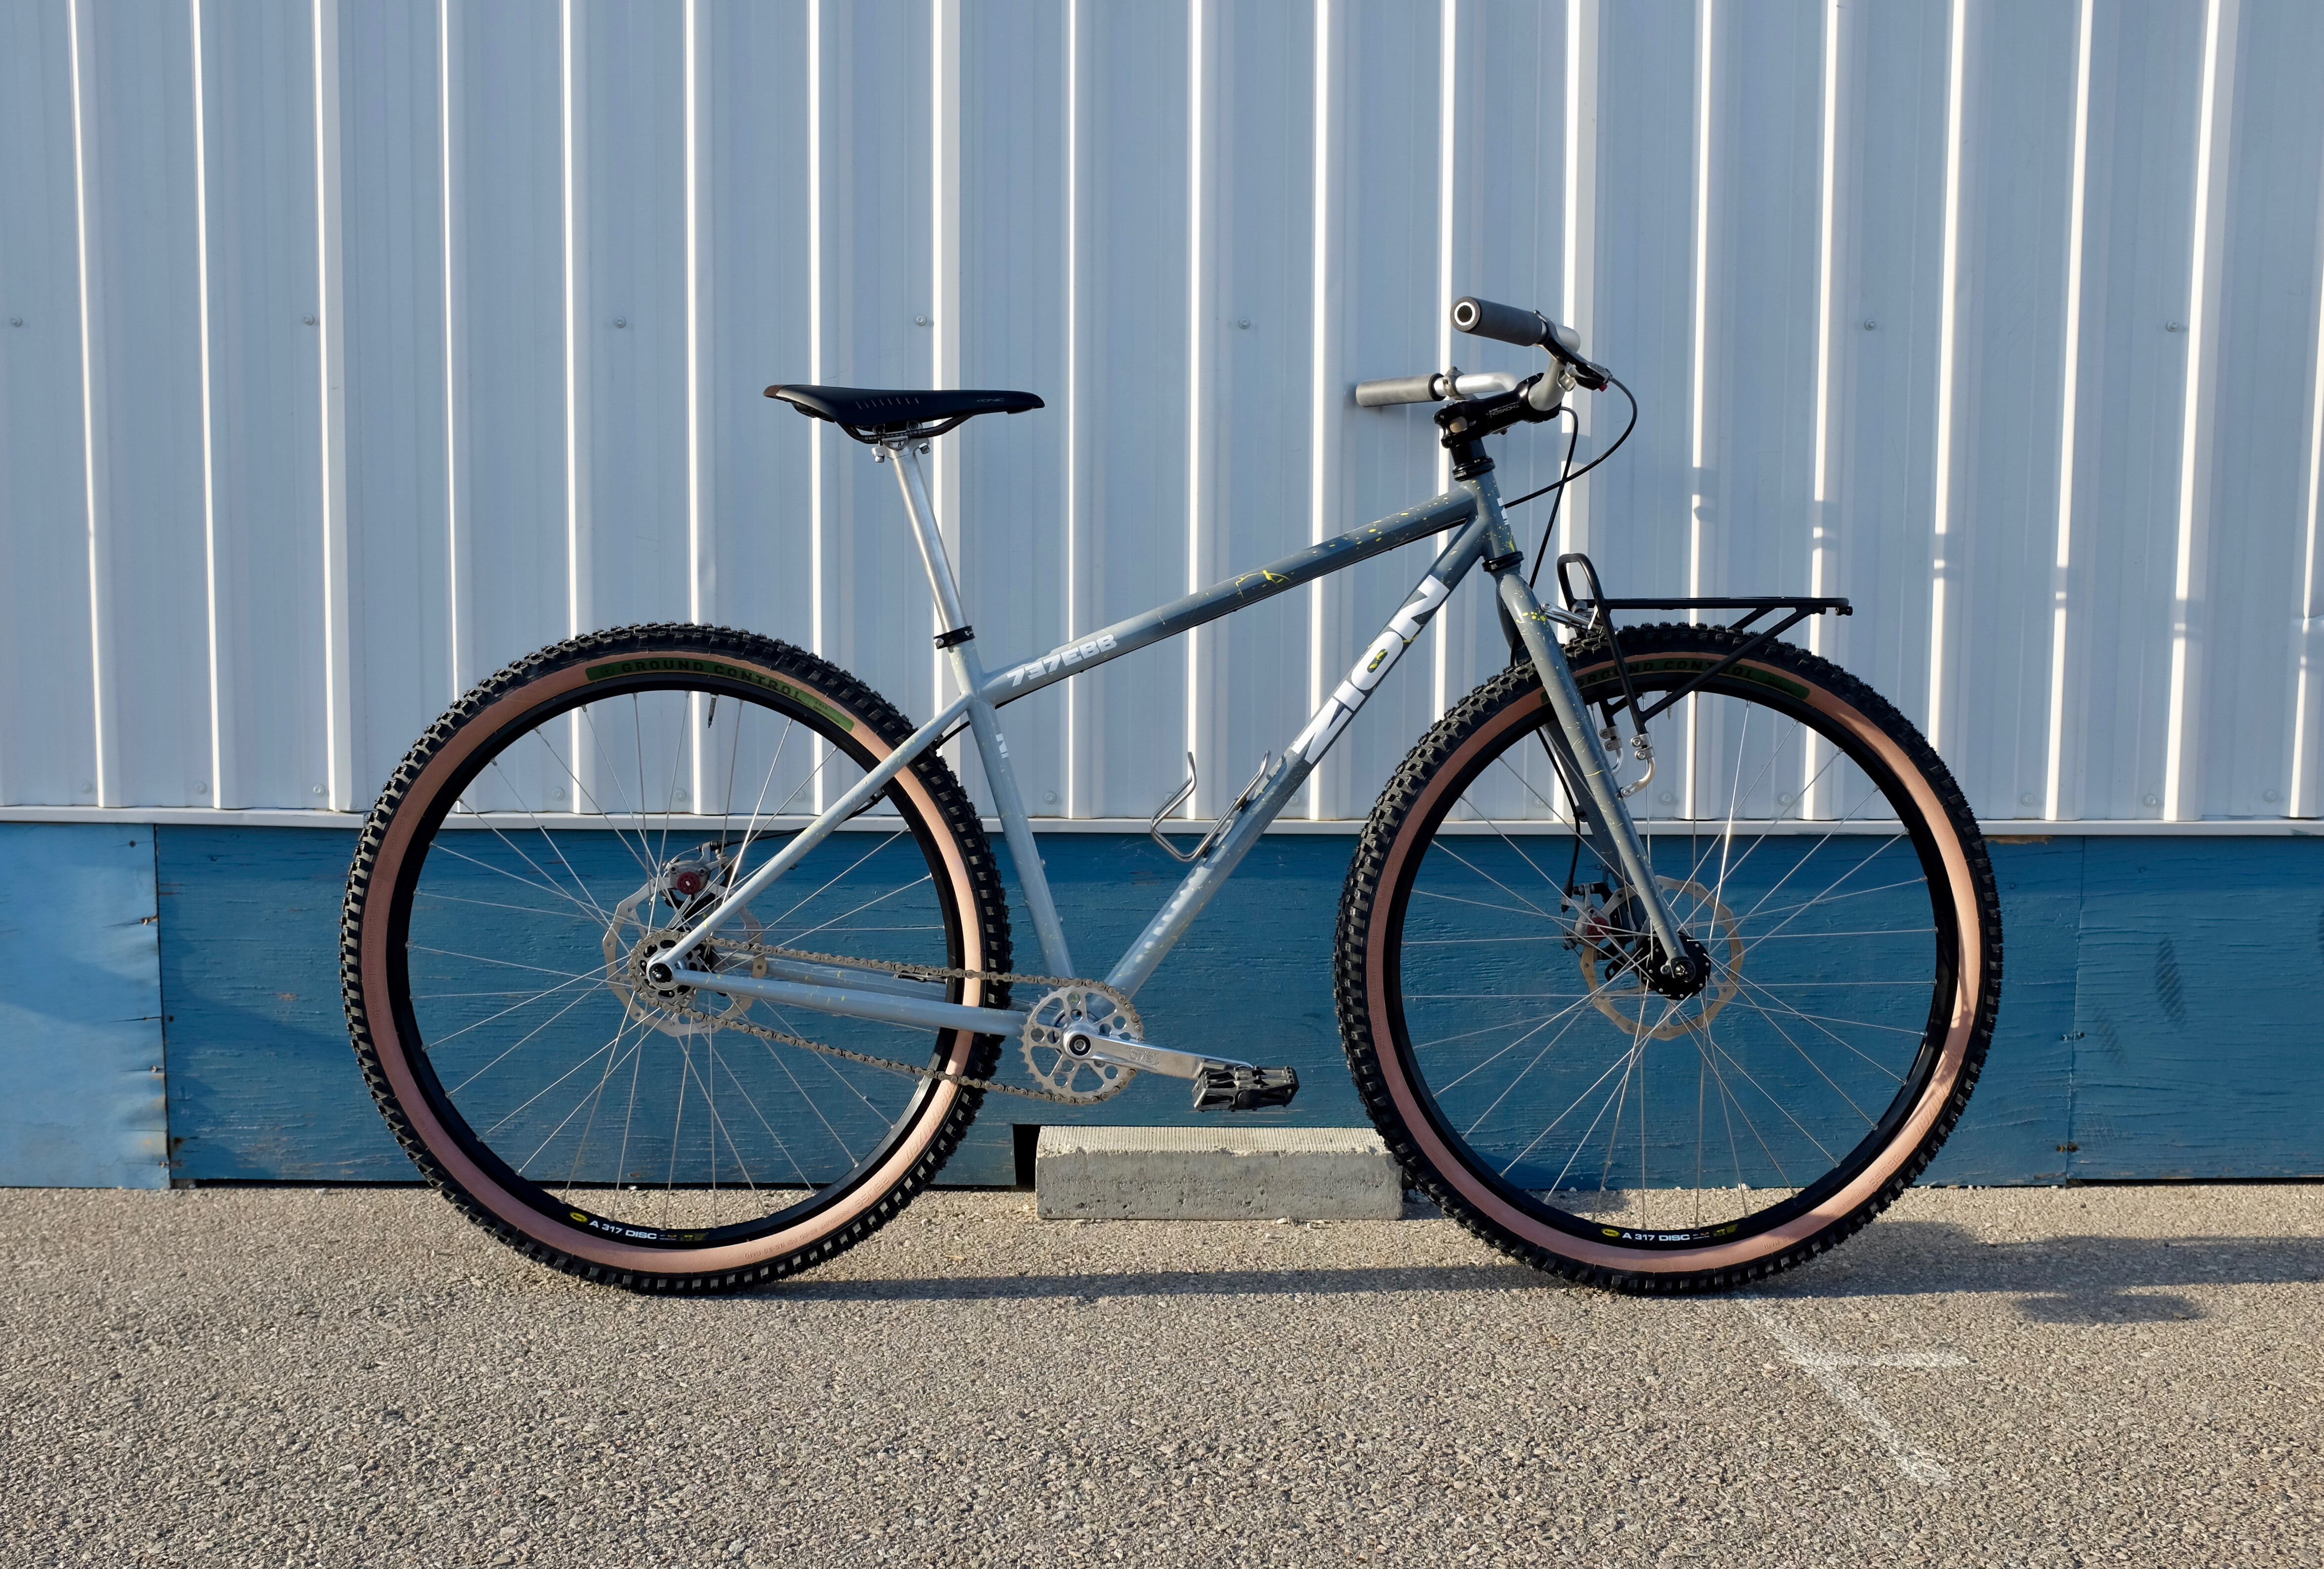
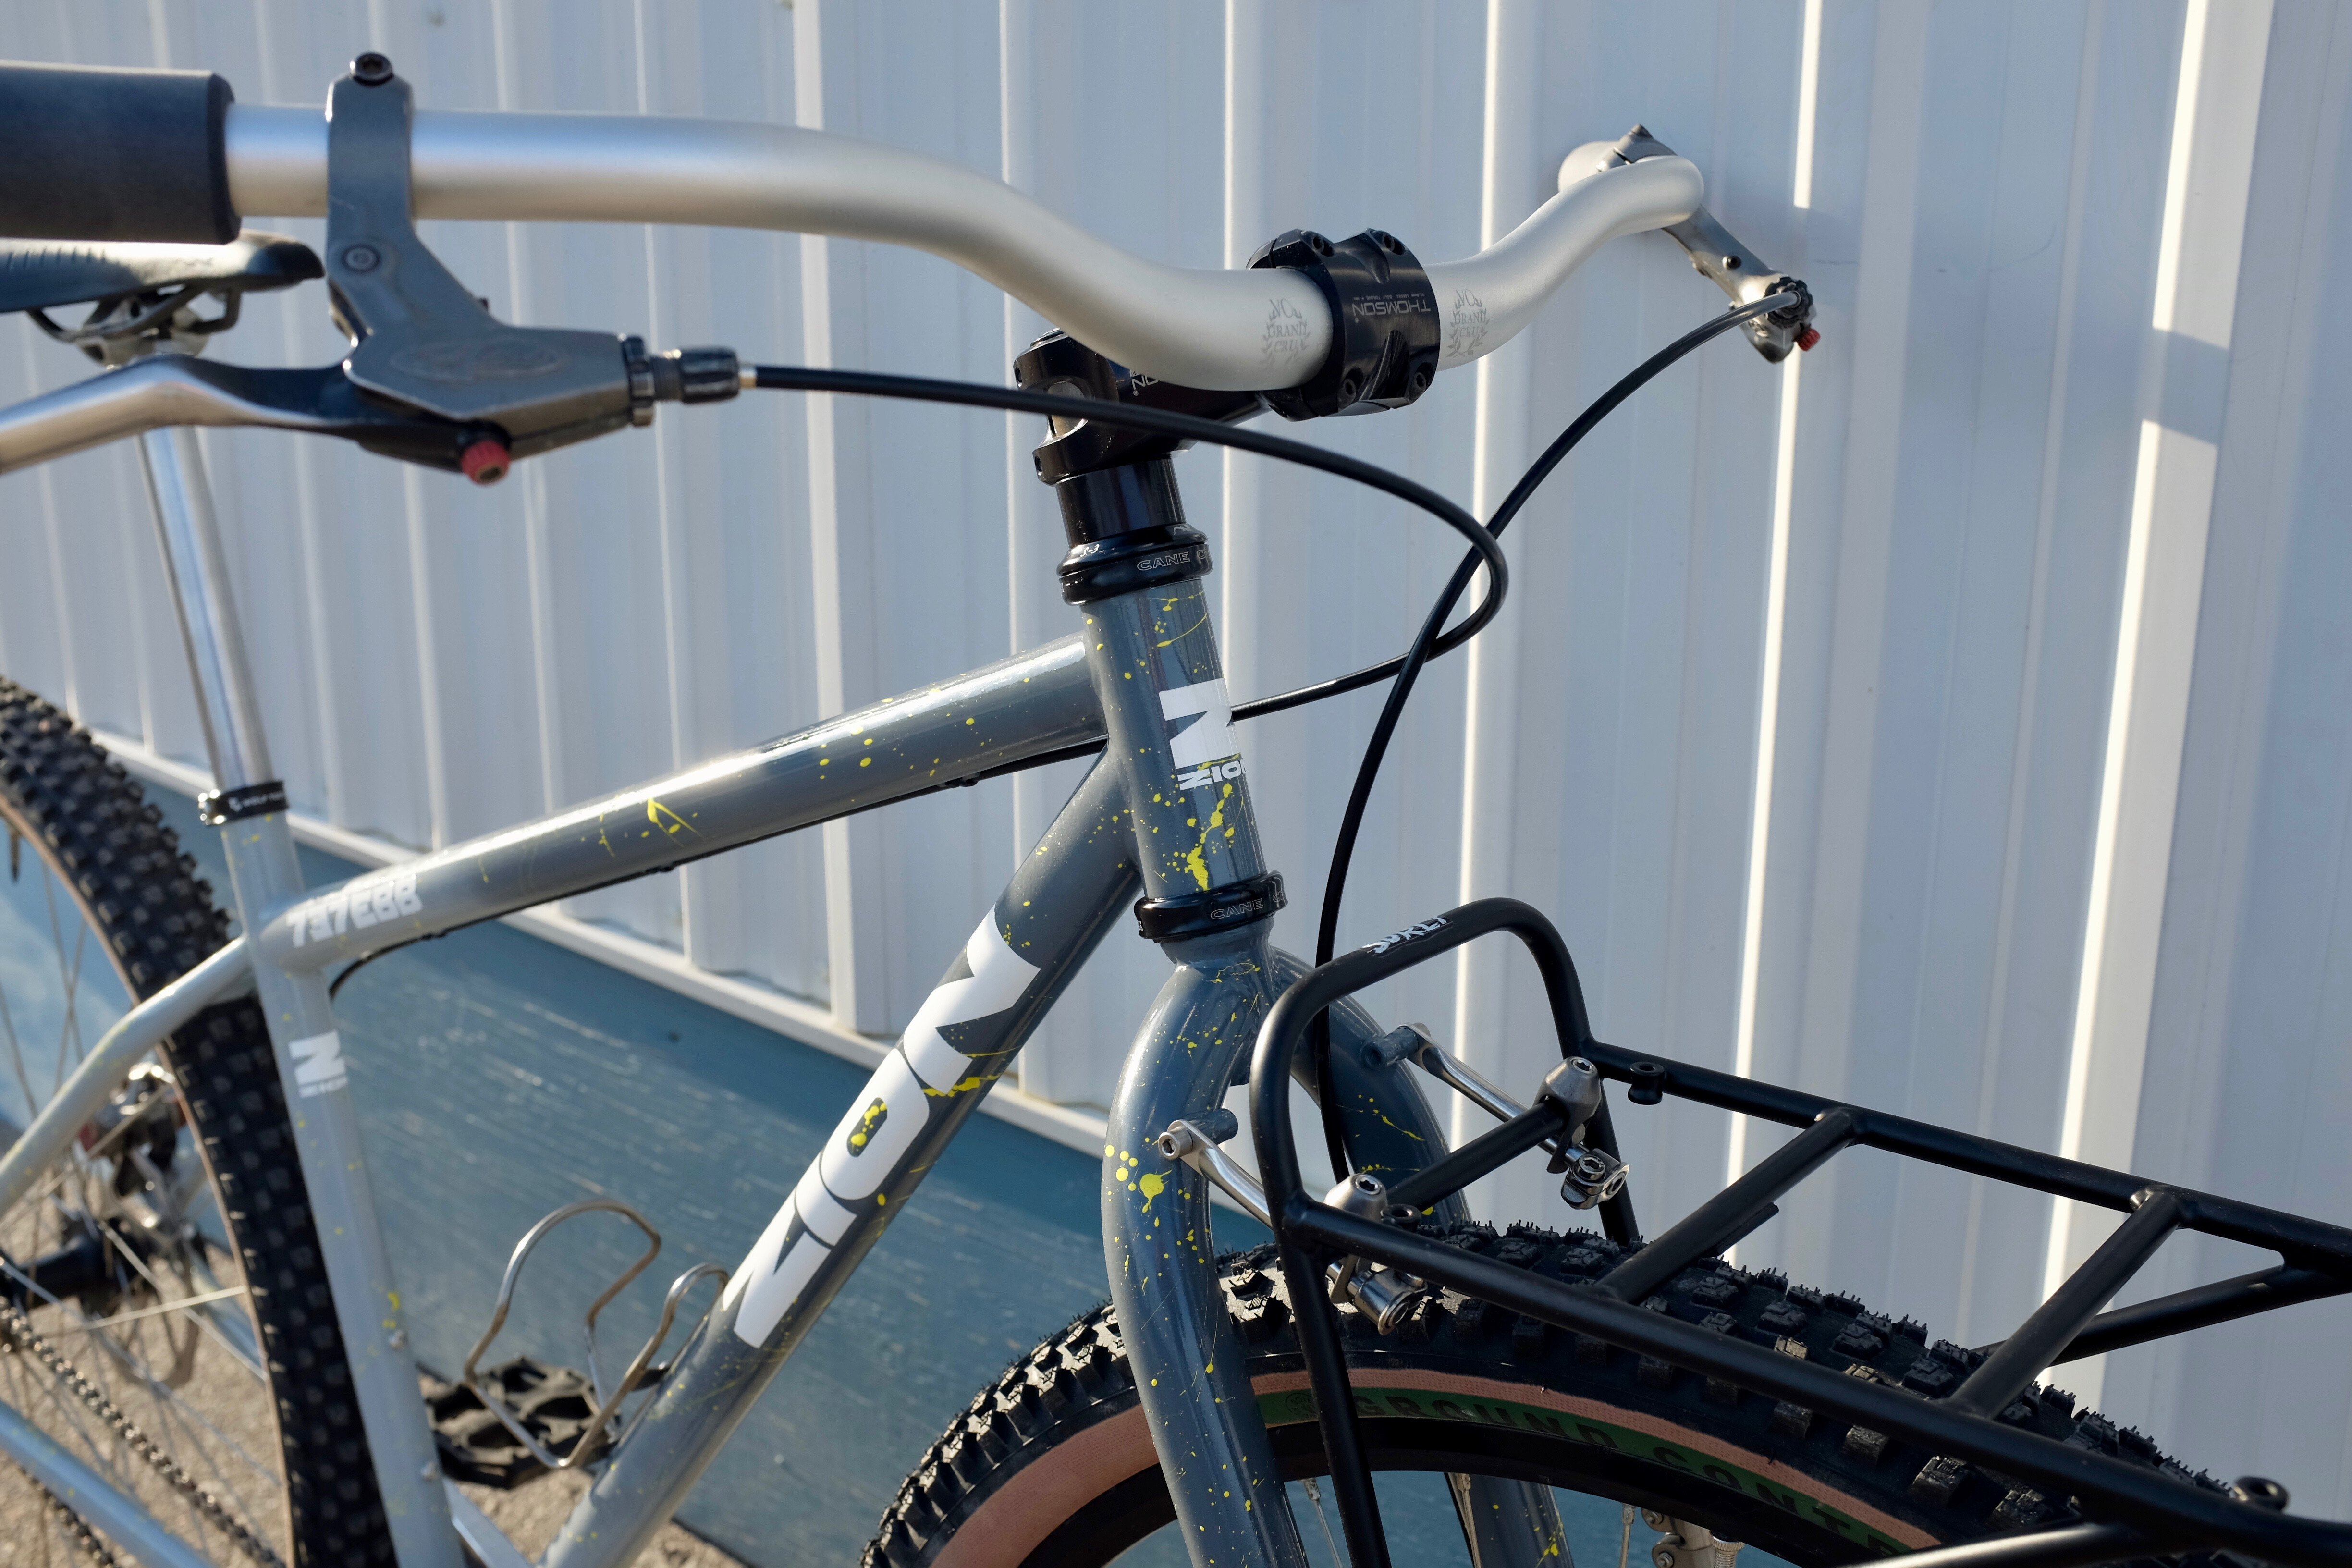
Just finished a paint job using this tutorial as a guide: using spray max 2k epoxy and clear coat + Montana gold for the colors. Edit: I also did use a partial can of primer filler from spray max, but it’s not essential unless you have big corrections you want to make like pin holes etc)
My takeaways:
-
the spray max stuff is good and worked really well. I definitely needed 2 cans of the primer for a frame and fork
-
trying to do painted on graphics with masks was not really worth the effort and caused a lot of extra time and hassle. Would just paint and add decals and clear over top if I did it again. I actually ended up putting the decals over top of where I had masked them off anyways
-
you need to get way closer with the spray nozzles than you think to to end up with a nice smoothish finish without orange peel in the final coats. I found too far away and you get too much overspray and a very grainy texture. If you get fairly close and move the spray along the tube fairly quickly. You can keep applying very thin layers until you get a nice smooth finish which is a fairly fine line between too much paint and drips!
-
splatter paint techniques add a lot of relief and may sanding the clear coat between coats quite tricky
11 Likes
Looks great and thanks for the info!
I used the 2K primer not the filler primer and probably could have done 2 frames with 1 can. (edit: I did not sand the primer and only did 1 primer coat) It makes sense that the filler version would take more, but I’m glad you mentioned it because I would’ve only got 1 can based how far the non filler version went. The non filler version goes on thin and doesn’t hide anything so the filler version sounds pretty useful.
I was reluctant to use the 2K clear on top of montana or spraybike, so I am glad that you confirmed that it worked without wrinkling👍
2 Likes
That’s an error in my description I’ll go back an edit. I used the non filler version. Every little thing showed up and there was a few times that I sanded through the thin layer of primer and what led me to use 2 cans. Another thing, my technique on the first coat of primer was not grey. Was afraid to get too close so I think I wasted a lot. In retrospect thinking about it, I think one can could have done it. Through an error in shipping I ended up with a can of the filler which I ended up using in a few places (but you could totally get by without it) because it dries a lot quicker and was good for any little touch ups where I wanted to build up more of a layer like on the dropouts and chainstays.
The clear coat worked fine over top of the Montana gold paint. No issues.
The technique of painting base color, masking and then painting over the decals was a bit of a disaster. When I removed the vinyl, the vinyl stretches as you pull it off, and the Montana gold paint flakes off of the vinyl. Which is fine because you are throwing that stuff out, but a lot of the flakes ended up landing back on fame where the graphics were and it was a tiny bit tacky (maybe a tiny bit of adhesive residue?) and it was really hard to get it off. This became impossible to deal with where I had tiny lettering. For a garage job, just burying the decals under the clear coat would have been way easier and looked fine.
3 Likes
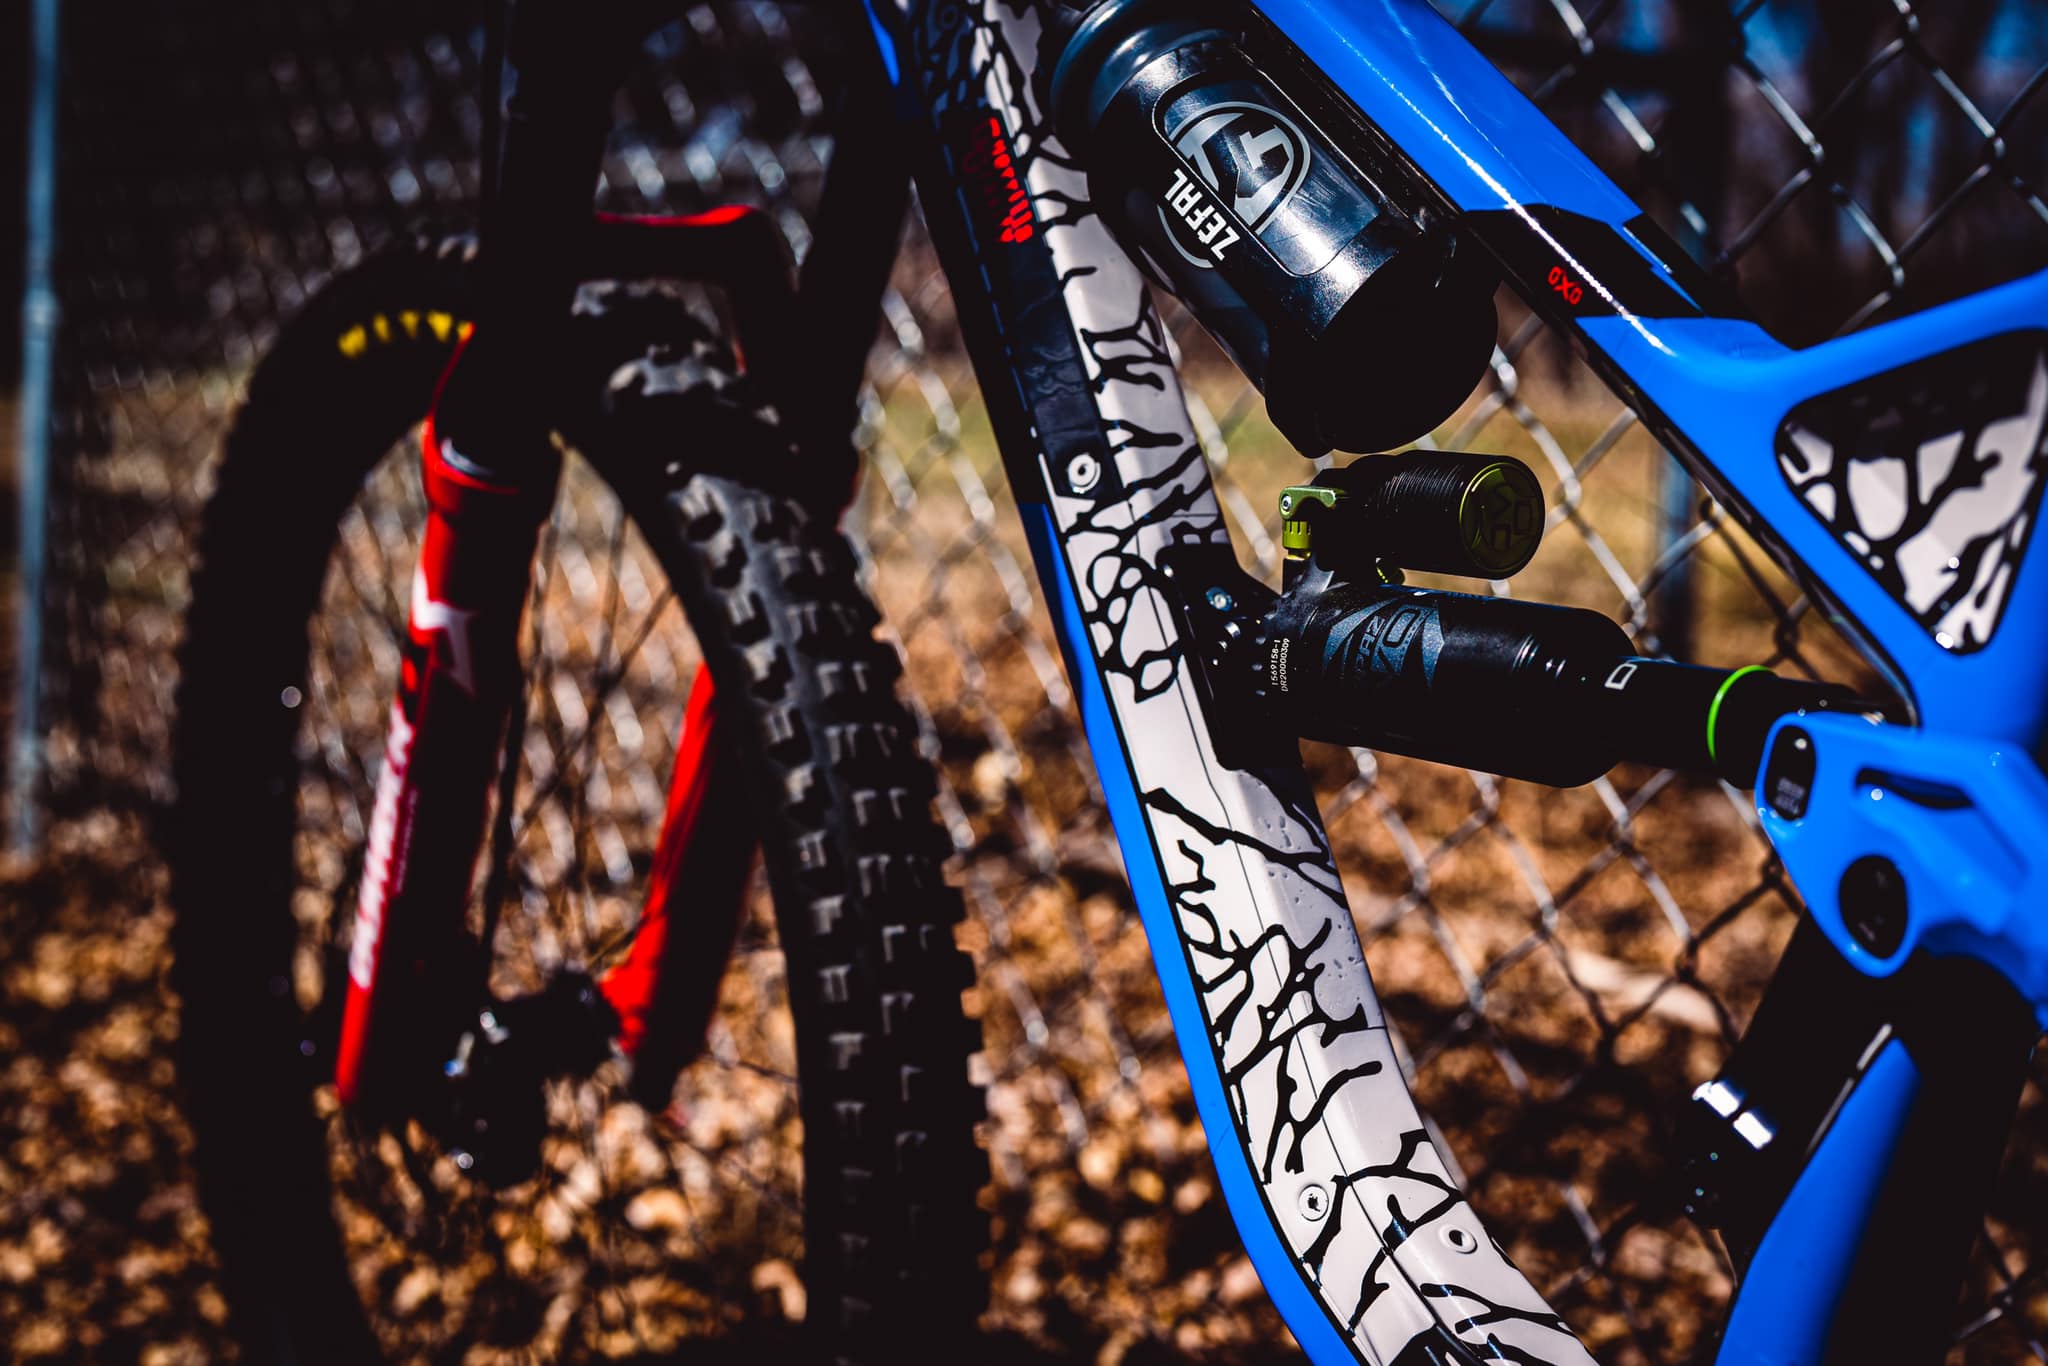
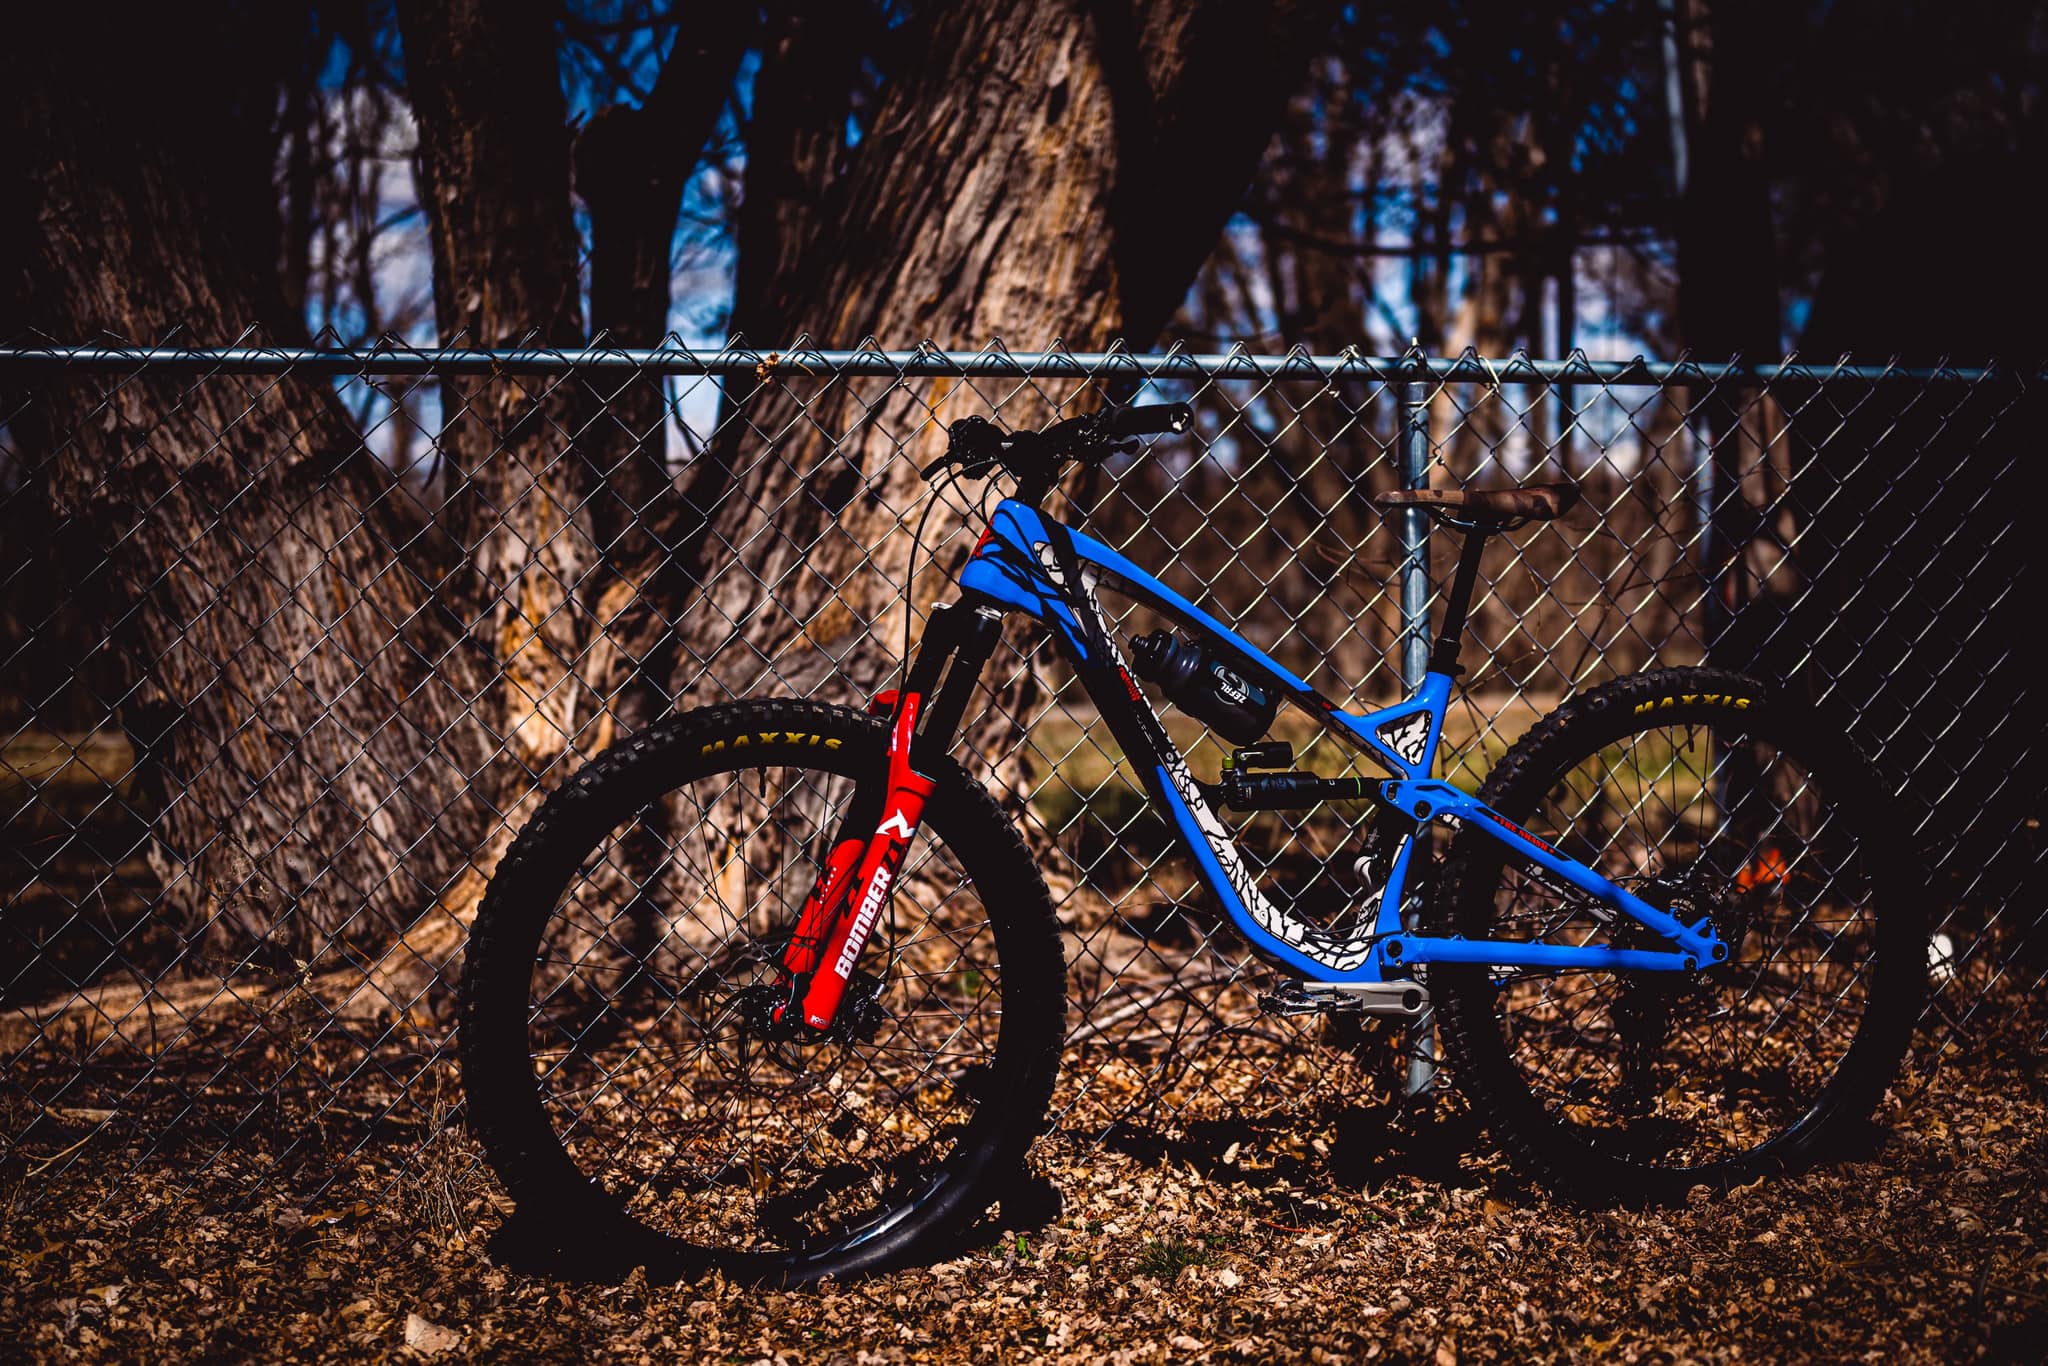
Just wanted to add my 2 cents to this topic; I love throwing down some custom paint!
Below is my Guerilla Gravity Smash (carbon front triangle, aluminum rear). This was done in rattle cans from Specialist Paints (Kustom Canz). They sell automotive grade paints in rattle cans, 2k primers, 2k clears, etc. Its great stuff, durable, lays beautifully and wet sands amazing well. The grey/black pattern; inspired by the Air Jordan elephant print; was laid with hundreds of individual vinyl sticker masking; same thing with the thin black line around the pattern. I regretted this decision half way through trying to lay the masking out, lol. The same pattern is present inside the chain/seat stays. Was a super fun project but underestimated the amount of time id put into this. Over a year later and its holding up unbelievably well. Lots of time pointing down rocky mountain trails and bumping into trees; im sure the ridewrap has helped some! Prep is definitely keep whenever you throw some paint, but I’m a believer in rattle cans.
*Cranks and fork knobs were sprayed in cerakote, which im also a huge fan of!
11 Likes
Hey Folks,
I’m going to be sending my track bike off to powder in the next few weeks. I’d like to get the stem/bars all matchy-matchy.
Seems like masking the inside of the steerer + h-bar clamp are no brainers. Unsure about masking the area on the handlebar that gets clamped.
Thoughts?
1 Like