Everything Powder Coat / Powder Coat Everything!

Let’s discuss best practices and experiences with getting frames/forks/racks powder coated professionally OR when doing it yourself (I’d love to build an oven…)

  1. what instructions do you give your powder coater?

  2. what frame/fork building steps do you leave for after powder?

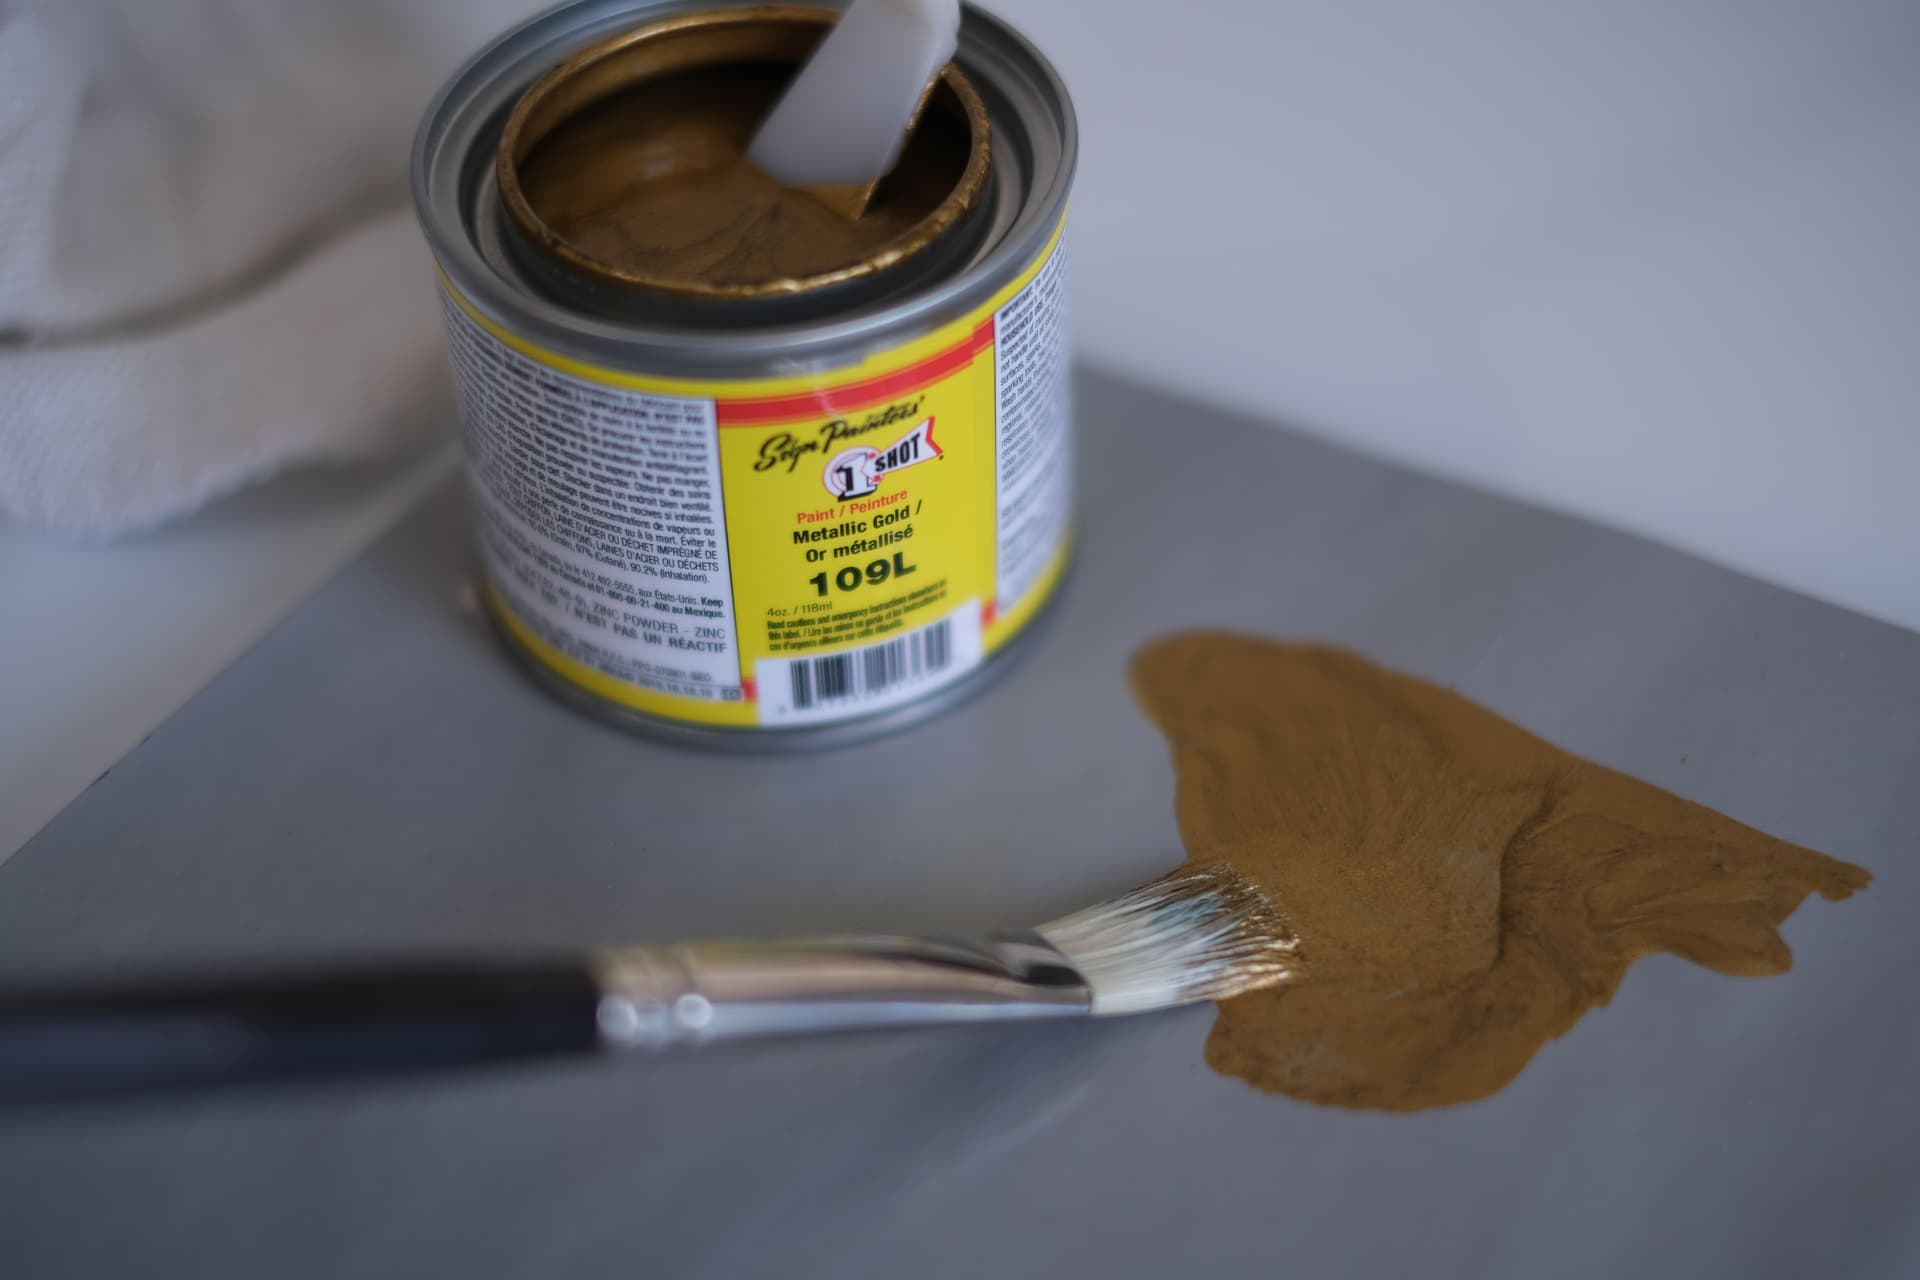
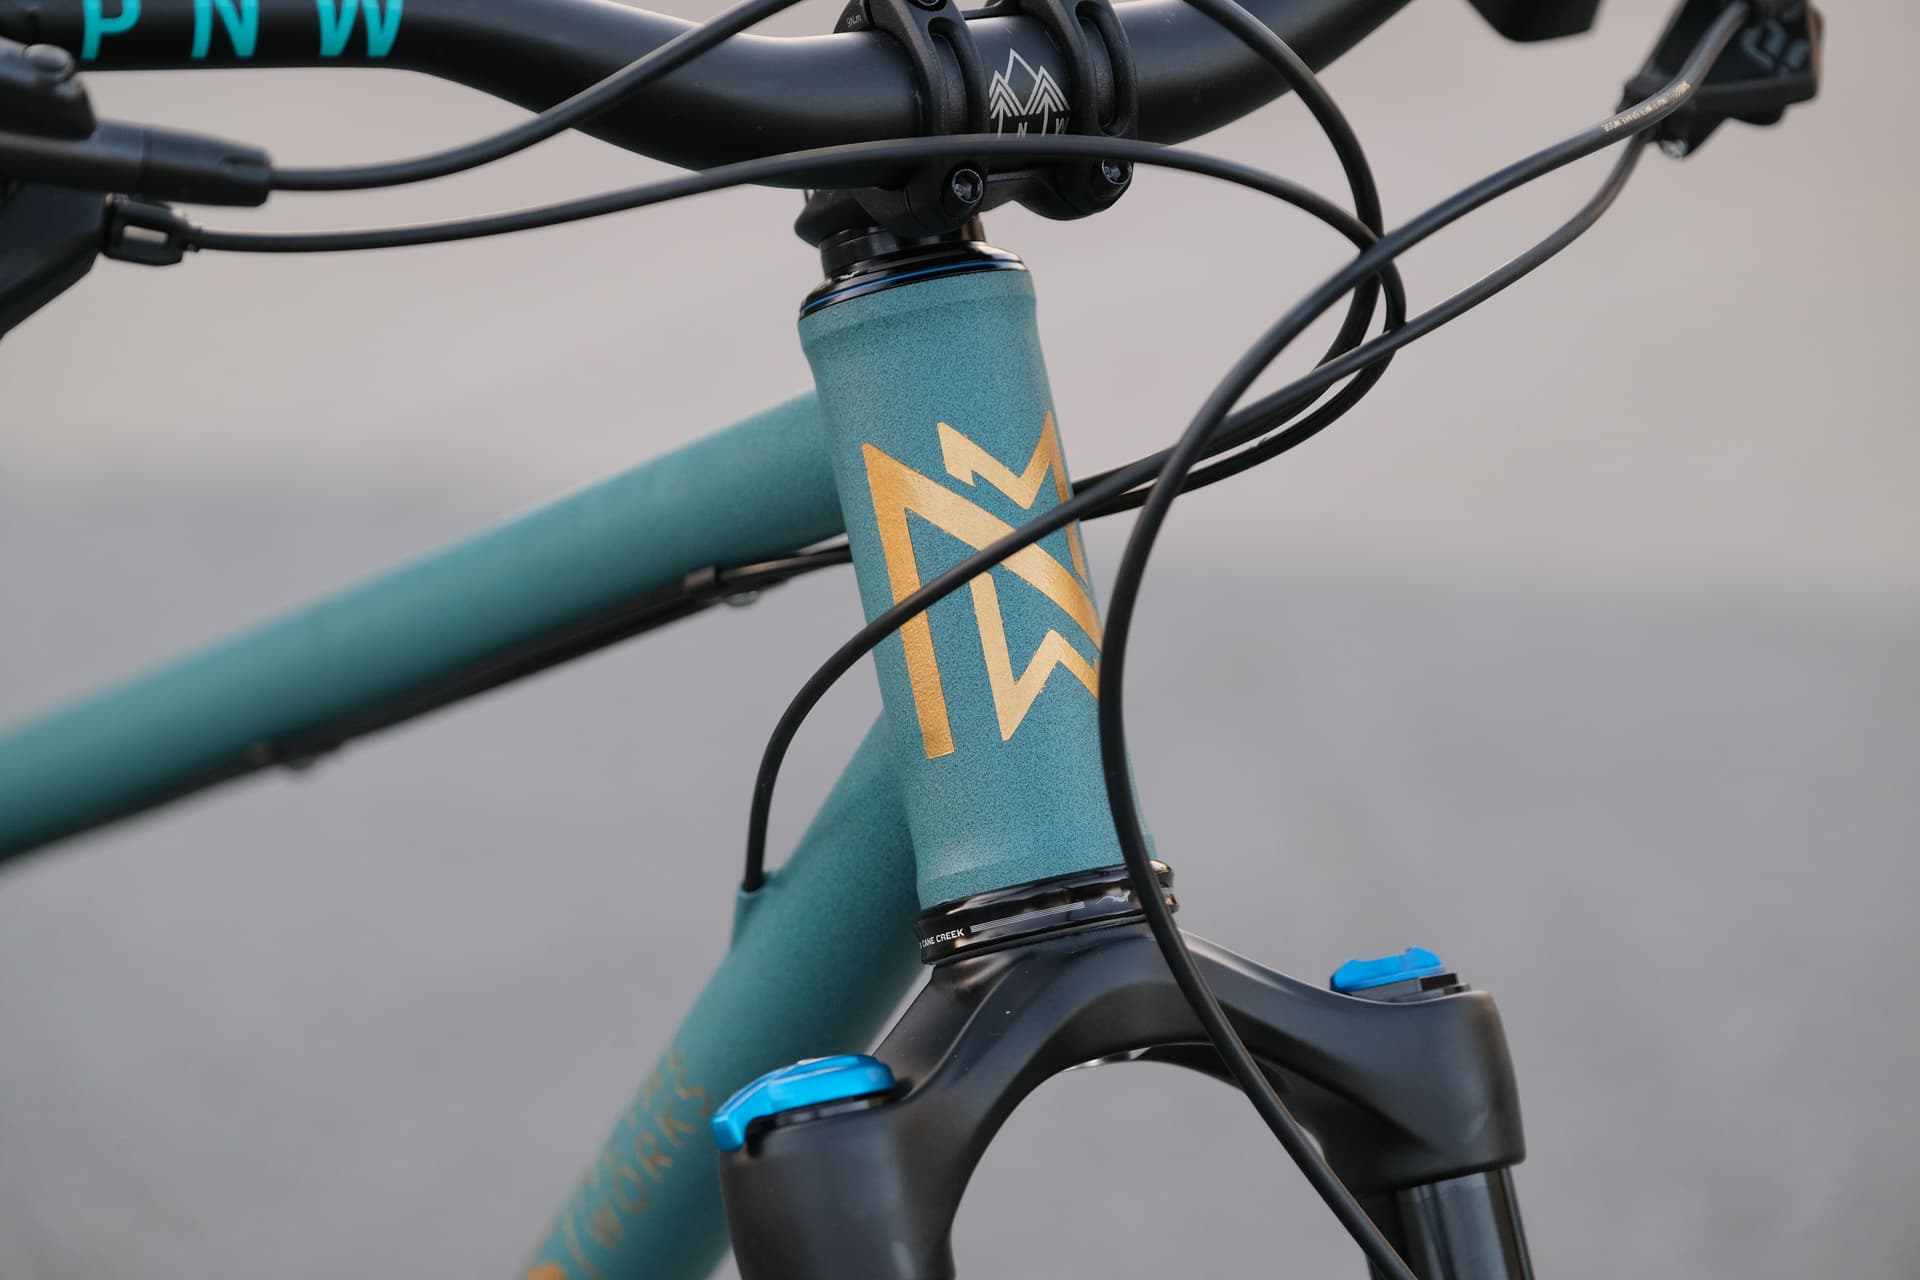
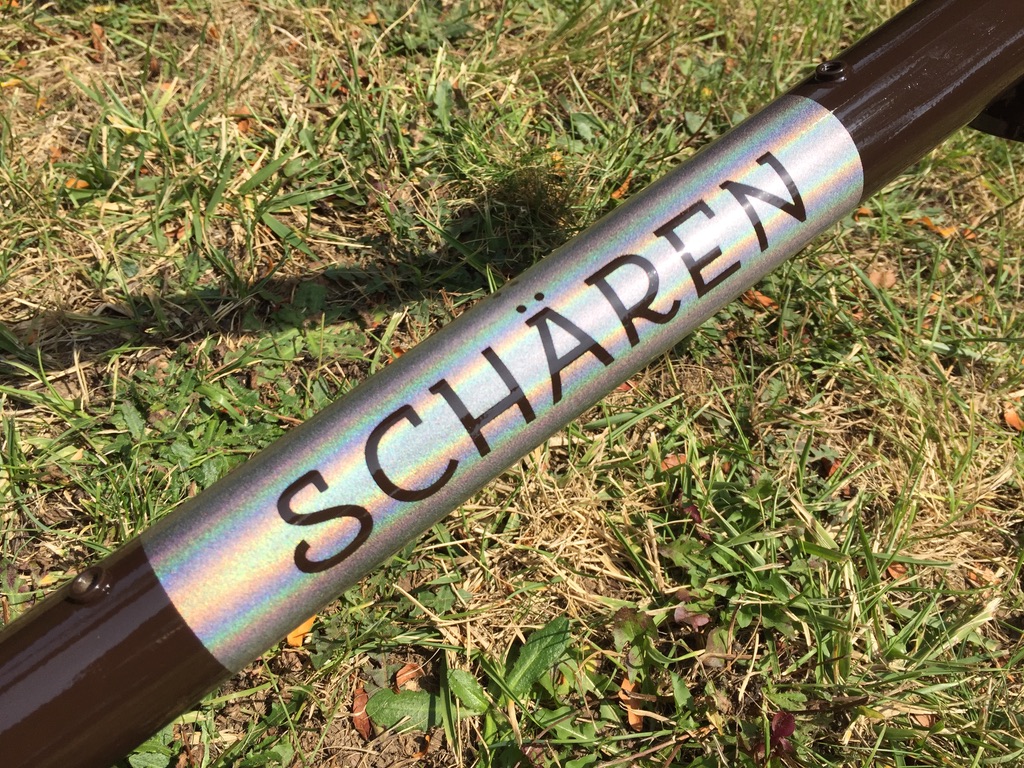
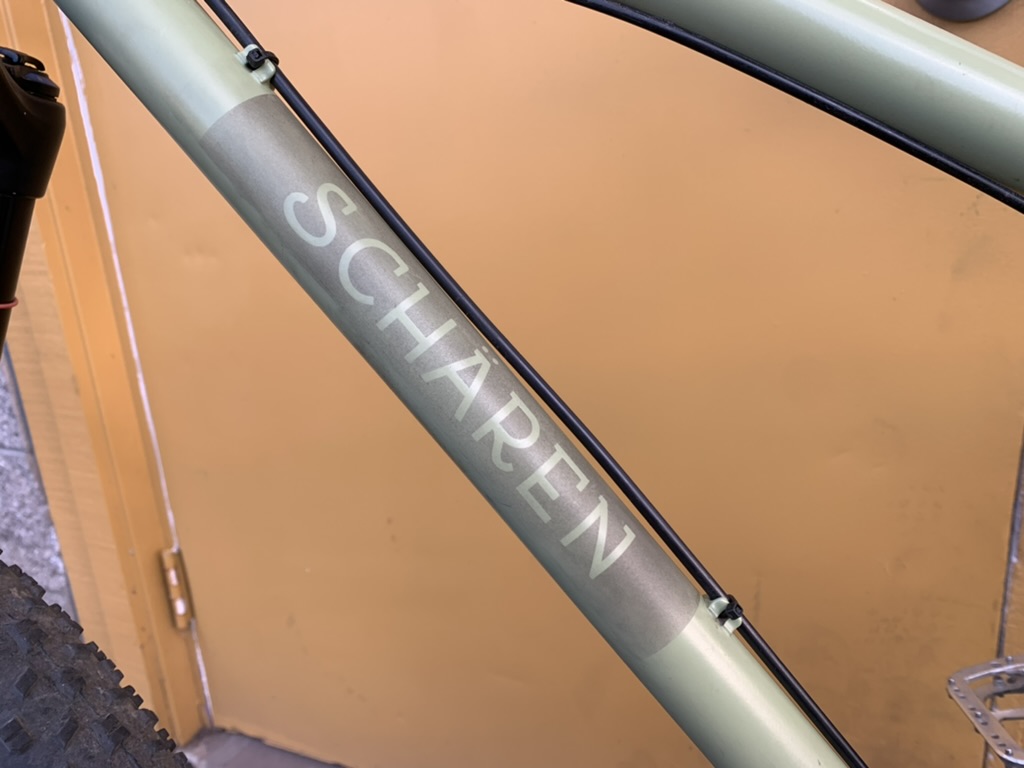
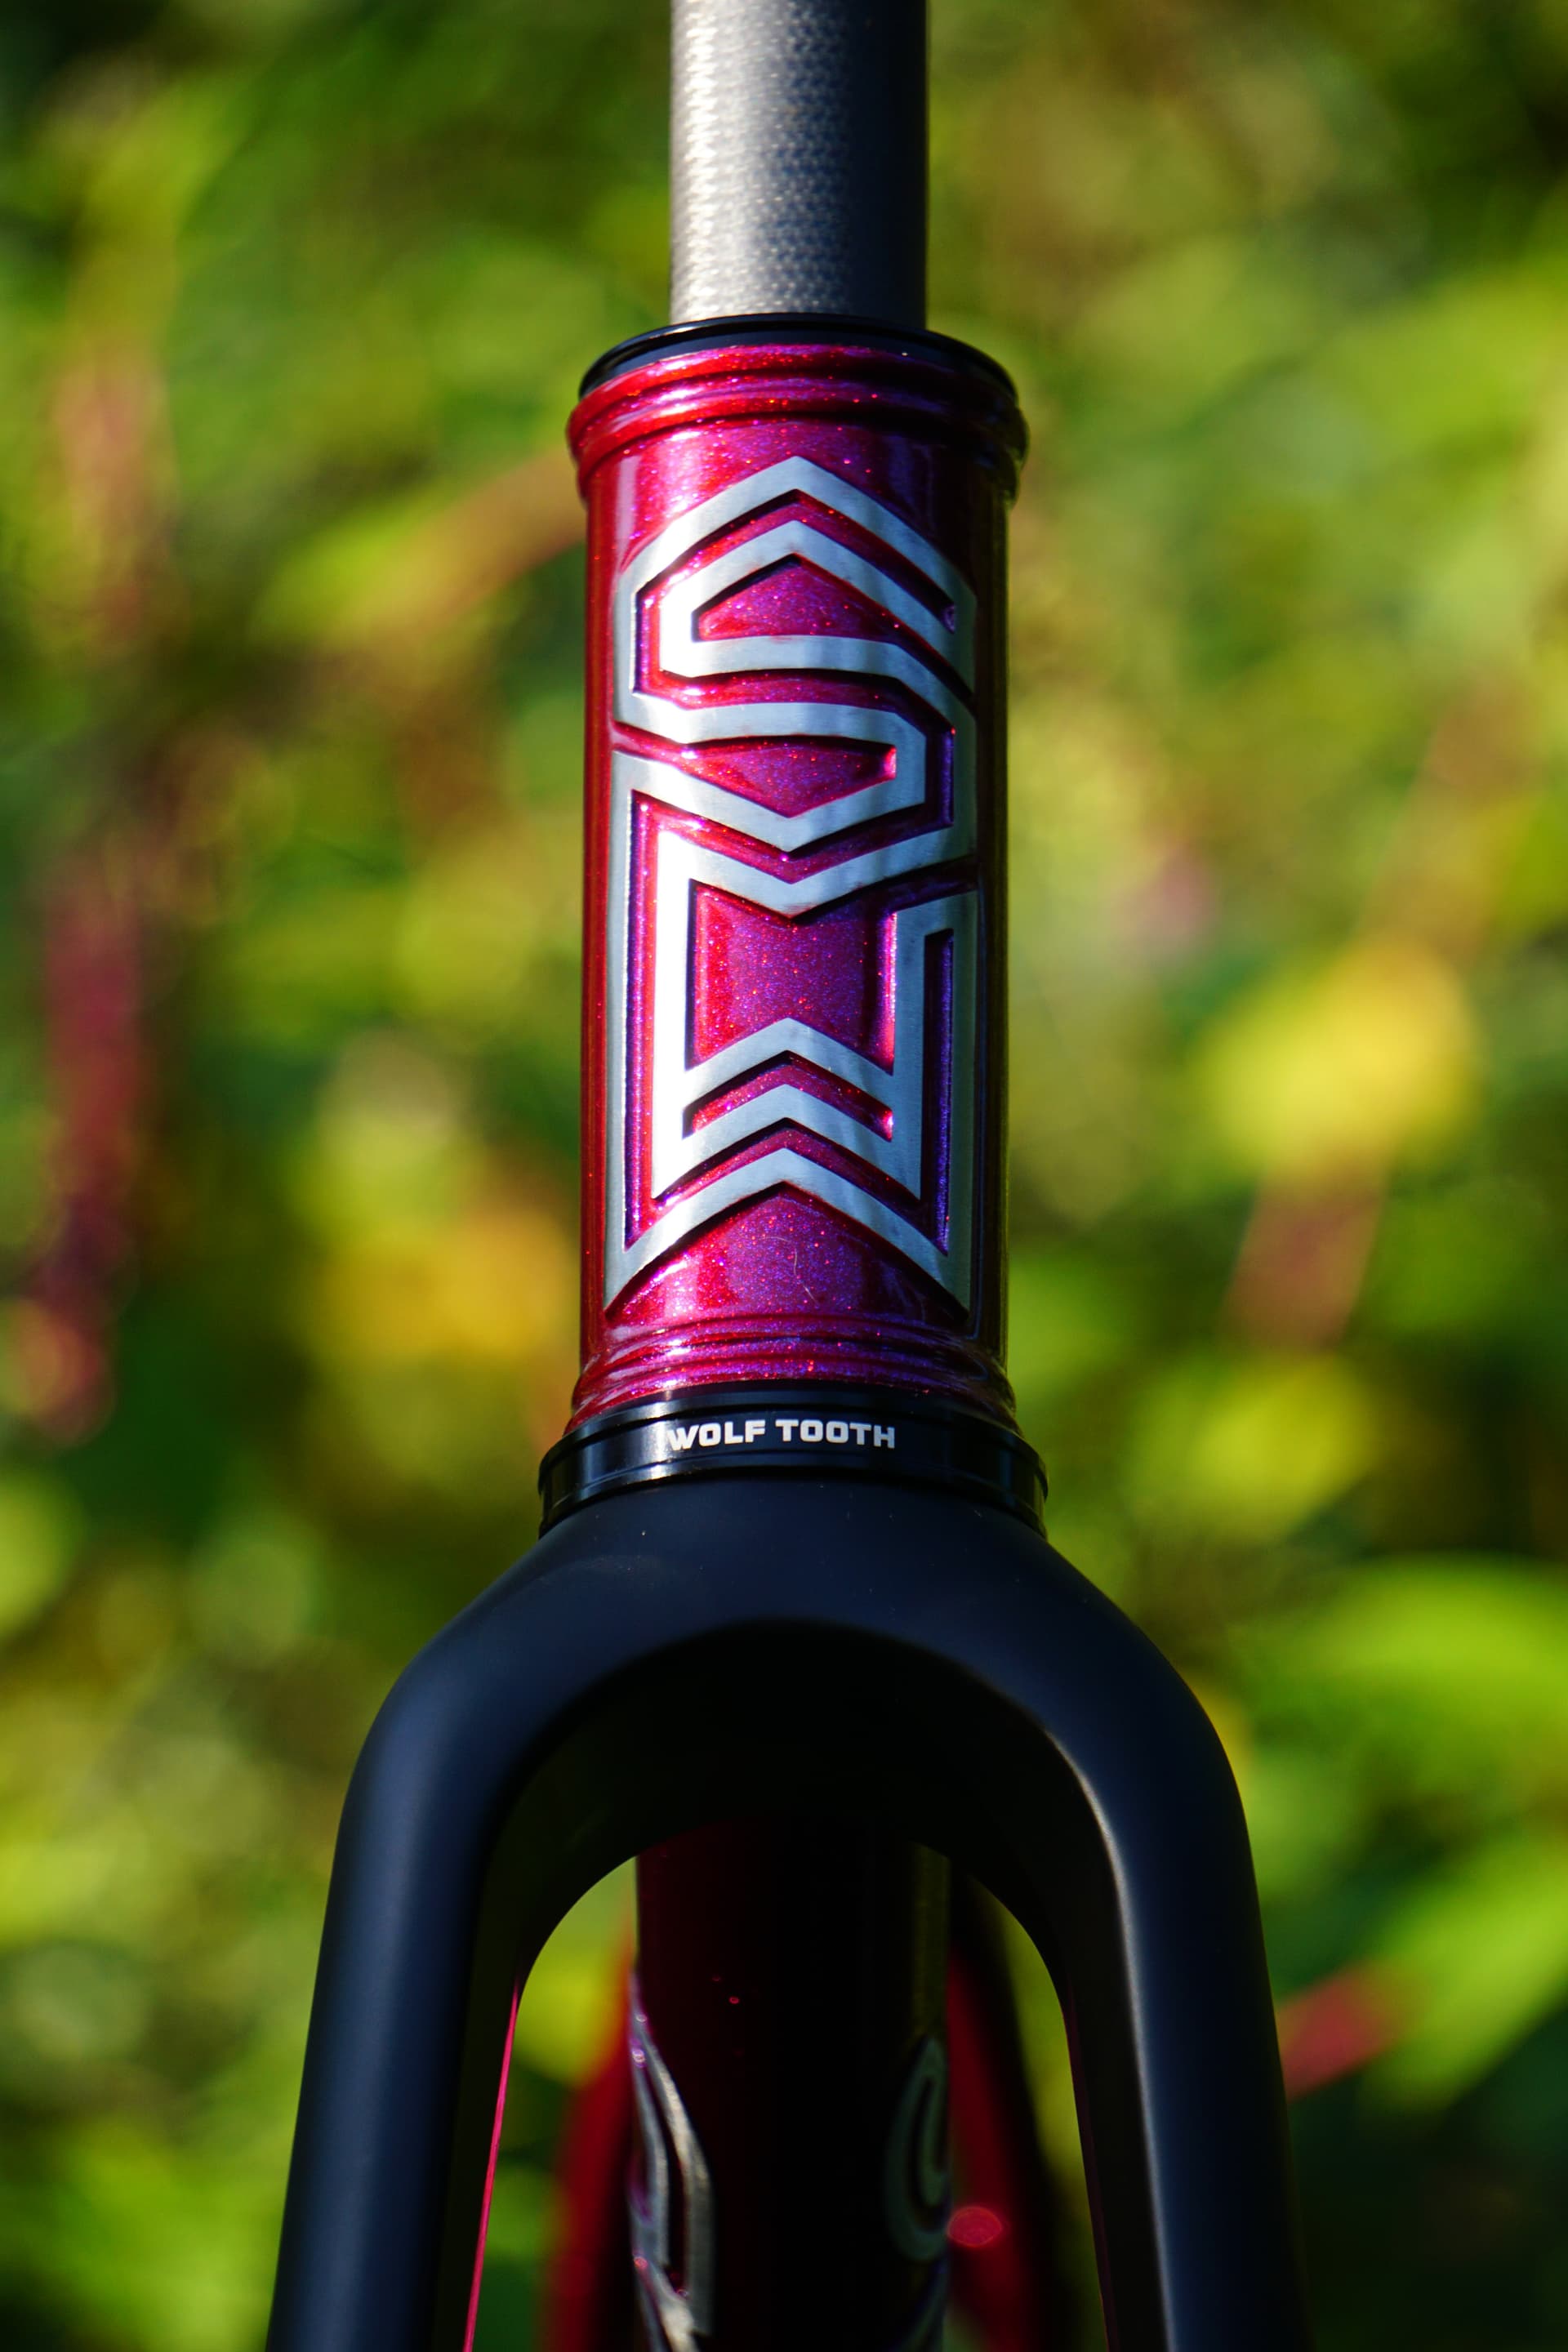
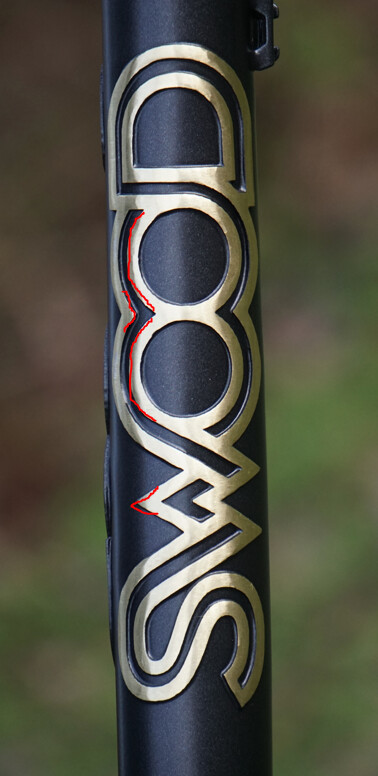
  3. how do you do logos/lettering on your frames/forks? Does the powder coater use vinyl to powder coat in the design and then clear over it? Seems like many powder coaters don’t do this type of stuff.

  4. best powder coat options for durability while still looking good?

  5. etc…

I’ll start with my experience, but feel free to discuss powder coating more generally.

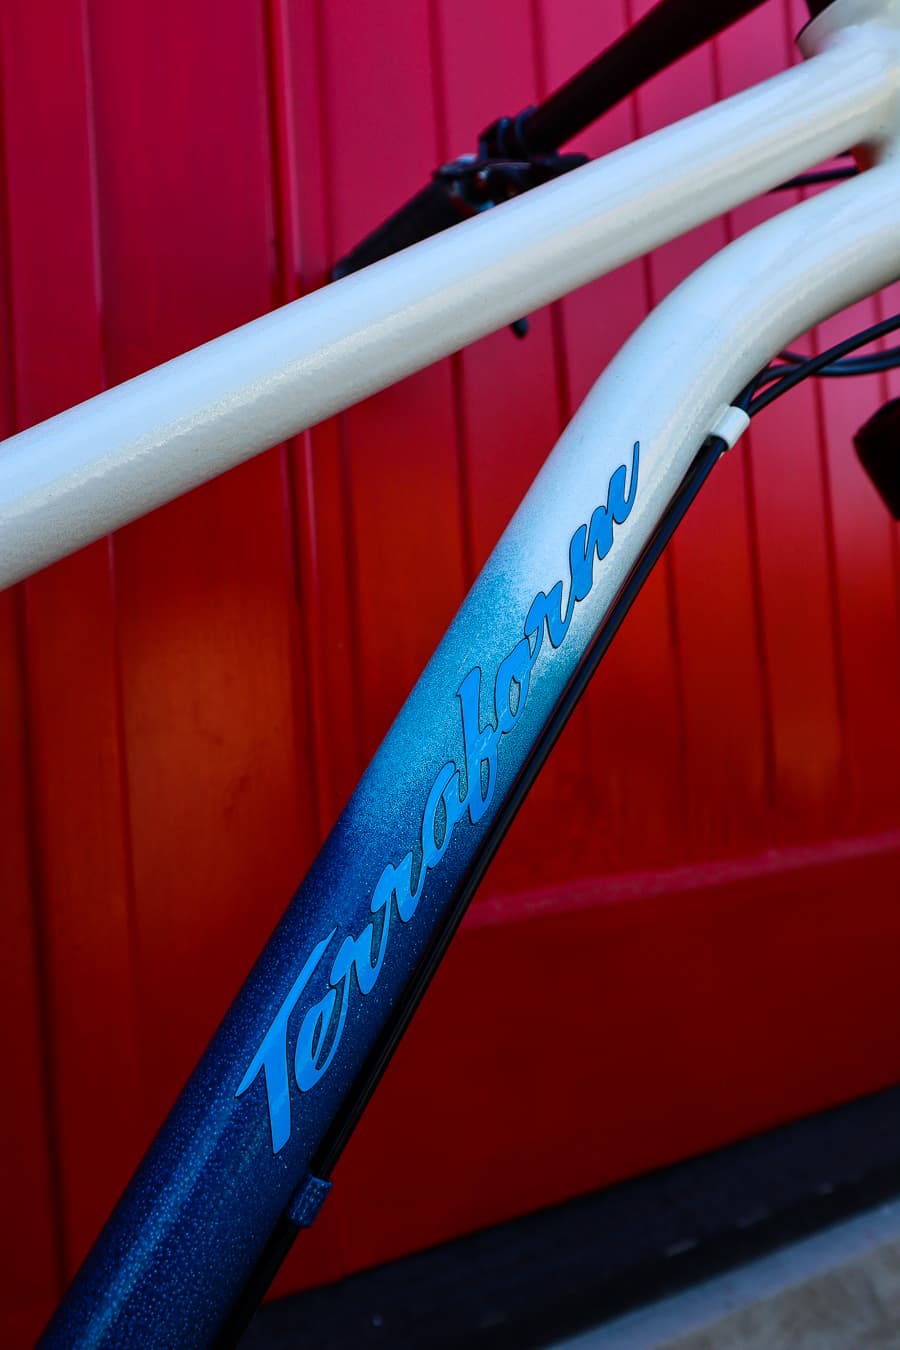
I recently had my first experience getting a frame and fork professionally powder coated. The shop I used does not specialize in bikes. They were well reviewed in general and a few people had good things to say about getting bikes done there on google reviews. We went with Prismatic Powders Misty Midnight.

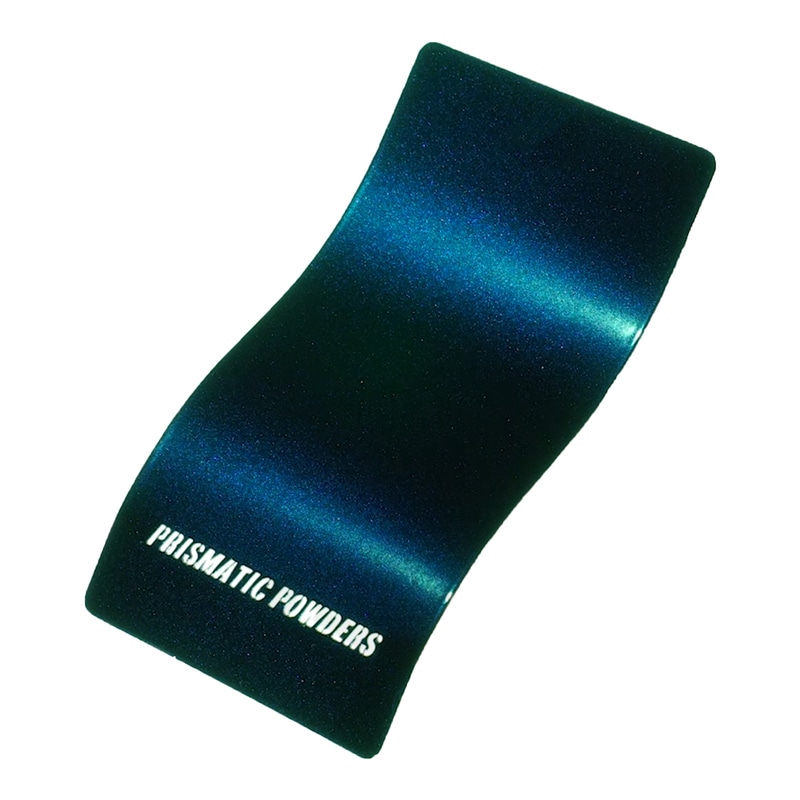
This is a single step powder (don’t need a base coat or clear coat) and they specified a double coating. Other specifics we agreed on were:

  1. don’t protect the threads of bottle bosses/rack mounts

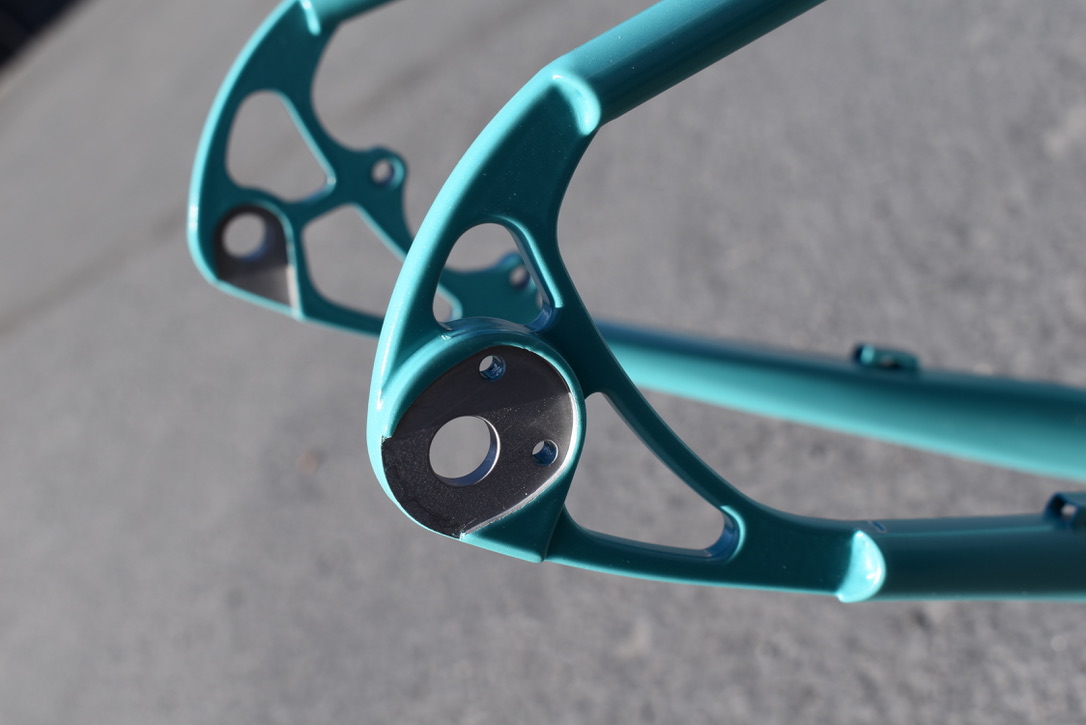
  2. don’t worry about protecting the dropouts (I used the PMW utility dropout)

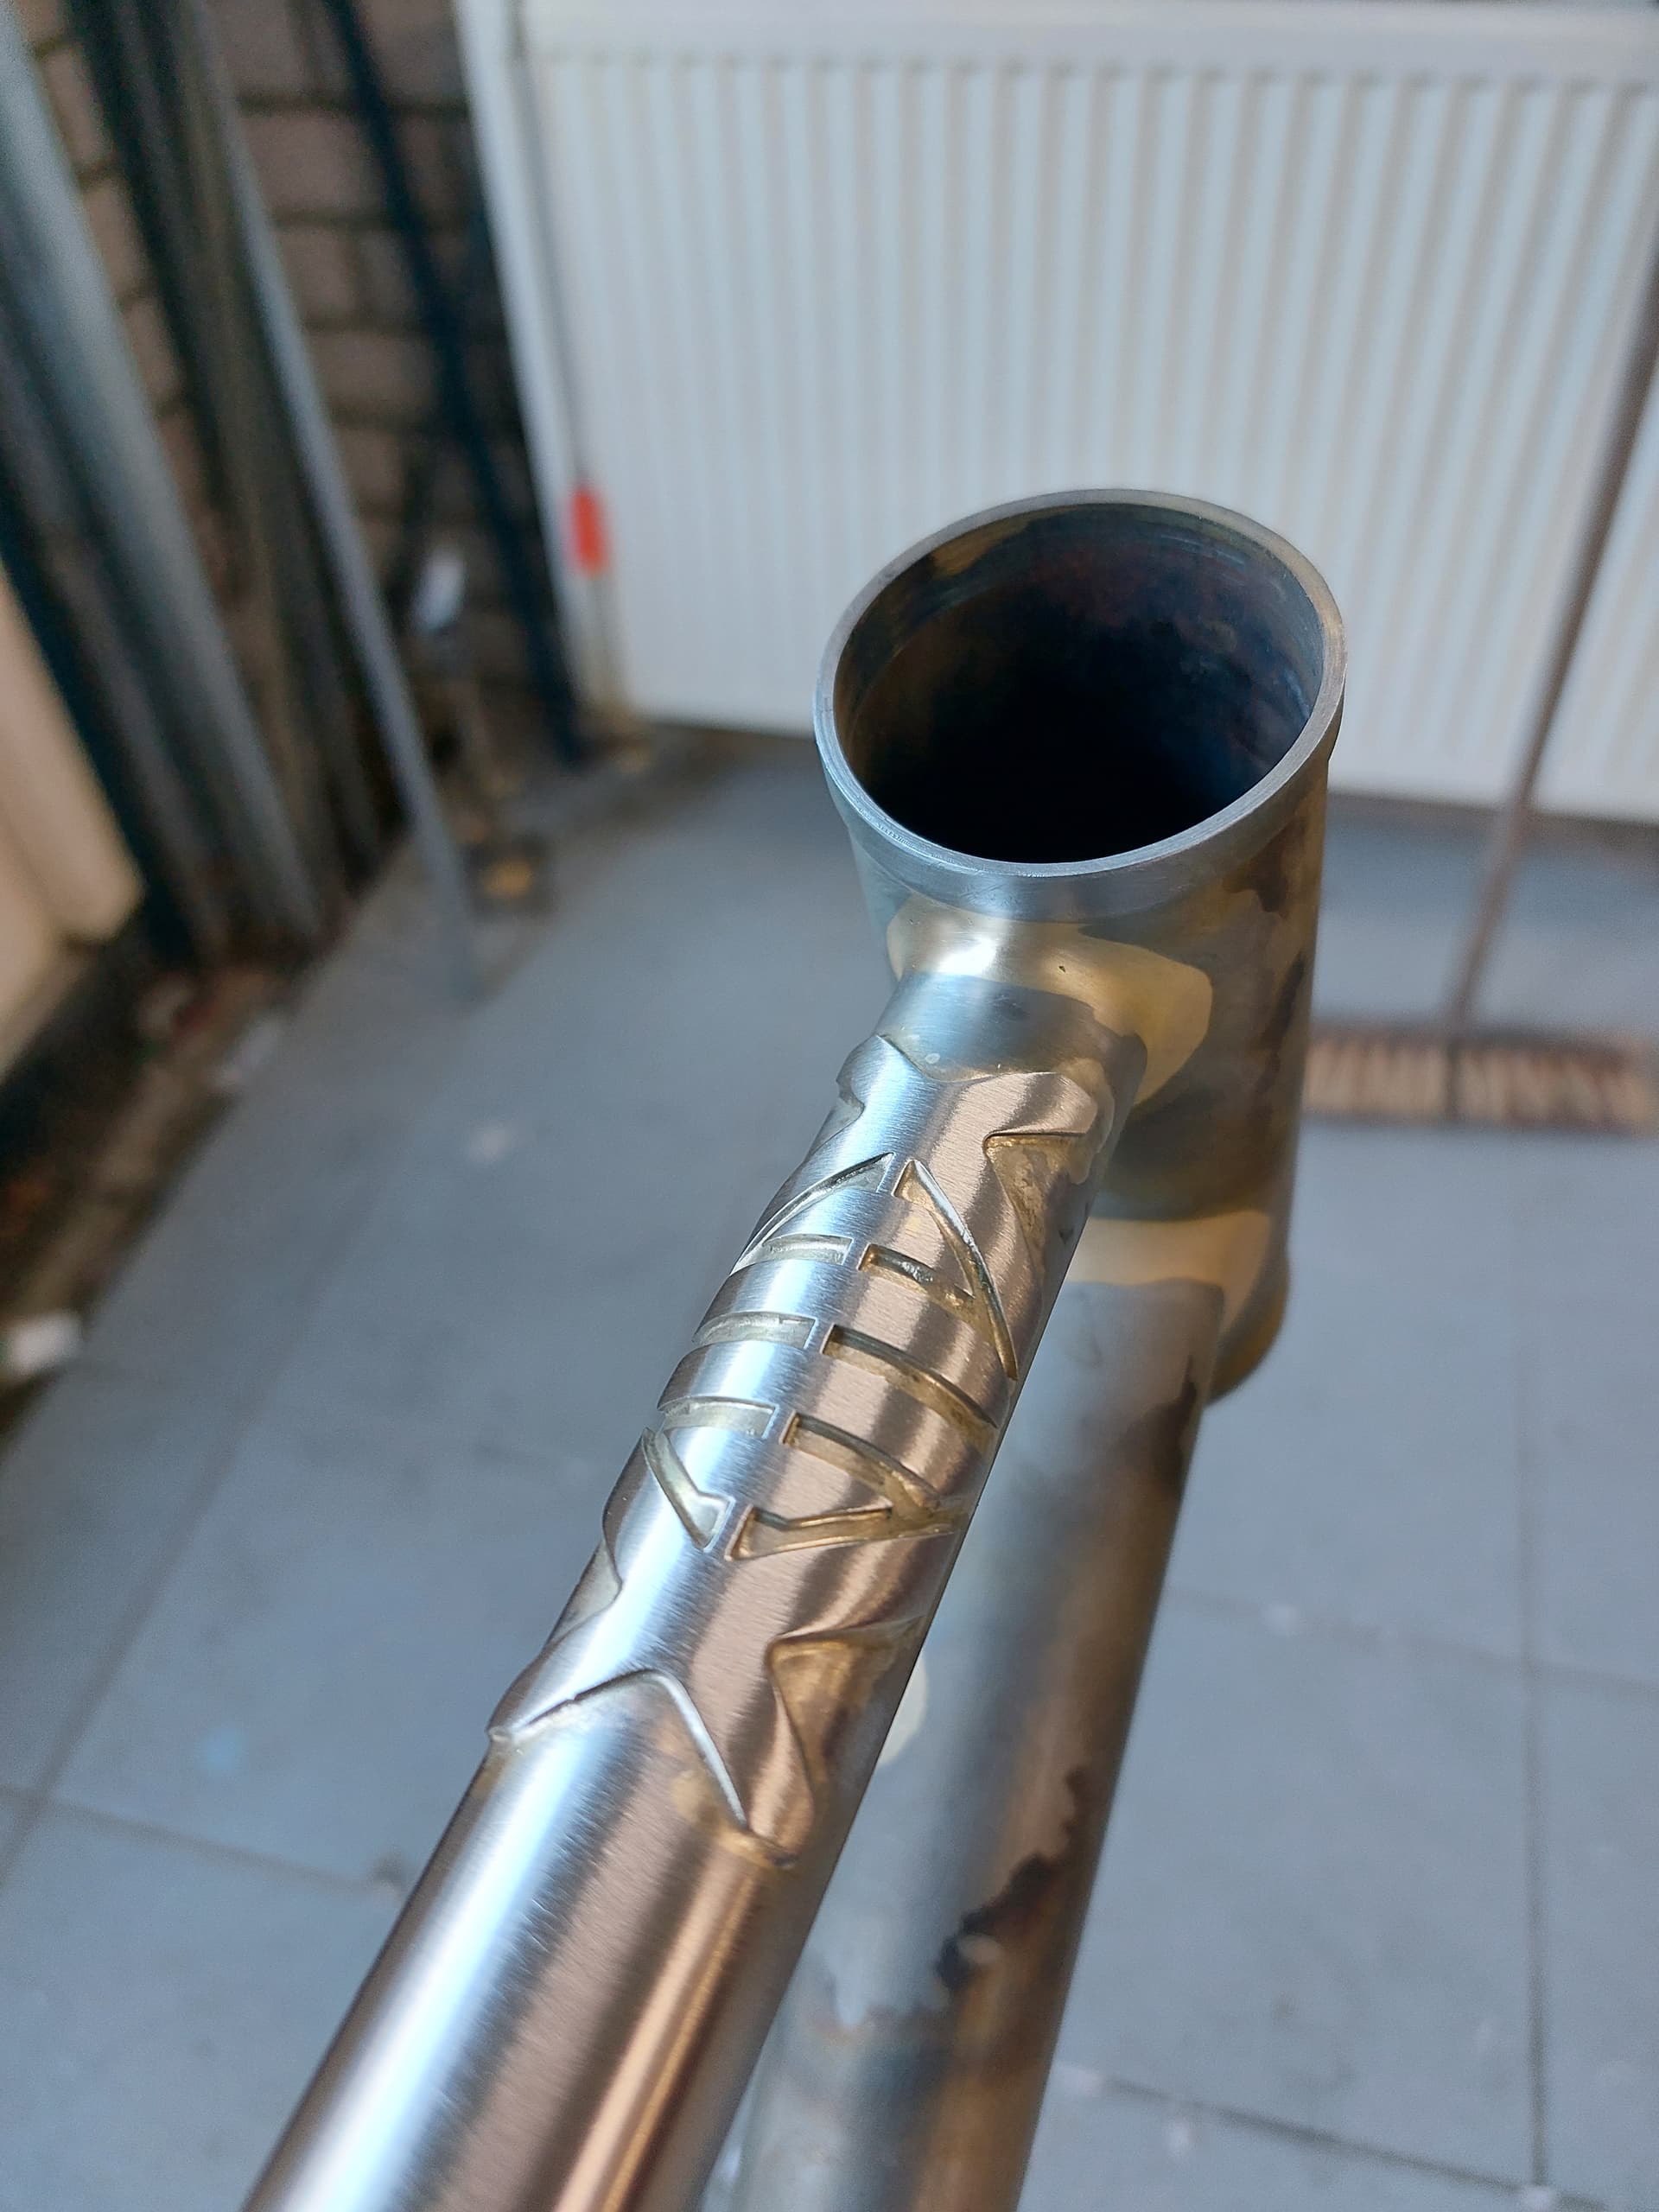
  3. allow powder to get down in the seat tube neck. I did this because I used this Dedaccia seat tube that utilizes an aluminum shim to fit a 27.2 seat post and I was unhappy with how loosely the shim fitted. I had already reamed the seat tube at this point.

  4. protect the interior of the head tube - I had already reamed and faced it

  5. I said don’t worry about protecting the BB shell, thinking I would easily face and chase any excess powder coat off, but they said they use rubber plugs on the bb shell, I believe for holding the frame while powdercoating, not sure.

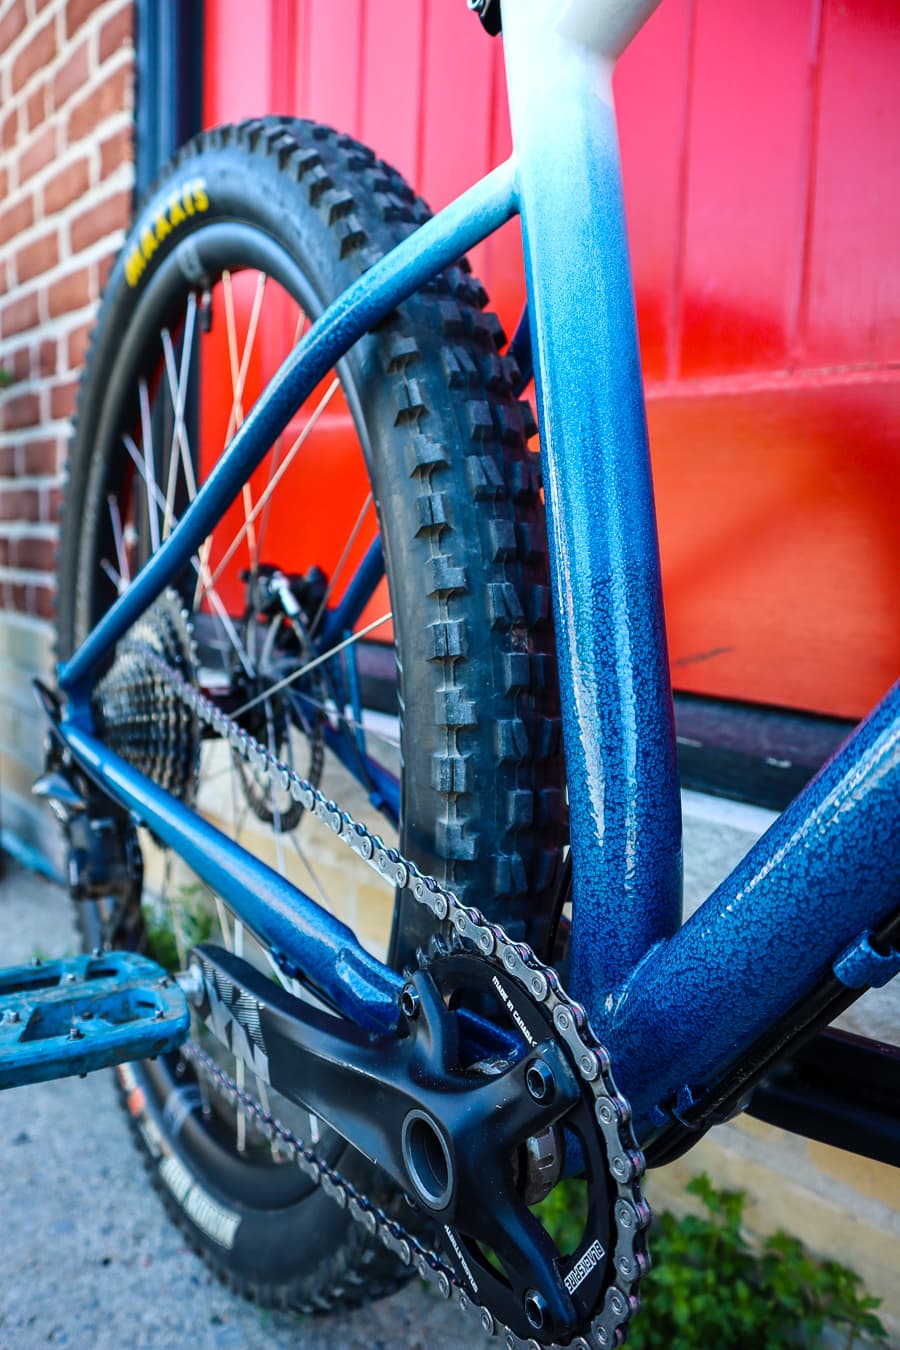
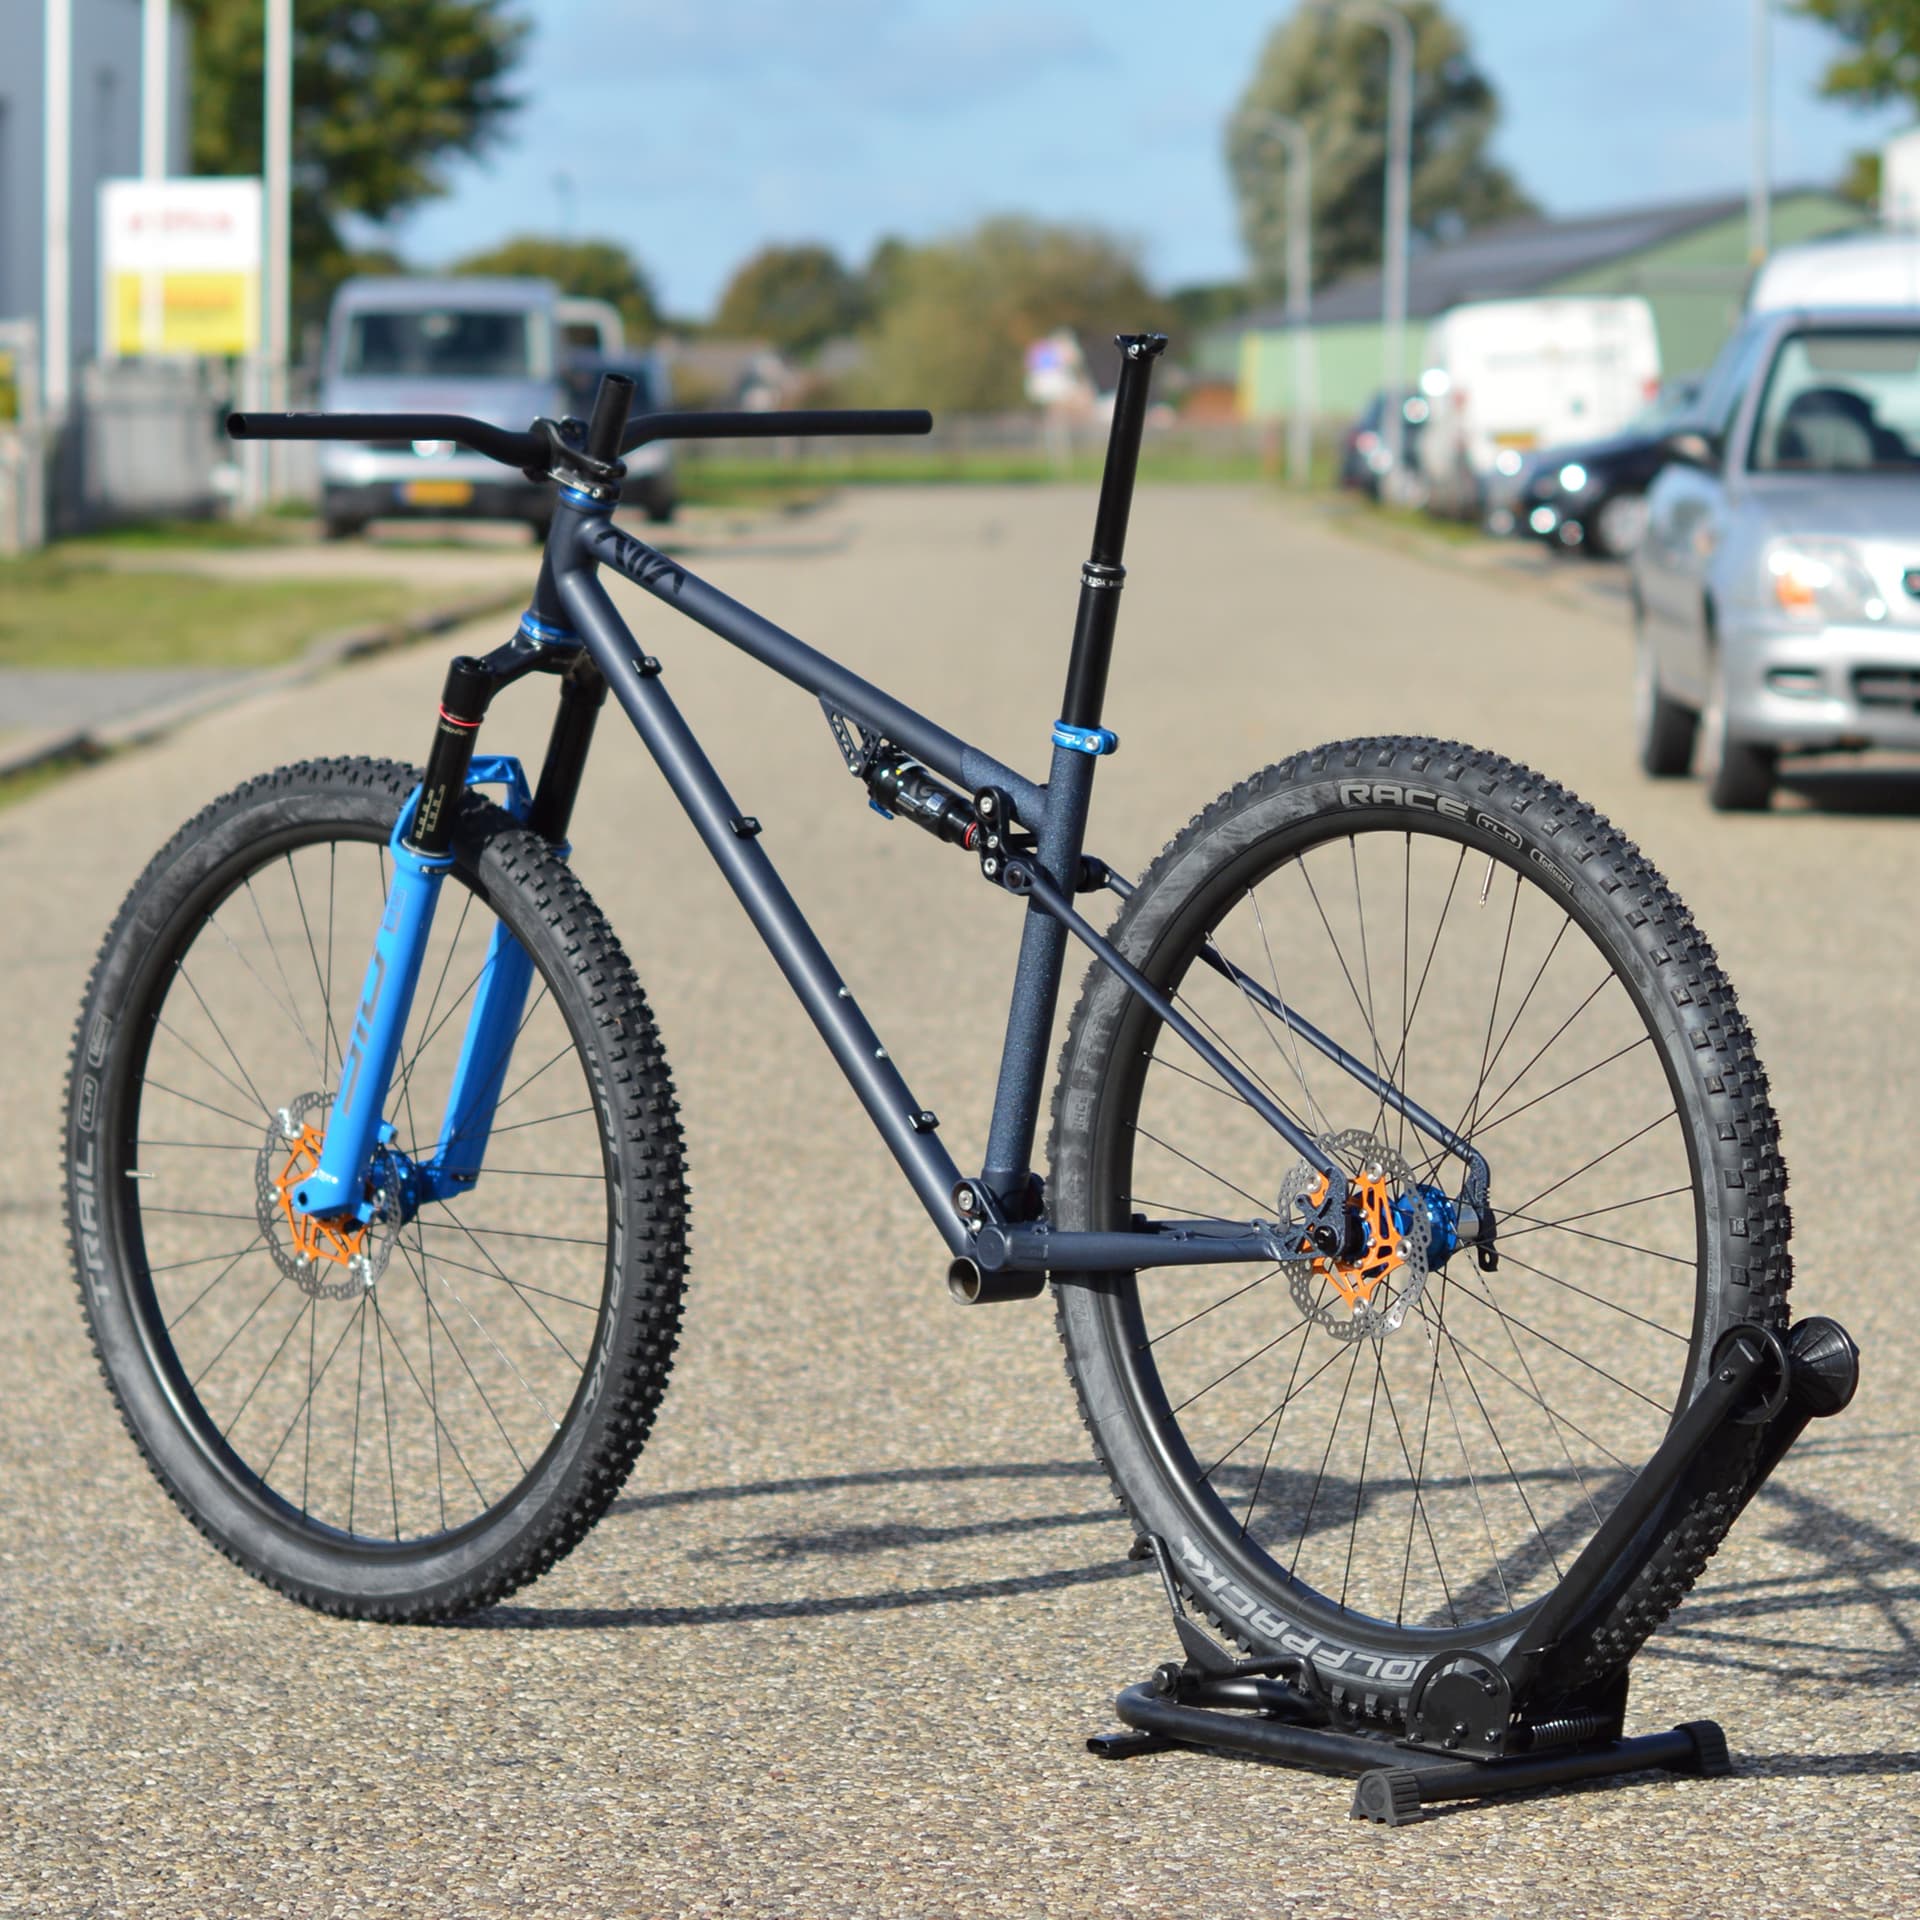
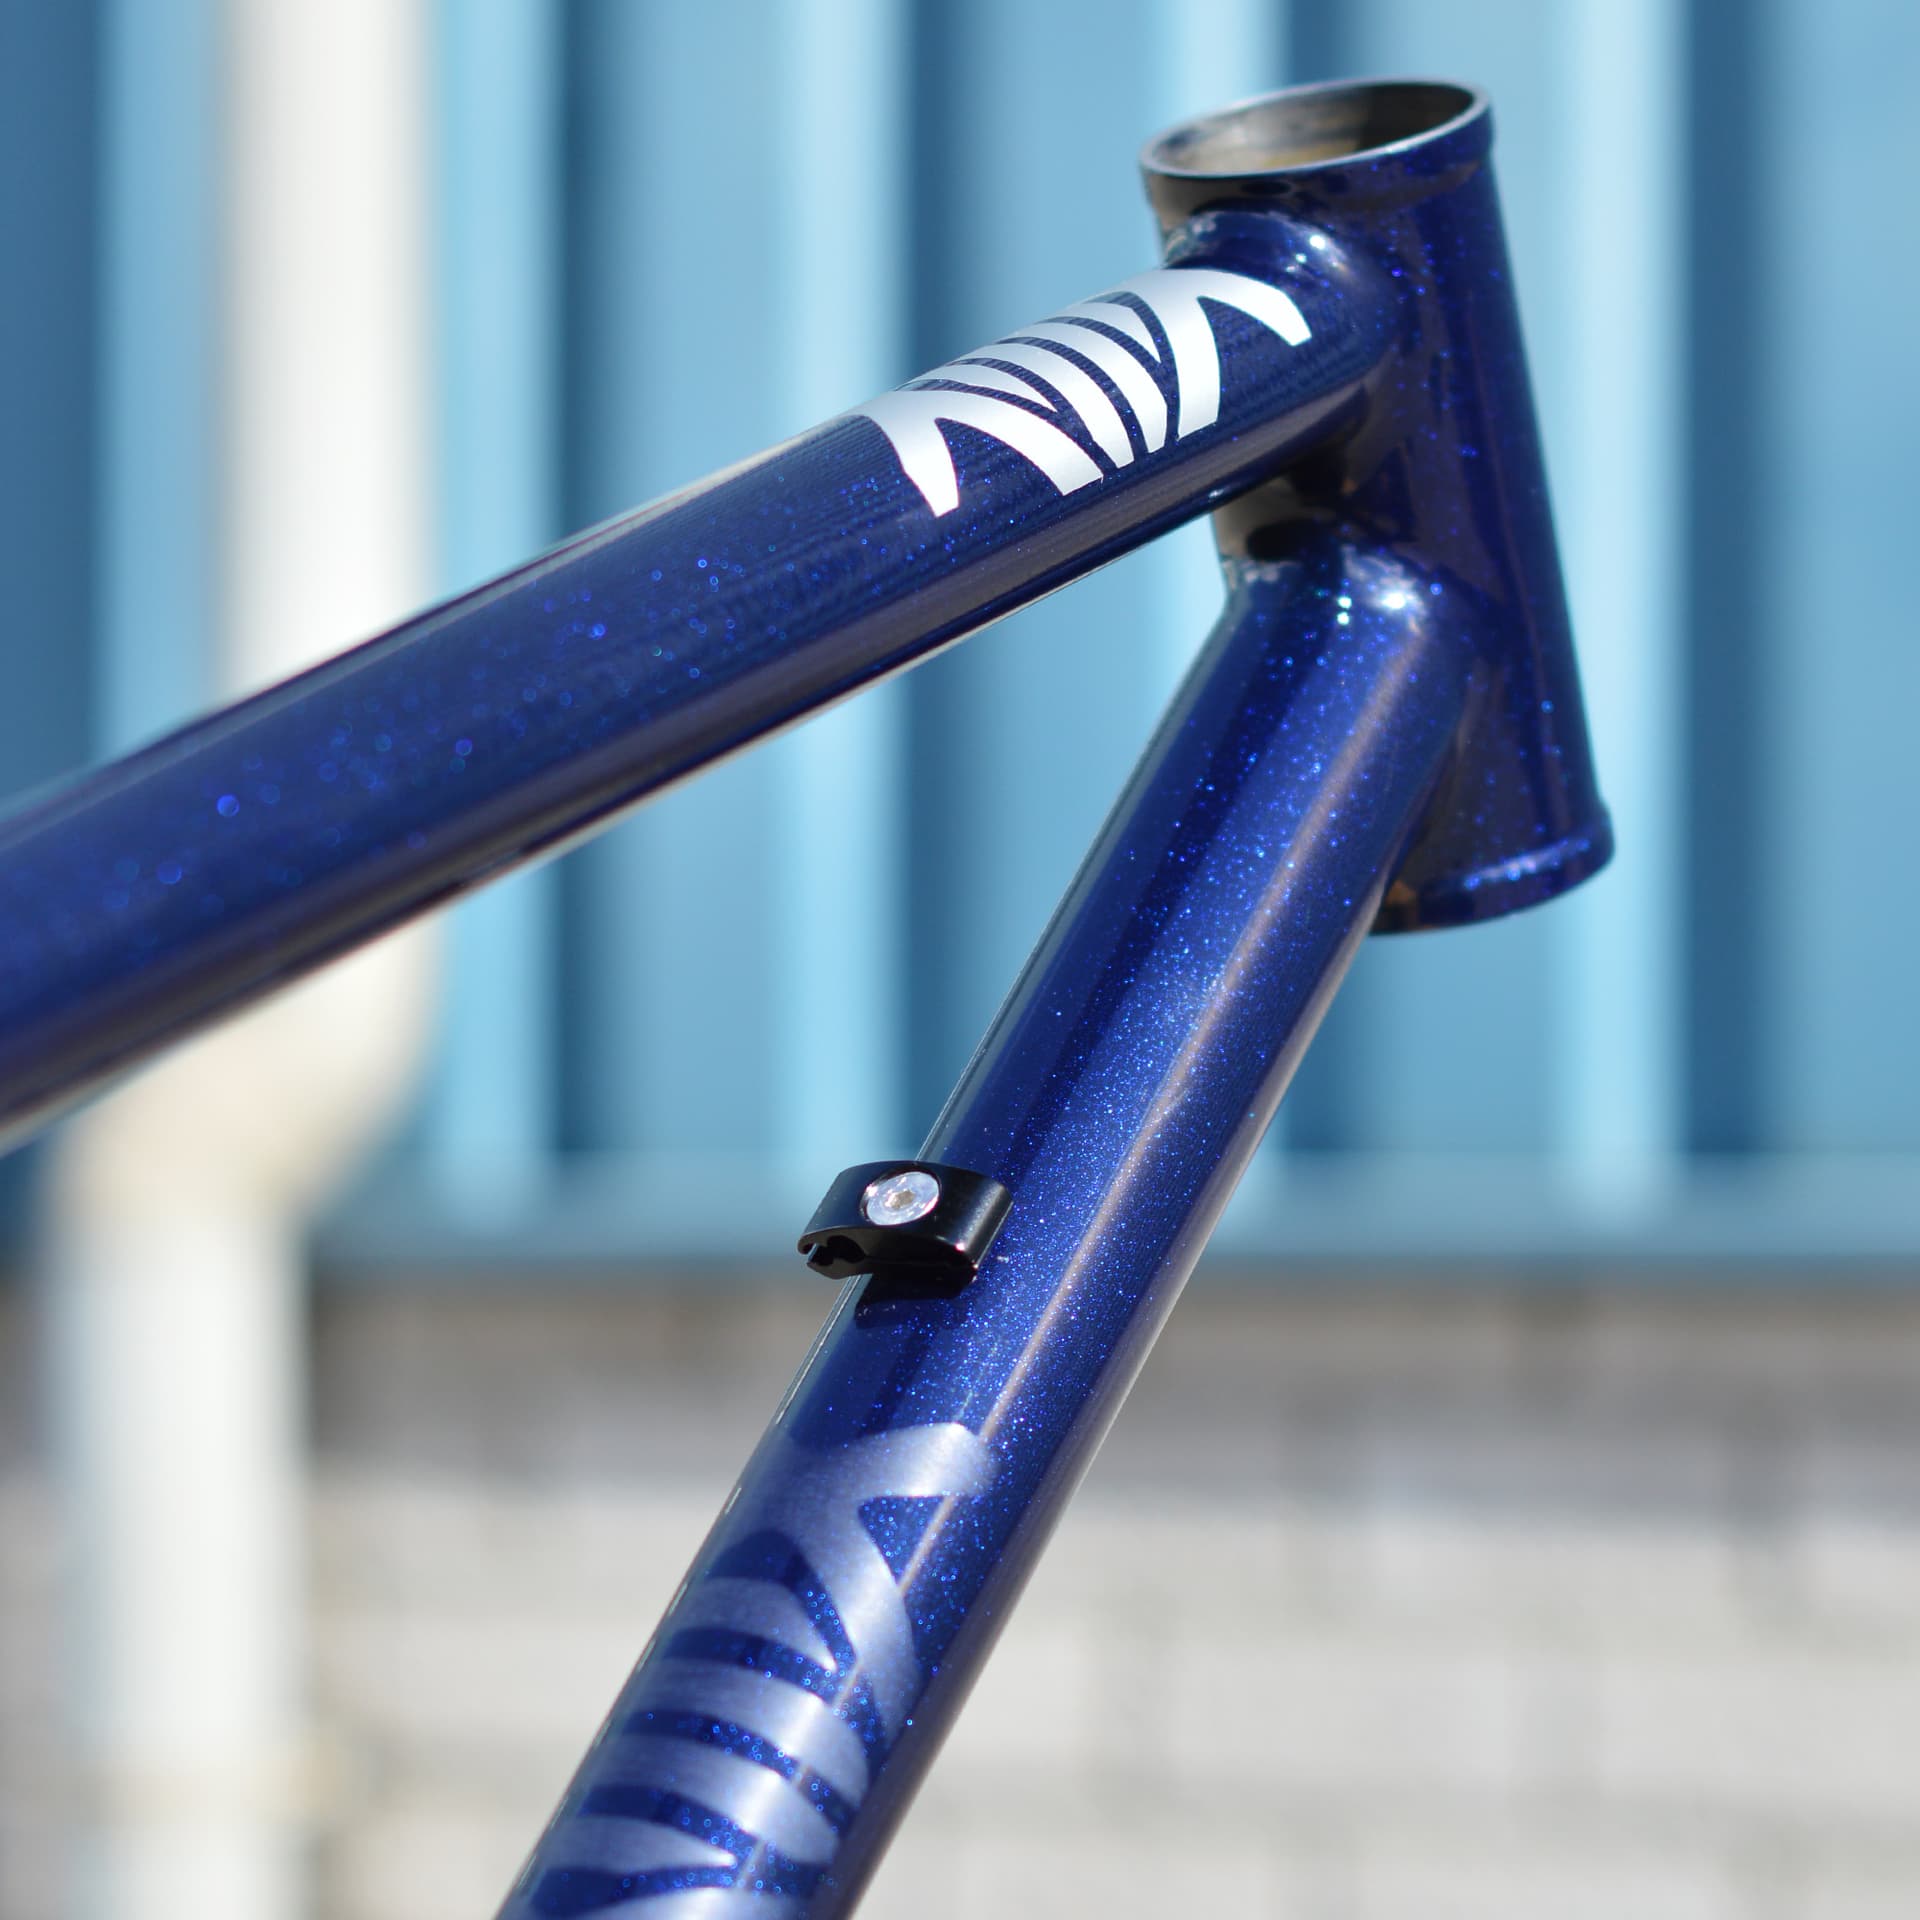
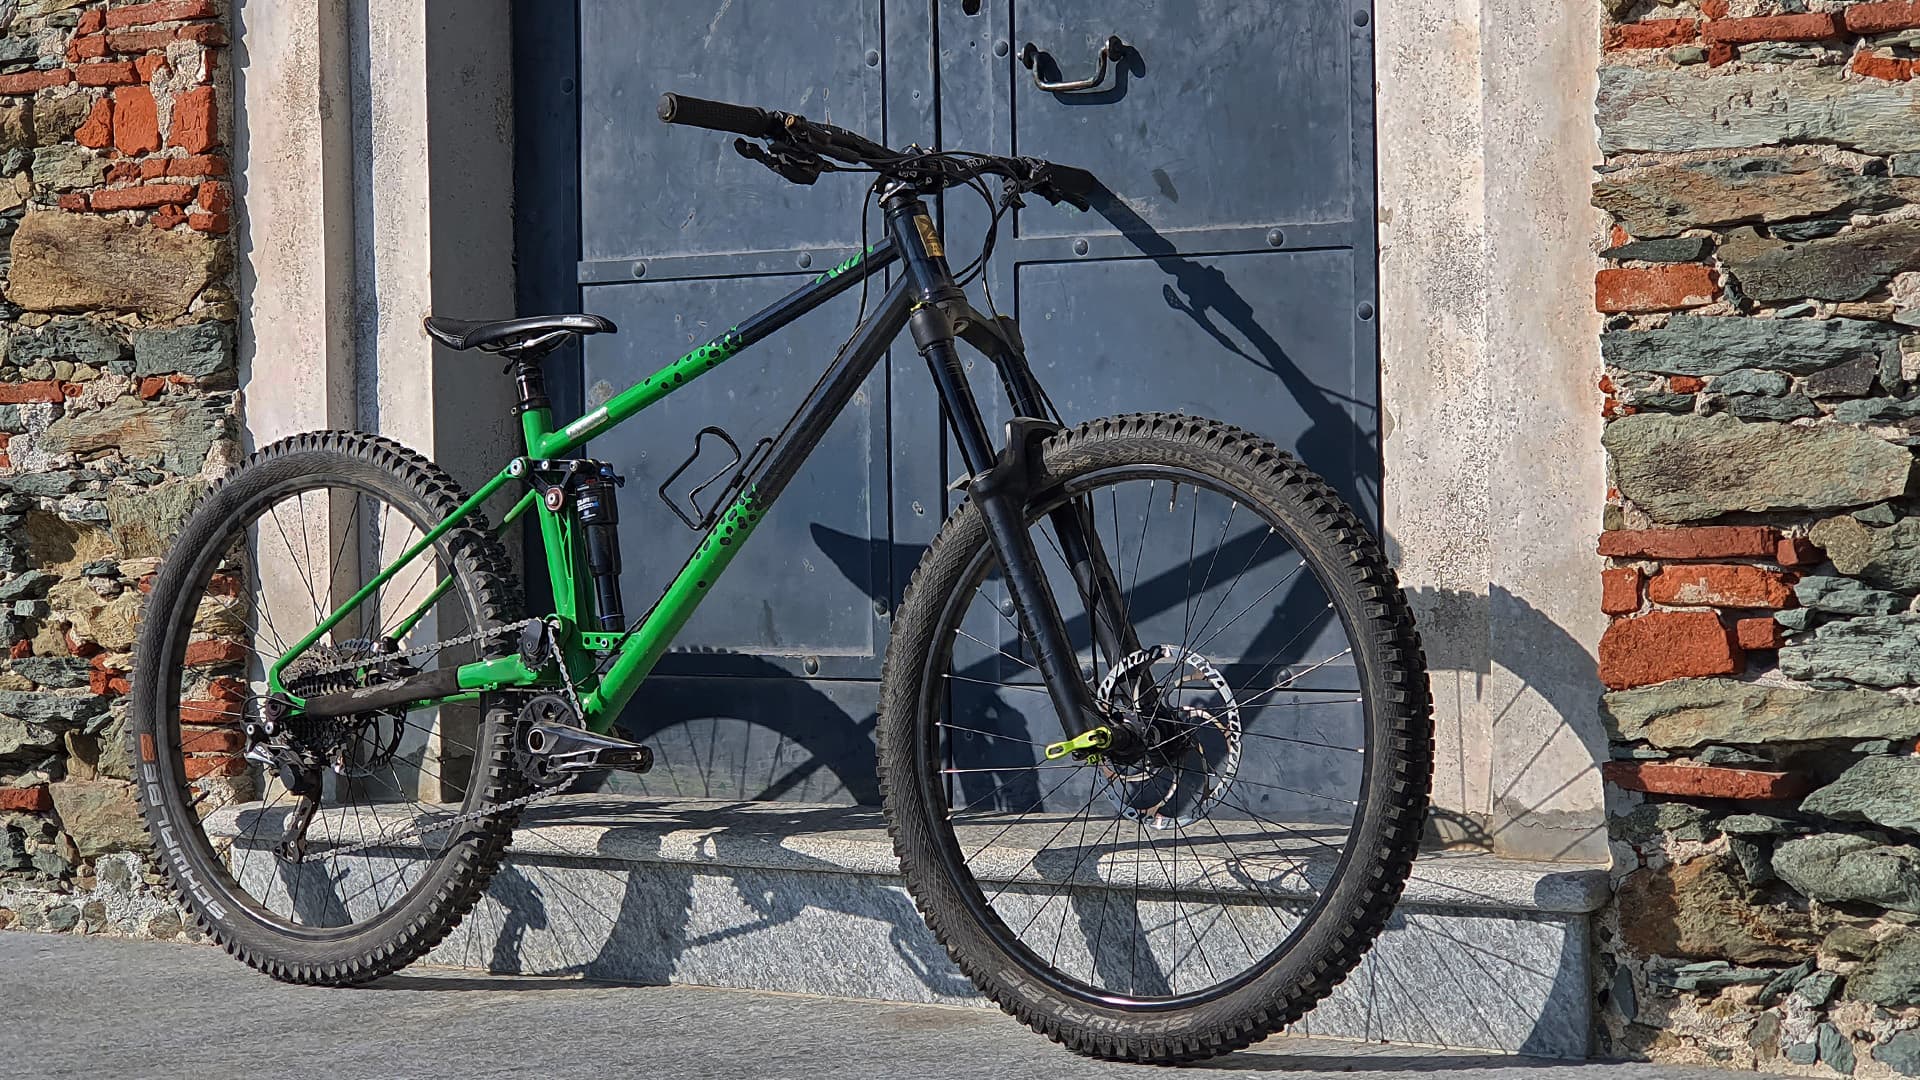
Here’s how it turned out, sorry about the poor lighting.


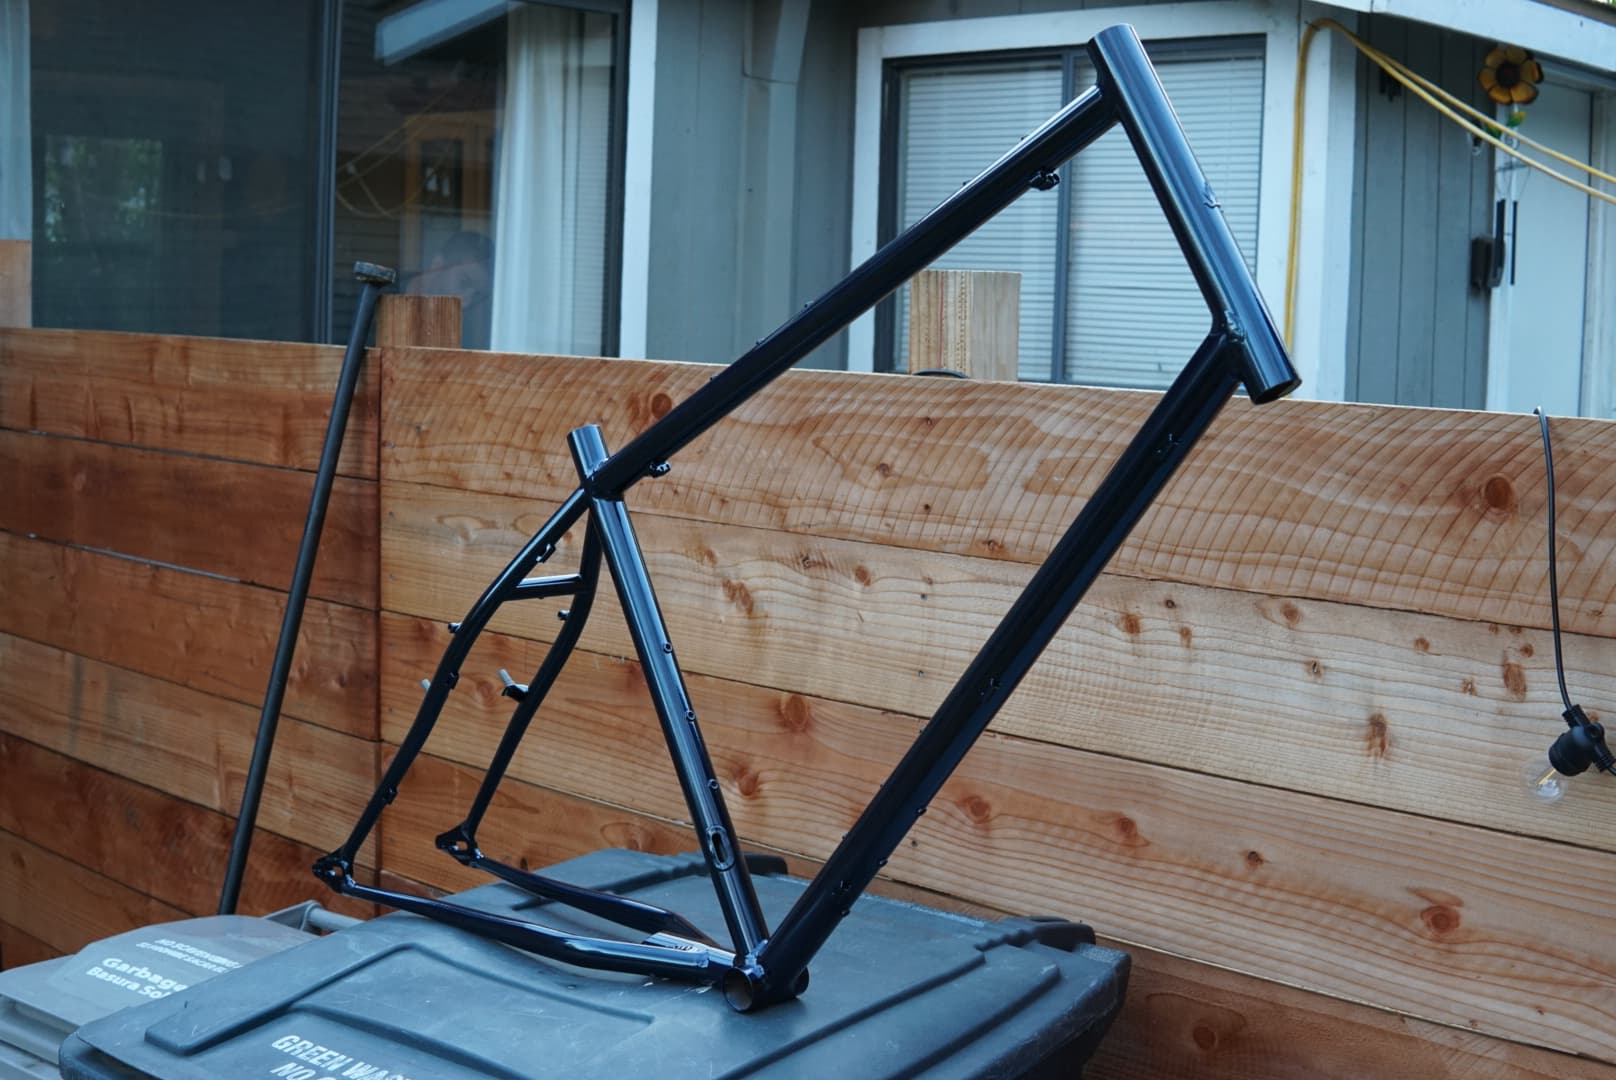
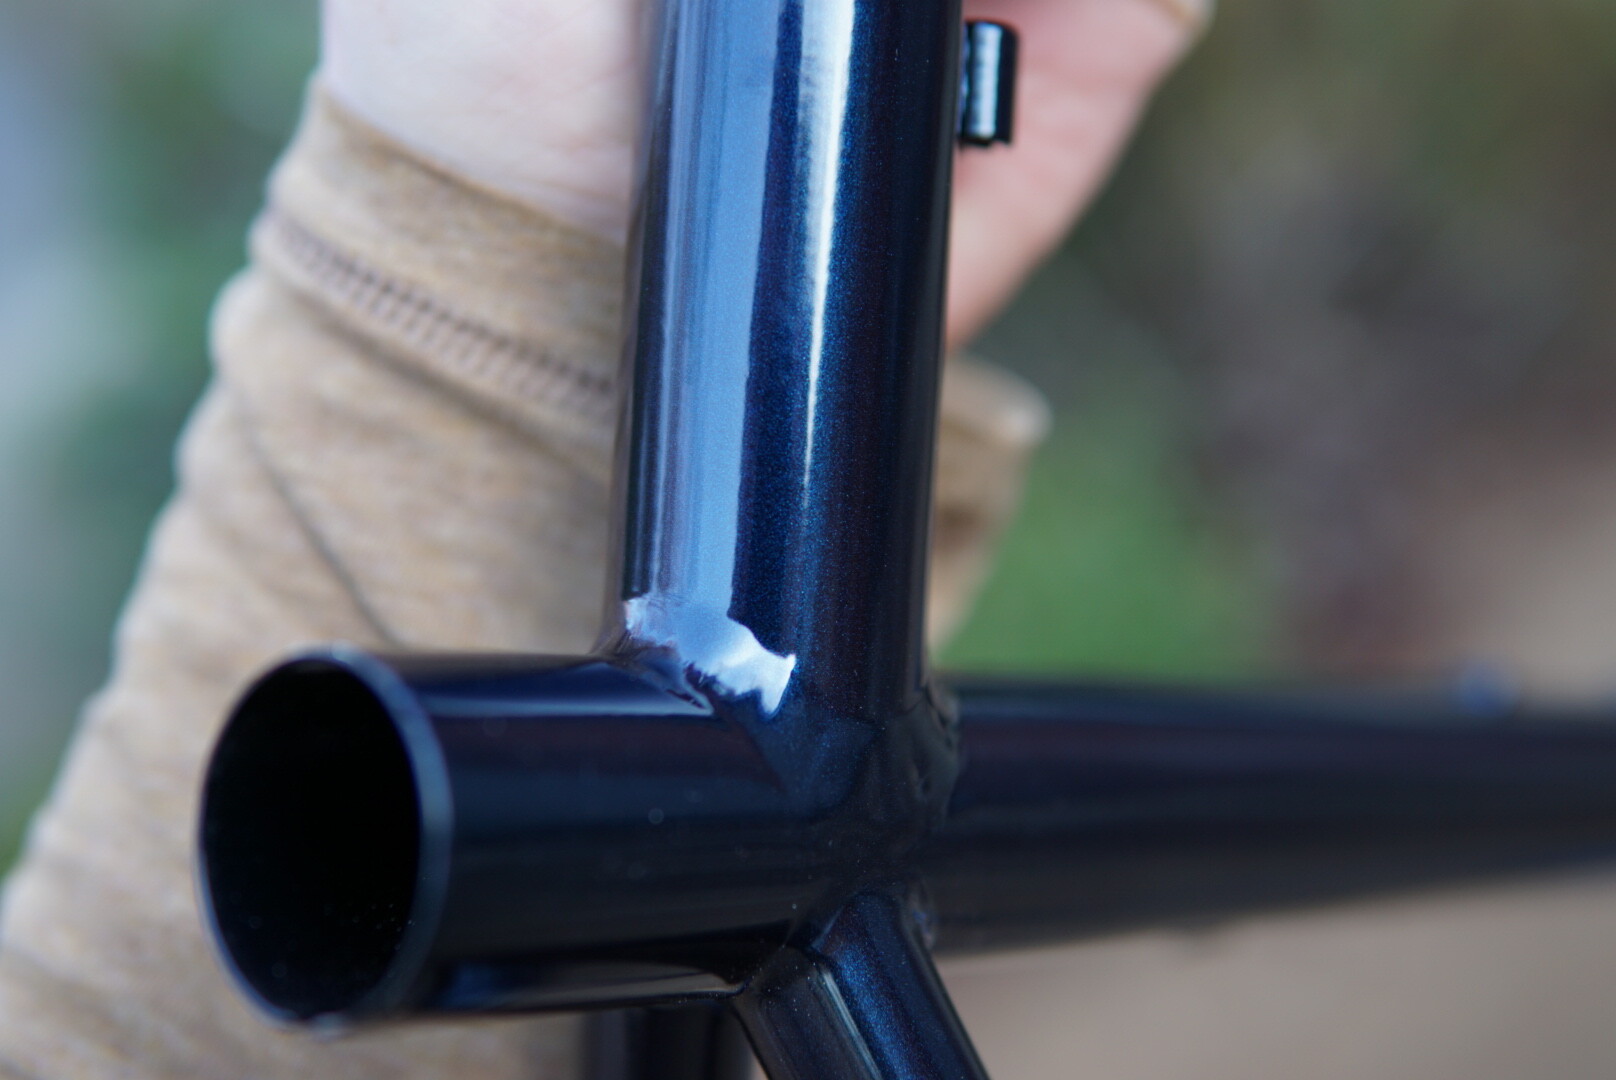
To my inexperienced eye the results were impressive, however if you run your finger along the tubes there are a few little lumps of what I assume could be clumped powder nuggets.

The threads were easy to clean up with a tap, so I was happy with having some extra protection there. The play of the seat tube shim was greatly reduced by getting the powder in there, so happy with that.

The dropout inserts most definitely did not fit after getting powder on the mating surfaces, so I had do a fair amount of powder removal on the dropouts, but it was not too difficult due to the simple shape. I reckon it would be a pain if I was using Paragon’s round dropouts and the derailleur hanger wouldn’t fit.

This particular powder doesn’t strike me as super durable so I’m wondering what the best options are for achieving maximum durability? Would doing a clear powder over this be a good solution?

6 Likes

I’ve tried a few different places for powder coating with various degrees of success.

I was lucky with one shop in Toronto, they took me super seriously and were attentive to my instructions. I made sure they weren’t an automotive shop and they specialized in more custom jobs. They had done a few bicycles previously, but were known for motorcycle parts / rims / etc,.

When dropping bikes off I’d attach a sheet to each one with clear simple instructions. Mask this area, be careful about this, etc,. We even had chats about Aluminum Oxide vs. Glass for sandblasting. They used AO but were aware of the microscopic cracks it can make. I also brought in a .7/.4/.7 tube so they could understand how thin the tubing was.

At the time I was using OGQ dropouts and I really disliked the fitup of the thread catcher. It’s a separate triangle looking piece. They painted into the retainer it goes in and it made a really nice press fit. Just a few light mallet taps and it wouldn’t come out. Apparently this was a complaint about OGQ dropouts (that the thread catcher would fall out).

I moved from Toronto just over a year ago and was intending on mailing my stuff to them but a friend here turned out to be a really good powder coater. We’ve been playing with decals that go into the bake oven but success is hit and miss. There is a specific material made for this but it’s expensive and slides sometimes. We’ve been trying out normal vinyl and surprisingly have had more success.

He also does the lay down a base coat colour / put on a logo mask / do another colour / take off the logo mask. It turns out great but sometimes the edges aren’t sharp. He is also super great at doing fades and it seems like every bike I make gets a fade.

My current painter masks the head tube faces / seat tube face / BB faces and whatever else I don’t want paint on. I had asked if he would like me to provide plugs but he wasn’t fussed about it. I always bring the bike in with all faces reamed and faced already, if you don’t you may cause paint chips when doing this process after paint.

Sorry for the ramble, here is a tldr;

  1. Find a local shop where you talk to the owner OR painter themselves.
  2. Include written instructions.
  3. Try to make sure they specialize in custom work, not fences and shit like that.
  4. Tell them to charge you whatever the hell they want because you expect top quality work. Whenever I start a conversation with a professional that I’m relying on, the first thing I say is that I don’t care how much it costs, give me your best work and bill me for it.
  5. If you receive good work and are happy with it, praise them, ask to speak to the powder person, praise them. Maybe drop off a 6 pack or a bit of weed if that’s legal where you are.
  6. Ream / face everything prior to paint, and ask them to mask BB / HT / ST / dropouts if applicable.
  7. Supply them with a visual aide so they know where to mask (like a Bikecad drawing that’s zoomed in and has arrows).
  8. If you are requesting a fade, supply them with a Bikecad drawing using the colouring tool showing where you want the fade to begin / start / the height / etc,.

The goal is to reduce the game of telephone, trying to remember exactly what you said, and to make things as clear as possible

I always use Prismatic.

Another good source of information on powder and how to approach shops is the Myth Cycles shut up and build bikes podcast. Myth was using a shop prior and they let go of the powder person he liked. Ended up making his own oven and doing it in house.

@poopieprancer perhaps if you use that seapost again you could install the shim the way press-fit bottom brackets are installed into carbon BB shells (I know your frame isn’t carbon). Park Tool Adhesive Primer + green loctite and stick it in, let sit for 24h. Or maybe red loctite?

7 Likes

Great info, thanks. I made sure to build a good rapport with the owner and sprayer, it wasn’t hard as their ears definitely perked up when I said I built the frame. But I didn’t want to come on too strong with the expectations this first time around. That does make sense to say hey, charge me what you need in order to take the time to get it right.

So have you dealt with the situation with steel dropouts where you want some powder on the hanger mounting surface, but not too much? Ask for a really light coat there? Or save the trouble and go with a stainless dropout… :face_with_monocle:

Good to know on how well the vinyl ‘masking process’ for deals has been working. I have seen a number of powder coated bikes on instagram with what looked like actual vinyl decals under the clear as far as I could tell so perhaps those are a low temperature clear powder as @liberationfab mentioned, or an actual clear paint as you say.

For the seatpost shim that’s a good idea, but I felt that the play was substantial enough that I’d really need to goop on the adhesive to fill the gap and was concerned that it might end up slightly off center. But perhaps not because the powdercoat pretty much eliminated the play.

2 Likes

I’m primarily fillet brazing and making MTB so I don’t use stainless dropouts. I don’t think silver is strong enough for a MTB hooded dropout.

I personally haven’t had issues with paint / hanger interferences. At least not on OGQ dropouts, but I’ve moved away from those now. Neither on PMW sliding dropouts (though I did file away the paint where the slider goes into). I can’t say what dropouts I’m using right now as they are prototypes for someone.

Main issues I’ve had was paint too thick for the seat collar to slide on, specifically the Engin seat collar. I put masking tape below where the collar ends and lightly sand the powder where the collar goes. This has only happened to me once, and it was on a bike that received two coats (prismatic Ink Black as a base under some prismatic Moss Green). Never had this issue with Salsa collars, but the Engin ones have much tighter tolerances.

I do tend to come on a bit strong when it’s my first time trying a professional I’m relying on. I’ve been burnt before. I try to soften it by saying how I’m relying on them, and that I can make a naked frame beautiful, but if the paint isn’t good then how good the frame looks doesn’t quite matter. I follow this by saying I don’t care how much it costs, they are the pros and I don’t want deals, I want good work. Maybe that isn’t softening how strong I come on, but since I’ve taken that approach I haven’t been burnt.

The shop in Toronto went way above and beyond for me several times. These pictures are of a bike they did for me. I wanted a fade, but with the vein powder from Prismatic. Blue vein to white vein (it has a texture to it, like crackling). They even made the decals for me, applied them, and brought it to a wet painter for a clear coat (we didn’t want to risk decals sliding and couldn’t get them work under powder, even low heat). They said it took them three tries to get the fade right and were happy to make it perfect because they knew I’d pay whatever.

I supplied them with a bikecad sketch of where I wanted the fade to end / start. I should’ve mentioned this in my OG reply.

When I picked up the frame they were super nervous about their work. I was amazed at the quality and spent a good amount of time saying how it was exactly what I wanted. The powder person came out and said she was anxious about it but super happy to know how much I loved it. They only charged me $400cad for the work.

For anyone in the Greater Toronto Area, the shop name is ‘Rice Rocket’.


5 Likes

This is good advice. In our process, the powder coating is the bottleneck and our biggest struggle. Even with all the mitigations and instructions, we have had a few frames ruined and several that had to be re-sprayed.

The reality is powder coaters are used to dealing with wheels and lawn furniture, not delicate steel frames! I am sure they are frustrated by our needyness :rofl:

Right now we are figuring out the best way of applying logos to the powder.

I have experimented with 1shot enamel paint, and had decent success with matte frames (more surface area for adhesion). The enamel scratched easily on glossy surfaces

5 Likes

@terraformbicycles and @Daniel_Y your powder coats look really nice.

In the past I tried using a local powder coater. The owner told me he was afraid whenever I showed up :grin:

The challenge with fillet brazing is some of the pits don’t reveal themselves until the frame is baked. I think it’d make sense to set up a relationship with a local powder coater who will do a blast and pre bake and let you come by for inspection. If all looks good then full send.

This is one of my main motivators to TIG weld my frames in the future. There aren’t any surprises. What you see is what you get.

I can count on one hand the amount of powder coaters in the US who specialize in powder coating bikes and then use the other for the liquid guys. Seems like a huge business opportunity for the right person.

2 Likes

I have been lucky to find local powder coaters who have done bicycle frames before and know the drill. Most coaters in my area won’t even consider a two stage process, like base coat and clear coat. They want big batches, simple colors, and single coat. My current coater knows the important places to mask and we go over any changes from previous frames (new bosses, different dropouts, etc). It has worked out great for me every time, with only minor hiccups.

@terraformbicycles I have also had the issue of powder pooling into a thick area at the seat collar. Not an issue if you use an integrated binder, but if an aftermarket collar needs to slide on after powder you are working with tight tolerances. Masking and sanding works. Last time I mentioned the issue to my coater and he went a little lighter in that area - no problems.

Before coating, I do a full ream/chase/face on all the places. I have the inside of the head tube, seat tube, and bb masked, which allows the faces to get coated. After coating I do another light ream/chase/face just to clean up the surfaces. After consulting with @mark_pmw I have all my dropout faces and shoulders masked to ensure proper fit when using Paragon dropouts. The face where the hanger attaches has tight tolerances and powder is thick, so you don’t want these areas coated. Here’s an example:

Regarding logos… I’ve found there are very few coaters who want to fuss with logos. There are a variety of ways to do logos in powder and it can turn out great, but it’s a lot more work than just spraying a frame. My current coater won’t work with me on this aspect of the process so I have been resorting to cut vinyl logos, which is fine at best. I want a classier solution. A coater I have used in Springfield, OR - Bob at Custom Powderworks - can do a stunning logo that’s smooth to the touch by spraying the base coat, then masking and spraying the logo in either heat-stable paint or powder, and then spraying the clear. There’s sanding in between steps, making this just as complicated as a wet-paint job. I don’t use him often because of the long turnaround time. Here’s how it comes out, though.

My latest thinking is about how I can take the process into my own hands and make my logo cool and unique without needing to rely on a coater for the process. Some builders like @Swood and Portus braze on a logo cut from thin plate which then shows through the powder. The result is stunning, but it looks like a lot of extra work. I’m still thinking about trying this eventually. It’s already what I do for my head badges. An experiment I tried recently is etching a logo into the clearcoat with media blasting. I masked off my logo and used some aluminum oxide grit in a cheap HF blaster gun. The result was interesting, but not enough contrast. Here is how it looks with a little black shoe polish rubbed on to exaggerate the contrast:


I’m not super stoked on the result, but proof of concept is there for sure. Maybe if I forego my panel design and invert the logo so the lettering is colored rather than the area around it.

Regarding durability: I’ve had one frame done in a single coat with no clear and it was not thick enough to hold up to abrasion from cable housing, rock dings and scratches, etc. I always do two coats (base + clear) now for durability. I’m lucky enough to live in the same valley where Prismatic Powders is manufactured, so I can go to their showroom to look at real swatches of every color and ask questions. They will mail you swatches so get in touch if you are as picky about color as me!

4 Likes

Yup, It’s quite a bit extra work.
Getting them bent just right is a challenge.
And the post powder sanding is pretty stressful. My coater has offered to wipe the powder off the badges in between stages at an extra charge but I haven’t taken him up on it yet.


3 Likes

Lots of great advice already.
I wish there was a local painter and powdercoater that specialized in bikes. With how busy Blackmagic and Dark Matter are this seems like a business opportunity.

I have tried a handful of powdercoaters and they’re all over the map. The ones I developed a good relationship with in the Sacramento area have retired or closed down. There are some that don’t want to touch bikes. Even with the good ones it was hit or miss depending on who coated it (it’s never the owner). If they blast the frame first a single coat is fine (very durable for years). But if they don’t blast you will start to get surface issues under the powder after a couple of years and will have to re coat the frame (strip it, blast it, coat it).

Usually a clear coat is great for protection but adds thickness and may create issues with collars and hangers if they’re not a really dialed applicator. People also tend to love the Prismatic Illusion series powders that require a high gloss clear to look like the swatch. Most pearl or bassboat finishes have a high gloss clear and if they lay it on thick it can add a tint of yellow. If you want a matte finish like the Casper clear it makes the frame almost absorb dirt and grease and they become hard to clean. It’s better to find a low gloss powder and not add a clear, or use a med gloss clear instead of Casper. It’s way easier to choose 5-10 colors to offer and work with the place to dial in those. Plus saves a lot of footwork and shipping money that happened when ordering by the pound.

I would offer to tape off the faces and bores yourself, or find a shop that is cool with doing that. McMaster has the tape. Even Ventana didn’t tape off stuff for my or their frames. But they did have a chemical soak tank so if i needed a frame recoated it was way better than using paint stripper and a puddy knife. Talk about torture…

Most powdercoaters don’t have the right media and knowledge to safely blast a thin walled steel frame and can do damage. Some don’t know how to hang frames and can drop them (happened to me twice and got a big dent). Most don’t understand how you can charge 2k for a silly little bike frame yet do custom car work that is way more. So that’s why I build a relationship with a good one. They make you look good. I would bring beer if I had a rush request, I would stay to chat about whatever and learned a ton about the process of powder coating in that time. Assume they have had bad relationships with anal framebuilders and approach them with respect and they will eventually respect your work and treat you better because of that. Over the years I had a lot of work for them even though it was only one every two weeks for the most part. They end up like seeing your Instagram posts of their work so tag them! It can become a feel good selling point for them. But Covid has made them all overworked and too busy. I don’t know if it has calmed down yet but they were all struggling to find employees even last year.

Once I tried going to a pro for powder (Dark Matter) I was kicking myself for not going that way sooner. A world apart…and they can paint or powder graphics on there too. More money and need to ship but well worth a price increase on your frames once the final product is seen. @manzanitacycles can vouch for this too. The peace of mind is worth it alone. Having said that you can do a lot with a single coat powder and nice vinyl decals.

8 Likes

I have been using different coaters over the years, from the big industrial ones who could do a RAL color in between 500 seats to the one man show mainly focussed on motorcycles and stuff. I had a great one for the last couple of frames who liked to experiment and could offer more than boring RAL. Unfortunately he stopped, so I am currently shopping for a new coater. Have some frames at different places right now to see what holds up best. But I would very much prefer do it all in house. We had Hahn in the building here last year and his enthousiasm made me even more convinced. We have an empty garagebox that would be perfect for a powdercoat setup, but I first need to find an oven, or find a way to build one myself. I did find some box style ovens that will fit one or two frames fo around 3000 euros, but I am wondering if there not cheaper ways…
Anyways, here are some examples of the work Bart, my last coater, did:


4 Likes

Concerning decals: I was pretty happy with some decent stickers, but I have quite some clients that feel that’s not fancy enough. I always tell them its easier to replace a damaged sticker than fix a painted one, and I haven’t found a coater yet that wants to do decals under clearcoat.
So I decided to go the Portus way and offer stainless braze ons. Looks nice, but it’s a pita to get them bent right. Have tried tubeblocks and 3D printed blocks, but the more small pointy details there are the harder it gets. I am thinking about getting a plate roller (is that the correct term?) but either the rolls are too big, or the width is too small. What solutions do you guys and gals use?

4 Likes

I have a set of tubes, cut in half hotdog style that all fit in each other like nesting dolls.
I just smash and keep getting smaller diameter until the fit is close.

You’re right about the small pointy bits though, these edges give me a hard time every time.

I’ve had success with a little heat and a lil tap from a light hammer. I’ll also put a cobra clamp on them and then apply a tad more pressure once its warm. Sometimes this leaves a little crater but it can be sanded out.

3 Likes

Those are some striking and unique powder coats! They complement your unique designs so well. I can see why it would be hard to go back to a more conventional coater after this.

2 Likes

Here’s an interesting technique for logos in powder that I have not seen before. He coats the base color, cures it, masks the logo, sprays the second coat - and here’s the interesting part: he heats the part again only to the point of wet out and pulls the logo masking off before putting it back in the oven to complete the cure. Gotta have a steady hand! Skip to 17:45 for this part.
https://youtu.be/bUD96naVoBY

4 Likes

Hi all, powder coater (Utah Powder Werks) and former pro cyclist here-joined at the request of a local frame builder. Unknown Coatings video shows doing logos the proper way. Oracal 651/751/951 can be used under powder clear coat just fine, and there are low-temperature cure clears (340 vs 400 deg) that can help out with ensuring vinyl is fine. Generally vinyl on top of existing powder leaves weird residue if not pulled immediately after the powder melts (flowout). Fully curing the base can help but then there is no inter-coat adhesion between layers of powder. We do logos this exact way on wheels, bike frames, calipers, whatever. Yes, there is some elevation change from the layers but certain powders require different mil thicknesses to look good. Cerakote applied over a powder base using airbrush & vinyl masks works fine too and can be cleared over-it’s probably the best method to get low-mil thickness logos. Powder base coats and clear can also be wet sanded just like wet paint. We’re doing a frame for Salt Air Cycles-would it be helpful to do a video series on it for you guys? It’s a simple two-tone logo/head tube badge and main frame color job but would show masking techniques, logo techniques, and provide a good place to answer questions.

15 Likes

We should do some tests for you guys using q panels on different vinyls (ex 651/751/951) under different clears (low temp, hi temp, cure times. Let me know if this would help you guys out.

7 Likes

You hit on a good point with blasting-for us, a clean, outgassed frame only needs a bit of tooth for powder. We have noticed some small craters open up on some brazing-these can be filled with Tiger Drylac’s Epo strong, steel stick, JB weld, or Alvin’s Lab Metal and then sanded out, but a 20-40psi blast is all that’s necessary with 100-120# aluminum oxide or garnet (alum oxide is the only media that has very strict mesh standards compared to others, which is why it’s also the most expensive). Have you tried automotive ceramic coat on casper clear to see if it helps with staining/cleaning?

8 Likes

Thanks for joining the forum! That was the best description of decals and powder I have seen. I really appreciate it.

Powder is such a pain point for us. We end up having to redo l1 in 20 frames because of problems with the powder coater, so I’m happy to see a company able to handle delicate parts and decals.

2 Likes

Glad to be here. We hate redos as well but with a strip tank you toss it in and it’s bare metal again in a few hours. Frustrating? Yes. But that’s finishing for you.

4 Likes

Oh yes! You’ve already shared a ton of really useful and actionable information. I’d love to see more about the specifics of how you work with masking.

4 Likes