Ex DH rider trying to design and build a gravel frame, go get the popcorn

Happy new year to all you bike fab maniacs!

So the other day I had the opportunity to purchase a GRX groupset at a very good price and couldn’t turn it down. This obviously left me with no other possibility but to design and build a frame to mount it to.

But alas! Having only ever ridden (and built) squishy bikes before, that focus a lot more on descending scary rock gardens while stood up on the pedals, I have absolutely no clue what I’m doing, especially geometry wise.
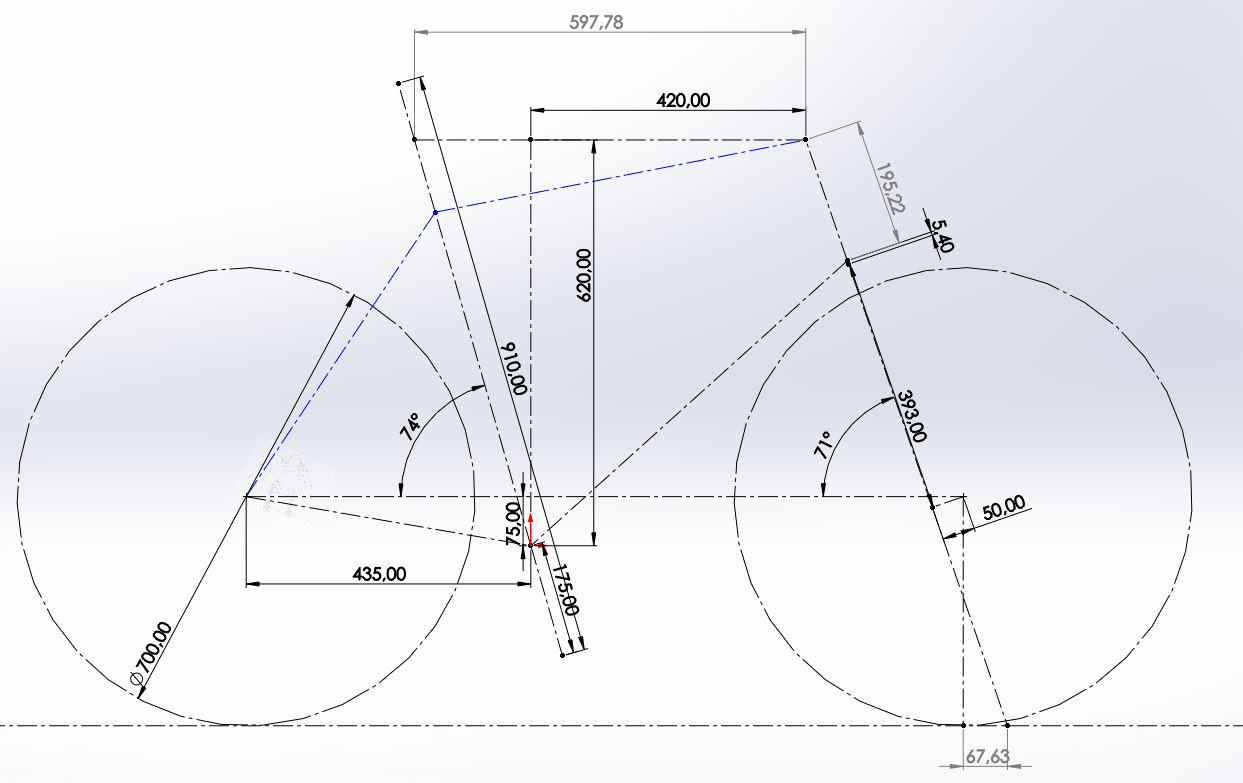
So I asked chatGPT to give me a few geo numbers for my 189cm height/91cm inseam, and I also asked a few people who may or may not have some more experience with the geometry of a bike that is mostly ridden while sat down. This is what I ended up with so far: Feel free to criticise/suggest other numbers!

The fork I’ve taken the numbers from is a Ritchey 1 1/8" carbon gravel fork. I chose this one because it is less “meaty” than other carbon forks around the top end and I hope this blends in well with a paragon 44mm head tube and zs44 headset cups. Again, please correct me if this sounds stupid to you :wink:

Alright, a few more choices that are already pretty taken are the chainstays (Deda MPO240C2022) and Allotec C82 dropouts, because I already have them in a drawer… Apart from that, everything is pretty much up for discussion, especially tube diameters. So far, I’m shooting for a 35mm DT, 31.8mm TT and the seat tube, I’m actually a bit lost. Most tubes are too short for my size, and I don’t really understand the benefit of the external butting of many of the columbus tubes. Some advice here would be greatly appreciated!
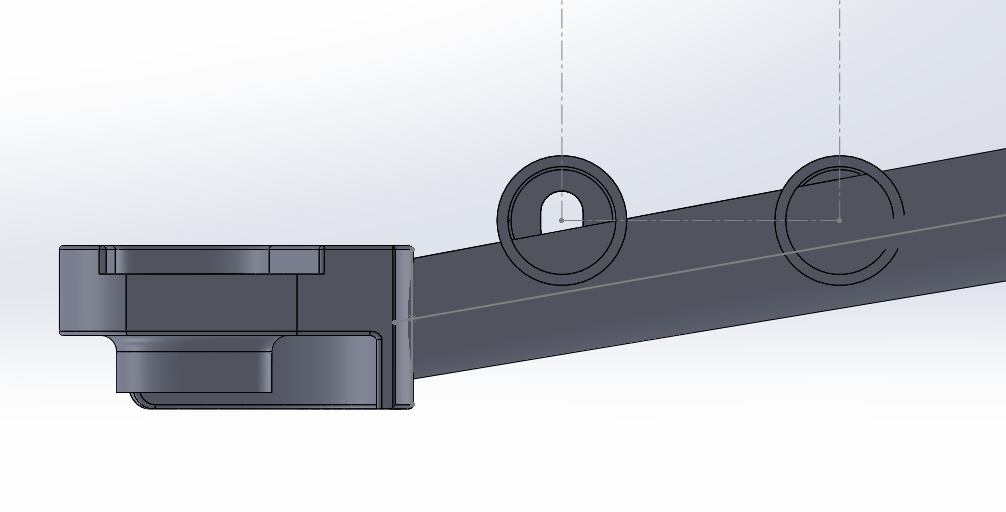
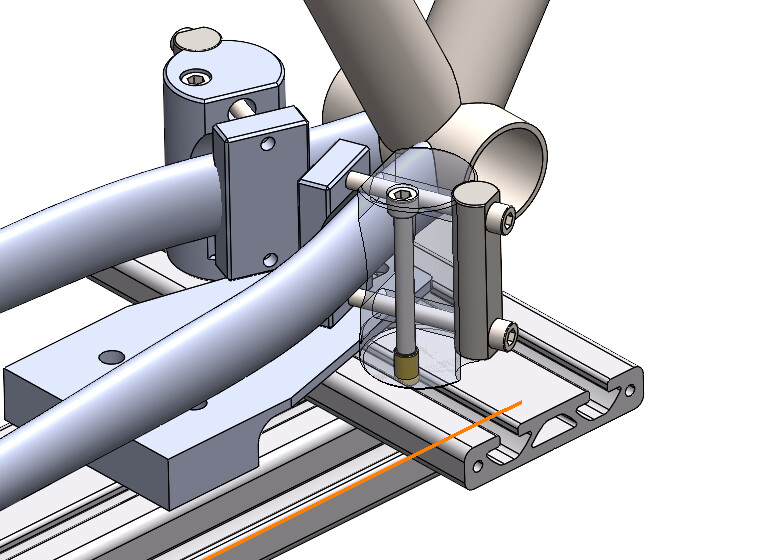
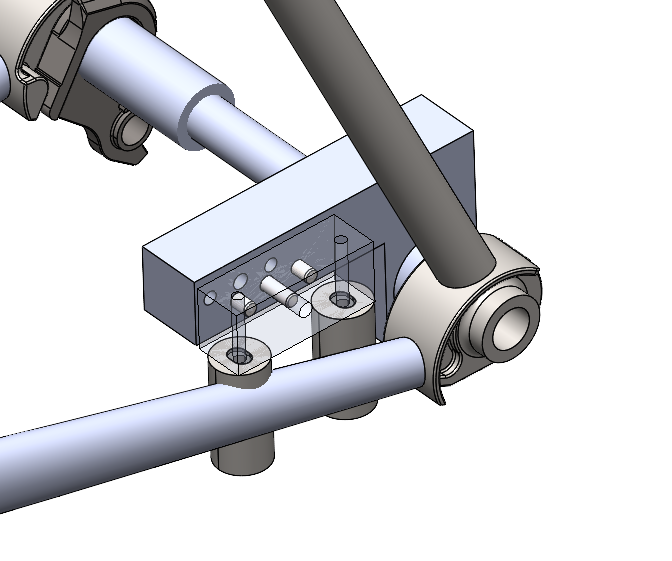
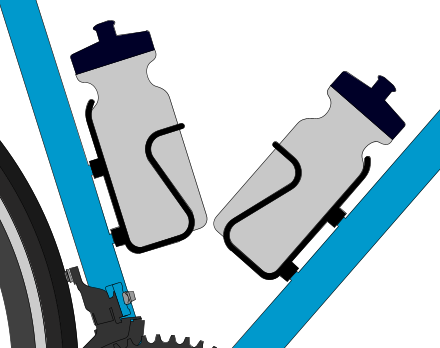
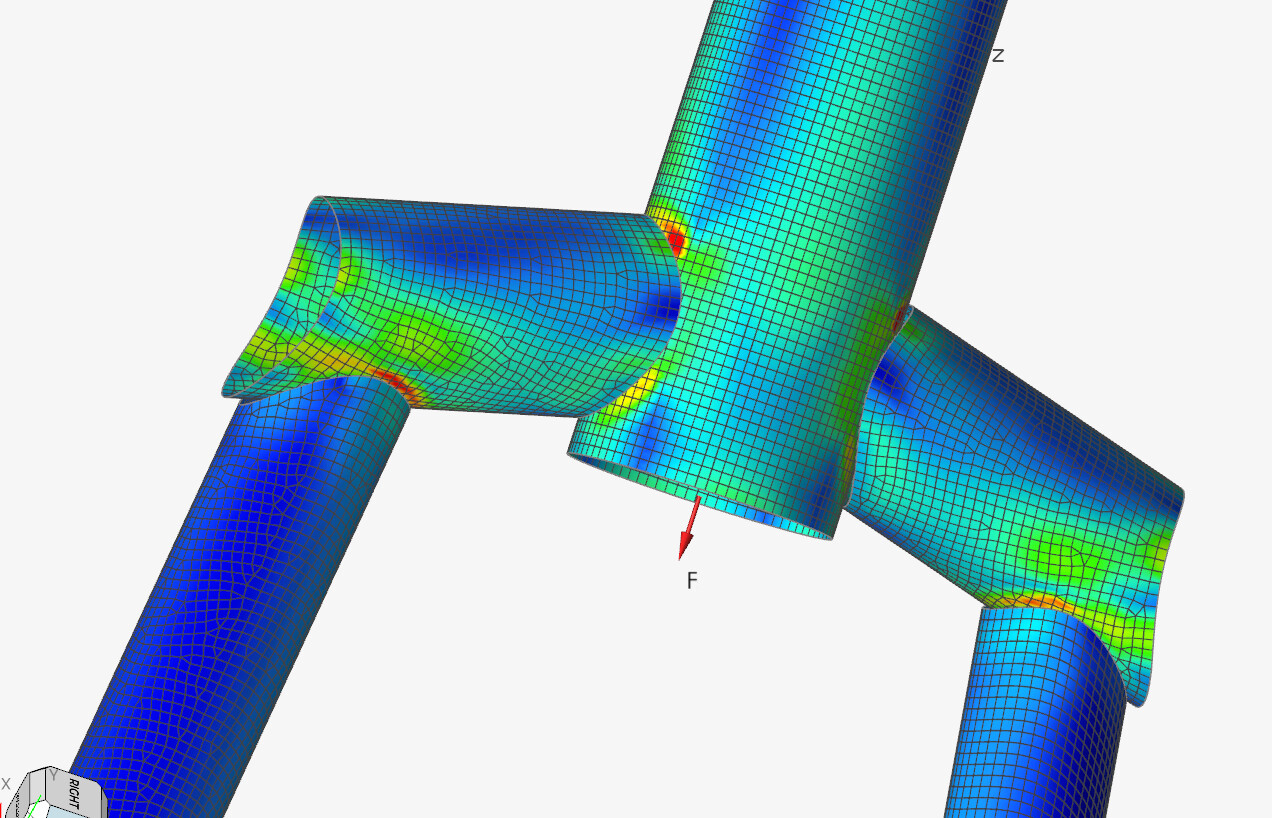
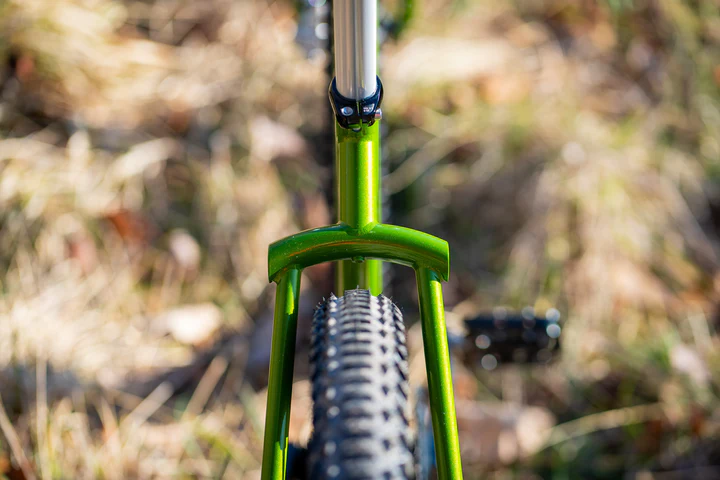
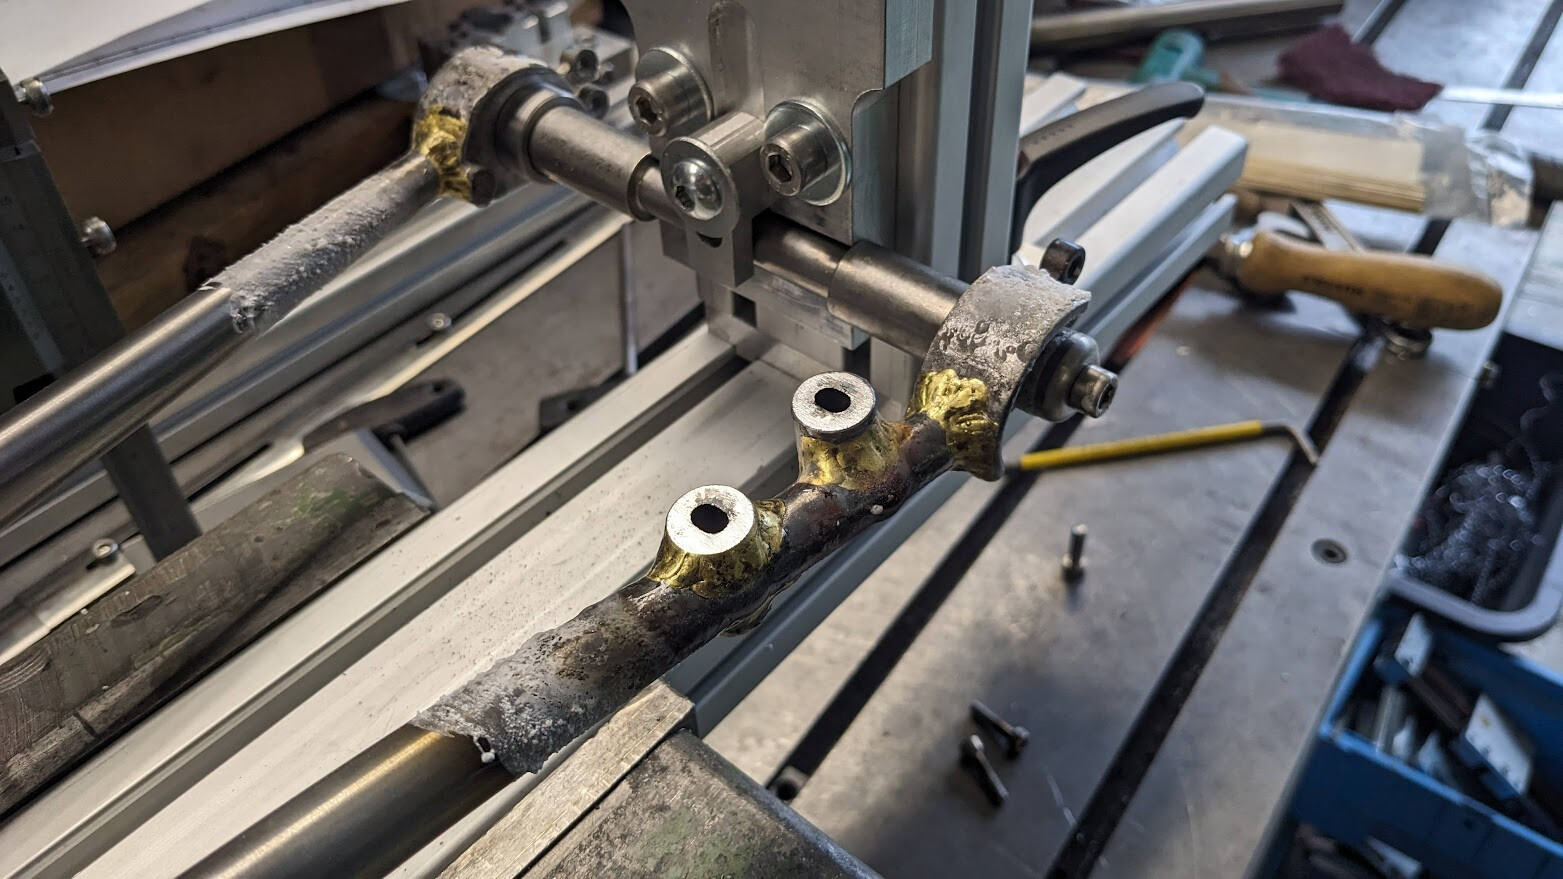
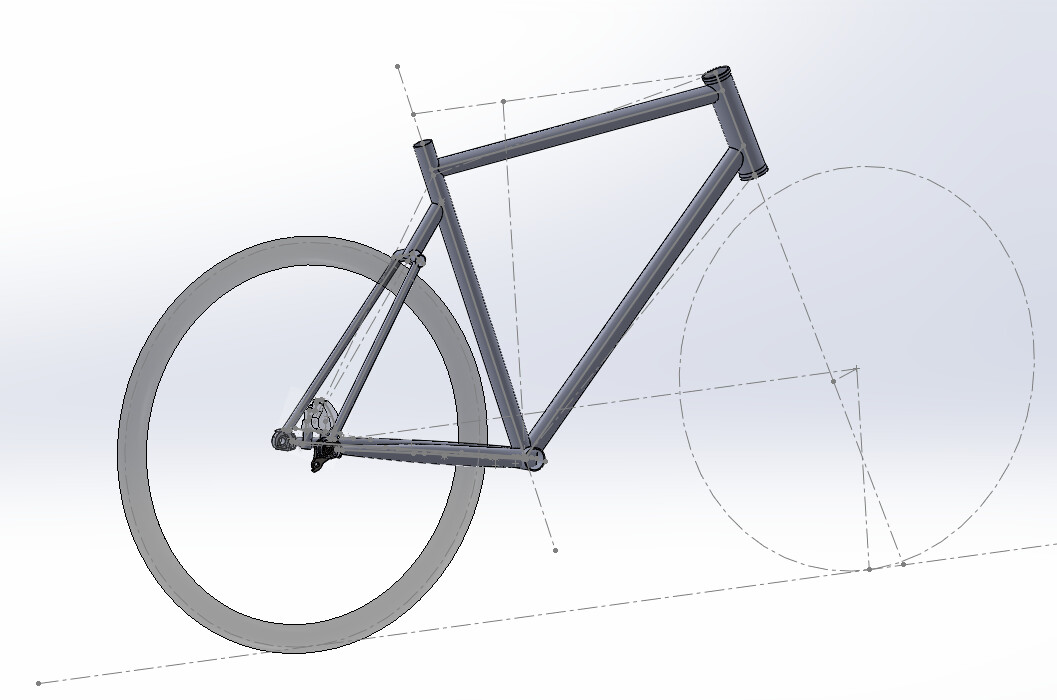
Since I don’t have a tube bender, I will probably build wishbone seat stays (and because I think it looks cool). Also because it looks cool, I would like to have a dropped seatstay junction, which makes positioning the FM mounts a bit finnicky, but we’ll see…
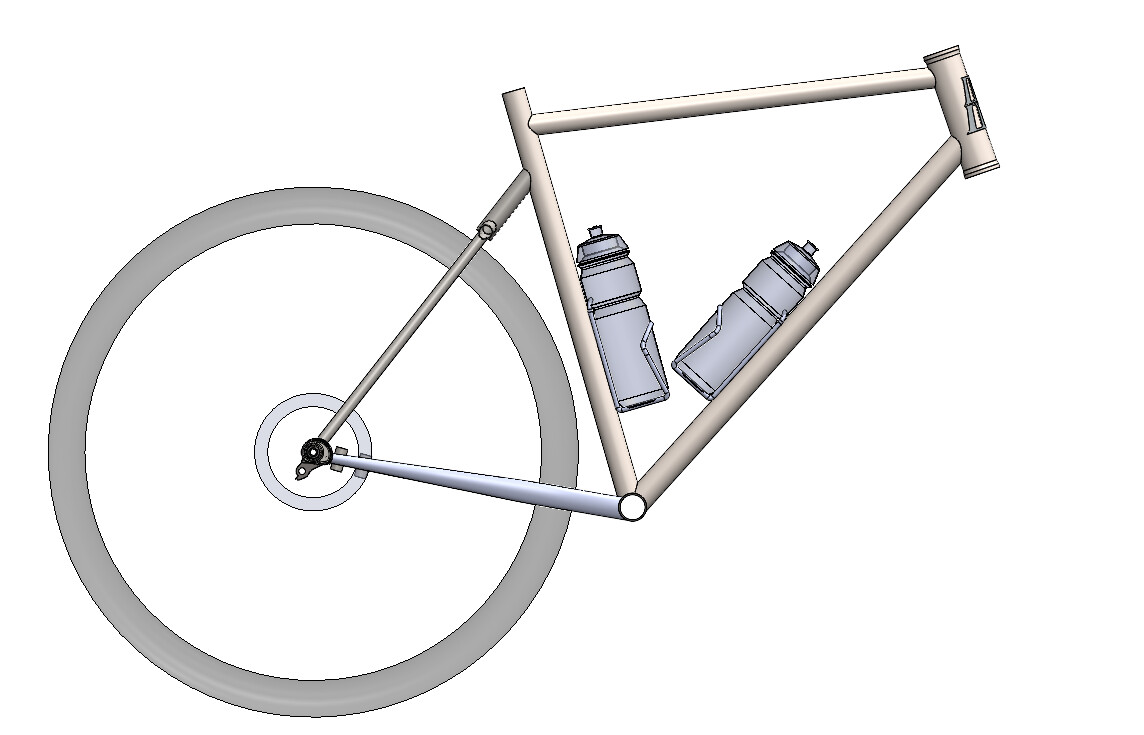
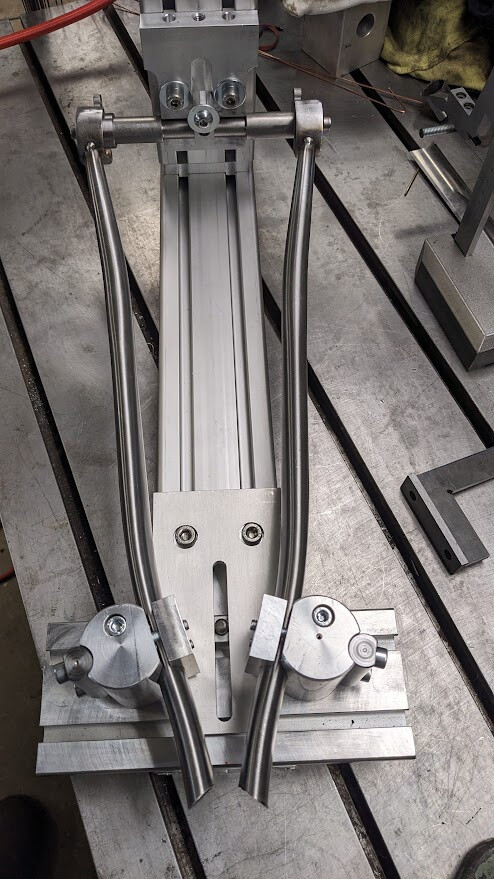
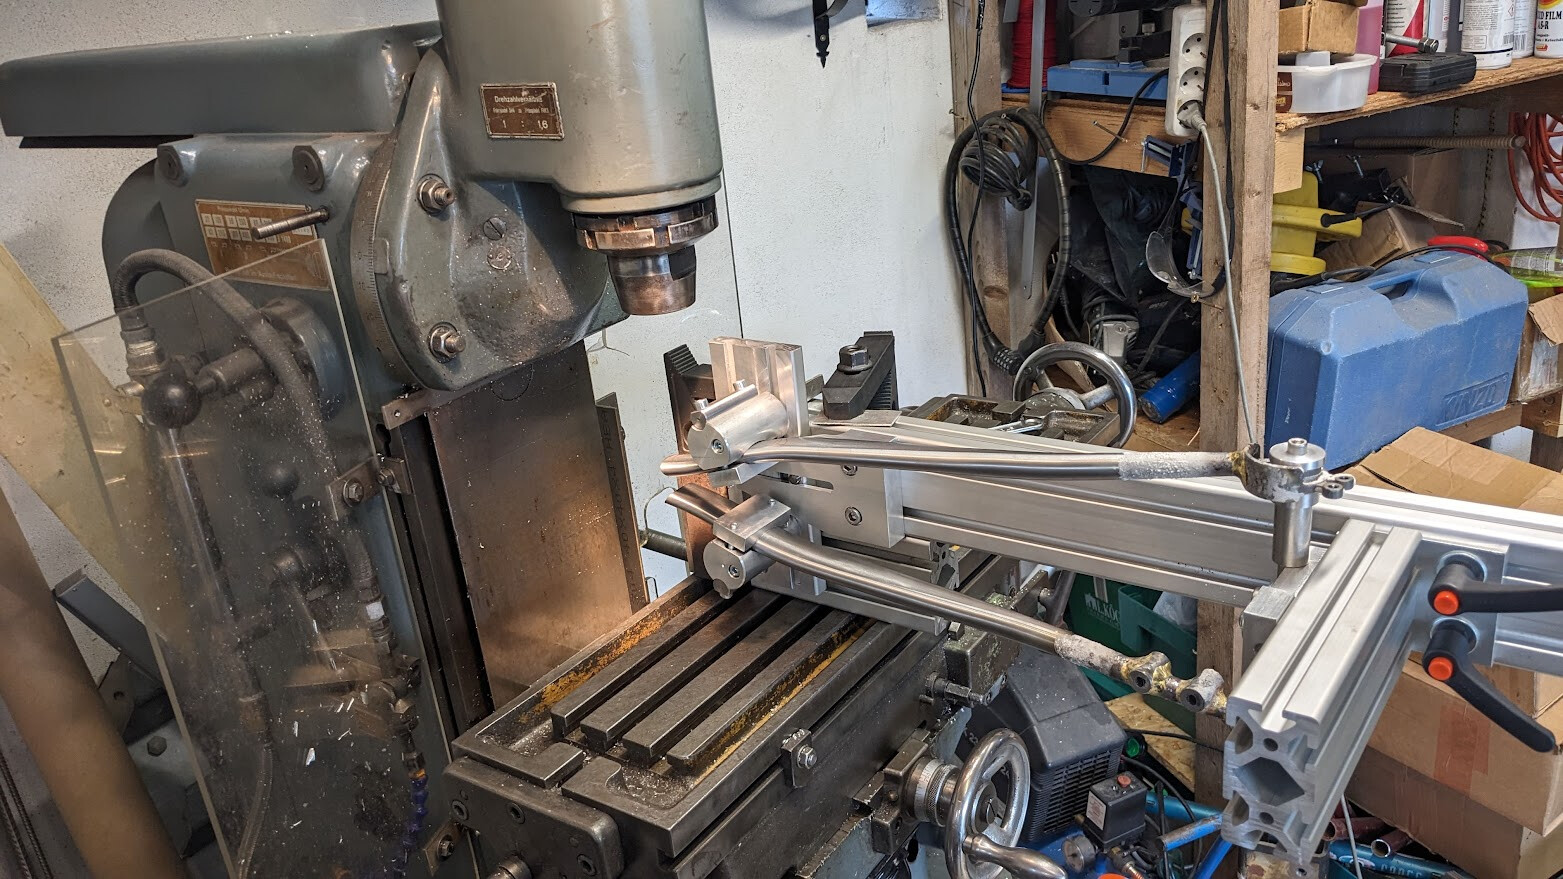
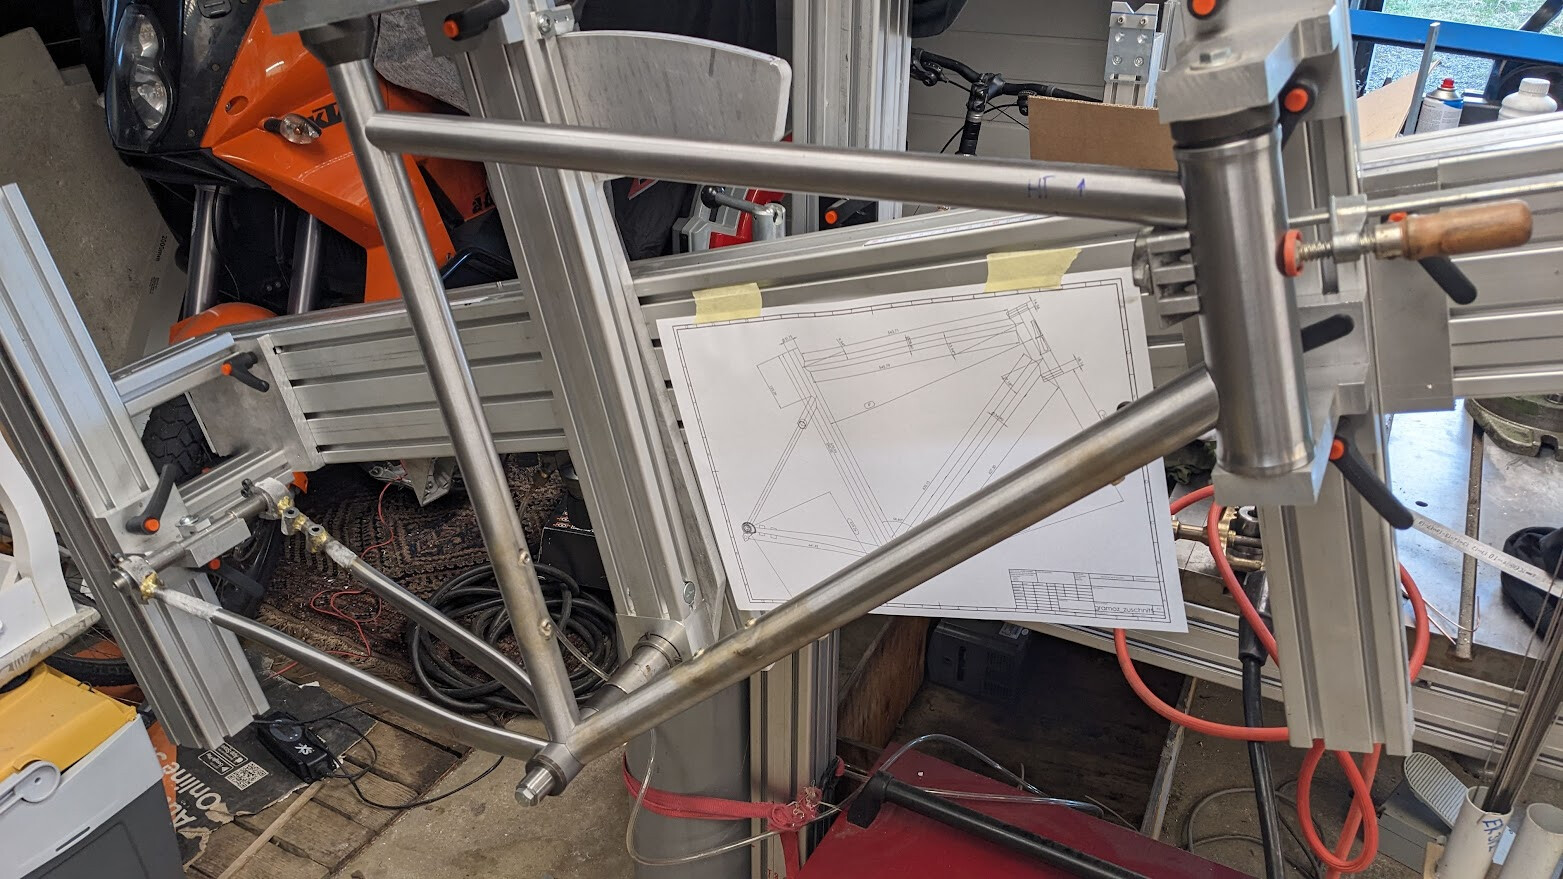
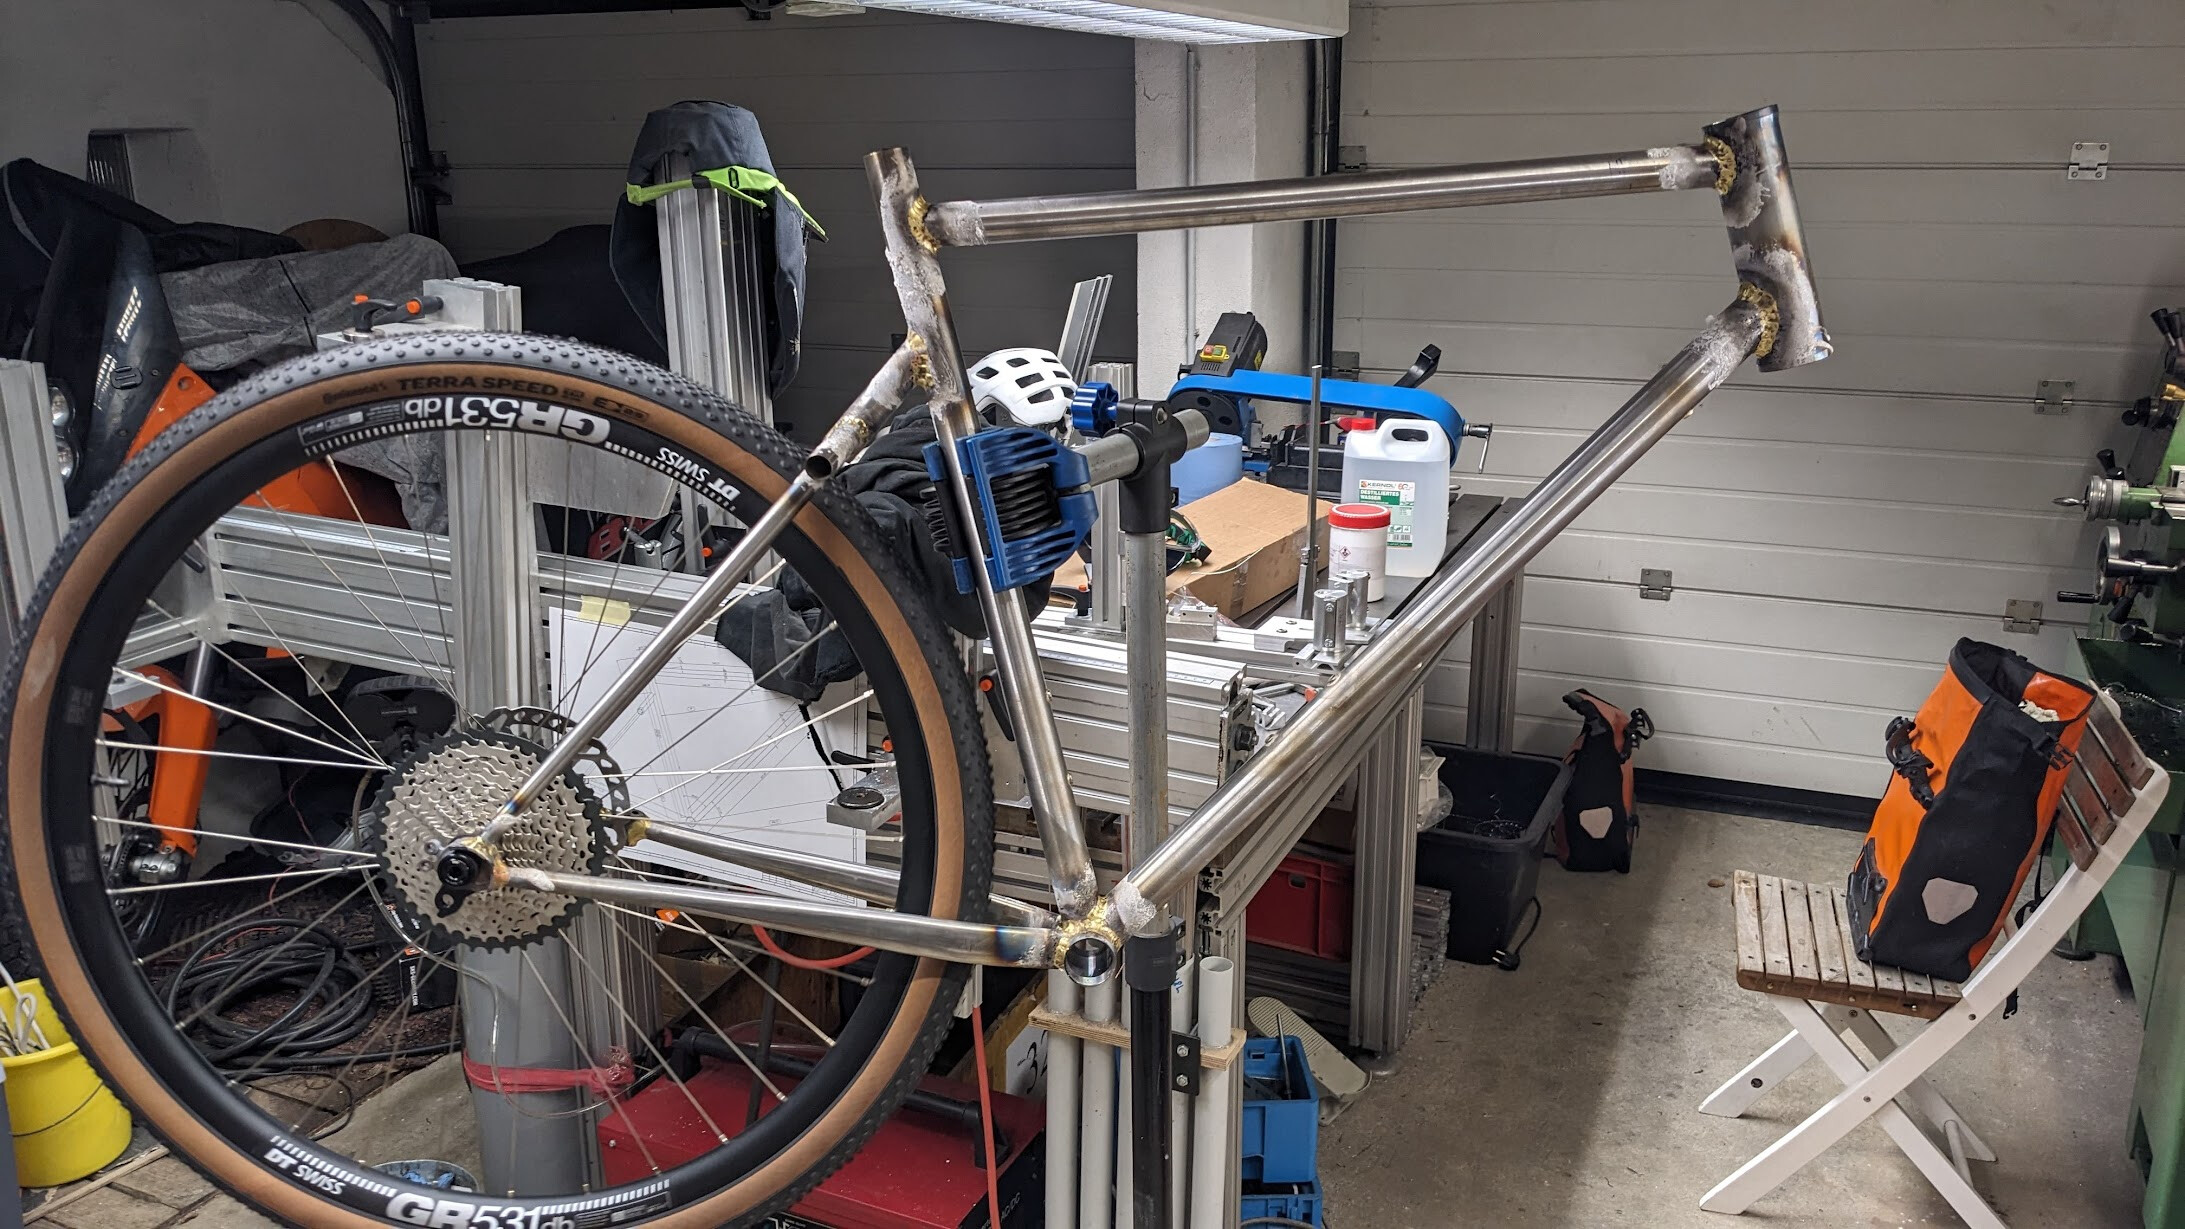
So this is where I’m at so far:


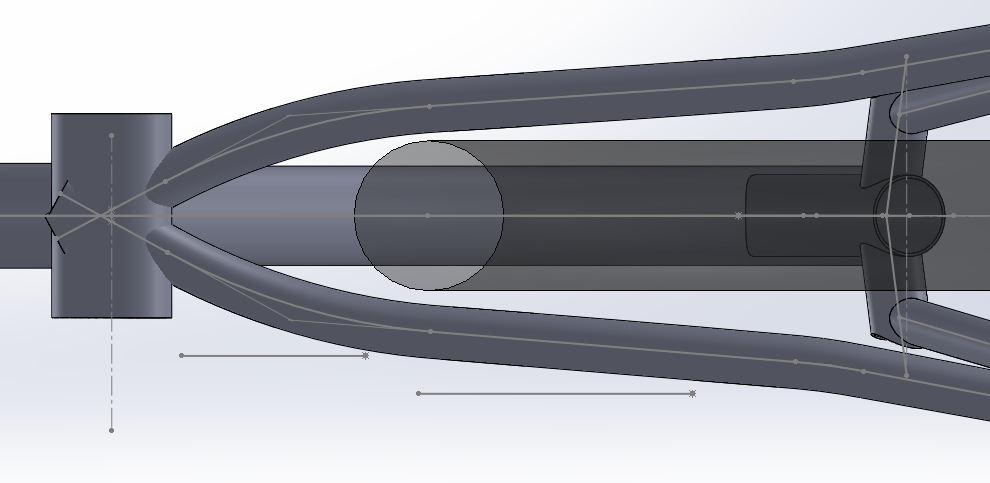
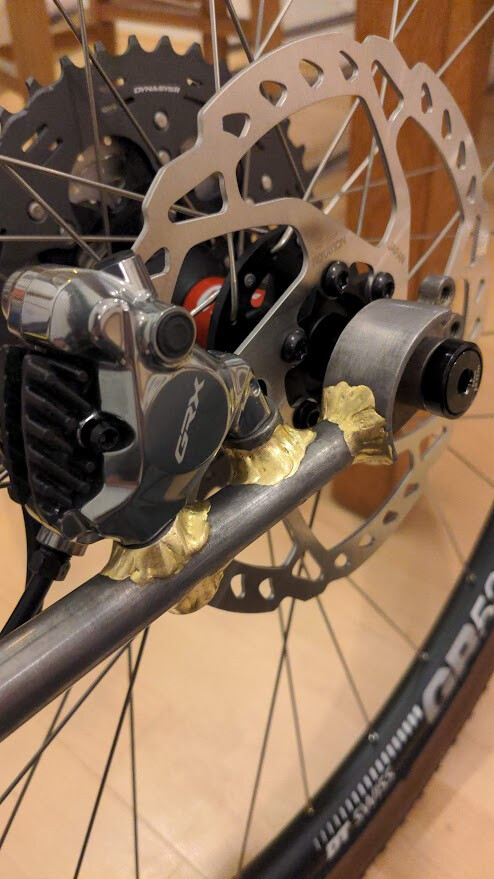
Chainstay will probably require a bit of a dimple for clearance (thx @Daniel_Y for the measurements in ressources!), tire in this pic is 50mm wide and also probably a bit too close for comfort?

Excited to hear what you think! Oh and also, anyone in mainland europe ordering from paragon anytime soon? I may be in the market for a few things and shipping costs are less painful when shared!

8 Likes

First thought is the geo looks solid but a bit conservative. I reckon if ya coming from a DH background I can imagine you’d want to be riding smoother blue trails on this bike as well as gravel/fire roads. If that’s the case I would look more at some of the “progressive” gravel bikes out there. This is a quick seach on gravel bikes with a 69deg (or slacker) HTA. Might be a good starting point. Personally I love the look of the @Amigo_Frameworks Bugout.

2 Likes

Looks good to me!

A few comments/questions:

  • With the UDH dropouts and those tapered stays, do you get enough “meat” on the CS to land the flatmount boss?
  • Tube diameter is probably would consider a frame that size
  • Seat tube:
    – I would reccomend a 27.2 seatpost. I think the majority of frame compliance comes from the seatpost and (anecdotally), 27.2 flexes way more than 30.6.
    – that limits you to a 31.8 topper
    – Since you have a dropped stay, you should probably use a straight guage 31.8x.9 seat tube.
    – The combination of the 31.8 topper and seat tube might make the seat tube very stiff and heavy… That is a total guess though.
    – If you go down to 28.6ST, the velospec seat tubes are nice: AH29/28110608-680
  • Segmented SS’s: since you have the CAD already, you should look into lasercutting the tubes! (this is my current homework project)
    Laser Cutting and Sheet Metal Services l OSH Cut
    https://www.ptlmfg.com/

Most tubes from Columbus and Reynolds are old school. They are too short for mountain bikes and big drop bar bikes. I would look at the velospec pro catalog: Velospec PRO (Cold Drawn, Air-Hardening Steels) to see if they have better lengths for you.

4 Likes

Thanks for all your input, greatly appreciated!

CS/FM meatiness is probably enough. I’ll fillet braze these in probably, so I can create extra meat :wink:

ST: Now that you say topper, that opens up new possibilities :wink: This method isn’t really common here in Europe I guess, haven’t really thought about it!

Laser cut SS:
I have done the data prep for a small batch production run of normal, bent seat stays in a previous job. Both mitres and a hole for the ss bridge were cut on the tube laser. It worked quite well, although bending after cutting leaves a lot of room for error :wink: There was no possibility to “3D-Cut” the mitres, so the cutting direction was always perpendicular to the tube surface. This has to be taken into account, especially with acute angles, small diameters and large wall thicknesses! The data prep was not easy, a lot of projections of cut lines onto surfaces etc…
For my home built single frame the process is probably not really worth it, especially since I’d like to use different diameters for all the segments.

2 Likes

Ok, I just realized I haven’t posted in a while… Well, I’ve moved appartements in the meantime, and have otherwise kept myself busy with procrastinating around the actual frame build, designing a few jigs and building them as well :wink:
So this is where I’m at right now, a few things have changed since the last time I posted:

Most notable changes are:

  • Chainstays are now Columbus Zona, they give me a lot more clearance around the ST/BBCS junction
  • The seattube is a 31.8x0.9mm straight gauge 4130 tube in which I will put a reduction insert for a 27.2mm seatpost. This should be plenty strong enough for the dropped seatstay junction (I hope…)
  • I’m now using a Sour Bikes carbon fork with a slightly longer ATC (405 vs. 393mm) and an EC44 lower headset cup, so I can get away with using a slightly shorter Headtube. I find super long headtubes to be looking a bit awkward…

Cable routing is still a bit undecided to be honest. I do like completely external routing, so I’m thinking under the DT, below the BB and underside of the CS. Is there anything (apart from maybe aesthetics) that would speak against that?
Same goes for positioning the bottle cages… Is there a style police opinion for that? As low as possible?

Things I have been procrastinating with include (but are not limited to):

9 Likes

The routing you described is pretty standard with flat mount brakes.

If you ever plan to use a frame bag, putting the bottles as low as possible will give you more space, with the bottle on the seat tube as close to the down tube as you can. I miter the front triangle and stick a pair of bottles in cages to locate them on the seat and down tubes. It’s a fast and easy way to ensure your bottles won’t bump into each other or the tubes.

If you don’t plan to use a frame bag, then you might want to move the bottles up a bit so they’re easier to reach when riding. On classic road bikes, some builders will align the lower edges of the bottles.

Screenshot 2024-02-27 at 11.15.08 AM

4 Likes

That’s good advice, thanks a lot!

1 Like

Looking good! CADing the bike inside the CS fixture is next level CAD :rofl:

Full housing or naked cables with stops? I prefer full housing if the bike is going off-road.

I like the Paragon cable clips for external routing. They look much better than Zipties because they press the housing against the downtube. With a dark paint scheme, you can hardly tell they are there.

I go as low as possible. IMO it looks better and maximizes frame space. If you use big 1L bottles (because why not) they are very easy to reach.

One thing to keep in mind is the front derailleur clamp for 2X. Annoyingly, SRAM and Shimano have different specs:

SHIMANO RULE OF THUMB:

  • Road (50-52t): 130-156 (top and bottom)
  • Gravel (46-48t): 123-157 (top and bottom)

SRAM RULE OF THUMB:

  • Road bikes (48-52t) 141-160mm
  • Gravel bikes (43-48t) 131-152mm

If you use the low ST bottle mount position, you need to make sure the derailleur clamp is not right on top of a bottle boss:

3 Likes

You must be mad (with jetlag?), answering right after stepping off the plane :wink:

Thanks a lot, that’s extra cudos coming from a cad/data wizard like yourself!
I’ve actually done it the other way around, designed the jig around the frame so I’m not missing any weird spots for access. Maybe I should add my milling machine to the assembly as well? :joy:

Full housing defo… Cable stops and dirt don’t mix! Already got some PMW cable clips!

Phew, just dodged a bullet here. This one is going to be 1x11 :wink:

2 Likes

Is it still jet lag if i didn’t sleep yet? :rofl:

1X is the way to go. I think you will see 2X gravel phase out (if it has not already). The gear ratios are too weird now.

3 Likes

Yes, please!

Enough procrastination…

Tubes have been cut, miters have been mitered!

Btw I’m extremely pleased with the jig. I can set it up and cut the tubes to the numbers from the drawing and everything fits together nicely! I “snuck up” to every mitre but ended up dead on the money every time…

10 Likes

So, I have another question regarding the seatstay assembly. I am planning to build a segmented, whishbone-style rear on this frame and I couldn’t help but notive that other builders do this almost excluzsively “the other way around”. This goes for rear ends as well as segmented forks. By that I mean the way the little spreader tubes are mitered. Usually, the stays or blades are left unmitered and just cut to length, while the spreaders are mitered on both ends to connect the legs and the steering shaft or whatever you’d call the corresponding bits on a rear end.
Is there a particular reason for that?

I did a quick and dirty FEA to find out that the stress level on both joints is pretty similar, I am not overloading one of the two. If there would have been a massive difference, I’d have made another model for the “usual” way to put this together, but since it looks to be fine…

4 Likes

I think they do it the other way around because it is less sharp/pokie. It seems like I have to be more careful about that than some so go with what you like.
It’s looking good good so far! Good luck with the rest of your build.

2 Likes

Will be fine either way. The VO Piolet is a production bike with a wishbone design similar to your design. They even put rack mounts at each end of the cross tube. Personally I think the other way looks better.

3 Likes

One reason to do it the traditional way is then the builder doesn’t have to make the legs exactly the same length. If one is slightly longer than the other it won’t affect wheel alignment.

7 Likes

Hmm that’s a good point, I’ll have to think about that for a bit. Haven’t really decided on a battle plan for the stays yet anyway.

1 Like

Now that the stay-jig is finally finished, let’s put it to use!


Sketchy workholding… I should have modeled my milling machine with it, so that I would have known it was going to be a challenge to mount on the table :wink:

But I seem to not have messed it up too badly overall. It’s starting to look like a bike!

First time building a flat mount, first rear end in this jig, first flatmount bosses positioned with my diy-jig… and it still fits. I should buy a lottery ticket today I think, seems like it’s my lucky day!

10 Likes

I like that. The wishbone rear end is the only feature of my Planet X Kaffenback I don’t like!

image

15 Likes