I’m new to the forum and thought I’d share some of my recent projects and what I’m currently working on.
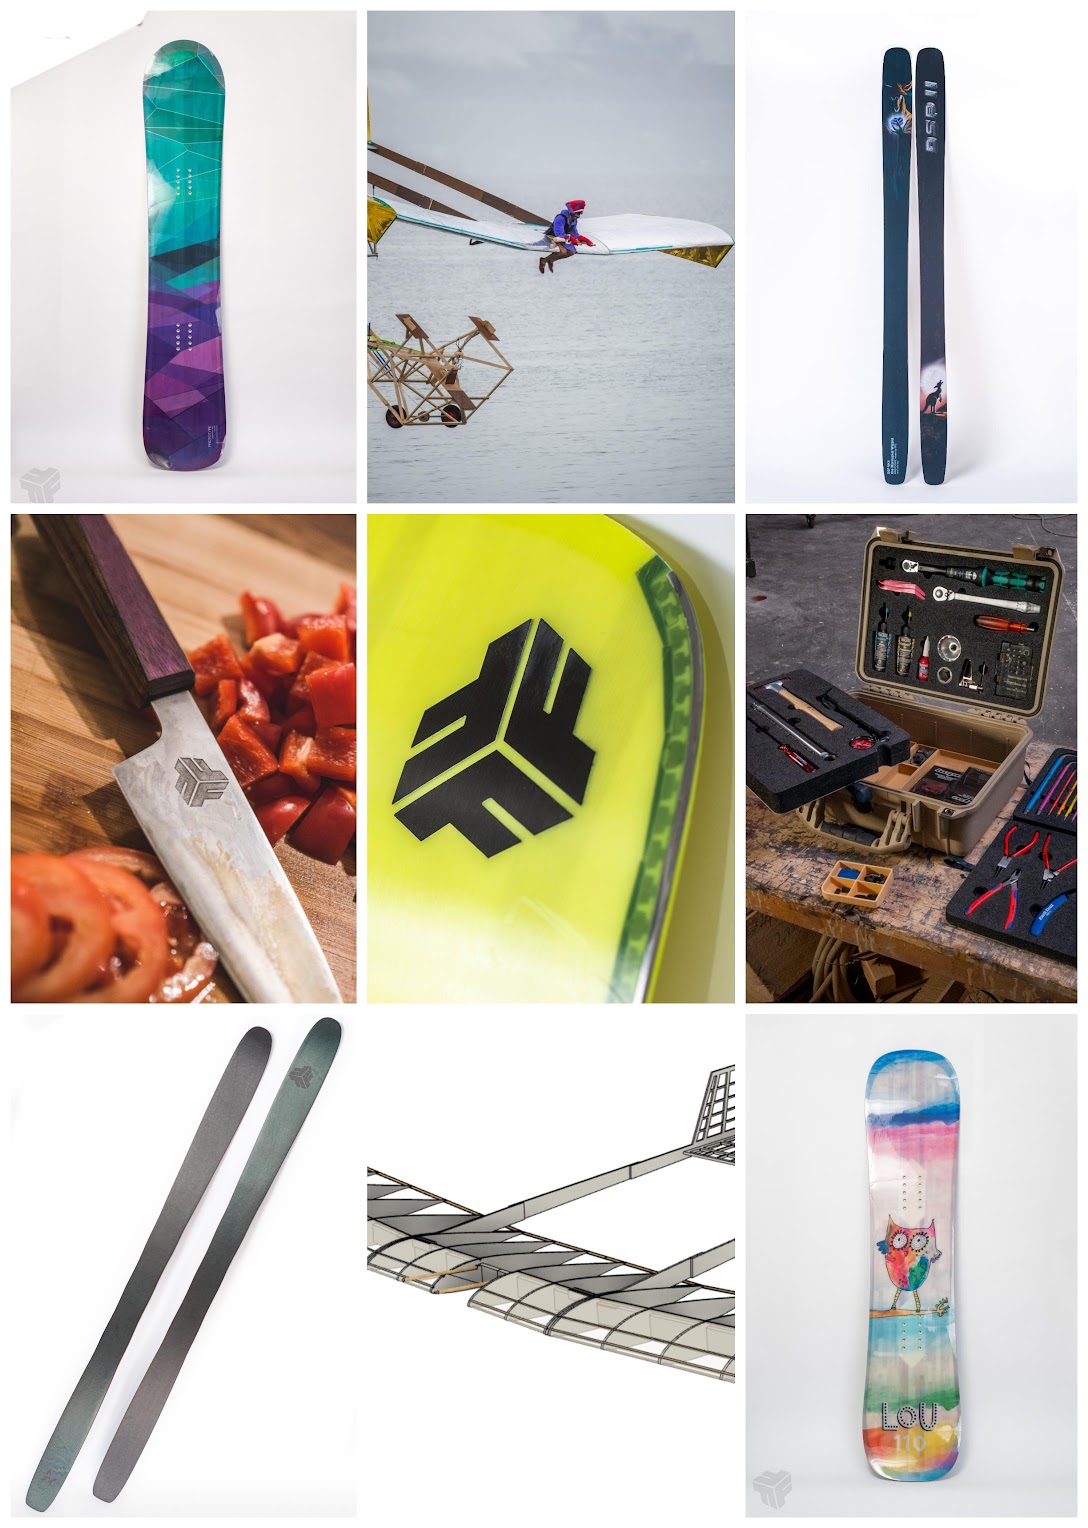
My brother and I built a lot of different stuff over the years, but mostly kiteboards, skis and snowboards, but also some kitchen knifes, a plane for the redbull Flugtag, …
I work a lot with composite materials, which I believe is awesome for the home builder. There are relatively few tools required to get started and one can make really high quality, structural parts in a garage.
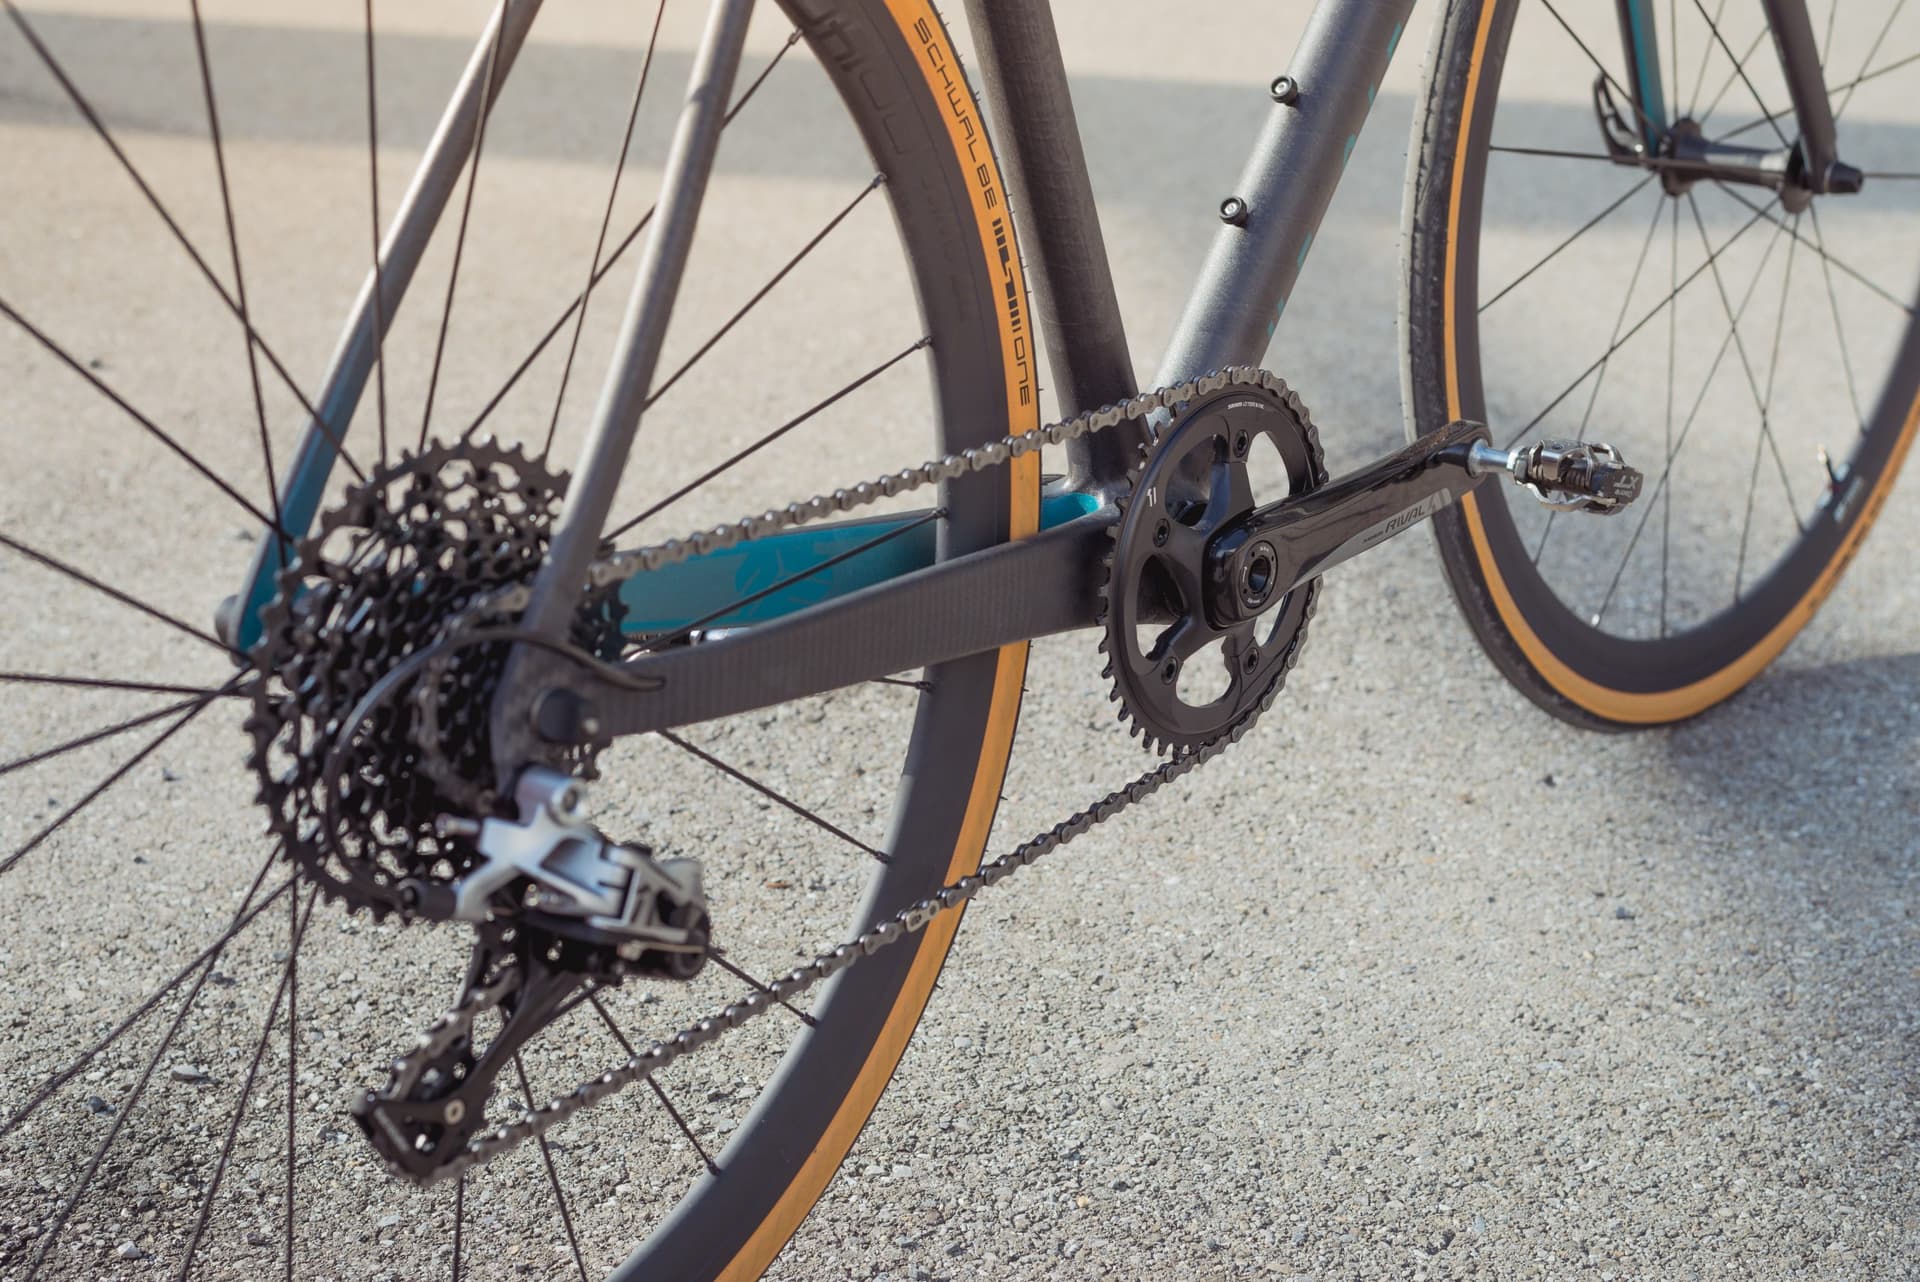
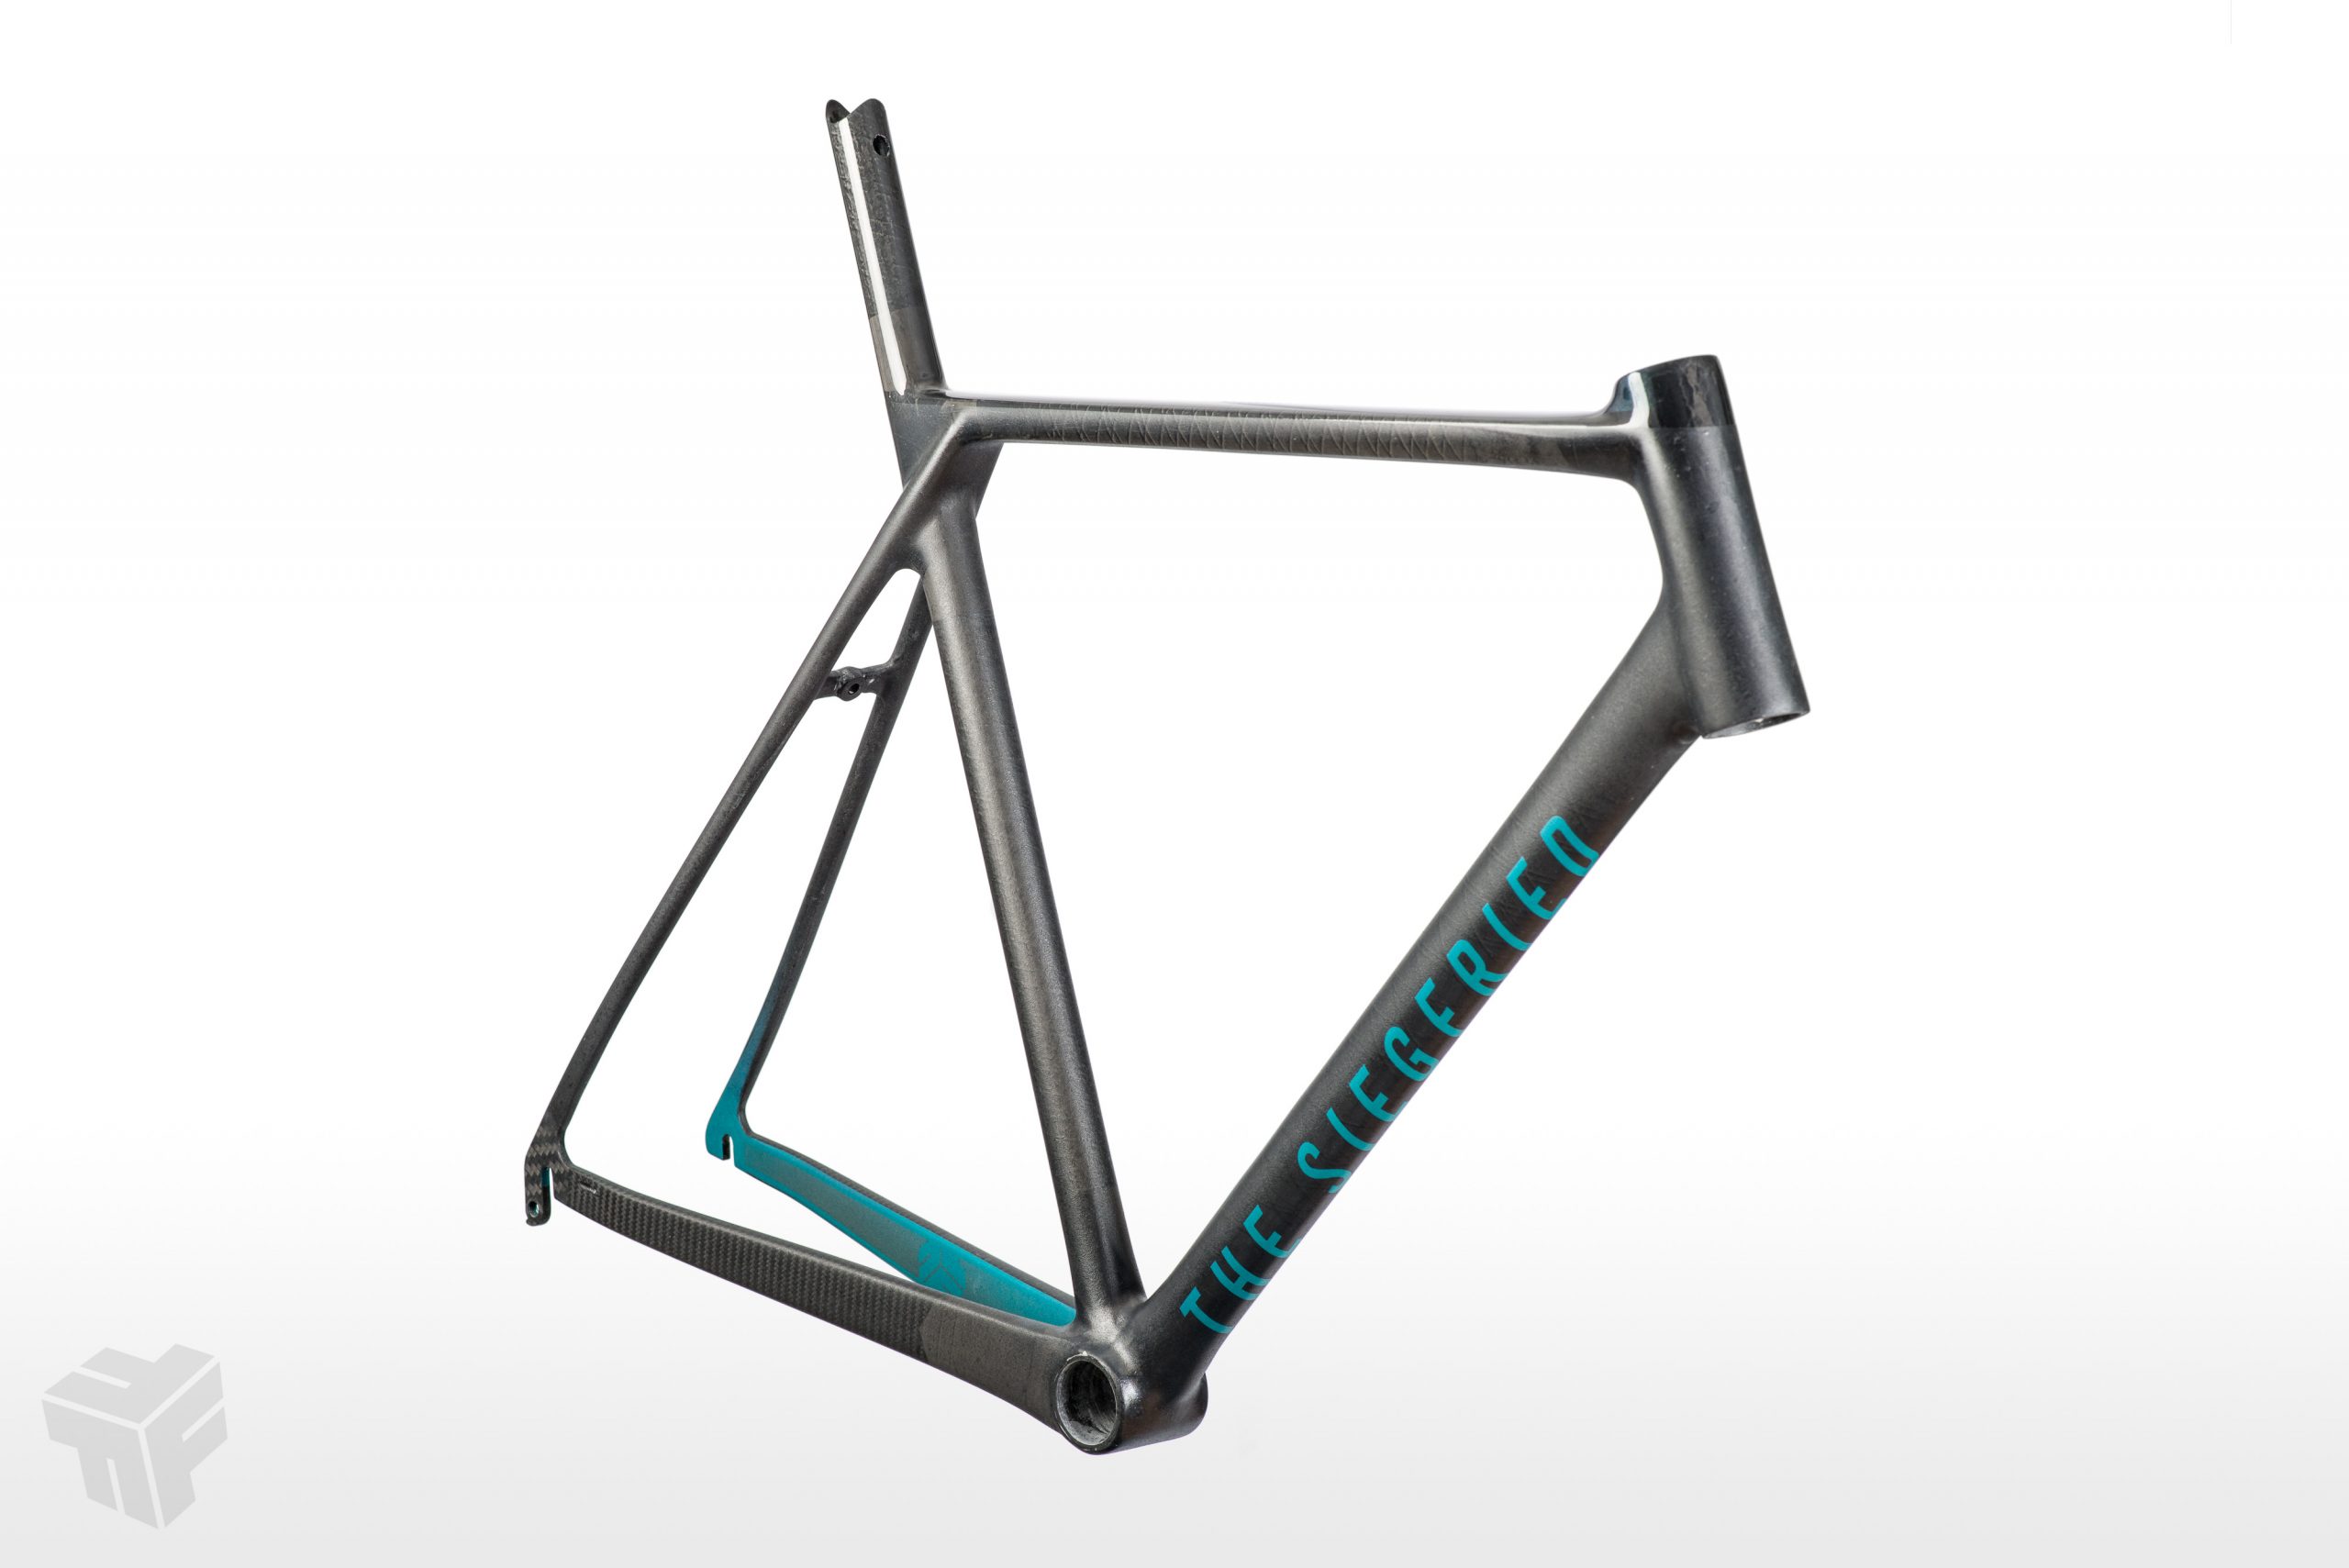
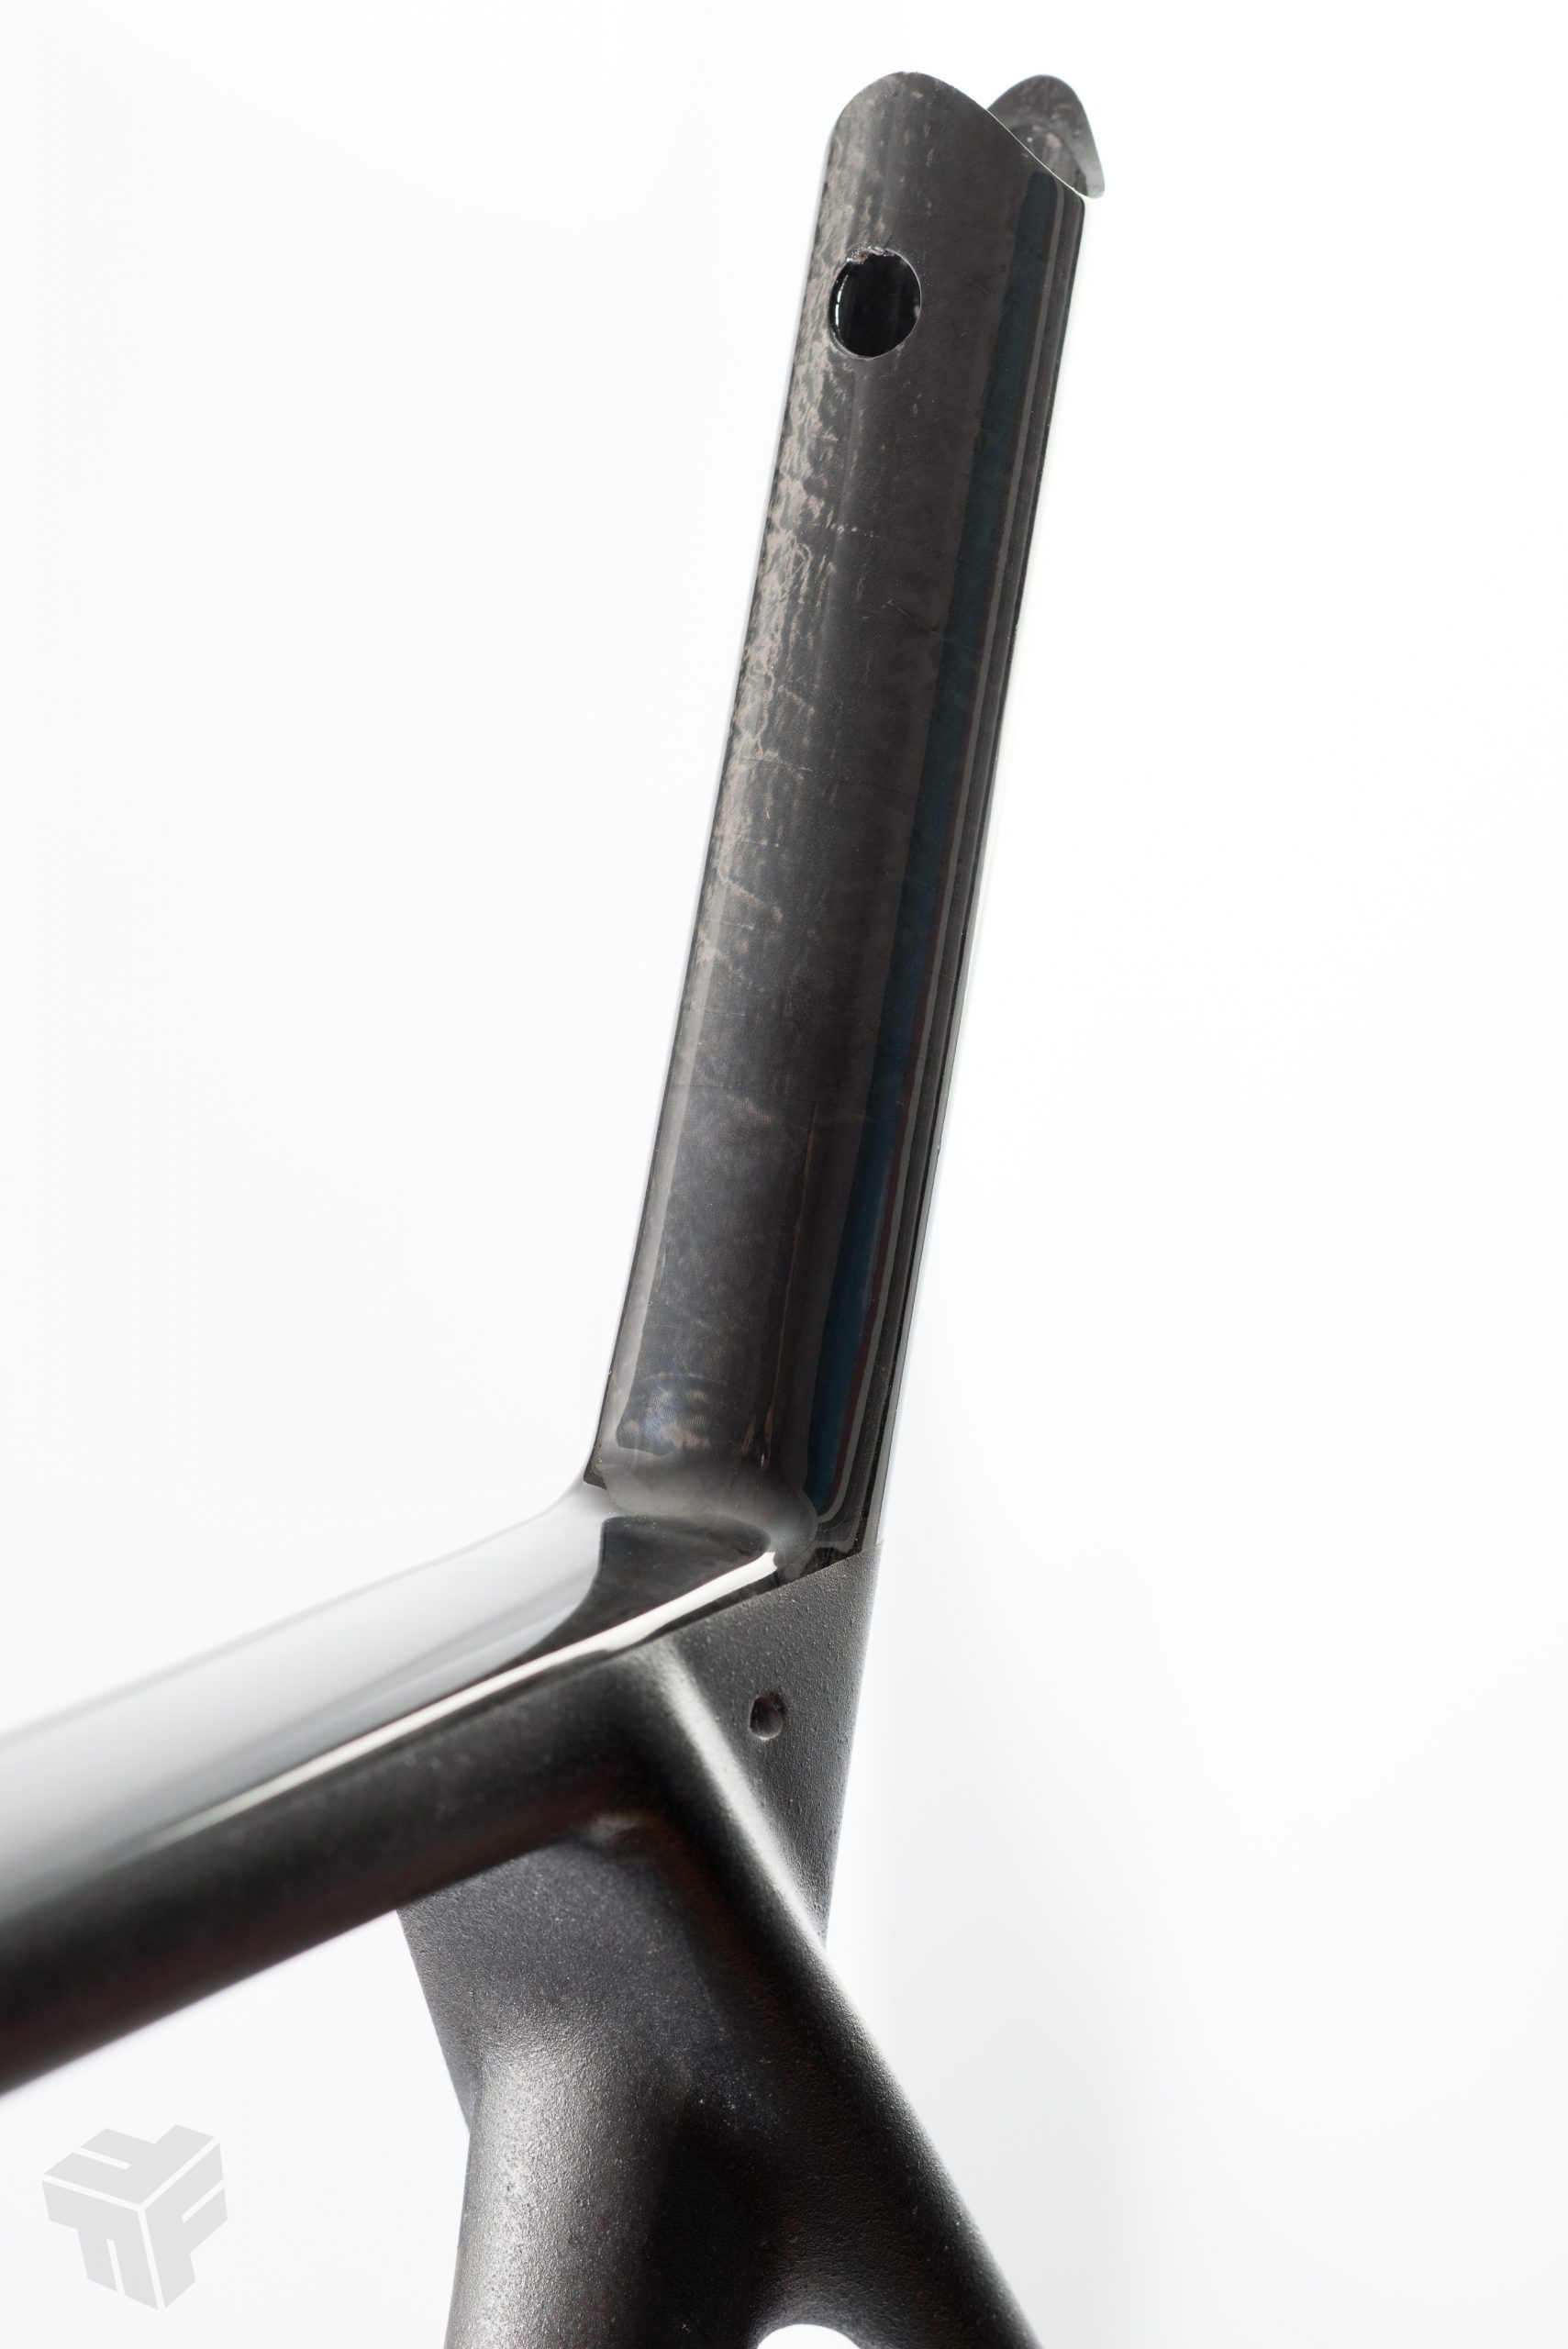
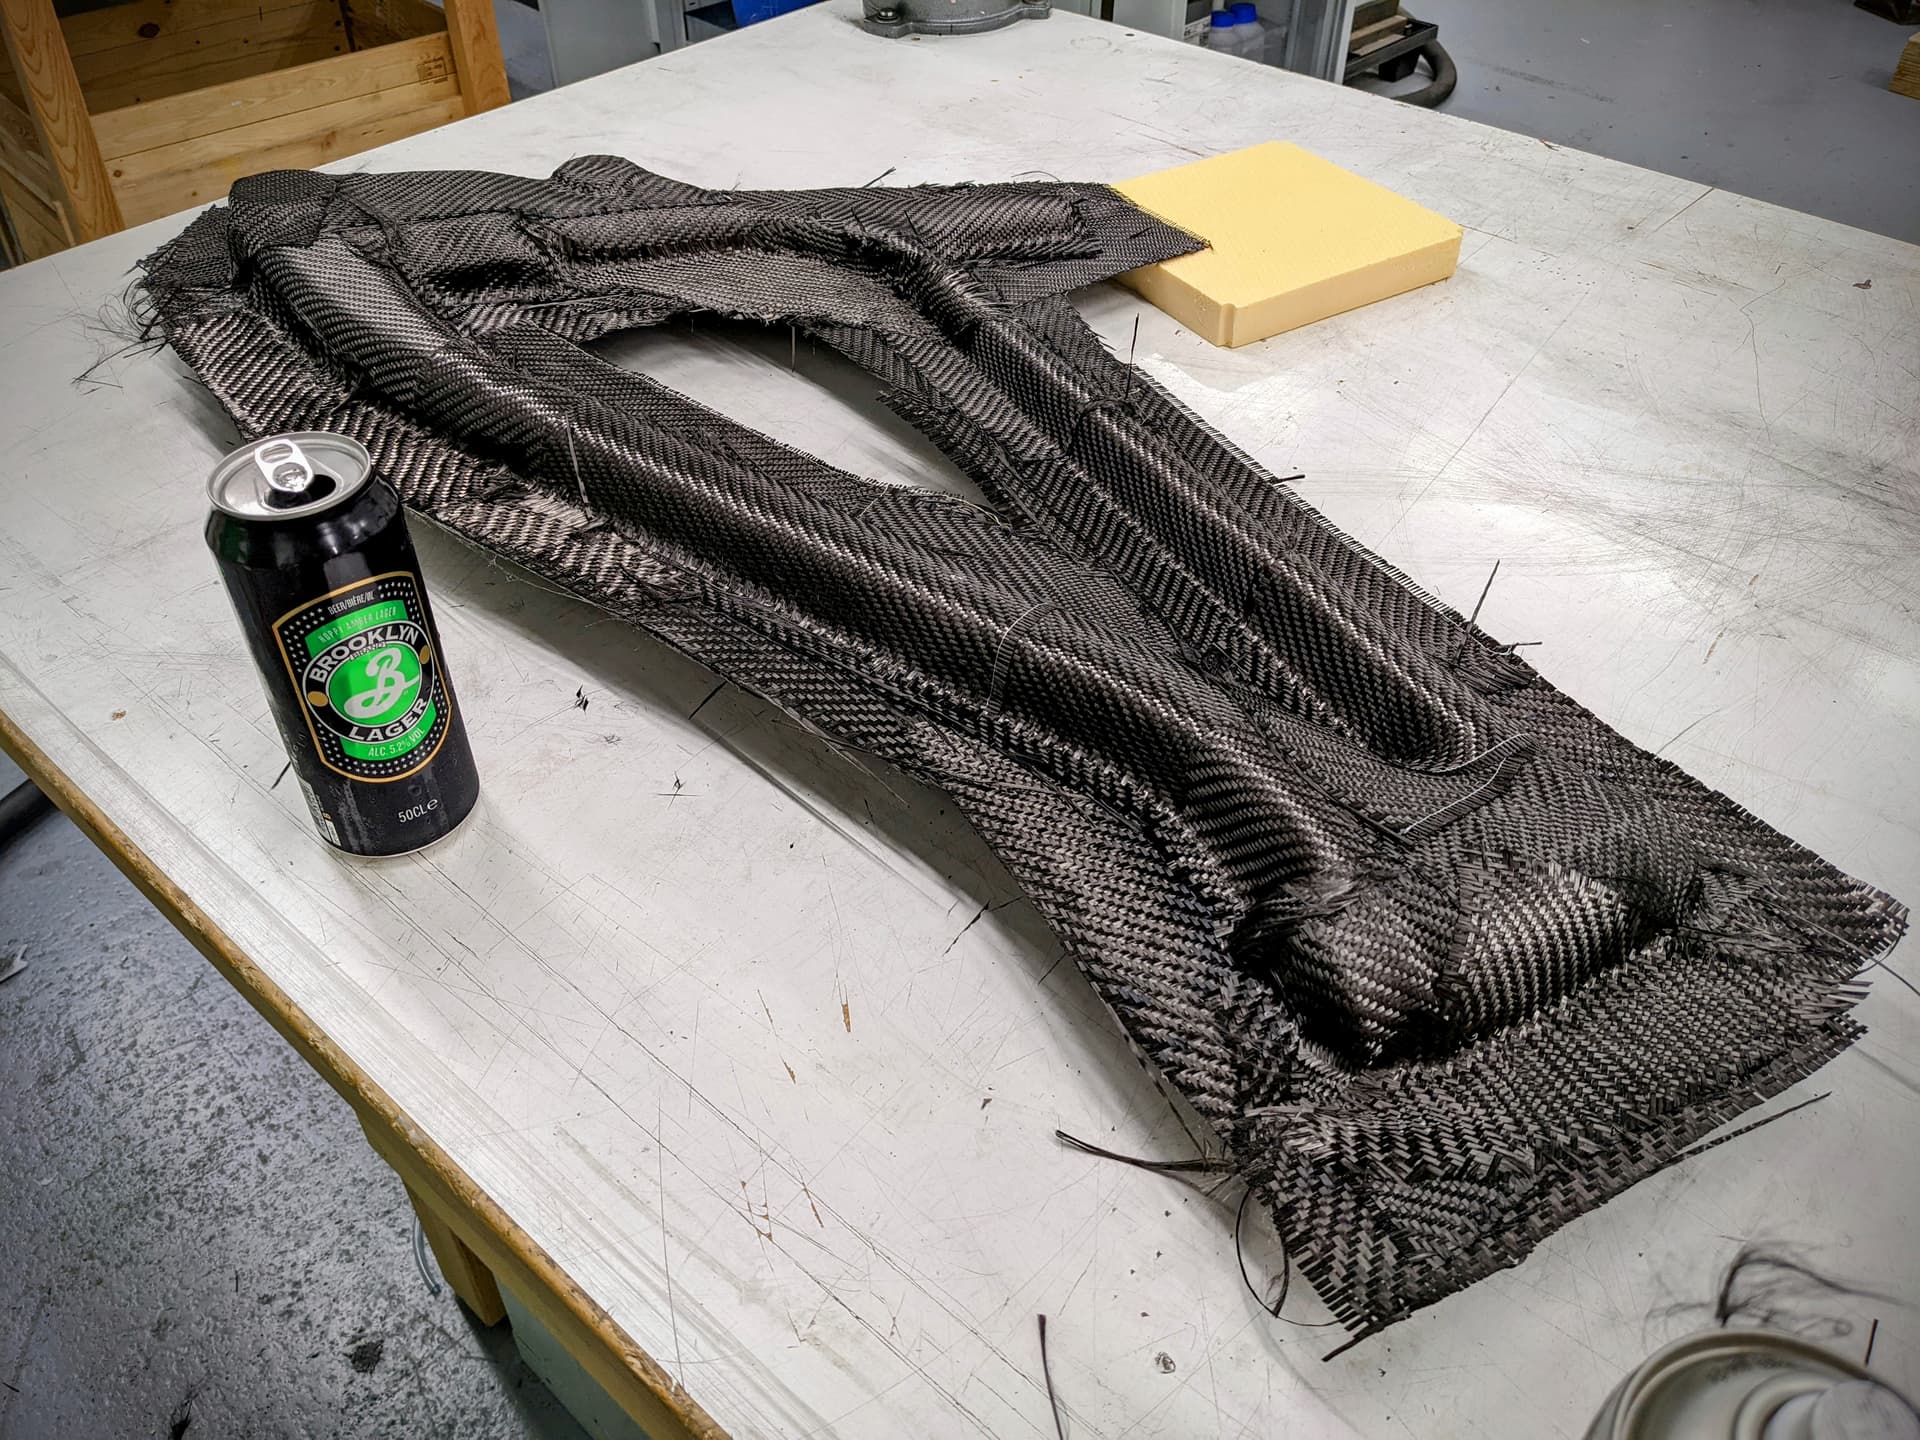
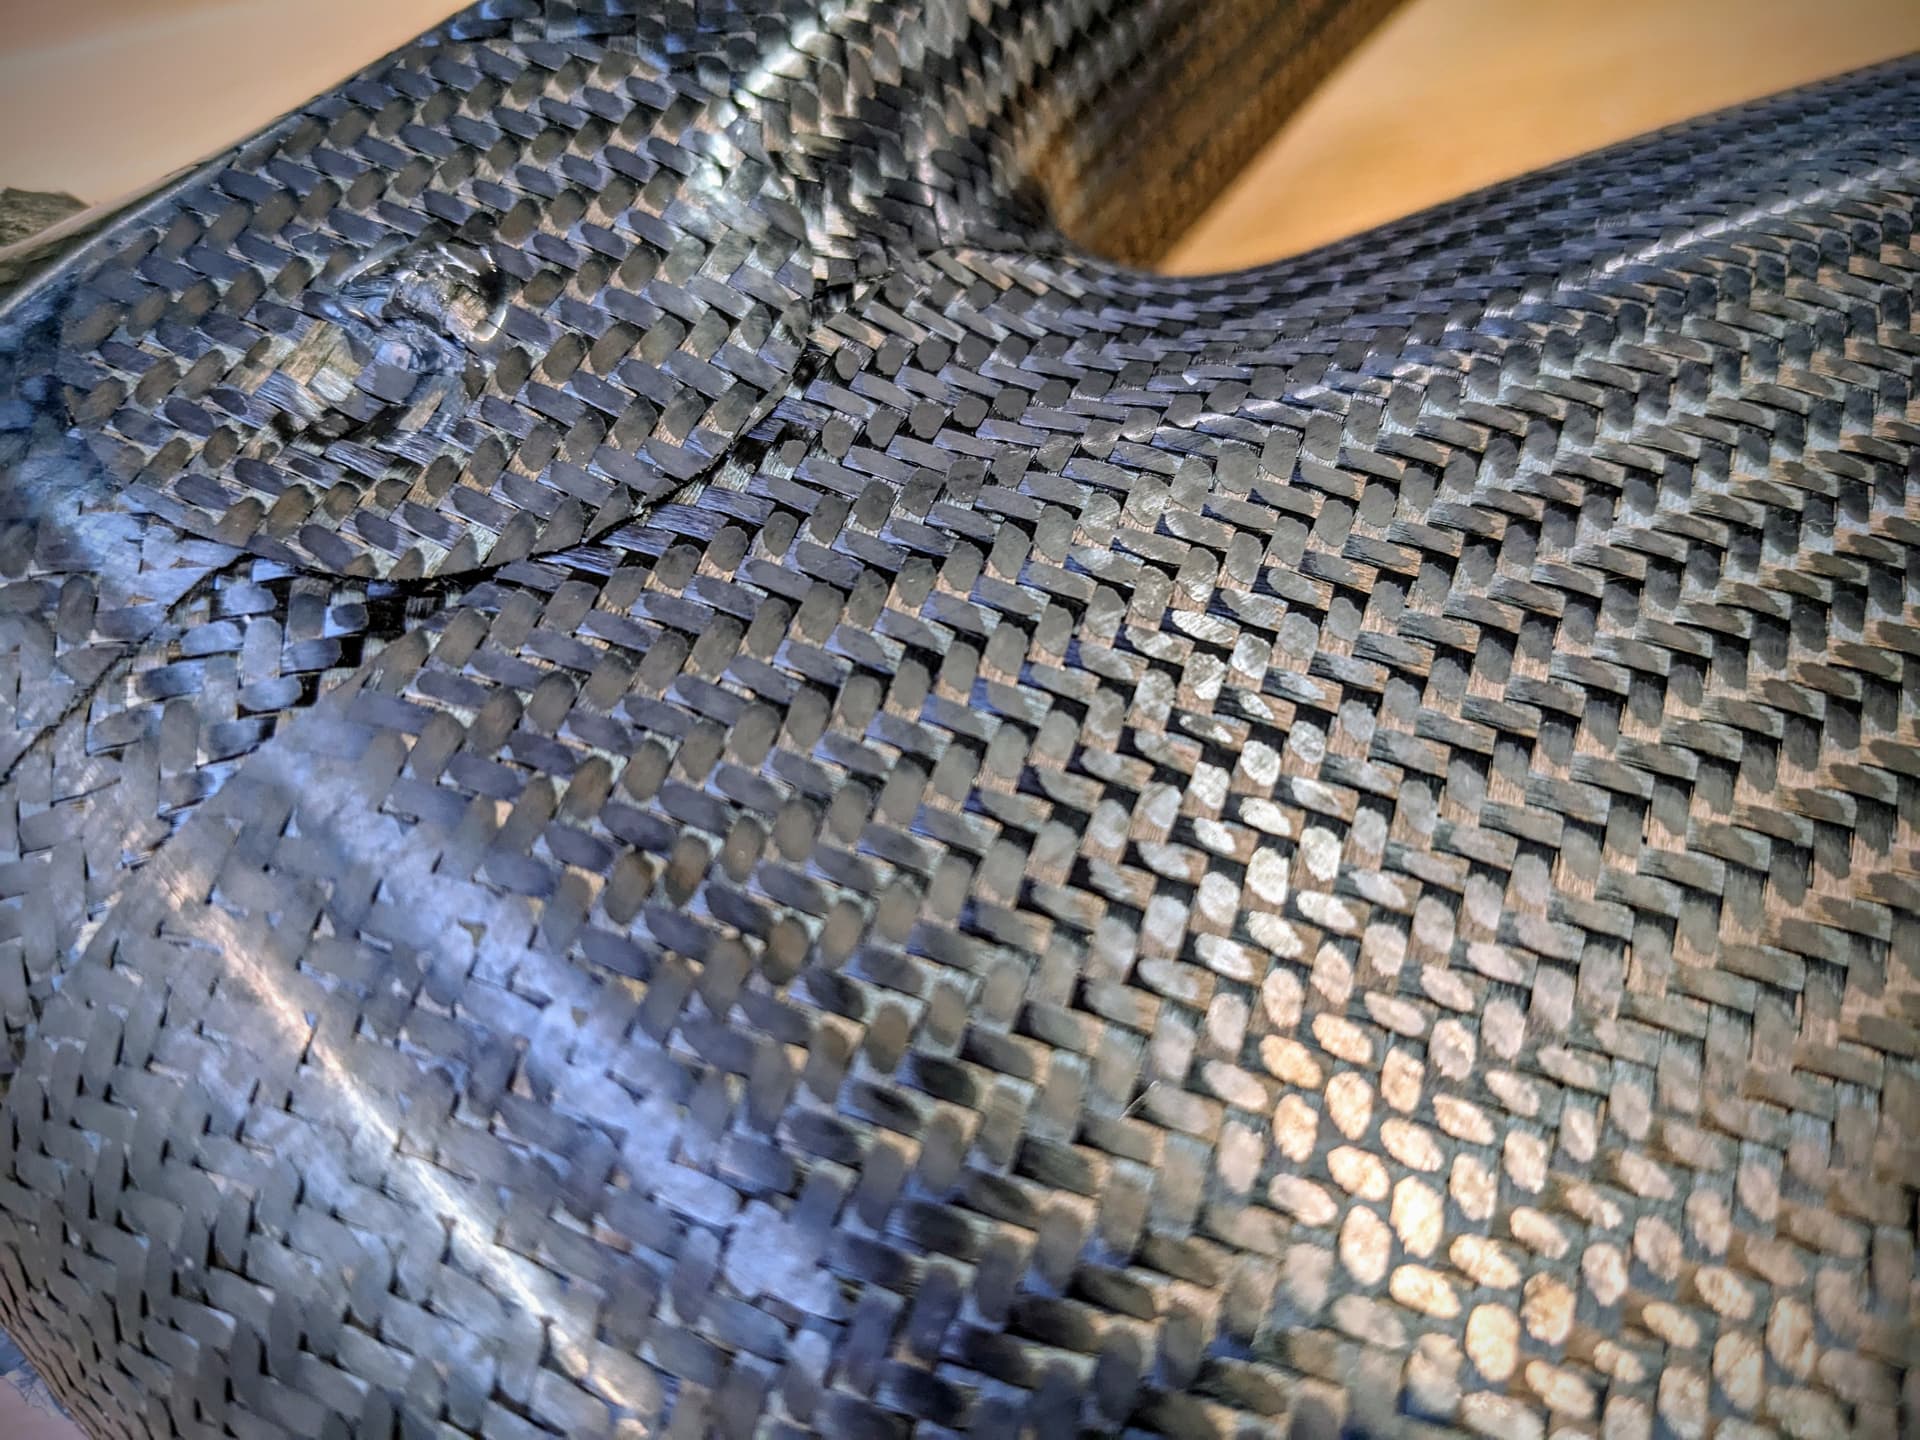
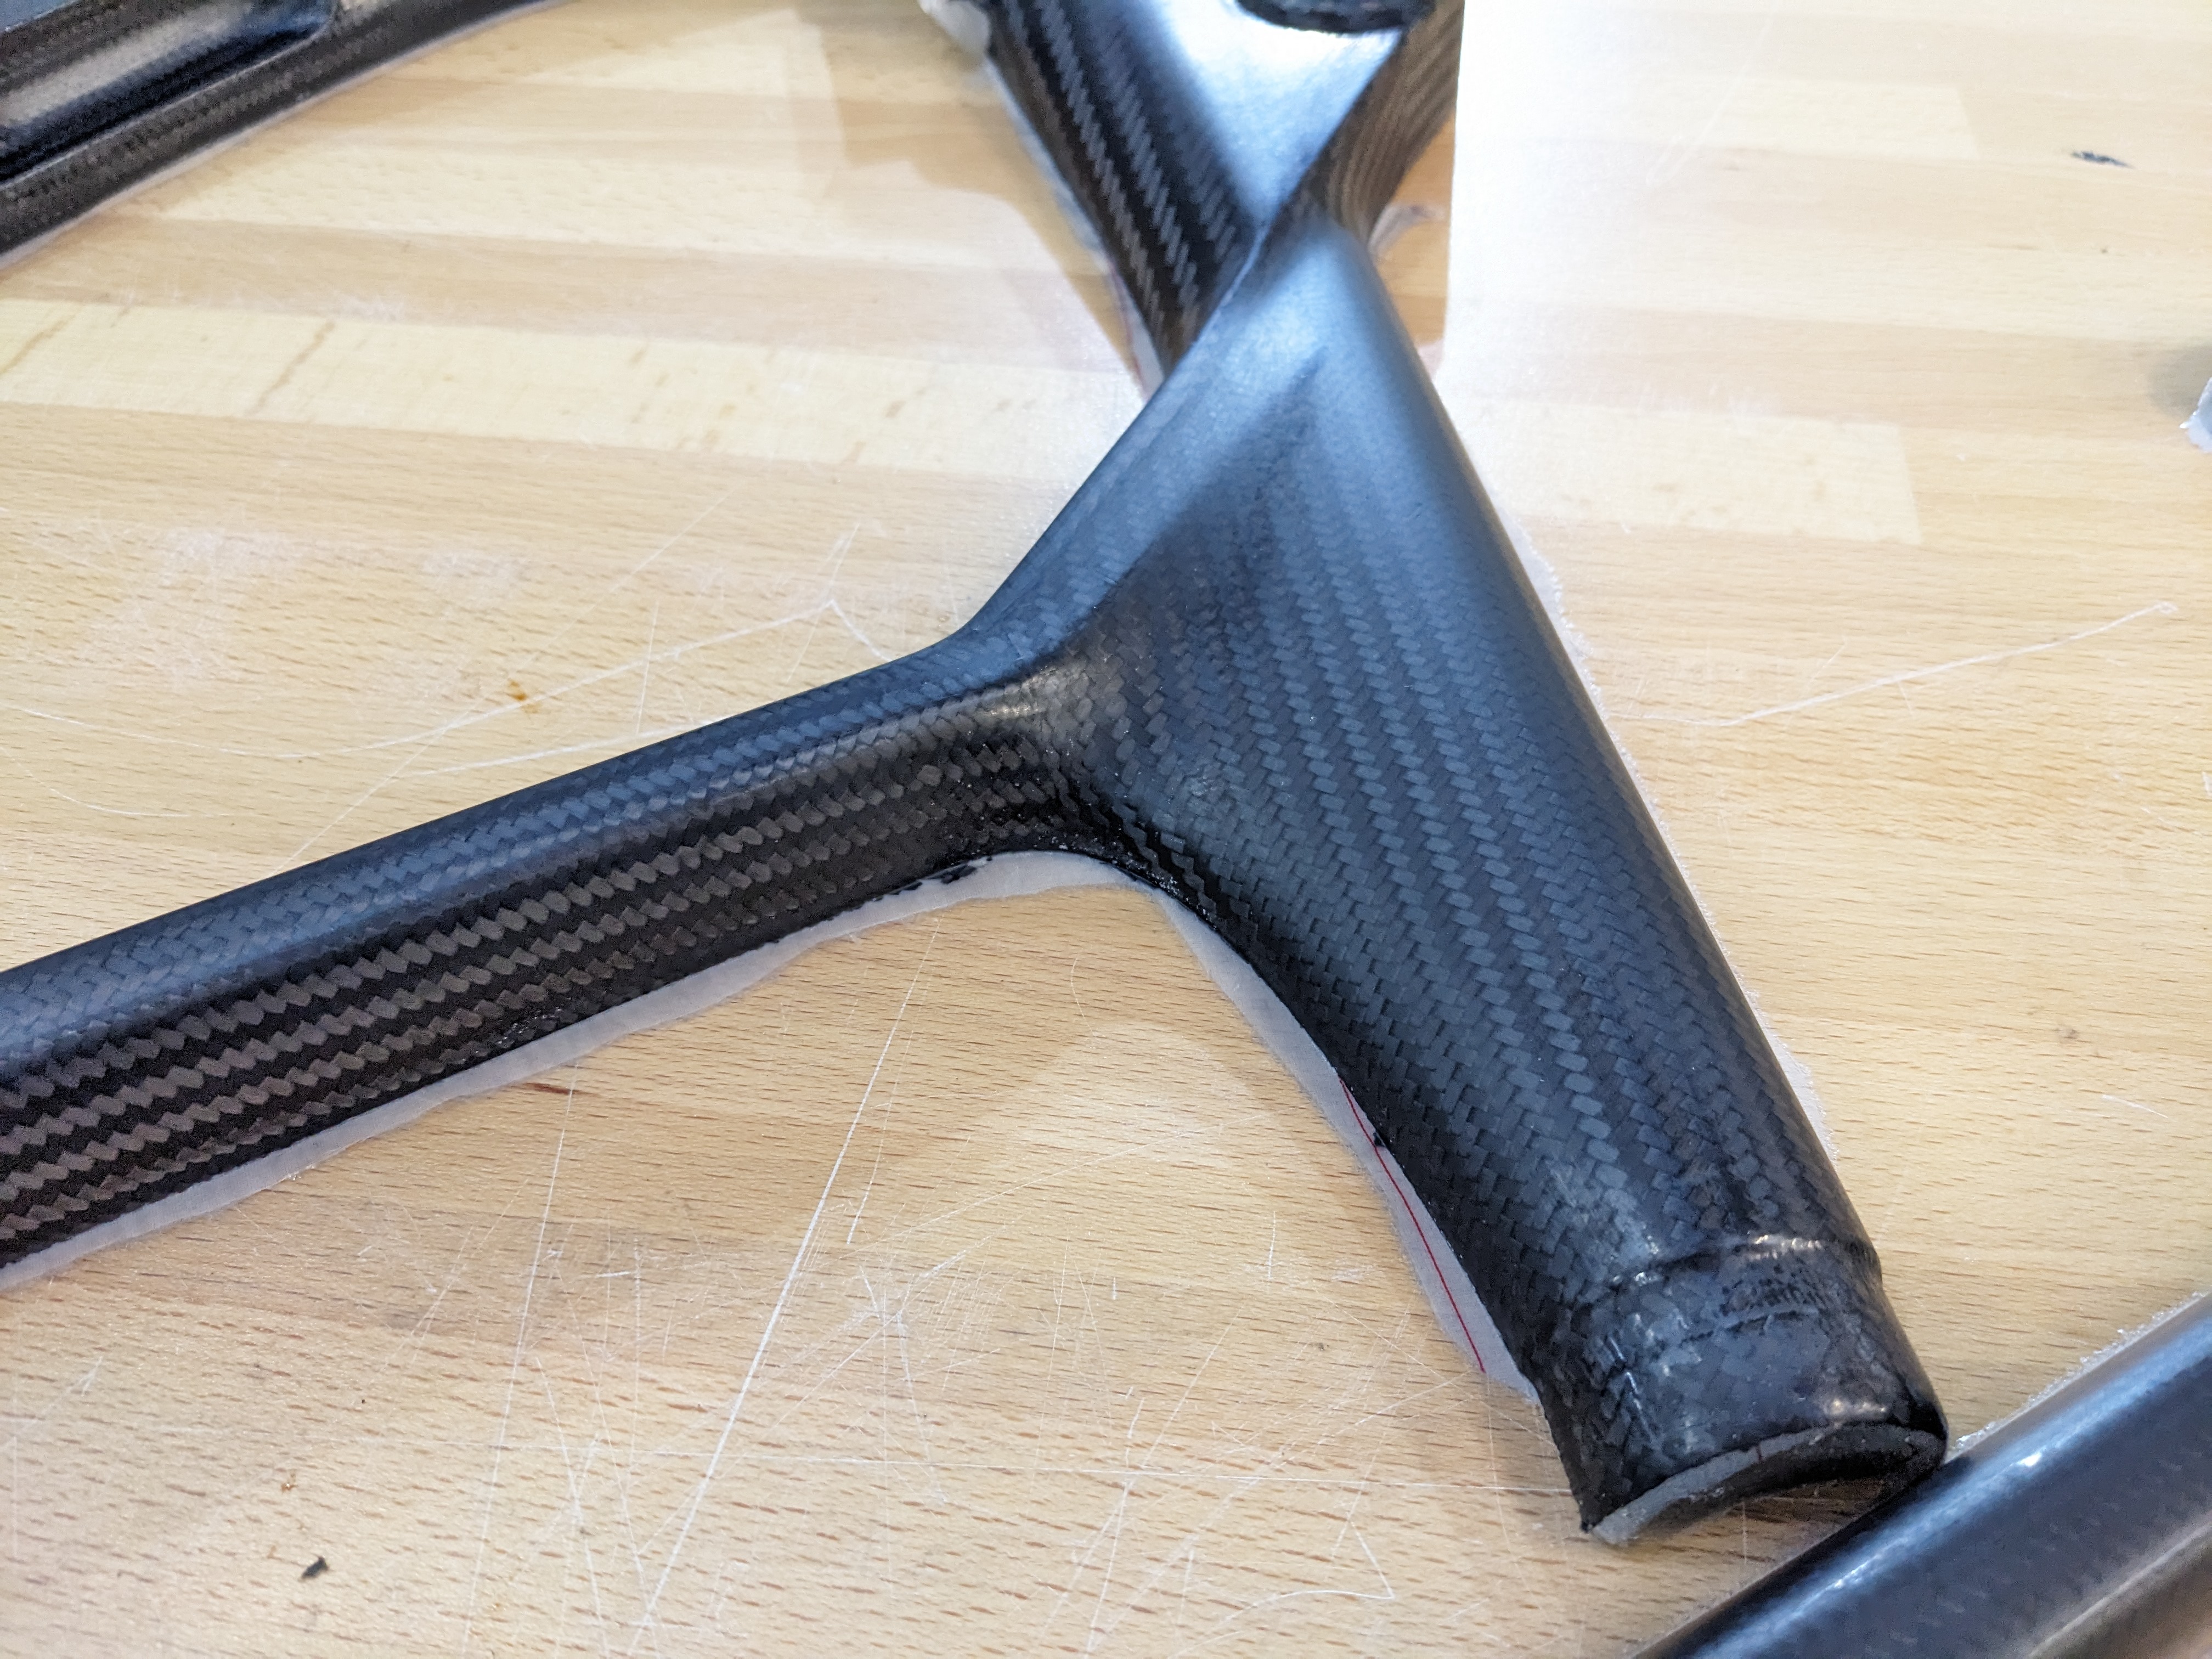
It was made in a tube-to-tube process. all the tubing was manufactured in vacuum infusion on 3D printed mandrels. those tubes were then cut, mitered, bonded and all the joints overwrapped with prepreg. I built this thing 3 years ago and it held up beautifully since then.
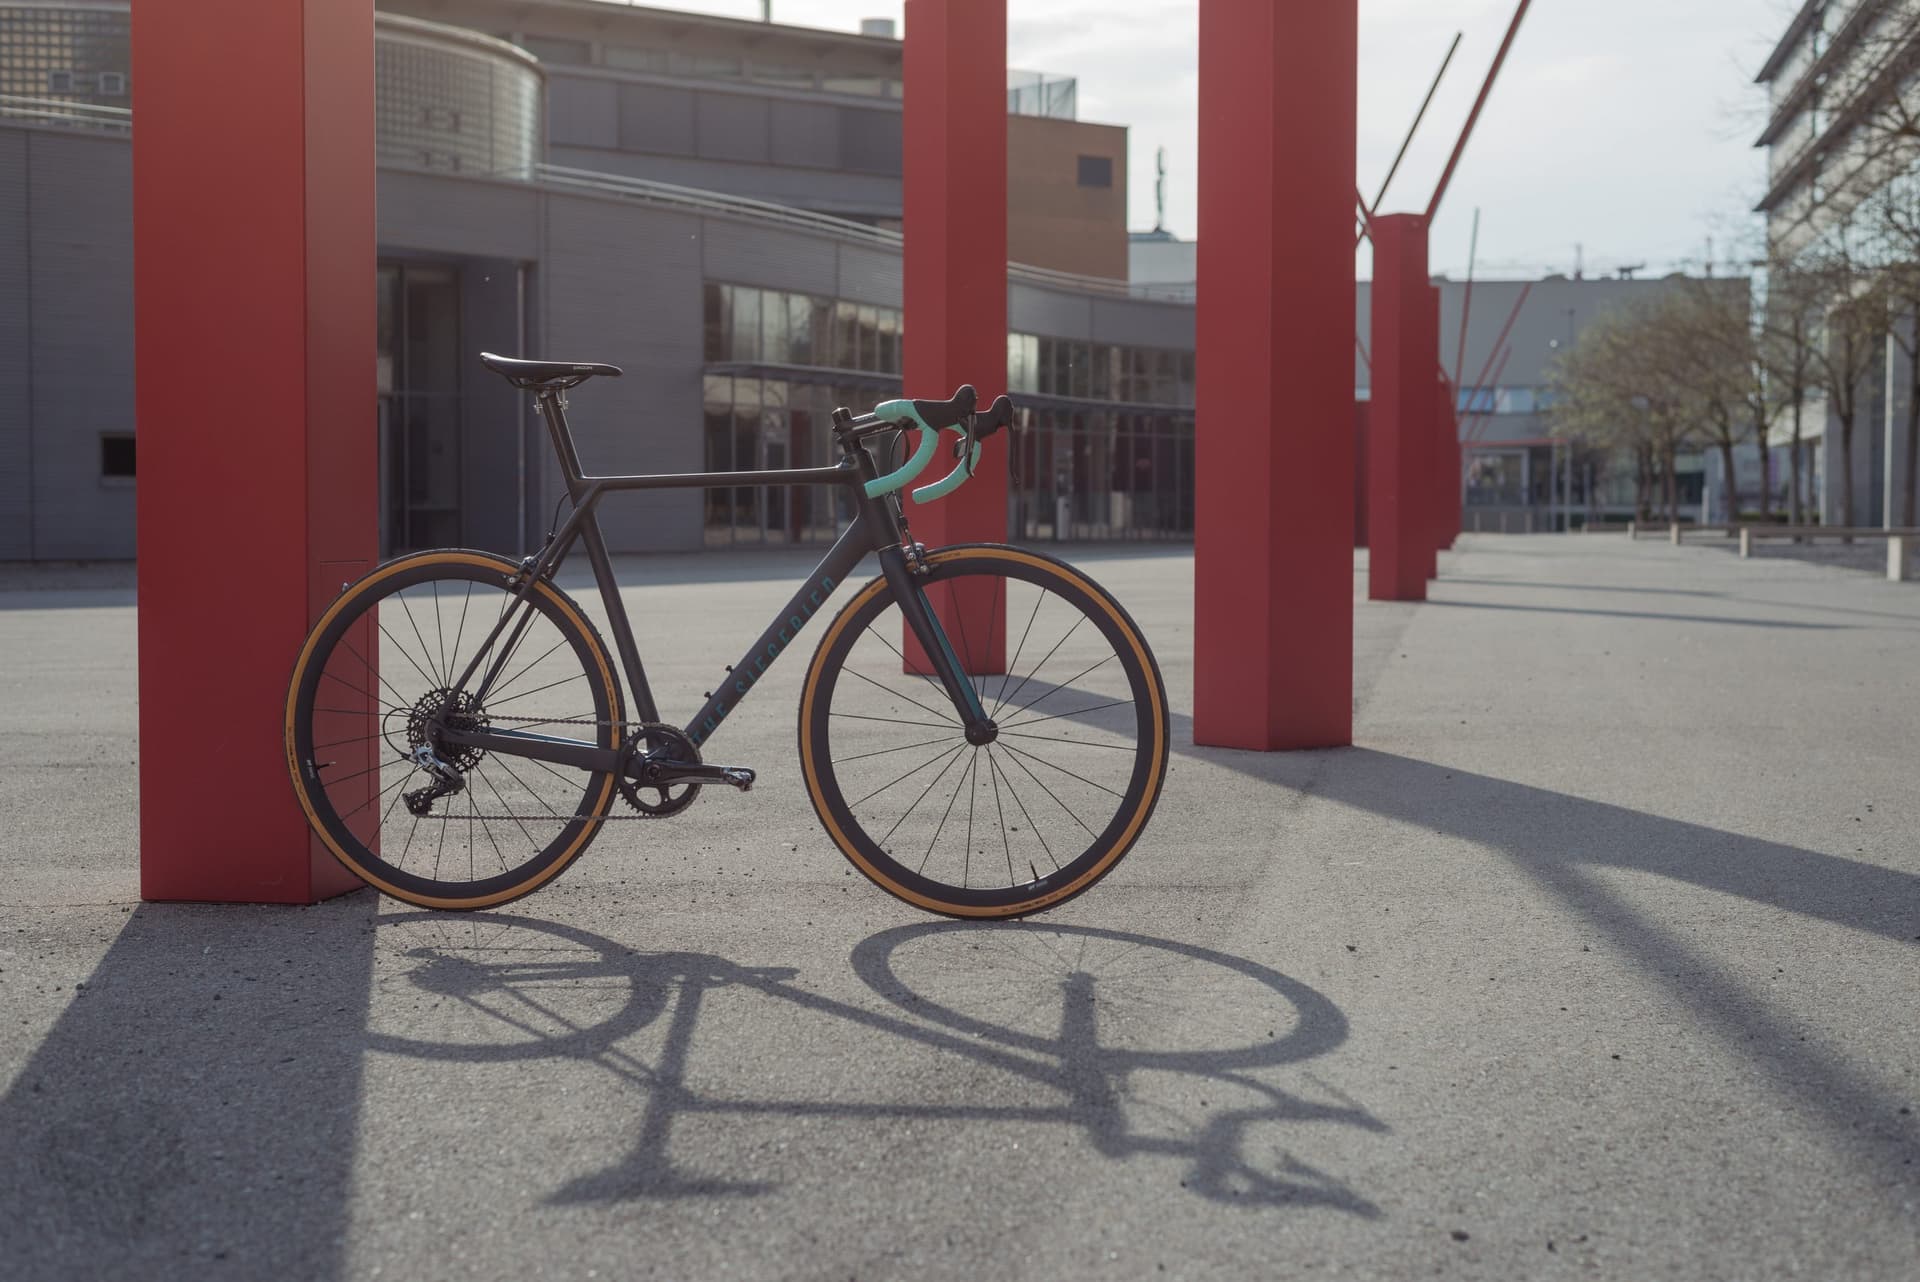
And shortly after, being a mountain biker at heart, I started building a high pivot enduro bike. Some pictures from the process so far:
Great work and craftmaship! I have seen you on pinbike already. Could you share your hints for tube to tube builds? I have put some questions here in this forum.
And from another point…how you are making slide side of ski?
yes i cannot see a reason why a tube to tube construction wouldn’t work for a mtb. Depending on the design you might need a moulded downtube that is not just straight to give you room for a shock, and if you do this i would probably directly mould the shock mount.
Honestly if I had to start over with the project this actually might be what I’d do
I build a lot of skis and snowboards - and unlike with building bikes i kinda know what I’m doing there. I have a very systematic approach for this and calculate the exact core profile i need to get the stiffness I want with a given core material and layup. freeride ski build on youtube
this is an old video, the last pairs are CNC machined and pressed in a pneumatic press.
If you want to give a ski build a go then hit me up, I’m happy to help with the flex, layup, material choices, …
If you tinker with it for long enough you pick up a lot of bits of information from here and there, and by now I work in the composite industry-ish. Not directly with composite materials anymore really, but in the development of machinery of a company working in the composite industry. So I’m constantly in contact with the topic.
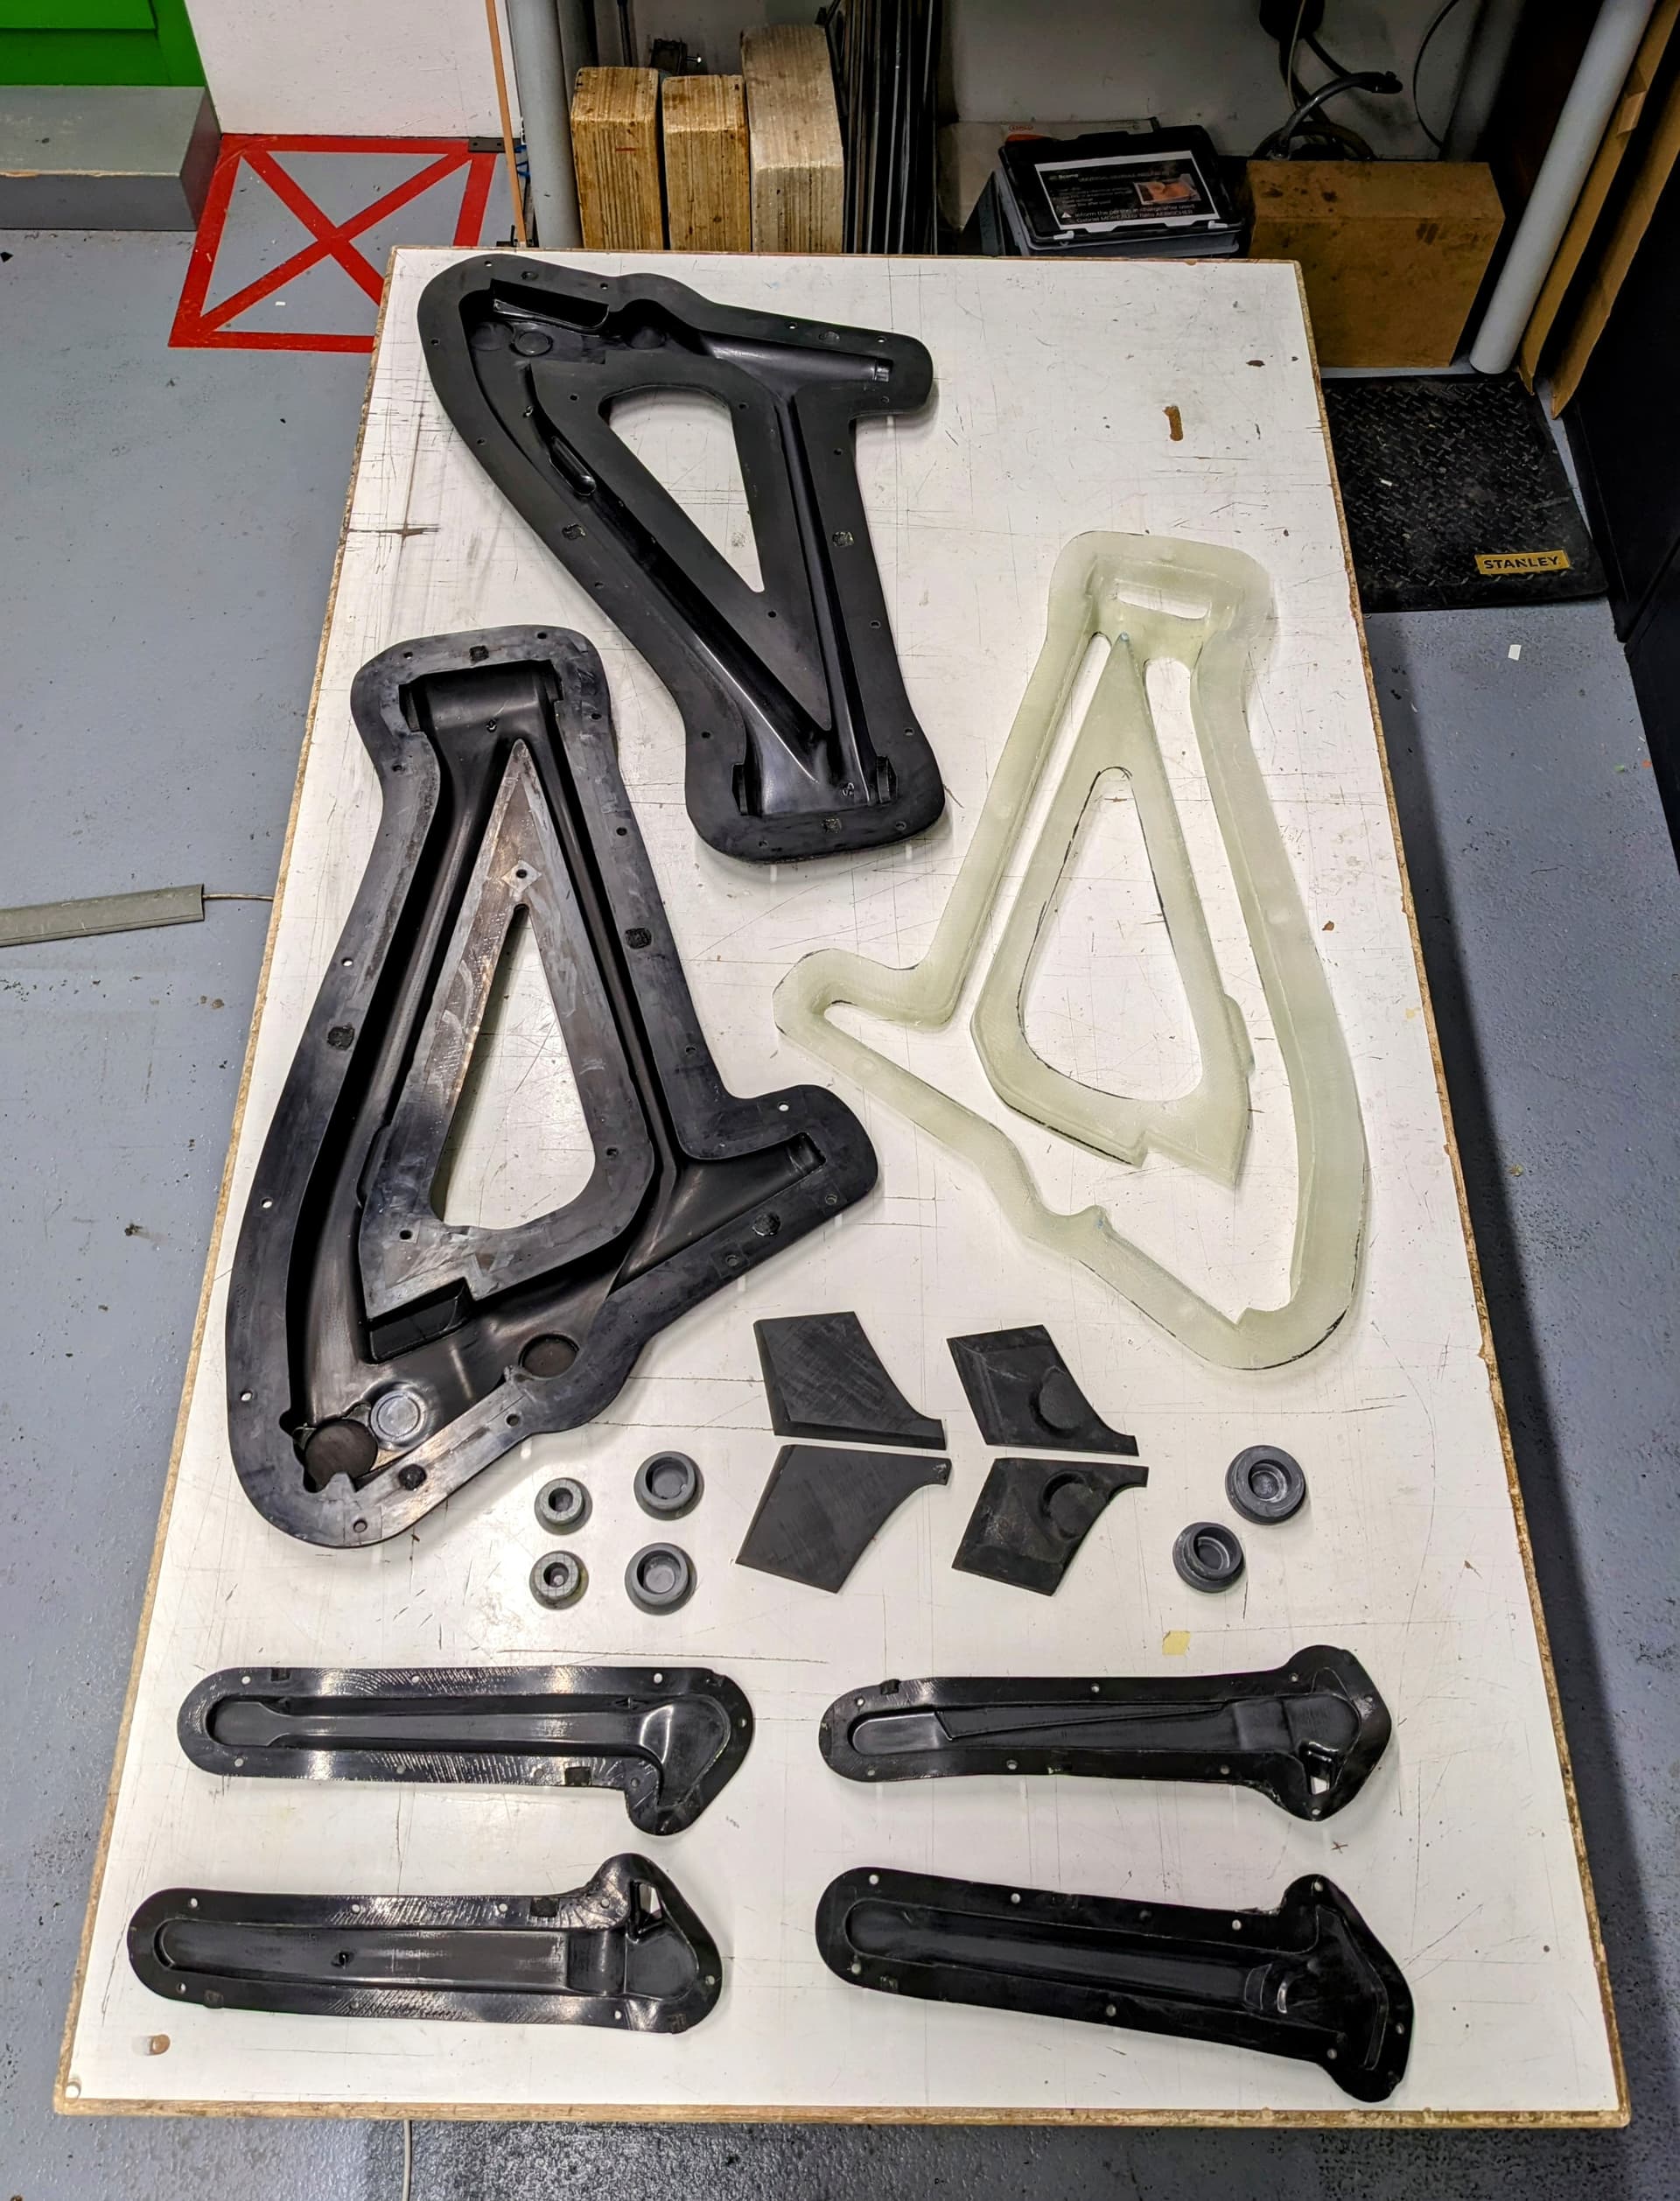
The male mould is machined from a PU tooling board, not MDF, but same idea.
the negative mould is made on that with carbon fibre, but with vacuum infusion instead of a wet layup.
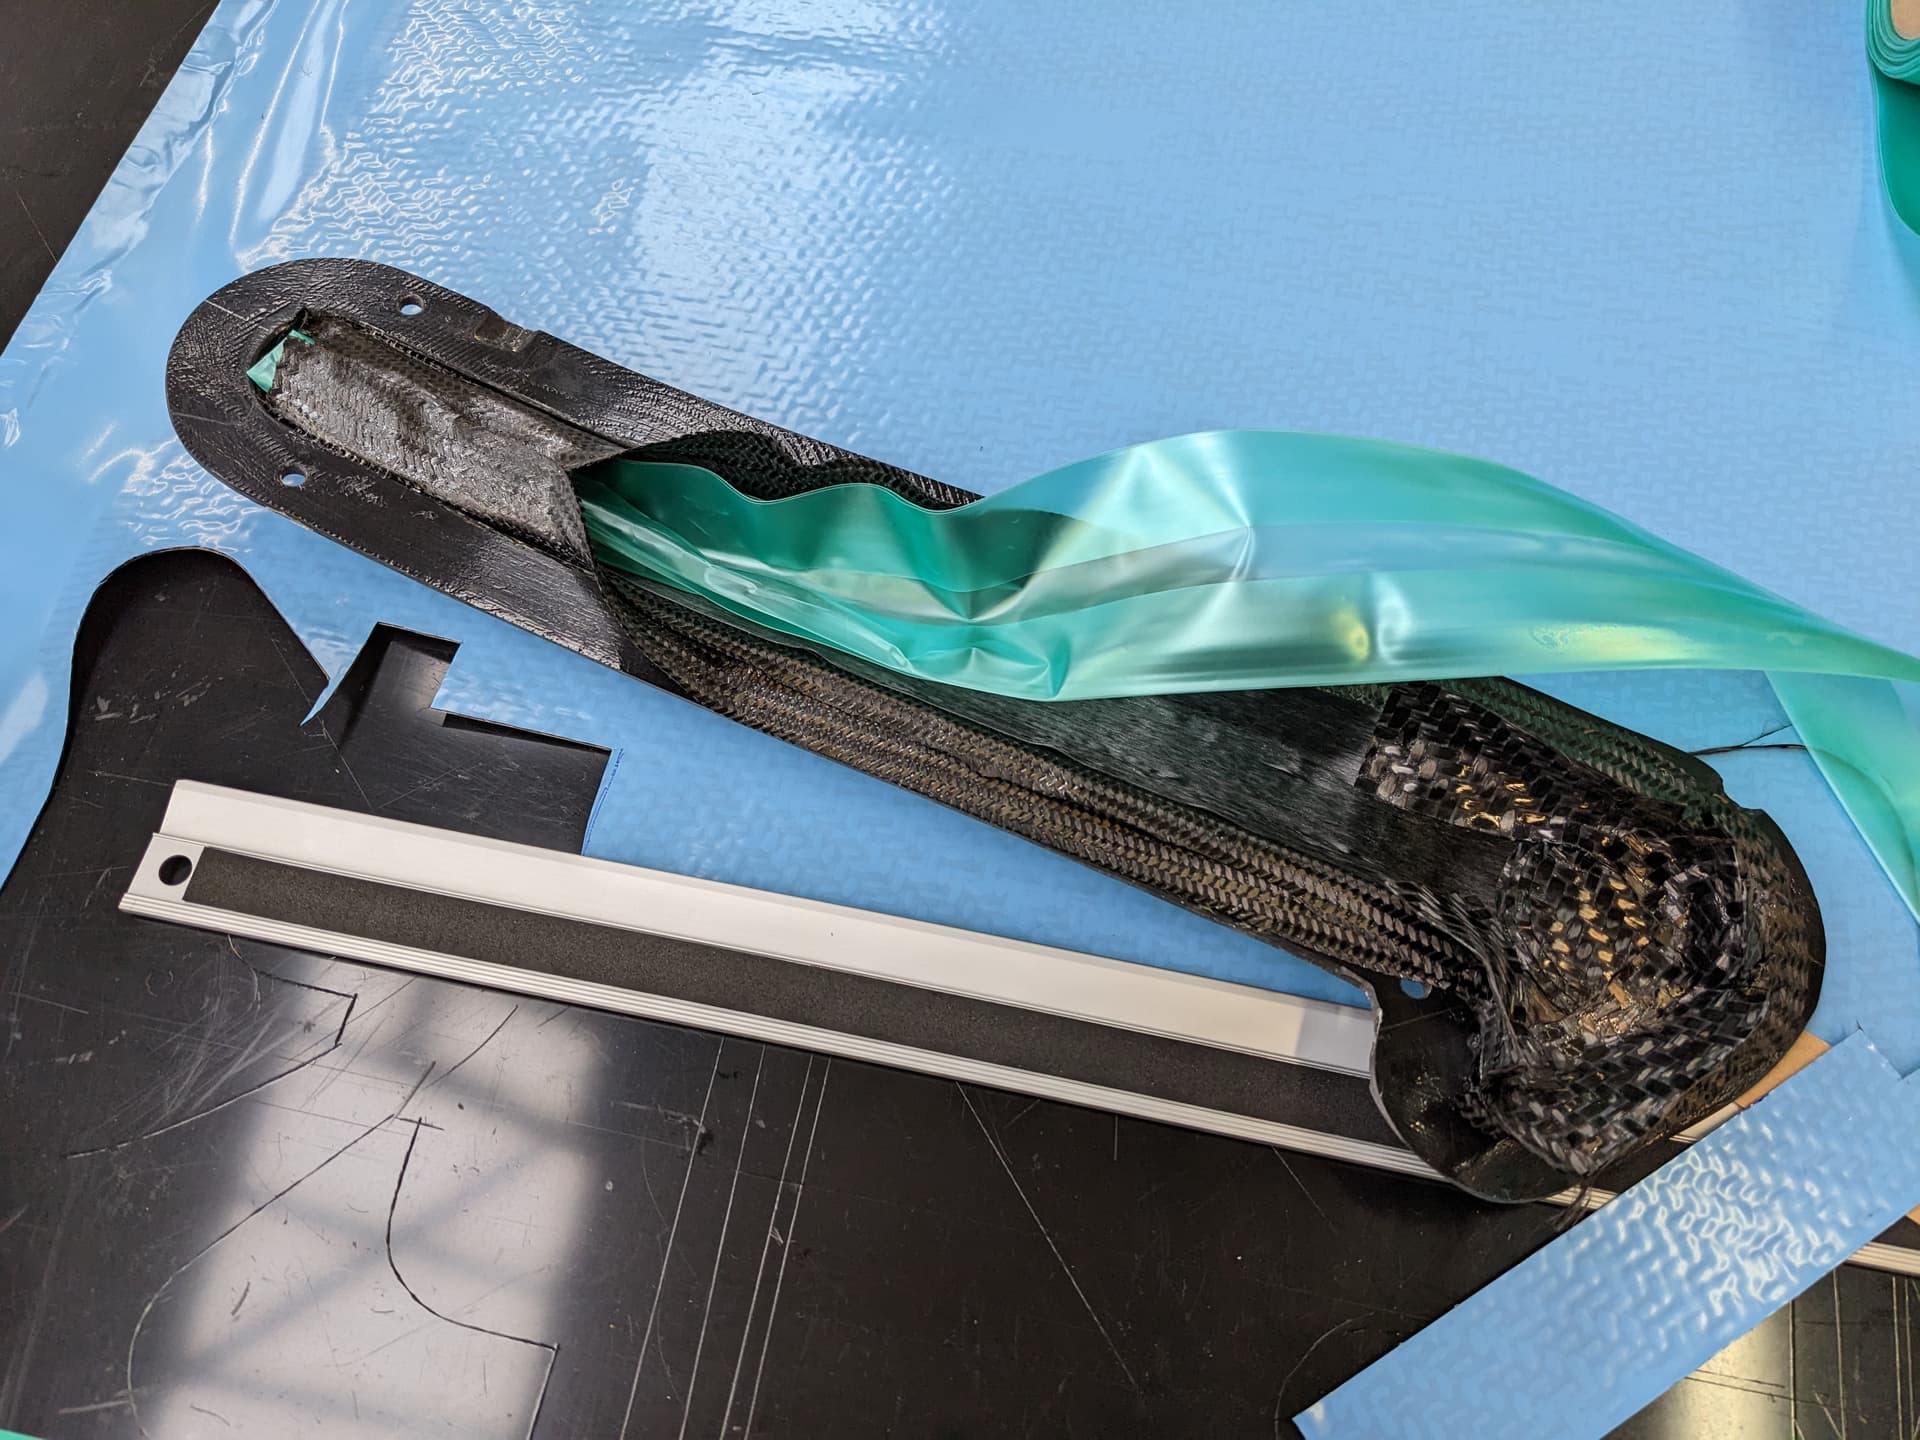
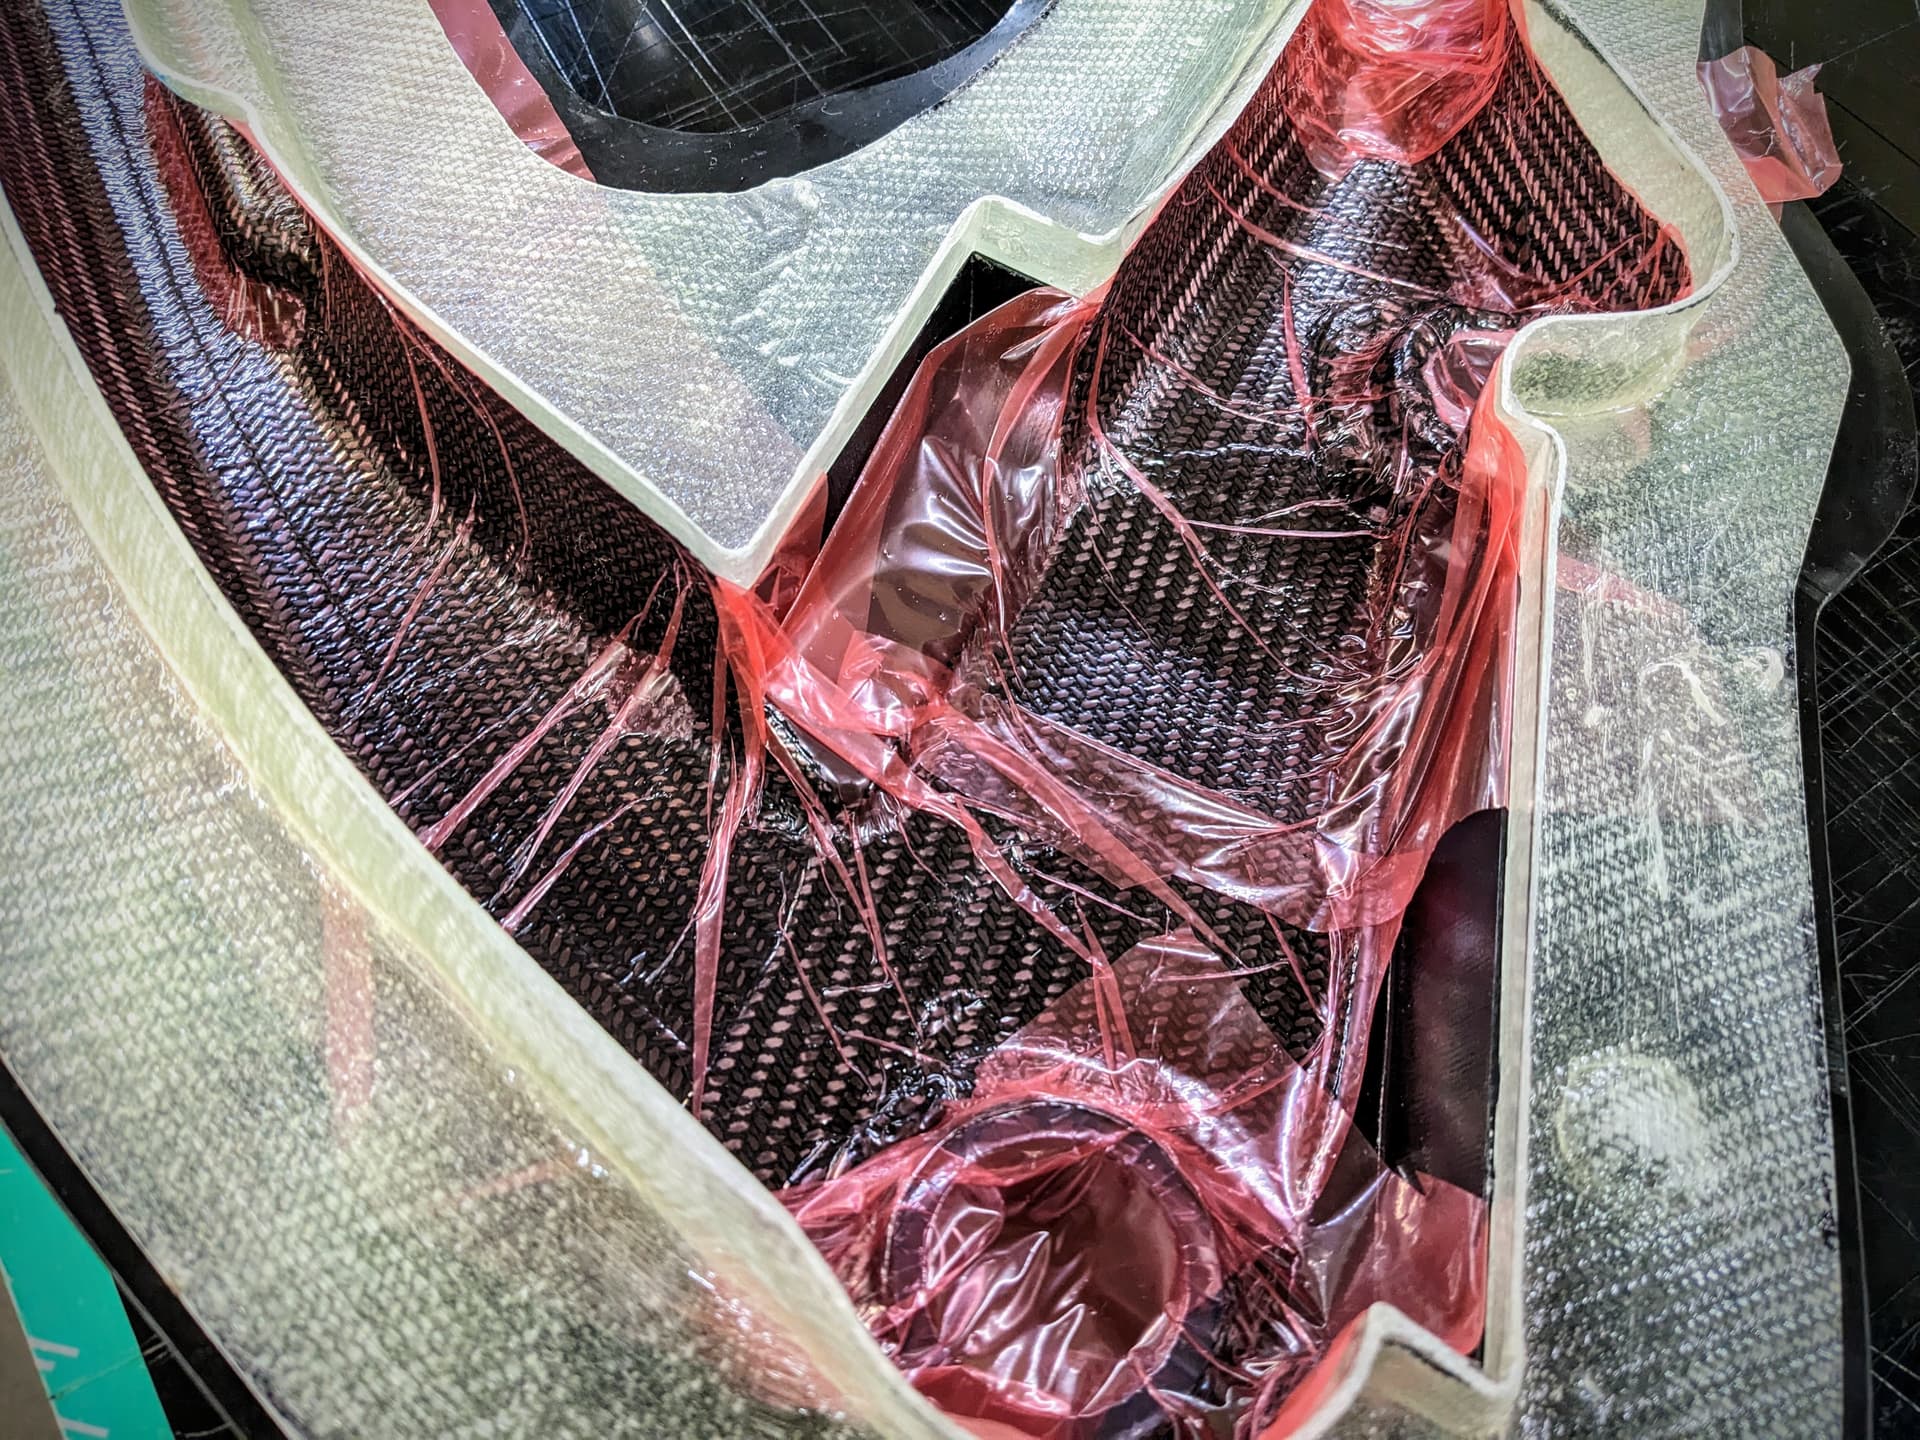
the prepregs are laid into the moulds, with bladders on the inside
originally the plan was to inflate the bladders and cure it in an oven, but by now i luckily have access to an autoclave.
the fiberglass mould you highlighted is a helper to shape the overlap that sticks out over the split line of the tool during debulking.
with thick laminates in complex shapes it is best to do a debulk every couple of layers, where you put the whole thing in a vacuum bag to consolidate all the layers. This tool helps to have the overlap properly shaped which really helped to close the two moulds and you can have a pretty high level of confidence, that there are no wrinkles in the overlap. I’ve never seen that being done anywhere, so I don’t know if there is a better/easier solution to do the same, but it worked great.
you can get the ski base, edges and everything you need in shops like skibaumarkt.de
Nice to have you here @Lester !
Btw, I got all the infusion stuff to try a top sheet with glass like you explained to me once a few years ago but I haven’t tried yet.
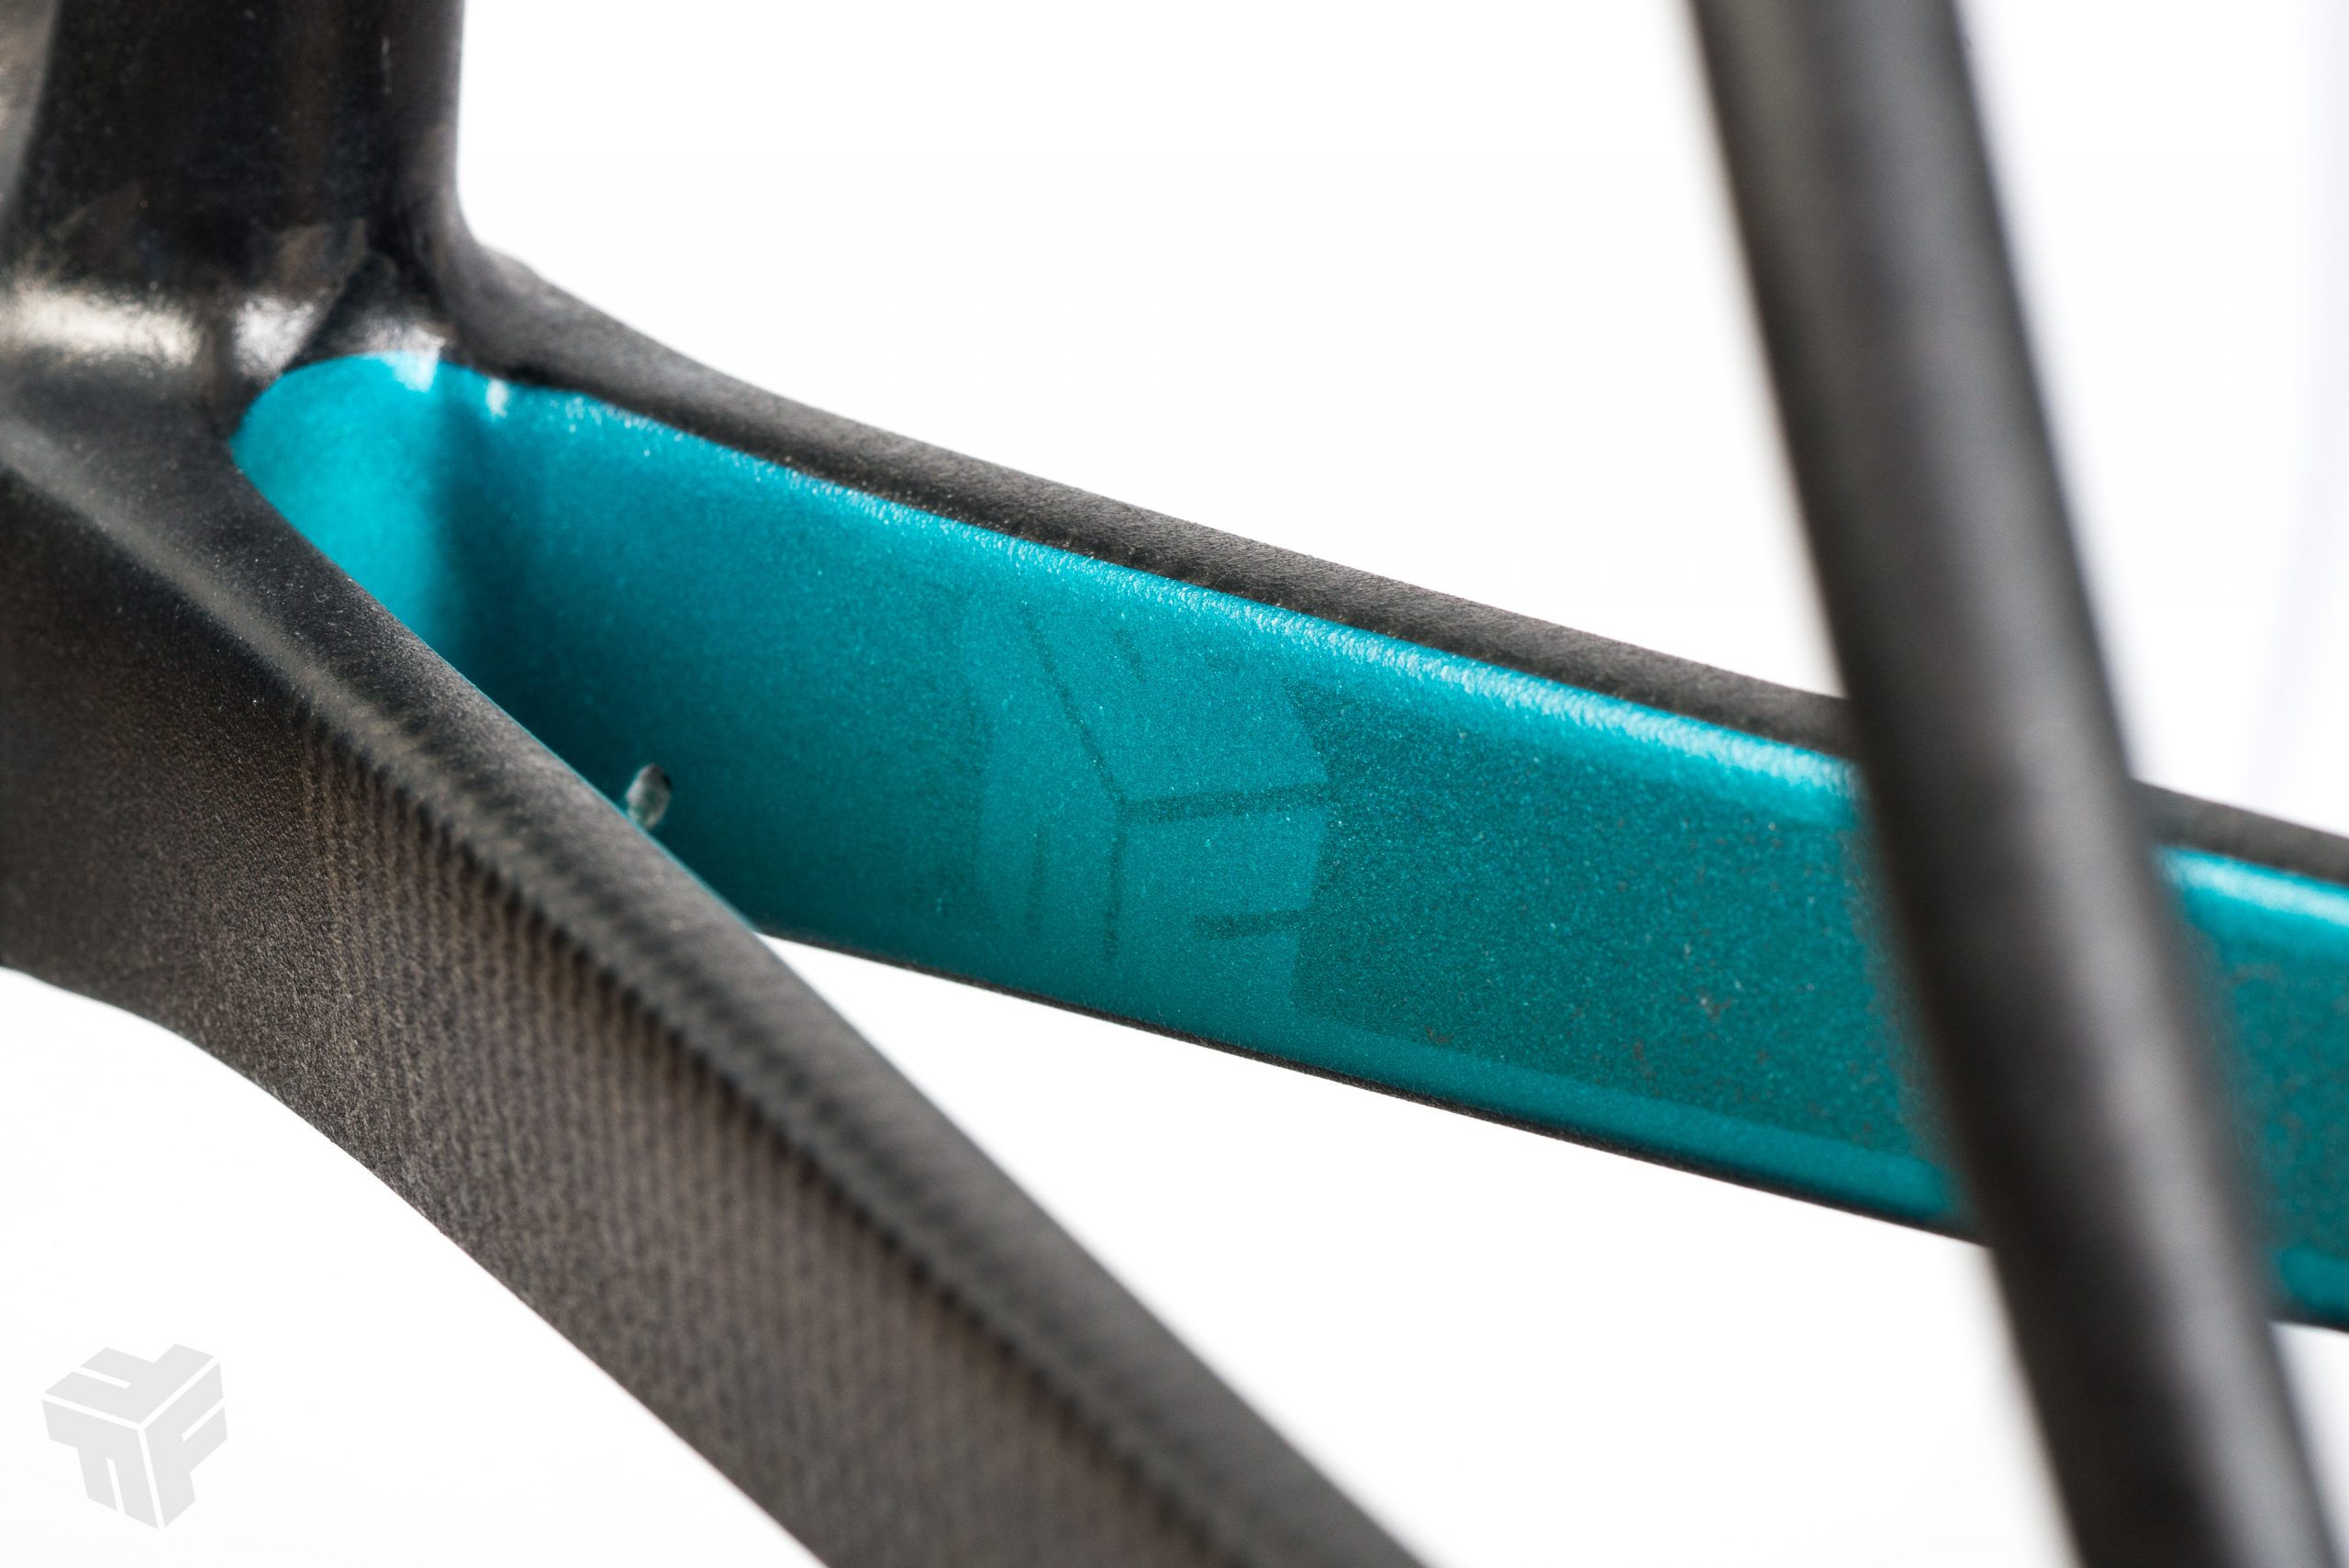
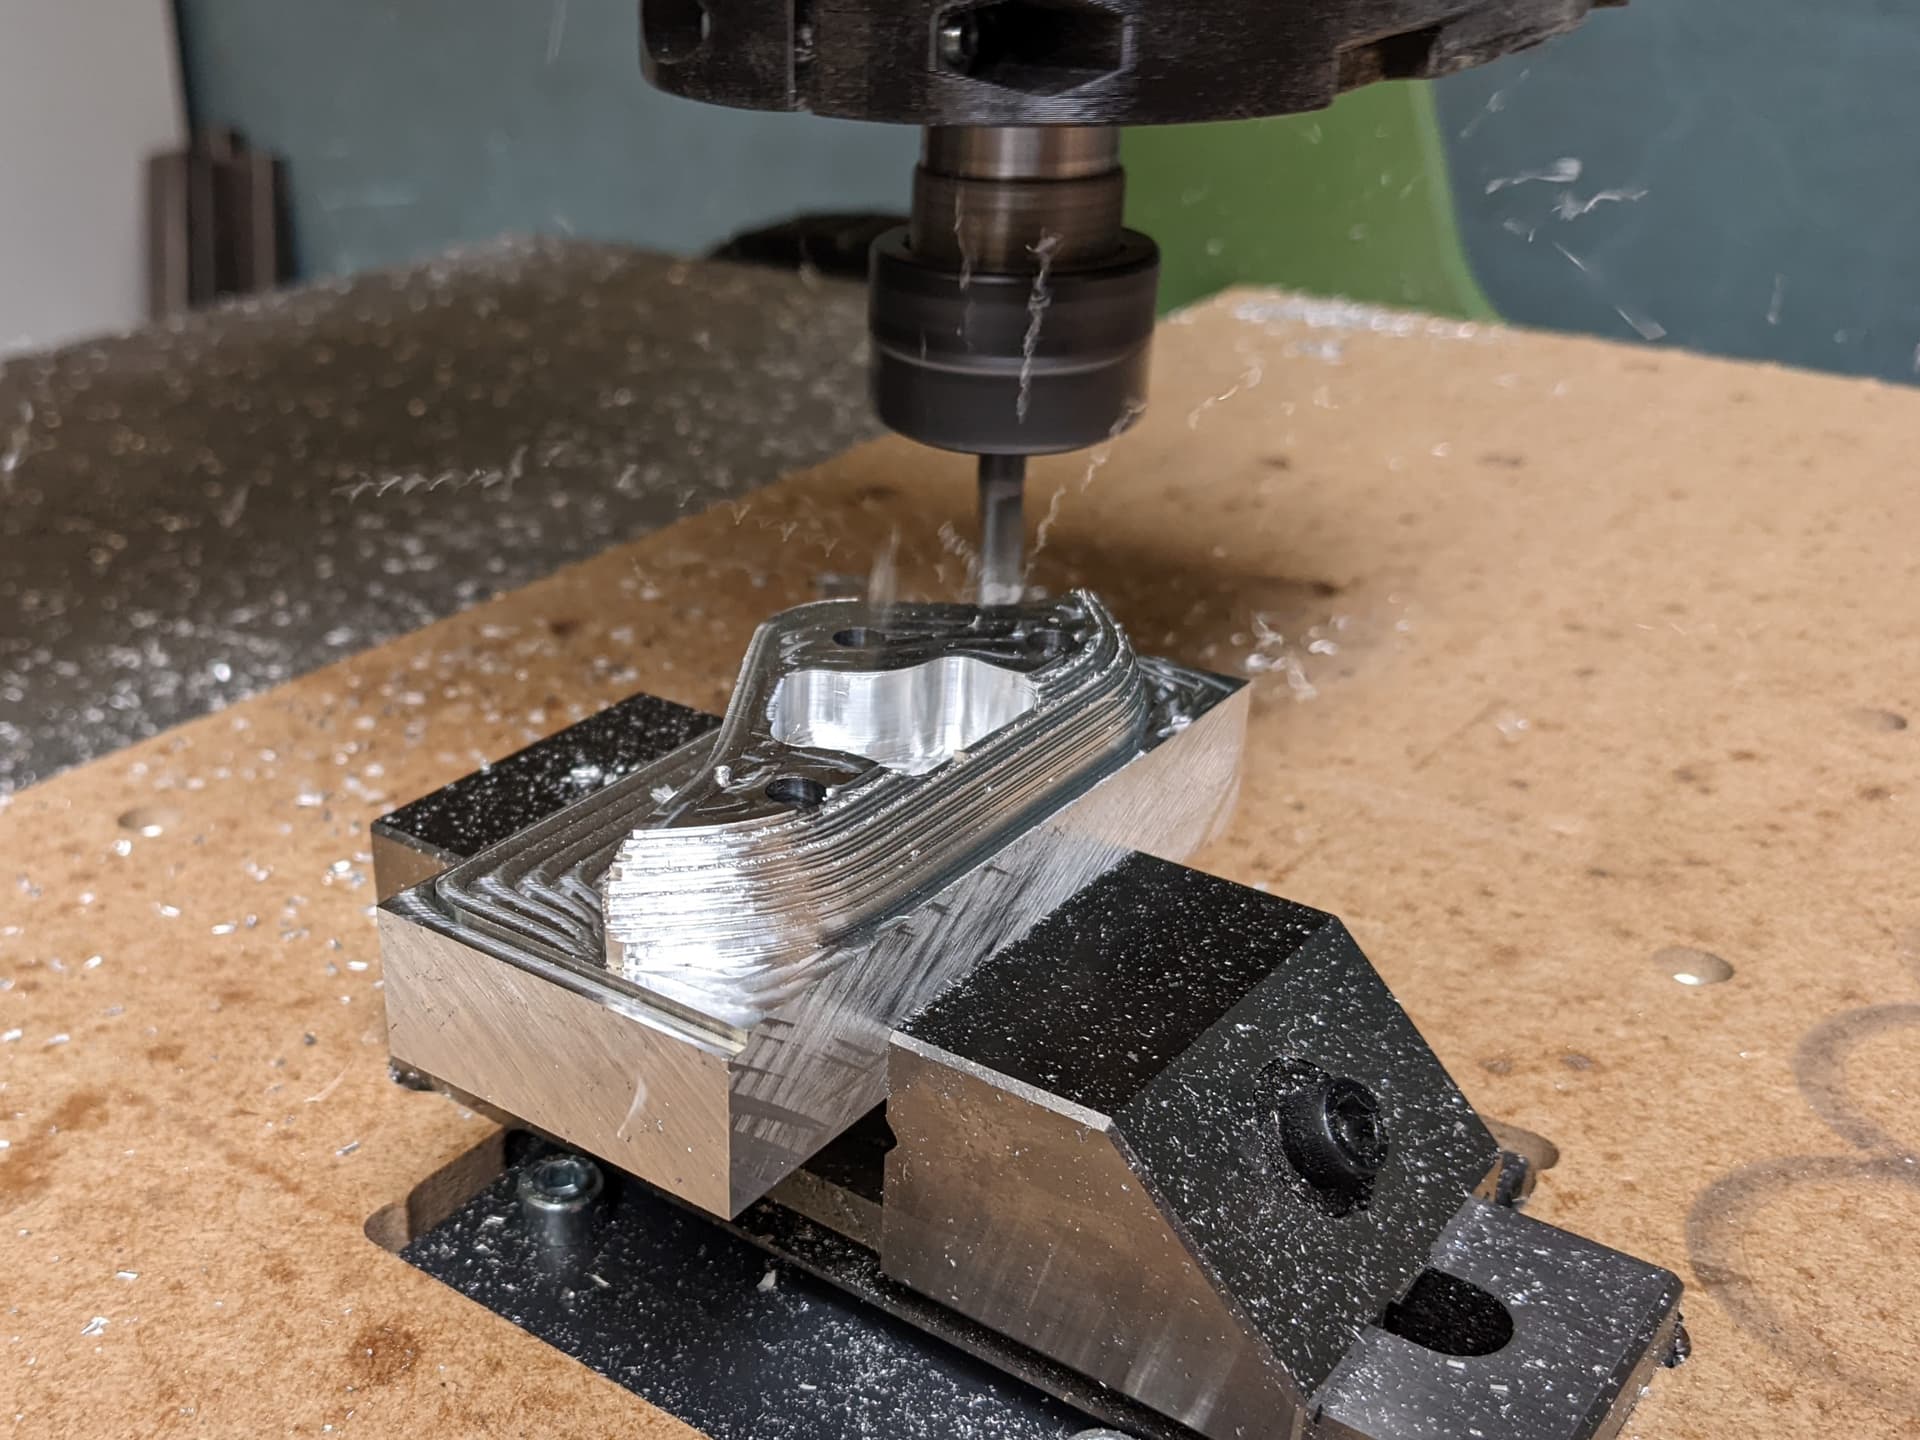
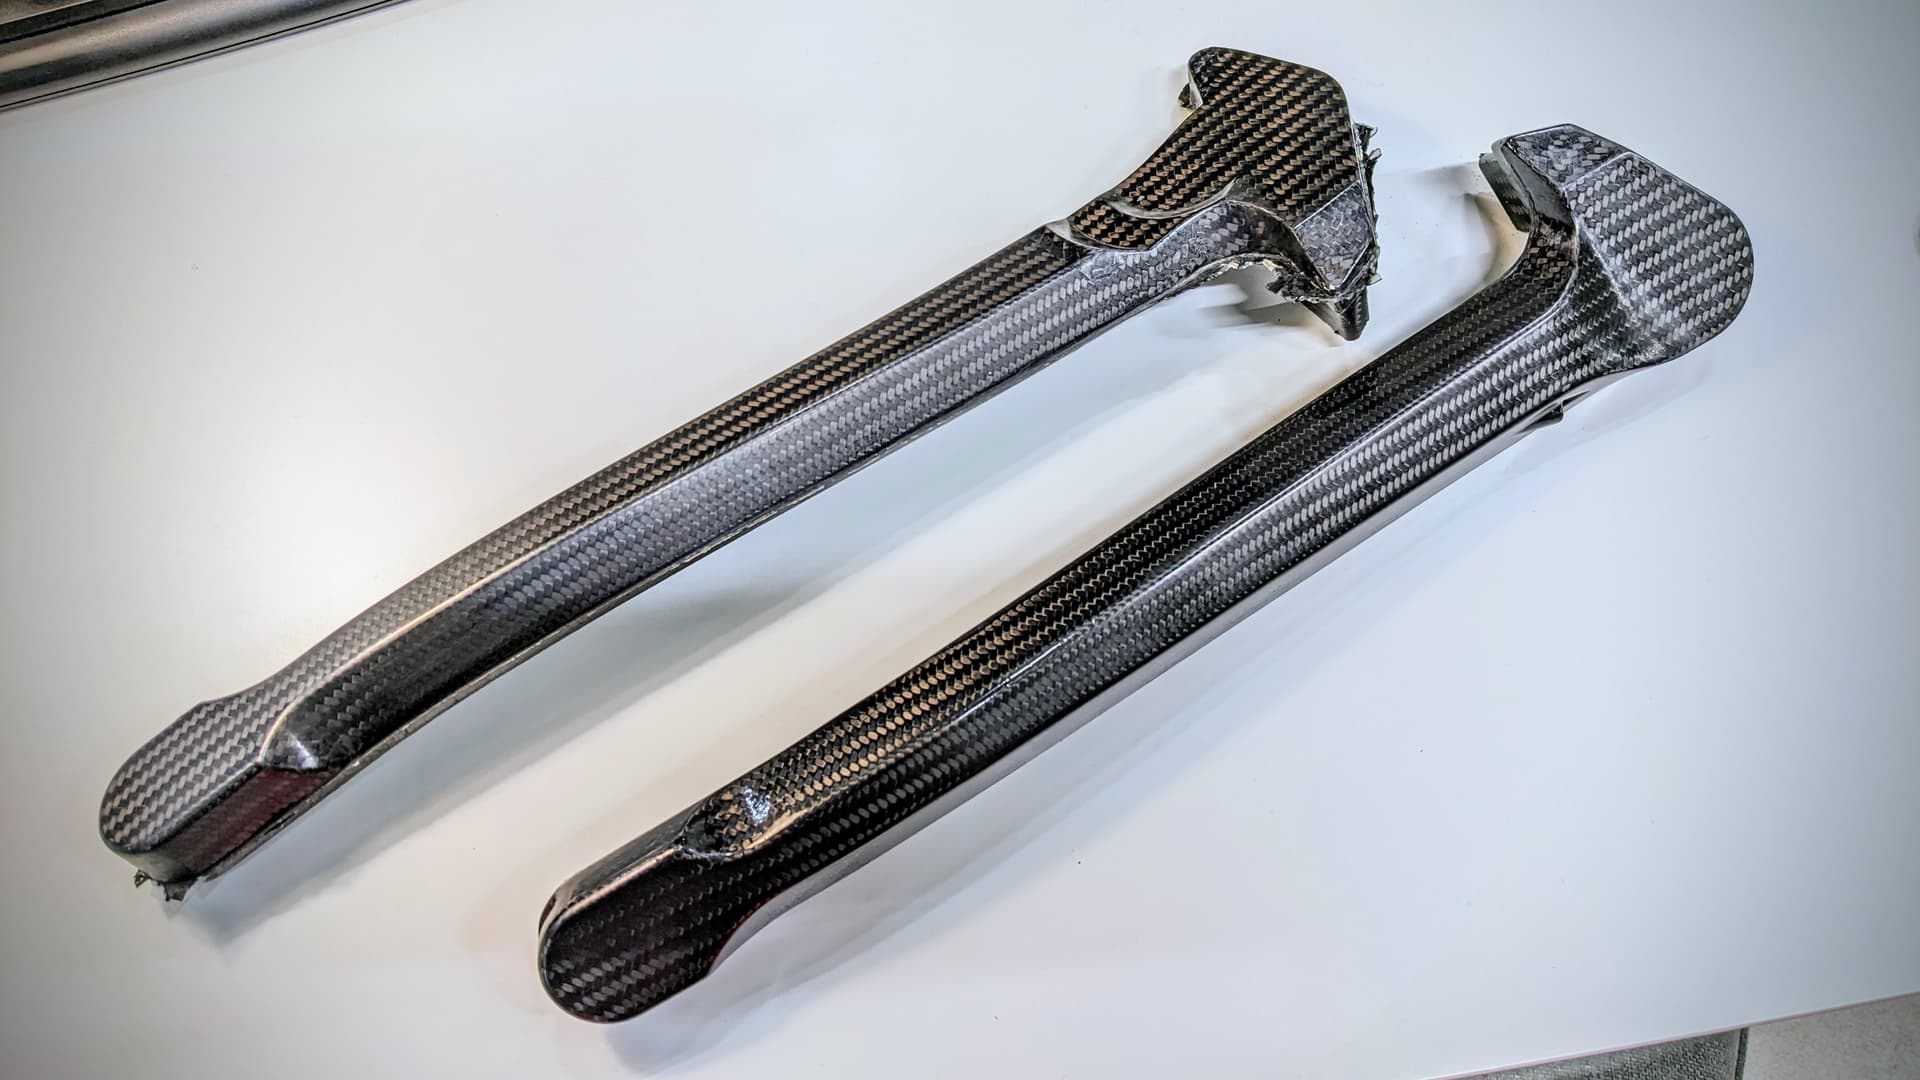
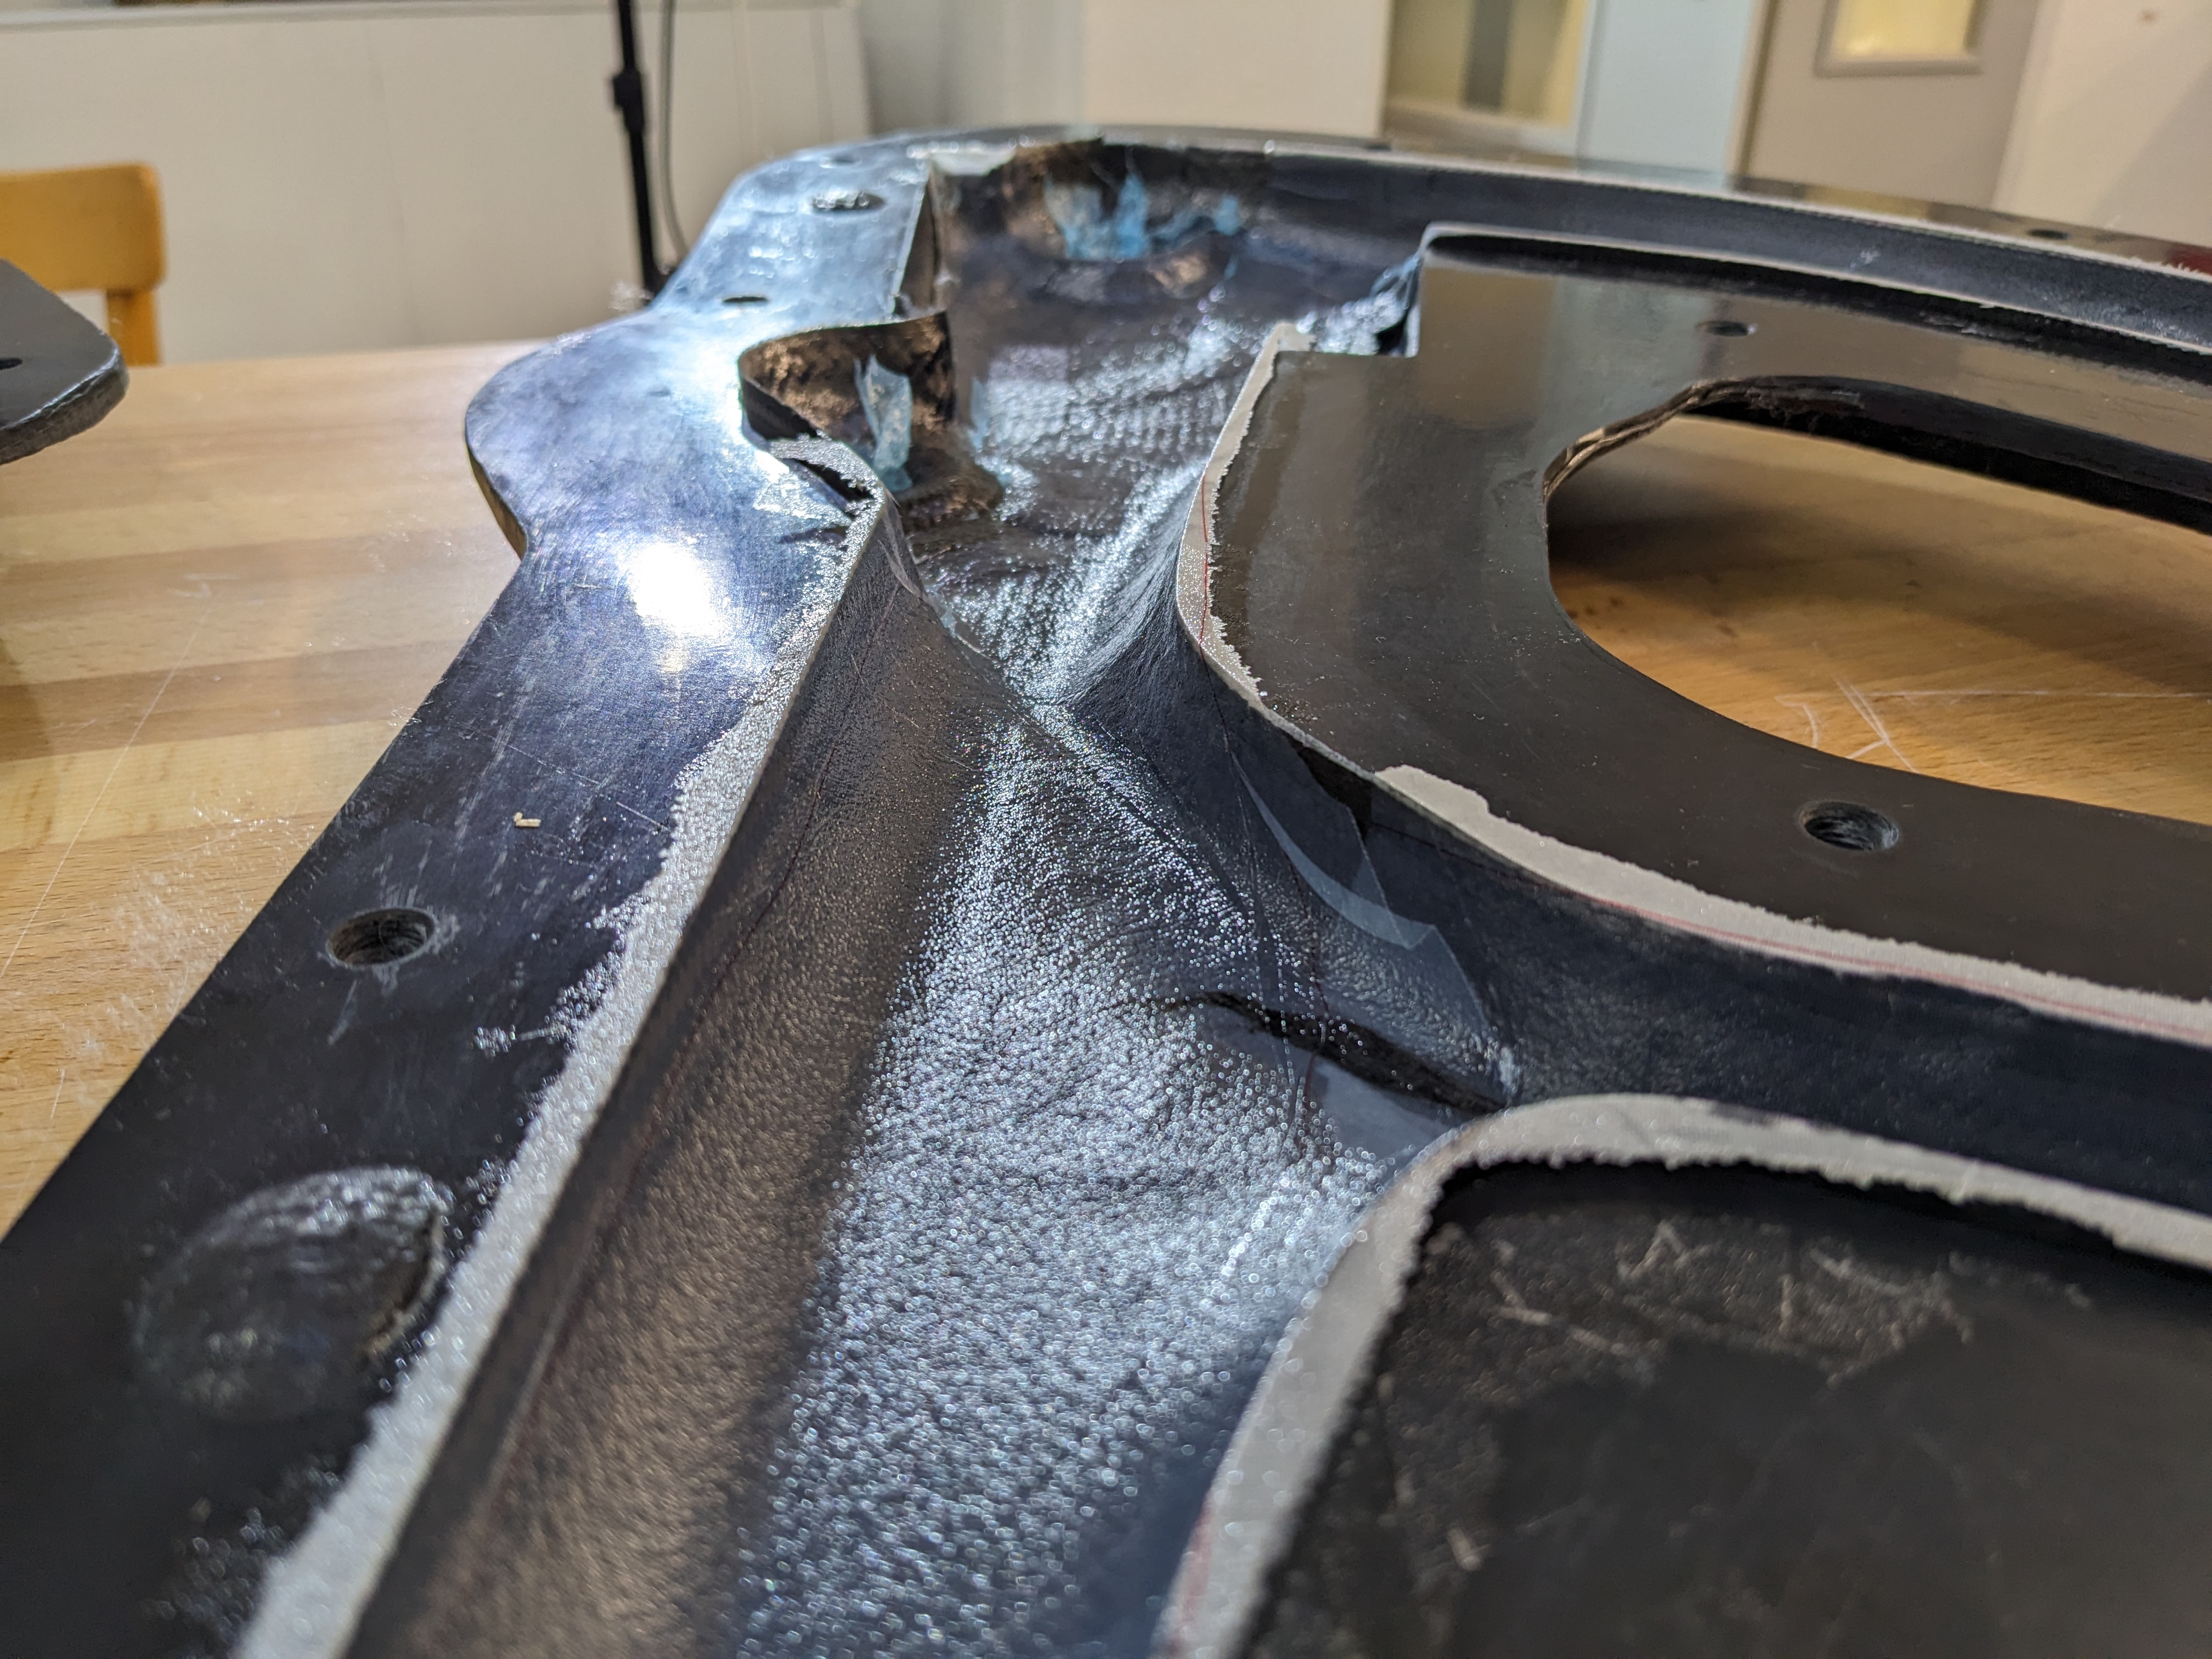
Machined the seat stays last weekend, and managed to cast the chain slap protector during the week. It is weirdly satisfying to drop this floppy piece of PU in place
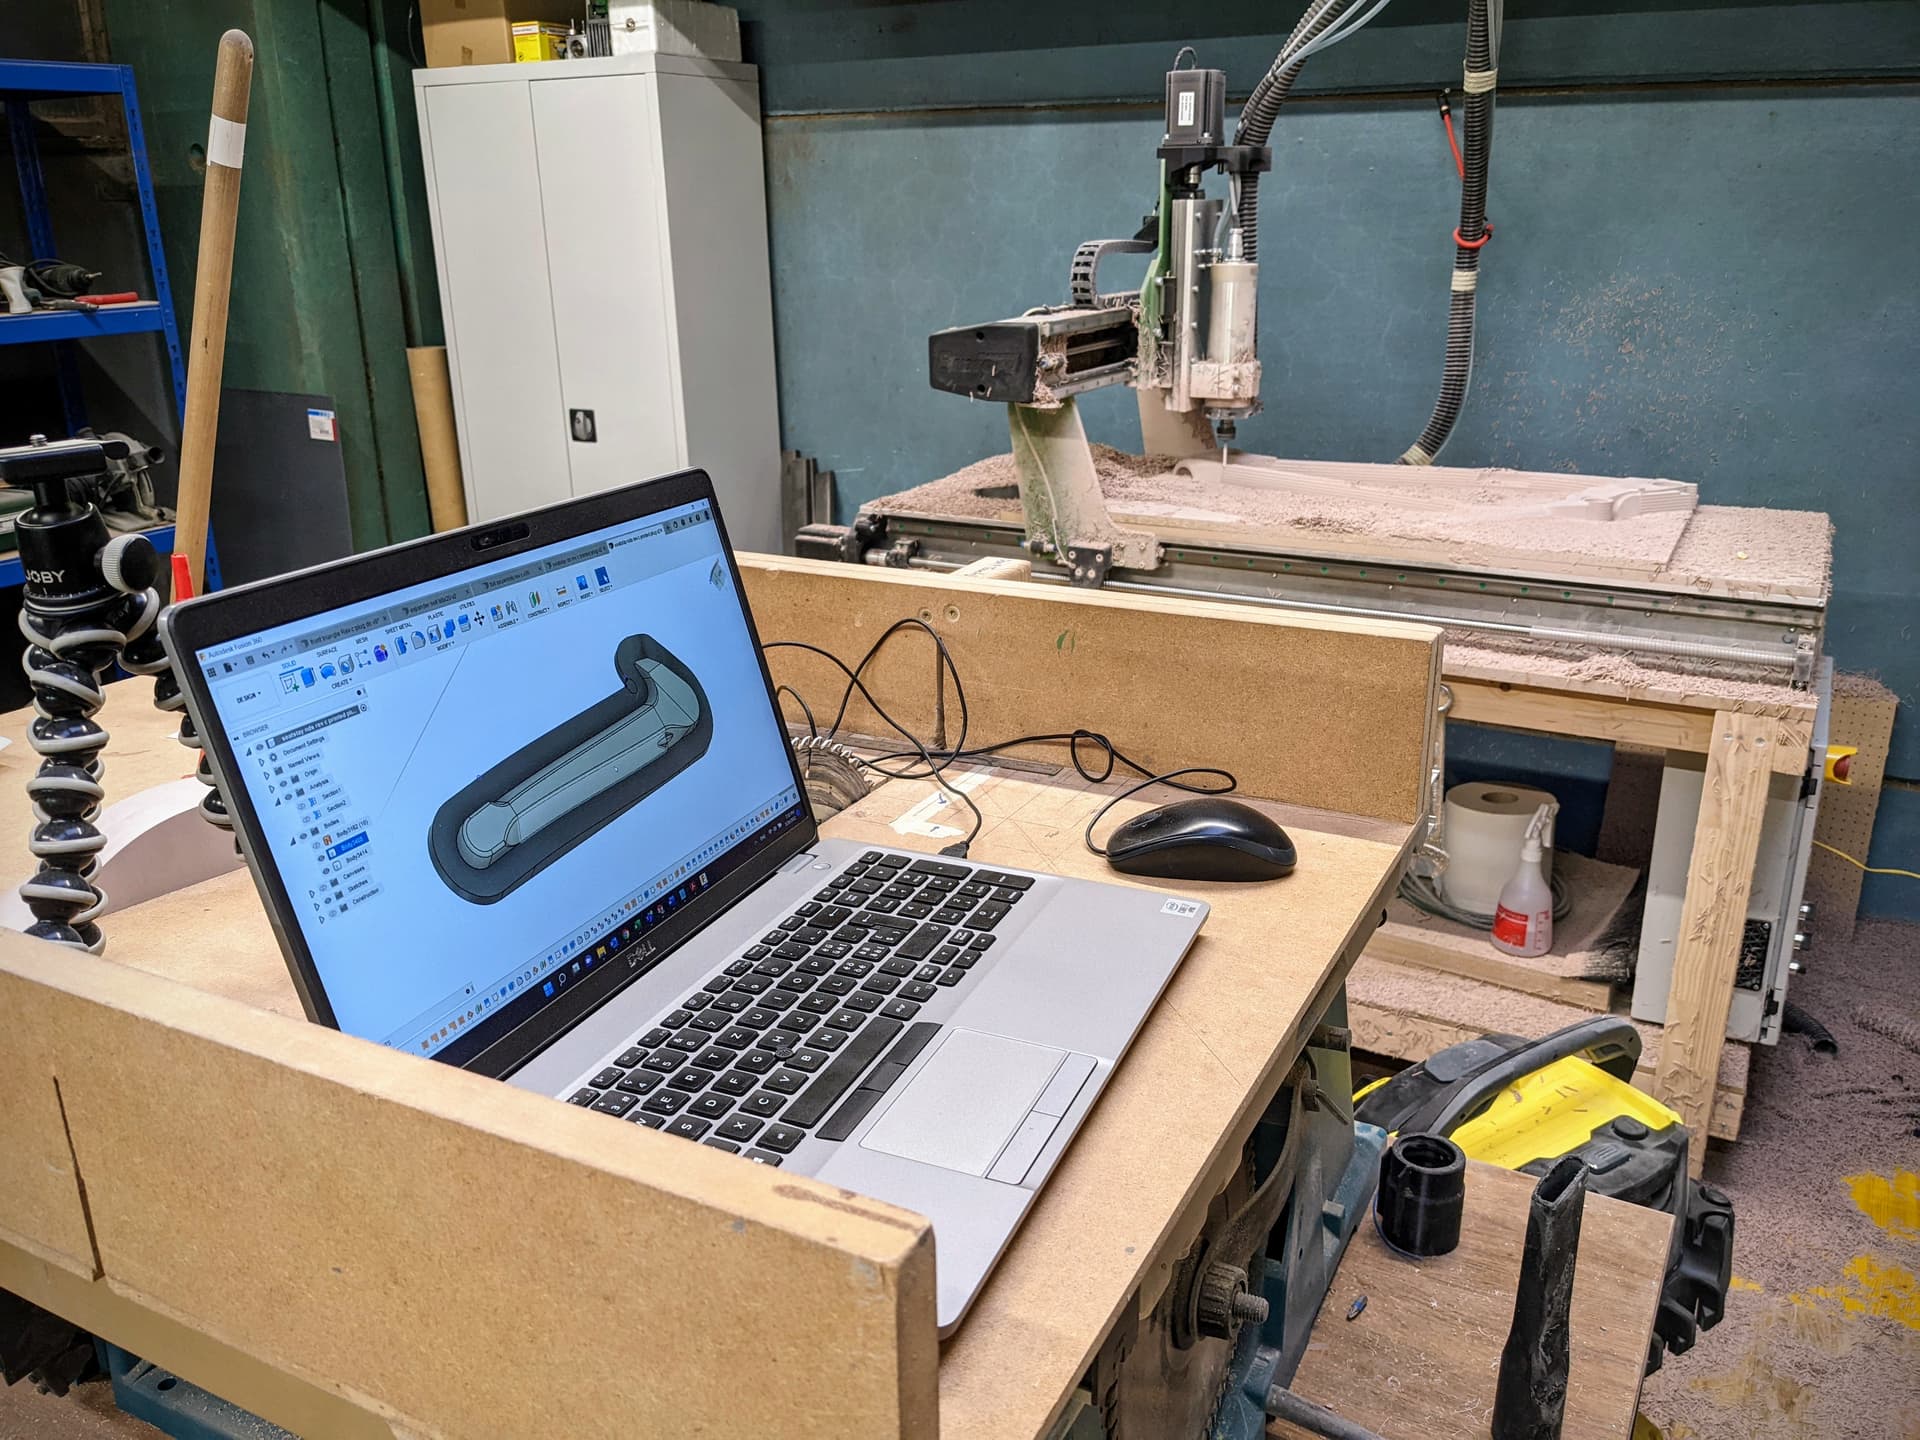
I’m back at it! little unorthodox but I decided to make two half shells first, that then will be bonded together with more prepreg strips on the inside. Should help me with process reliability and hoefully make something rideable this time
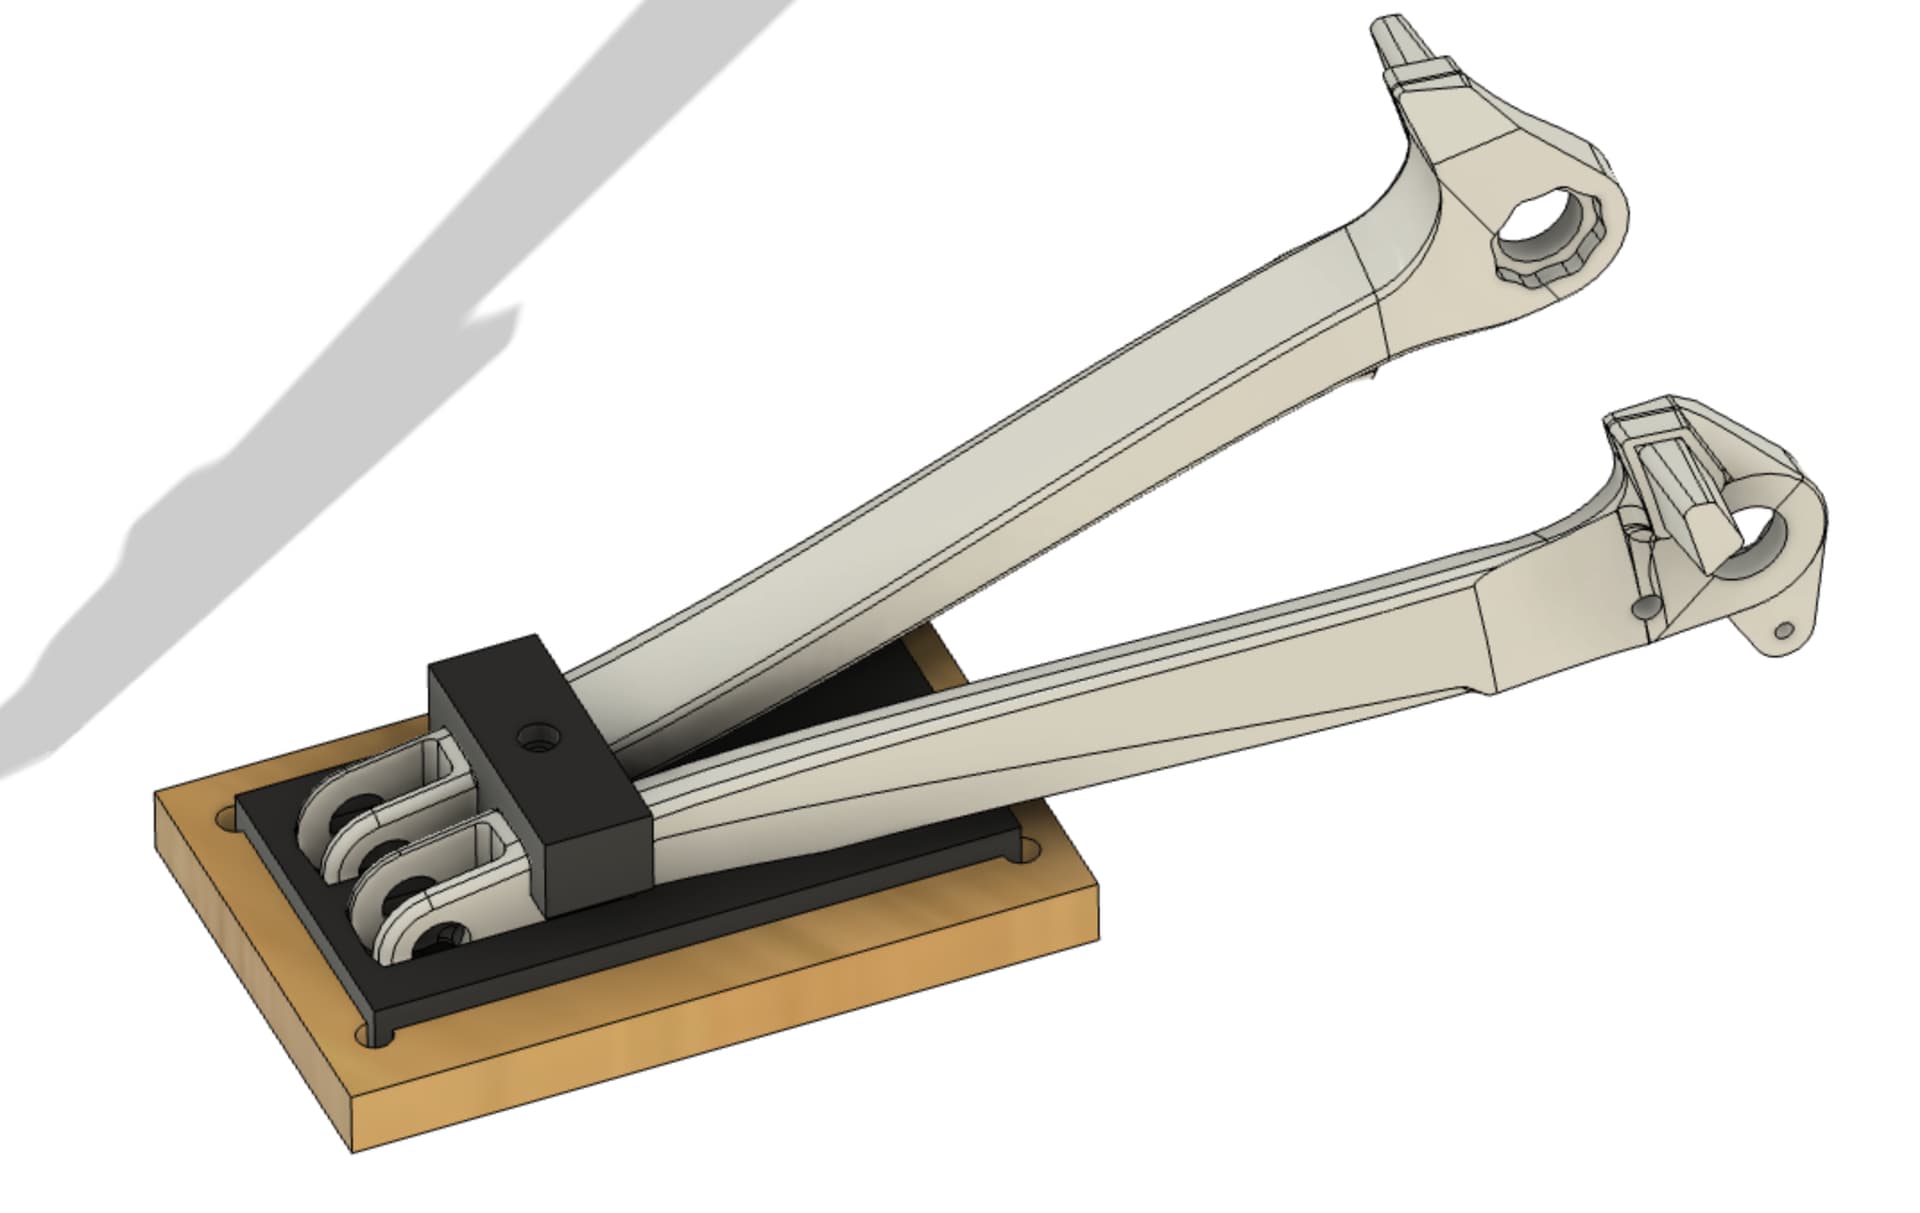
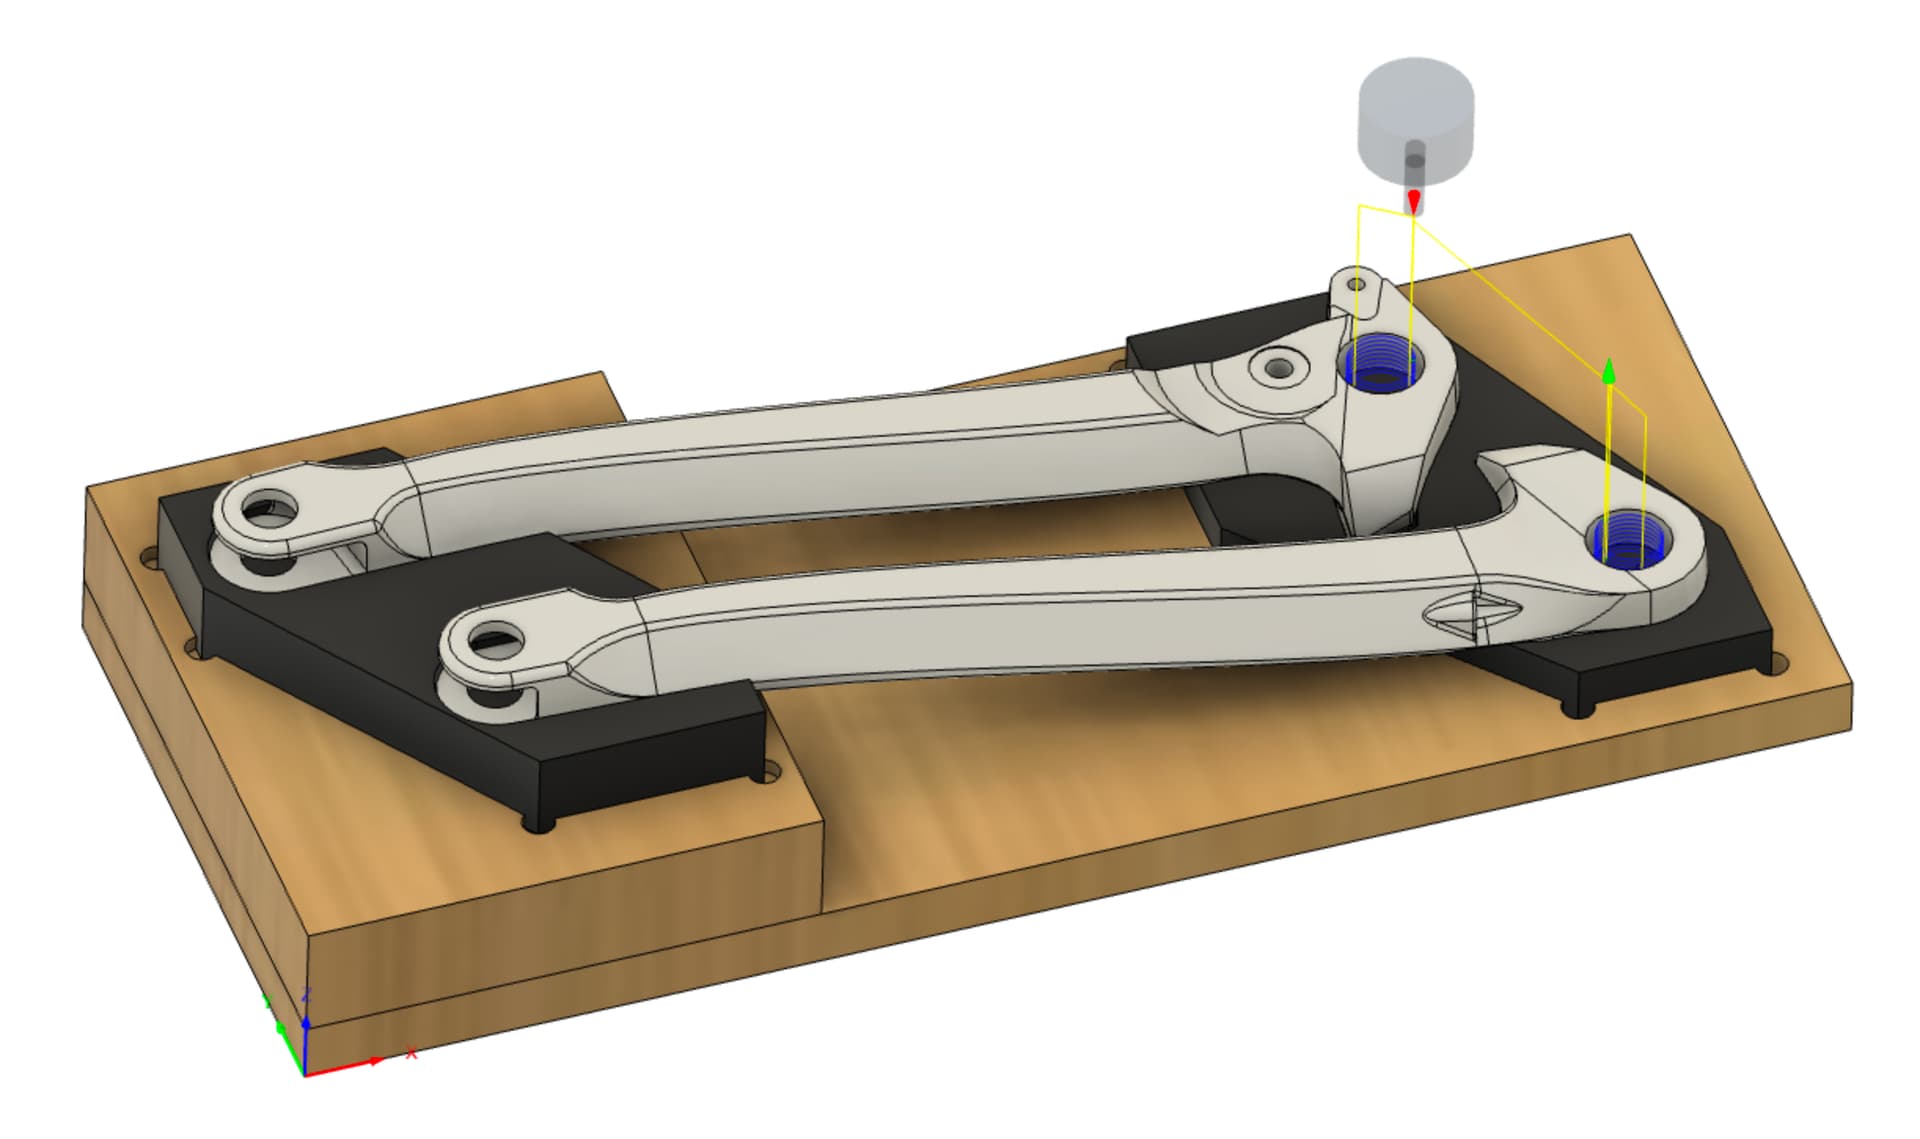
Yes all done in Fusion. Was a big learning curve and I spent way too much time on the design, but I am stoked every time i see the transition between top tube into the seat tube down to the main pivot
This is a pretty epic project! Daniel is right, the industrial design of this thing is incredible. You should definitely be proud of what you created here.
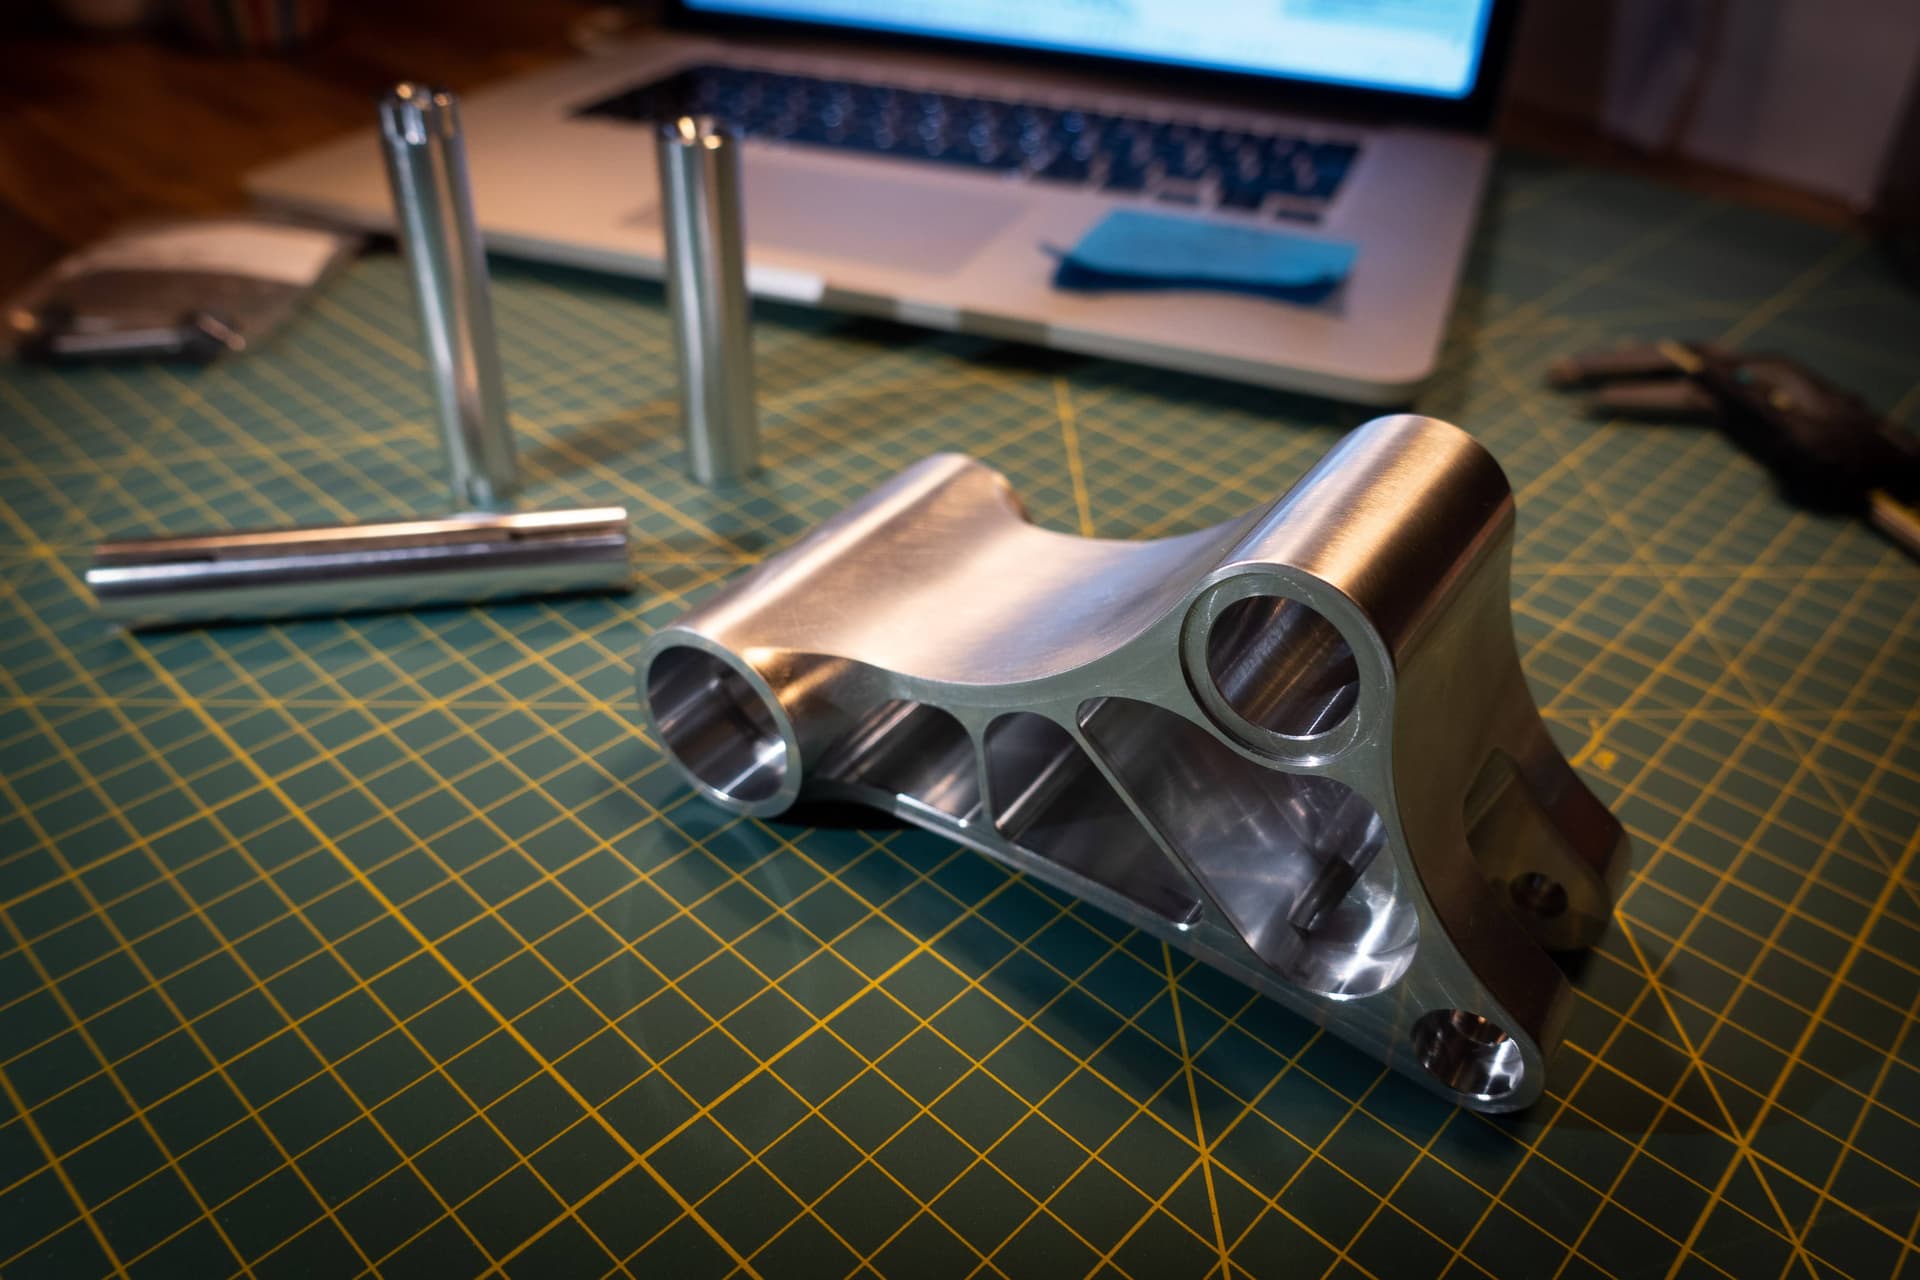
Do you have any tricks to get such a crisp sharp edge on the TT-ST-main pivot line? That’s not a trivial feature to pull off. What material are you using for the BB and pivot inserts?
Also, what was the deciding factor in going with the clamshell/dual cure process? More control over fiber placement on the outer control surfaces?