Hi! Came across this forum and seemed relevant to what I enjoy. I have an odd build idea that I’m trying so thought it would be fun to share it and get any feedback.
So I’m working on a steel frame where the steel tubes are bonded to steel lugs. Obvious question is “Why not weld or braze it?”. I don’t have experience or access to either of those and while I would like to in the future, gluing makes it a little more accessible and leverages my cad experience. The trade off is that the frame will be heavier and cost more too. It’s weird, unique but I think should be sound?
I just recently started this project so I’m in the middle of making the lugs in onshape. Since I’m on the free tier, everything is public so feel free to checkout my progress here: Onshape
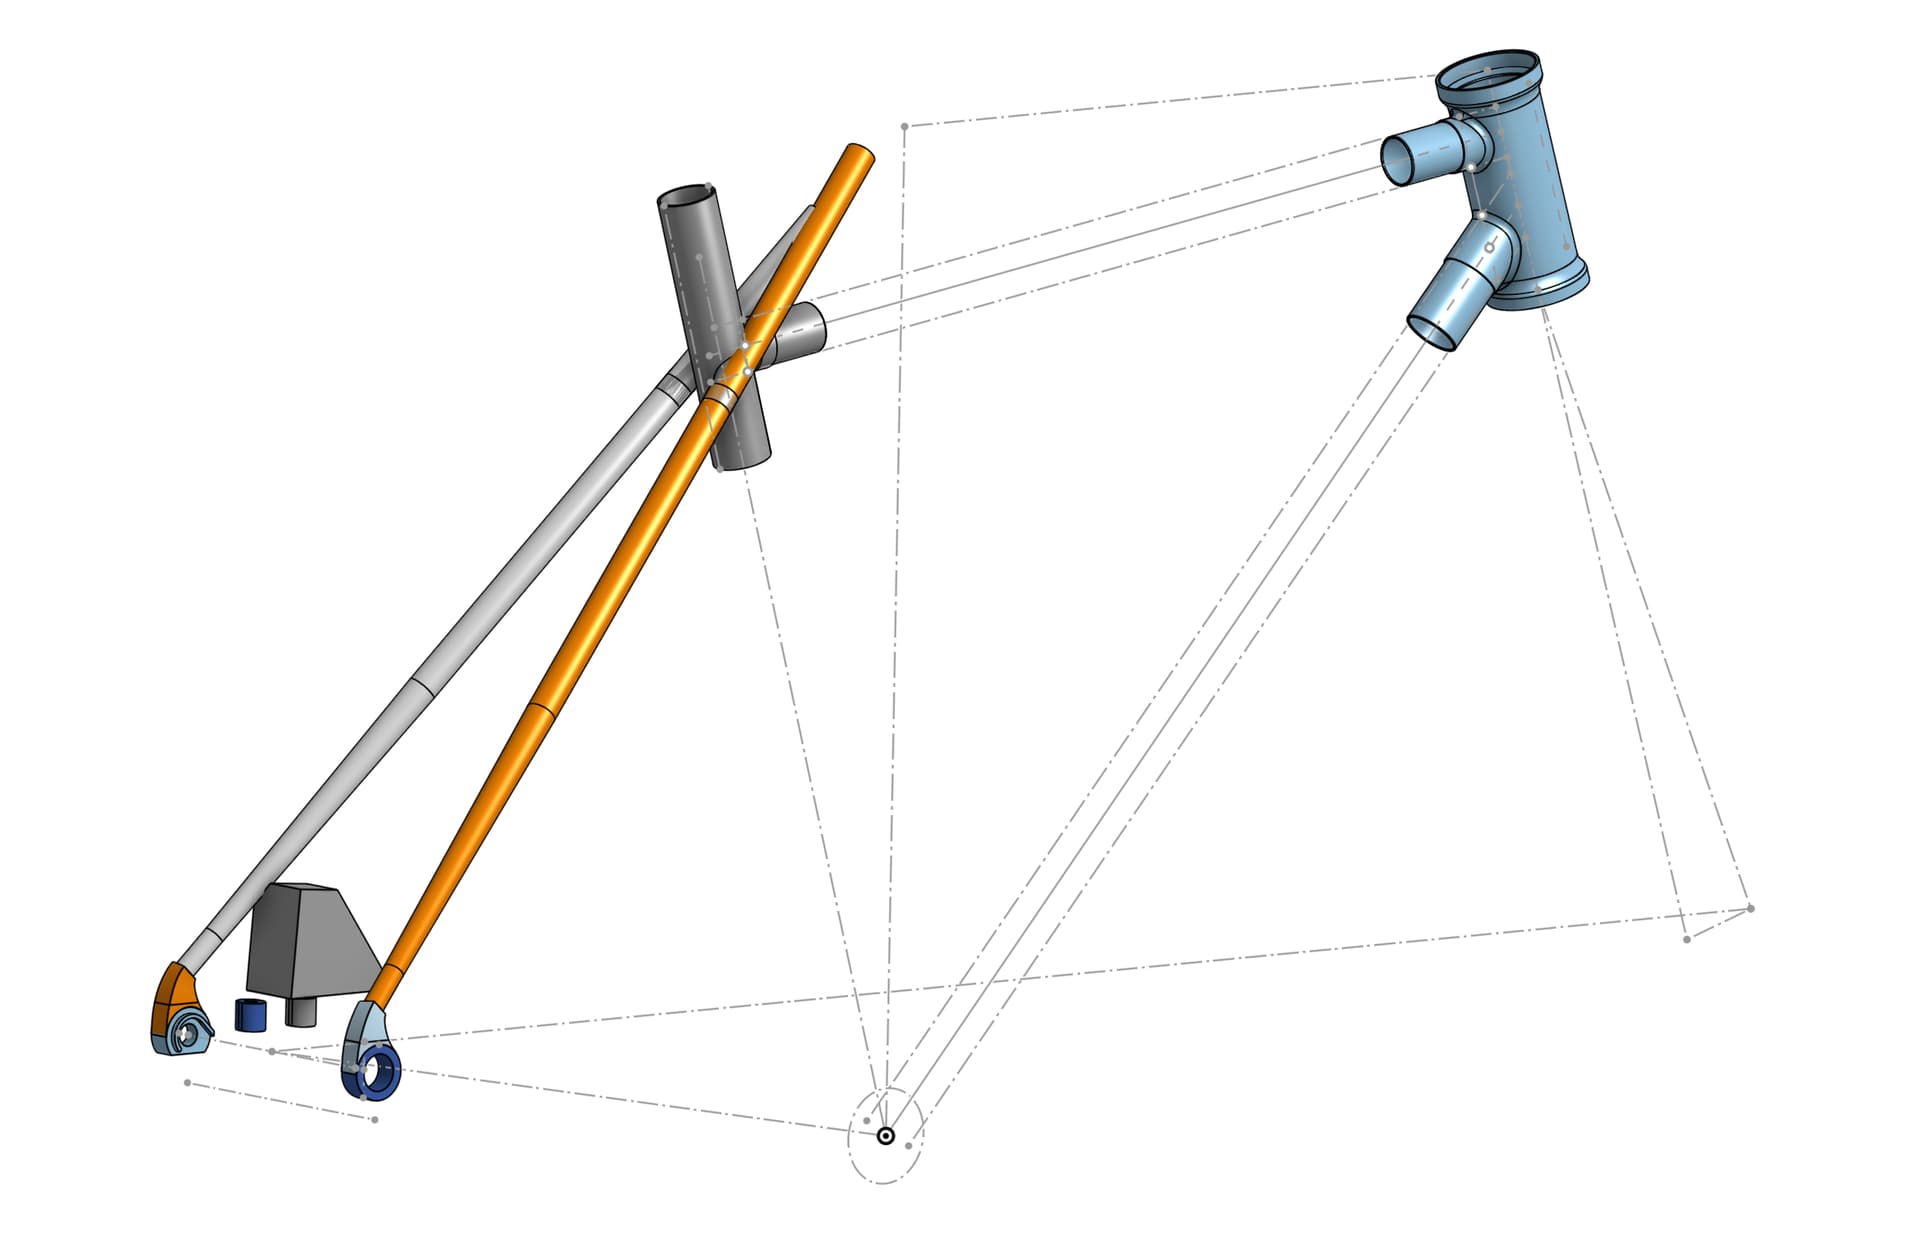
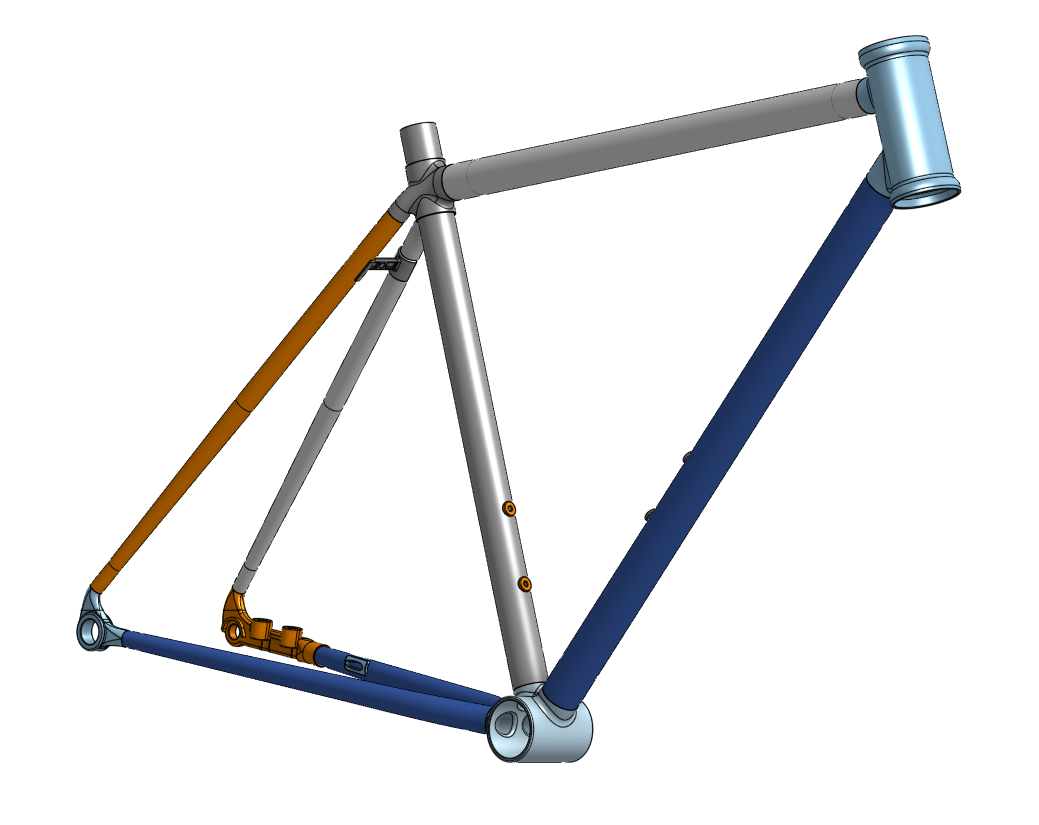
Photo so you don’t have to open the link if only vaguely interested
I plan on using Reynolds tubing 631 or 853 and getting the lugs cnc’ed from 4140 or 4340 steel. The lugs are sleeved into the tubes rather than over for a more seamless look. The bike is a road bike with ~38mm tire clearance and internal routing because that is the fork I already have.
Happy to hear any thoughts or ideas! I’ll post more updates as I get further. If you browse my other onshape projects, I have a couple other projects like a diy carbon tailfin rack and a carbon frame (didn’t quite pan out)
It should be OK if you make the lugs long enough to have plenty of glue area (as glue is less strong than braze).
I have made frames with carbon fibre tubes glued into lugs. Only the TT and DT were carbon. I used MMA glue on the advice of the CF tube supplier.
What I found interesting is that the frame has to be kind of teased together, pushing each lug together maybe 1/16" at a time in turn. The tubes bending a little bit gives you the wiggle room to do this.
This means that when it’s assembled it’s quite hard to get apart even with no glue in it (I did a couple of dry runs to get a sense for what the procedure would be ahead of having a lot of activated glue in there).
This makes me confident that it would never fall apart when riding. If the glue failed you might just start to notice a bit of movement in some riding conditions.
Making the lugs long enough to ensure this property (in my case it was by accident) but not so long you can’t get the frame together will be something you can maybe work out in CAD. Oversized tubes might be too stiff to assemble at all.
I would ask loctite what glue they recommend. Consider 3d printing as it allows for more complex geometry too, the compromise is that the lugs have to be 2-2.5x thicker than the tubes due to the fact theyre not cold rolled, and the 3DP material is less dense and has a different structure CNC’d material, so it’s weaker for a given thickness. Use as many off the shelf components as you can stomach, and keep the lugs compact and simple if you can. It may end up being more expensive but making the lugs out of a material that can’t be welded or is difficult to weld and buying tubes to match may be a good idea, like 7075 or Ti.
Gluing steel tubes into aluminium lugs does risk galvanic corrosion issues (as does CF into steel lugs as I did, but that’s probably not quite as bad).
It’s a bit of a weird idea but certainly feasible! Do make sure you’ve walked through assembly of the frame ahead of time. I’ve run into issues like @guy153 describes where you have to squish the whole frame together at once and it’s way easier to have subassemblies you easily connect. I have almost made a few unassemble-able frames and doing this walkthrough has saved some expensive mistakes.
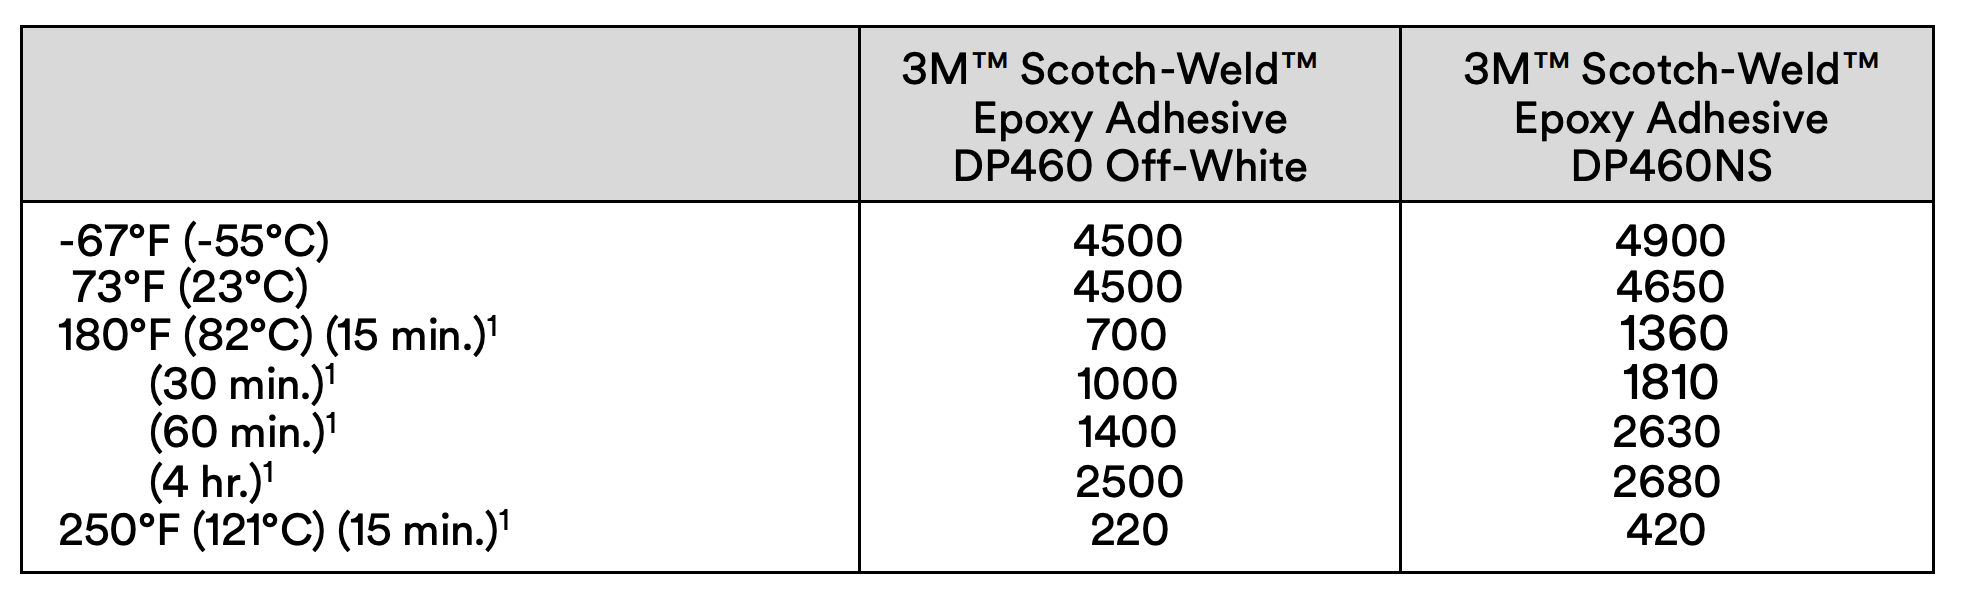
Gluing is very sensitive to material prep so be sure you can access the tubes and lugs for sanding & cleaning. Depending on the adhesive you use it may be worth finding an oven for curing the frame. I know for the 3M DP-460NS I use for Ti/CF bonding it achieves maximum strength when cured between 120-160ºF.
Study up on Raleigh Technium frames, I bet they learned a thing or three that might help you.
They made frames with alu tubes and steel lugs, but also one high-end model with alu lugs and 753 steel tubes.
I didn’t like the bikes, but the frame gluing was well engineered and reliable. I don’t think I ever saw one come apart. And they made tons of them over I don’t know how many years, so if they were breaking, I think I would have seen it or heard about it.
Their lugs had raised ridges that enforced a certain clearance between lug and tube, apparently needed for the type of epoxy they used. That was maybe mid-'80s and into the '90s? Glue technology has no doubt made leaps and bounds since then, so we shouldn’t slavishly follow what they did, but still I suspect it could be worth a look.
Good point on test assembling and it makes sense but I didn’t think about the difficultly of assembling. Perhaps I’ll print all the lugs in plastic to do some test fits first. Currently the lug overlap length is 1.2 * tube OD but I’ll probably have to do some math or fea to really know
I thought of 3d printing at first but based on the quotes I have gotten, its a lot more expensive Maybe for future frames when I’m more experienced and 3d printing gets cheaper
3M DP460 is also what my preliminary research came up with so glad it has been used in bikes. I’ll probably get the frame powder coated so hopefully that bake time can do double duty
Thanks for pointing out Raleigh Technium frames, I’ll look into more of what they did!
I don’t think this is a great idea, the epoxy isn’t rated for temperatures needed to cure powder coat (which is 350-400ºF). But you could powder coat before assembly.
I can vouch for In3d, got hands on with some bits and they’re quality. If you’re gluing they’ll need a bit of finishing to get the surfaces completely smooth but the prints come out looking sturdy.
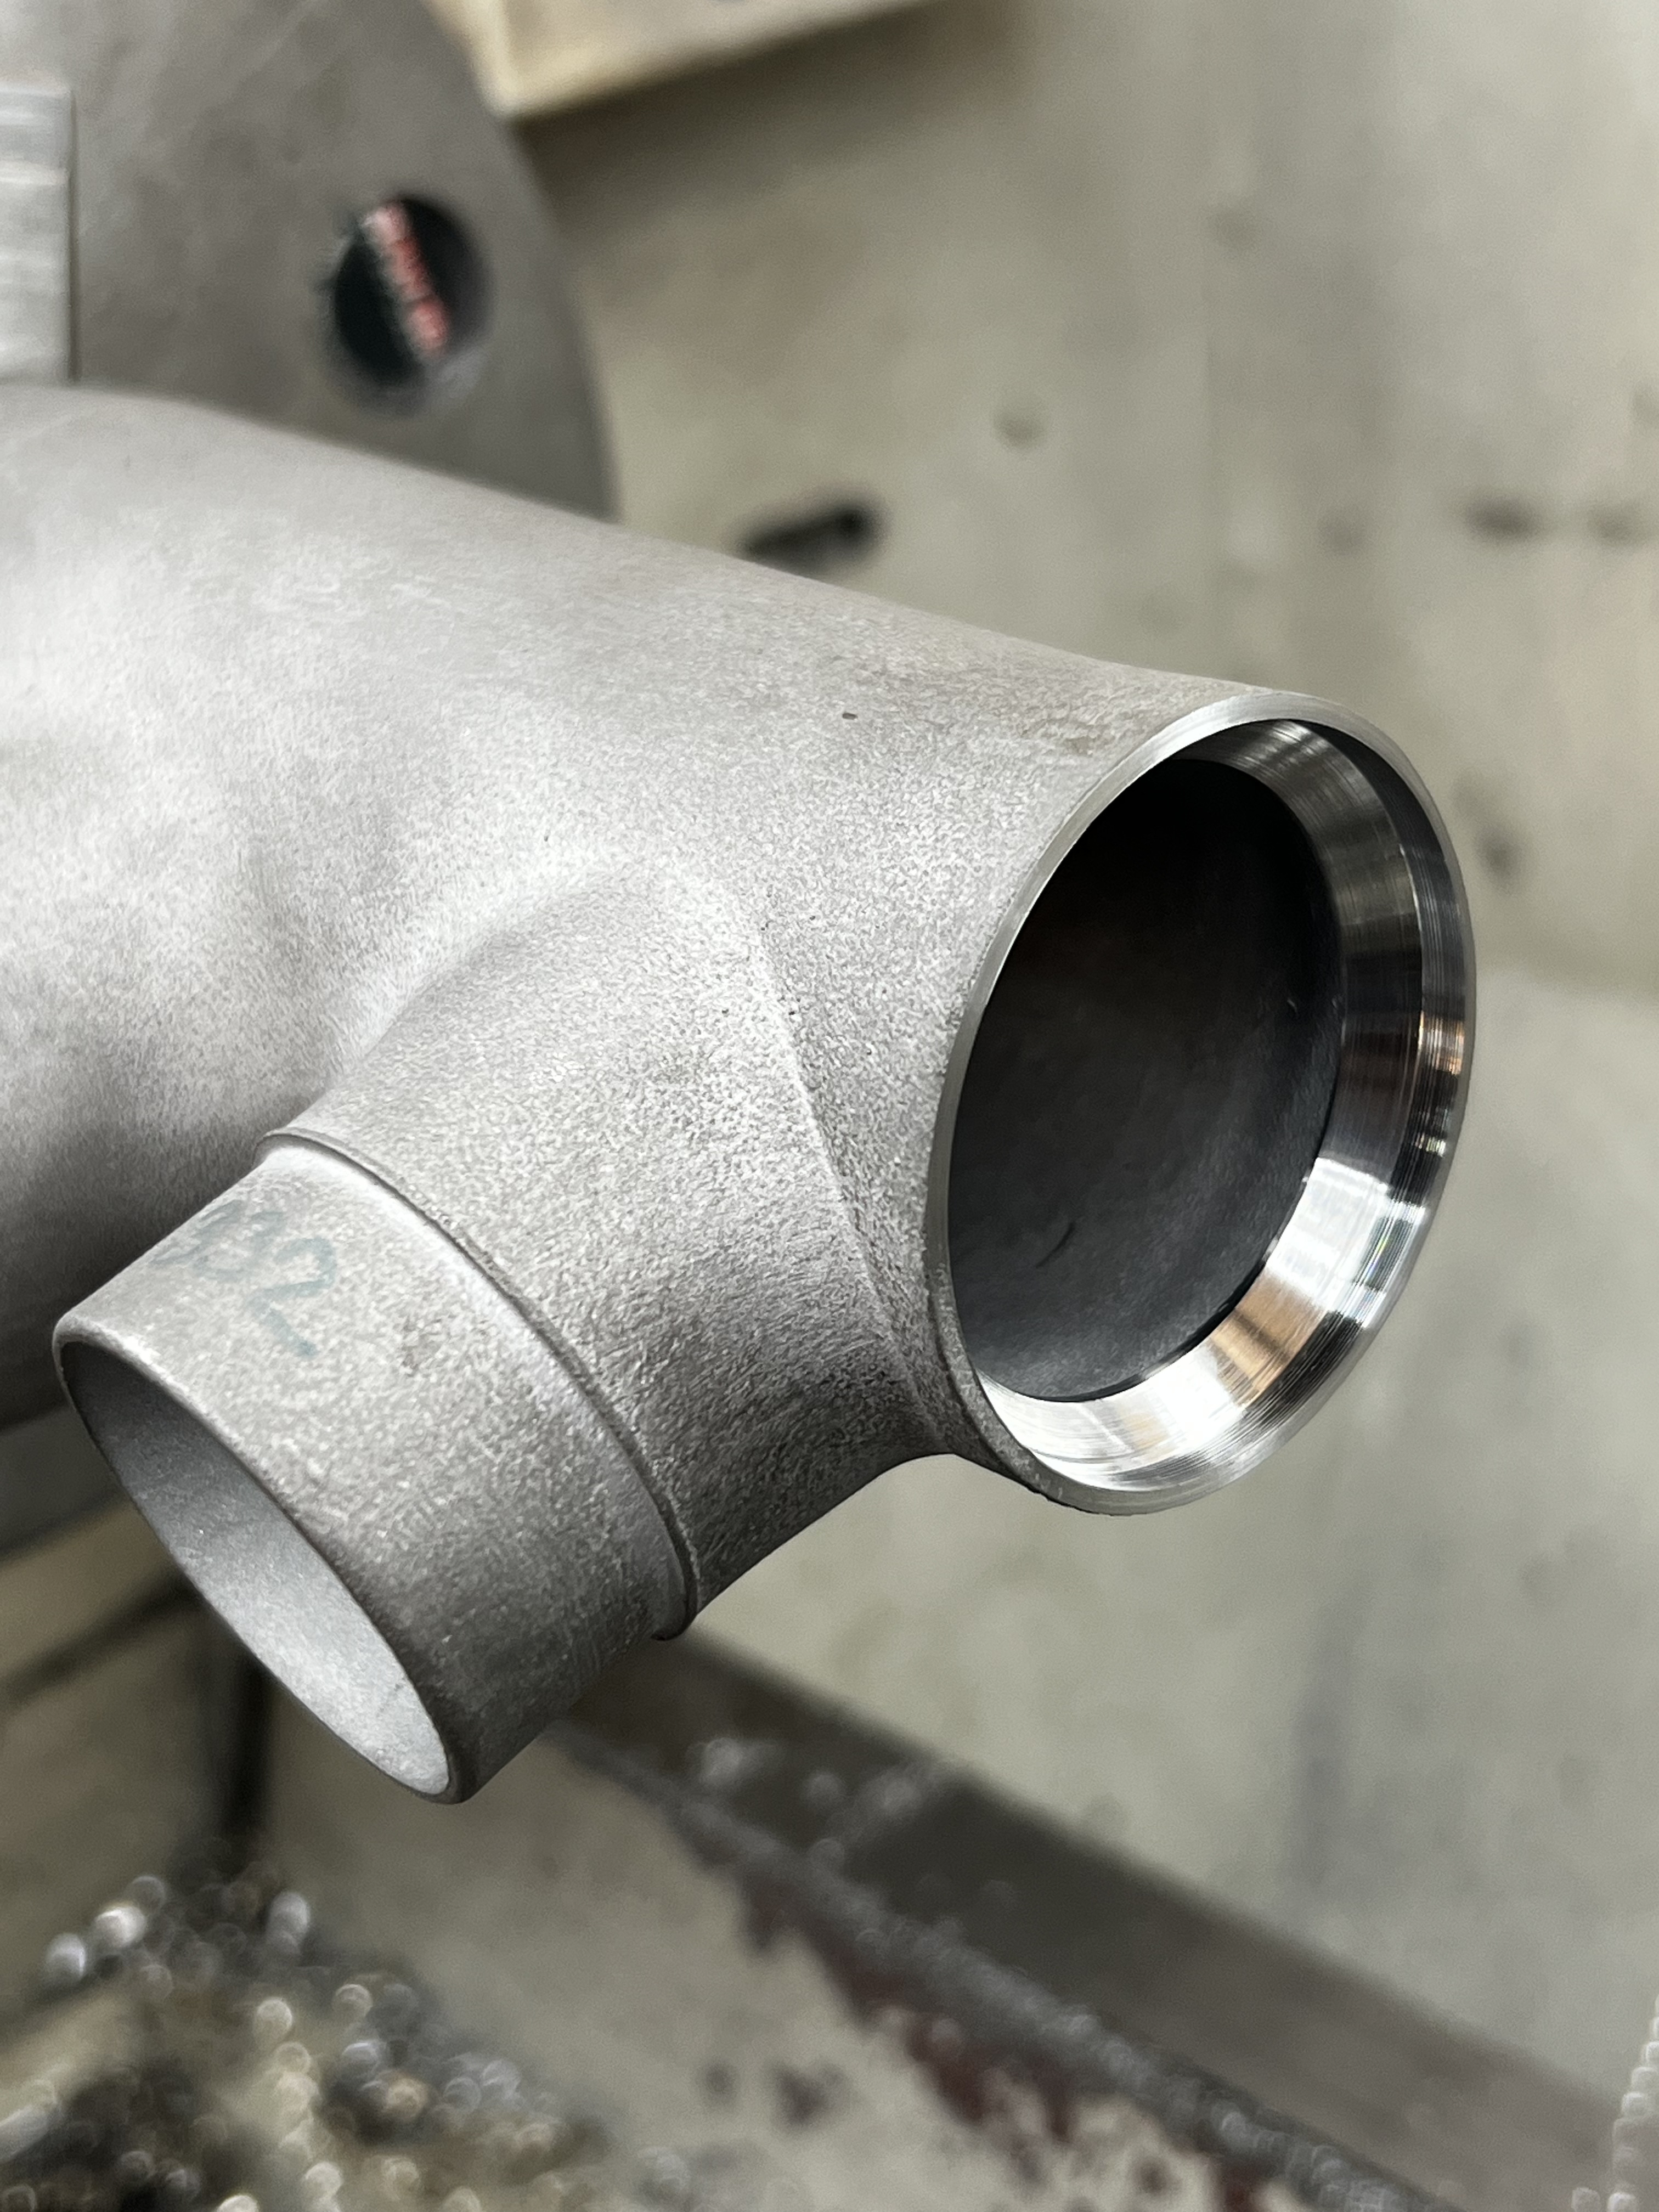
Any bearing seat or interface with another part needs to be machined to be properly finished. The last order I did with Protosoon I got them to machine the T47 thread and main pivot bearing seat in the BB section. I will amchine teh headset bearing seats on my lathe. Obviously you need to allow for a little extra material in those places to machine to size.
Also putting discs in the openings to help maintain circularity is a good move unless you have thick sections. ie. on teh head tube I found the opening was only about 0.1 out of round but I allowed 0.25 of machining material so had enough room to move. I didn’t use discs on the head tube. On the first BB shell I did in 3D print I had some problems with an oval BB shell that needed inserts to fix. They had to remove the discs to remove the internal print supports, it may have been during teh heat treatment that the differential cooling between the thicker section and the thinner shell may have caused the ovalisation. I ended up modelling in a 5mm thick ring in the shell and got them to CNC the thread in so it was all on them to ensure the shell came out to spec.
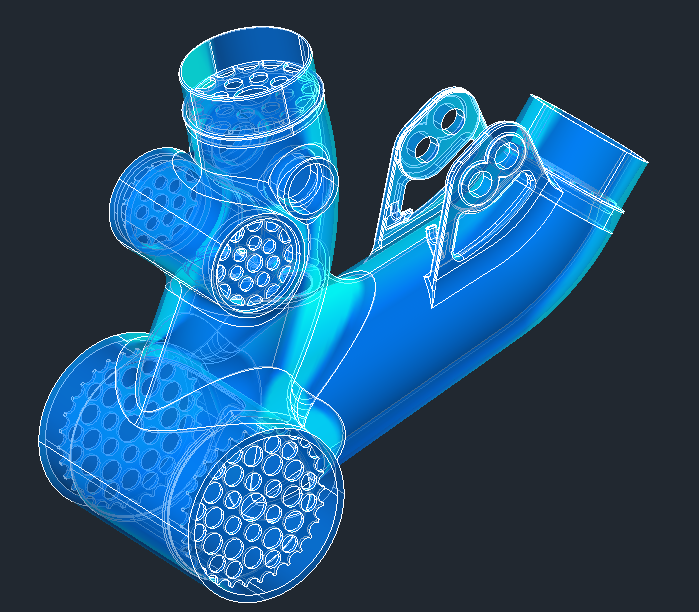
A little update. Frame is close to being done designed. Glad its in CAD so I can account for things like heel clearance . I also pivoted away from CNC to 3D print mainly cause I wasn’t quite designing the parts well for manufacturing and after some conversations with some CNC places, I think moving to 3D printing will give me some more flexibility. Designing for CNC is a skill it itself tbh
I adjusted everything for 316L and did some very rudimentary FEA. Definitely going to over build this a little compared to some of the hollow dropout structures I have seen on this forum but I rather start conservative.
Going to reach out to some places to get 3D price estimates. Things left are adding some final details like head badge, fender mounts and ordering the tubes so I can get actual measurements in case I need to adjust anything
Definitely worth a shot, if you have enough surface area in the lugs and a really good prep (sandblast?) on the metal.
Regarding galvanic corrosion with aluminium lugs, that’s not really an issue unless there’s dirty water pooling between the parts. If the glue joint is tight you’re good to go. We’re all terrified of stuck seatposts - that’s the perfect example of a great situation for galvanic corrosion - water spraying off the back tire and collecting between the parts, and staying for a long time. Just having the metals next to each other is, in practical terms, not a problem.
Fun fact, you can actually get galvanic corrosion between bronze and steel. Bronze and steel are about as far apart on the chart (have about the same potential for electromotive forces) as aluminium and steel, except in this case it’s the steel that gets eaten, not the aluminium. The problem won’t be between your braze joint and the steel tube, rather on the steel tube in the area near the braze joint. I have seen this on steel winter bikes that have been regularly covered in salty slush - deep pinholes in the tubes next to the lugs. But if your frame isn’t regularly soaked in an electrolytic solution then it’s not a concern.
Hit a little of a snag. I ordered the tubes and didn’t realize the round-oval-round tubes weren’t round in the join area which makes it hard to create a lug for. So instead I’m going to add a yoke from the bb to the straight part of chainstay. Should be ok but I’ll be 3d printing part of the tube structure.
What wall thickness are people using for 3d 316L parts? It there a relation to the steel tubing you all using? For example the chainstays I have are 631 and are 22.2mm diameter with a 0.8mm thickness. I read up on the 3d printing thread and there were some concerns of fatigue life so I’m thinking 1.5x or 2x?
Also when you get parts 3d printed do you all ask for heat treatment as well?