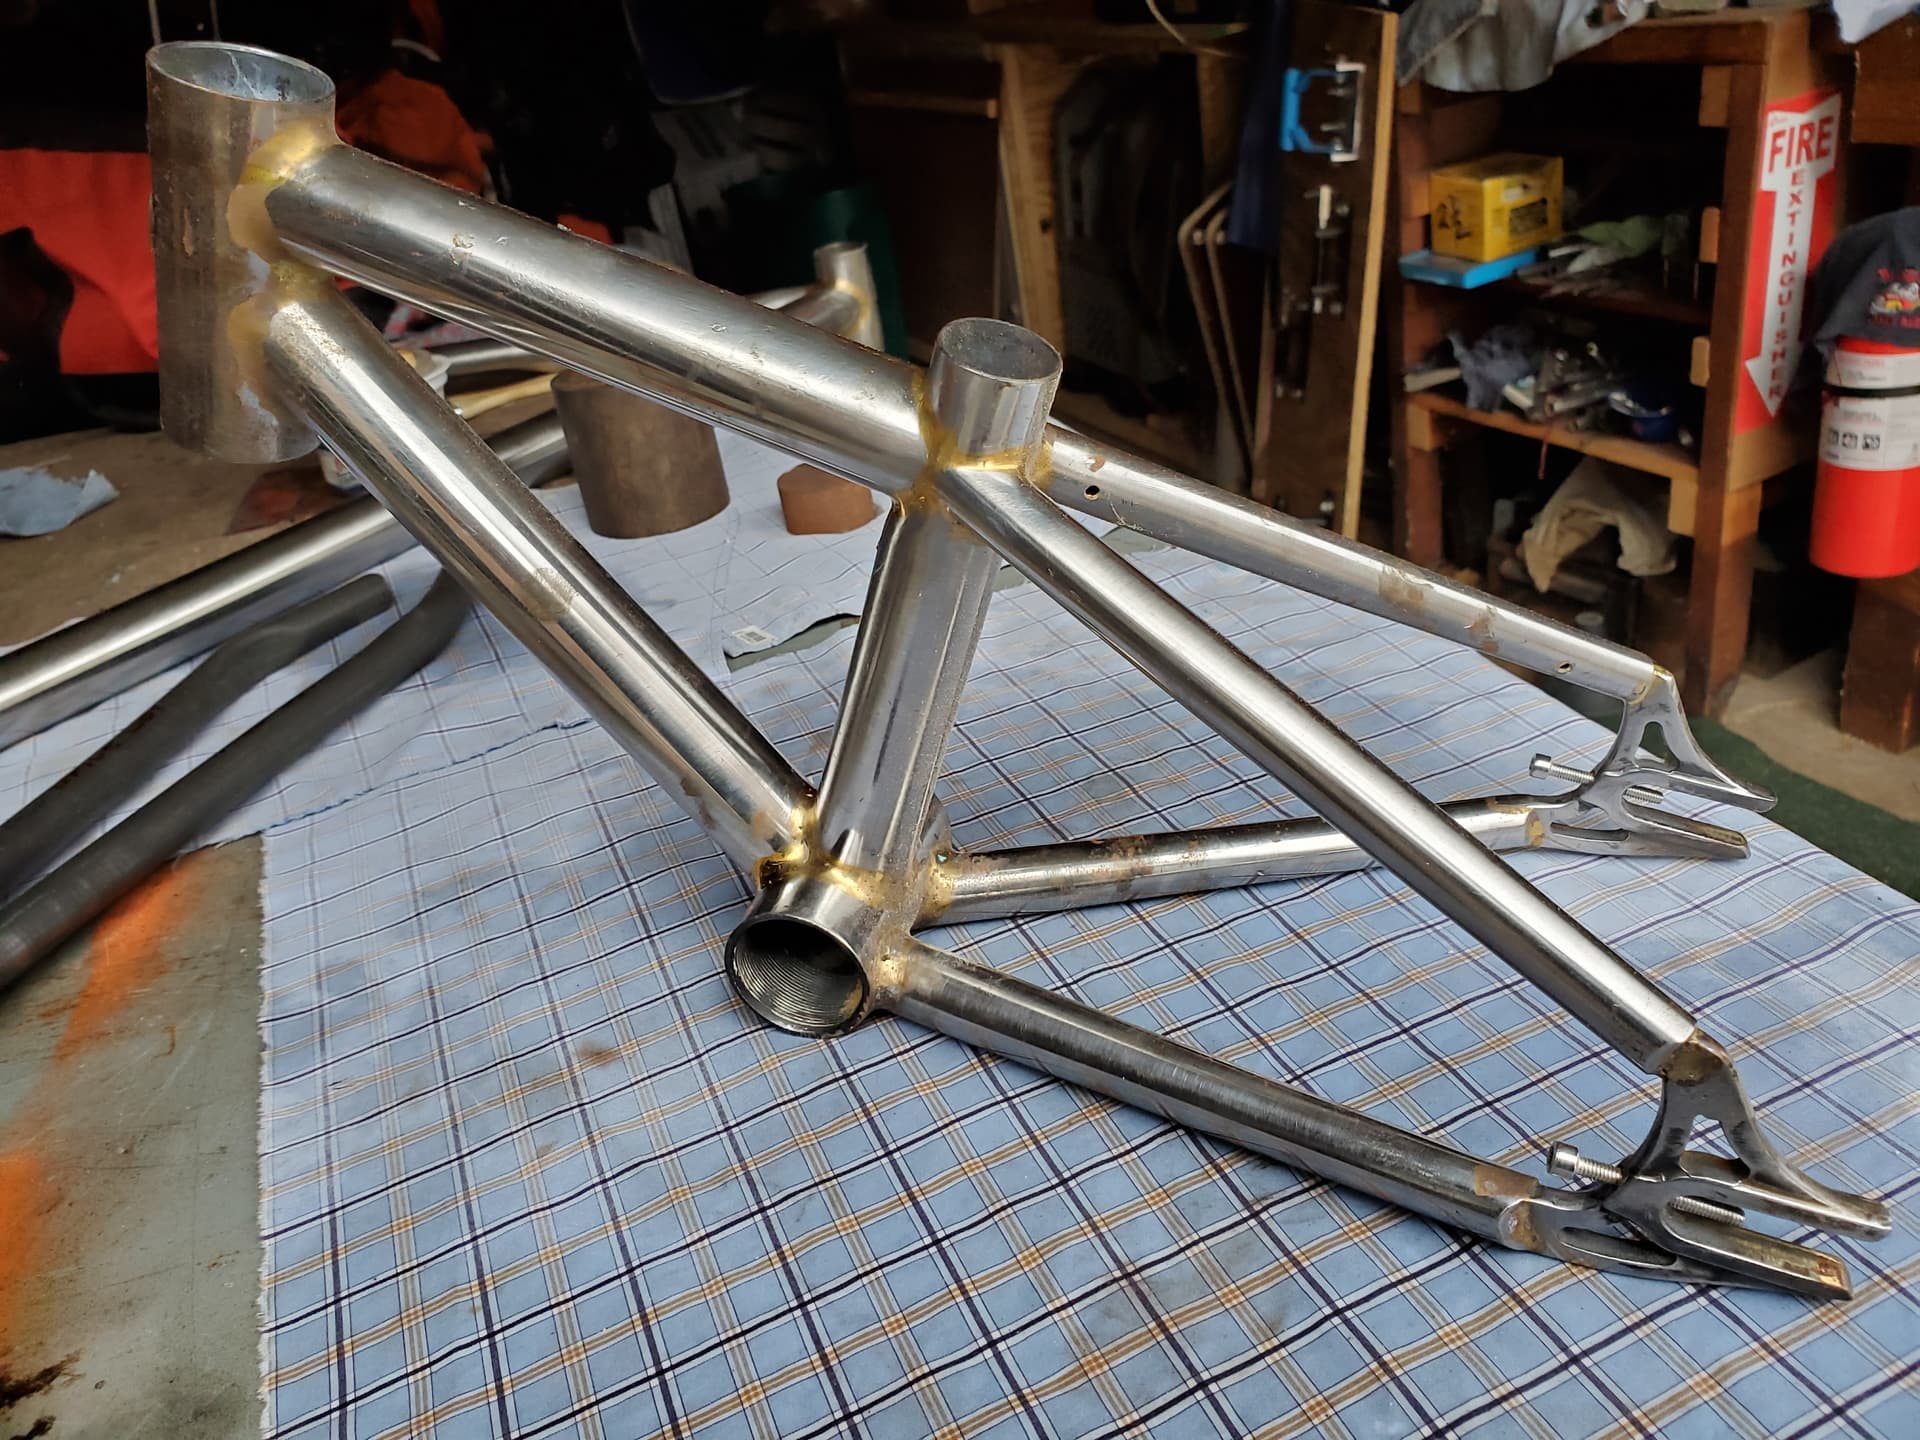
Novice builder here, slowly progressing to build my first frame. One of the steps in frame building that will probably be the most difficult for me is getting good miters - I don’t have a mill or tube notcher so I will be mitering all the tubes by hand. I have mitered several tubes for practice, and although I have noticed an improvement, I am curious if I could get any advice/feedback on the last tube I mitered? Here are more details:
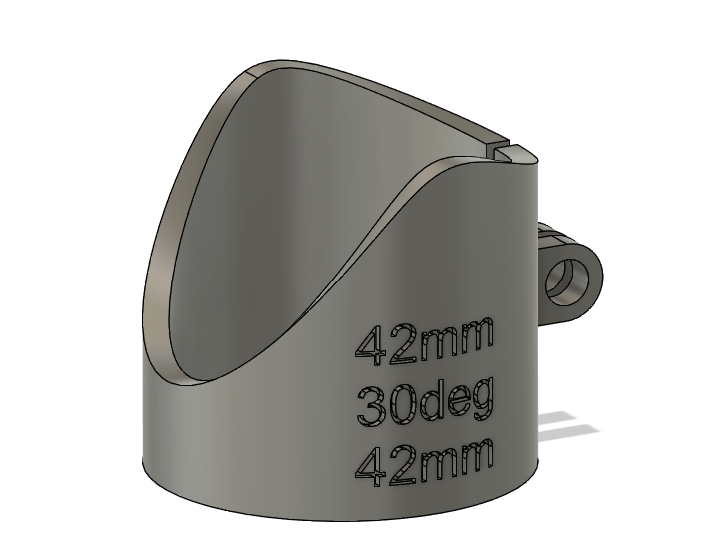
I started out using paper templates, but the dimensions were always a tiny bit off (enough to frustrate me at least) and I tended to be unhappy with the results. I probably could have made it work but I wanted something to facilitate this process, so I sketched up a 3d model for a miter template. The tubing I have been using to practice with is 42mm OD 4130 with a wall thickness of 1.2mm. Below is the model I last practiced with. I labeled the template with the child tube OD, angle from parent tube, and parent tube OD:
In addition to an improvement in accuracy over paper templates, these 3d printed templates are also easier to miter with because I can tighten them on the tube and leave them there as I miter. To me this is a much better visual guide than the sharpie lines from the paper templates:
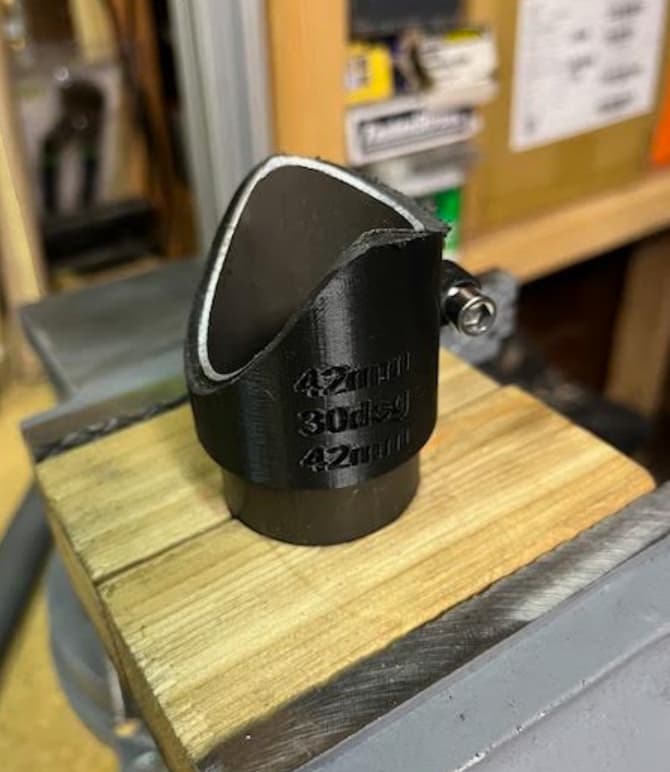
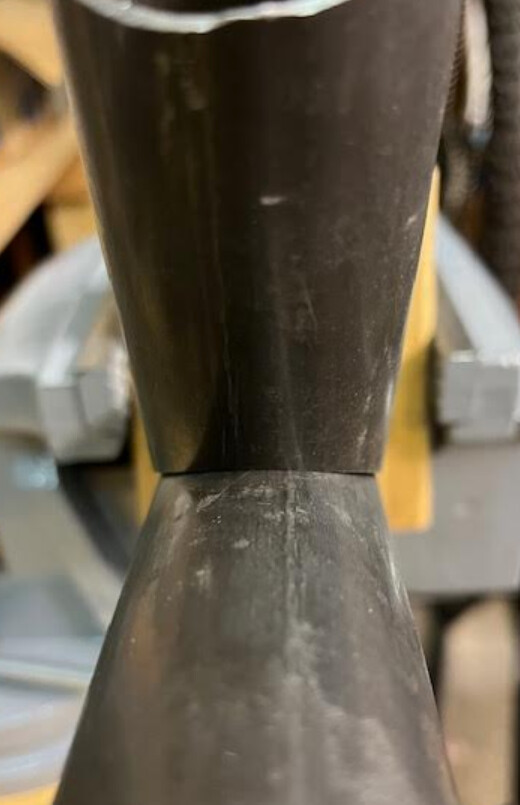
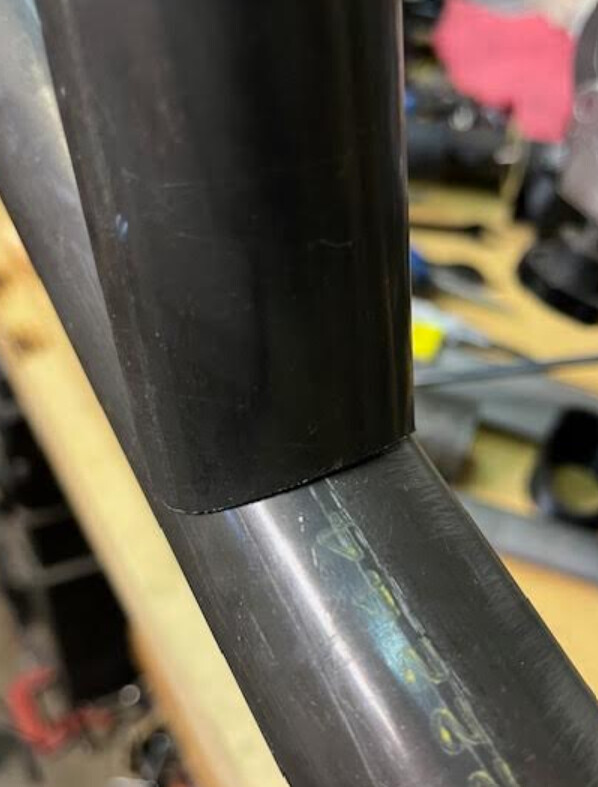
Anyway, here are the results. I could not wiggle the tube around so the miter was tight enough for that, but I could still see some small gaps between the tubes, which makes me question: what is good enough for a miter?
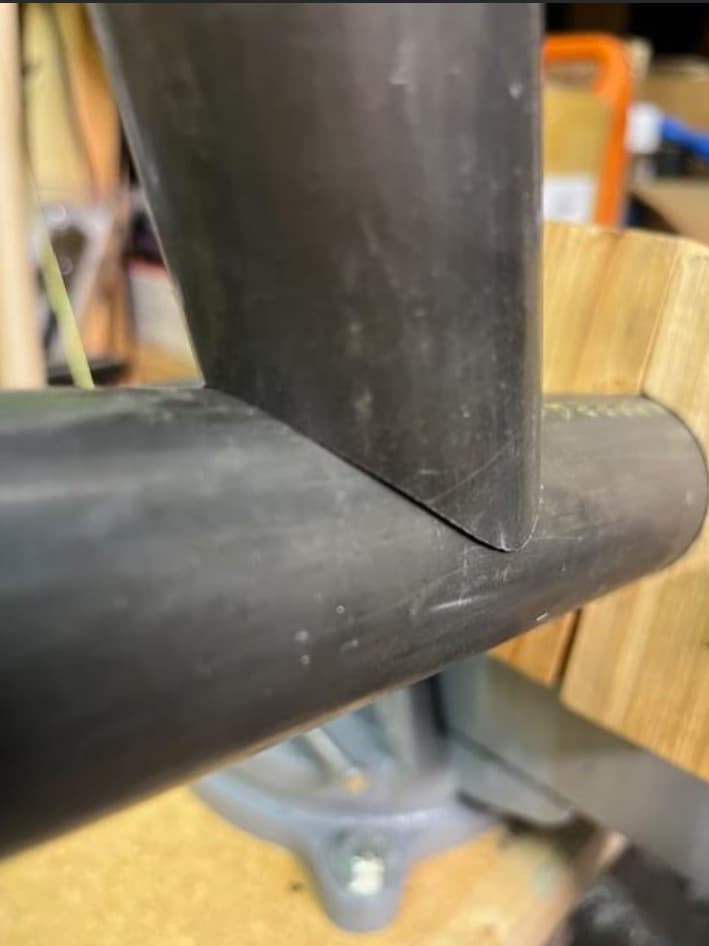
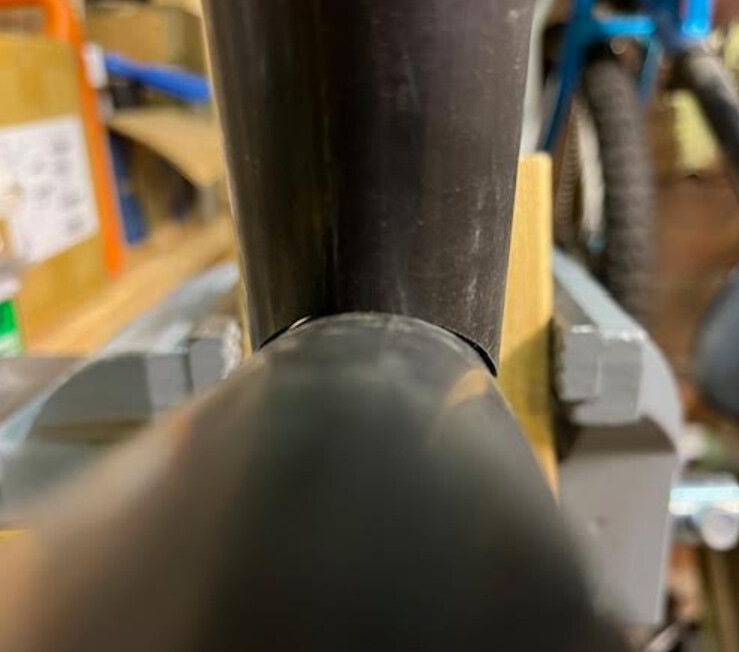
I took a photo of the inside of the tube as well. Here the gaps are a lot more obvious. I couldn’t get my phone camera to focus super-well so it’s not as bad as it looks (at least I hope so lol). I kind of eyeballed with my caliper that the gaps seemed <=1mm.
I was able to get the best results with a paper template miter when I finished by wrapping the tube it joined in sandpaper and used it to hone the miter. It is definitely possible to make a very tight miter that way. That should work with your guides as well.
The hardest part is getting 2 miters that are on the same plane or perpendicular, as well as near the correct angle and distance between miters. I got my best with results with layout dye and a scribed centerline to layout the paper templates. It took me a a lot of practice to get what I felt were good miters. I brazed and rode some frames with miters I considered bad that were out of phase, but none ever broke.
That does look like a nice template! As for your fit up, it may depend on what process you’re using. I TIG everything and in my experience what you have there is perfectly good enough. You actually may want to knock back the edges a bit because it looks like they are bevelled a bit the “wrong” way (as hole saw mitres always are in fact). There has to be somewhere for the weld to go and there’s nothing wrong with a small gap like that (yours is tiny) here and there so long as it doesn’t catch you out when you’re actually doing the weld and cause you to burn away the tube or anything.
I’ve seen people on YT use hole-saw mitres that fit perfectly. They don’t bevel them back at all, and then they lay a bit of very thin MIG wire in the joint and zap over it on pulse. It makes for an easy and good-looking weld, and it’s probably fine, but I would be nervous about the strength.
People say you will get distortion if the fit isn’t perfect because the uneven weld will pull more on some sides than others. Makes sense in theory but I have never had that problem (and my first build had much worse fitup than you have there). A few tacks all the way around before you start and pay attention to weld sequence and it’s fine. It may be different if you’re fillet brazing– I’ve never tried that!
Where the parent tube isn’t much bigger than the one you’re joining to it, and especially if it’s at quite an angle, the sides of the tube are often going to be a bit tricky (DT to HT is often like this).
I wouldn’t be happy with this level of fitup. I don’t want to sound condescending but it isn’t really a difficult process. You just need to be methodical and take your time. In that picture I’ve quoted, you can see exactly where the material needs to be removed, so just remove it!
Again I’m not saying you won’t be able to get it to work but if it can be better and it’ll make it easier, then just put a bit more effort in.
One thing that I find helps sometimes is to wrap a bit of shop cloth round the tube and use that to remove the material. It acts as a kind of mandrel. Just be careful to to wiggle it around too much or you’ll end up with a sloppy fit.
Also, having files with the correct radius will make your life much easier. Not sure what you’re using there.
For brass brazing I call that good. I was able to get away with worse fits, however, the more precise the fit the less movement it will have once welded/brazed, meaning it will be straighter.
I struggle with notching a lot as well and I have a round-column mill setup, it’s my #1 issue.
I am having tubing laser cut for my next frame
I think you want to get it tighter for stronger joints and better final alignment. Templates are good to get close, but then you need to go to the hand file and get it closer. Maybe not water-tight, but closer than you have it.
I hand file everything. It starts with paper templates and sharpies but ends with reading the wiggle and looking for gaps. It gets quicker with practice, just keep at it.
The biggest thing to remember as the filler/molten material cools it shrinks. So any gaps in the joint the material will pull the two parent material parts together causing the majority of alignment issues most of us have.. Ideally you have perfect contact all the way round though we know this ain’t possible but you can get pretty darn close.
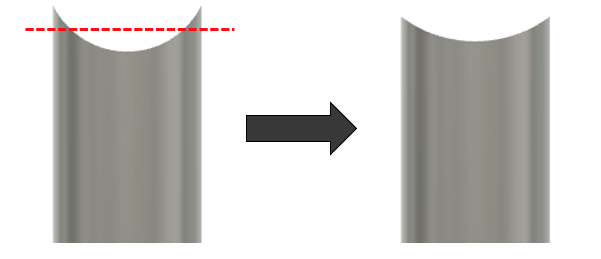
I think the hsape of the mitre template you have modelled will lead to some errors until you get the feel. I still use paper templates which I leave on the tube taped down so they don’t move. Do a gross cut removing most of the material and creep up to the paper edge with a 2nd ut and then a finish cut.
As mentioned above get the right size files for the cope and also run the file through, rolling across the surface so you aren’t filing grooves in the shape as you have there. It’s diagonal movement that matches the shape of the cope.
I’m with Shand. You aren’t there but you’re really close. Just look at where the tube is touching the other tube, and take a little material off there. I use a sharpie at this point to mark where the material needs to come off because it’s hard to keep it in your head as you move around the piece.
To me, you are a few file strokes away from being there, but you aren’t there yet.
I don’t mean to be rude or insulting to the person that posted this, I don’t think they meant harm by it, but in my opinion this is bad and unsafe advice. You’re on the right track with your mitering and more practice will get you there, but the fit-up shown in the photos is not good enough for brass (bronze) brazing. I can’t comment on TIG, but a brazed frame you made with miters like that might fail, and you and your loved ones wouldn’t like to find that out.
To have any appreciable strength, a brazed joint needs the gap between the two tubes to be tight. This is necessary to ensure the filler is “constrained,” or kinematically locked by the steel base materials you are joining, forcing any strain in the filler to be compatible with the deformation in the base materials. The gaps in your photos are too large for this. For bronze brazing the gap should be between 0.001” and 0.005”. A good way to verify this is by testing the fit-up with a piece of shim stock: I try to make sure that a 0.006” shim won’t fit anywhere into the joint.
Some advice I found helpful when I was hand mitering joints was to set the tube up in the vise at the correct angle so that your file strokes are always level/parallel with the vise jaws. That way you only have to practice getting one angle right with your body, and every joint you practice reinforces that movement.
First off, don’t settle for good enough. Tight miters are what ensure you get a straight and strong frame. I’m opposite of Guy, I only braze with brass or silver (fillet or lugged) and the miter pictured here will cause ovalizing distortion of the main tube to the point where it won’t be useable. Where you see this is headtubes and seattubes at the top tube joint. This is NOT good enough.
What files are you using? Round or semi-round? I have a medium (8 or 10inch long) semi round that roughly mirrors a 28.6mm tube and I find that to work really well unless I’m mitering for a 1” tube - in which case, it’s a bit too big. You are only a few file strokes right in the middle from having very good miters. Even when using a mill to miter, unless your fixture is PERFECTLY accurate and your method of cutting angles is perfectly accurate, you will need to adjust your miters with a file to make them fit. A mills just gets you close faster, it isn’t foolproof.
From here, mark the point where the tubes touch and then take a couple swipes at it with a file and try the fit up again. I usually do this 5-20 times for each joint. Don’t be satisfied with ‘good enough’. Sometimes I get lucky but usually not. Be patient.
In-person live feedback/tuition would be ideal here. There are so many little knacks and tricks that are hard to fully articulate in text without it ballooning out to “War and peace”. You images indicate to me that you are close to a great fit… but not there quite yet.
If you wish to really dial your technique, I would suggest practicing (i.e. repeating it many times) a perpendicular ST-BB mitre. You don’t need to use real ST/BBs, but just a perpendicular mitre where the mitred tube diameter is smaller than the other. You should try to do this without templates, aiming for a centred, square join (check with a square!). This removes most of the other complexities and lets you focus on mitre quality.
When your mitres are in the very general ‘mitre’ looking shape, you should then iterate! Coat the mitre with ink/sharpie and focus on removing material only where you want to, with only a few intentional file strokes, then check the fit and repeat as needed. There is more specific advice on how to remove material from specific parts of the mitre (e.g. the throat vs. the ears), but it is too nuanced to describe here.
There has been some real gems posted by everyone so far, so I would like to 2nd them just to highlight what I think may help you.
The hand file alone can achieve practically perfect mitres, no other tools are required.
The file radius should roughly match the mitre radius, deviating from this requires skill and makes things harder. Buy a collection of half rounds!
Set your tube block, or fixture, so that you are only filing horizontally.
Practice without templates on the simplest mitre: the ST-BB (no offset).
Roll your wrist and rotate the file slightly through your stroke (don’t overthink this, a quarter turn is plenty), but keep the file horizontal and running parallel.
File with intent, mark the mitre and know where you want to knock material back and do so with a small set of strokes.
Some great replies in this thread. I expected my comment that you can get away with those mitres to be controversial. However it is also true that you can (when TIG welding at least) and worse gaps are considered a normal (if occasional) occurrence in other contexts outside bicycle framebuilding.
It does make the welding a bit harder but being able to cope with less than perfect fitup is a good skill to have. On practice joints I often made mitres just by eye without even using templates.
But none of this is a reason not to get the best mitre you can on your build, and the best part for me in this thread is the comments about how that joint you have is not far off. Marking the high points with a Sharpie sounds like a good idea and is something I will try myself.
I start with the ST to BB joint and I do get that mitre 100% perfect. But I also think that particular mitre is the easiest.
One trick I’ve found useful if my half-round file is smaller than the diameter of the miter I want is to cut down the ears of the miter before trying to reduce the curvature. Larger diameter miters are shallower than smaller diameter miters and in my experience it is difficult to go from smaller to larger by simply working the file back and forth within the miter.
Hand files remove material surprisingly quickly, so I also find that it is useful to commit to making a certain adjustment in a number of file strokes or within a set amount of time. Three or four file strokes take fewer than 10 seconds but can be enough to take a fit from being close to way out of the ballpark. If I pre-allocate a couple minutes or 5 or 10 gentle file strokes for an adjustment that helps slow me down and in the grand scheme of things isn’t much additional time.
Before i brazed any good tubes for my bike, i made a test bike from scrap tubes. It had an 8 inch long seat tube, head tube, drop outs,BB, etc. What could go wrong if the miters are close enough (like the pics above).
It looked nice…from a distance.
All the tubes were oval! Head tube not usable. BB, no amout of tapping would make it round enough for a threaded BB. The top tube buckled seat tube. Visually you can see the tubes were so out of round, no micrometer was necessary.
Remember bronze shrinks when it cools. Steel on steel will not move. Miters must be tight.
Make a test bike and learn from your mistakes. Practice, but not with good tubes.
My first functioning bike (covid project) is straight and all the tubes were round. I used a feeler gauge (that my OCD) on all my miters. I know its overkill but the BB threaded in with two fingers w/o chasing the threads. It’s still my favorite bike to ride.
Have fun on your frame building adventure. Short cuts or good enough will be a nightmare in the long run.
Im not a pro, the above is just what worked for me.
Cheers, John
Wow, thank you all for sharing your knowledge and advice! Apart from being very helpful, it also encourages me to keep trying and to strive for more than “good enough.”
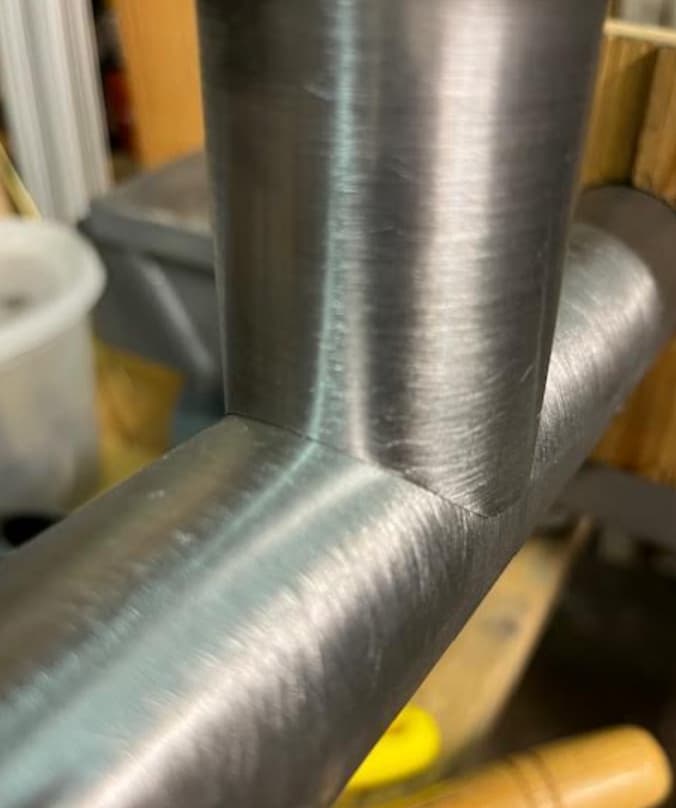
I managed to get more time in the garage and put some of these tips into practice. Here is my last miter:
I think the tips that echoed most for me were to be more patient and methodical with how the material is removed. Using a sharpie to mark the areas that need removal also helped.
Now that’s great progress. Well done!
Here’s to going beyond the “good enough” mindset.
Soon enough, it’ll be second nature for you to get the miters this tight.
There you go! Nice job. The next one will go faster and at some point, you’ll be able to do them by hand faster than folks with their lathes and mills.
Haha yeah I’ve done that “race”. Apologies if I’ve told this story before but when I worked with Glenn Erickson (starting in ‘79), we were hand-filing all miters and we got good and fast at it. Never heard of a paper template, never needed one, perfect miters every time, all by eye.
Then maybe 1980 we got a little milling machine and I started mitering with holesaws. Glenn wasn’t interested, kept filing them. He challenged me to a race, and he won, by a little. My miter may have been a little more perfect, so I thought of it as a tie. His day-to-day normal miters were water-tight though.
There’s no limit to how perfect you can hand-file a miter, even fast enough to make money at it, with practice.