Heavily modifying an old frame

yeah i’ve been seeing some on marketplace for around $150. i don’t think i’m quite ready to convert though, i’ve only just gotten started with acetylene, i’m going to stick with it for a while.

i’ve read the converting to propane thread on here a couple times through and there’s a ton of good info and links to torch setups and stuff, if i go that route ever i’ll be digging through that thread again for sure.

I tack everything in the fixture and then braze in a park stand. I just have better access to the whole joint and the mass of the fixture sucks heat away so joints can take longer.

With those dropouts, I tack them and then unbolt the alum part so it doesn’t suck heat away as well. Alum conducts heat quickly.

2 Likes


rear of the bike is put together. it’s pretty ugly but i can see my progression from my first joint to the last joint.

i did end up taking it out of the fixture and put it in my stand to finish the joints, it was much easier. wish my shed had a few more square feet tho.

hoping to have the 9/8ths headtube fitted by the end of next weekend, then it’s just some gussets here and there and flux removal and i can start building it up.

i need to come up with a fork for it, 26" wheeled polo bikes typically have pretty short atc and rake, from 380mm atc with 25mm rake on the koncept zeke to 370mm and 35mm on the enforcer 13. i play on an enforcer and am used to it, but i’m trying to split the difference and go with 375mm and 30mm. i can’t find a fork with the geo i’d like so i think i have to make something.

i don’t have a lathe or access to one so to make my life easier (i hope), i’m going to repurpose a the steer tube/bearing seat/unicrown from a bmx fork so i only have to modify the blades/dropouts to get my 375mm atc and 30mm rake. i gotta come up with a fork fixture to do that though, so that’s next on my list of tools i guess.

anyway, forward progress!

9 Likes

my first frame is done, i think! i might gusset the headtube to the down and top tubes but i haven’t decided just yet.

i’m pretty embarrassed by how ugly my brazing is, but if anyone’s interested in seeing it i’ll post up photos. i’m pretty excited to build it and see how it rides!

2 Likes

Wow looks great! You can’t even tell you hacked a totally new rear end on.

From what I have seen, builders only use the fixture to fit up the tubes and tack. Everyone does the final joints on a welding table or bike-stand-thing.

1 Like

Congratulations!

the rear end looks alright from a distance, the headtube is another story haha

but hey, it lives up to the name plate

5 Likes

i ran out of gas again a couple weeks ago and haven’t been to get more yet. i’m going through it quicker than i thought i would, maybe i’m using too much?

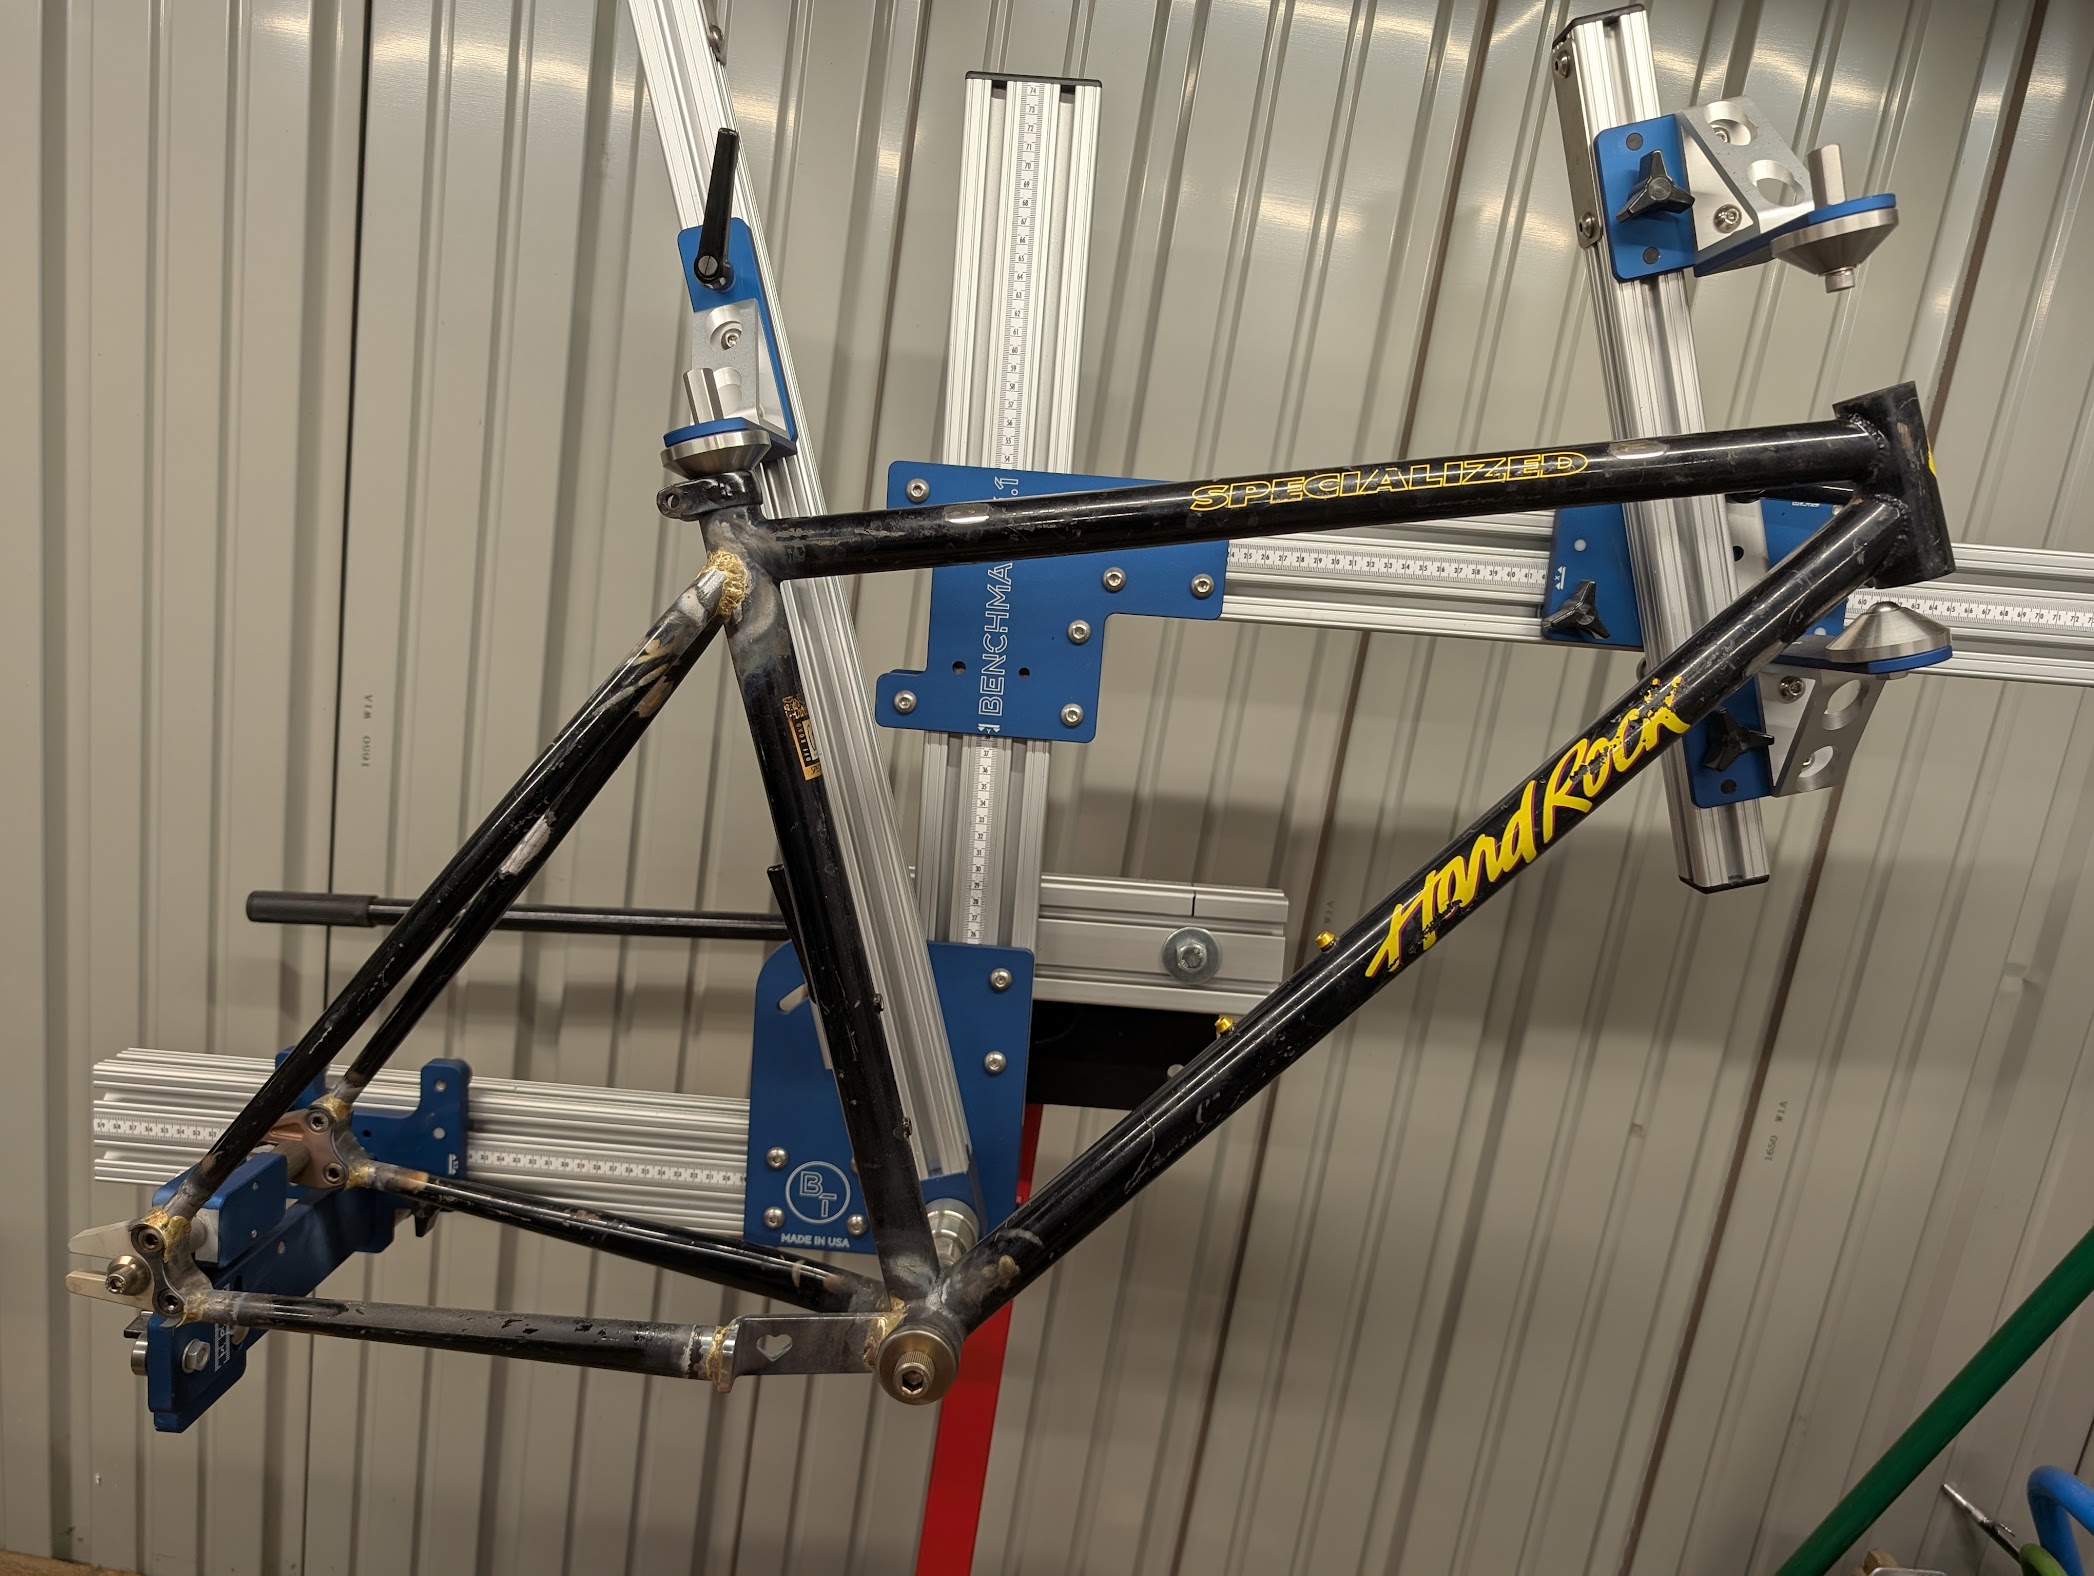
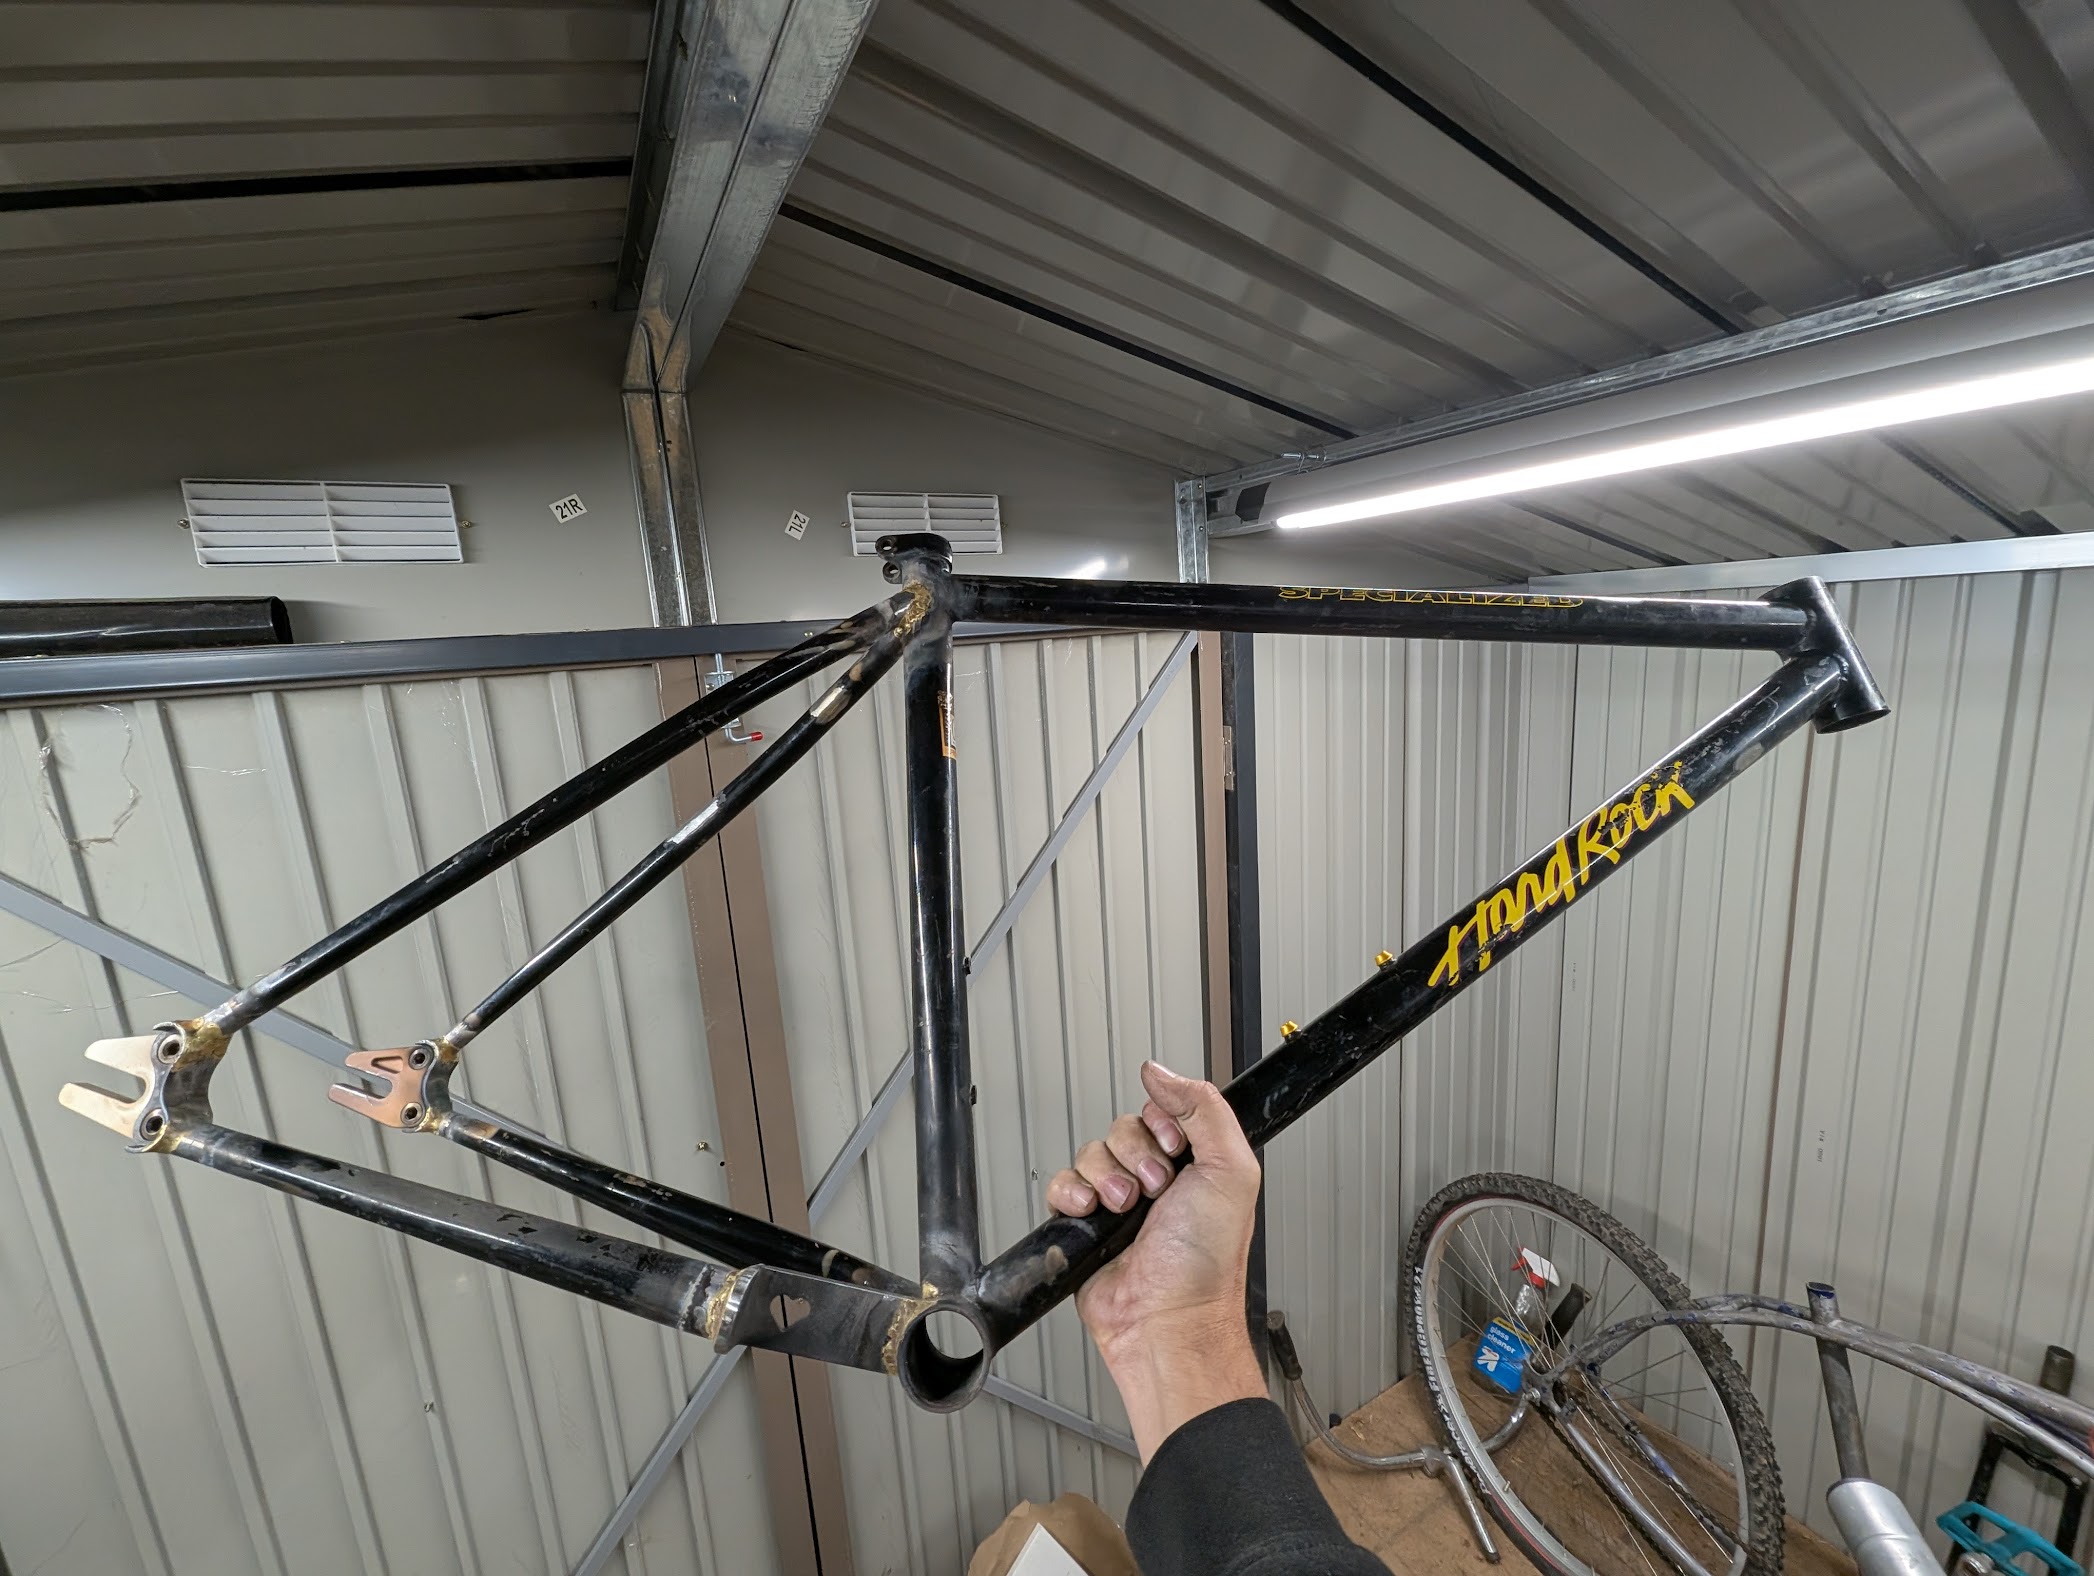
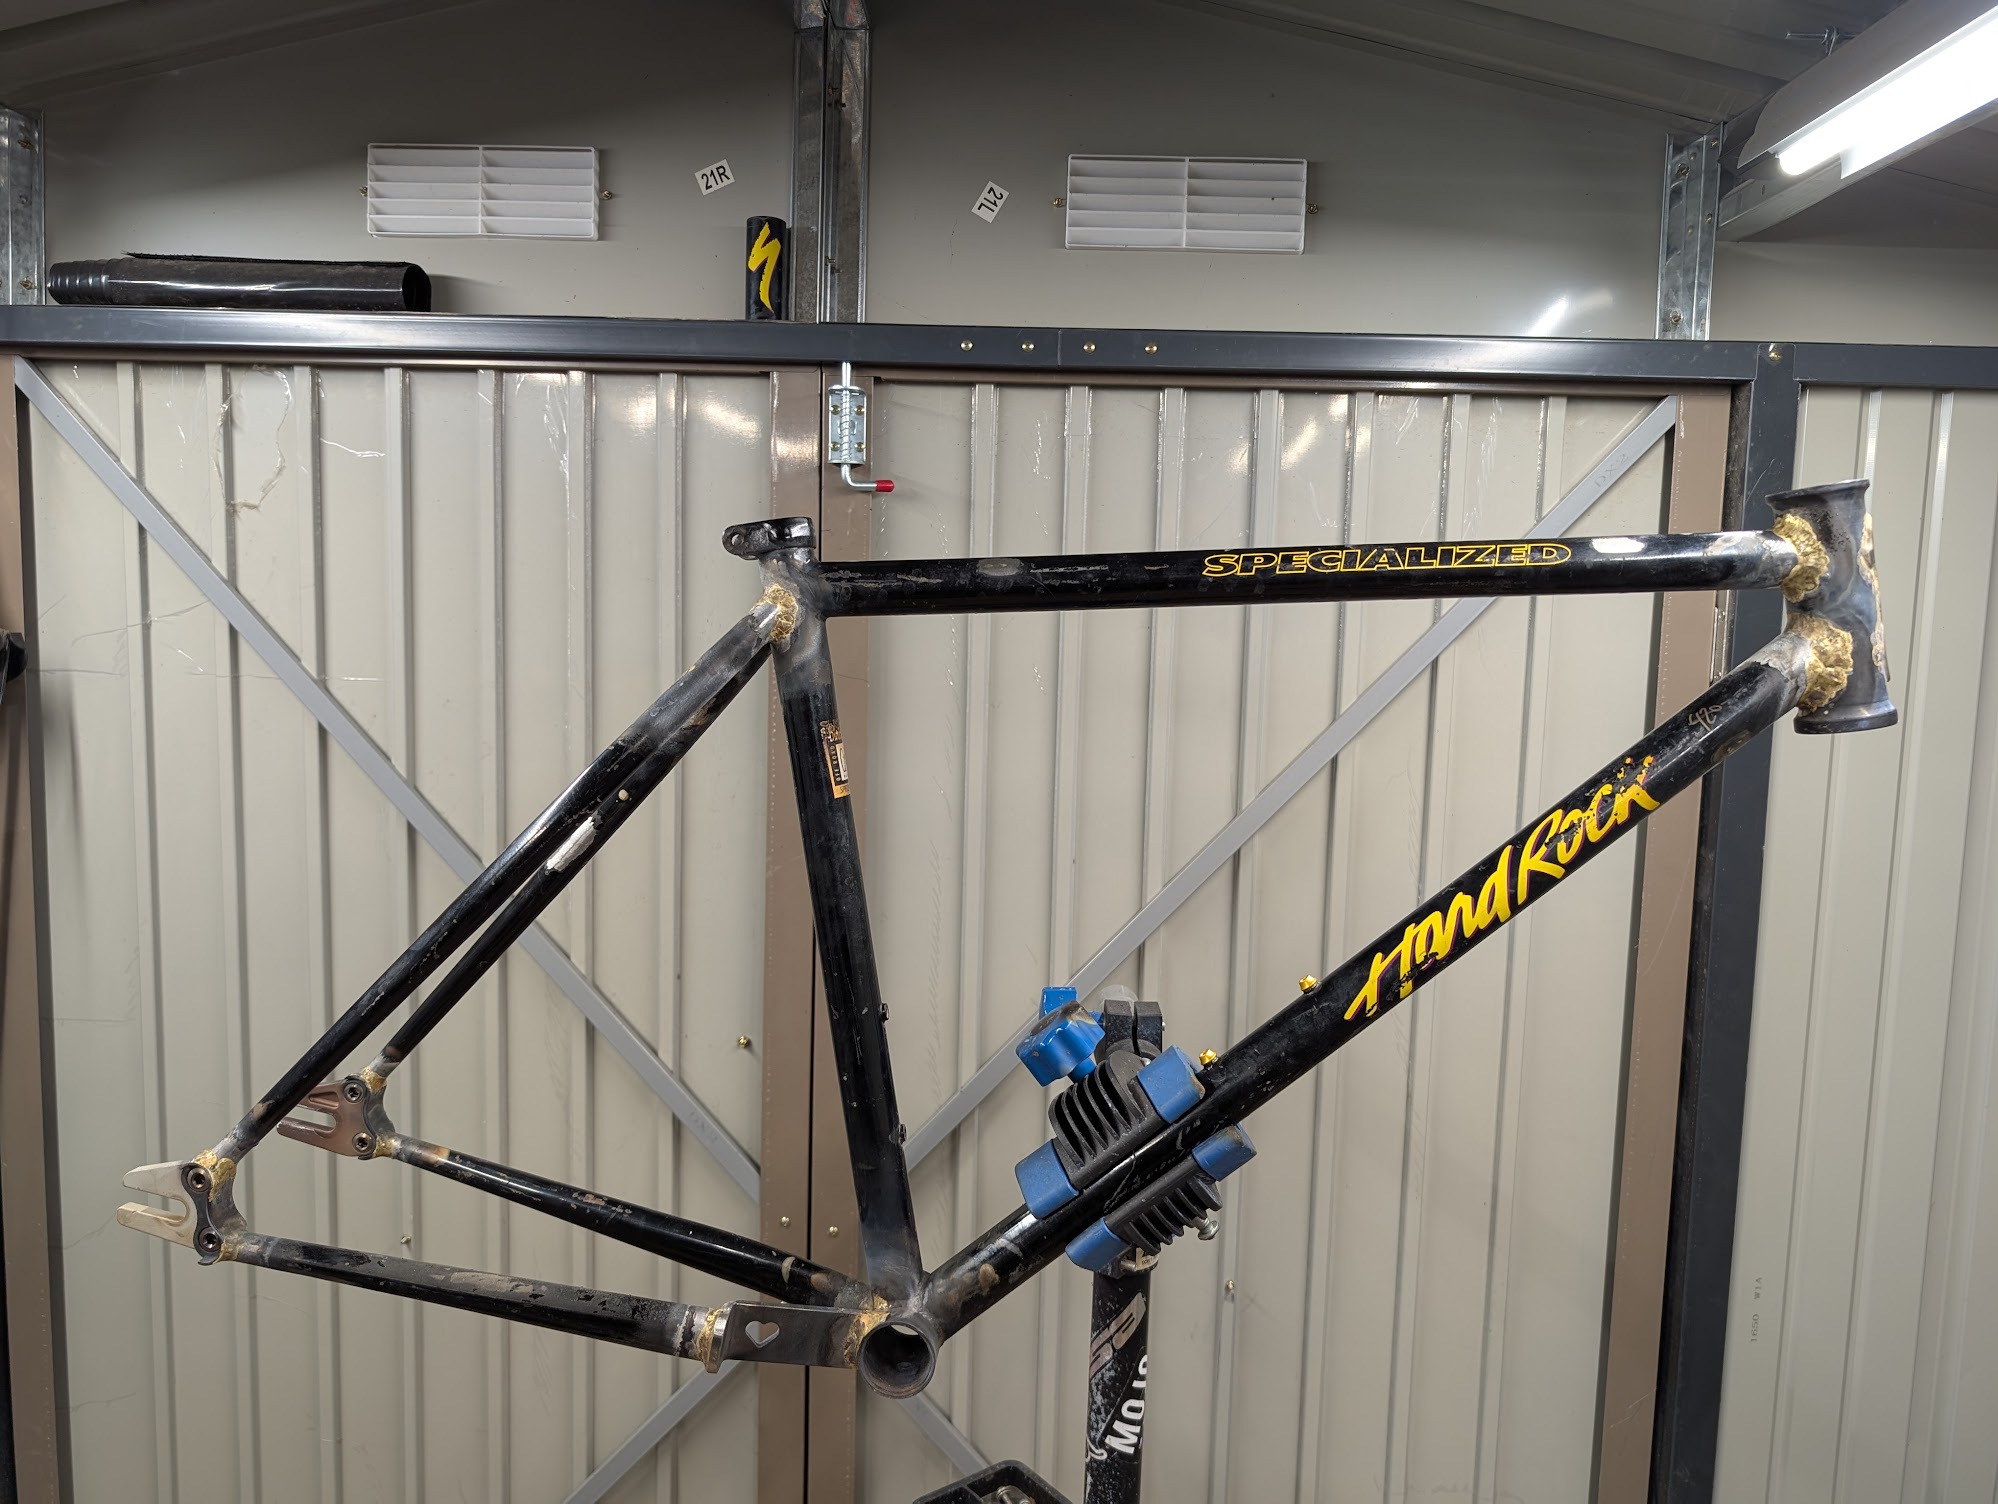
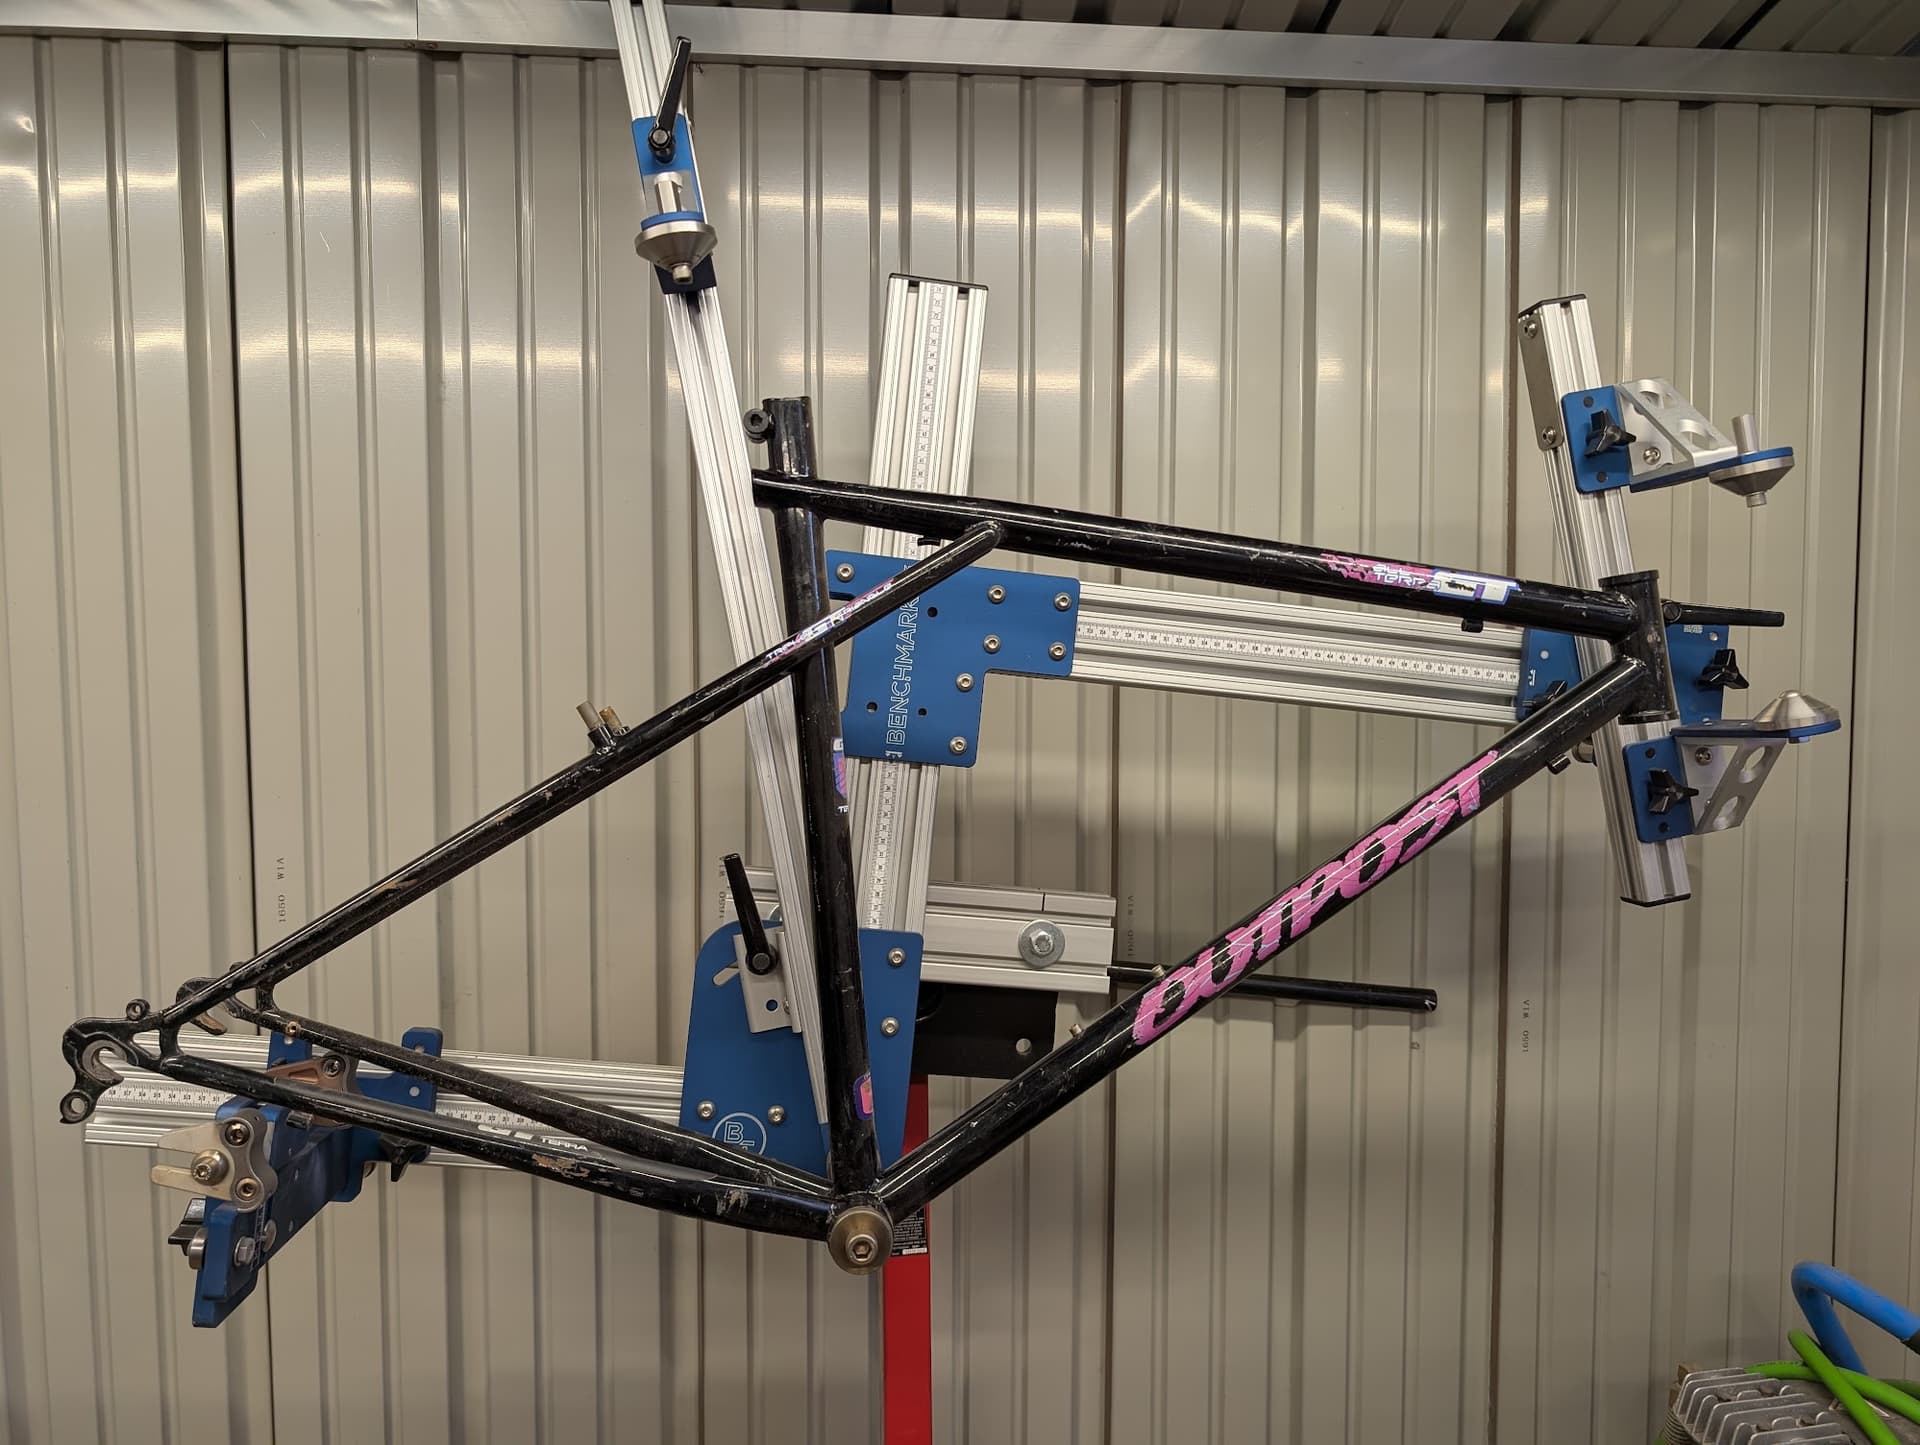
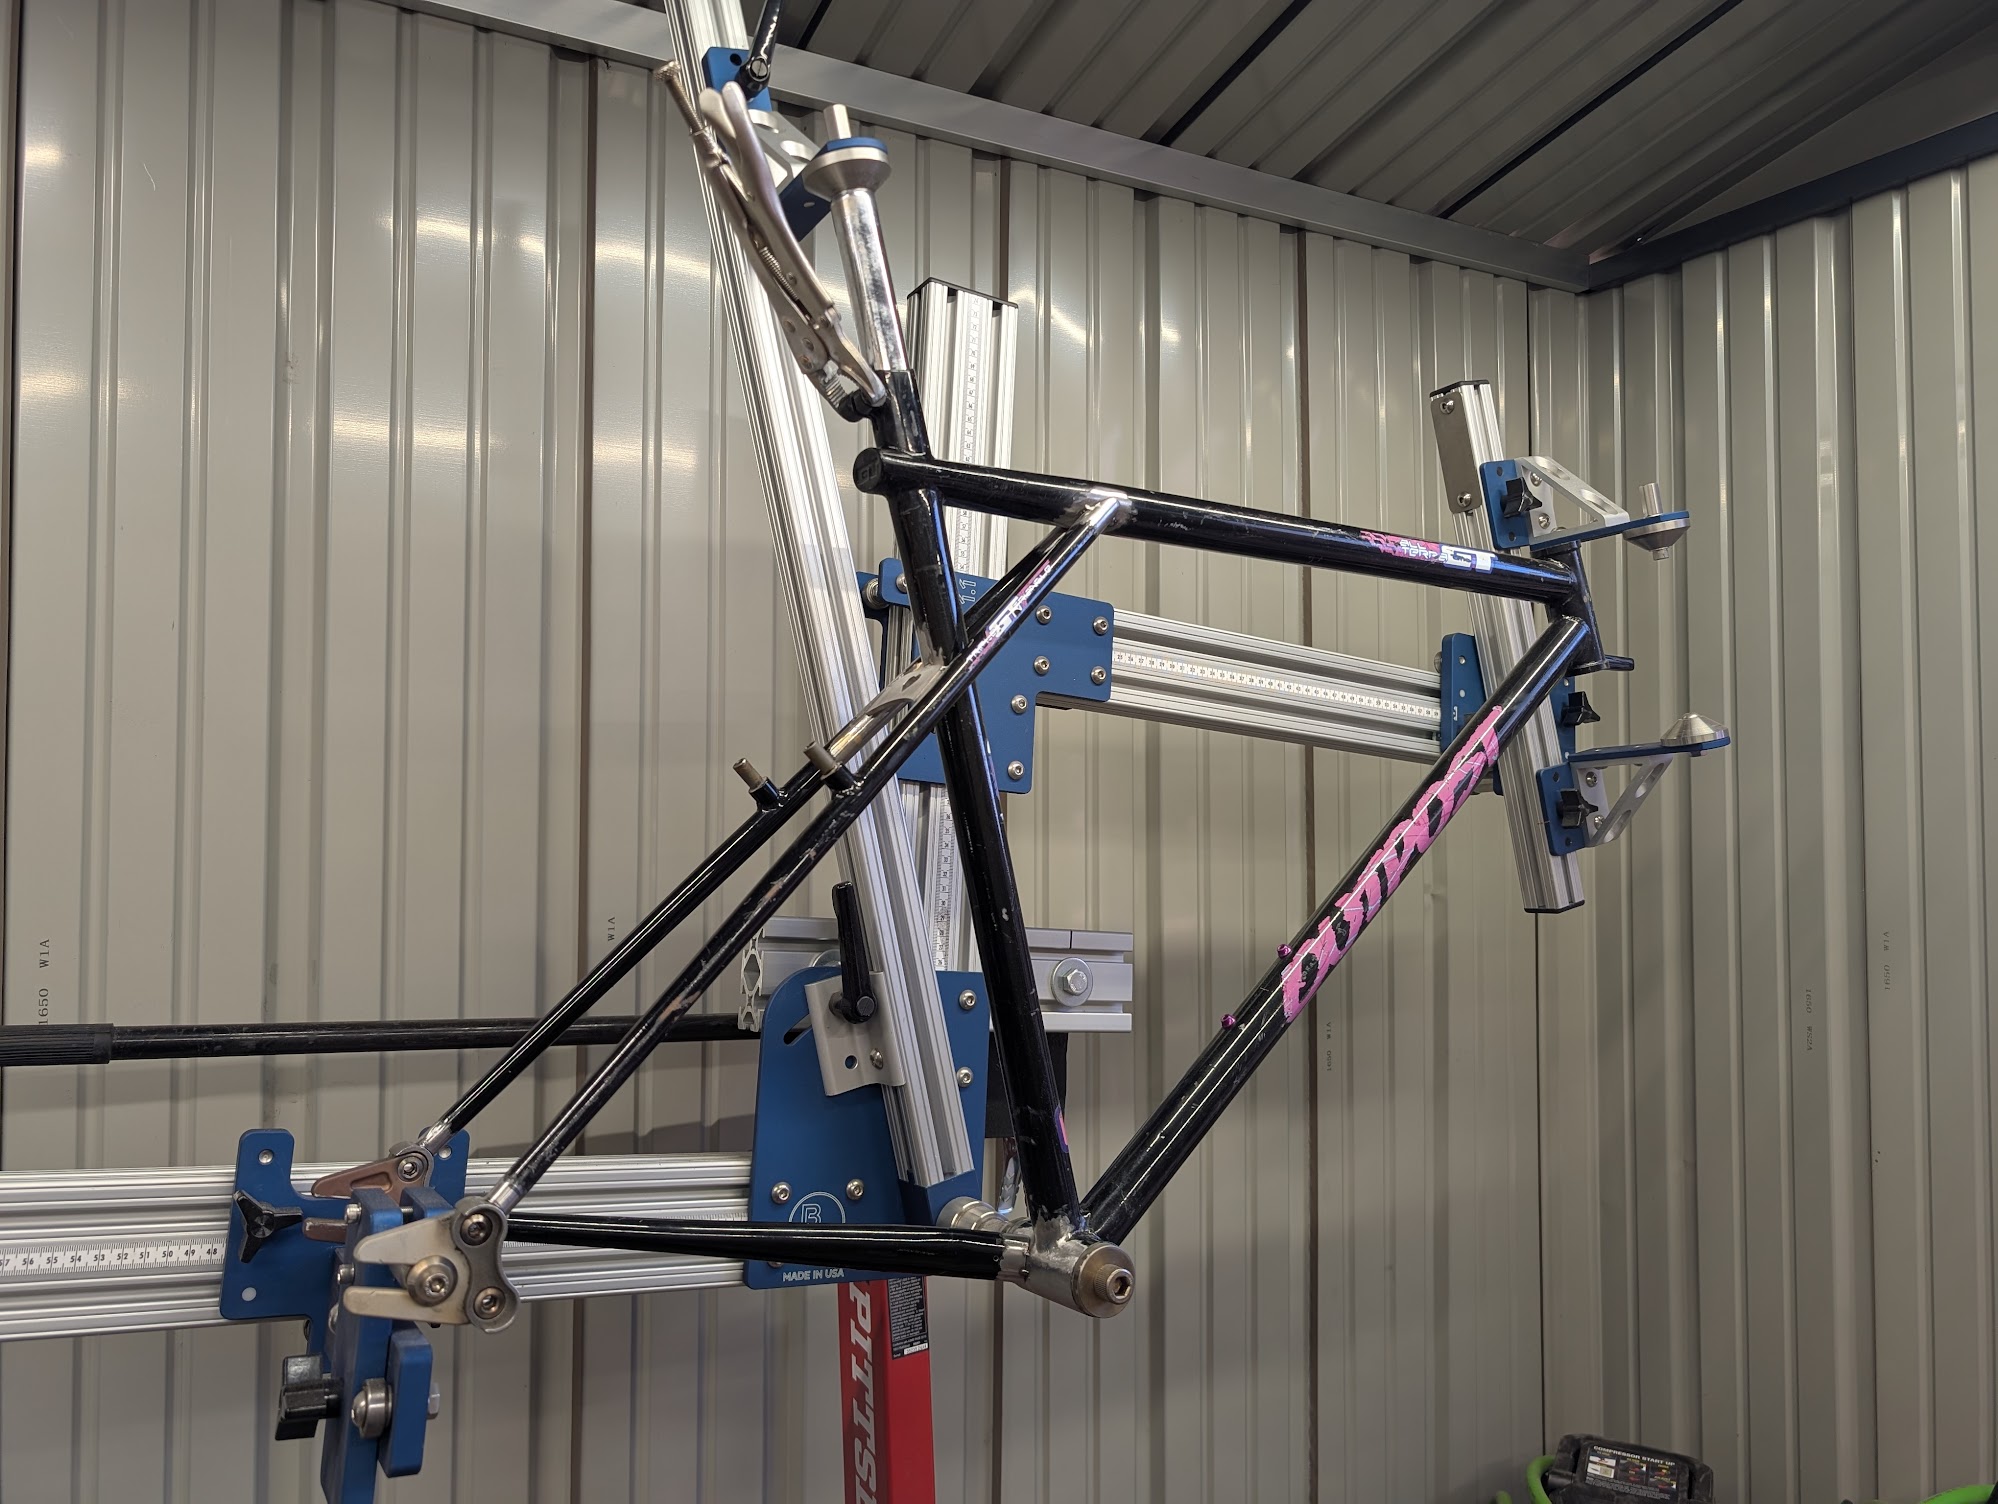
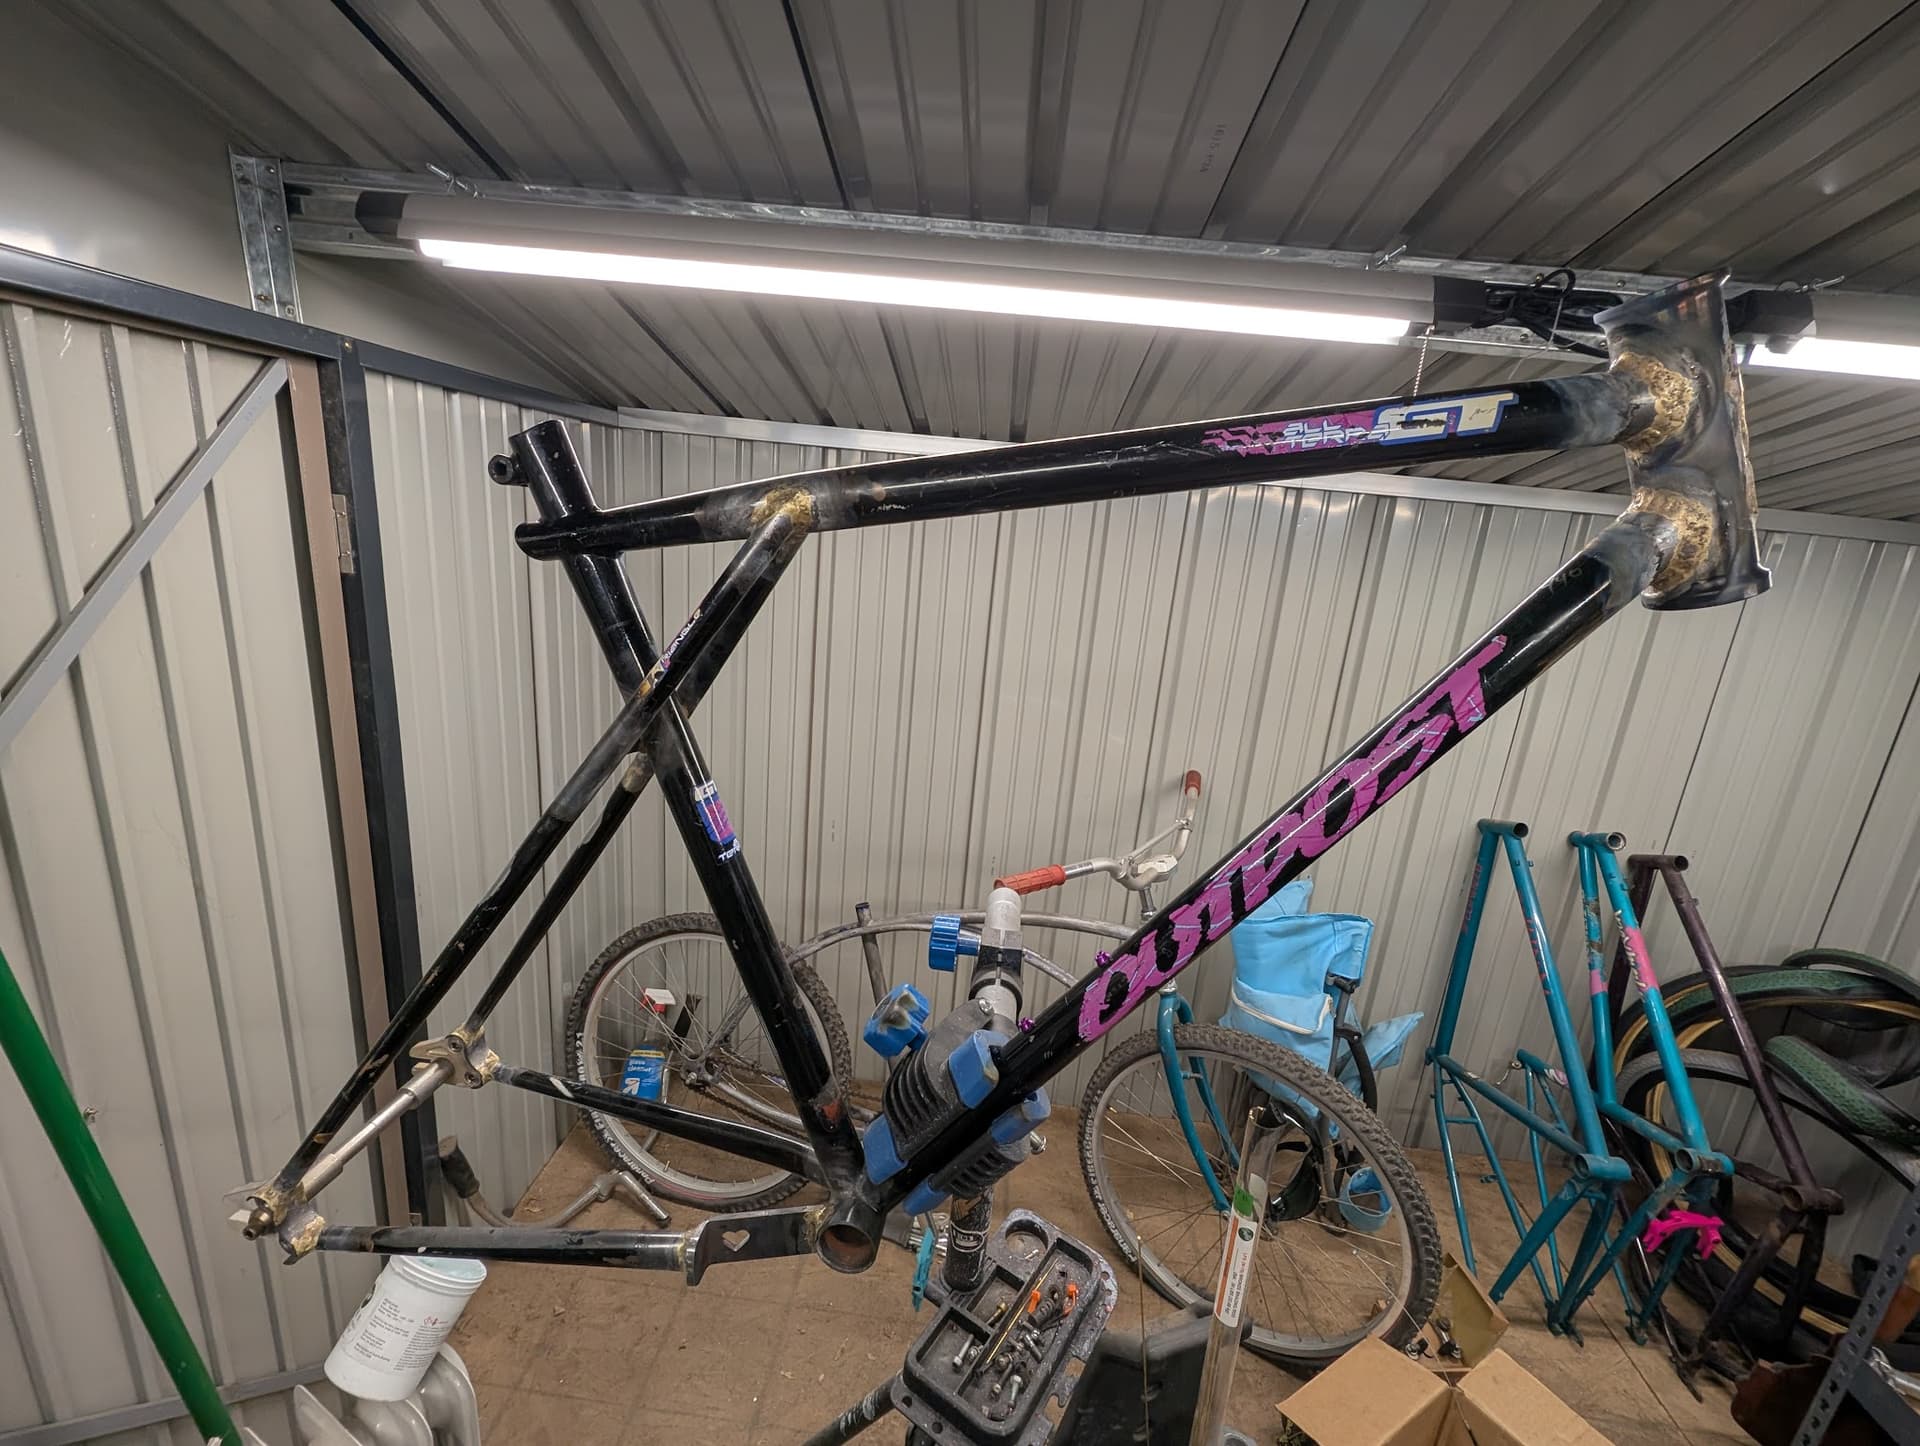
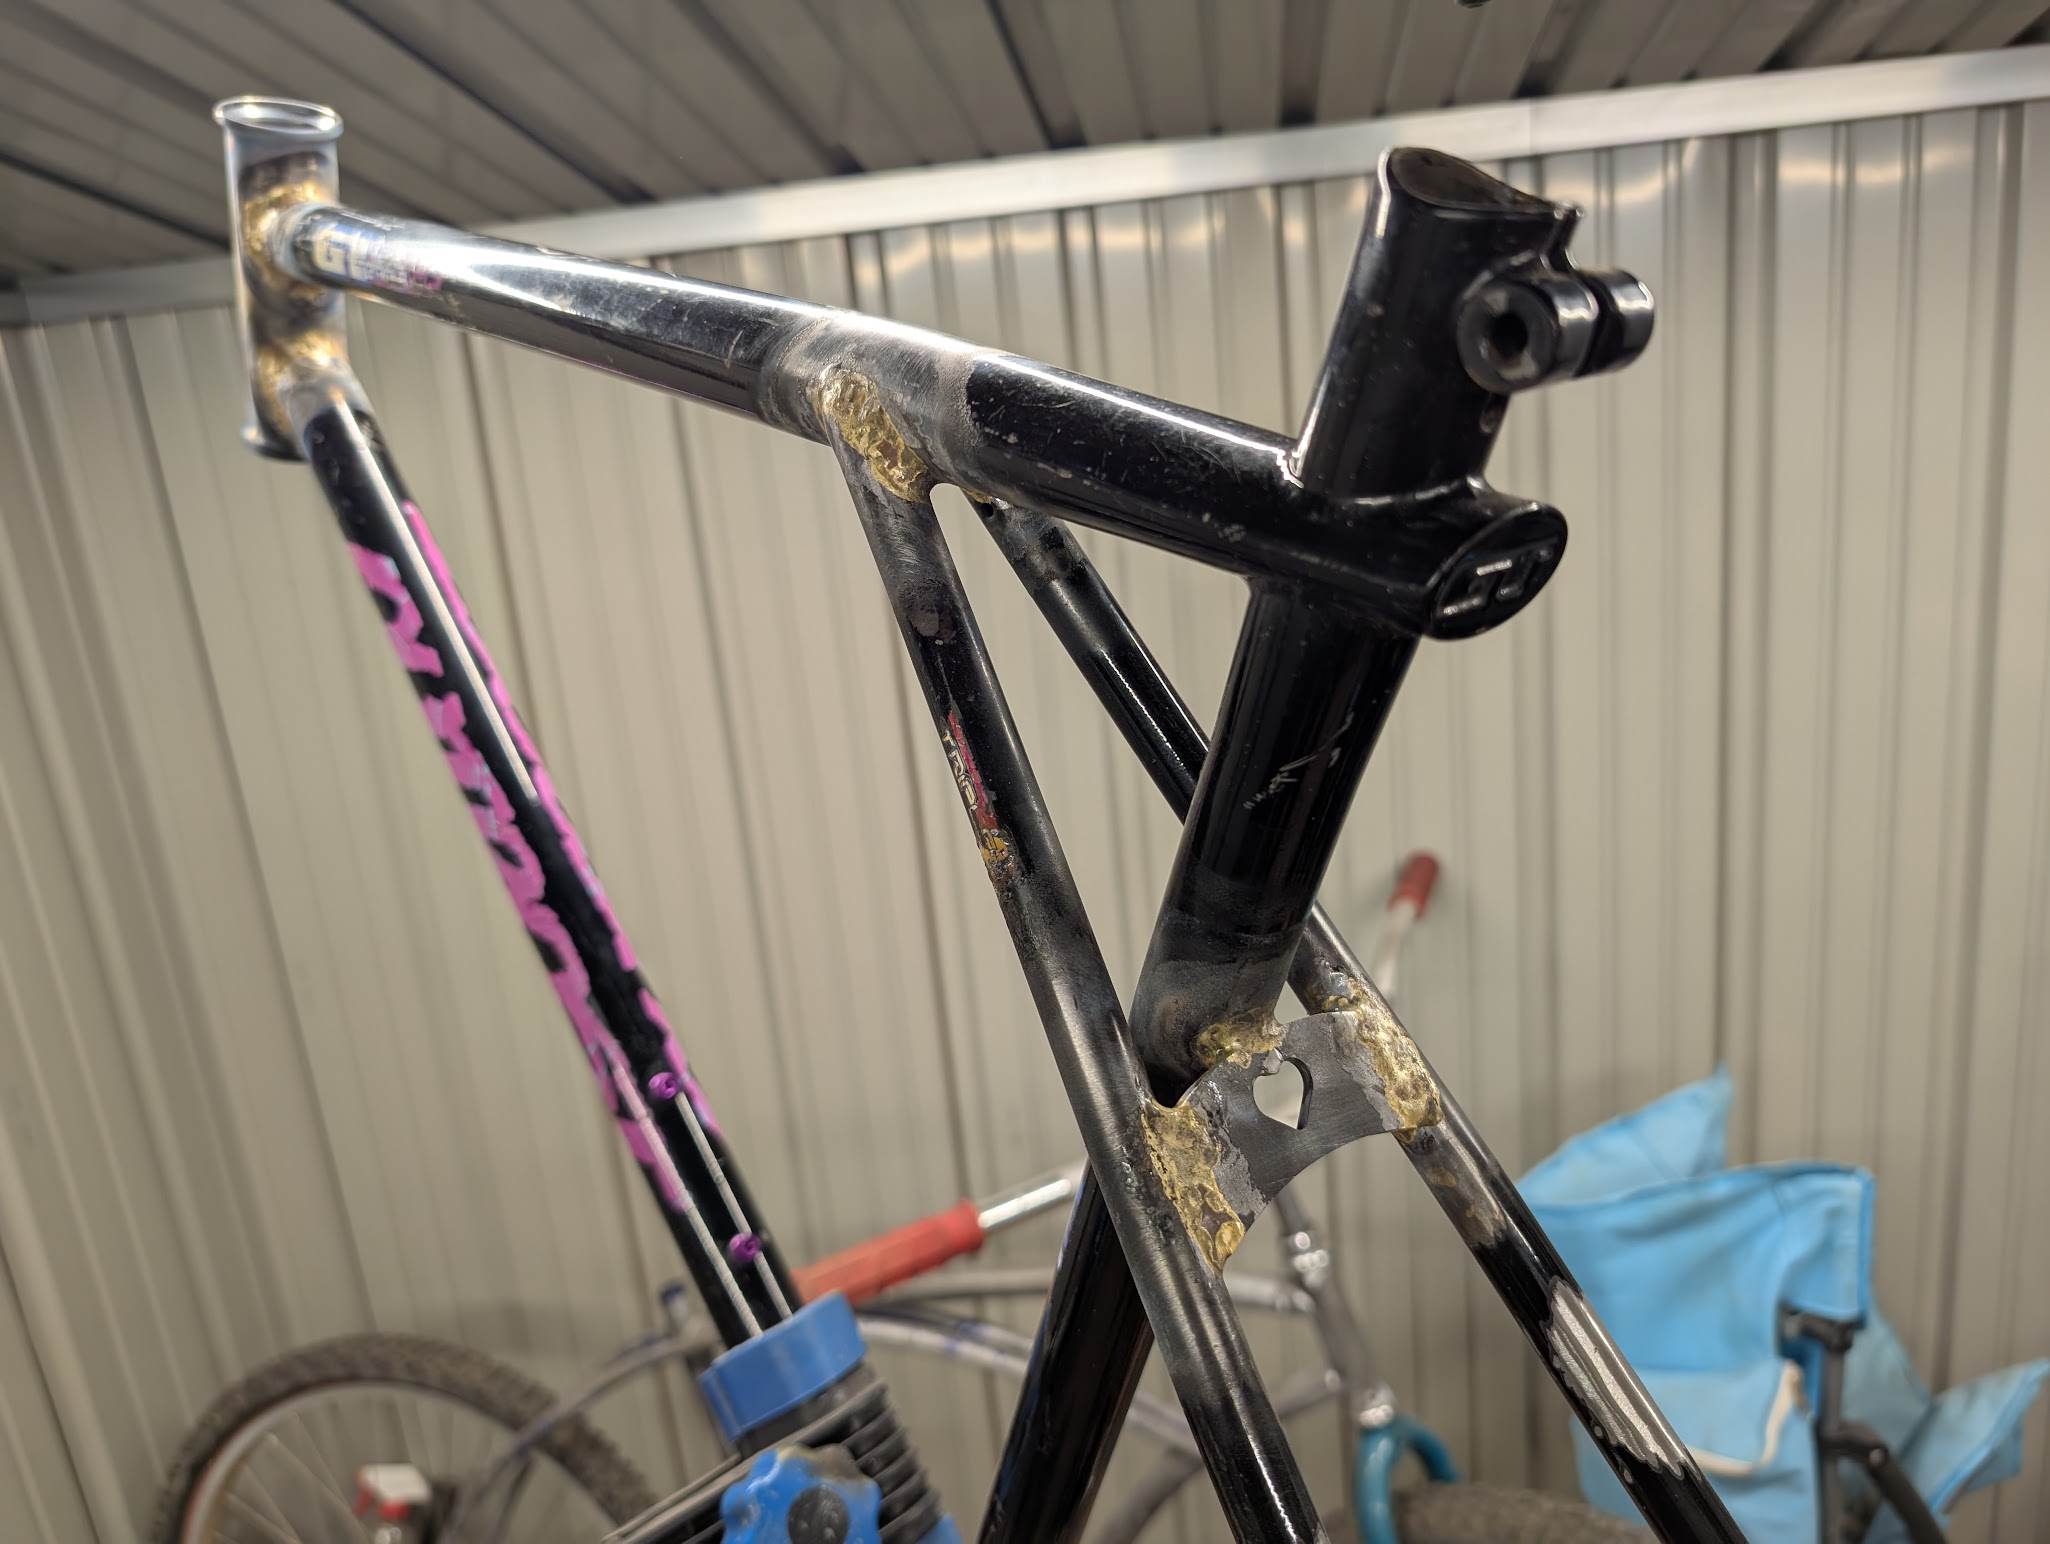
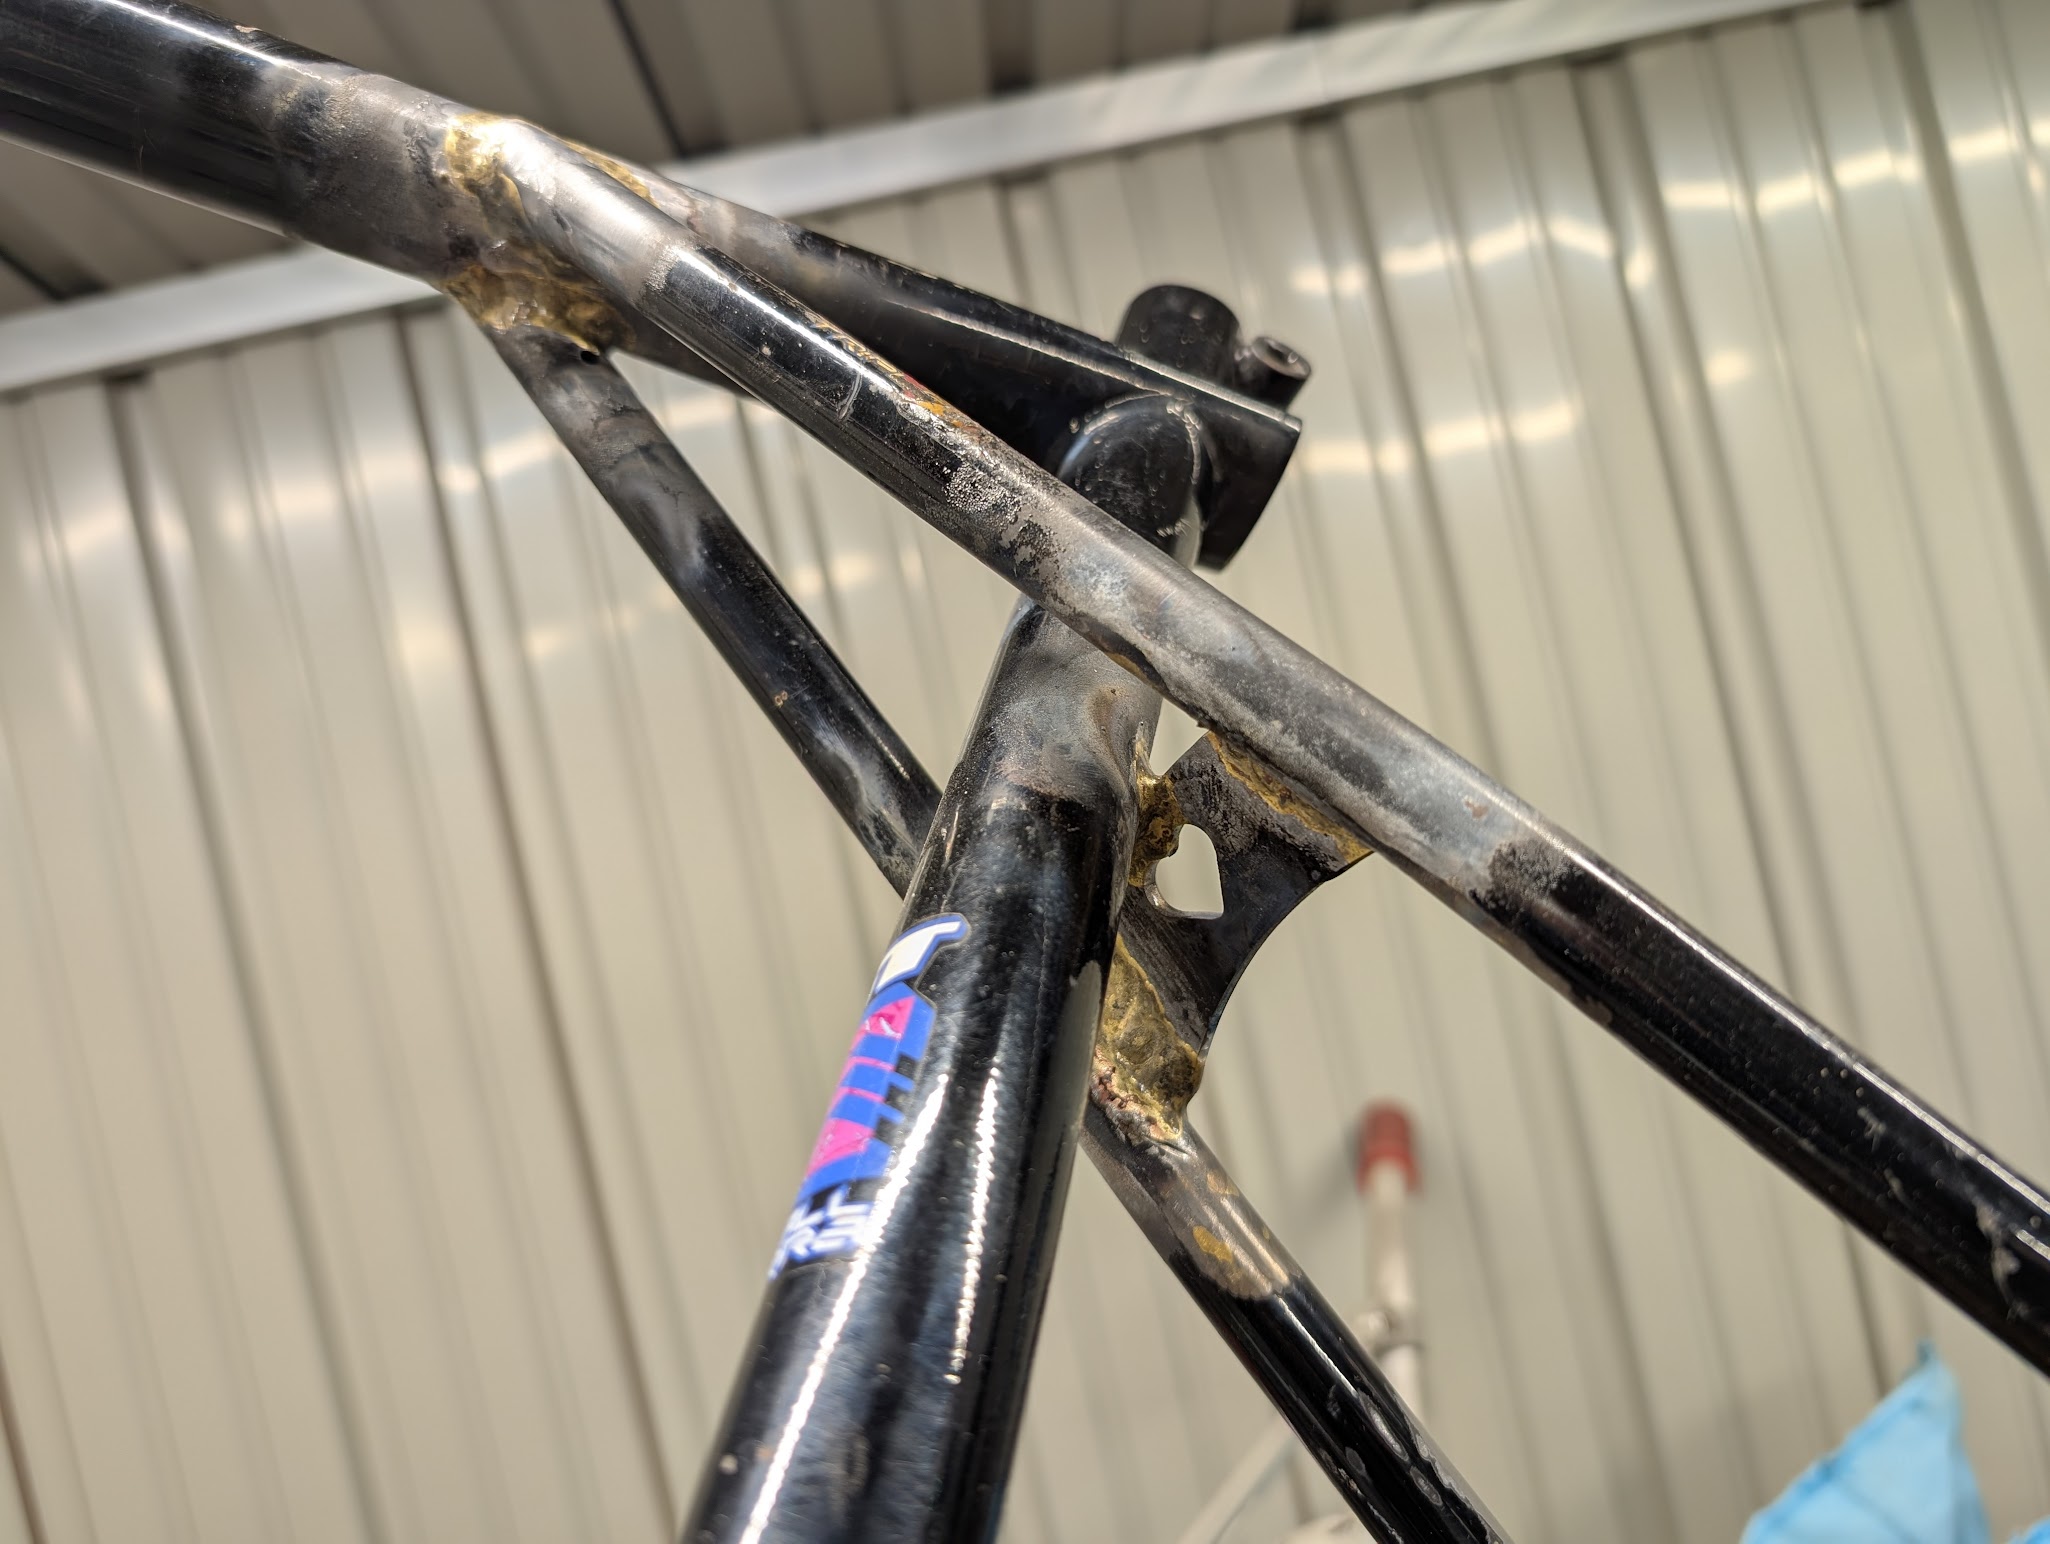
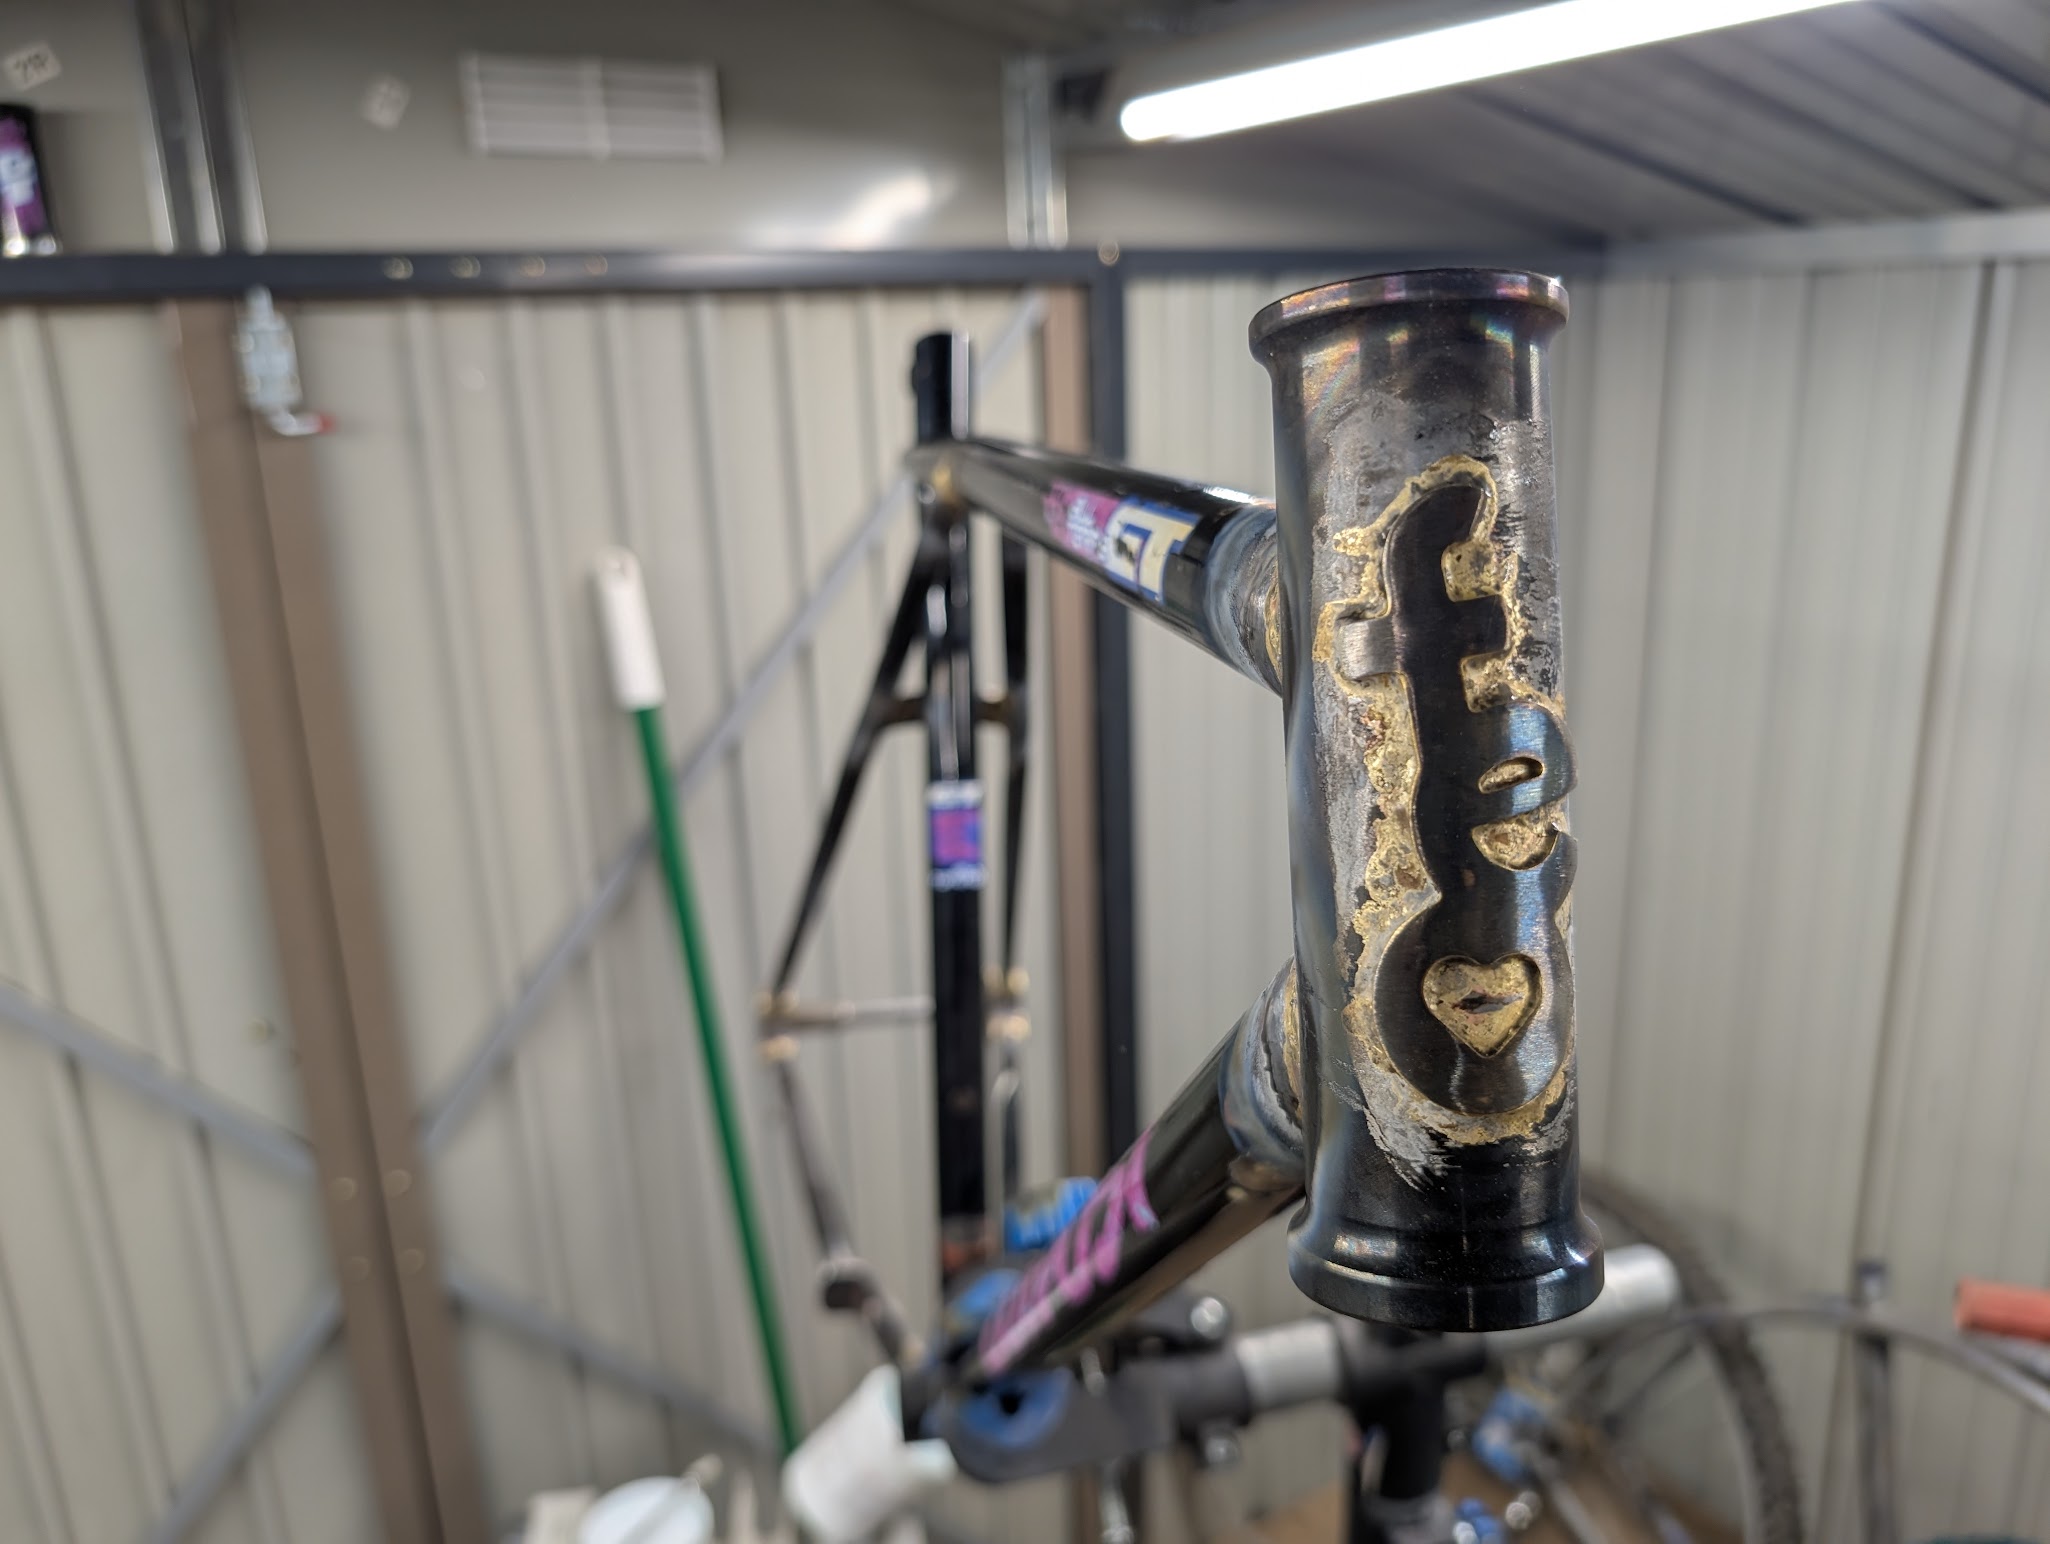
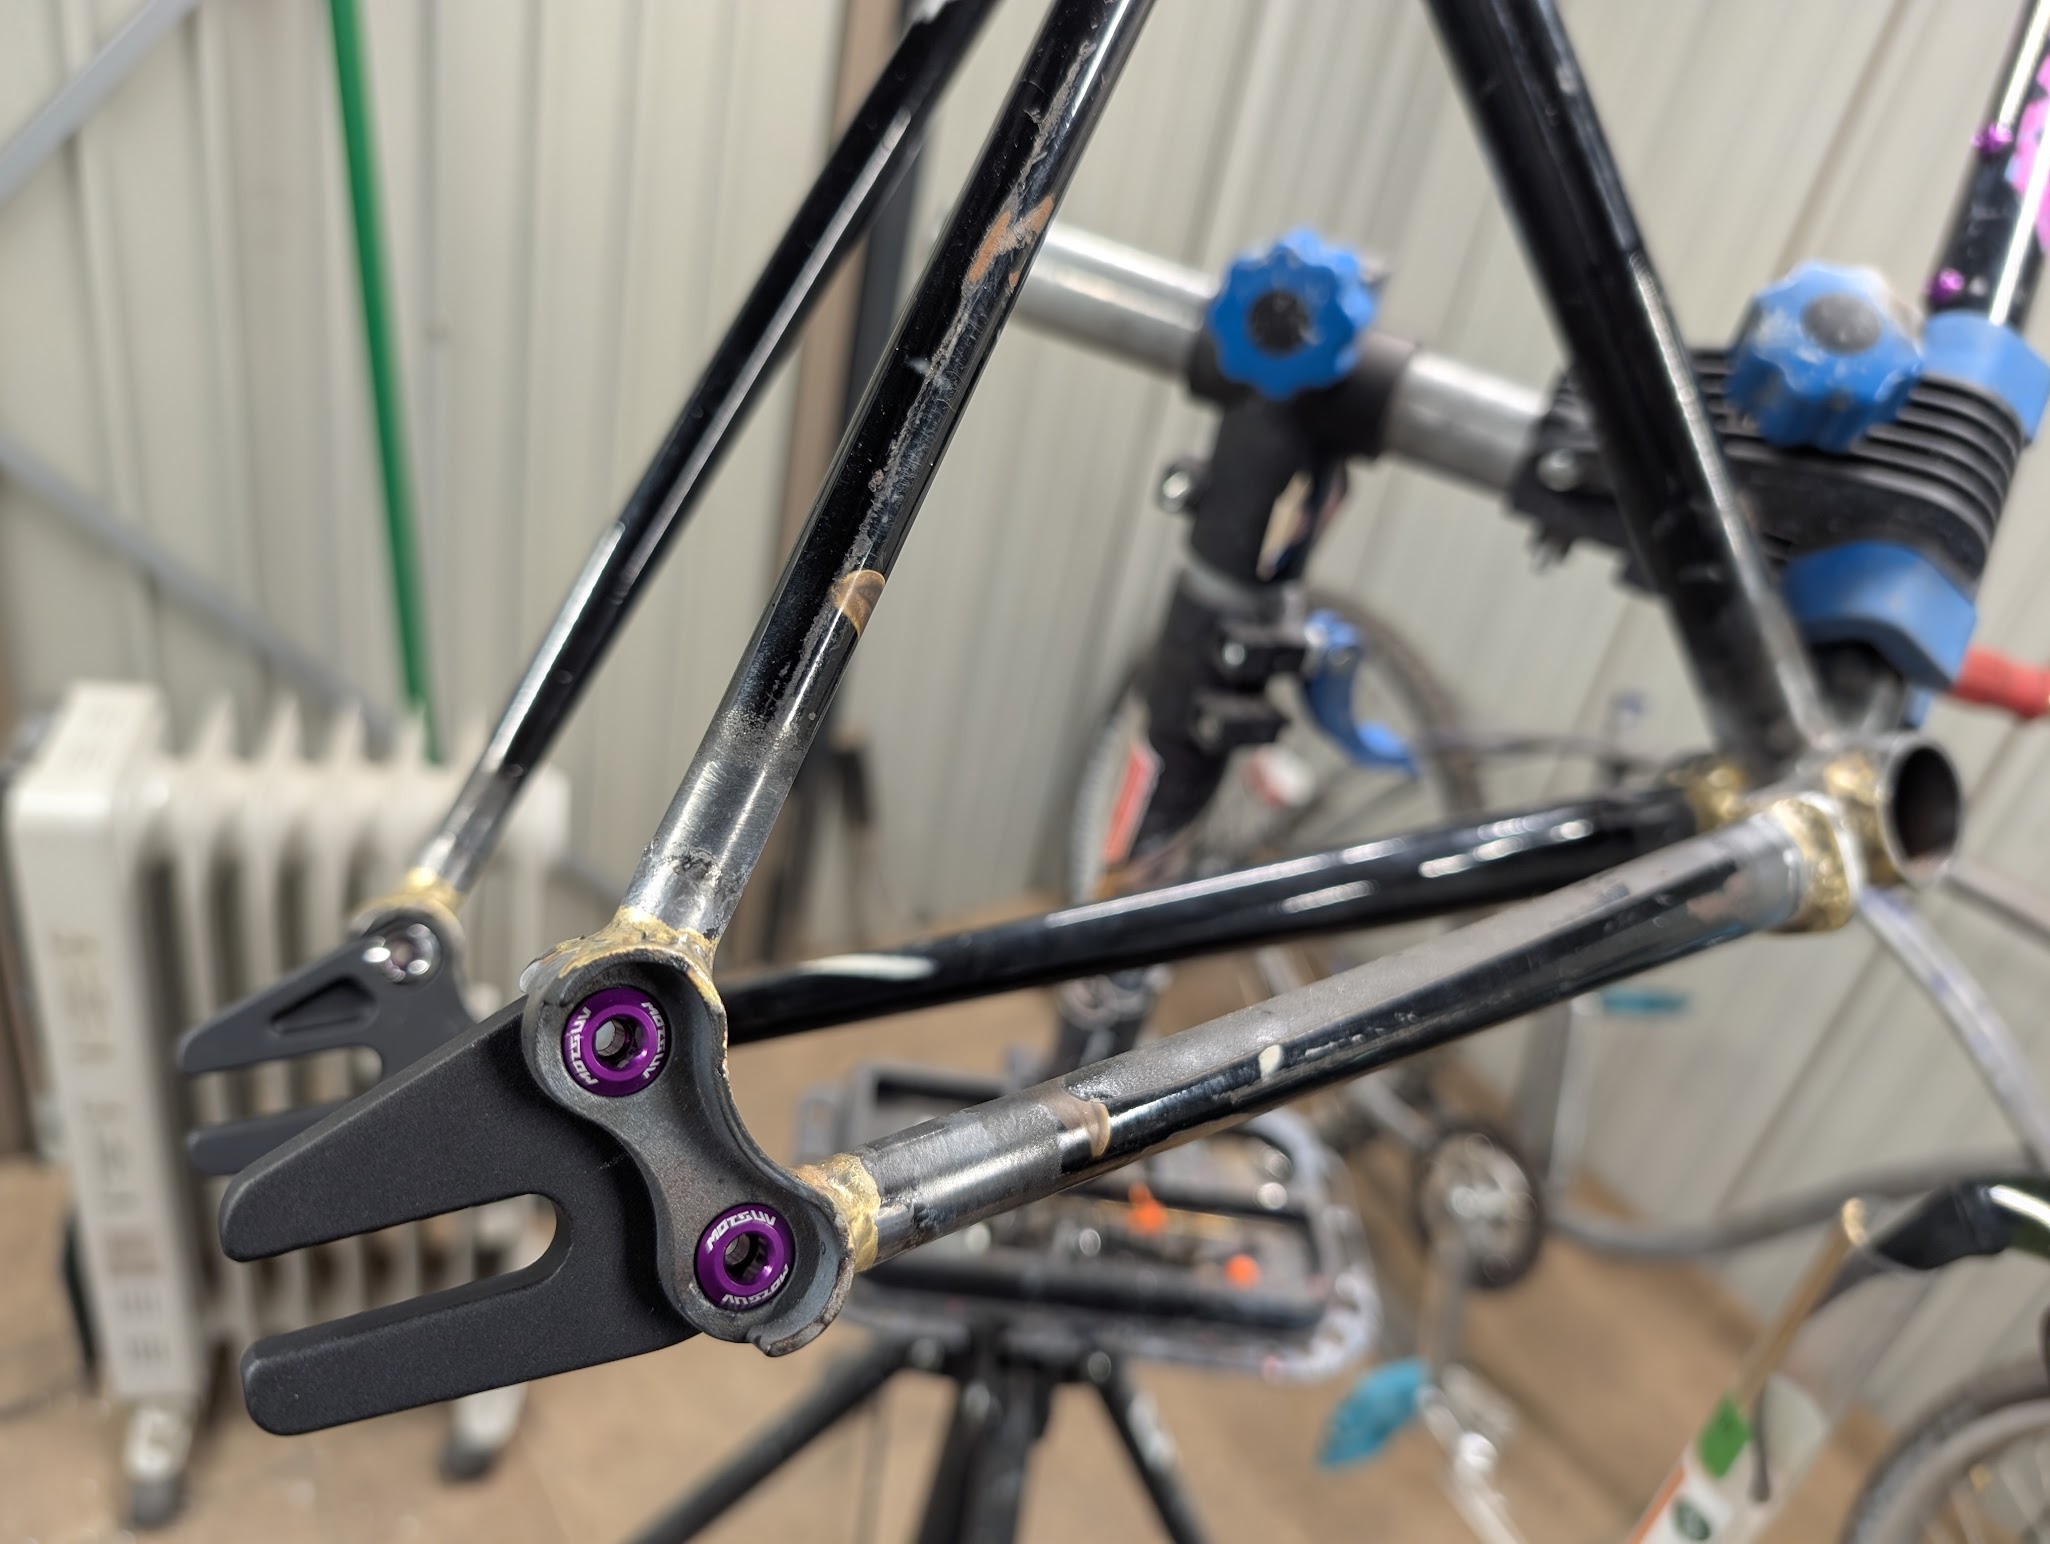
got the back half of the 2nd frame, an old straight gauge gt frame, mostly tacked up. still need to do the drive side chain stay, but it’s the tricky one with the yolk plate. ended up picking up a tiny little wire feed welder during harbor freight’s week long black friday sale to do tiny tacks with to help keep everything in place.

have a head tube on the way to get the front end in shape.

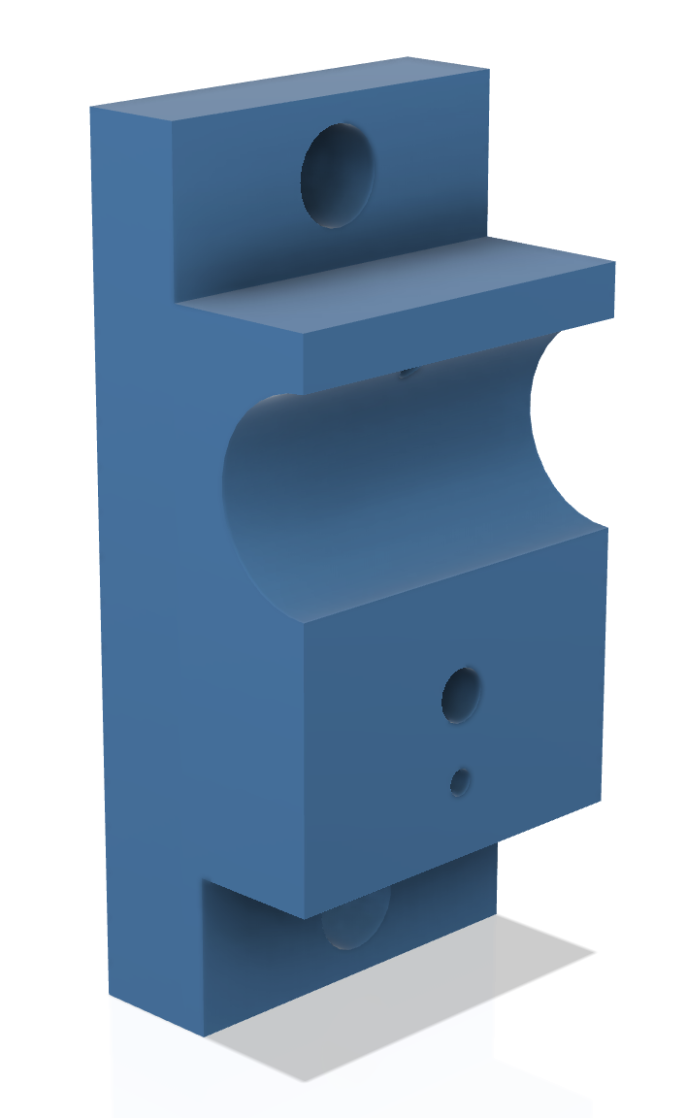
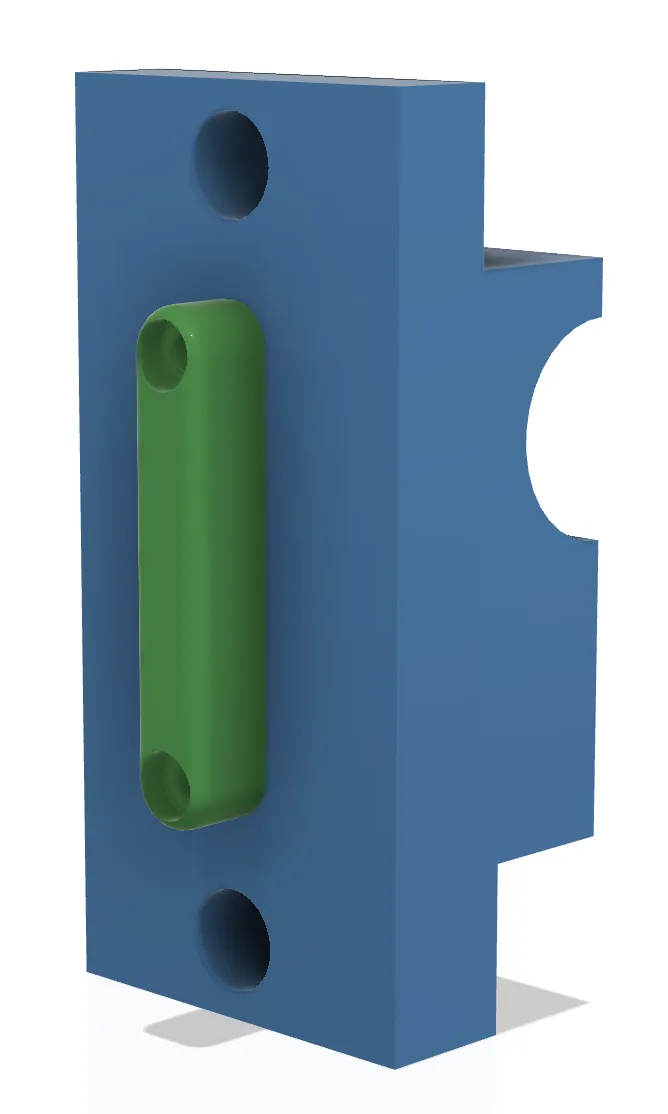
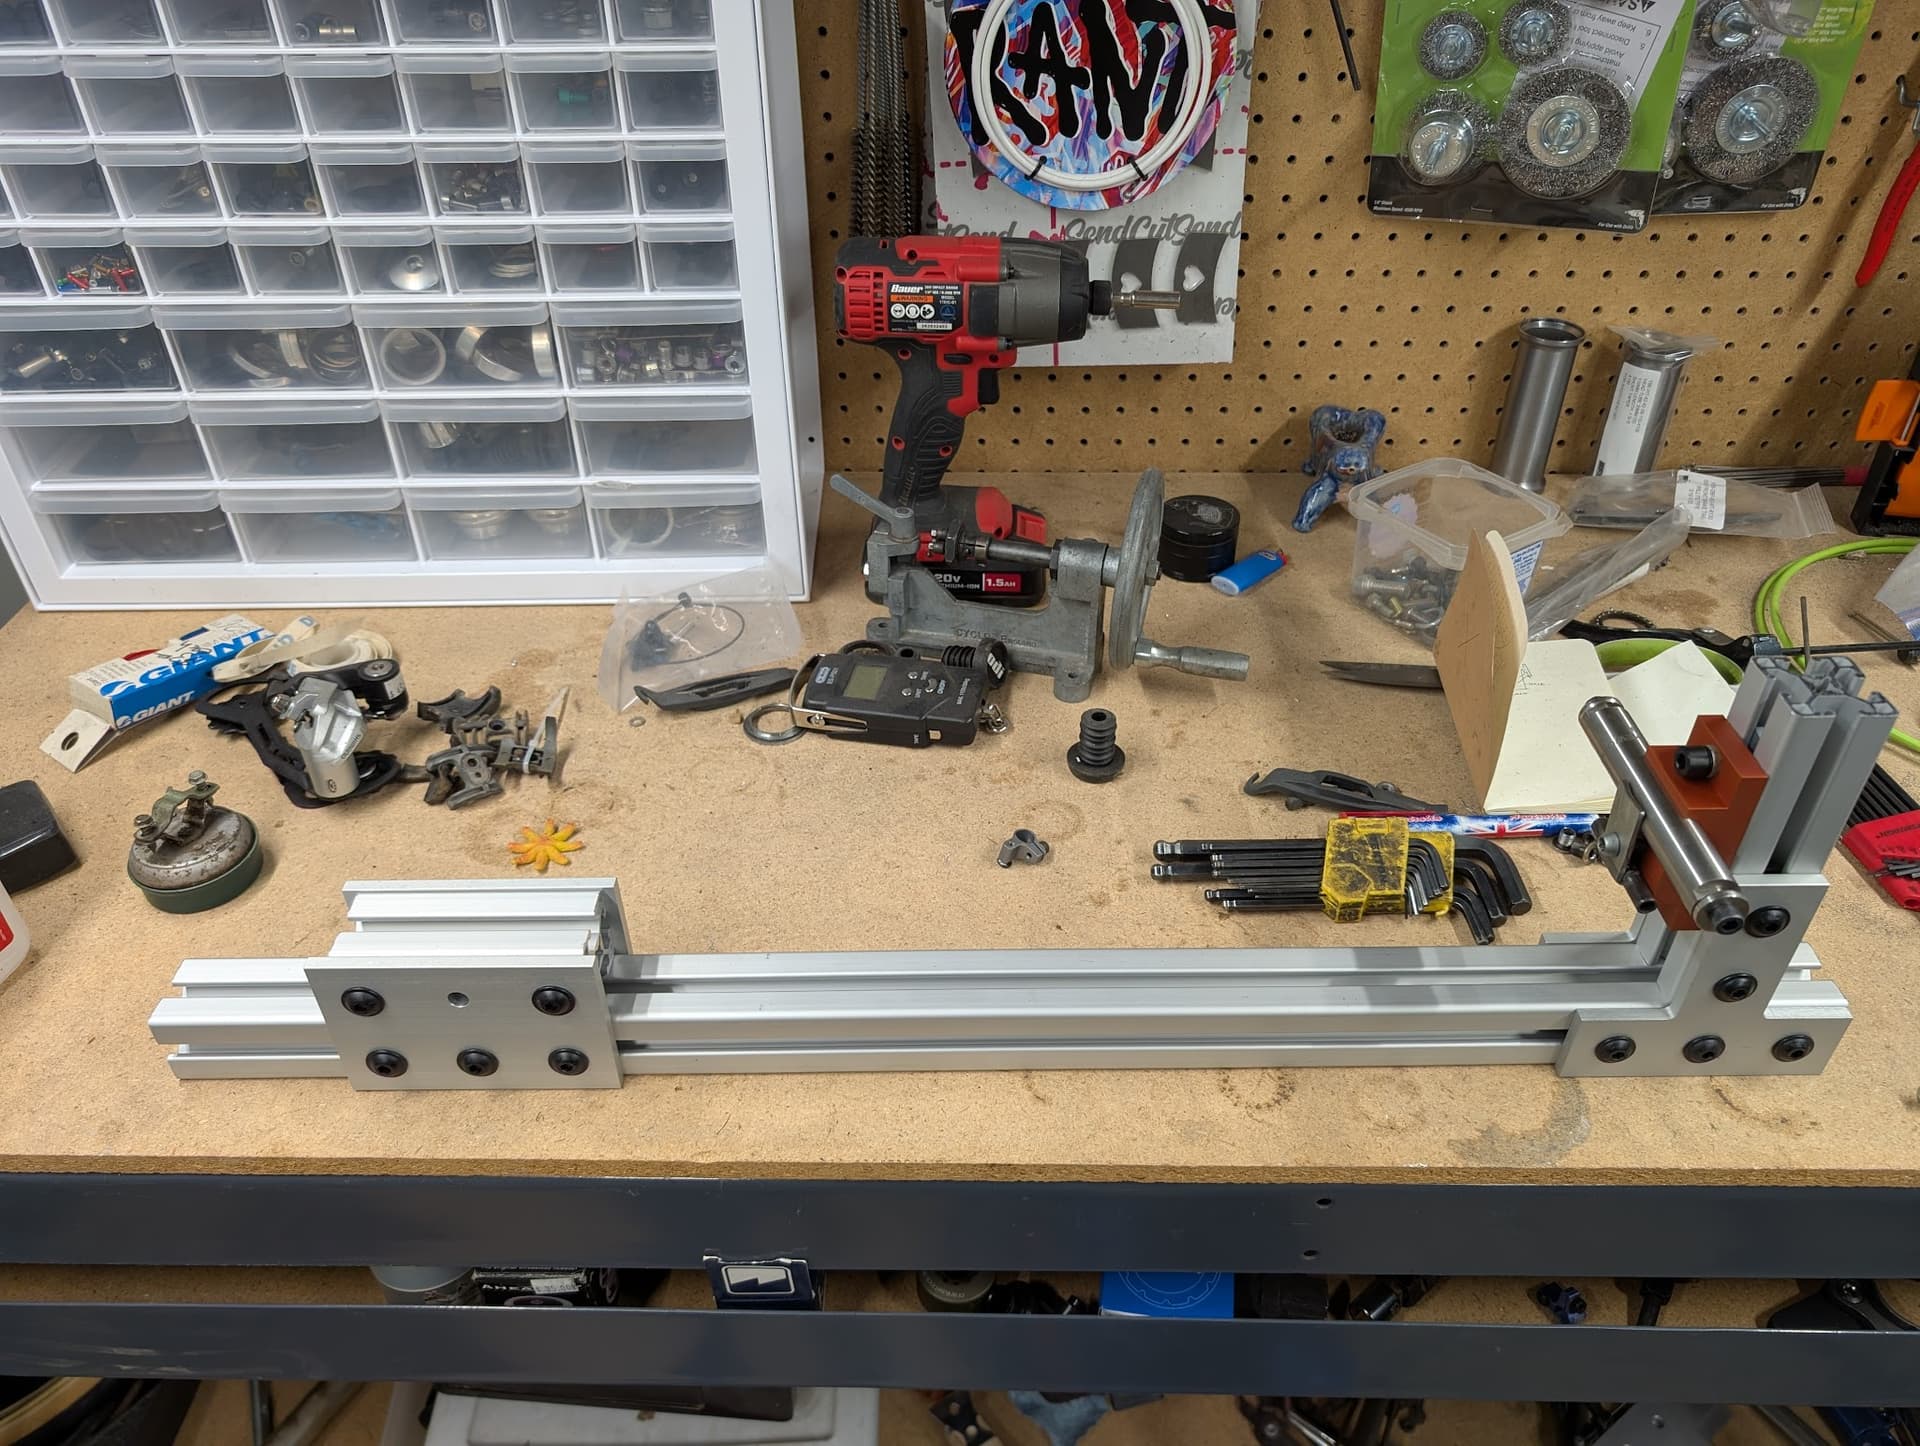
i’m also starting on building a fork jig. i haven’t seen one at a price point that makes sense to me for what i’m doing, so i guess i’ll have to make my own!

the dummy axle block is the tricky part, the rest is basically gonna be 15 series extrusions. i modeled a few different da blocks but since i’ll be having pcbway machine it for me i ended up with something that’s super simple to keep cost down.


the green bit on the back i’ll 3d print, it’s meant to sit in the slot on the extrusion to keep it square. i don’t think there should be enough heat getting that far into the fixture for it being made of plastic to be a problem. i’ll have to tap the two m3 holes for that myself, which might be tricky.

the clampy bit i’ll make from 4130 left over from a rack i made a while ago, and an m6 cap head bolt will do the clamping. i’ll have to tap that hole also, which i’m not looking forward to. something like this -

it’ll bolt to the extrusion with a couple m8 bolts and t nuts. i’ll scribe some center lines on it to help with setting it up and i think it should work?

the extrusions and other bits i’ll probably get from 8020.net, they seem to have the best prices from what i’ve seen.

that’s where i’m at! still surprised by how quickly i’m going through the gas. maybe i should look into going to bigger tanks? or maybe do more pondering on switching to propane.

If I were you, I’d make that clamp base with a vee notch rather than the half-round slot you have. With the halfround, you’re relying on really accurate machining for both that part and the dummy axle. With a vee notch you have a bit of wiggle room (acknowledging that you may have to compensate for height if the DA is out by much). The half round is also much more likely to pick up swarf and other stuff which could throw out an accurate seat.

2 Likes

very good points, thank you! unfortunately it’s already off to pcbway. since i’m basically making the same bike over and over right now, the da probably won’t be leaving the fixture very often. i’ll for sure keep an eye on it picking up junk and if it becomes a problem i’ll see if i can find someone to modify the clamp for me or have a new one made.

1 Like

This has been fun watching your progression! So rad.

2 Likes

thanks! it’s def been a learning experience and a lot of fun. i can’t wait to get a fork on that first frame and to build it up, it’s gonna be fun to ride around on something i stuck together

3 Likes

how much brazing time should one get out of a small acetylene tank? i hooked up a fresh bottle this morning and i didn’t get all the way through brazing up the rear triangle on gt i’m working on before i was out of acetylene again.

pretty frustrating, i just wanna get this frame done and out of my my fixture haha.

the gas guys gave me a free bottle after i told them the last bottle wasn’t full when i got it, so that’s rad!

i haven’t built up the hard rock yet because i’m waiting on parts to put together a fork fixture, but i was looking at the frame and noticed the head tube is slightly off square with the frame. it seems like it’s within cold setting distance, but i don’t really have a way to try and cold set the front triangle of a frame.

i was thinking about attempting to flame straighten it, has anyone who might read this done this before? the top of the head tube is slightly to the drive side of the frame, so would i want to heat part of the nds top tube to shrink it that way, right? i’m going to read up and watch some videos on flame straightening, i don’t think it’ll really hurt anything to try.

got the gt “done” a few weeks ago, still no good way to straighten these frames as i finish them tho. just need some slight tweaking to get them perfectly square, but i don’t have a table of any sort that’ll work for that at the moment.


also got my fork fixture mostly together. it’s changed a little since this photo and i’m still working out how to make the steer tube clampy bit i have work but i have some ideas and hope to have a go at my first fork soon.


excuse the messy bench, i feel like i’m constantly making a mess trying to rearrange things to work for me with such a tiny space for all my stuff.

not having access to a lathe means i can’t really make a fork from scratch since i can’t machine the bearing race once i’ve got the fork together, so i’m going to do like what i’m doing with the frames for now, modify an existing fork. i have some unicrown forks laying around that i plan on turning into segmented forks with new blades and dropouts once i get the fixture squared away.

i’m having fun with this stuff, i can’t imagine how much more fun it must be with proper mitering tools and a proper work space. can’t wait to be there one day!

2 Likes

also, incase it’s not obvious, i haven’t cleaned the flux off the frame yet. i don’t really have a good way for that either haha. i got a hot plate for the shed and am going to heat up water in a pot and try my best at soaking it off, one section of the frame at a time.

your fork jig places the crown / steerer joint way too close to the main “beam” - at the very least it will scorch the channel, but it also could end up warping or melting it, too.

Put @ 4-6" in there for better access and clearance, IME.

Remember - if you make your own jigs it ALWAYS takes at least three tries to get it close to working semi-properly, LOL.

1 Like

i had considered that, but since i won’t be doing any bazing on the crown/steerer joint, blades only really, i figured i’d be ok. i’ll keep an eye on it and if it’s getting too much flame i’ll adjust it. thanks for the heads up!

2 Likes

You may be able to align the frame with a laser level and some ingenuity however, most home-made frames are good enough with eyeballing squareness, or at least mine are

There is also a good video from Paul Brodie on YT about straitening a frame without a flat table, plenty of good insight on that video

2 Likes

that video is great, however he straightens the head tube with a flat table in the first half and when he’s showing how he does his straightening on a bench vice without a table in the second half he doesn’t go over the head tube as he had already straightened it. i’m sure my frames aren’t straight in a lot of ways but the head tube is what i’m the most concerned about