Kovabikes - From a Thesis Project to Producing Bikes!

New bike time!

I’ts been approximately 2 years since we finished our thesis project at the university and graduated with a functioning product and a brand - Kovabikes.

We had a passion and used all of our efforts in making the best bike to suit our needs. It was a success. During the development of the bikes we had to sacrifice our time and put aside what we love the most - riding and enjoying the hobby. After we had graduated, we decided to take a break in development to spend time actually testing and enjoying the creation we had made.

2 Years forward to this day, we have validated that our prototypes are exactly what they were meant to be; A way to enjoy and have fun. More to the technical achievements, we have identified certain aspects of the bike that might need revising and things that were spot on from the first go.

Taking from the learnings, we are sparking a new chapter under the brand and seeking possibilities for producing these epic bikes with values that other riders share with us. Our aim is to first make the new revised prototypes before next summer and run real world testing. We also want to validate the results with a third party provider (e.g. iso-testing, efbe testing) so that others can also really trust our products. We want to highlight transparency and collaborating with you guys to make the best product for us riders.

Follow along because now you have a possibility to really be a part of the community we are building :slight_smile:

Any suggestions, collaborations and thoughts are welcome and needed!

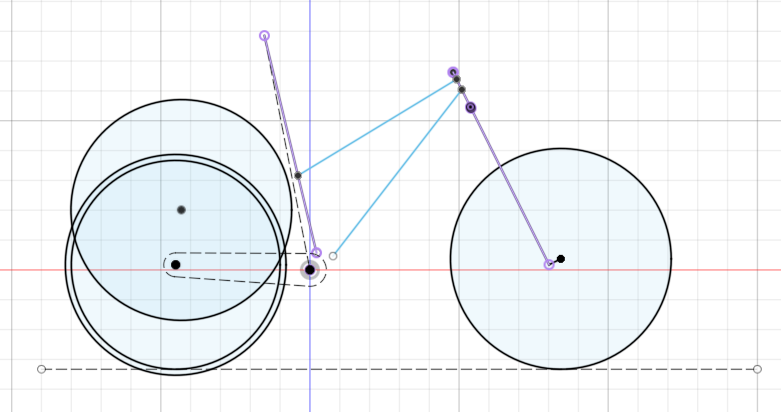
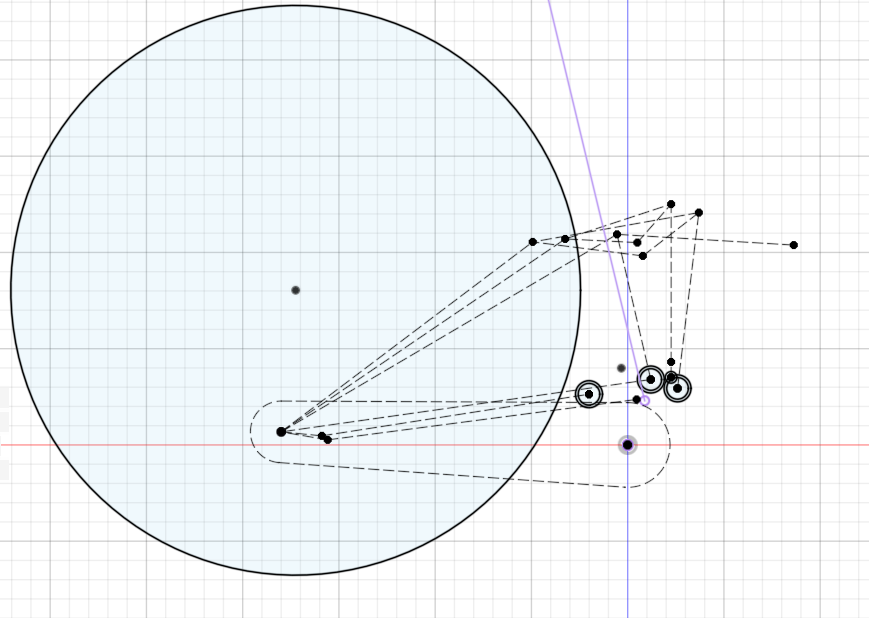
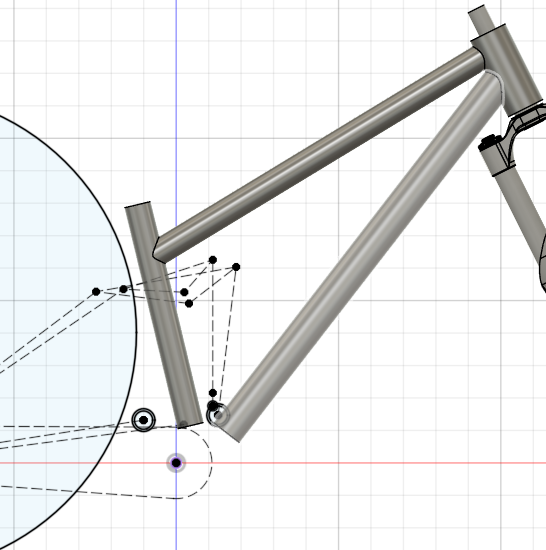
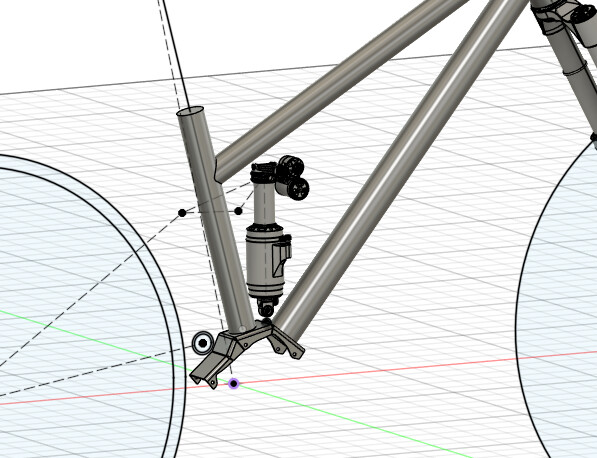
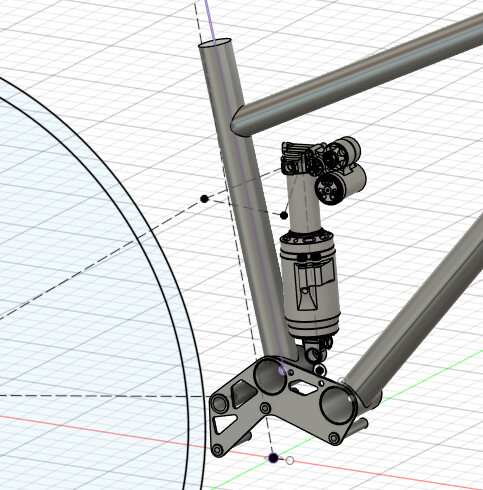
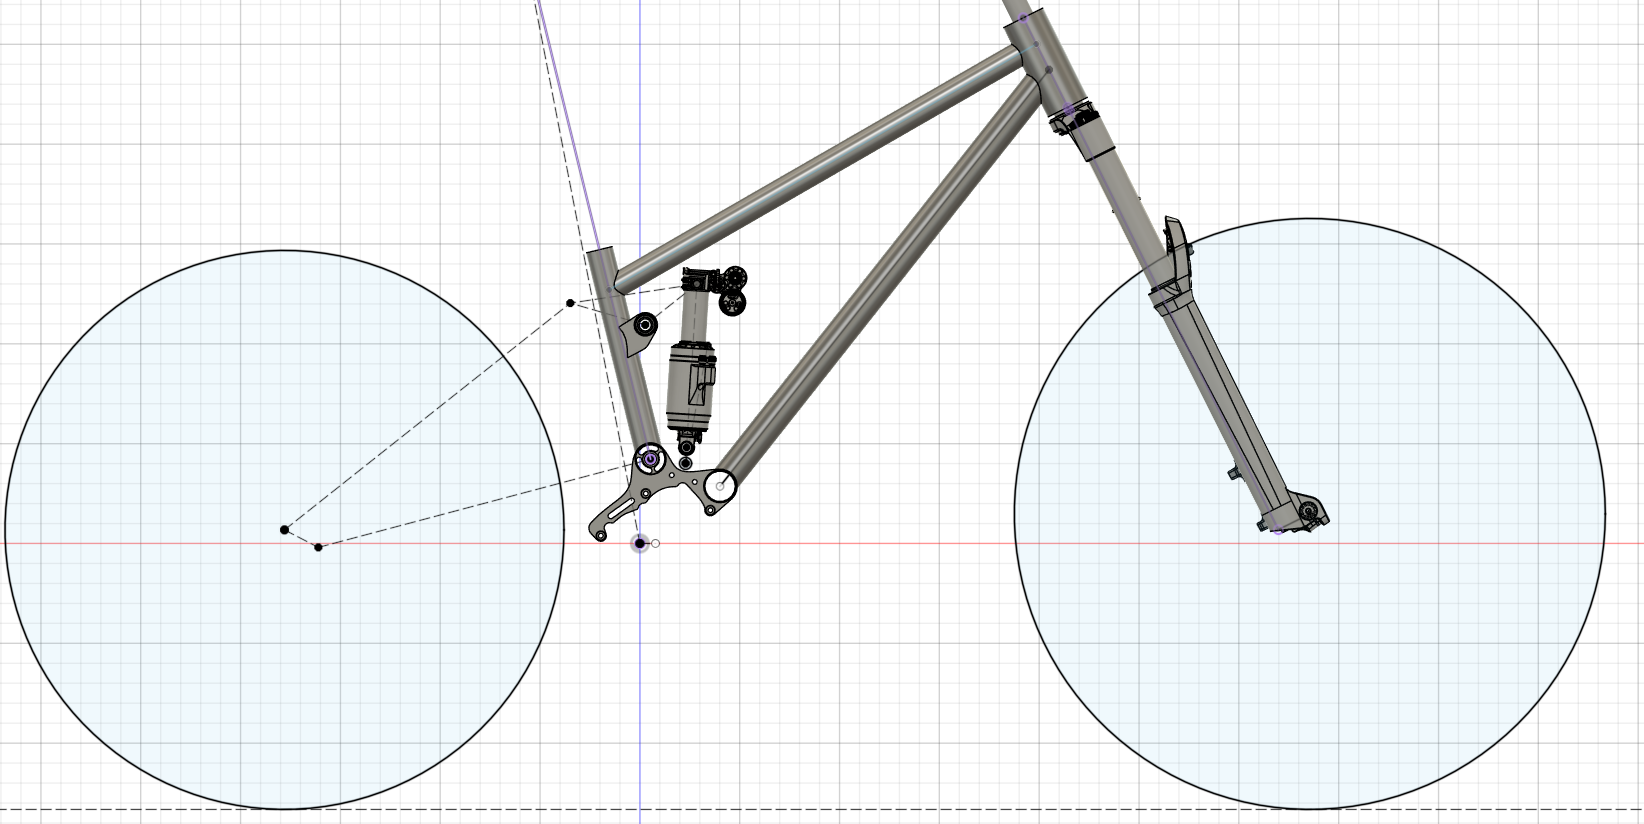
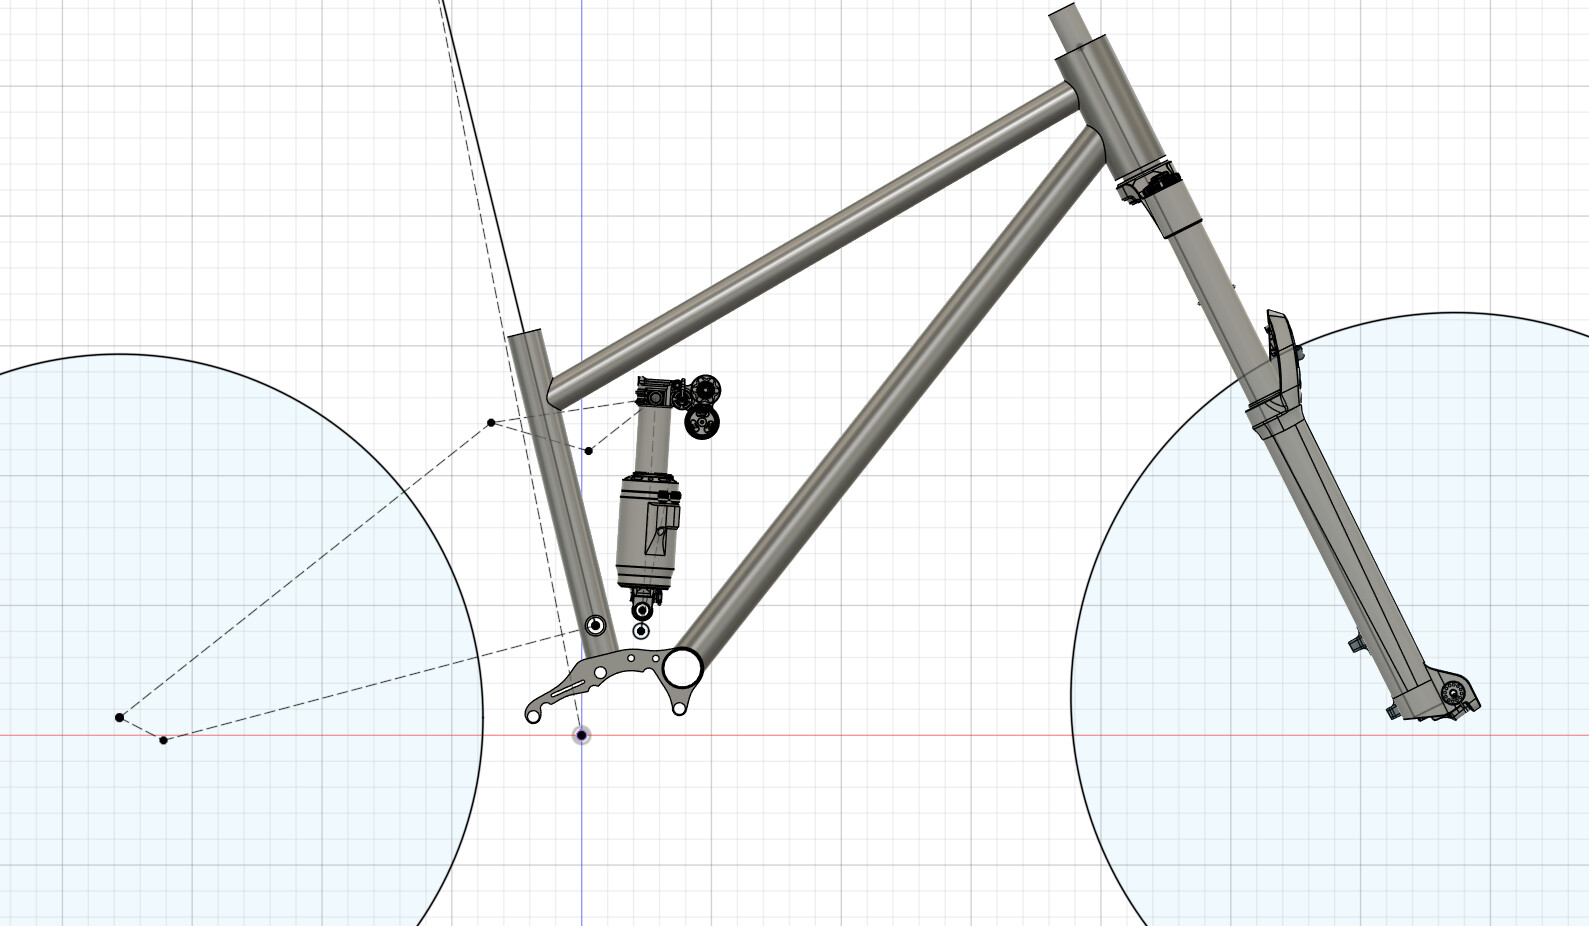
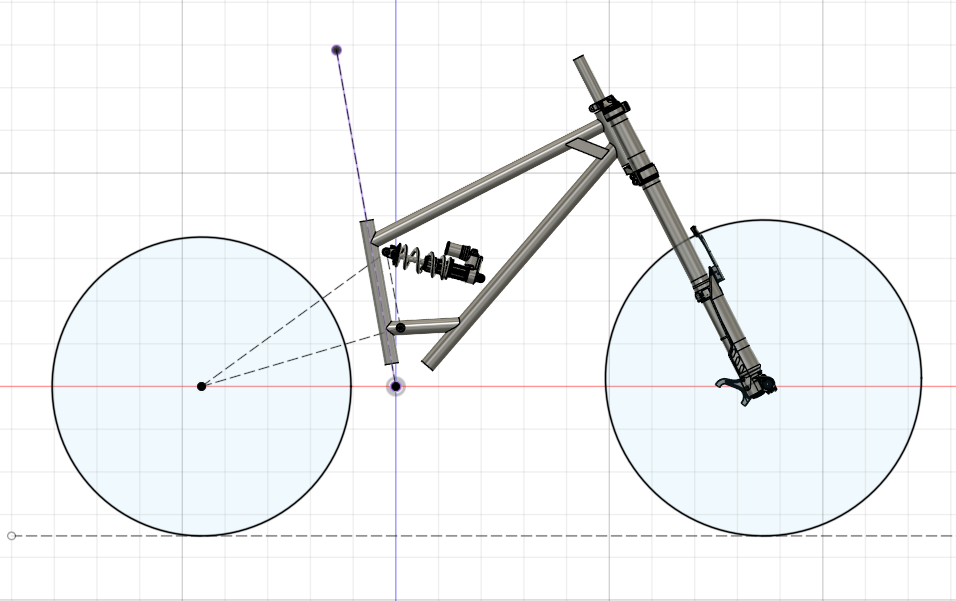
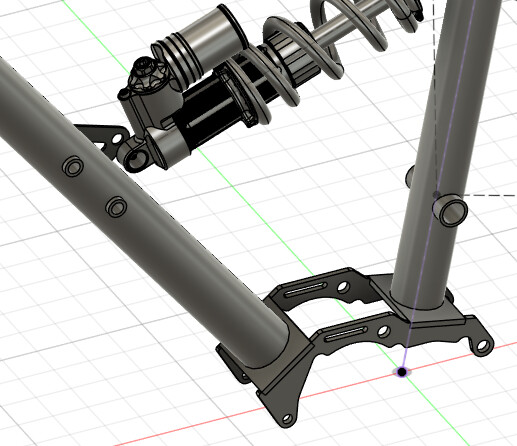
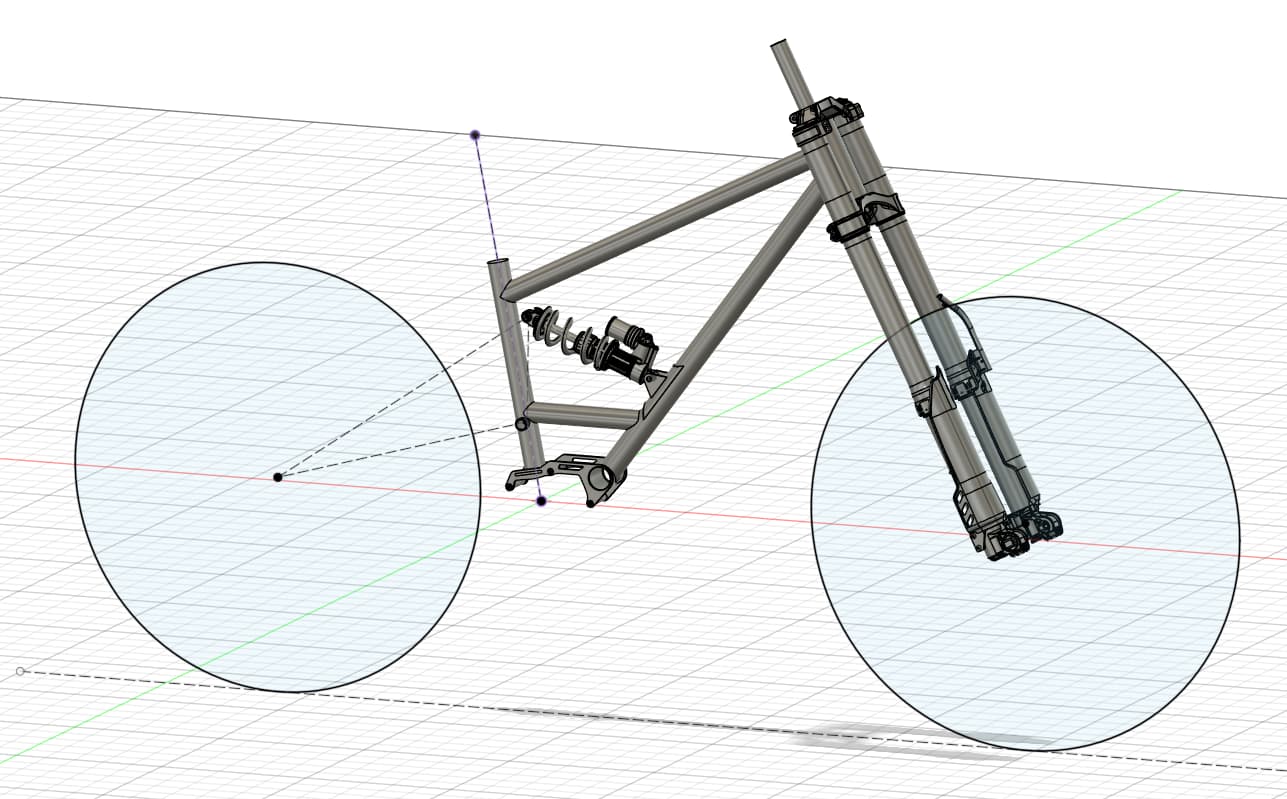
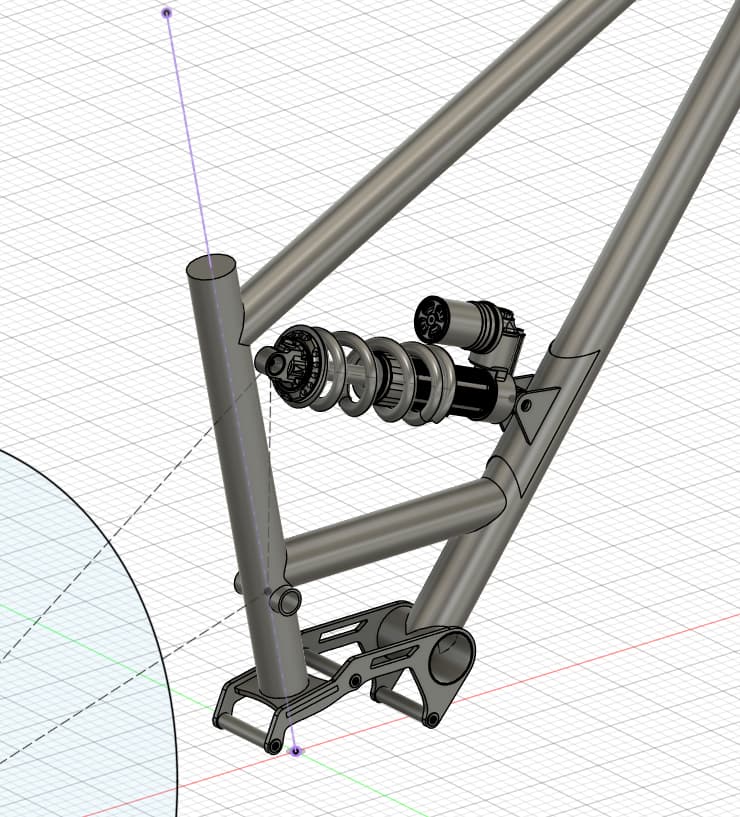
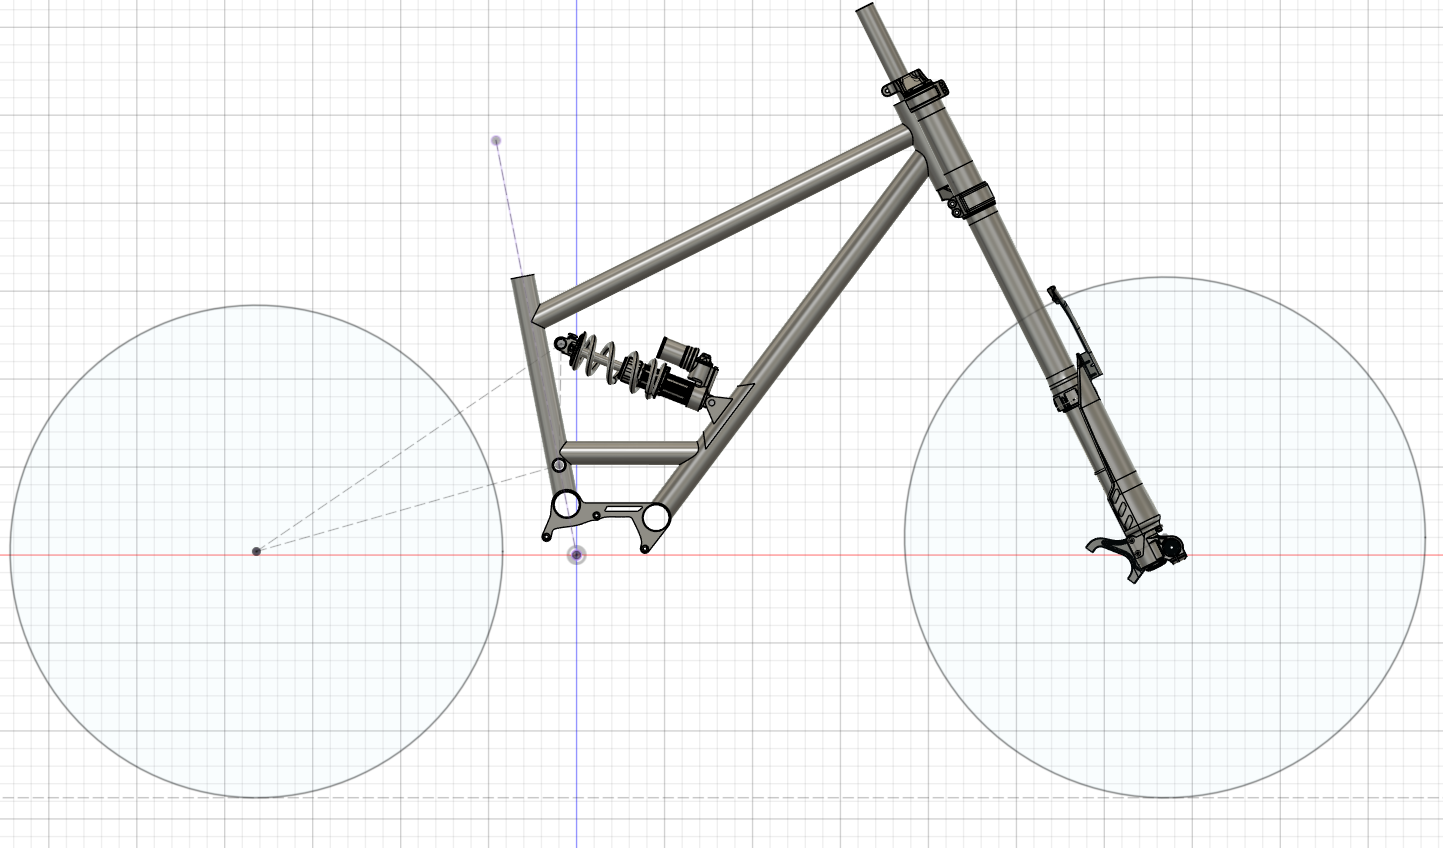
Here is the current form of our bikes, lets start enhancing it together to make it available for everyone!

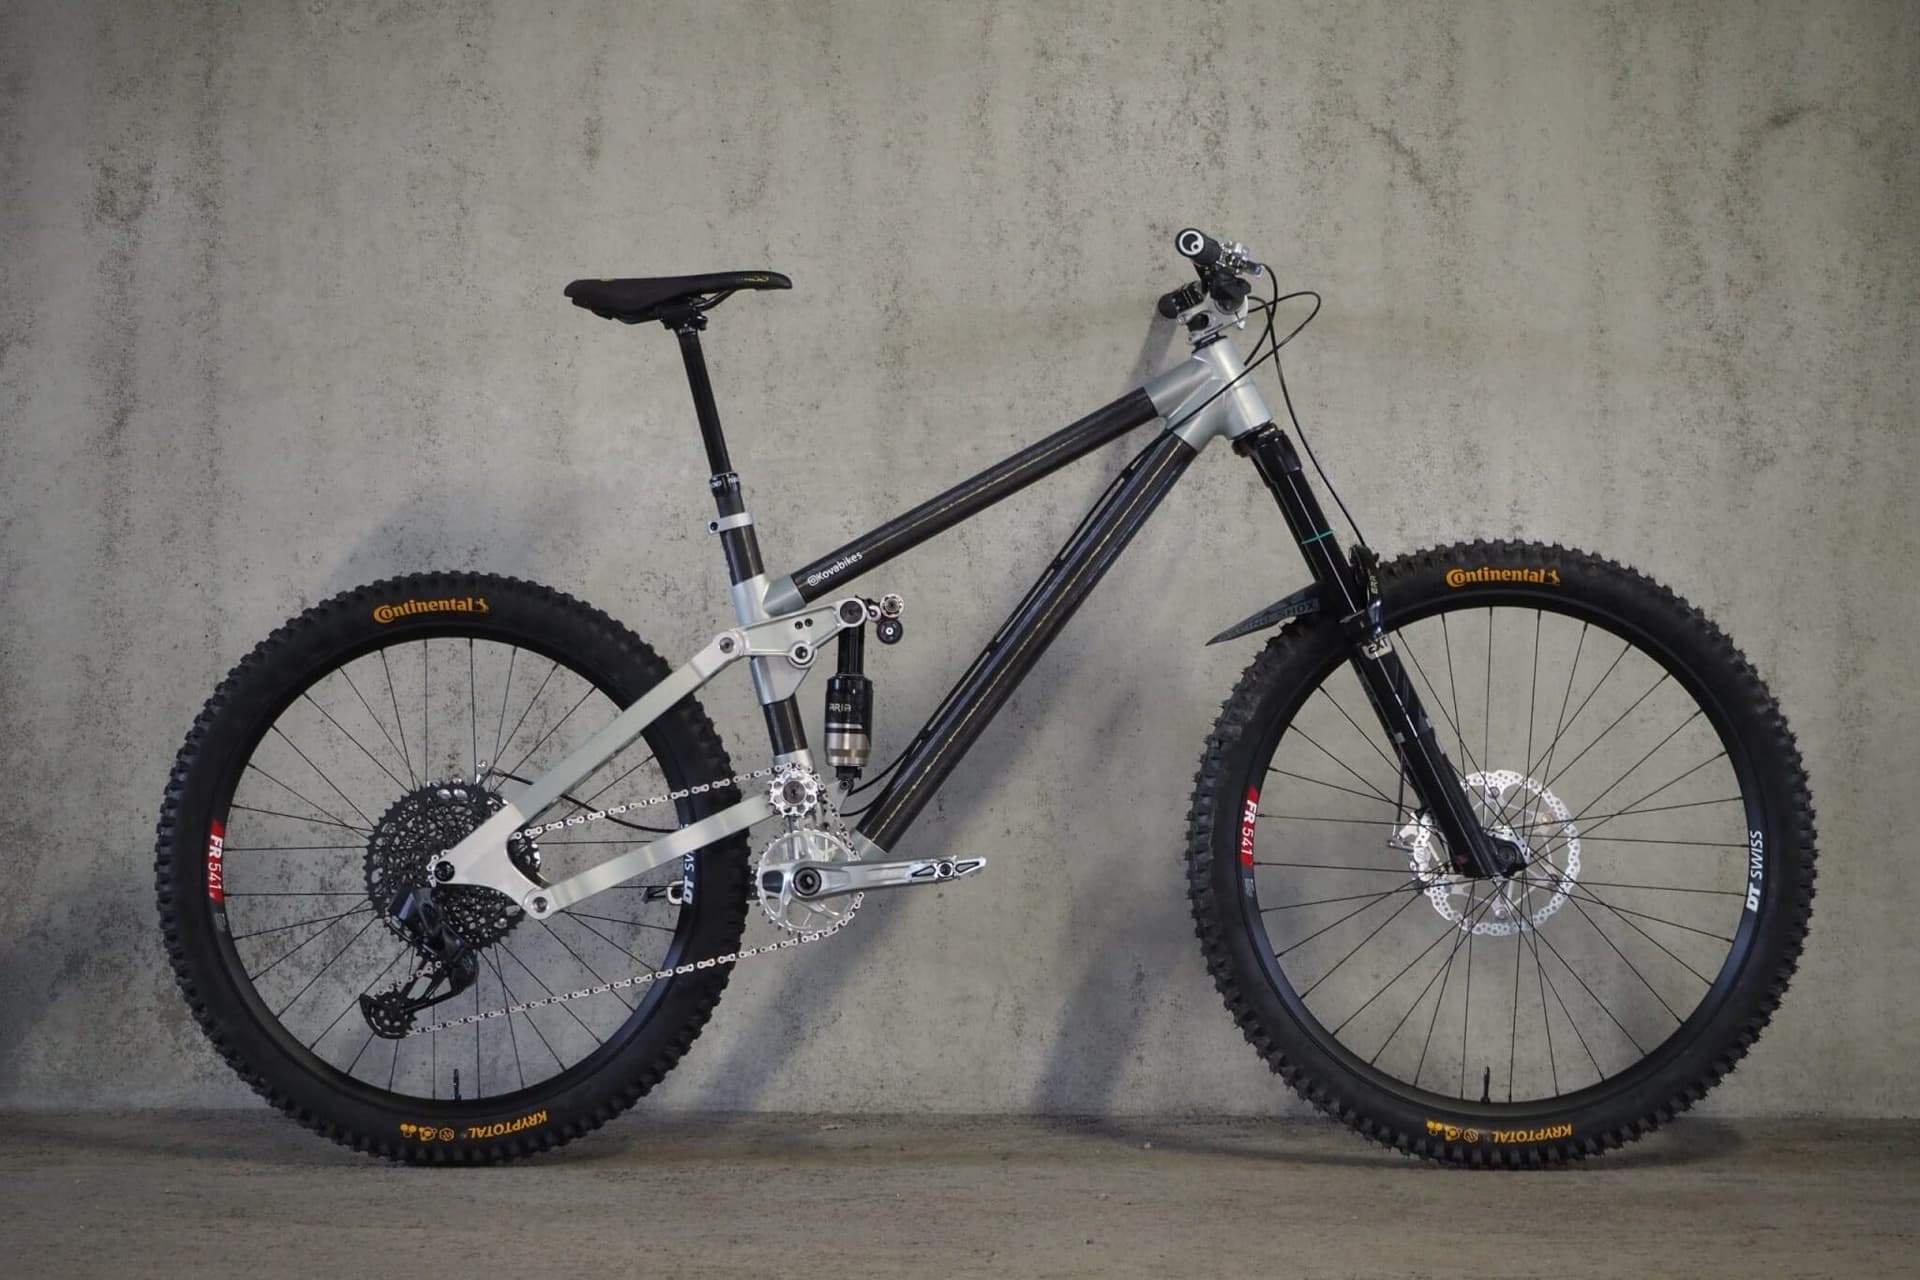
We are thinking gearbox, optimized rear triangle, modularity, aesthetics and much more. Let me know what features would make the best bike for you? What do you value the most in a bike?

4 Likes

If you want help with ISO testing, let me know. There is a very good lab with good prices here in Portugal.

2 Likes

Hey,

Fantastic! I will let you know once its the time for testing!

1 Like

Im using Fusion to model the frame. Last time we used Fusion and Solidworks, since those were available. Fusion has unintuitive assembly constraint tools in my opinion. Its hard to use them after conventional tools that most cads use. The assembly feature creo uses is still best in my opinion.

Anyways, I have been sketching the first frame skeleton as a sketch. It contains all the geometry points what i can refer to when starting to model tubes etc.

Im including the measurements for the size i feel fits a L frame. The goal is to make one frame fit both 29/29 wheels, mullet setup and different shock sizes to fit your riding needs.

The floating circle represents the rear 29” wheel at bottom out. Its tight, but it can be made to work.

It also highlights the chainline mainly just to illustrate the sprocket/pulley sizes. I feel that the rider needs to have a choice between chain and belt drive for a gearbox bike. Its worth having as many options as you can consider, while maintaining some kind of sense in the design. A good product has only the necessary features, not more, not less.

From here I’ve sketched multiple possible kinematic designs including a single high pivot (with a inconcentric idler, which is patent protected, so just a benchmark design) and two different horst link designs:

Last bike was a high pivot and it truly rocks. This time we are reconsidering as the bottom lug design was quite tricky to manufacture. We haven’t locked in on the kinematics yet. Let me know what desing you like the most and why!

Also at this point everything is pretty iterative. Clearance models on one screen and syn bike (linkage software) on the other. Previously we used linkage (a kinematic software), this time Im trying syn bike and have been quite happy. It is pretty intuitive, if you guys are interested you should give it a try with a free 30 day trial as I did.

For cost reasons Im considering building a steel front triangle for the first prototypes as its cheaper to prototype the kinematics and geometry with that rather than locking in on a cnc machined lug prototype. All about cost efficiency when you need to validate a design. Of course the ride feel isn’t same on a steel frame but its worth trying, I might learn something.

For specs Im really feeling a 160/170 “base model” that can either be turned into a dh or trail setup. I’m also considering zs56/56 headset design, as you could micro adjust your travel to suit your riding needs. Fun thing about designing in CAD is that you can easily try different designs and iterate.

EXT shocks have worked on our latest model really nicely and the support from a local entrepreneur at 4130.fi has been really golden for the start of the project.

Next up on the menu, we try to decide on a kinematic design that suits us and more importantly you guys, while keeping the cost as low as possible to make it affordable for everyone. We choose together on a design that gives the most value without wasting money on features that no one really needs or wants.

Plese make sure to give feedback, I’d like to hear if I missed anything!

Kavenz just also released their journey for their V8 frame on Youtube be sure to check it out, it was interesting!

Until next time, cheers.

4 Likes

I’m learning how to do sheet metal modeling in Fusion. Not the prettiest yet, but you get the idea. At this point im not worried about the shapes too much, im just making clearance models to see how the kinematics fit into the design.

I also made sure to design for manufacturing so both the seat tube and bottom tube attaches perpendicular to the bottom gearbox bridge. This way you can eliminate cutting the seat tube entirely and the lower part of the bottom tube. The fork clears the bottom tube nicely.

EXT clearance models are cool to look at while modeling, so i added them in.

5 Likes

Just yesterday as I closed my computer, I got some ideas to simplify the design around the gearbox. It’s hard to sleep when you got so many ideas.

Excuse me for the poor design, I’m still just making clearance models to figure out the kinematics. This model is basically asking for a high pivot, and I’m really tempted..

This design utilizes 2D sheet metal attached to tube-ends. It is really cost effective and modular as you can only swap the plates for different frame sizes and you can mount different shock lengths using varying sized shock mounts. The side-to-side support comes from the “pins” that double up as threaded inserts for the gearbox. Others have used this method too (e.g. Archibald, trinity) and i can see why.

Great stuff. Until next time.

5 Likes

Is it a bird, is it a plane? No, its a High-pivot!

We found a nice way of connecting the seat tube to the bottom construction while using it as a main pivot point. This is also nice in design if you plan to run a belt, as the belt rides along the seatstay.

I’m finding it a bit difficult to decide on the method to connect the rocker pivot into the seatstay. Now i just modeled a piece that would probably be made by CNC machining. The only advantage of a machined pivot is that you wouldn’t need to machine the bearing race or surfaces after welding. Obvious disadvantage is the cost. I wouldn’t consider 3D printed parts, as you’d have to machine them anyways for correct bearing seating. Any tips regarding steel pivot connections are appreciated!

There is also a preliminary high pivot kinematic design sketched in. I really don’t see a point in making a low-pivot as the construction supports a high pivot and its honestly a superior platform if there isn’t any added complexity.

Previously we used 6902 (15x28x7) enduro bearings on all pivots, and used double bearings on the rocker pivot to make sure it can handle the bottom out forces. I plan to do the same here.

There might be a possibility to use a yoke behind the seat tube on this design to add stiffness and that way decrease that unwanted unsprung mass of the rear triangle even further. A light rear triangle without any spinning masses (casette) will track and feel crazy good, it makes me excited already. The added weight to the bb area is not a disadvantage either I believe. The total weight of a frame is a bit misleading and inaccurate measurement as the frames center-of-gravity, unsprung mass and flex of different parts is the actual tangible thing that the rider “feels” as weight transfering when riding. A bike can “feel” heavier than it actually is if the mass is distributed poorly. The total weight of a bike is not a bad metric in itself, but often when you look at one specific measurement, you can get carried out what actually gives value for your specific riding needs. You can ask why pro-riders glue lead under their bottom brackets.

Next up, we are trying to acquire the 3D clearance models for the effigear gearbox so that we can plan clearance for that.

Stay tuned!

1 Like

I’m considering placing the main pivot bearings on the chainstay yoke, and having a simple tube welded on the seat tube working as a mounting surface. The bottom tube would still be connected to a round tube housing as it enables using the same bottom bracket mount for all frame sizes. The seat tube would connect parallel to a plate that can be welded on the bottom bracket plates.

We are still waiting for effigears 3D models to see fitment. Let me know if you have someone to speed the process!

I really like a coil shock and this structure enables an easy switch of the bottom shock mount between the two bottom bracket plates. Therefore we can design for more or less progressive mounts. The mount also brings additional stiffness to the bb area in this design.

Next up ill try to model some rockers and mounts for the rocker pivot. This design allows for a seatstay bridge too, which can be tested to modify the stiffness.

Who will manufacture the frames? Do you have a business plan including forecasts, pricing, costs, sales channels and distribution logistics? These are WAY harder than designing the bikes or making a prototype. Sorry if that’s been discussed already and I missed it.

Hey!

Thanks for asking. I surely agree to this. The product and its value is way more than just the physical bike. We are taking it step by step and as we design the bike we are heavily considering all the possible dfm rules to make the manufacturing, assembly and everything as cost effective as possible to bring the most value and quality to the frames. This is something we did not have to consider in the first frame prototypes as we had unlimited access at the campus to manufacture what only we wanted.

For forecasting, marketing we are still currently at a stage where we involve you guys to participate in the decisions that give the most value and probability for success to launch products in the future.

I will definitely keep these things in mind and if you have any tips regarding this topic, I’m all ears!!

Hope i answered well enough and didn’t sound too political :slight_smile:

1 Like

Really exciting! While we were in Finland this past summer on vacation, I had a chance to visit a Ceracote facility in Estonia. We took the ferry over and spent the day understanding their capabilities. The bikes would be assembled in Finland (we’re hoping!). We’ll be back next August for FNLD GRVL and a week long bikepack tour.

1 Like

I have spent some time and thought on a high single pivot design. I’ve tried to balance out the geometry, kinematics and of course tried to add some DFM thoughts. I really like the motocross vibes. They also use chromoly frames in moto for fatigue strength, balancing costs, ease of manufacturing etc. there are multiple reasons.

Current geometry is:

Reach 490

Stack 662

Chainstay 450 / front center 856 for a total of 1306mm wheelbase

STA 80

HTA 63

MX rear wheel / 29 rear wheel options

Front travel supported anything from 150 to 200mm

And kinematics:

80% AS @ sag

120% AR @ sag

-15mm axlepath

Rear travel (with 230x65/60/55 shock): 180/167/153mm

Tell me what comes to your mind :slight_smile:

PS. Single pivot guys let me know the best practices in designing / manufacturing this kind of setup!

1 Like

Project is moving along.. We tried contacting effigear for 3D models to try to fit into our design, but no luck getting in touch with them.

Please let me know if you have a contact to their direction!

The main thing that this design screams is manufacturability. I’ve worked with sheet metal in the past, and it definitely needs some practice to get it looking good. Of course a cnc-machined gearbox mount is ideal in looks and strength but im afraid the costs are huge. A lugged frame would obviously be nice here and tempting.

I’m thinking of reinforcing the shock mount in the bottom tube area with 2 pins that double up as a mounting point for the shock. I’m only worried about the high stress in this area and don’t want to crack the frame on the first run.

Next up is to start modeling the rear triangle. If anyone has clearance models for 27.5” or 29” wheels including tires, and dropper posts, let me know.

1 Like

If anyone has recommendations for stainless materials for steel frame construction let me know.

Hey, cool project!

I’m new posting here, but maybe i can chip in a little on the geo and how perspective customers may perceived things.
I’ve been on an interesting journey trying many different enduro frames over the past 3 years: RAAW, yeti, nukeproof, starling, Rocky Mountain, santa cruz, deviant, pole to list the ones I’ve spent significant time on (thats me trying to say i have a bit of experience on bikes :hugs:…also been mountain biking for 30 years…so old fart opinion incoming)

In general i think mountain bikers can be a little stuck in their ways and often have preconceived ideas.

Maybe a 490mm reach (size large) is going to push it a little far for the average armchair buyer (irrespective of how the bike rides or how the other geo figures work together).

I’m 180cm, with a positive ape index (too many years climbing) and generally ride a size large. Reach figures around 470-480 see to work well for me, depending on chainstay length, stack etc.

But reach seems to the number I gravitate towards with regards to sizing. However, to challenge this (and i wanted to try a high pivot) I recently picked up a nearly new Deviate Highlander 2 with a 490mm reach in large…a bike I’d previously disregarded as way too long. I’m happy to say in rides great, but did found myself over forking it to 170mm and thus reducing the reach a touch.
I’m waffling…but my point is maybe don’t got down the Pole and Deviate line of moving too extreme (relatively) in sizing or maybe build some adjustments (e.g. adjustable headset cups etc?). Too many people will/may make an armchair decision based off a single number. Just read the pinkbike comments :winking_face_with_tongue:
To maybe quality this a little more. I rode in Finale with an investor in Deviate and discuss this exact point on. Although he stood by their overall geo philosophy he did acknowledge their sizing was putting some would be buyers off. And now they’re the way of Pole too…although that’s more to do with ebikes maybe??:thinking:

Anyway, keep up the great work! Super impressive

1 Like

Hello Marf!

Thanks, I really appreciate your feedback on the subject. The geometry is still open and just with a click of a button really easy to swap over. I’m trying to base the design on the best “middle spot” and integrate swappable dropouts, zs56 headset for reach and headtube angle adjustments.

We had 485 reach on our first prototypes and I personally ride a Pole that has 480. Perhaps i should drop the reach to 480 from where the rider can choose to have ±5 with an adjustable headset.

Anyways thanks for the feedback and stay tuned. I would love to hear more of your thoughts as it seems you have a lot of experience riding different stuff.

Until next time!

1 Like

Last progress pic before heading to sleep.

Contacted effigear for clearance models. Swapped the design on shock mounts to support a doubler plate. Headtube gusset is still under development. Testing 475 reach until someone else changes my mind again :smiley:

Smooth sailing. Until next time.

2 Likes

After some thoughts and suggestions, I decided to add a bracing tube between the ST and BT. I really like the straight parallel lines that flow with the shape. Maybe the headtube gusset should have something similar in design.

It’s really starting to shape up. This platform is simple enough that it can be applied to house different kinematics if that is the direction we want to go in the future. With single pivot it’s quite easy to prototype and have a basepoint from which to start with.

The bottom bracket plates are 4mm in thickness and coupled with studs that increase the torsional stiffness and double up as threading points for the gearbox. There is also space on top of the gearbox to house tools and snacks. There are also quite many possibilities for cable routings in this construction.

Another angle for all the interesting bits:

1 Like

I hope some of you appreciate the daily updates of the project.

Front triangle actually shaping up really nicely. Been noticing that I need to design something to visualize it and do the brainwork if it really works or not. After multiple designs some make more sense than others.

The design looks like this now:


I really like the hollow holes for tube joints around the BB area. They also make sense for manufacturing. Next week I’ll start drafting the rear triangle. That is going to be exciting.

Stay tuned and let me know if there is something missing or that could be improved.

3 Likes

Looking great!

Nico at Egerie makes one solitary to what you are working on. He might be able to help you with Effigear drawings.

https://www.instagram.com/p/DPTu861jEXg/?igsh=MXBqbGNkZm82ZXc4Nw==

1 Like