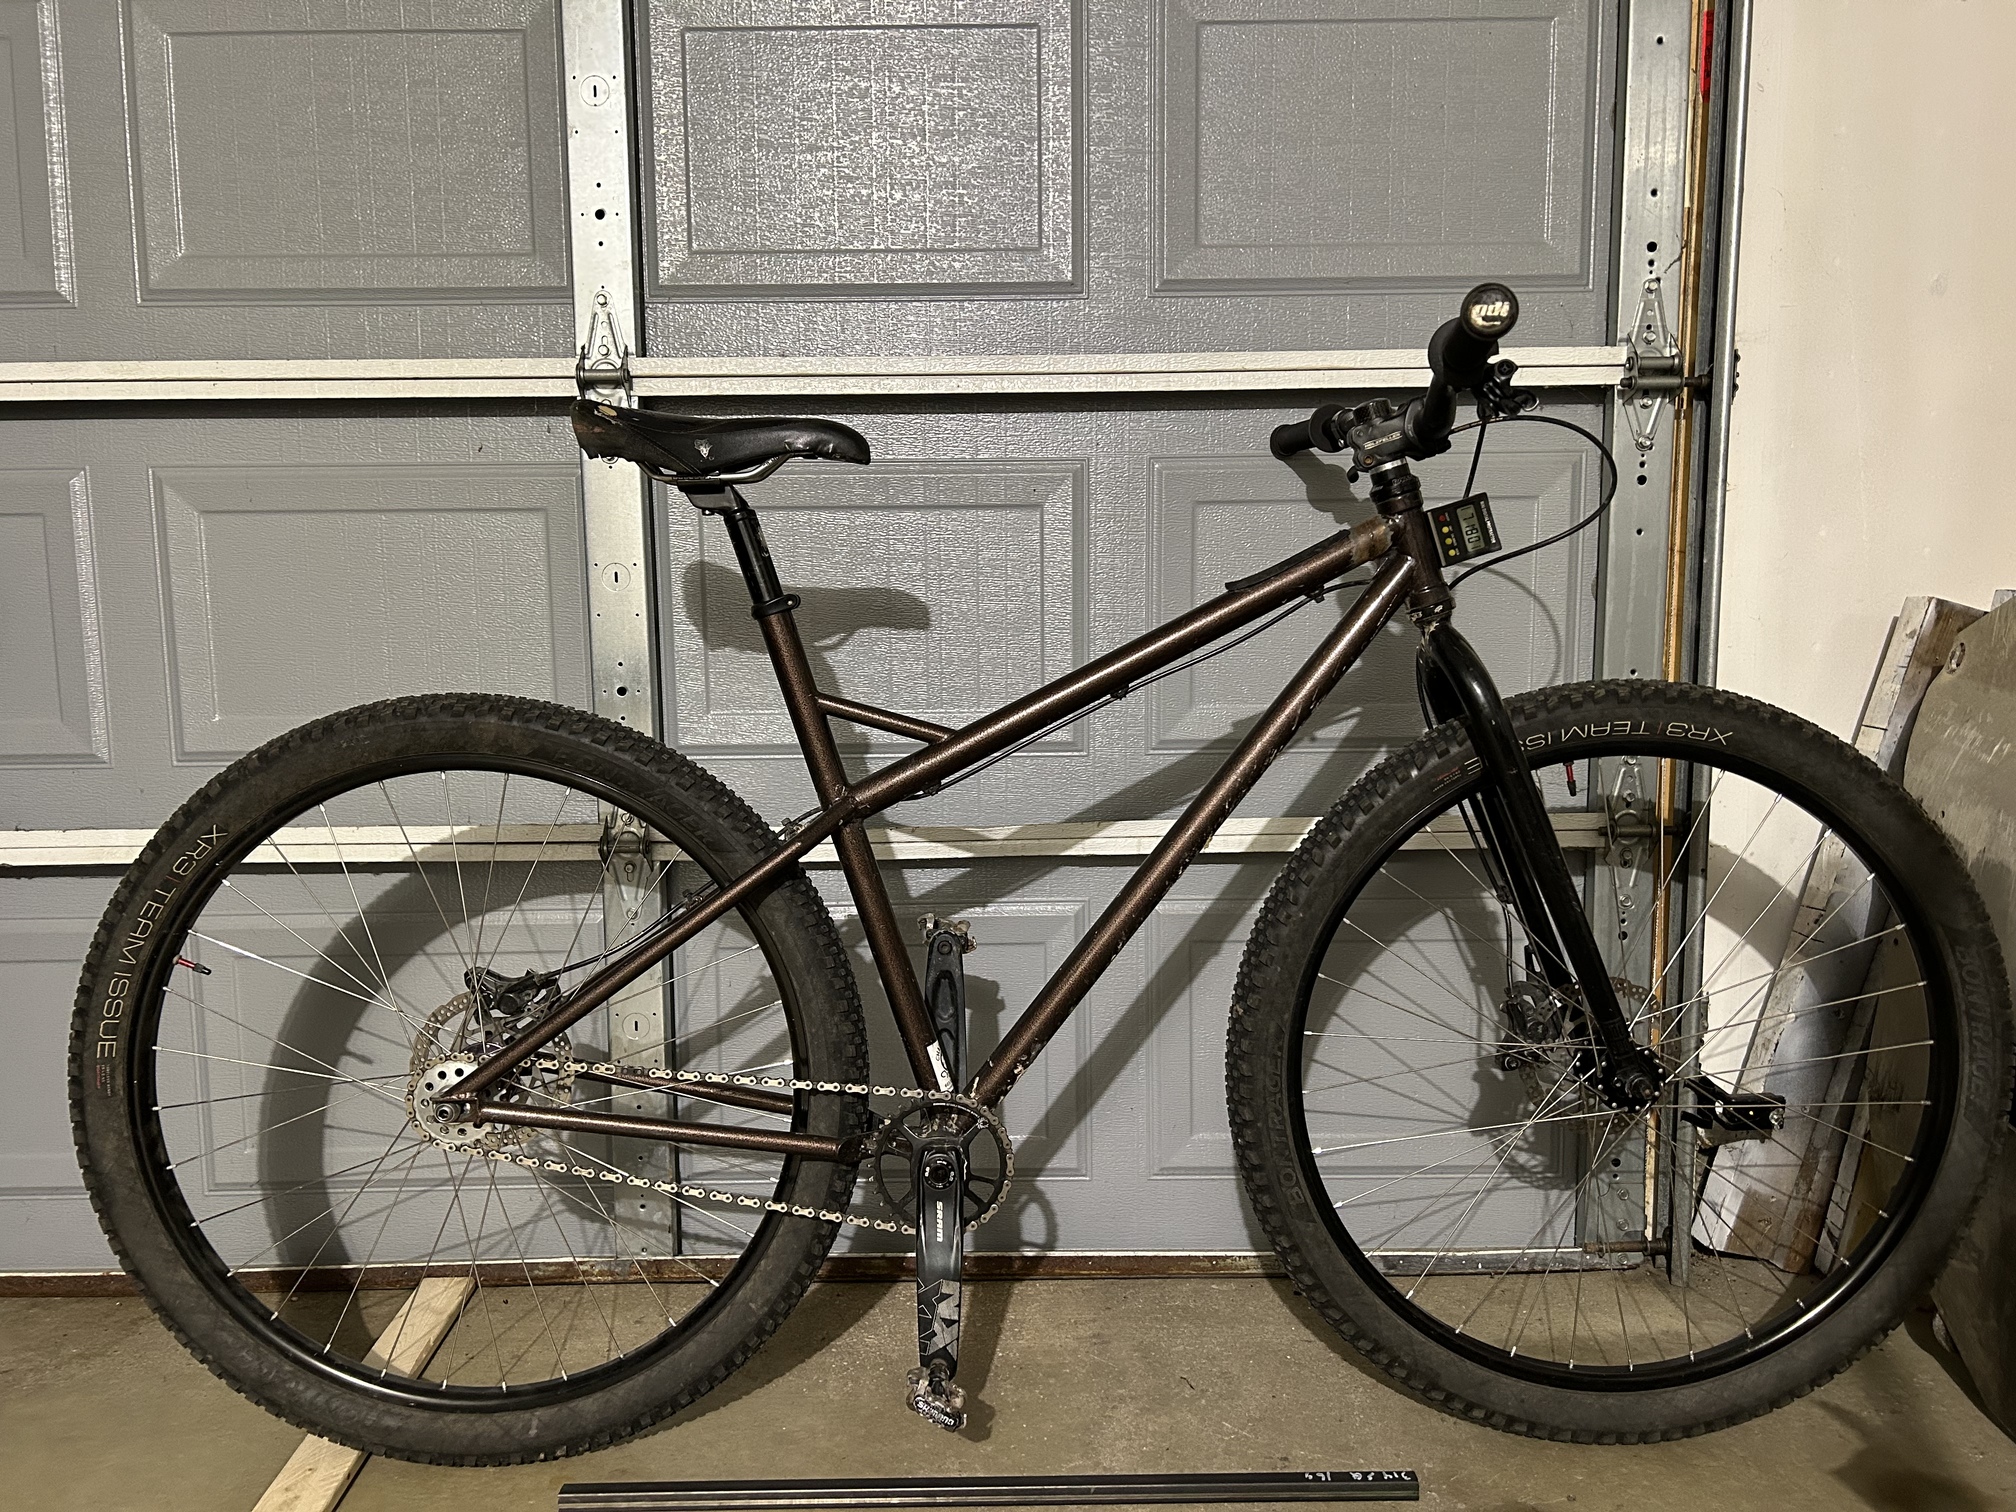
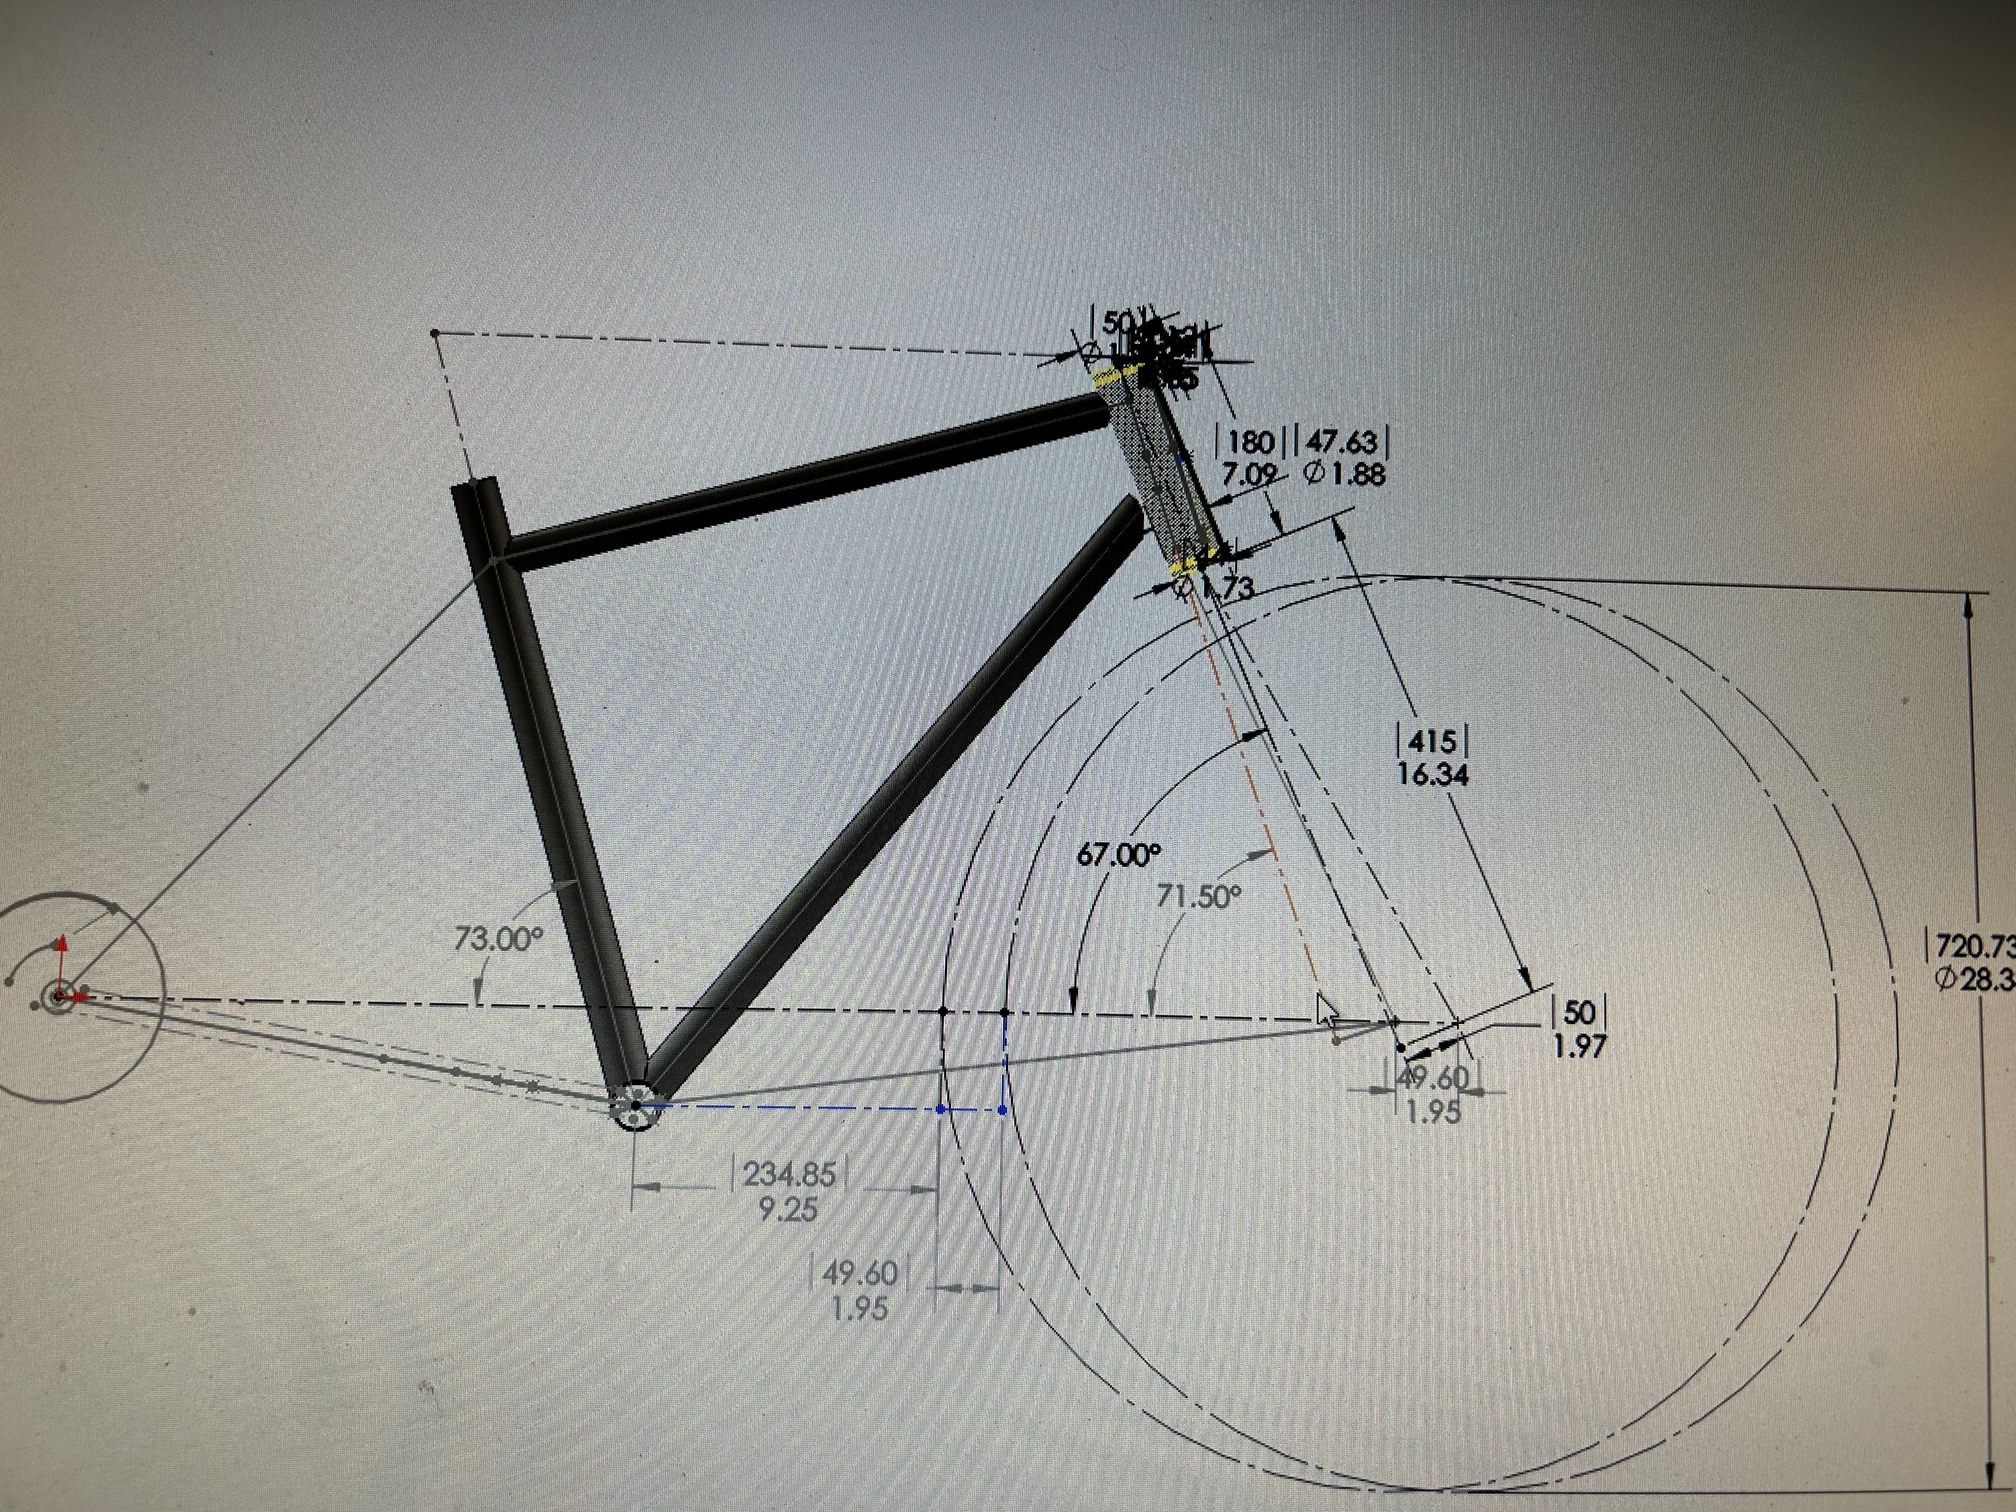
Did some quick tape measuring of it, 24” TT, 72°HTA, 73°STA, bb height at 11-7/8”, CS range from 16-3/4” to 17-3/4”
I’ve thought a lot about this frame upgrade, my plan was to make it more modern but still really simple. Re use all the parts, minimal cost to buy a dropper and headset. I designed around the modular dropout so that it can be changed over to a geared setup if needed.
So in order to keep things simple I bought a used 120mm pike 29+ (so it’s dumb and extra long), ordered a shorter head tube, and re designed the frame. After riding my wife’s honzo and measuring my other bikes, this is what I’ve come up with for geometry. I’m about 5’10” and mostly ride pretty rolling xc type of trails with this bike.
I’d love to hear any geometry feedback that you have! I admittedly have a poor understanding of trail, flop, front center and rear center. Thanks in advance!
What’s the tyre size on the drawing? FC hasn’t been dimensioned so kinda hard to comment on any FC/RC balance. IMO the chainstays are a little short considering the relatively slack 73deg STA. Maybe the SS inserts allow for that to grow a bit though. I would also go for a slightly higher BB but that’s very much personal preference and might be ok given the rolling terrain you’ve described. But with an SS bike I find clearance to be more important given I have less control over when I can/can’t pedal. Looks like a very fun bike !
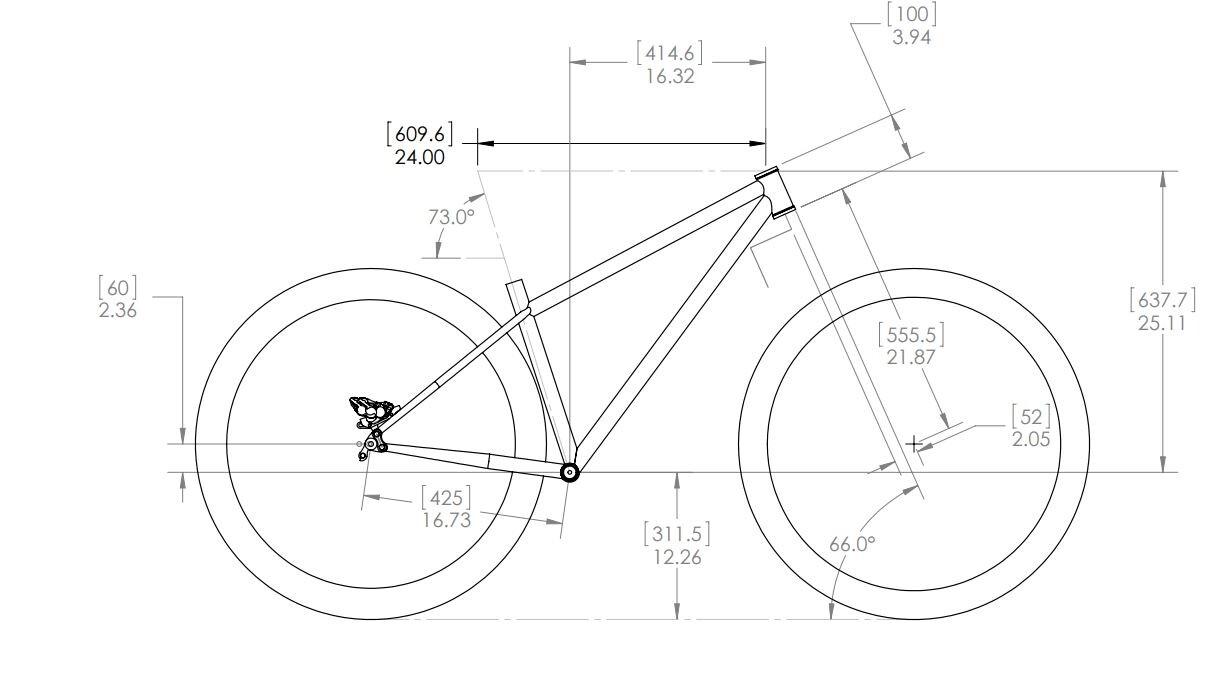
@bushtrucker this is great feedback thanks! The tires are 29x2.4 modeled oversized at 29.25 OD. I’m measuring the front center at 731mm in my model. The single speed inserts will definitely allow the stays to be longer. I typically ride a 32/19 or 32/21, which put me more in the 430+mm range. For a while I ran the old bike on a 34/19 and that felt real fast. Not sure that I’ll go back to a tall gear like that in the future though. That makes sense about the BB height, I’ll definitely take that into consideration!
Is this geo chart sagged or unsagged? IMO, the reach seems a bit short for 5’10. I would aim for 440-460. With a 66deg HTA, I think a 50-60mm stem matches the steering geometry better.
Thanks @Daniel_Y ! This is unsagged geo the fork is 120mm travel. I guess I’m a bit hesitant to extend the top tube 25-45mm, but you’re probably right, you’ve got a lot more frame design experience than me haha.
Maybe I’m not thinking about it right but my thought process that landed me at this reach was to use a similar a saddle setback length and top tube length to what I found comfortable on the old single speed. I should read the driving dimensions thread again more carefully. I appreciate the insight!
I realized that the bikes I referenced for top tube length both have offset seatposts and I’m planning to use a dropper with no offset, so I changed up the design to a reach of 443mm and top tube length of 25-1/8” (638mm). I really appreciate your insight on this, it got me to do a thorough double check, the bike would have definitely been too short how I had it.
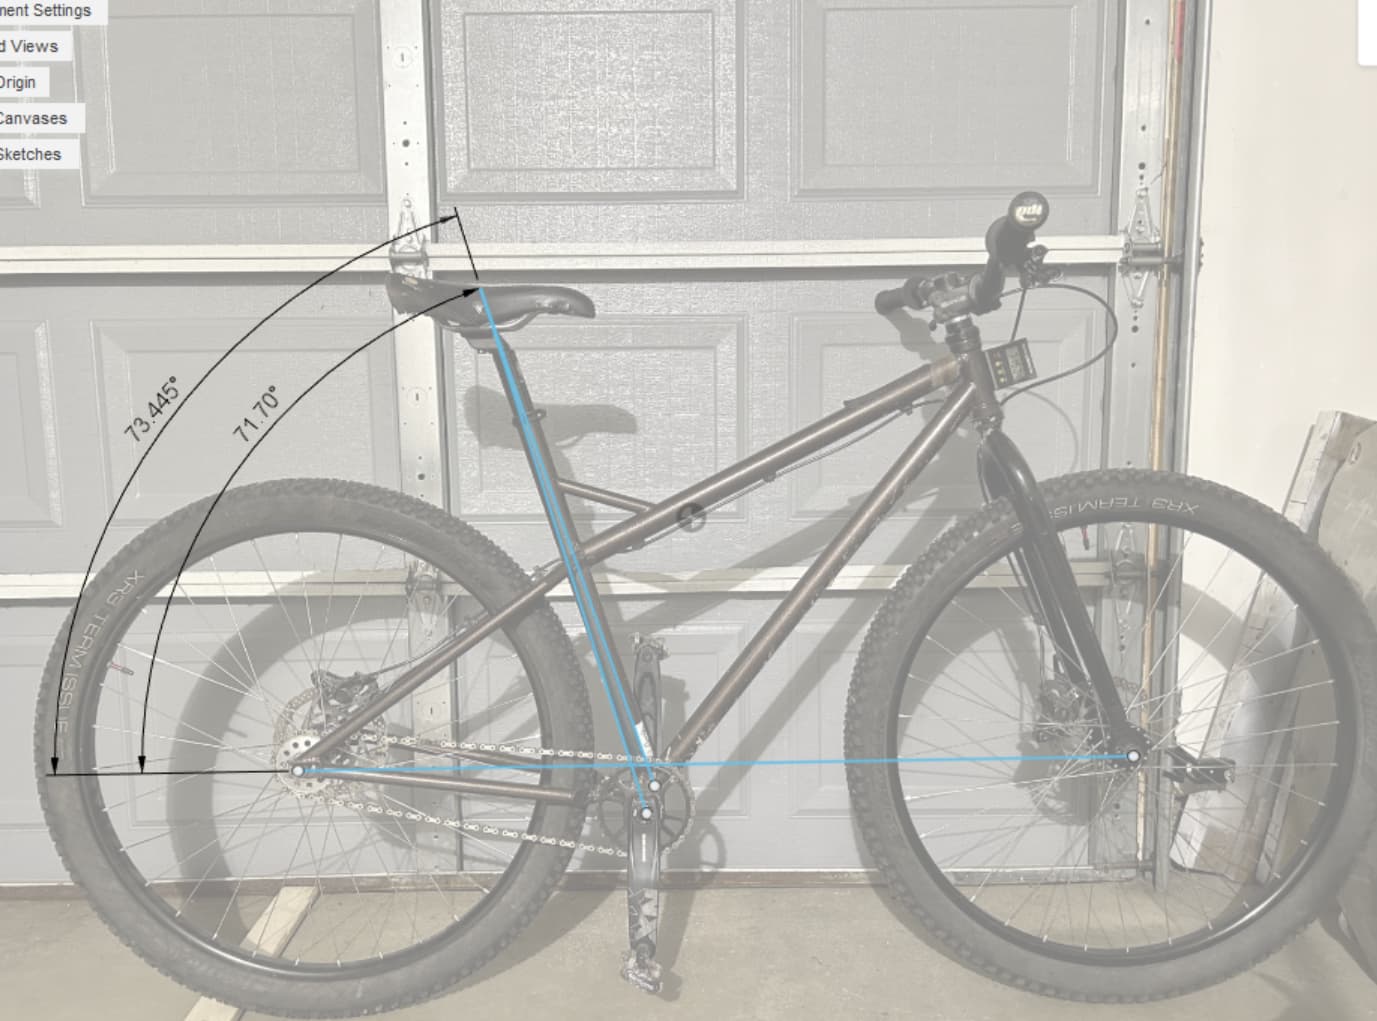
It looks like your reference frame’s seat tube is offset at the downtube. The “effective” angle looks like 73.5deg. the “actual” angle is approximately 71.7deg
For rolling terrain, I think 73.5deg + a zero offset dropper would be great. A 440mm reach probably lands you close to a 50mm stem.
A few things to keep in mind:
under sag, the reach will grow ~10mm and the STA steepens 1deg
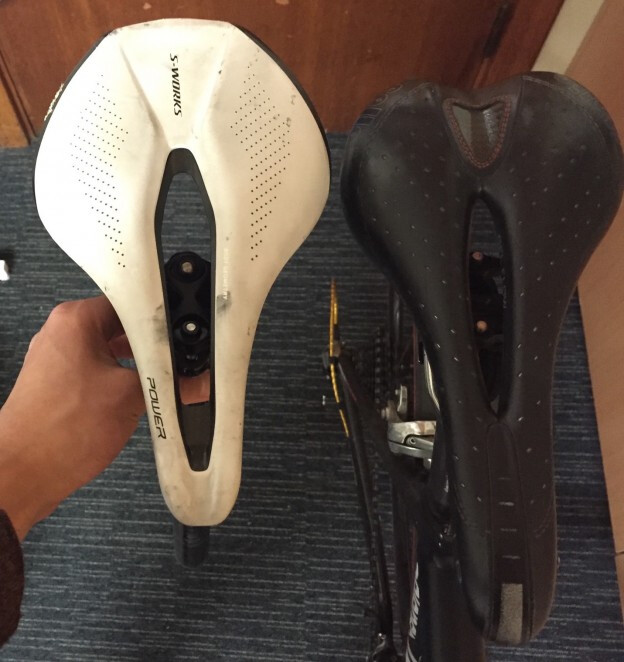
different saddles have different “sweet spot” locations. I have run into a few issues with the popular “power” saddle shape
Compared to a conventional saddle, specialized instructs you to set the power 2-3cm further back, which is not really achievable on dropper posts.
If you want to mimic a gravel/road position with a dropper, you could consider something even slacker like a 72.5deg STA. But IMO that won’t feel good on >10% grades
Emphasis mine, I’m curious why you bring this up. Sure, its 100% true, but so far as I can tell it has no anatomical relevance - it’s just a byproduct of the construction of the reach measurement. It’s not like the top tube is getting any longer with sag, which is to say that the distance between your reference of choice on the saddle and on the handlebars stays the same. I.e. the important measurement as it relates to the rider’s comfort doesn’t change. The change in STA will change weight distribution (and that’s definitely something to consider) but what about the increasing reach is… something to keep in mind? I think I’m missing something and I’m curious what this change implies to you.
Totally agree, it’s tricky thinking about the design changing from an old offset post to a new dropper pos. Even after looking at a bunch of more modern frame geometries it’s still odd.
You are correct, I did take this into consideration. Since I’m designing around a zero offset post, dropped a string from the center of the seatpost clamp, then measured setback from the bb (about 8” on the reference bike). So in my design the sta is driven by the setback number. My mistake was that I measured the top tube length to the center of the seat post and not the center of the clamp.
Oof yeah that saddle looks like it would be a challenge to design around. It’s cool that there are options like this though for adjusting fit to some extent
Thanks! I’ll keep an eye out for a longer stem. I think this one is 35 or 40mm.
I think reach getting longer is anatomically relevant as I’m using a rigid bike to design some of the fit characteristics, it’s a good reminder that on the new bike, under sag the bb rolls under the saddle slightly, and adds more weight to the hands as you noted. To me this is important to keep in mind because I’ve ridden some bikes with steep seat tubes and found the body position to too heavy on the hands.
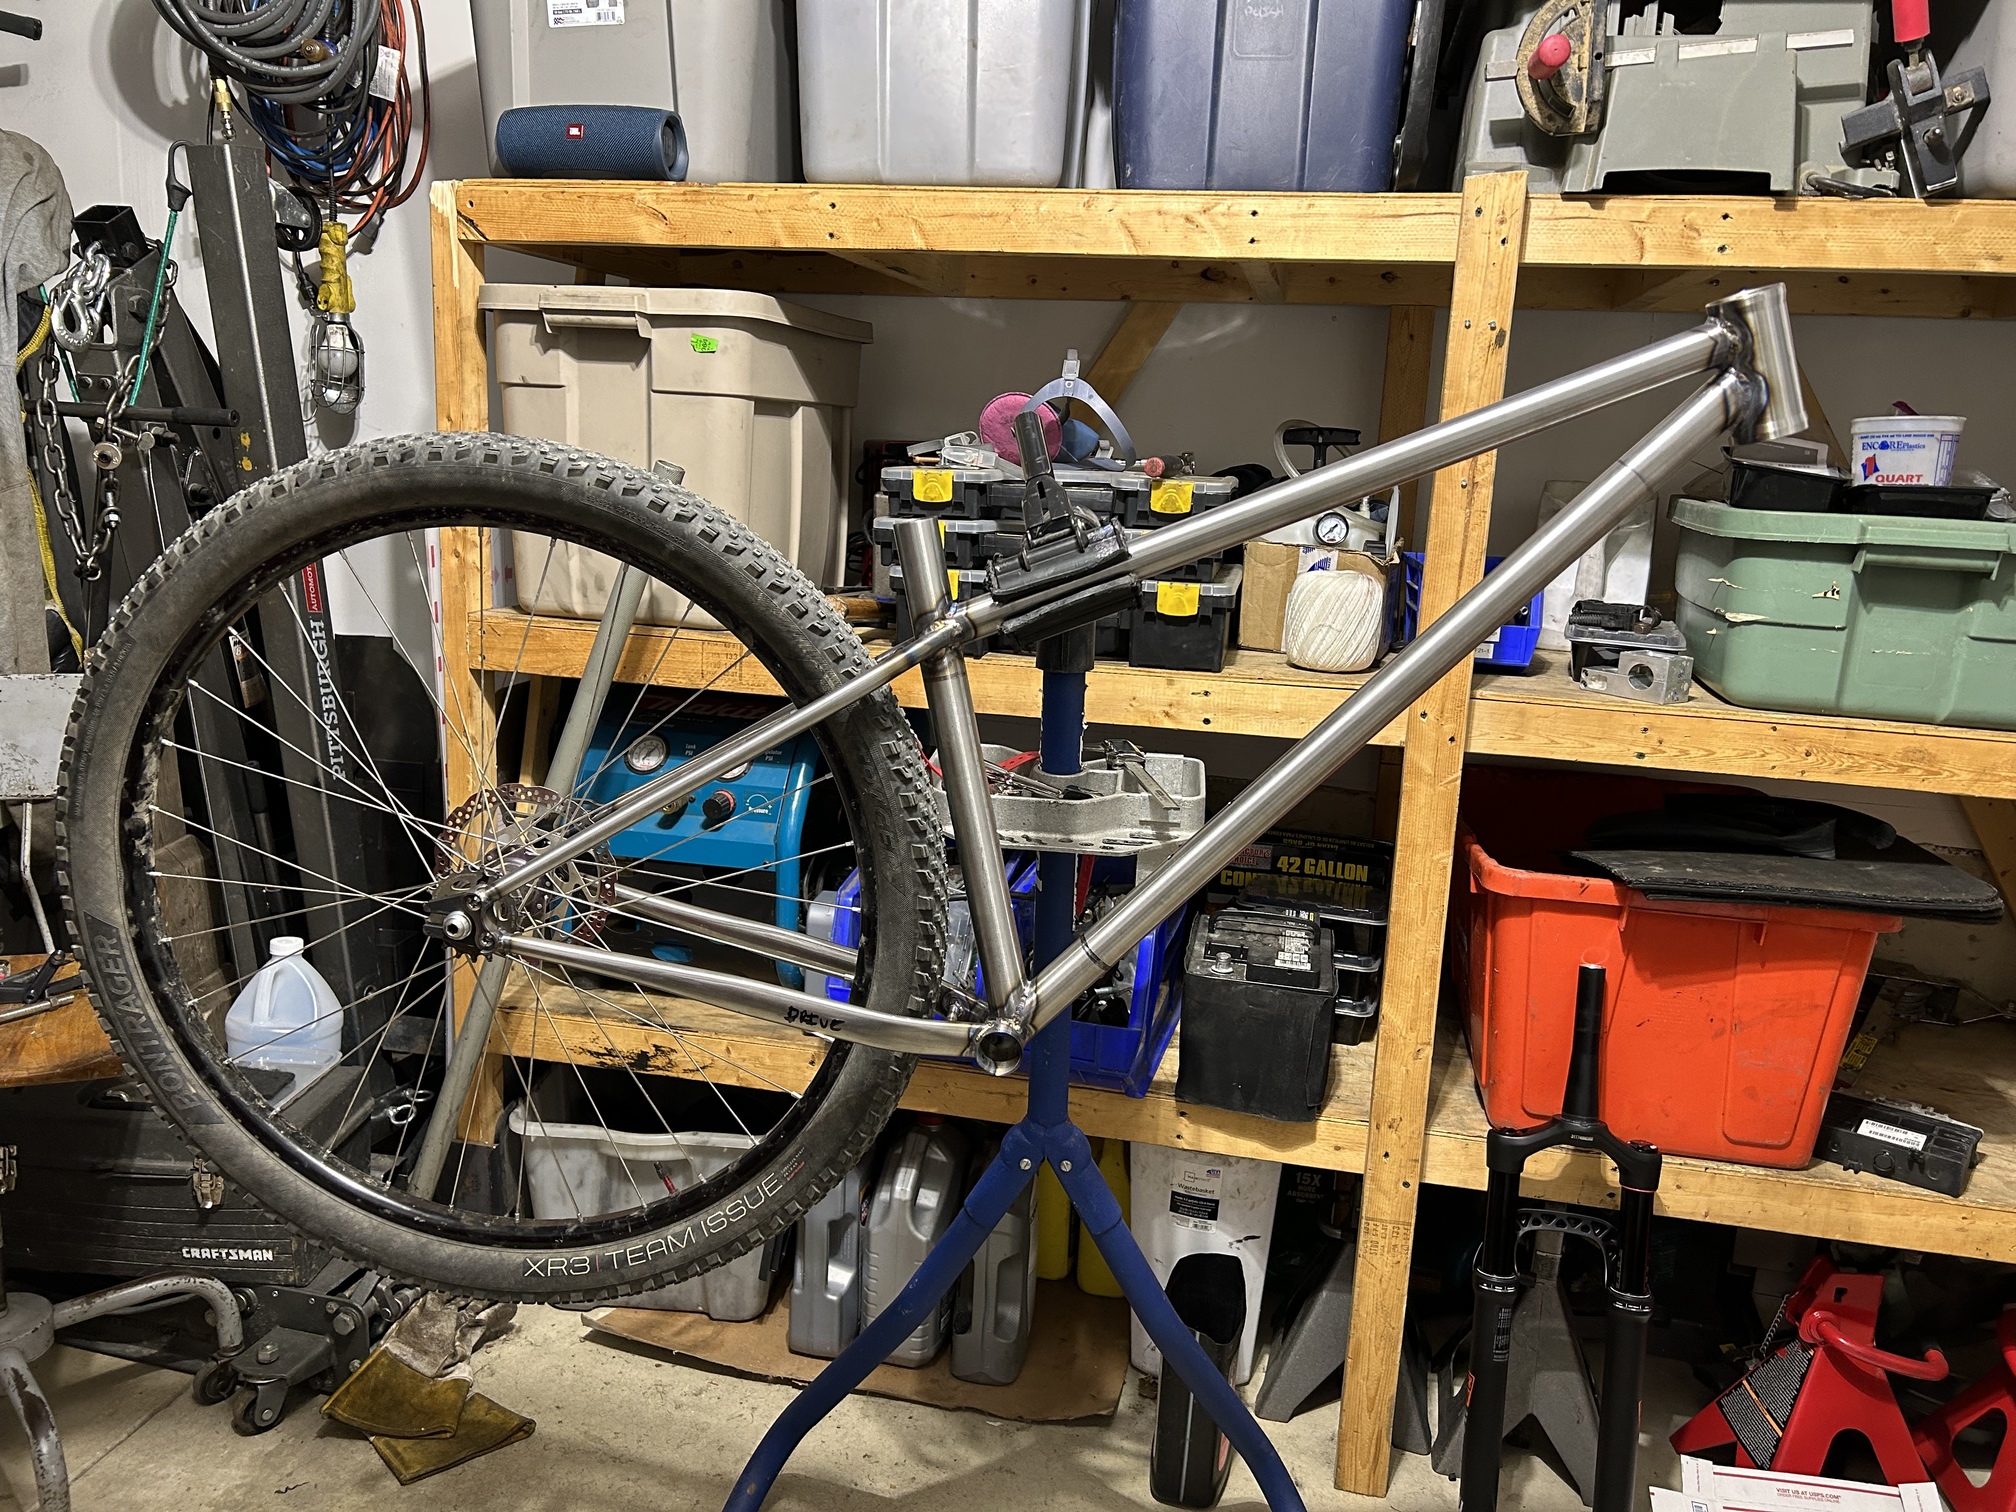
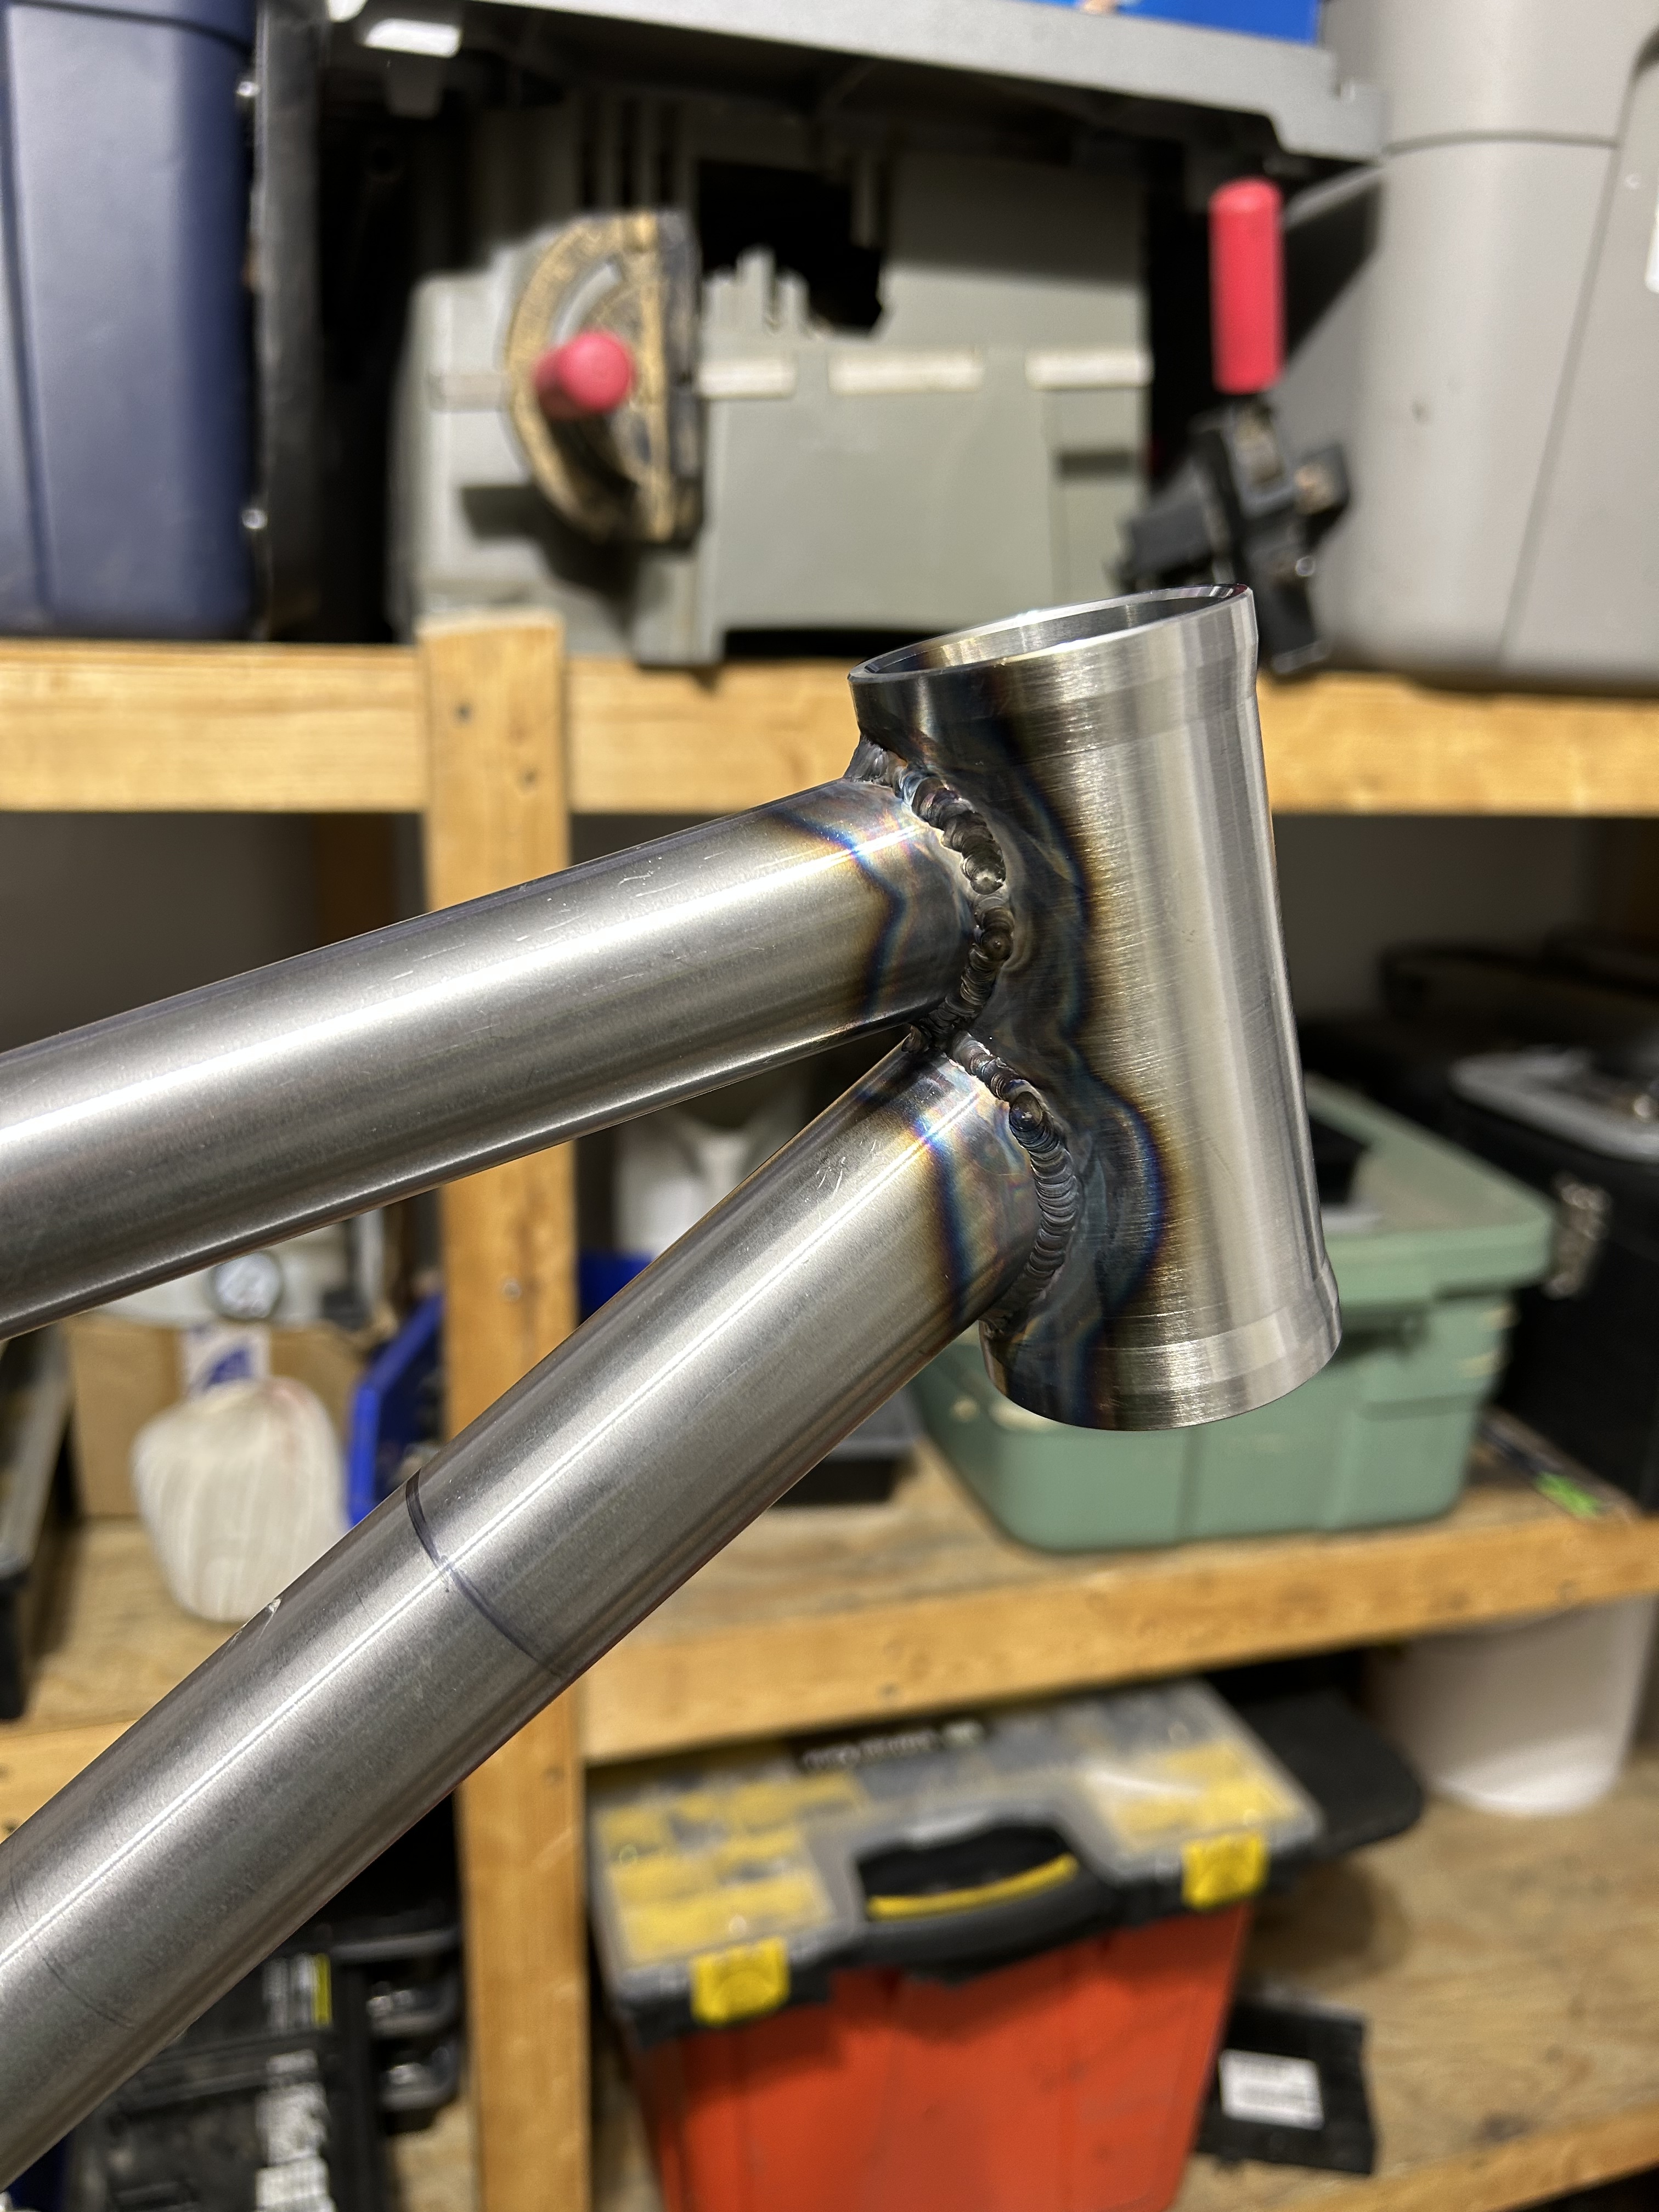
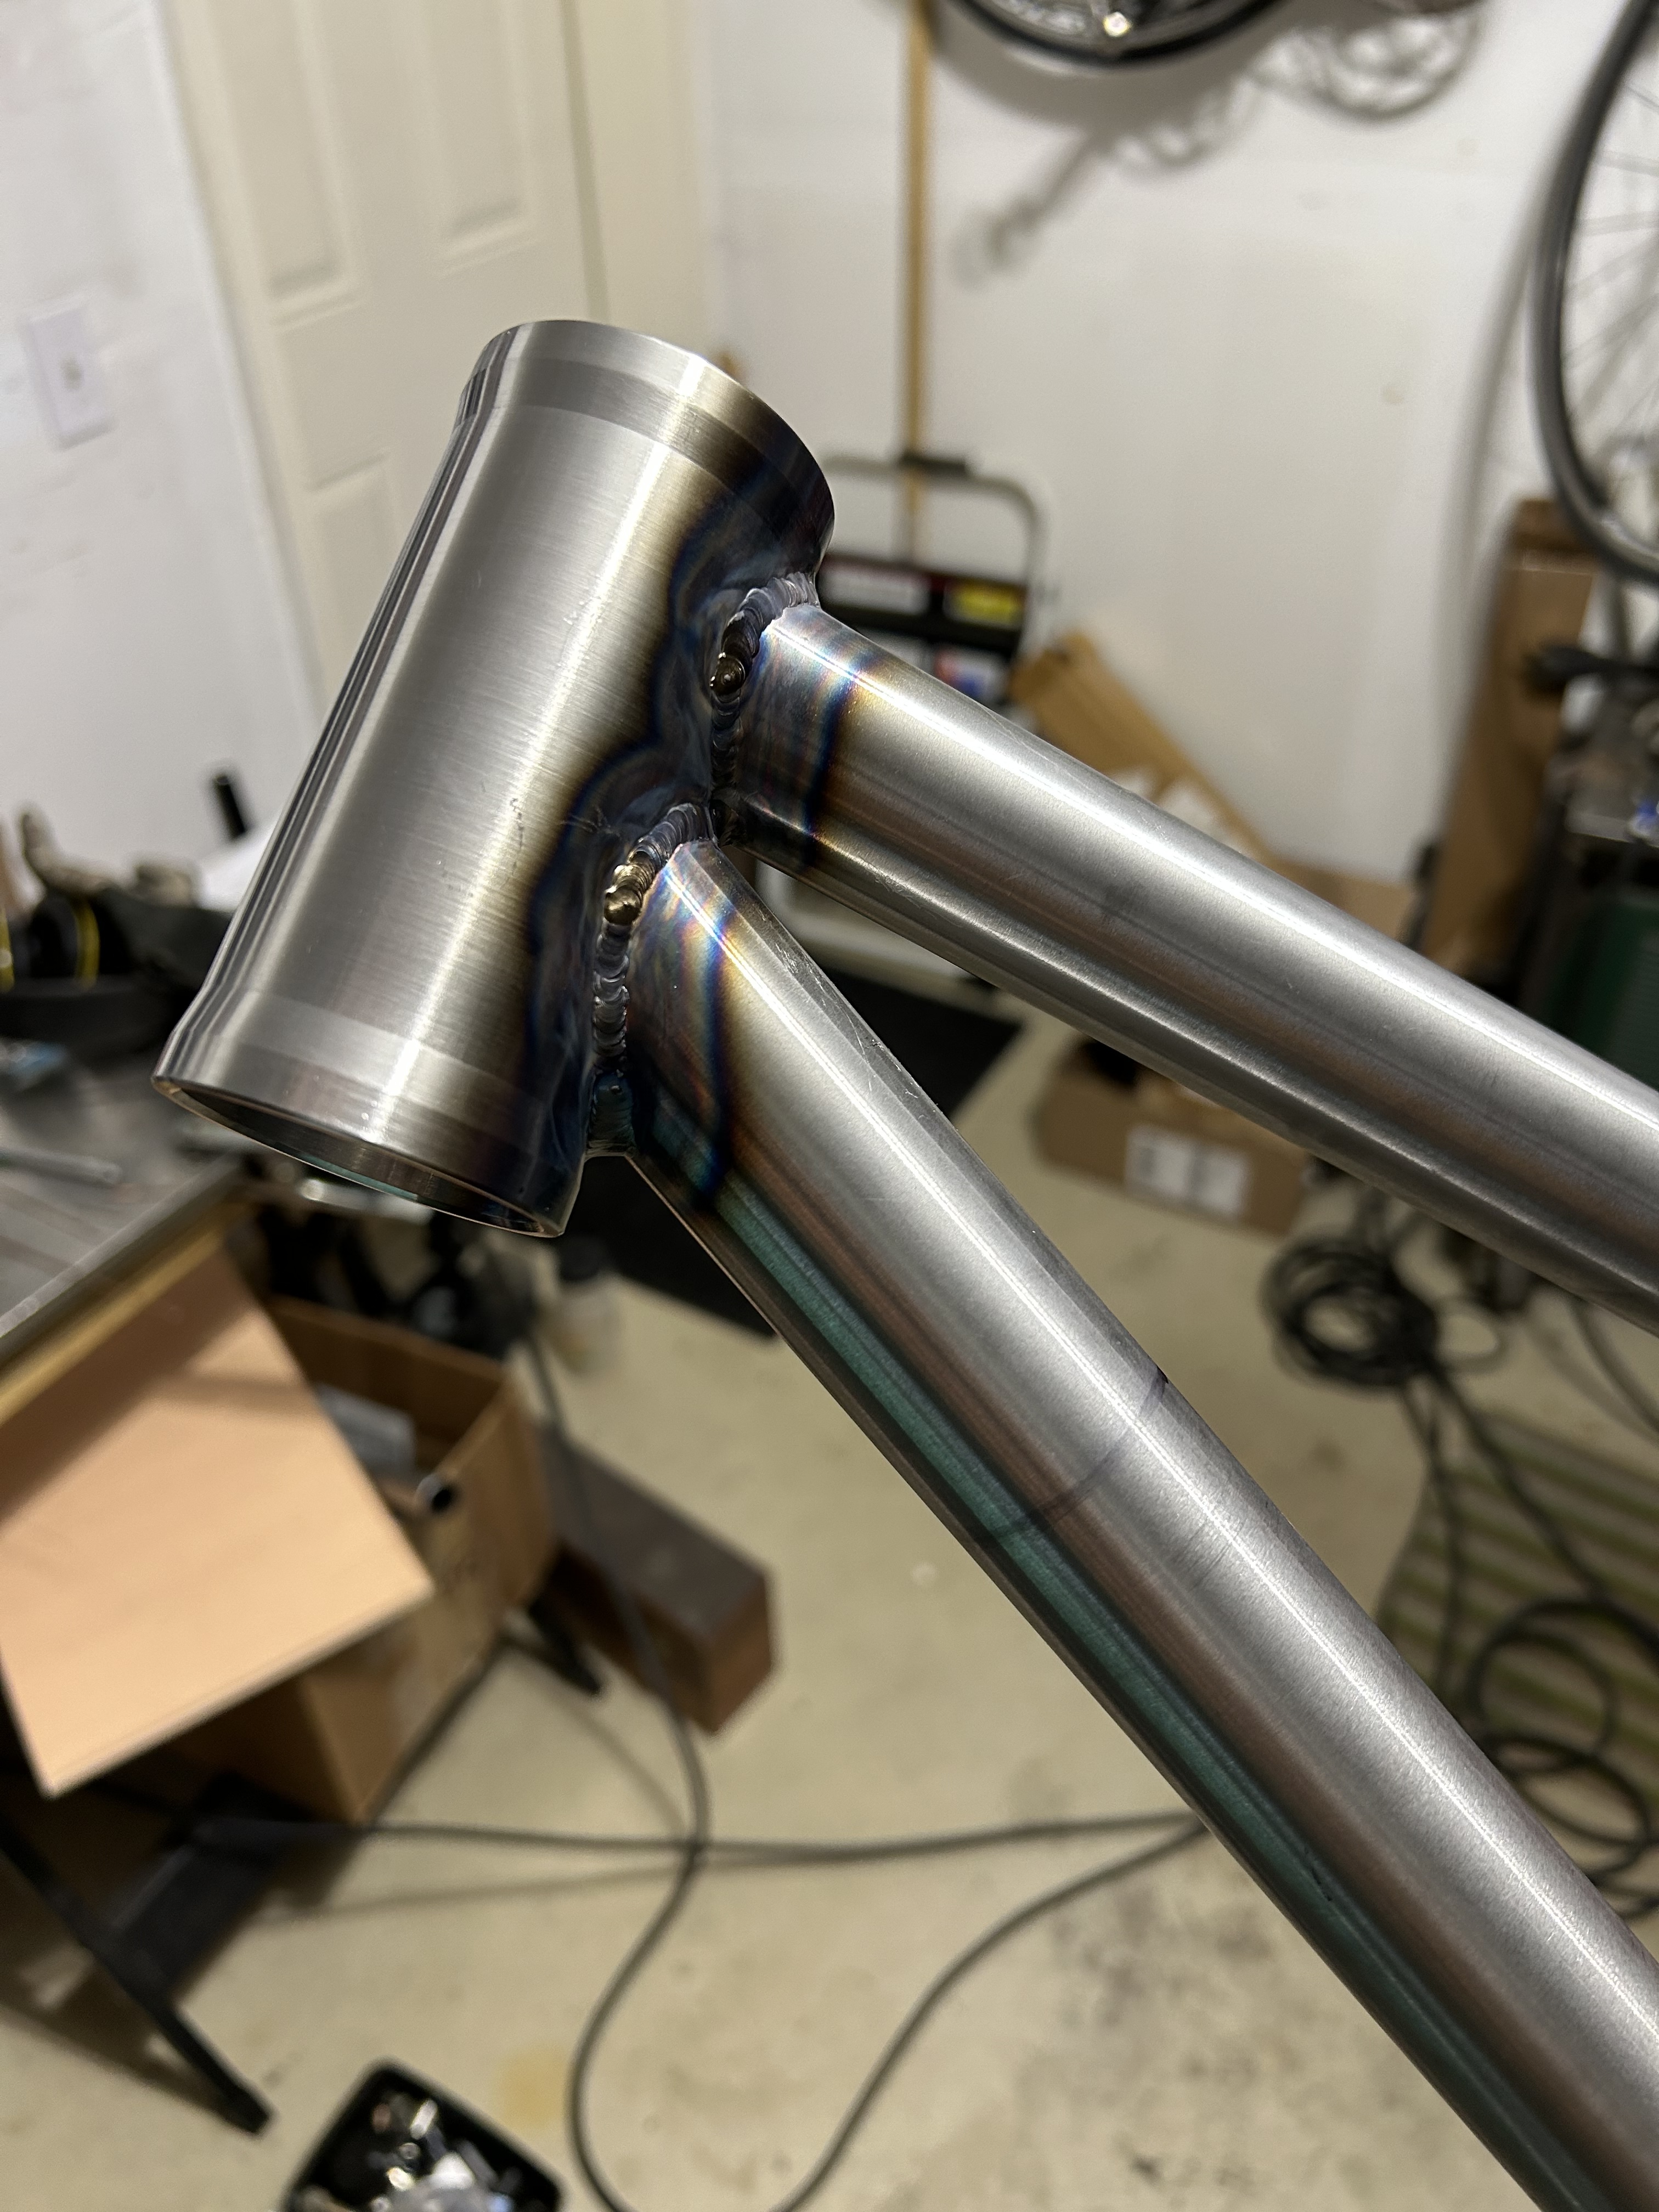
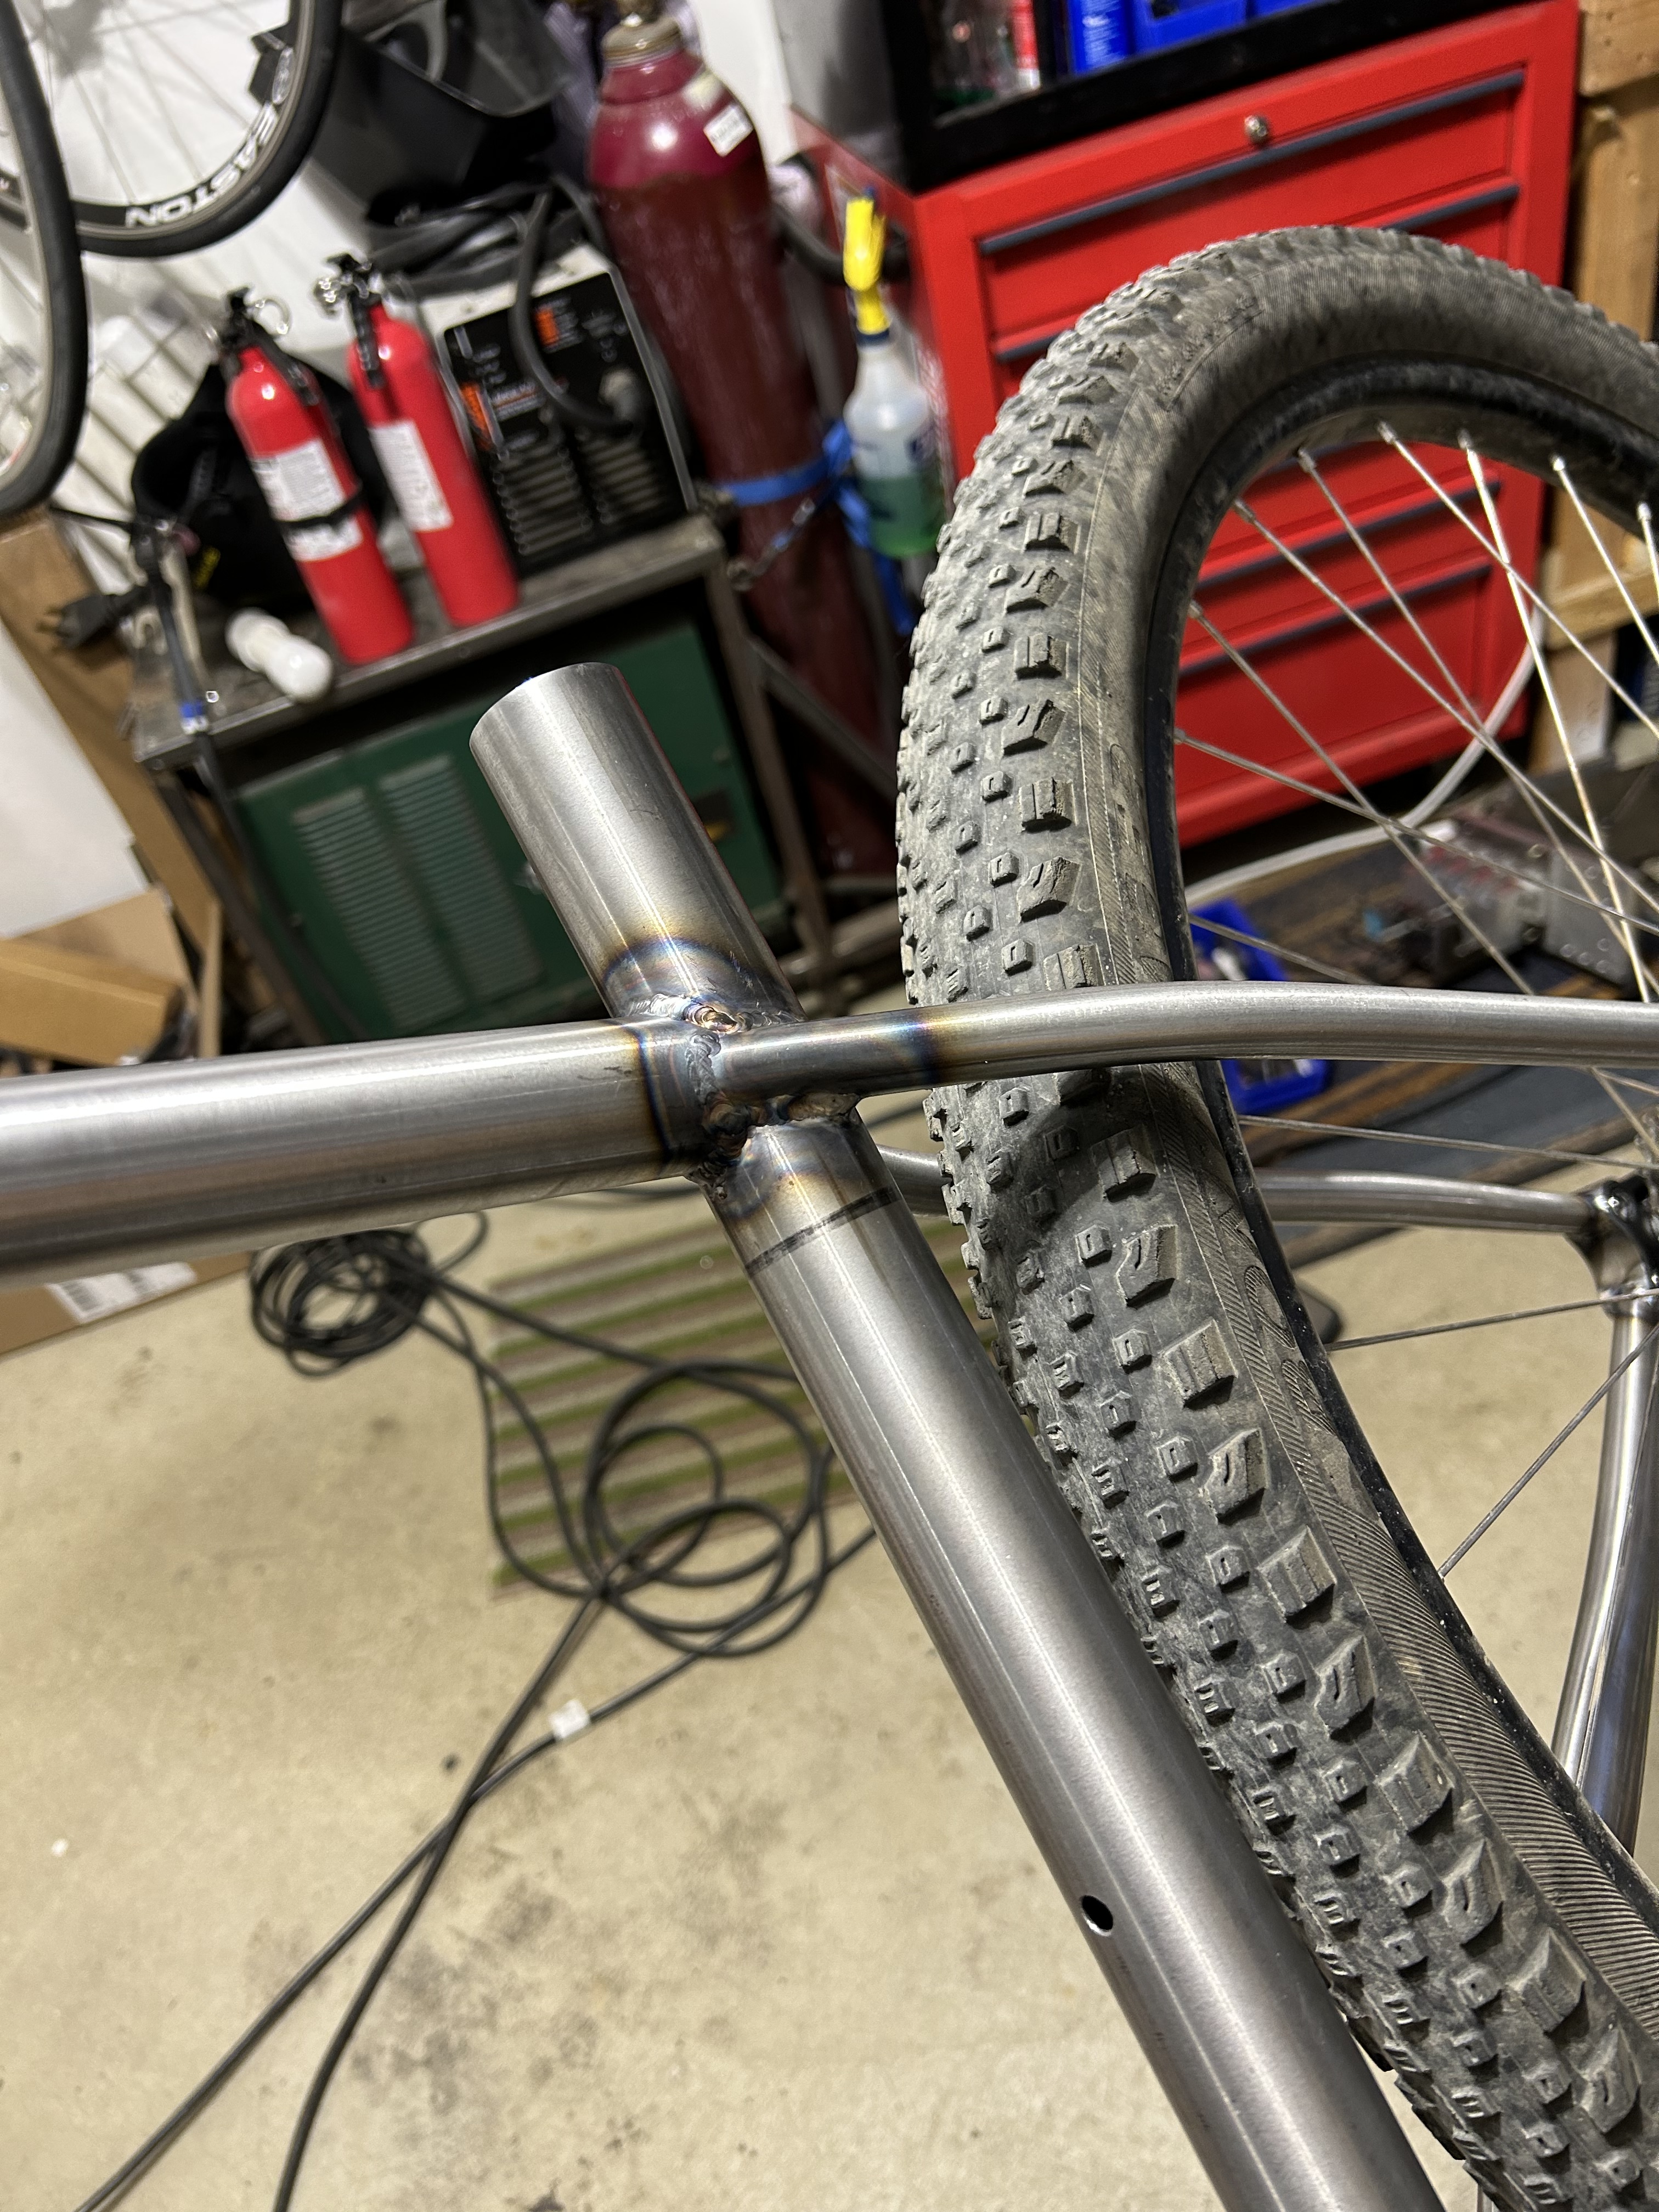
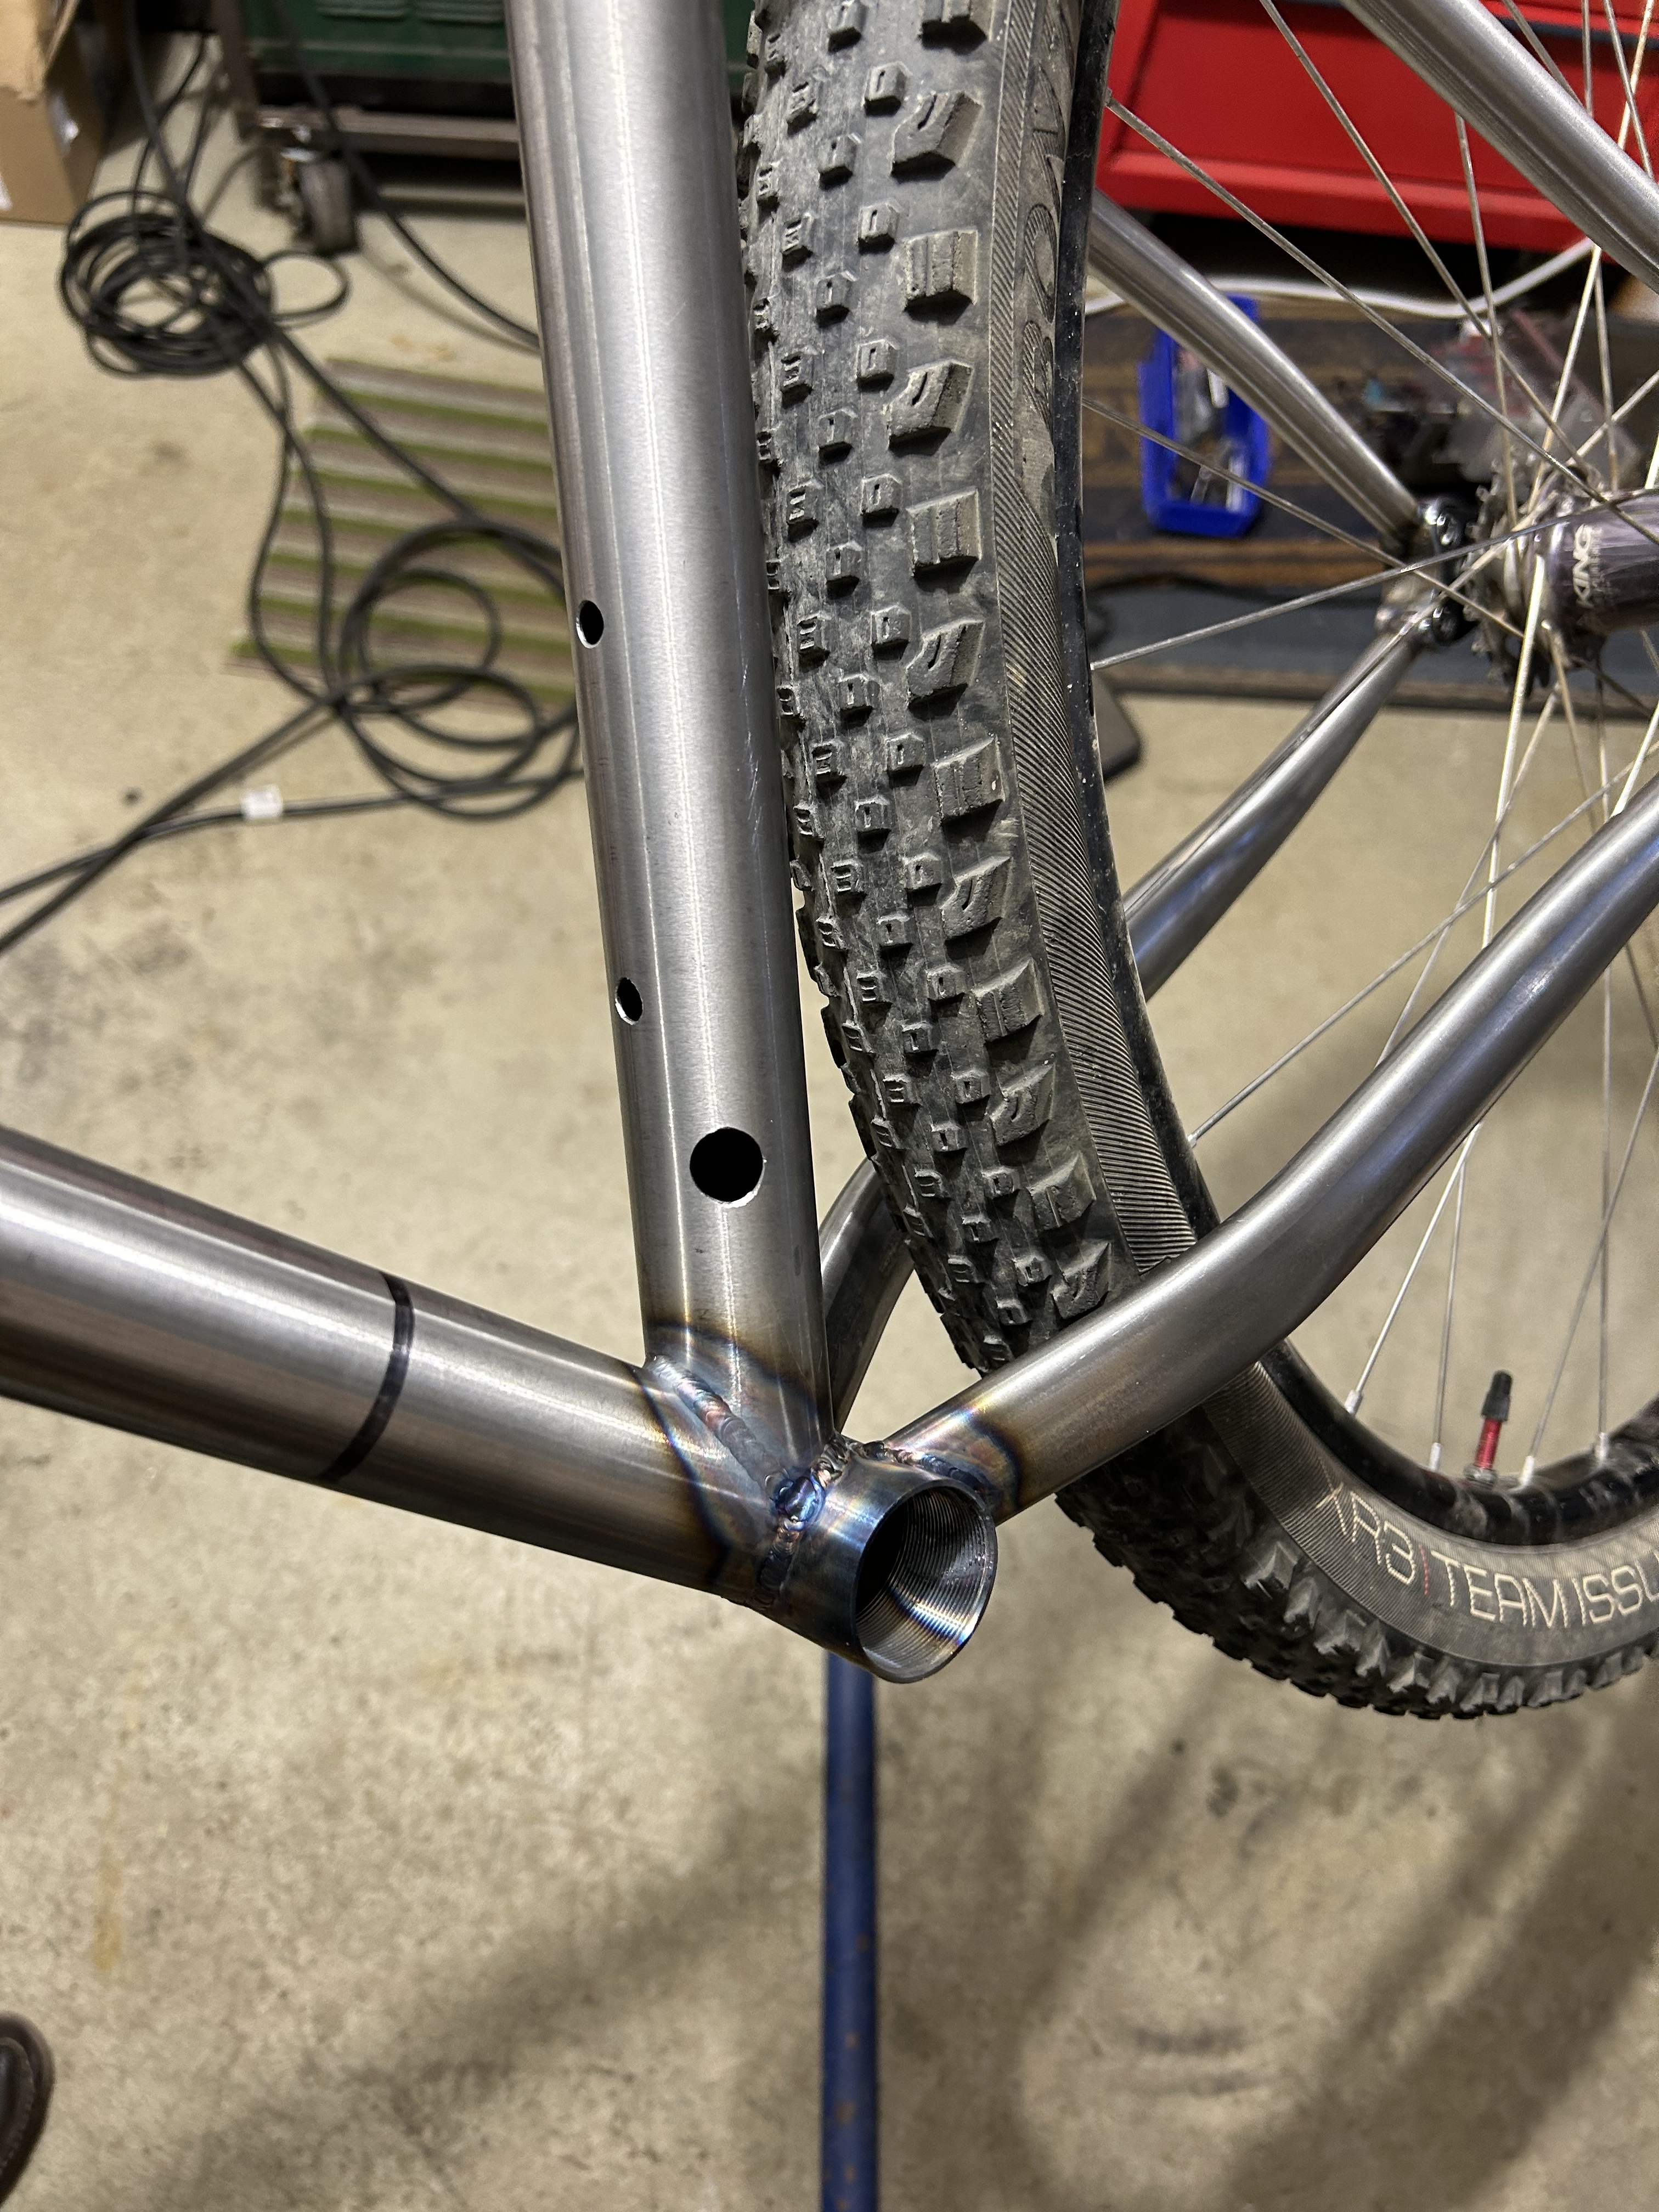
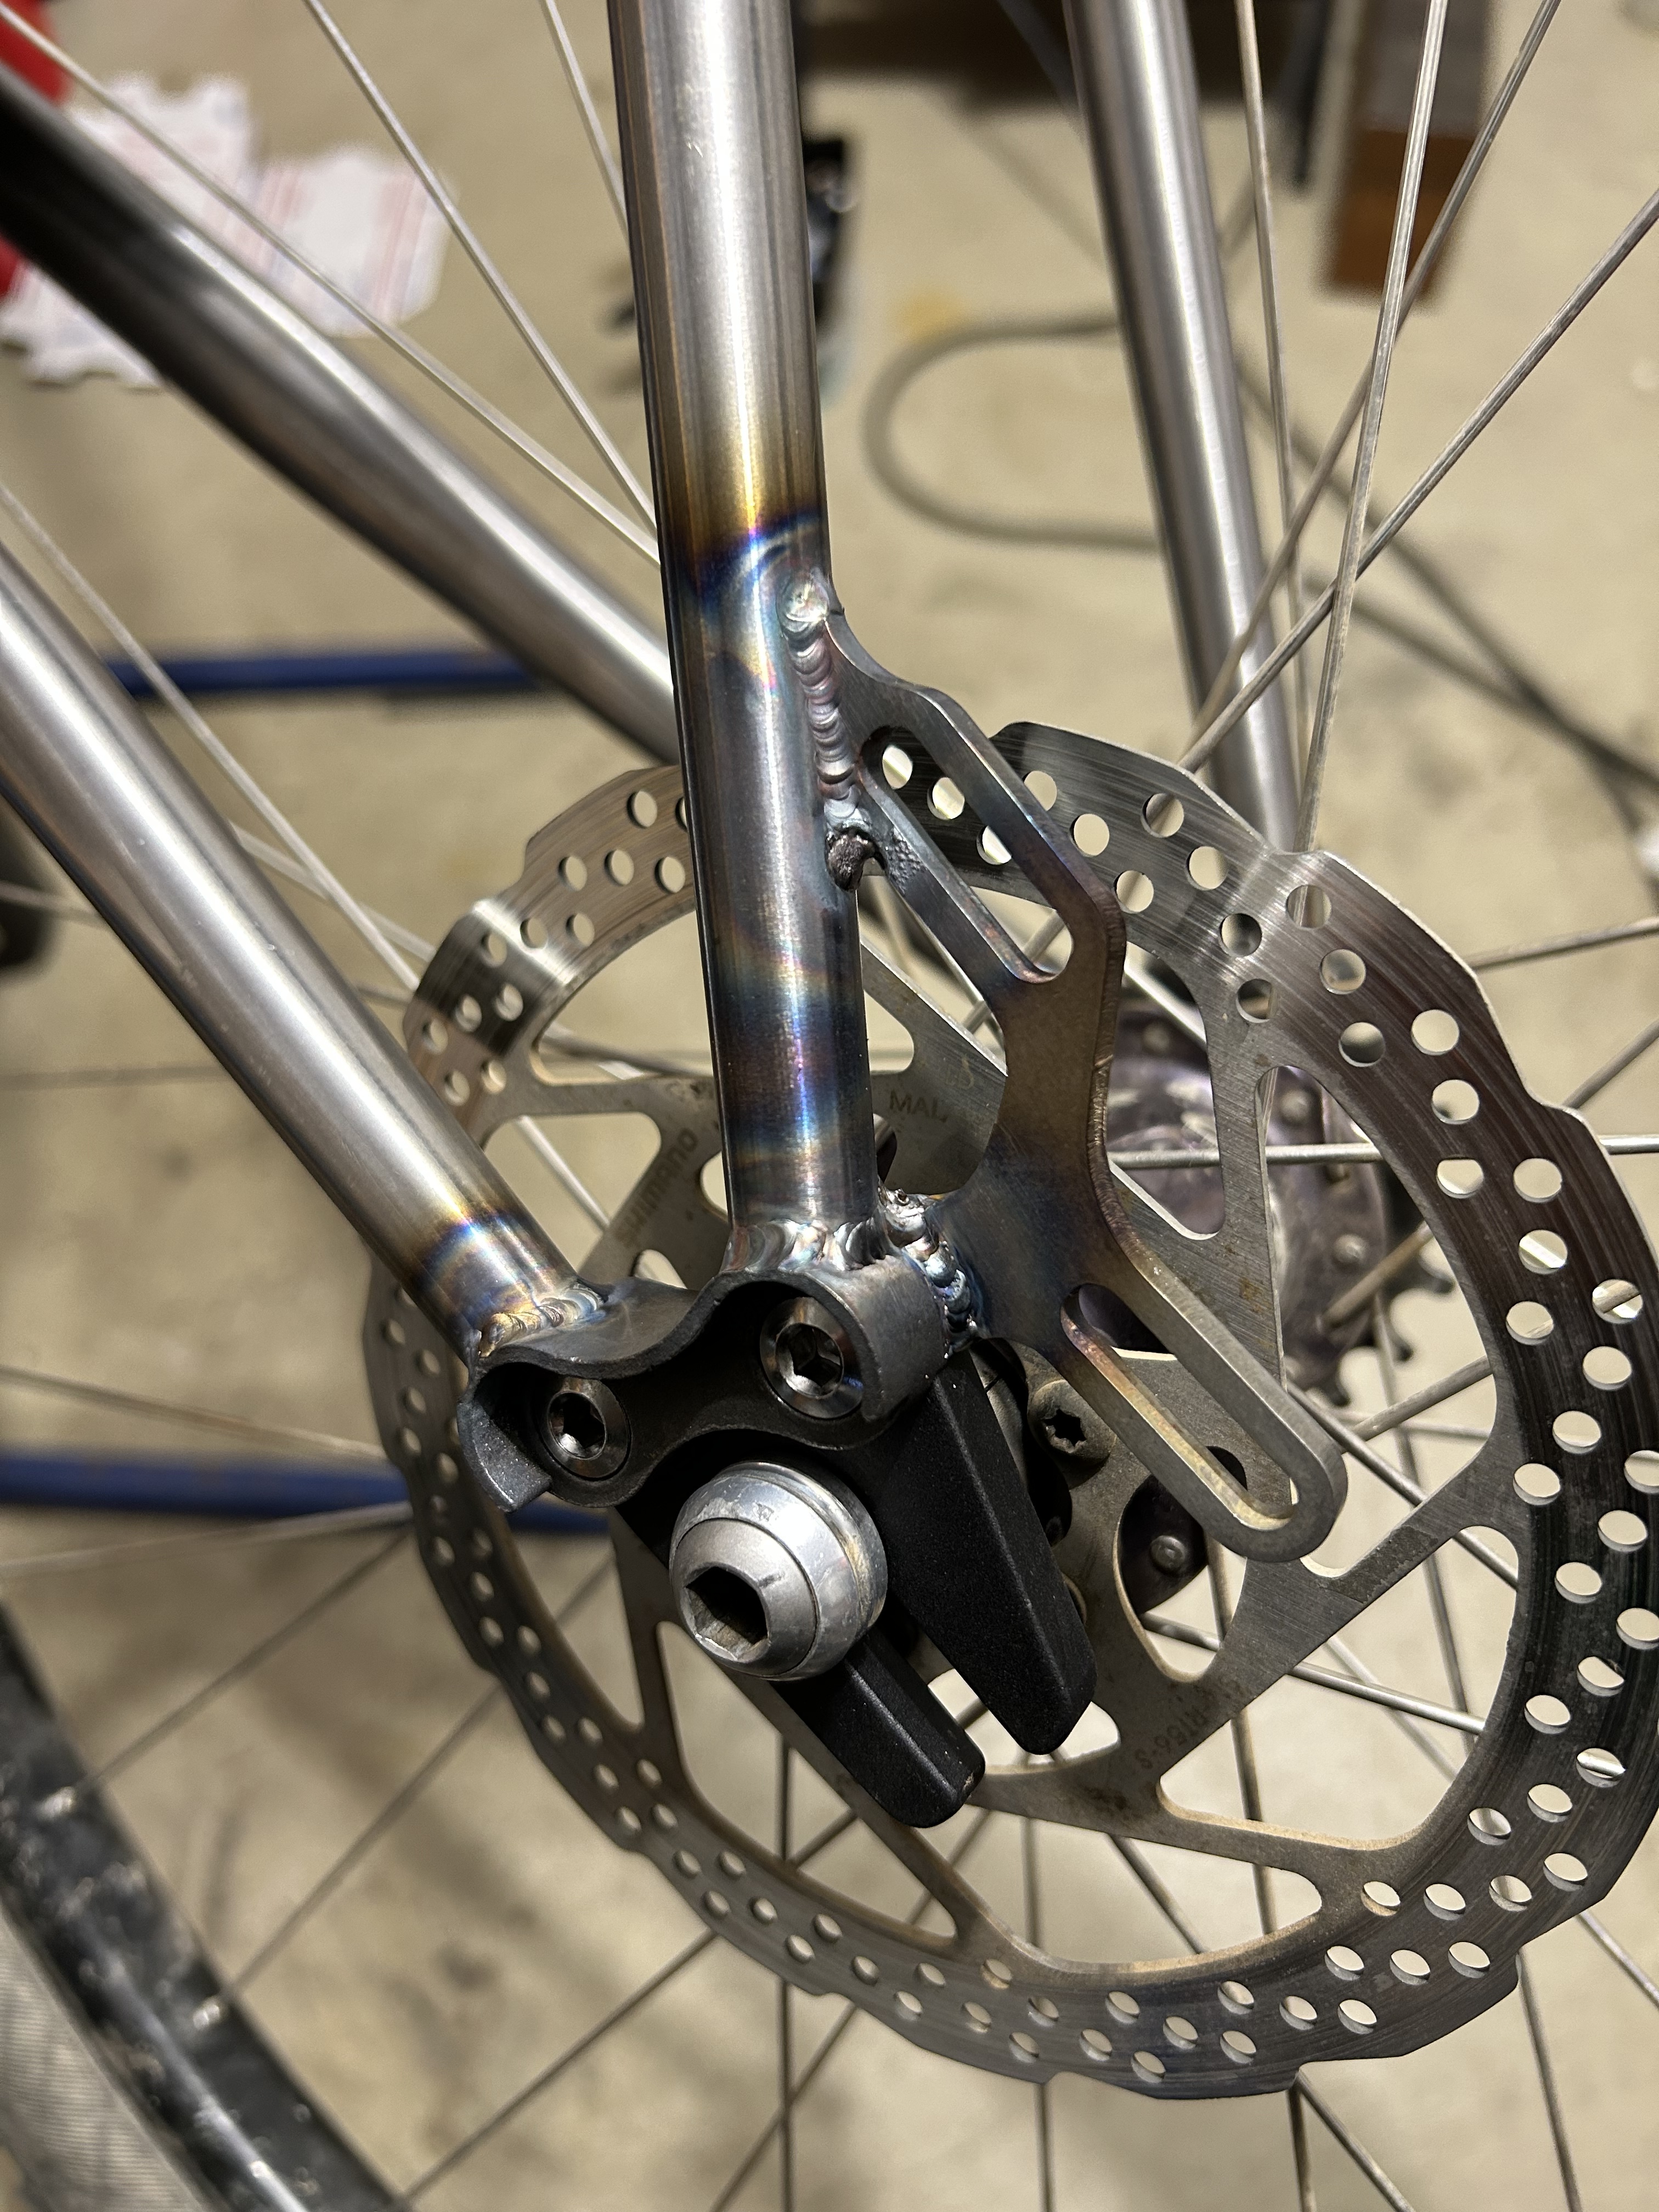
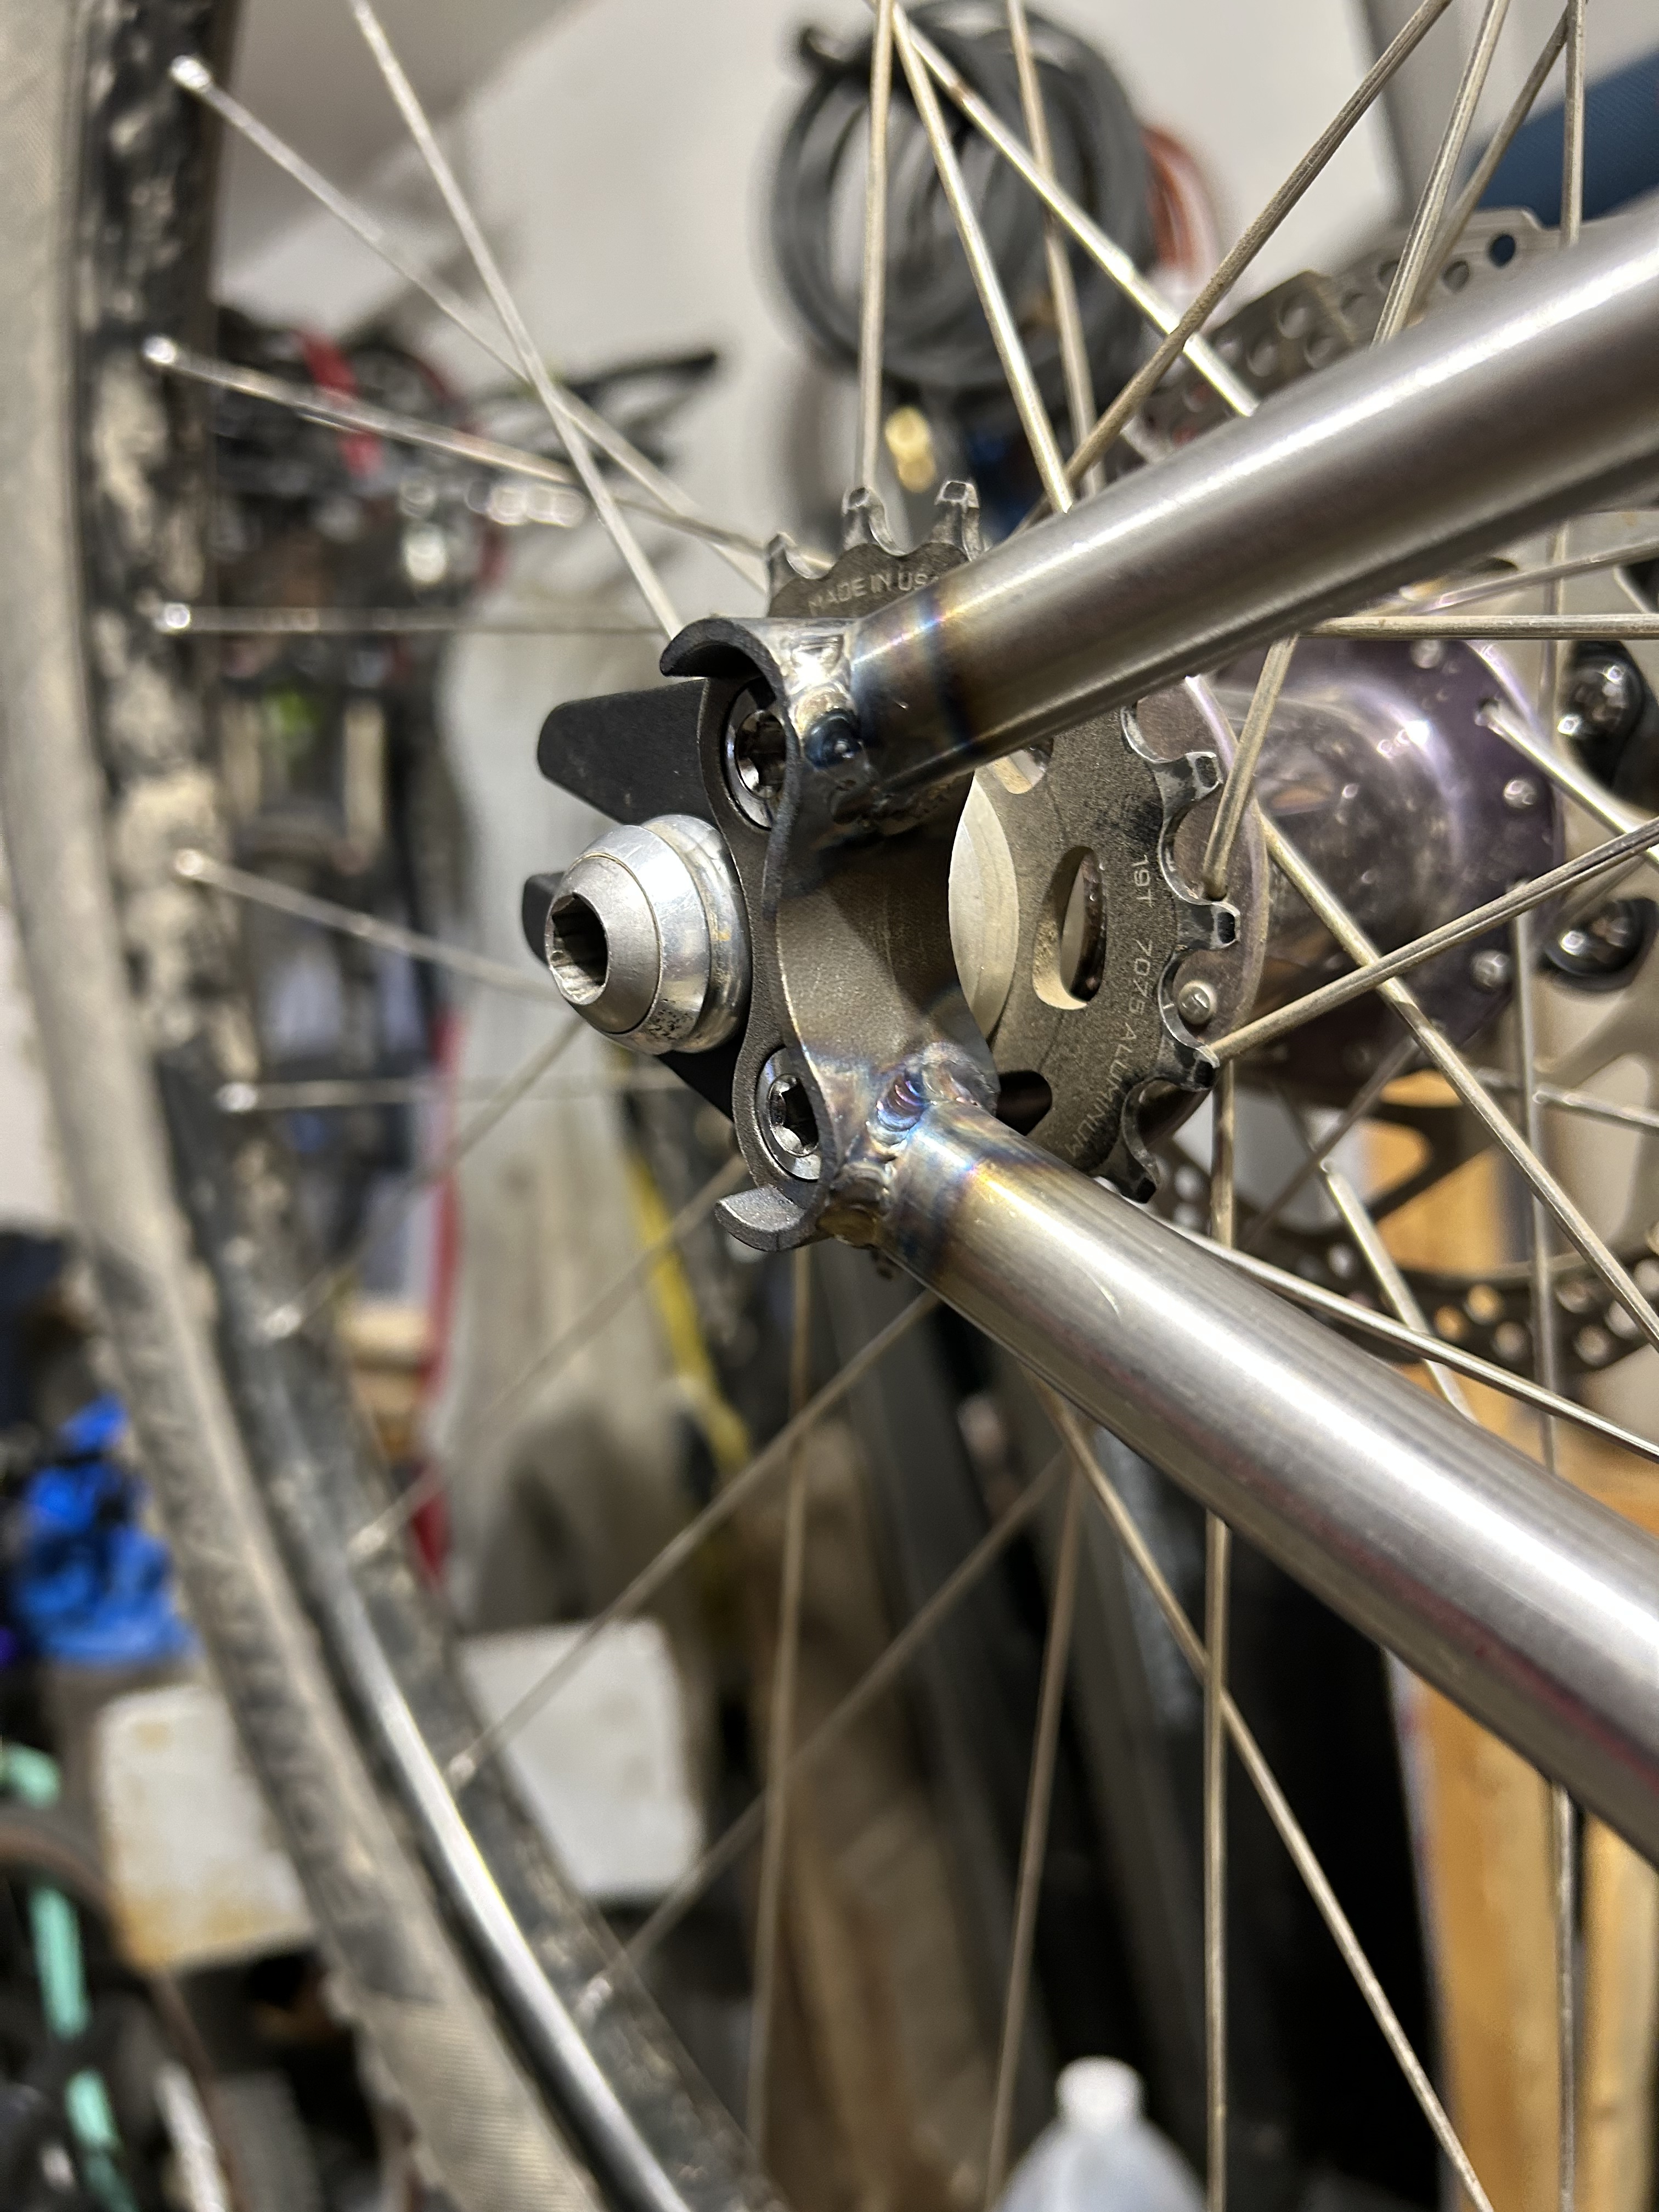
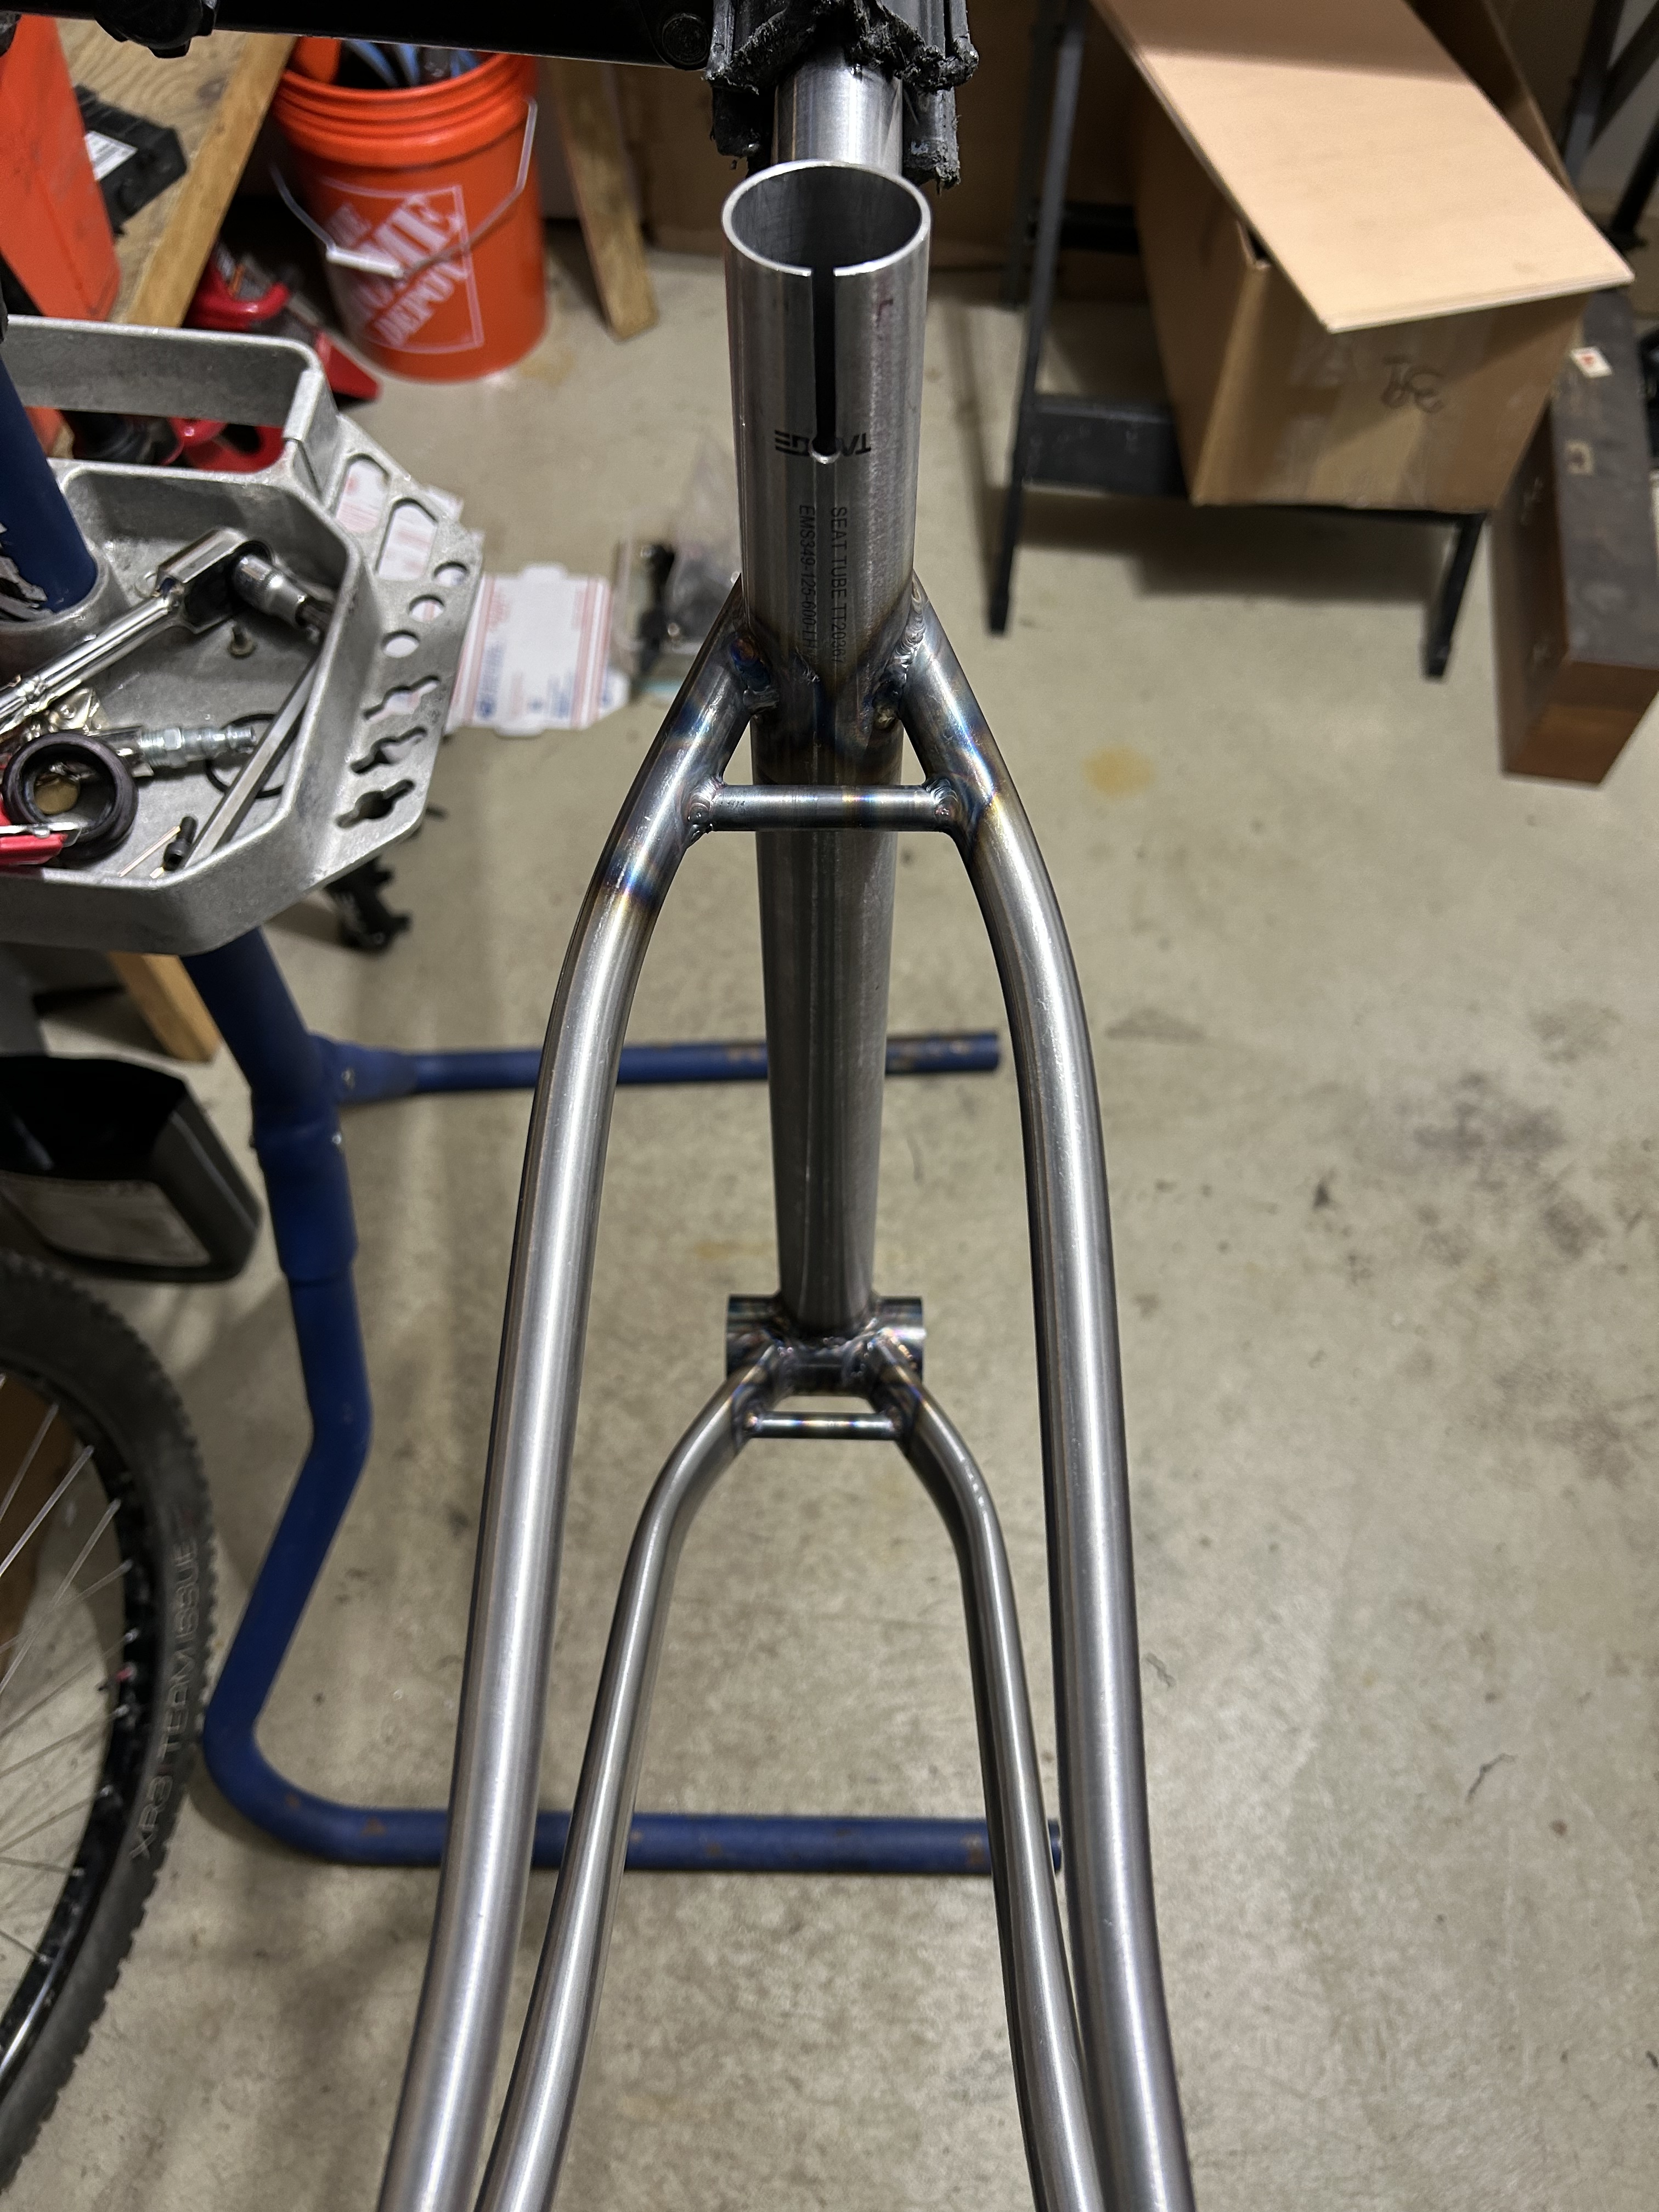
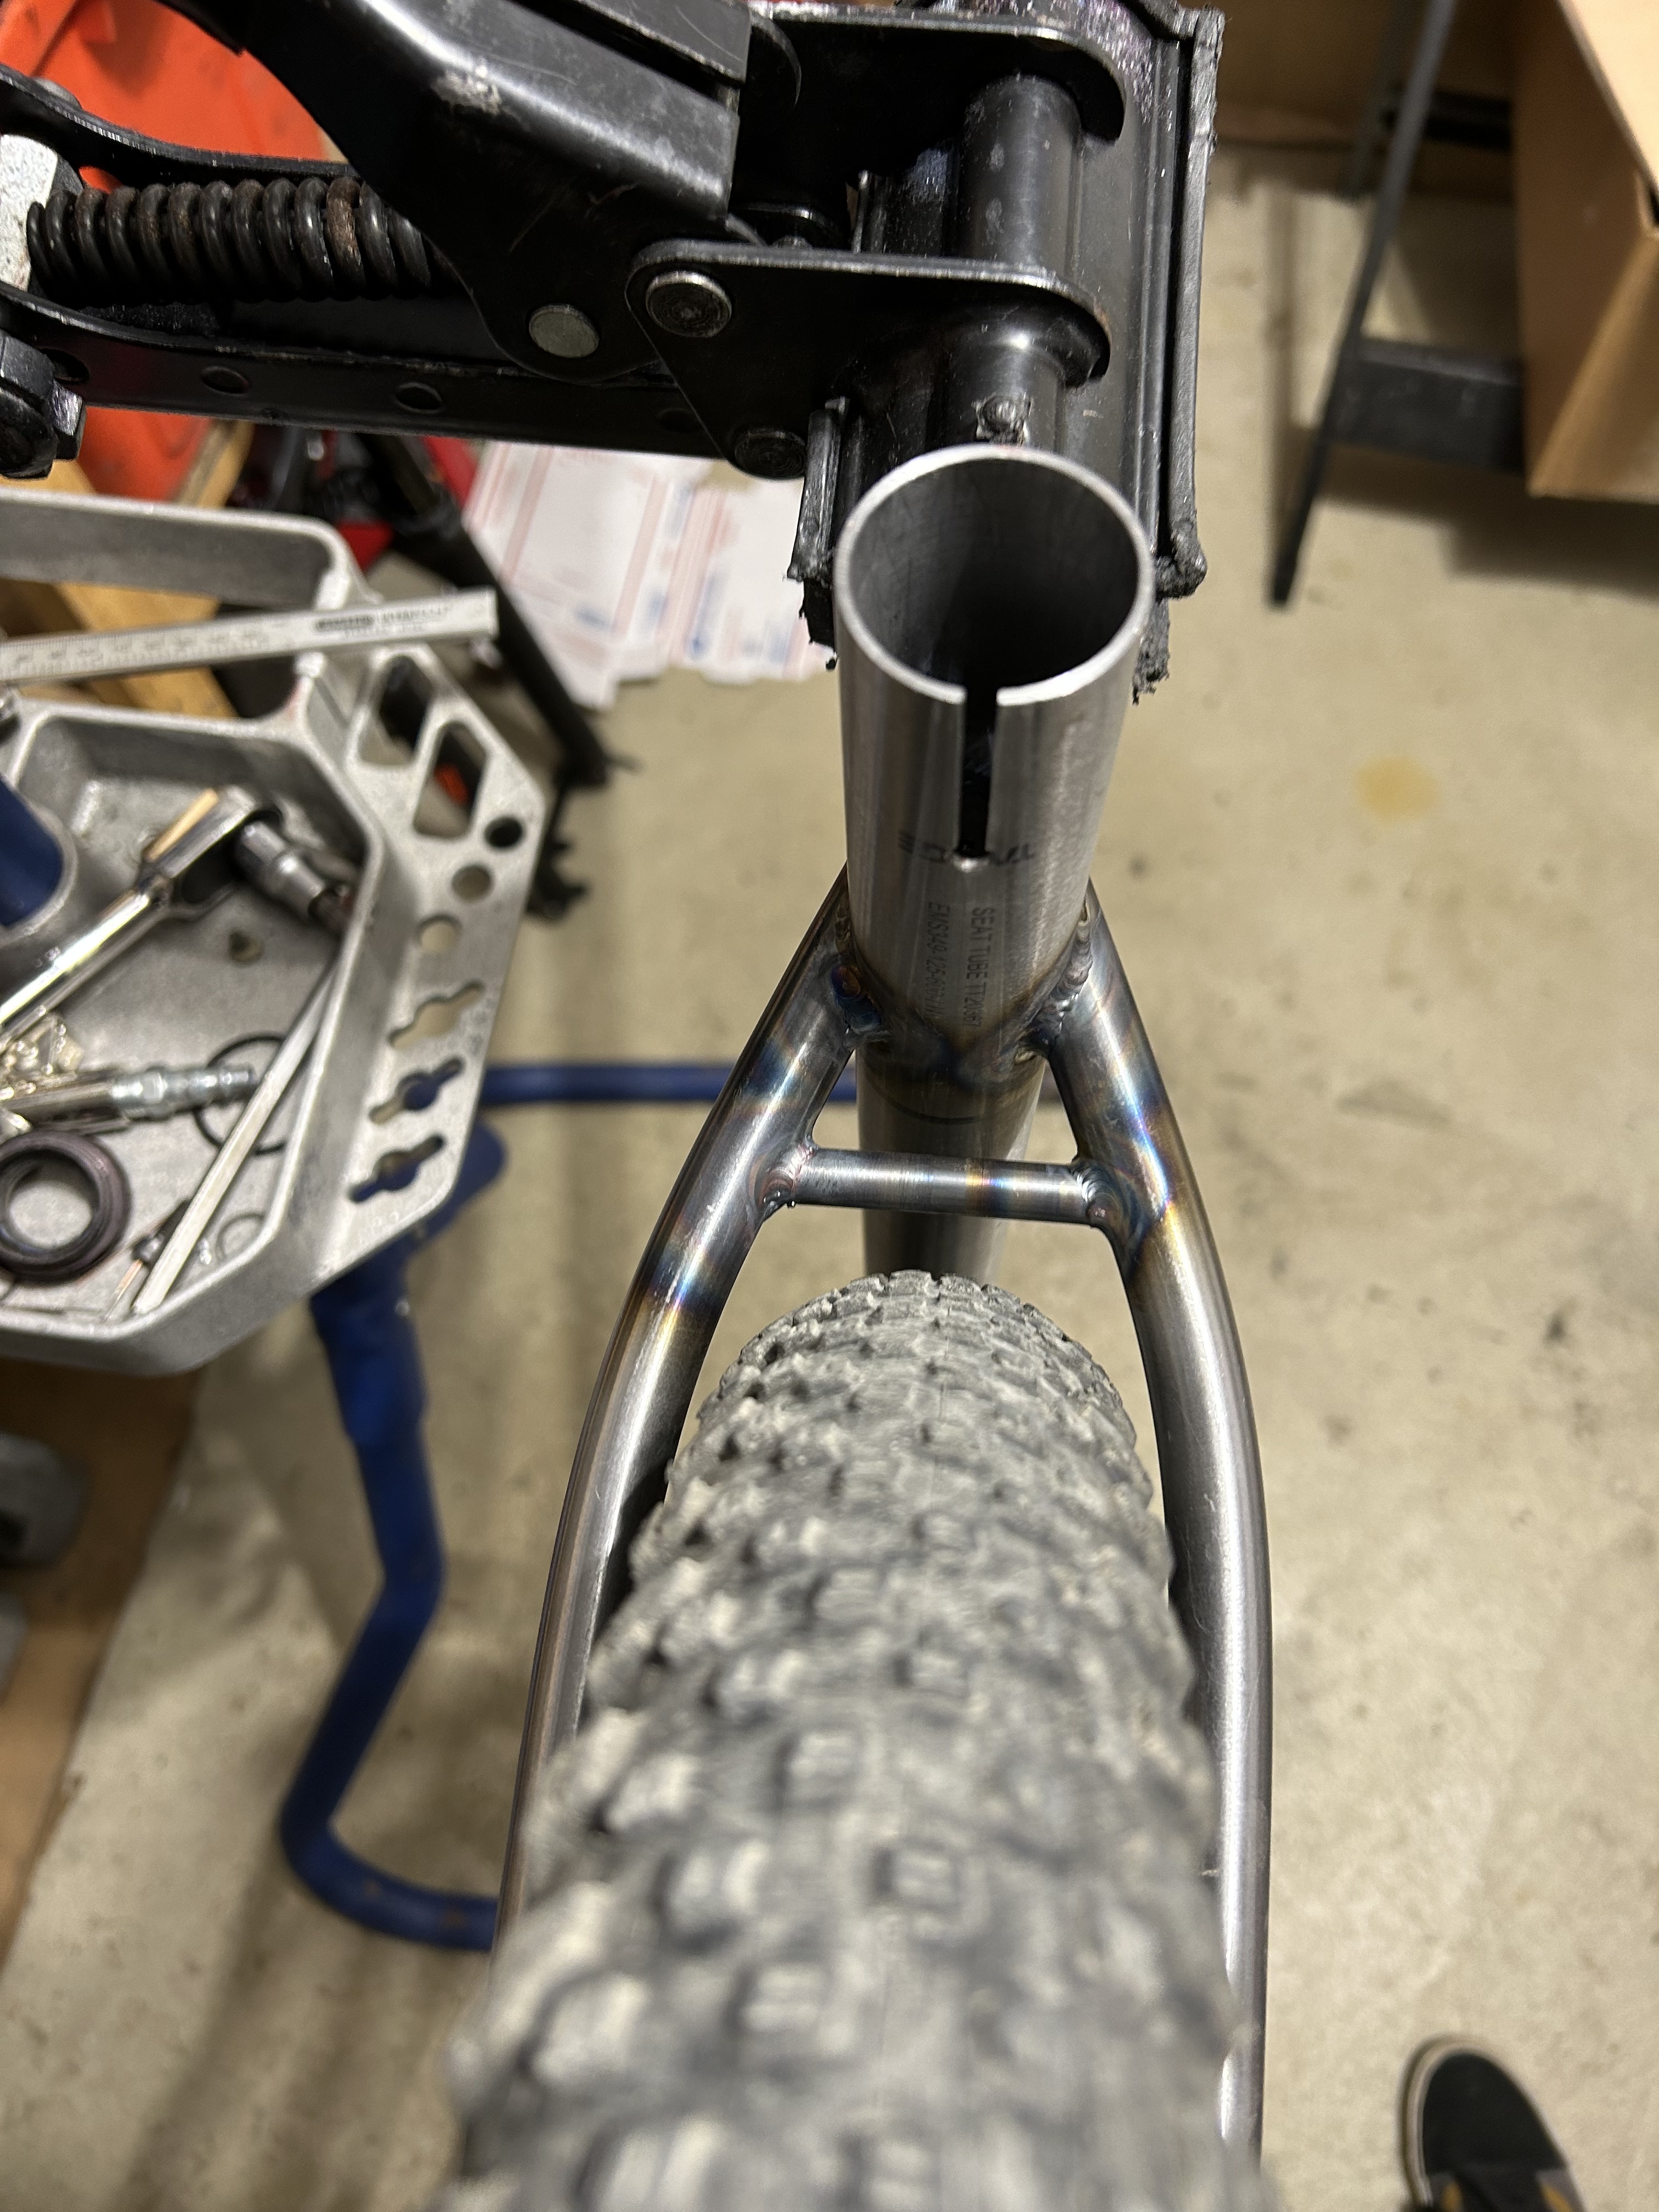
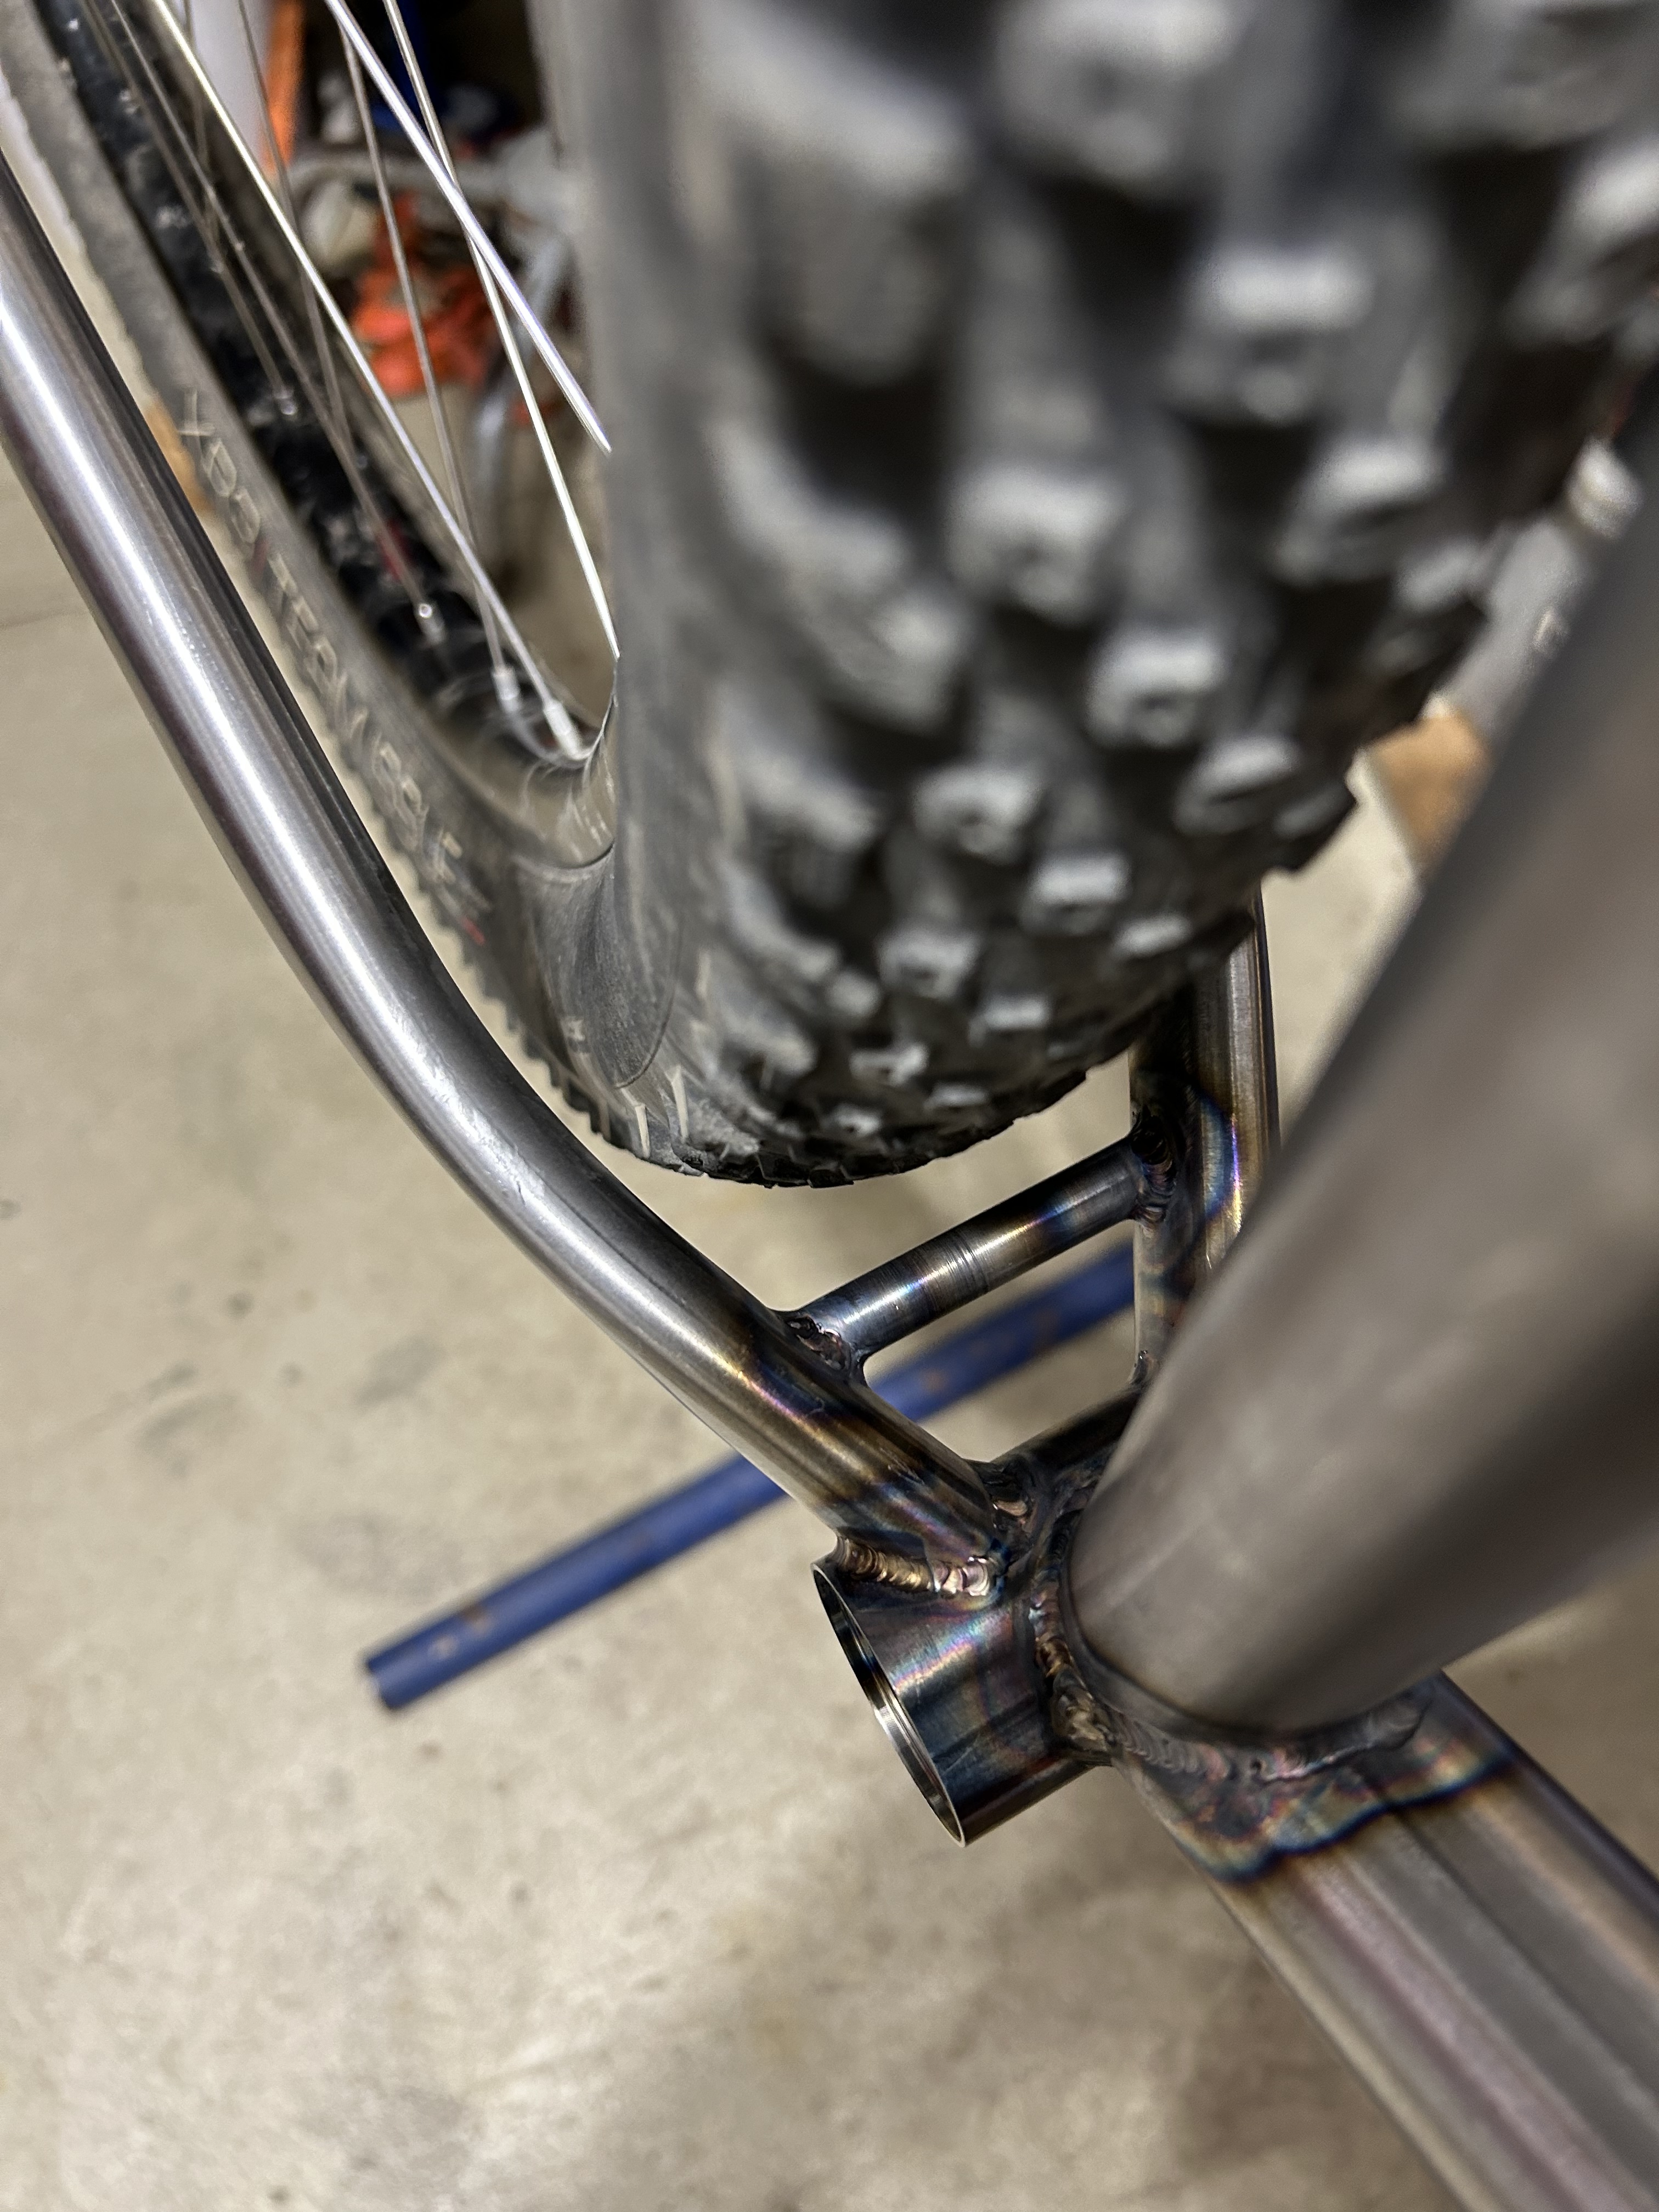
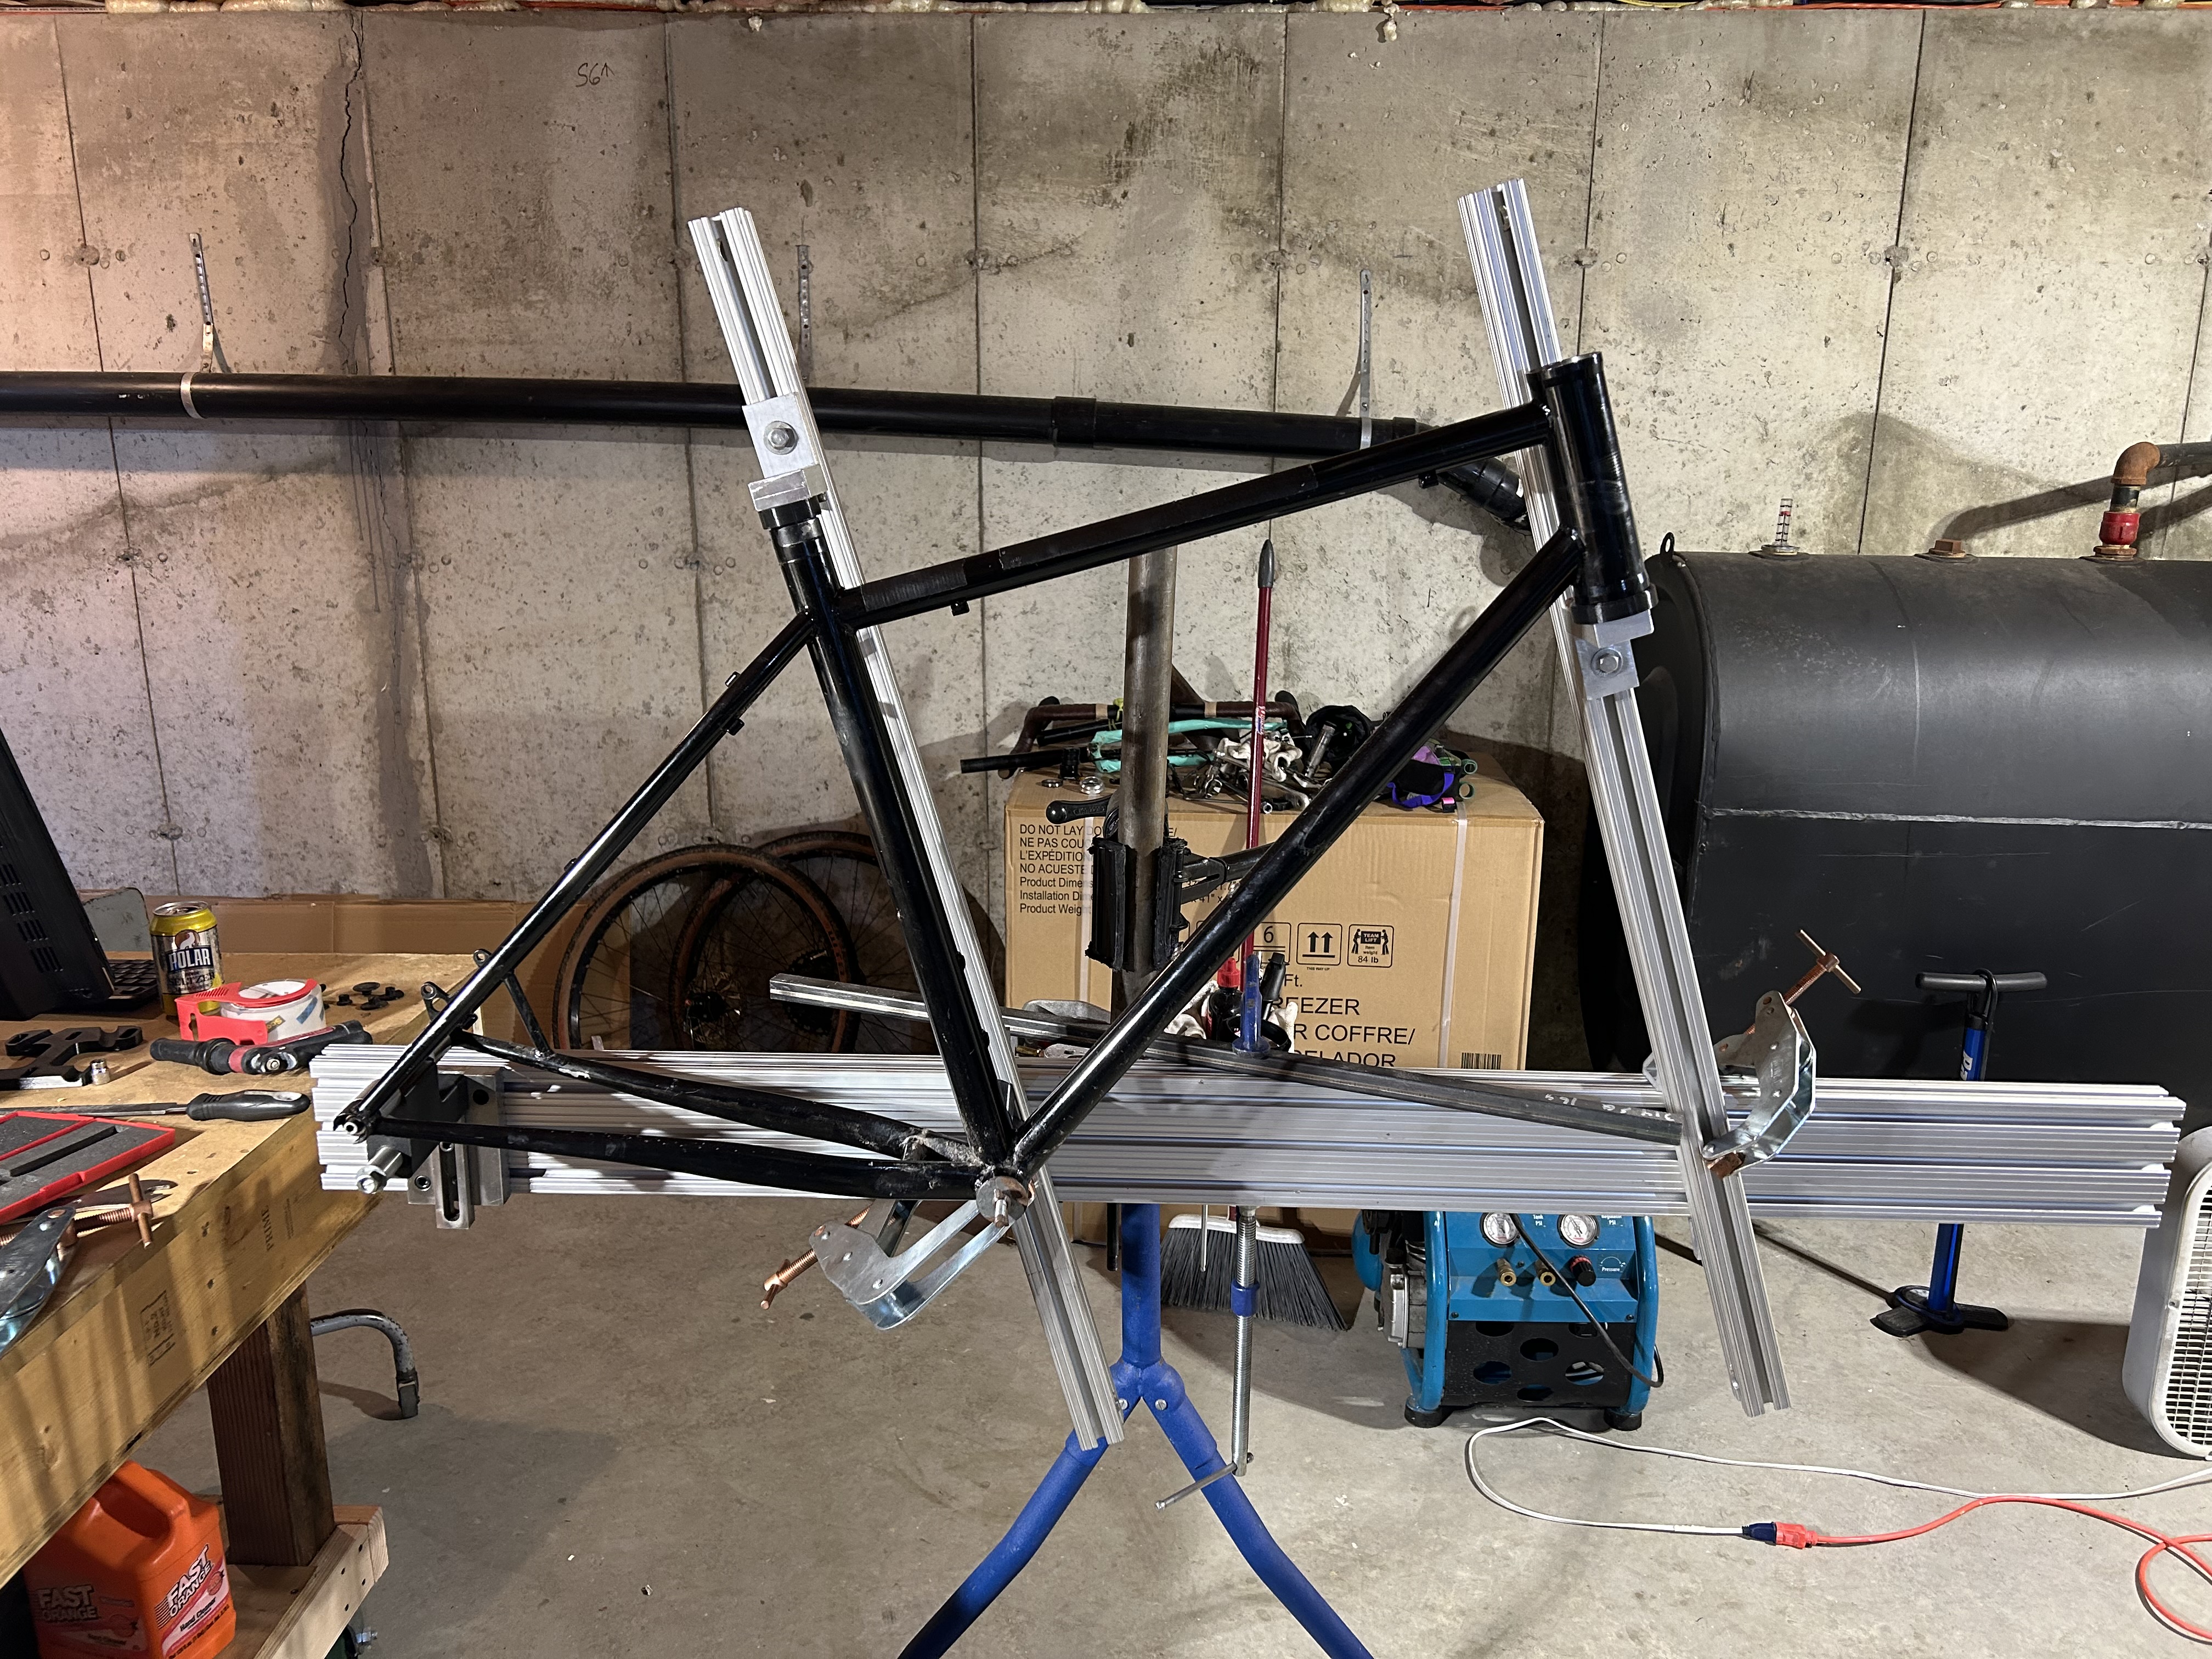
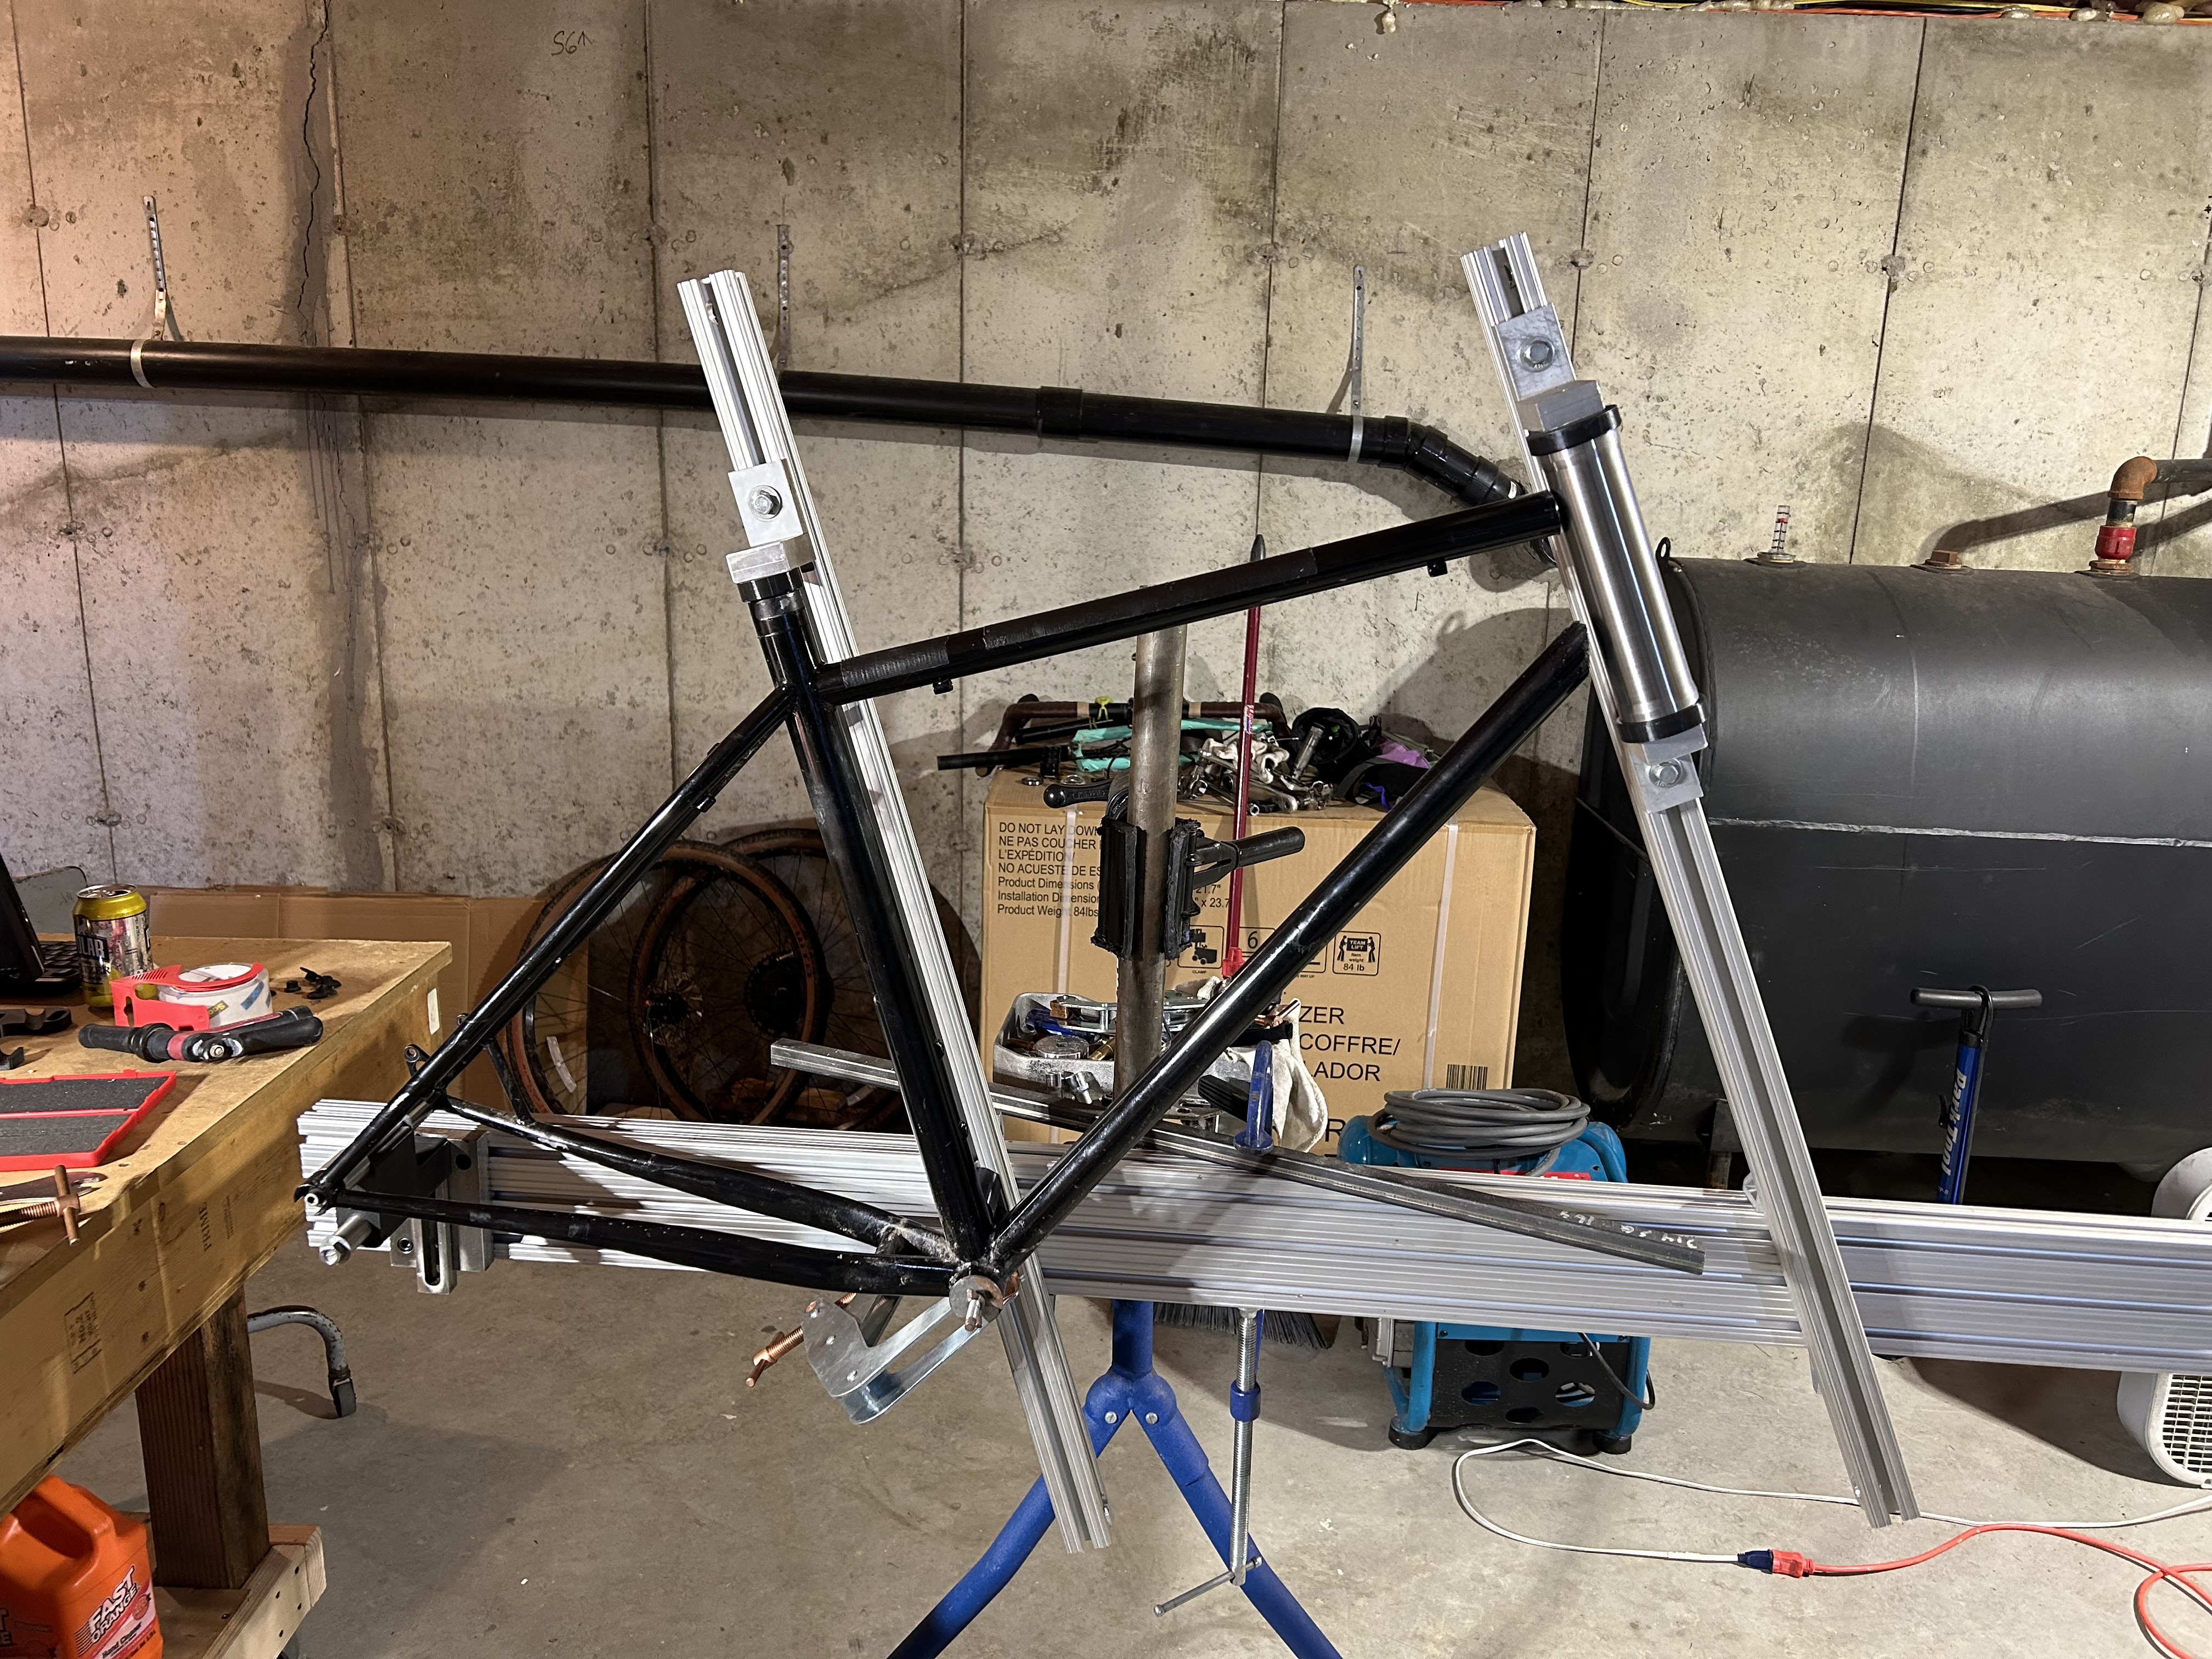
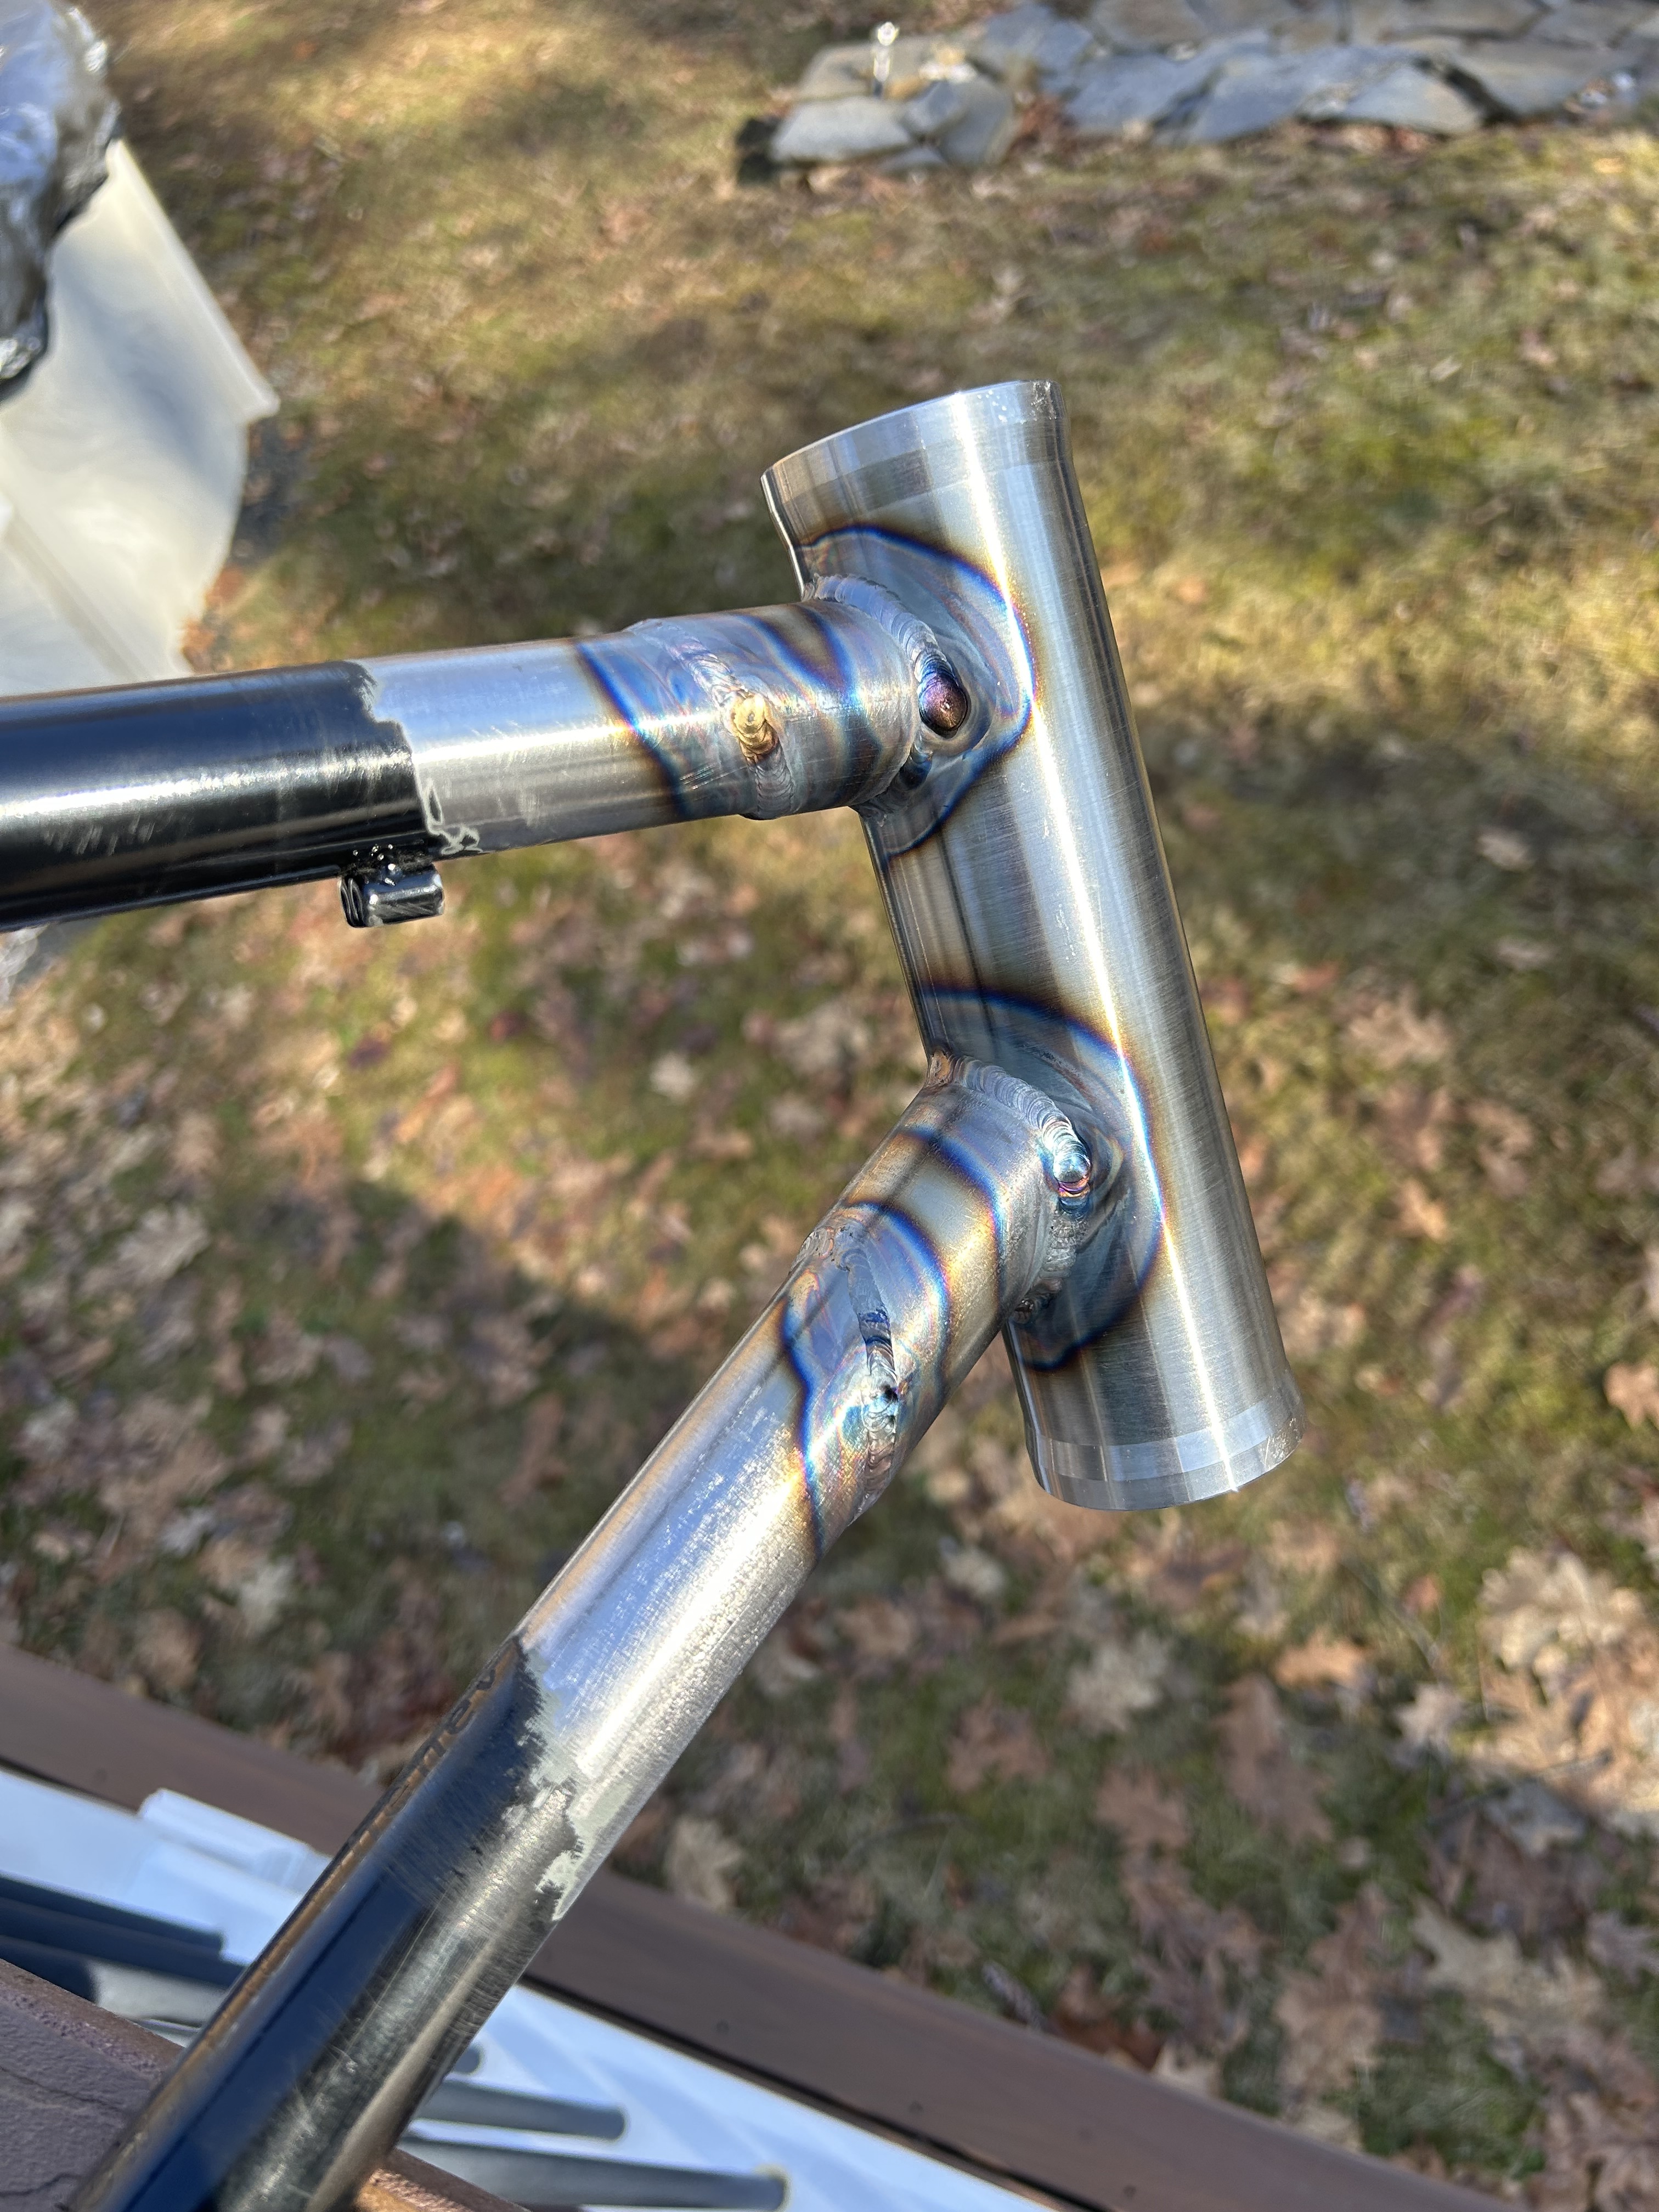
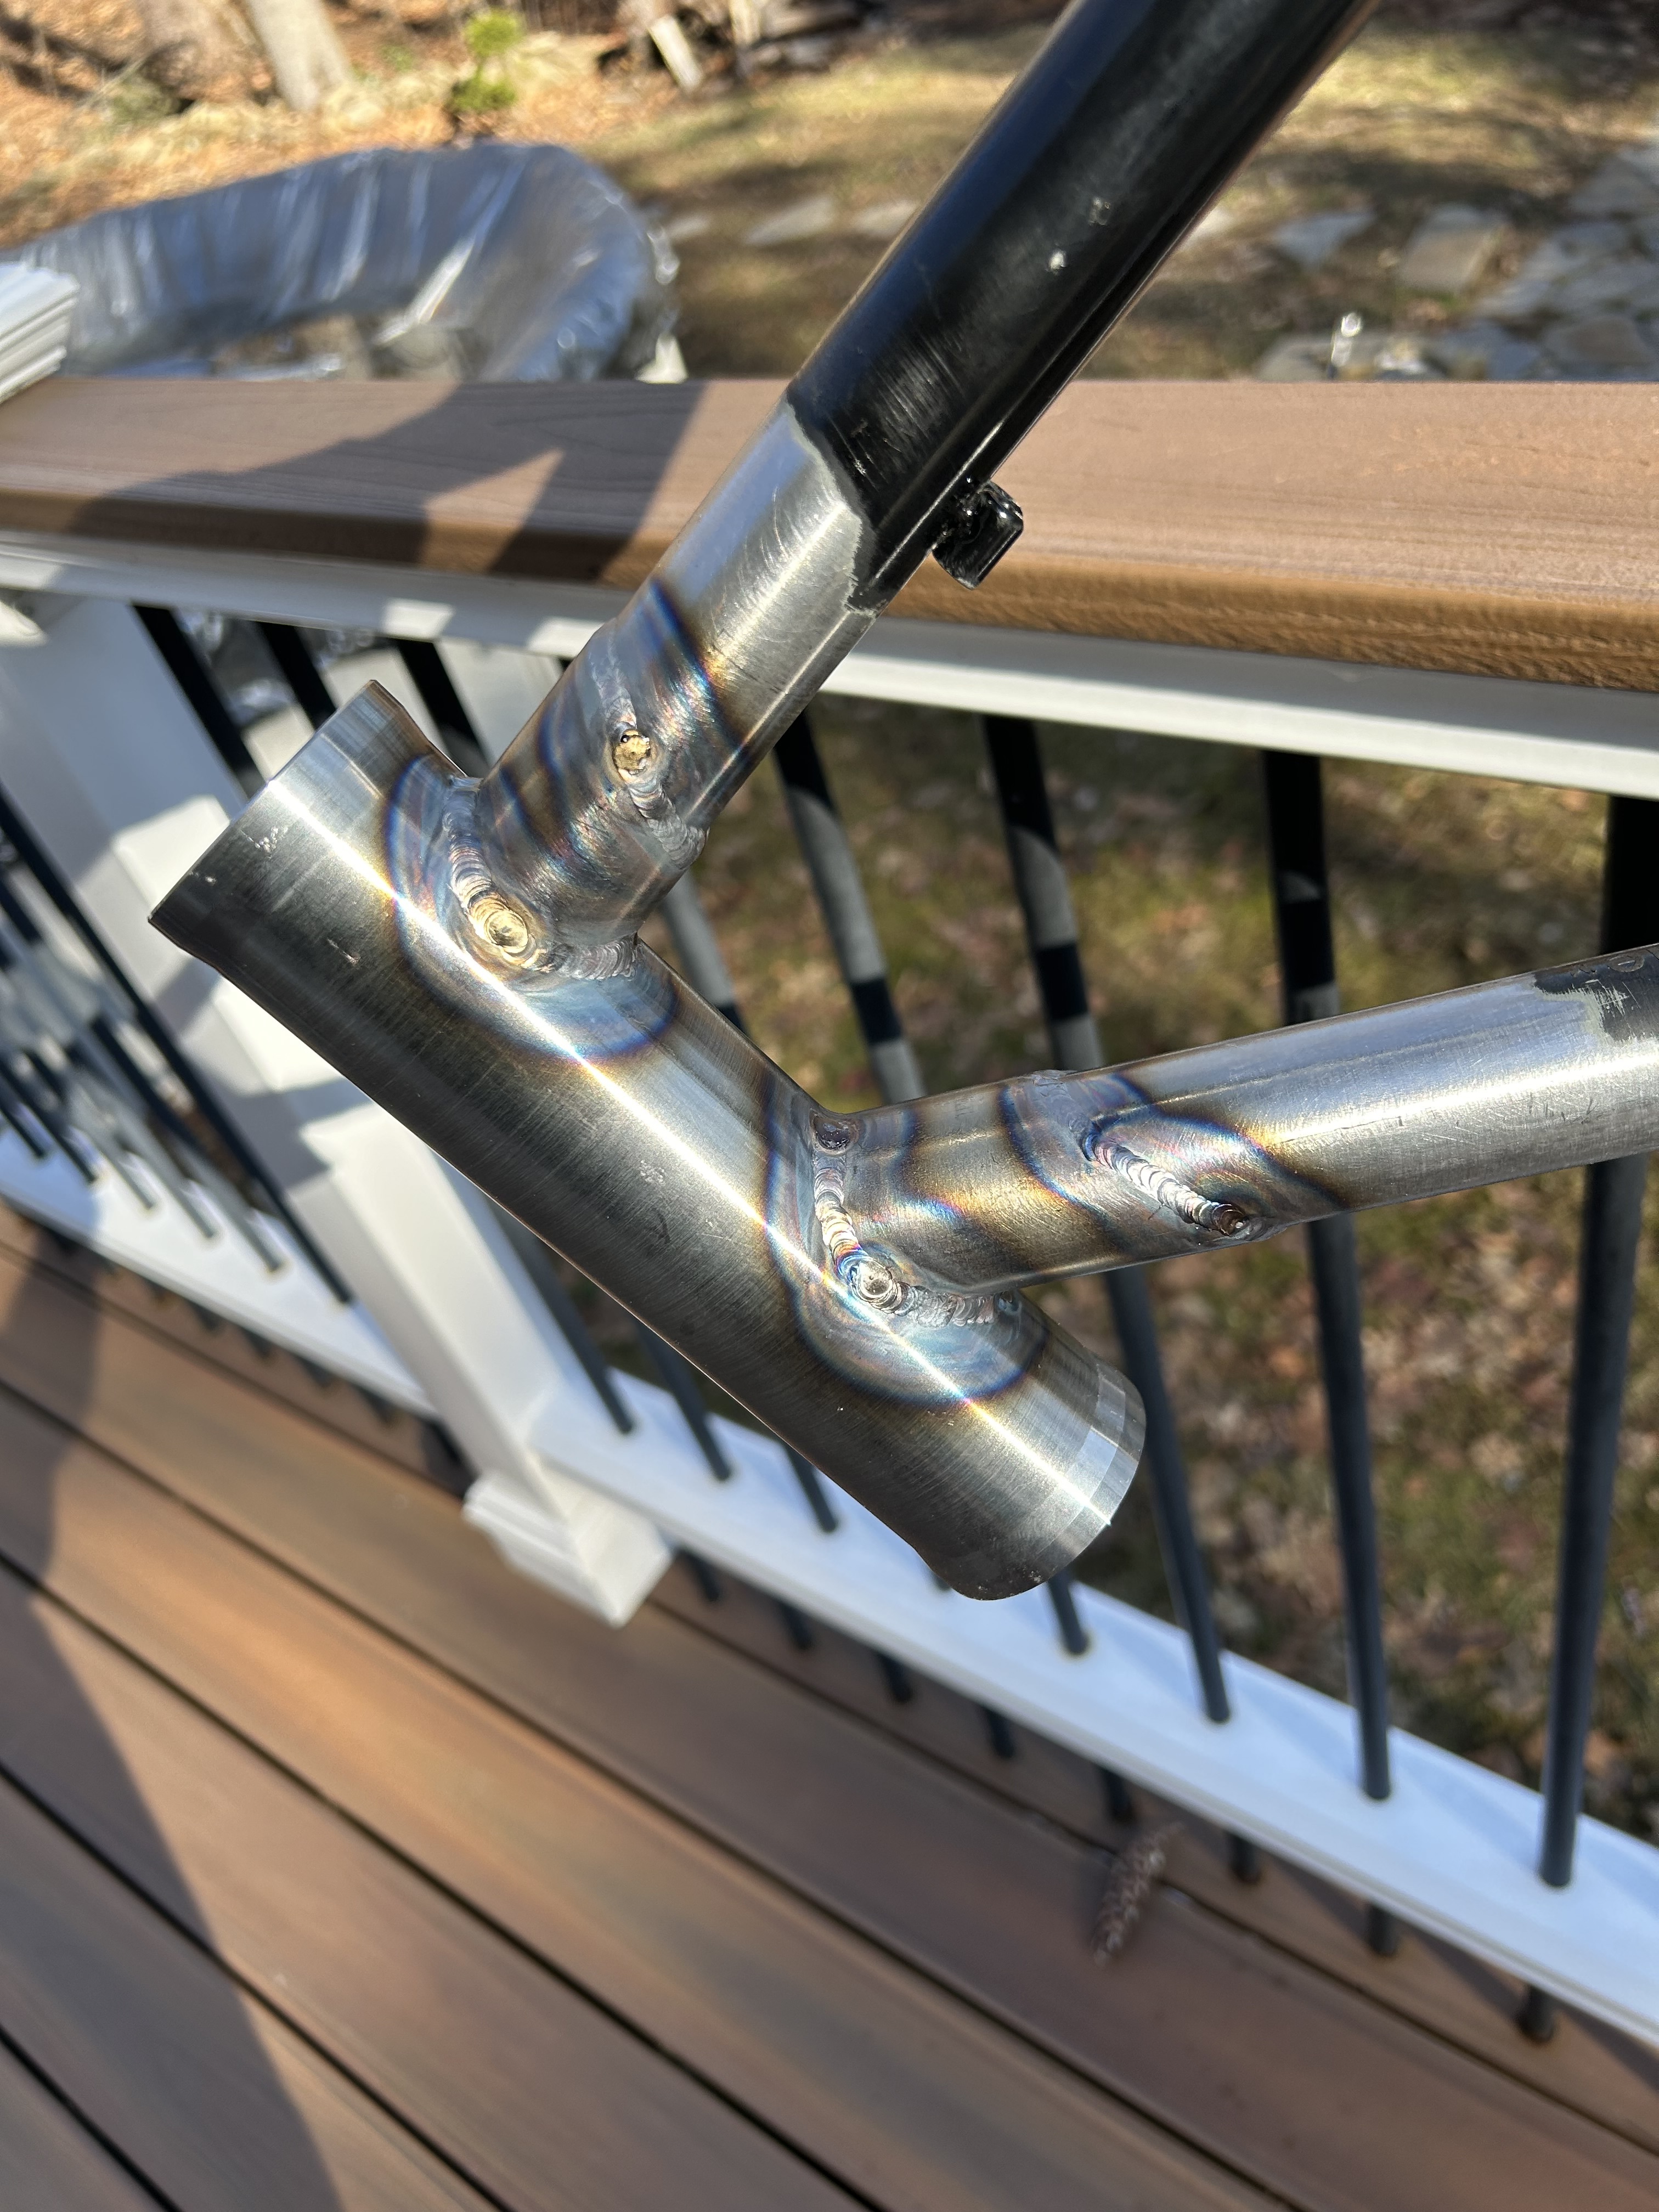
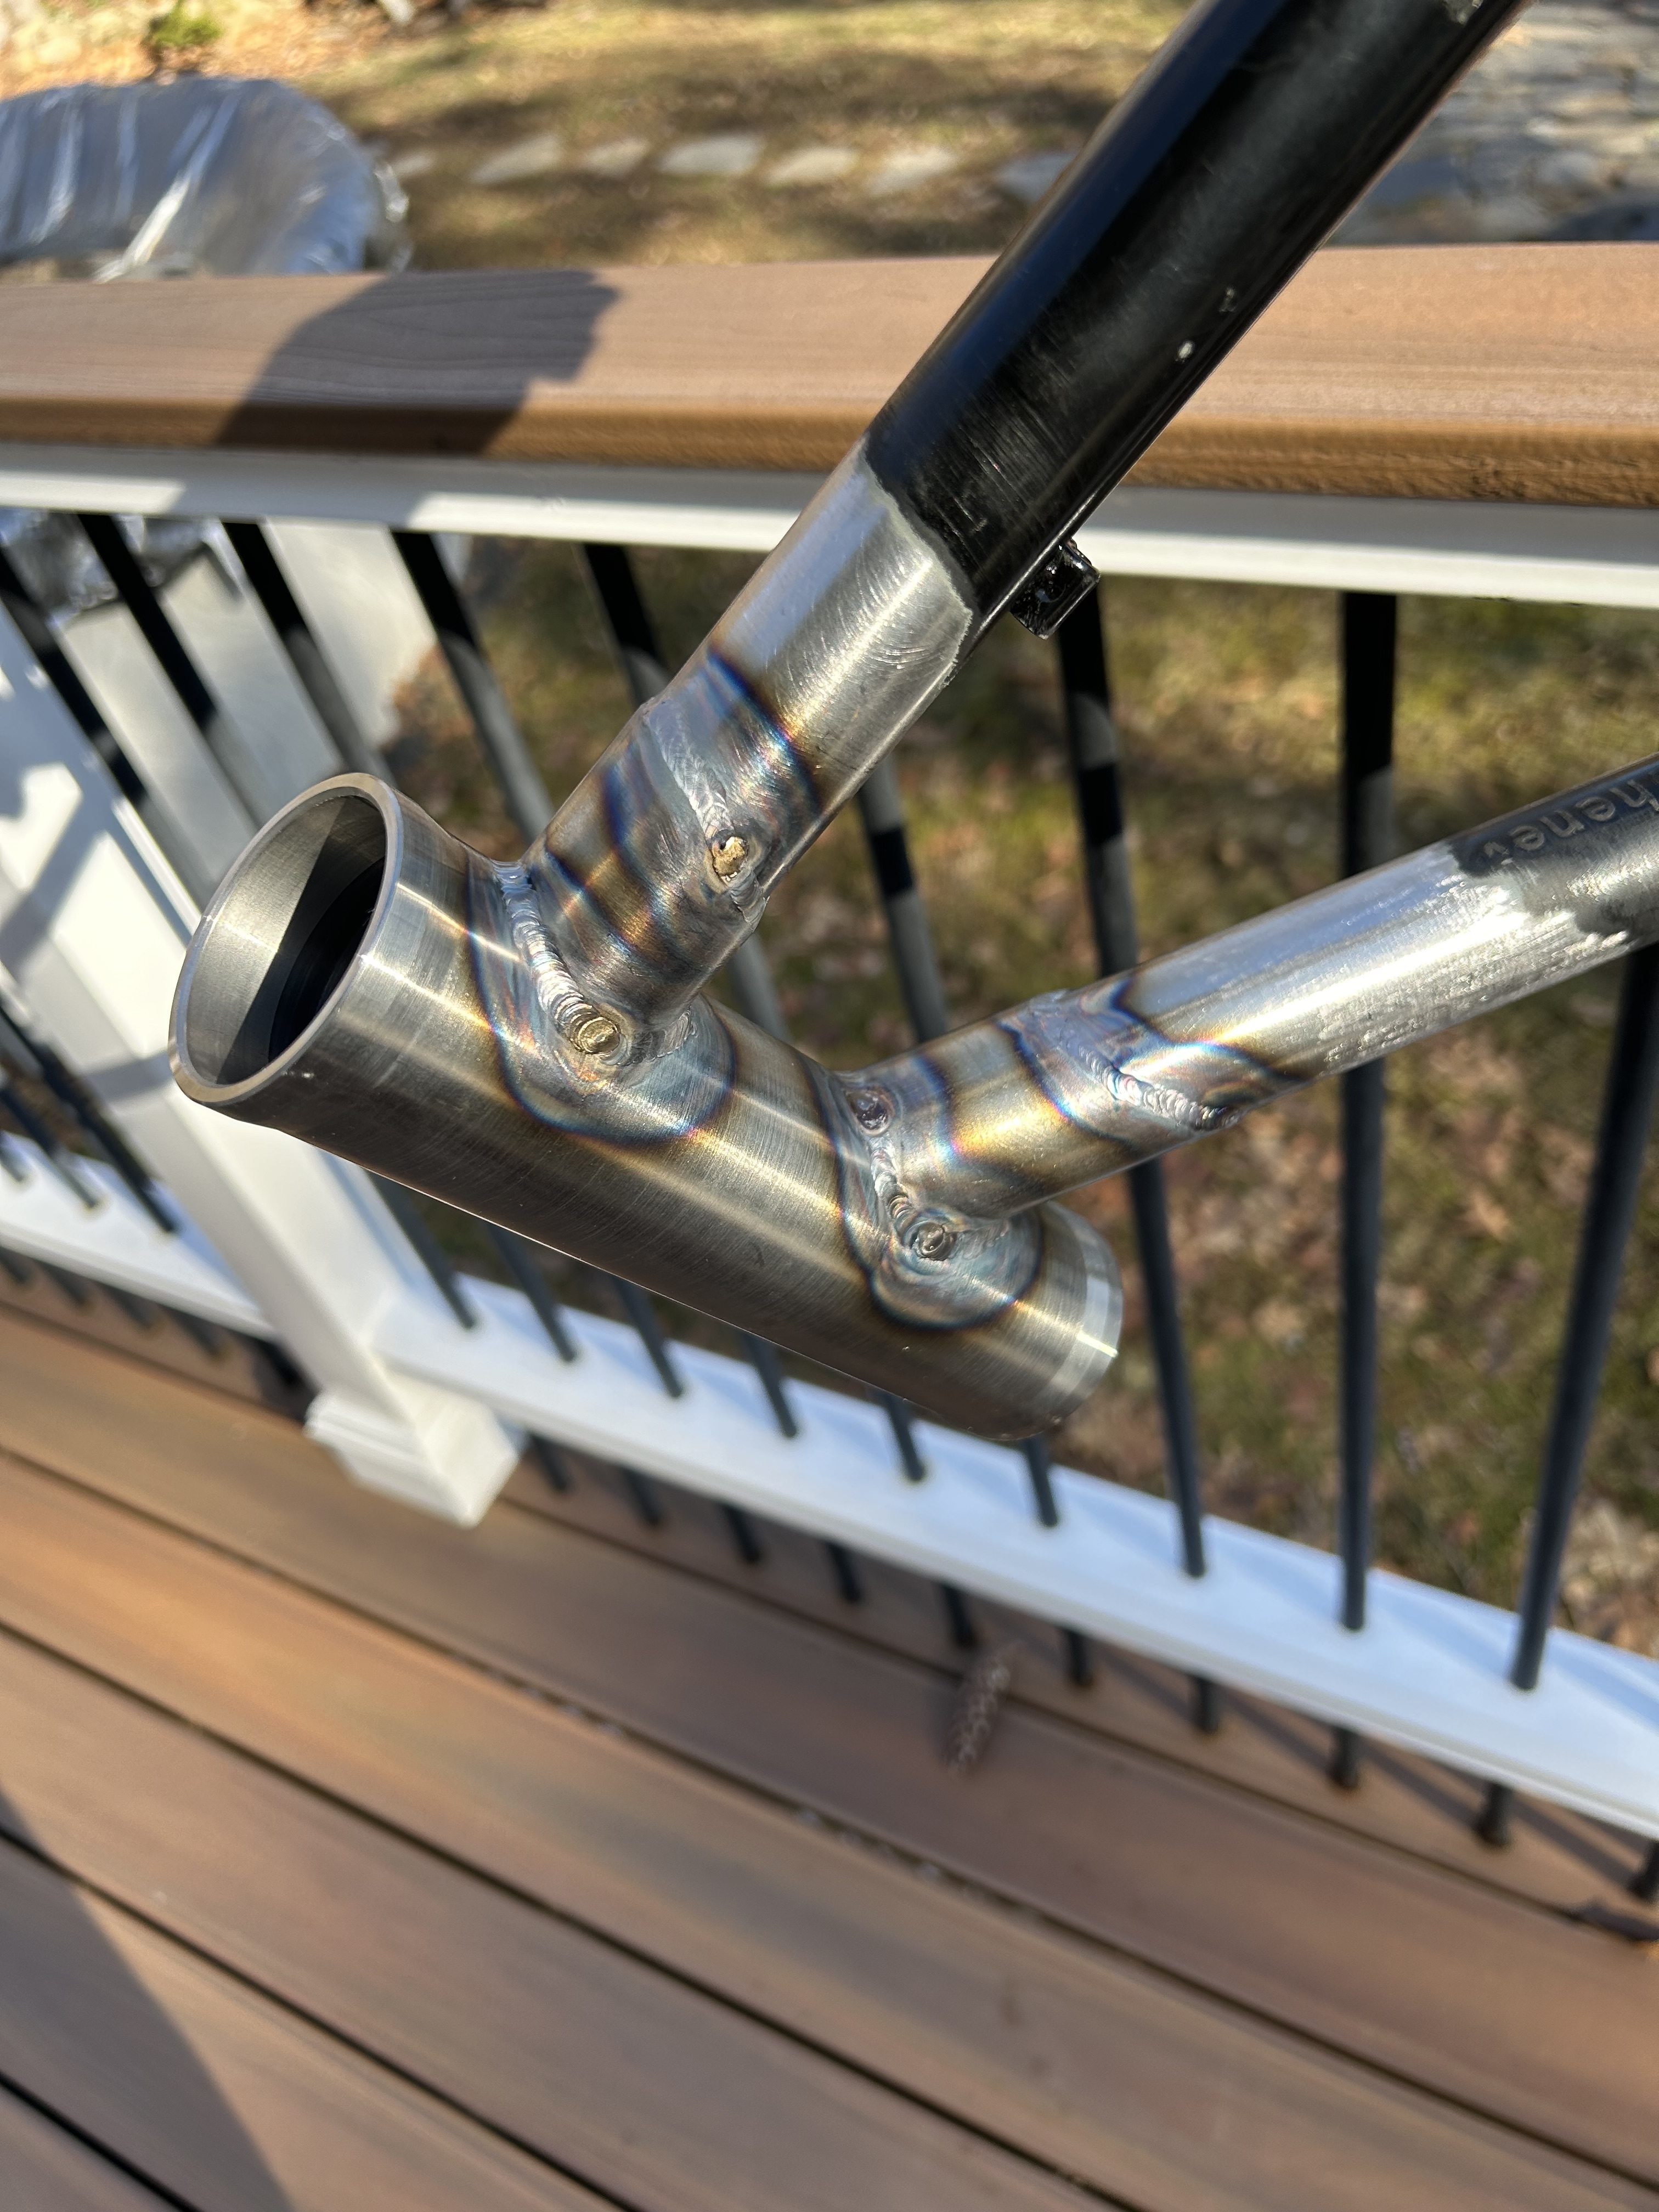
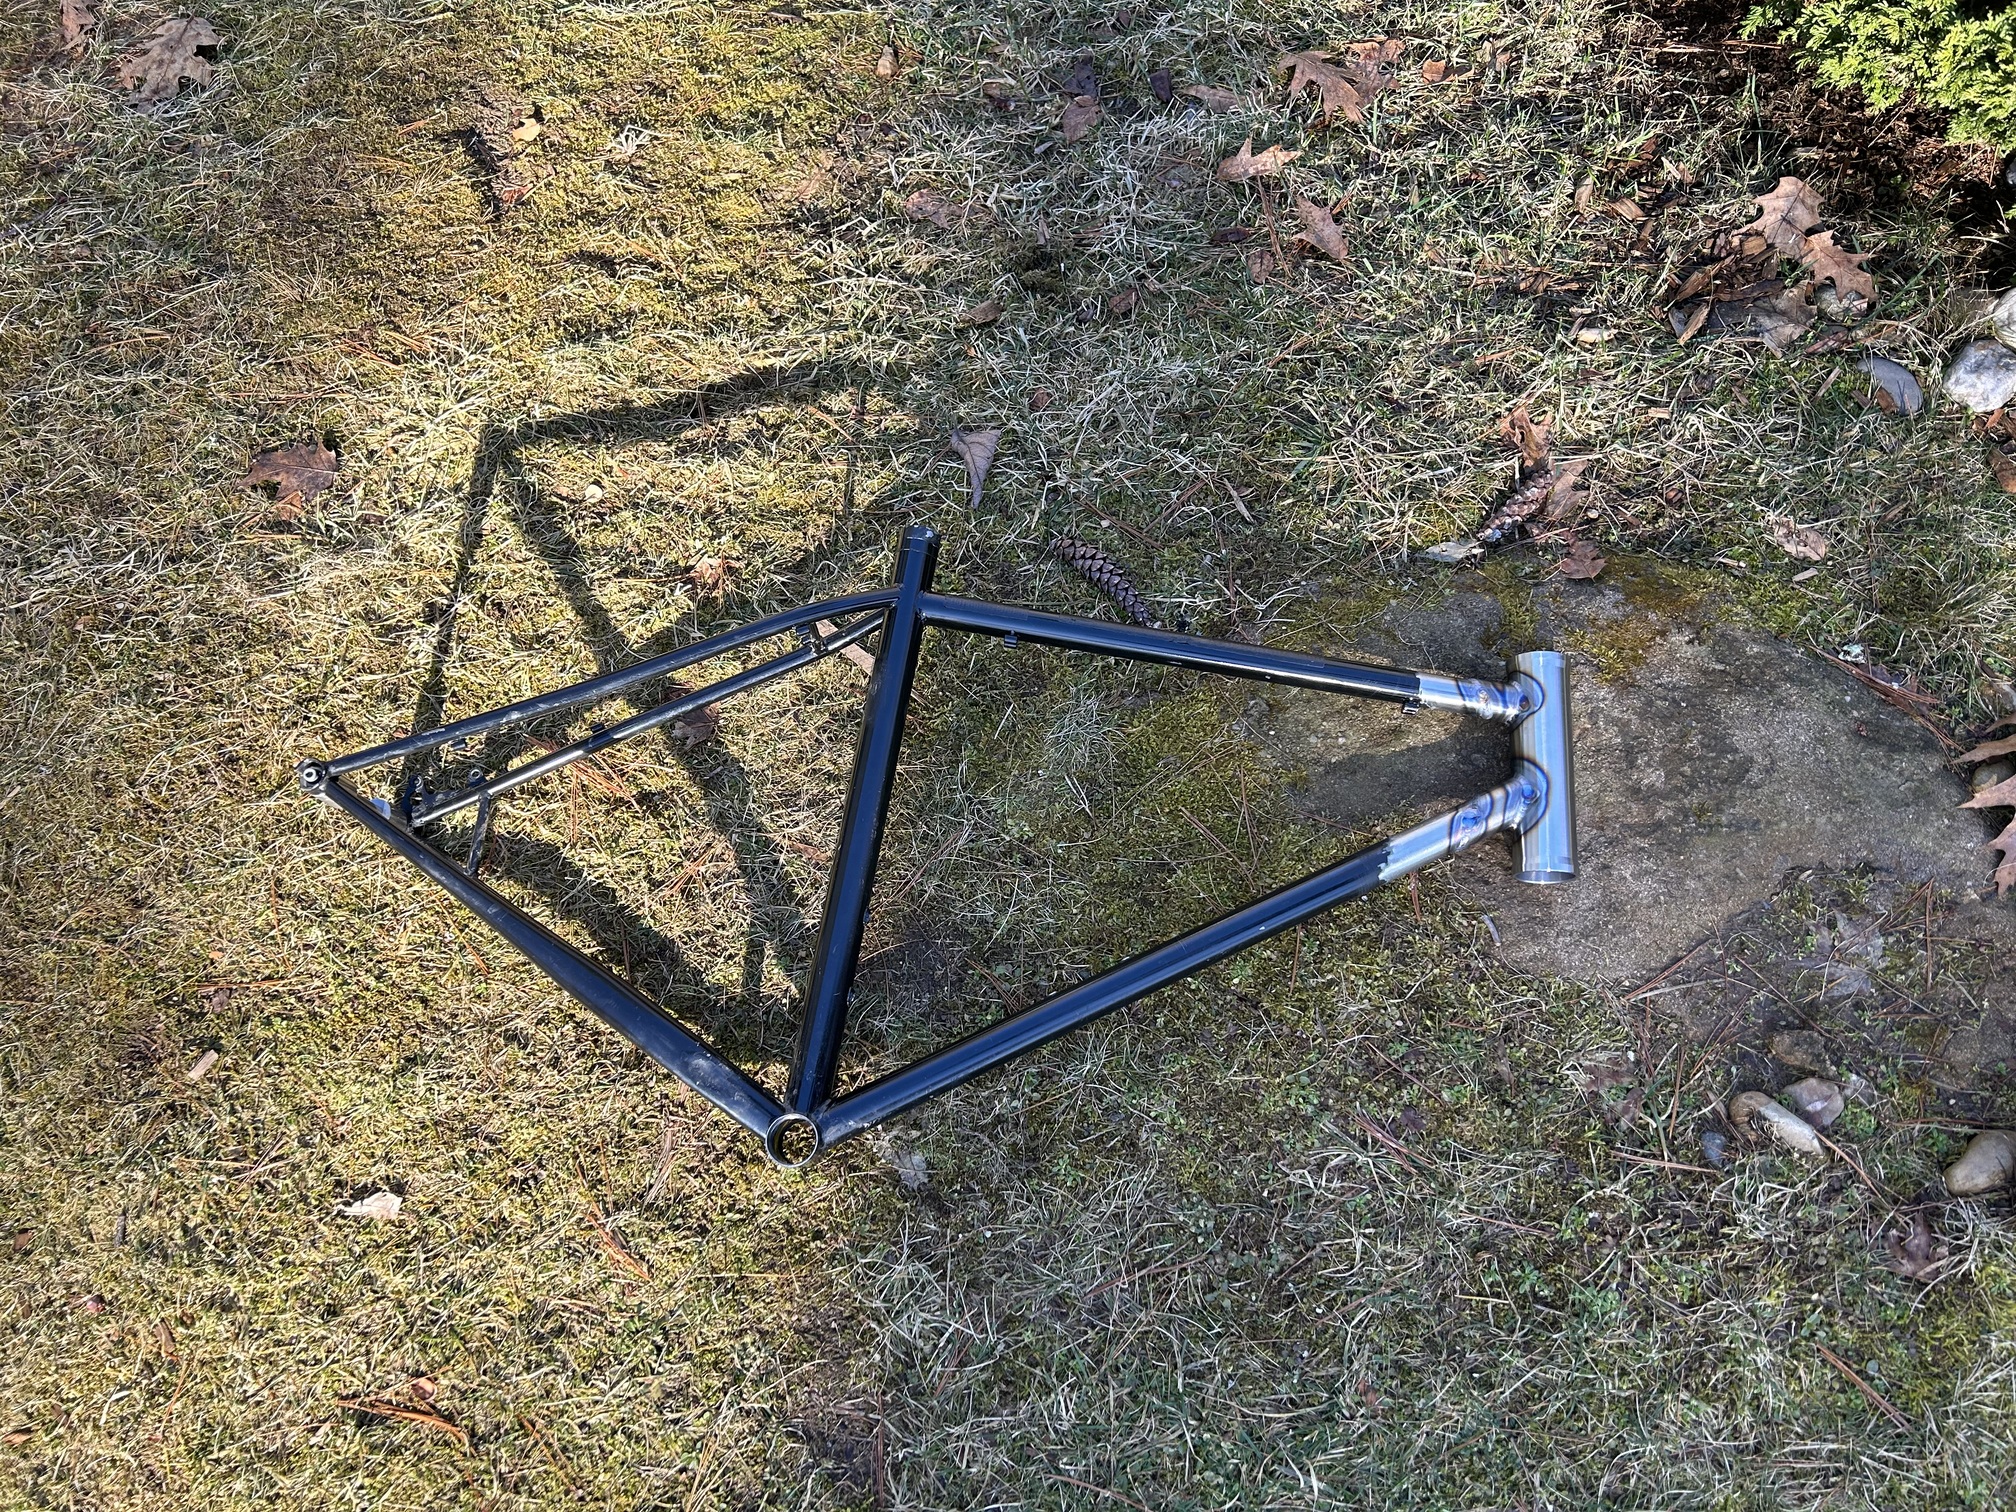
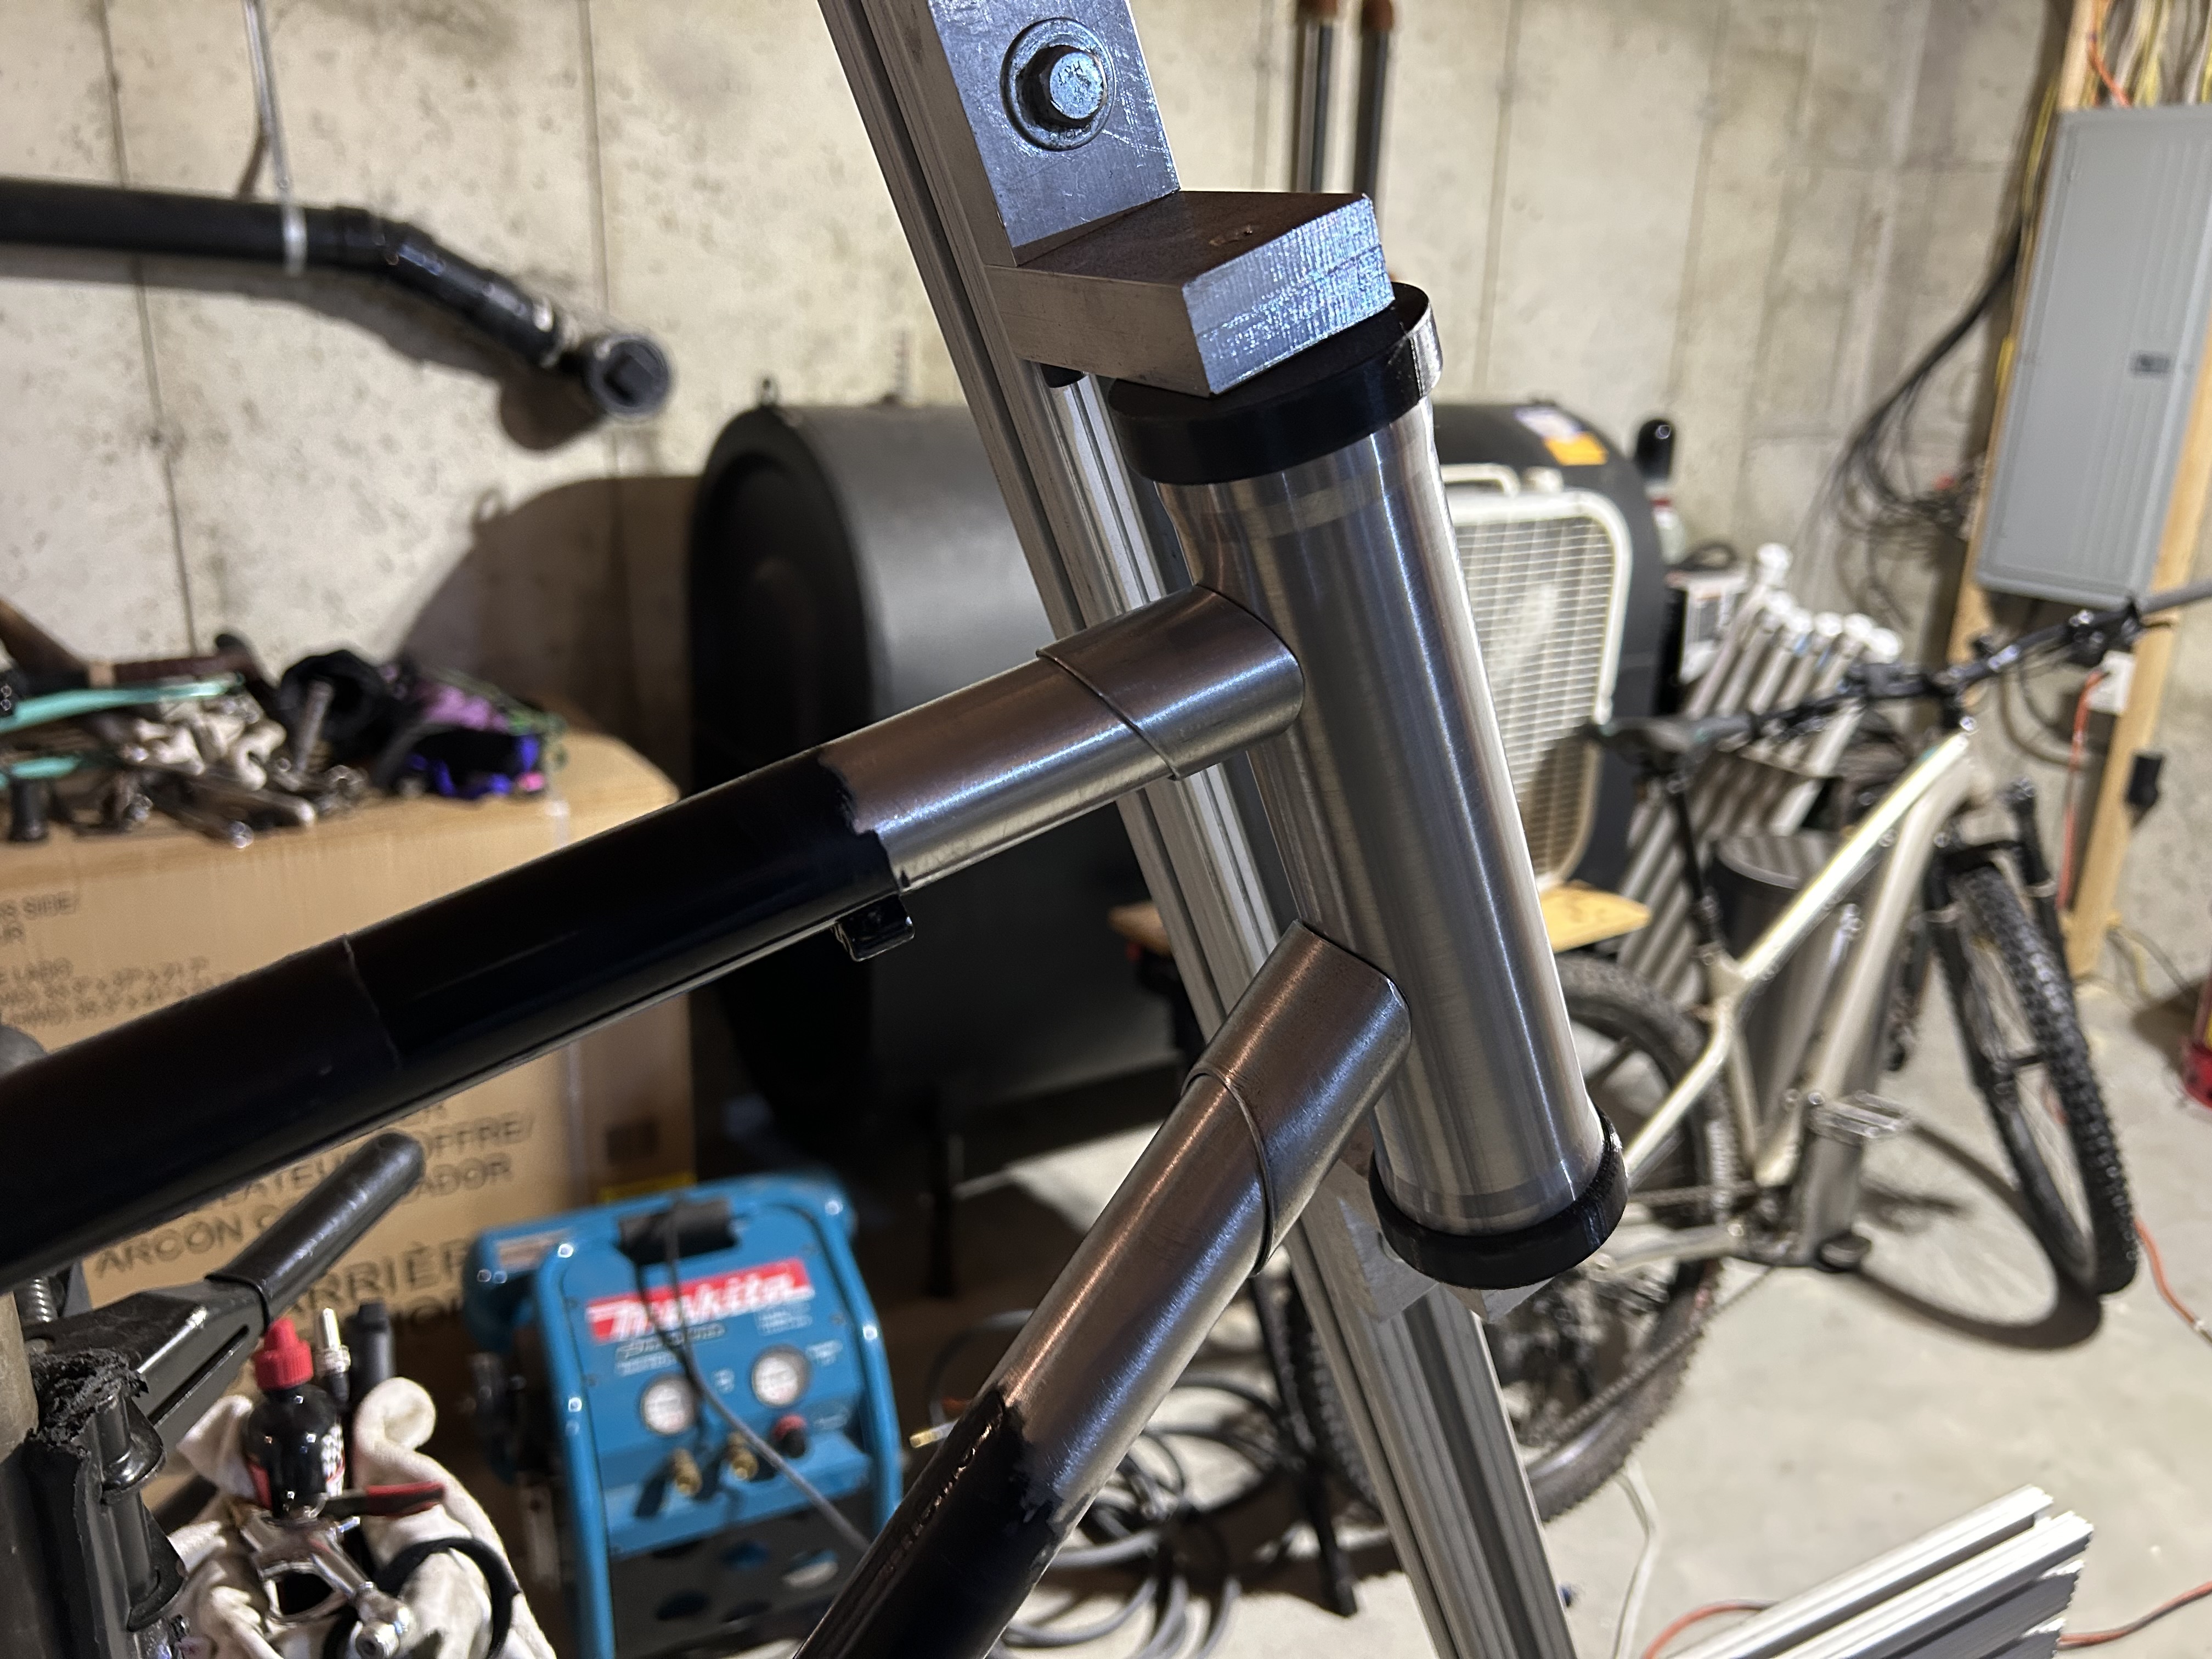
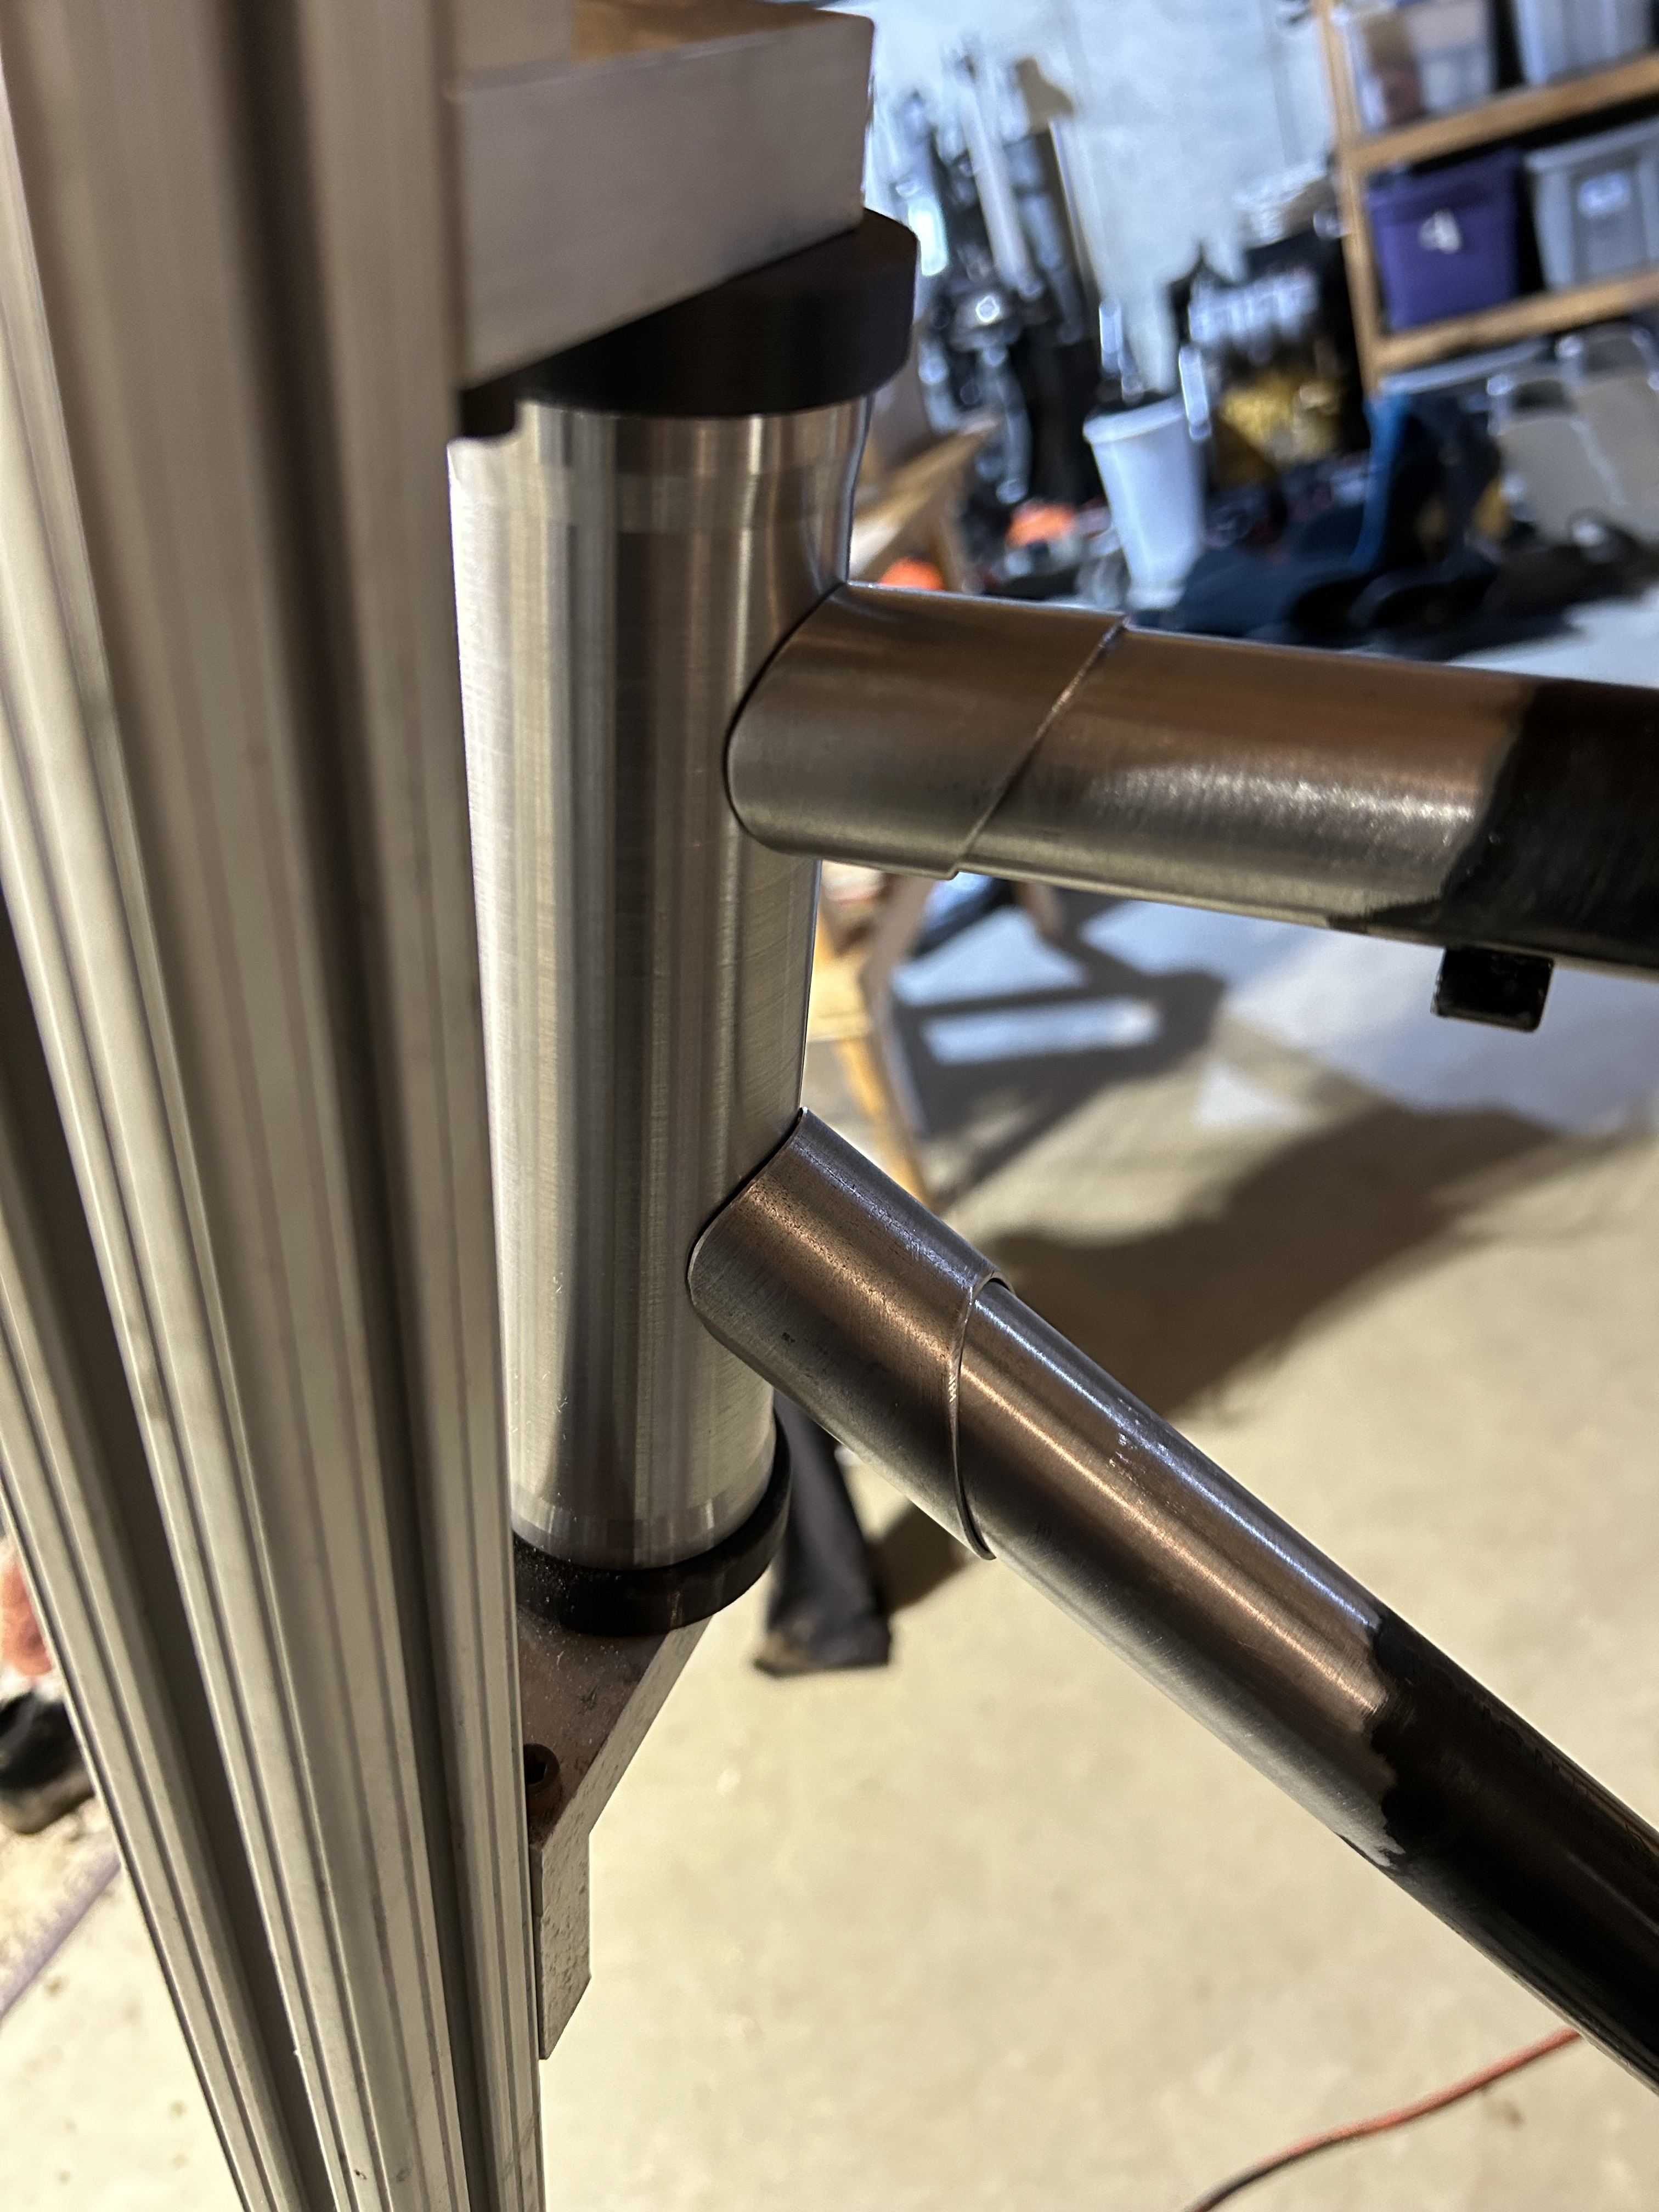
This trash pile is welded, dropped it off at the shop today to have the bb and ht finished. Still need to do riv nuts for the bottle cages, add some cable guides, and the bridge for the brake tab. Some of the fit up around the seat tube and head tube/top tube joint was not so good. This frame was a lot harder to make than the gravel frame I last did.
Things that I found more challenging:
cutting the st and tt too short, that was real silly. Will have to make a size small version or something.
seat tube being offset from the bb. That made it more complicated to fit up and weld the down tube and seat tube joint
seat stays attaching to the seat tube and top tube
poor fit up in these areas as well as my cs/ss bridges. Next time that I need to do bridges in a tight area I’ll make them out of sheet metal
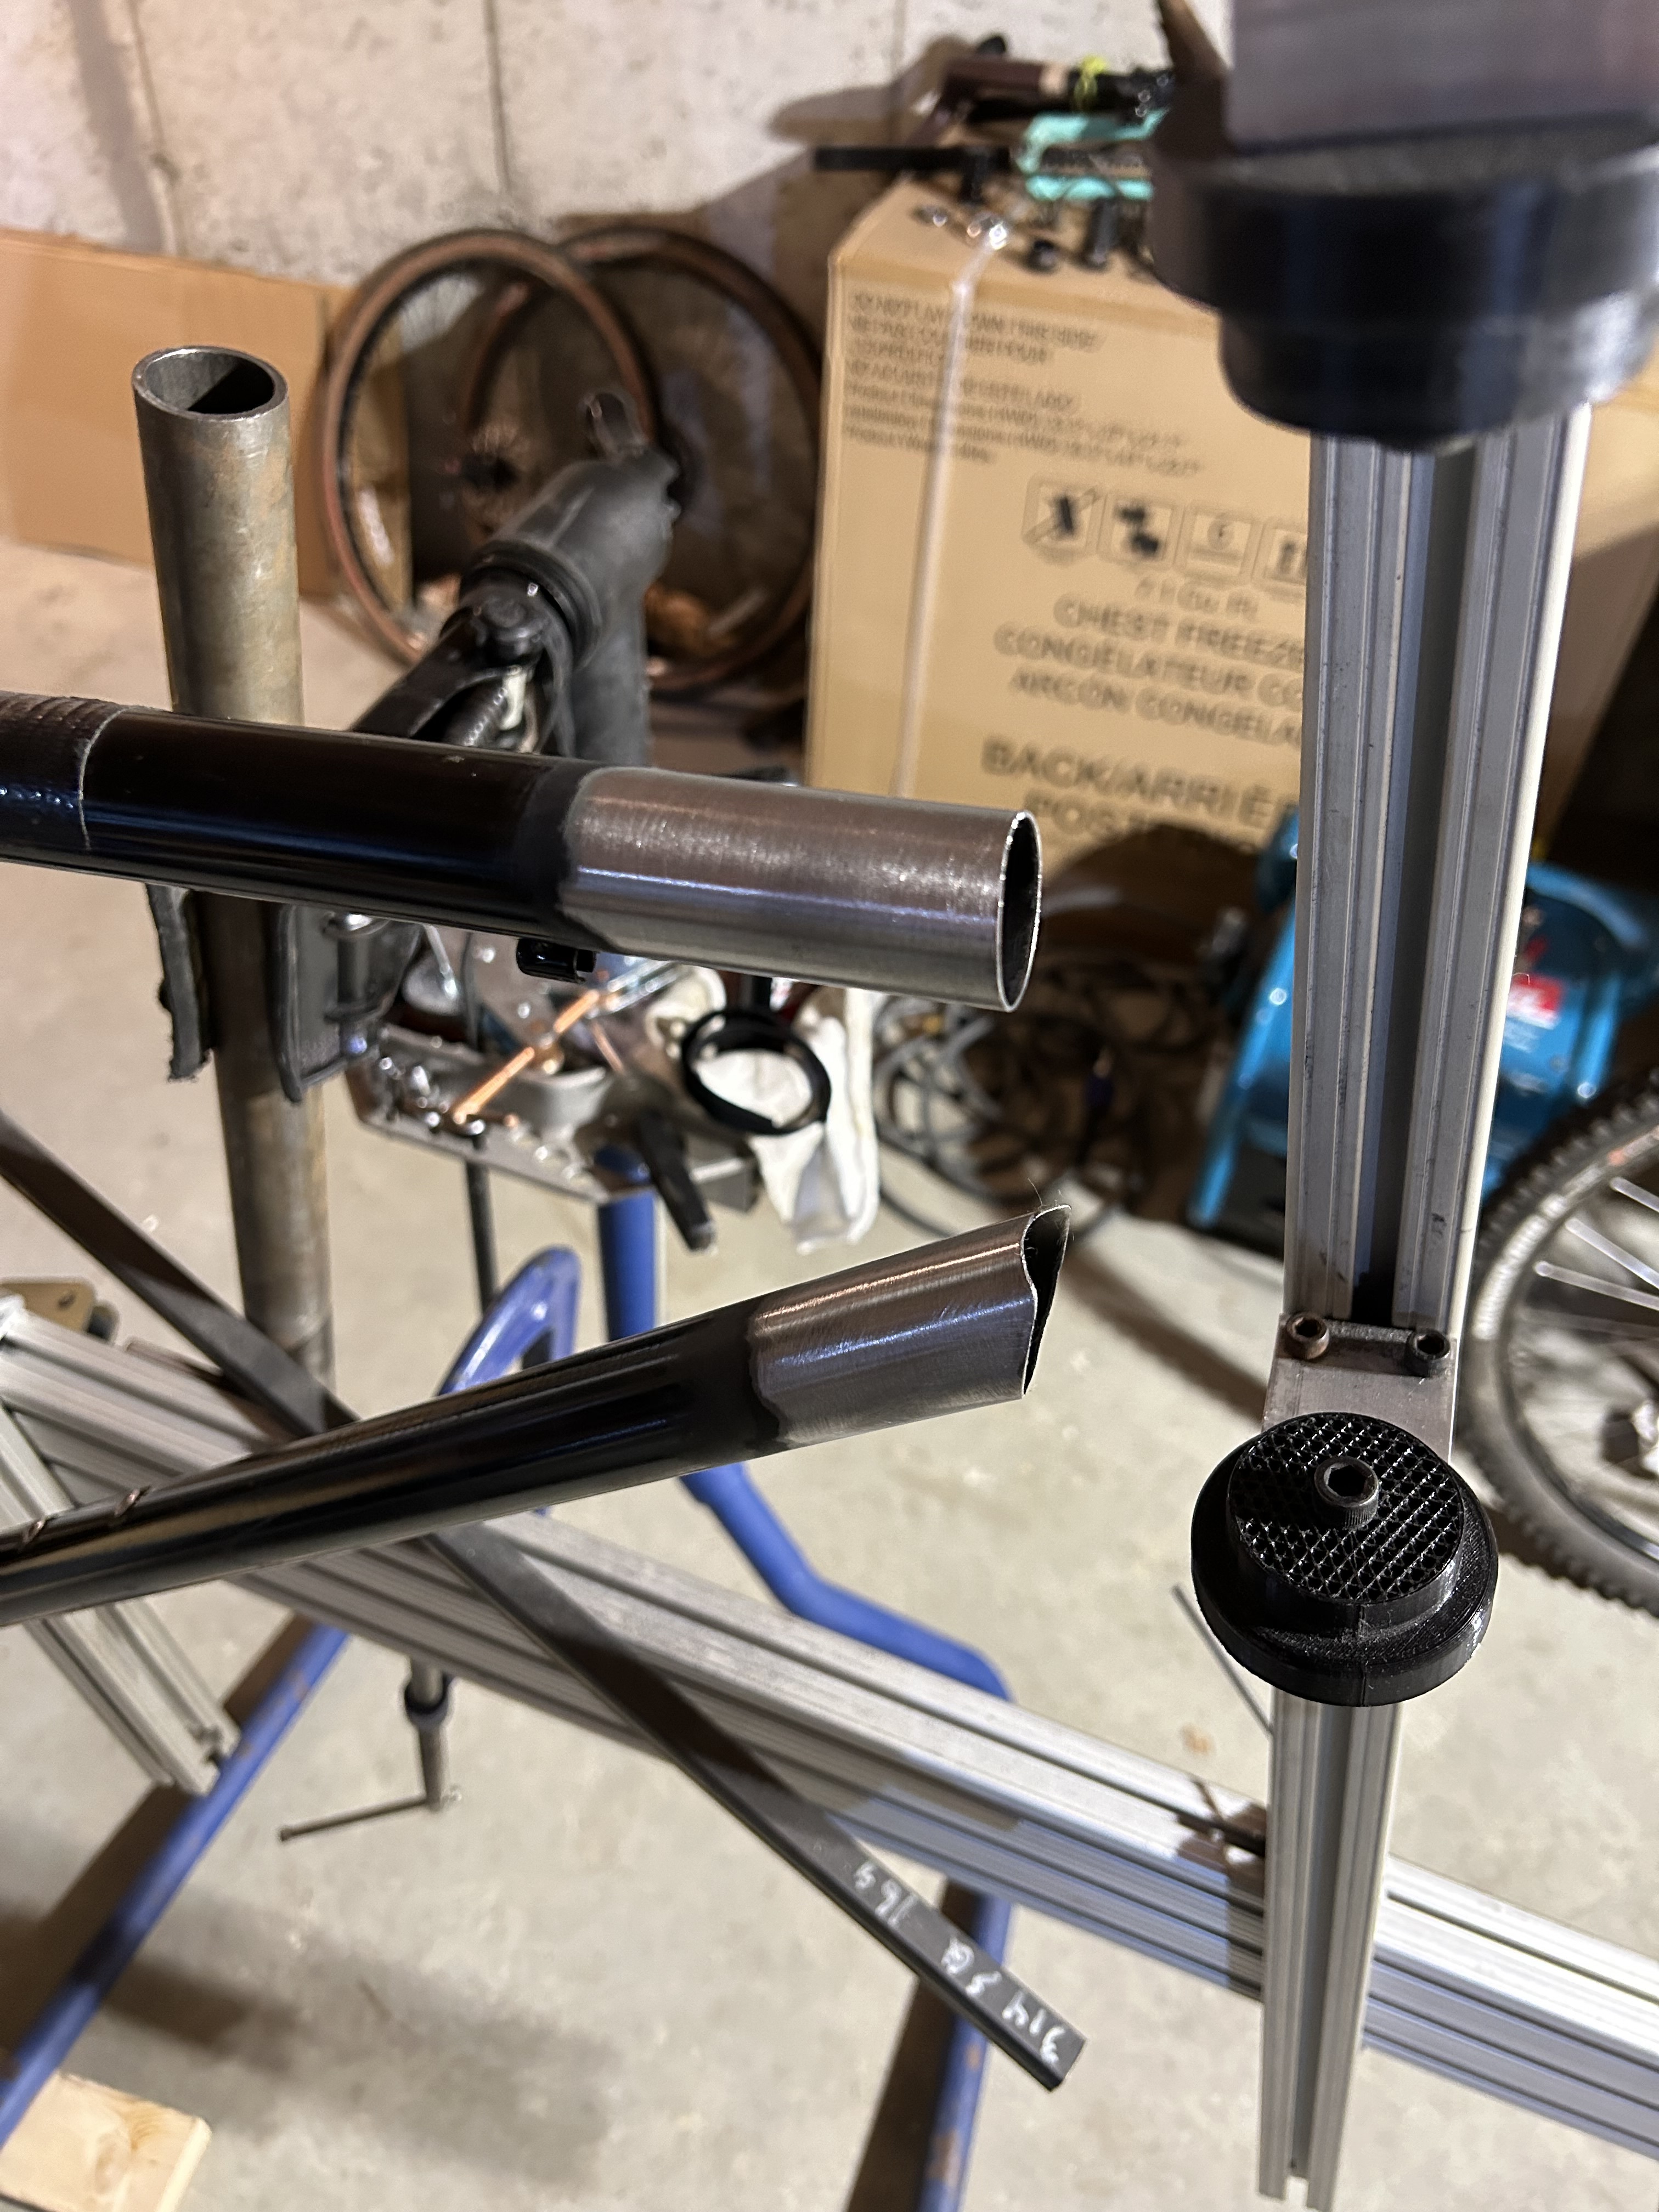
poor fit up at the top tube and head tube resulted in melting my 3d printed top tube fixture
modifying the thru axle dropouts so that the dummy axle would interface with them
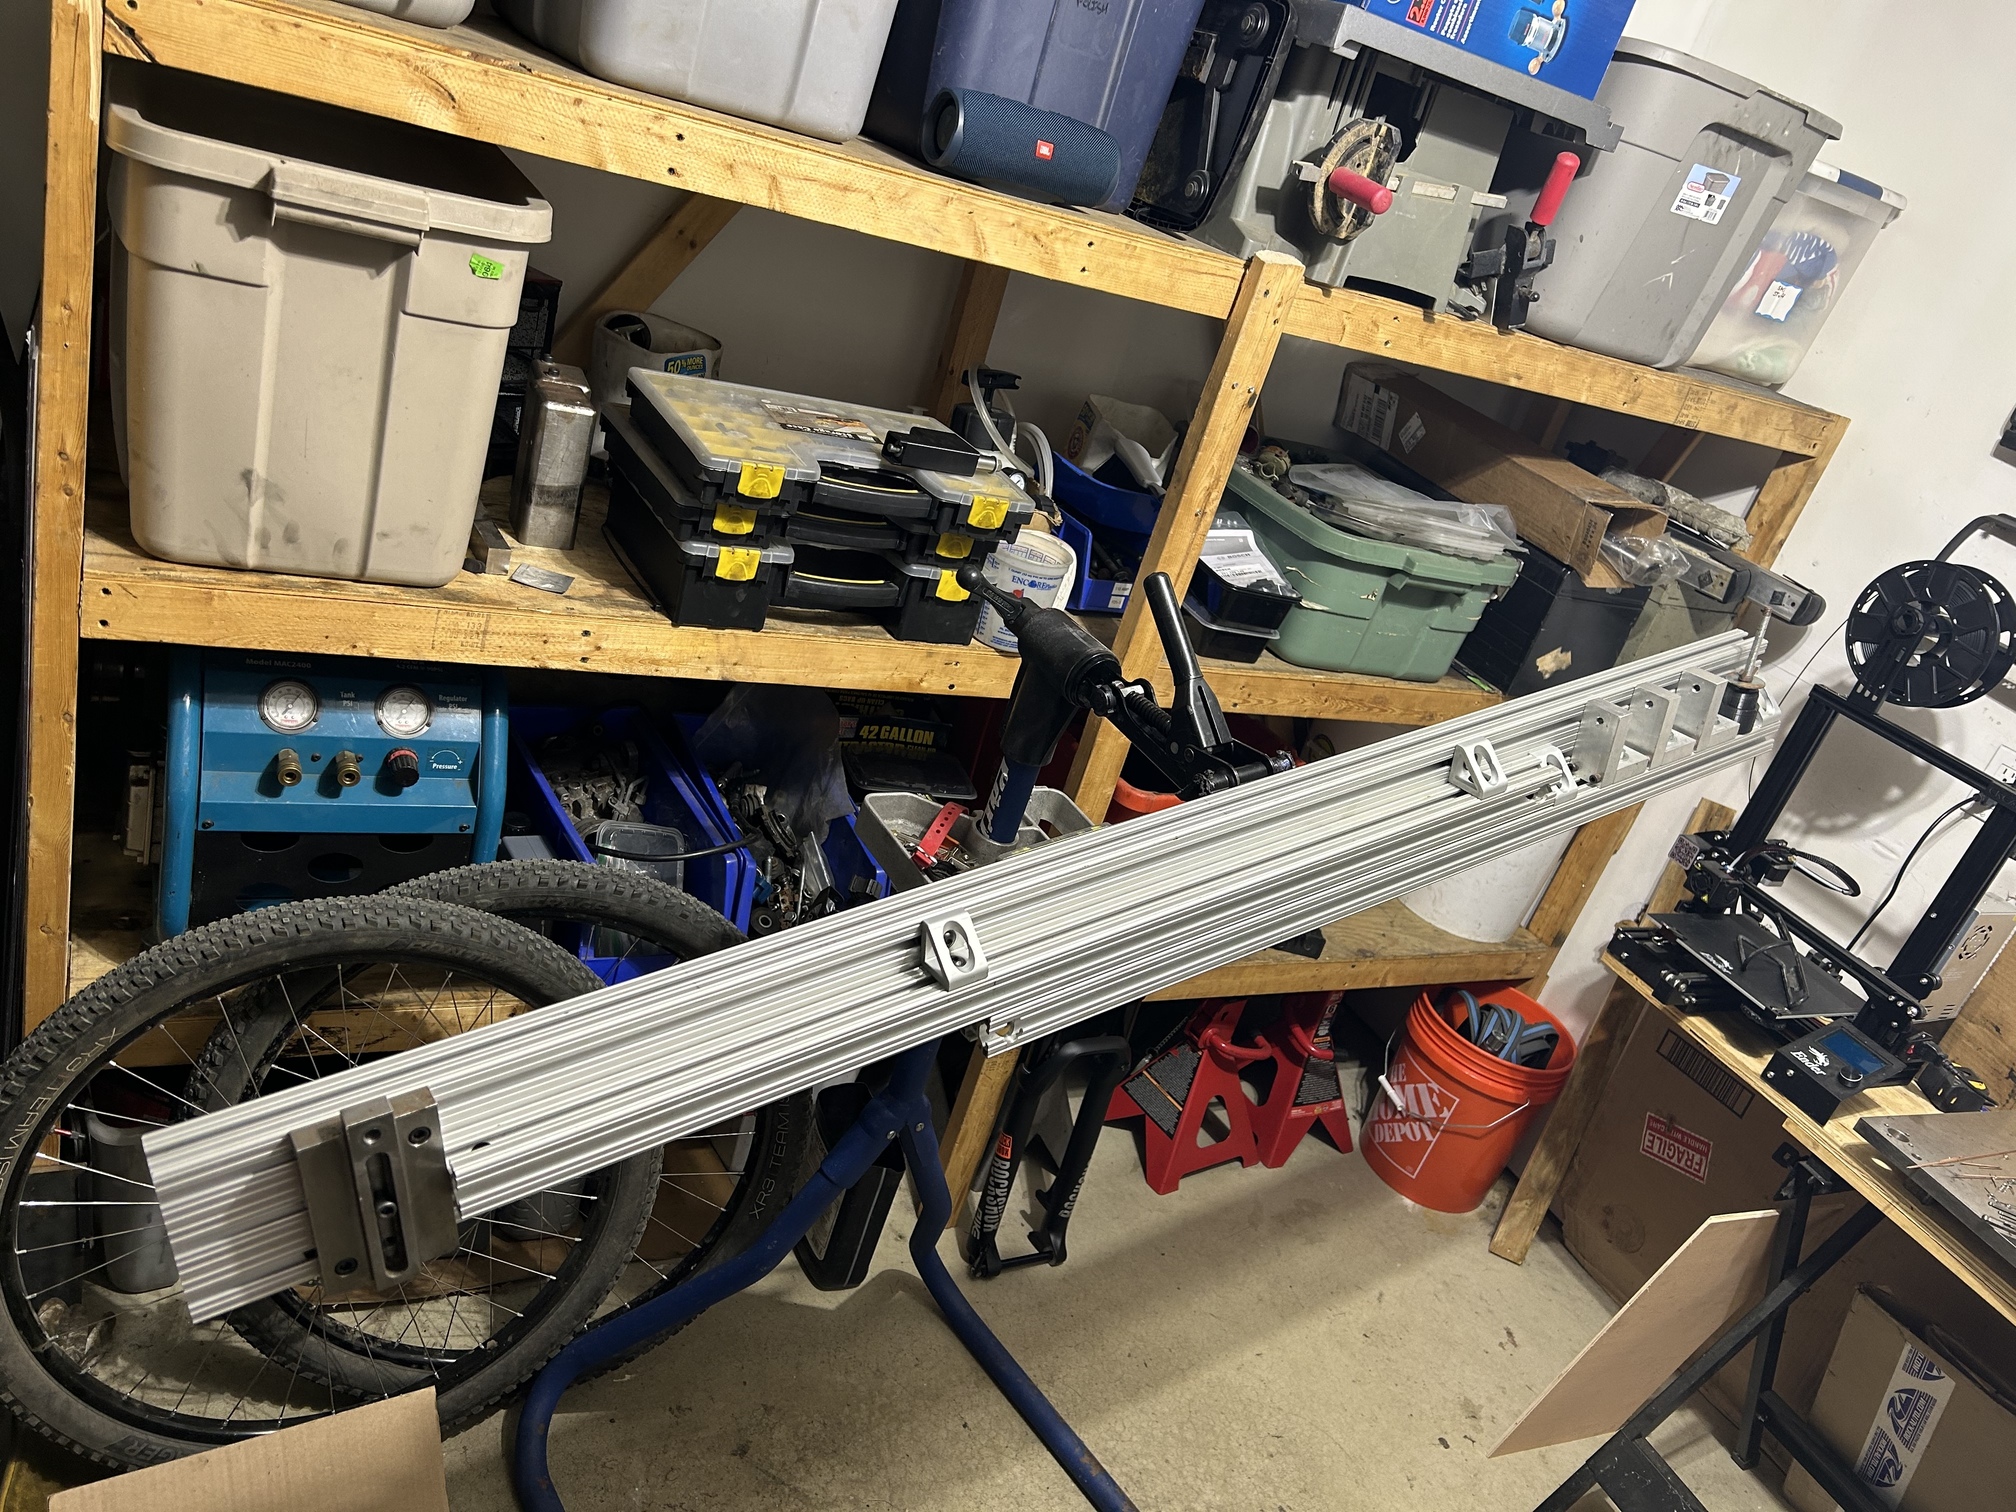
cheap angle finder cost me hours of messing with the frame jig, then was disposed of. iPhone angle finder works good for sanity check, protractor head is the right tool for the job.
I also learned that my frame jig packs up pretty nicely, pretty excited about that!
Anyway, the frame should be back Friday or Monday, hopefully the weather will be good next week for painting. My plan is to retire the old rusty 26” twin top tube bike once this is built up. Looking forward to reducing the bike fleet a little.
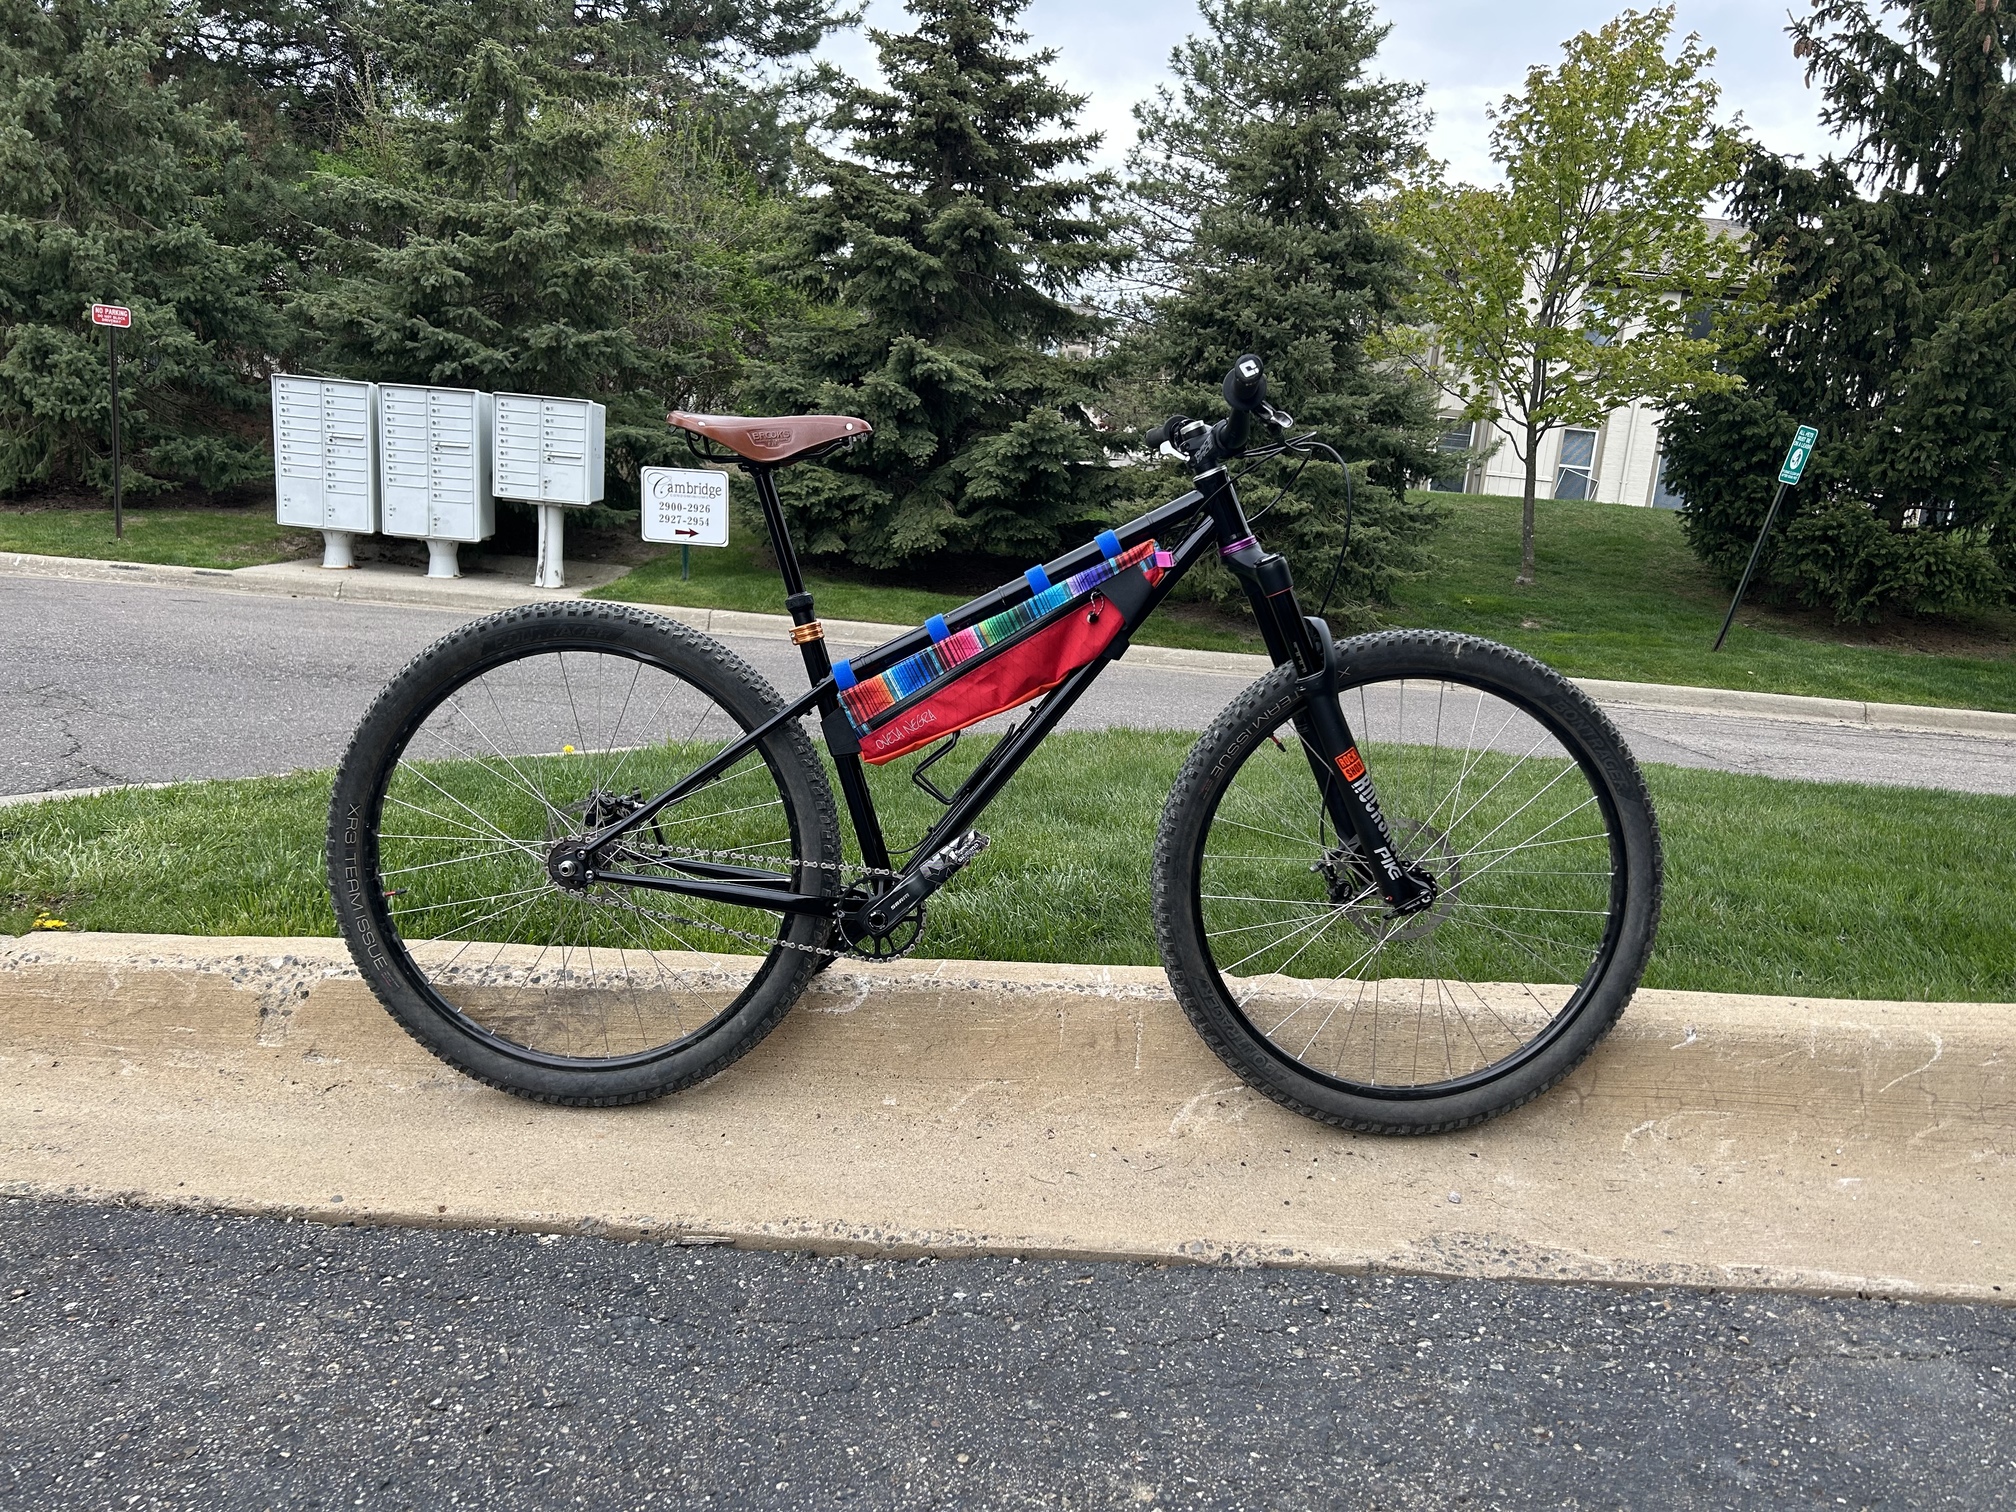
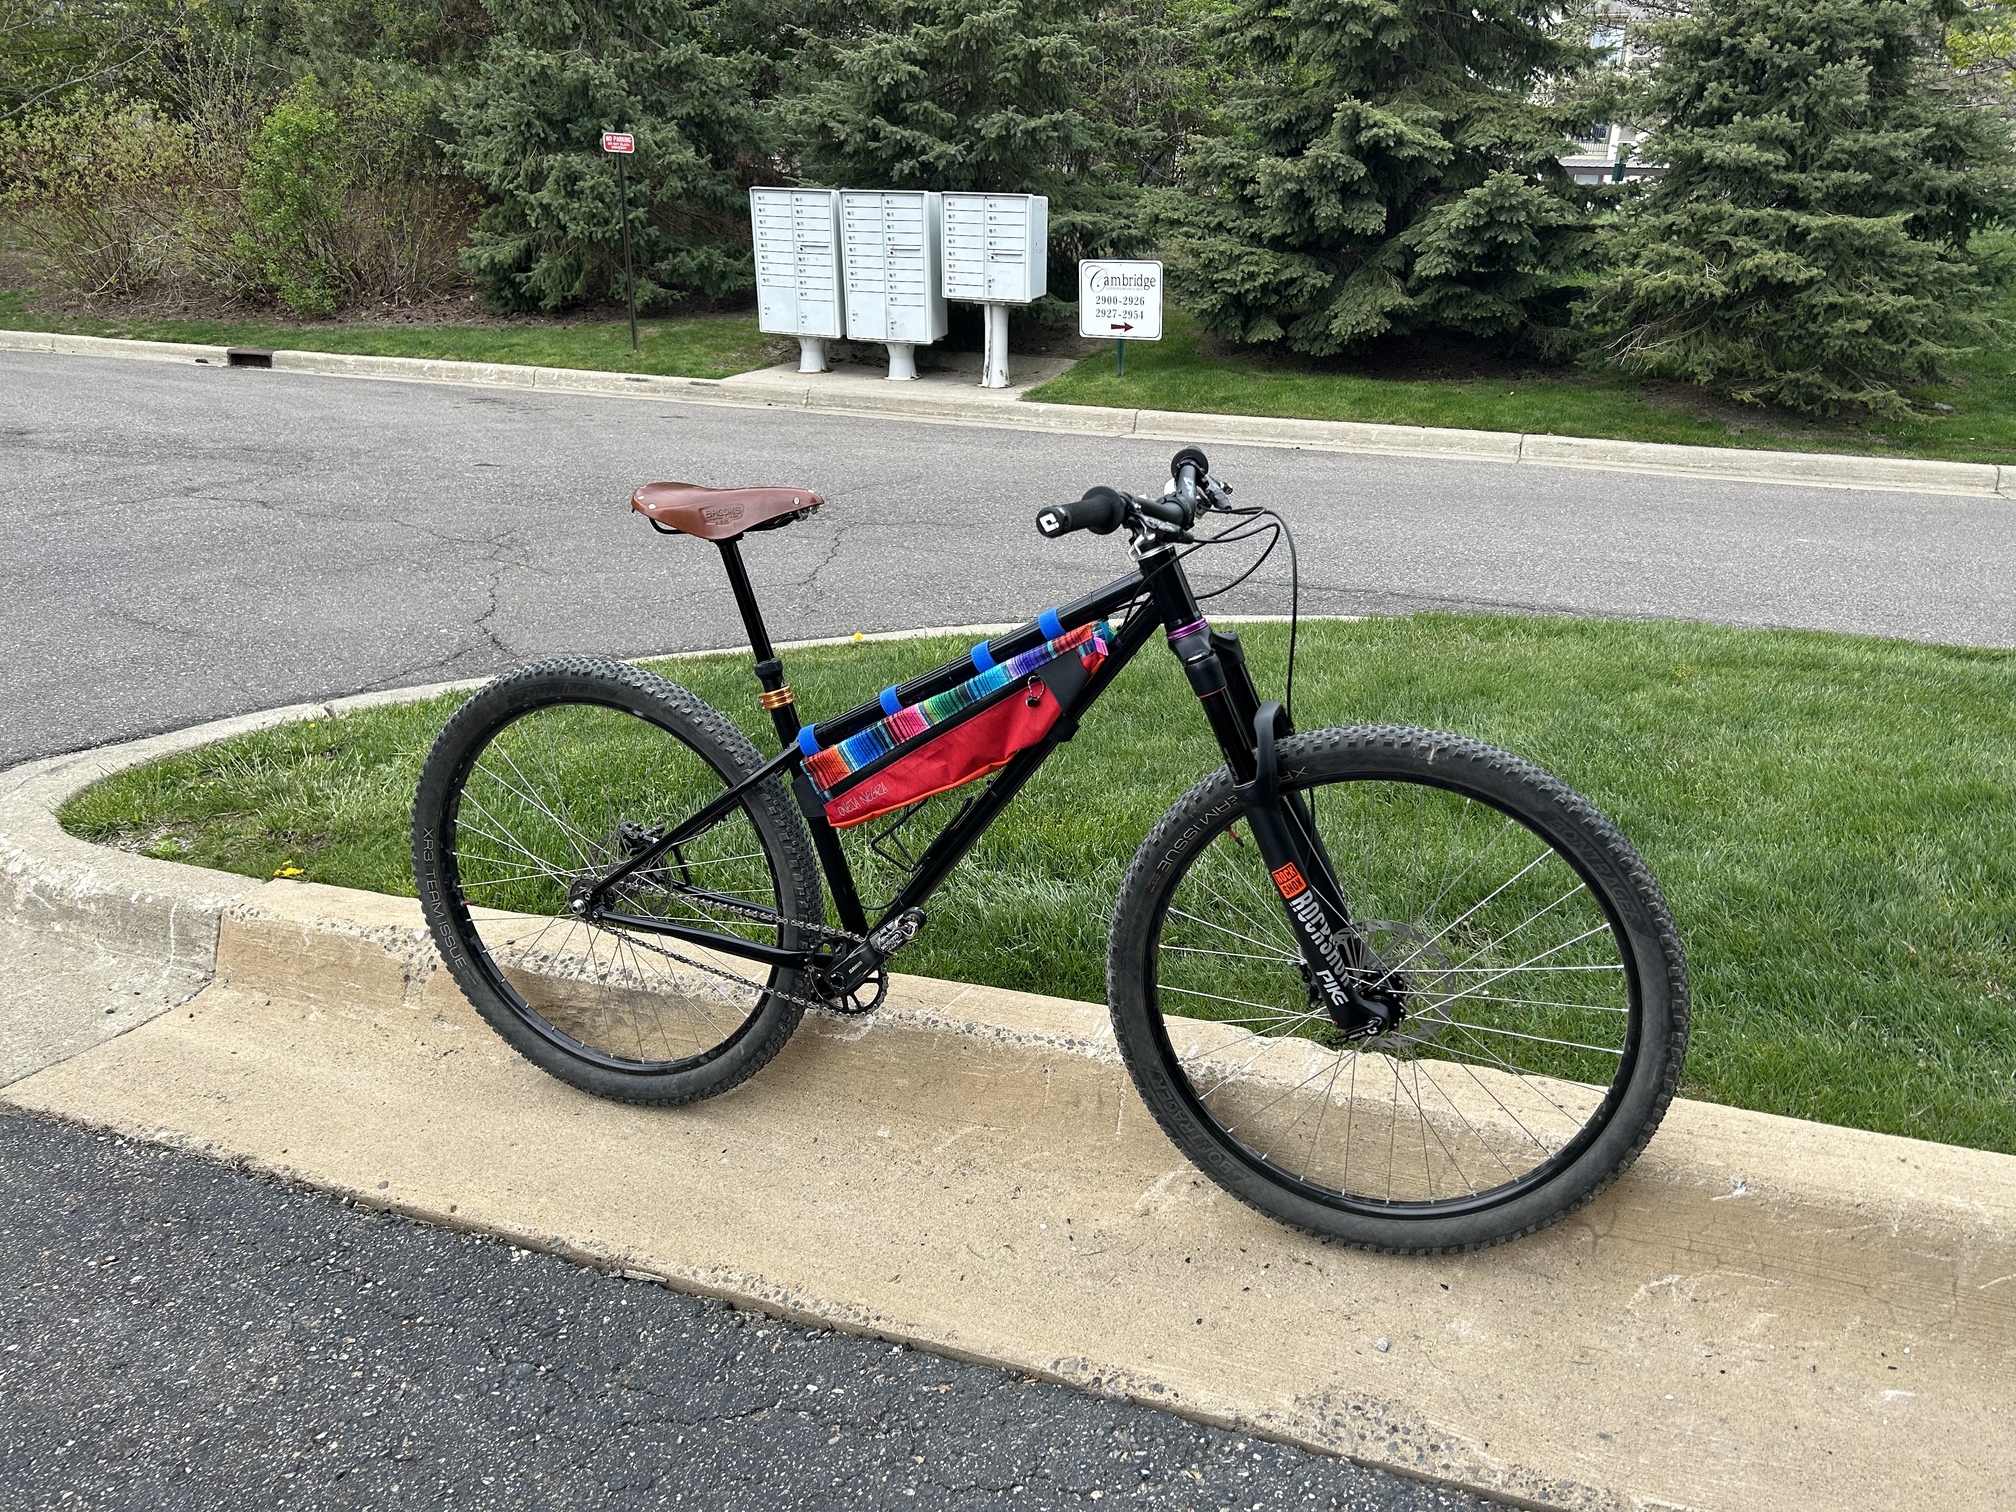
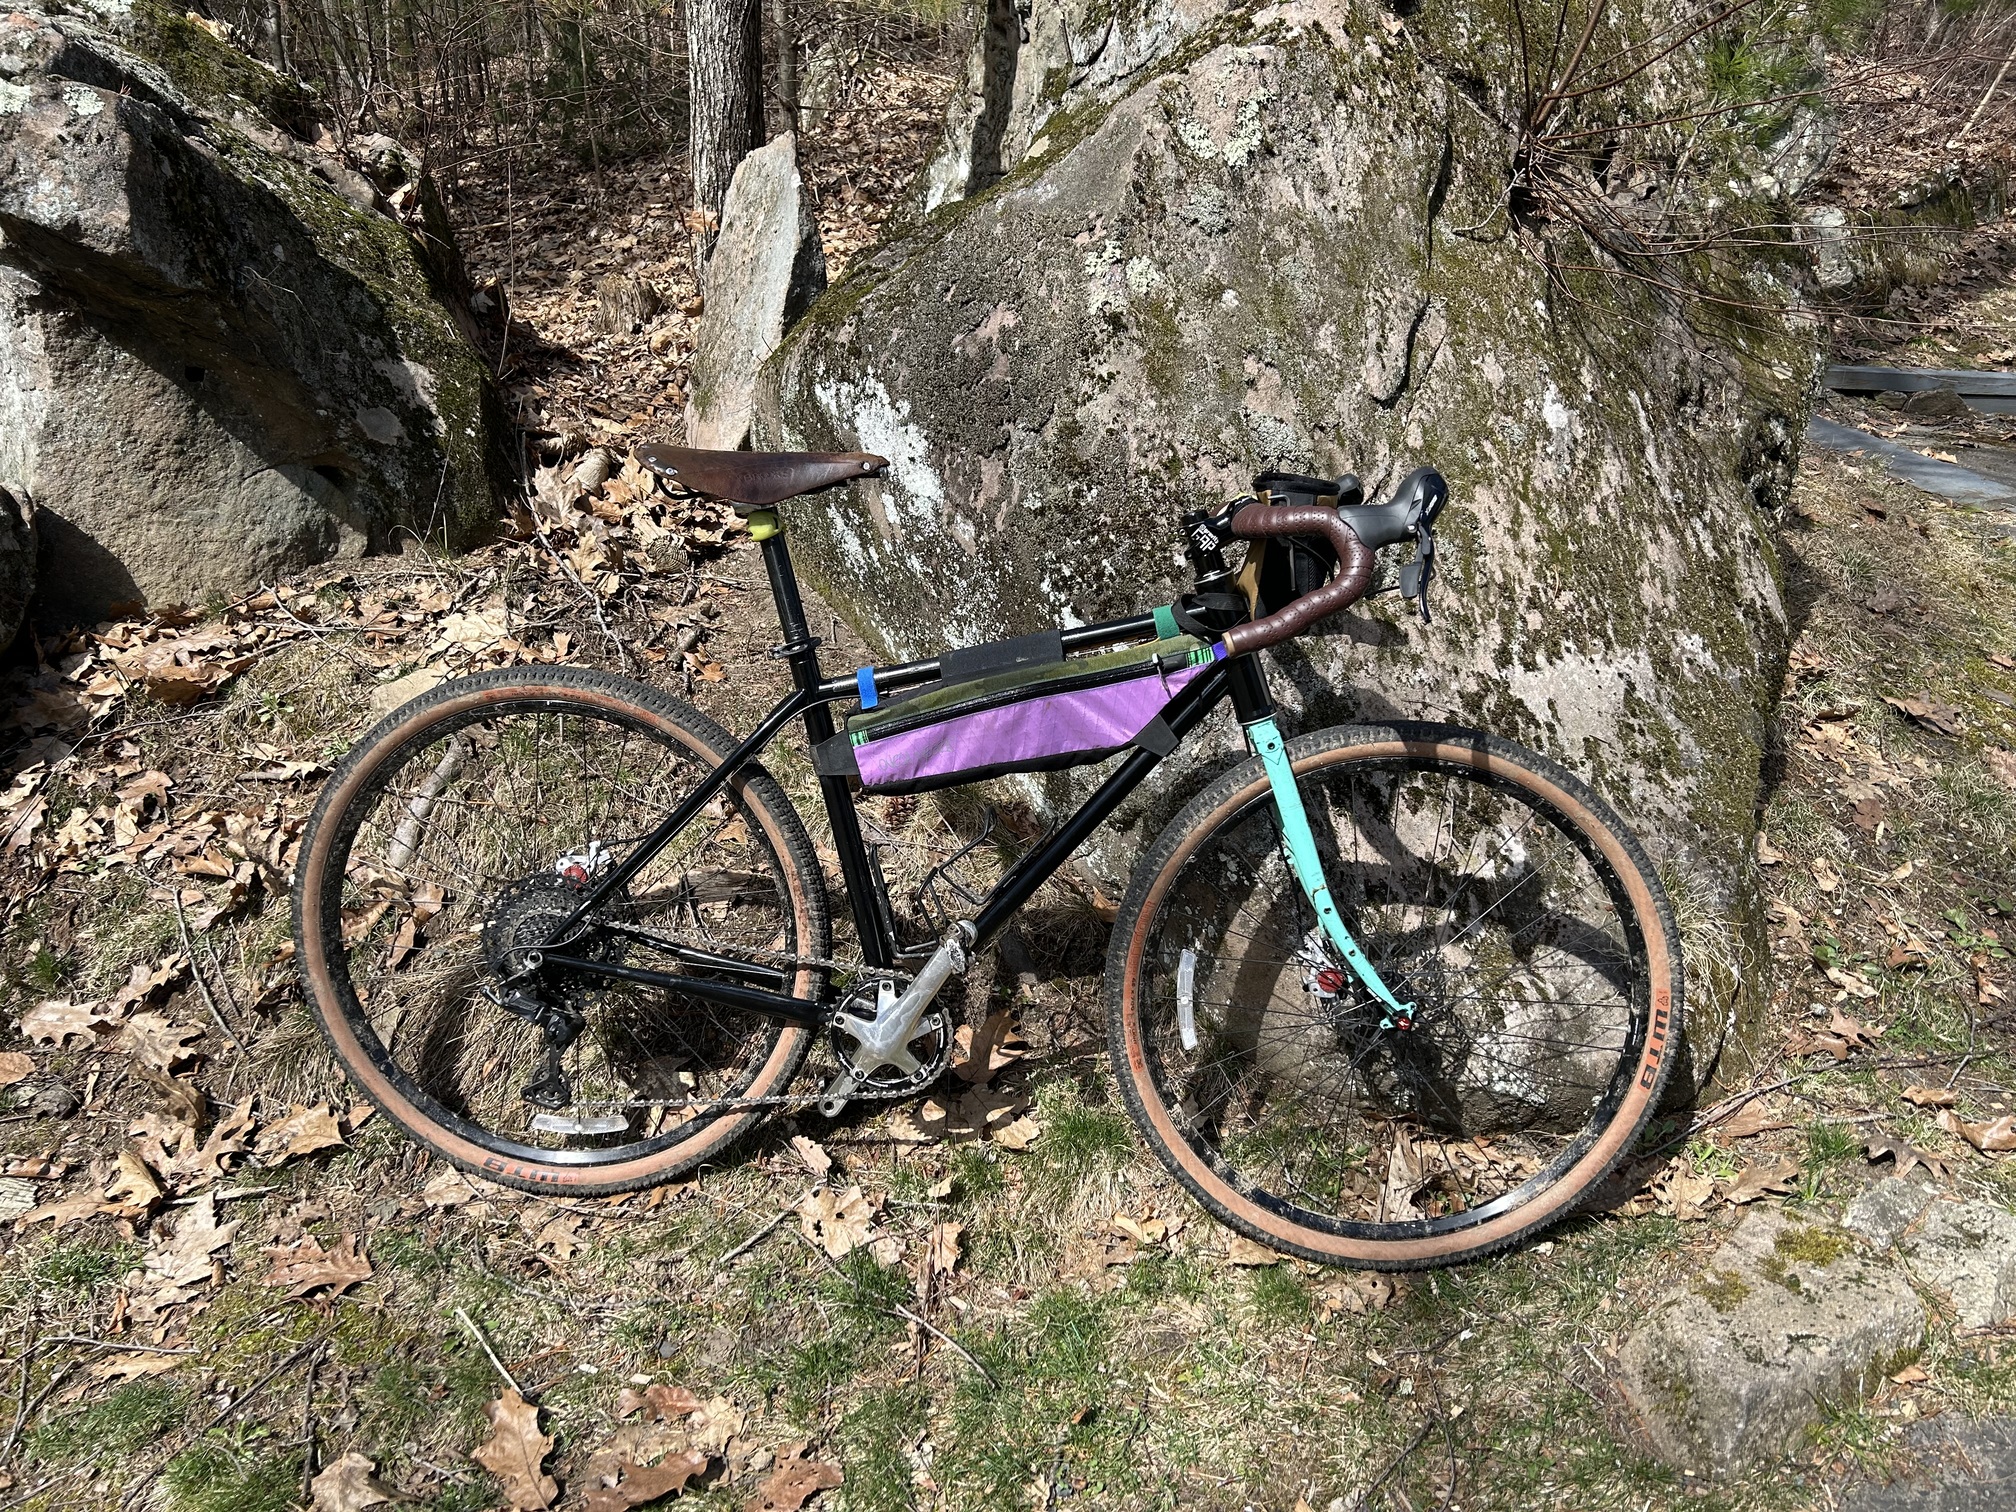
Got the mtb painted and assembled. It passed the driveway pedal. Stoked to get it out into the woods. It weighs 28 lbs all assembled, pretty much just gained a few pounds due to the fork and dropper post, compared to the rigid setup it replaced. Real excited to get it into the woods.
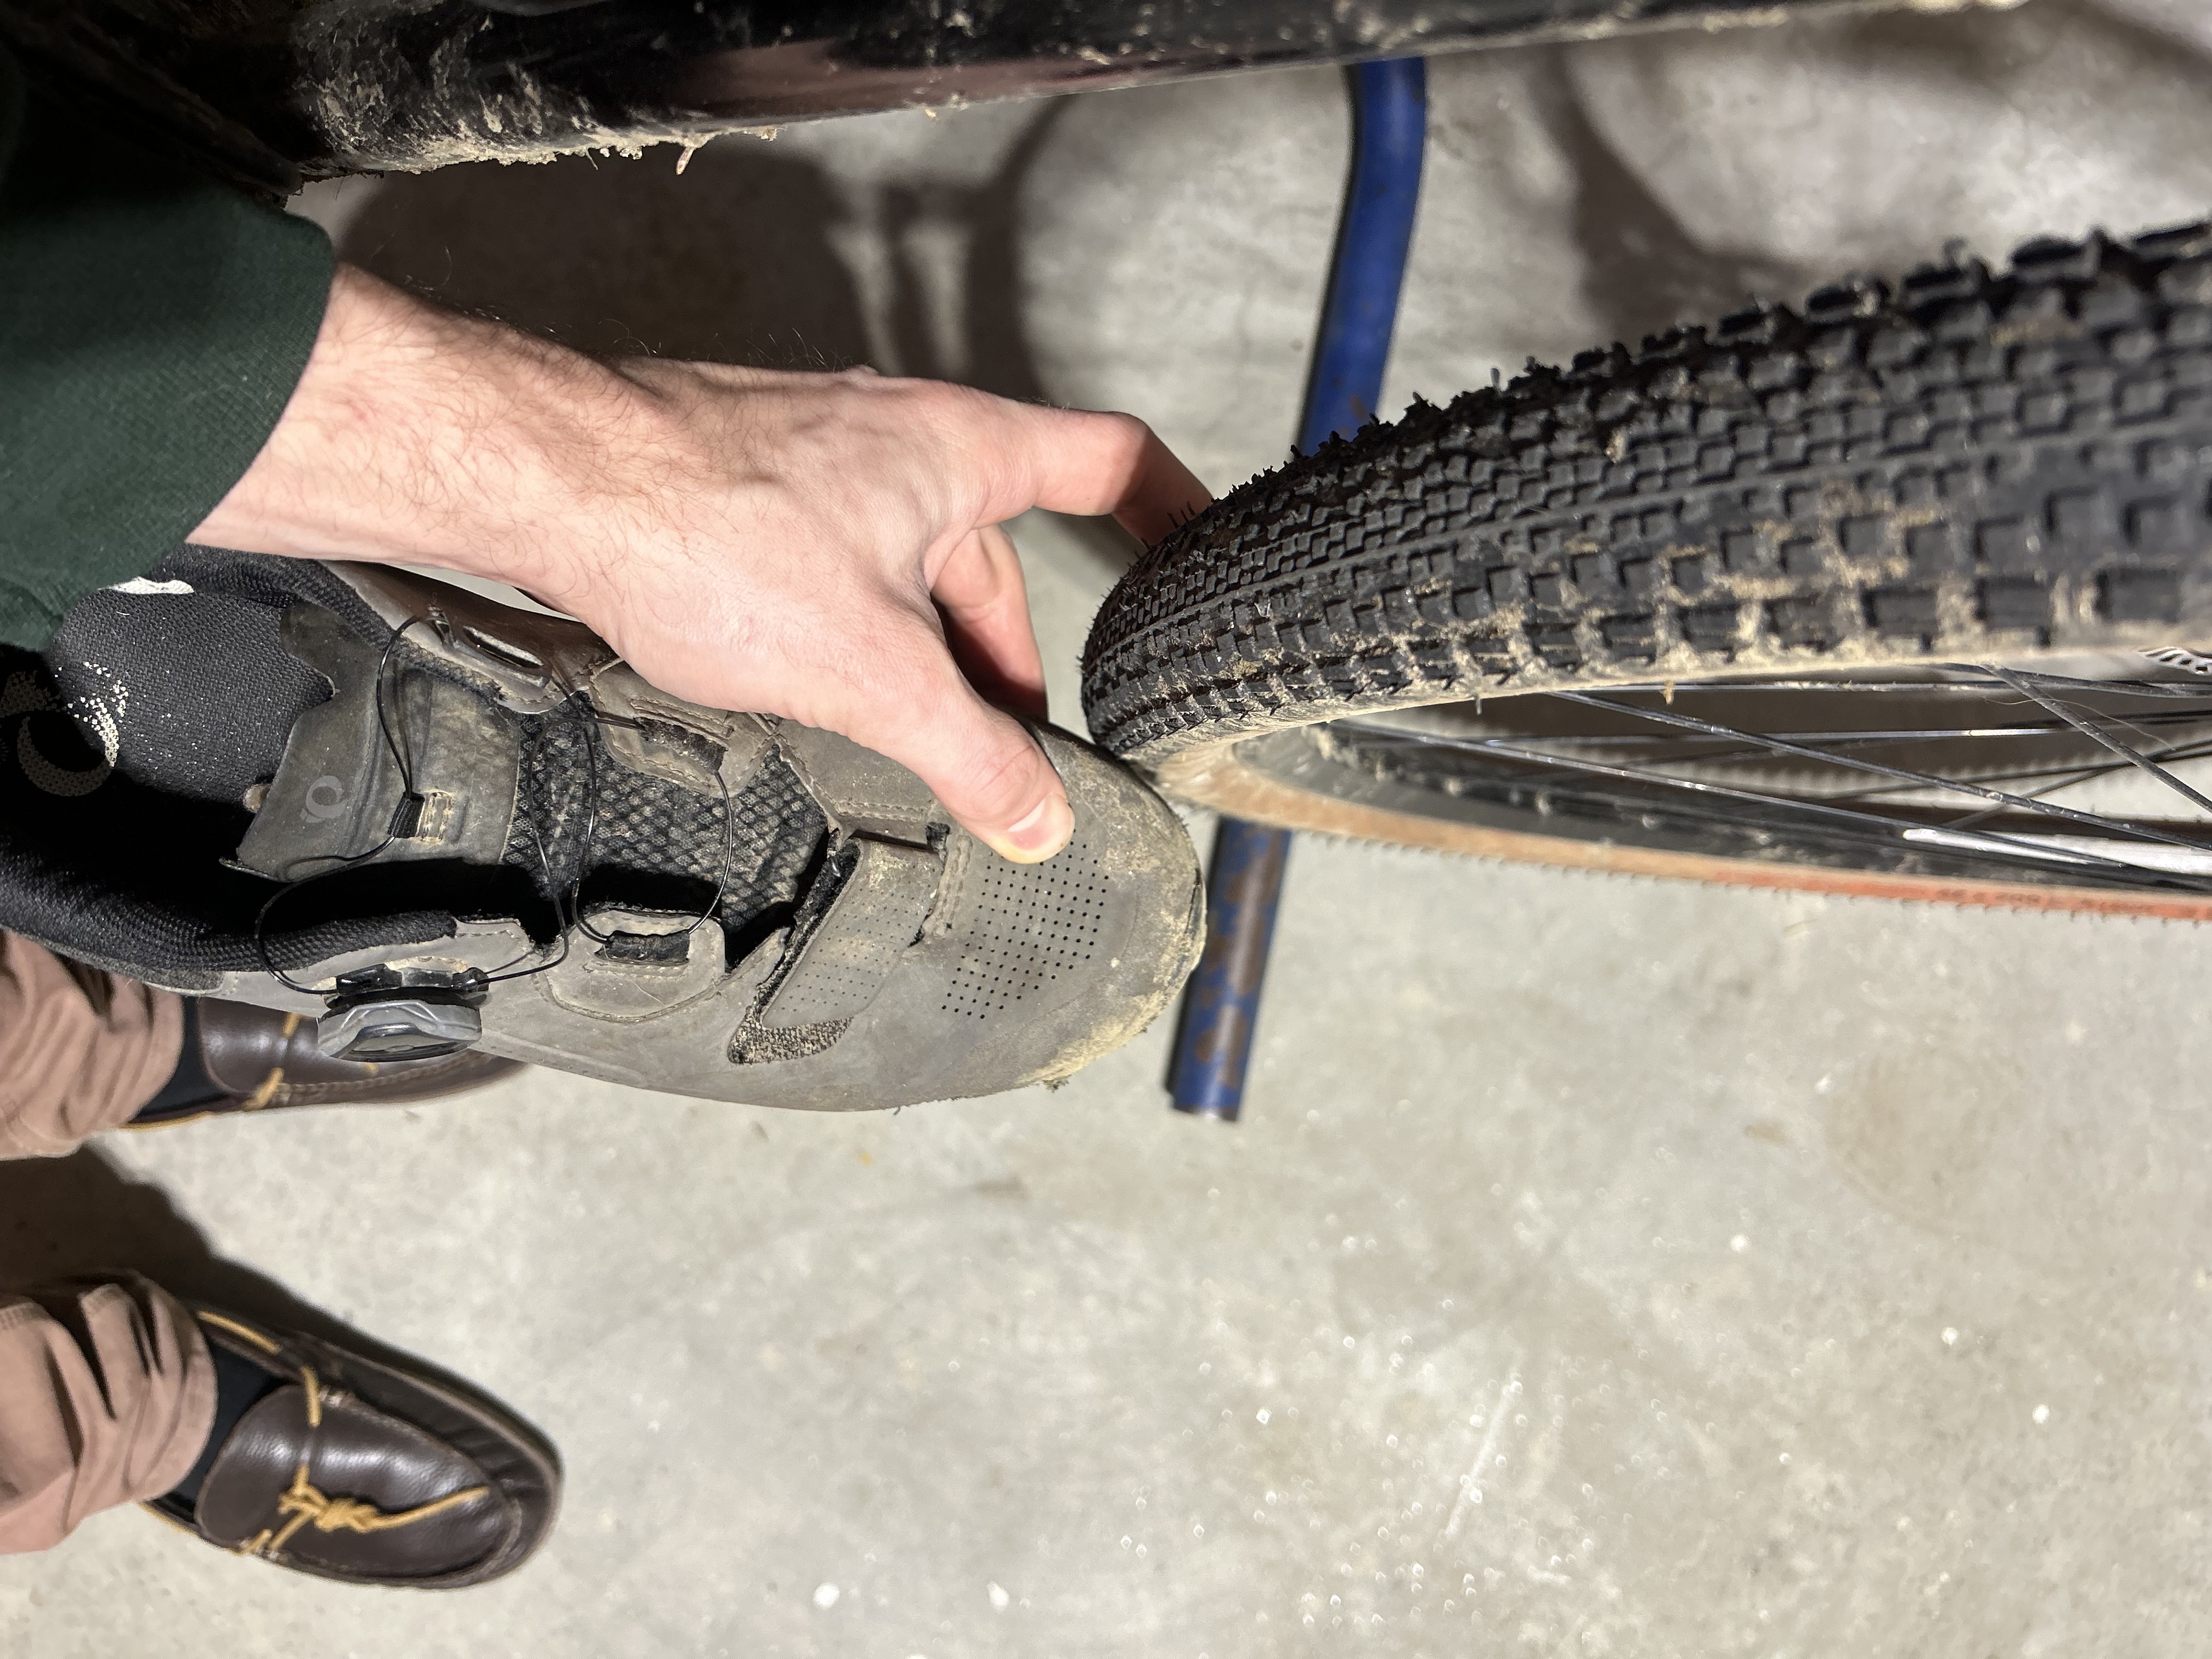
Been slowly working on fixing the toe overlap on the gravel bike. Changing the head tube angle from 71.5° to 67°. As usual, excuse the basement mess hah.