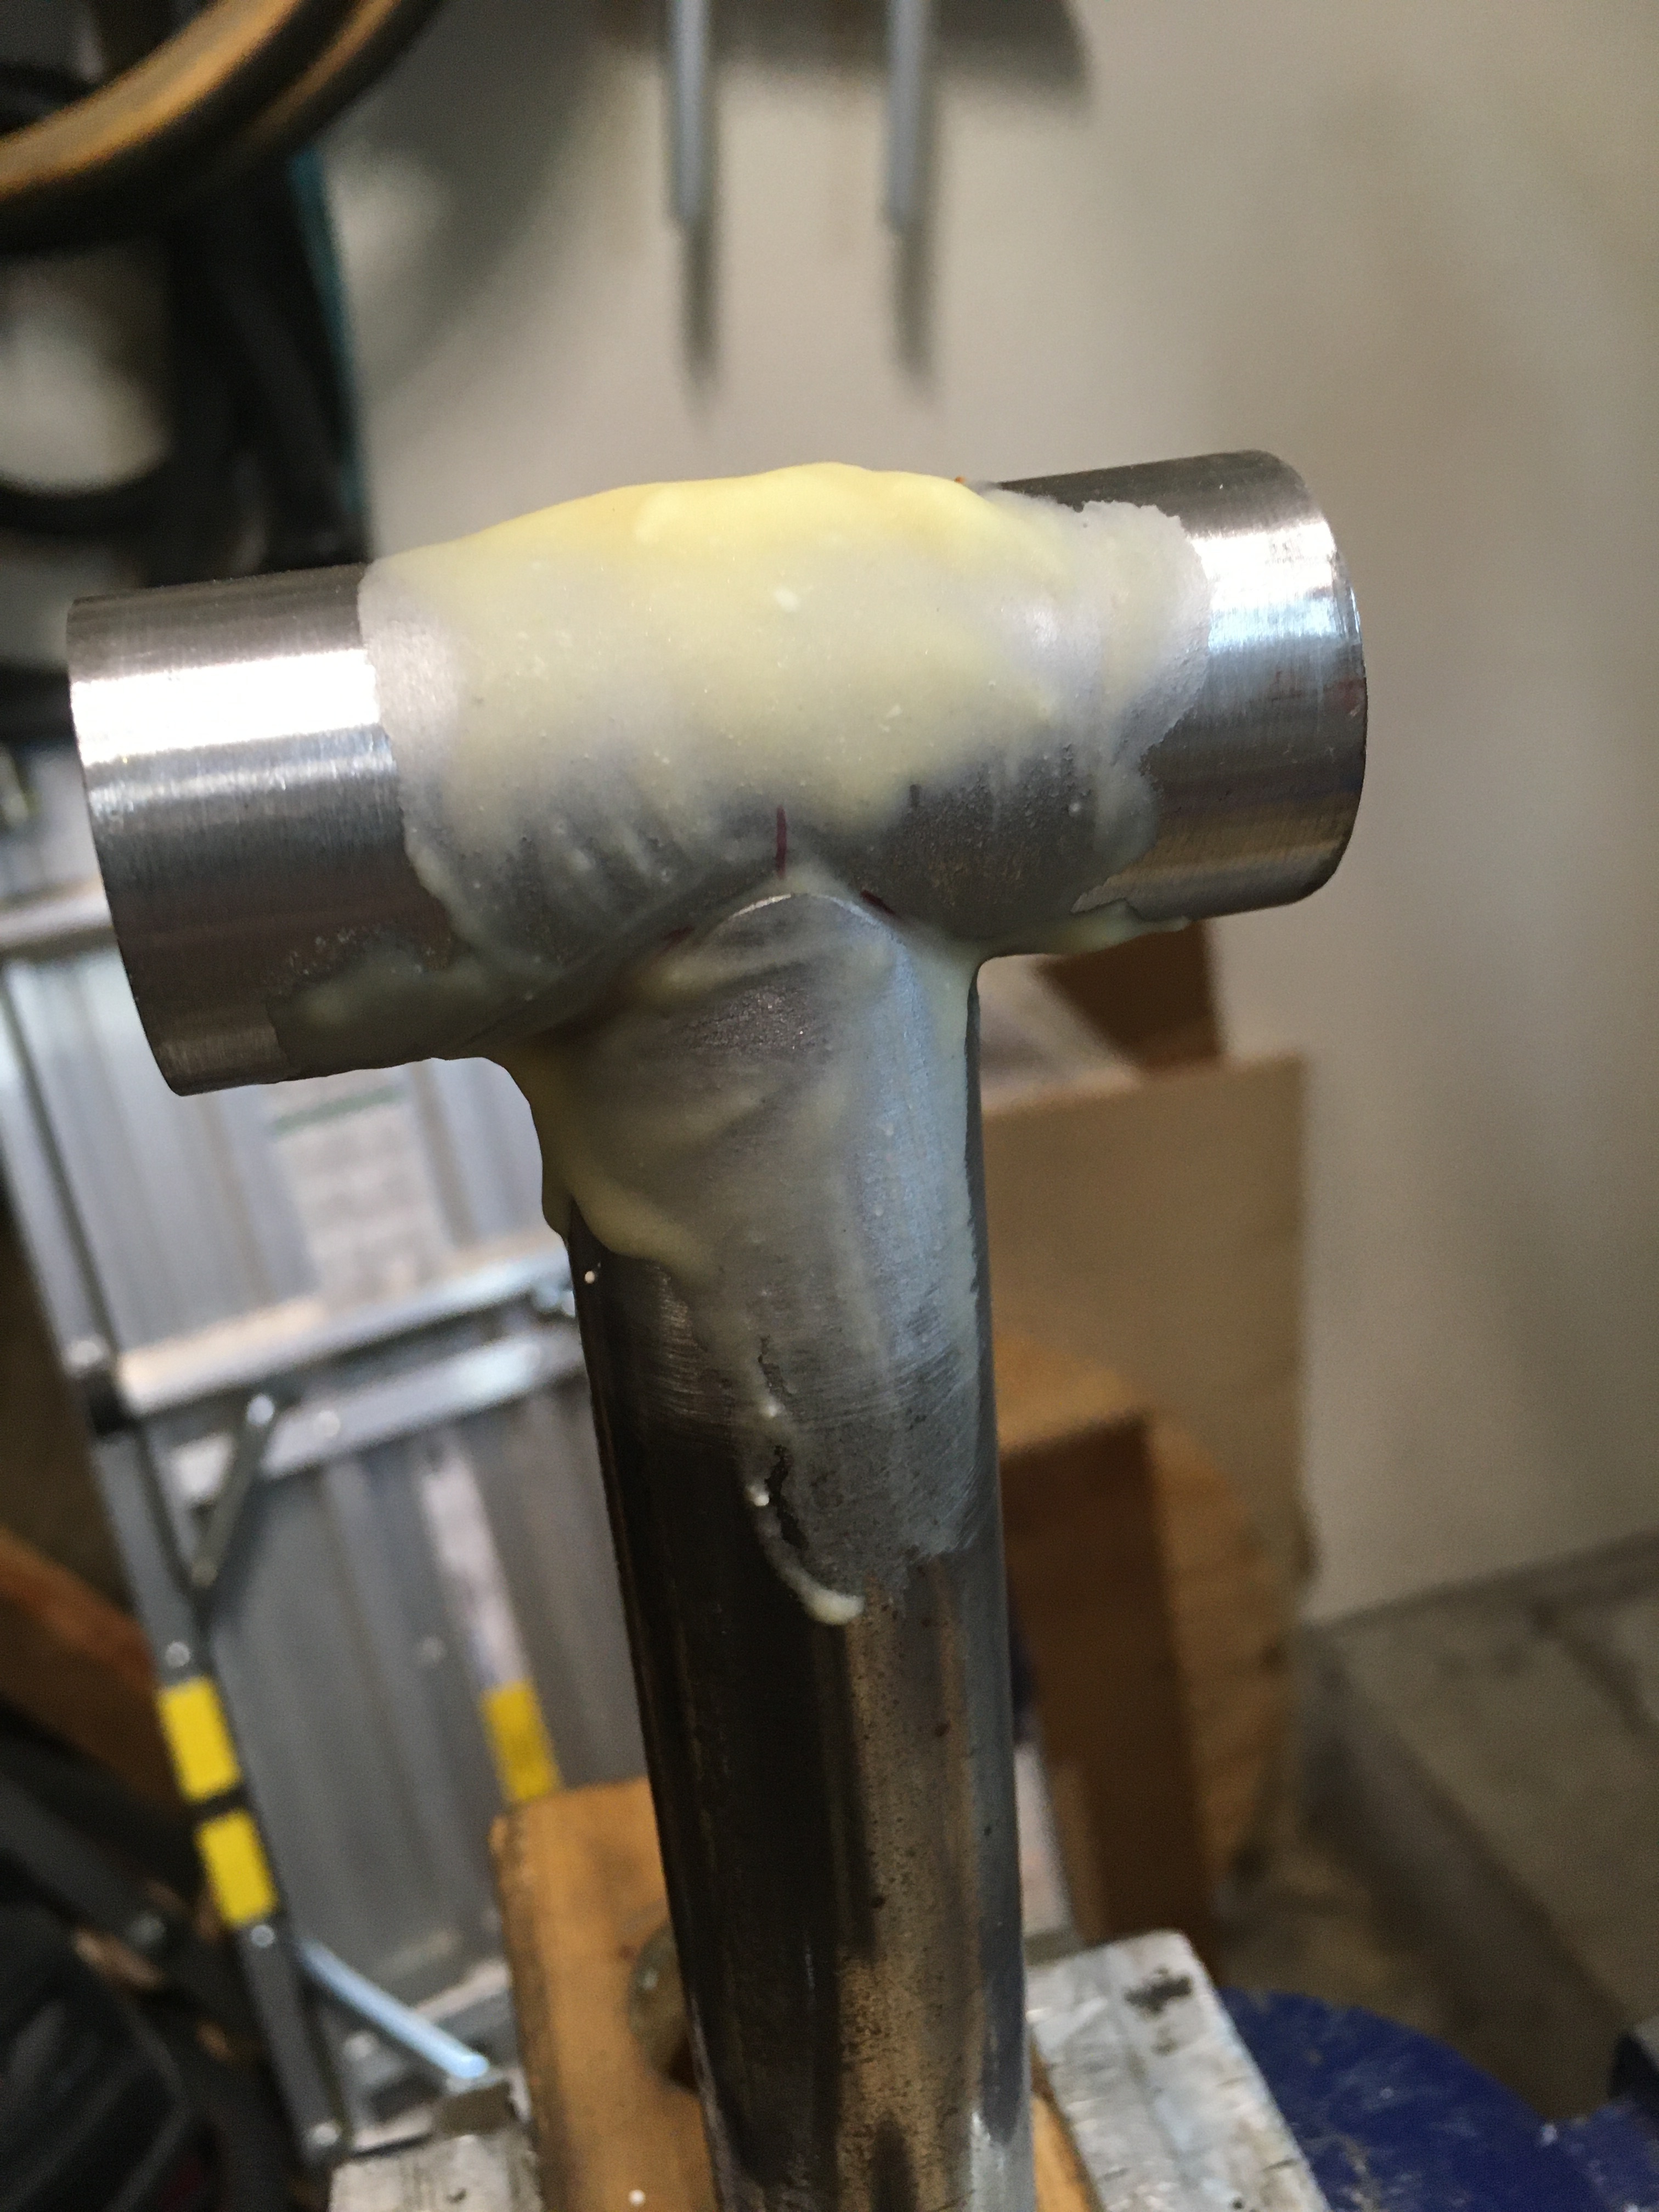
My input. Skip the tinning stage. You don’t really need to do that. The purpose of tinning is to make sure you’re getting an internal fillet. Done properly, a brazed joint will achieve an internal fillet in a single pass. I did lots of testing of this in the past by cutting up test joints. There was no real difference internally between a tinned joint and a normal joint. If you really feel you should tin the joint, then the example you’ve shown has way too much filler. You want to get the whole joint up to temp and get in and out of there fast. You should see a little bit of filler on the outside but hardly any. As I said, get the joint up to temp, add filler and as it sucks into the joint keep moving. Whole joint like that should take about 30 secs for tinning. You should be left with a thin brass line round the joint.
I’m also not convinced by a separate smoothing/shaping pass, I know Tom Ritchey does it but unless you can get a no-file joint done that way, you’re going to be filing it anyway.
One thing to remember is that heat is the enemy of the material. The higher the temps you get it to and just as importantly (if not more) the number of heat cycles you put into that tube, the more damage you’re doing. You’re also going to be making things difficult for yourself when it comes to alignment.
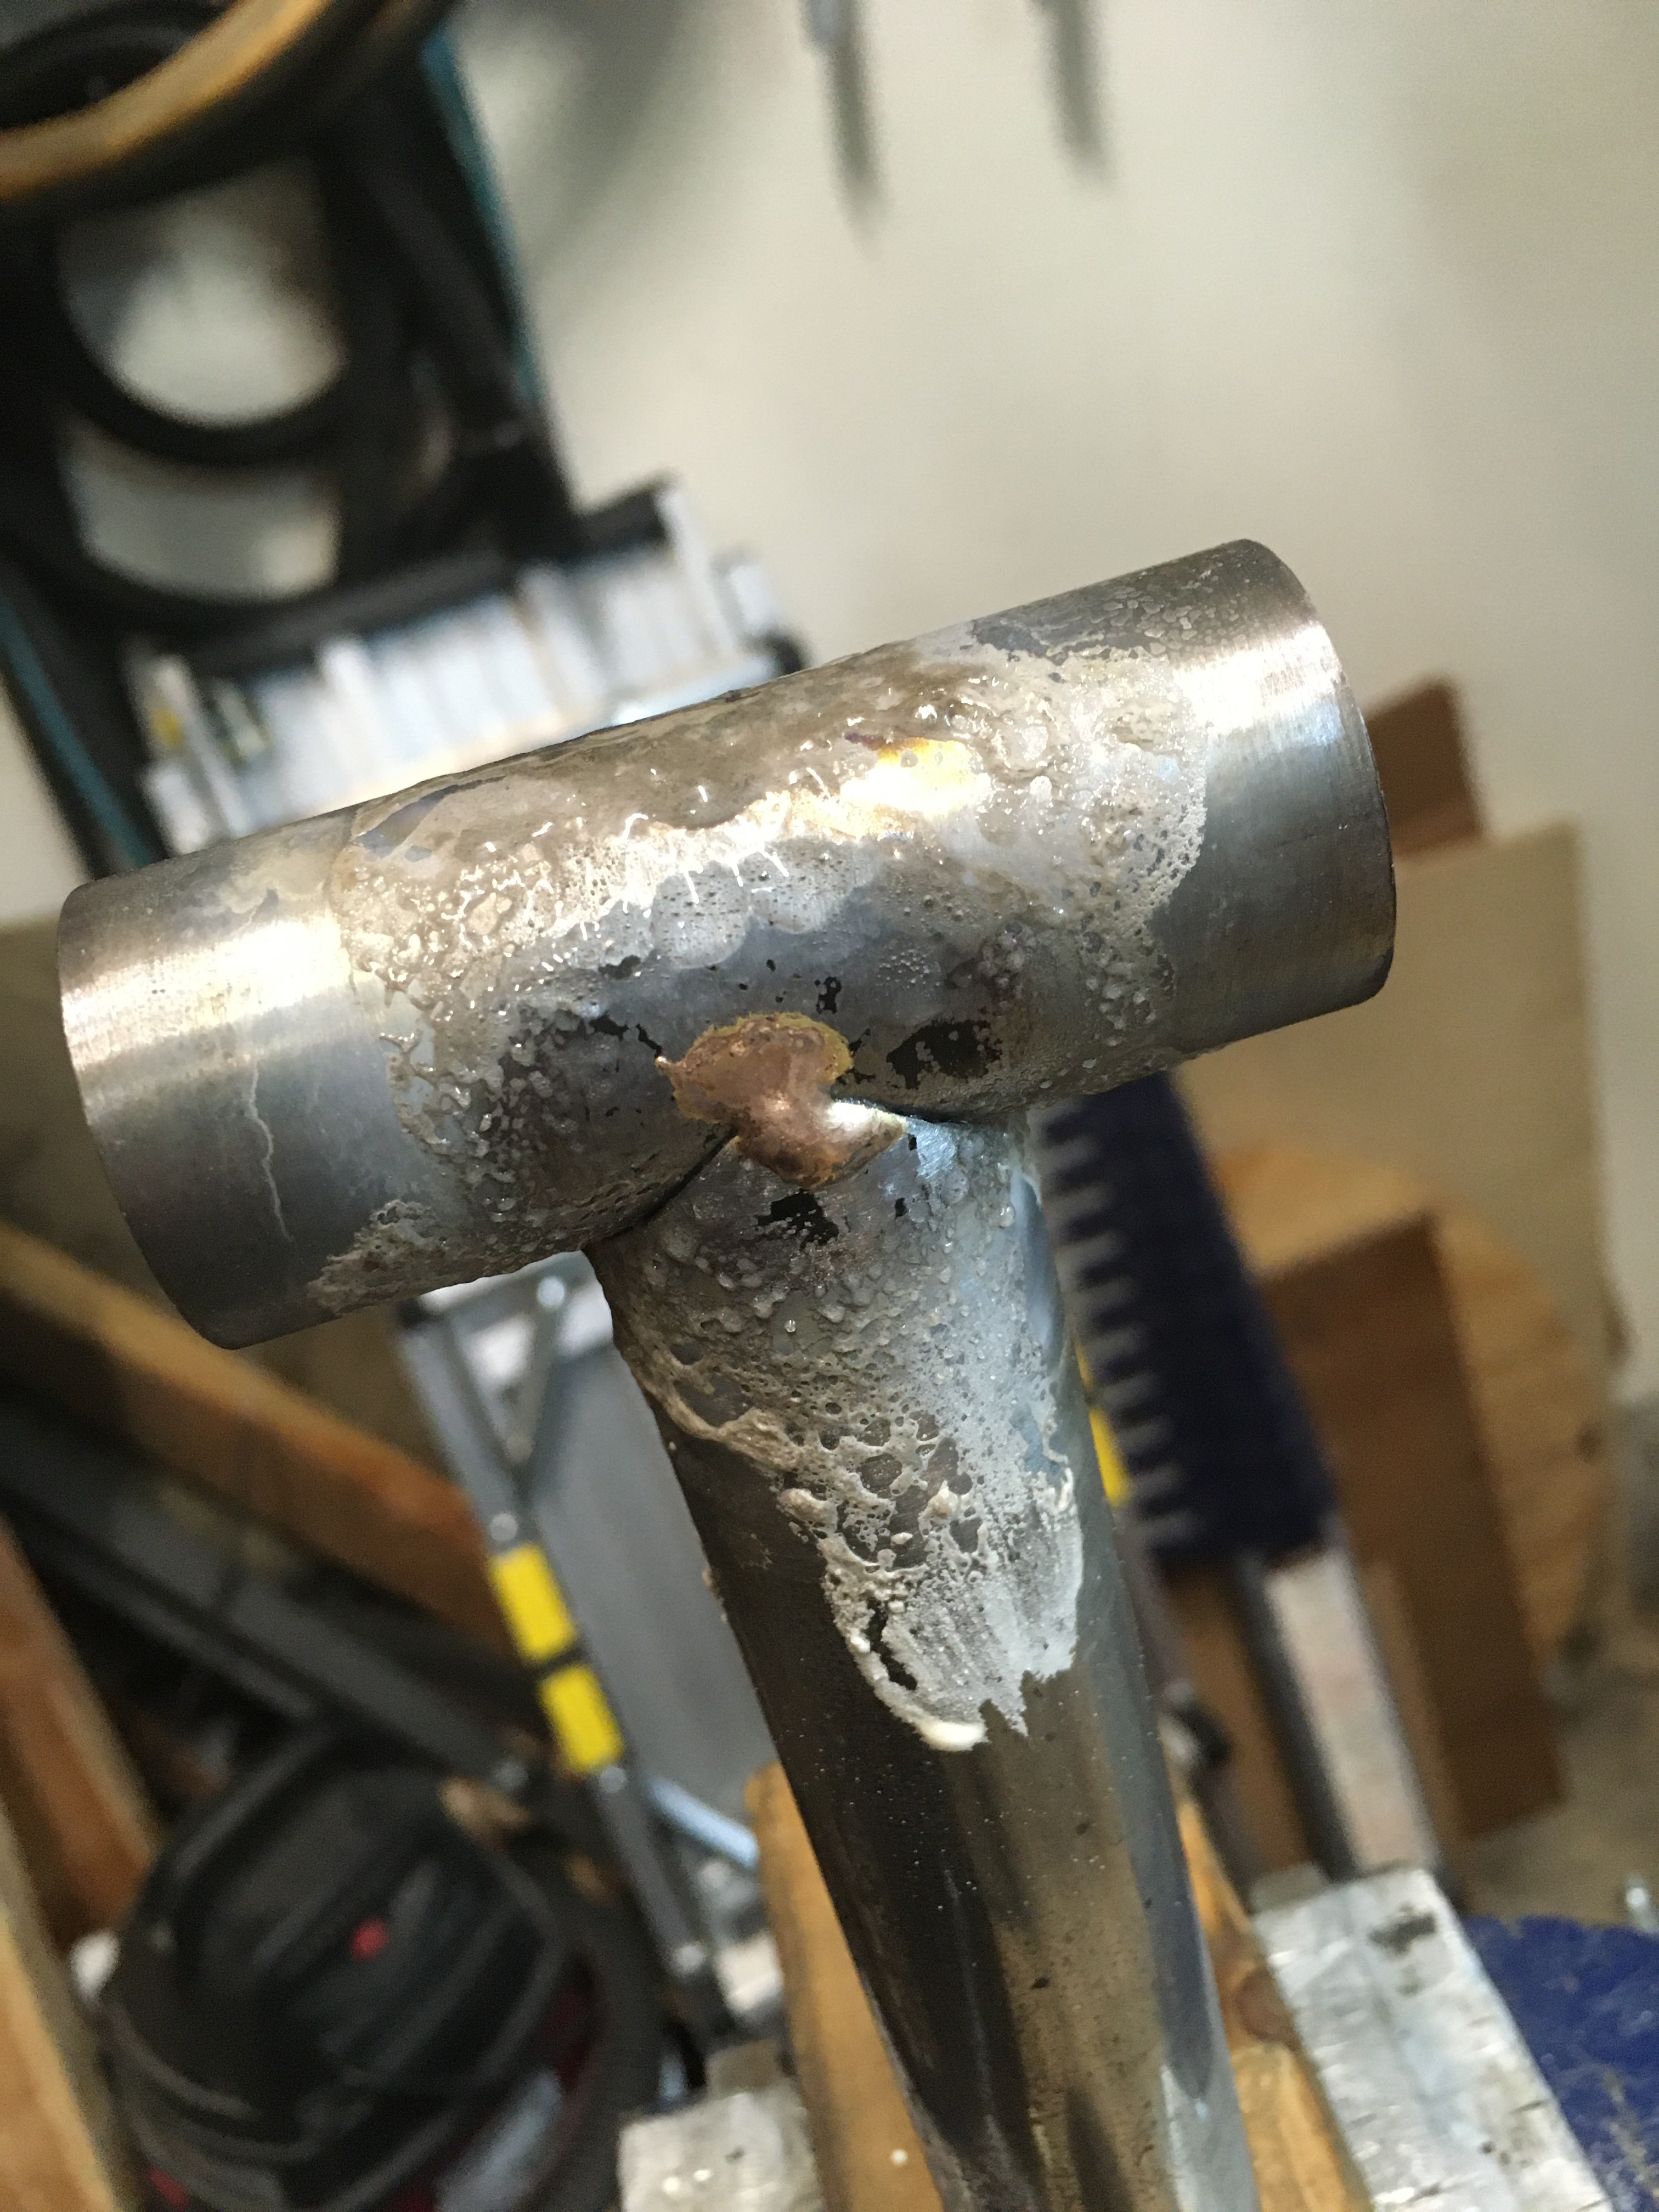
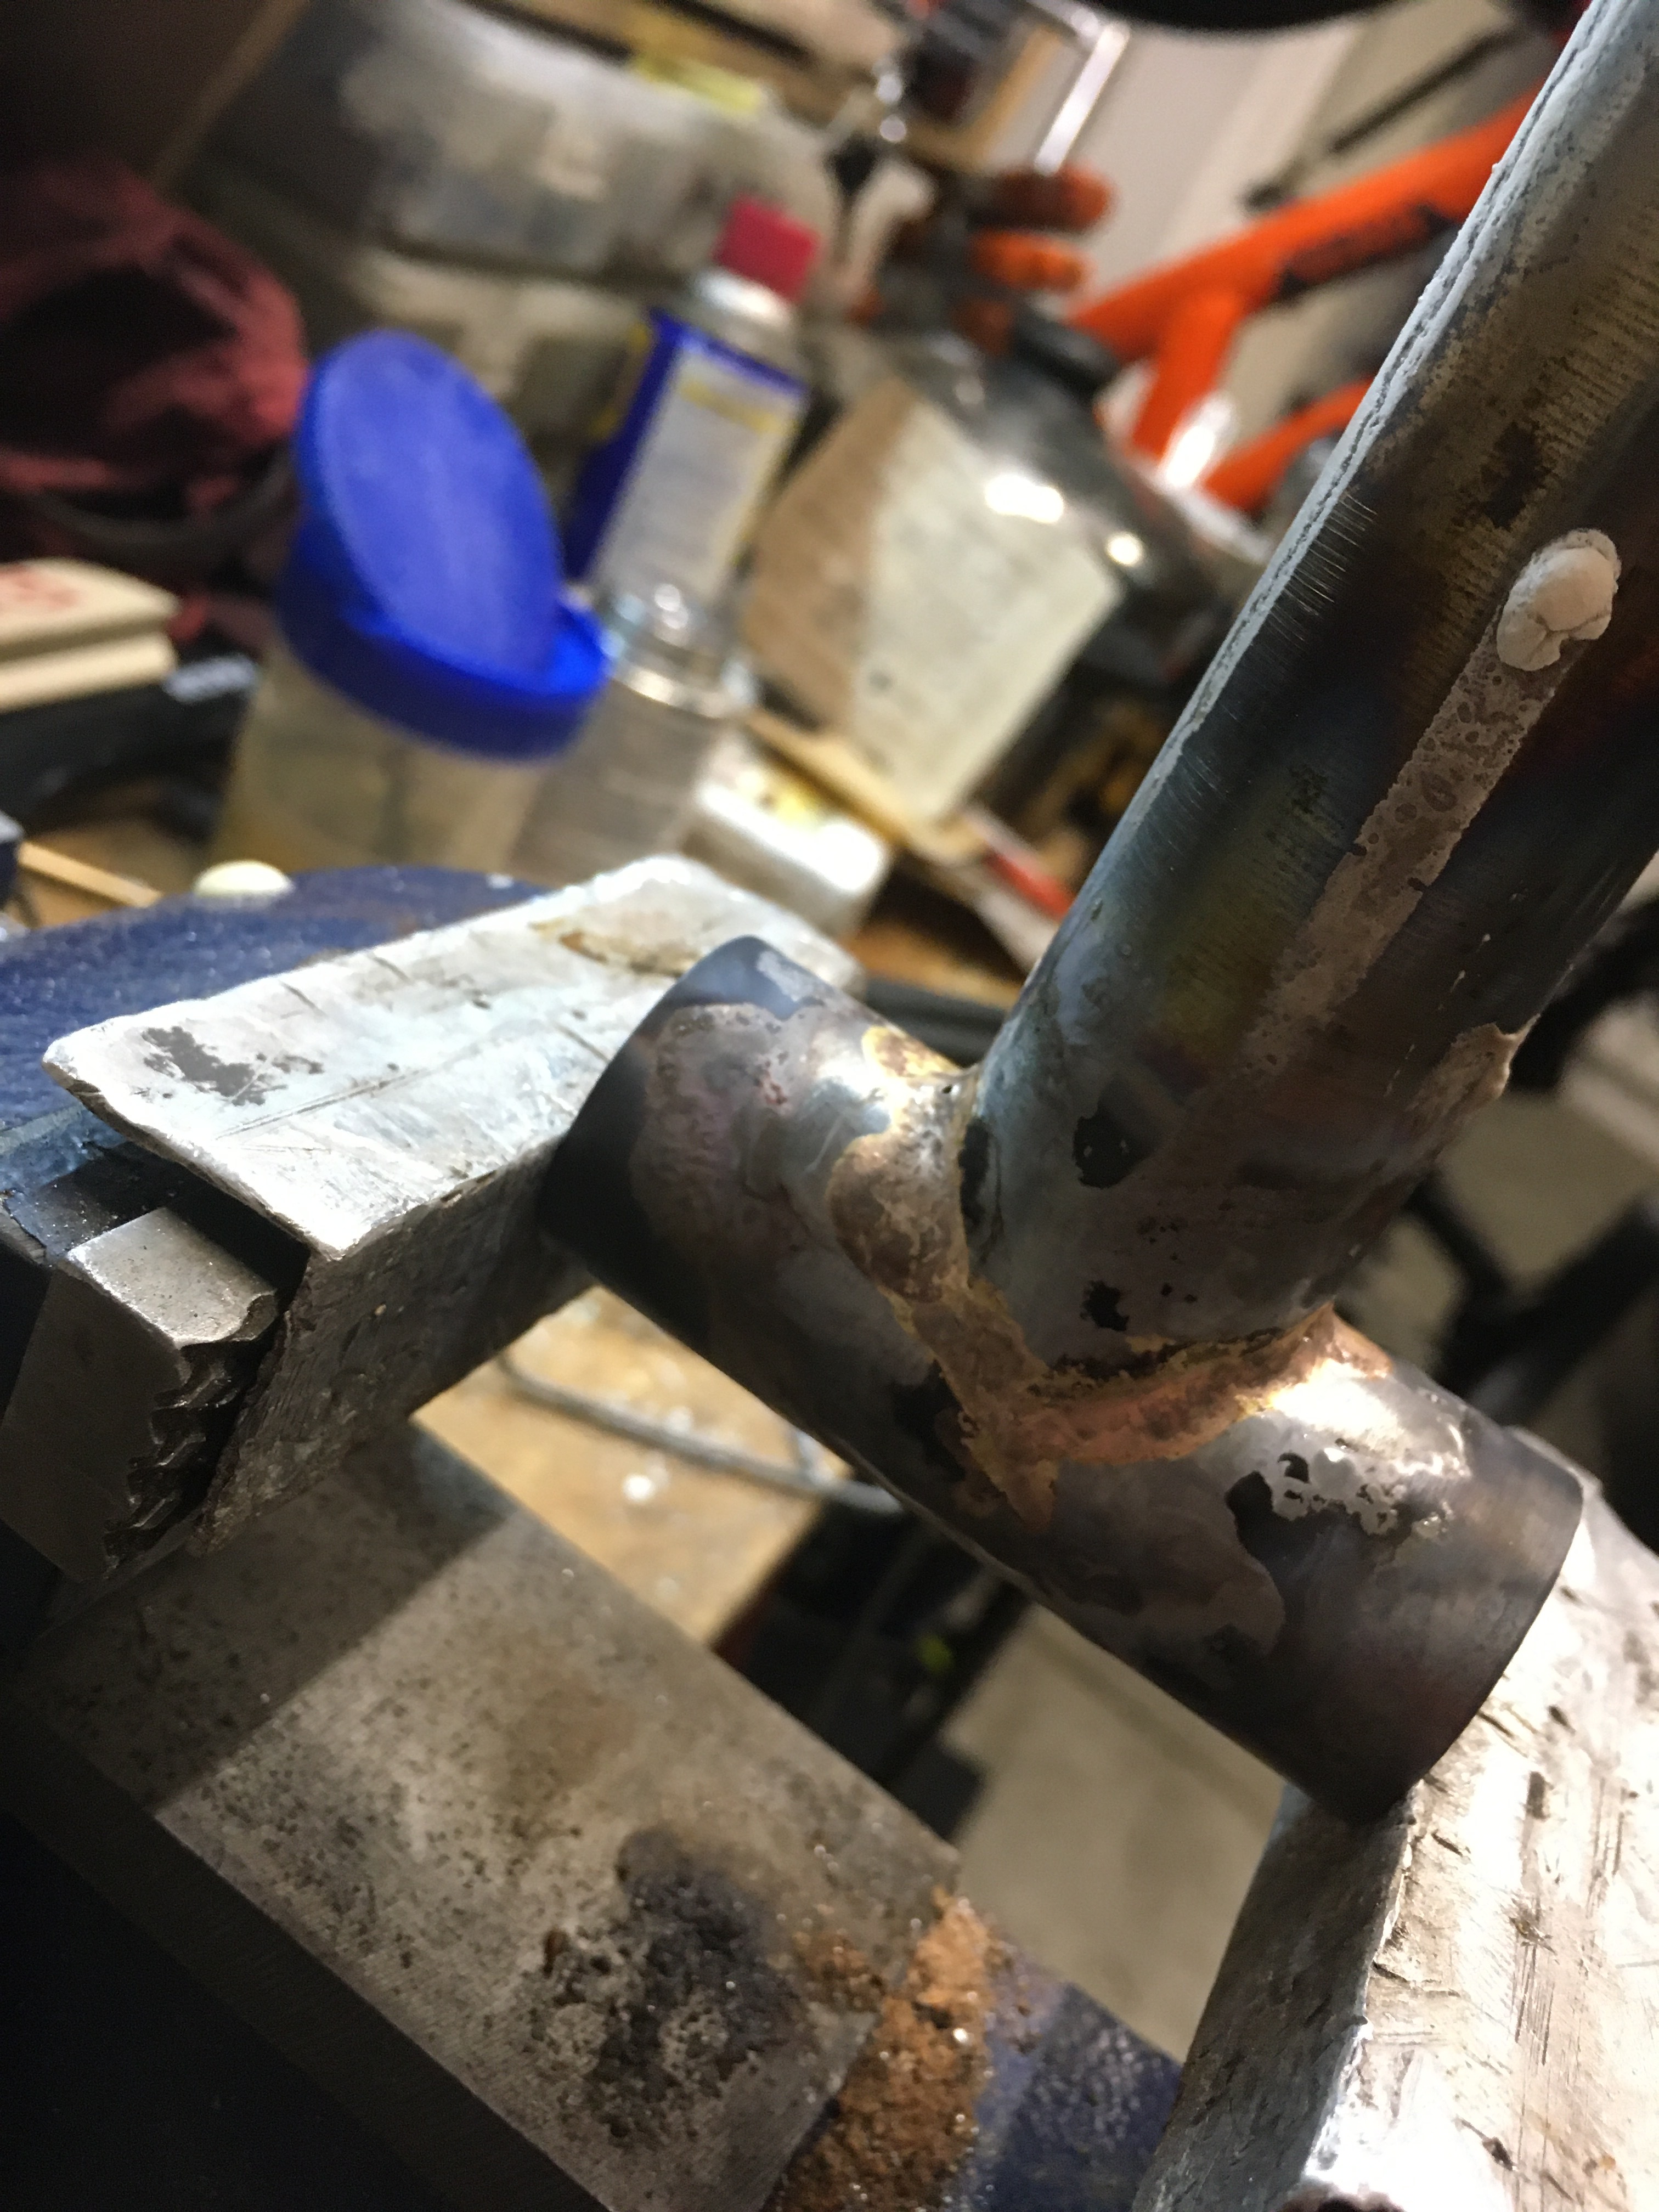
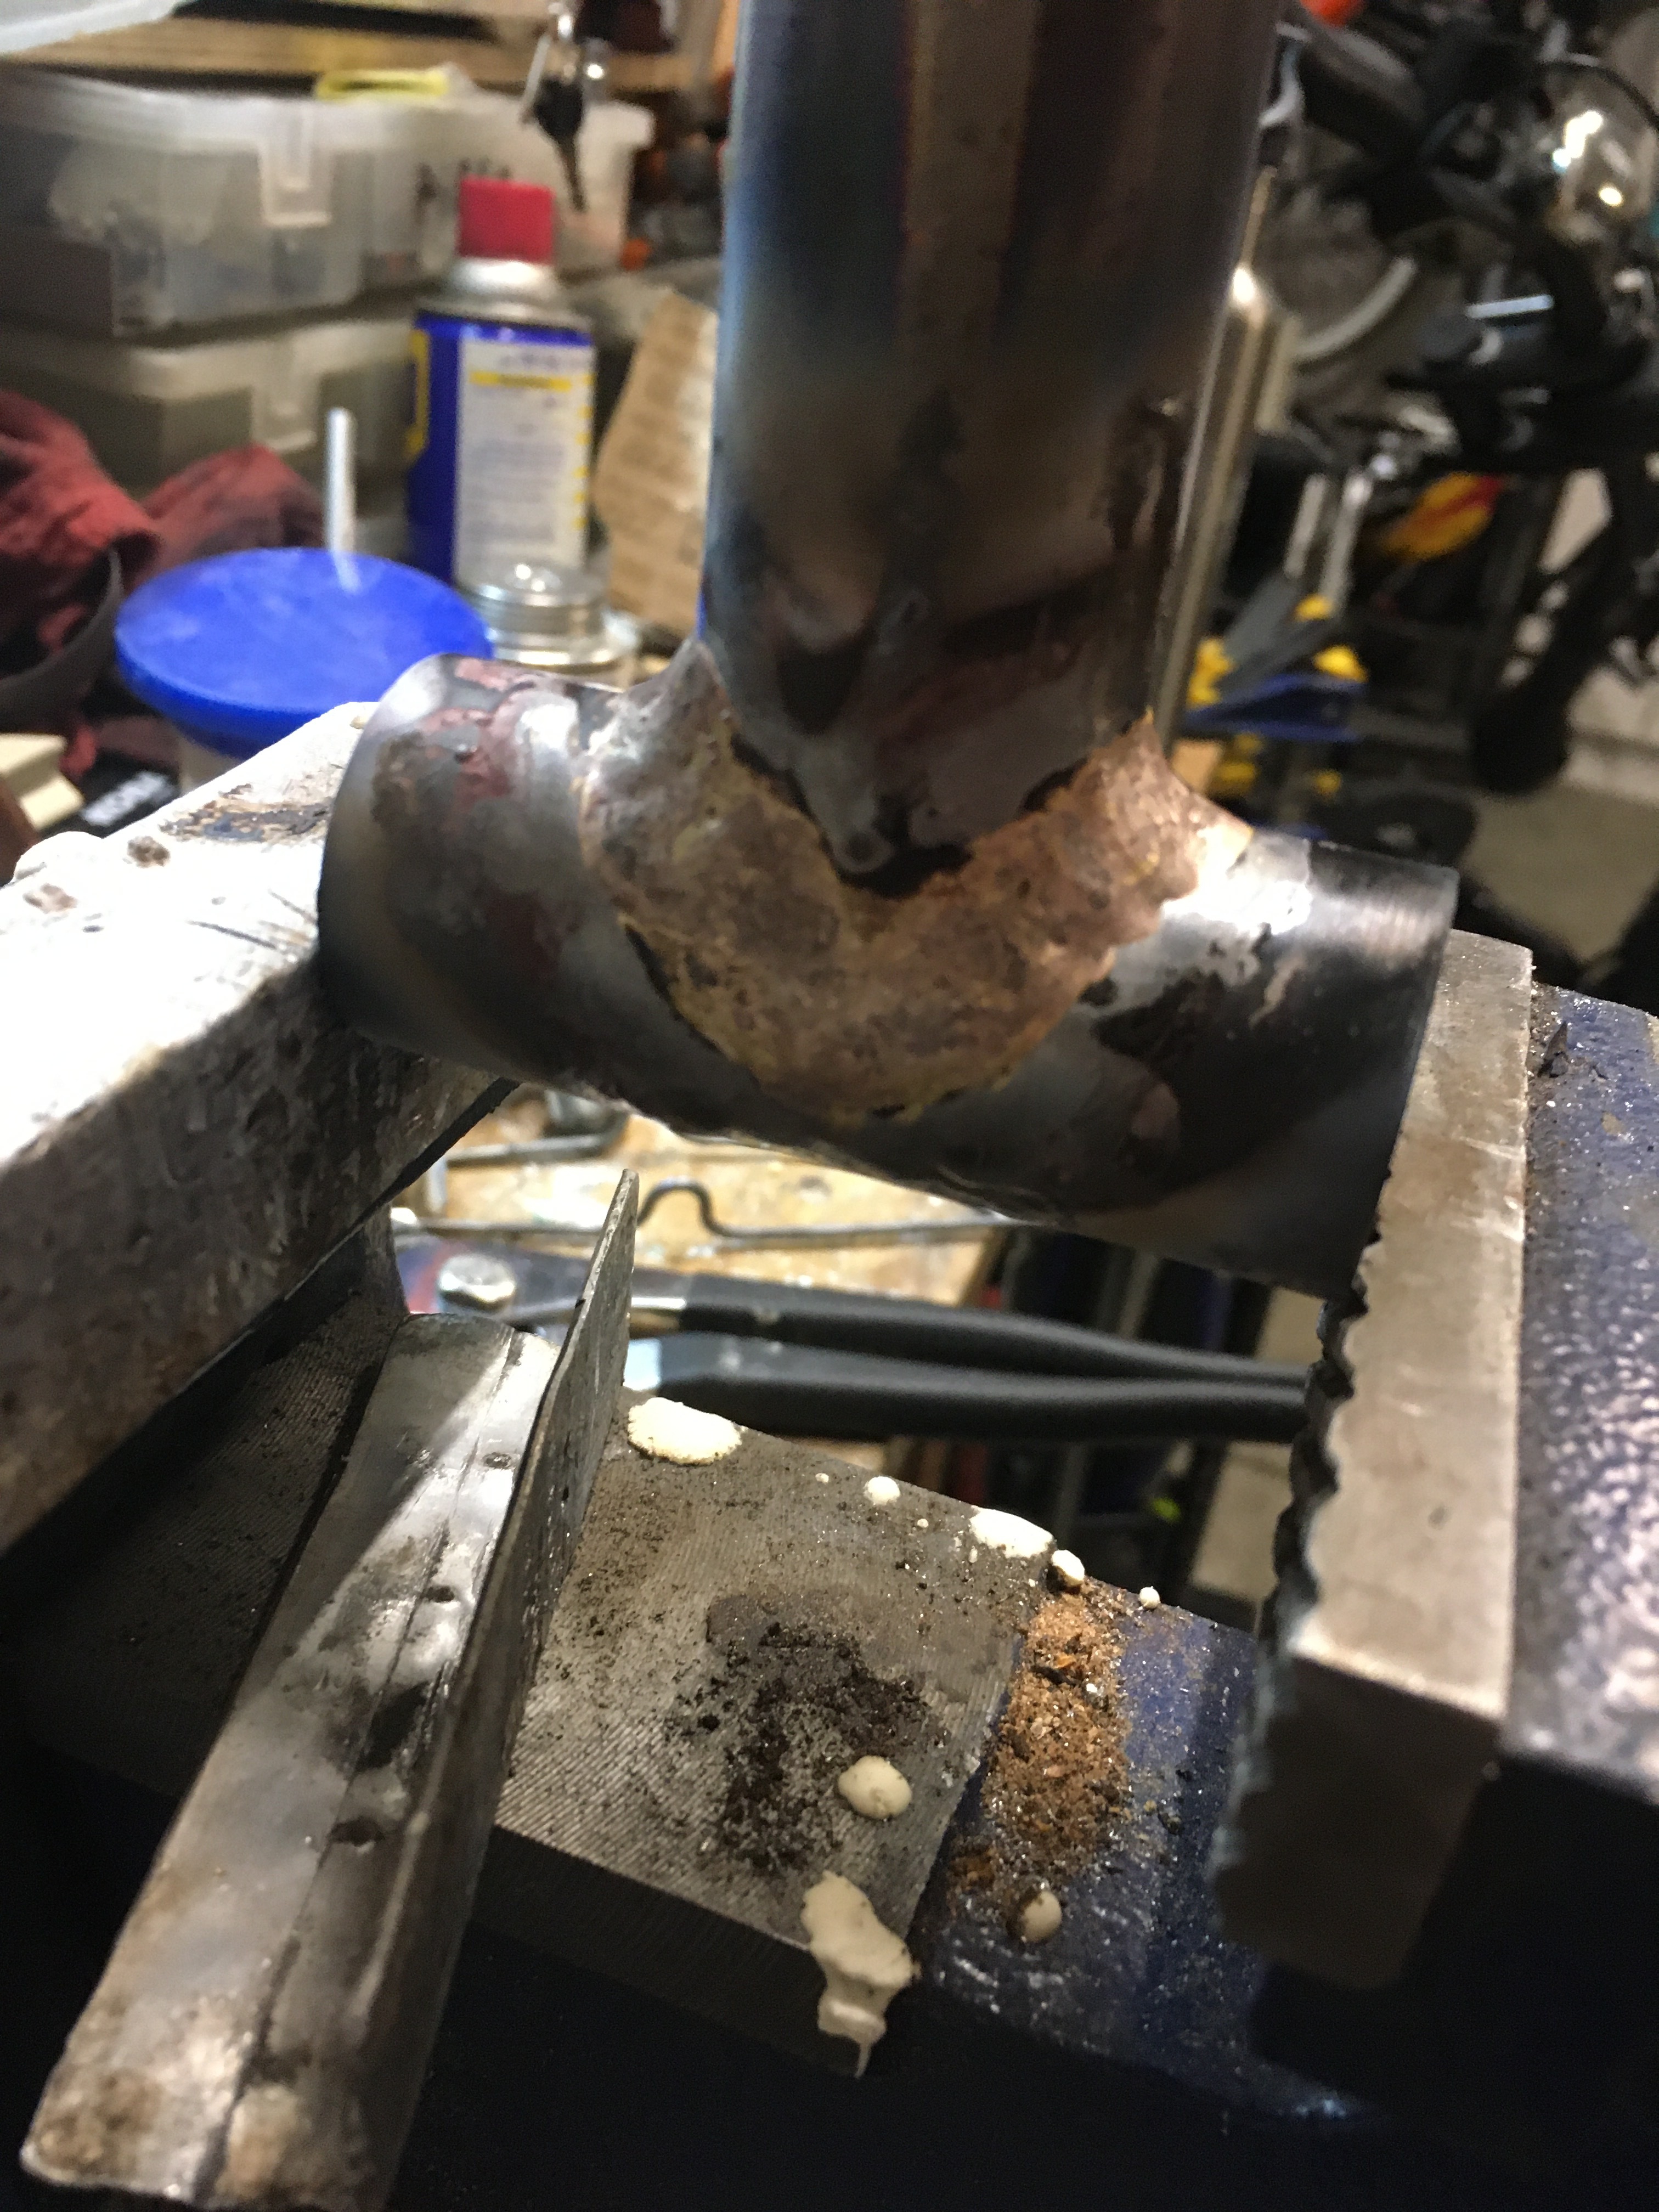
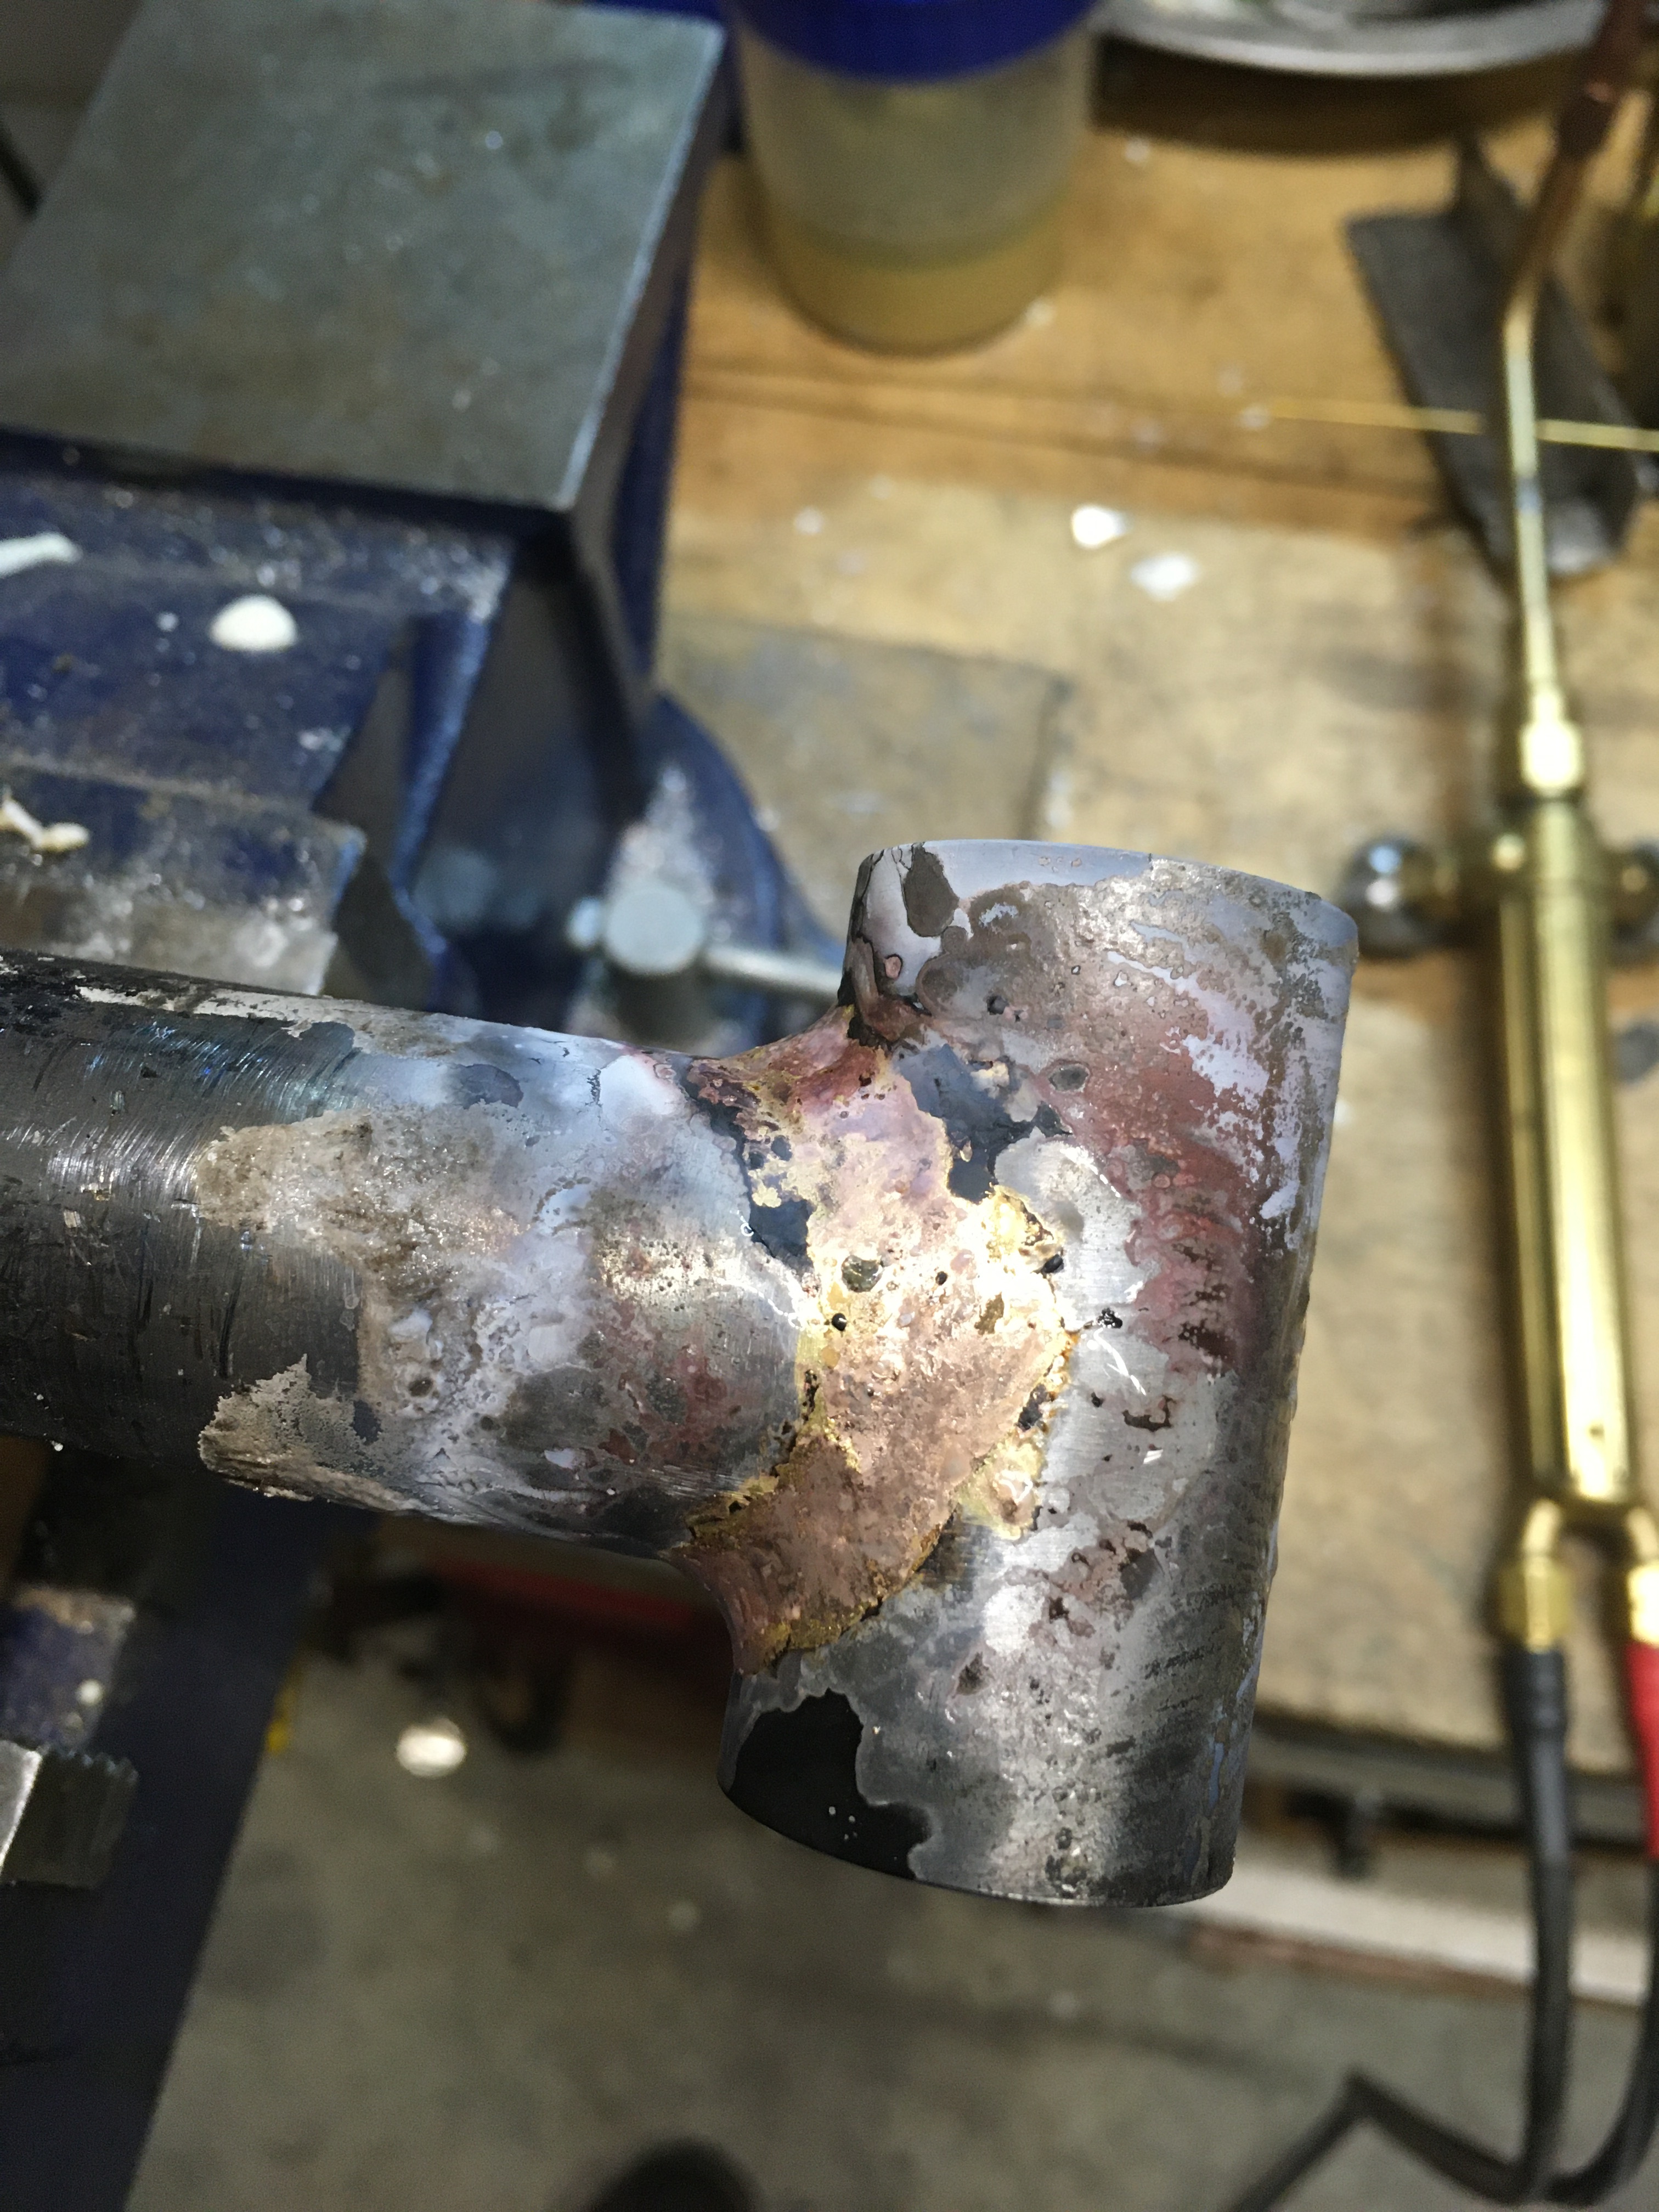
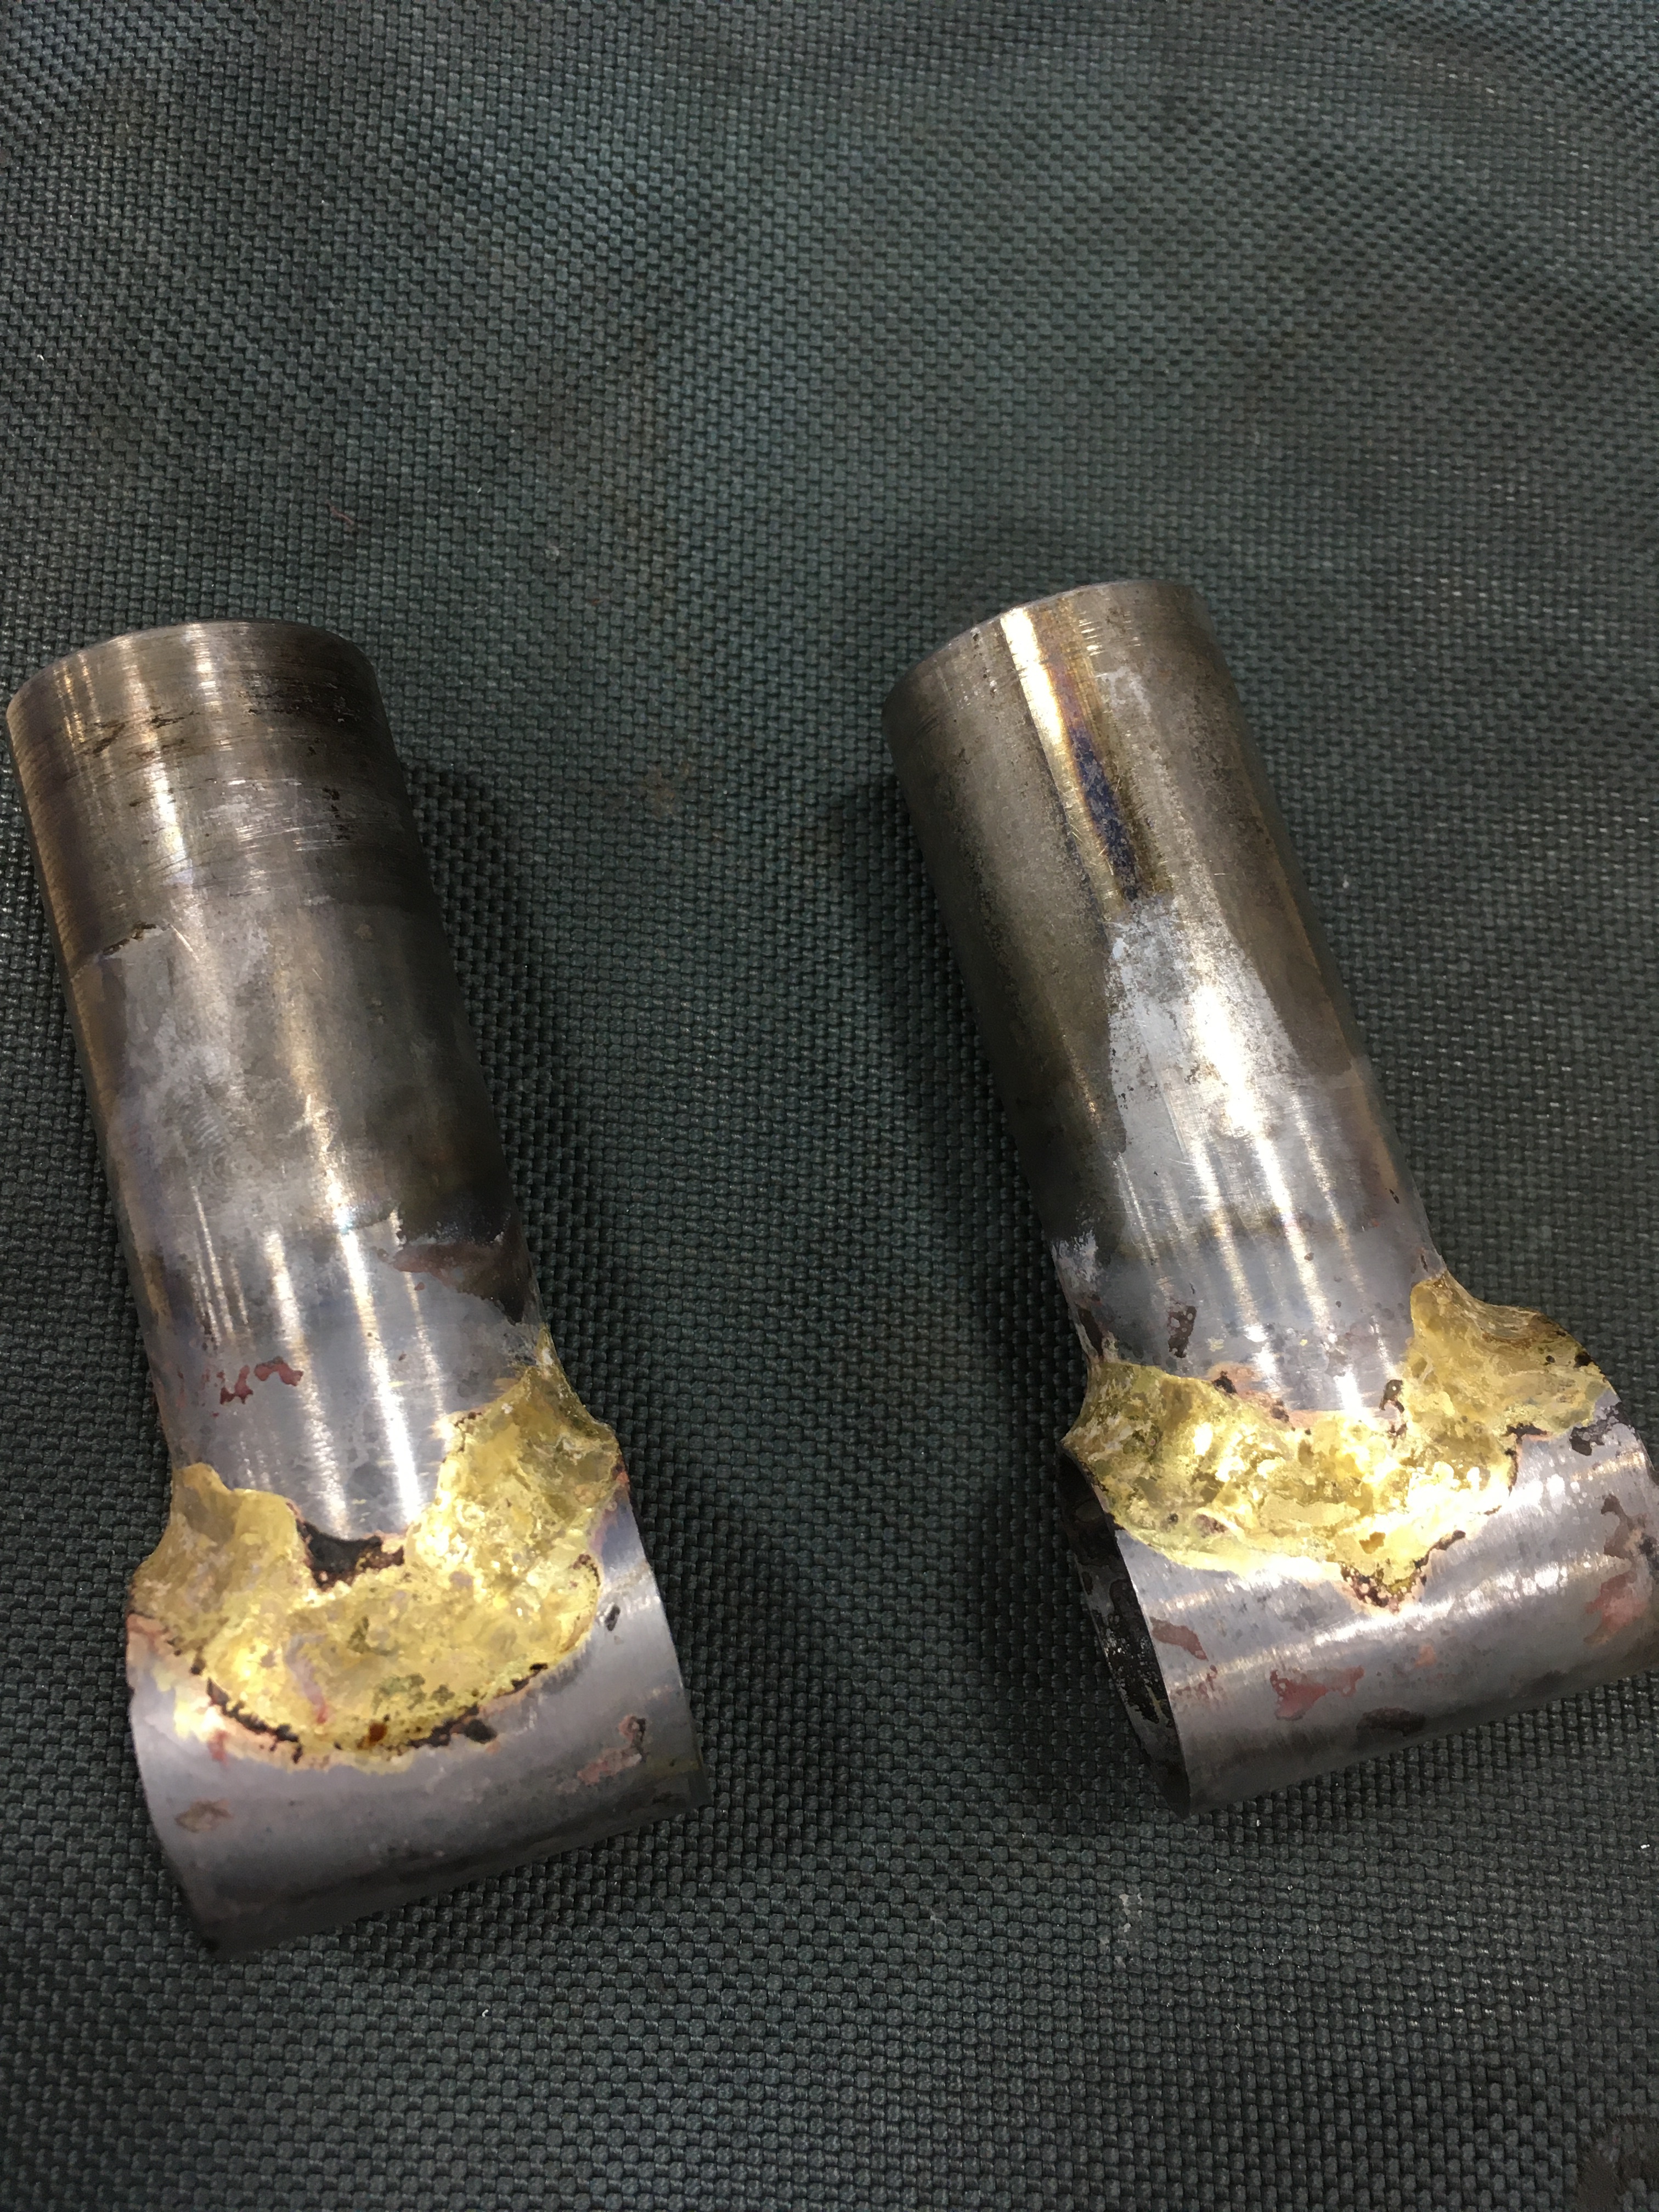
It looks to me is some of the pics that you’ve not got the base material hot enough all over. You can see this from the hard transition of the braze onto the tube. This should be totally smooth with no ridge.
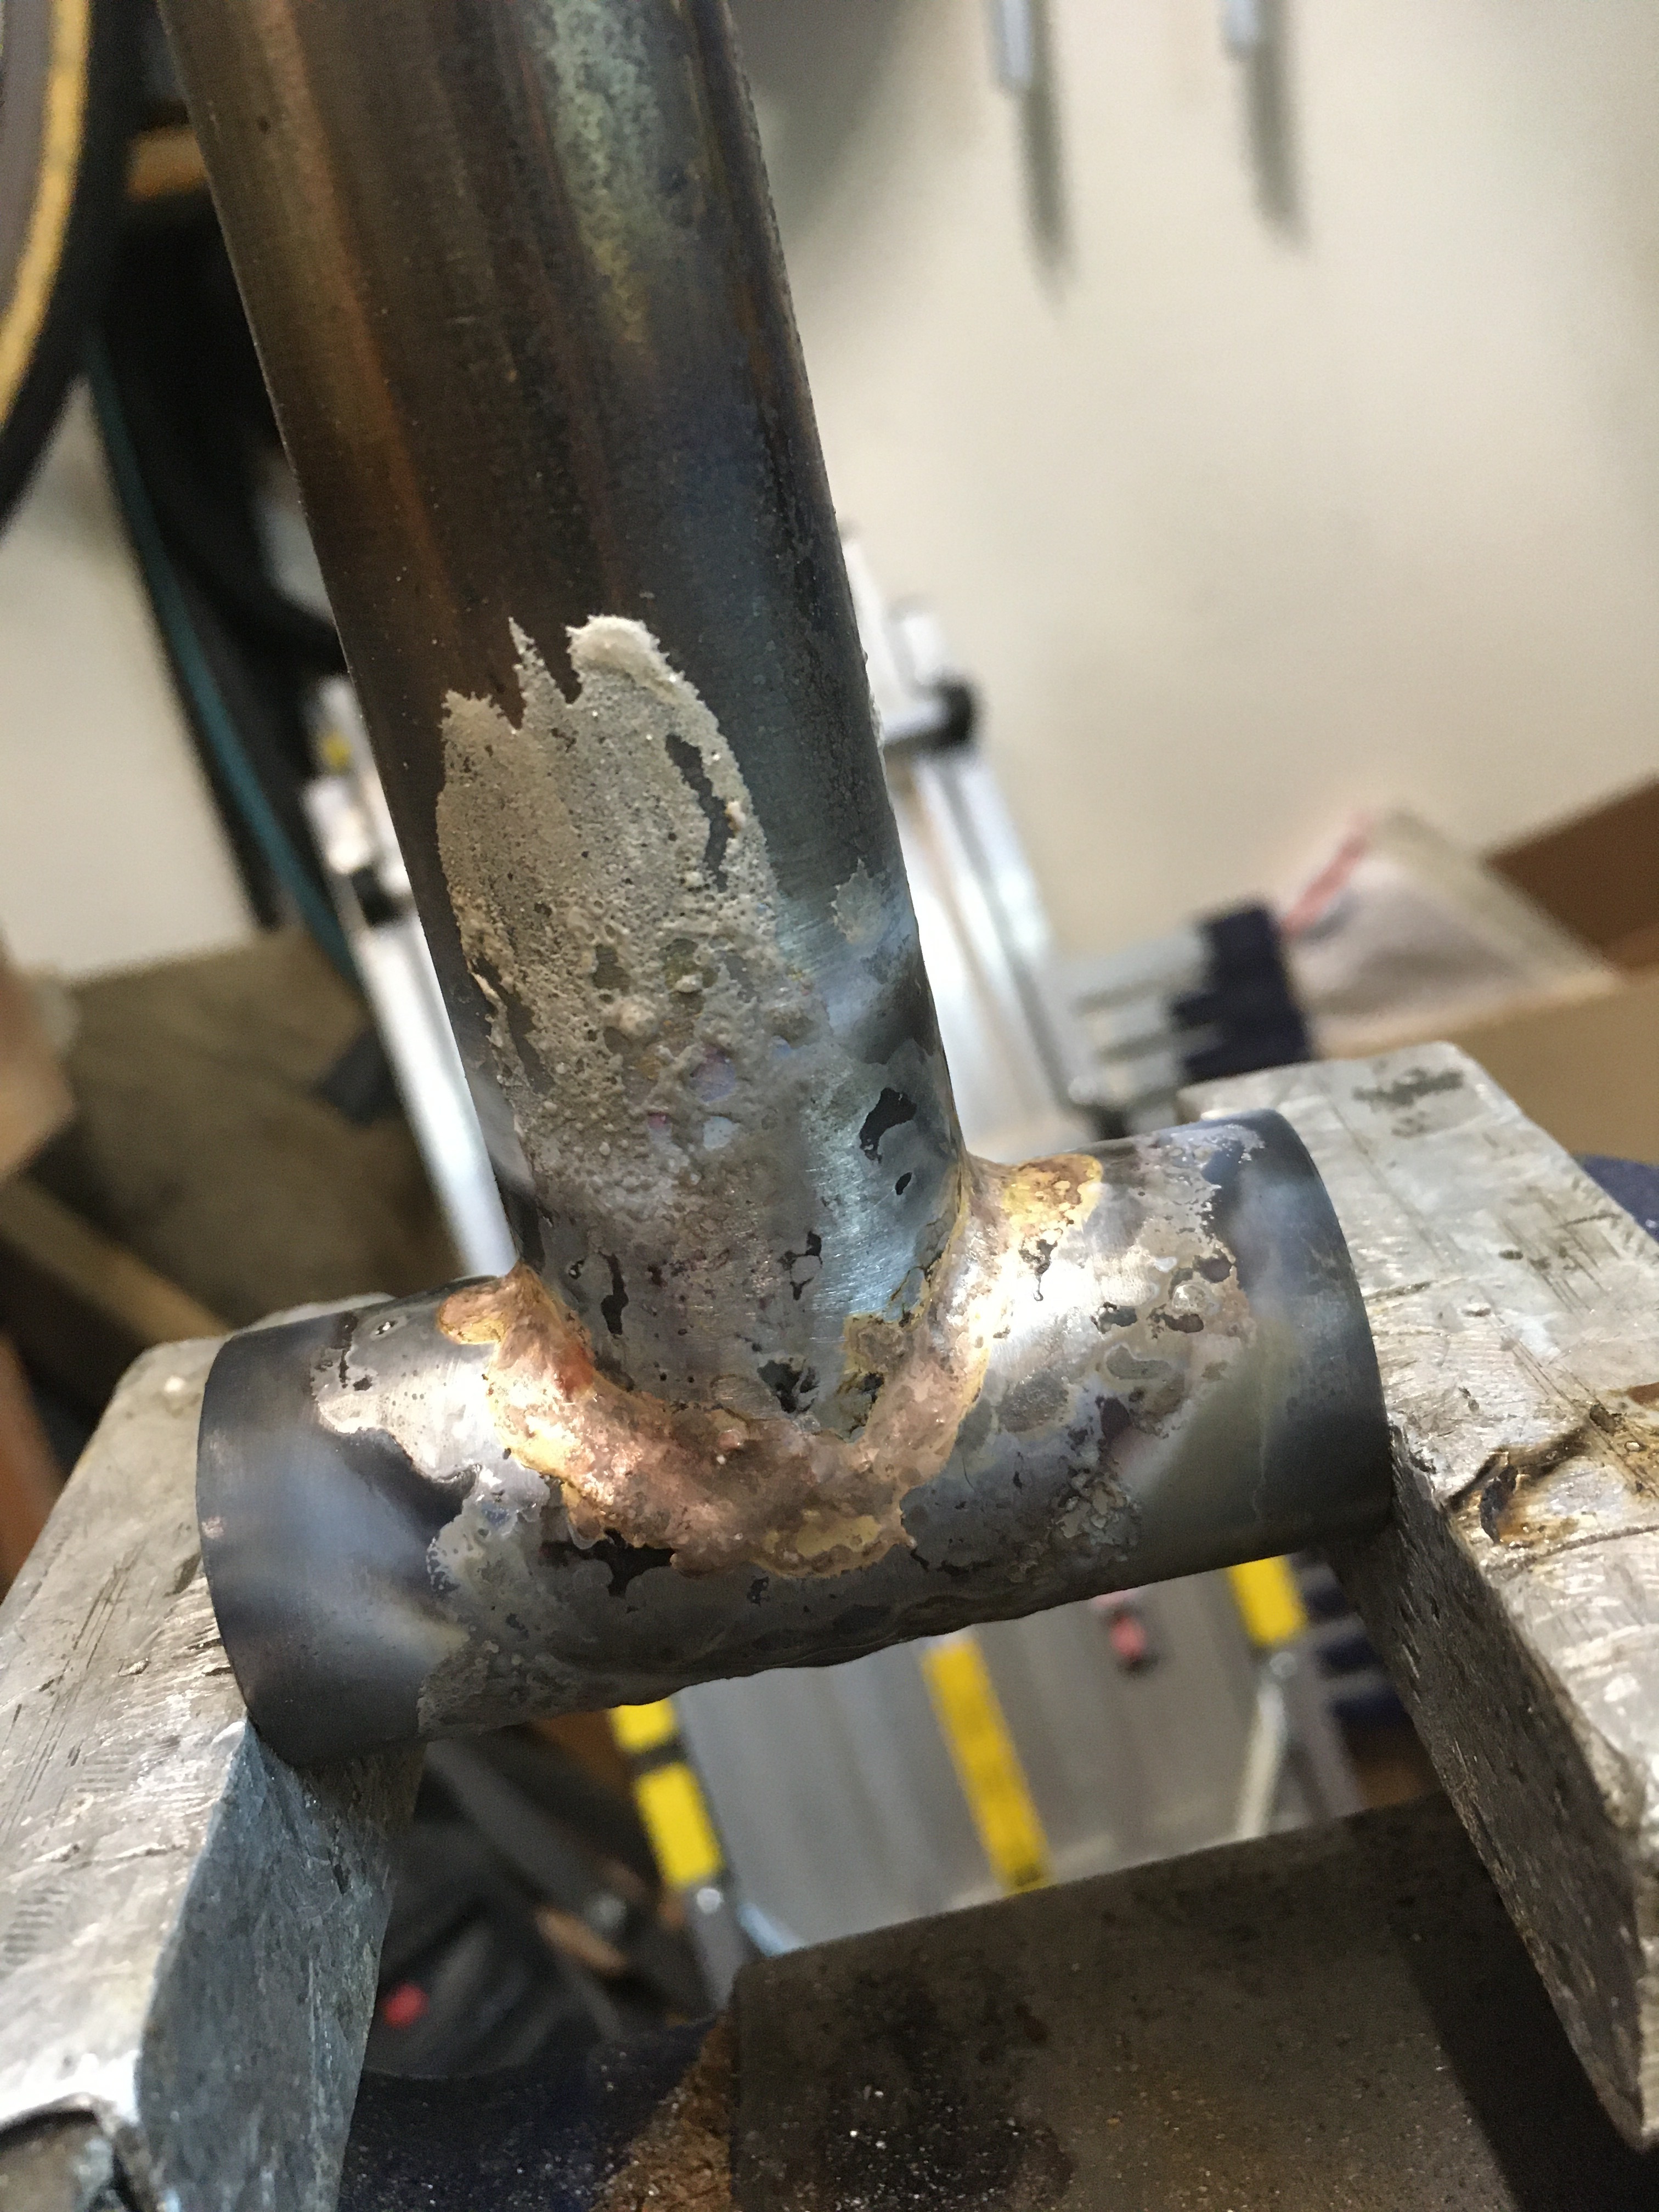
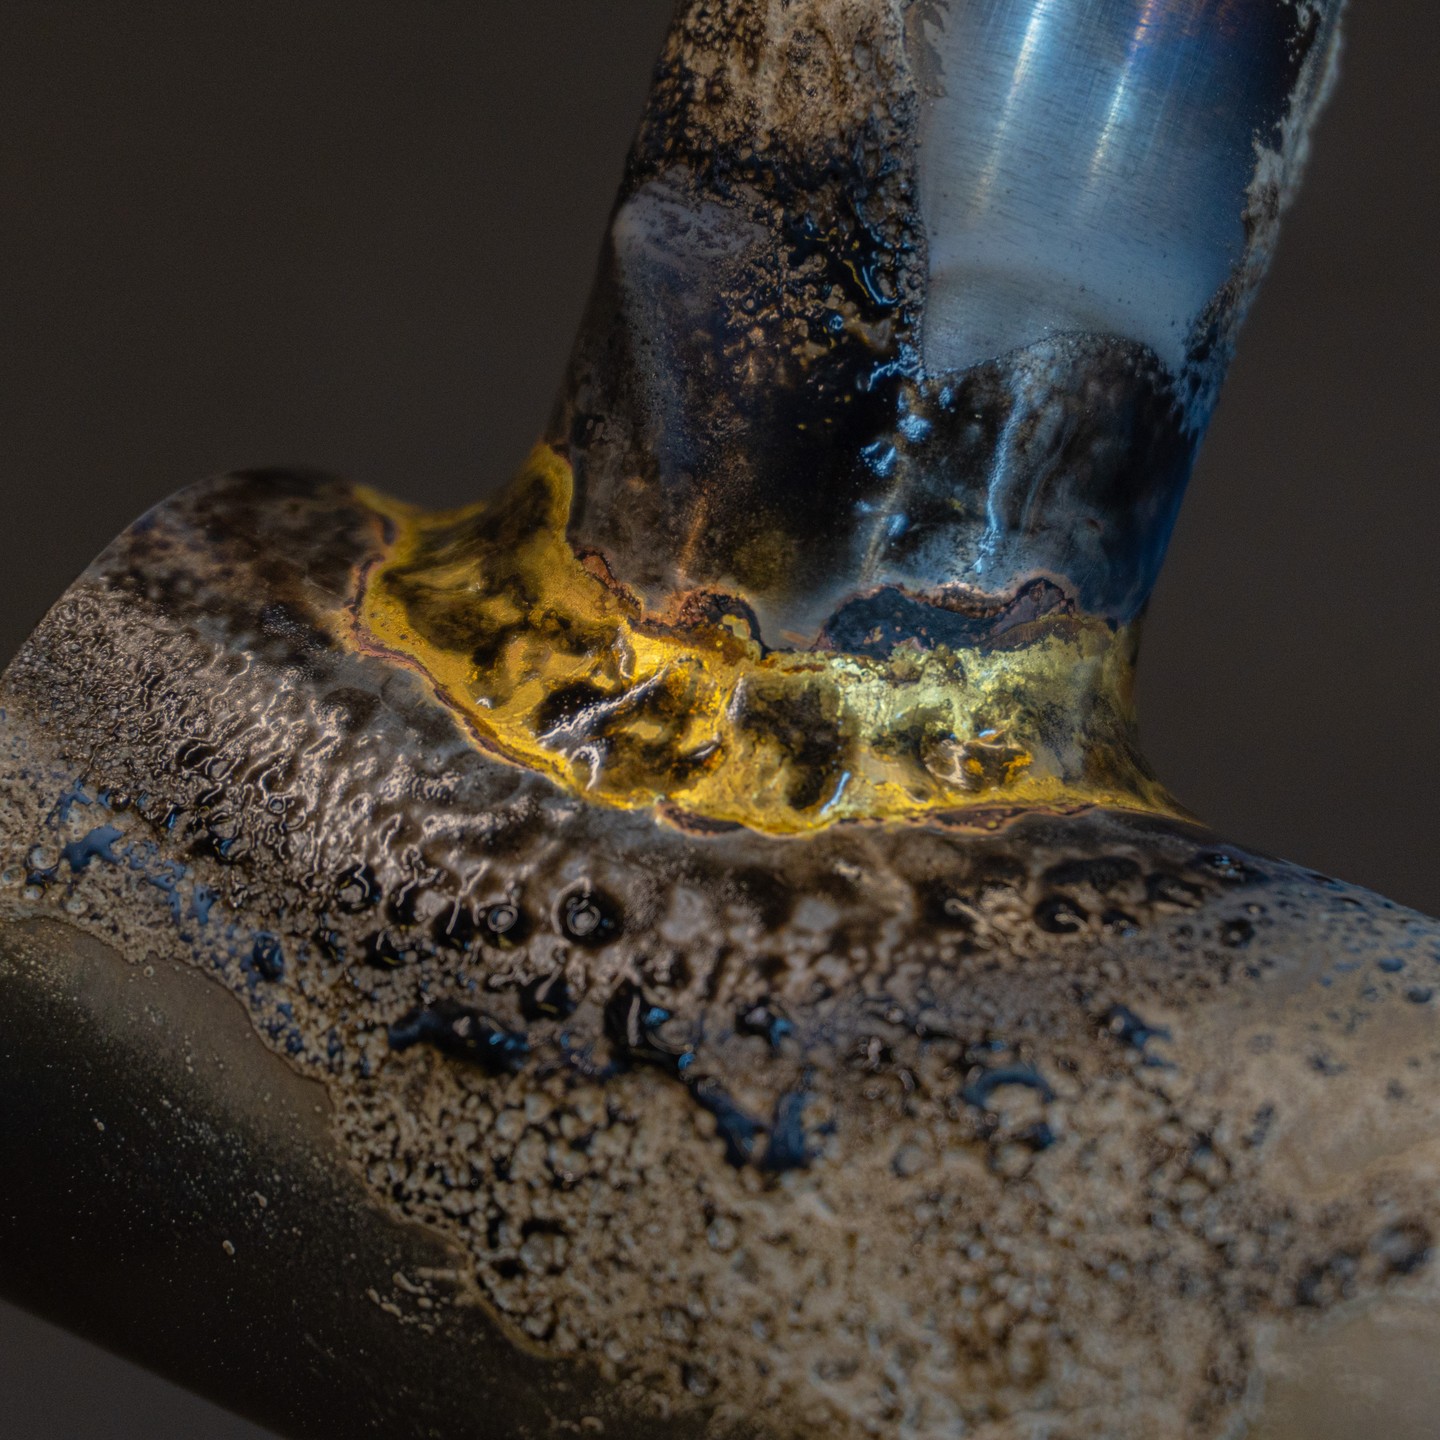
The pic below is a recent braze, toptube to headtube I think. It’s a single pass, total time brazing that joint was maybe 3 or 4 minutes. You can see how the filler is flowing out onto the tube with no ridge or bump. You need to get everything up to temp for that to happen. That joint was probably run a little hot to be honest, you can see the copper separating out of the filler at the edges and a couple of spots of burnt flux (not all the black bits, that’s just the way Cycle Design Flux looks).
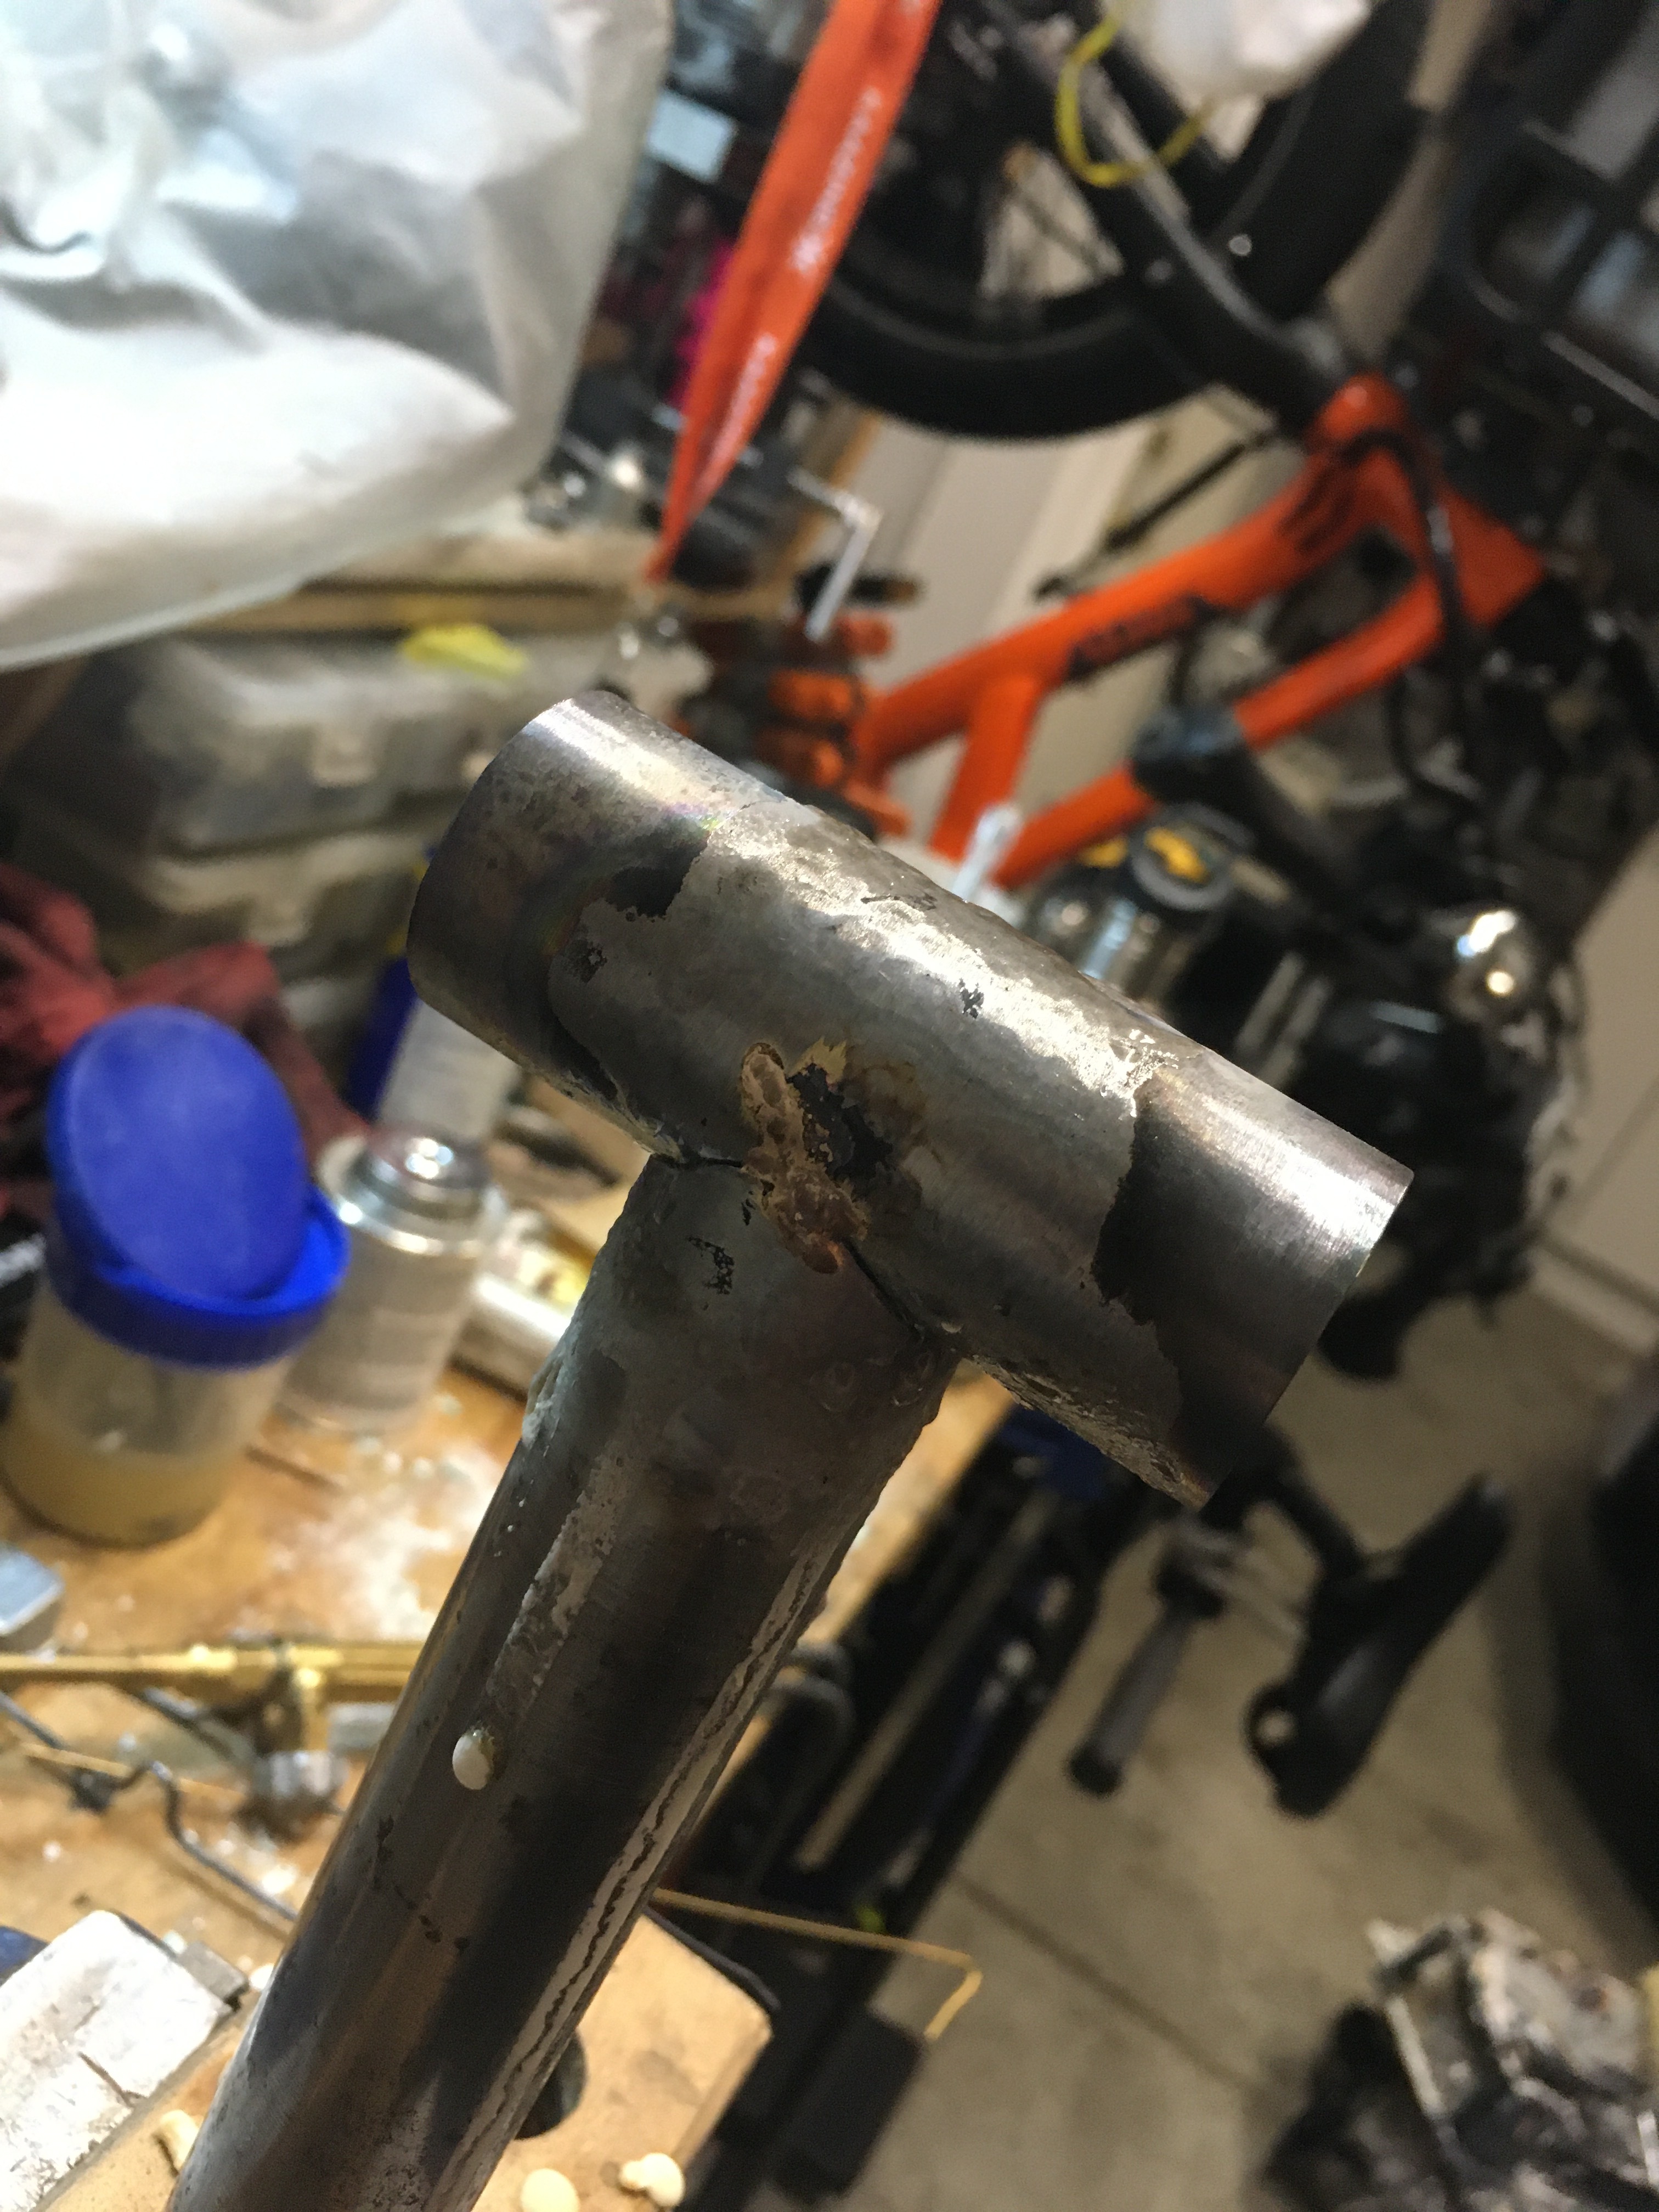
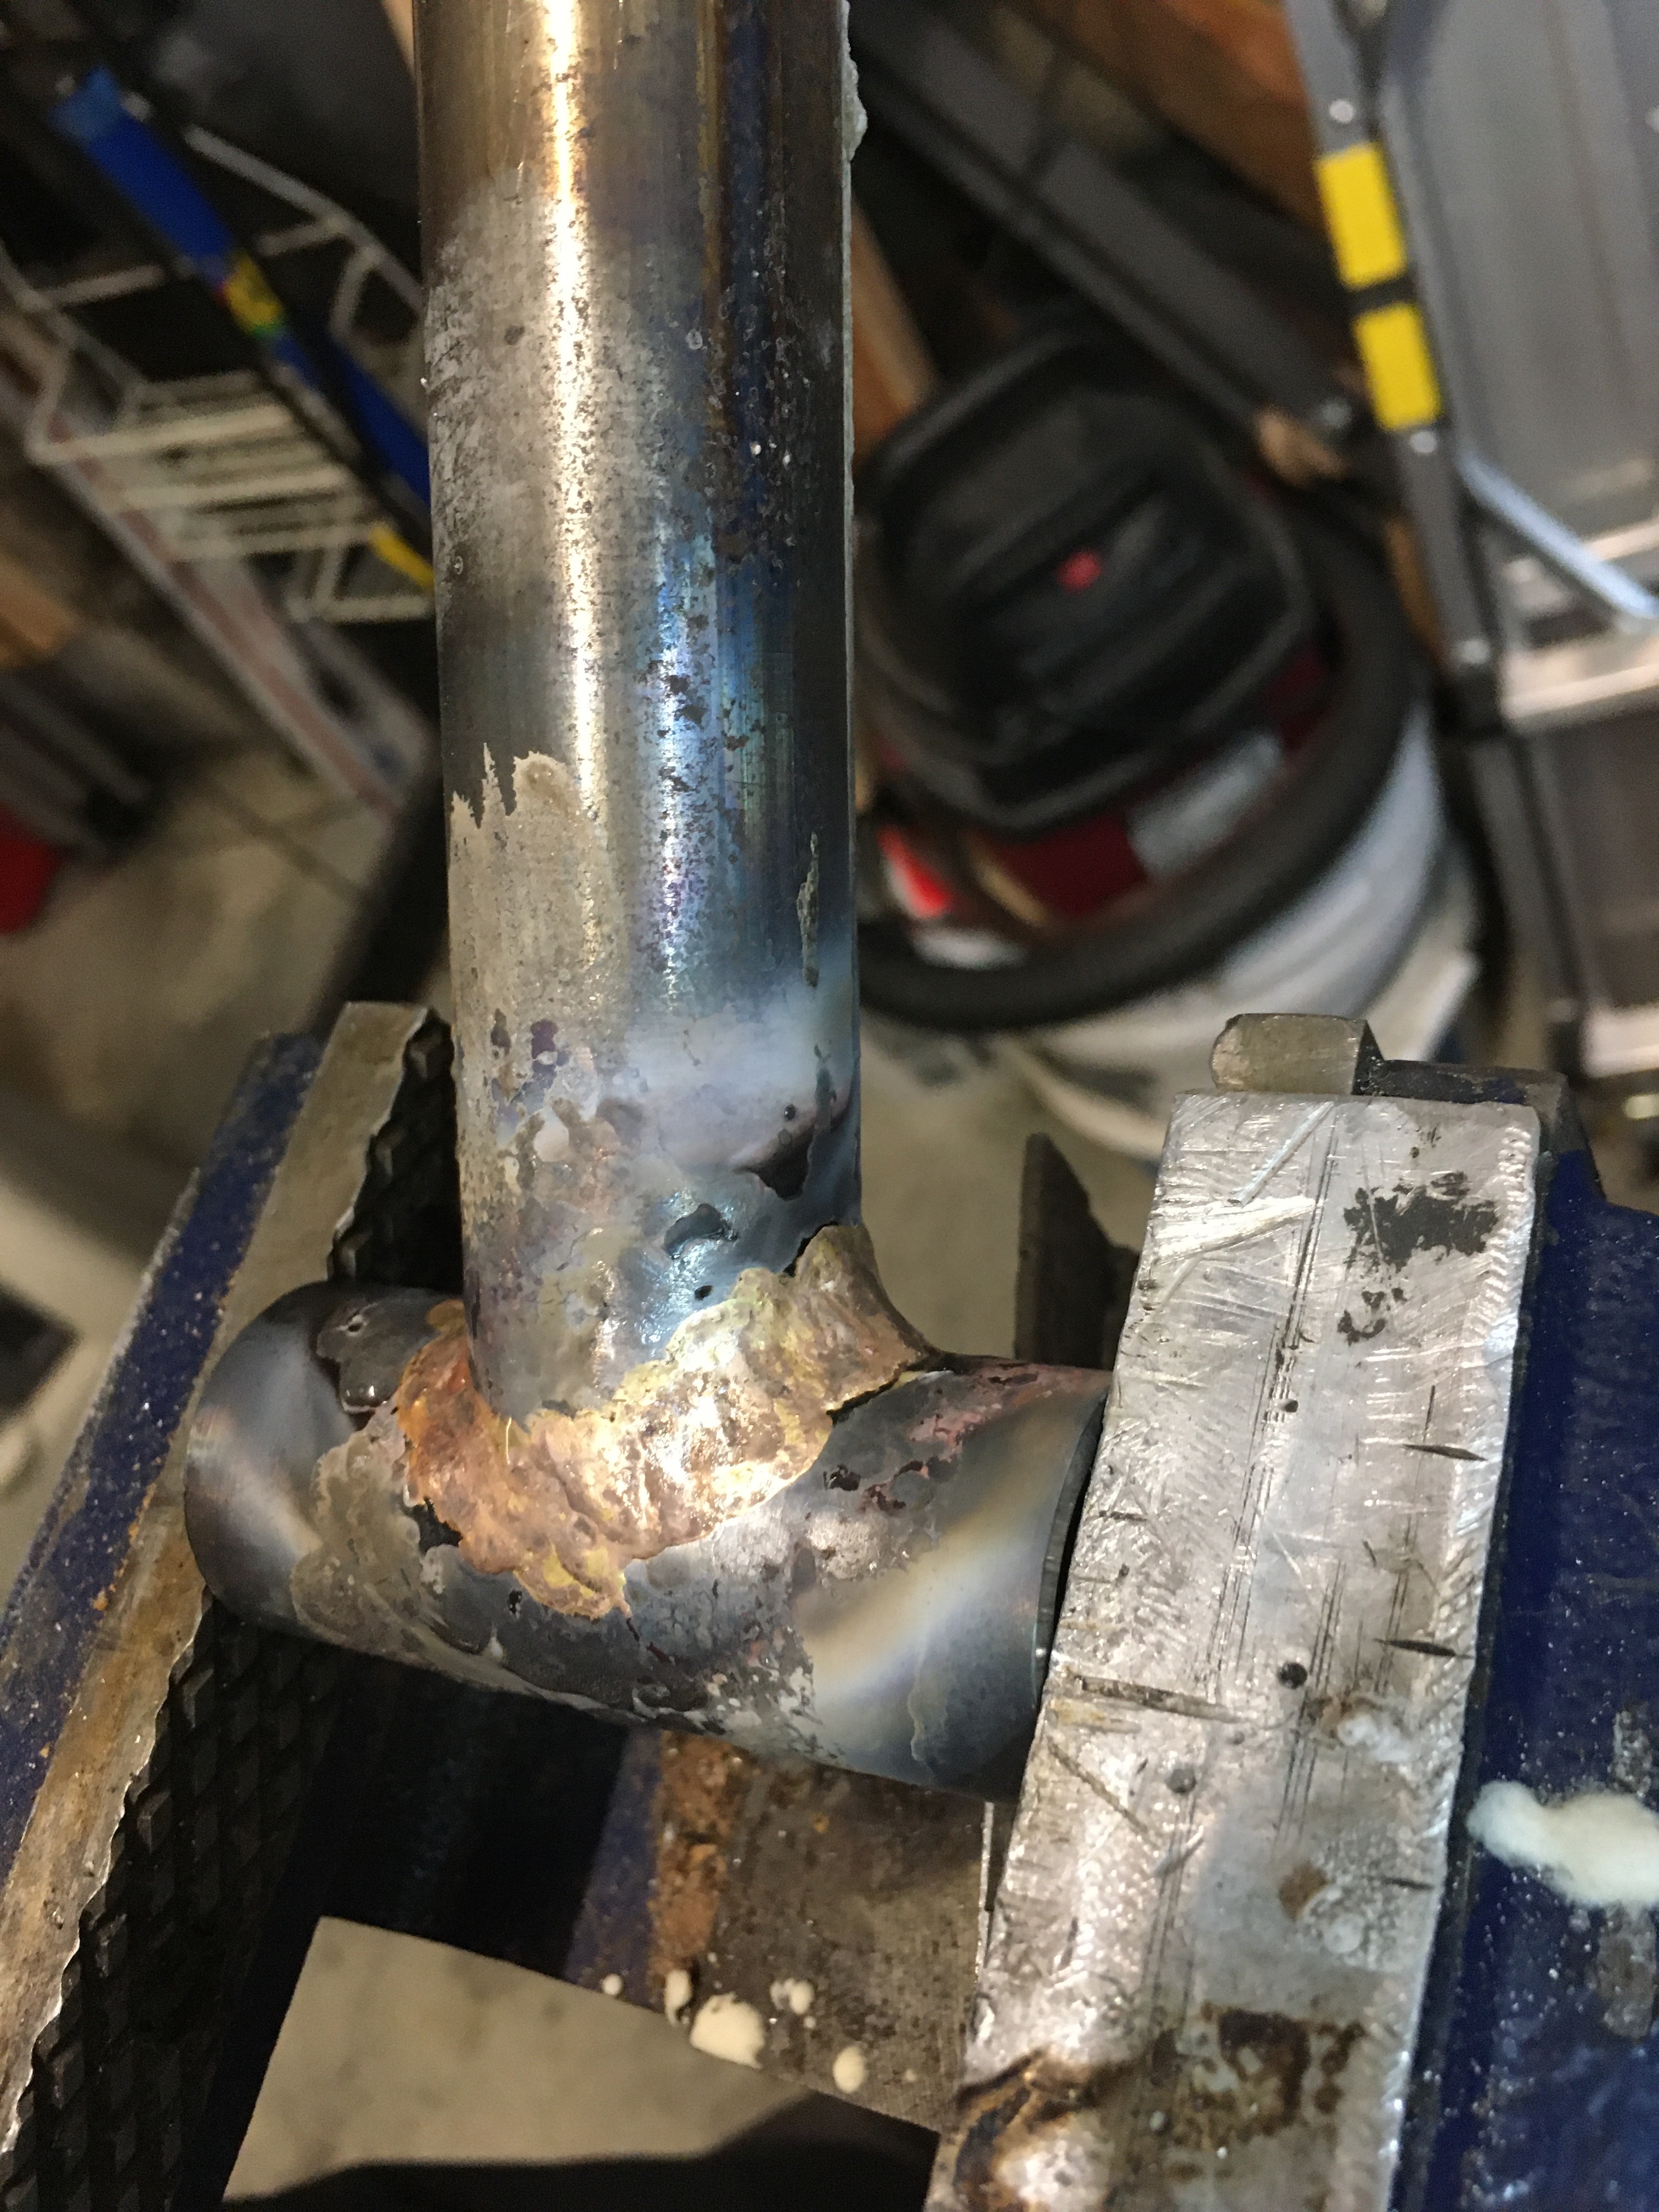
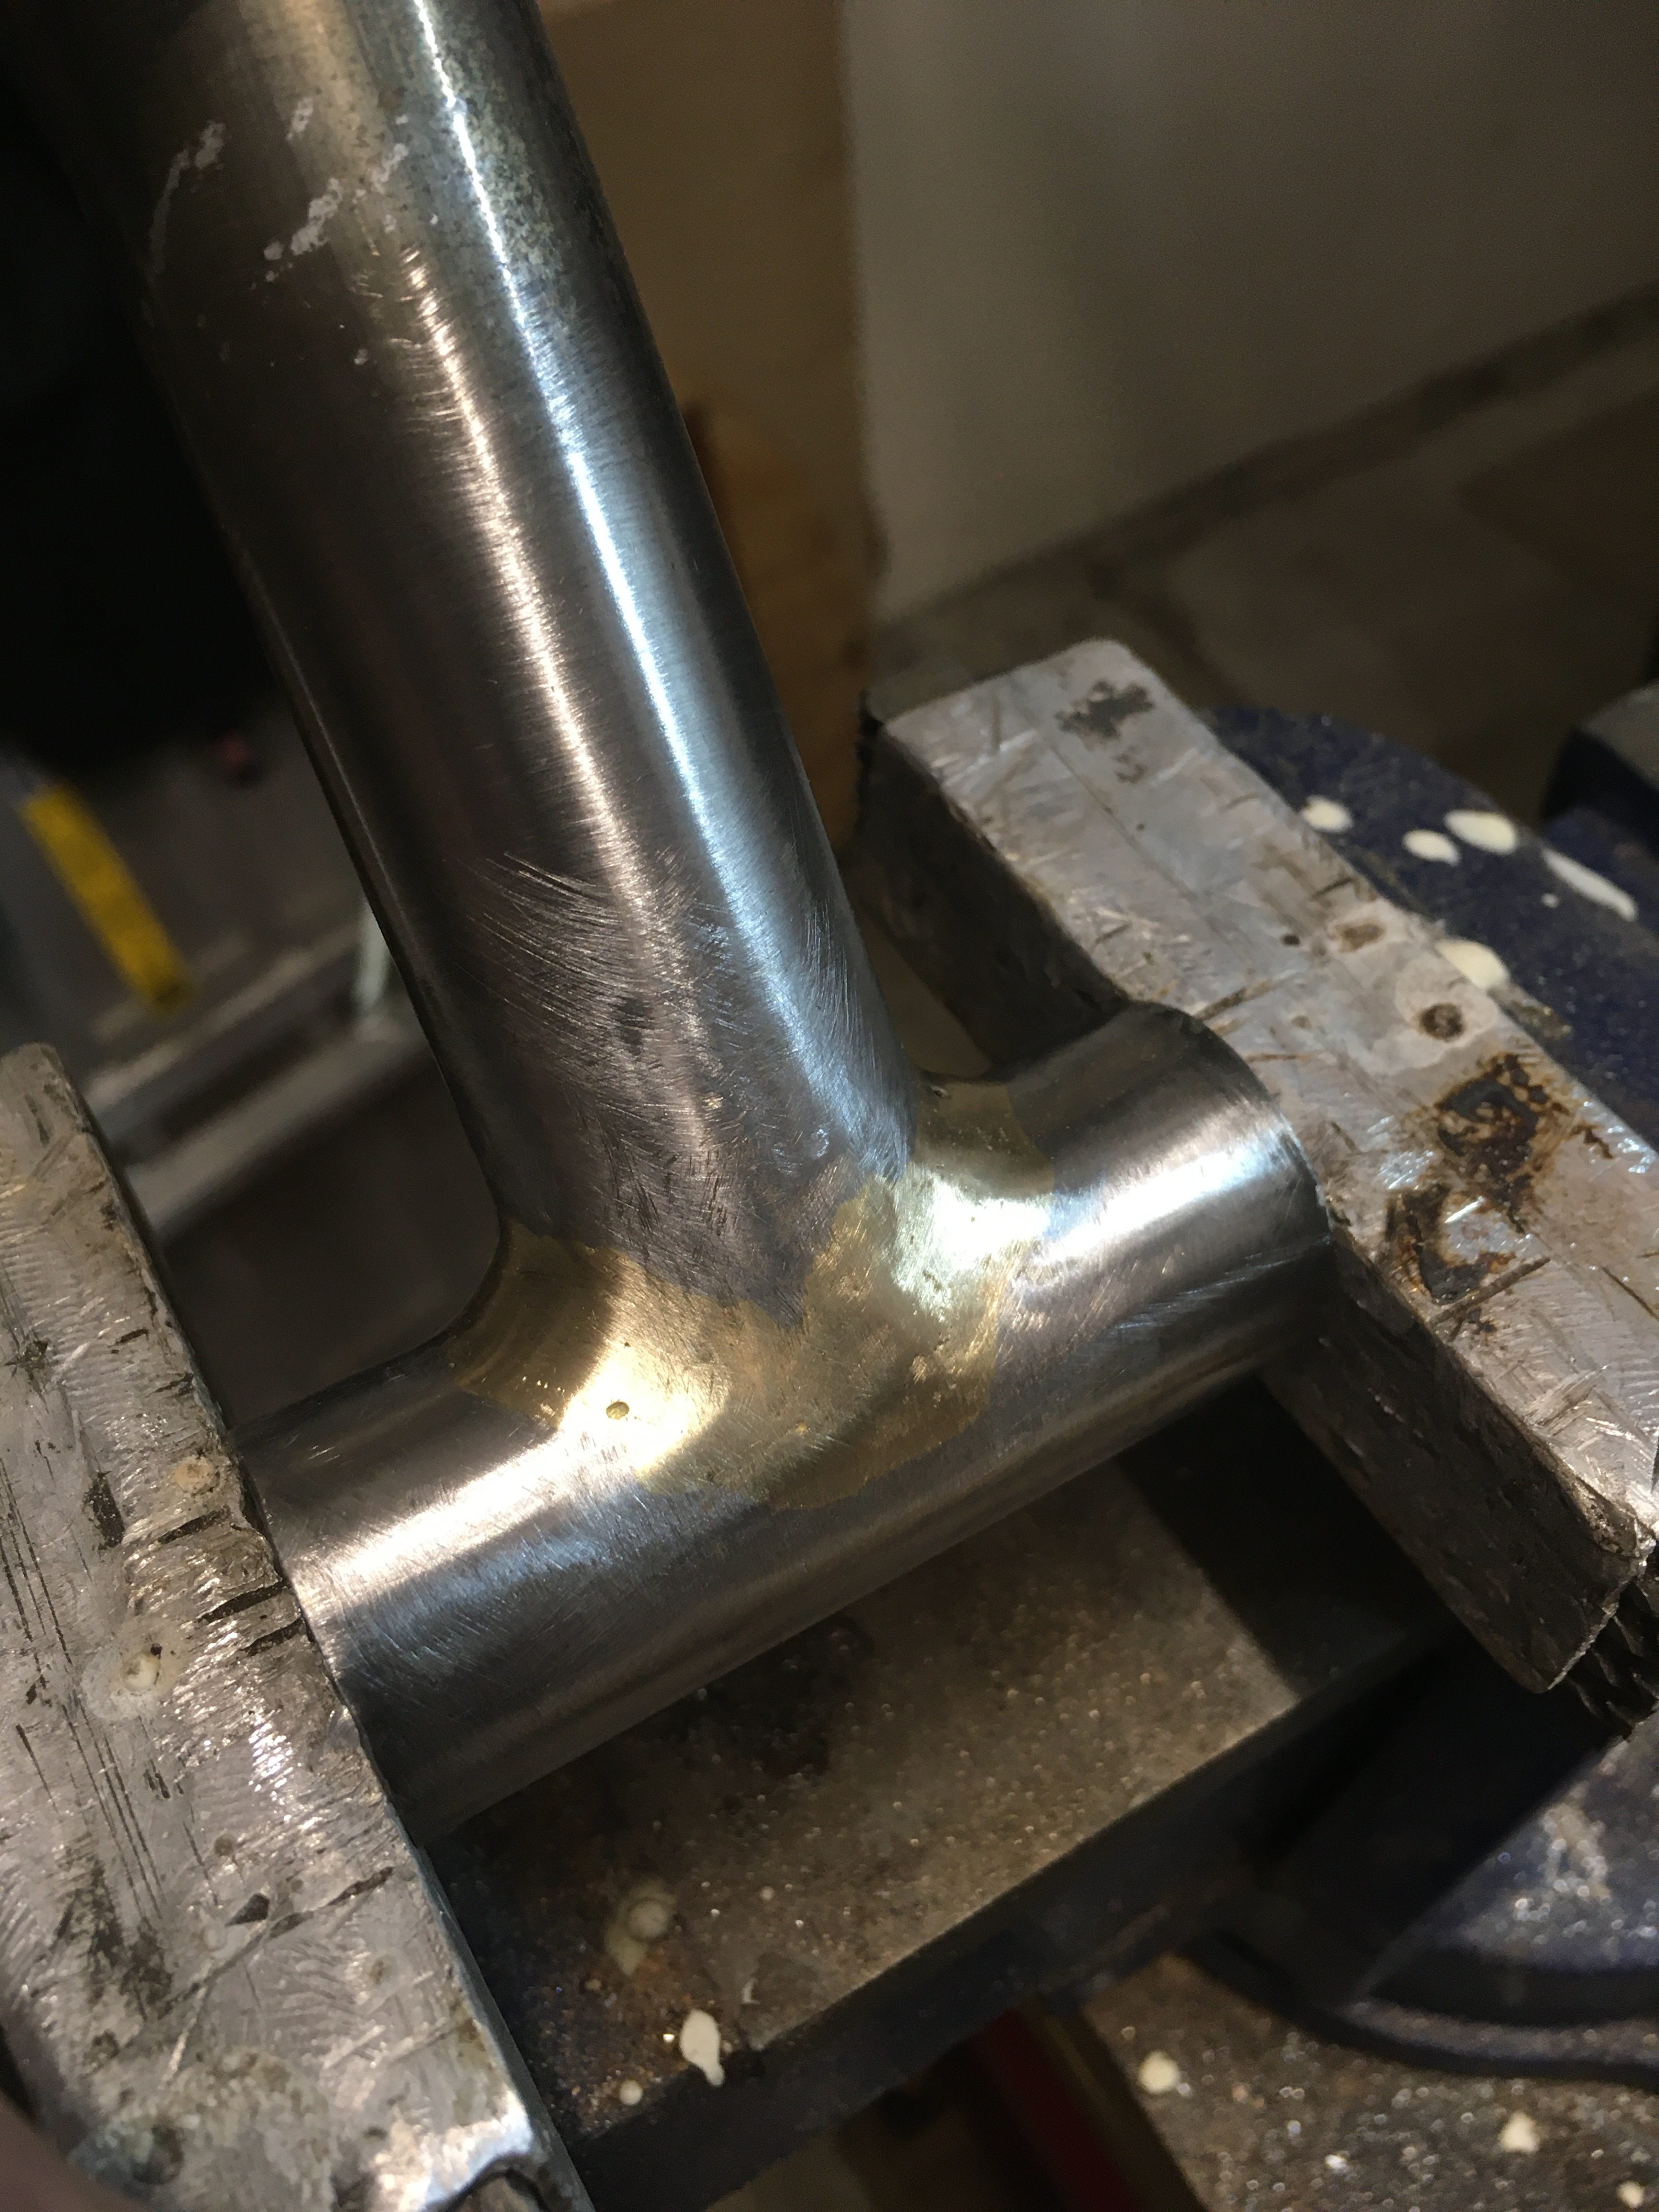
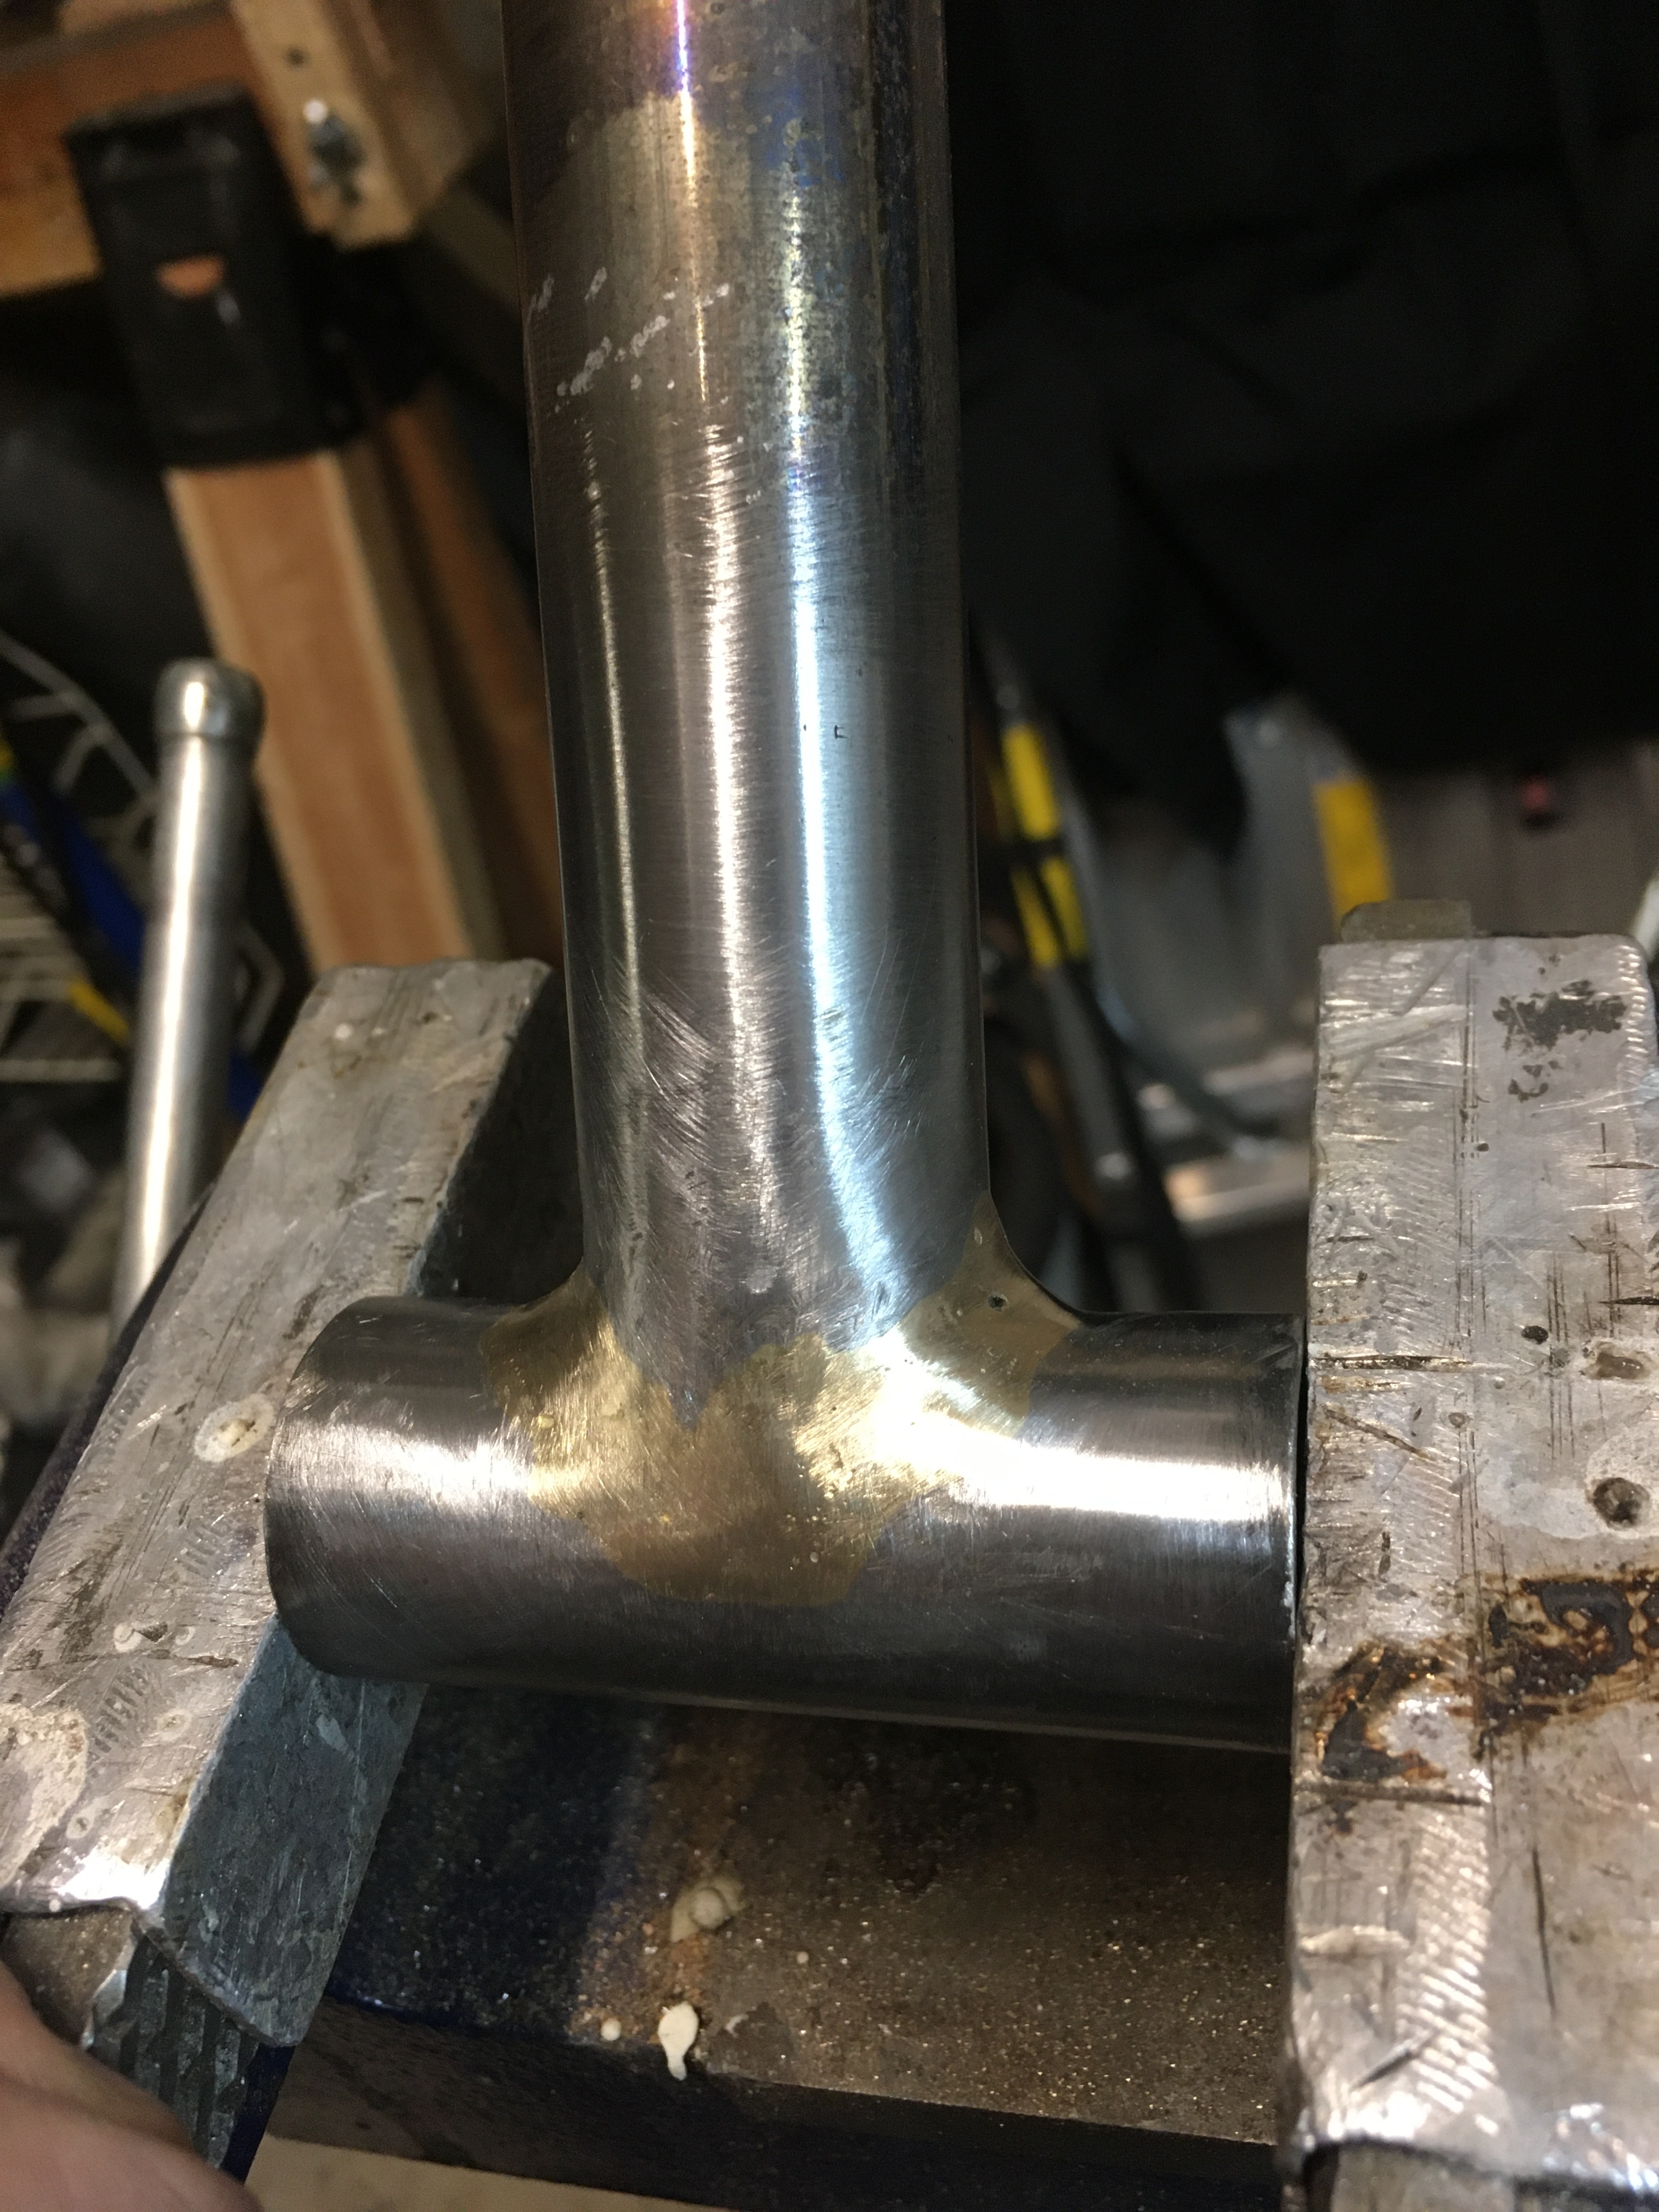
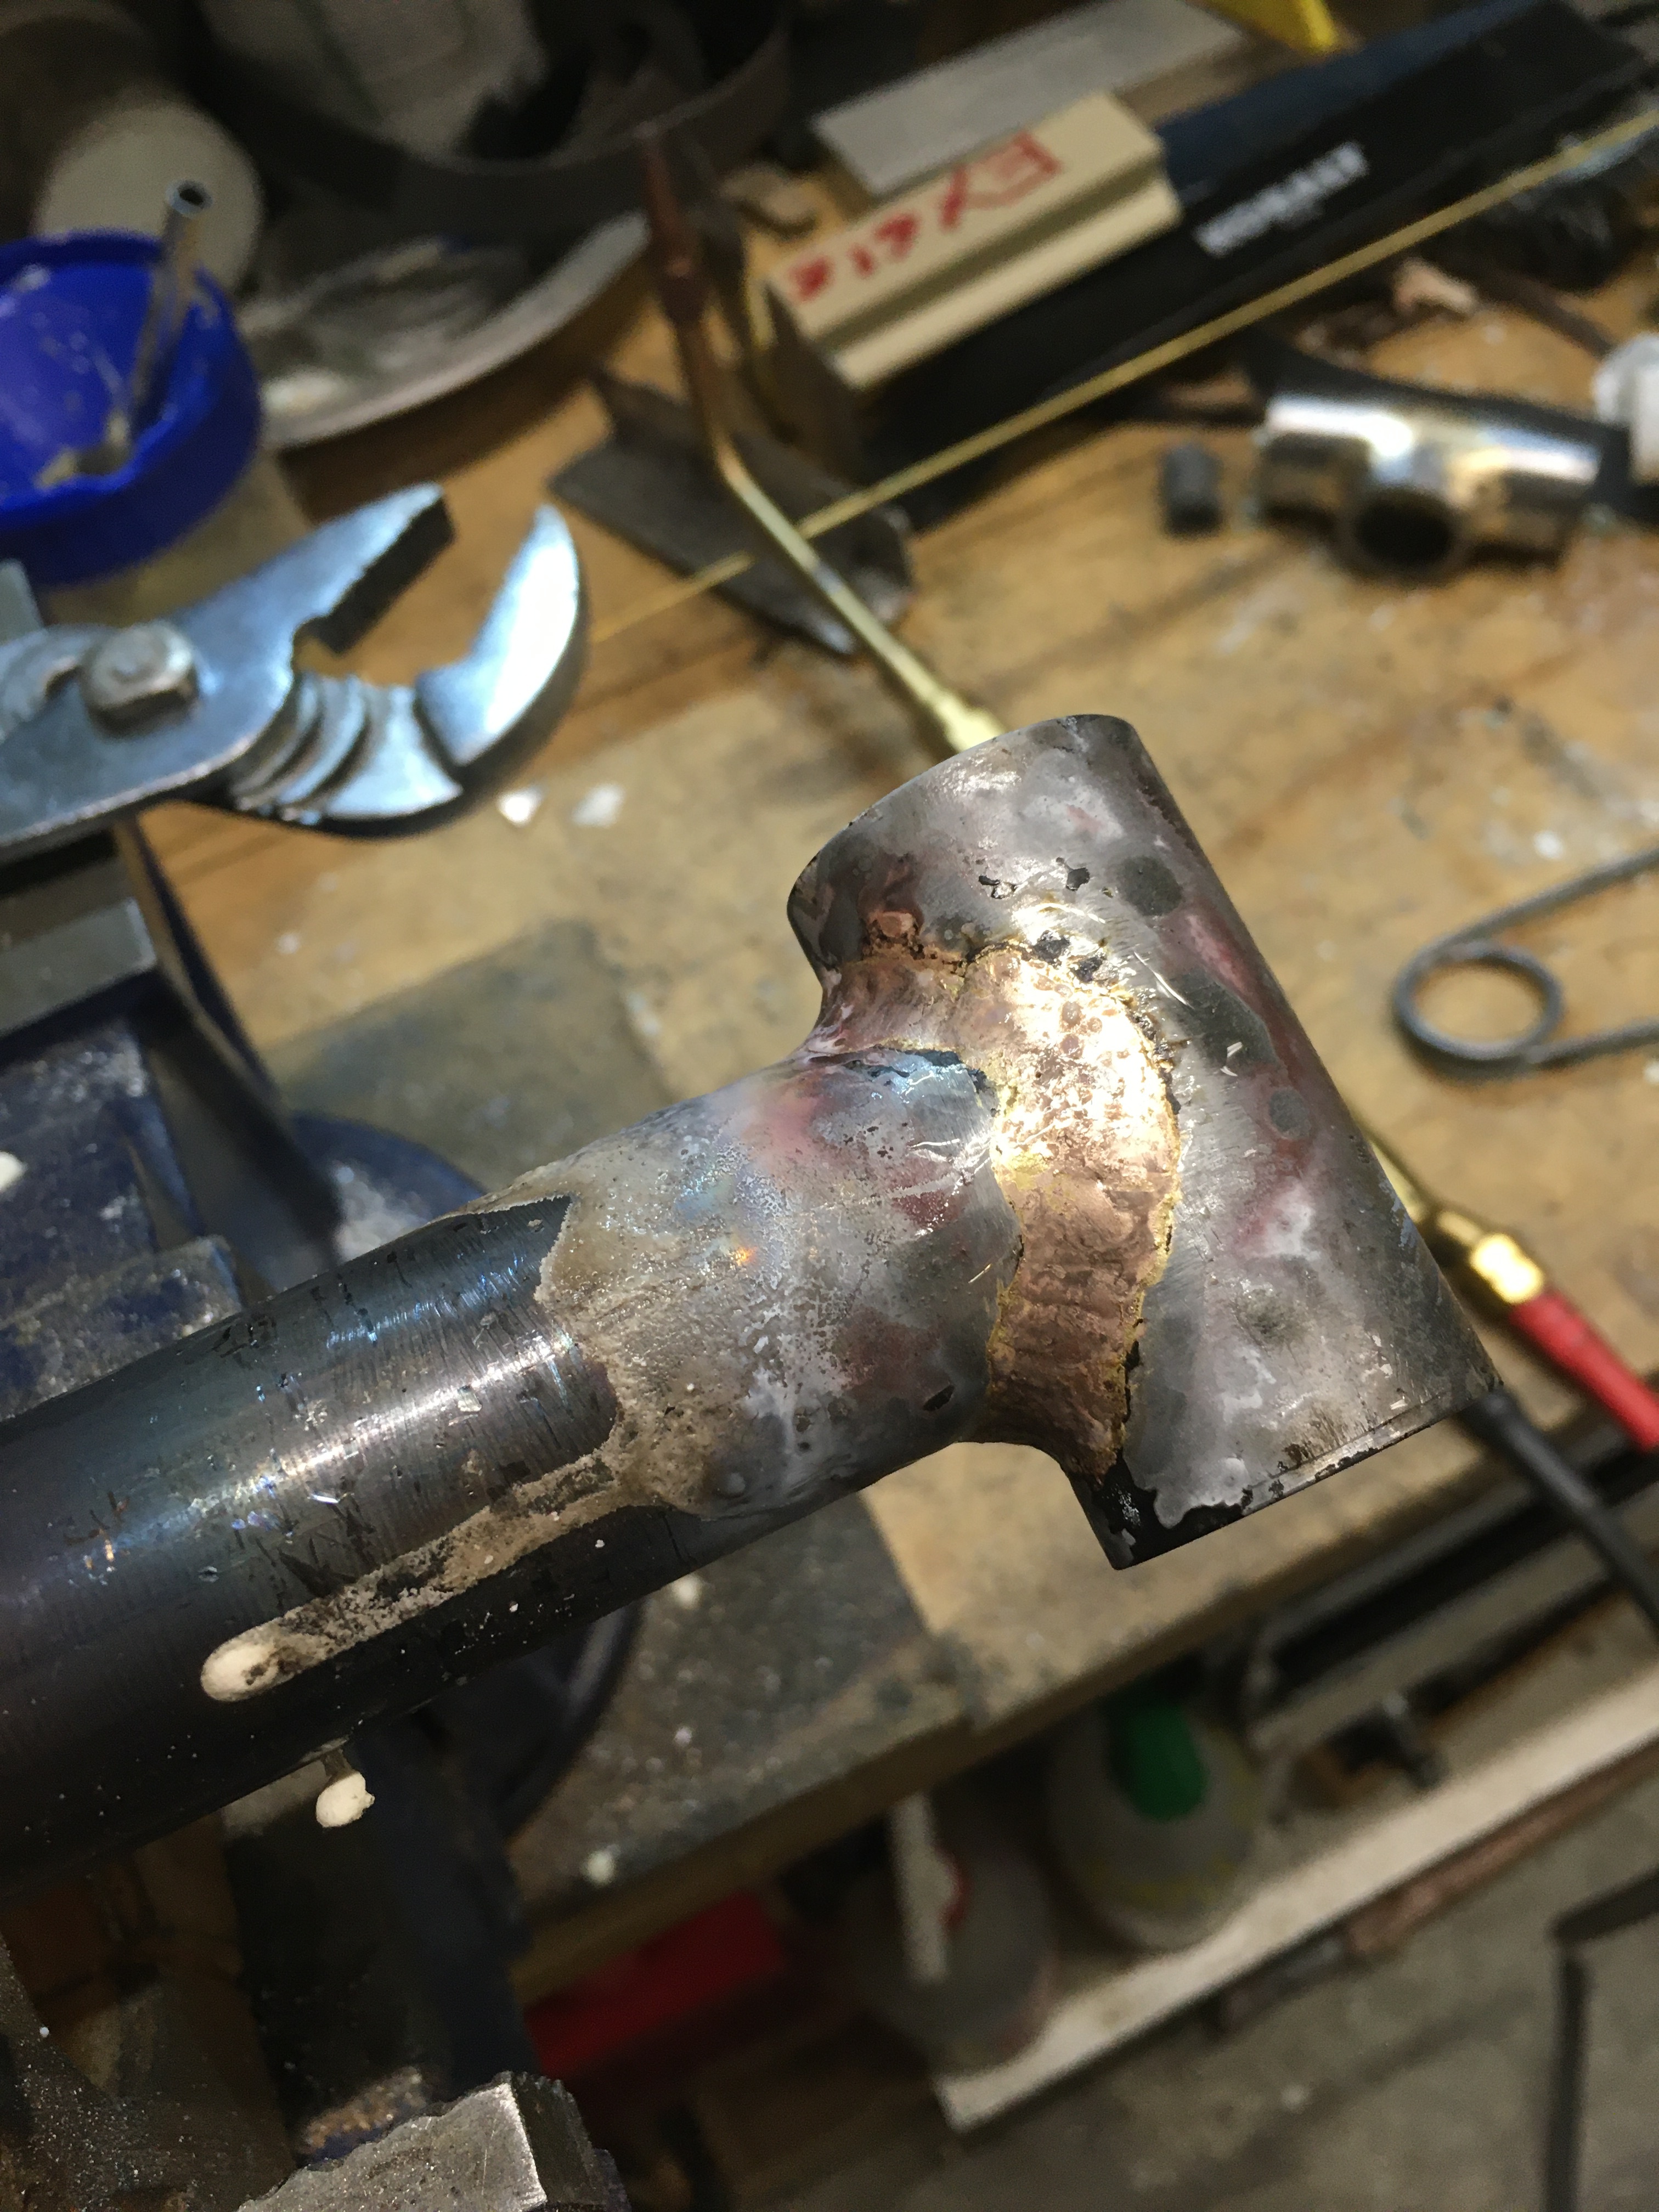
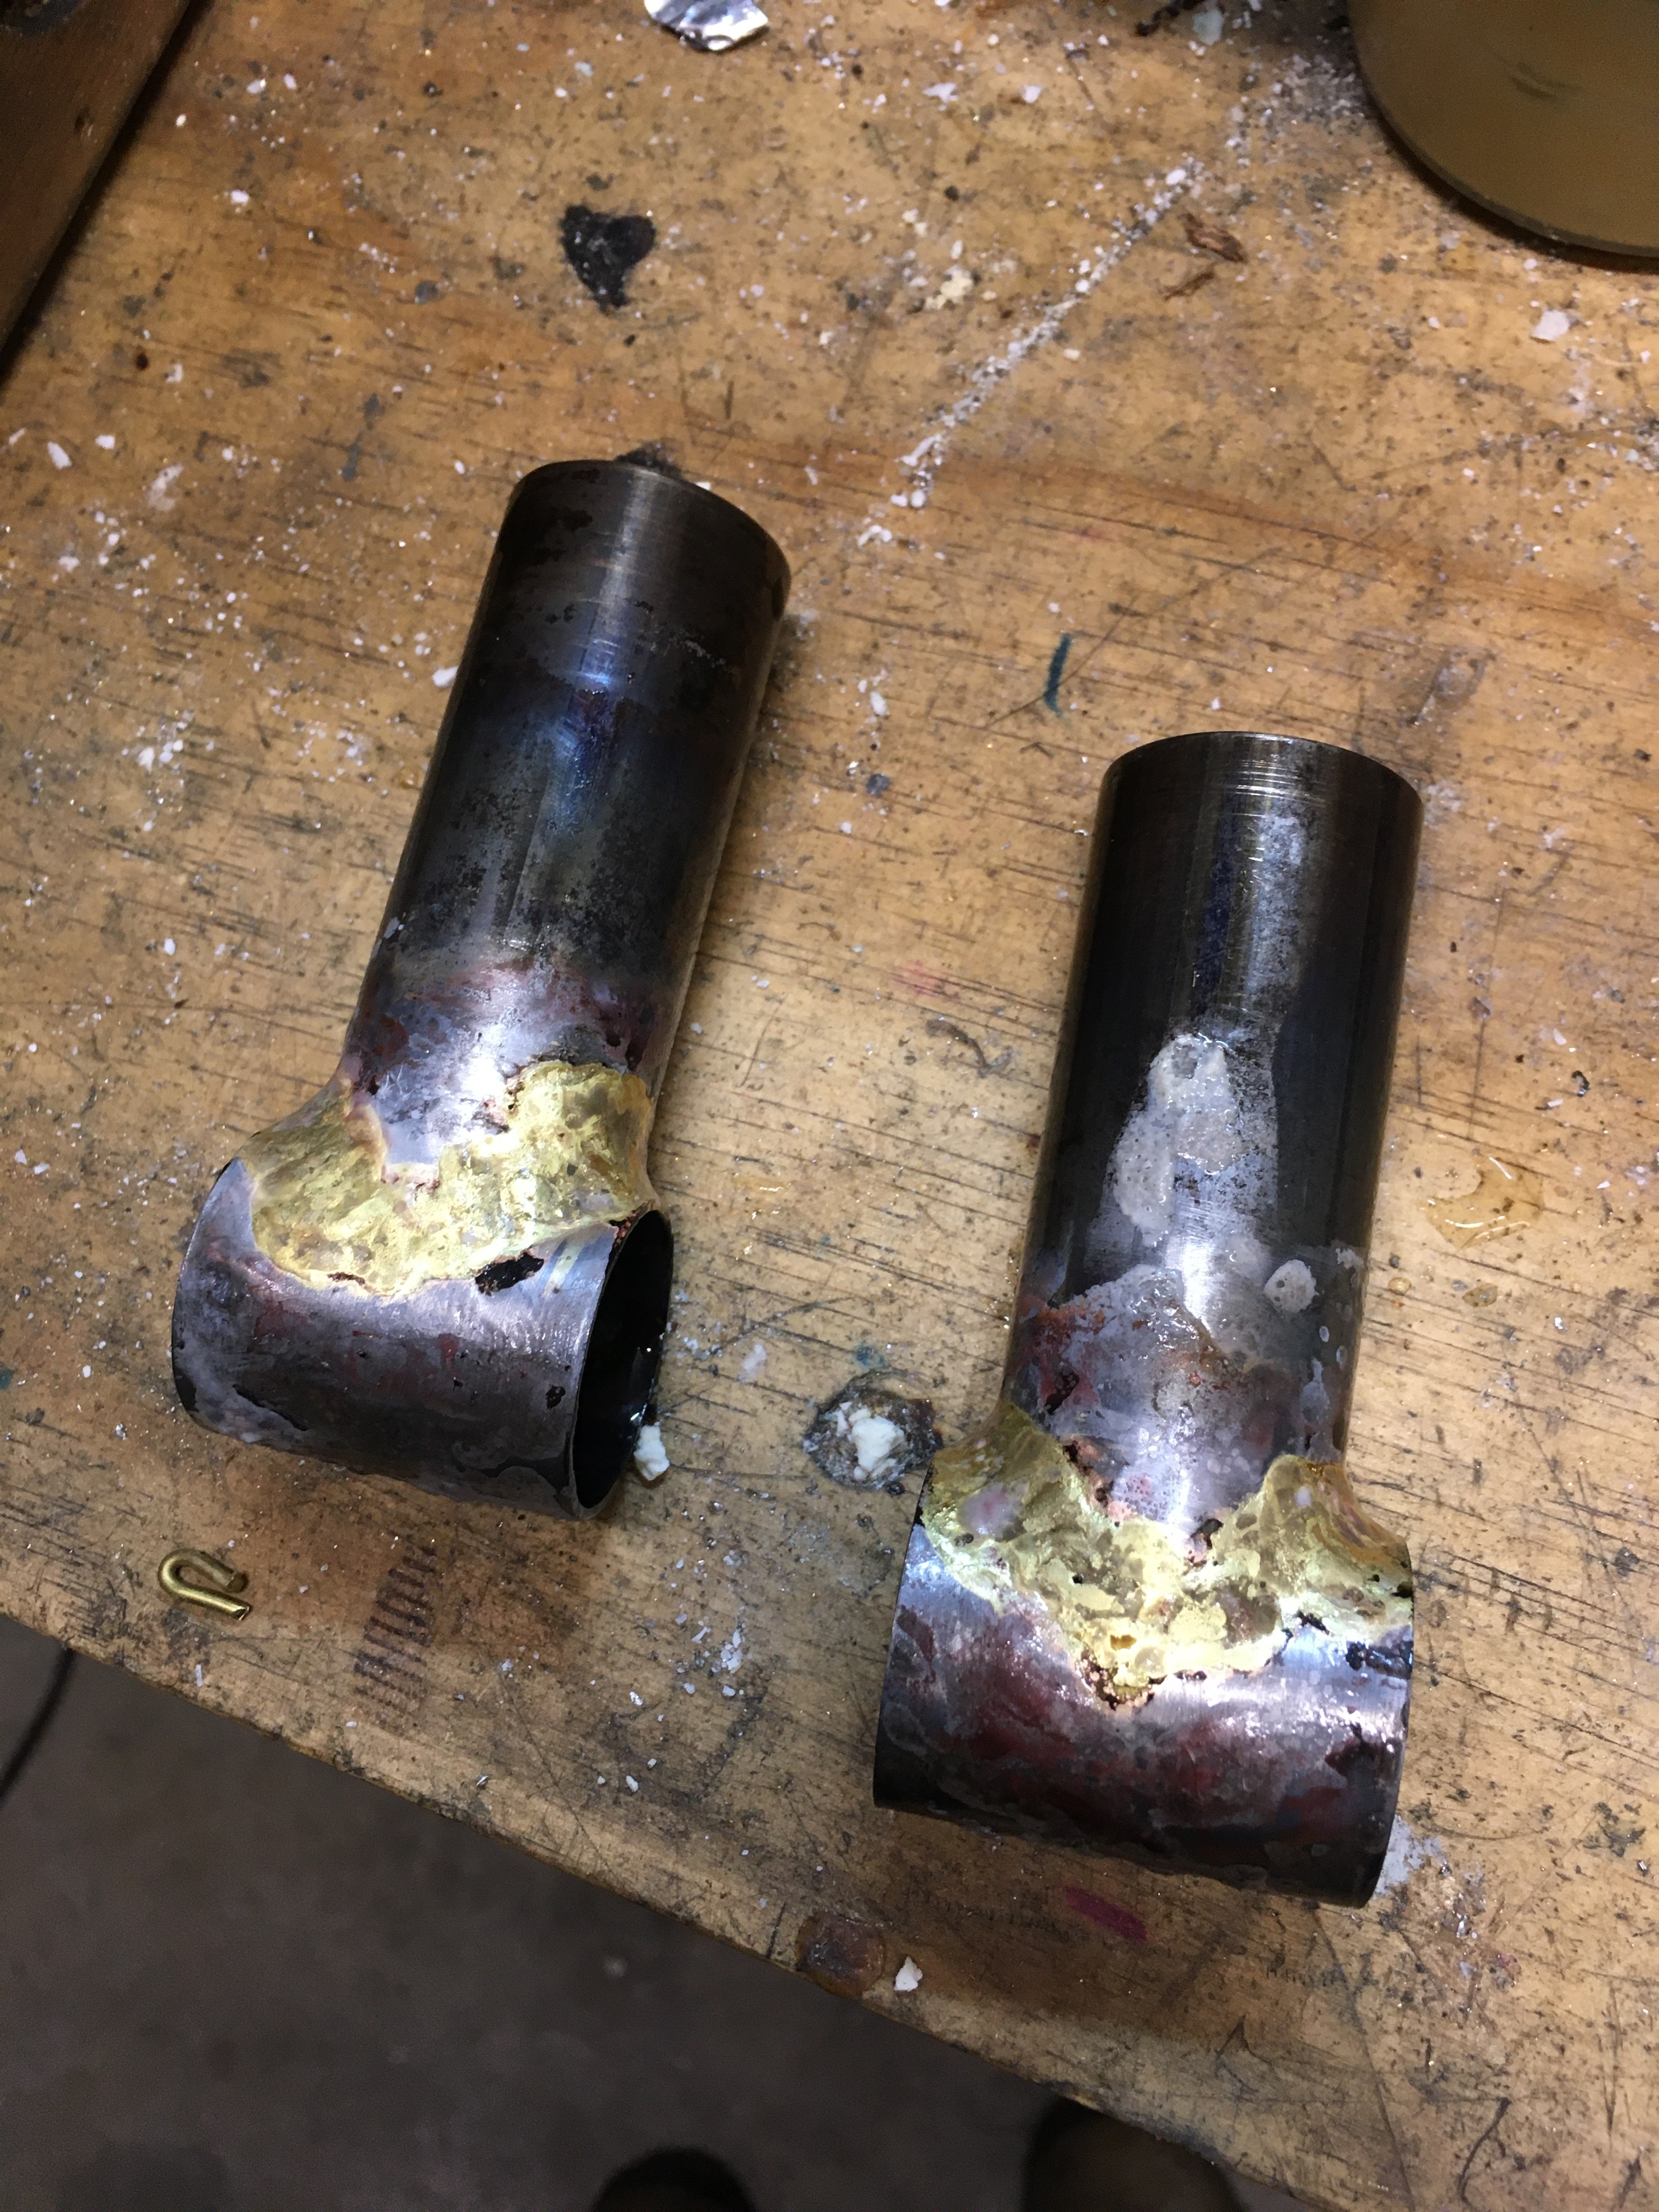
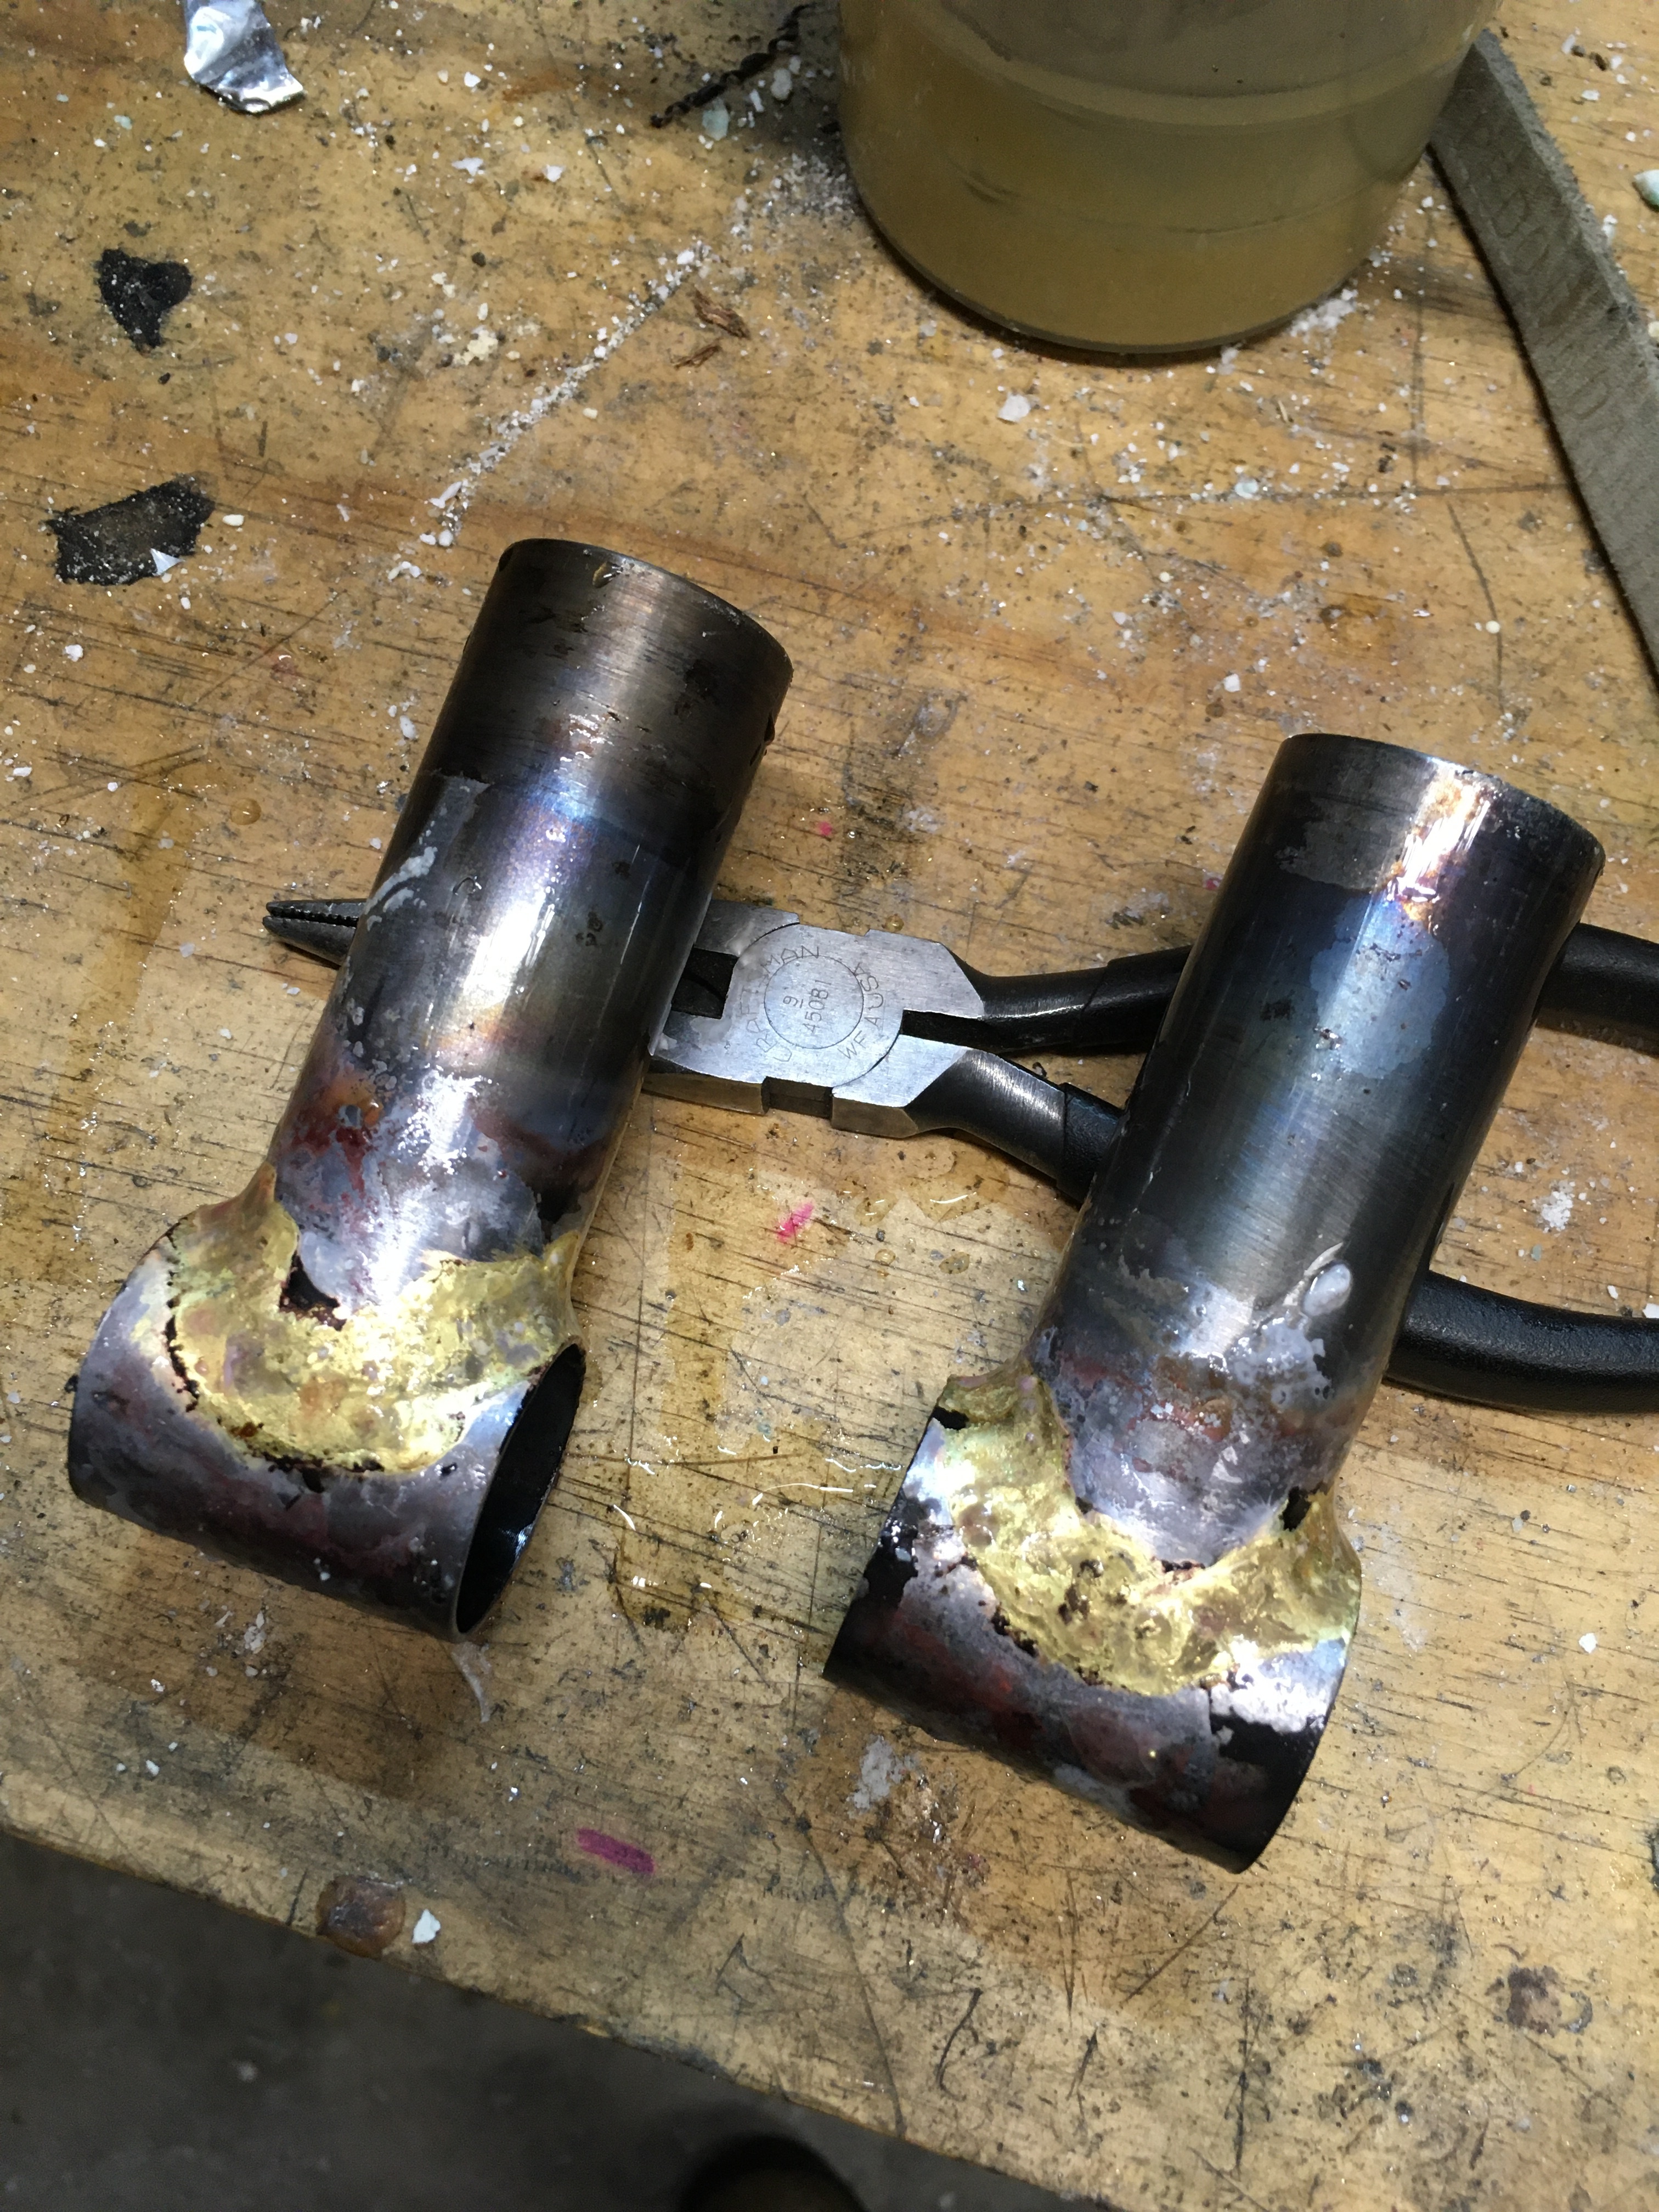
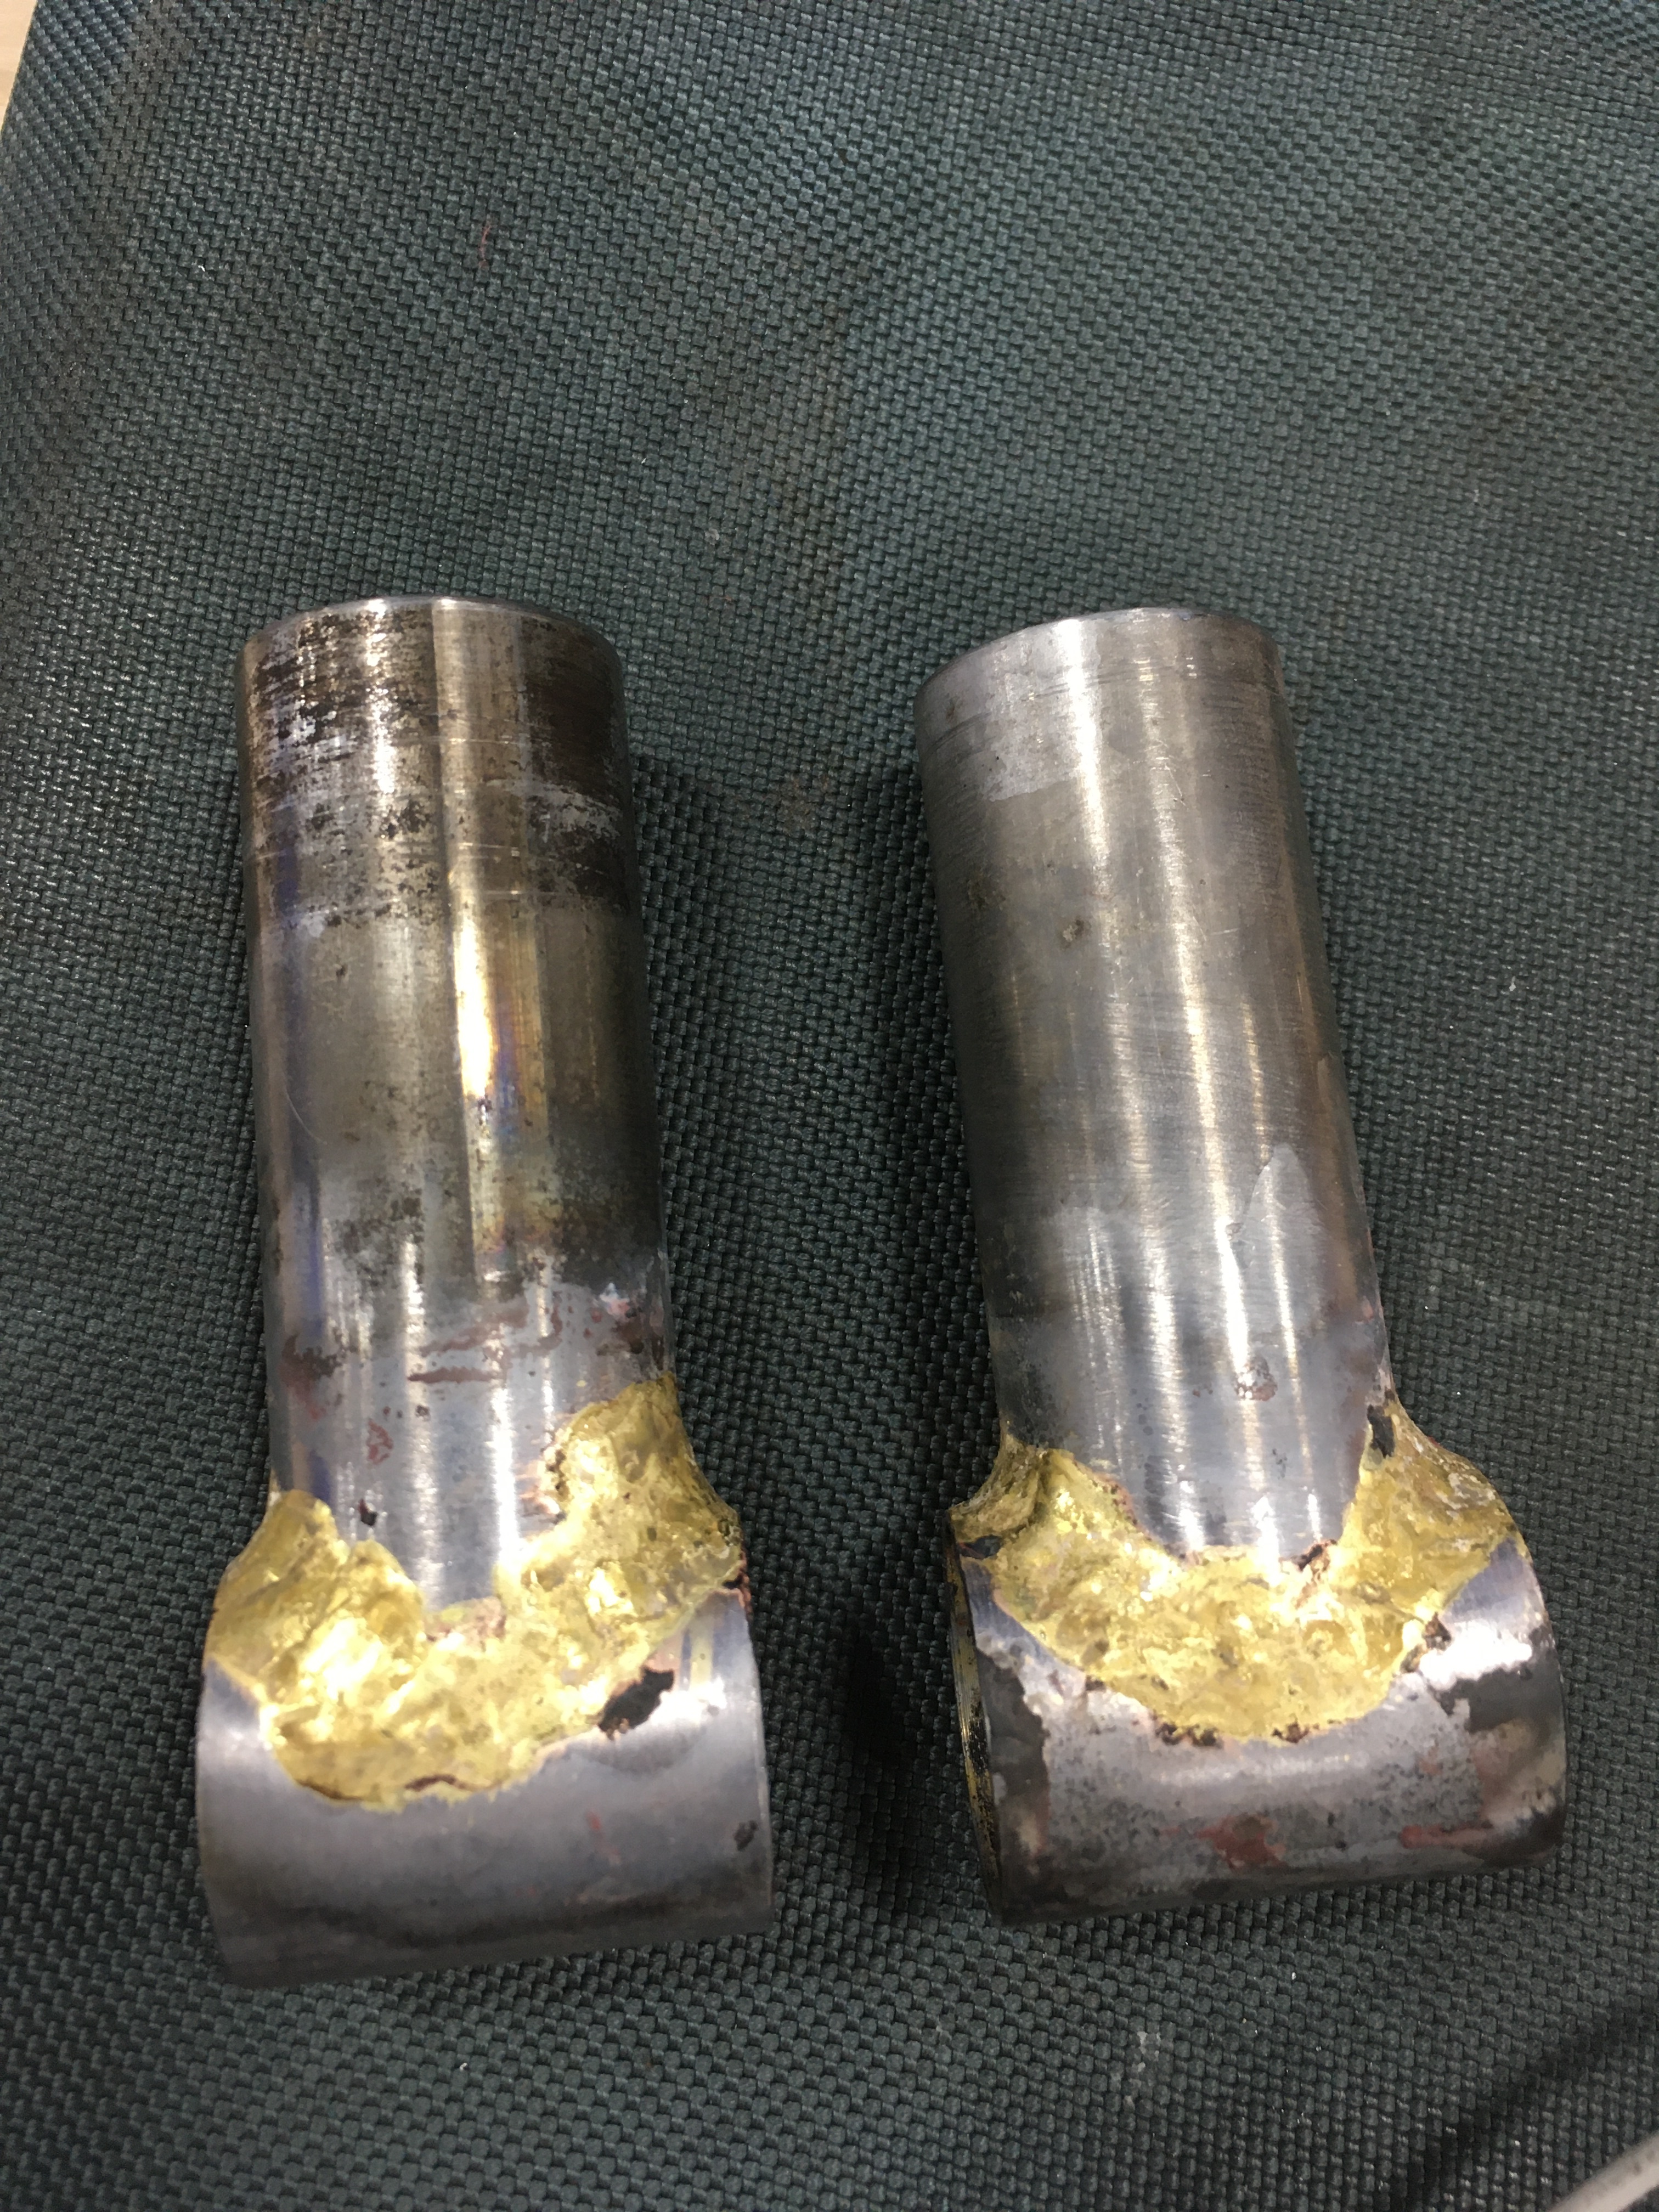
Here’s a second try. No tinning pass or smoothing pass this time, and I tried to make sure that the metal was hot before applying more brass. I think I got the edges to wet out better/smoother this time…?
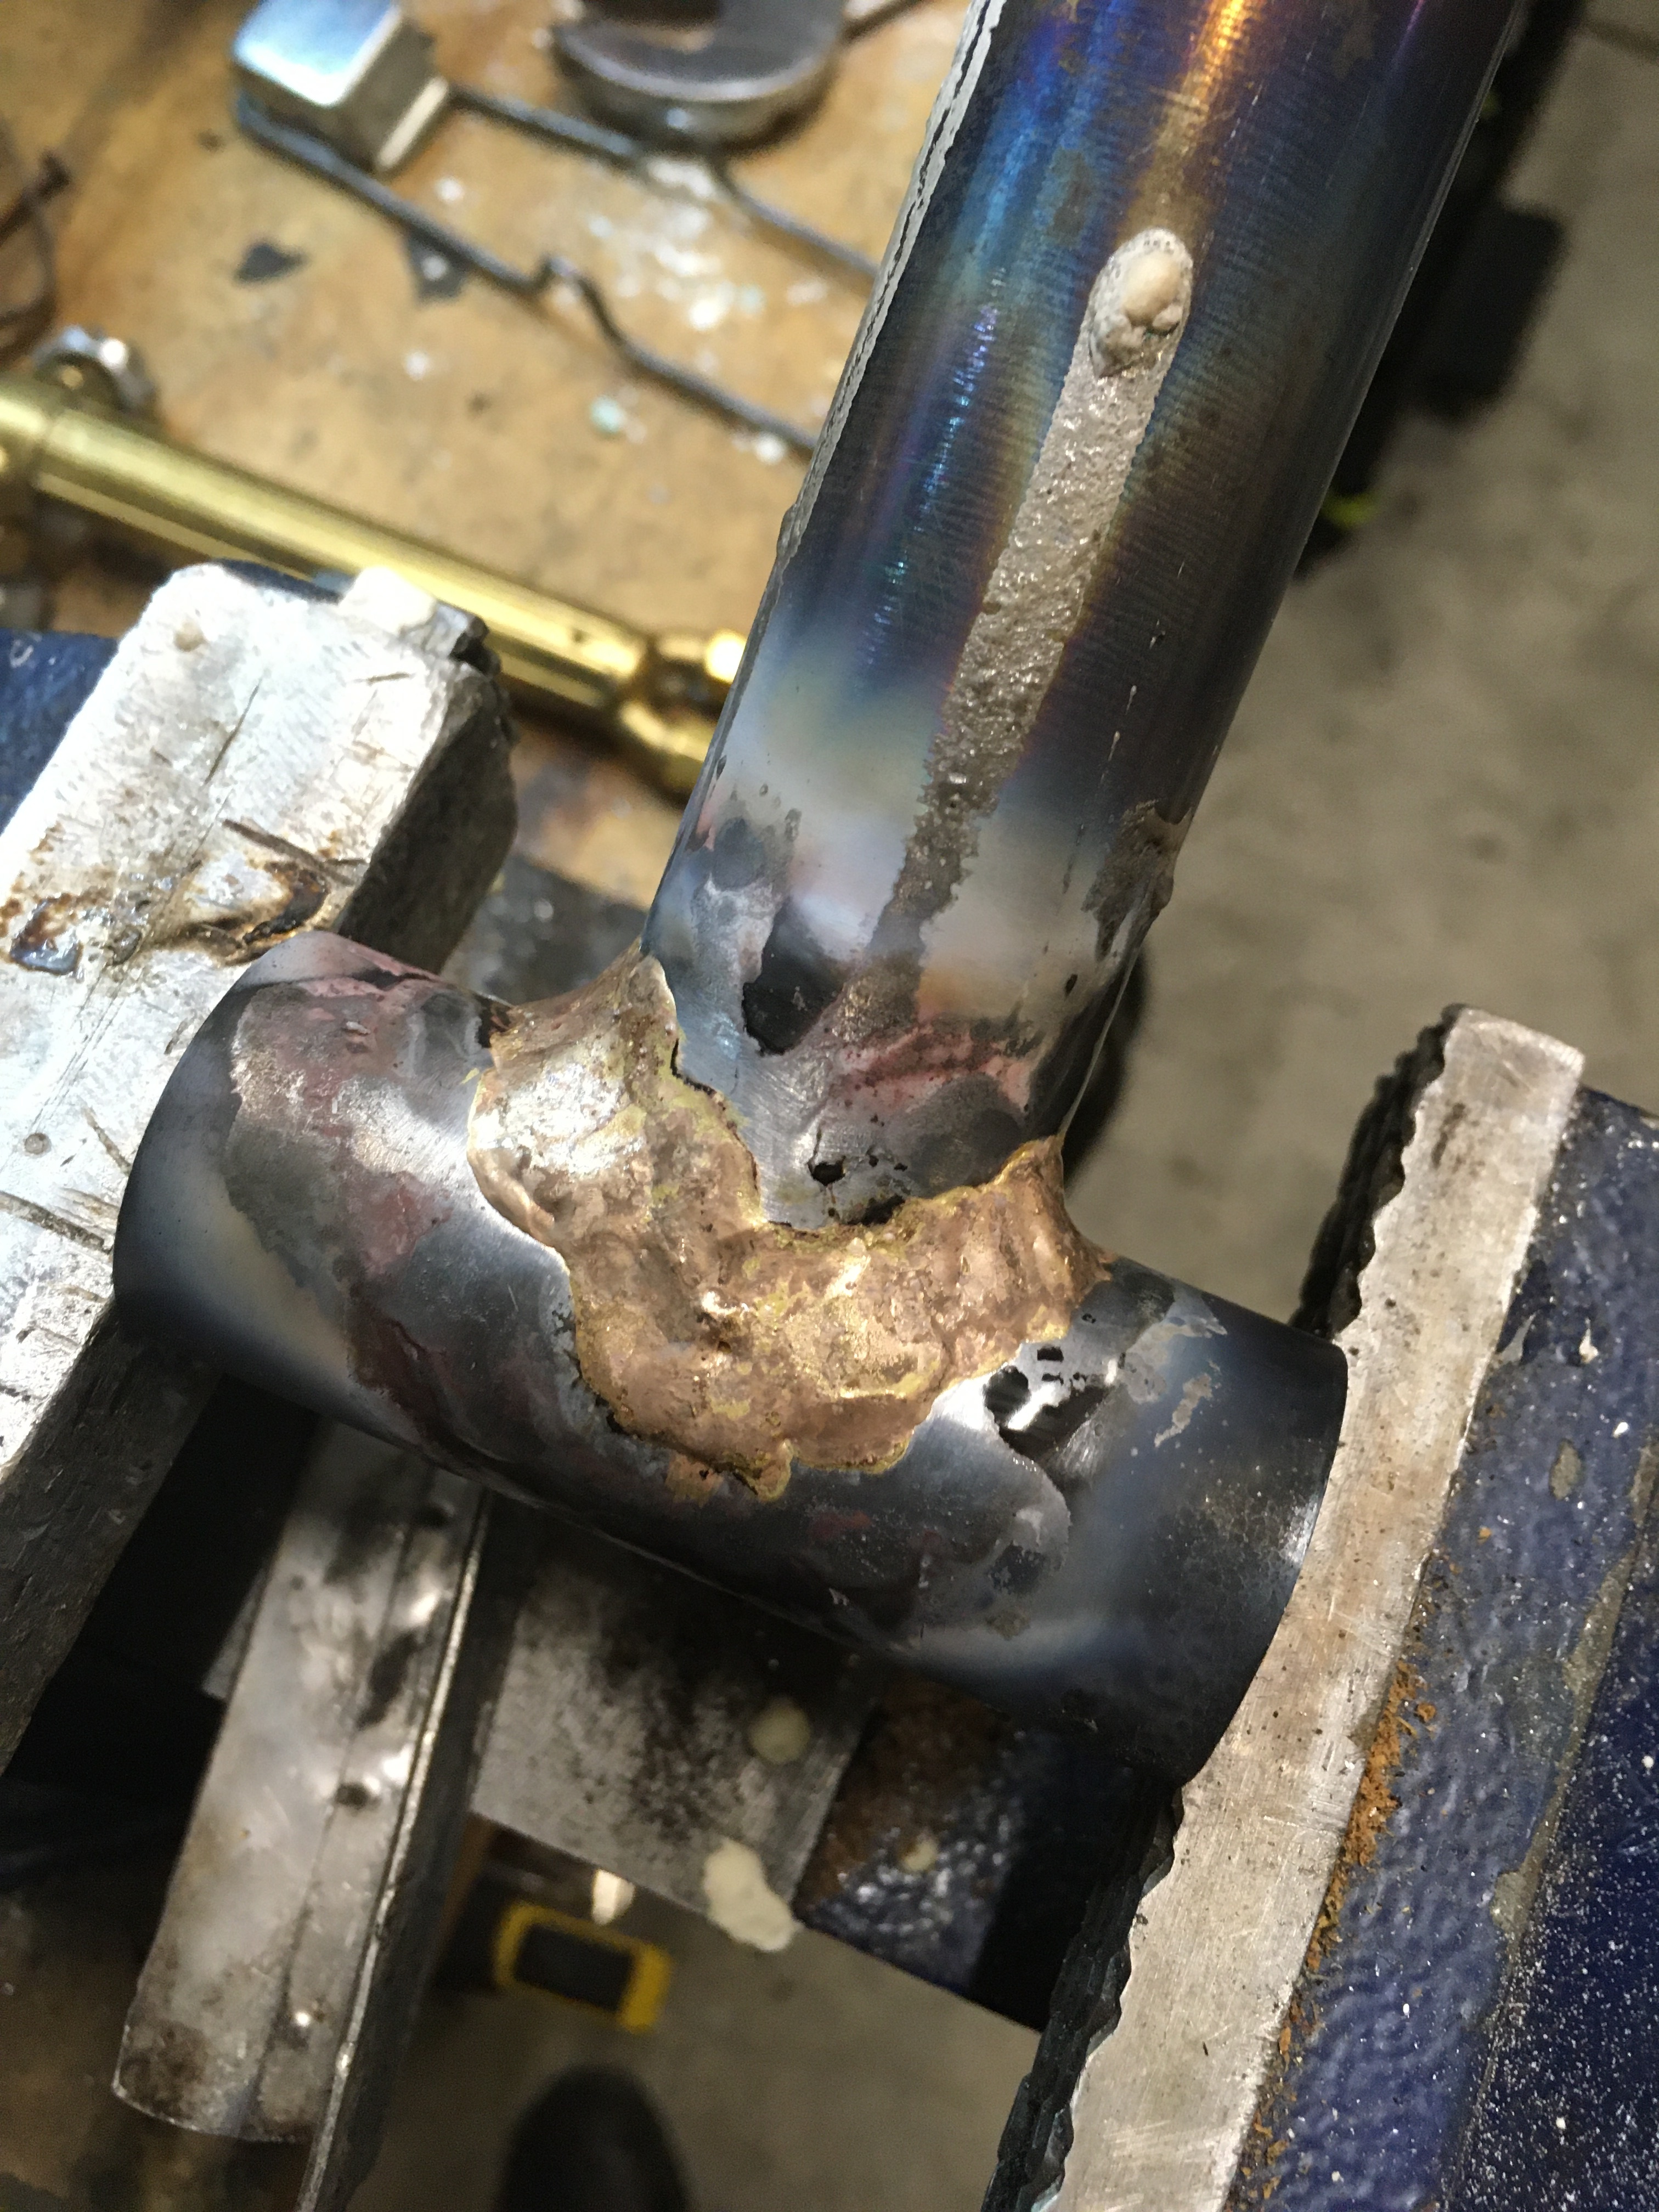
That looks way better. Good job. It looks a little like you go back and forward a little on the brazing? That’s what causes the uneven lumpiness on the flatter sections of the joint. I try to make sure I’m not going back and remelting any of the filler. I braze a little like if I were tig welding, once I get everything up to temps I’m adding filler and moving forward, add filler, move forward, I’m not going backwards at any point. I’ll stop and reposition the tubes/frame maybe 5 or 6 times during a full braze. Just to make sure gravity is working for me and I don’t have molten filler sloshing all over. Keep going and just practice as much as you can.
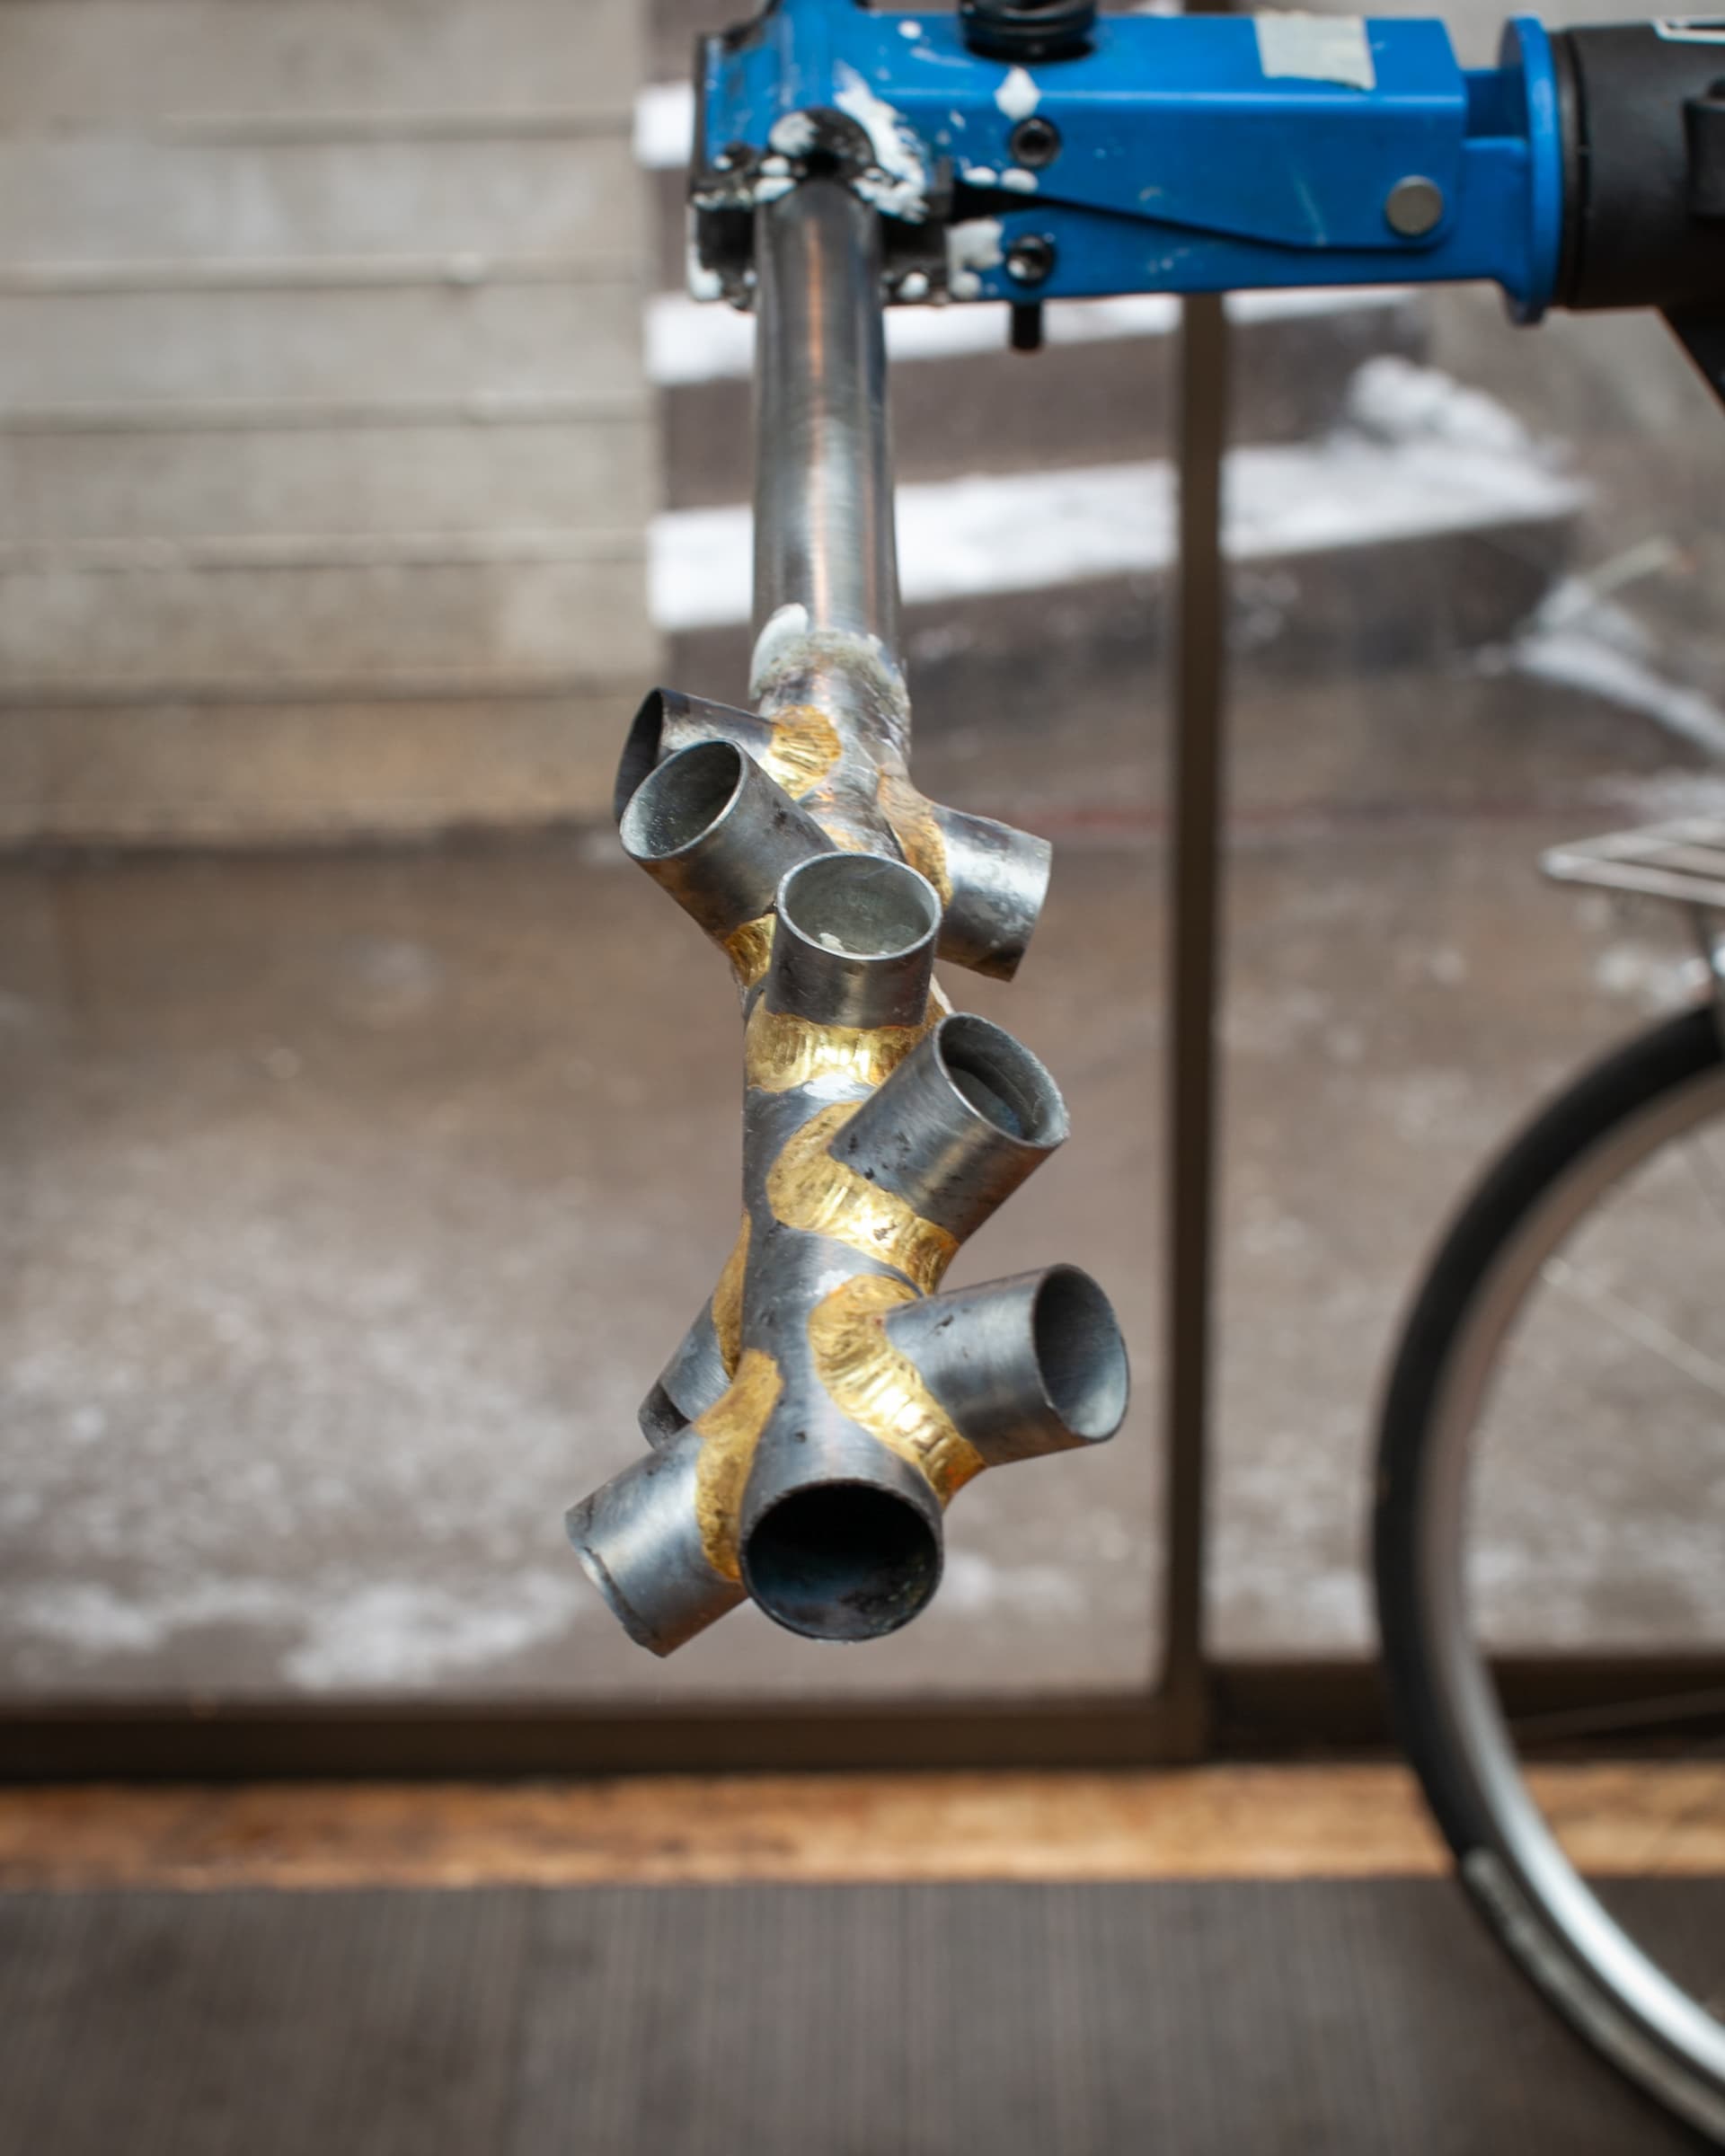
One quick tip for practicing… Rather than miter the longer tube to fit the stub, miter a bunch of stubs to fit the longer tube. And, if you want to make it a little easier on yourself, make the stubs out of a smaller diameter tube than the main tube, and miter them at something other than 90 degrees. Like this:
As with a lot of things, I’ve found that being comfortable and being able to change the position of the work easily while brazing is really important.
Finally, miter 4 or 5 at a time so you can work back-to-back-to-back without any pressure to get it right on the first rep… Regardless of how much practice one has, the 2nd or 3rd joint is always going to go better than the first.
Then just do a couple hundred joints and it’ll start to click. Haha.
Thanks. I rewatched the “How To Bronze Braze” video where he talks about melting the leading edge of each “coin” when adding filler…that’s what I was going for this time, but it didn’t work as cleanly as in this video. I should probably mention that the tubing I’m using for practice is 1-1/8 x .100" and my torch is oxy-propane (Victor 2-TEN tip) – the tubing takes a relatively long time to heat up and I don’t have the hot pinpoint flame one gets with oxy-acetylene, so once things get up to temp, the brass tends to flow everywhere. Is this making things harder for me than need be? Probably I need more practice to improve my heat control? I intend to keep trying!
I braze with oxy / propane as well. I don’t know the tip you’re specifying, but I tend to bust out my biggest Smith tip for main triangle fillets.
My settings are between 8-10 PSI on both gasses (always equal to each other) when doing main fillets, using a neutral flame.
I find the biggest difference between propane and acetylene is that you have to be more patient with propane. It just takes longer to heat stuff up, but patience is really important when brazing.
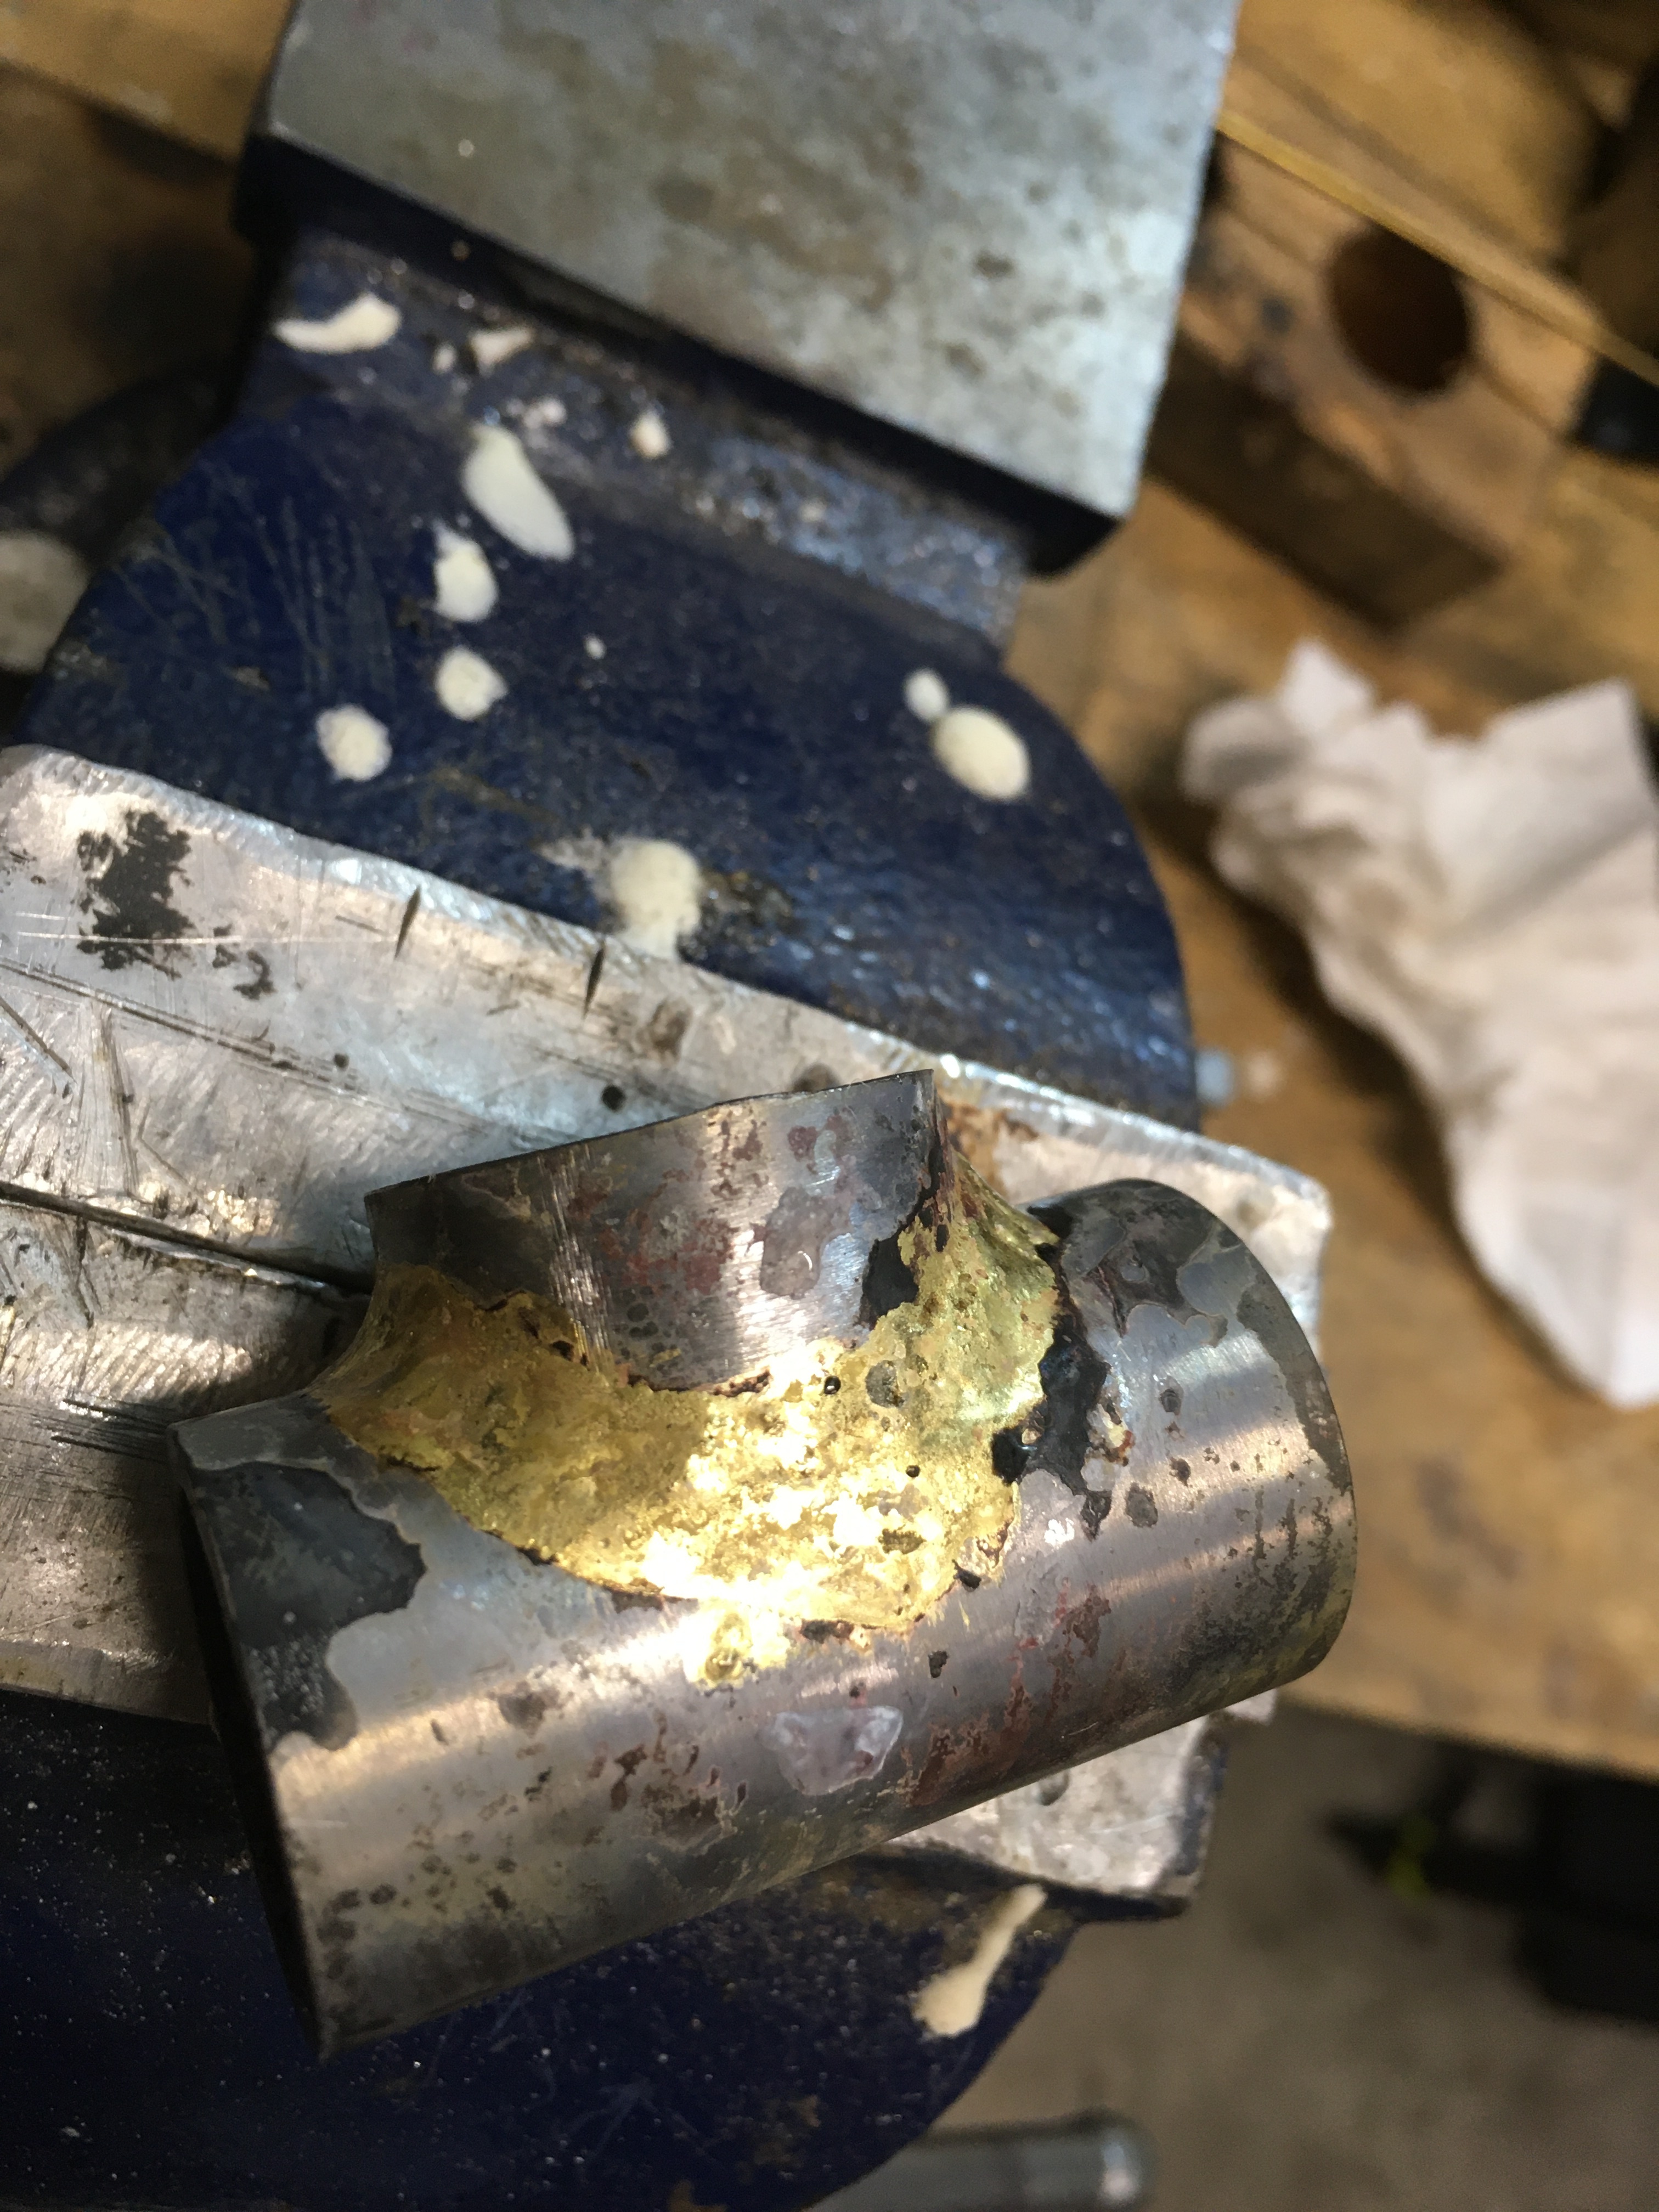
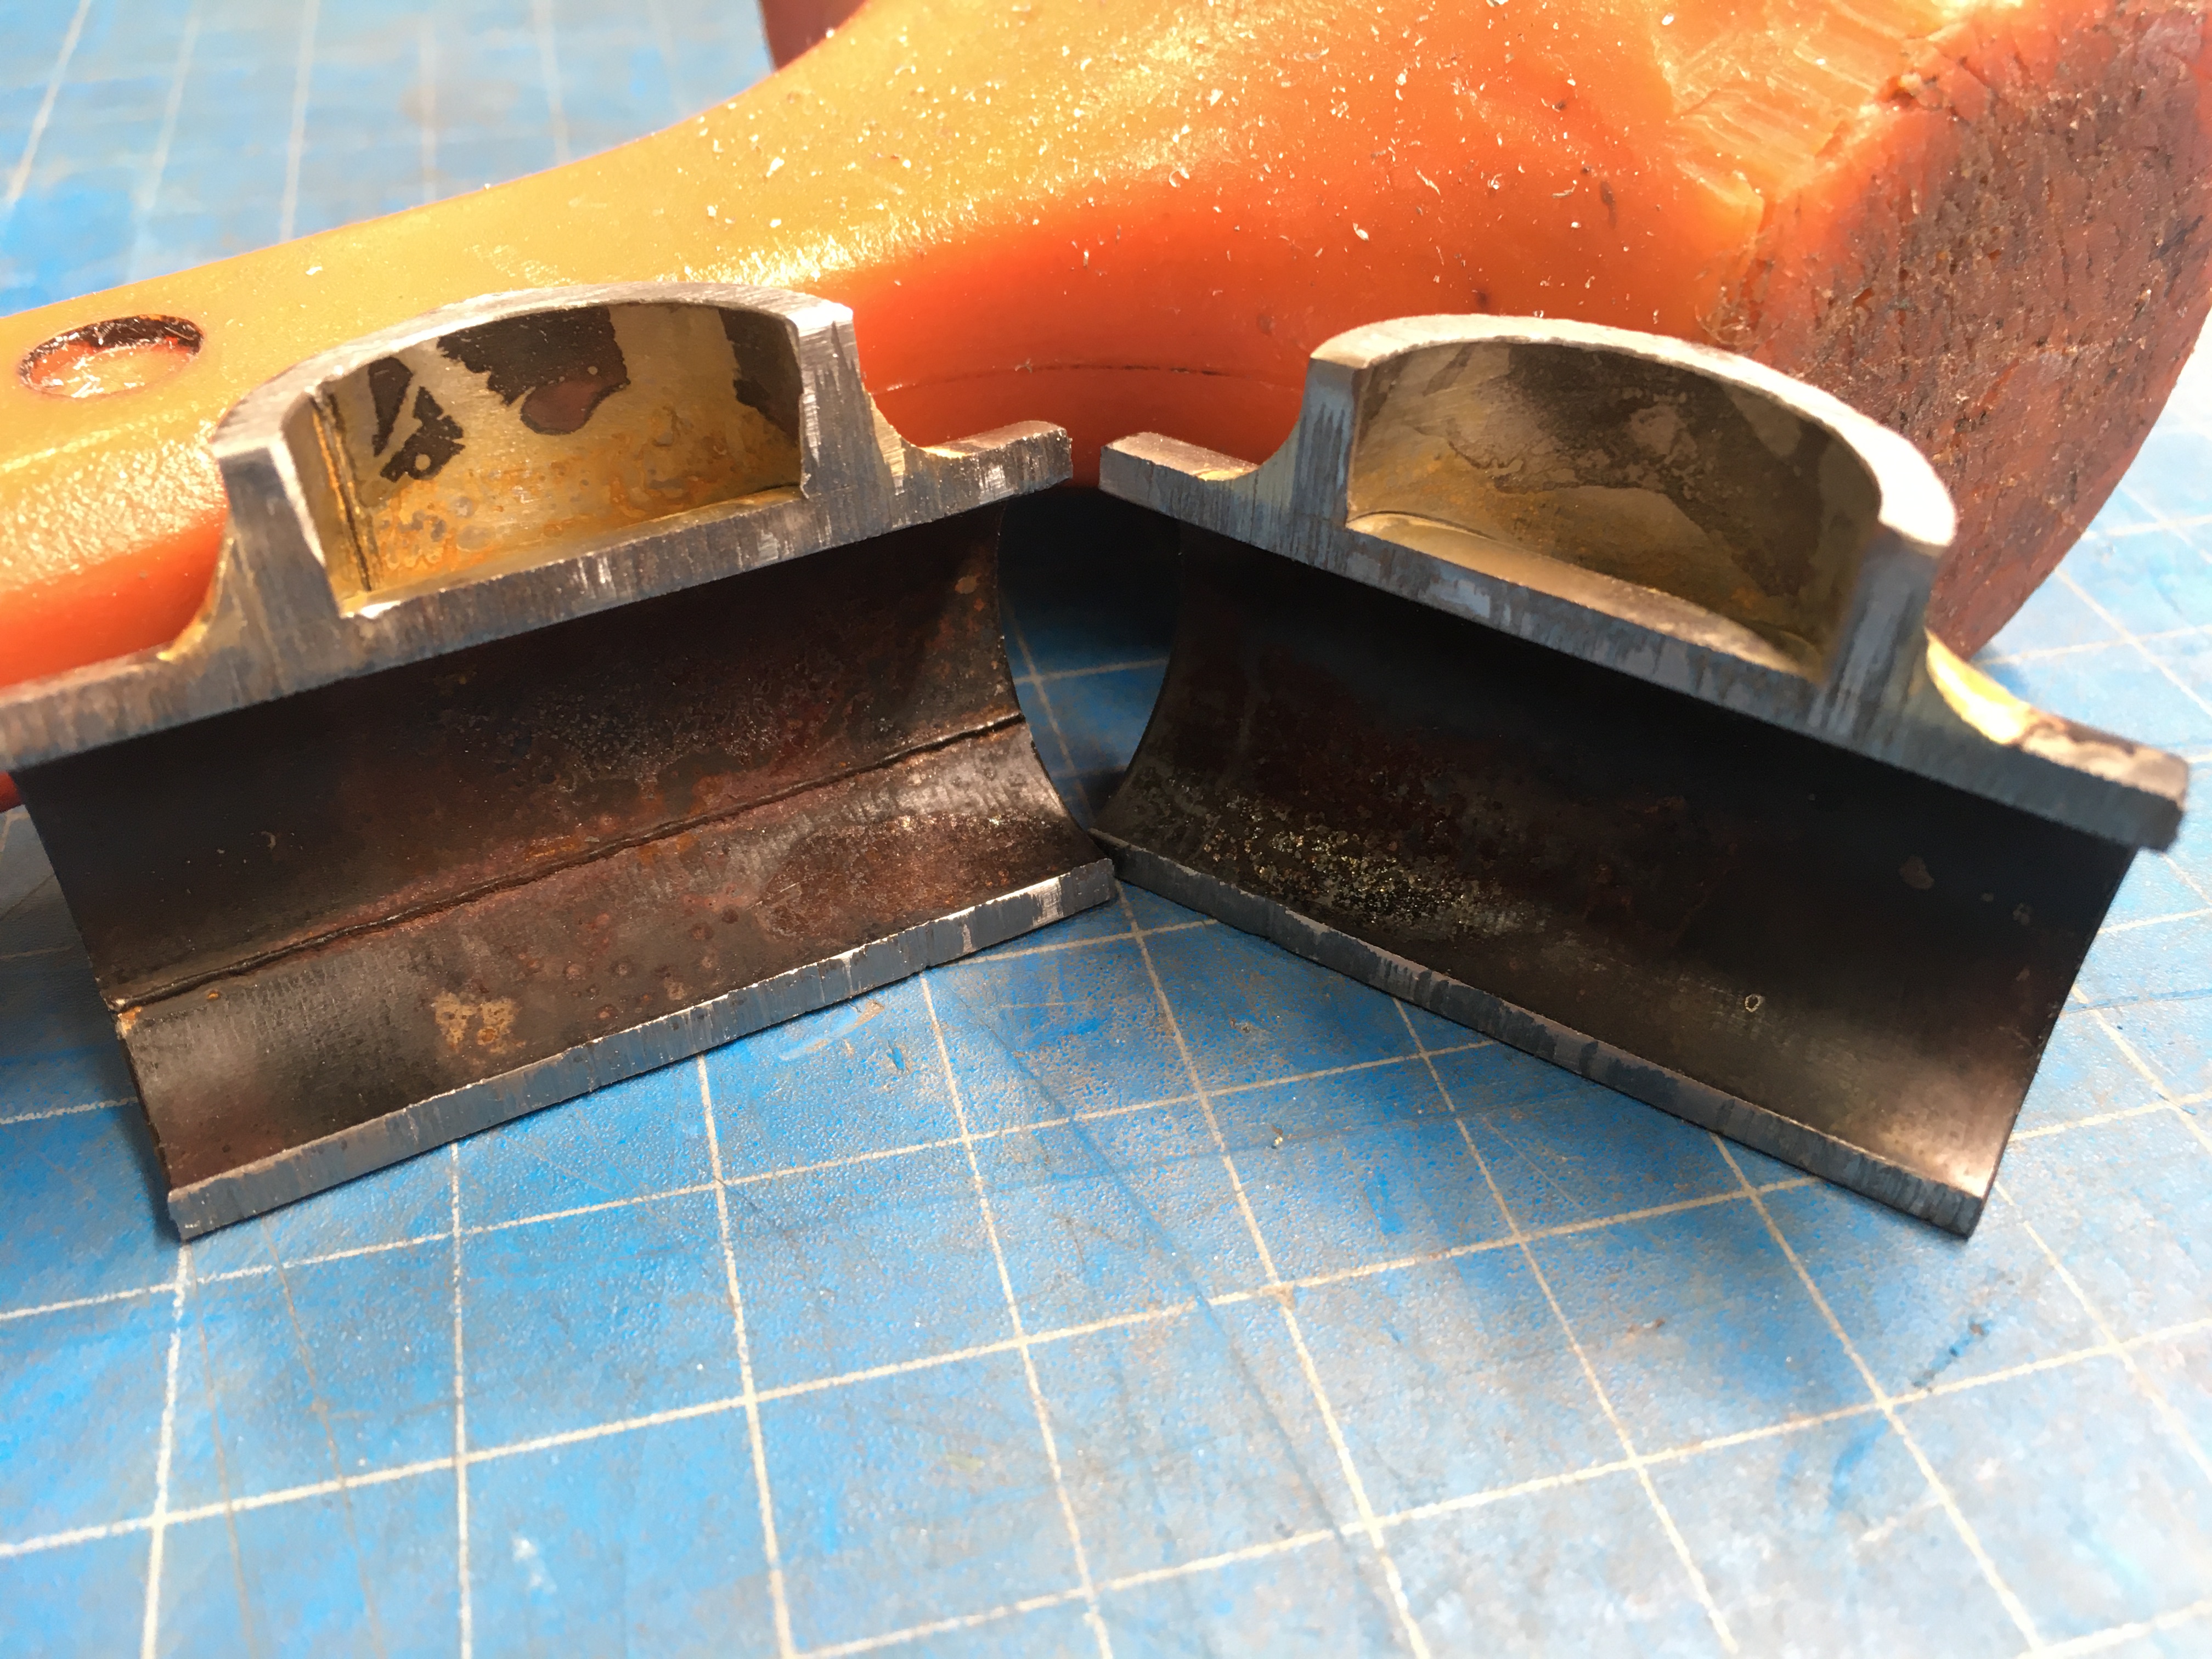
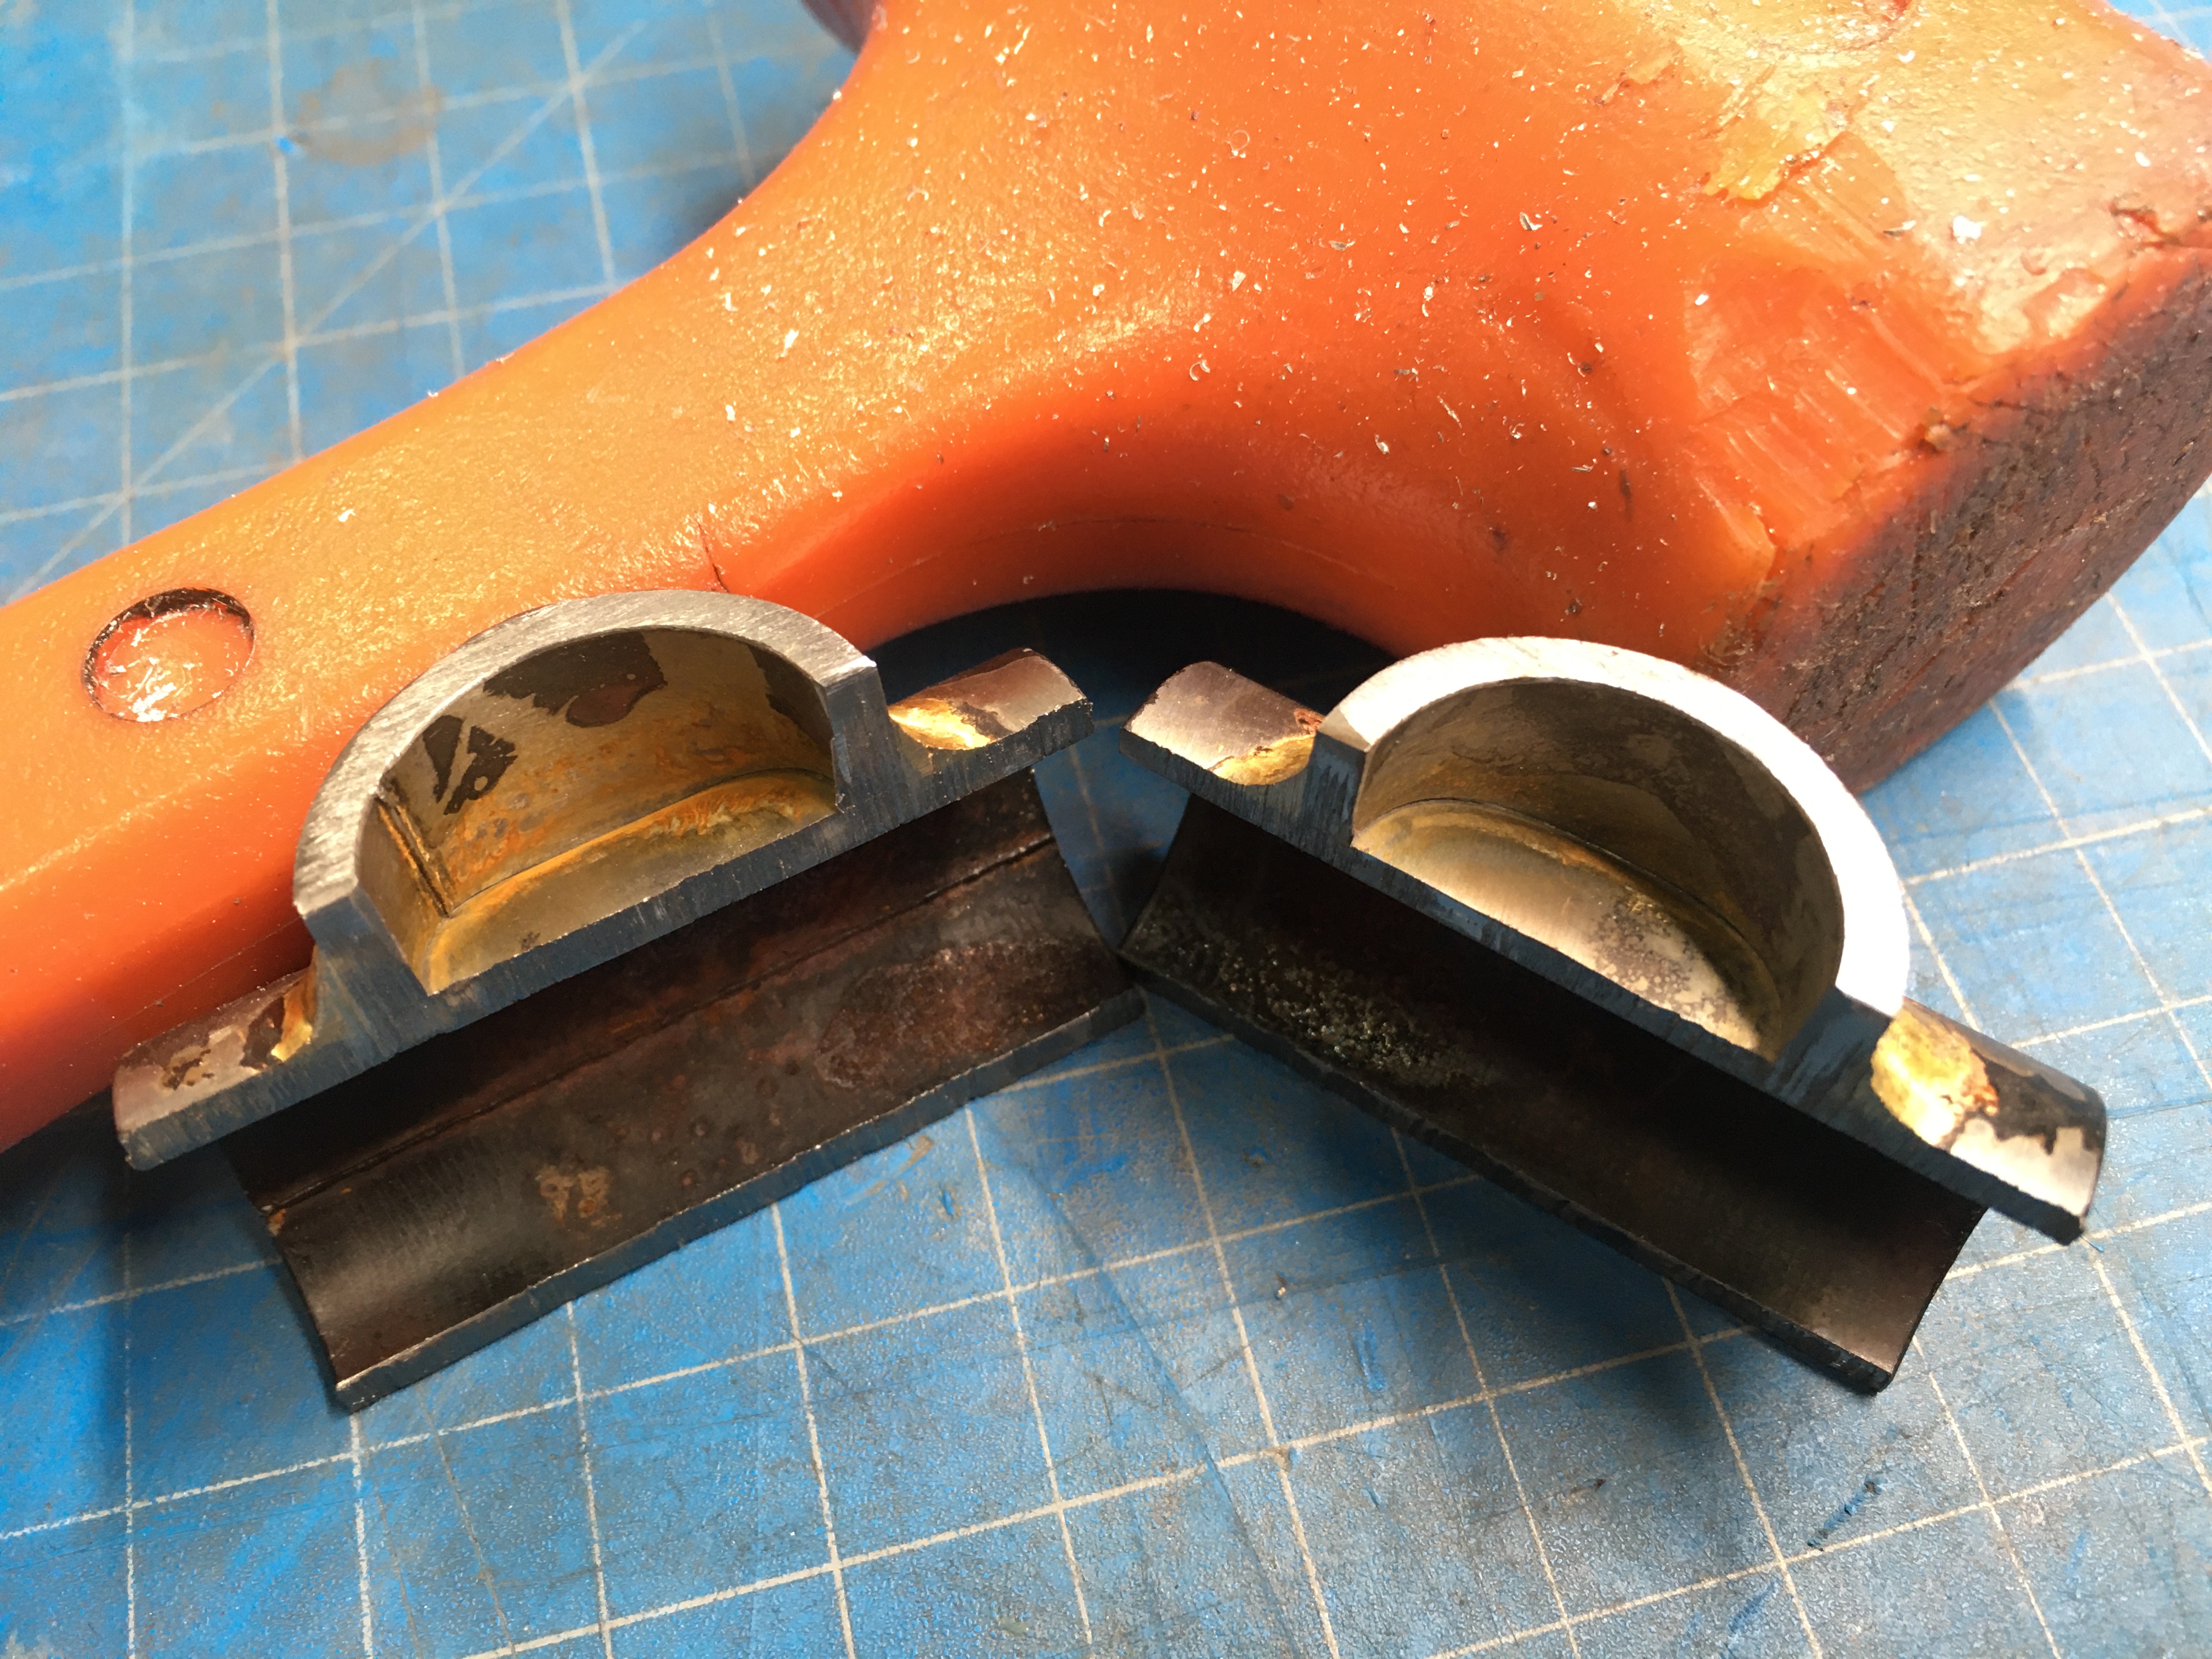
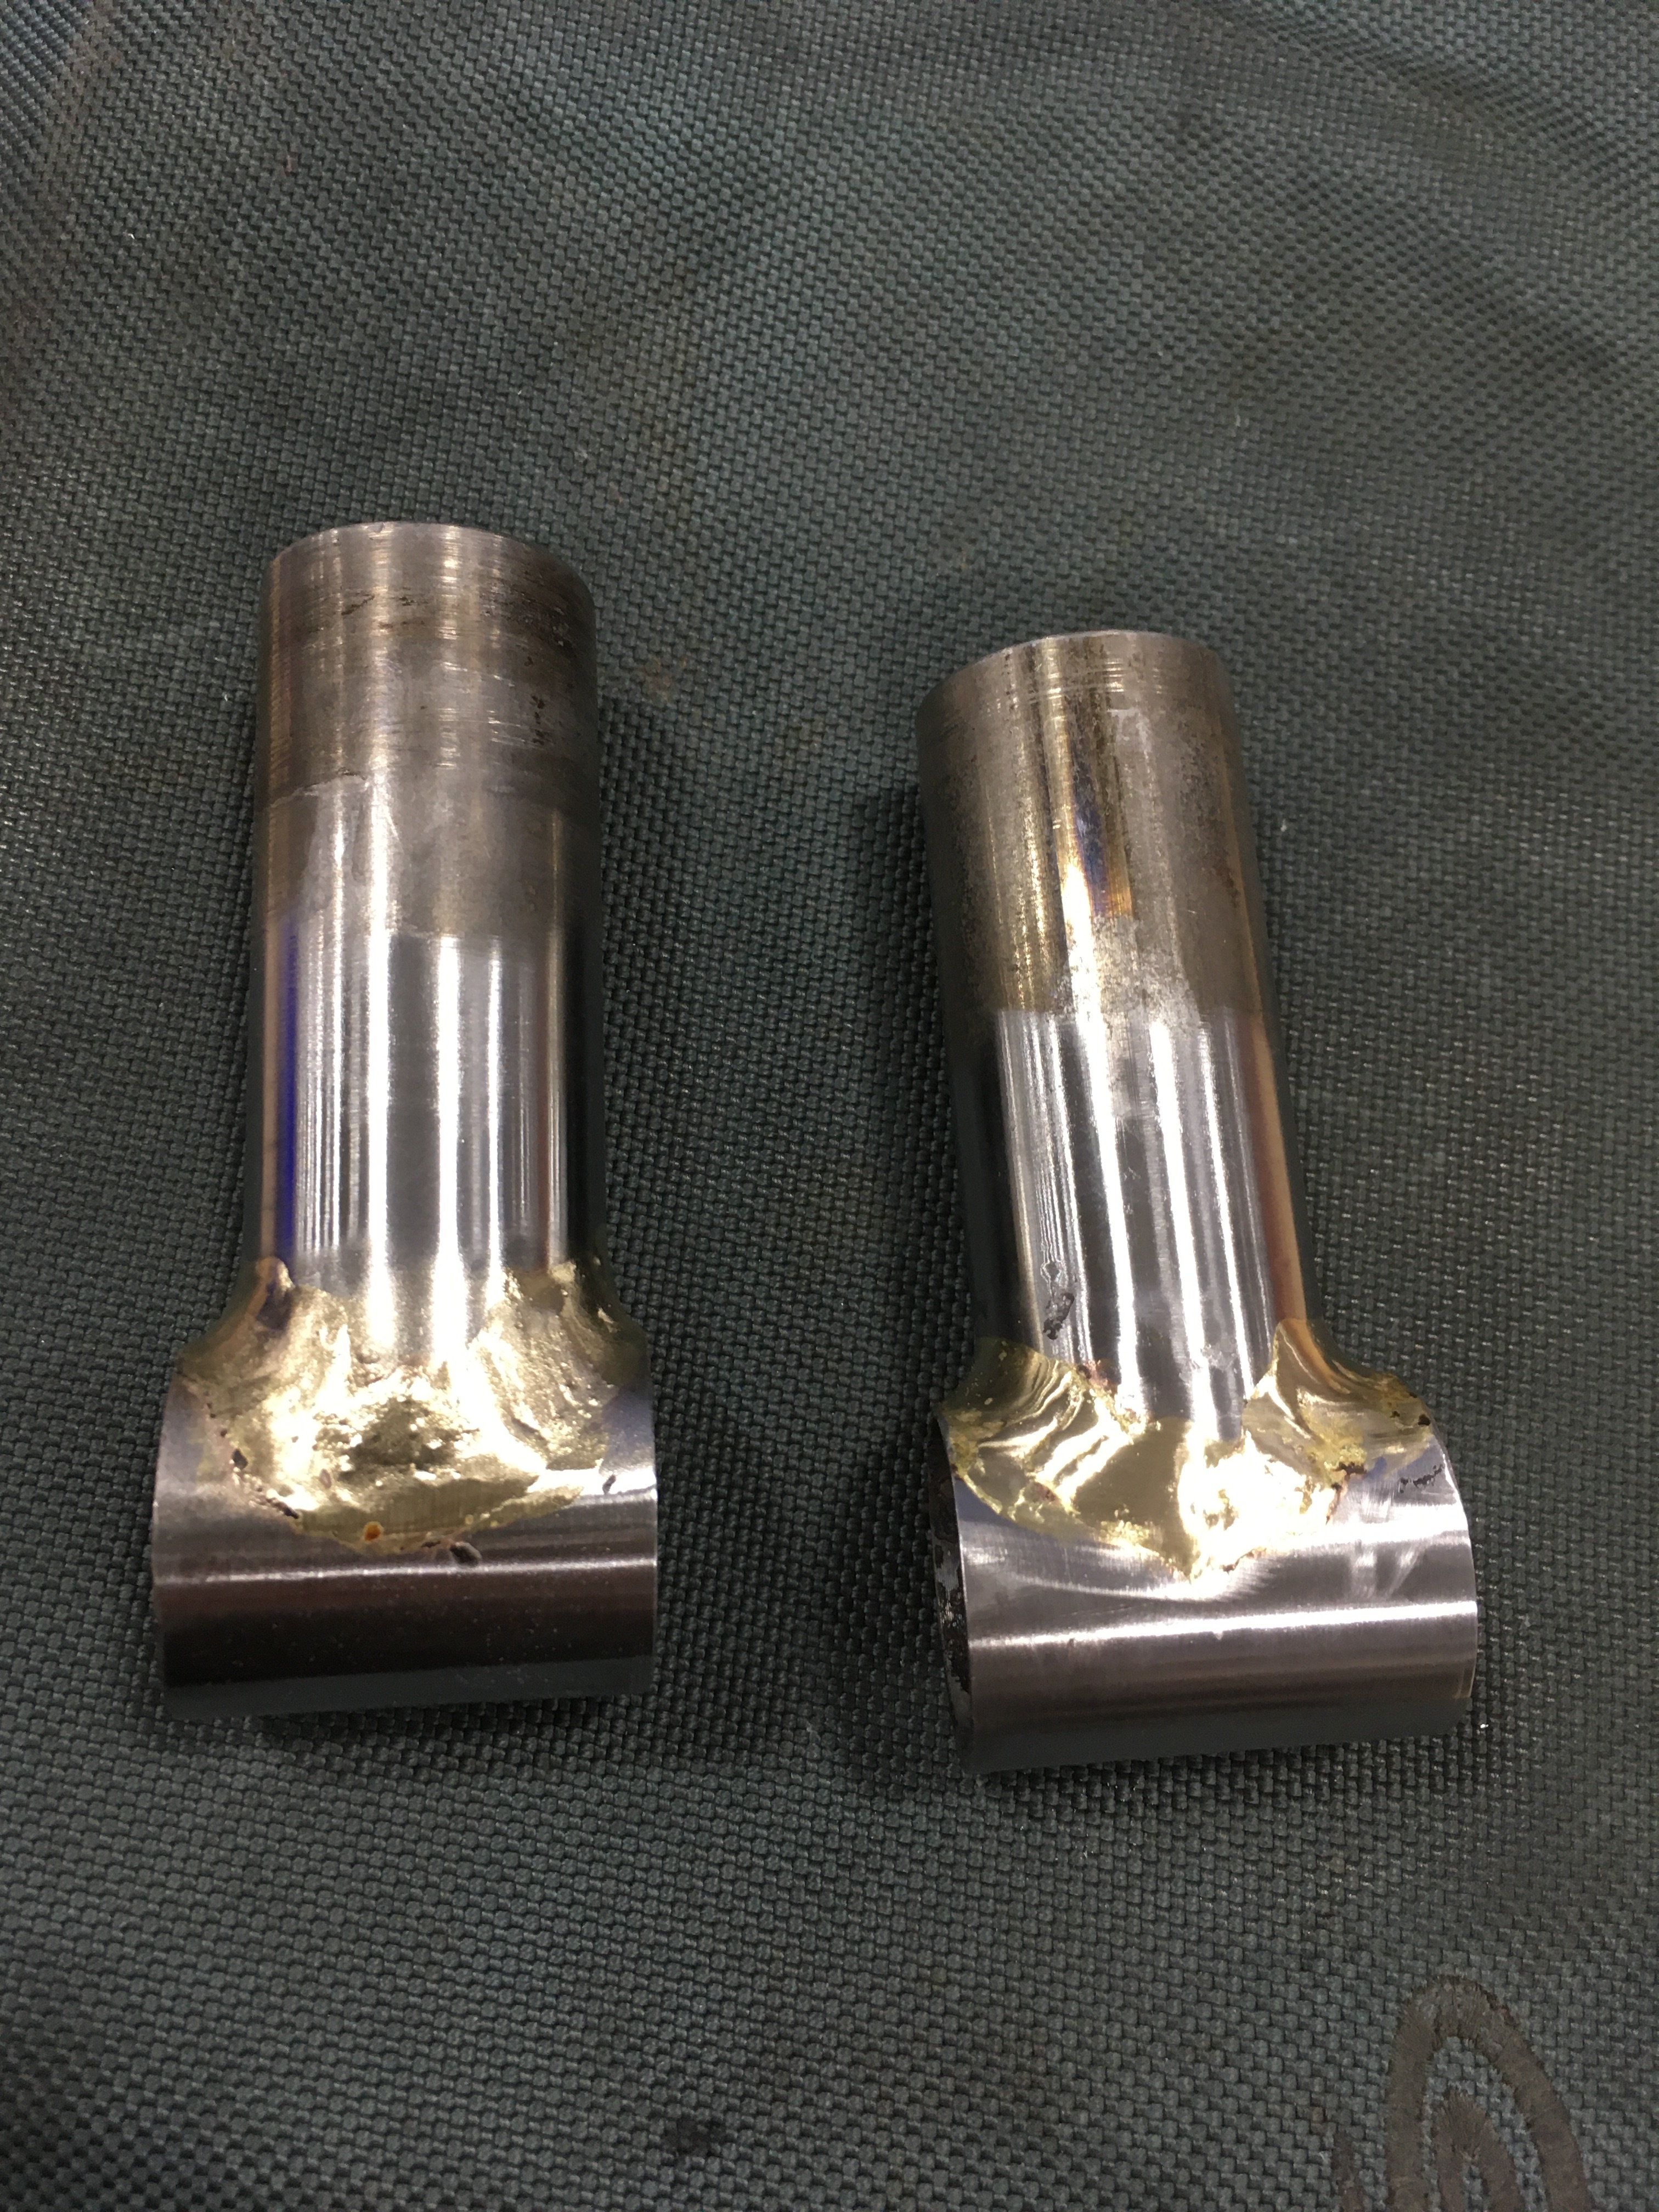
Here’s my 2nd try cut in half. Doesn’t look like I’m getting any penetration inside the tubes. :(. Does this mean I’m not getting things hot enough? Or is my joint too tight? Or…?
I agree that using thinner tubing similar to what you’ll eventually braze would be helpful. You’ll probably get better bronze penetration with the thin stuff without changing your method.
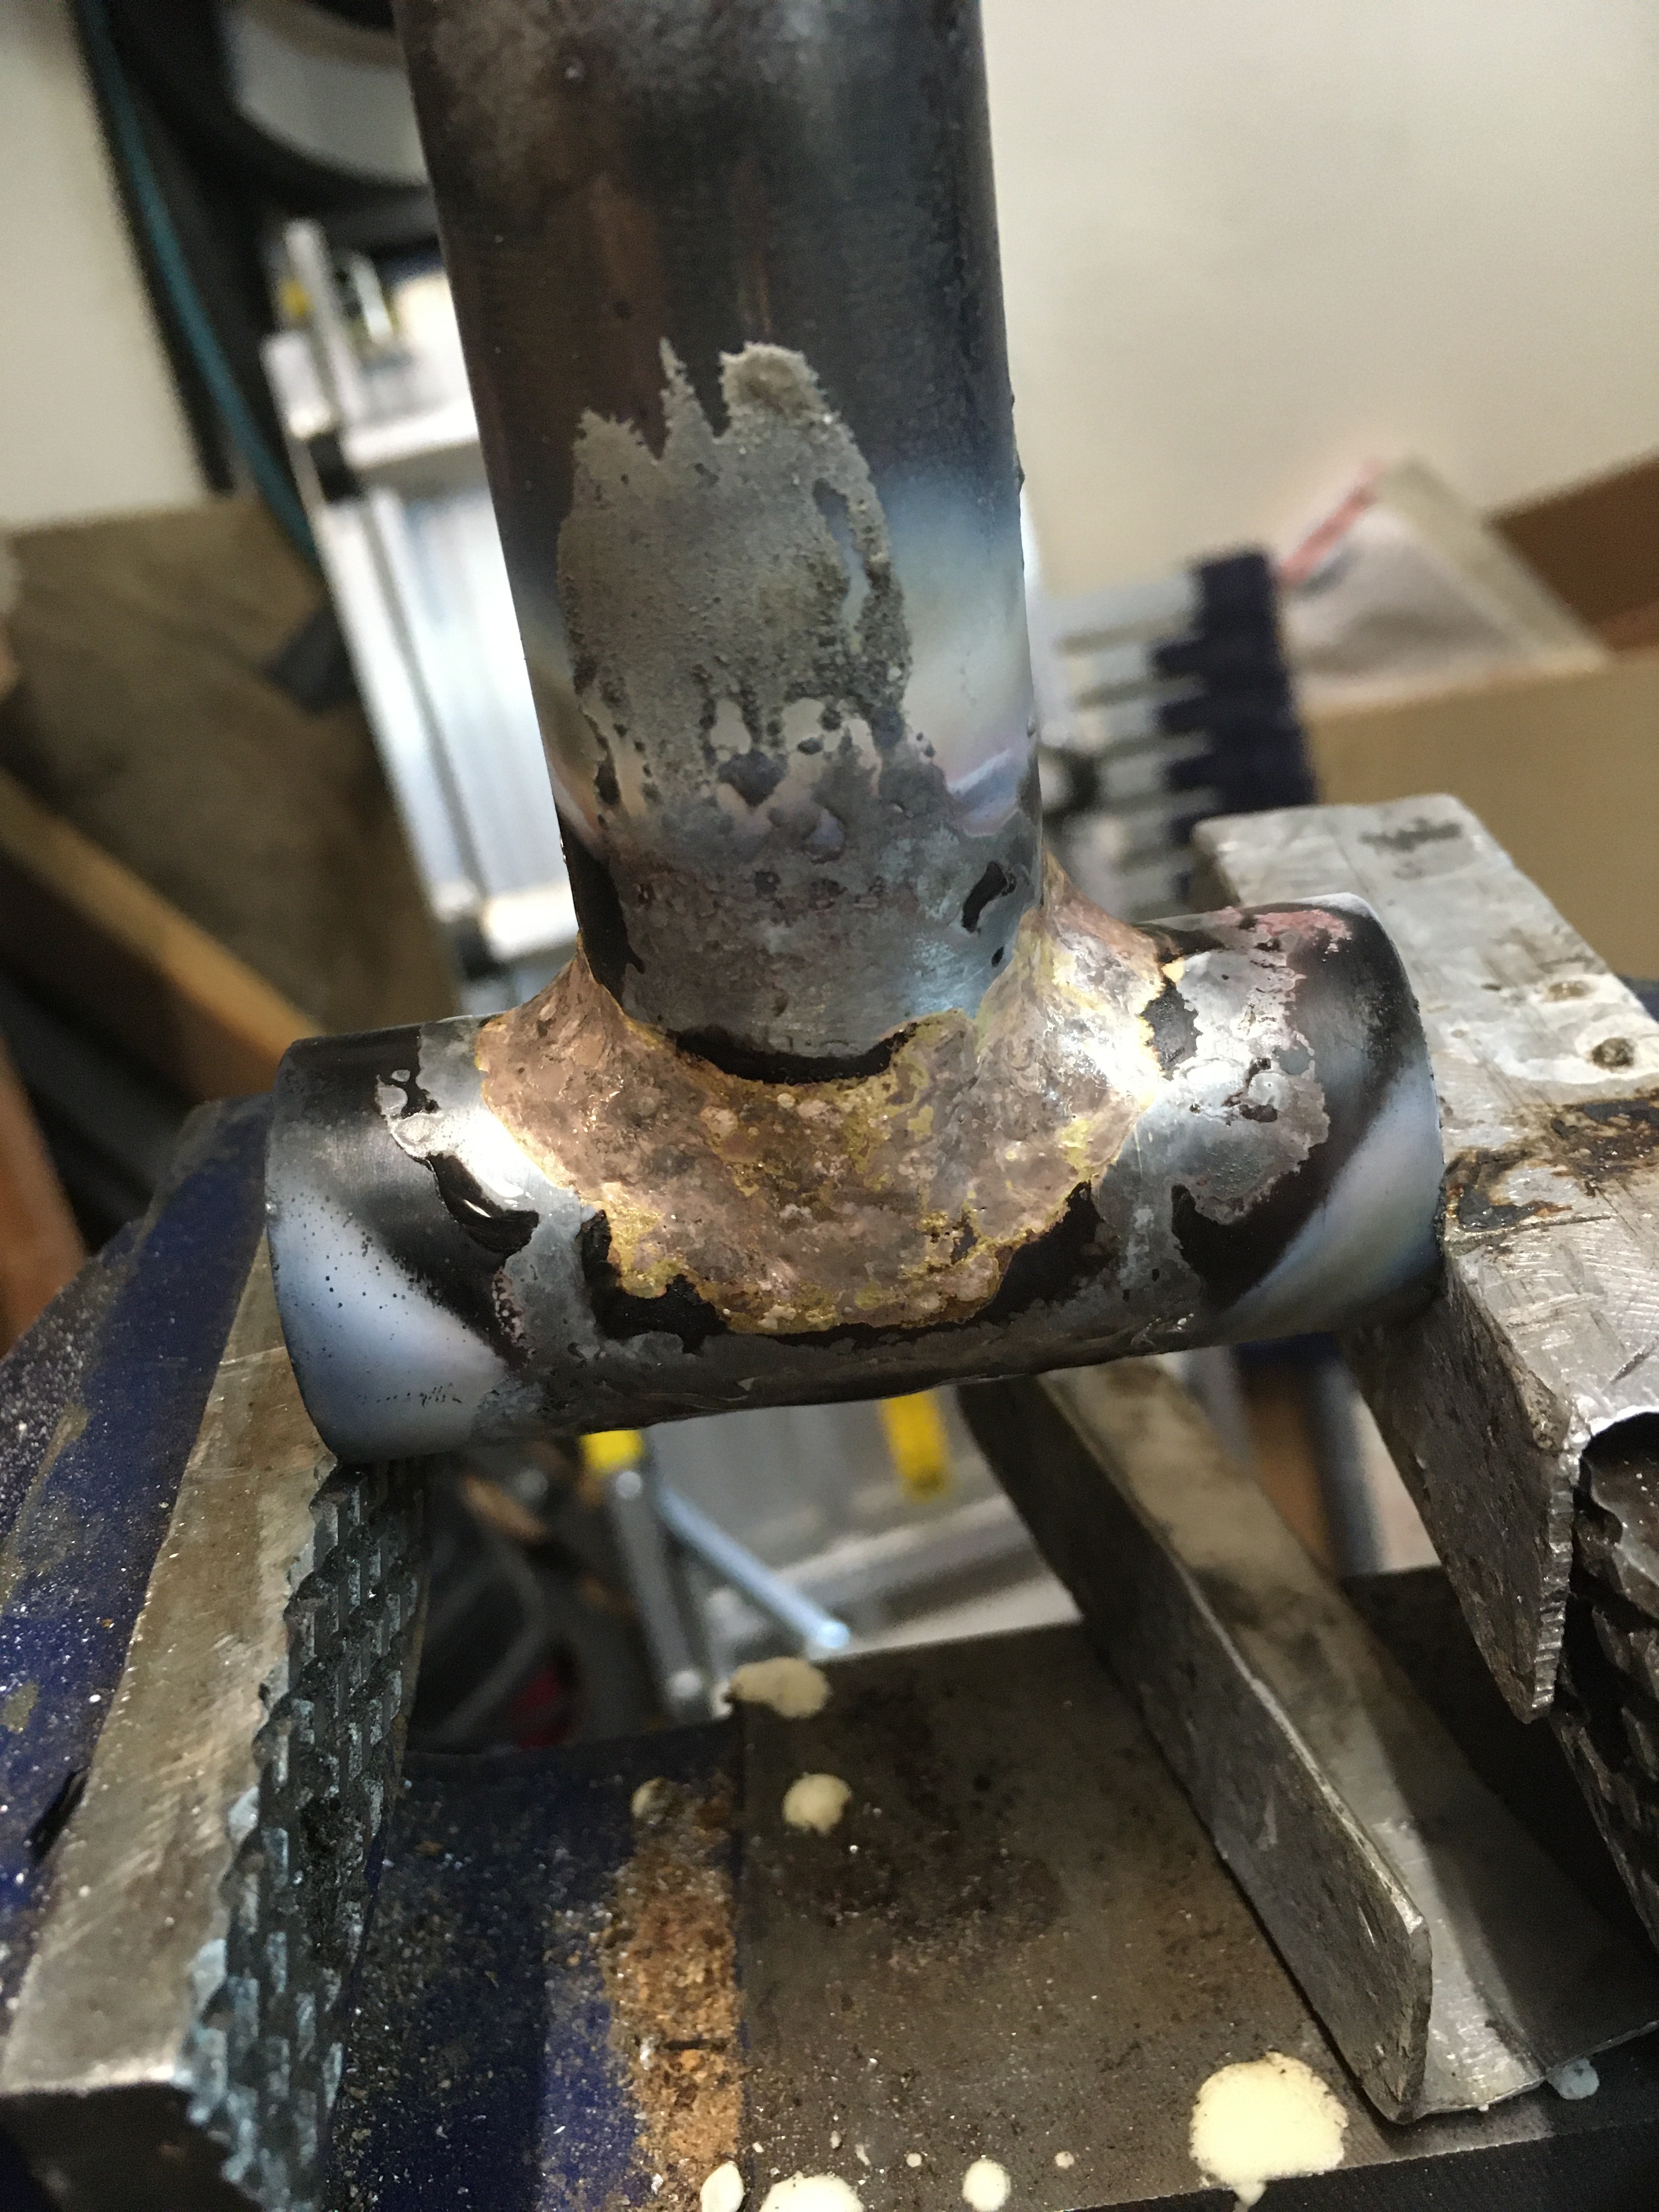
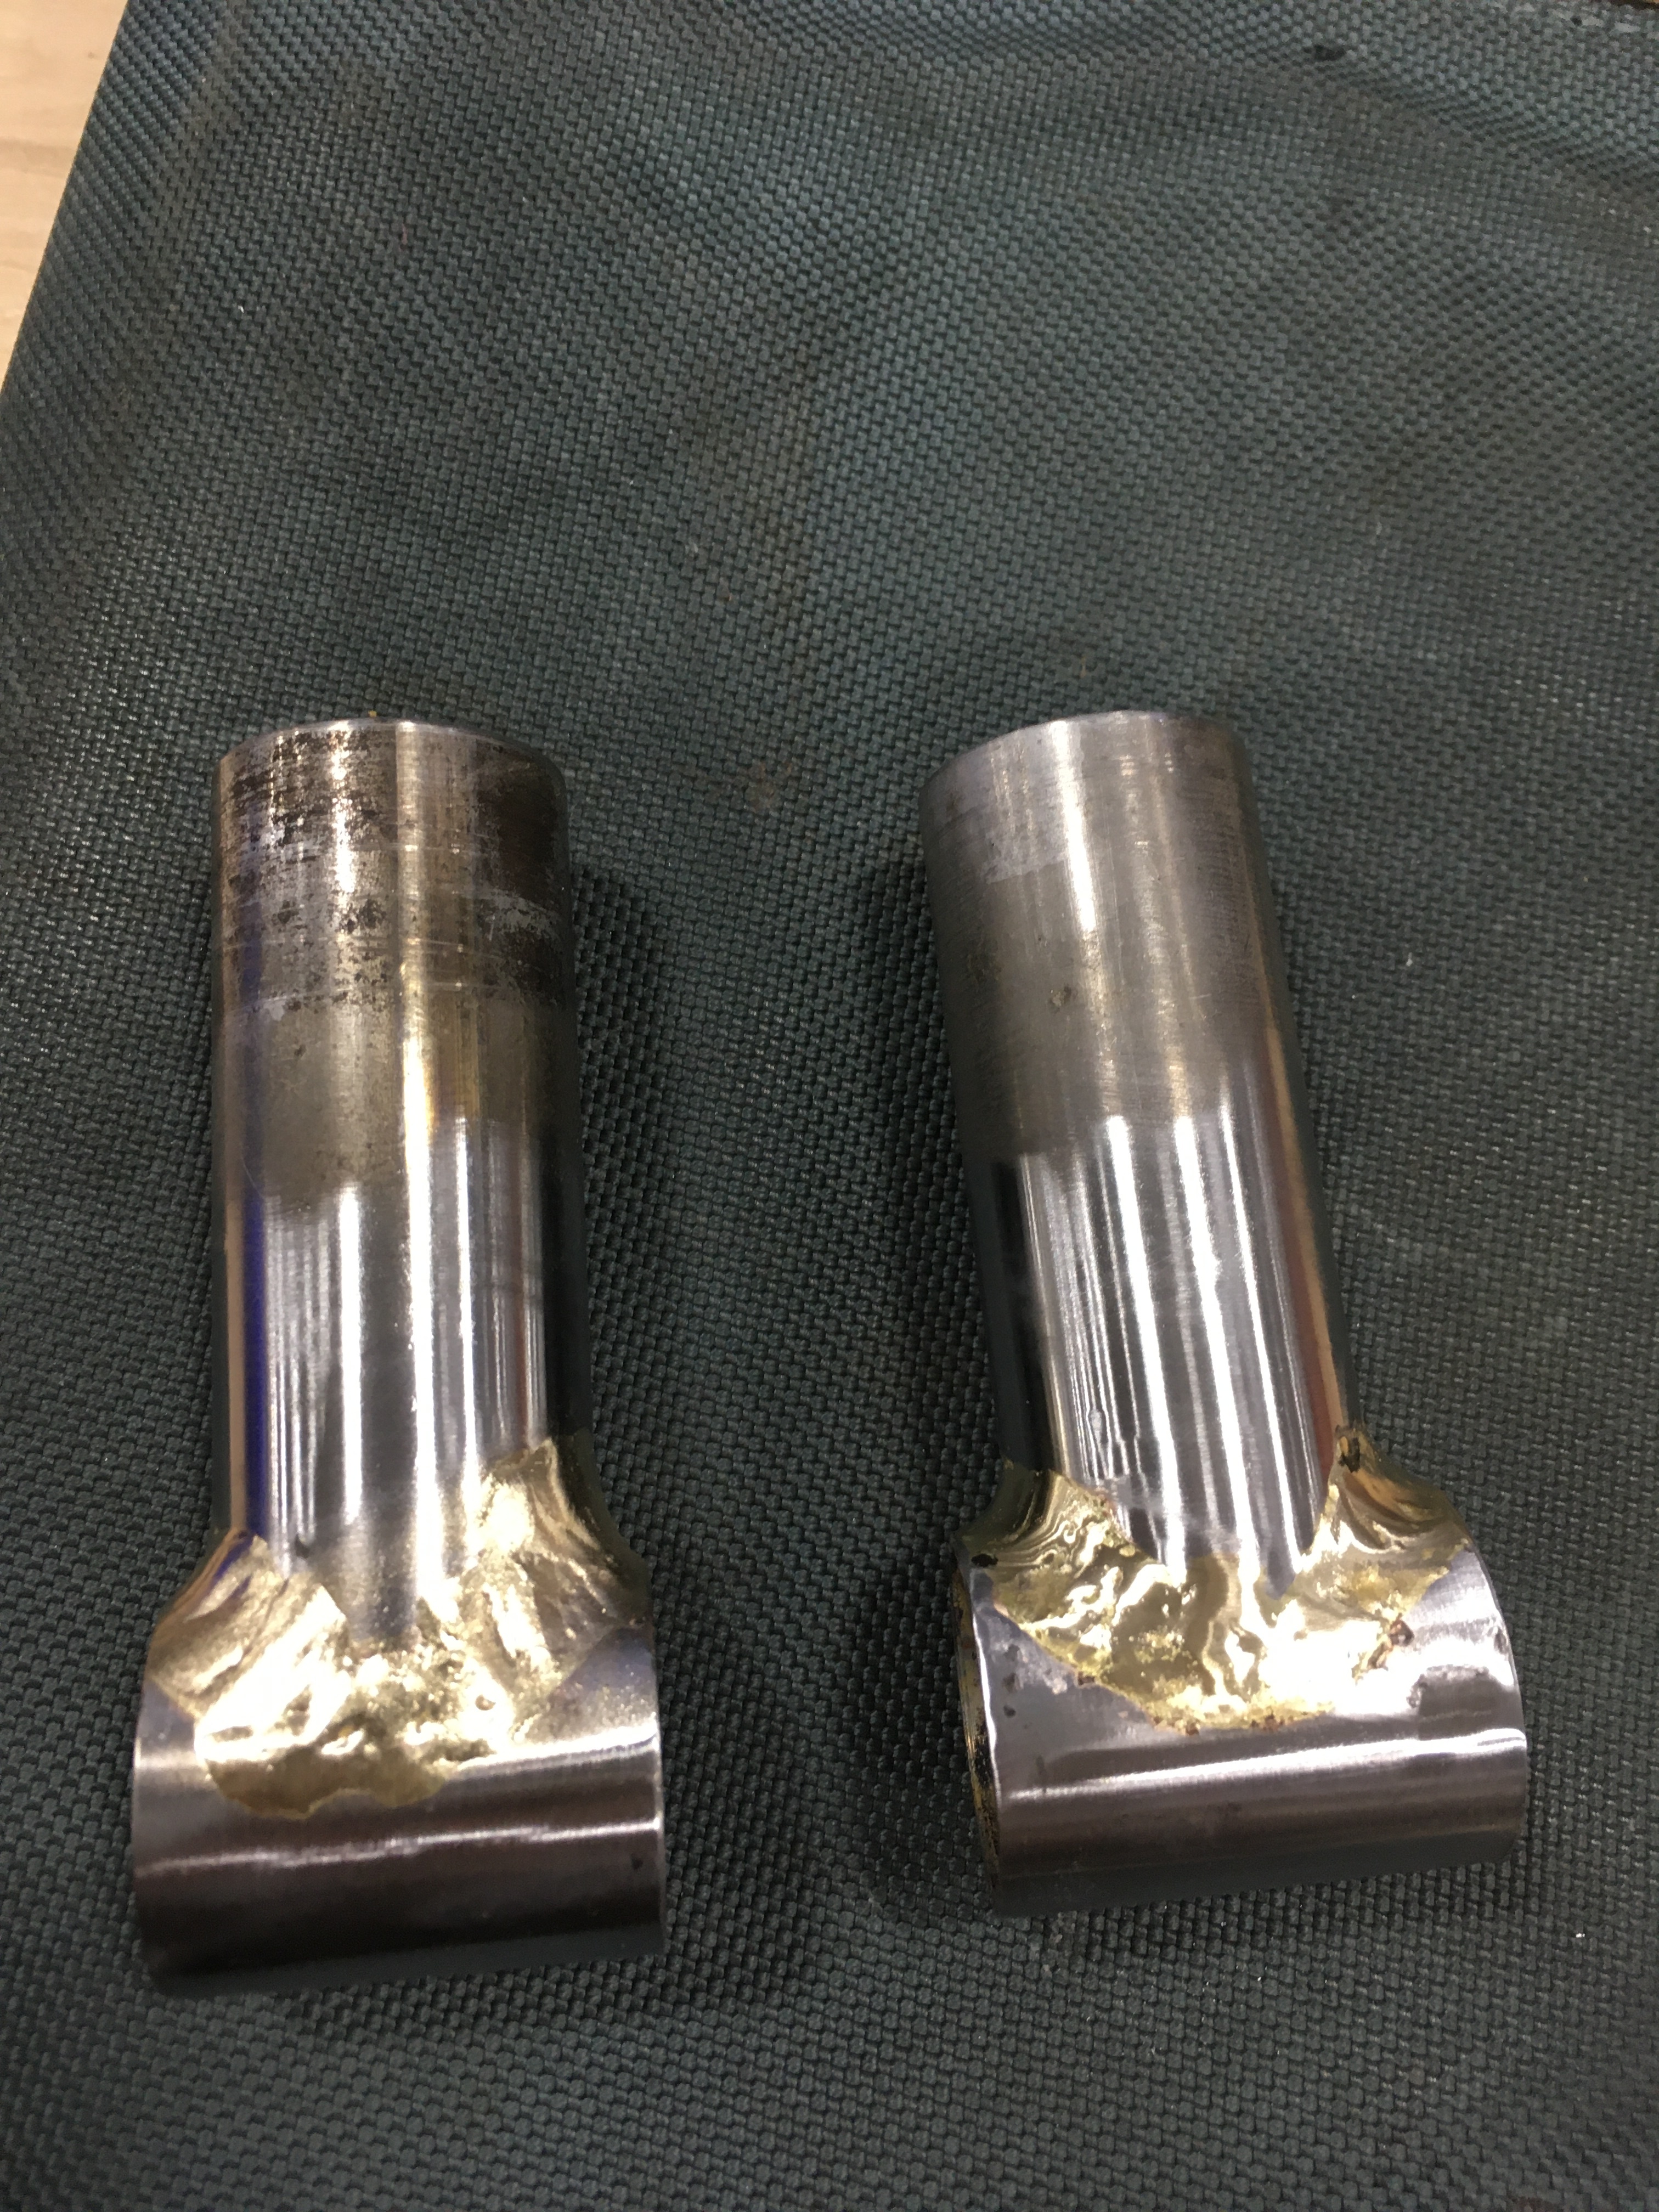
So here’s my latest practice attempt, this time using .045” wall tubing. I think I got better internal penetration but worse heat control. My torch was either too hot or too cold, I couldn’t find the happy middle.
Some quick thoughts from a fellow newbie, so take them with a grain of salt. I’d be interested to hear from the more experienced brazers as well.
I think of heat control as being a function of the following, in no particular order:
Tip size
What torch and tip are you using? If the tip is too large or too small for the application you’re probably going to chase your tail when it comes to heat control.
The distance from the flame to the joint, and the flame angle
Are you being consistent/systematic about the way you move the torch?
The amount of time the flame is exposed to the joint
Again, are you being consistent/systematic about the way you move the torch? Tip size, flame distance/angle, and exposure time all interact and result in the amount of control you’ll have over the resulting braze joint. If you read the threads on welding, there’s lots of discussion about different welder settings that act to control some of these variables and a good amount of experimentation to figure out what works best. It’s going to take some experimentation to develop the eye/feel for what works. You can go through the motions of brazing like someone like Paul Brodie, but if you don’t have the correct “settings” you won’t get the same results.
The amount of material in the joint
The short piece of your practice joints is barely larger than the diameter of the mating tube, and this doesn’t leave much material on the ends to conduct heat away from the joint. If you’re not doing these sections first, this could also be a reason why you’re struggling with heat control. The joint will already hot from the earlier brazing and as you move into these sections theres less material to absorb heat which compounds the problem. Additionally, it looks like you’ve had to migrate the braze deeper into the long tube to maintain your fillet width, and unless you’re careful about adjusting the angle of the flame as you make this transition you could end up with a cold braze. It does look like the bronze hasn’t wetted as well in some of these areas.
How you’re able to hold the joint
If you’re not able to hold the joint in a way that allows you to rotate it as you progress, you’re going to struggle to maintain consistent flame angles and will fight gravity while brazing some parts of the joint. Having a comfortable set up that allows you to achieve good angles on the workpiece is a huge part of achieving good results.
One final thought: If you start the joint with the goal of good internal penetration, you may be getting the workpiece hotter than necessary straight away and then spend the rest of the joint chasing your tail as you try to manage heat. I’ve been practicing on pieces of flat metal so that I get a good feel for how to achieve a properly wetted braze. This eliminates some of the variables/difficulty of brazing tube joints while I’m still developing my feel for the process.
Thanks for sharing all that insight! Much of it makes total sense!
Tip Size – I’m using oxy/propane with a UniWeld71 torch, a Victor UN-J elbow, and a 2-TEN tip. Propane pressure is about 5psi, I don’t know what pressure my oxy-concentrator outputs, unfortunately.
Flame-to-joint distance and angle consistency – I am not doing a good job here. This comment totally made me go “DUH” because I just finished up an introductory welding course where our teacher tried to drill this concept into me…and of course I forgot! There’s a big difference sitting at a welding table in a chair with good arm support and a flat plate vs. standing at a round joint clamped in a vise with your hands and arms waggling around in mid-air. I should know this!
Material thickness vs. heat – YUP. Because I was (over) focused on getting good penetration, I again attempted to tin the joint (even though I’d previously been given the advice to NOT do that), which of course made everything hot when I tried to lay a fillet and the brass just ran everywhere. Paul Brodie uses a big flame to tin, and then dials that down to a very small flame to fillet – but he’s using acetylene which probably(?) works better this way. I was trying both bigger and smaller flame sizes, and the small one seemed like it just didn’t have enough oomph to heat up the part – so I increased the gas/oxy to make a bigger flame, which then heated things up broadly and made the brass run all over. I need to practice more patience here.
Work holding – I did have the joint clamped loosely in tubing blocks held in my bench vise, and I was trying to rotate things around so I was mostly working flat.
I did previously tell myself to practice on some flat bar, but I got impatient and went straight for another practice joint. Again I’m reminded of my welding class because ALL WE DID was lay beads on flat plate! I’ll try that next.