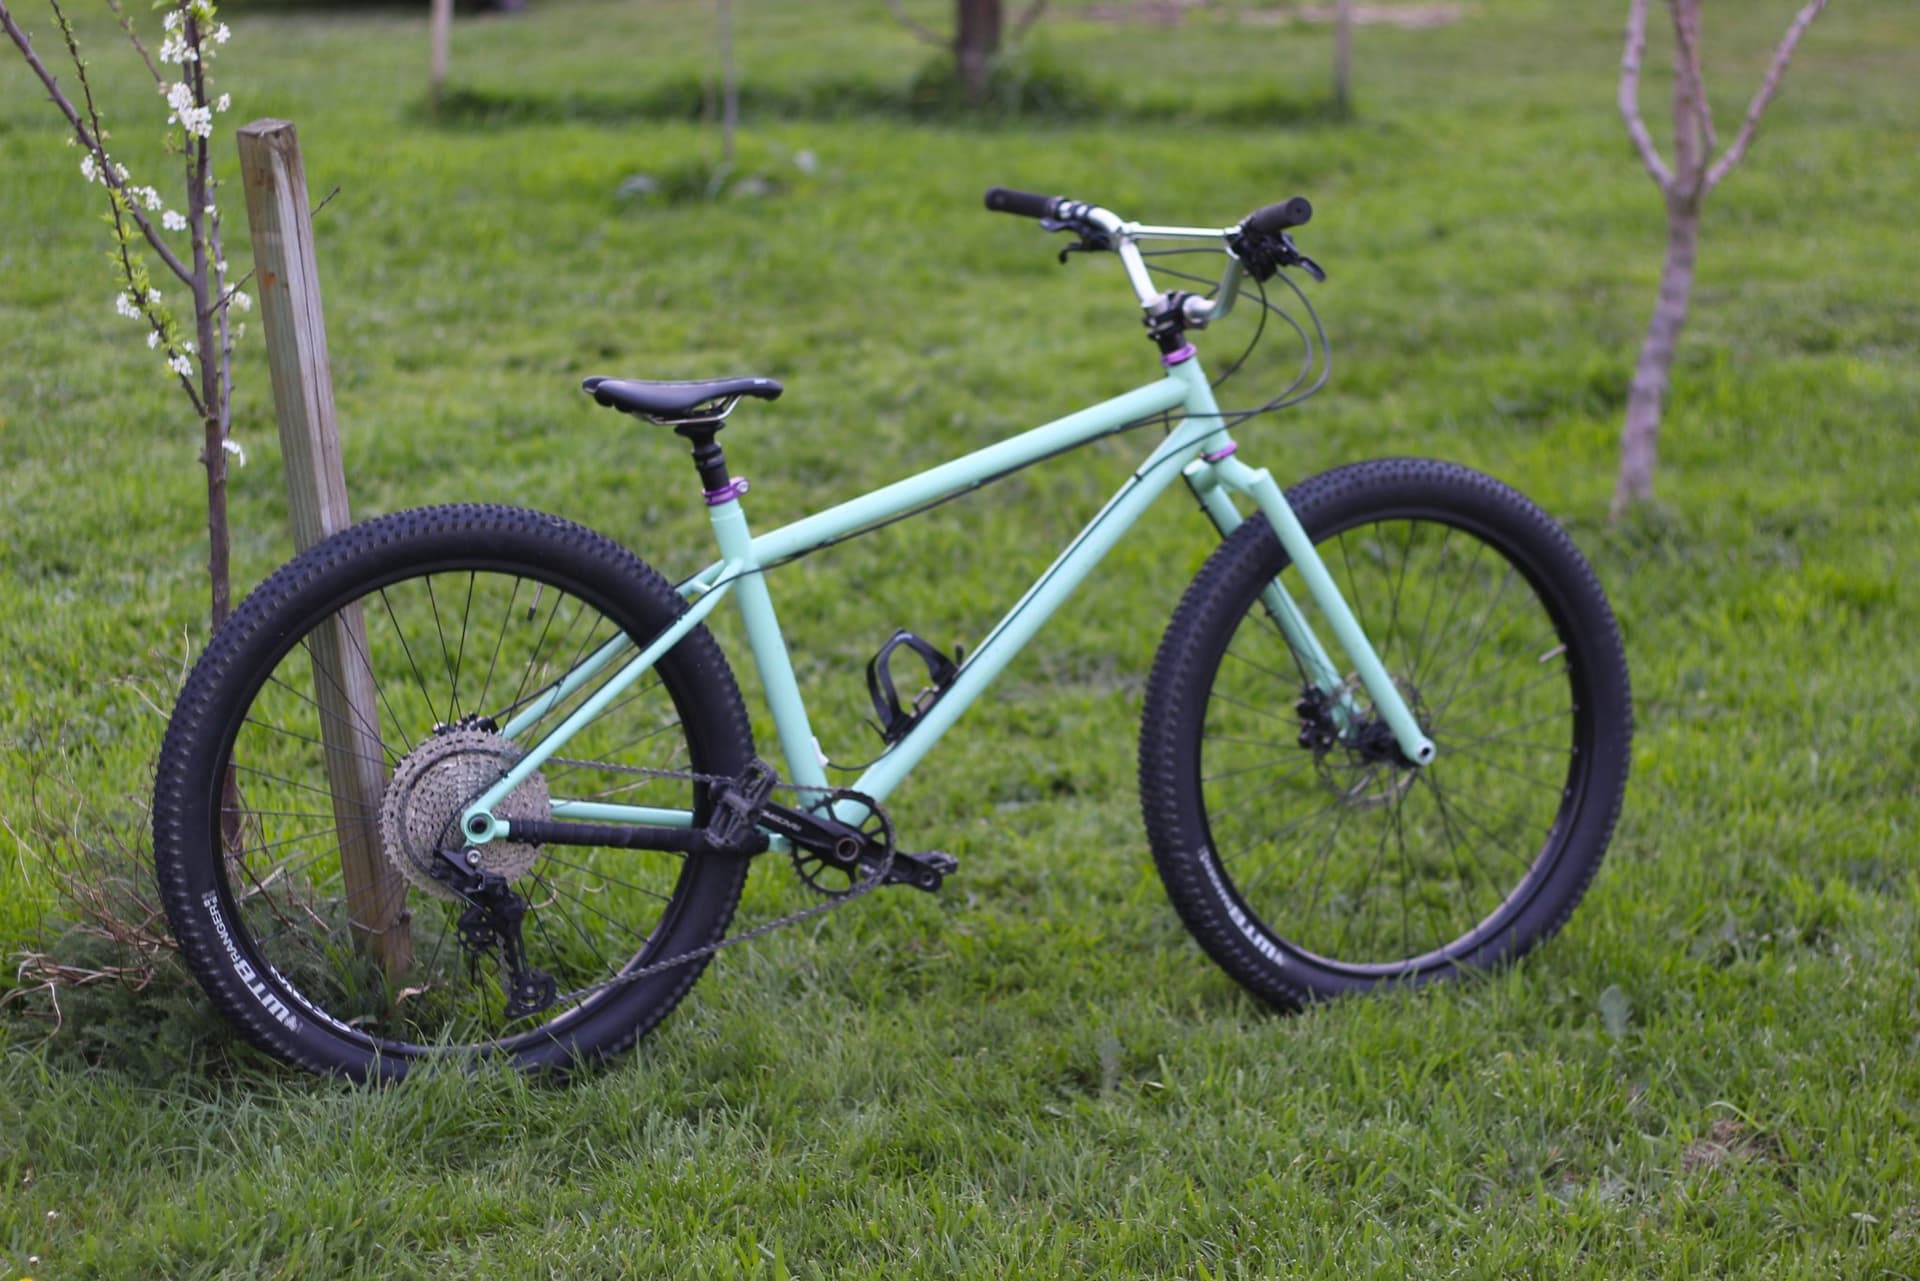
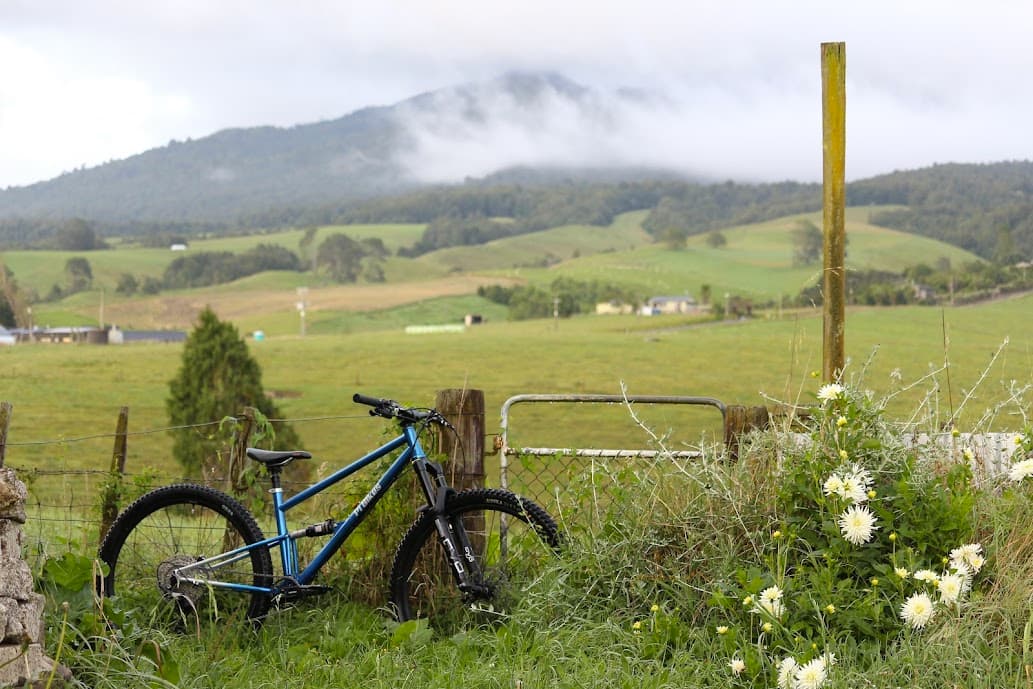
Someone said we are supposed to talk about chainstay length here right? Here’s my 5th bicycle, I call it longboi. It has very long chainstays (480mm)
Anyway this is mostly a test post but long story short, bicycle rides great.
Someone said we are supposed to talk about chainstay length here right? Here’s my 5th bicycle, I call it longboi. It has very long chainstays (480mm)
Anyway this is mostly a test post but long story short, bicycle rides great.
Thanks for posting your chainstay length @Pi_bikes, its what the community wants to hear.
Kidding of course. Great bike. I like how you cleared the caliper on the chainstay. What did you use to bend those seat stays?
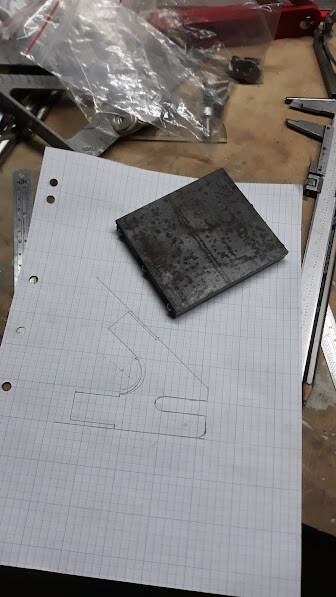
I put together a home made bender for the seat stays.
It’s made out of scrap metal and the wood for the bending die came from the firewood pile. It’s good as a proof of concept, but the wood die is starting to split so I may have to splash out on some better materials soon.
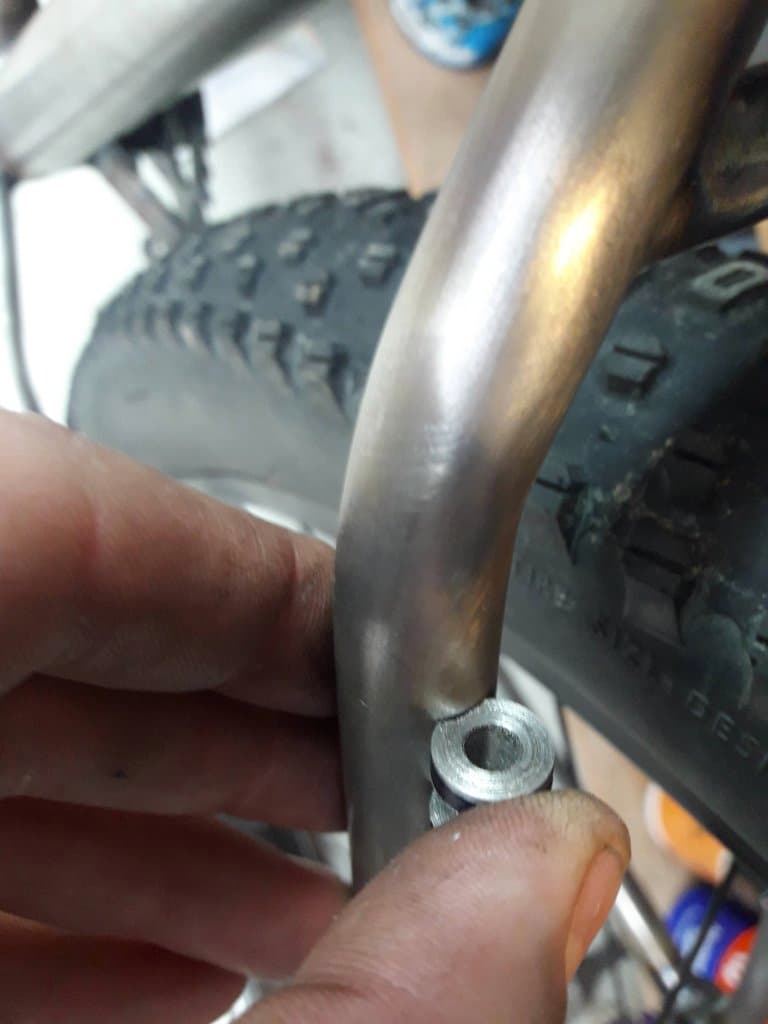
The caliper only just fits, it’s not ideal really as some brands of brake won’t fit due to the shape of the caliper and where the seat stay intersect. I’m not much of a plan the details type person so really I am a bit lucky that the brakes fit at all! I did have to put a dimple in the inside of the seat stay to clear the rear post mount adjustment as well.
480mm?? Those are rookie numbers! ![]()
Kidding of course, I feel like 480mm might be a pretty sweet spot for a hardtail. I built up this rigid mountain touring frame at ~515mm. I was hoping for 520mm but my Anvil jig maxes out at 515mm - just another example of The Man trying to keep us down.
It’s made out of scrap metal and the wood for the bending die came from the firewood pile.
I am equally impressed by the DIY tube bender haha.
You two are making me really insecure about my chainstay lengths
@liberationfab you might have uncovered a conspiracy: Cobra, Farr, and Anvil are in the pockets of Smol Chainstay Cabal.
515mm? Sounds deamy! It was supposed to be 485mm to match the frame reach. Not that I think matched reach and cs length means anything, it just seems poetic to have matchy matchy numbers. But I chopped the Cs a little short by accident so 480mm it is!
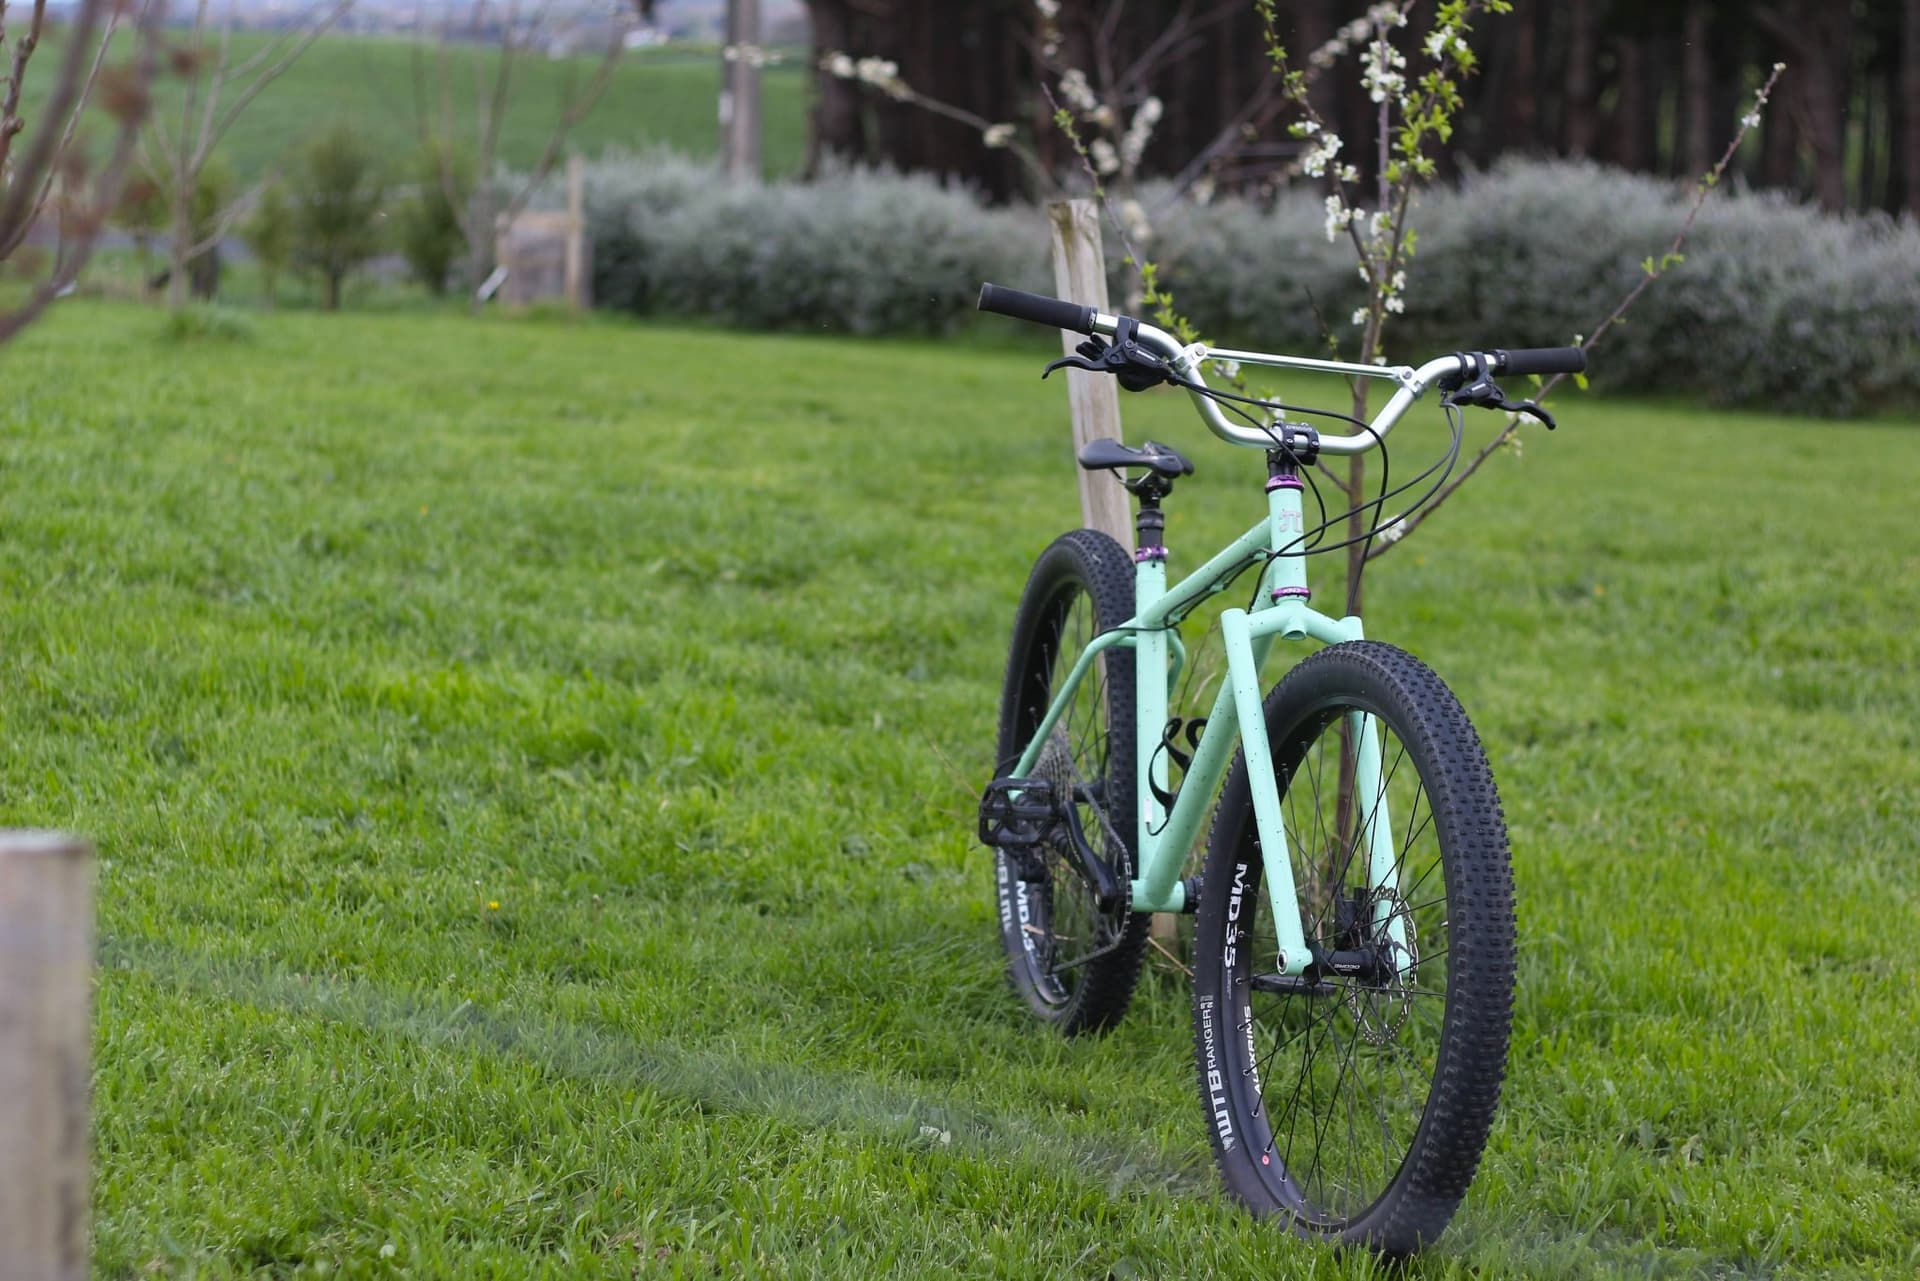
I made a sister bike to this one earlier that has the same reach, hta at sag and bb height at sag. But it has very short chainstays 390-410 in sliding dropouts.
You may notice some very slight differences, wheel size, fork travel etc. ![]()
Regardless the frame fit and front centres are very close at sag. It’s not exactly scientific but it has taught me what wanted to know and I have a plan for the next bike now.
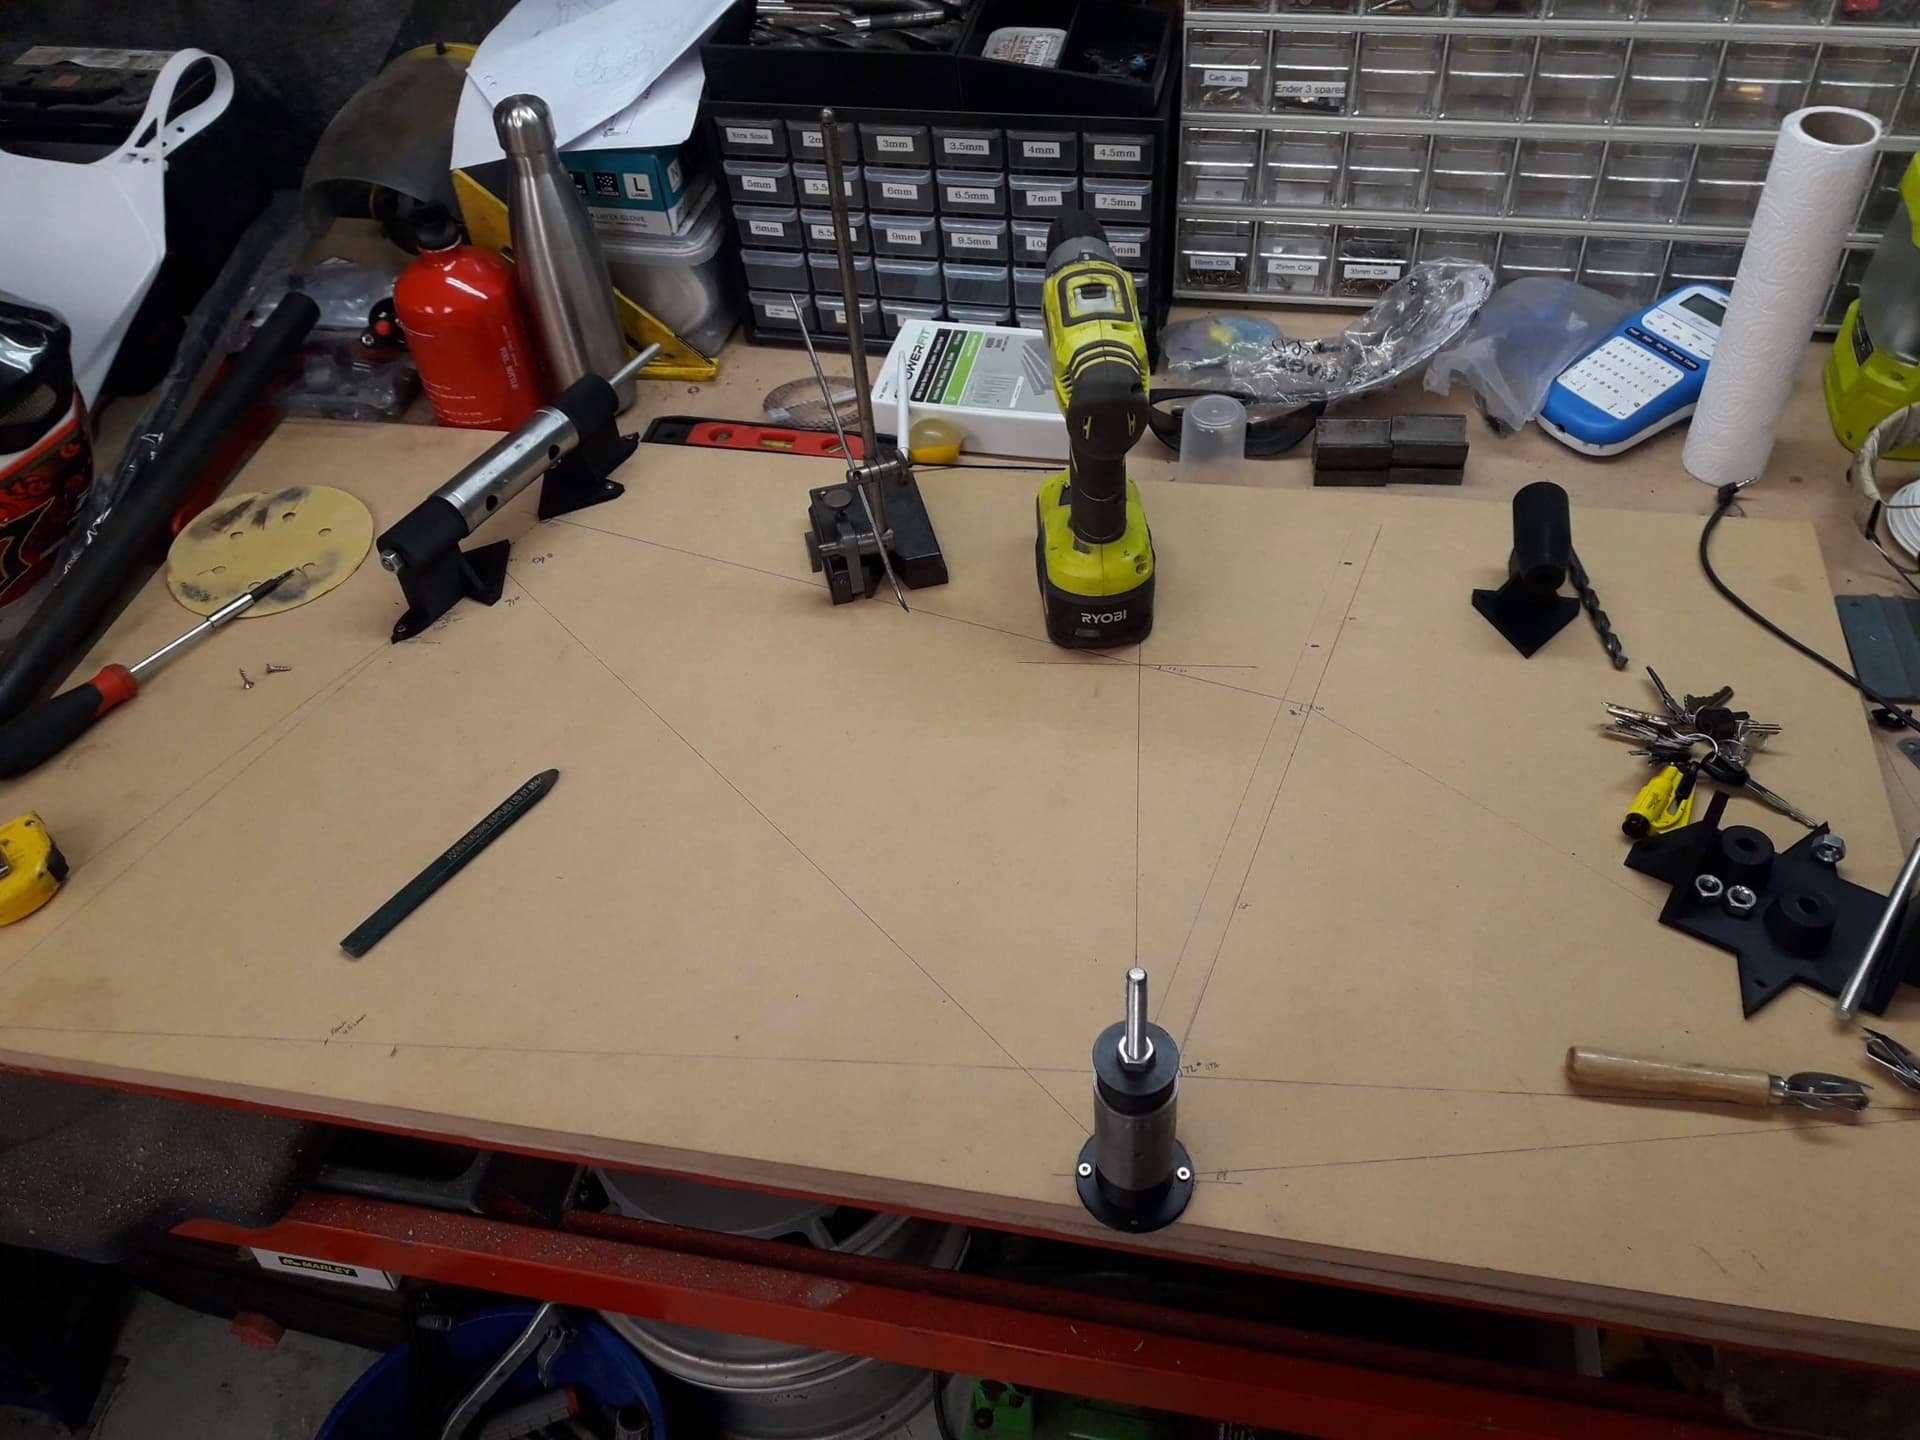
So I figured I might go back a year and a half ago to my first frame build and share how things have progressed over time. I decided to build my first bike after going on a binge of watching pithy bikes youtube channel, and after having a good hard think about it I decided that people have built bikes with less tooling and equipment than I have, so I should just make it happen.
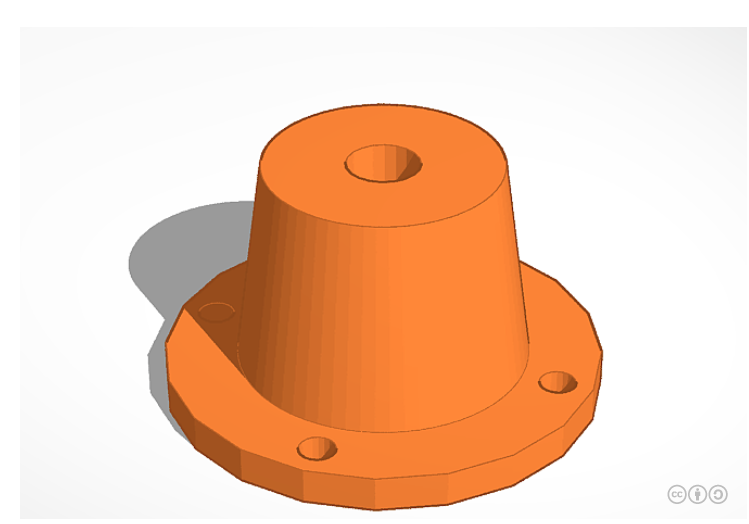
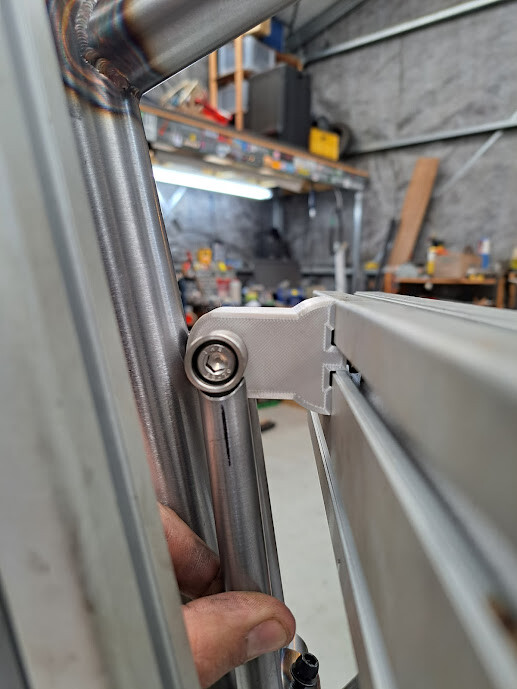
I started off by making my “jig”. I drew up some standoffs in tinkercad to hold the tubes in place:
At this point I wasn’t even thinking about the rear triangle, that was a job for future me. When you have a challenging task and you don’t know what to do, break it down into more manageable chunks. The goal at this point was to make a front triangle, thats all. So I 3d printed the standoffs. The bike I wanted to build was a rigid mountain bike, 27.5+ so I drew up what I wanted in bikecad (quite similar to what stooge cycles makes) and then transferred that to a piece of mdf and attached my 3d printed standoffs
the head tube and bottom bracket were donated my a rusty marin hardtail frame from the early 90s.
Next thing I had to figure out was a way to notch tubes. I came up with a clamp to go in the toolpost of my lathe like so:
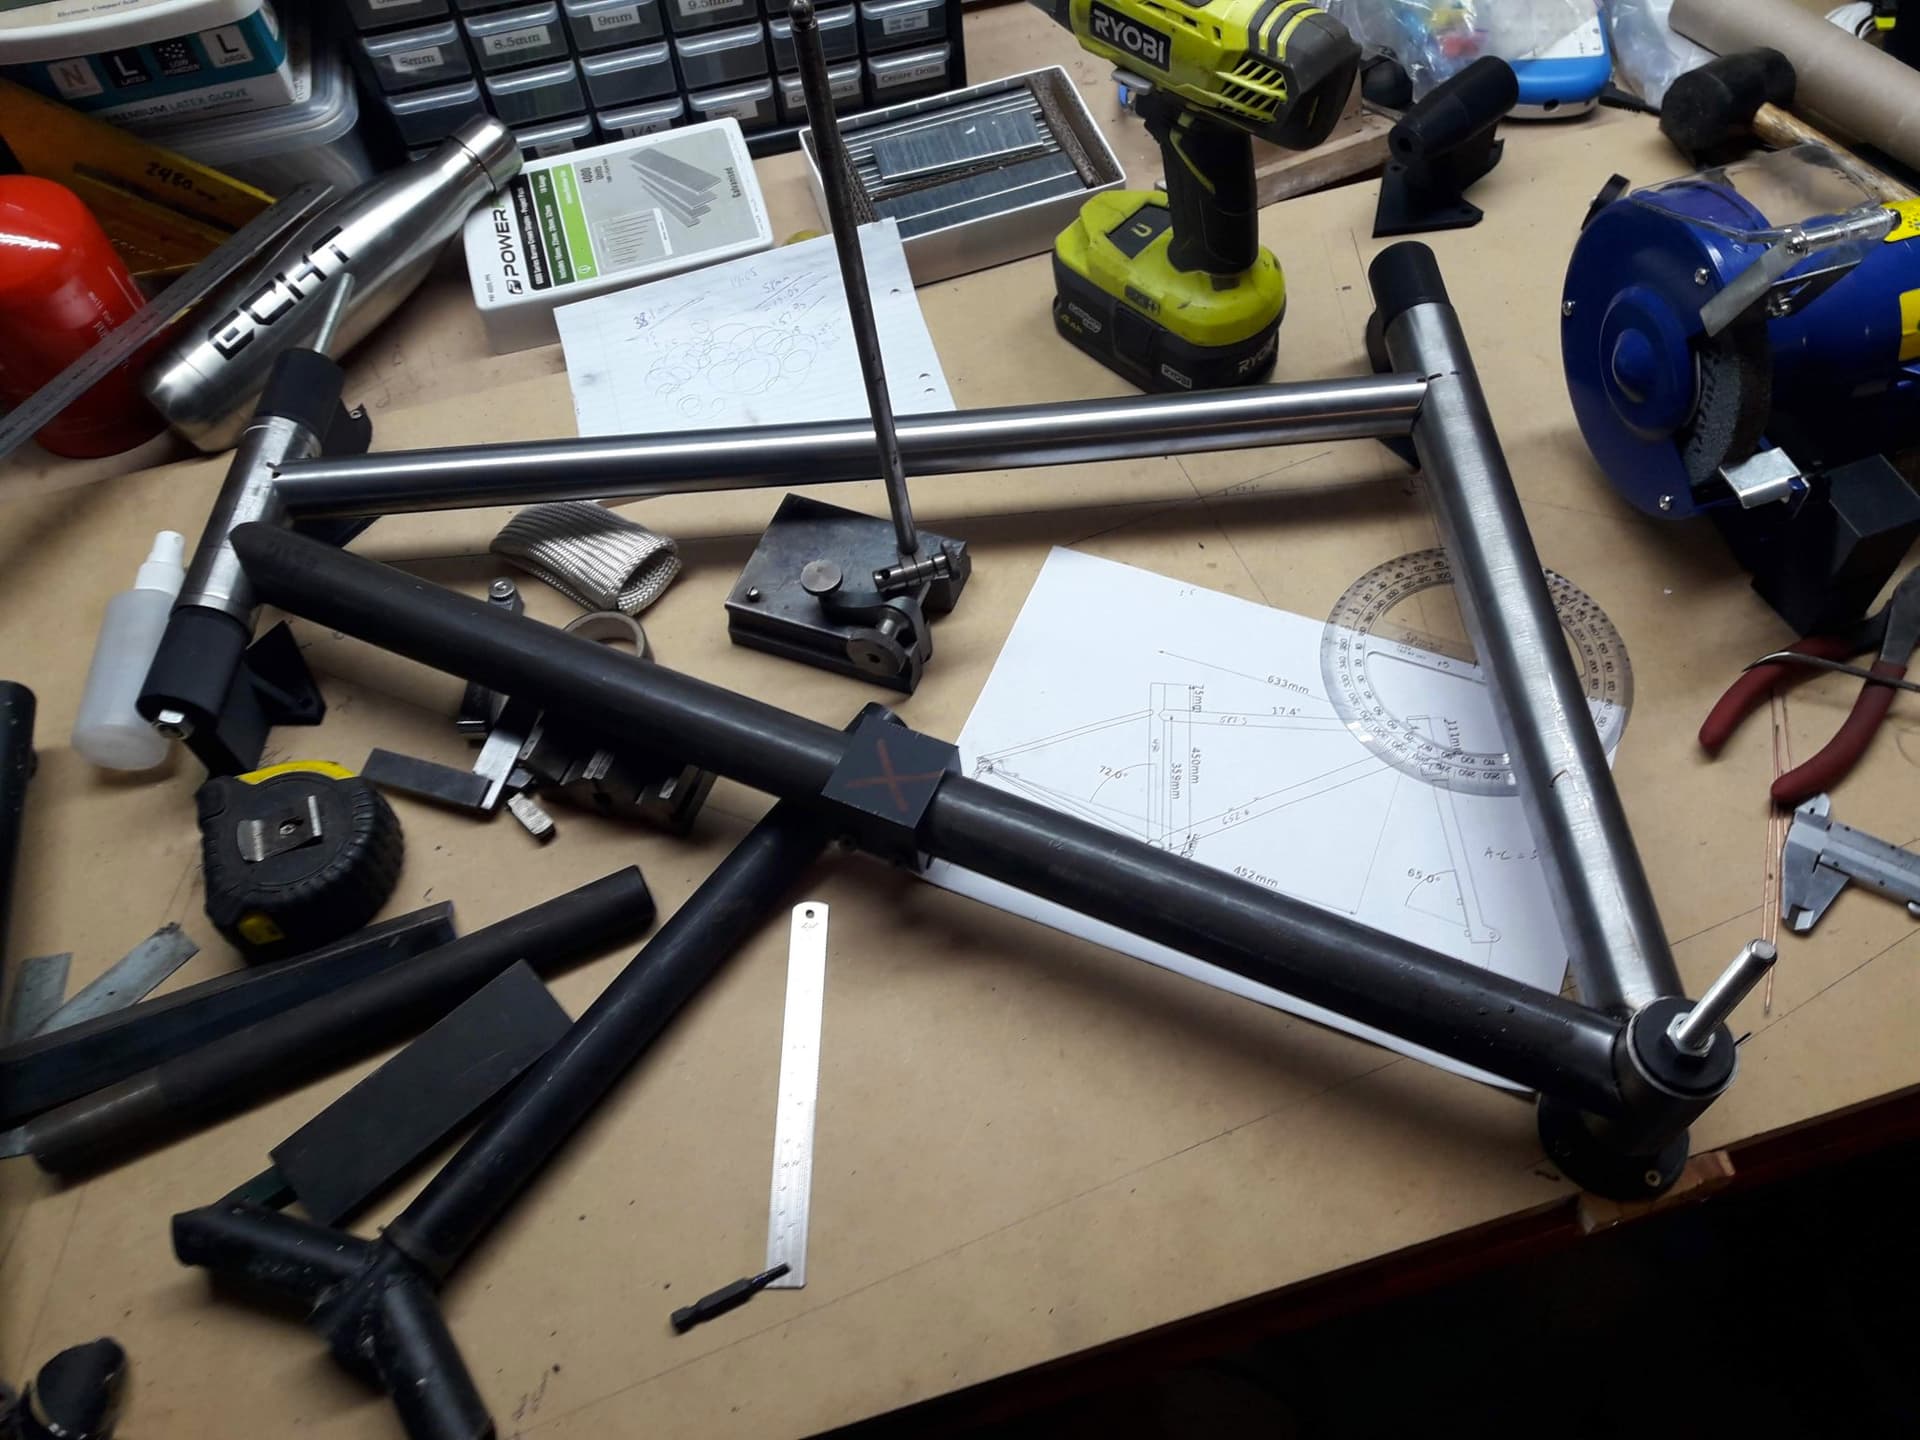
So a short while later I was getting somewhere
The tubing is straight gauge 4130, 1.25" tt 1.5" dt and st. There is no local source of framebuilding materials in New Zealand, just a bit of straight 4130 in limited sizes so thats what I used. I’m going to leave it there for today cause its past my bed time so I will pick this up again later!
Woah super cool fixture, I like the way you added alignment pointers to the 3d printed tube holders, very creative!
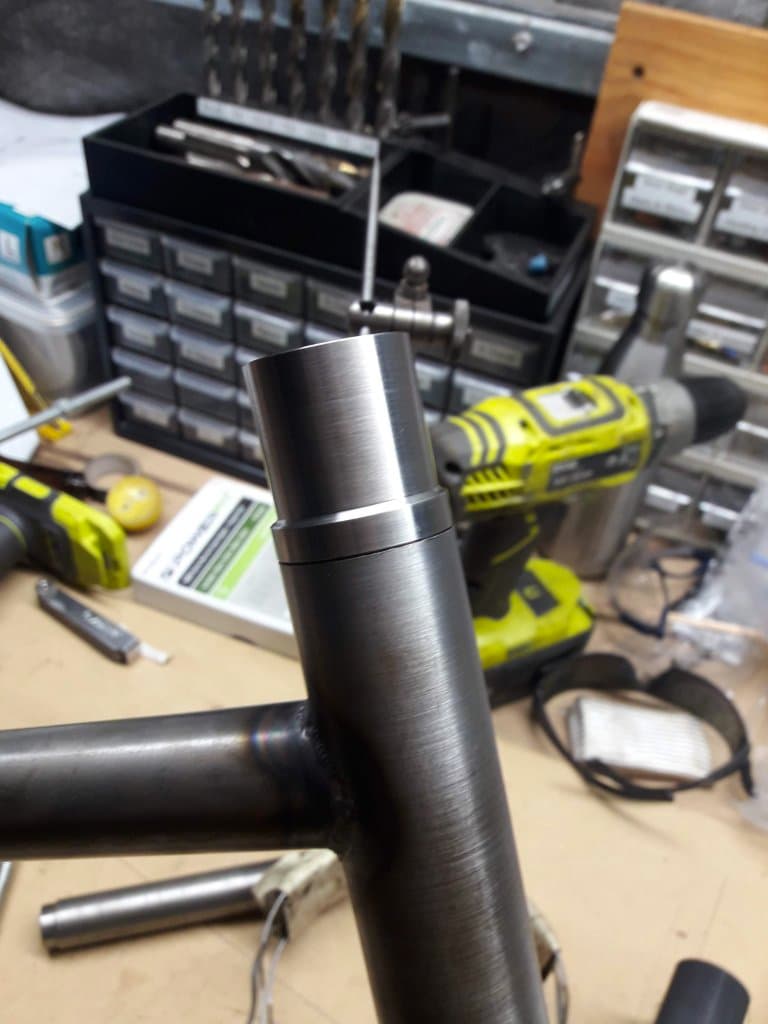
I made a sleeve for the seat tube on the lathe out of a lovely piece of scrapbinium, some kind of stainless steel.
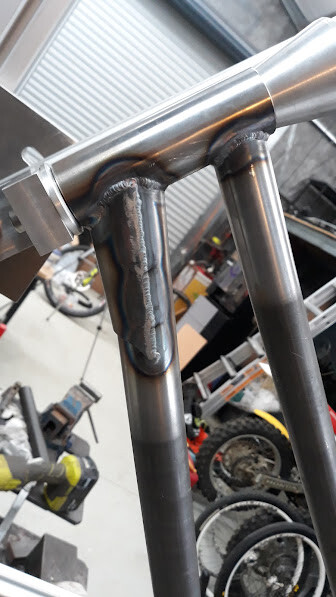
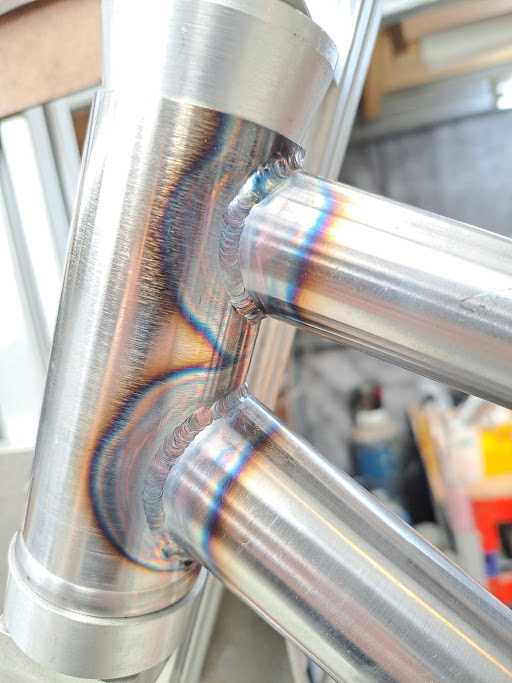
front triangle welded up. Had quite a few contamination issues, in the end I figured out the torch body was chooched. After that things started getting a bit easier!
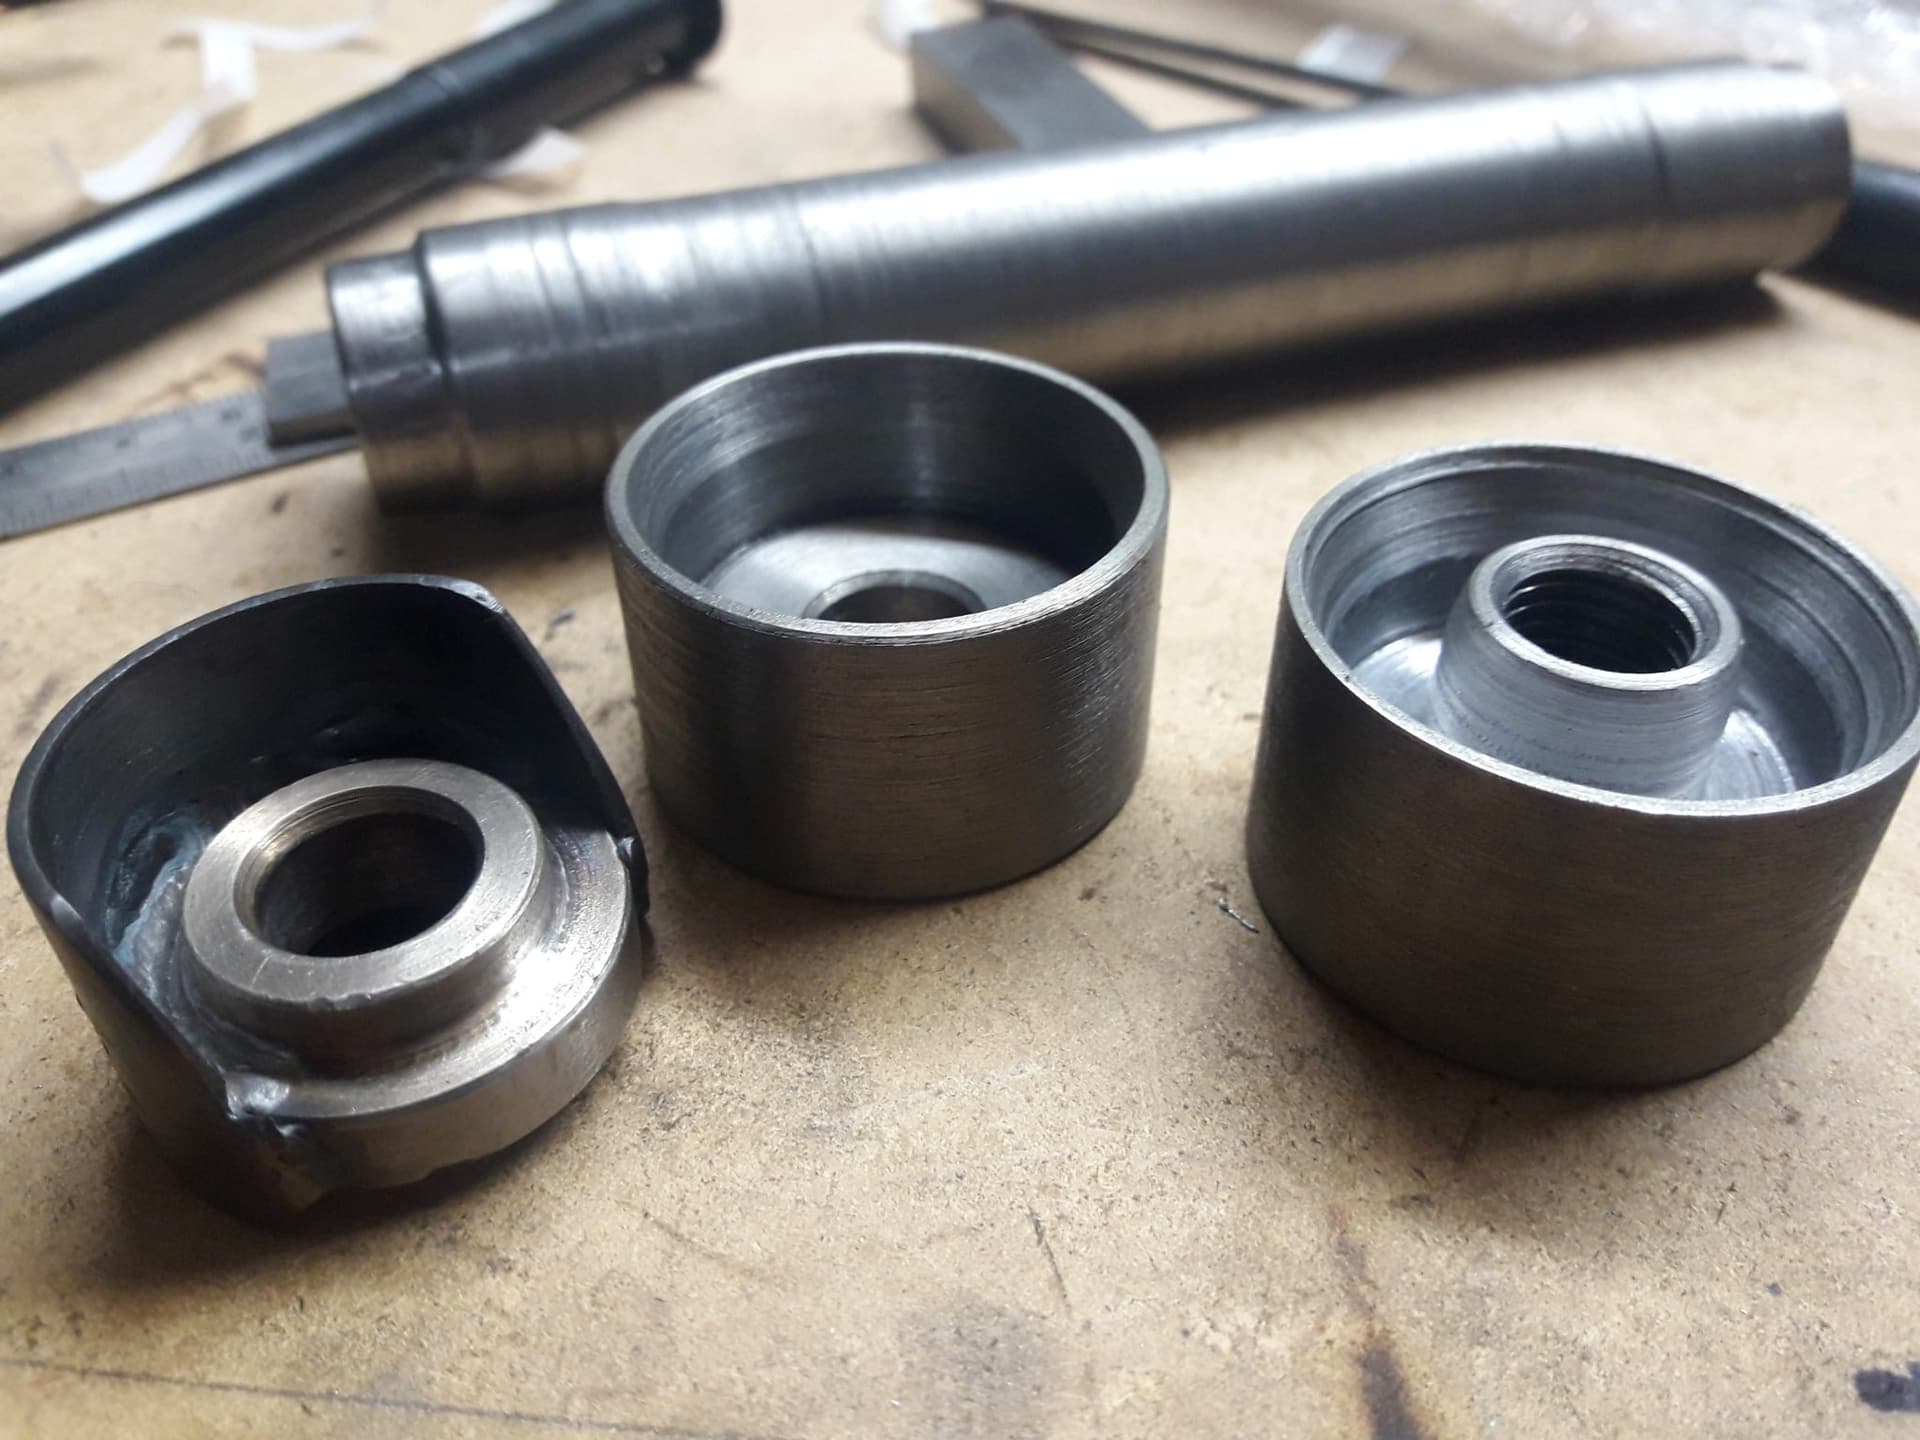
I made the dropouts myself on the lathe, just a very basic turned thing. Later on I cut the derailleur mount off the old marin donor bike and welded it to the bottom of the drive side. It works ok, but I couldn’t find the frame fit specifications at the time so I tried extrapolating from other bikes and it is a bit too far rearward. The one to the far left was attempt number 1, but too difficult to make in the manner I was attempting there. Looking at it now I recon I could have trimmed the tube a bit differently and silver soldered the axle mount in but oh well ![]() .
.
Now that the front triangle was done I made a rear triangle jig thing. It was ok, but not great. Real jig build comes in just before frame number 3, but at the time I didn’t know if this was just a passing fad or something that I would enjoy long term.
Chainstays attached. The “yoke” is hardox 500 wear plate, not sure if that was a good thing or not but it seems to tick a lot of boxes. Designed to be bent and welded but super tough and abrasion resistant. Anyone else used wear plate on a bike? I did add a little brace to the inside toward the bb shell later on after getting paranoid about breaking it.
Chainstays were donated from the marin donor, 19mm. I think they might be butted even. I wanted to go long so ended up with enough material for 450mm stays so went with that.
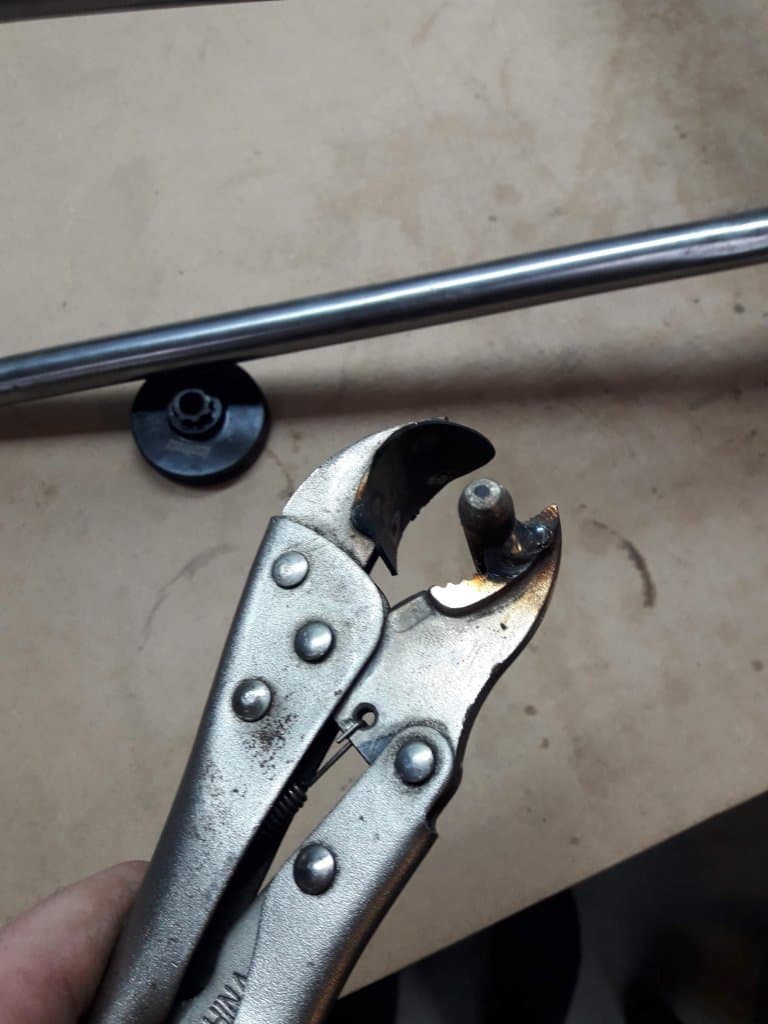
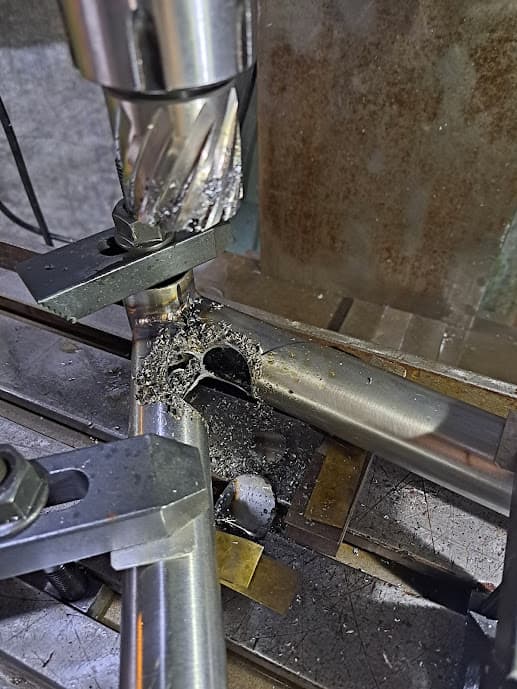
I made a whoopise and didn’t realise that cranksets want clearance too. Silly me only ever thinking about chainrings. First bike problems i guess? anyways managed to squeak past with some dimples, heres the tool I made to do dimples:
Works ok, will probably be making some die sets in future for the arbor press. speaking of which, I used it to bend some 5/8 x .049 seat stays for this bike. Shop made dies work ok with the thicker wall tube but wouldn’t be any good on thinwall stuff
So a while later I ended up with a mostly finished frame
I also made a fork to go with it. I had to take a brave pill before taing it out for a proper mtb ride but it hasn’t broken yet. Possibly went a bit overkill on the material size/thickness with the 1-1/8x049 but better safe than sorry.
The crown part was actually a recycled piece so I guess I made about 70% of a fork to be honest. I wanted to see how a bike with a longer offset fork would ride so I went with 65mm offset. It matches the 65 degree HTA. How cute.
Right about this time New Zealand went into lockdown for Delta. This meant that the postal system was screwed, but I had a whole lot of time on my hands as well as raw materials, but no pre made braze ons to speak of. So I made my own. There’s something not quite right about spending an hour or more making a $1 part, but I am kind of glad it happened that way. Makes me appreciate the little bins of cable guides and bottle bosses I have on my counter now hahaha.
Homemade bottle bosses. Made from genuine recycled slushie machine shafts. Tig brazed in:
Pity that was a bit of a mess, moved away from tig braze for bottle bosses after that.
Next up is cable guides.
Started by turning a little bobbin shape
Filed a notch to match the tube
Cut it out of the bobbin
and weld 'em on
I think that they worked out at about an hour a piece, but hey. Lockdown! what else are you gonna do!
For the routing under the top tube I got fed up making tiny bits of metal so I made some tubes with a notch for the TT like this
The idea was that you thread the zip tie all the way through, round the cable on the far side and back again. It actually works pretty well.
I think that it was mostly done at this point so I sprayed it with a coat of epoxy primer and took it out for a test ride
Just to finish off time for a photo dump, starting with the pre finishing photo
That time I rode through a chain between some bollards and lived to tell the story
It was night time and we didn’t see someone had put the chain across the bottom of the hill-bomb
And the grand reveal of the finished article:
I still use this bike semi regularly around the local XC loop. Its singlespeed now but I really like the front to rear weight distribution of it. Its fairly straight though there is some kind of misalignment in the rear triangle I think as it wants to turn left when you ride no hands. But all in all I really enjoy this bike and for a first attempt I am really happy with how the fit and finish came out.
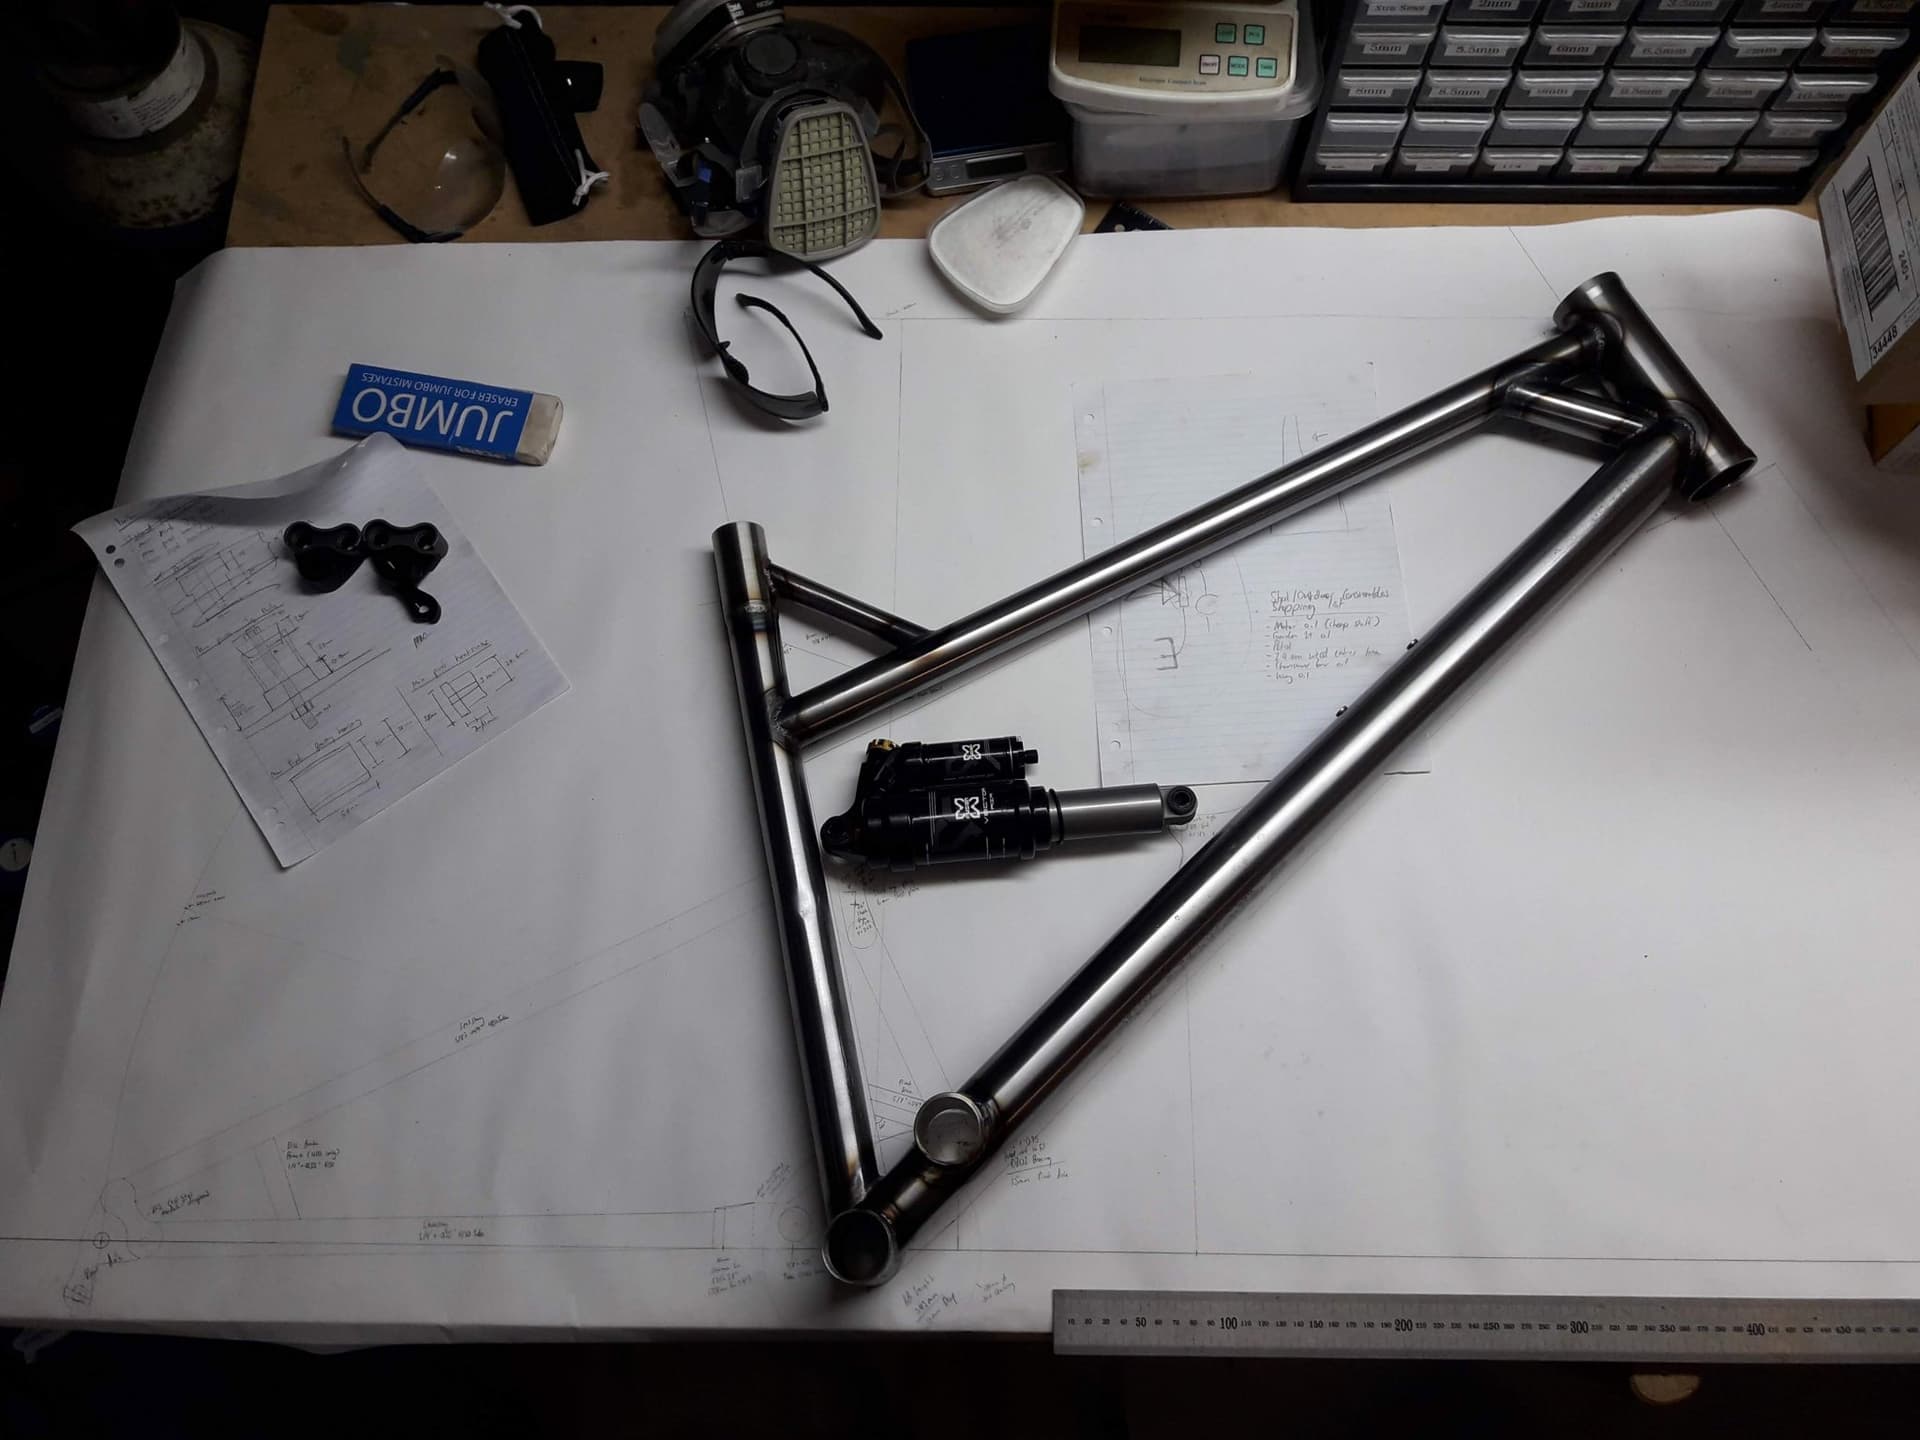
On to Pi #002. Some of you may have seen this one on MTBR forums. The plan with this bike was that I wanted to make a full suspension bike, but I didn’t know if I could make something that worked well. So I decided to go with a big travel downhill bike. I figured that if made a trail bike and it sucked at pedalling then I had made a useless bike. But if I make a downhill bike and it sucked at pedalling then it doesn’t really matter, it can be relegated to shuttle/chairlift usage. It just needed to have lots of travel.
I bought a copy of Linkage x3 personal and moved dots around until I had something that looked like it would do what I wanted went ahead and started building. Front triangle breezed through pretty quickly using the same method and Pi 001 with the 3d printed standoffs and MDF.
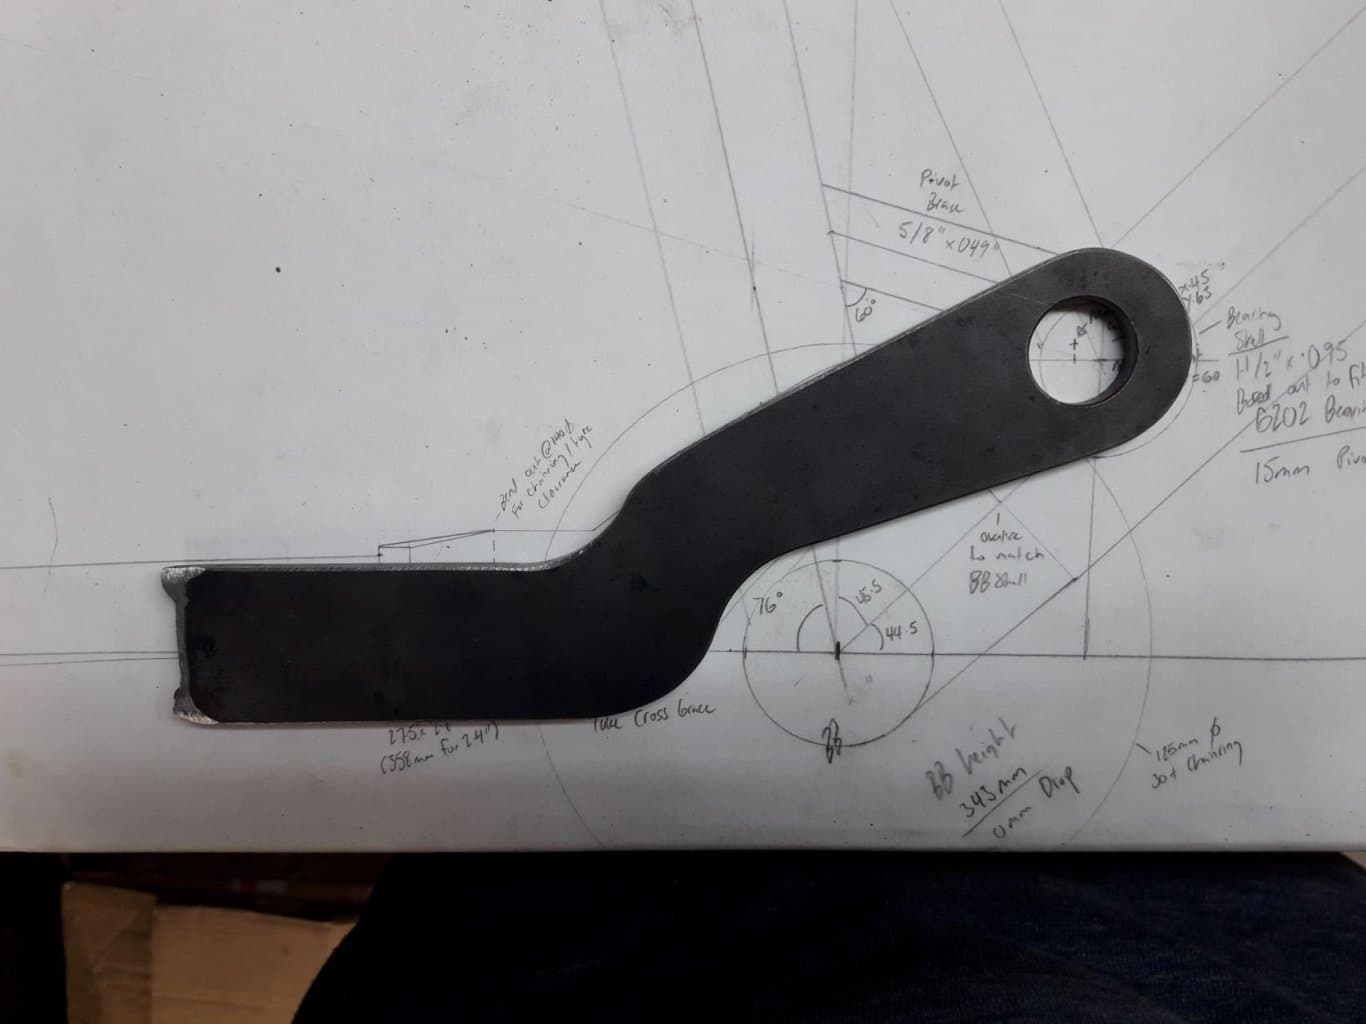
I had done a 1:1 drawing for this bike, was handy with the amount of handwork that I ended up doing for the swingarm plates and whatnot
I made a jig for the rear triangle out of some box section offcuts
And the first mock up
All the parts on it were things I already had lying around from old bikes etc. which led to some less than ideal standards on the bike, like the 160mm head tube (hard to find double crowns that will fit) and the 216x63 shock which is really too small for a bike with 197mm of travel. Despite this it actually rides very nicely, the suspension is very supportive and with the coil has a good level of sensitivity. It is prone to the occasional bottom out which would be a problem if I was into big jumps and drops but I like techy steep stuff more than jumps and drops. it is on the heavy side around the 17-18kg mark (38lb-ish) I actually use it like most people use an enduro bike because aside from the weight it actually pedals pretty well.
Here’s the pics of it in finished form all painted up. I have replaced the shock in the pics for a Fox dhx 5.0 recently so will be cool to see if that performs better than the Van RC.
The paint is a fade from black > 1988 corvette gunmetal grey > 1993 mazda starlight silver. This bike is named the “Fullcam”. Its a bit of a joke with a friend who refuses to ride any bike other than a DH bike, his name is Cam. We will go for an all day ride ups and downs, but he will insist that DH bike is life, so I named it after him. He enjoyed the joke when he found out.
There is a lot of things I would change were I to do it again, but DH bike number 2 will be a long while off. Maybe in a year or two.
loos great! I love the rear triangle fixture. So simple yet so effective.
I am curious about what you used for the pivot hardware. What bearings, axle, nuts/bolts, etc…
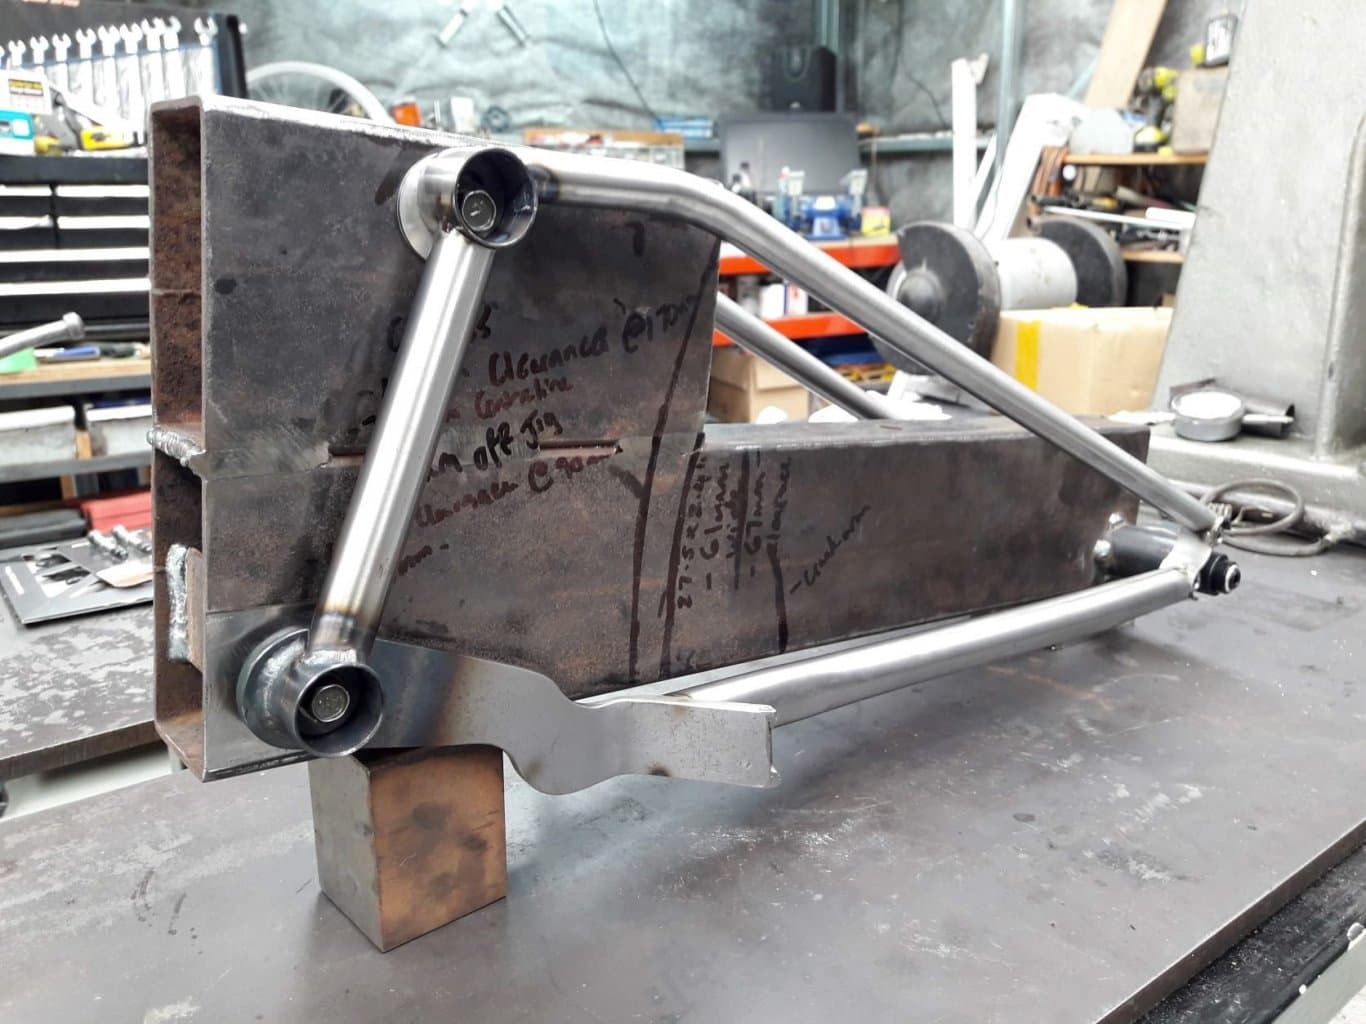
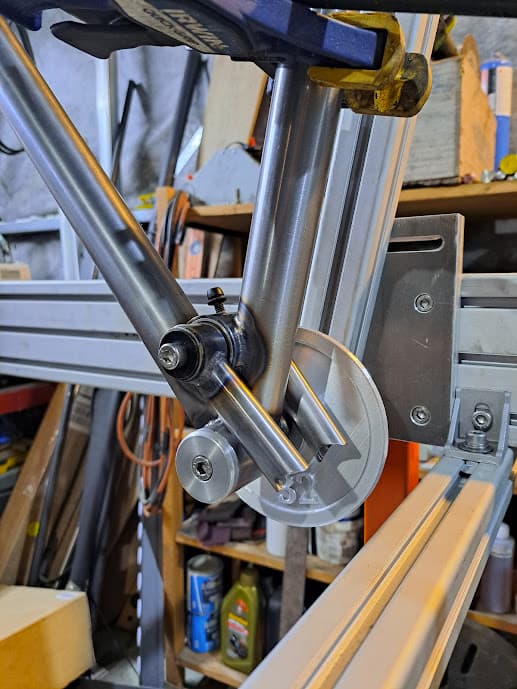
@Daniel I used 6202 bearings. For the axle I used a bit of stainless steel, my lathe turns quite a taper so I had to machine the ends separately to get the correct bearing fit. The bearings are a slight press fit into the front triangle and the axle passes all the way through the swing arm and the frame. It has m8 stainless hardware in the ends of the axle to pull the whole thing together preloading the bearings, the swingarm has has a boss on either side so that it pulls up against the inner bearing race.
I had a look through my photos and I couldn’t really find any that showed it well I’m afraid so I hope that makes sense!
Both the bikes and the fabrication stories are awesome.
-Walt
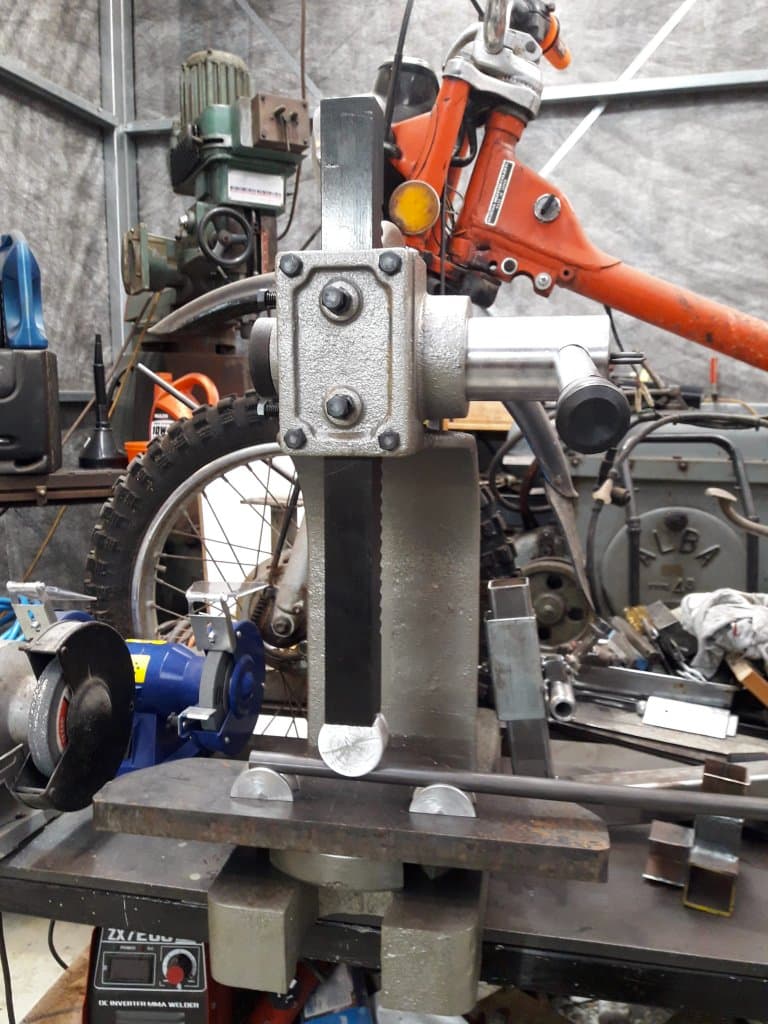
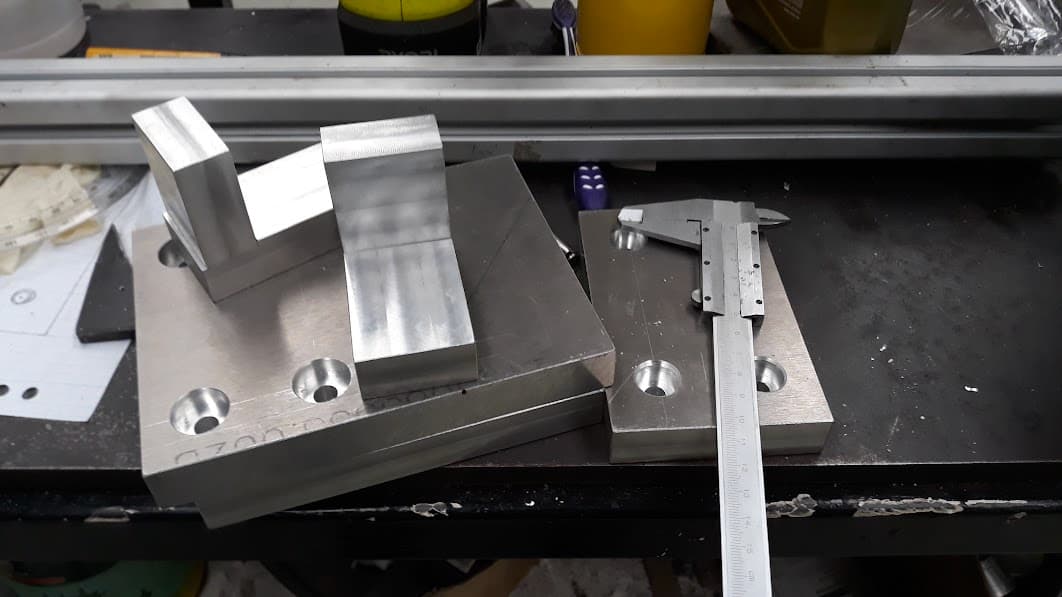
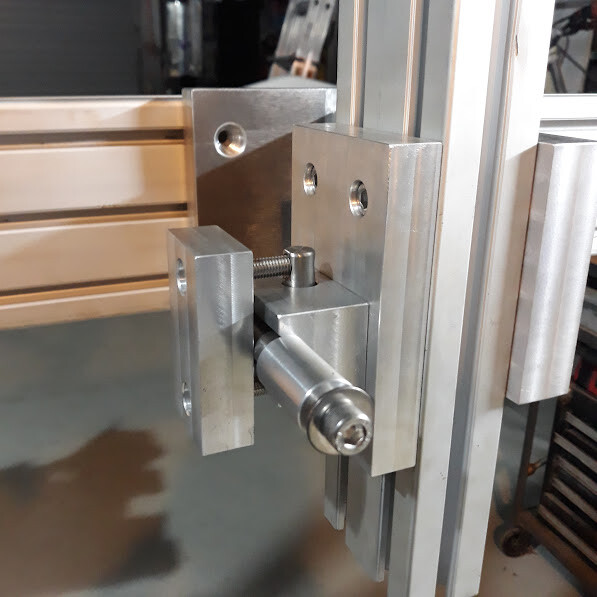
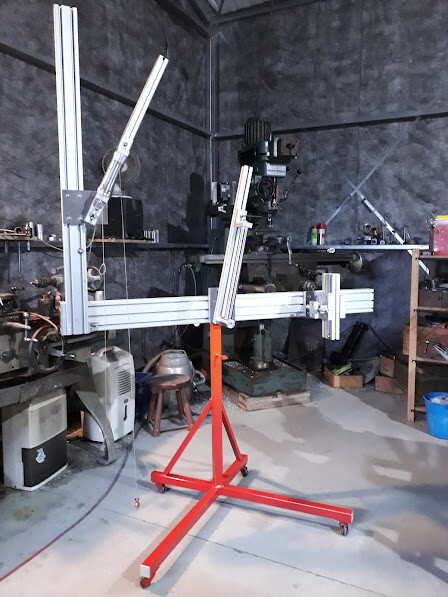
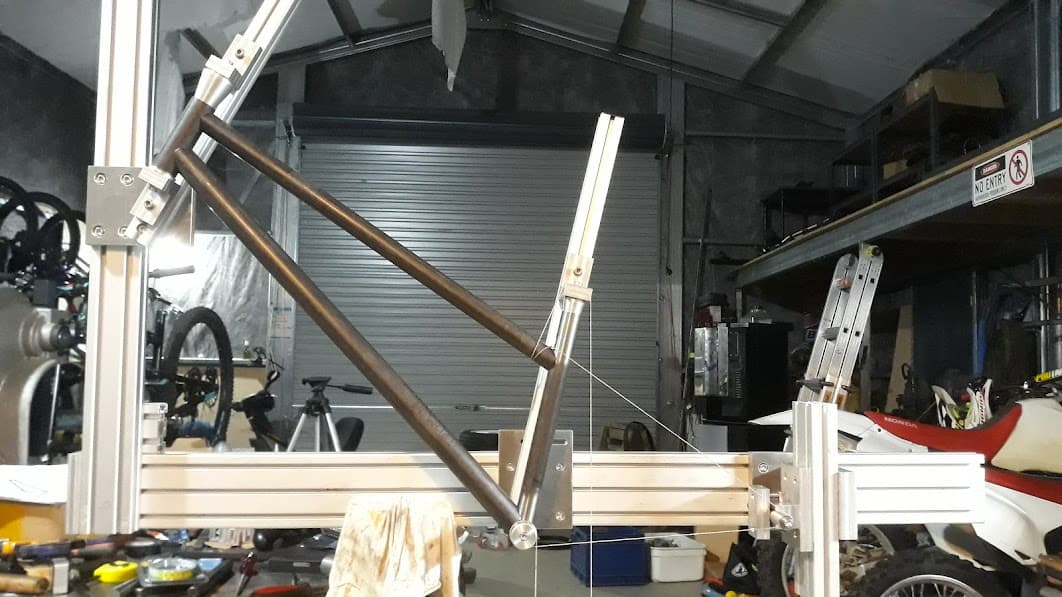
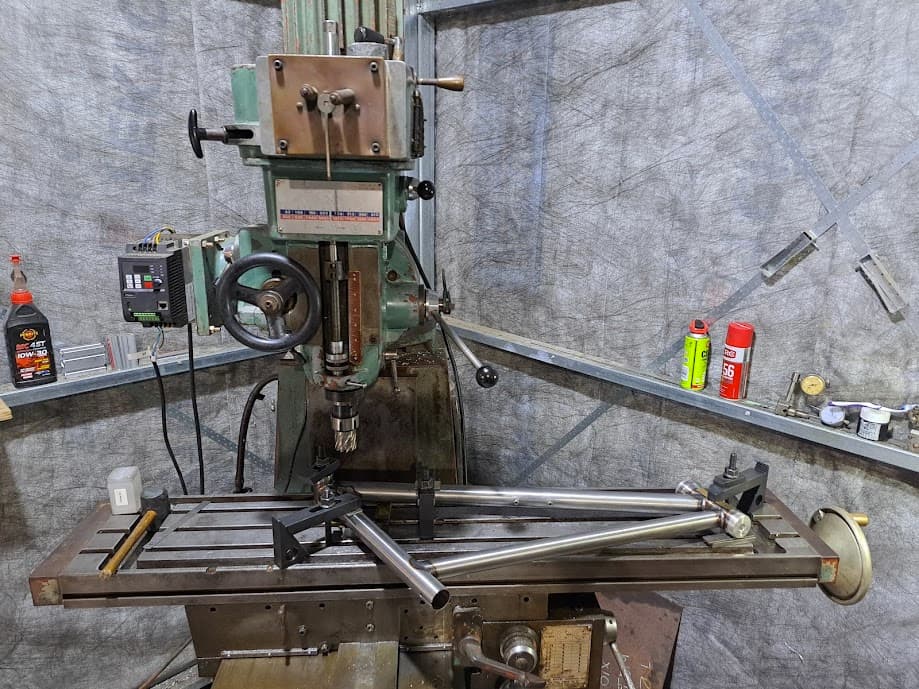
Righto time for #3! But before that I decided I was sick of 3d printed standoffs and MDF and needed a jig. During the build of #2 I had got my mill up and running, but still didn’t really know how to use it, so I was right at the bottom of the learning curve. Anyway, I started off with some lengths of 40120,4080 and 4040 extrusion and I bought a piece of 25mm 6061 plate. Here’s what I ended up coming up with.
It should be noted that we don’t have the same availability here of off the shelf brackets and whatnot for extrusions, though things are improving. About 5 years ago t slot extrusion almost didn’t exist here as far as I could tell at the time when searching.
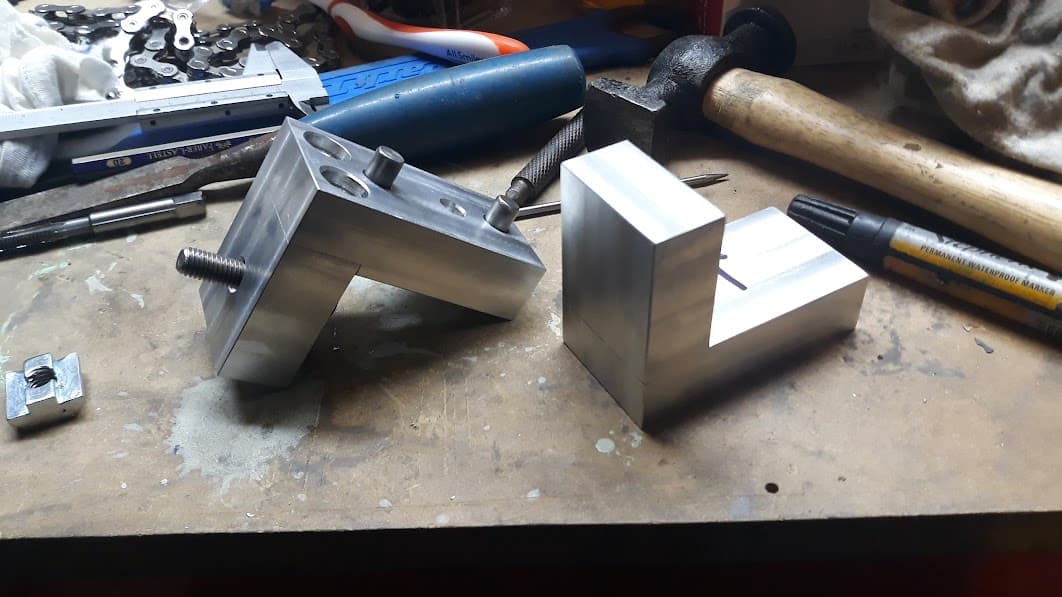
I like this part because it looks a bit like a Llama
And this one looks a bit like a duck
Home made dummy axle. It uses the 2.5" spacing that seems to be pretty ubiquitous.
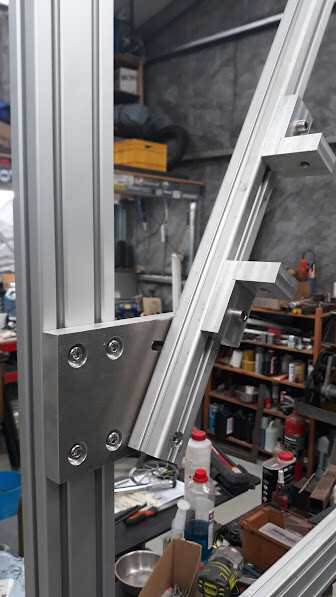
And done!
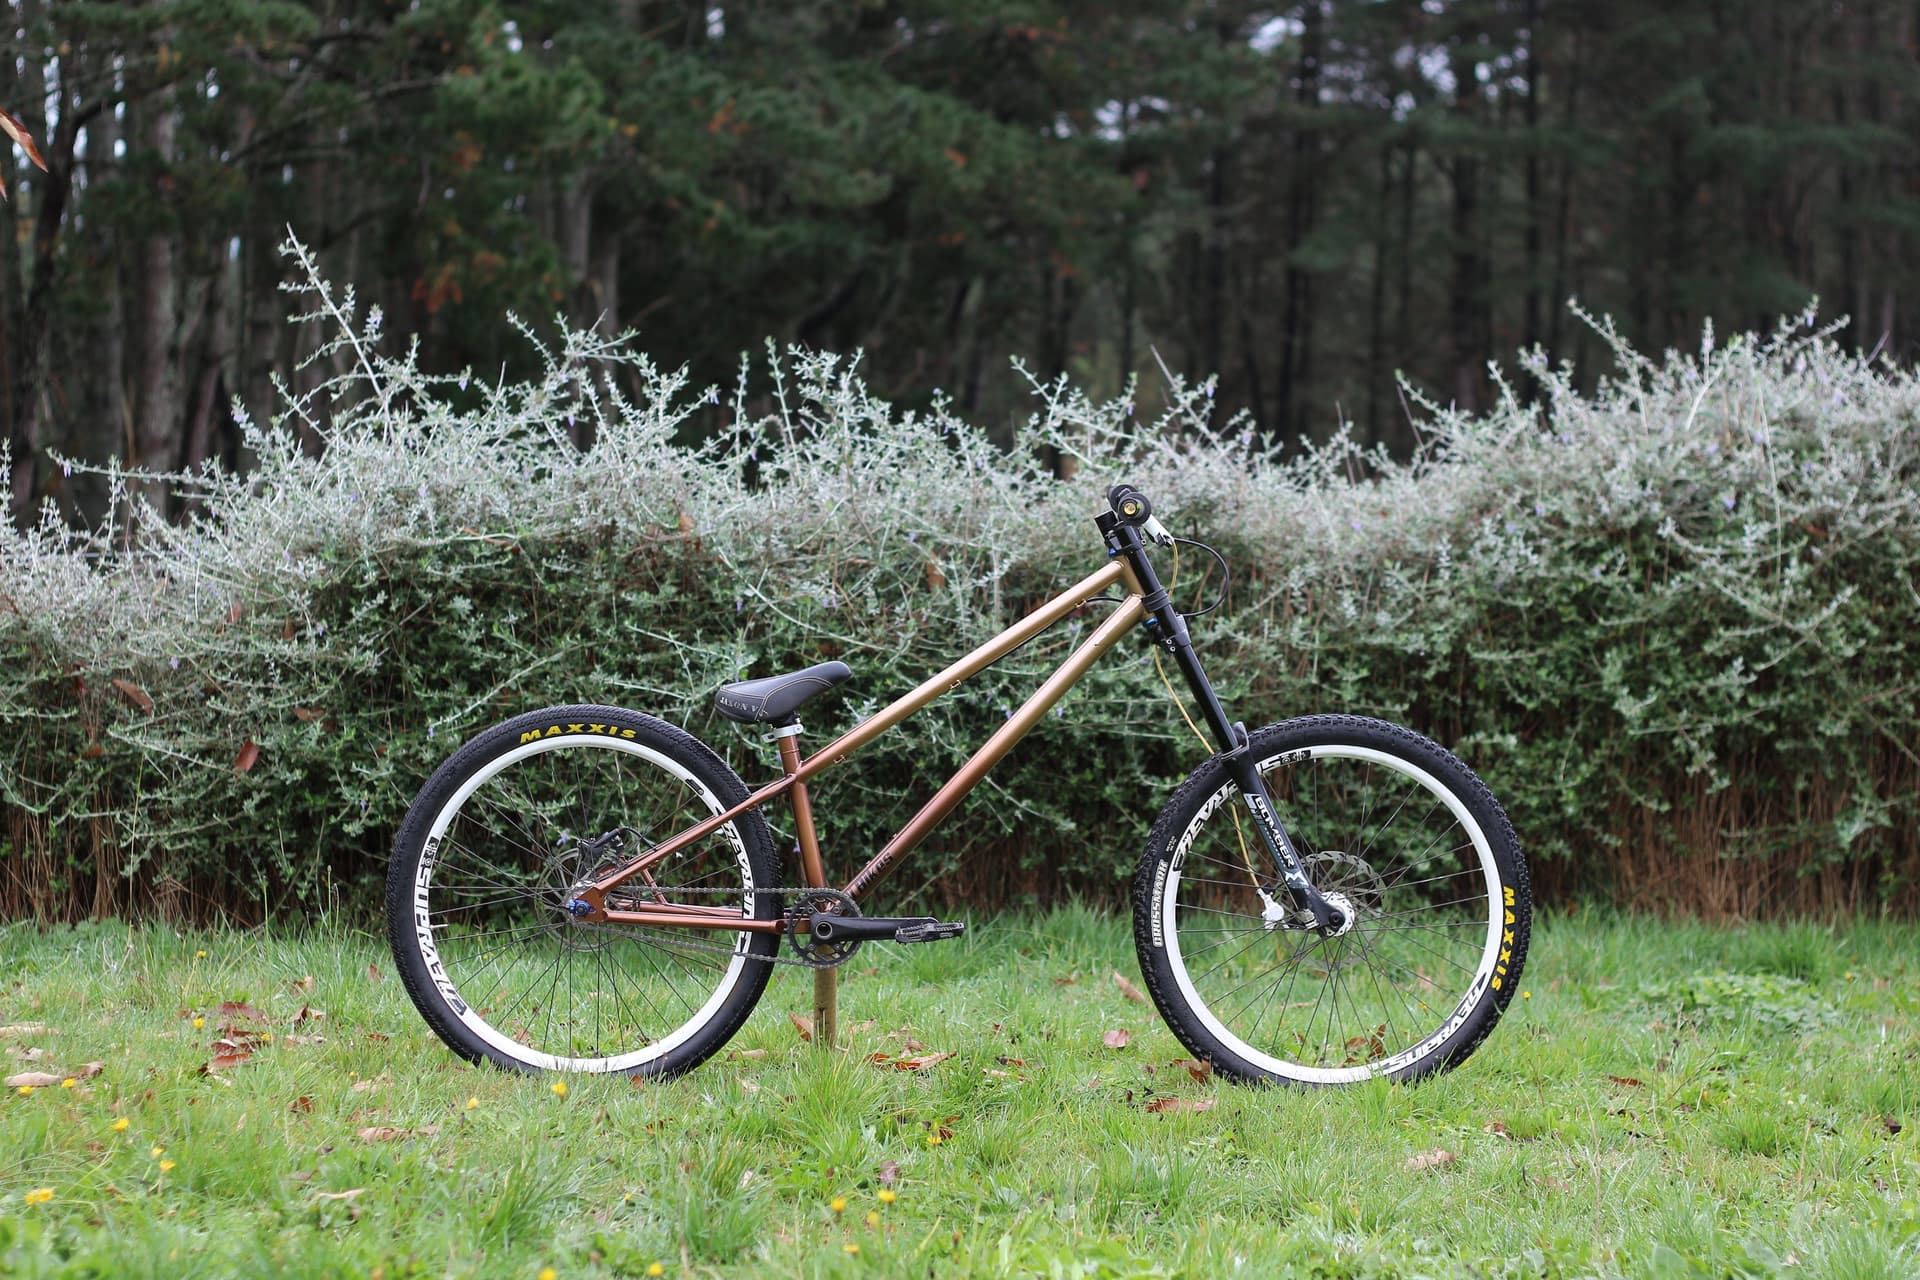
Anyways, back to number 3. I made this bike to test out the whole min/maxing of RC/FC that PVD and other folks seem to prefer. I already thought that it wasn’t really for me, but at the same time I figured don’t knock it til you have tried it. The only way I could really know if it was any good was to make one and try it.
The plan was to use a bunch of bits and pieces that I already had lying around in my shed to build the bike, and that in the interests of not over investing it was going to be single speed with no dropper, so slammed seat post. All the tubing is straight gauge 4130:
1 1/2" x035 DT
1 1/4" x035 TT and ST
7/8" x035 CS
5/8" x035 SS
I made a yoke out of 25x6mm mild steel flat bar. It has homemade sliding dropouts, 6mm steel plate. The headtube is 1 1/2" x095 which makes for a cheap 34mm headtube if anyone was wondering. A bit on the porky side, but I wasn’t really worried about that on this bike. A few skims on the lathe and you could bring it down a bit if you were wanted too.
I put a doubler on the down tube, probably not actually helpful in the least but I try to add something to each frame that I have not done before
Seat tube collar
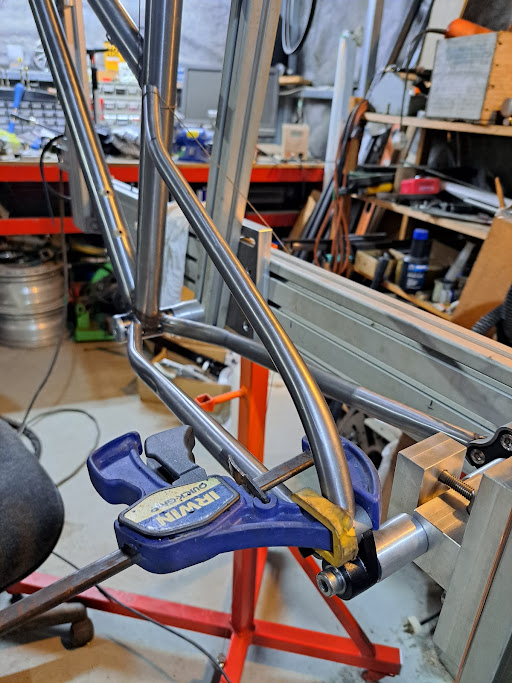
Sanity check before welding the yoke on. I actually welded it on a little bit crooked, not that it matters. But lessons learnt, next time a do a yoke I need to find a good way to hold it level on the BB
Please ignore the shambles in the background!
With parts on it
The forks are some old marzocchi super T RV, they actually work surprisingly well considering how simple they are inside.
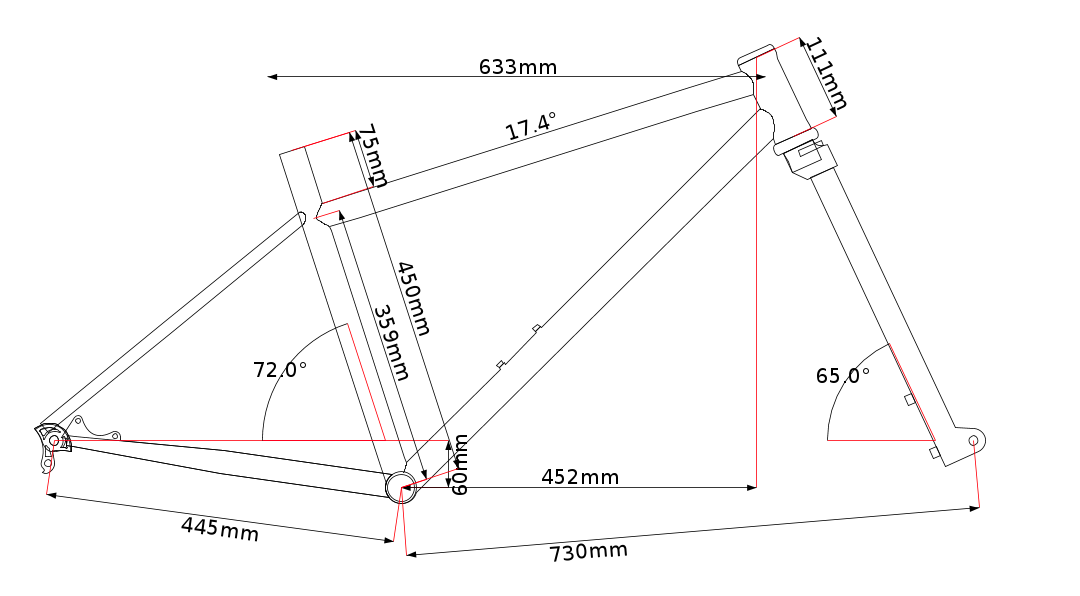
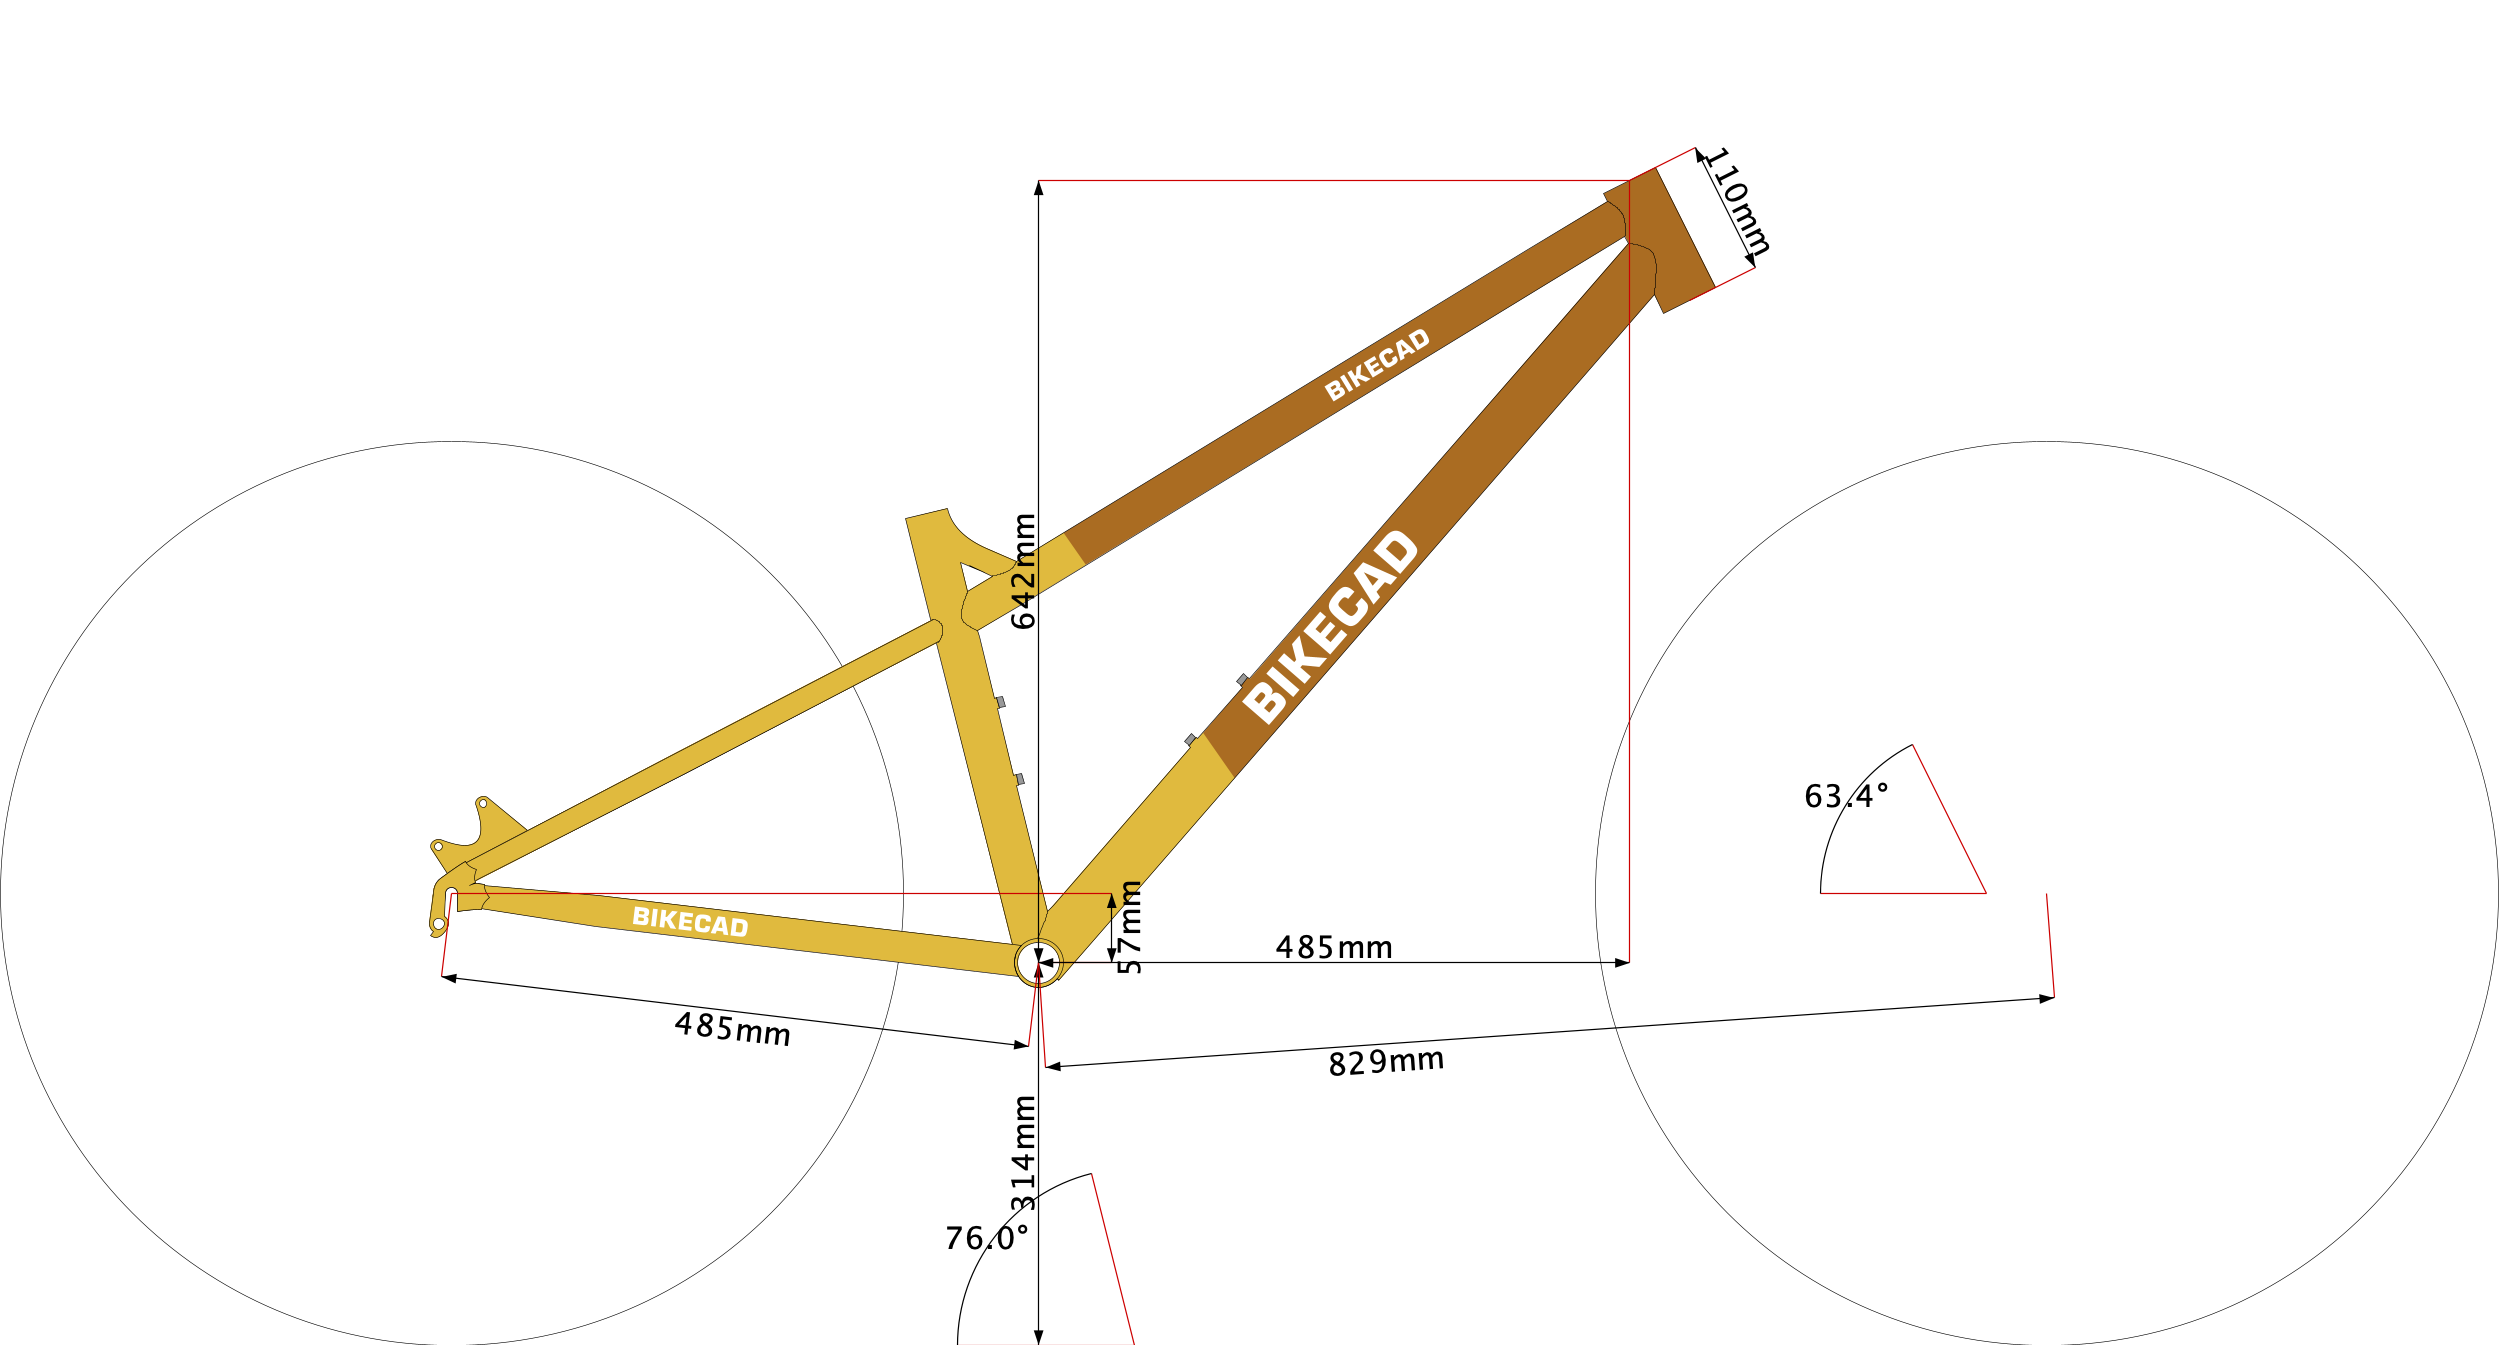
I stamped the geo into the HT, but in the interests of clarity it is as follows:
62* HTA (65* @sag)
485 Reach
637 Stack
300 bb height
859 FC
390-410 RC
2.2 FC:RC
1249 Wheelbase
Sick fade brah
It got some more MTB appropriate tyres later.
Anyways, thats #3. It is a fun bike to ride, but holy moley I don’t know if its the short stays with beefy 22mm/16mm tubes or the 26" wheels, but man it rides harshly over rocks and roots. It is great fun of flow/jump trails, easy to whip around. But it takes a lot of effort to maintain traction on the front end. I think you could very easily destroy wheels on a bike like this, the rear end has near unlimited grip. I used the rear brake to get it to slide in a flatish berm once and the 36 spoke DJ wheel made some horrible spoke pinging noises hahaha.
So I guess the conclusion on the short rear long front geo for me is this. I get it. The way it corners is pretty fun, you can really slam the rear wheel into berms or really any little support/pocket you can find on the trail. It also reduces the number of cases by a surprising amount! But I like a more drifty rear end, and when riding this bike I feel like have too much leverage over the rear wheel and not enough throw. Like a lever that is too long for the load on the other side of the fulcrum. Maintaining the traction on the rear becomes a struggle when tired and without being able to aggressively weight the front wheel you end up feeling a bit like a passenger.
Anyway, despite its shortcomings I actually really enjoy this bike I sometimes take it to skyline Rotorua which is the closest proper uplift bike park to me, its a good time!
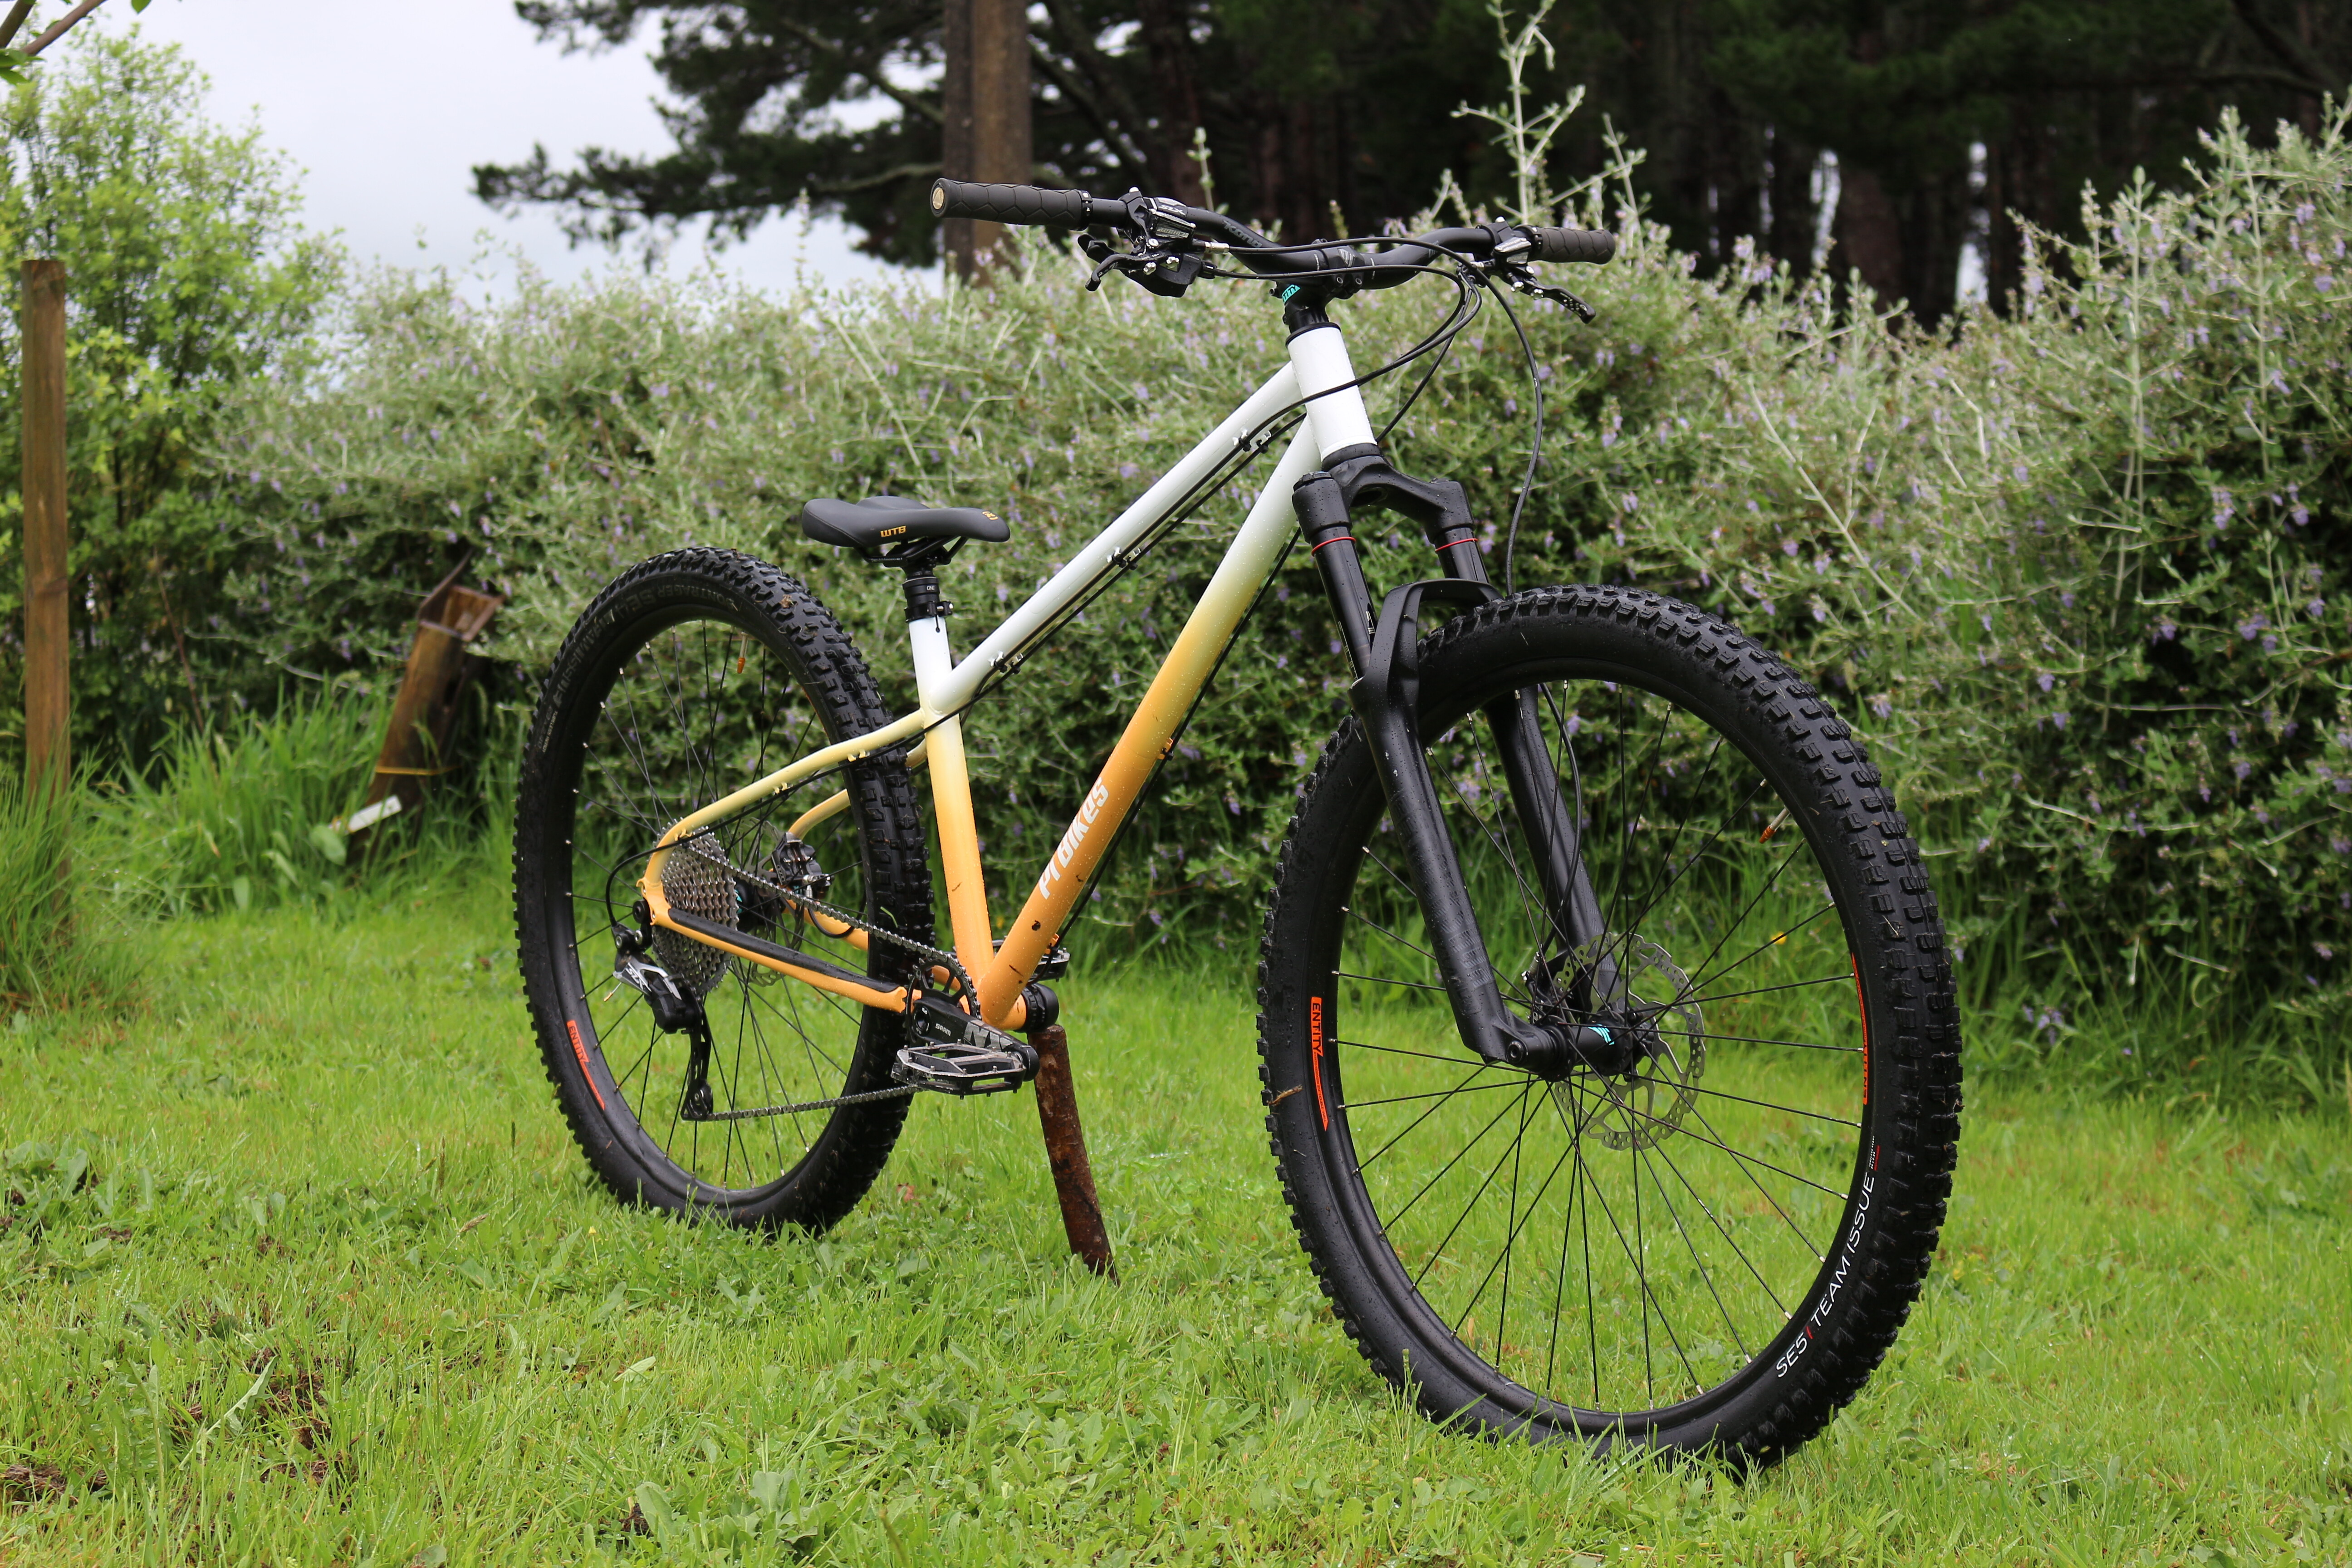
Bike #4. This one was a bit of a slog, but I finally finished it off the other day. Bikes 5 and 6 were completed before this one and number 7 got its paint job at the same time. Anyway, its a 140/130 travel trail bike built for my wife. Its actually a real ripper of a bike, we first assembled it in primer with some 27.5" wheels for testing then put the 29" that it was intended to have later.
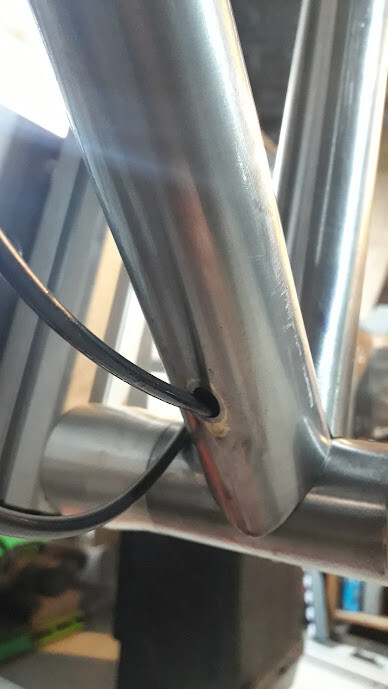
Because of the pivot location the only cable routing that really made sense to me was under the downtube with the dropper cable going through the underside
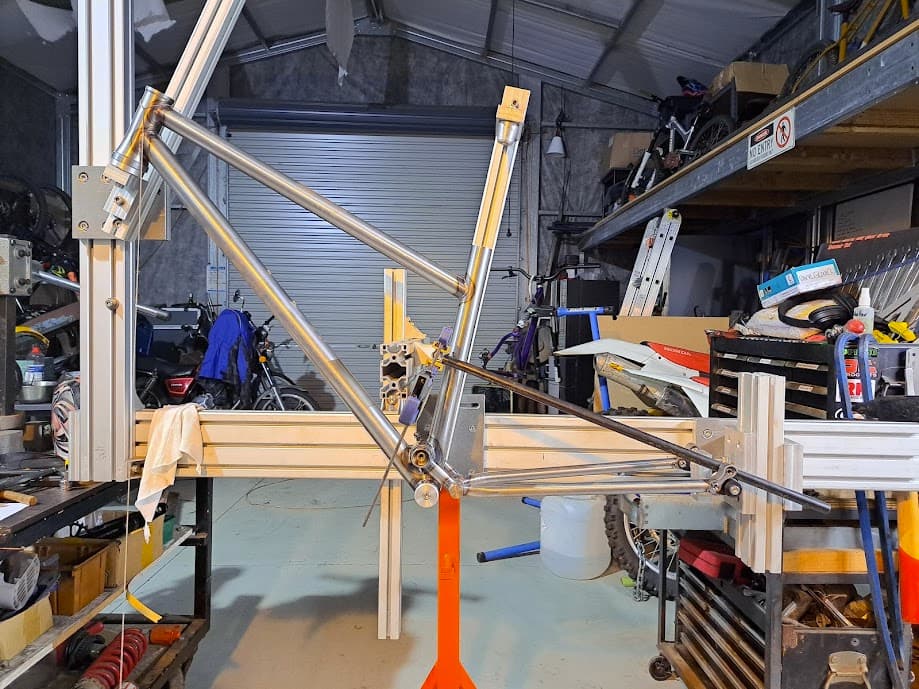
Front triangle welded
Setup for the scariest operation
Went flawlessly!
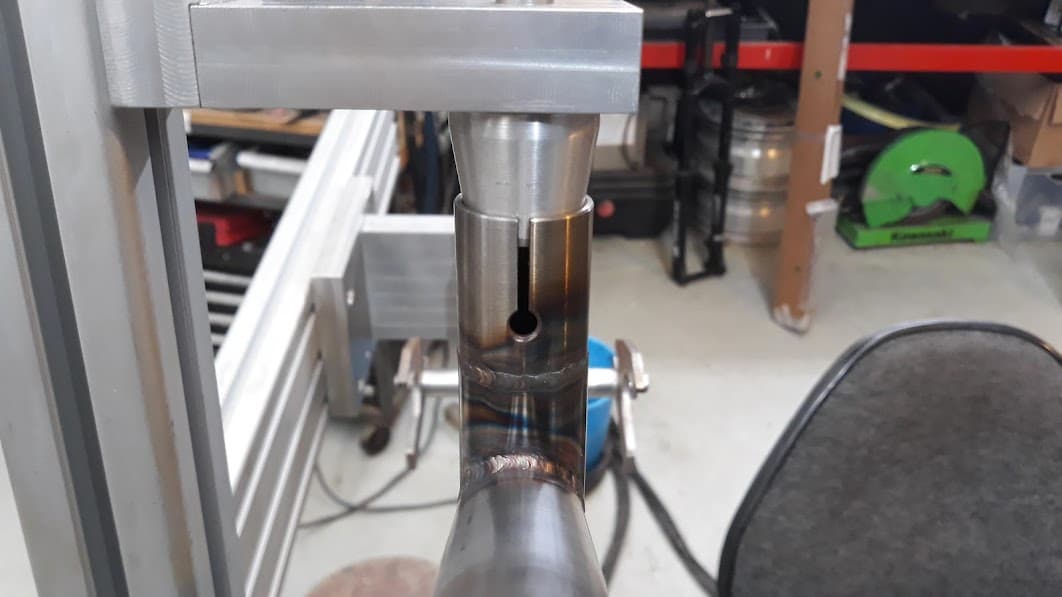
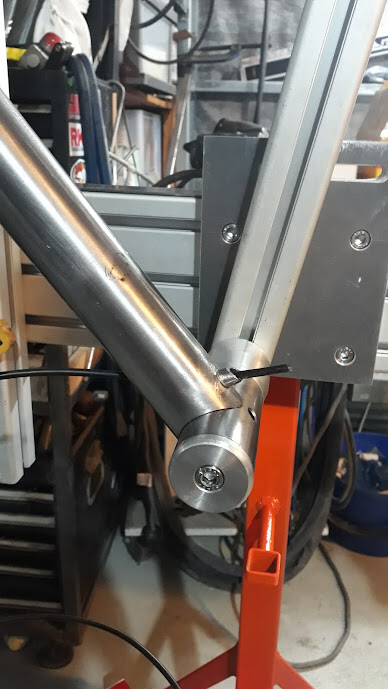
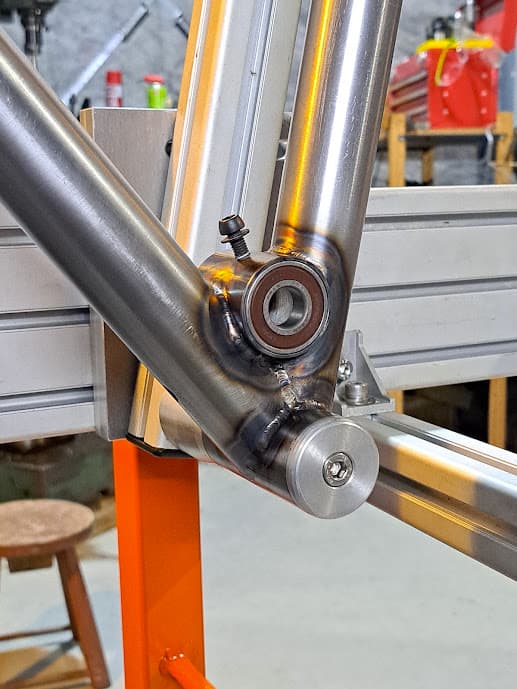
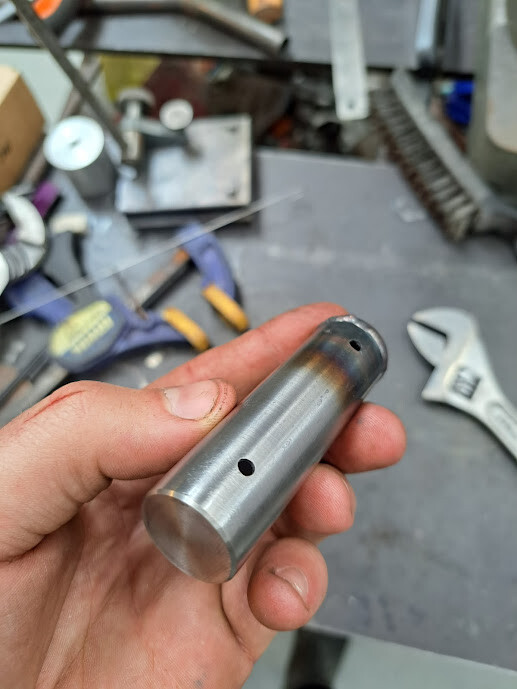
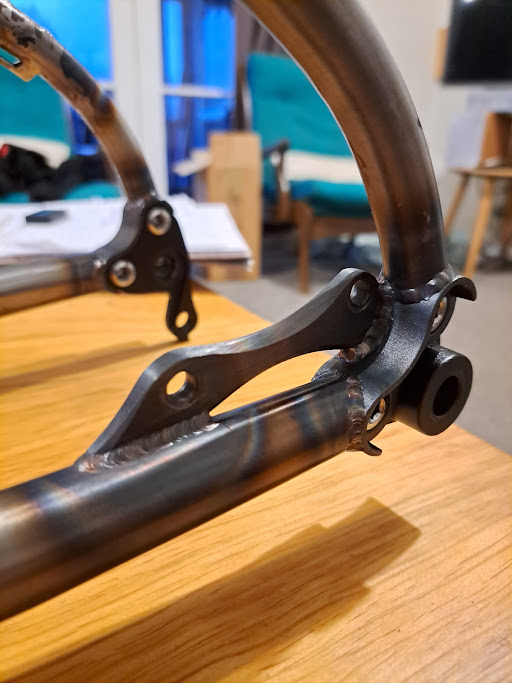
Main pivot sleeve welded in
Bored for bearing fit. The socket screw is holding a sleeve that the bearing outer races butt up against.
Round bits made on the lathe and bits welded on
Turned some endcaps on the lathe, welded and linished. Minor booboo on the thumb, be careful!
First CS going on, featuring 3DP tyre clearance tool. Turns out its wasn’t quite wide enough as will be seen later.
Second CS on, trying to figure out lines. Just ended up going point to point
Too short, bother
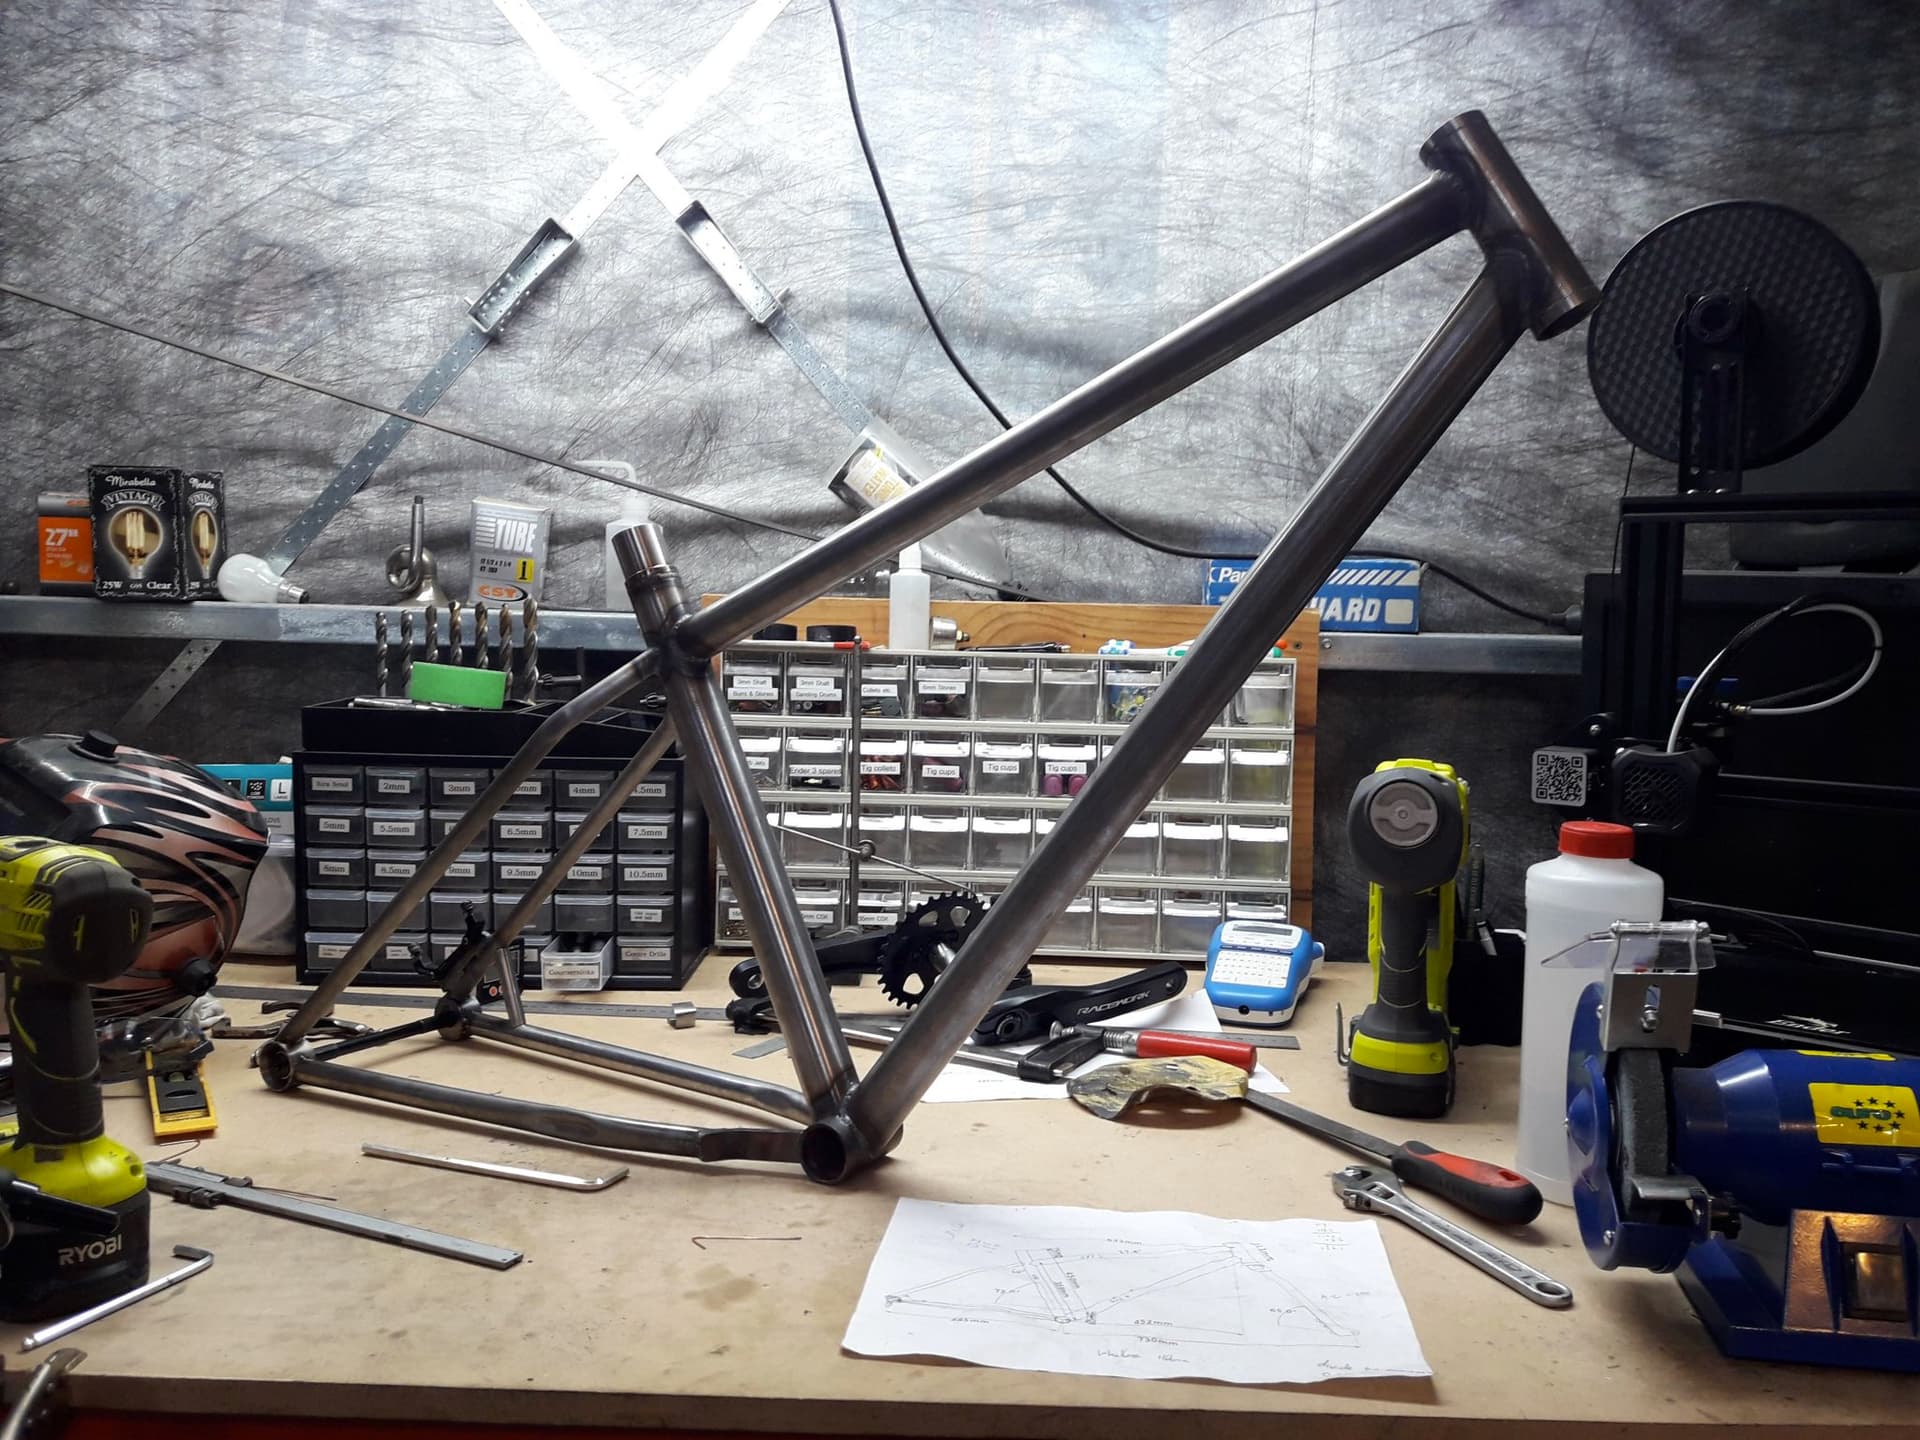
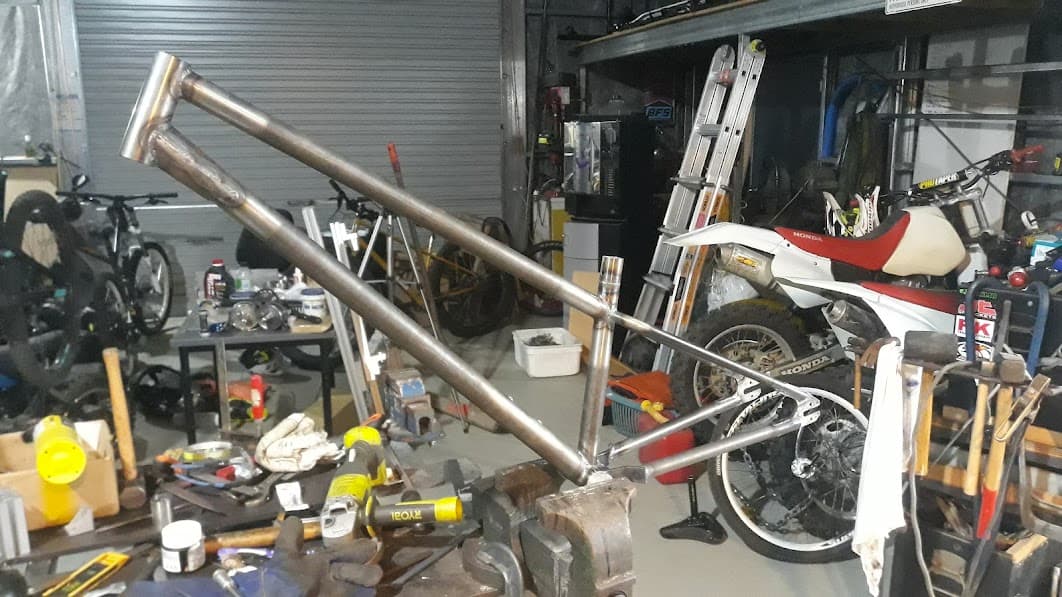
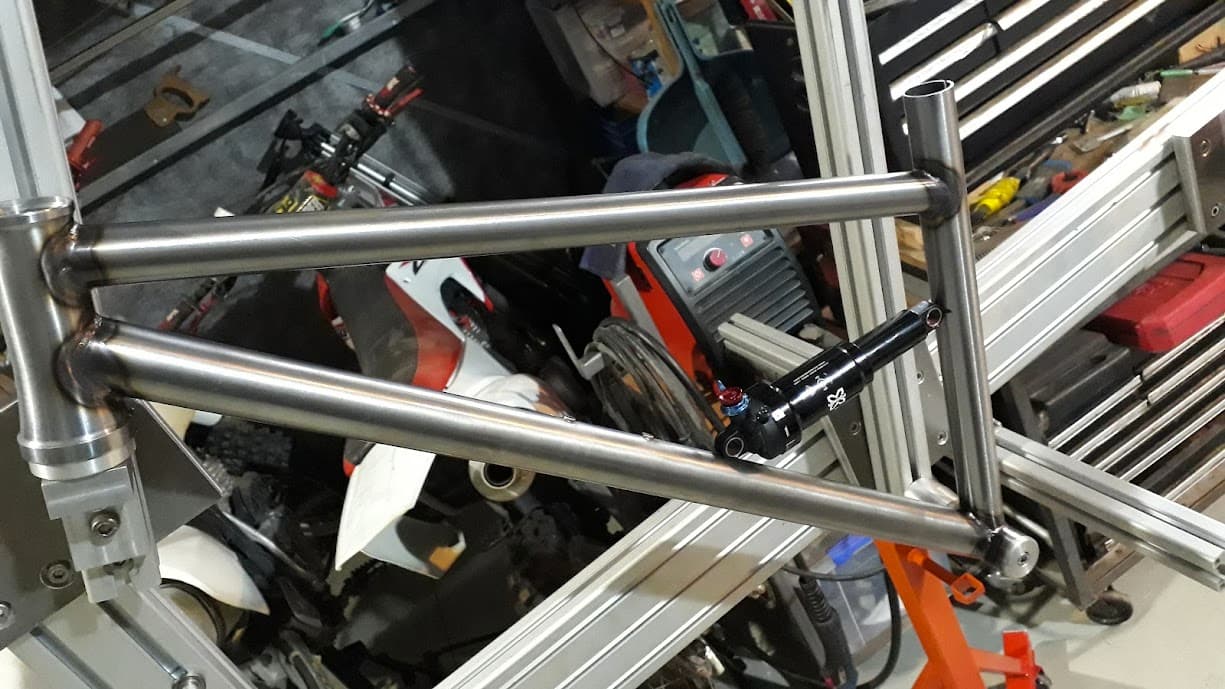
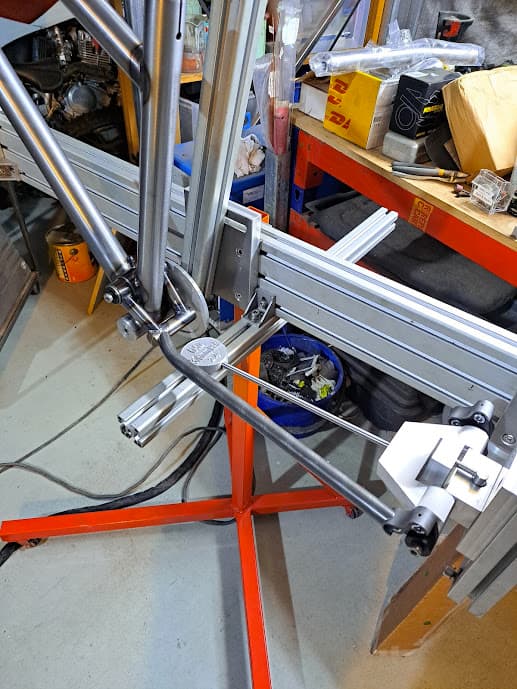
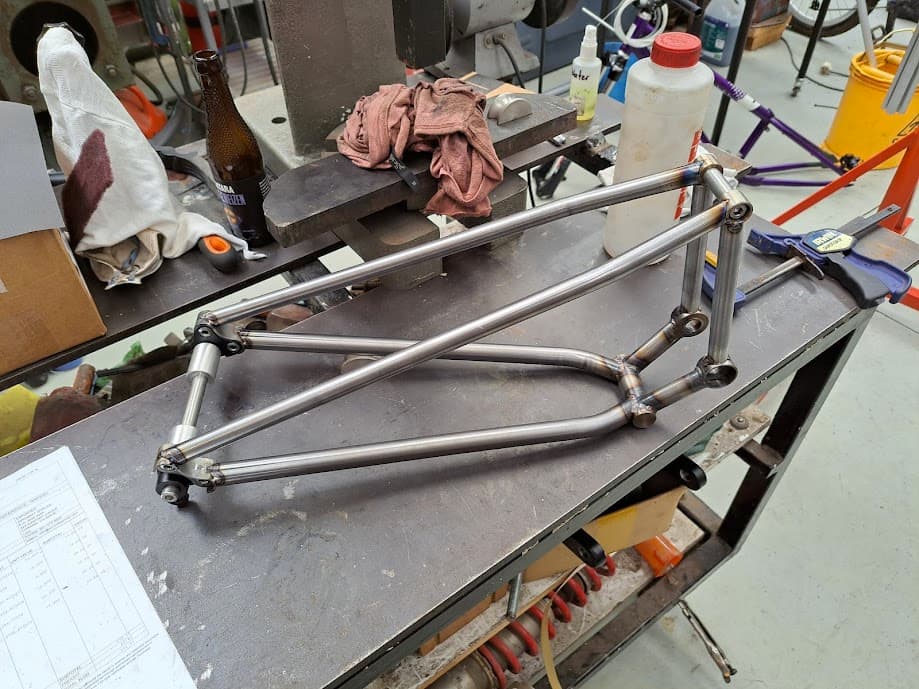
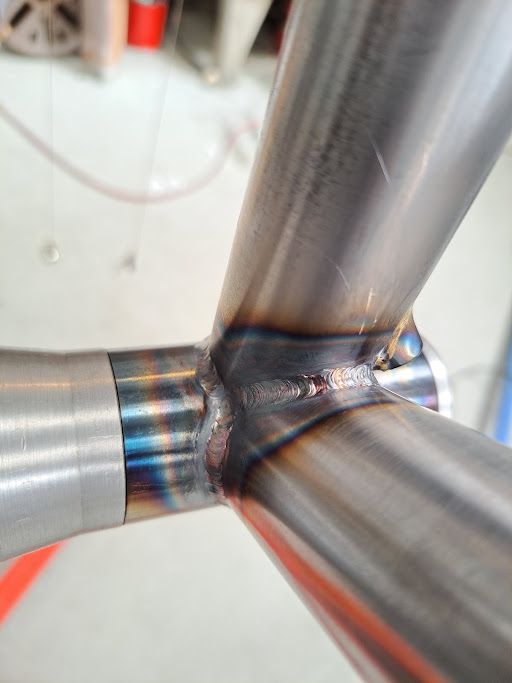
Rear triangle all together
Shock mount. Will have to be very selective with bottle cage selection, but my wife generally prefers camelback so it’s more for future proofing if she changes her mind.
All primed
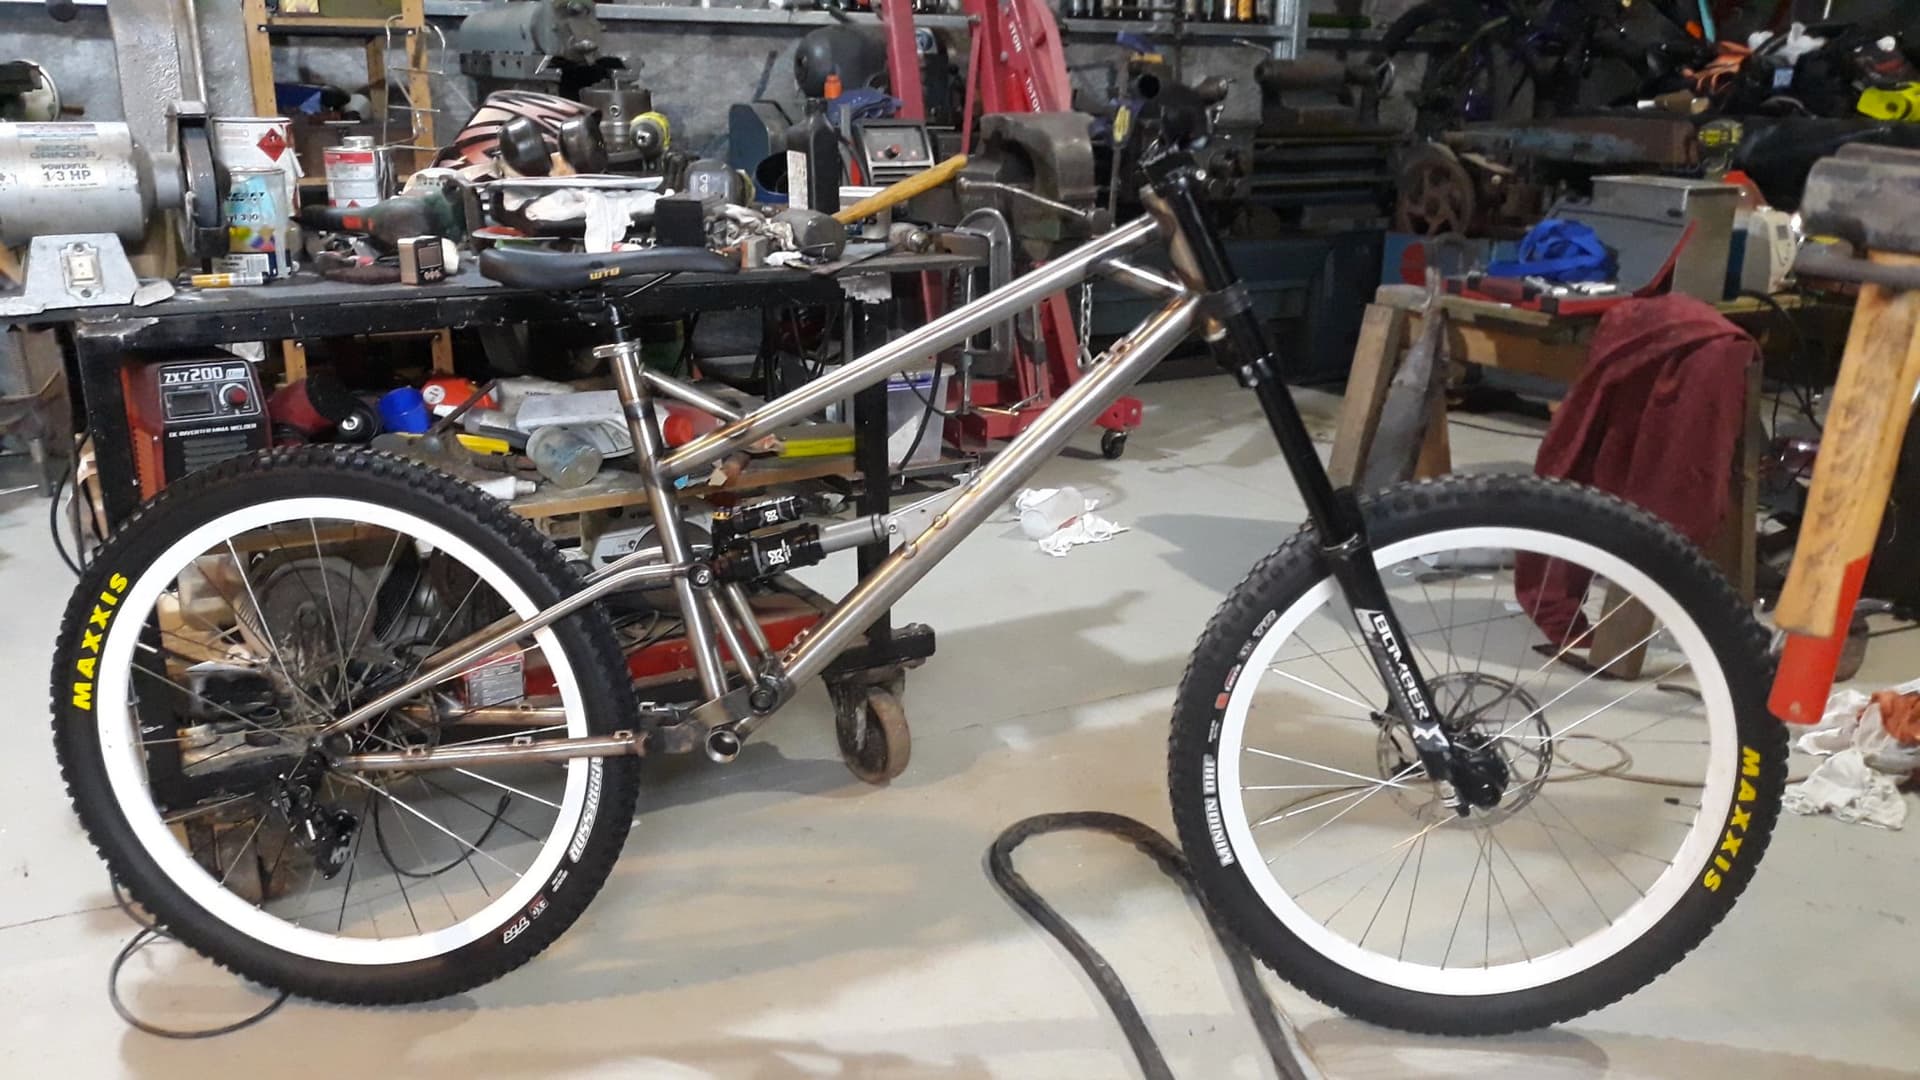
Assembled for testing purposes. This was just using parts that I had pulled off my old hardtail, so it was 27.5" wheels with 150mm fork and cranks that were too long, but I mostly just wanted to give it a few rides for a shakedown before finally painting it.
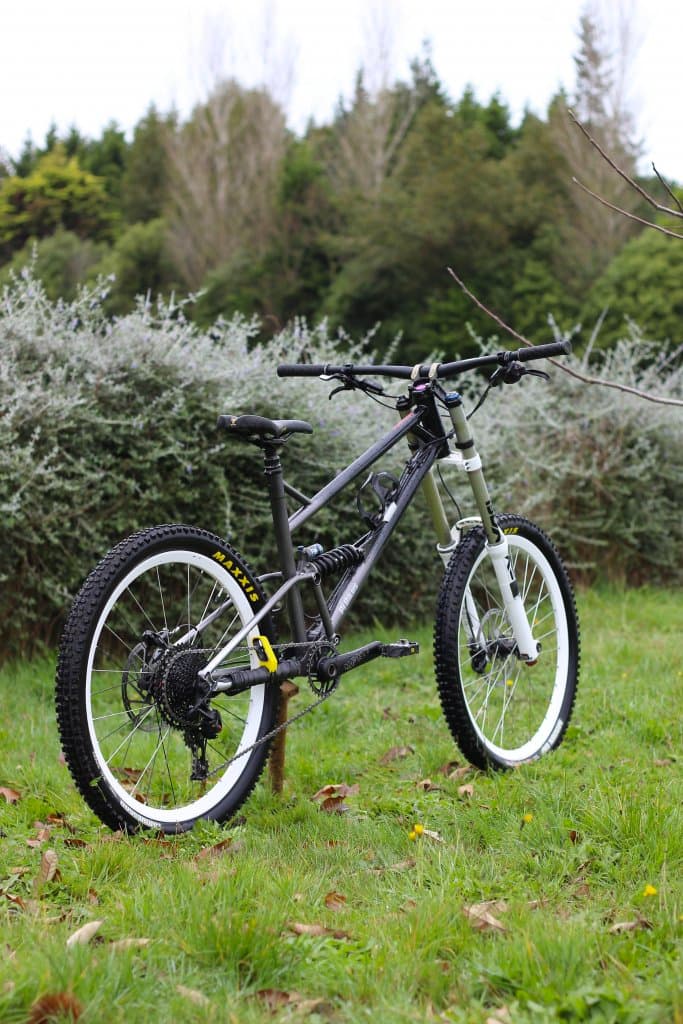
After thrashing it around for a bit it got diassembled and we saved up and bought parts for it. I took Heather to the paint shop to pick out a colour, she asked for a swatch book to pick a colour but the selection was overwhelming and she couldn’t make up her mind. Then she looked out the door and saw a mitsi triton ute in metallic blue and decided that was the colour.
I did a fade to silver with silver lettering. I actually cocked it up the first time which was pretty disheartening, but never mind, many hours of sanding and it was back to primer.
After that we took it for a ride, I originally designed it around a 190x45 shock, but it ended up with a 190x51 which gave it 145mm rear travel. This was fine with the 27.5" wheels and it looked like it was going to be fine with 29" too but under full bottom out it gets a bit of a rub. Not enough to cause a wheel jam or anything but I’m going to have to sort it out and do a touch up later
The onza tyre that is on it is a particularly generous 2.4" (etrto 61mm I think, measured 63mm at the knobs) tyre so I think moving to a more conservative 2.3" might solve the issue for the most part, failing that I will probably make a travel limiter to reduce the travel a bit. Going back to my mention of the tyre clearance gauge being inadequate it does rub on the chainstays under cornering with this tyre so again, more reasons to move to a 2.3". I have ordered a 2.3" maxxis aggressor so I think that will be a nice fast rolling tyre for trail bike usage. Anyways, my wife is very stoked with her new bike so I guess the jobs a good un!
It’s been a while so time for journal entry.
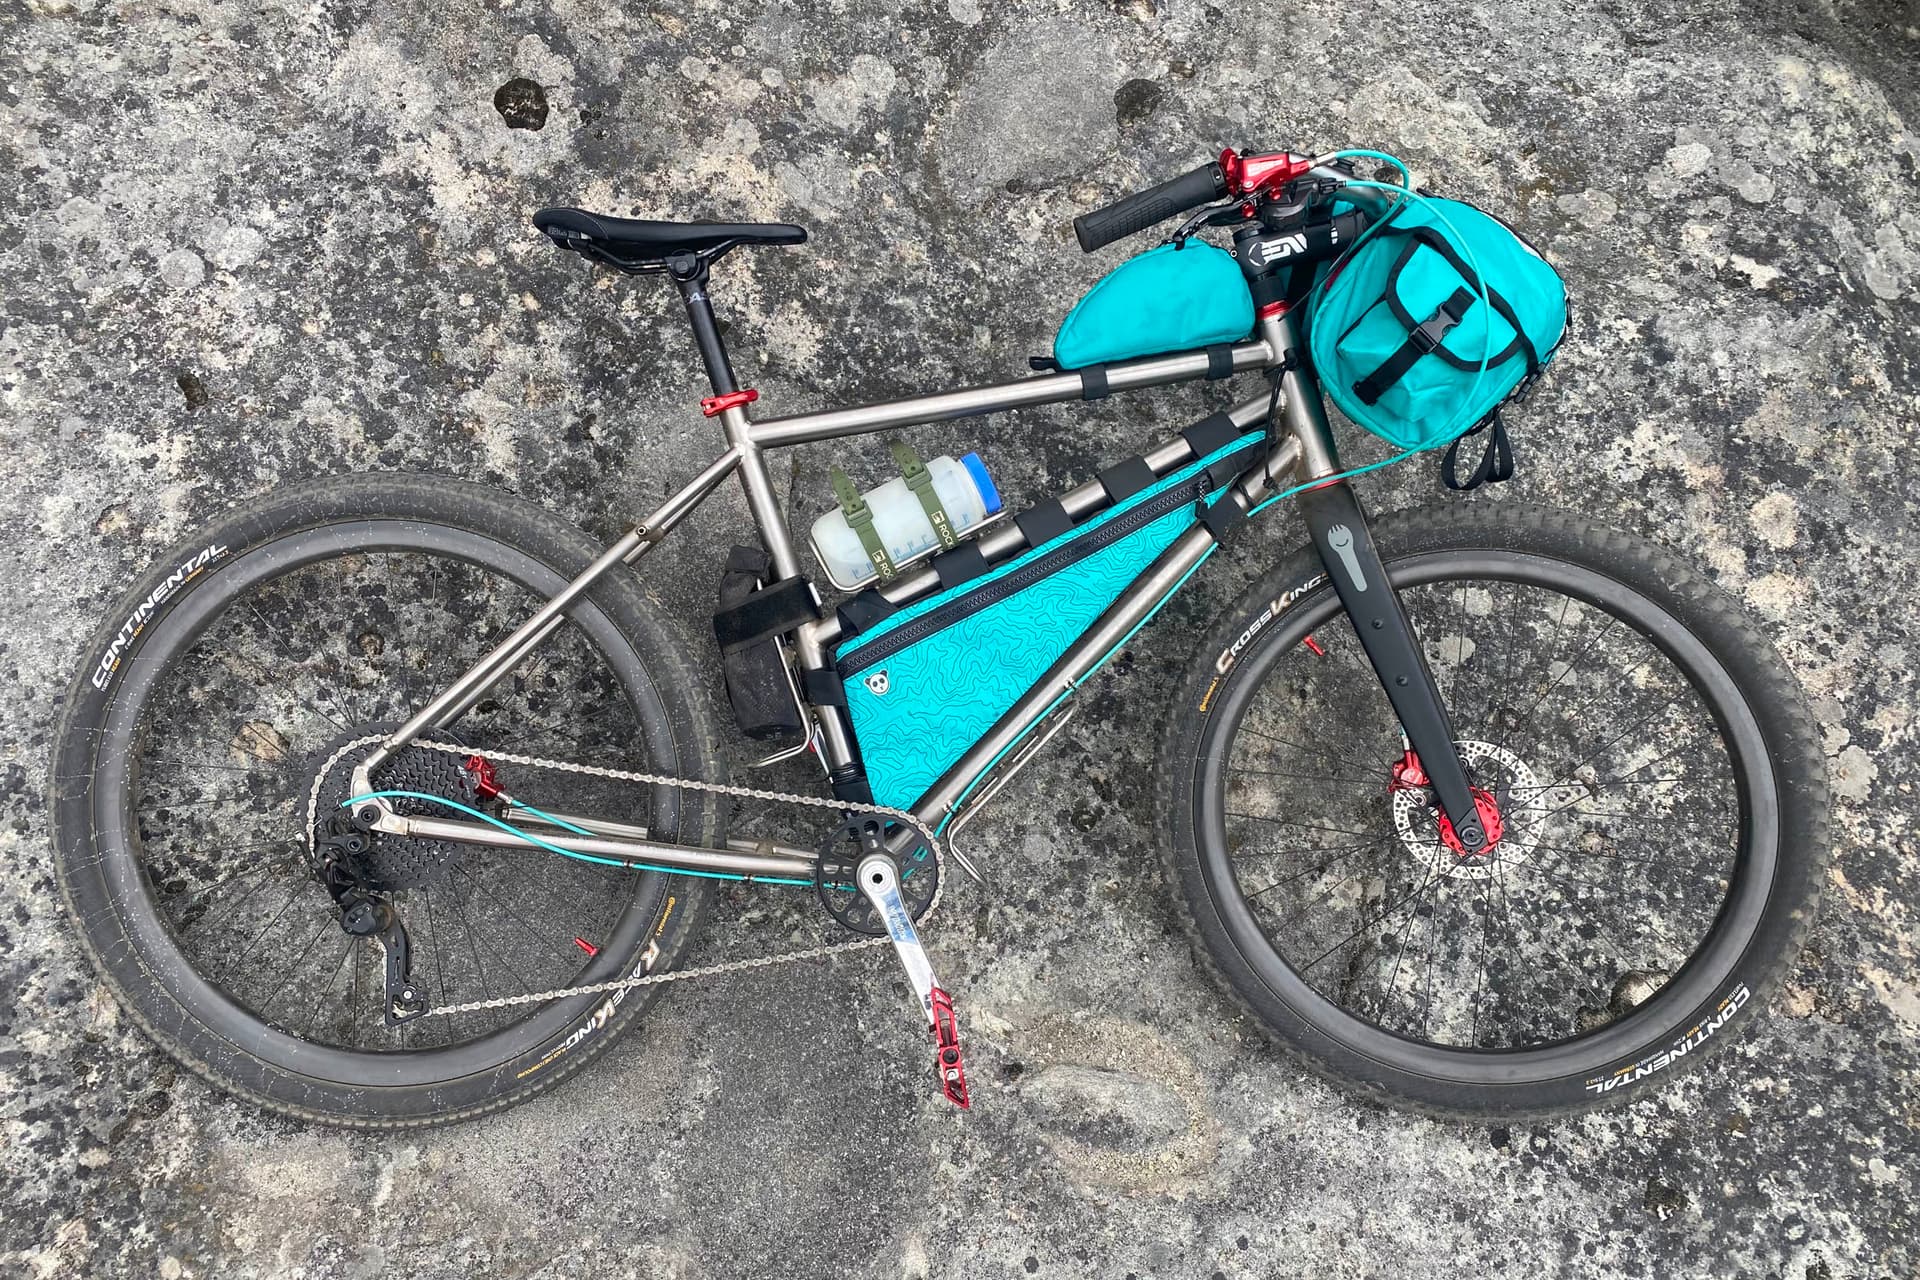
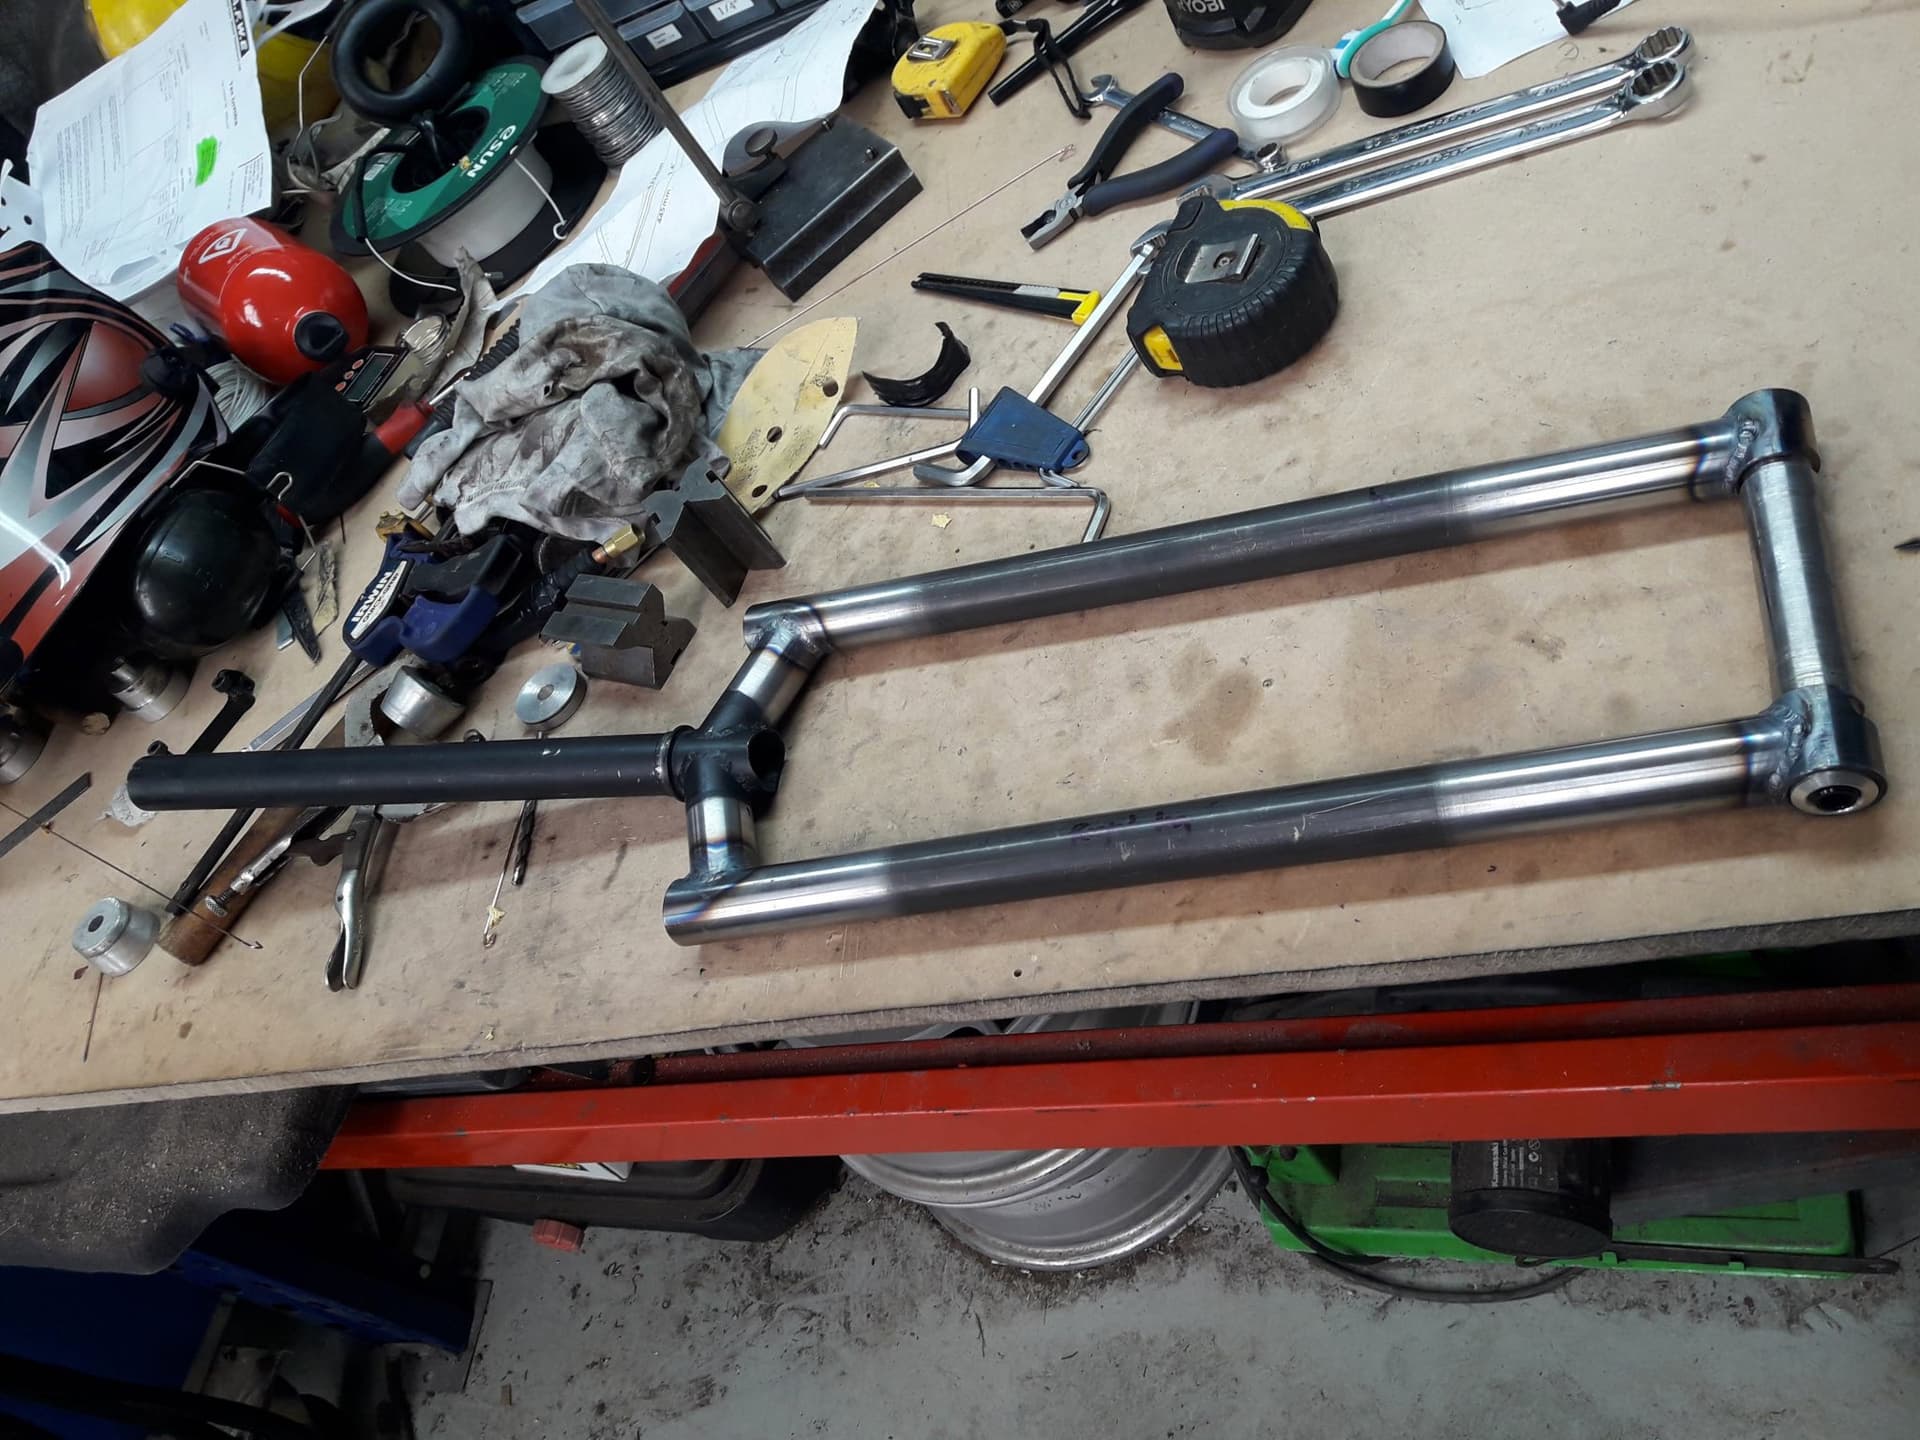
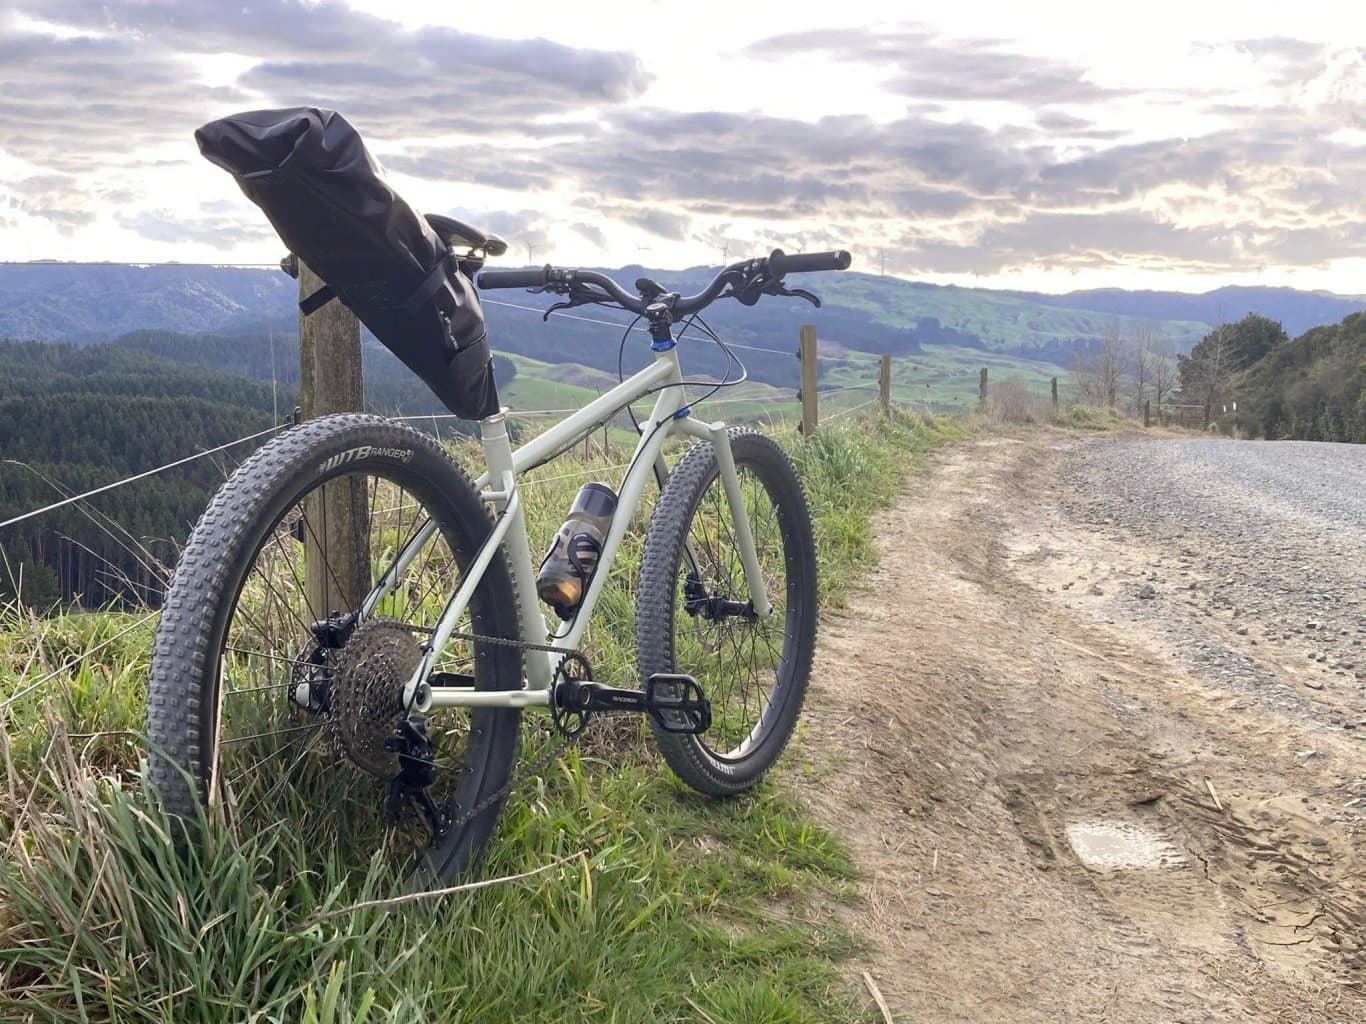
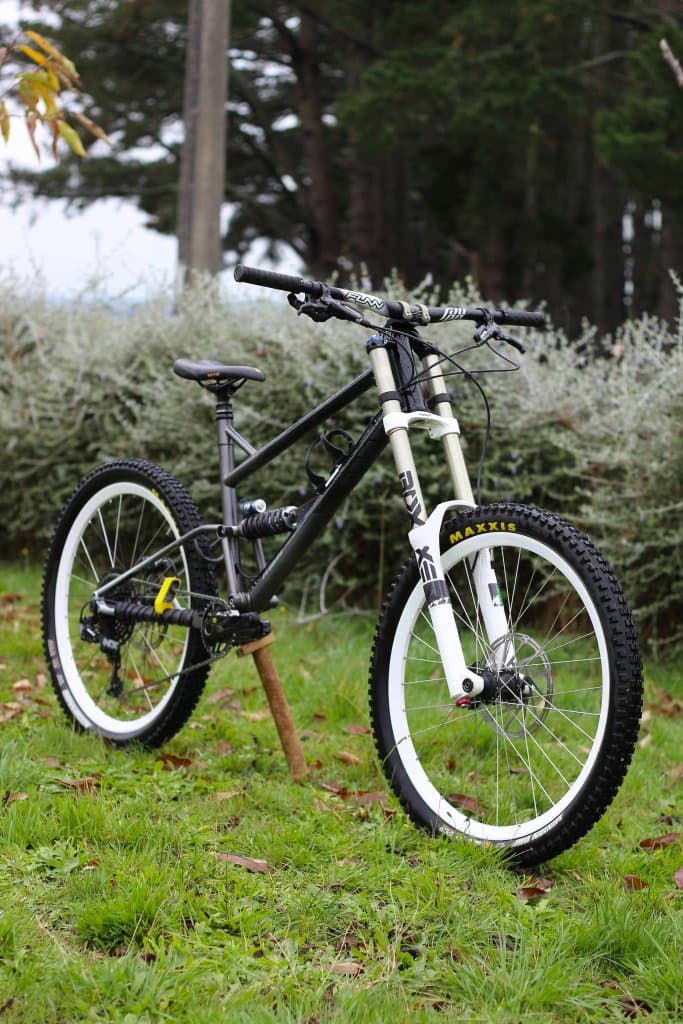
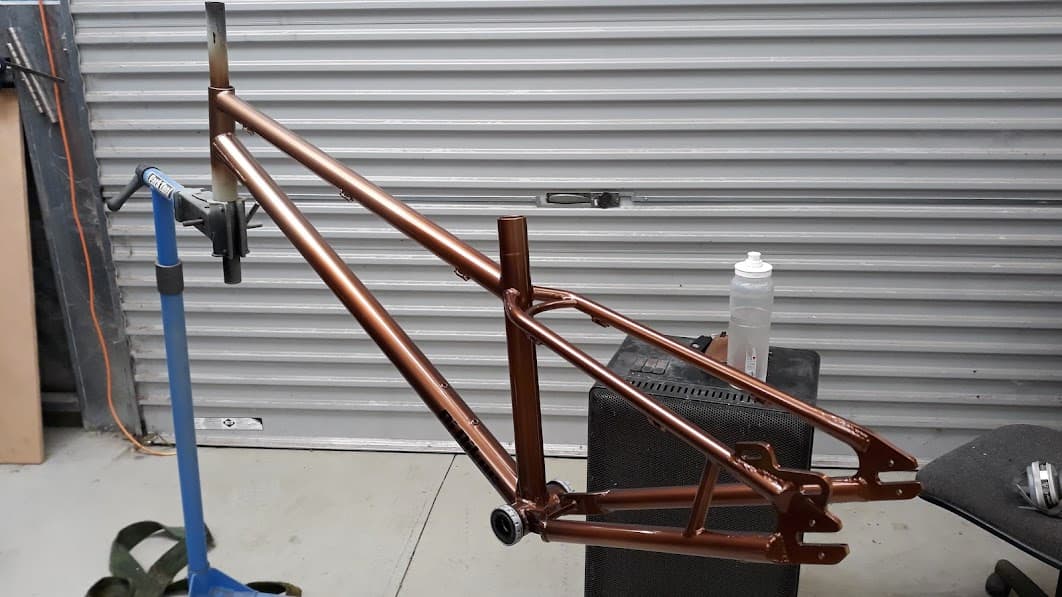
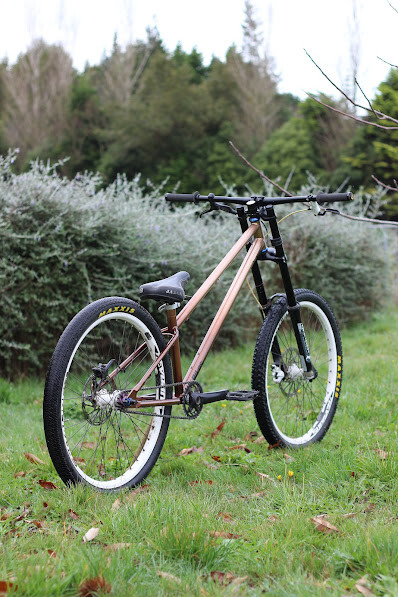
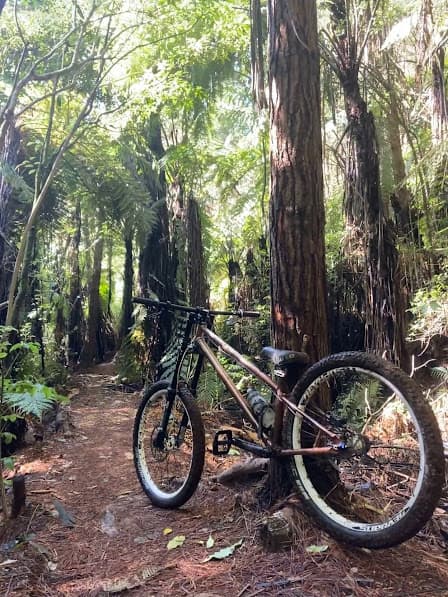
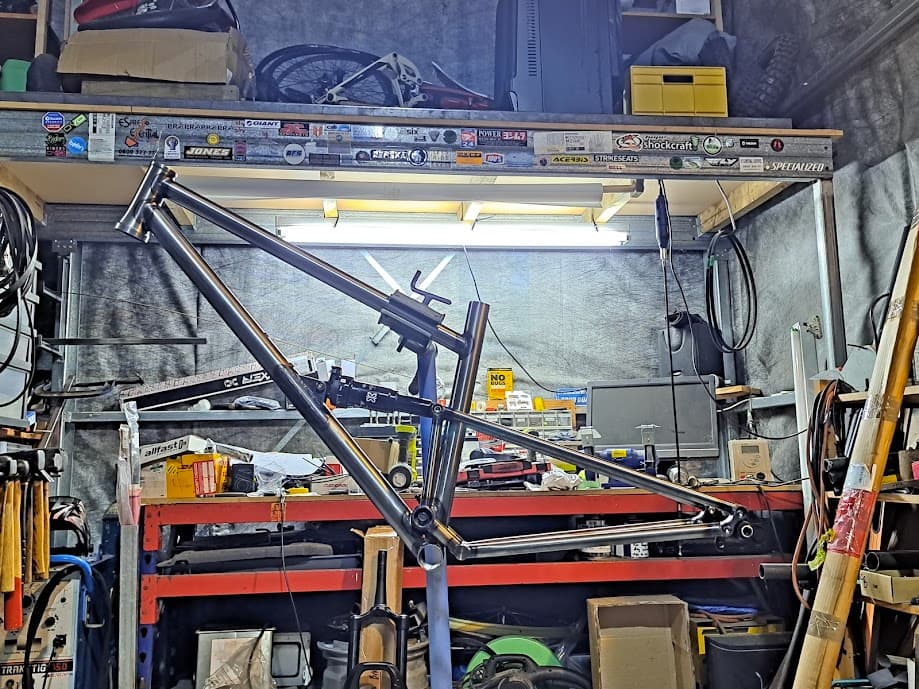
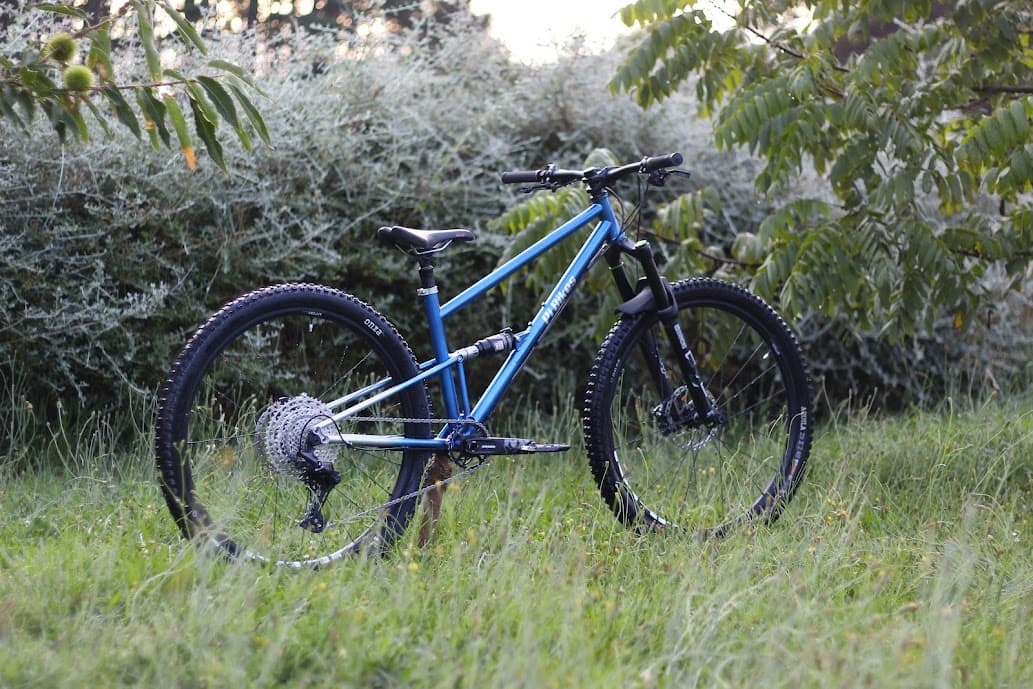
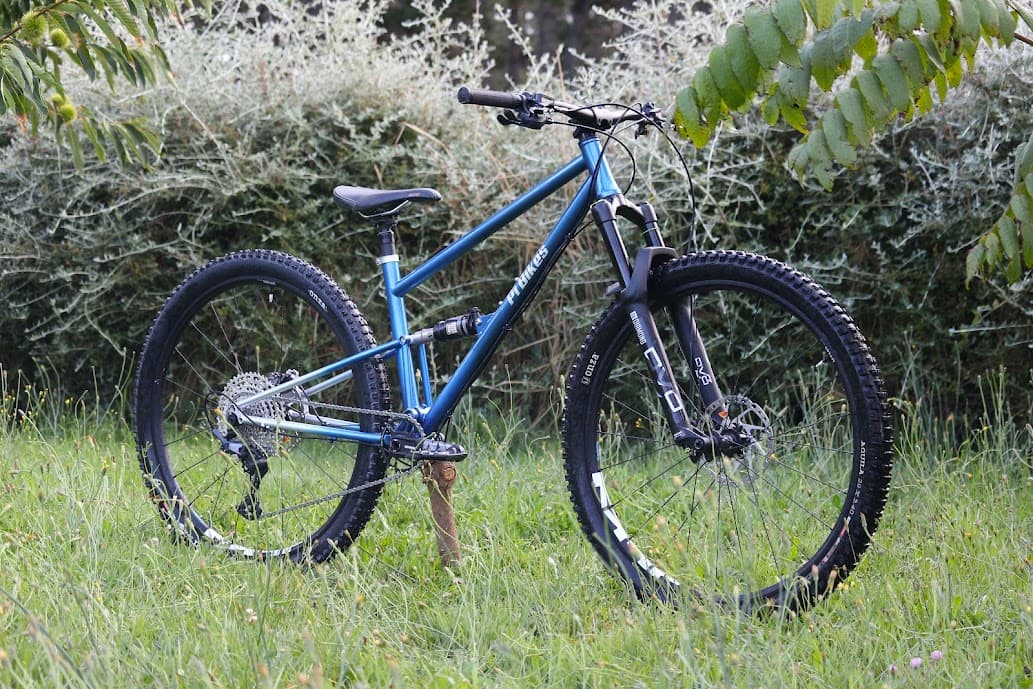
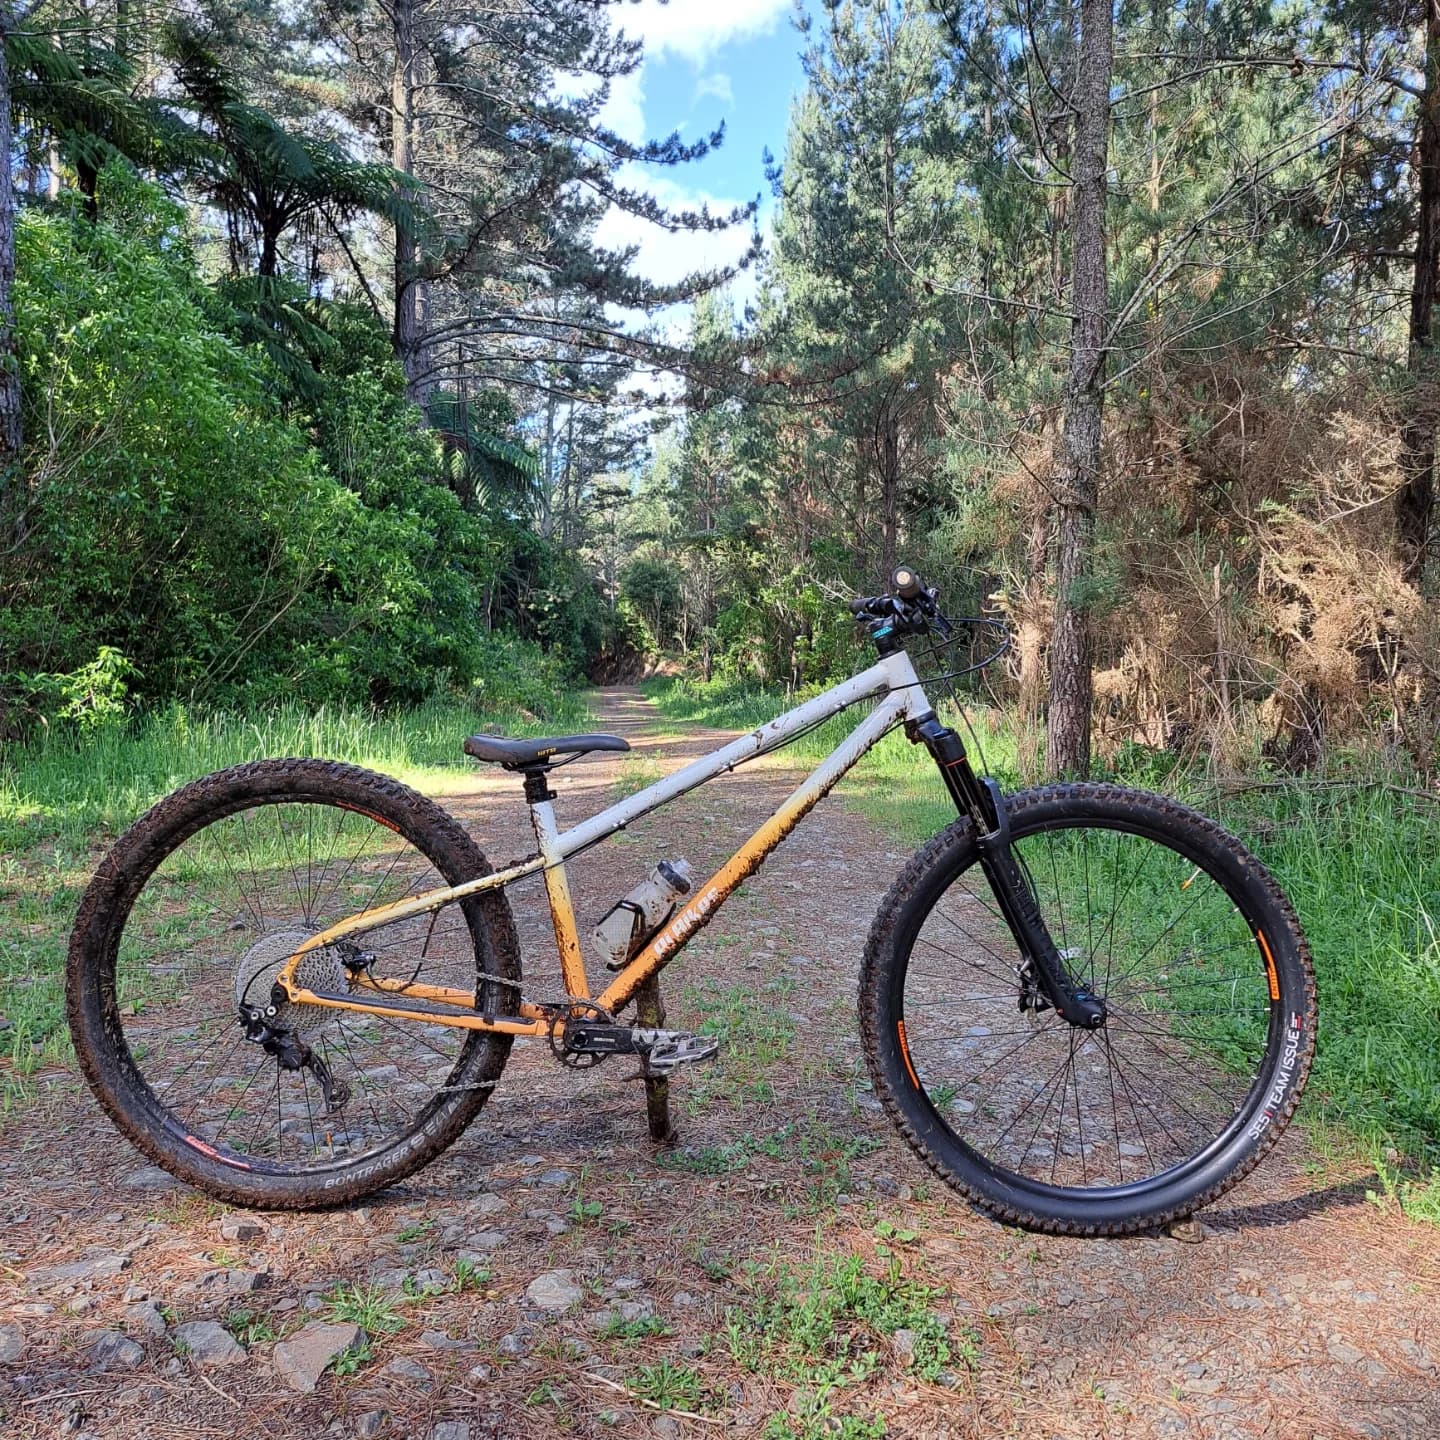
Bike #5, The Longboi.
I actually posted this on my first post at the top of this thread, but there’s plenty that I didn’t talk about. It was originally conceived as an experiment to make 2 bikes with the same reach figure but one with very long chainstays and one with very short. I learnt a lot in the process and I think this is probably the first bike where my welding was starting to get to the point where I was happy with it.
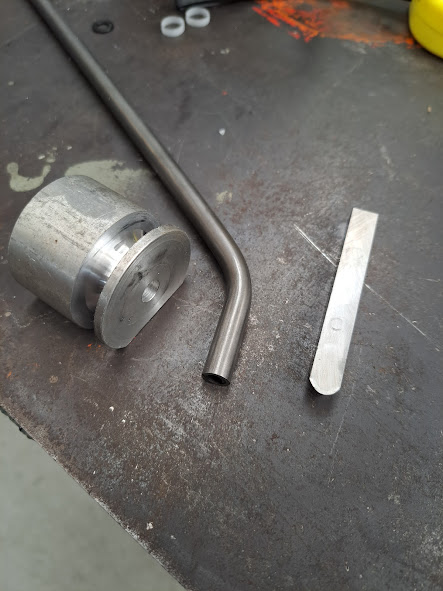
I started with the seat tube. I wanted to make a dropper port with a bent section of 8mm DOM tube so I turned a little bending die on the lathe and milled a flat on one side. Stick it in the vice with the tube in the channel and it makes a nice bend
Silver brazed it into the seat tube, looks like I may have burnt it a little bit but its fiiiine
One of my main goals with this bike was maximum dropper. As in oneup 240mm dropper, the seat tube is 390mm long and it is excellent. I read a review from one website that recons its too much but disagree, its not a game changer but more drop is more better in my experience.
I did a bit of a whoopsie when I was mitering the downtube and gouged the top side. It was pretty annoying, but being a bike for me and I filled it with weld and filed it smooth again. It hasn’t caused any issues so far, so it’s unlikely to become an issue as the bike has many kms of mountain biking on it now.
Tubes ready for welding. The seat tube is the single butted 16-9 tange tube and the top tube was a 9-6-9 31.8mm tube I think it was a dedaccai from memory. Down tube is 035 straight gauge. The CS are 7/8x035 and SS 5/8x035.
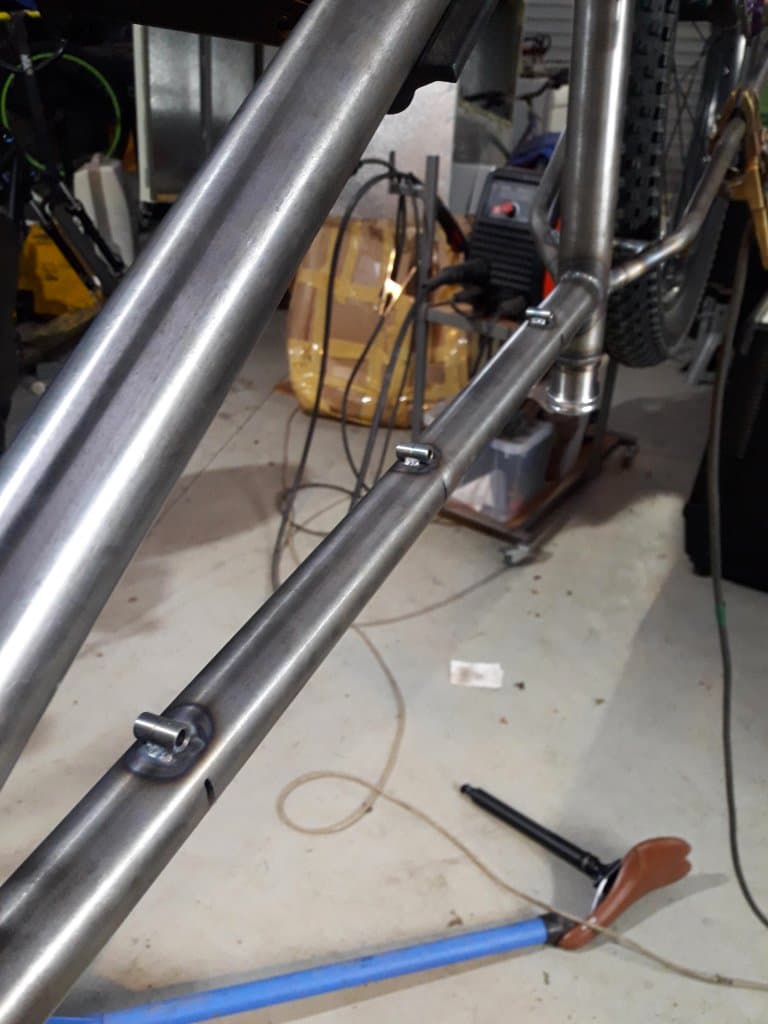
I went big on the vent holes on this bike to save some weight. It didn’t cause any issues on this bike, but I have since moved to smaller holes as the next bike had some issues with the BB threads due to the removed material allowing more distortion.
Did some of the welding
At the time of building this bike I had not made up my mind if frame compliance was a thing or not. So in designing the rear end of this bike I wanted to have bends on both the vertical and horizontal planes to give it the opportunity to flex and see if I notice it or not.
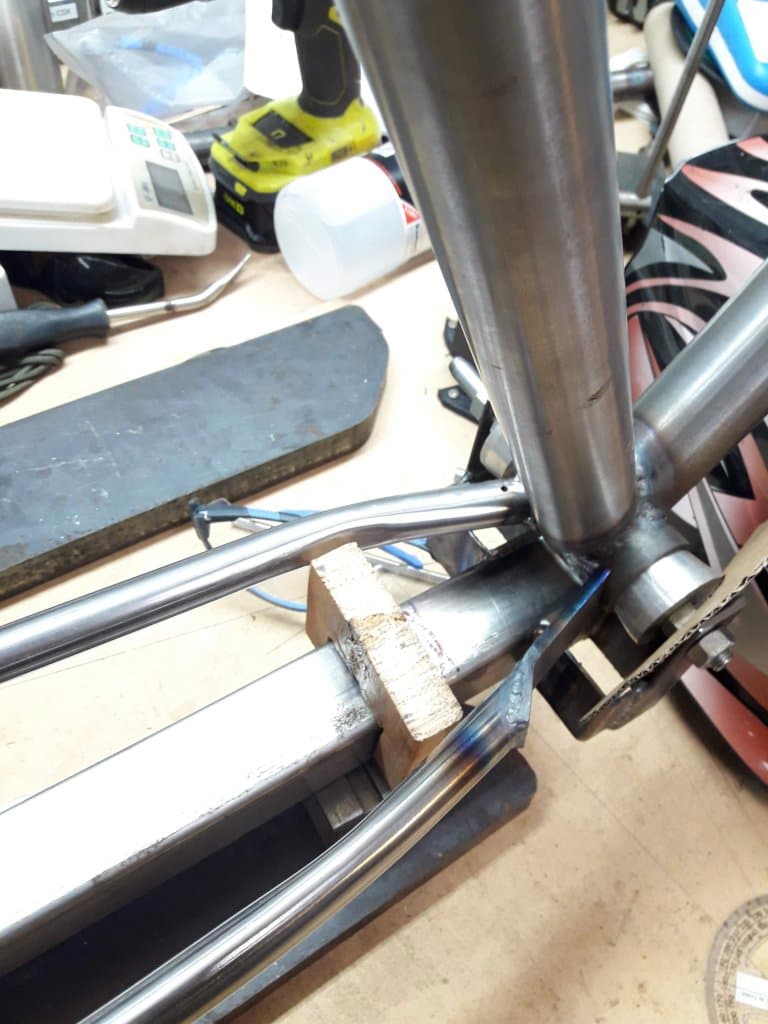
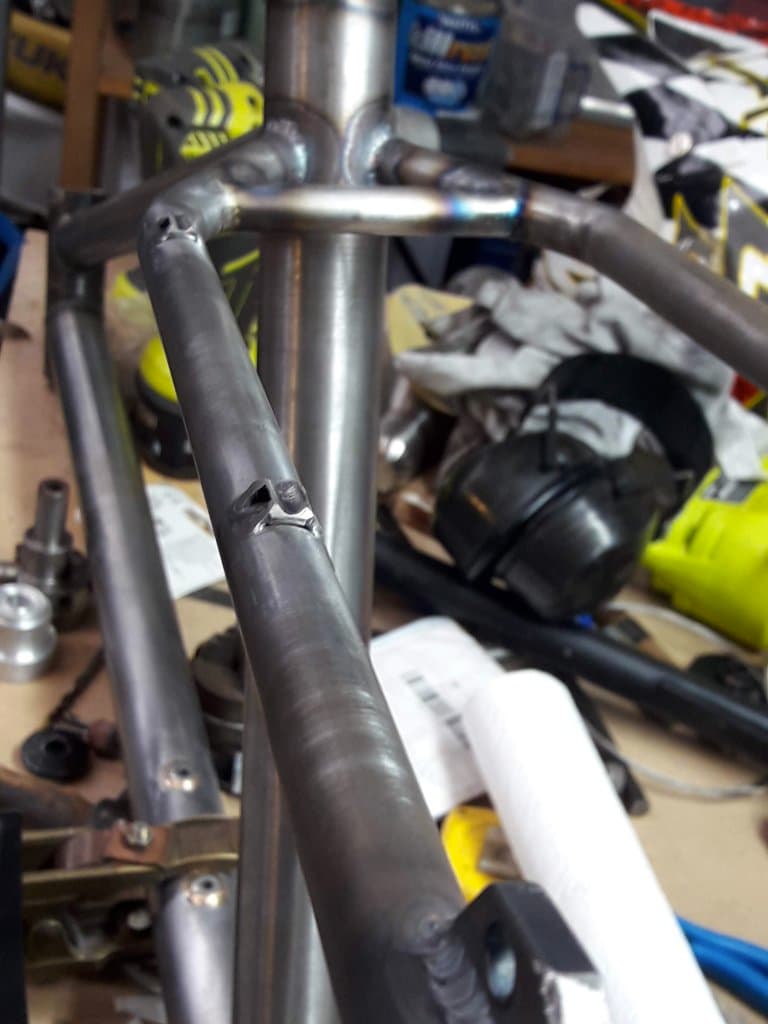
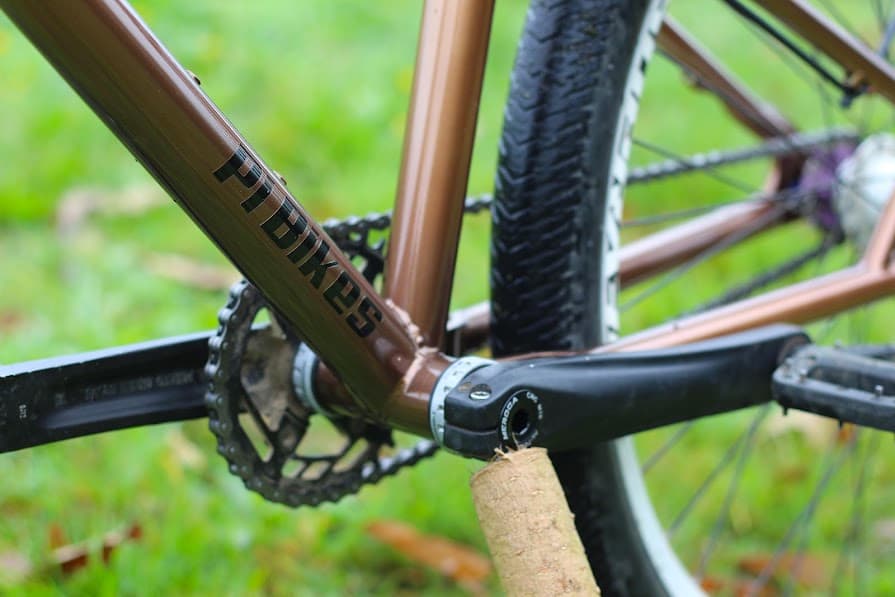
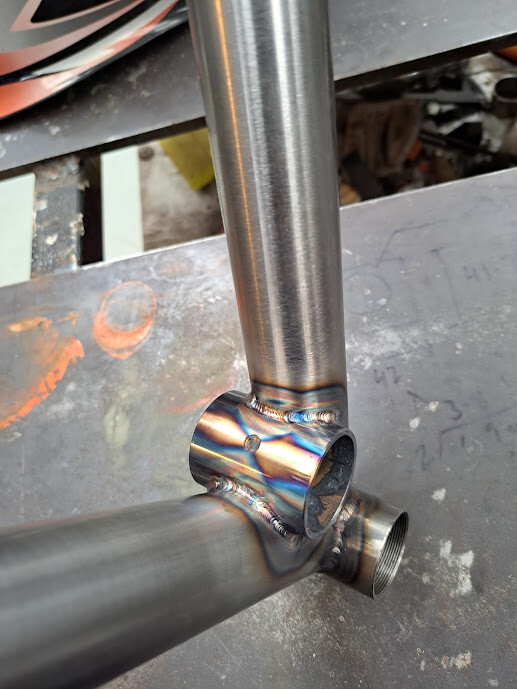
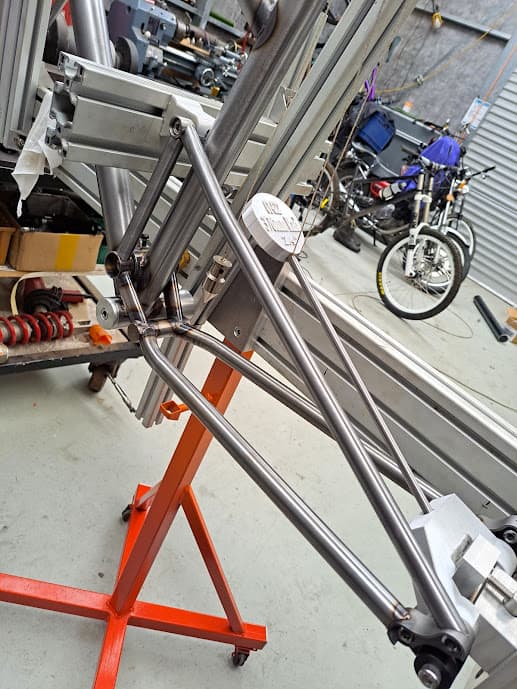
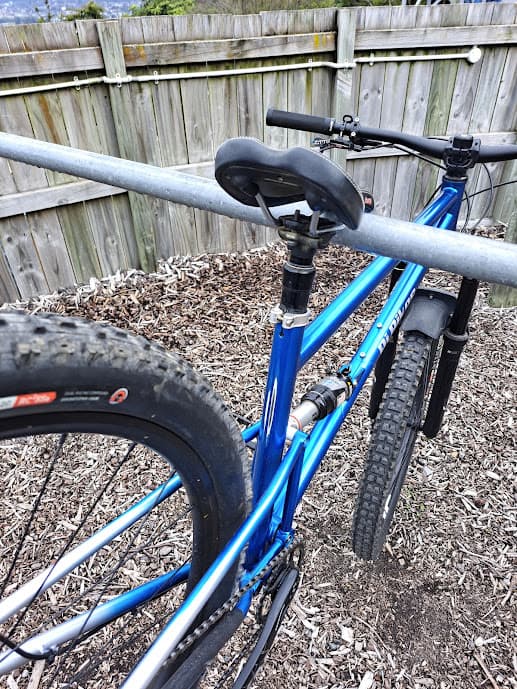
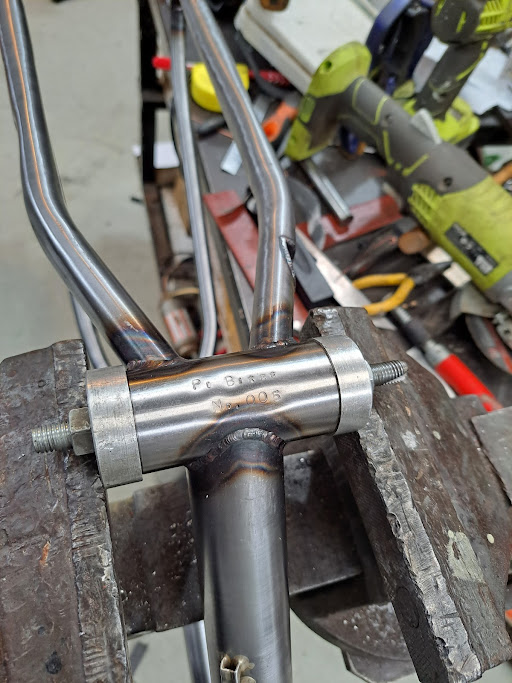
There are 3 bends on the seat stays, the main curve on the rear, a curve inwards to meet the seat tube and a slight curve upwards to make it line up with the top tube. I accidentally made the chain stays 5mm short so they ended up and 480mm. Still plenty long. It has all the tyre clearance, could probably go to a 3.5" rear tyre if such a thing was readily available. I have to put a little notch in the CS to clear the chainring
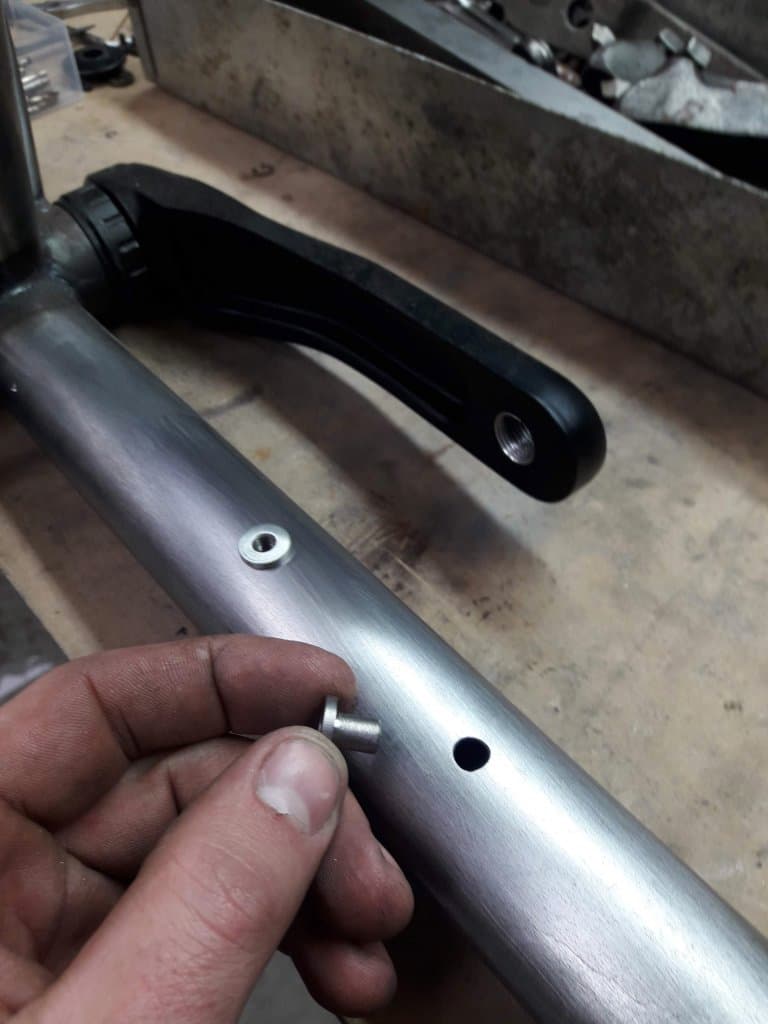
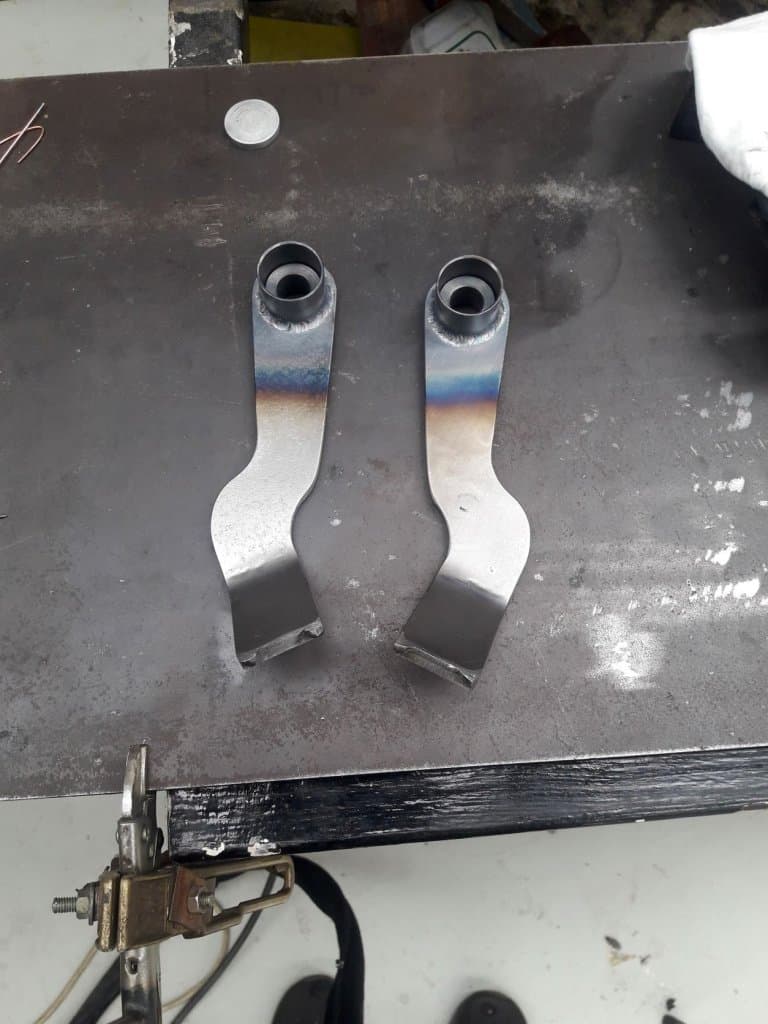
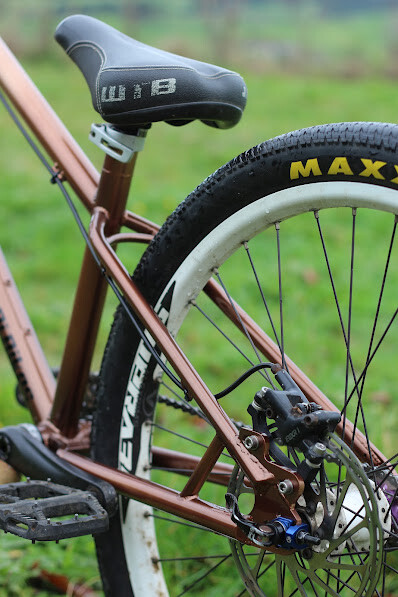
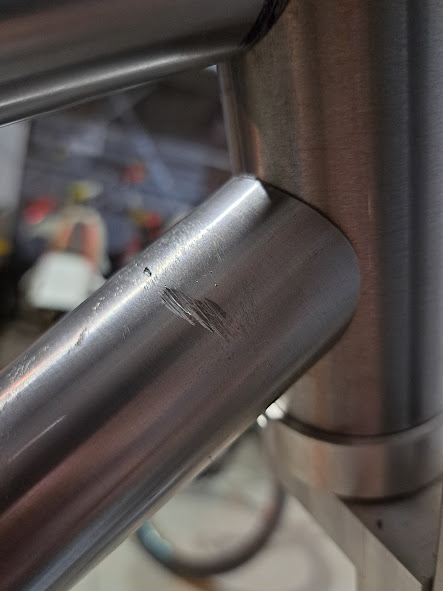
Brake mounting was a bit of a cock-up, but it works. so long as you don’t want to run sram brakes at least! Currently has hope e4 and they fit nicely but its tight. I did end up having to put a dimple on the inside of the seat stay to get some more clearance.
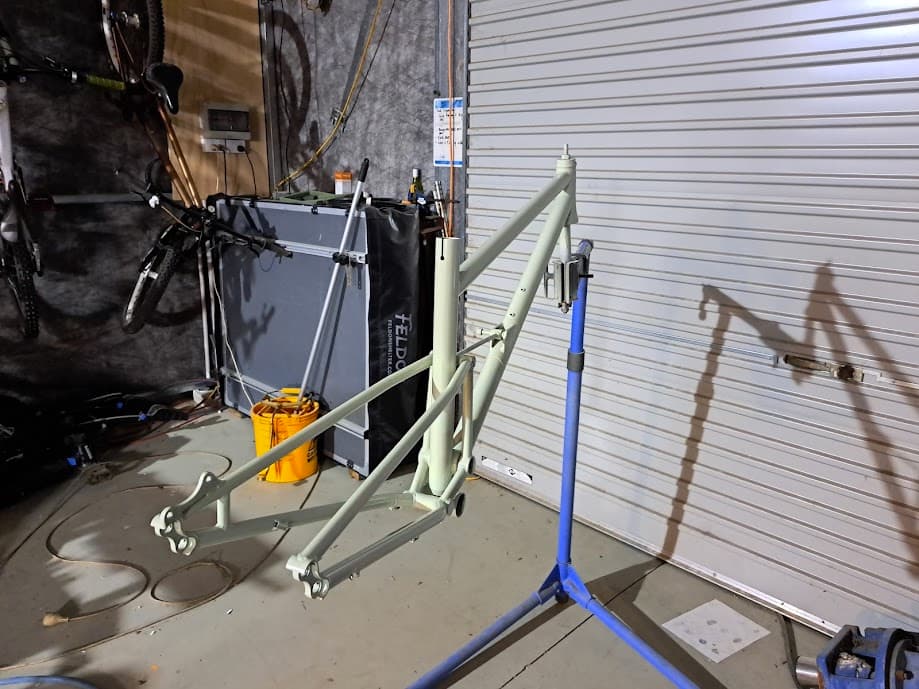
I painted it with some leftover auto basecoat I found on the local equivalent to ebay for $5. I wasn’t sure about the colour looking at it in the tin but once it went on I was pretty happy. Clear coated with PPG/protec carmaster clear.
I have ridden this bike a lot now and it has taught me a lot about both building bikes and geometry. And I also found out that when the stars align I can manual a bike with 480mm chainstays, but most of the time I cannot.
How do you like the se5 tire? I have been using xr4 on the back and it has been very good and punched well above its weight. All your bikes are pleasing to my eyes.
It’s been working well for me. I am fairly unfussy on tyres though, the places I do 95% of my riding are basically rock free so punctures aren’t an issue. My local is mud 3 seasons of the year so it’s a slip and slide regardless of what tyres you have, it also means sidewall support is far less important than it might be on a more grippy surface.
My favourite thing about Bontrager tyres is that every man and his dog wants Maxxis so when they buy a new trek they immediately sell their brand new tyres for usually about $30 a piece and slap on some Maxxis.
I’m glad you like how the bikes look, I try to make them look nice. I think thats one of the cool things about frambuilding, each builder usually ends up having their own style. You can often pick out who built a bike just by looking at it if you are familiar with their work.