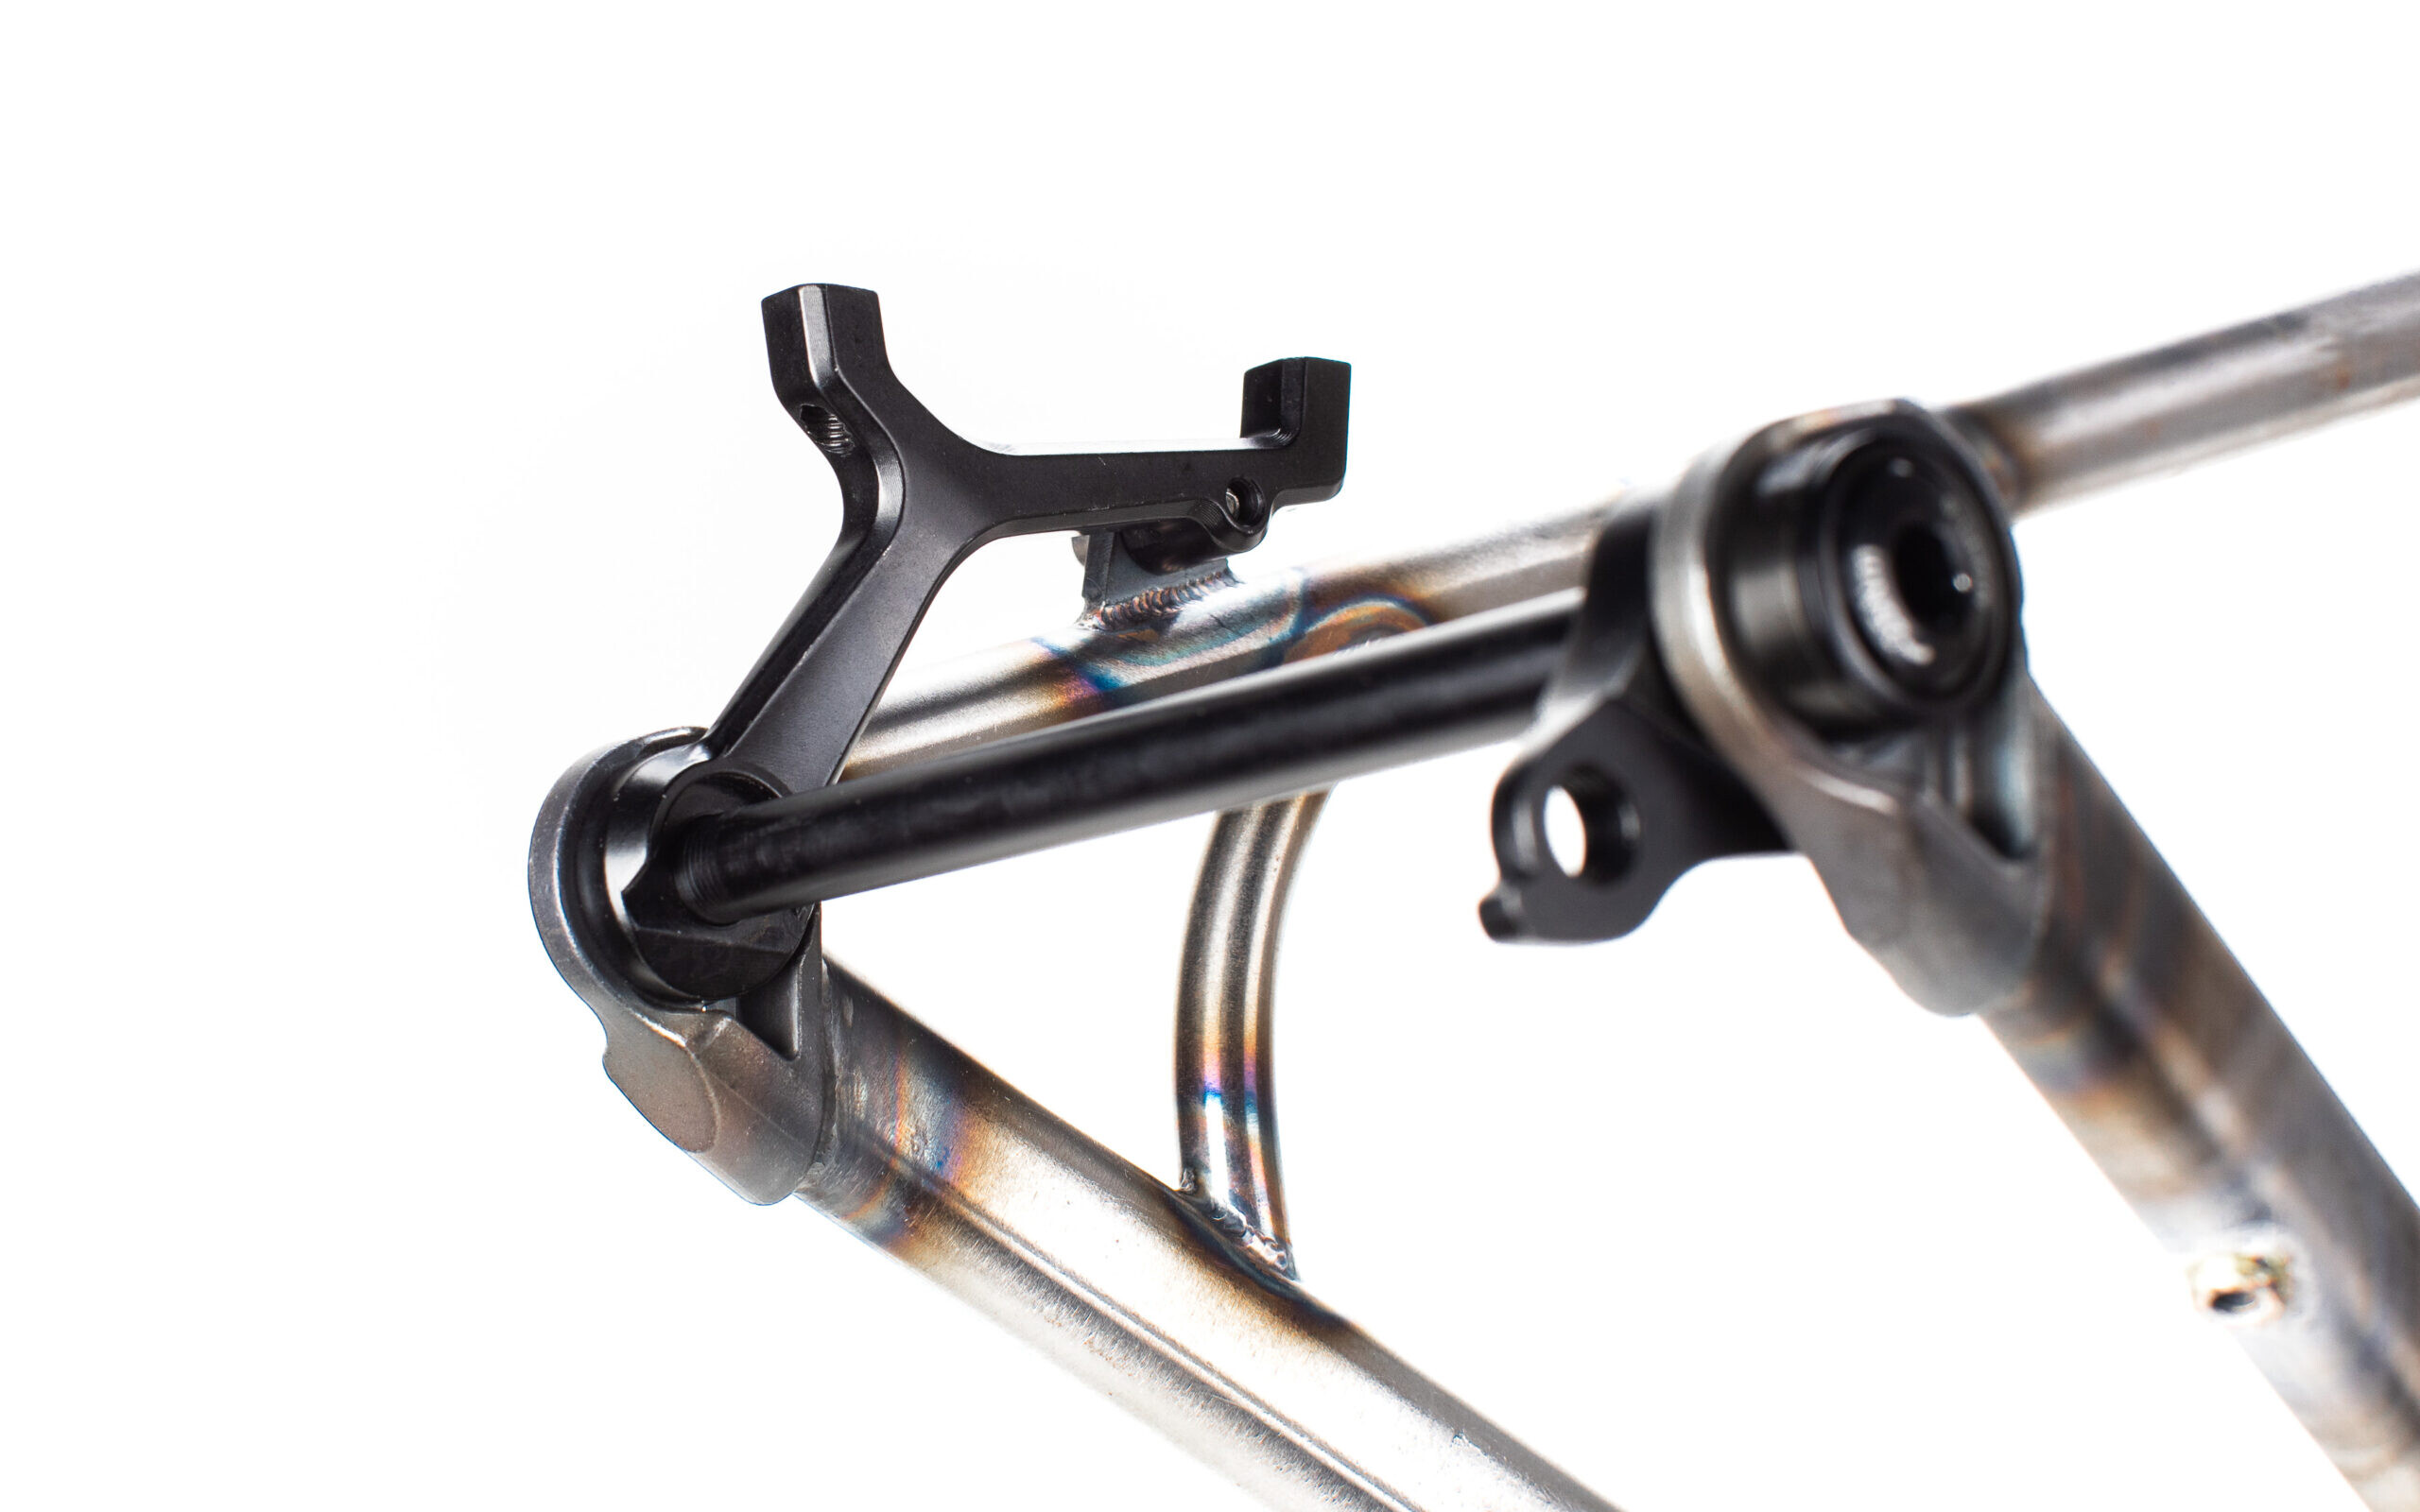
Saw today that Sour has re-realease thier Bad Granny MTB for 2024. Awful name but a great looking rigid all-rounder. What stood out to me most was the replaceable rear post mount that’s integrated with the NDS dopout (picture from the shop section of the site). Can’t remember seeing anything like it before. Definitely not on a Taiwanese made bike anyway.
What do people think? Looks too be a pretty neat solution as it removes the threads from the frame which is what I love about IS. Not sure if they intend to offer mutliple sizes to do away PM-PM adapters for larger rotors. Would be super neat if they did.
I also imagine it would be self-fixturing to some extent? Could be a great system if made availiable for the home/hobby builder.
Oh and semi-related. I know one issue folks have with UDH on steel bikes is the lack of symetry. This bike is UDH ready and it appears as though the extra width of this brake mount system has resulted in a symetrical rear end.
I guess it’s along the same lines as the sliding UDH dropout I’ve got in the works for my next hardtail. I’ve only got a flat mount version drawn up so far, but I should be able to make up a post mount variant too.
If you’re not yet acquainted with Vincent I’d highly recommend having a look at what he does as a mech eng student/ trials rider. His insta is always full of new cool stuff he’s doing. A lot of interesting 3D printed stuff which he’s testing out (properly!) and the development of a trials frame.
If you’re quick he’s currently got a load of frame failures in his stories submitted by other riders which is obviously like crack to us right?
He’s not on the forum yet and perhaps under the radar and defs deserves a look. He’s also producing a cool chain tensioner.
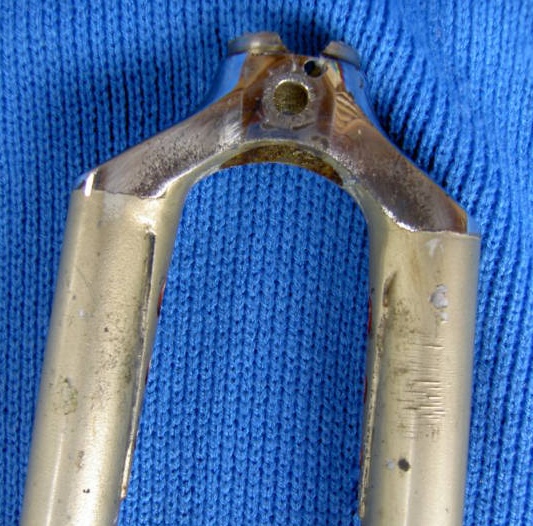
Henry Wildeberry first-timer lugged frame & fork build. Some interesting approaches to building with simple tools and no jig. Anyone recognize those tubing blocks?
Ouch! I had to stop watching partway through the fork video (#2), when he started heating the crown again to take the blades out. He explained that he had “almost $100” into it, but what’s the value of your time? The value of having a fork that won’t fall apart? Just chuck it and start with new steel.
Does anyone here braze a crown with such a small flame? I’m more of a “two rosebuds” kinda fork brazer myself. I like to be completely done in 2 minutes from striking flame, and that’s brazing the steerer and blades in one heating. 5 minutes if I’m being leisurely about it.
The first video was painfully slow, even watching at 1.5 speed I skipped ahead multiple times, seems pretty content-free. I would skip it.
I feel for the guy, he’s not stupid, but he needs to watch someone do it who knows what’s up*, at least a little before diving into making something that has to be able to hit cattle crossings at 50+ mph.
*not sure if there’s any Youtube content I’d consider in that category. I mostly see more of these un-earned confidence type — “I’ve never done it before but I think it came out great”. Paul Brodie is good but I don’t think I’ve seen him do a lugged fork crown.
@jimg wrote “Anyone recognize those tubing blocks?”
I didn’t watch the vid where he shows them, but from the thumbnail you posted they look like Alex Meade. I have some and they’re well made, but I generally prefer the Paragon blocks, same price but you get more atoms of aluminum! More is better, right?
Yeah that’s the usual procedure. By the time the steerer is brazed, the heavy part of the crown between the steerer and blade is hot, ready to braze the blade. The coldest part of the crown, usually the remotest part from where you can point the flame, is the last to get up to brazing temperature. That deepest, thickest spot should be above the flow (liquidus) temperature before introducing the filler, so filler can go everywhere as soon as you start feedng it in.
I think some people are hoping that the filler going in is going to conduct the heat they need to get that coldest part of the crown up to temp. Theoretically, that could help, a little, but it’s too little too late in most cases. When the “wavefront” of filler going in hits the cold spot, it freezes and doesn’t go any further, forming a wall that additional filler can’t get past. That’s how I imagine it anyway, I’ve never “been there” (inside the crown) to see it with my own eyes.
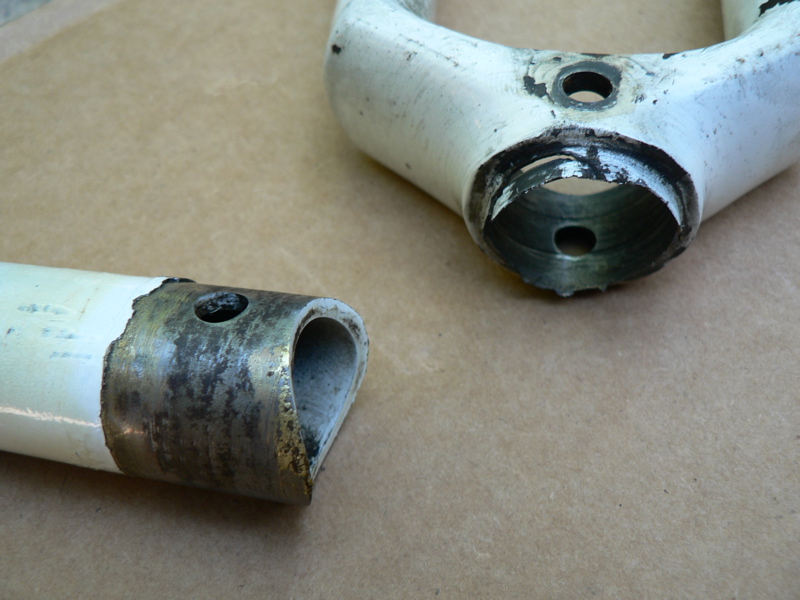
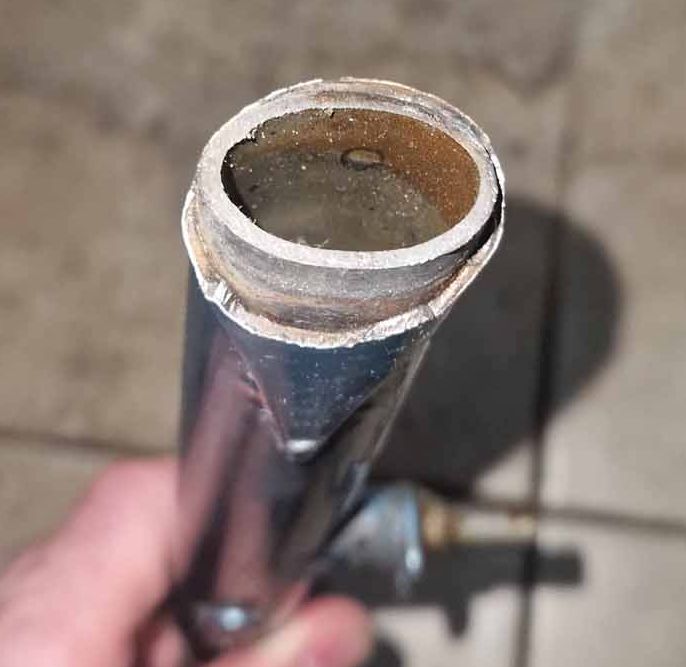
I wouldn’t ride a fork brazed by someone who hasn’t destructively tested at least a half dozen or so forks without a fail. Try pulling them apart in a vise with a cheaterbar, and also hacksaw through them to see cross-sections. Any lack of penetration is a fail IMHO. Only after you can consistantly get full penetration everywhere, on every fork, are you ready to let someone else ride your fork.
Since this is so hard to achieve for a beginner, I recommend buying a fork rather than trying it yourself. Unless you have proper instruction (class or apprenticeship) where an experienced guy gives feedback in real time, you’re likely to make bad (potentially unsafe) forks.
That YouTube showing the fork assembly was painful, and painful to watch as well. I hope no one takes a page from it.
I’ll second everything Bulgie wrote in his comments.
As far a fork brazing and videos go, the only ones I recall seeing that give a glimpse into how it should be done were made ?? years ago by Brent Steelman.
Maybe seven years ago, Vernor and I were in my studio for a shoot and he did this quickie but unfortunately there’s little there to use for inspiration.
Just watched that again, very enjoyable! I note that he takes about 8 minutes, which I consider good. I have brazed them in as little as 2 minutes but that was on a carousel with a pre-heating station, and brass preforms for both the blades and the steerer, not practical for most people. Though time-at-temperature is importand with quicker being better for the steel, 8 minutes is still a very good strong fork. Probably strong enough to bend your TT & DT if you run into a parked car! No sense in making them any stronger than that.
The crown he brazes there is way easier than the one in the earlier amateur video, the one that made me say “ouch!” Easier because it’s fully-sloping, so the crown sockets aren’t directly across from the steerer, and because it’s hollow, so no big chunk of cold steel at the center that takes a lot of heat-soaking to get filler to flow there. So that would be an excellent crown for an amateur. Nothing wrong with it for a pro either, not throwing shade — it’s just a good crown period, though not my favorite aesthetically.
Just one more note for any amateurs reading this: I agree with the choice of a rosebud tip, but be aware that you shouldn’t run such a big flame on acetylene unless you have a large bottle. Acetylene has a maximum safe withdrawal rate, that’s a percentage of the bottle size, so big tips require big bottles. Read up on the withdrawal rate for acetylene, and do the math, it means a pretty small flame with hobbyist-size bottles.
I strongly suggest propane, which has no such limit. I like a flame considerably larger than what Brent is using in that video (but a bit lower flame temperature with propane), and even then I start with two torches, and only set the second one down on its Gas Saver switch when it’s time to wield a hammer or hold a filler rod in that hand. Git 'er done!
I can just about guarantee that crown has inadequate penetration.
At least he’s using brass, which is safer than silver if you’re going to under-braze a crown.
The video is 7 years old. If that fork held up this long (big if), it’s a testament to how overbuilt most brazed forks with lugged crowns are. We’ve seen some that fell apart decades later and it turned out the steerer wasn’t brazed at all or just a tiny bit, with the brake centerbolt being the main or only thing holding it together. Note, I don’t recommend that!!
Fun sidecar concept.
A bit scary if you lean too hard to the right and the corner of the box hits the ground, or even worse; snags if hitting uneven ground.
Re: Apogee, he mentions frames welded by a subcontractor in Seattle. Anyone know who that is?
Thanks for posting that, very entertaining.
I’m pretty ignorant about sus design, but isn’t a single pivot considered kinda retro? No way to tune the path that the rear axle takes through the range of motion, other than where you place that single pivot, right? I get that they made it progressive, and maybe the axle path is unimportant. Over-hyped by makers of other designs with non-circular axle paths?
Concerning the kinematics: This is a slightly religious question, there’s no objectively definitive answer, just a lot of belief
My belief is that non-circular axle paths are not inherently better or worse than circular ones. With more links, you can have more control over certain characteristics of your suspension more independently, but it also gives you a lot more room to mess it up. And it is way more complicated to fabricate.