What spec tubing do you use for the segments that go from the legs to the crown?
What spec tubing do you use for the crown piece (or are these crowns available somewhere)? In the drawing I specified a 35mm OD because BFS sells a crown race with a 35mm OD on the lower shoulder.
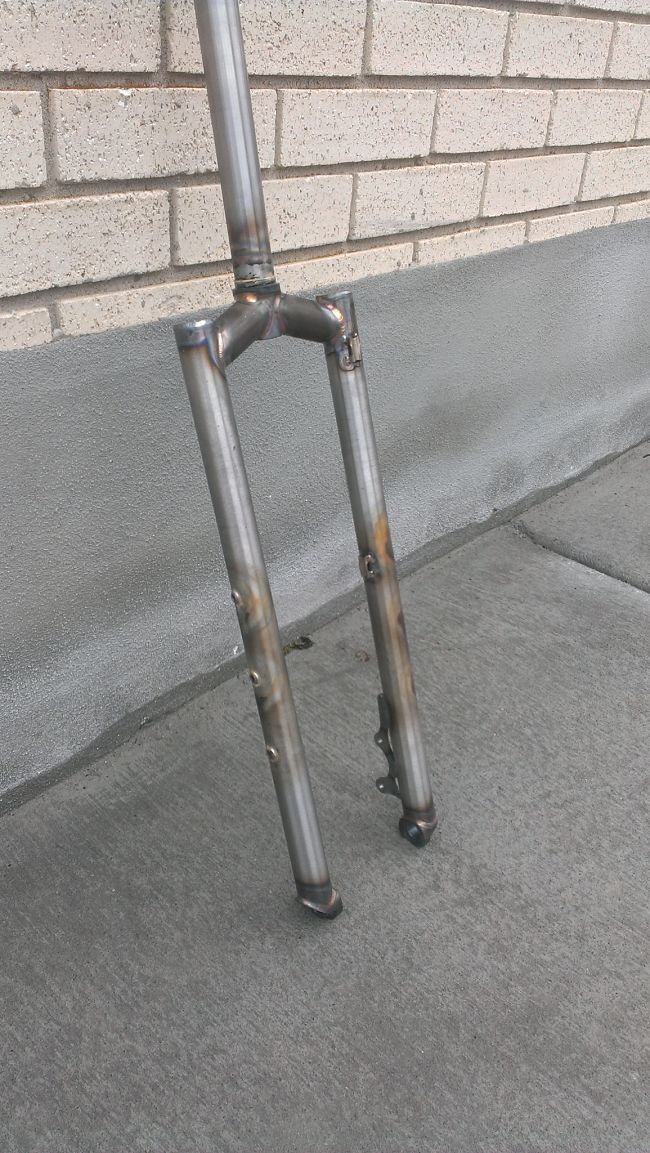
How do you create the offset for a straight leg fork as shown? In my drawing I have the offset accomplished by rotating the fork legs relative to the segments, which are in plane with the head tube. I think there are multiple ways of accomplishing the offset, such as rotating the segments forward and keeping the legs parallel with the head tube, or having a little bit of both leg rotation and segment rotation. Is there a best practice way? Is there a most straightforward way?
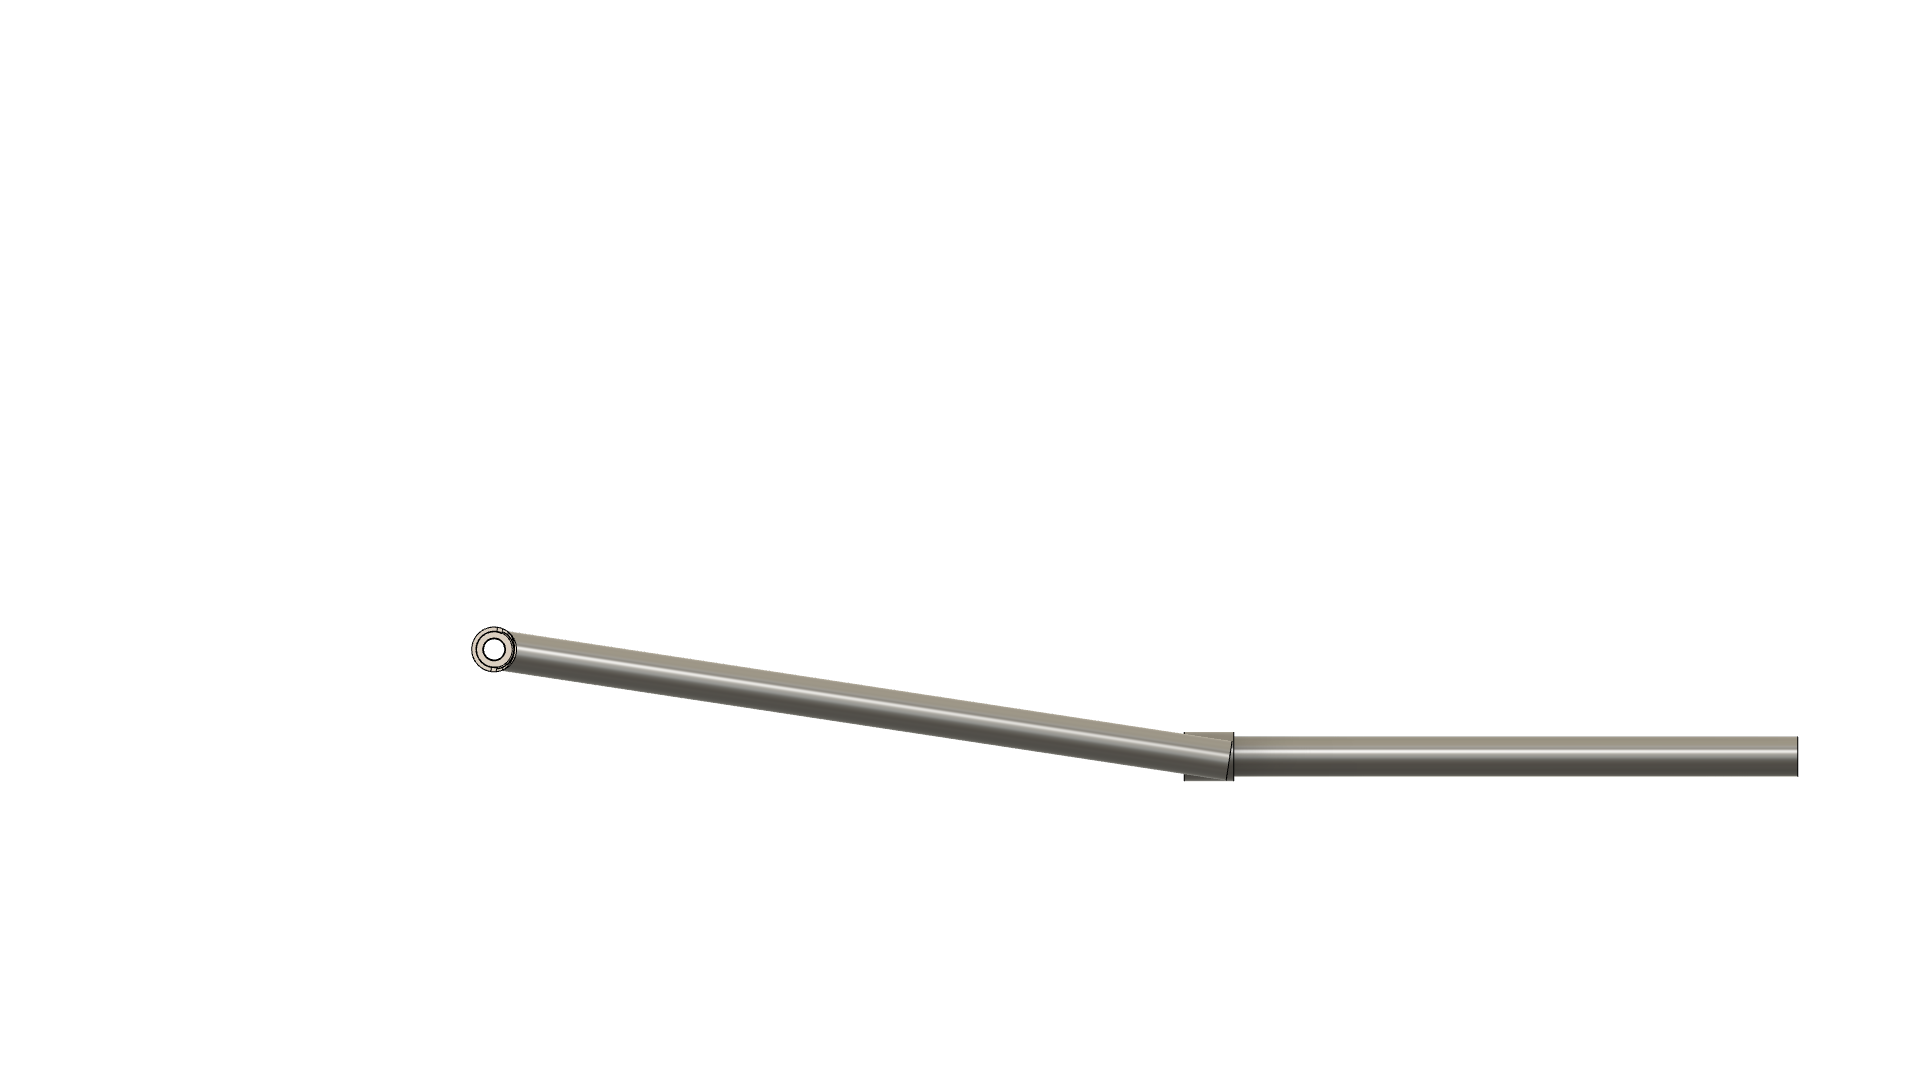
The dropouts I spec’d don’t have much surface area showing where the legs meet the dropout hood. Is this an acceptable amount of surface for fillet brazing? Is there a better and affordable dropout option with a larger hood for use with Walt’s fork legs?
I am curious about the choice of the 1 1/8 steerer. I love the classic look, especially with a smaller headtube, but if you are swapping with an Mtb fork, why not just used a tapereded steerer? I am assuming you are using an EC44 lower cup. It looks pretty ugly with a straight 1 1/8 steerer IMO.
From an engineering perspective, the designs make no difference. I think the biggest driver is how you plan on mitering and fixturing the design. If you have to do some sketchy fixturing and mitering, it sucks and could compromise the strength of the joints and allignment.
I have a bad habit of trying to do everything perfectly the first time. It could make sense to go with the easiest method first!
If you come up with a design you like, i can create a quick tutorial that shows how I would design and dimension a fork in Fusion. Please don’t make my life too hard
1 - for mtb forks I use 1.125x.049 or 1x.058 depending on the fork. The 1” is way easier to braze around since there’s actually a valley.
2 - I use PMW and engin steerers 99% of the time. No bonus work needed. I used a Reynolds super extra light steerer once and didn’t step up the lower section of crown to a larger size.
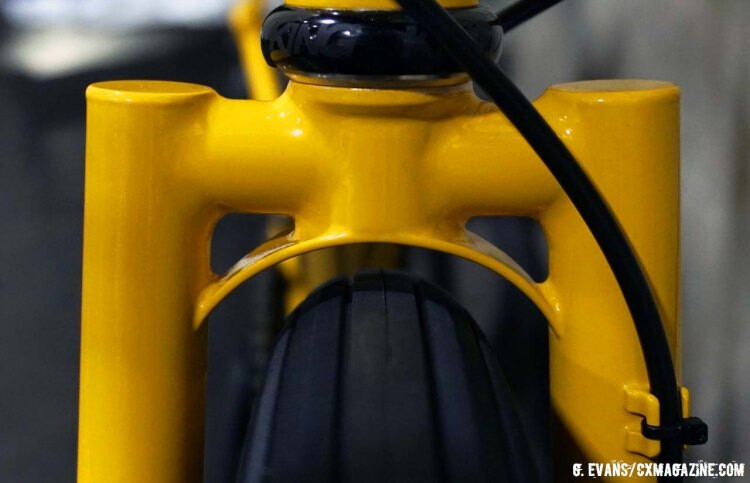
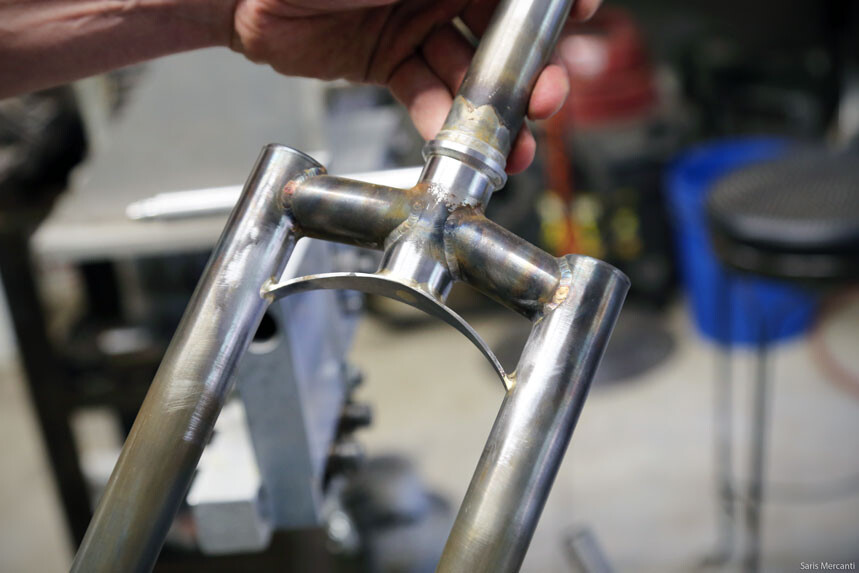
3 - I use a hybrid off offset in the leg and in the struts. I cut the leg end of my struts 5° off from the crown end. It’s a huge pain in the ass but looks great.
4 - the amount of dropout showing is minimal but works.
Bonus content - the longest I’ve been angle to do with Walt’s legs is 520mm a-c. Braze the brake on before you braze the legs to the struts or crown. Flat mount front DOES NOT work with non-tapered legs (not mtb related but the people need to know).
@wzrd answered most of that stuff and I agree with all of it.
Couple things to note:
-Don’t skimp on the crown pieces/segments. Yes, you can save 10g by going tiny/thin, but it’s not worth it.
-With my fork blades (about 65mm of thick section at the top) please please please don’t get fancy and attach extra stuff to the bottom of the fork crown below the butts. This is a recipe for a broken fork.
How you accomplish the offset is mostly a matter of preference/aesthetics, though your process for making the crown pieces may influence your decision as well. I walked the guys at Caletti through my way of doing that a while back and I can do the same here if needed, just let me know.
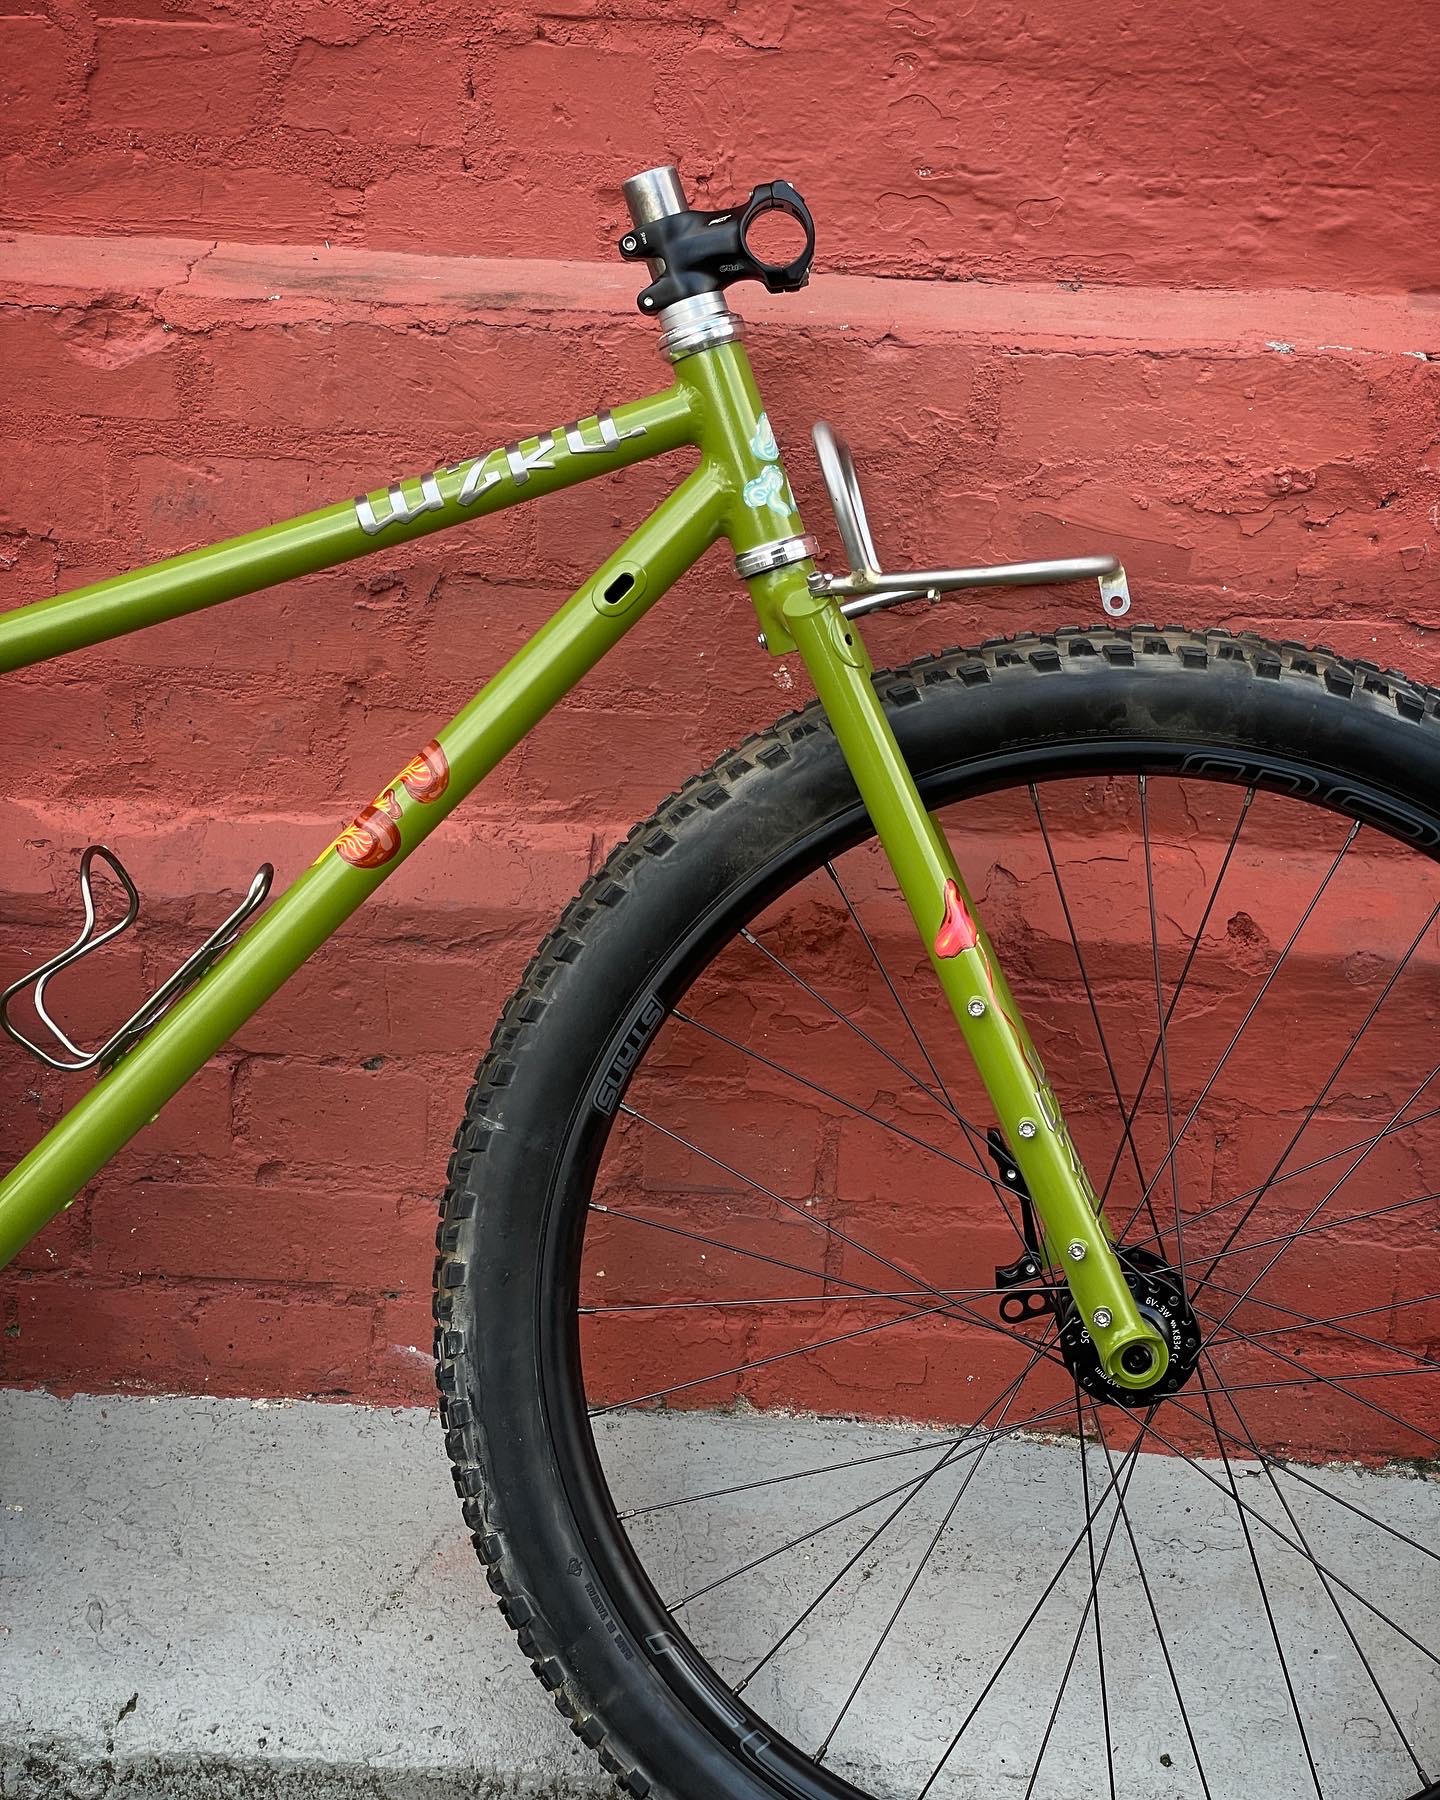
Thanks for the inspiration, those are quite nice indeed and I’ve been eyeing over @wzrd’s forks since they started making them, so nice.
For the straight steerer, you’re probably right I should just go with the tapered. I would be using a 44mm straight head tube most likely. Now that I see PMW lists their steerers under ‘stem parts’ haha, it’s all coming together.
A tutorial would of course be great, but I was able to put lots of the stuff I learned from your frame tutorial to use on this one!
Wondering how you go about testing the strength of forks at 520 A-C. I ordered a custom hardtail a couple years back and discussed the idea of a suspension corrected rigid fork to go with it (130mm so 510 A-C sagged) and the builder was very hesitant.
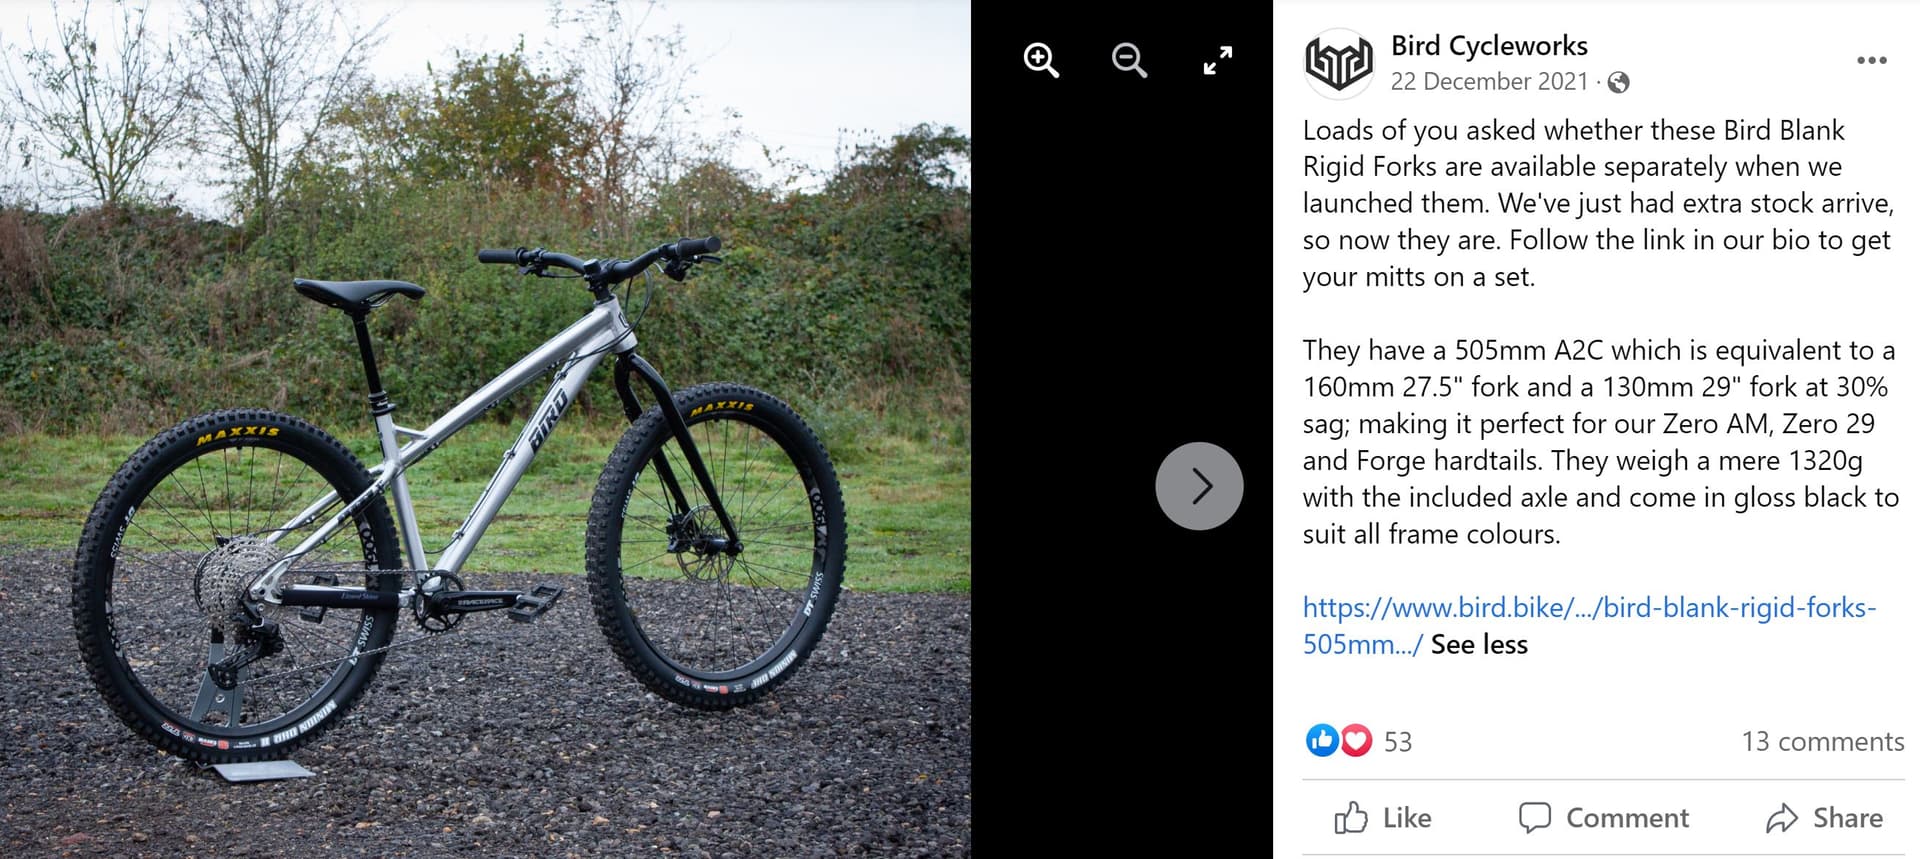
At the time the longest off the shelf option we could find was a 483mm A-C Surly KM/Krampus fork so that’s what was recommended. I recently saw that Byrd did a run of forks at 505 A-C and I’d assume they’d been tested (no longer listed on their site but there’s a screenshot below with details). These are all unicrown design so a bit off topic sorry.
I totally missed PMW’s steerers because they’re in ‘stem parts’ lol
Your forks look great, I appreciate the dedication to most aesthetically pleasing arrangement. Great info. Good to know on the 520 a-c, brake before legs, and success with the PMW dropout.
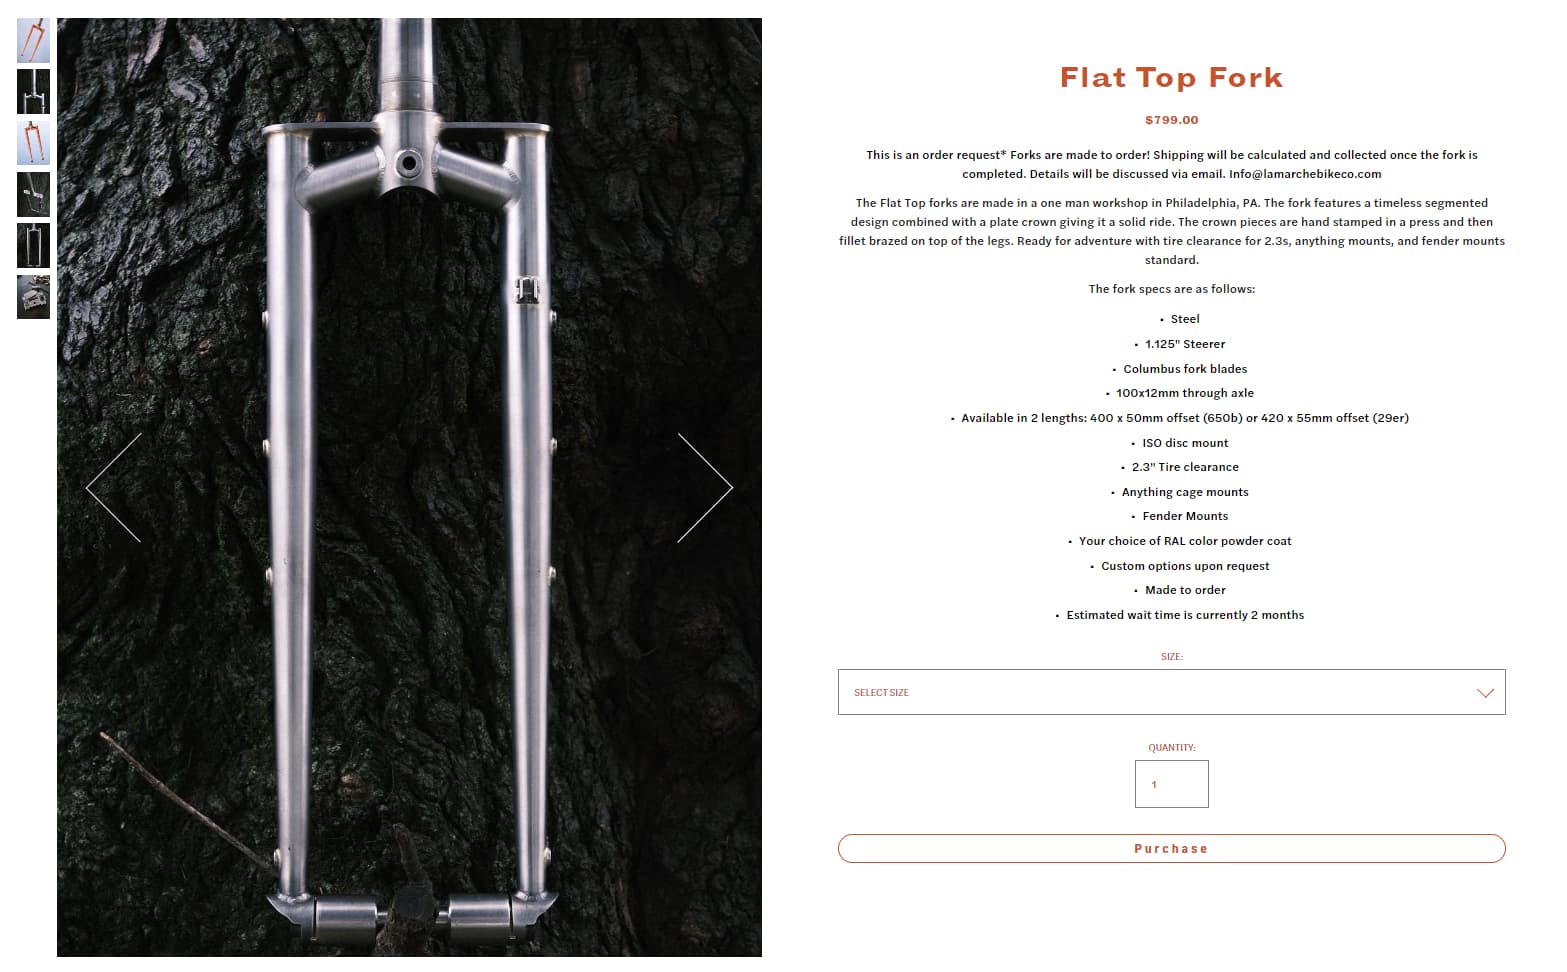
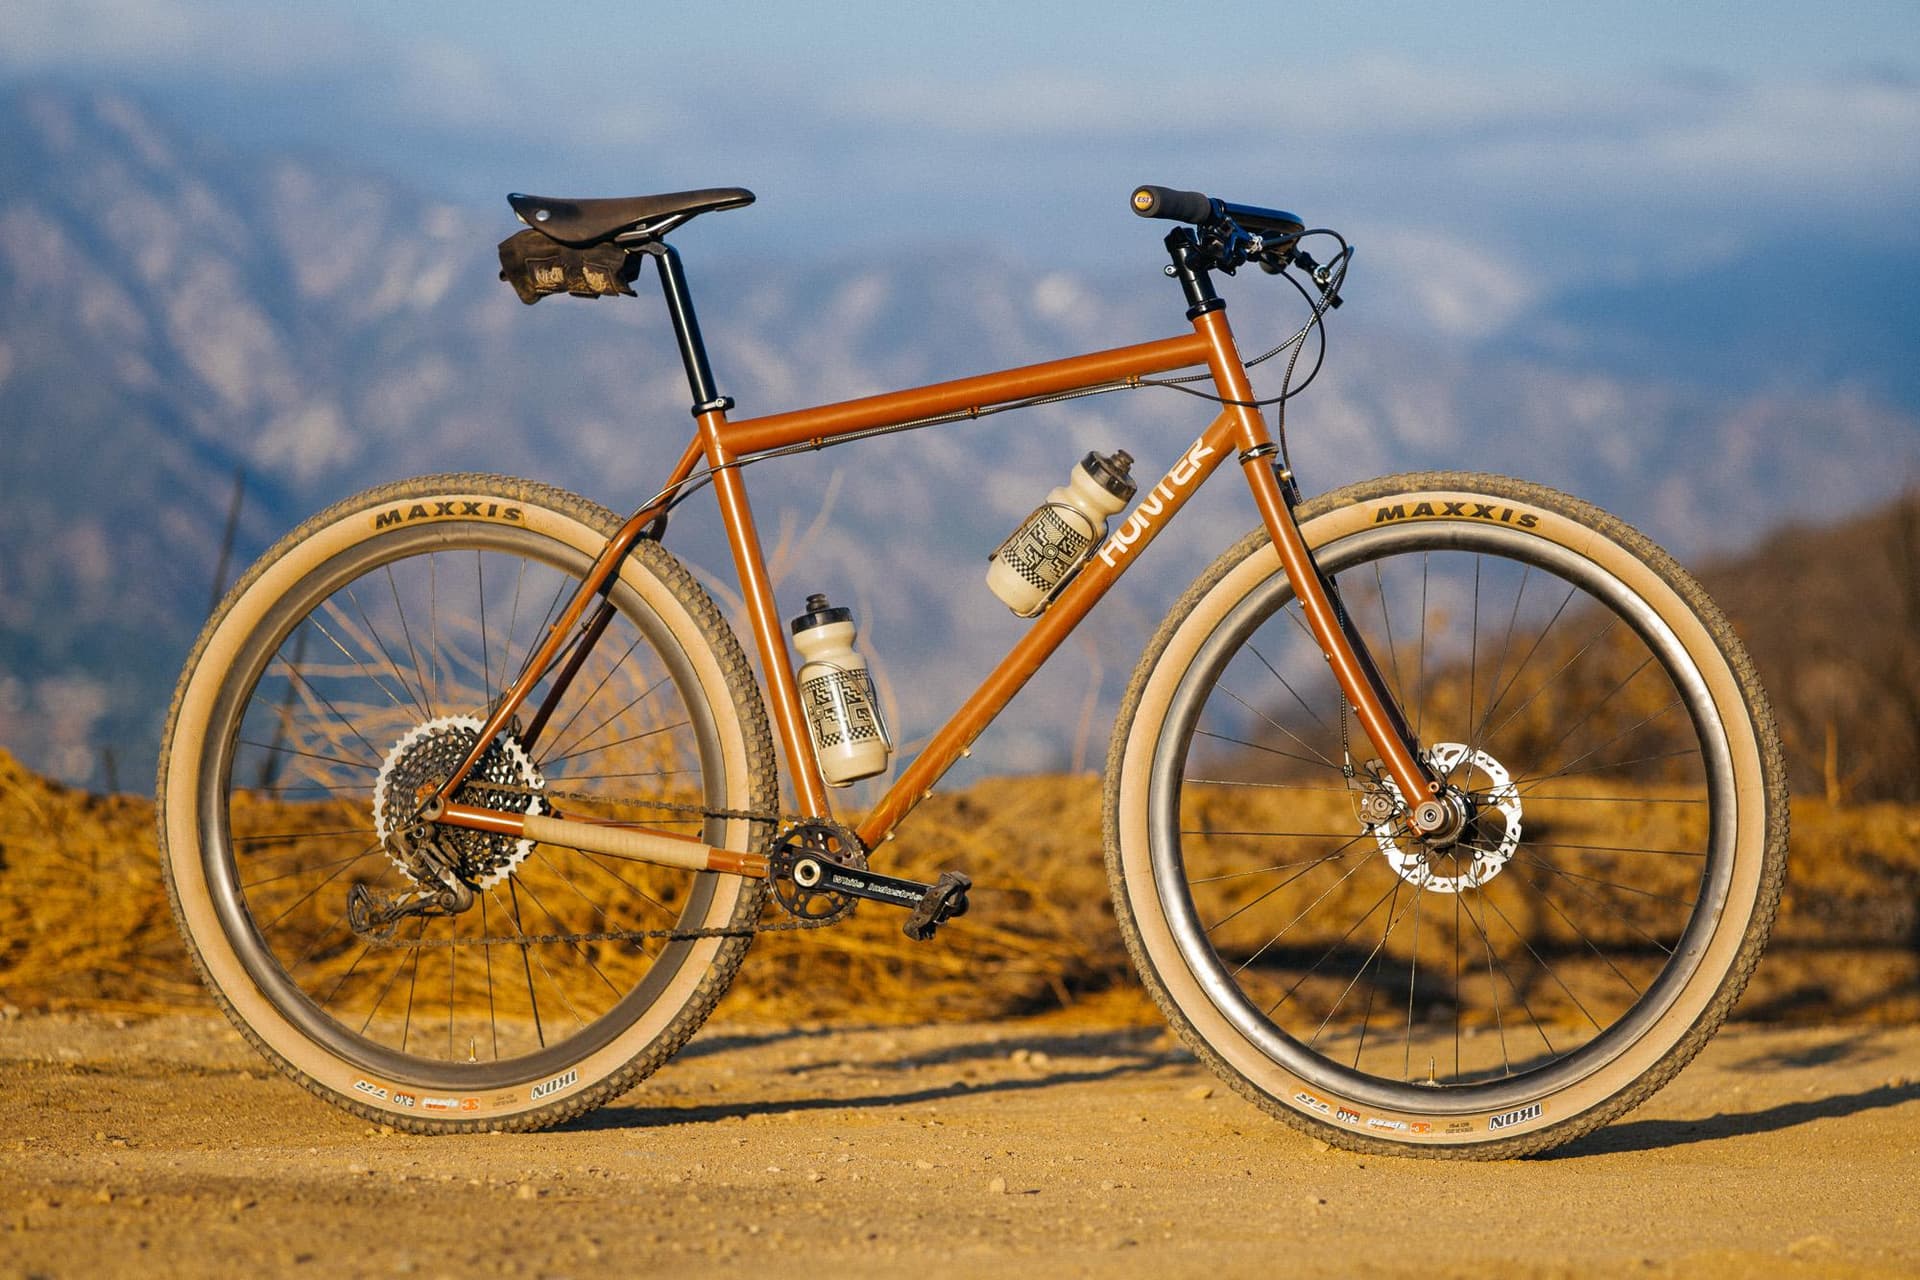
I switched the crown segments to 1 1/8" from 1", added a 1 1/8 to 1 1/2" PMW tapered steerer, and added a PMW willits style ISO brake tab.
I often refer back to the ISO disc tab standards so figured I would upload Magura’s ISO reference drawing here for posterity iso disc tab standard.pdf (82.5 KB)
Tapered steel steerers add about a pound to a fork for no functional benefit. I only ever use them for heavier riders and have really leaned into the straight steerers these days.
I’ve always been scared to build forks longer than 480ish but it sounds like other folks here have had good success with it?
Of all the mtb forks I’ve build I think I’ve only built one or two that are below 500mm haha
Most of the forks I build are to be hot swapped with 120-140mm 29er forks, hence the length and the 1.5 steerer. If I’m building a rigid frame + fork - 1 1/8 steerer / head tube and short a-c for sure!
Cool. I mean a lot of customers ask for them too… having the 1-1/8" to 1-1/2" base plate on your rigid fork is an easy way to swap them real quick and you don’t have to pull the race every time you swap.
So you’re saying there’s a base plate that allows you to use a straight steerer with a 1-1/2" lower headset? I figured there was a significant weight difference, but didn’t realize a full pound.
I think a pound is an exaggeration. Looking at the Bikefabsuppy items, the weight difference looks to be in the ballpark of 60g between the tapered option and a non-tapered 2.1/1.6 normal gauge steerer.
Regardless, 1 1/8 is lighter and simpler. There are 2 problems:
-Customers hate the look of the small crown and huge headset cup. Yes, you can swap to an internal bearing headset. Most people don’t want to swap headset cups all the time, though.
-I (and a couple of other long time builders who I’ll let chime in if they’d like) have actually had people break (yes, break!) even pretty beefy 1 1/8 steerers on longer suspension corrected forks. This is super, super rare but it makes you pretty gunshy.
This is precisely what I have been working on as well after fumbling through the bike frame tutorial. I’m waiting on a quote to get the segments laser cut.
If you have a mill or lathe or even a joint jigger type item you can make the segments yourself with a little effort. But laser cut works too, of course!