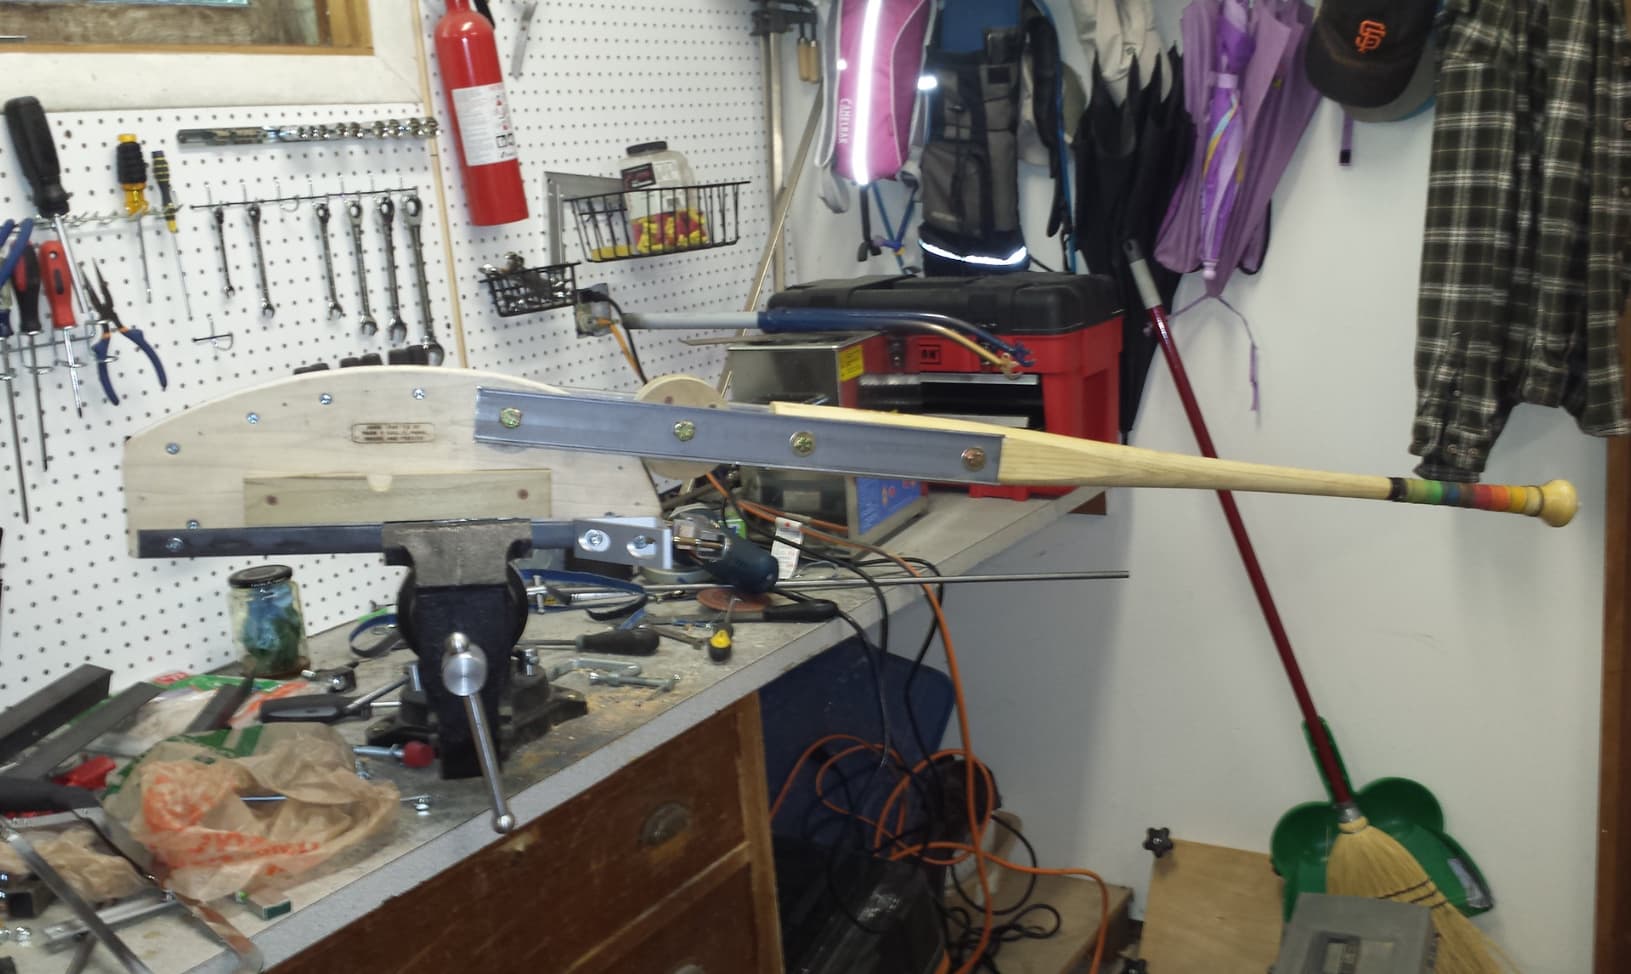
@jimg great idea! I love the wooden shovel (?) handle on your bender. Very classy haha.
I have been inspired by everyone’s DIY tooling on the forum, and it got me thinking. The state of frame-building tooling is always in flux. Unfortunately, a lot of great tool makers come and go along with their knowledge and product support. I think an open-source, community-driven, tooling and fixturing ecosystem be beneficial to amateur/hobbyist builders. Laser cutting services, 3D printing, metal 3D printing, and basement CNC machines are getting cheaper while people’s cad skills are getting better.
Last night I spent some time brainstorming a laser-cut, 3D printed, geared tube bender that uses hardware (gears, shafts, bearings) from FIRST Robotics: Gears — AndyMark
This might be relevant to the discussion. I modified a Pro-Tools notcher to use with a jig I made. The jig used 3d printed tube blocks and worked great. Bit cumbersome to setup but worked for the first couple frames until I got a mini mill.
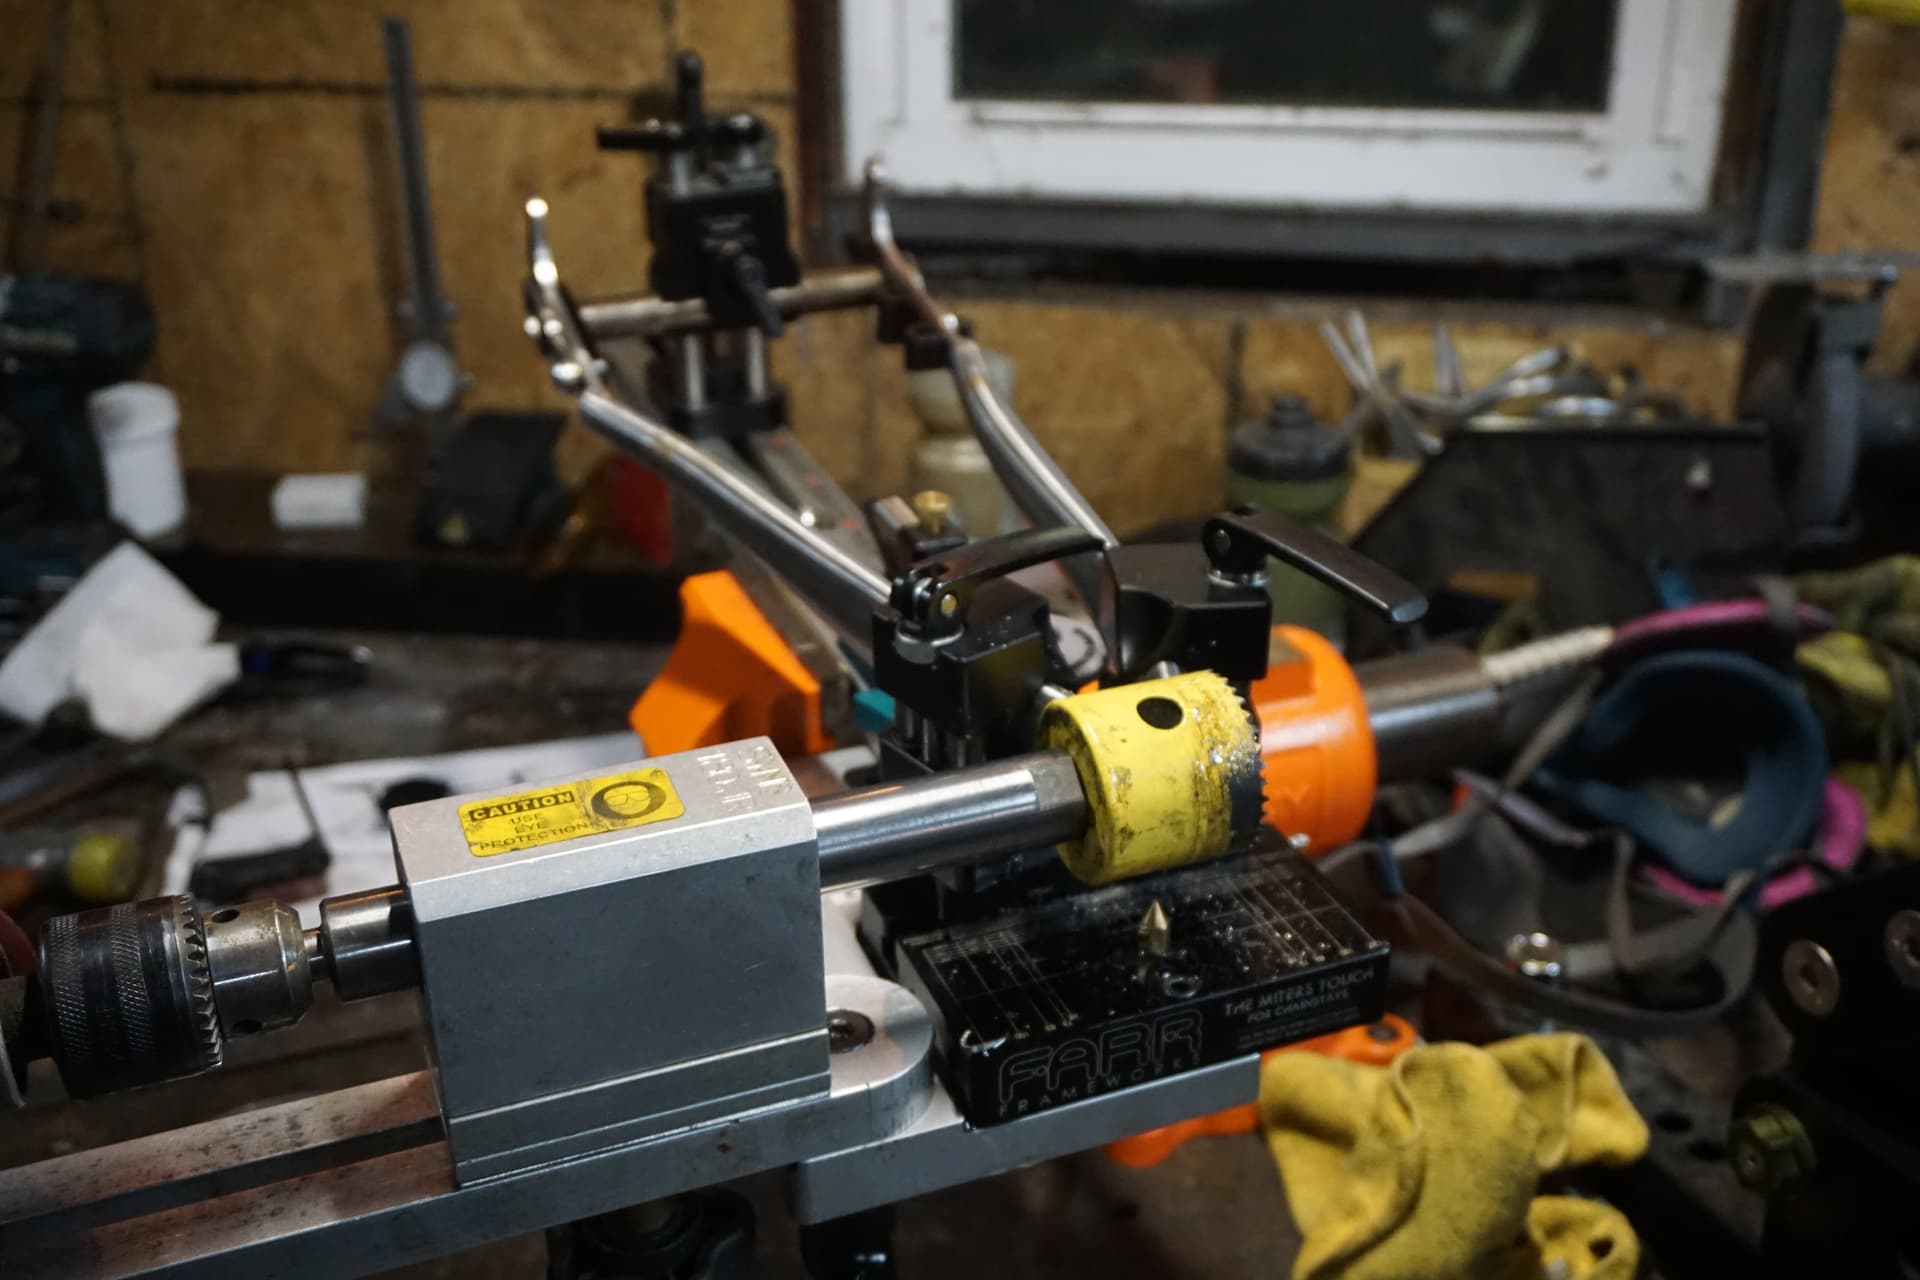
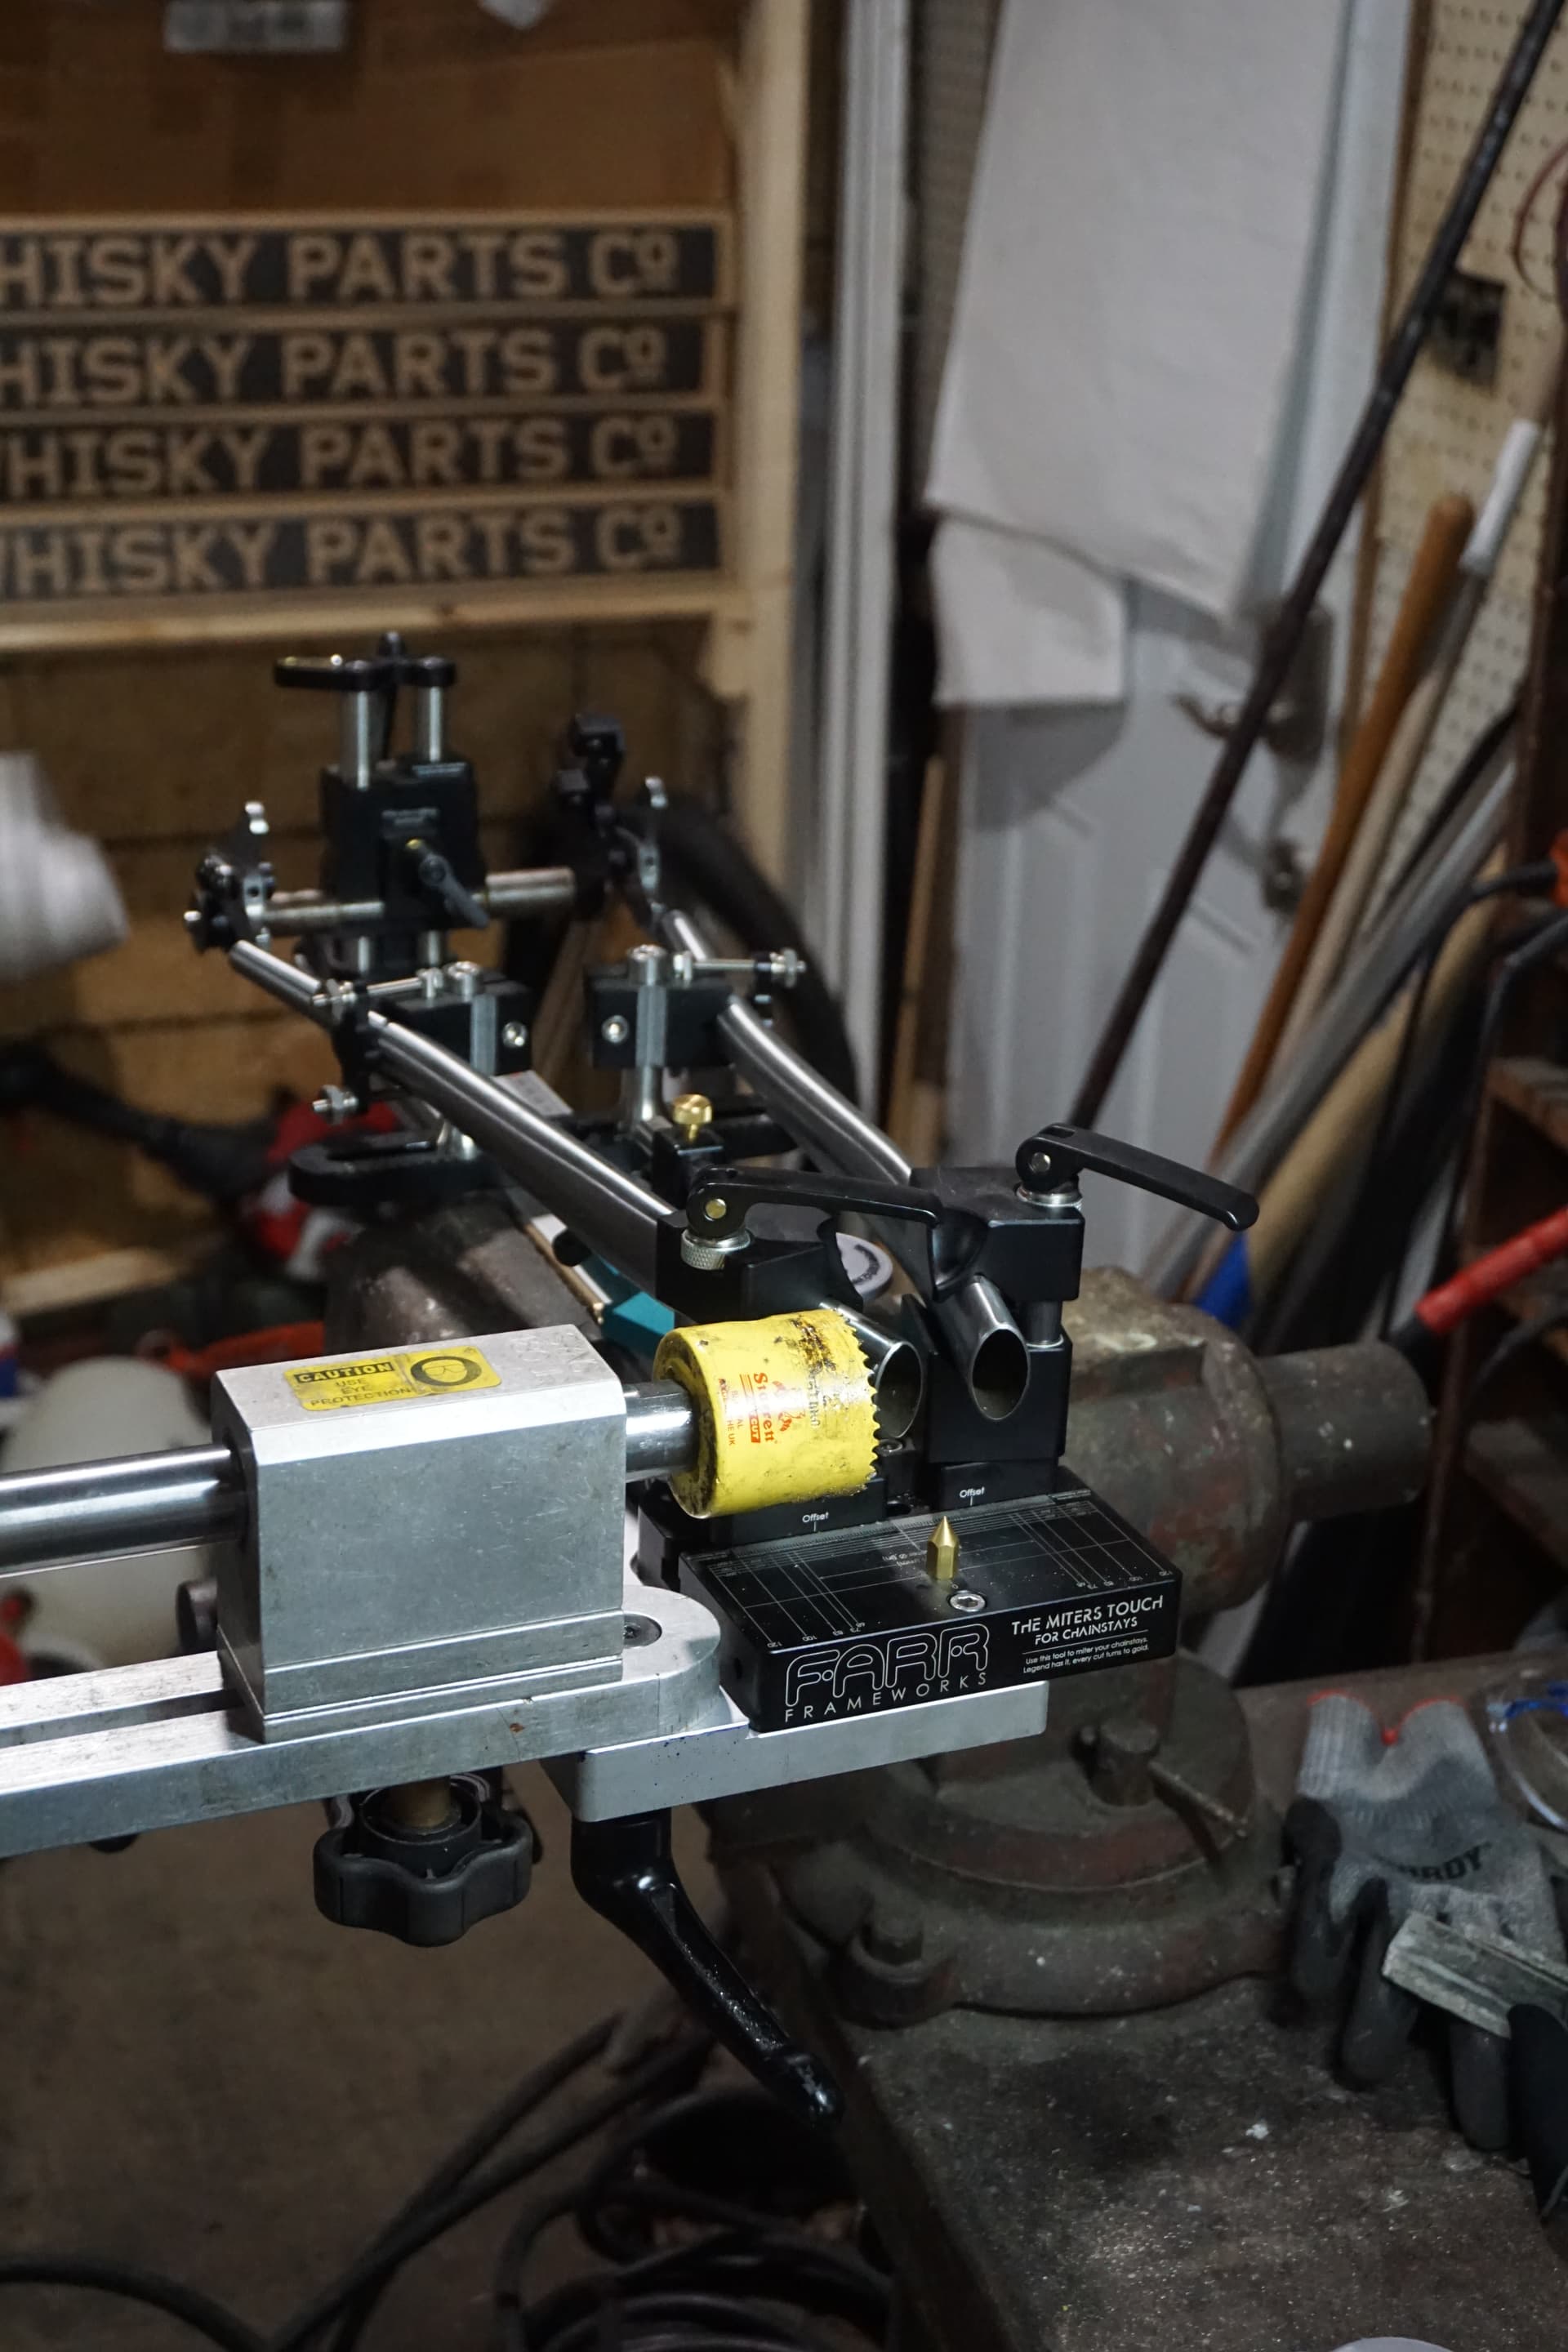
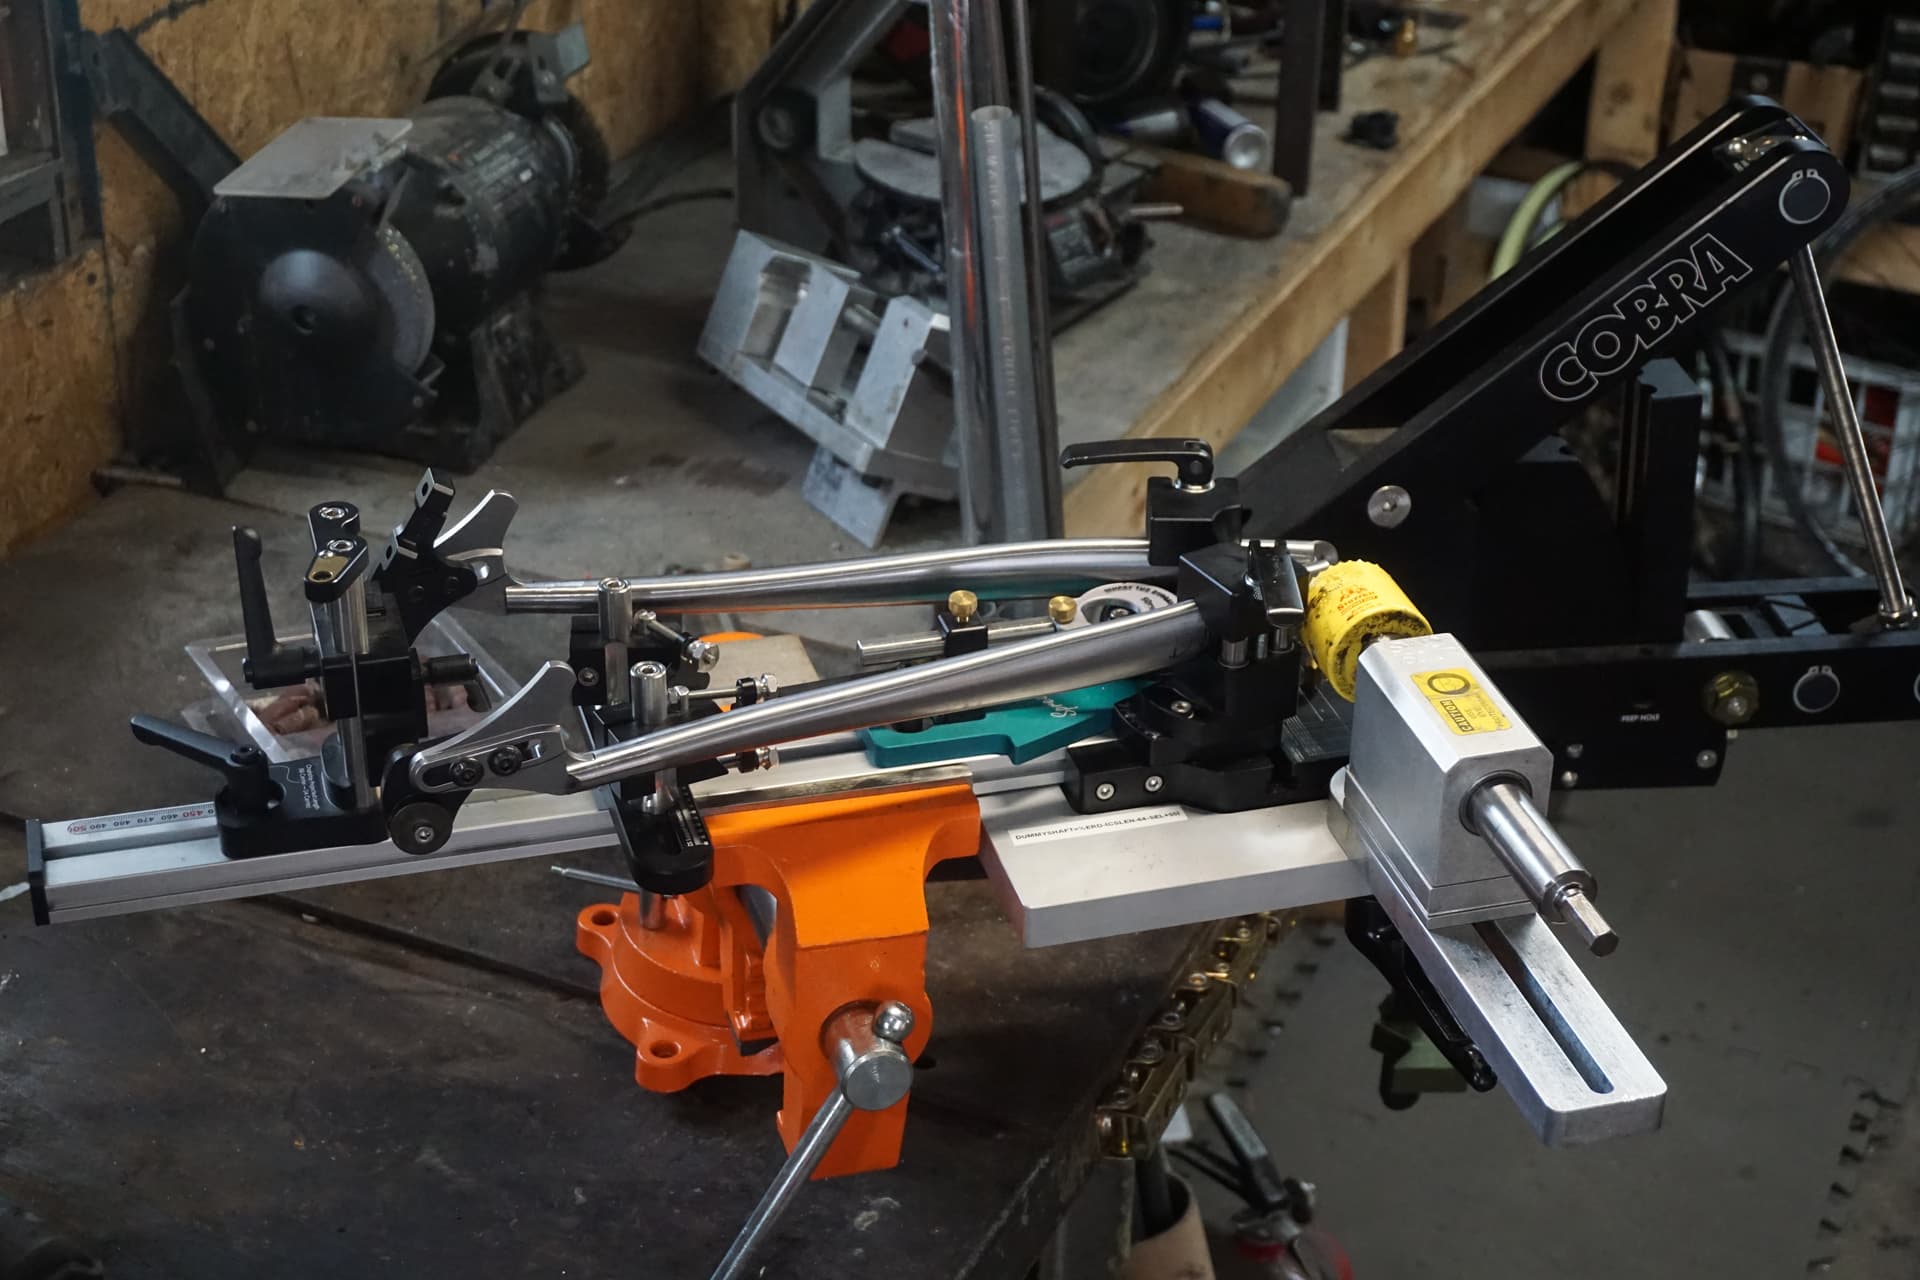
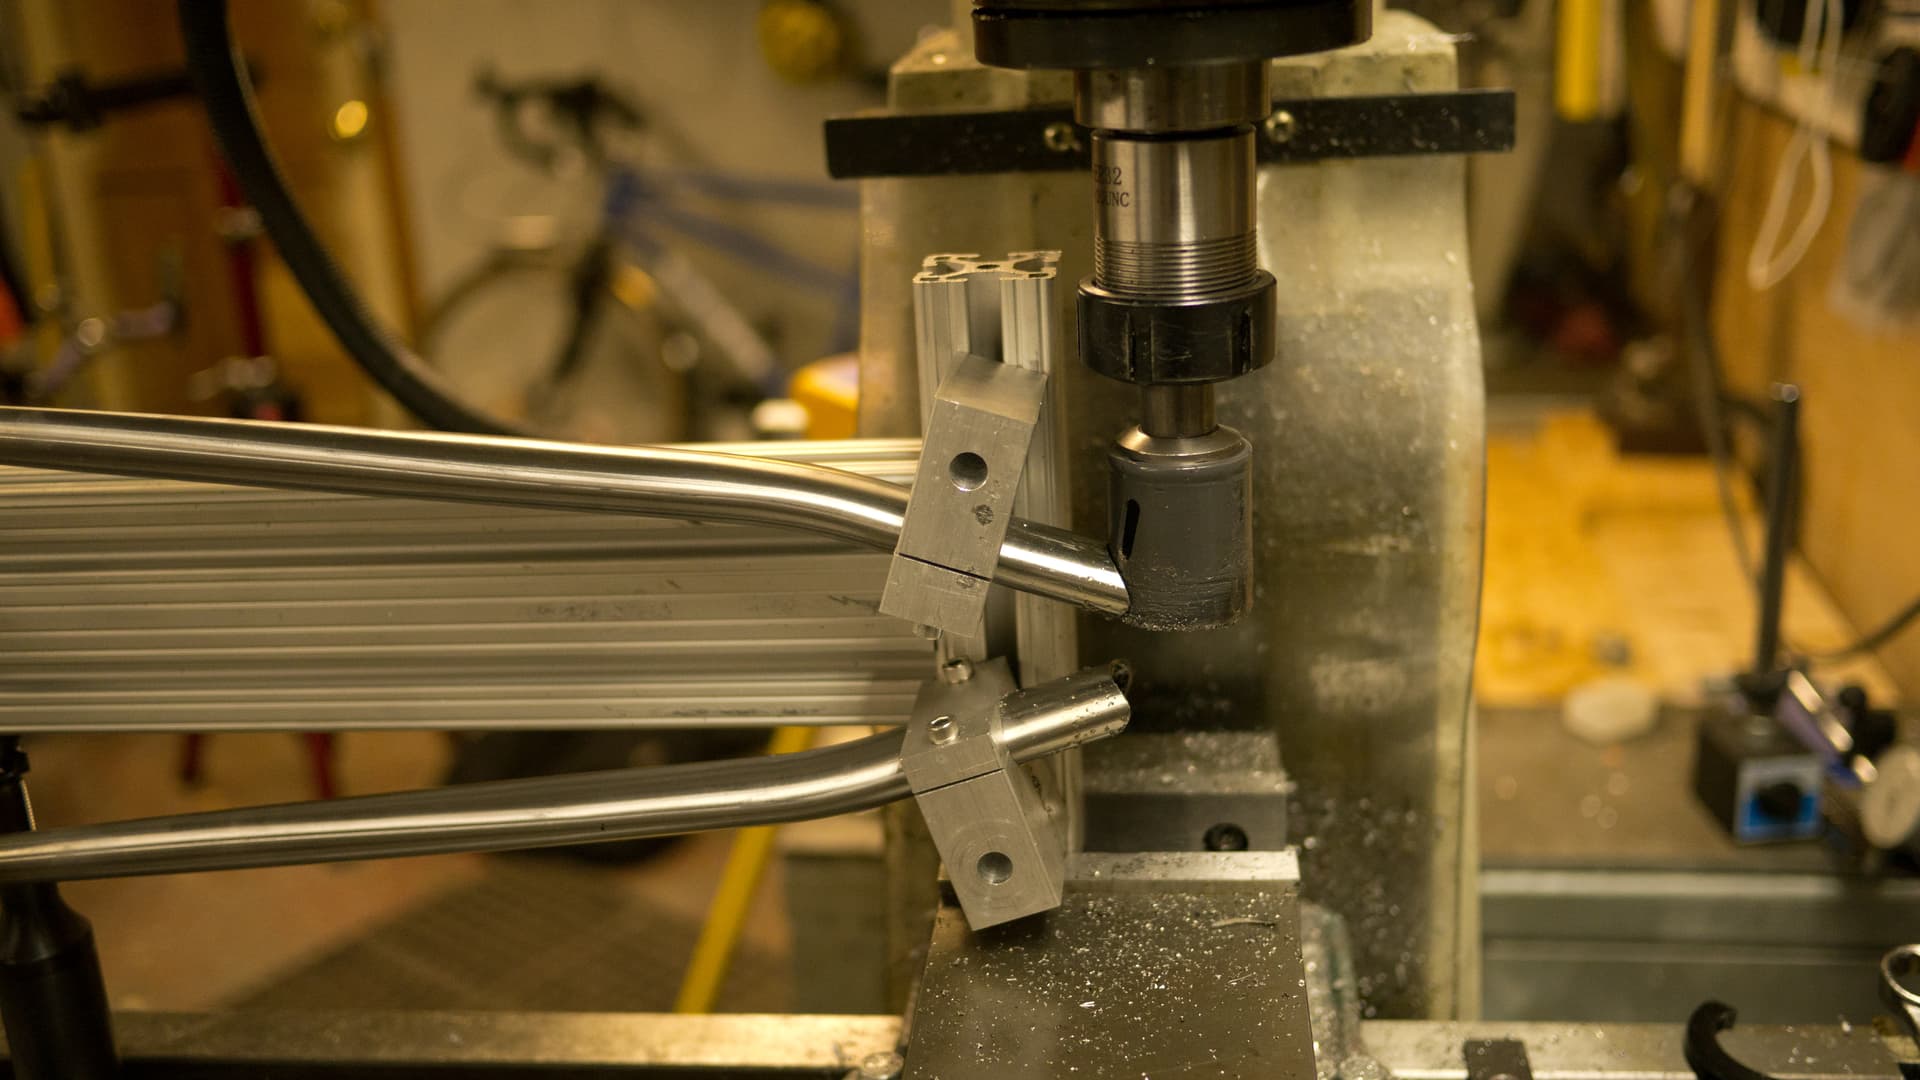
Tube notchers! When I look at these relatively inexpensive notchers I see the same issue as @anon91558591 with the tube clamping allowing for chatter. They also tend to run out of angle pretty quickly. The way the notcher is constructed with a long bushing, then a really long shaft with a hole saw on the end leaves additional room for chatter. The third issue to me (which was previously called out) out is the fact that there’s no way to control the feed rate. To me when working with thin enough tubing to make a bike out of, it’s pretty important to have good work holding, good hole saw holding, and some form of feed rate control. Fine tooth hole saws are a way to mitigate some of the issues of a tube notcher, but I still don’t think they really fix the rigidity issues which can result in notches being off center.
The work holding and hole saw rigidity issues of the inexpensive notchers available drove the design of the notcher that I made. Then when I needed to use it on bike tubing, it only took the saw grabbing one time to know that it needed a feed screw.
@Mikesbikester I am curious how your feed mechanism works. Do you hold a cordless/corded drill in one hand, and feed with your other? Or does the drill somehow hold itself from twisting?
@Daniel_Y thanks! That wooden handle was made by a friend who is a hobby woodworker. I got the idea from a friend of mine (Mark Guglielmana) who built a fork bender and used an old baseball bat as the lever – Babe Ruth of fork rerakers | Flickr
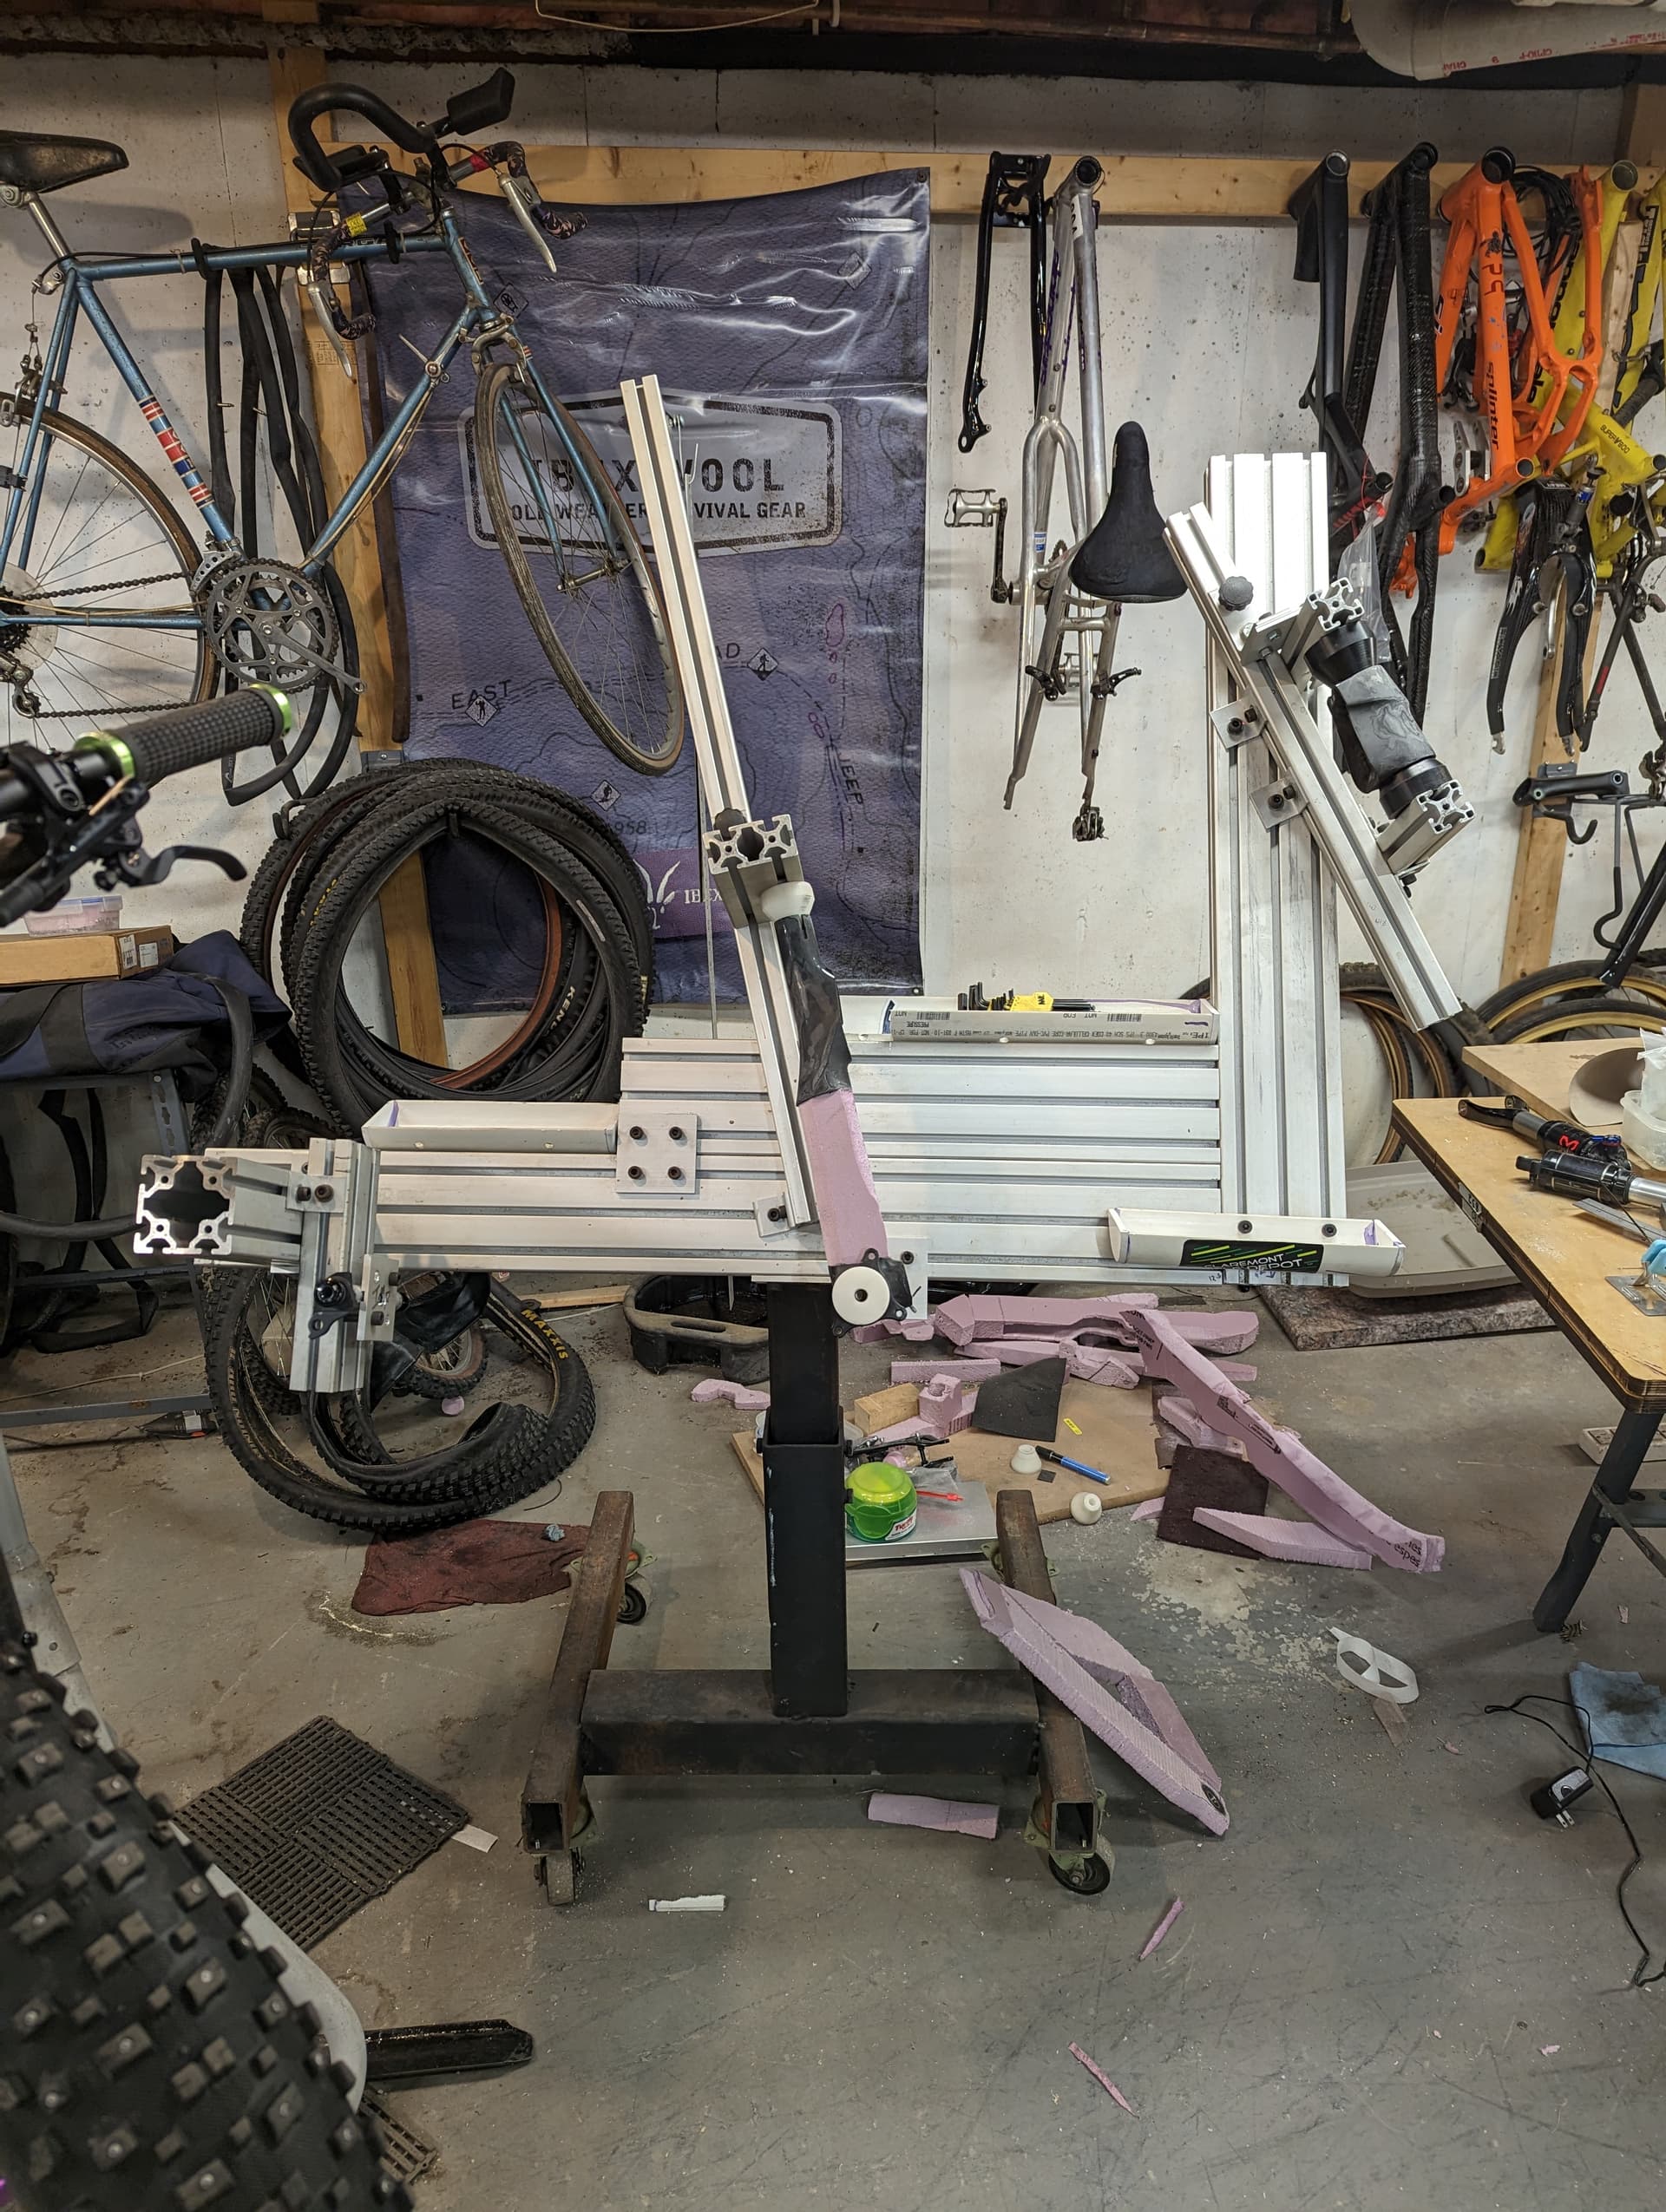
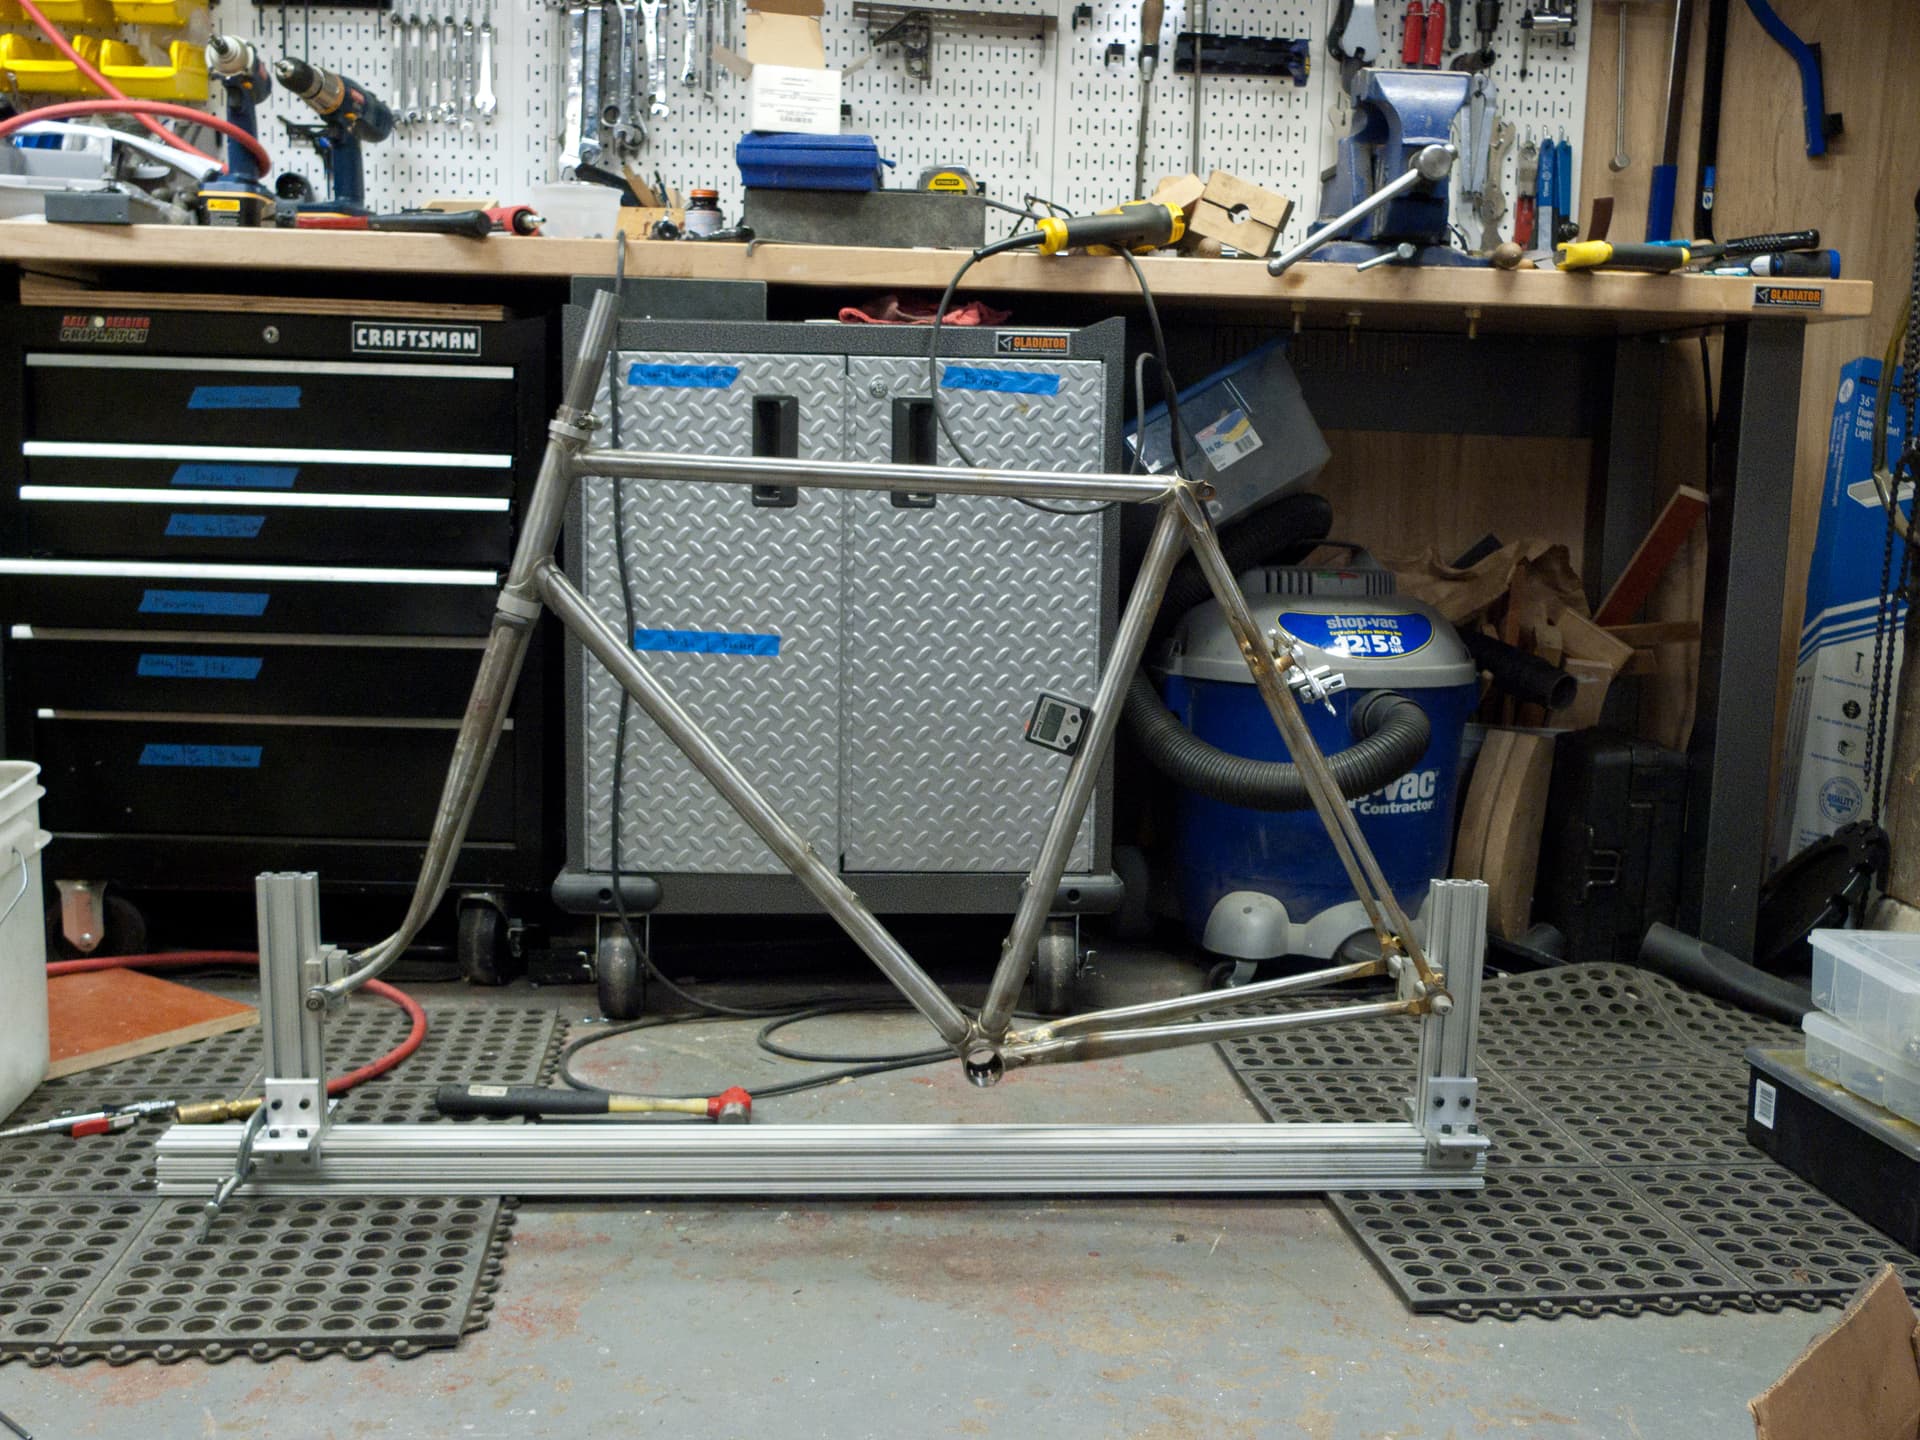
The only real tool I have built for frame building is my frame jig. I have had it for years now, but have never built a frame on it. One of my friends has built 2 frames on it and it has assisted in me repairing 3 majorly damaged carbon bikes.
It is mostly 80-20 with some custom bits and a super heavy steel base.
Twin blade hacksaw for slotting stays for dropouts. Drilled out spots where the blade attached to use a screw and nut, with some washers for spacing to 5 mm outside width. Always correct width and parallel slots for plate style dropouts.
I made an Arctos clone fixture. @hahn_rossman has it at his shop right now and might have better photos. This was my second real fixture, JimG has the first one. The build photos are here:
I sold kits for about 10 of these fork fixtures and still use one. Jeff Lyon is the one who put the idea in my head based on things that he didn’t like about his prior fixture. Mark Bulgier, Hahn, and a few others also gave me useful feedback.
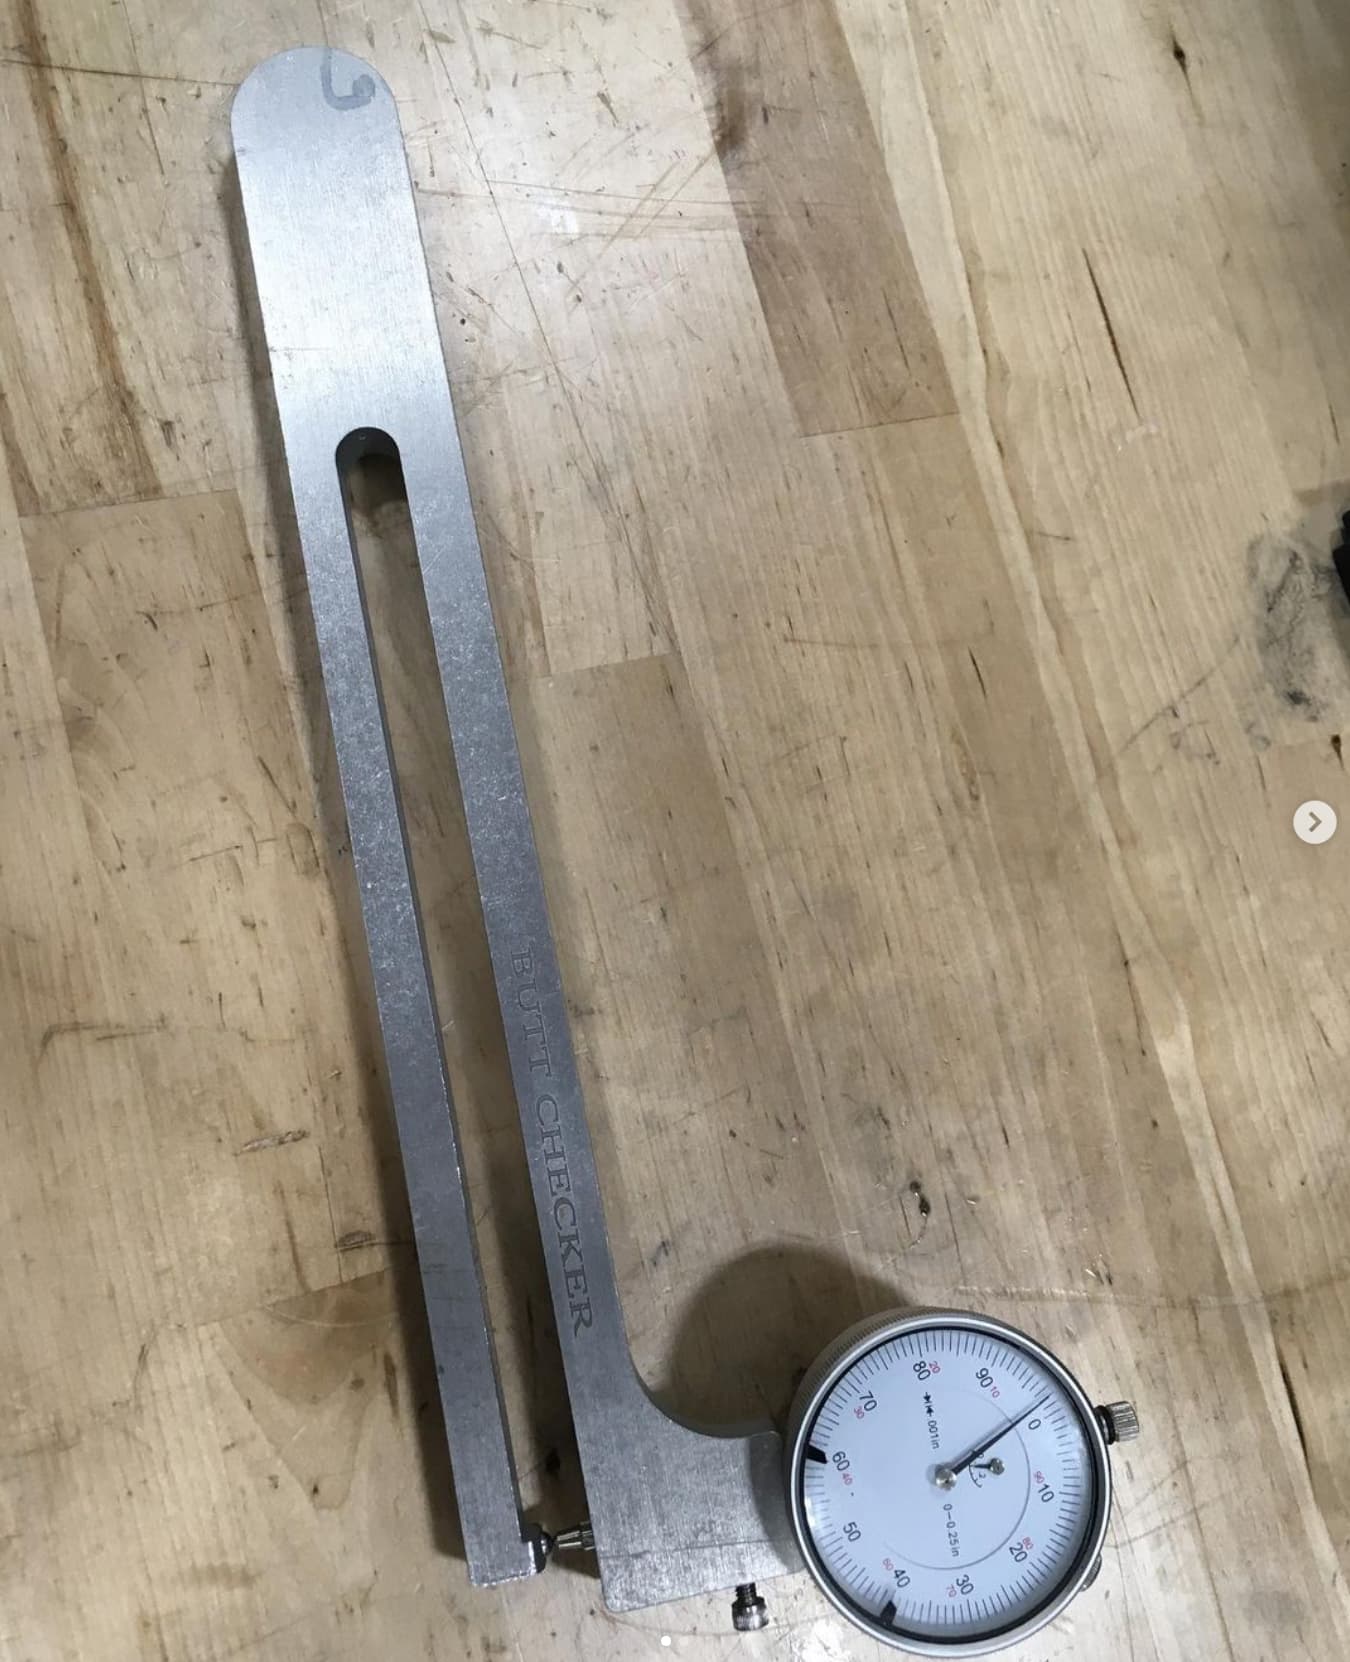
I made the first batches of the Frame and Fork alignment gauges that Hahn now sells. Mine were aluminum and made on a light duty Taig CNC mill, he makes nicer steel ones on a real VMC. Martin Tweedy gets all of the credit for the original design. I thought I’d sell a couple dozen, but filled over 100 orders in the 6 months that I offered them.
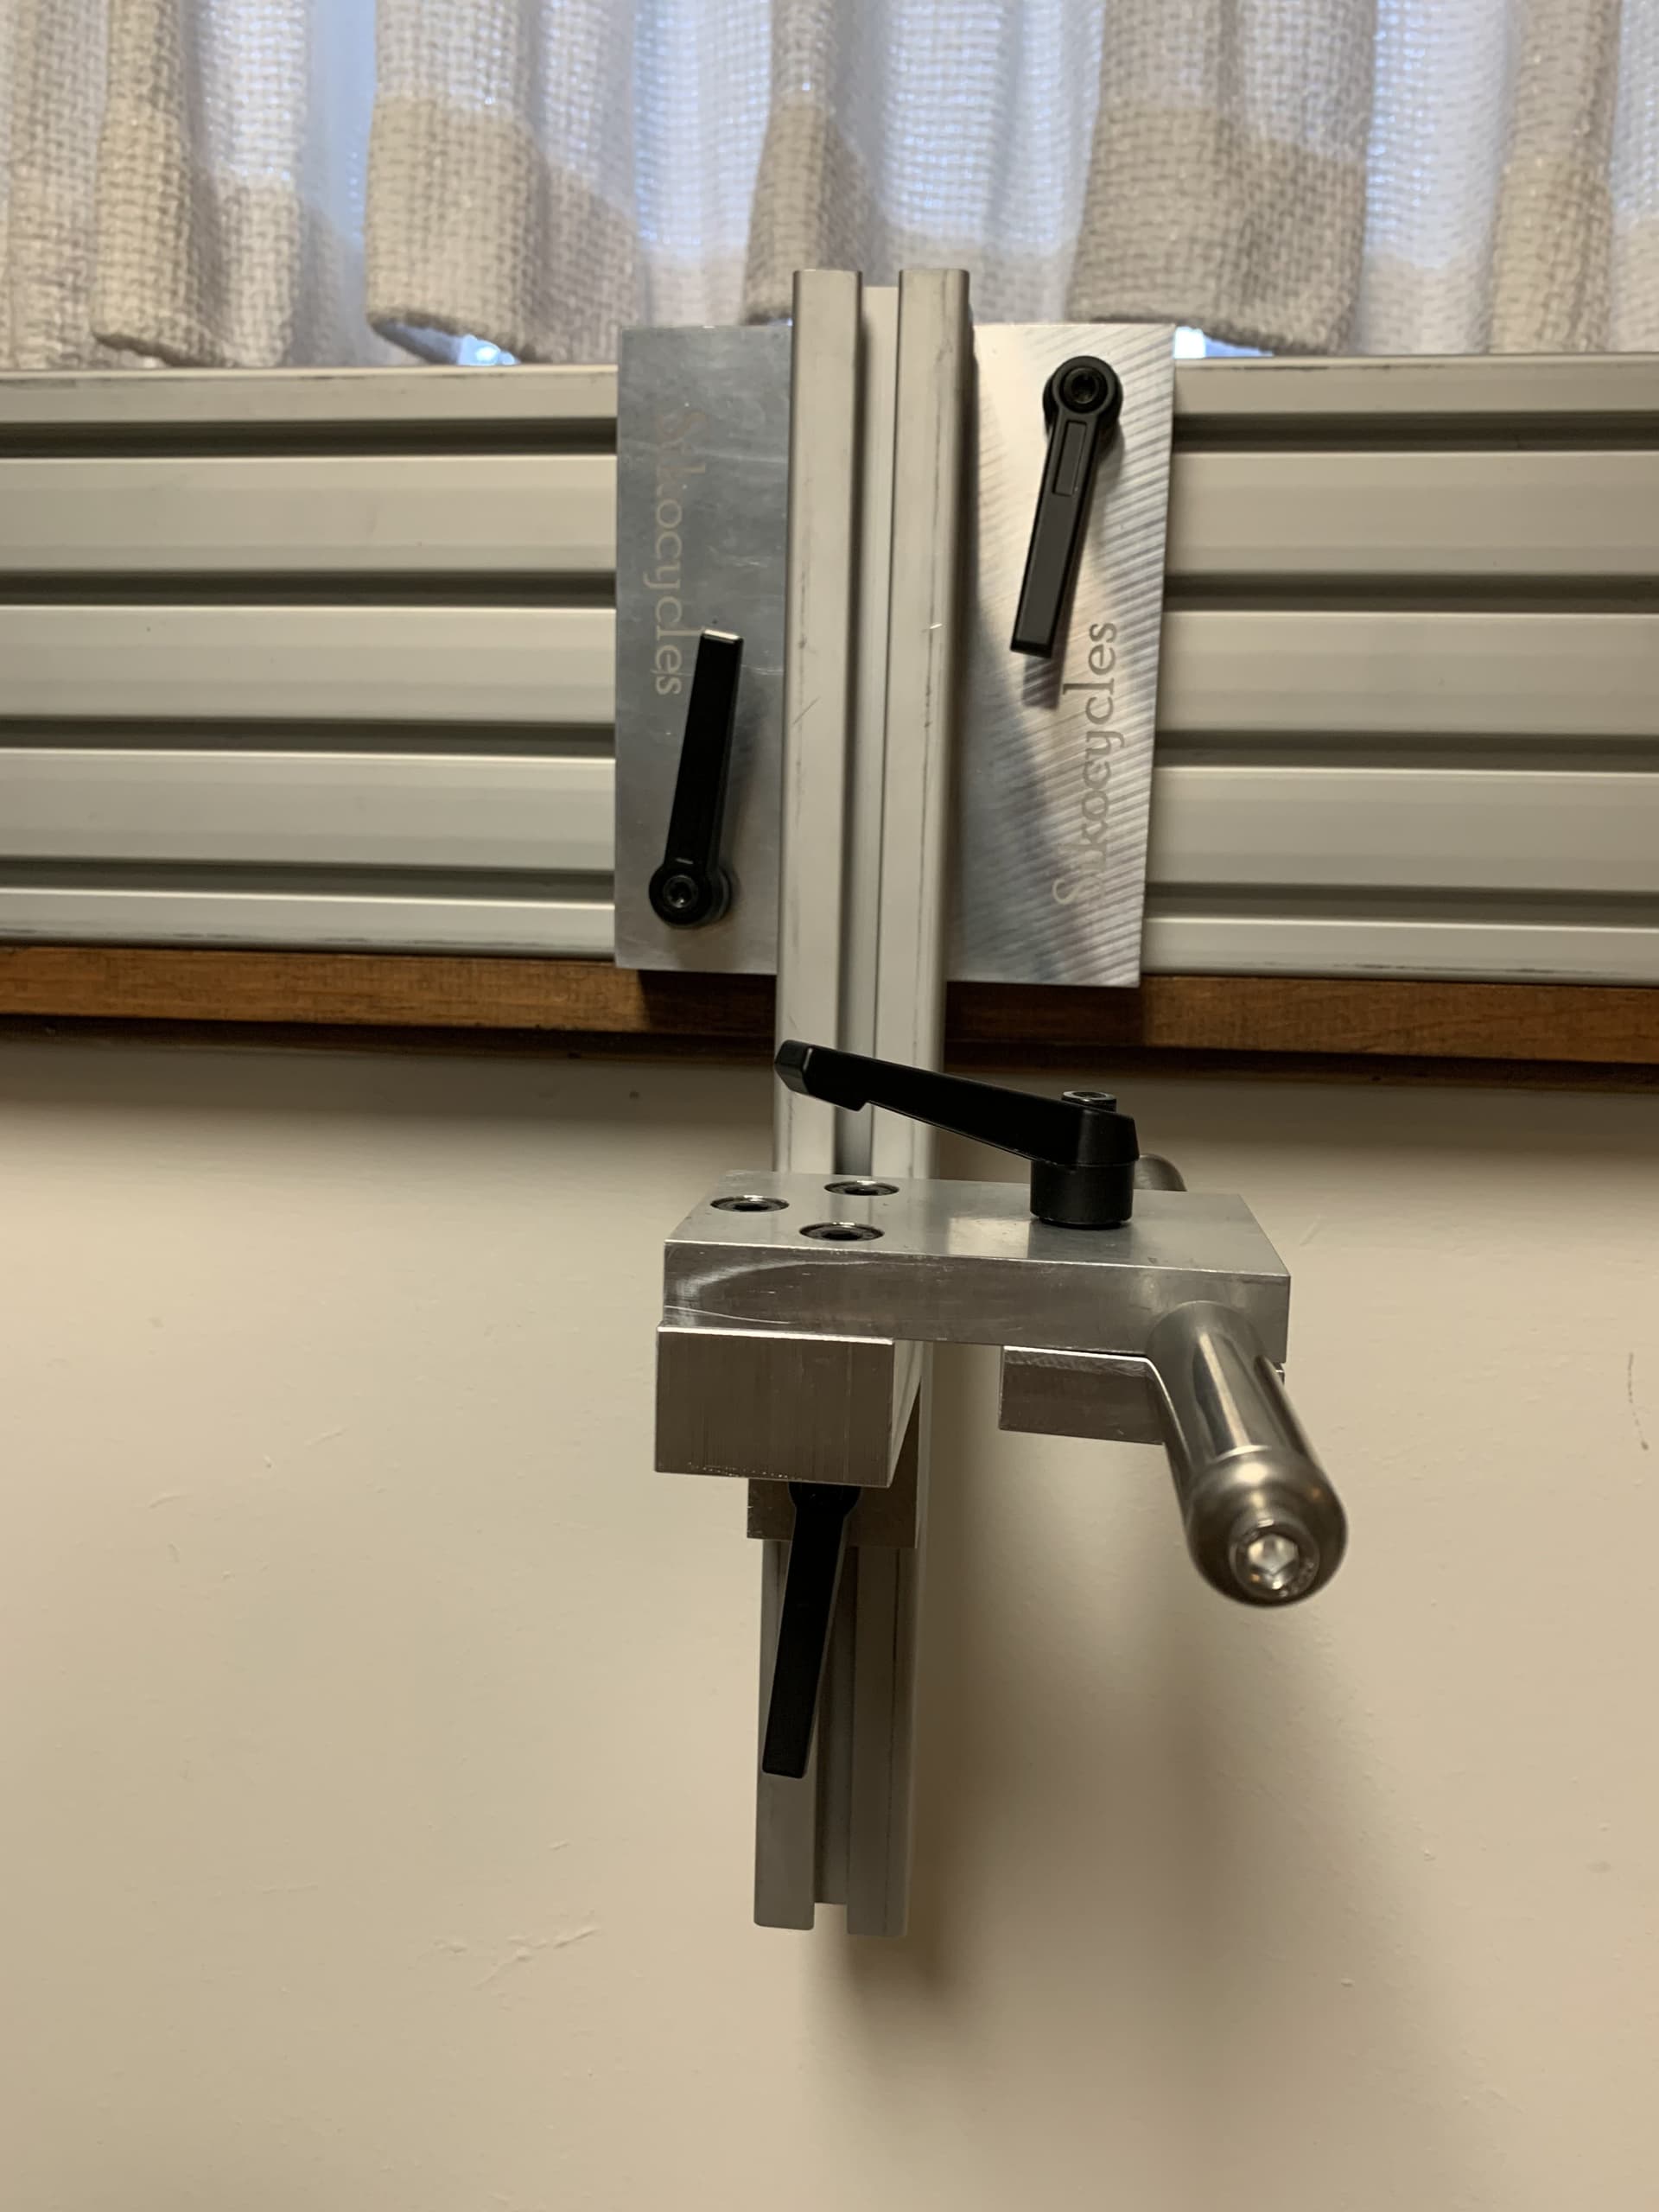
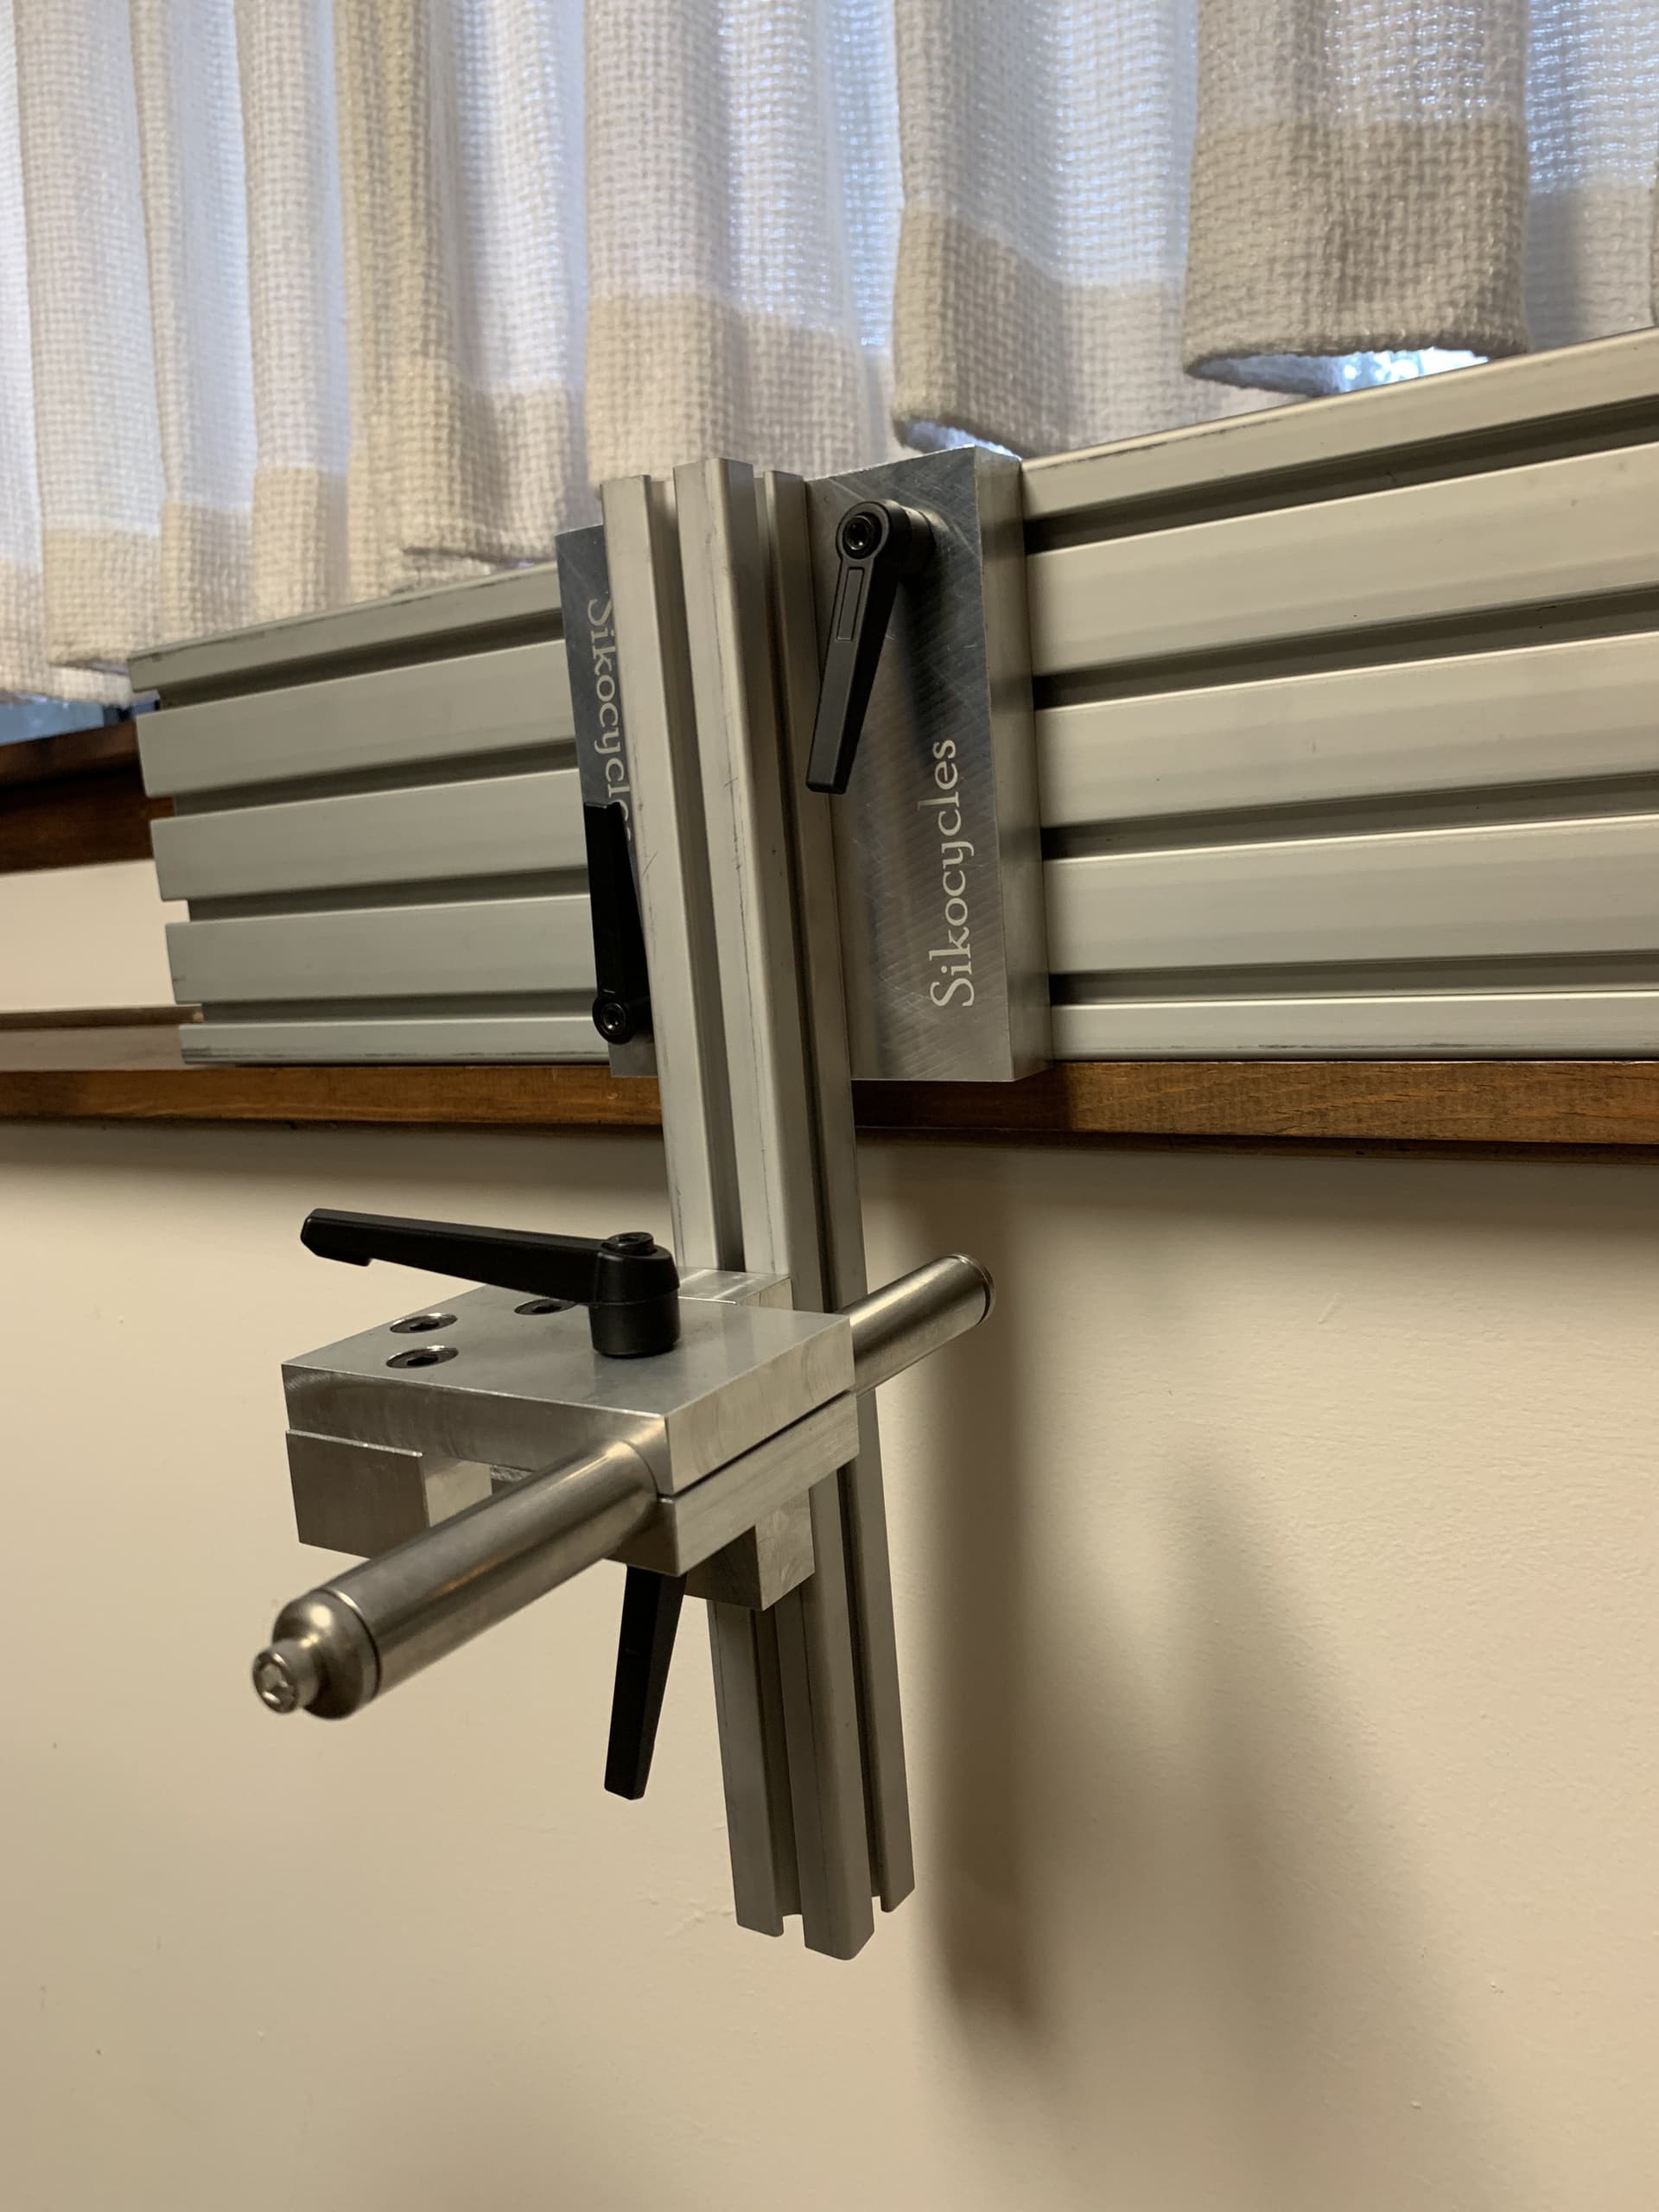
A few simple but great ones. This is a canti/centerpull jig made of two pieces of angle aluminum. Jeff Lyon tod me about it and I liked it better than everything else that I tried (and it was a lot simpler).
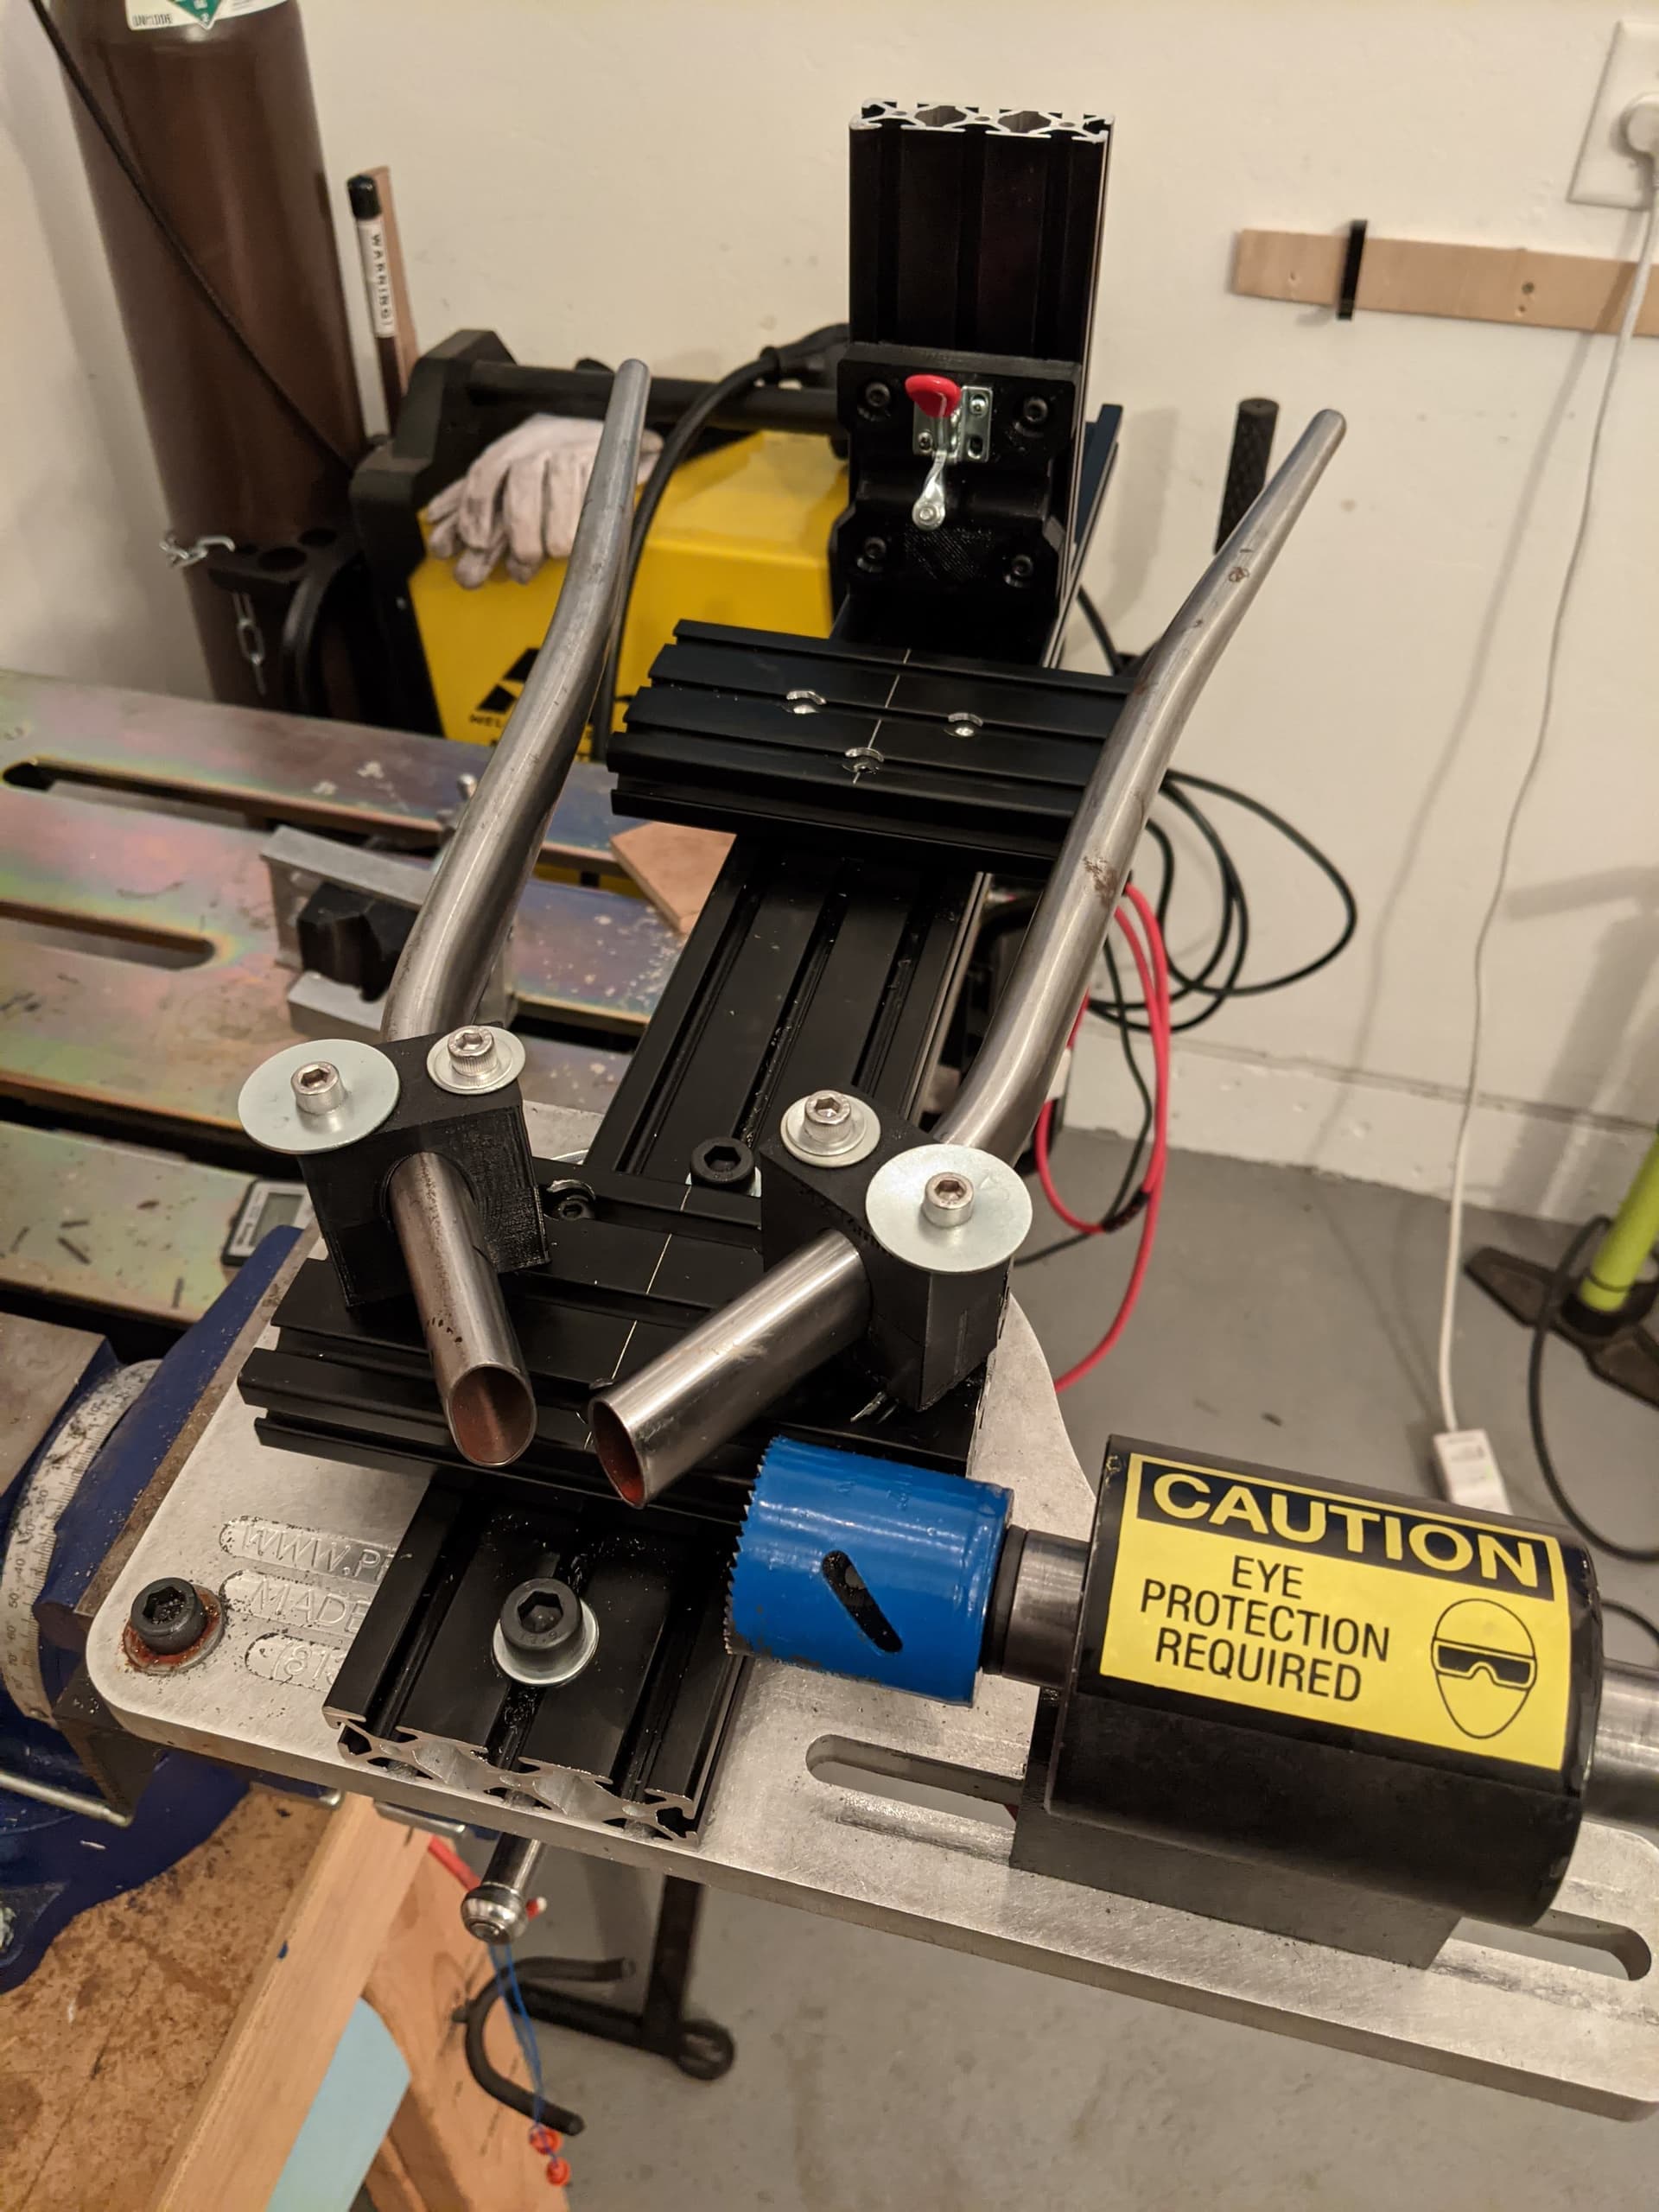
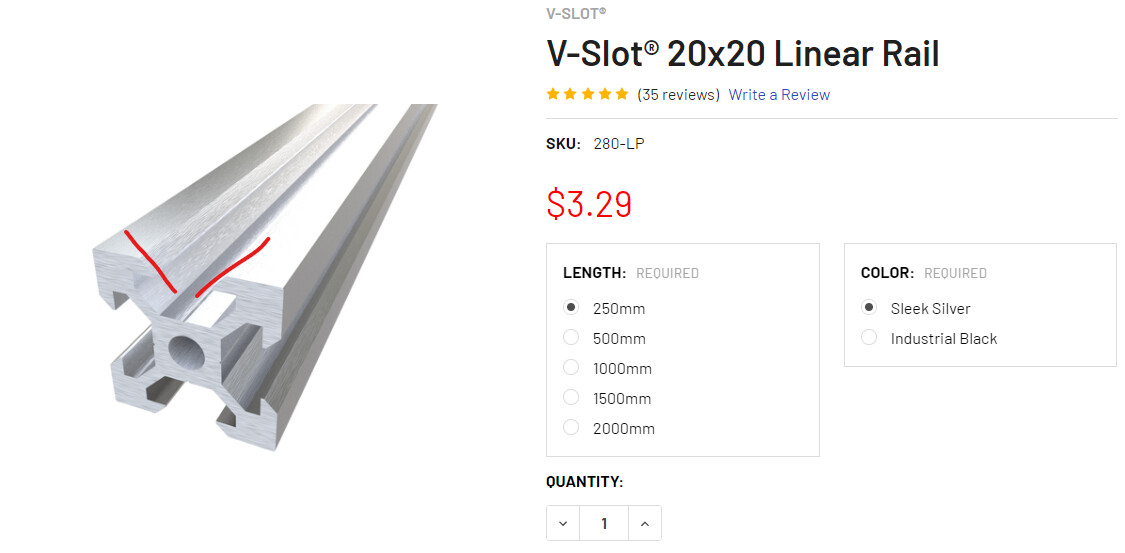
Nice build! I like the toggle clamp a lot. This would be an interesting addition: V-Slot 20x20 Linear Rail Aluminum Extrusion Profile
its designed for DIY CNC gantries, so it has a built-in V slot for the fork steerer
Can you get that in 40mm extrusion? I built those with 15-series 80/20 which is 1.5” wide. The v-block was 1545 extrusion with the top cut off to expose an inner V. I checked those for accuracy and it was a cheap and accurate way to make a V-block.
An off the shelf option would be nice.
The side business that I was considering back then was making some standard 80/20 attachments for DIY jigs. Things like dummy axle holders, cones and towers, plates to hold clamps, etc. I’m surprised that no one has done that yet.