You picked the hardest dropout to do a design with! A few pointers:
All CAD packages are the same.
SW and F360 workflows are basically the same, just different buttons. I would watch the bike-specific F360 video I made ([Video Tutorial] Drawing a real mountain bike in fusion360) and focus on the workflow and ignore the buttons for guidance
Start with a base sketch
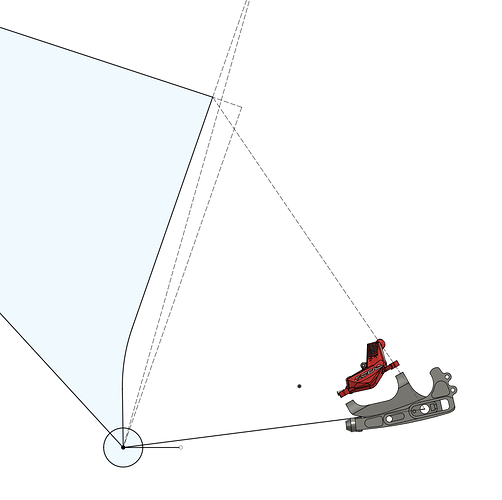
Rather than making reference planes relative to the origin, I think you should have a base sketch, and create your planes and your mates based on that. Below is one of the first two steps I do: draw a base geo sketch and mate the dropout to the sketch:
Design with the slider slammed forward.
In order to keep things simple, I would treat the dropout as a fixed dropout in the shortest position. The sliding dropout would change the BB drop, which will change every angle on the bike and your CAD will explode.
Virtual vs Actual Chainstays
What makes DR1005 so complicated, is that the actual chainstay (physical tubes) is offset from the virtual chainstay (imaginary plane that connects the axle center to the BB center). You will need two planes, one to locate the dropout correctly, and the other to draw your CS centerlines!
Clockign the Dropout + Hanger Spec
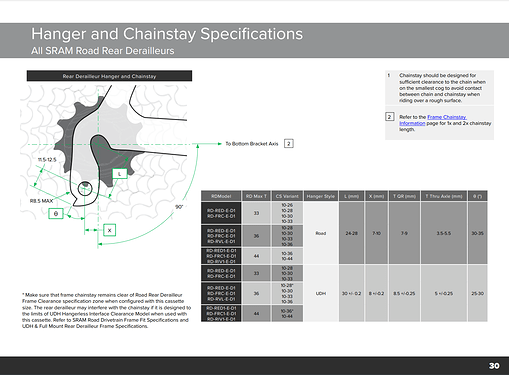
That DR1005 needs to be manually clocked (tilted) to look good. However, You need to be careful that your hanger is still clocked within spec. The tolerance is approximately +/-3.5deg.
From page 30 of the SRAM frame fit specifications: https://www.sram.com/globalassets/document-hierarchy/frame-fit-specifications/road/2023-road-frame-fit-specifications.pdf


