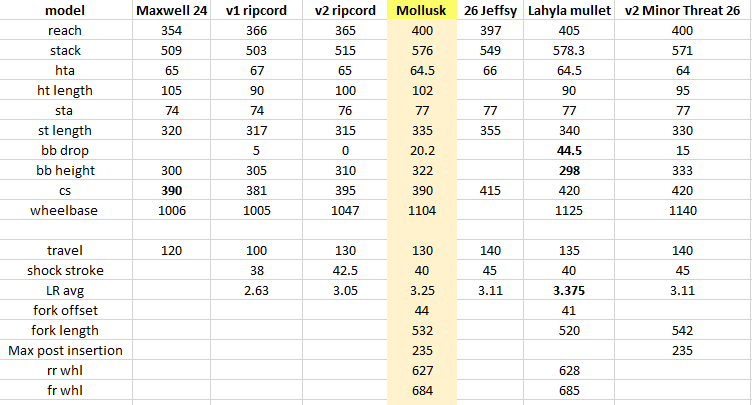
My son grows faster than I can keep up with for a build, so I’m jumping ahead to his first 26” (26/24 x 130mm travel) build. I started posting this thread to ask a couple questions, but figured why not do a build log?
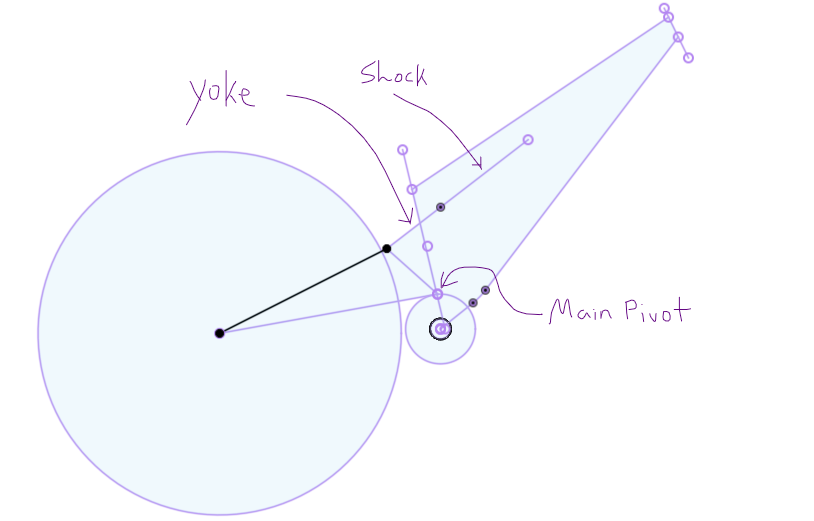
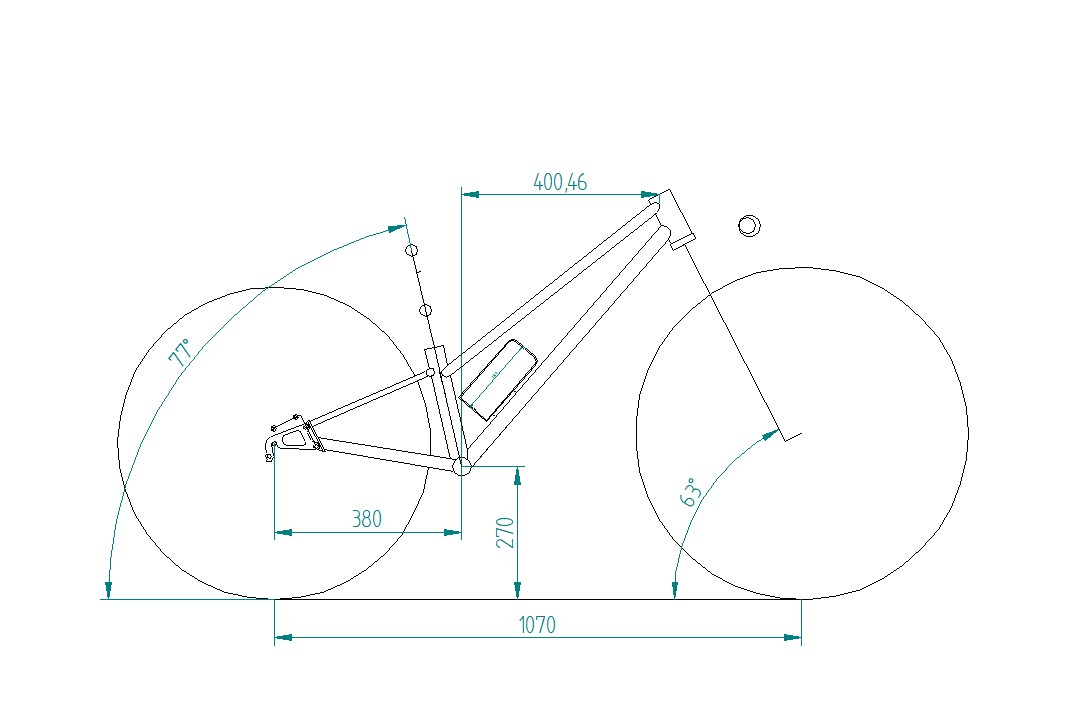
He weighs maybe #75 with gear right now, so I’m guessing #100 at his biggest on this bike. So I’m going with a single pivot, linear leverage rate @ ~3.25.
So roughly 130mm travel with a 190x40 shock.
Current questions:
Does my leverage rate sound appropriate? I want to be able to put air in the shock and have effective damping without a revalve of a “stock” shock.
Sidluxe shock, or RS Deluxe shock? I like the idea of the SID being small form factor, but if it’s a “pogo stick” as I’ve read, then what’s the point?
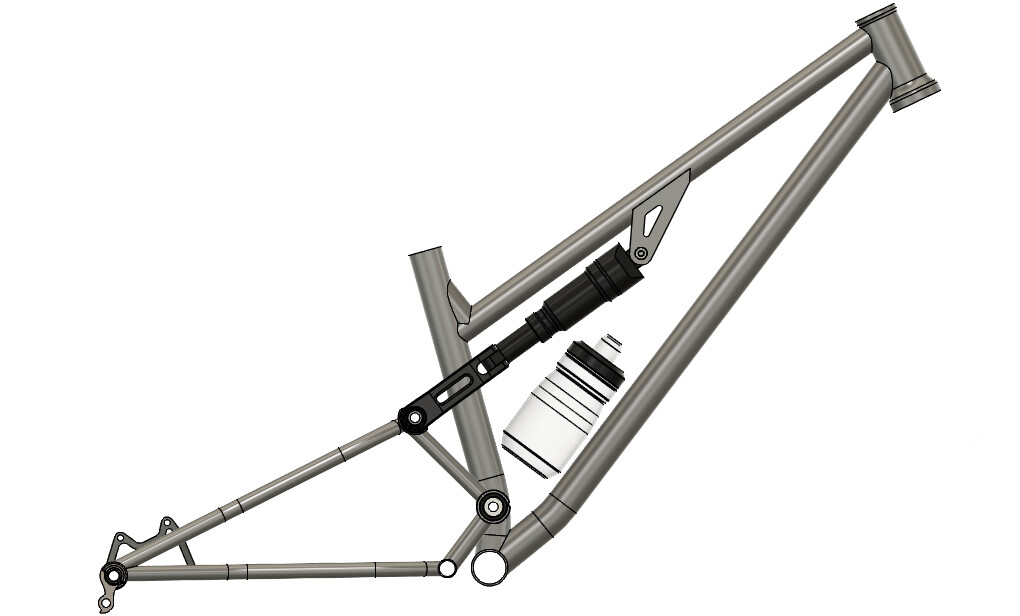
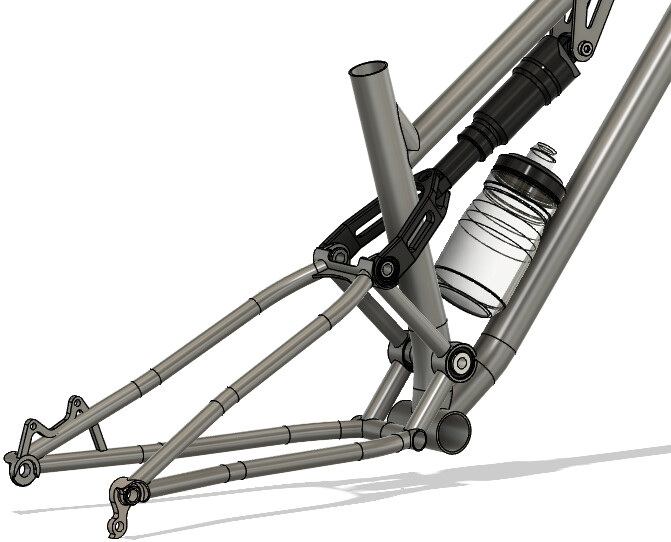
Design-layout wise, what do you all think about the strength- weight appropriateness of my layout/ tube profiles of the front triangle (see preliminary layout sketch below)? My son willbe doing jumps, laying it down and being a normal kid with it.
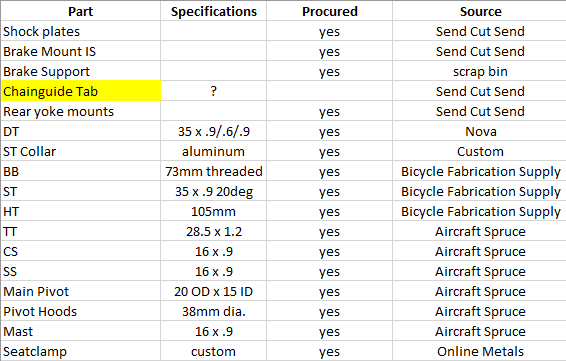
Current Tubing Specs:
HT: Custom
DT: 35 x 9/6/9 NOVA bent
TT: 28.5 x 1.25 (1.125 x .049) straight gauge (considering .035 wall…)
ST: 35 x .9 straight gauge
Rear end: TBD, but a mix of 5/8 and 3/4 x .035 wall truss-style swingarm
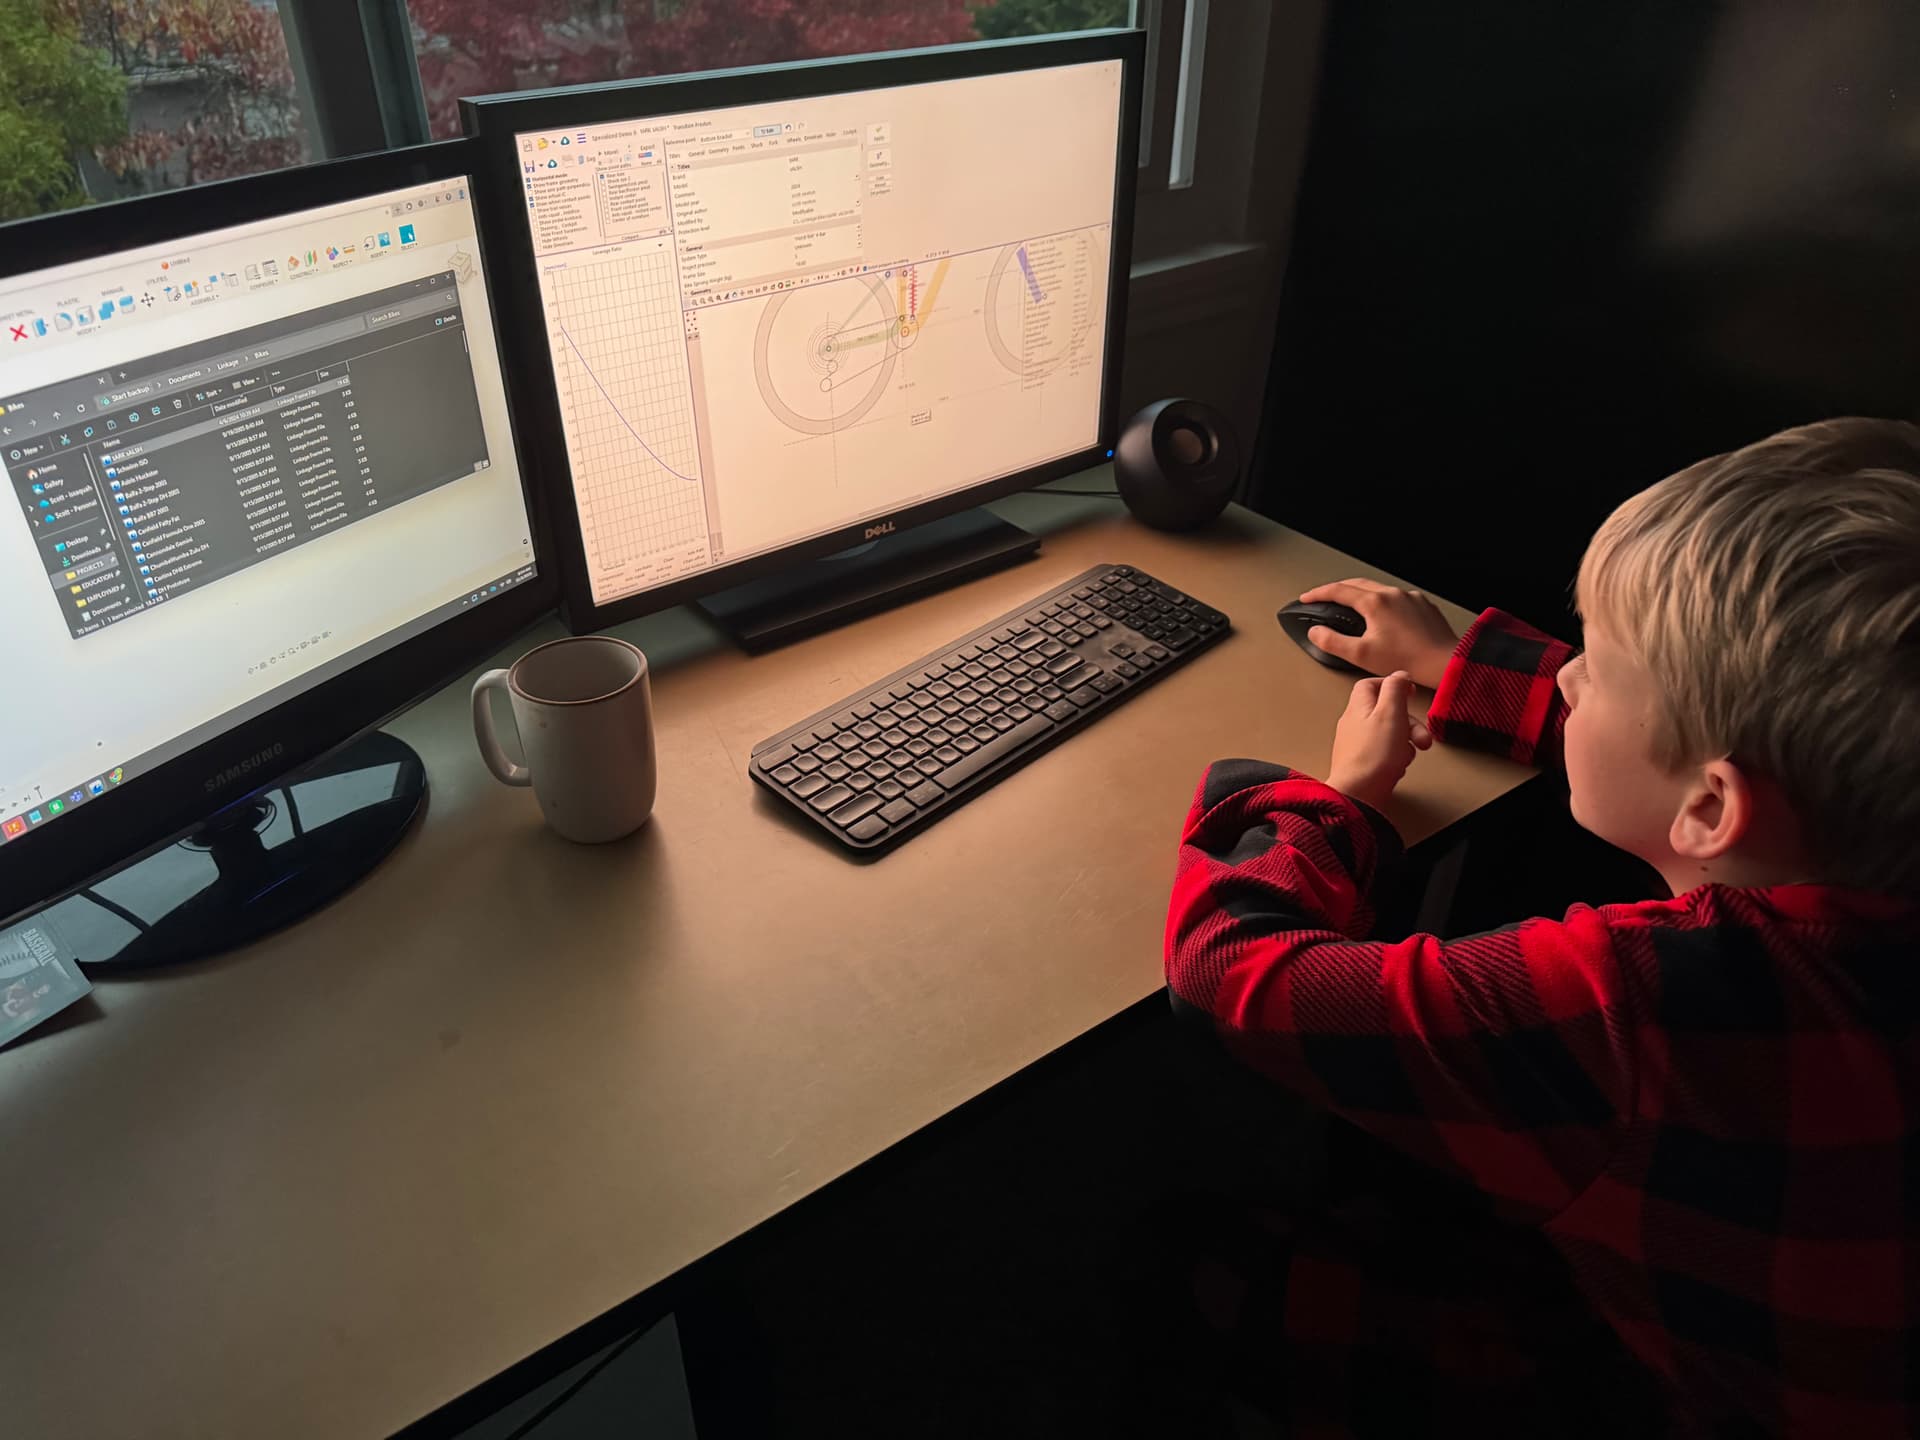
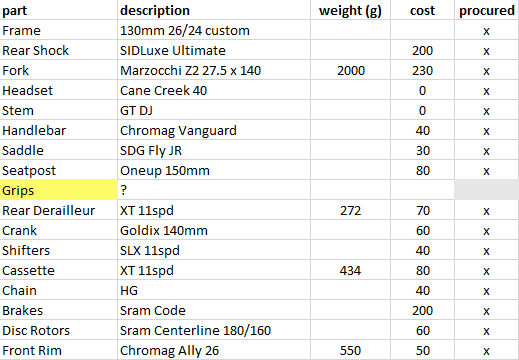
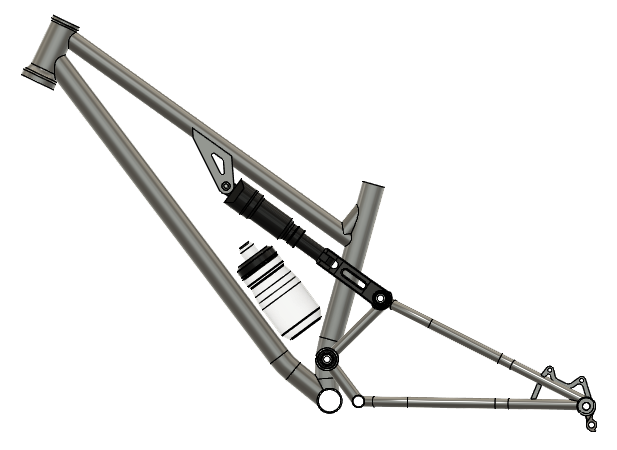
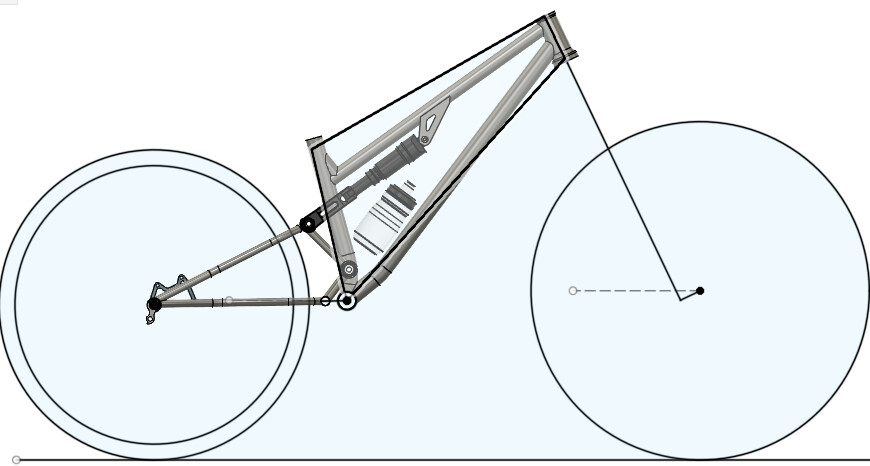
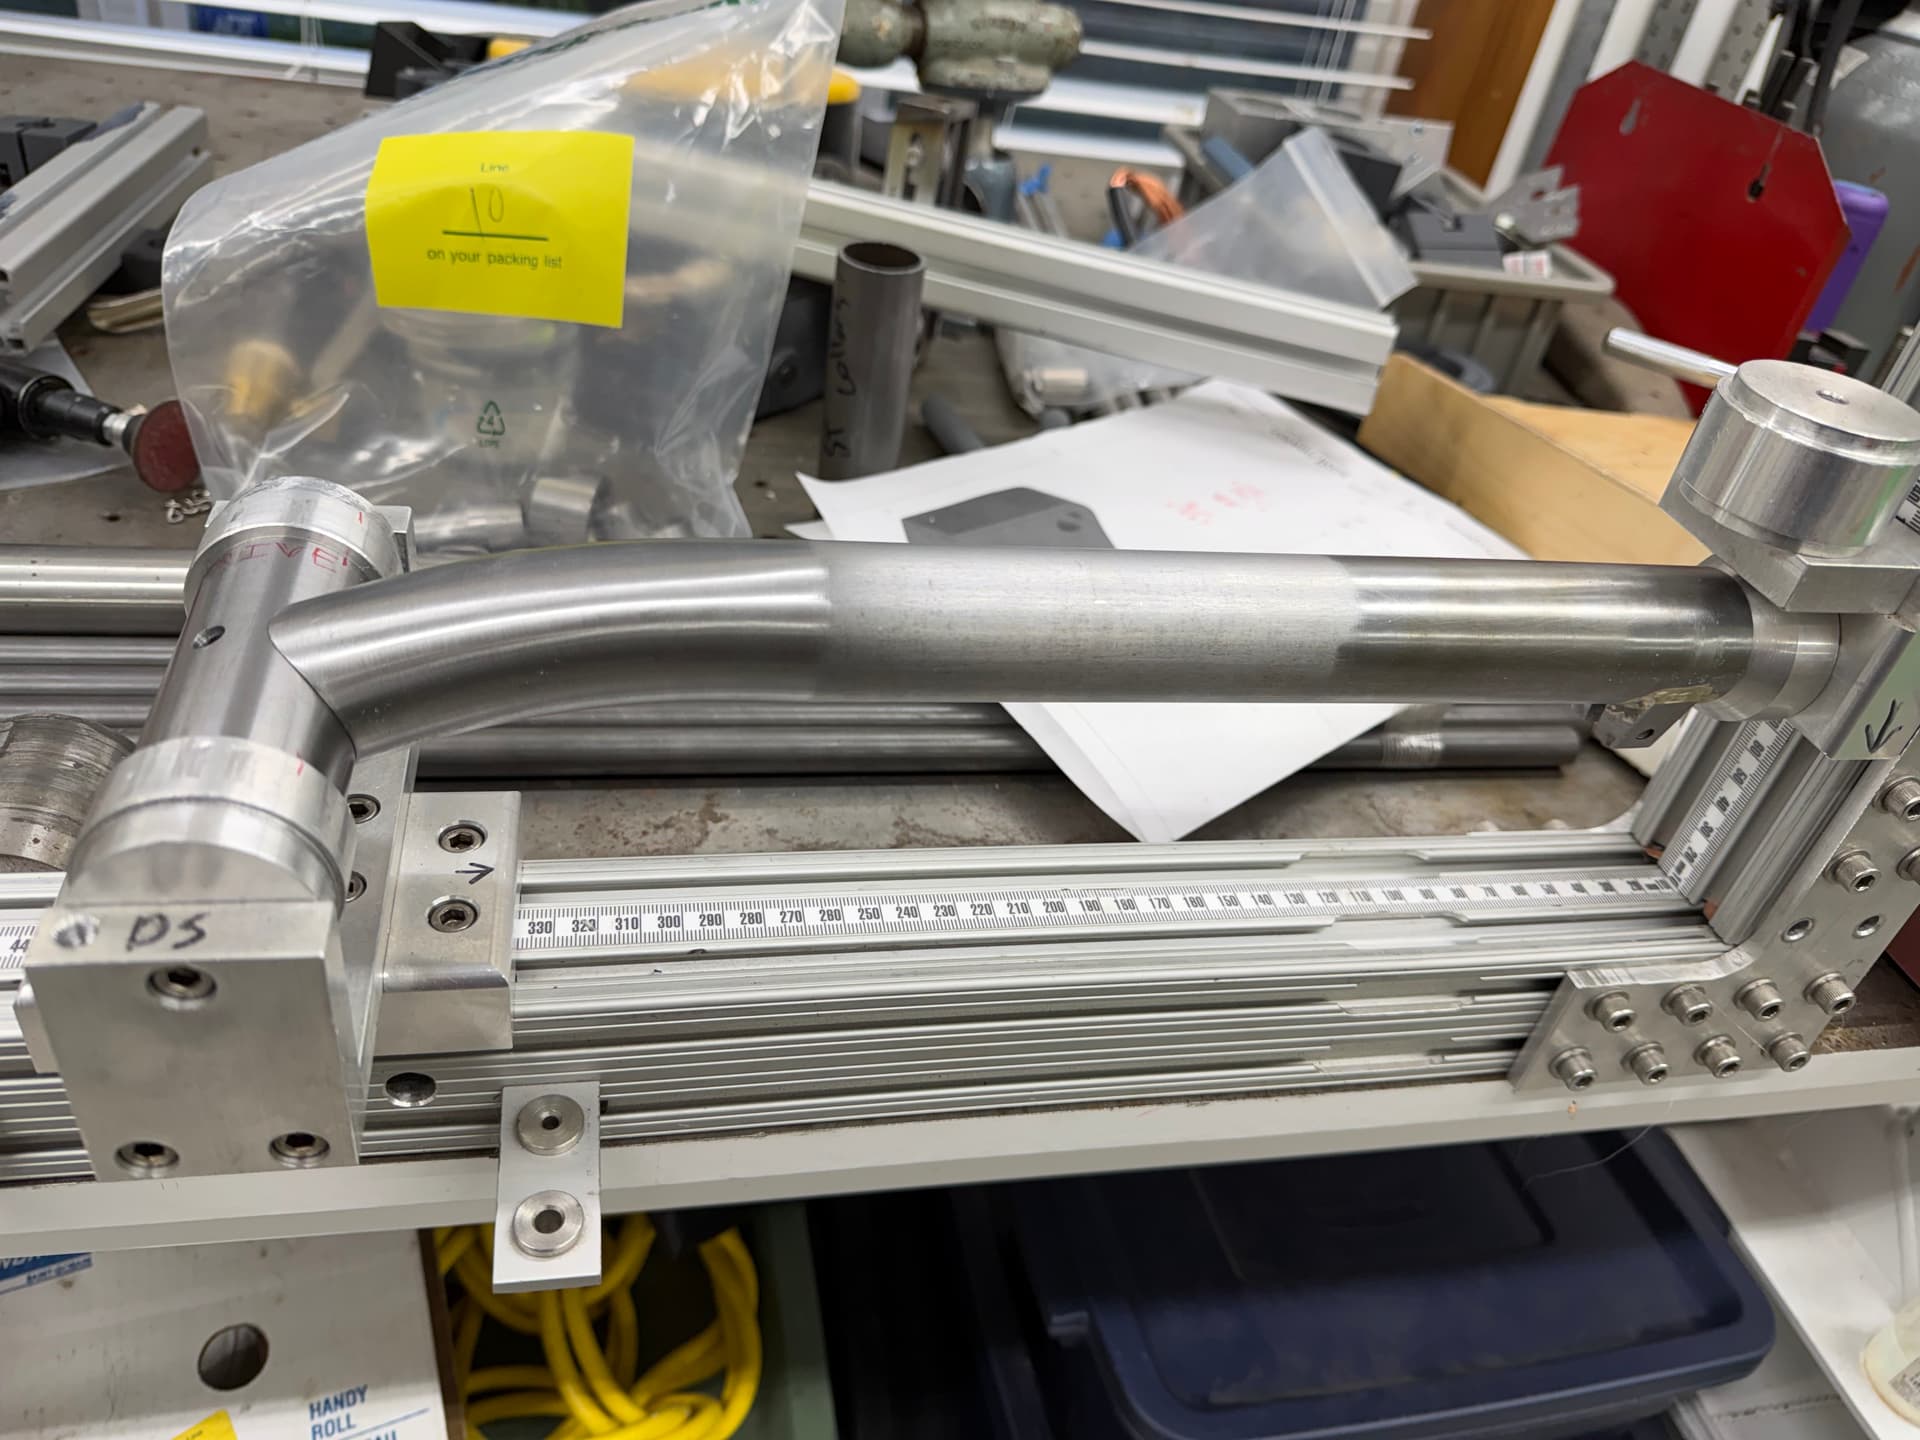
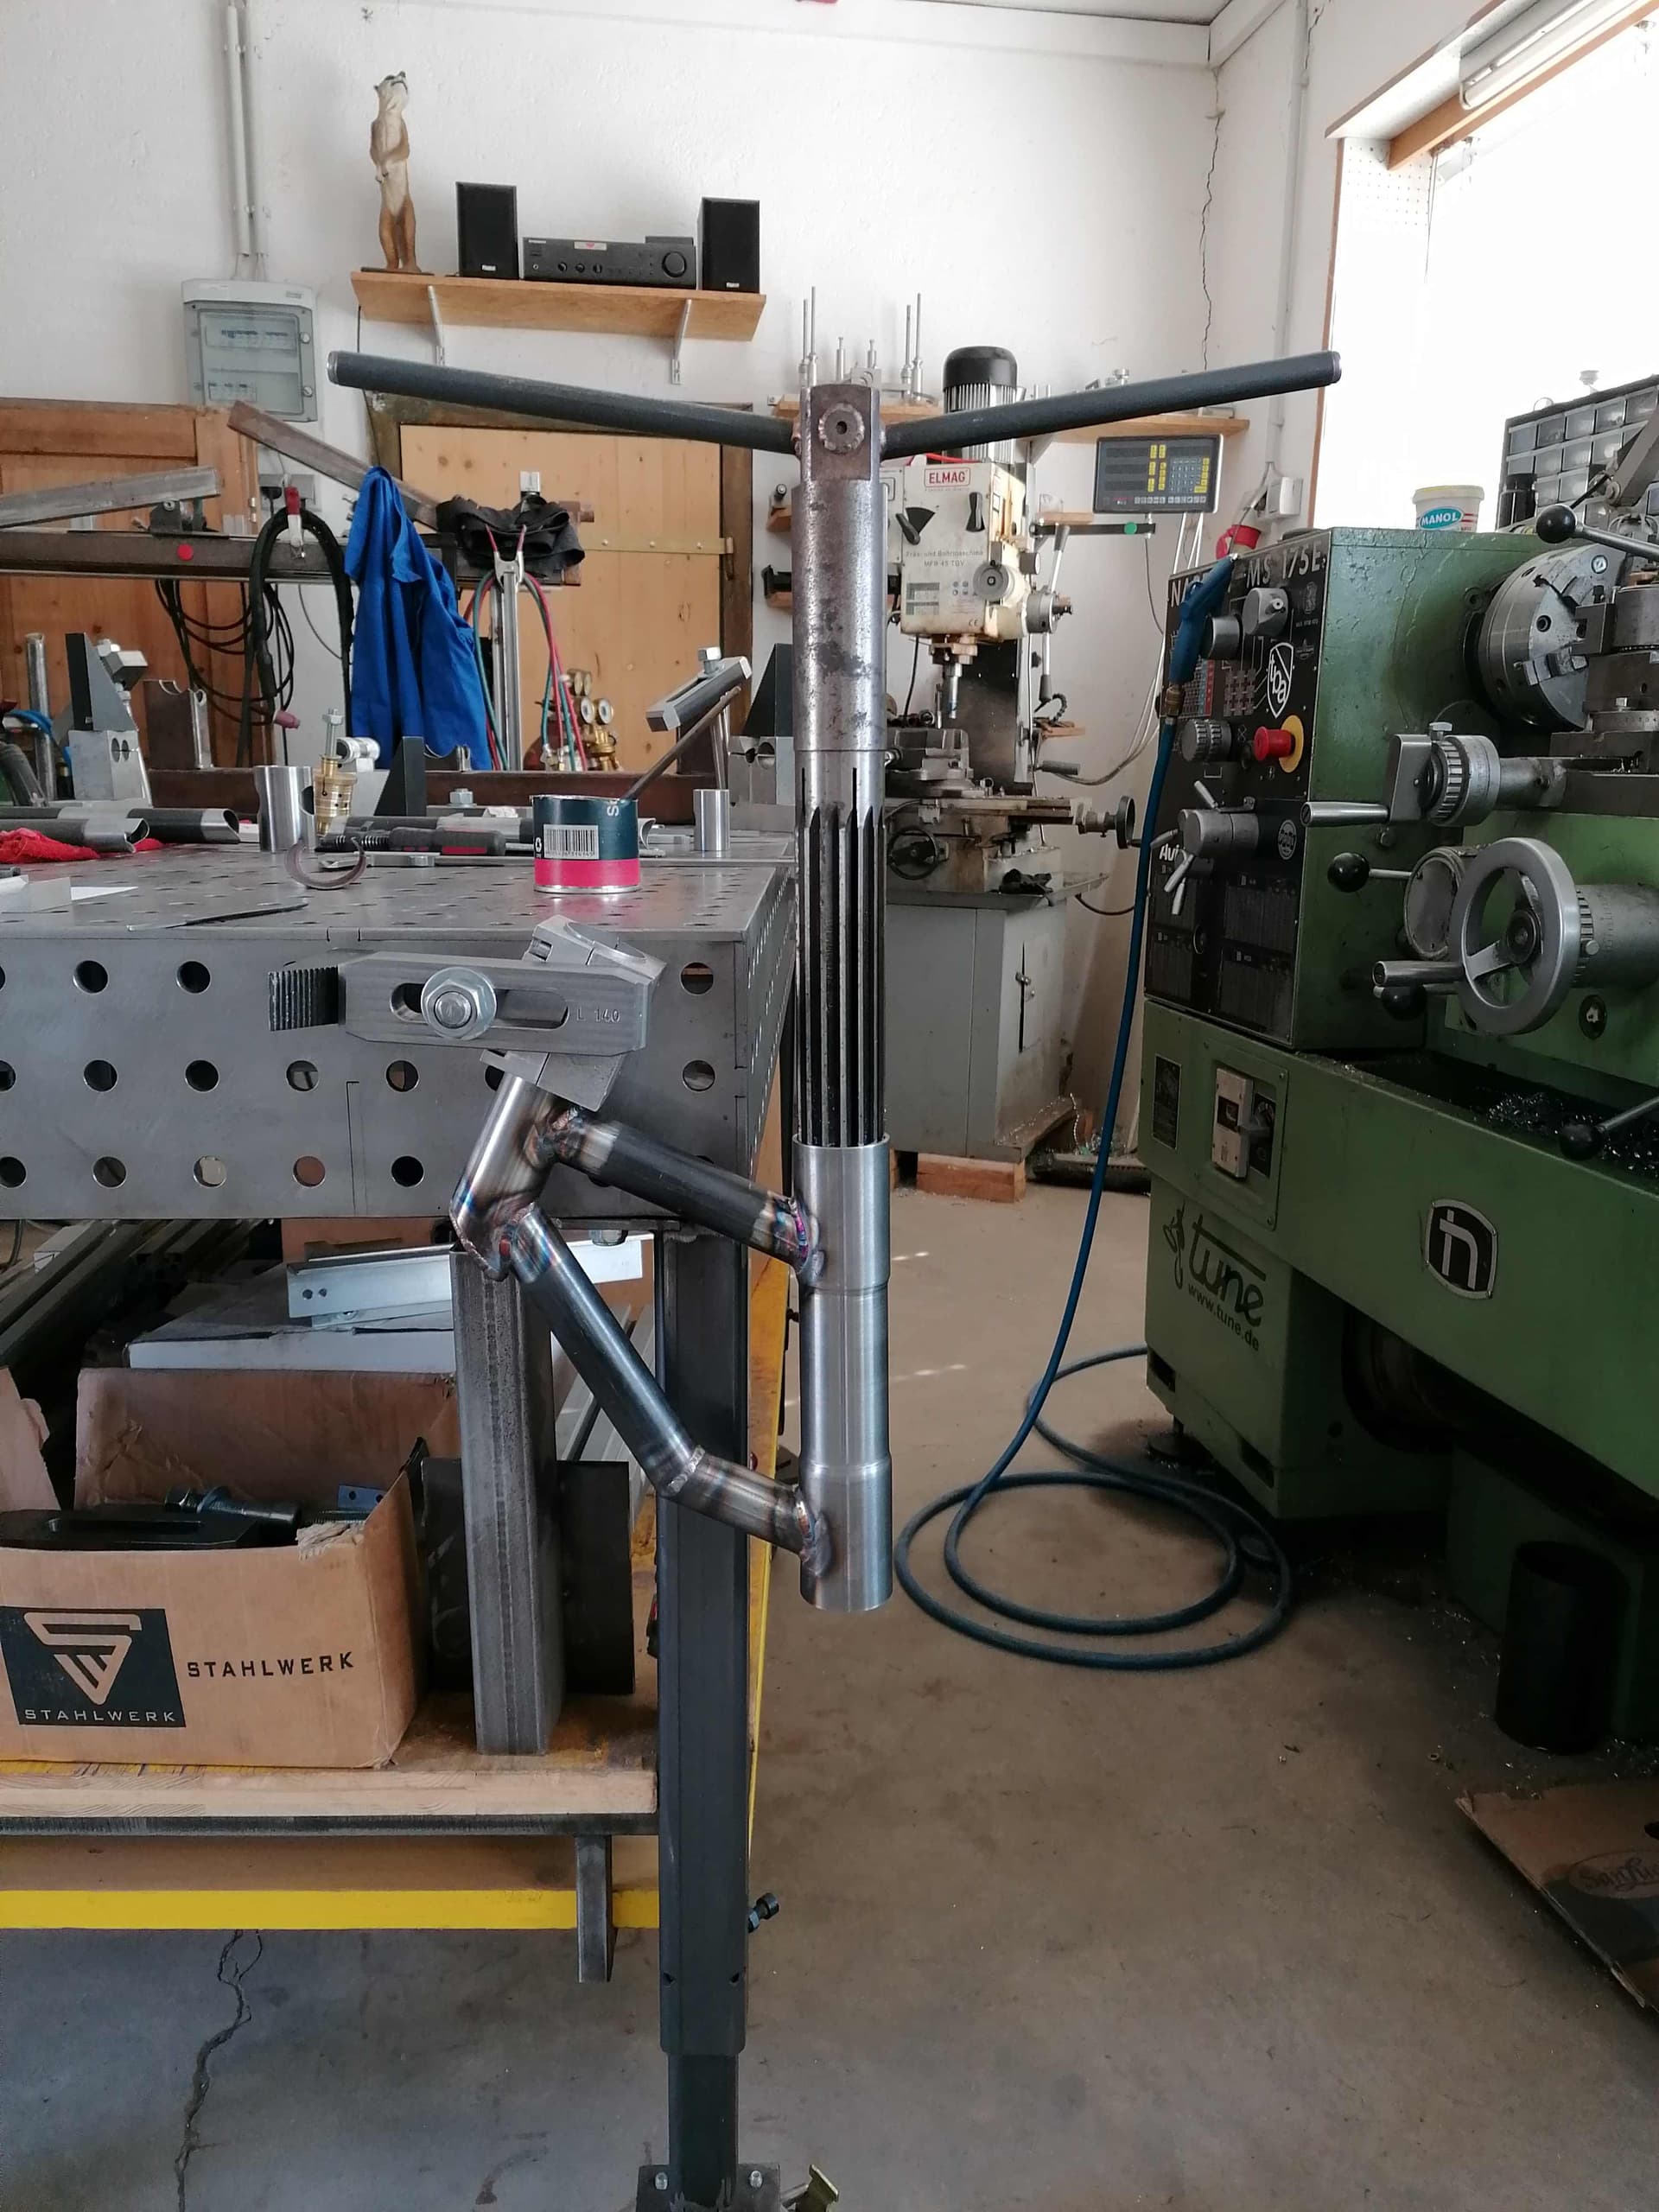
So far it’s been lots of designing and procuring parts, and I have some design progress to share! Based off of techniques I learned here, I’m creating my first fully functional CAD model of a frame. Lots of my other frames have been 2d sketch only, but I’m pushing a short rear end and find learning more CAD skills super fun! Still need to add a few thing like brake and bottle mounts…
I would LOVE input on tube diameter and wall thicknesses …. My main question is .035 or .049 top tube (1-1/8” dia)? Shock forces are not my forte. I tried to place things to avoid buckling tendencies, and I would like to go with a lighter TT, but still unsure. I am, however landing on .035 straight gauge 5/8 for the rear end. Also any other constructive criticism or questions are welcome!
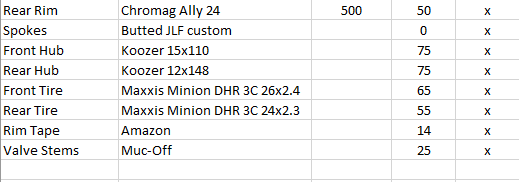
Locating a short shock, and building a decent quality matched 24/26 wheelset has been a challenge, but I got the parts and wheels built! Shoutout to Chromag for making identical 24” and 26” rims that are actually available! My buddy Josh said they built up really well.
I’m new to this forum and this ist my first posting here.
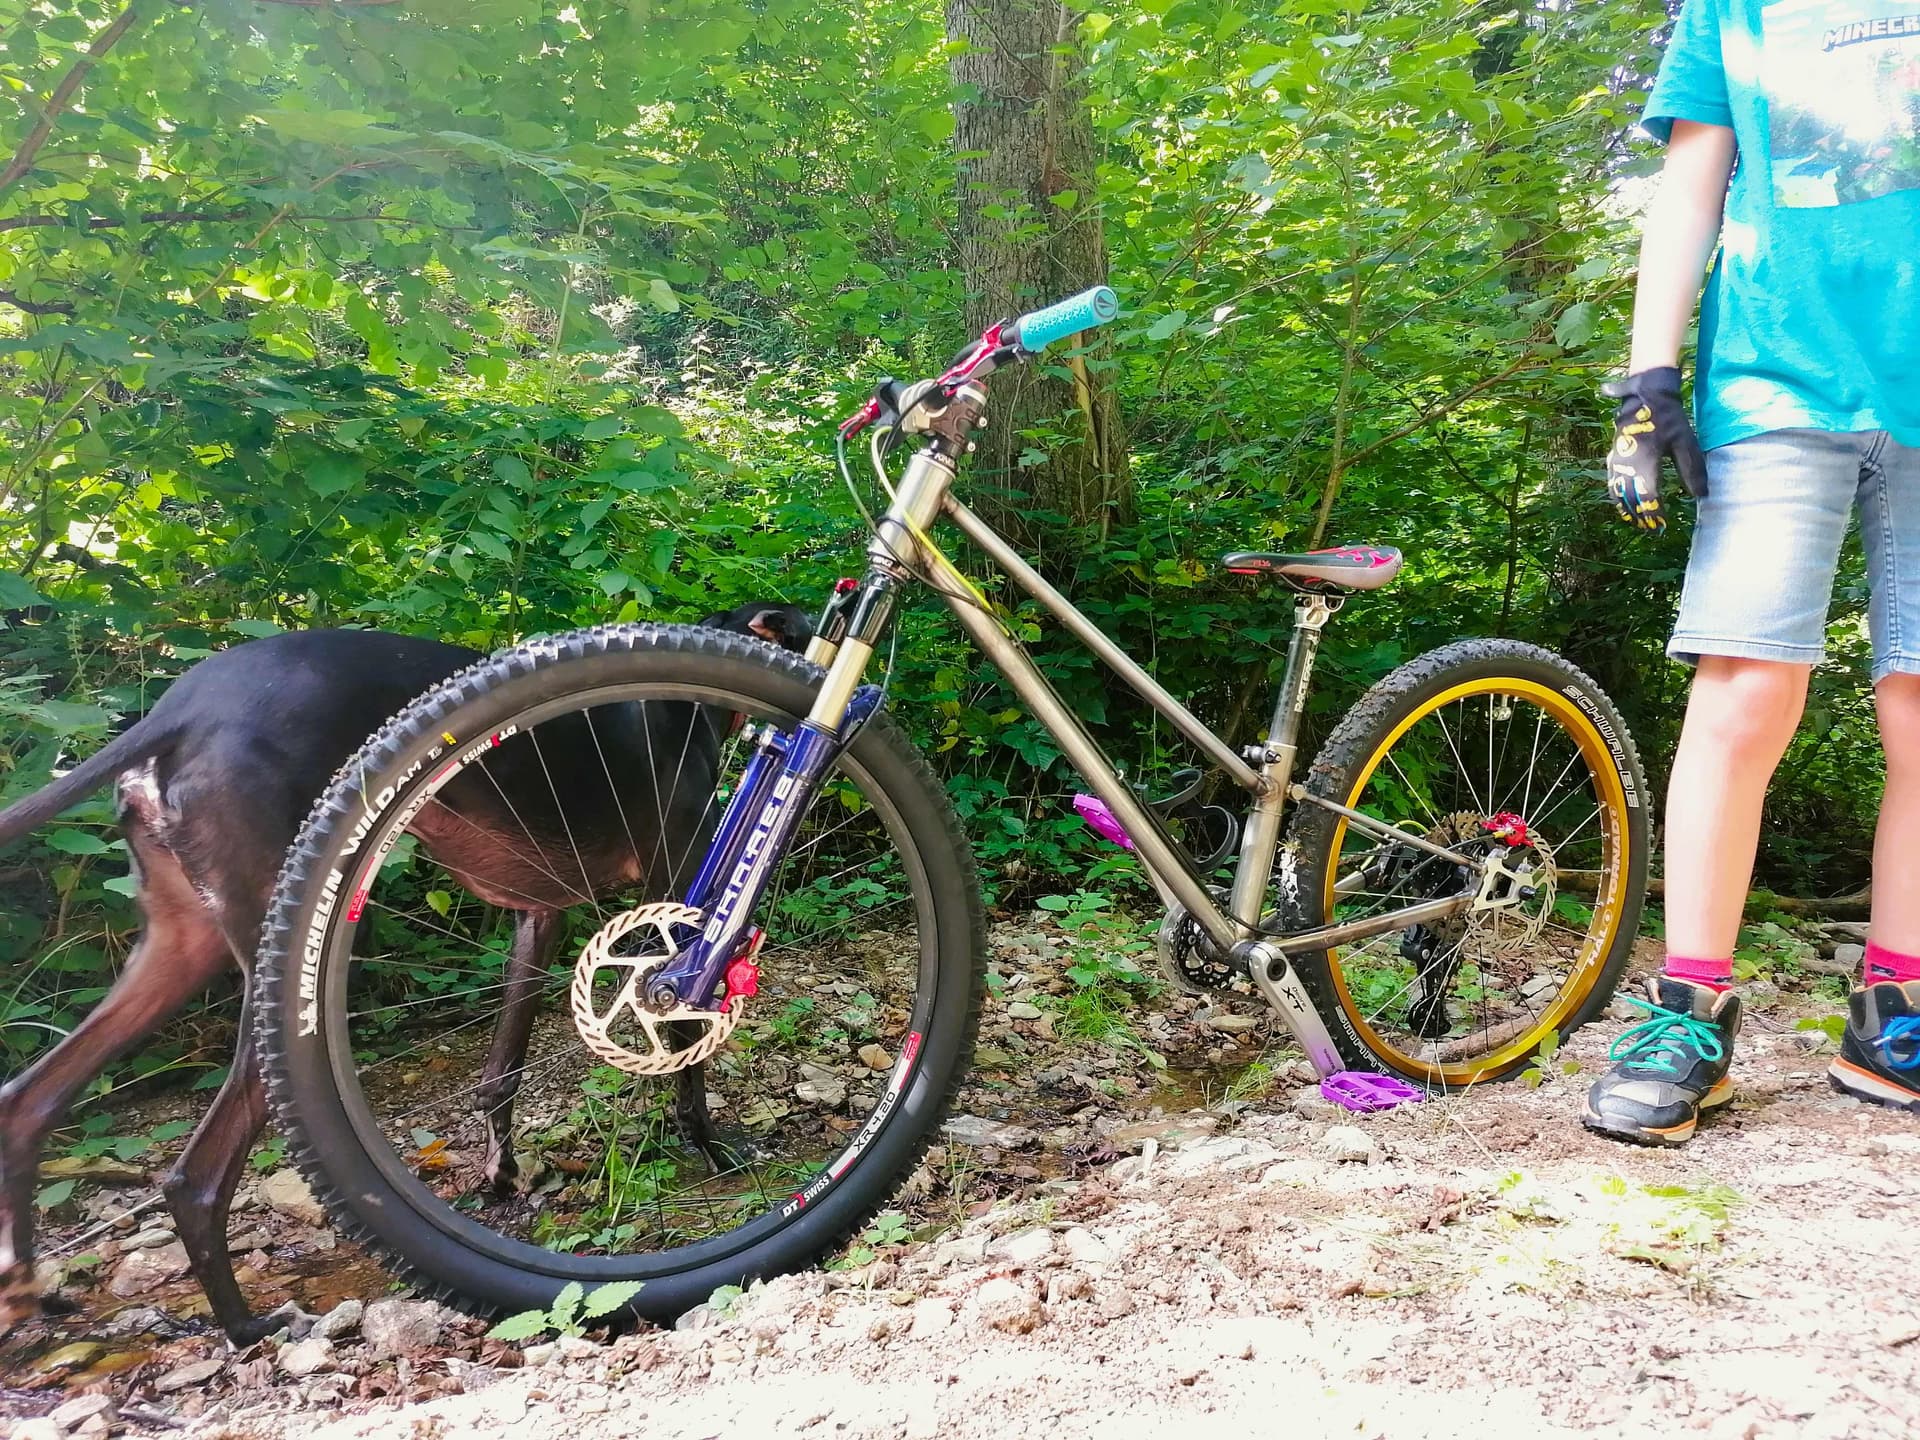
I really like your design! I also have a son that´s a little bigger than yours and I made a new 26/24” hardtail for him last year. It´s beautifull to watch kids on bikes that really fit them. About your tubeset. I think that you choose the right dimensions. What size will the DT be?
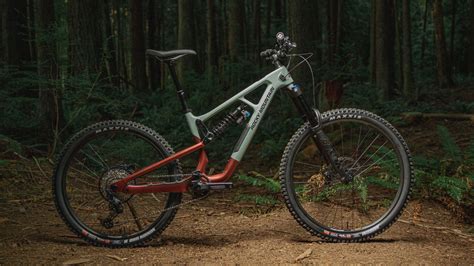
Which wall thickness the TT should have depends on the style you will design the shockmount. If you support it, in length and width, maybe with a tube, youre safe with 0.035” wt. You should avoid stress risers. You could also add a third tube between TT and DT and make a mount that’s much smaller or adjustable/flippable for different progression. This tube would also stiffen up the steering area without making the frontend to harsh. Rocky Mountain executed this design very well with their “Slayer”
Welcome to the forum! Thanks for your input~ That’s cool you did a mullet build for your kiddo, would love to see pics sometime! I do like the idea of the slayer type shock mount- I’ll explore that more as the shock mount pictured was thrown on there to give an idea of the concept I have in mind as far as mounting.
The downtube on this build is slated to be a 9/6/9 x 35 dia. chromoly downtube.
Dropouts are changeable for a longer RC or maybe a 26” rear wheel and I made an adjustable headset cup for more reach/FC. I also changed the XT crank set to 155mm length. The Skareb fork works just perfekt with only 40psi and the Oro brakes are, against their reputation, very reliable so it´s his third bike they´re mounted to.
I think, a Ø35 DT will make the Mollusks main frame a tad to stiff. The butted part is also quite dent sensitive. My sons bike has a Ø30x1mm DT and an ovalized 1” TT, rear end is made from ovalized Ø22x1mm and Ø10x0.8mm tubes and it´s pretty strong. I would use 1 1/4”x0.035” tubing for the DT and add the tube for the shock mount. This will make a strong but compliant ride.
Thanks for the ideas of what tube diameters and thicknesses you’ve used. Your son has an amazing bike to ride!
To be honest, I haven’t thought of compliance too much. I’ve been focused on strength, packaging everything with the geo/ kinematic I’m shooting for, and to some extent weight, but I’ll be thinking about it now!
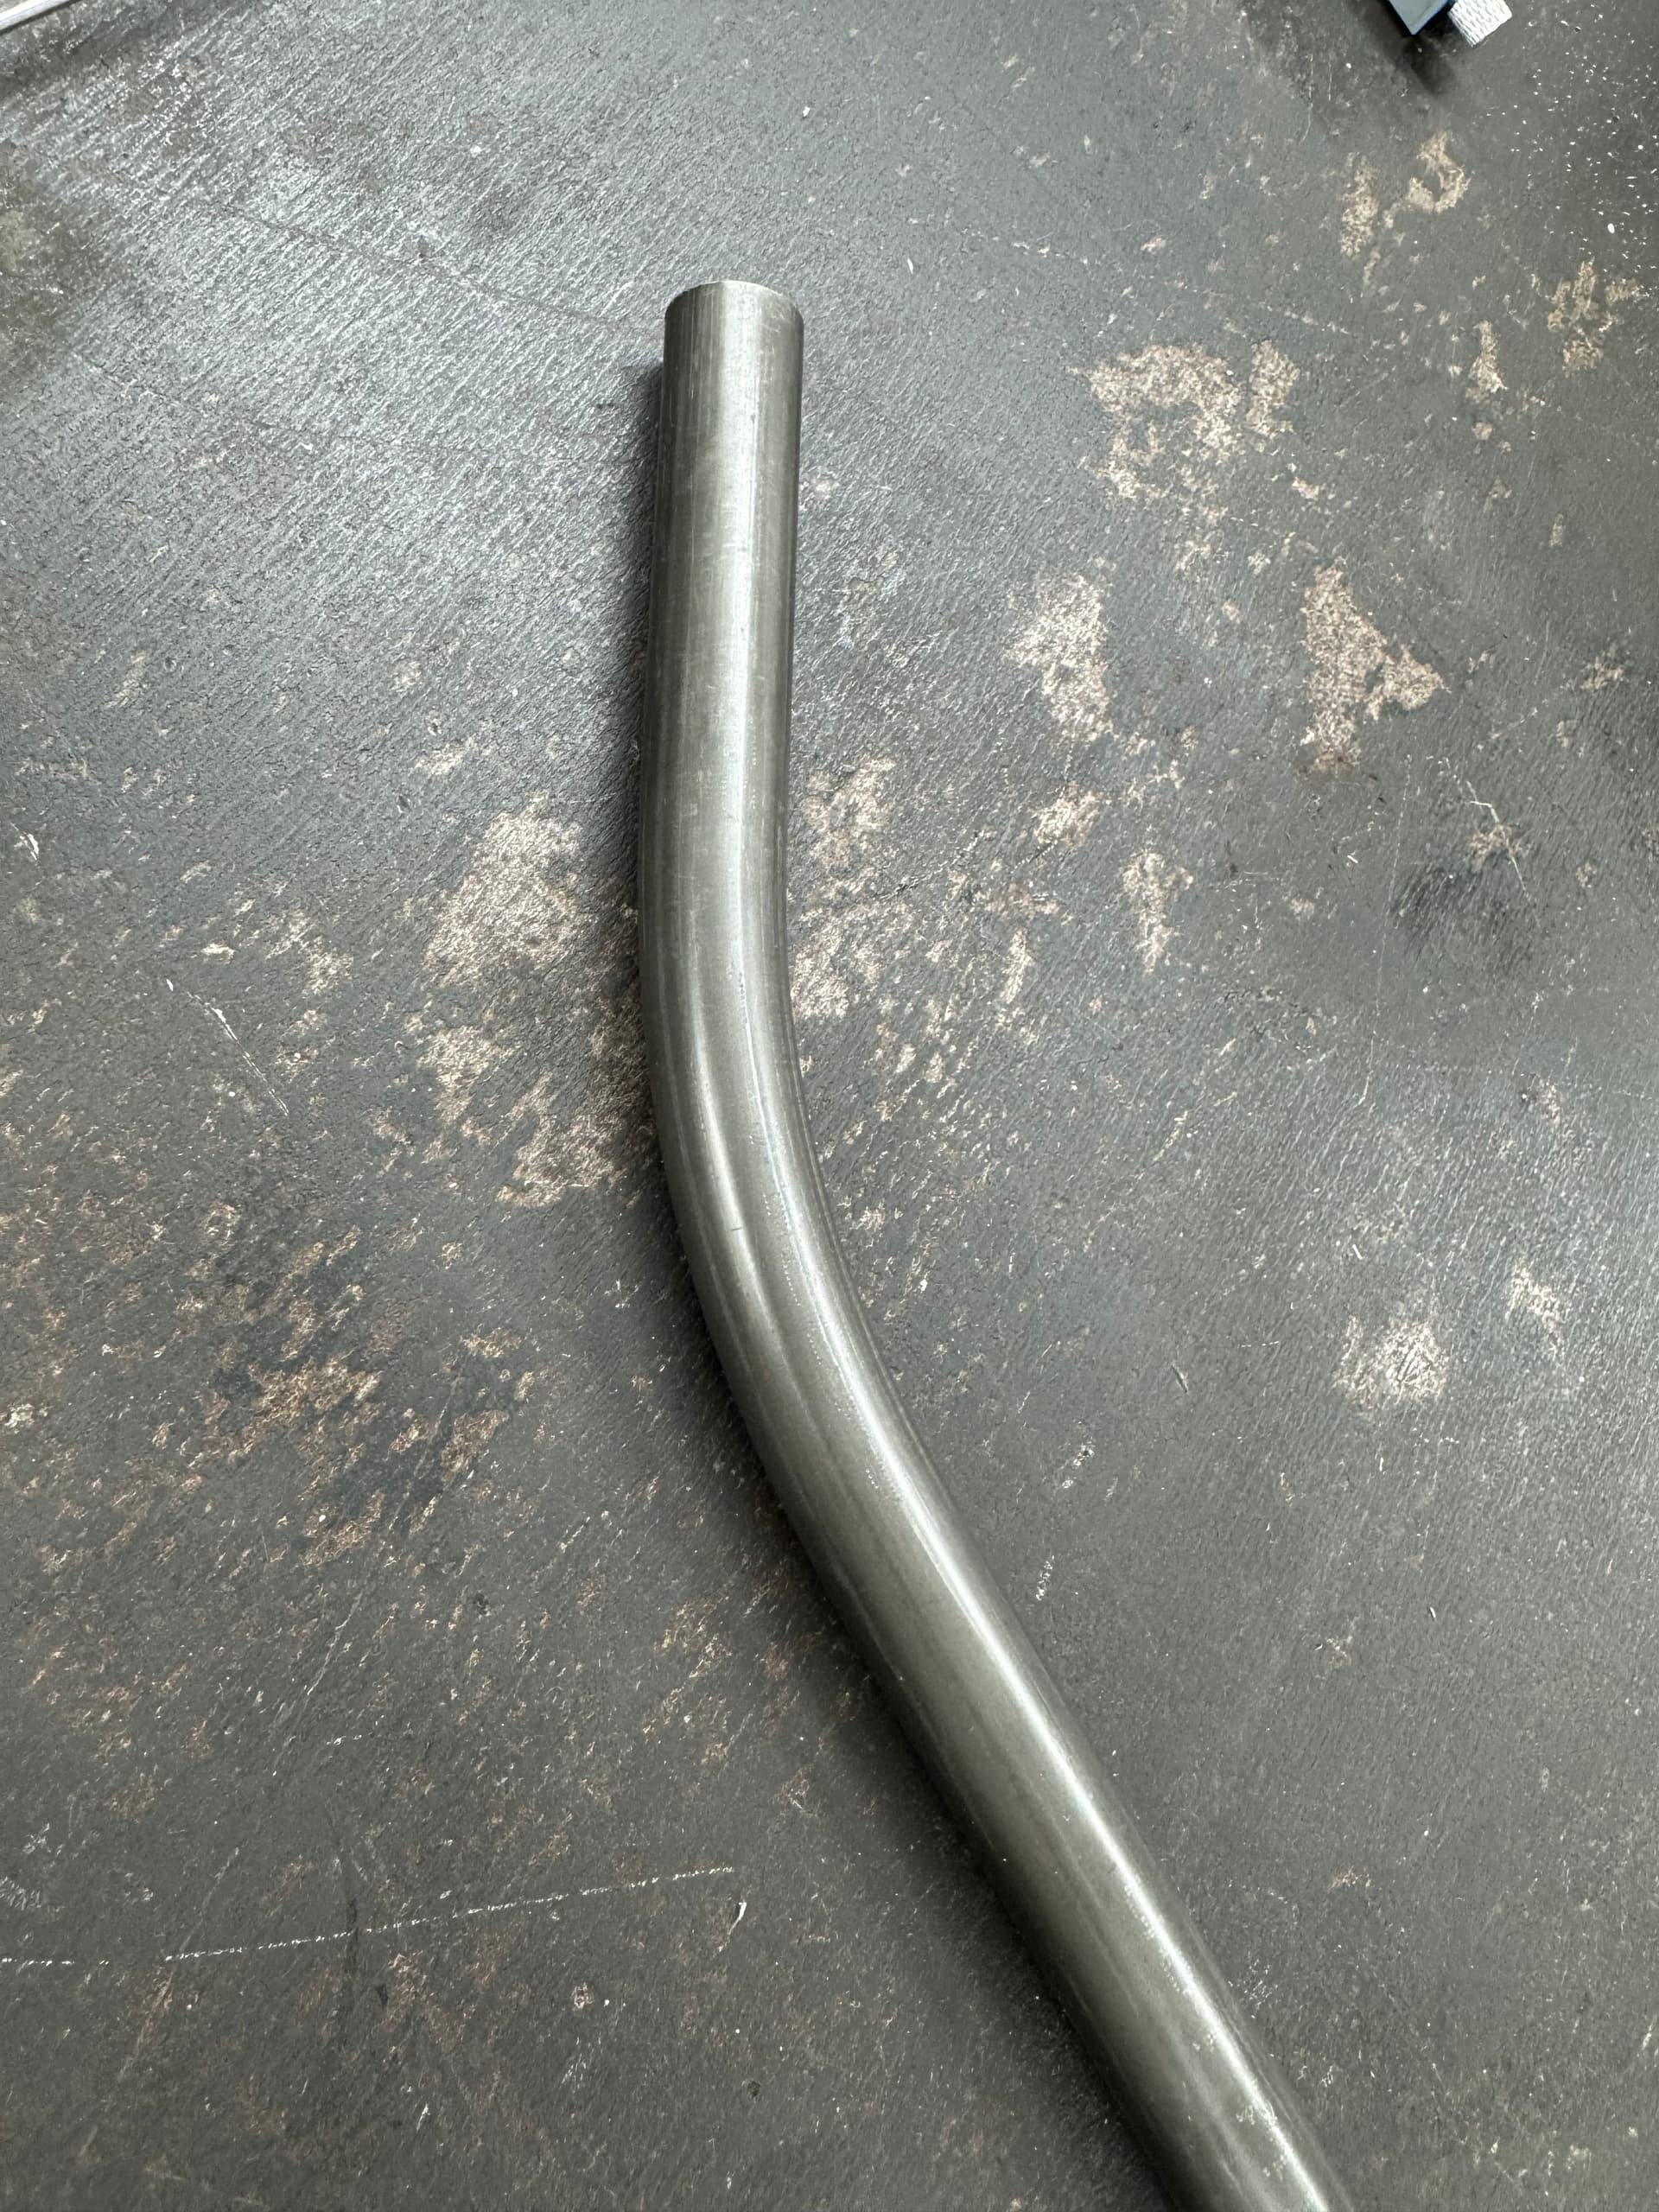
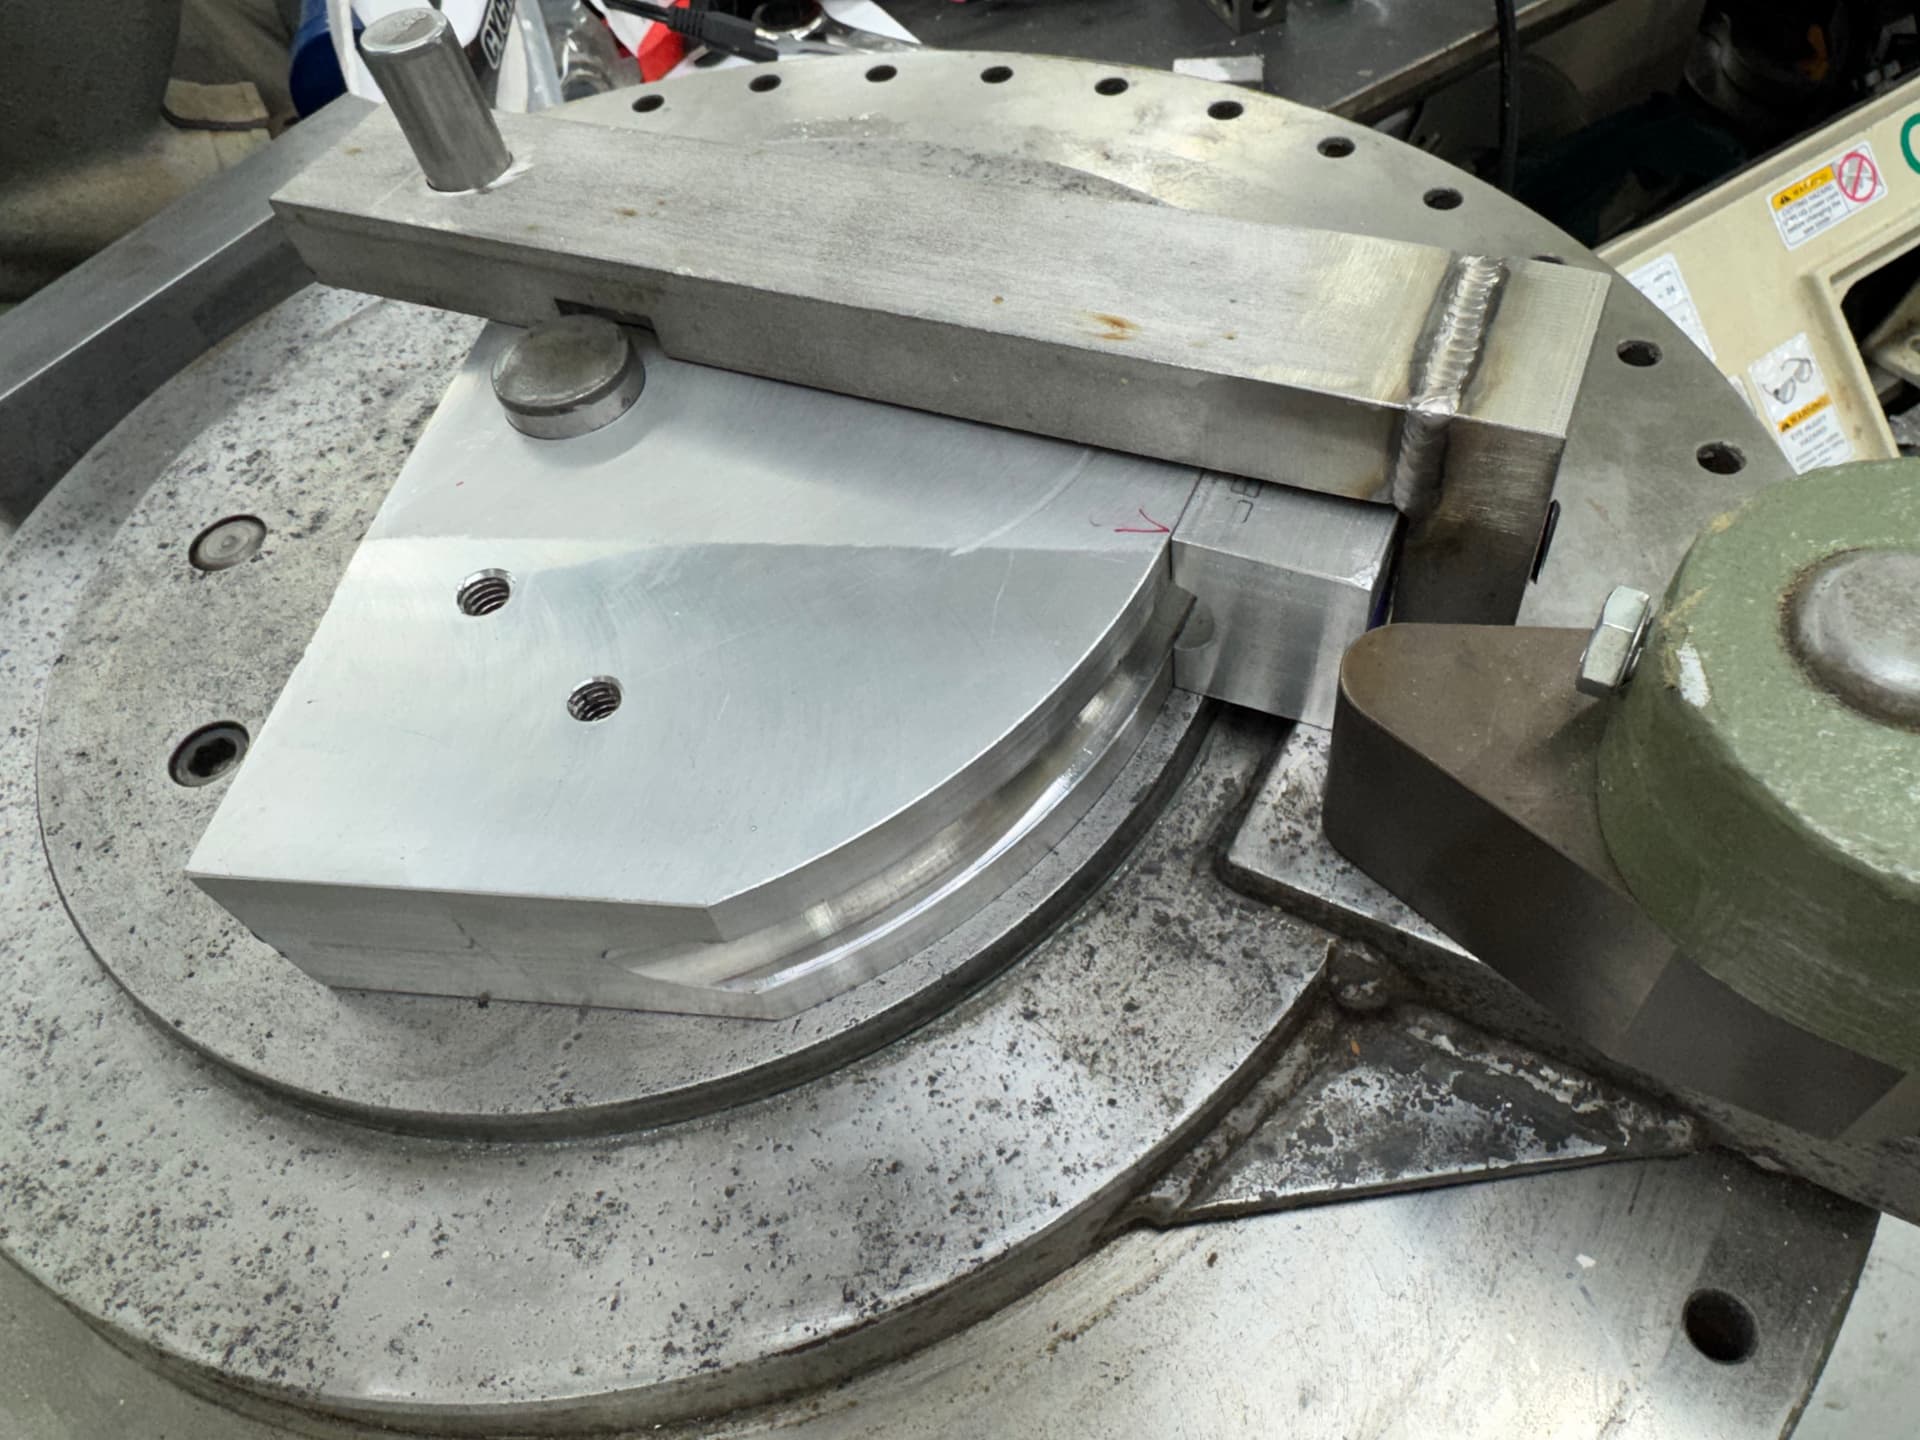
had to make a bending setup for my di-acro to bend the stays
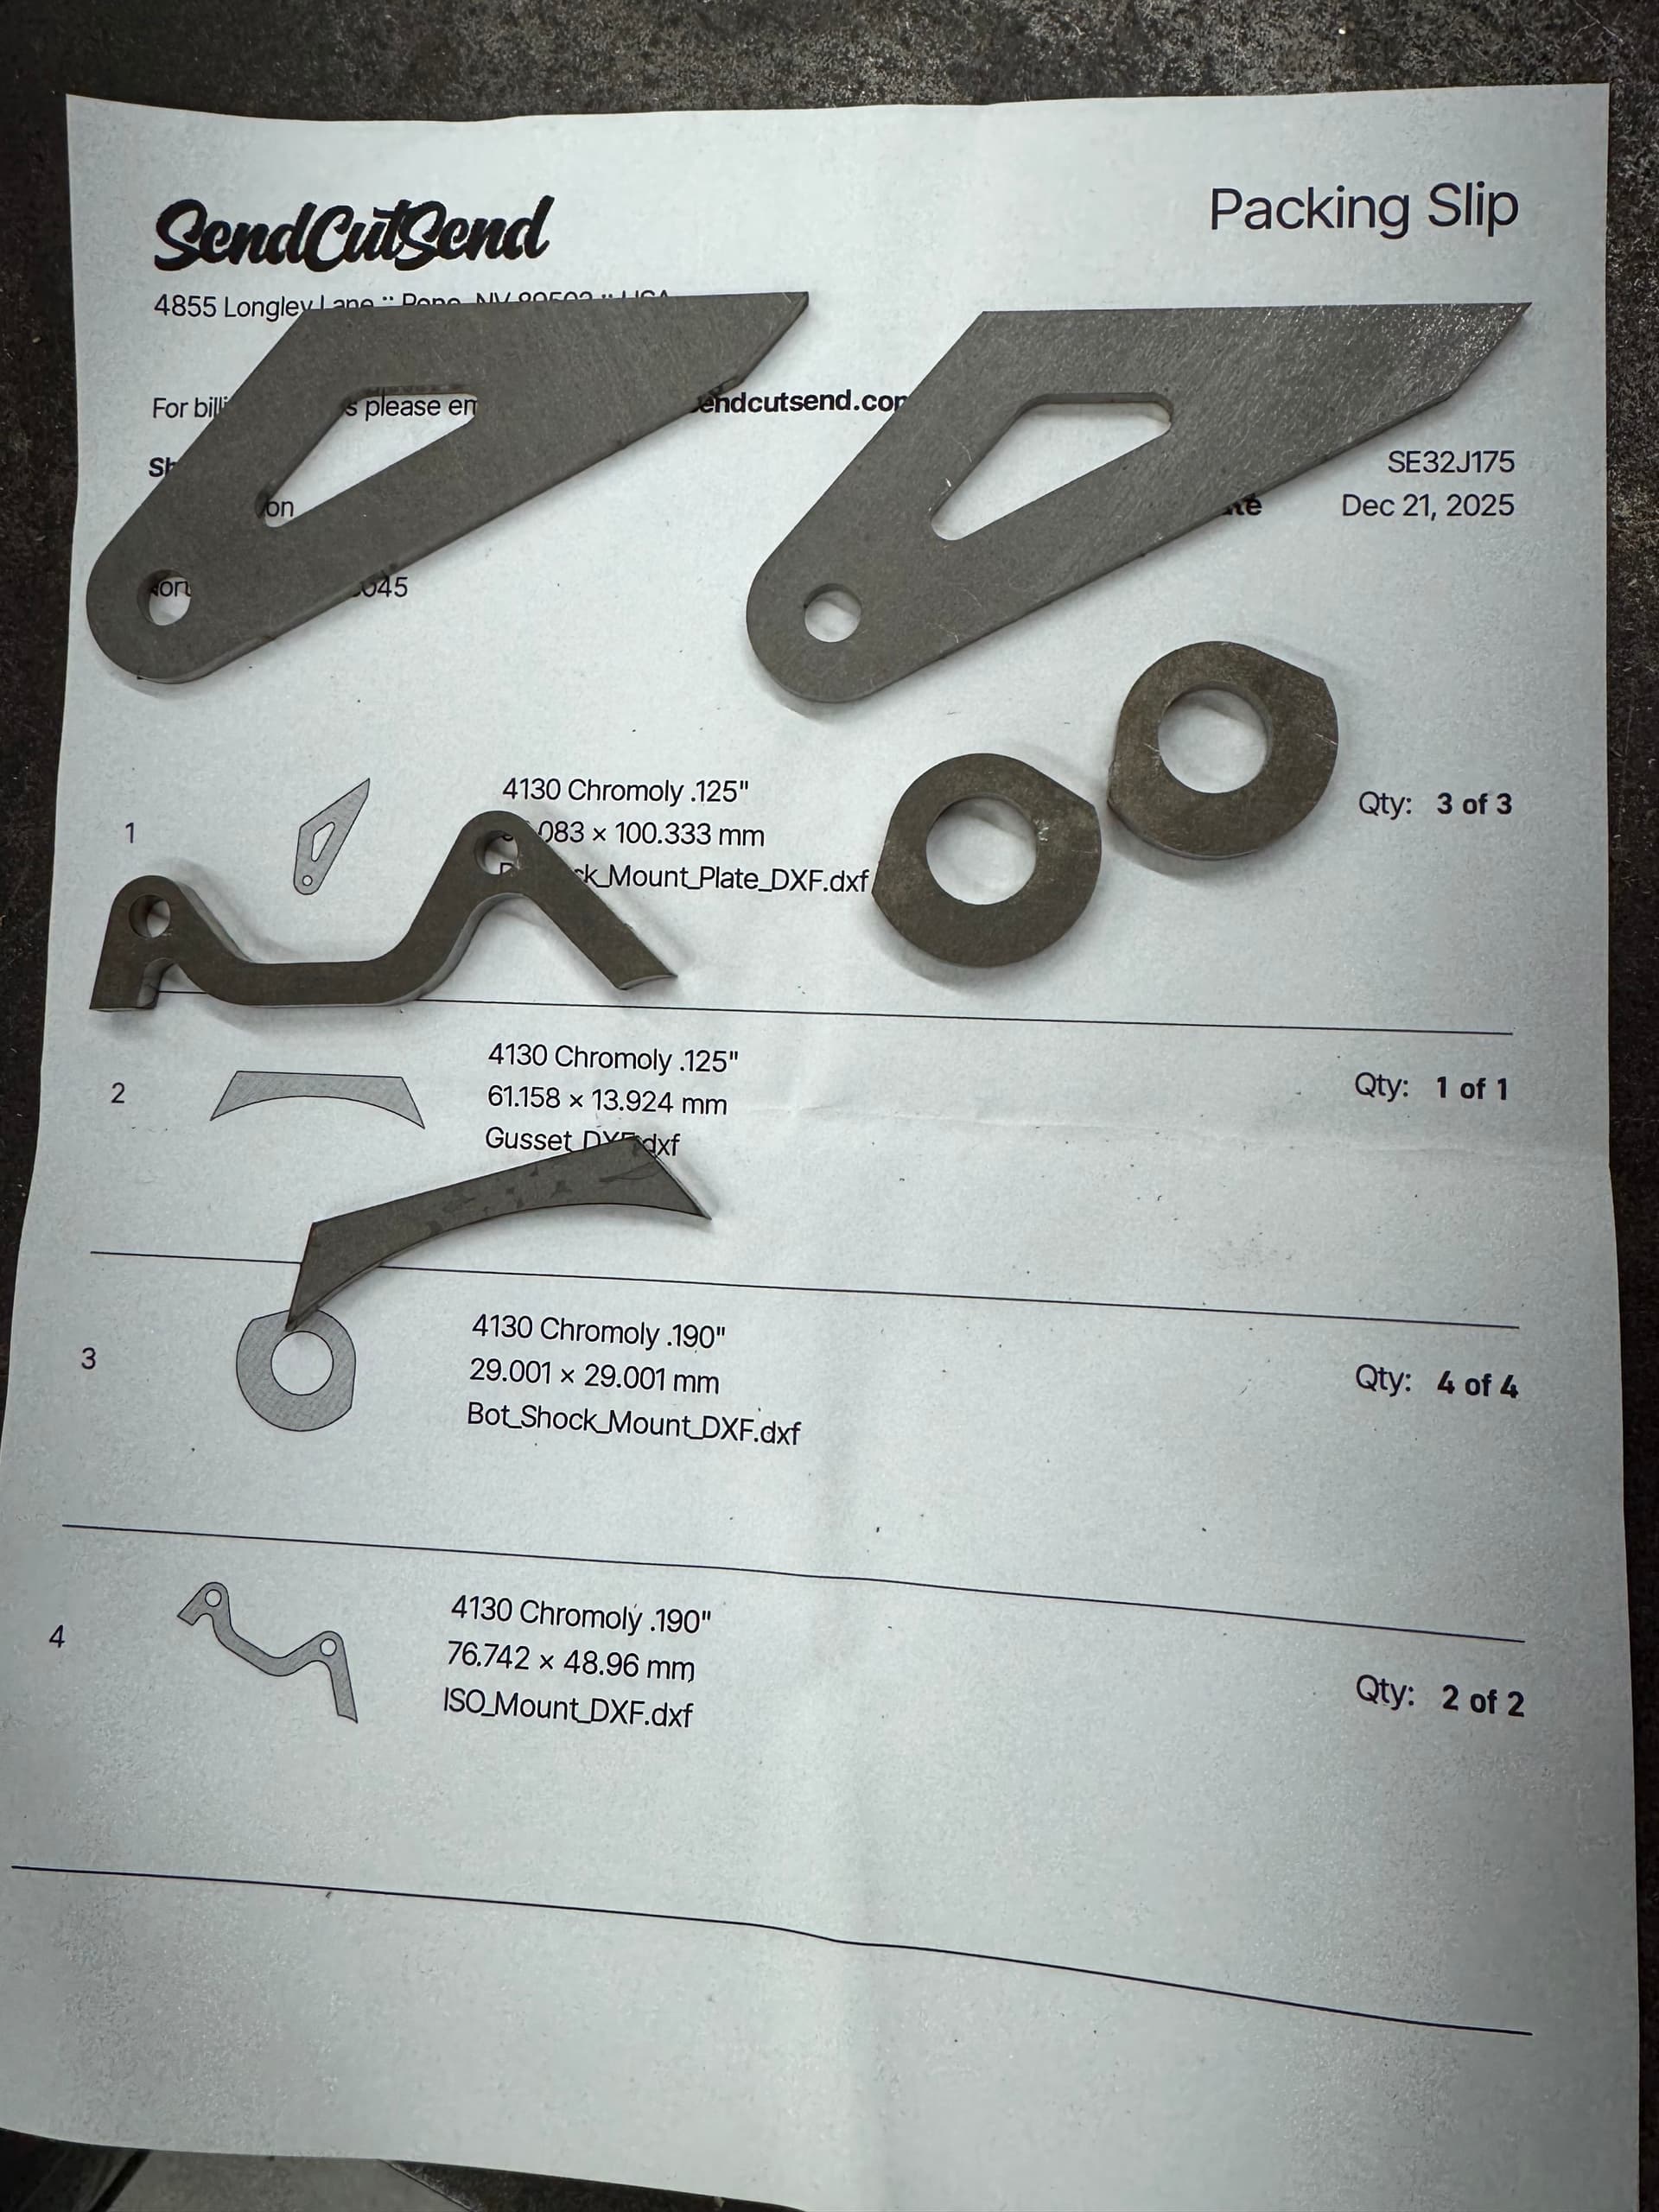
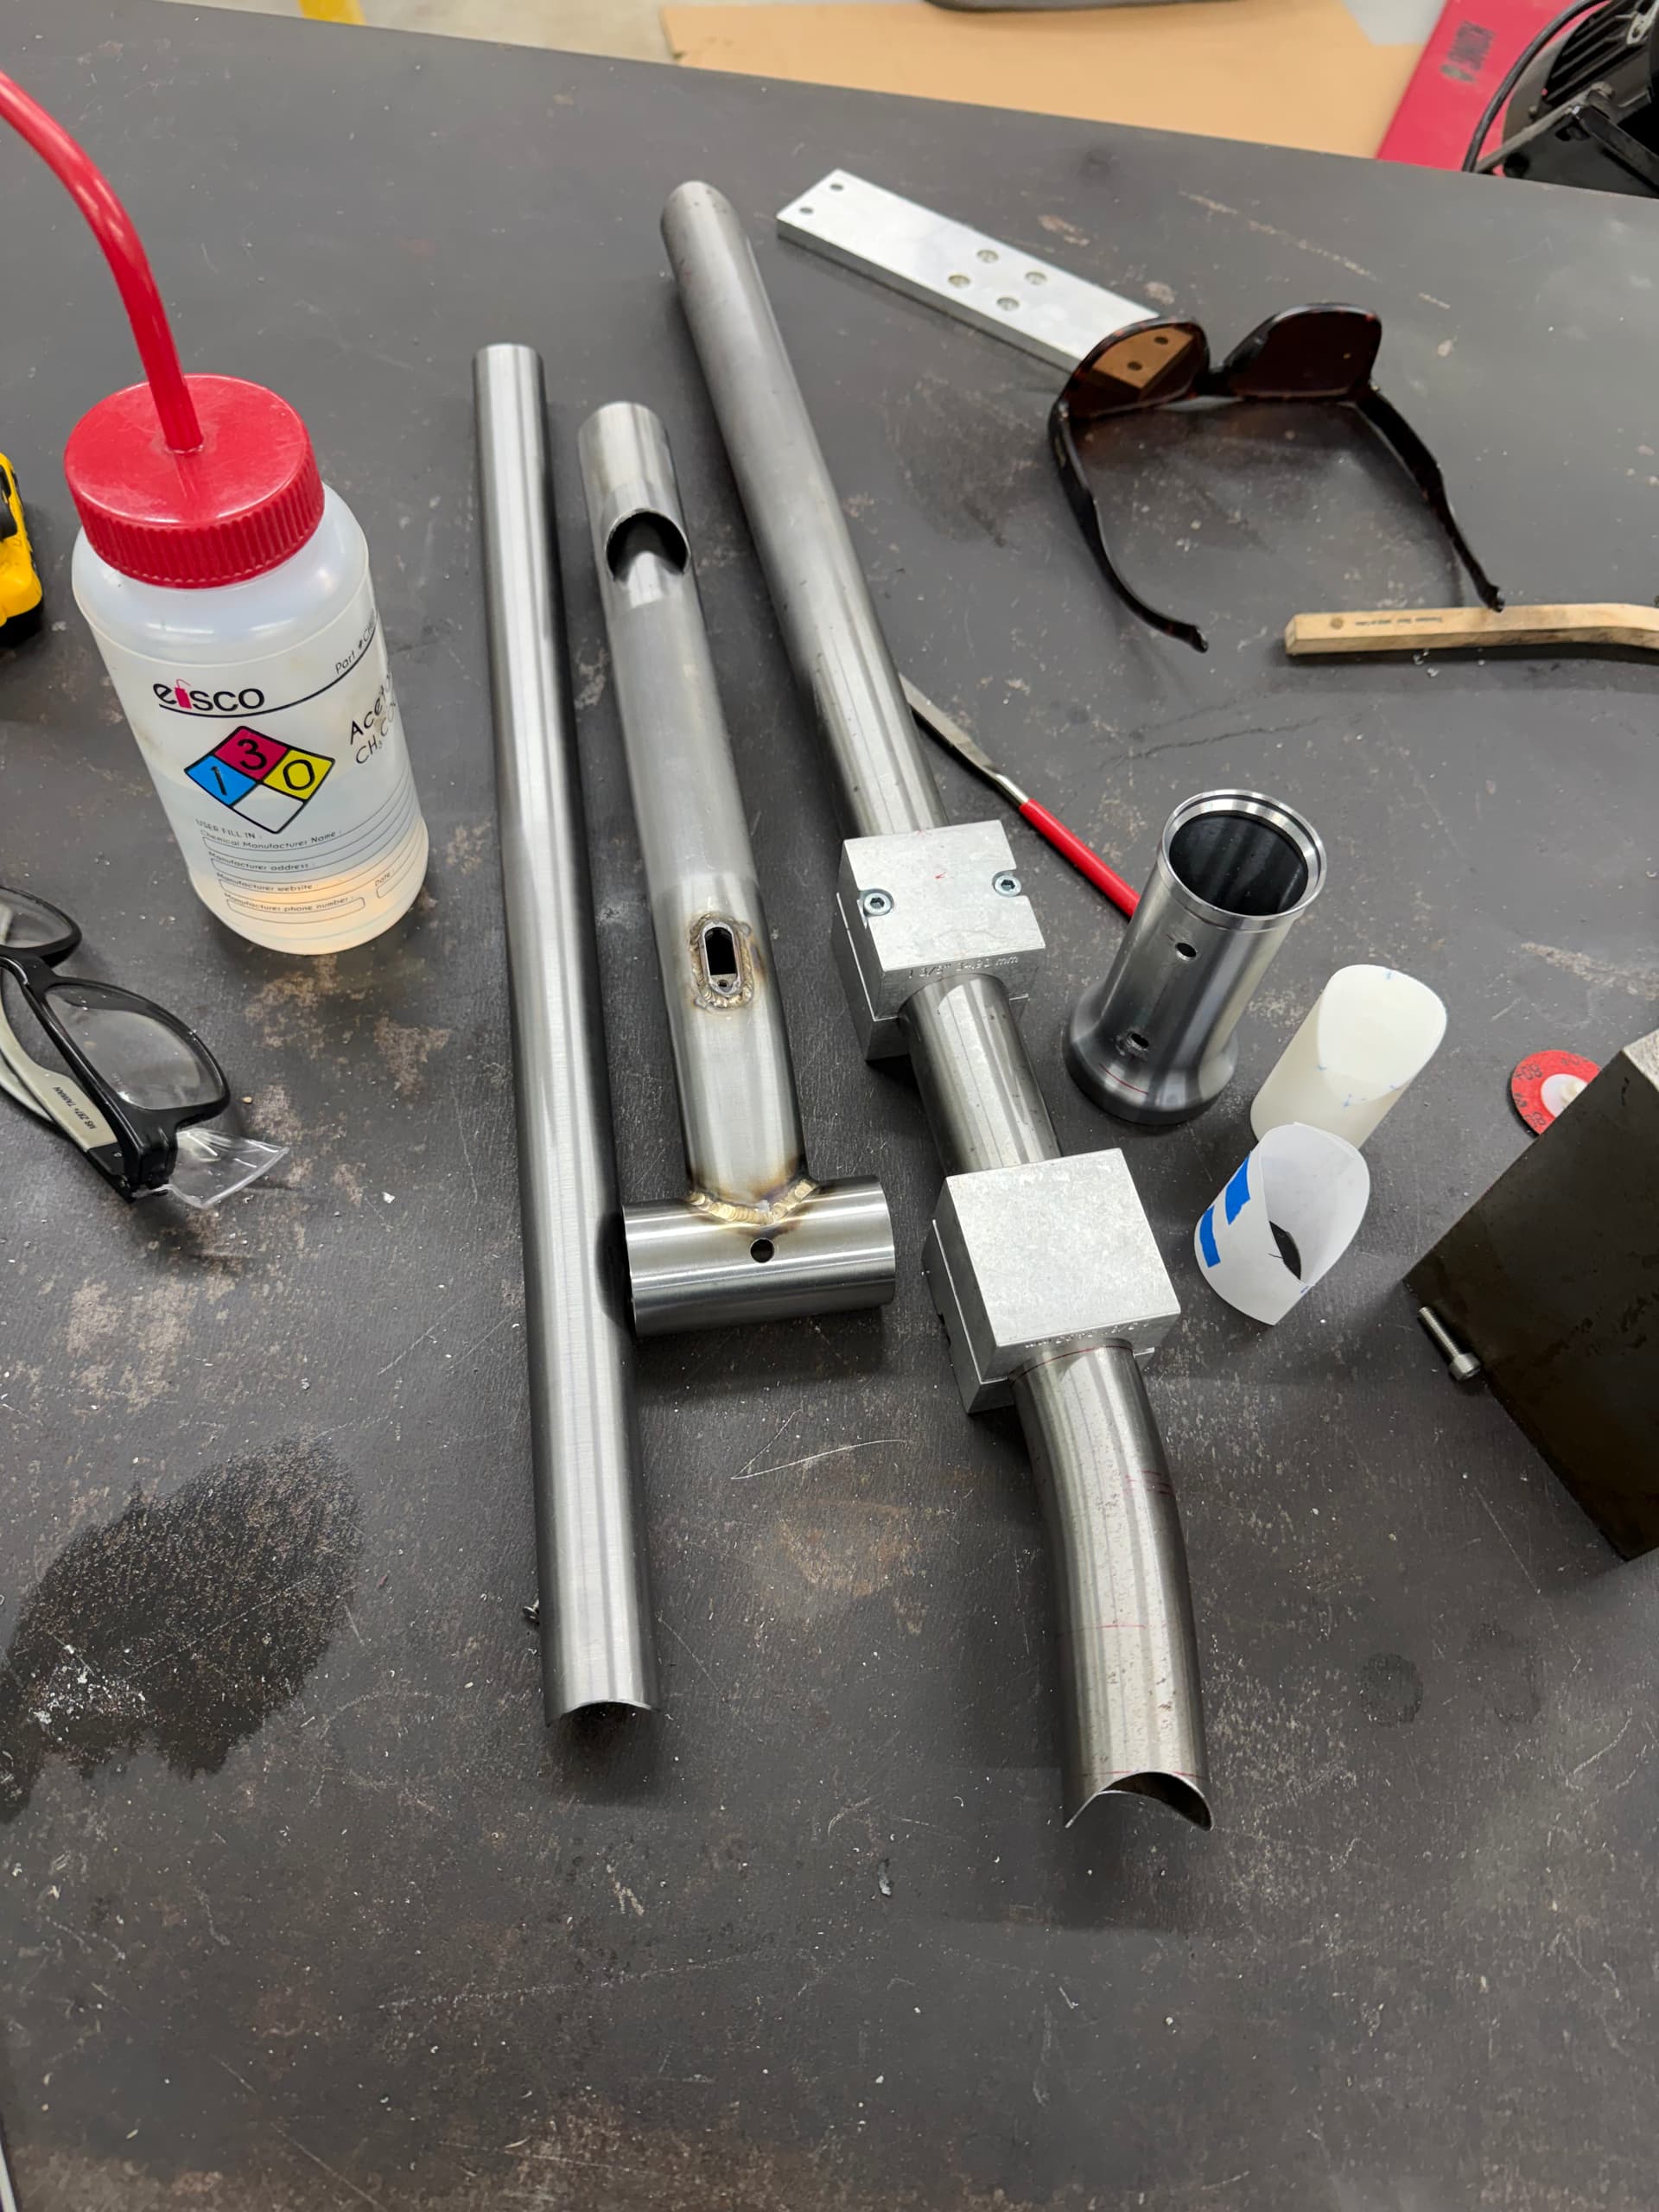
Got scs materials- yaaay!
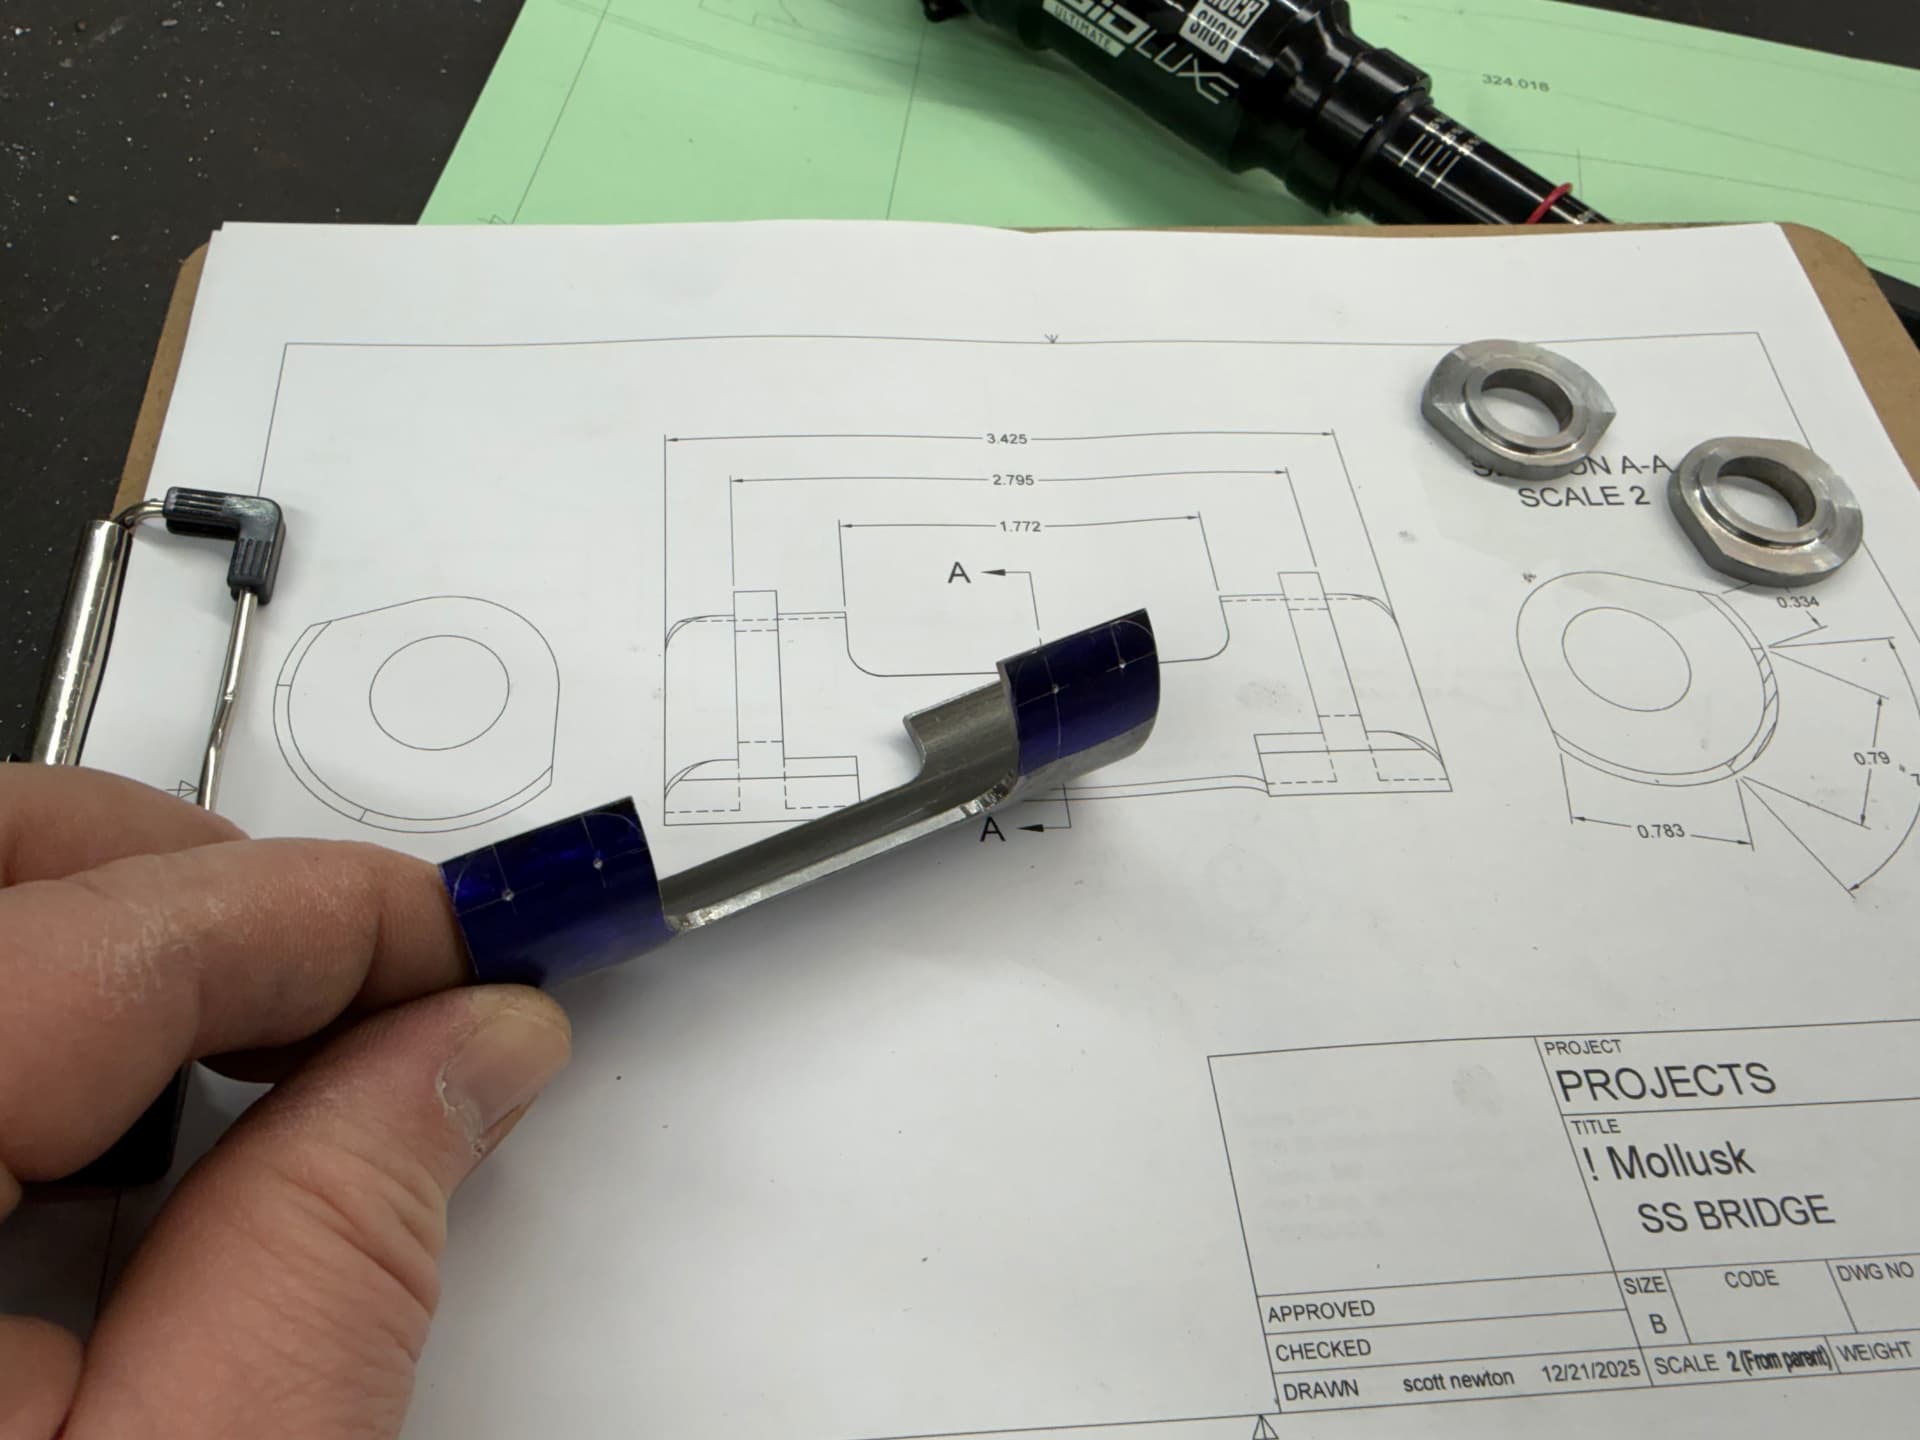
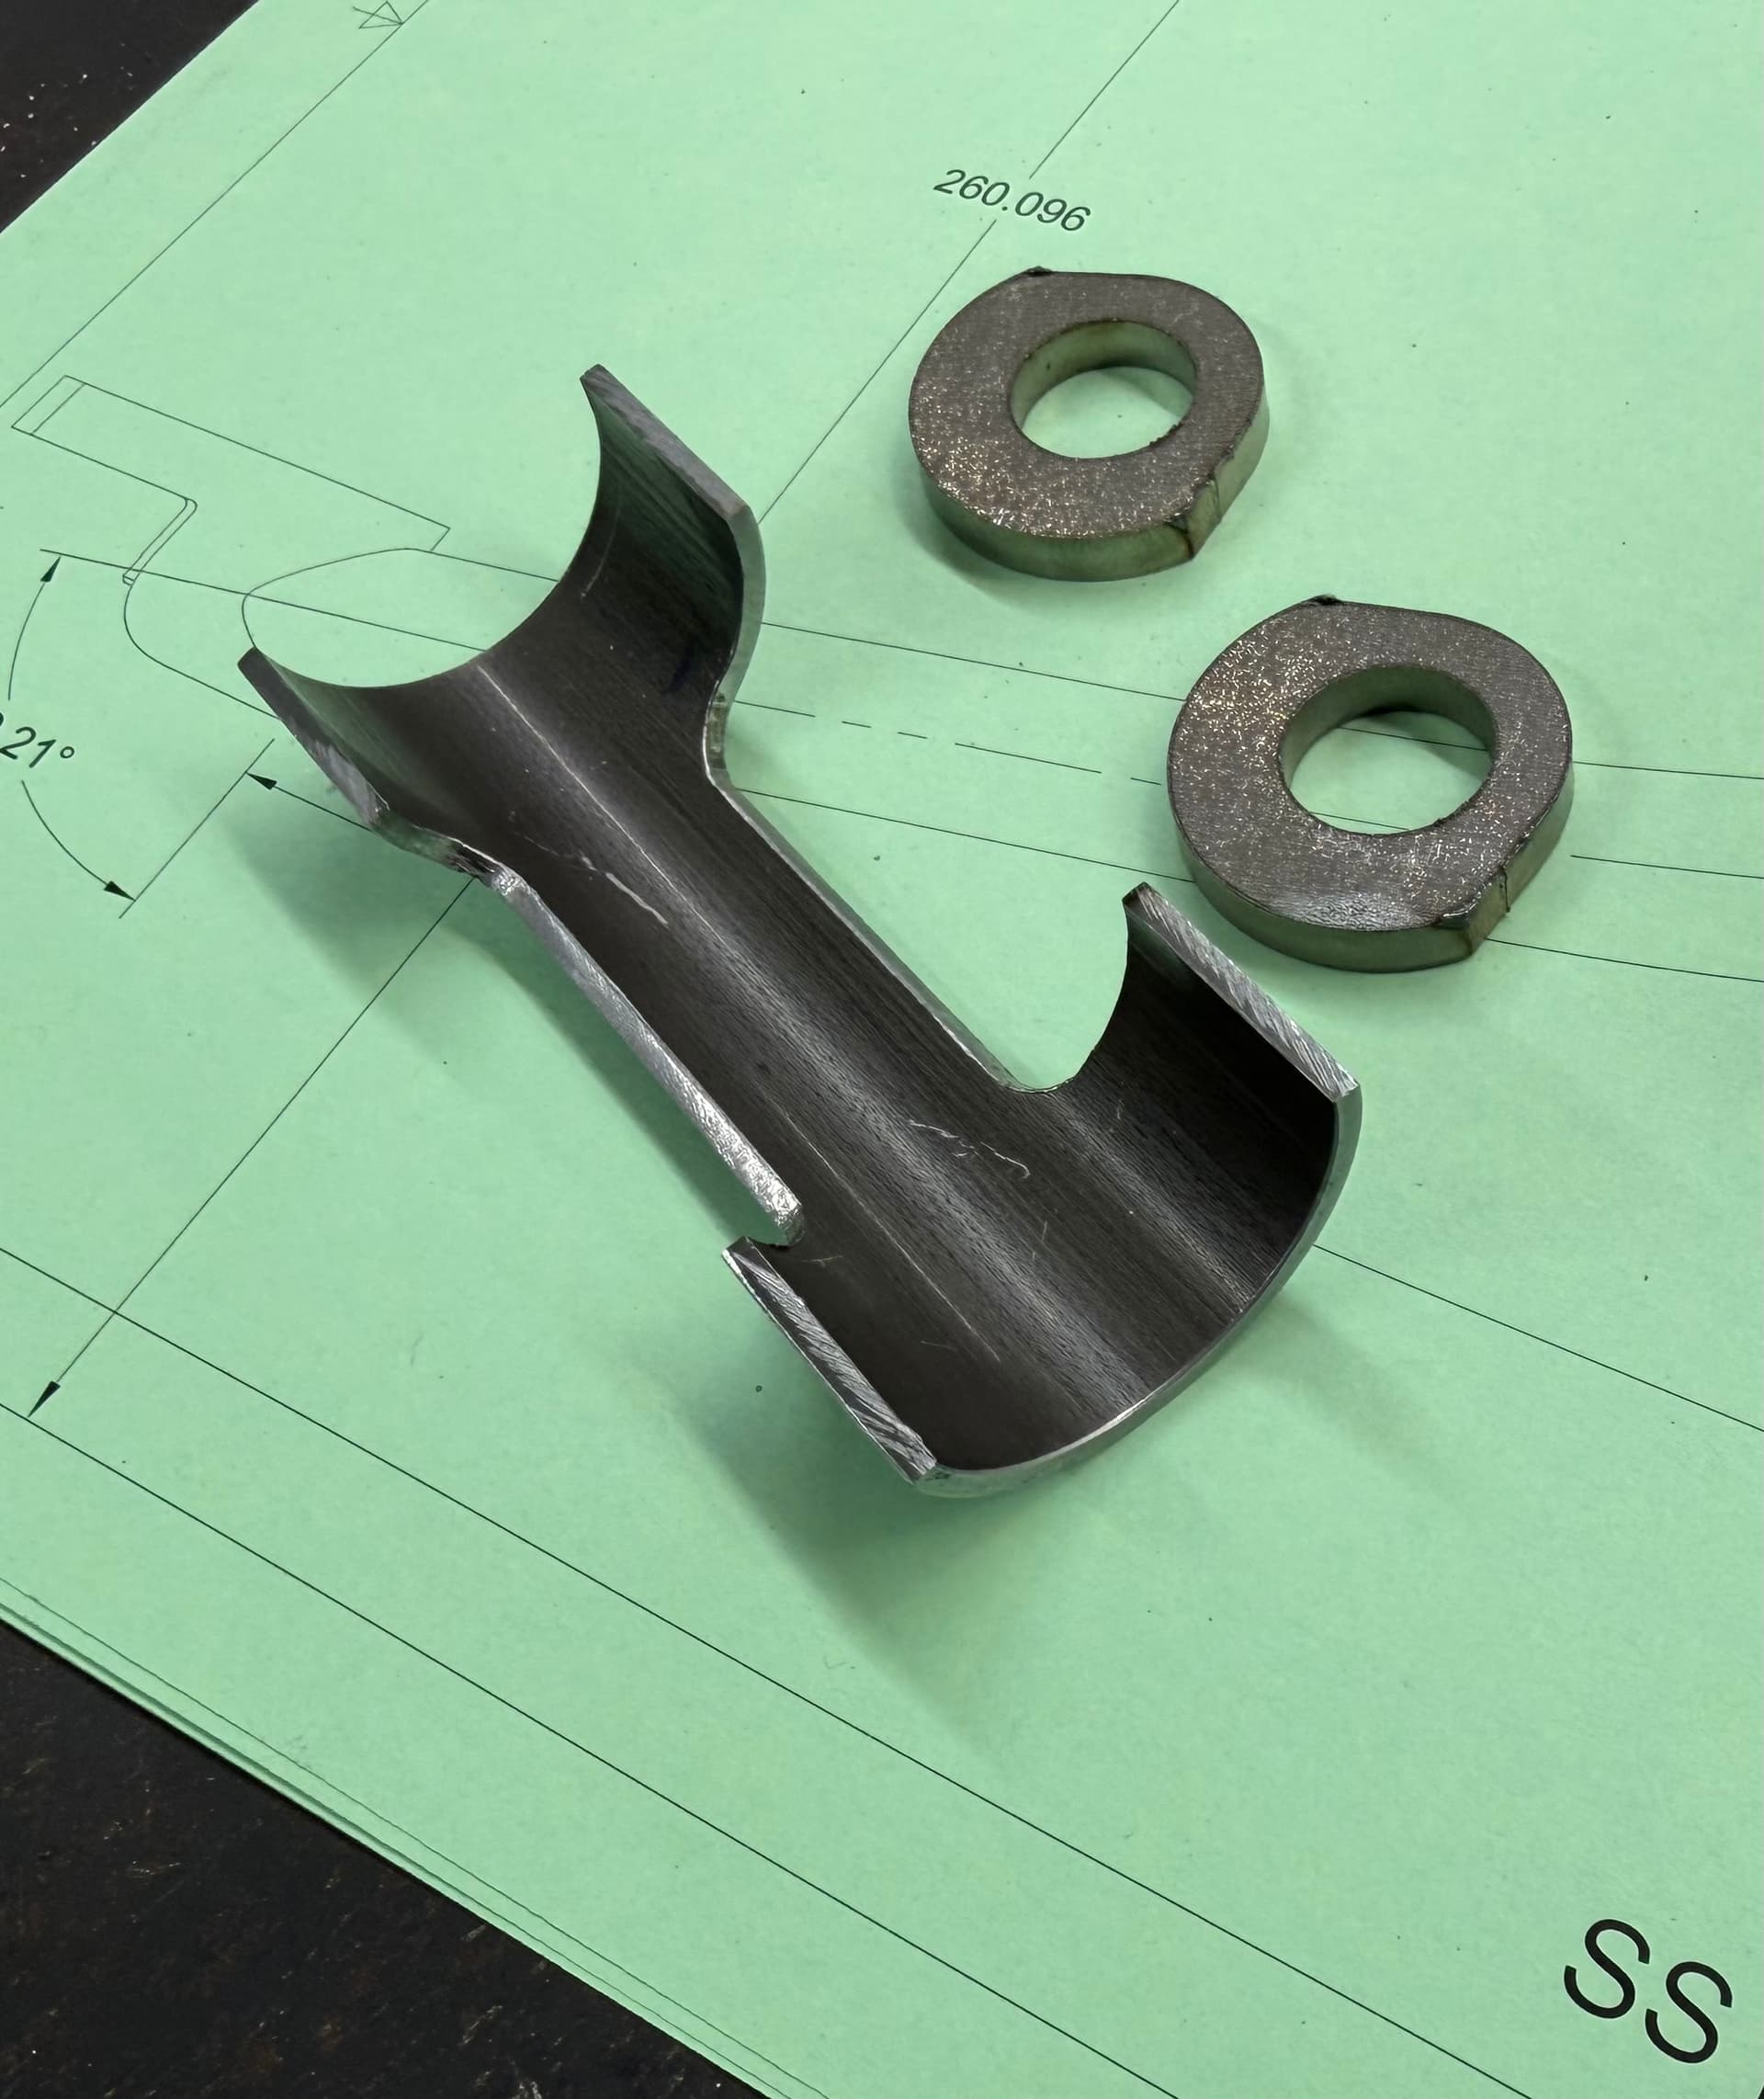
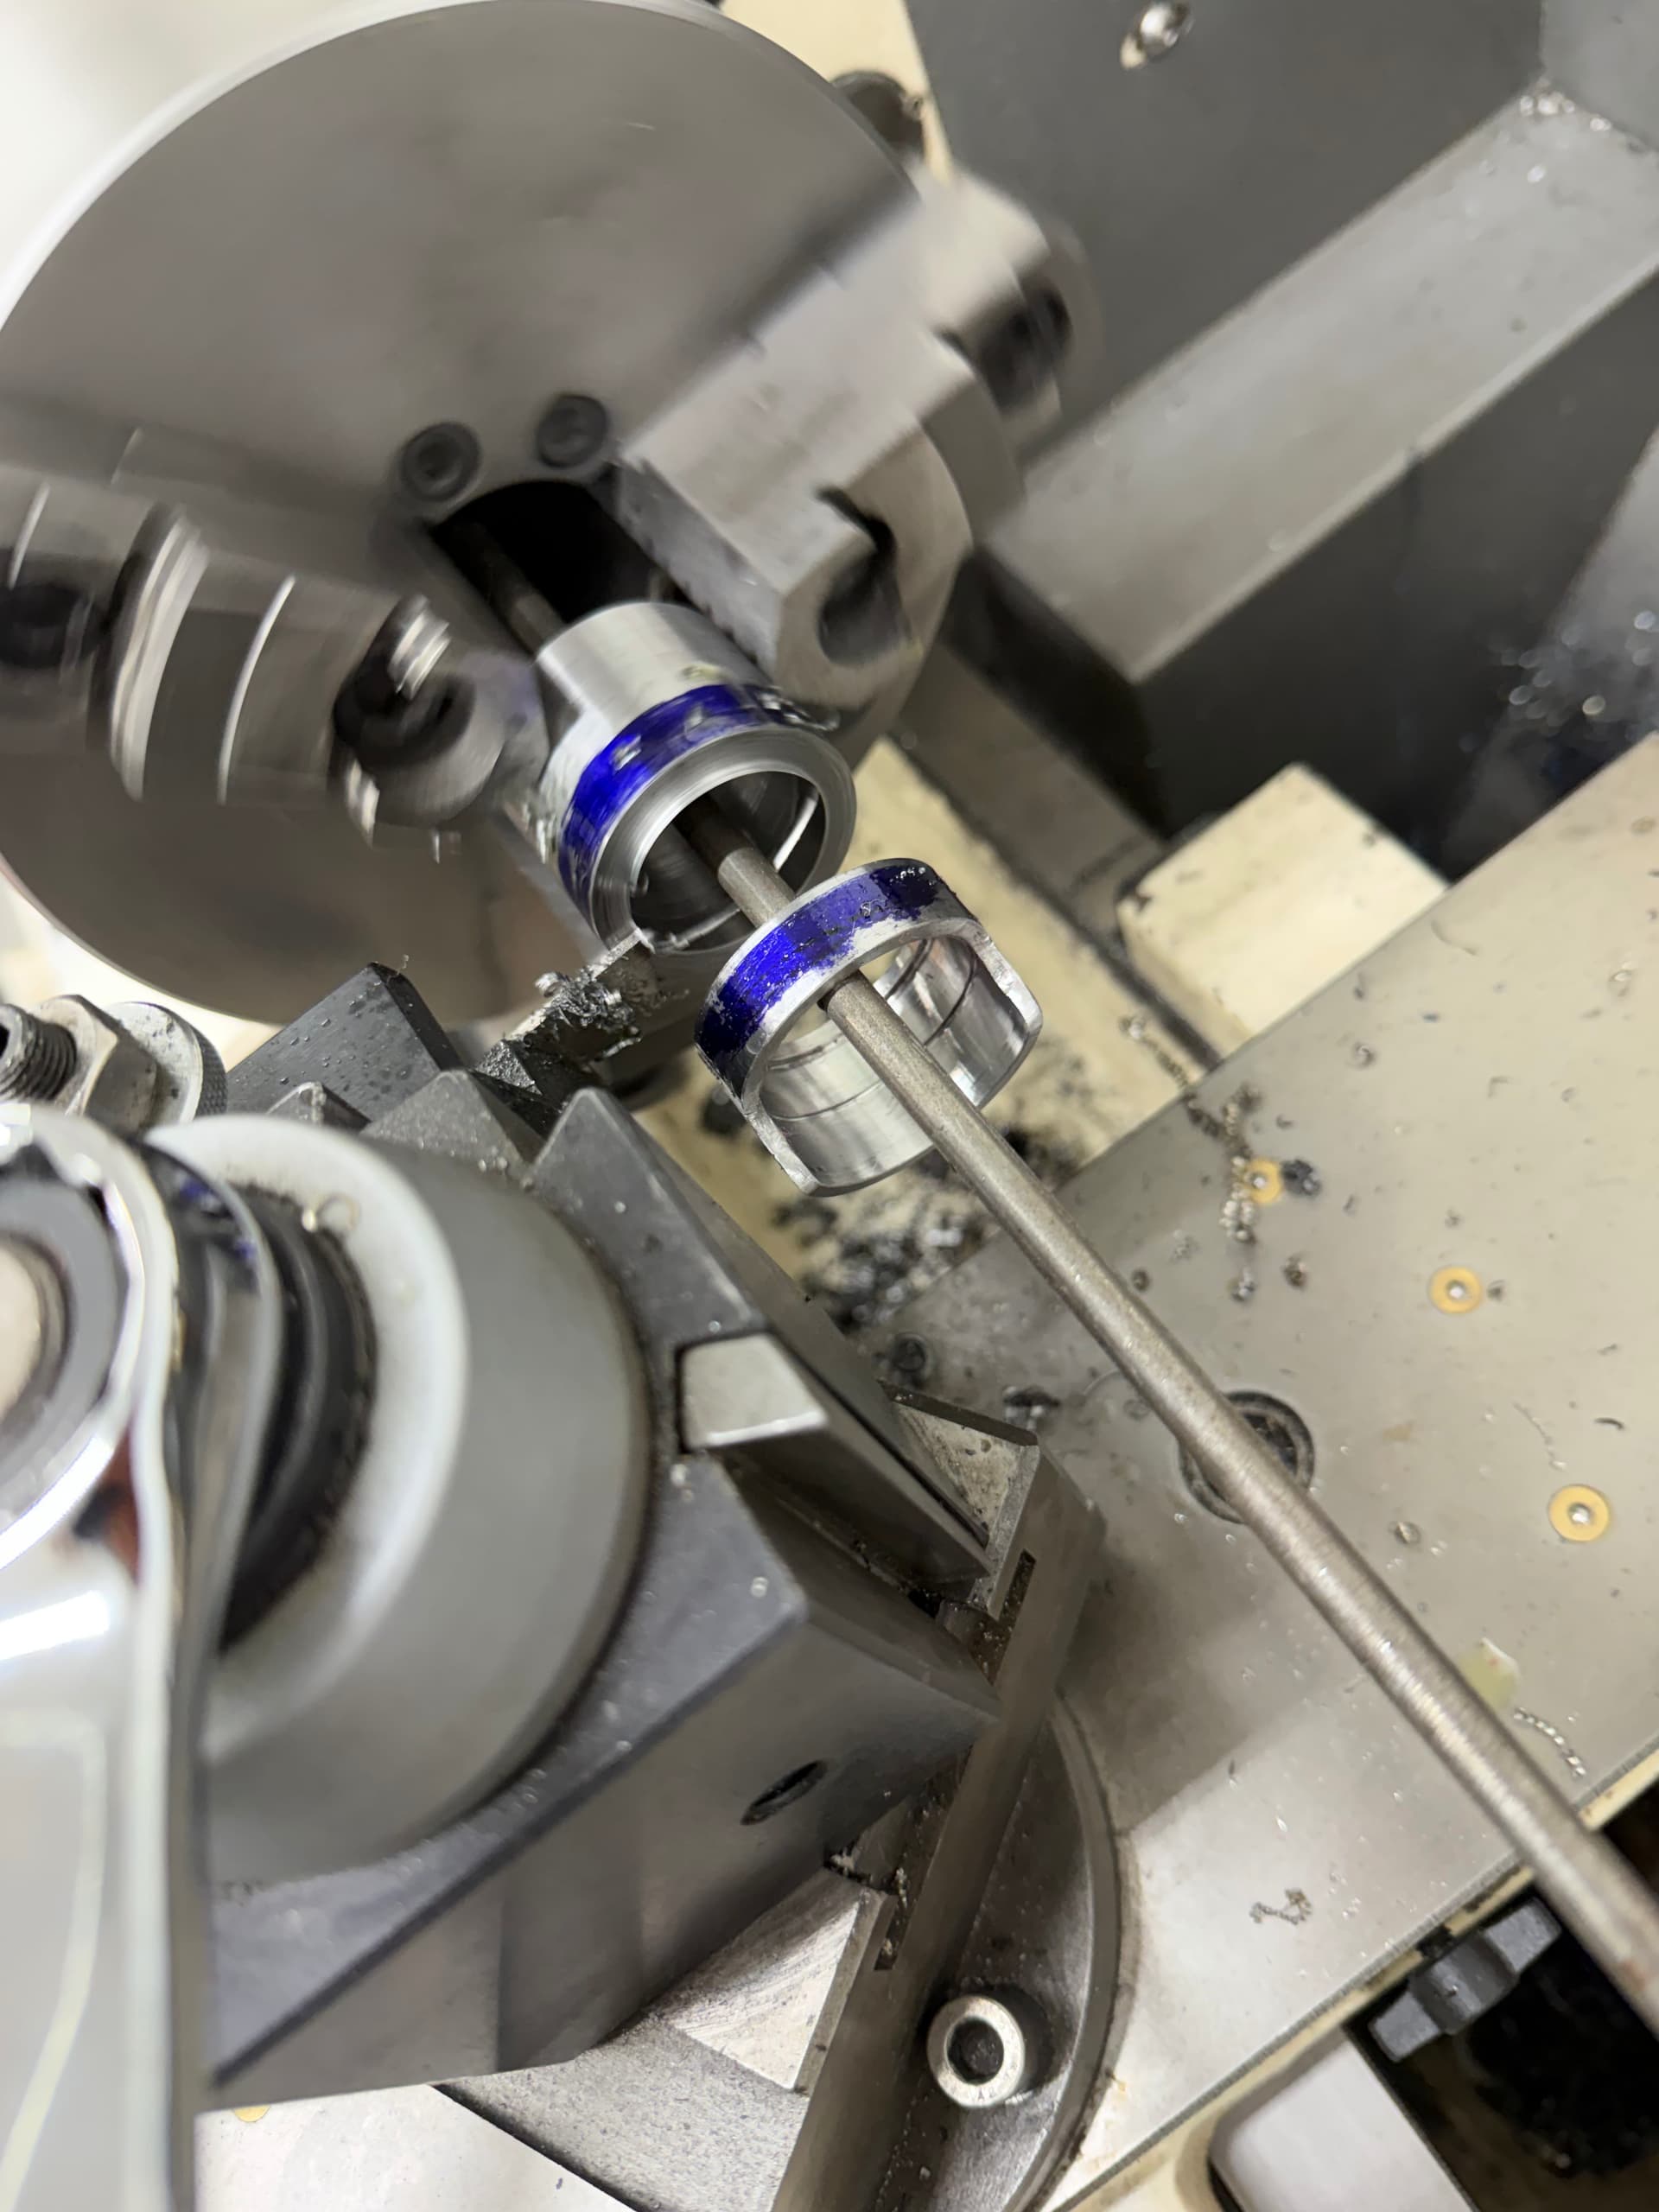
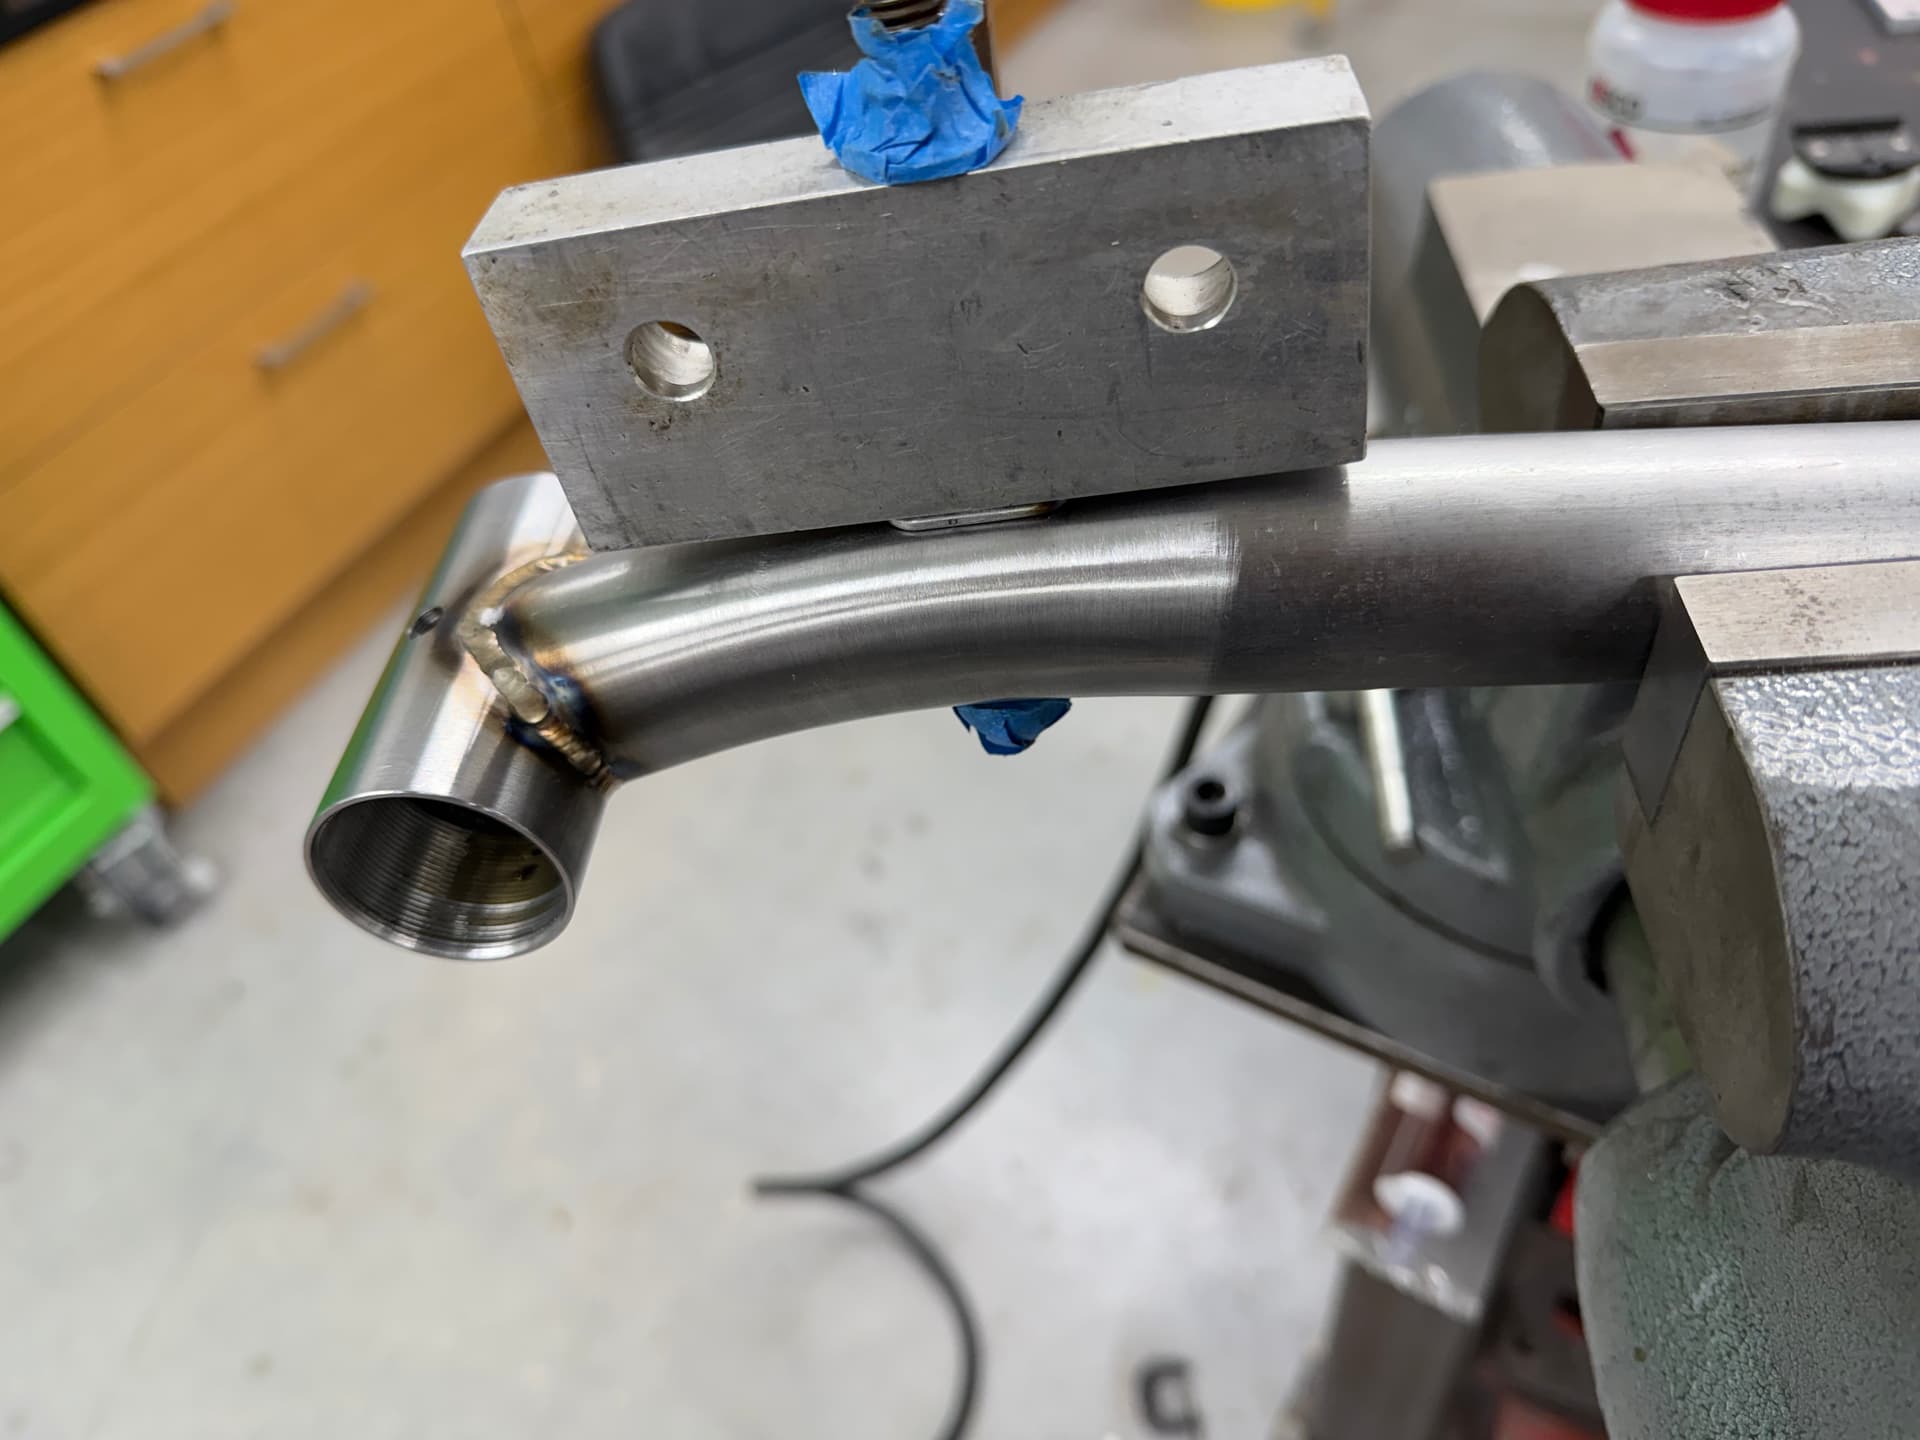
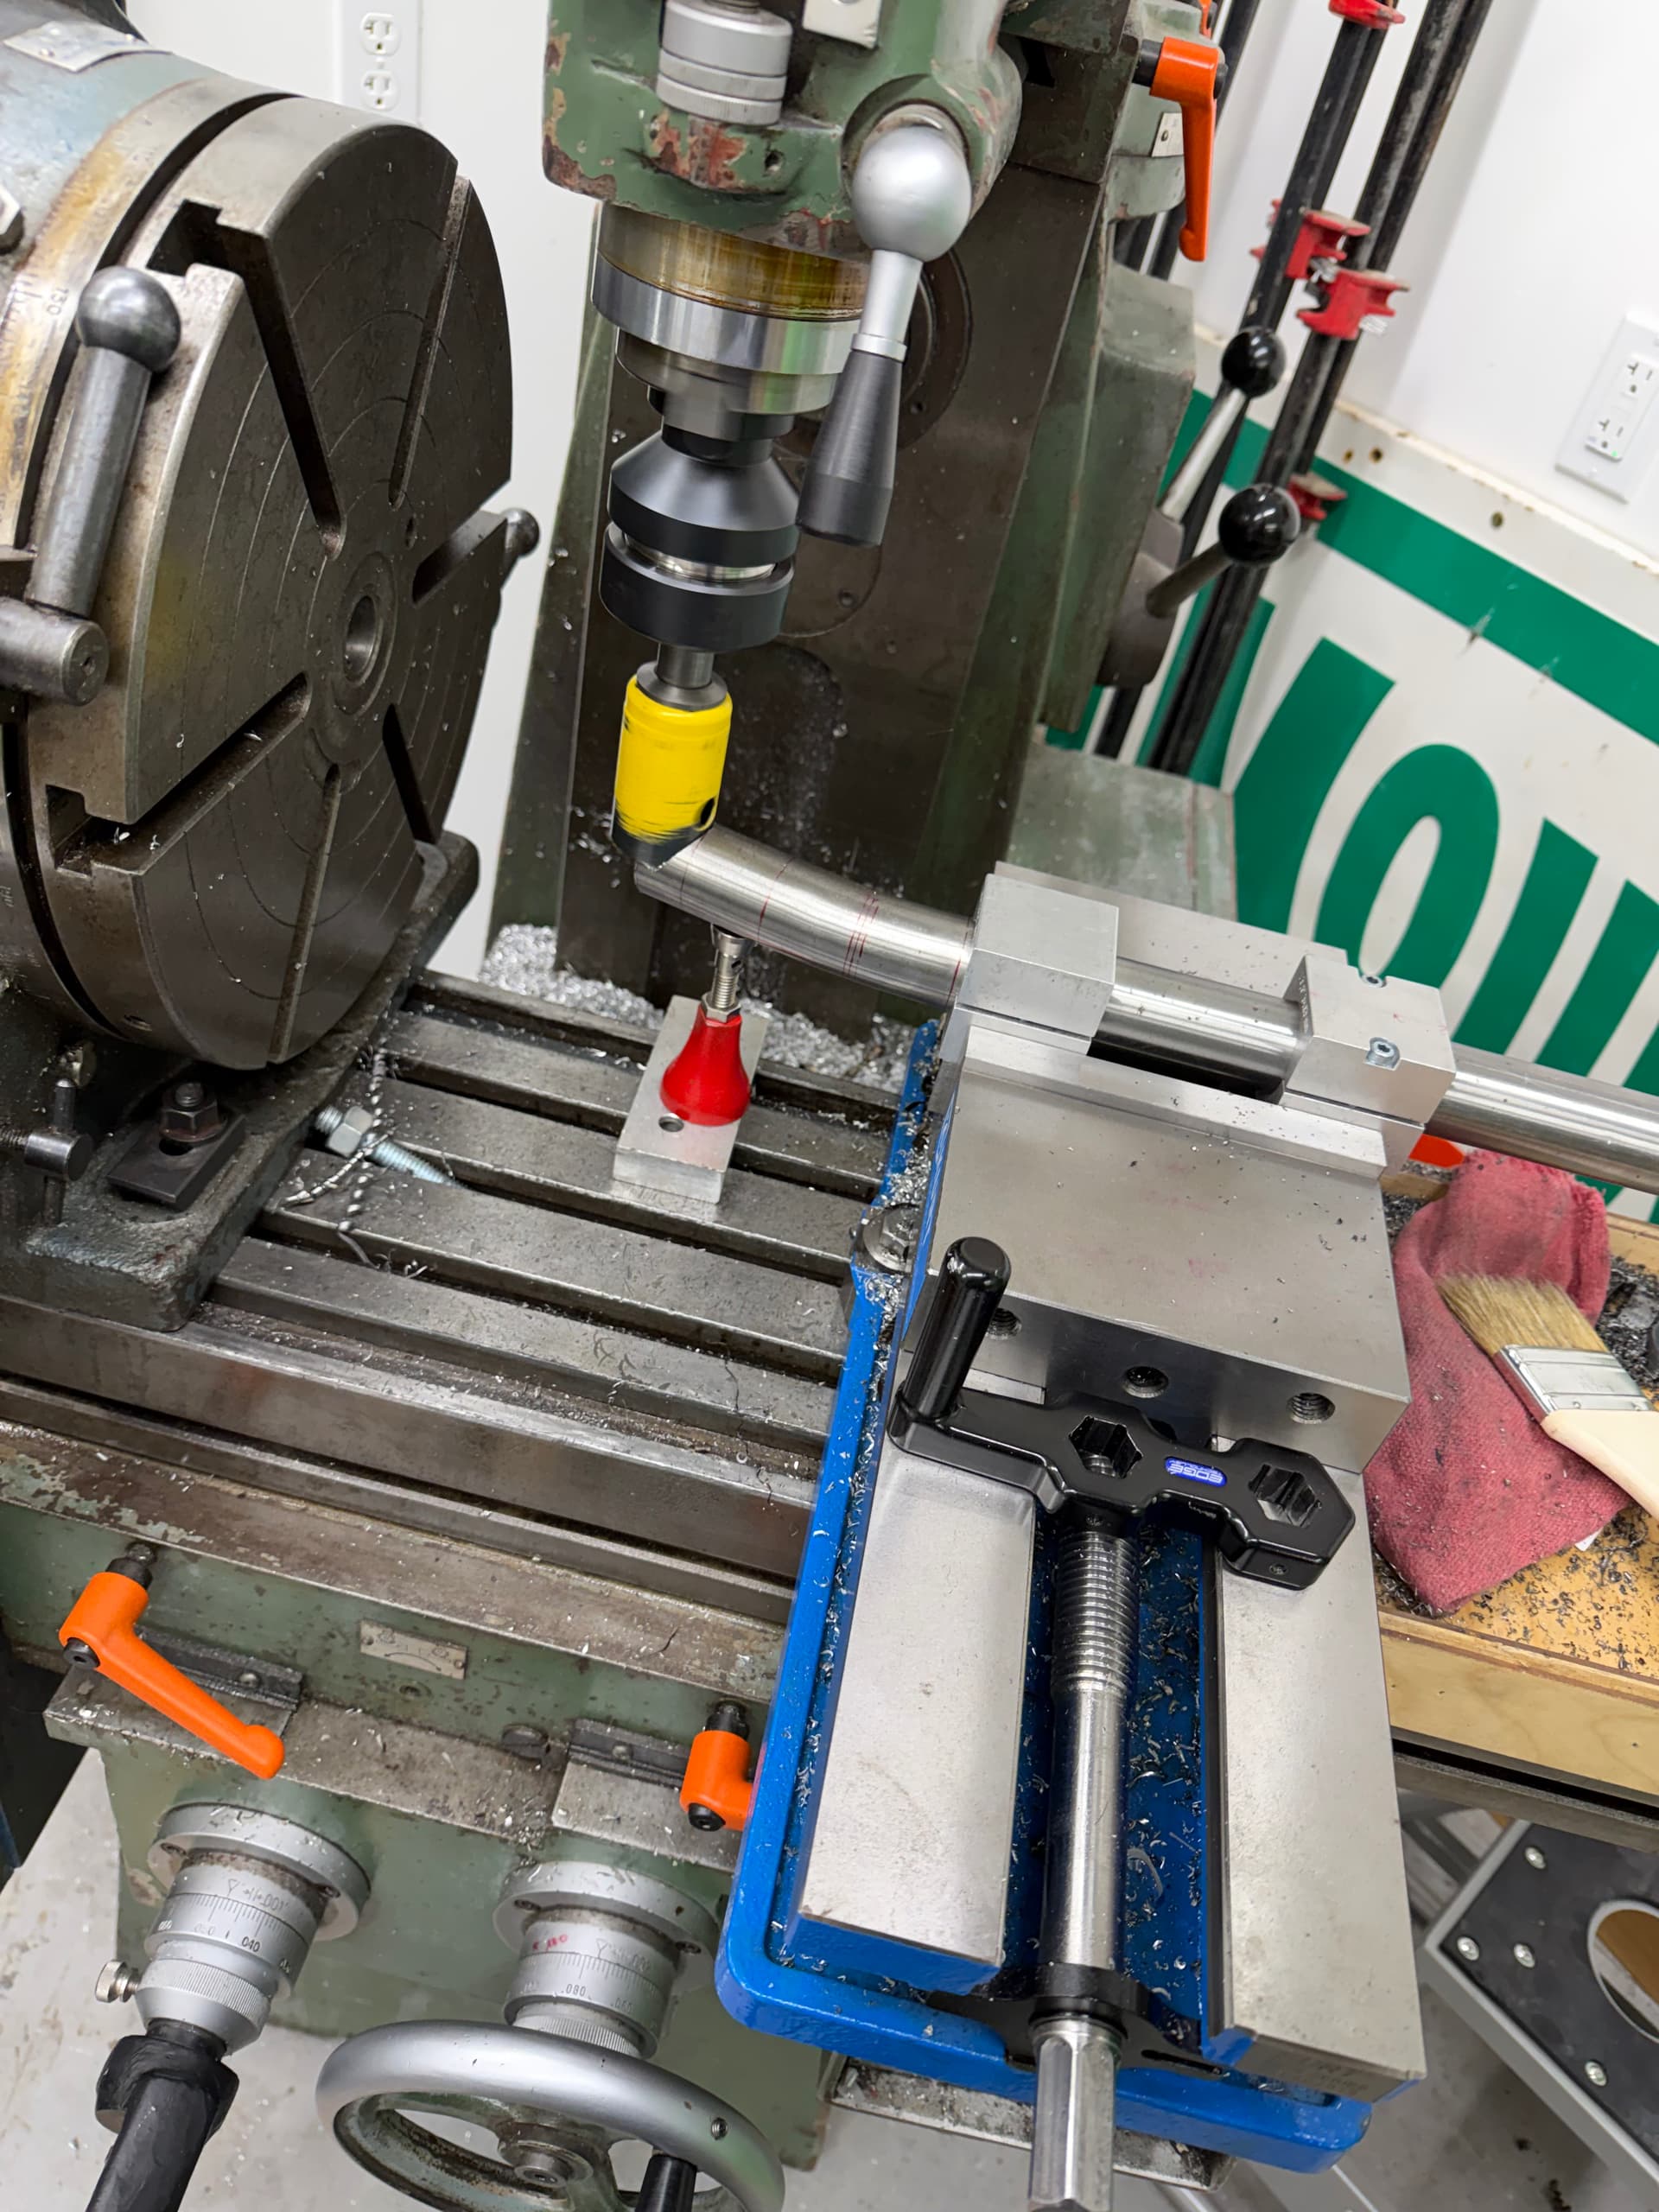
Got the rear yoke mount/ SS brace mostly done. I tried to machine the tube and couldn’t hold it well enough without crashing (I crashed), so I did it mostly by hand
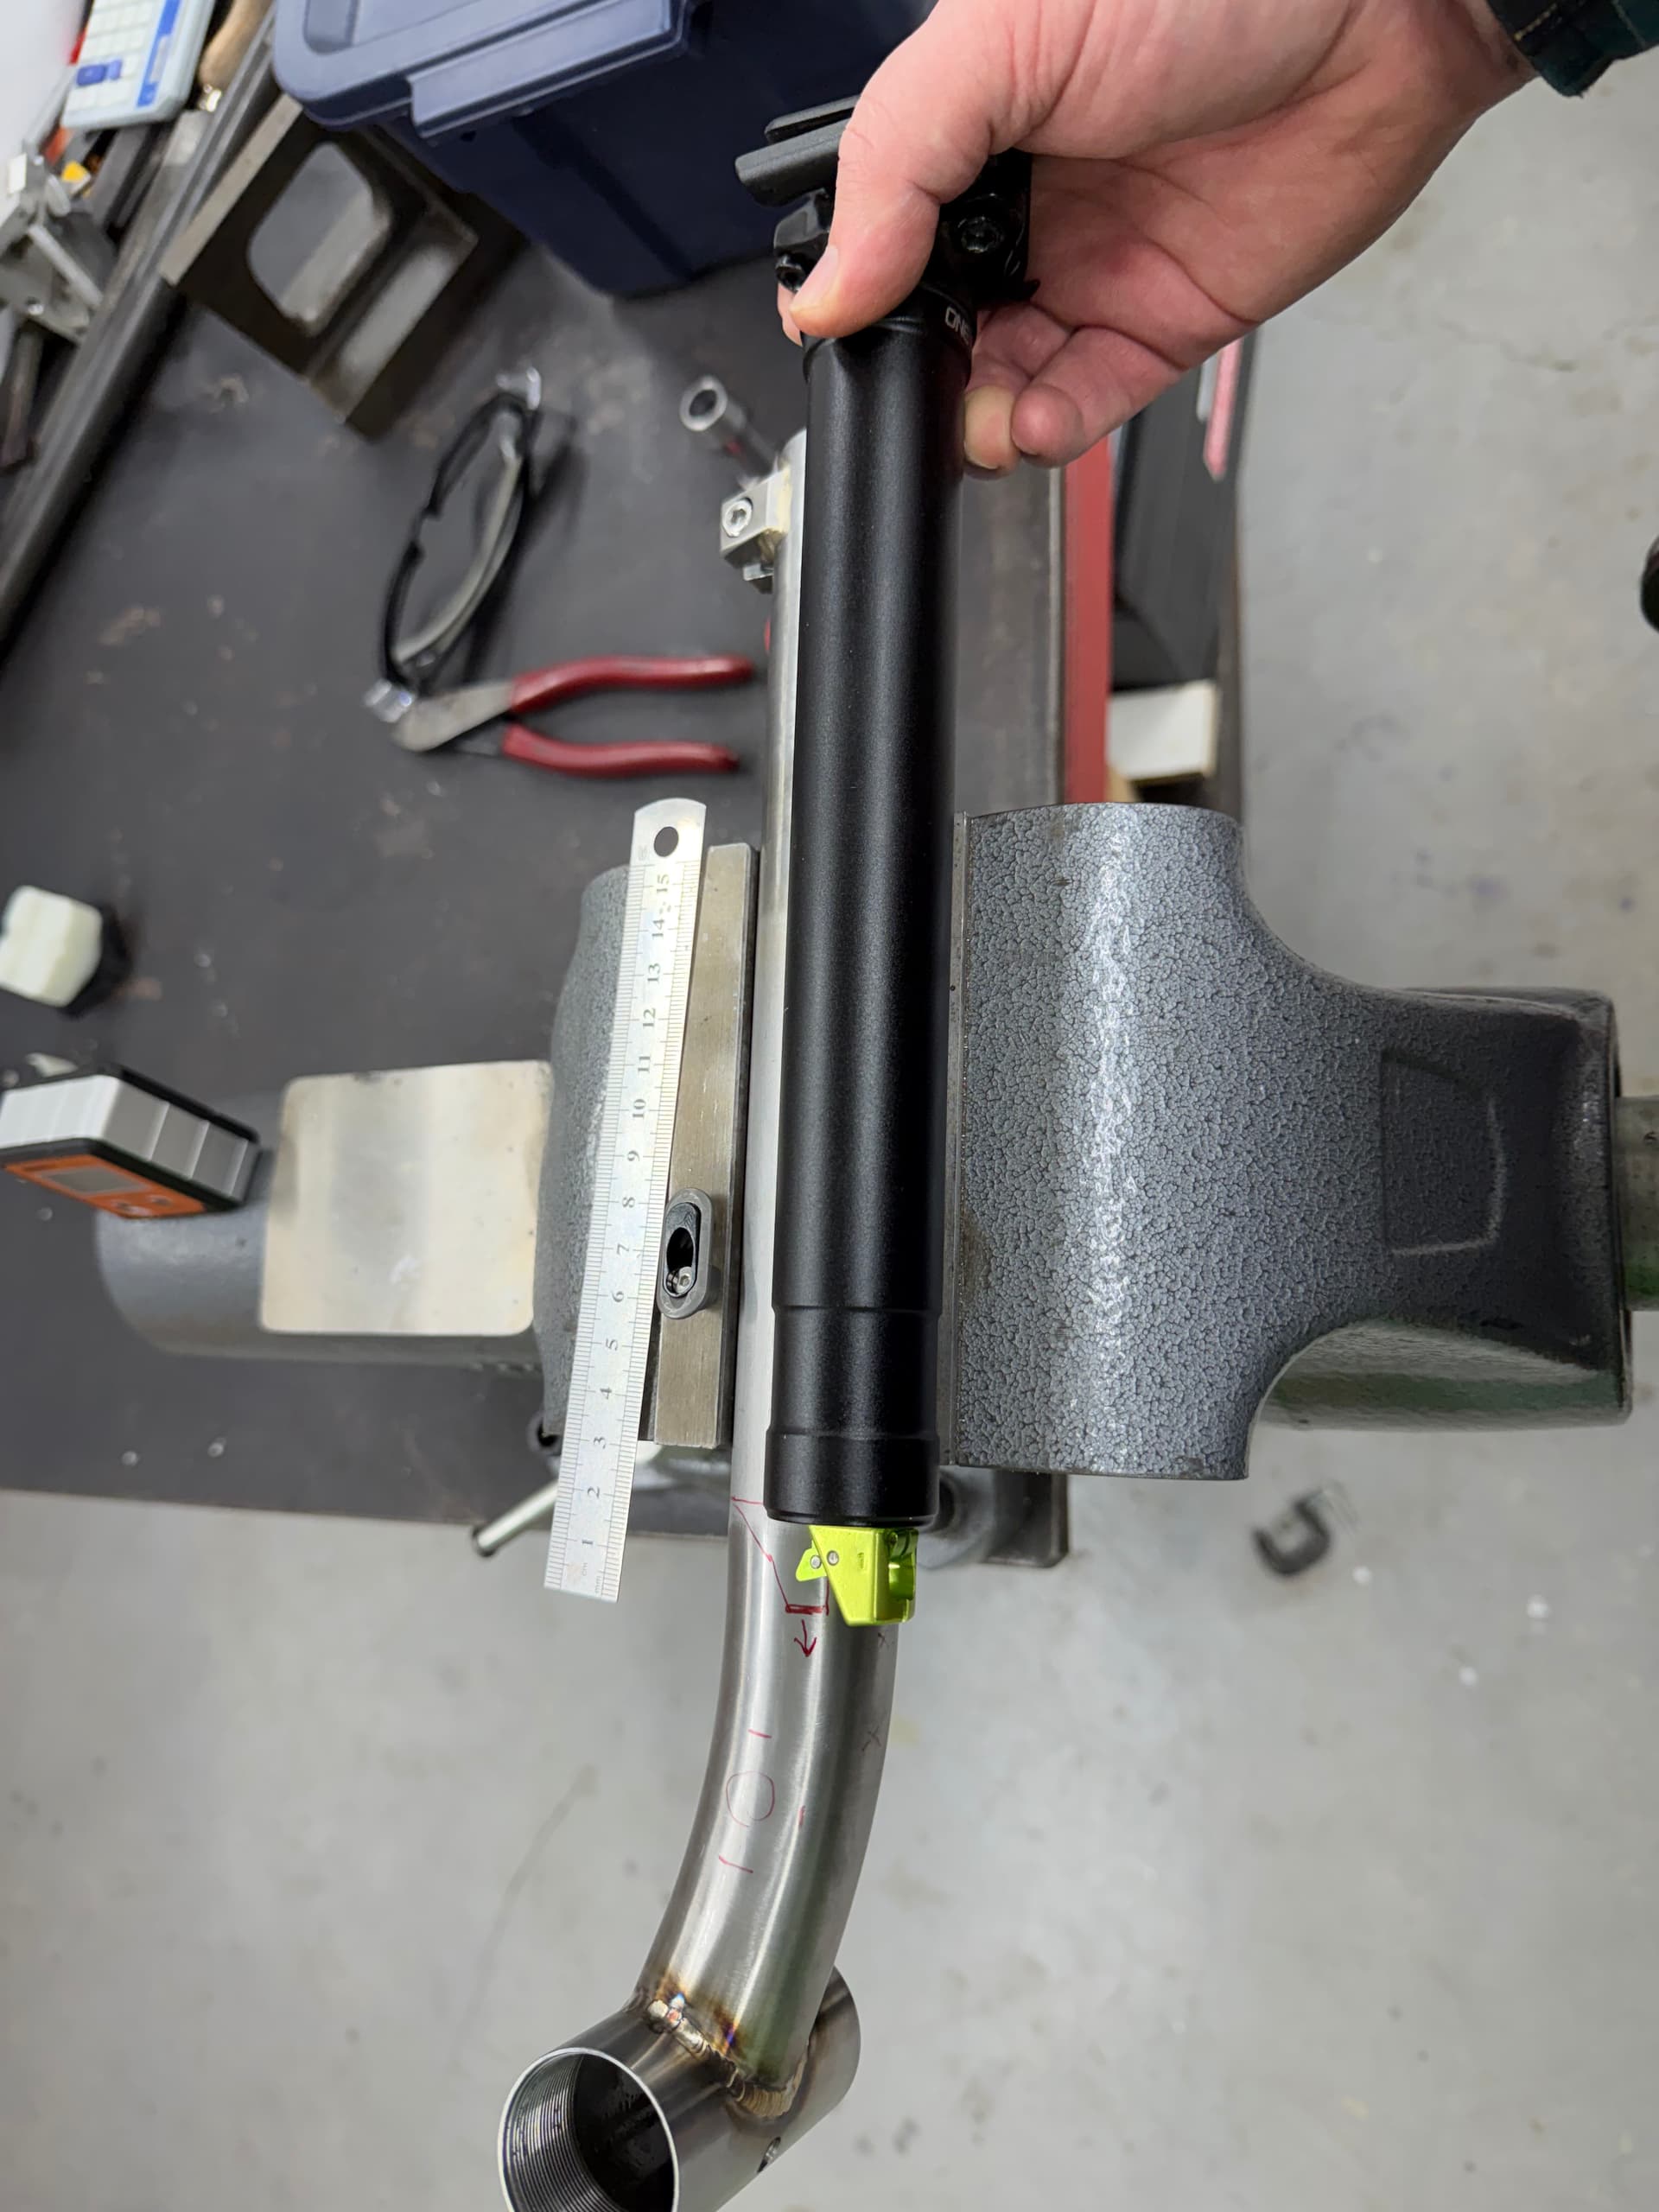
I am using this from BikeYoke. I considered making one, but for $120 it was an easy place to save some time (and probably money), so I went for it.
Actually JLC CNC (China) was pretty reasonable (~$80) when I put in a rough design, but that is without bearings, bushing, bolt and anodizing. Probably missing various fees also.
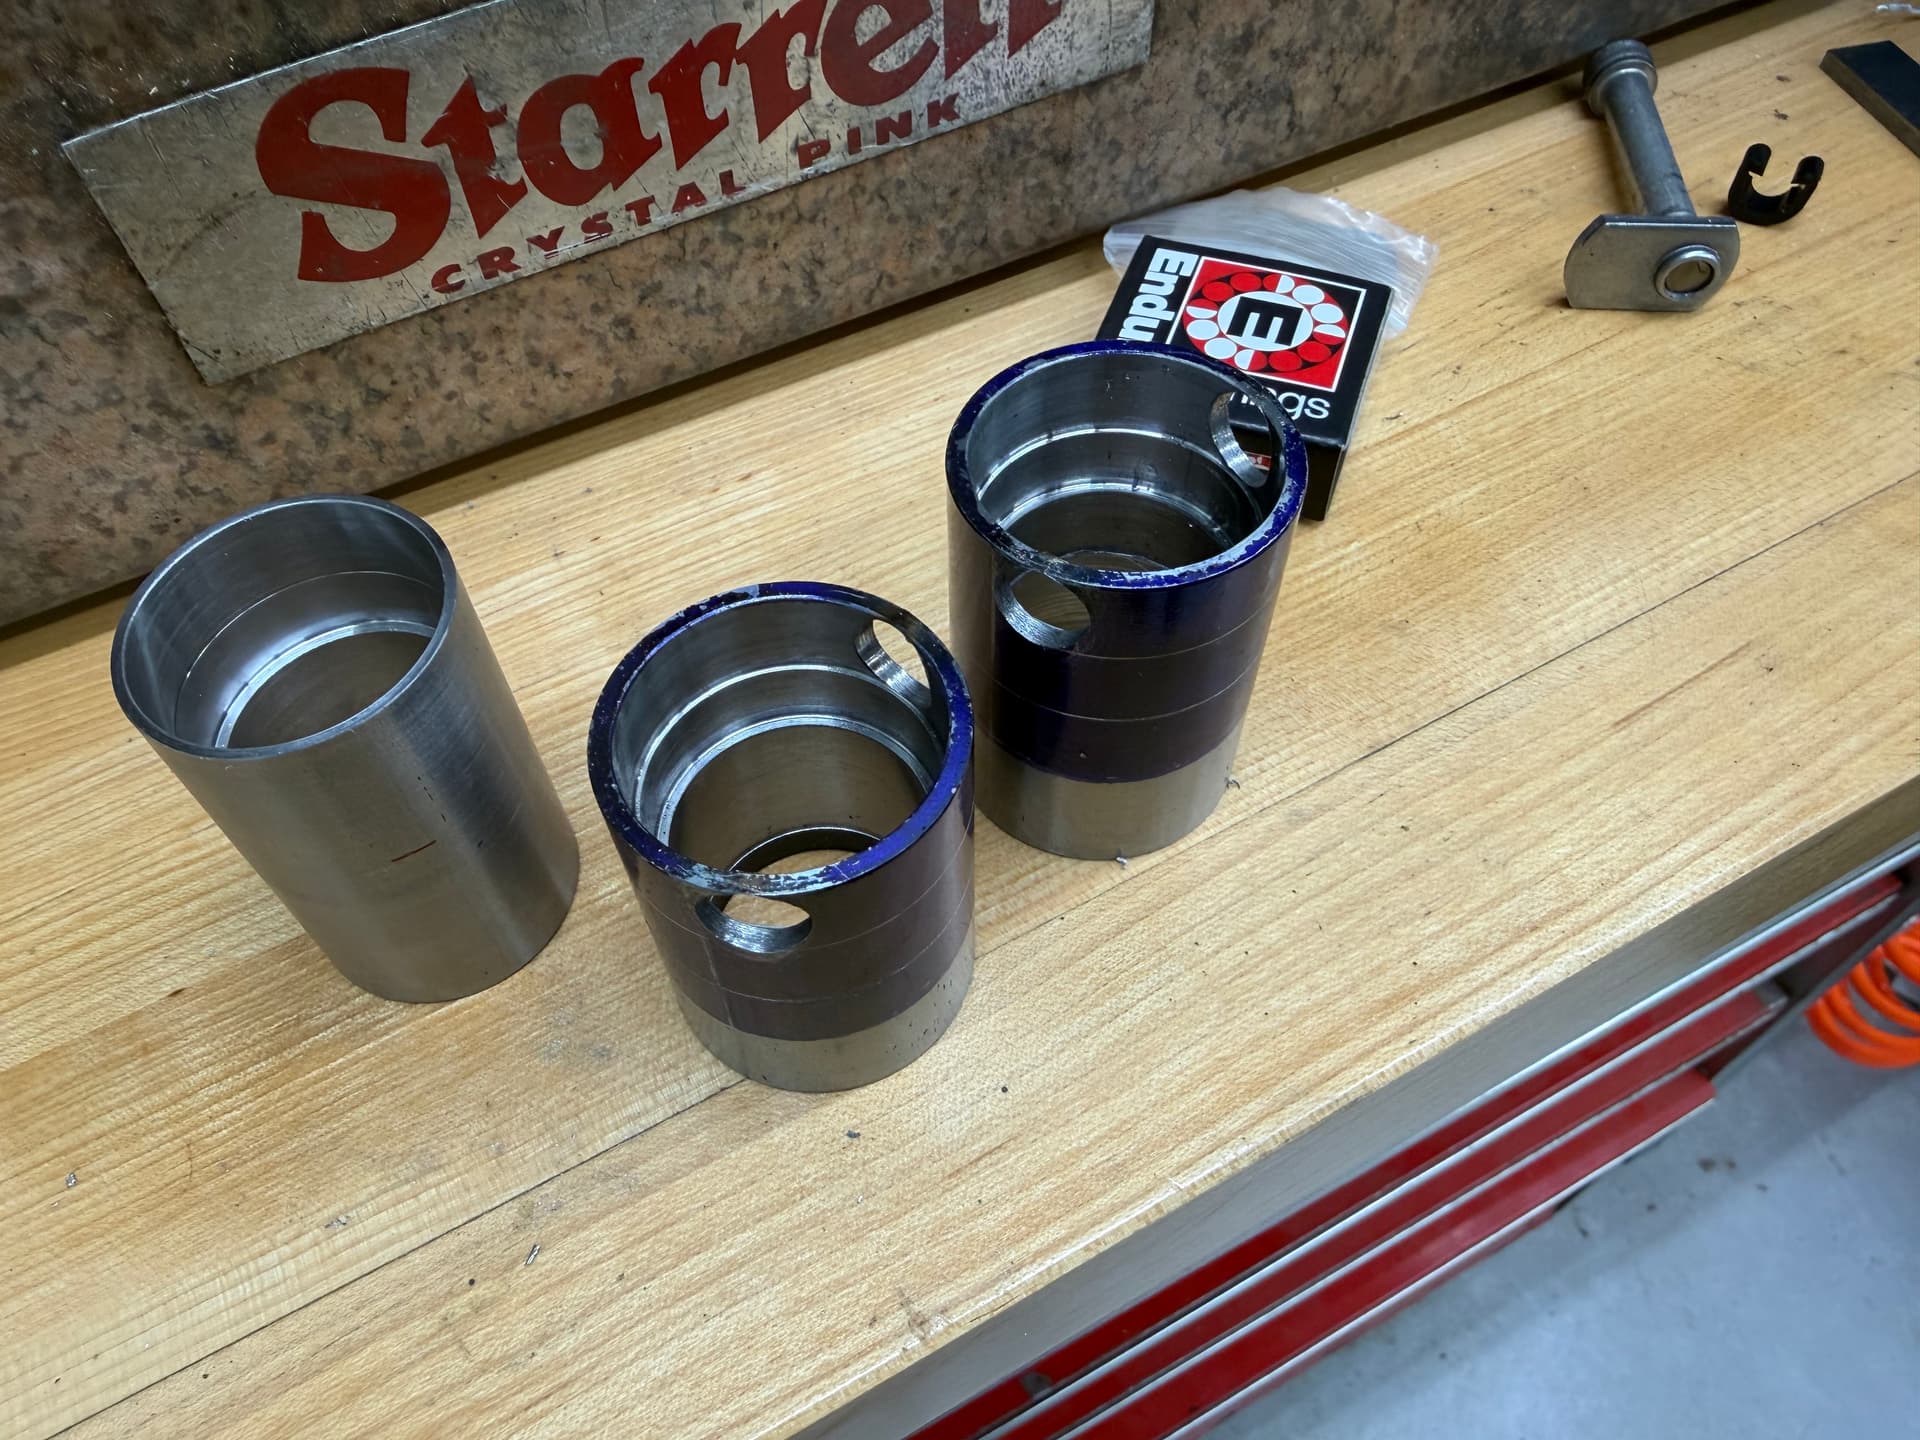
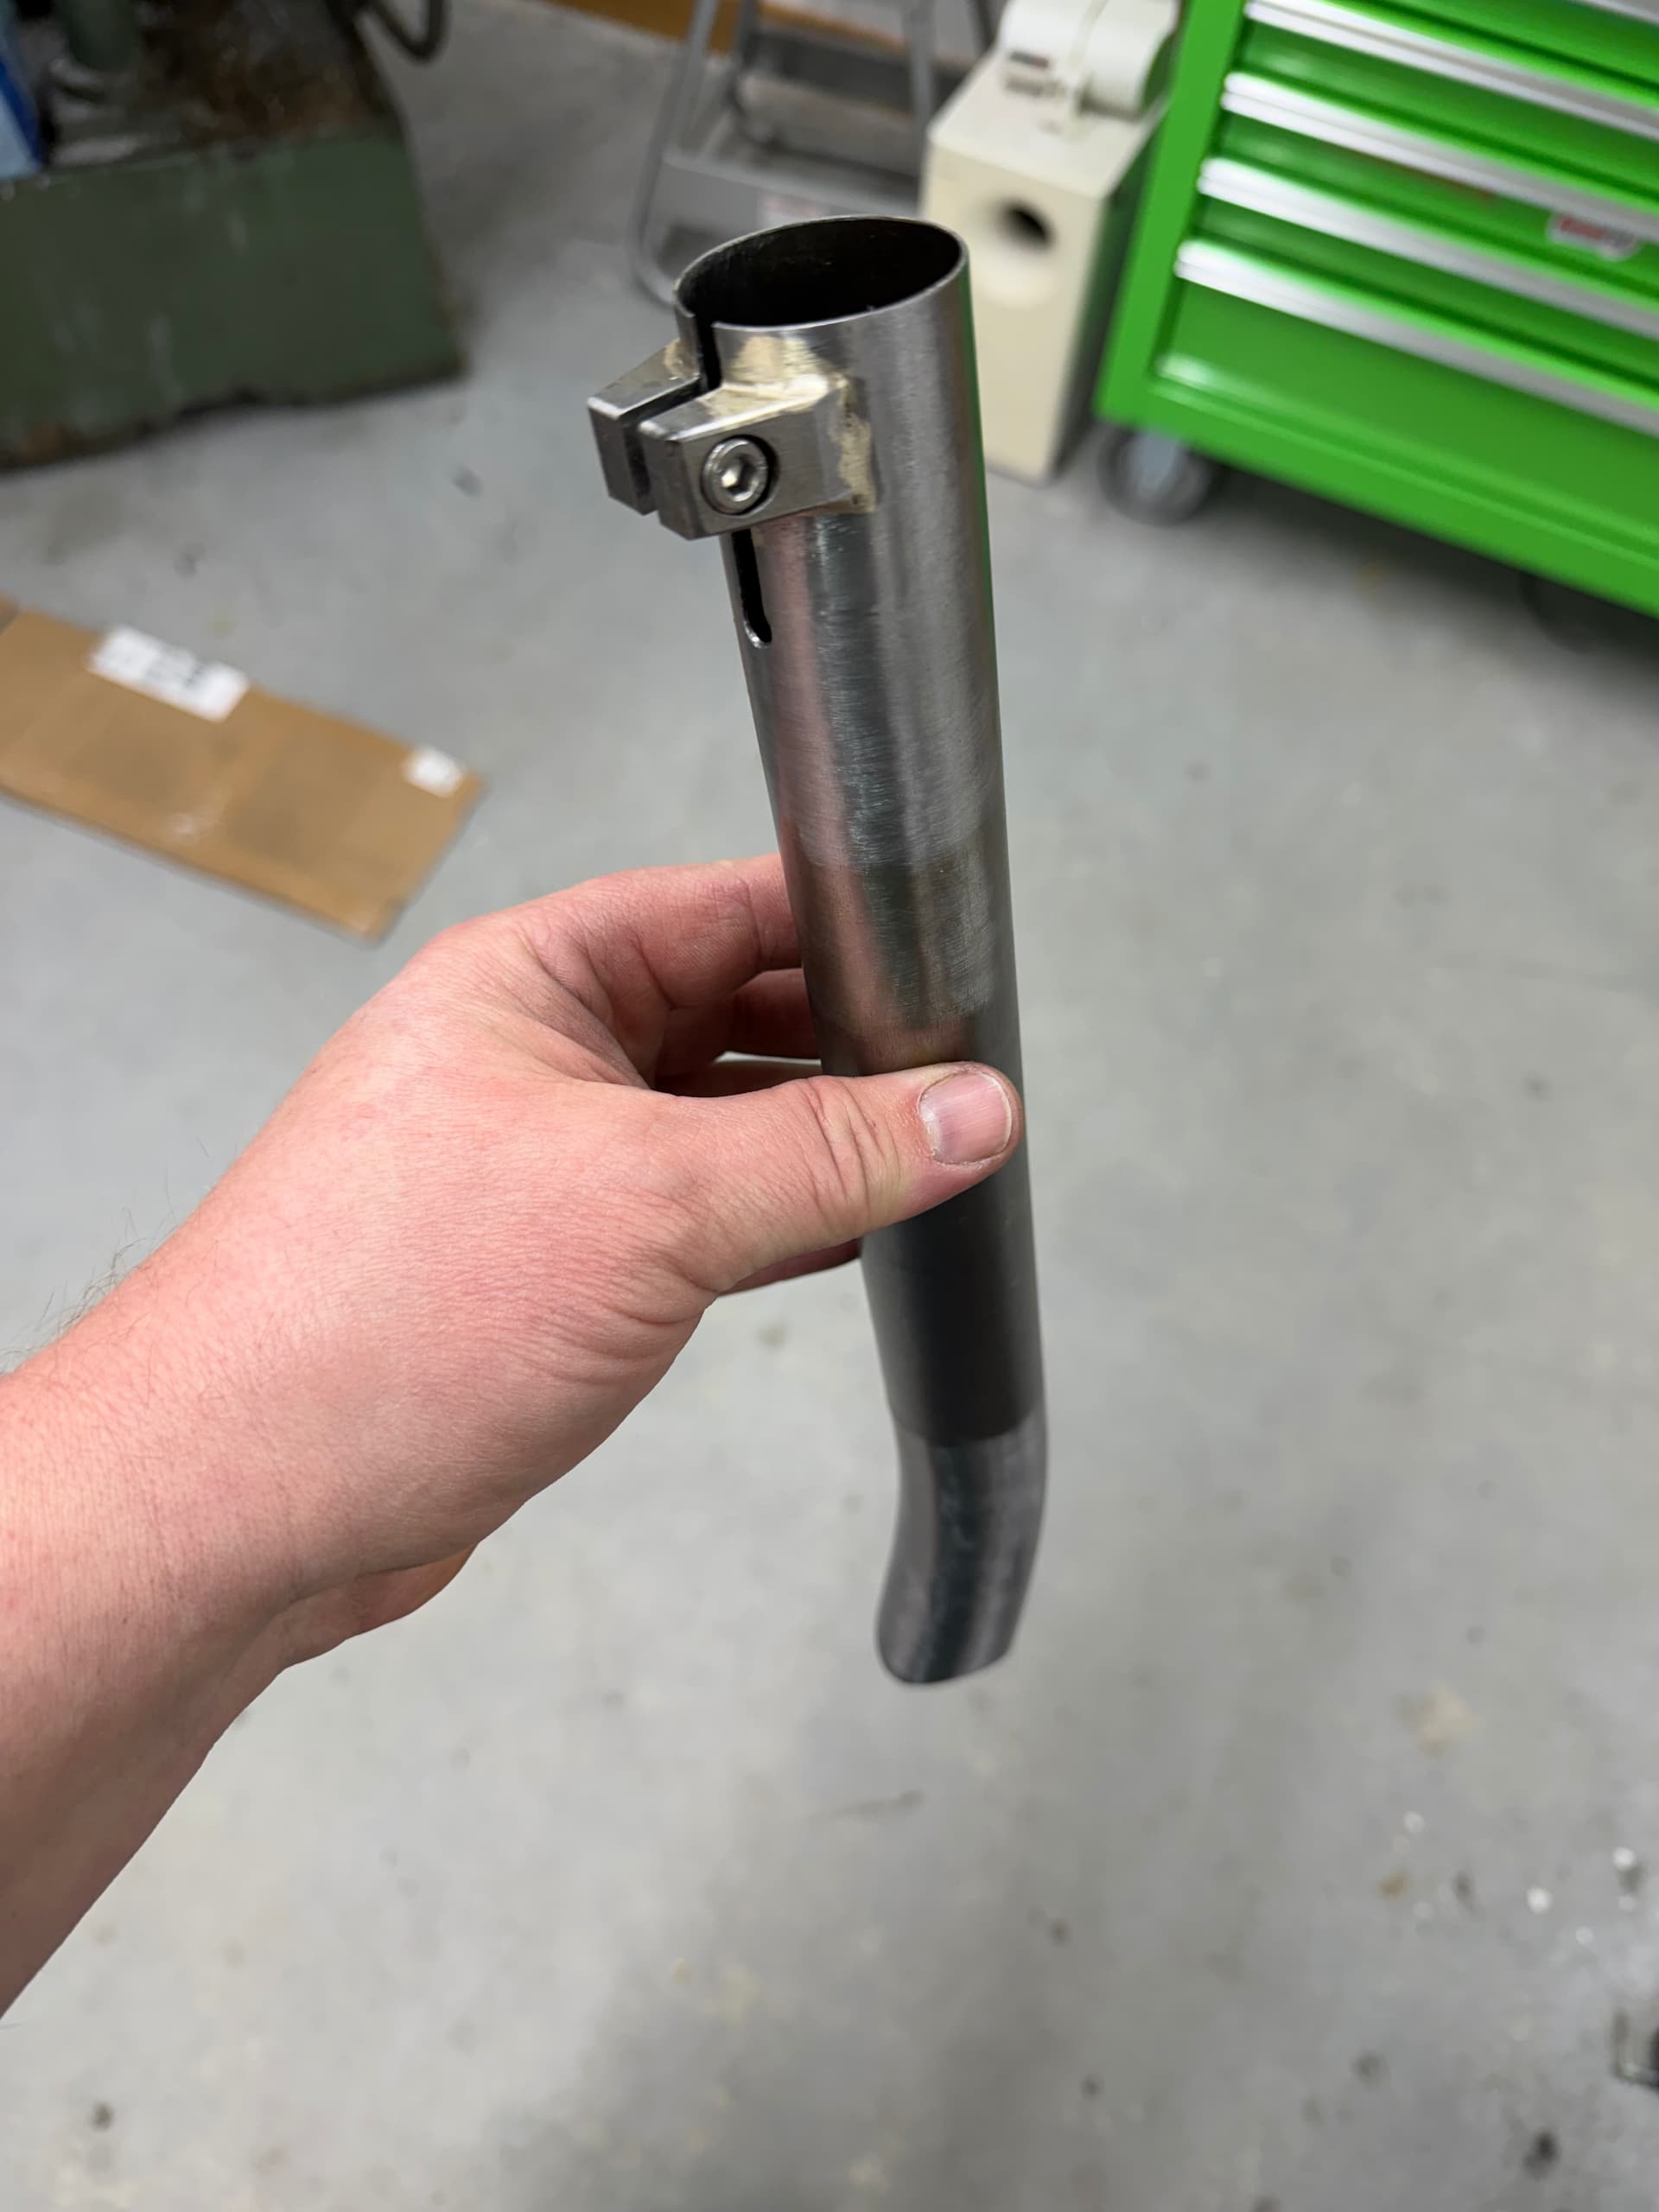
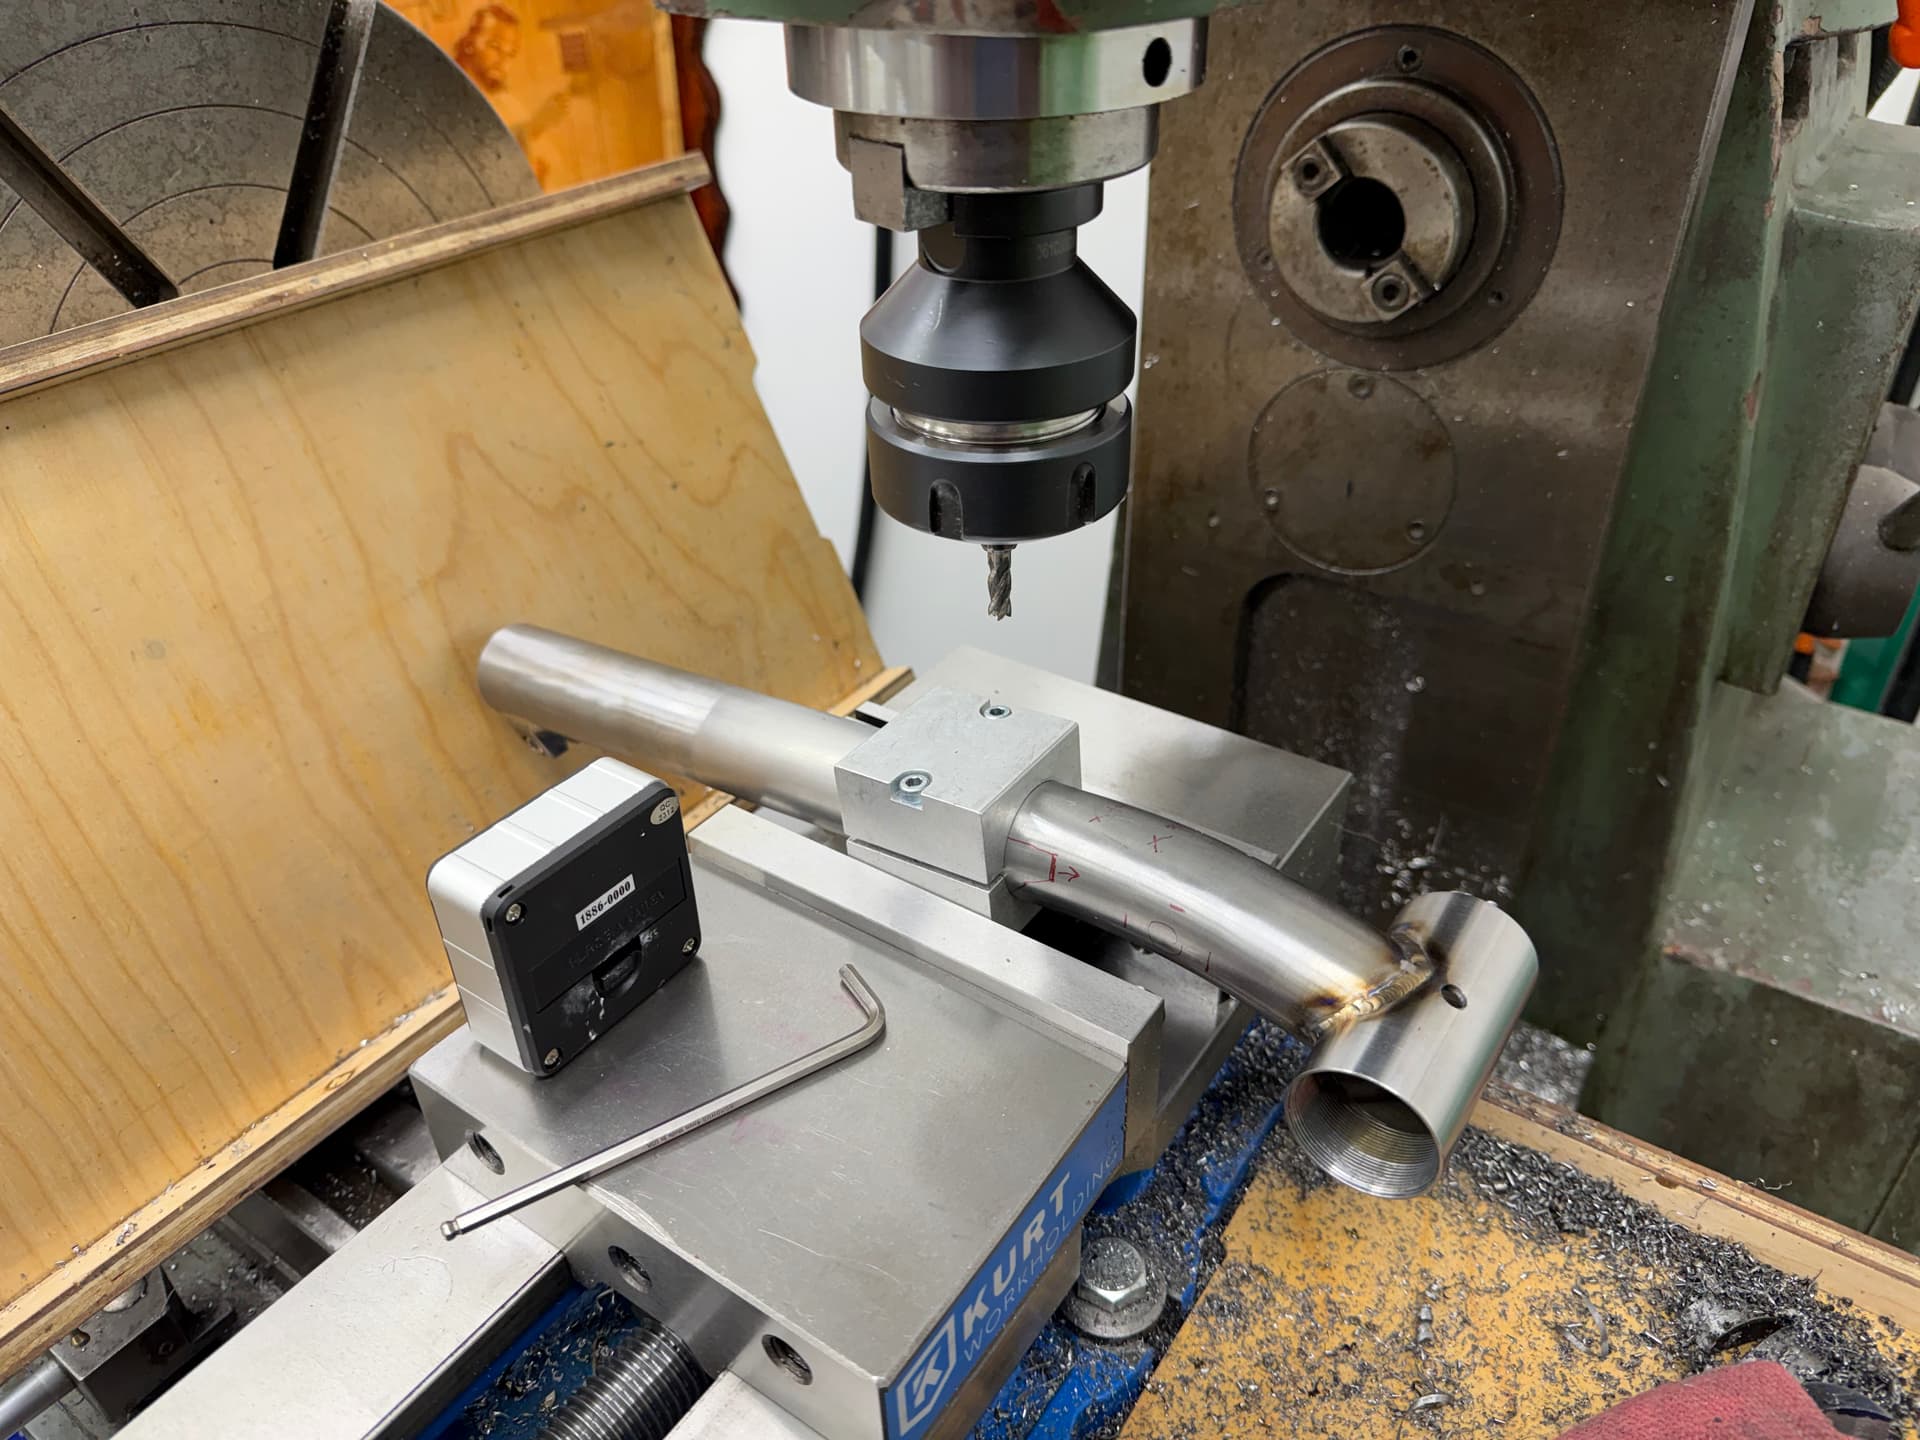
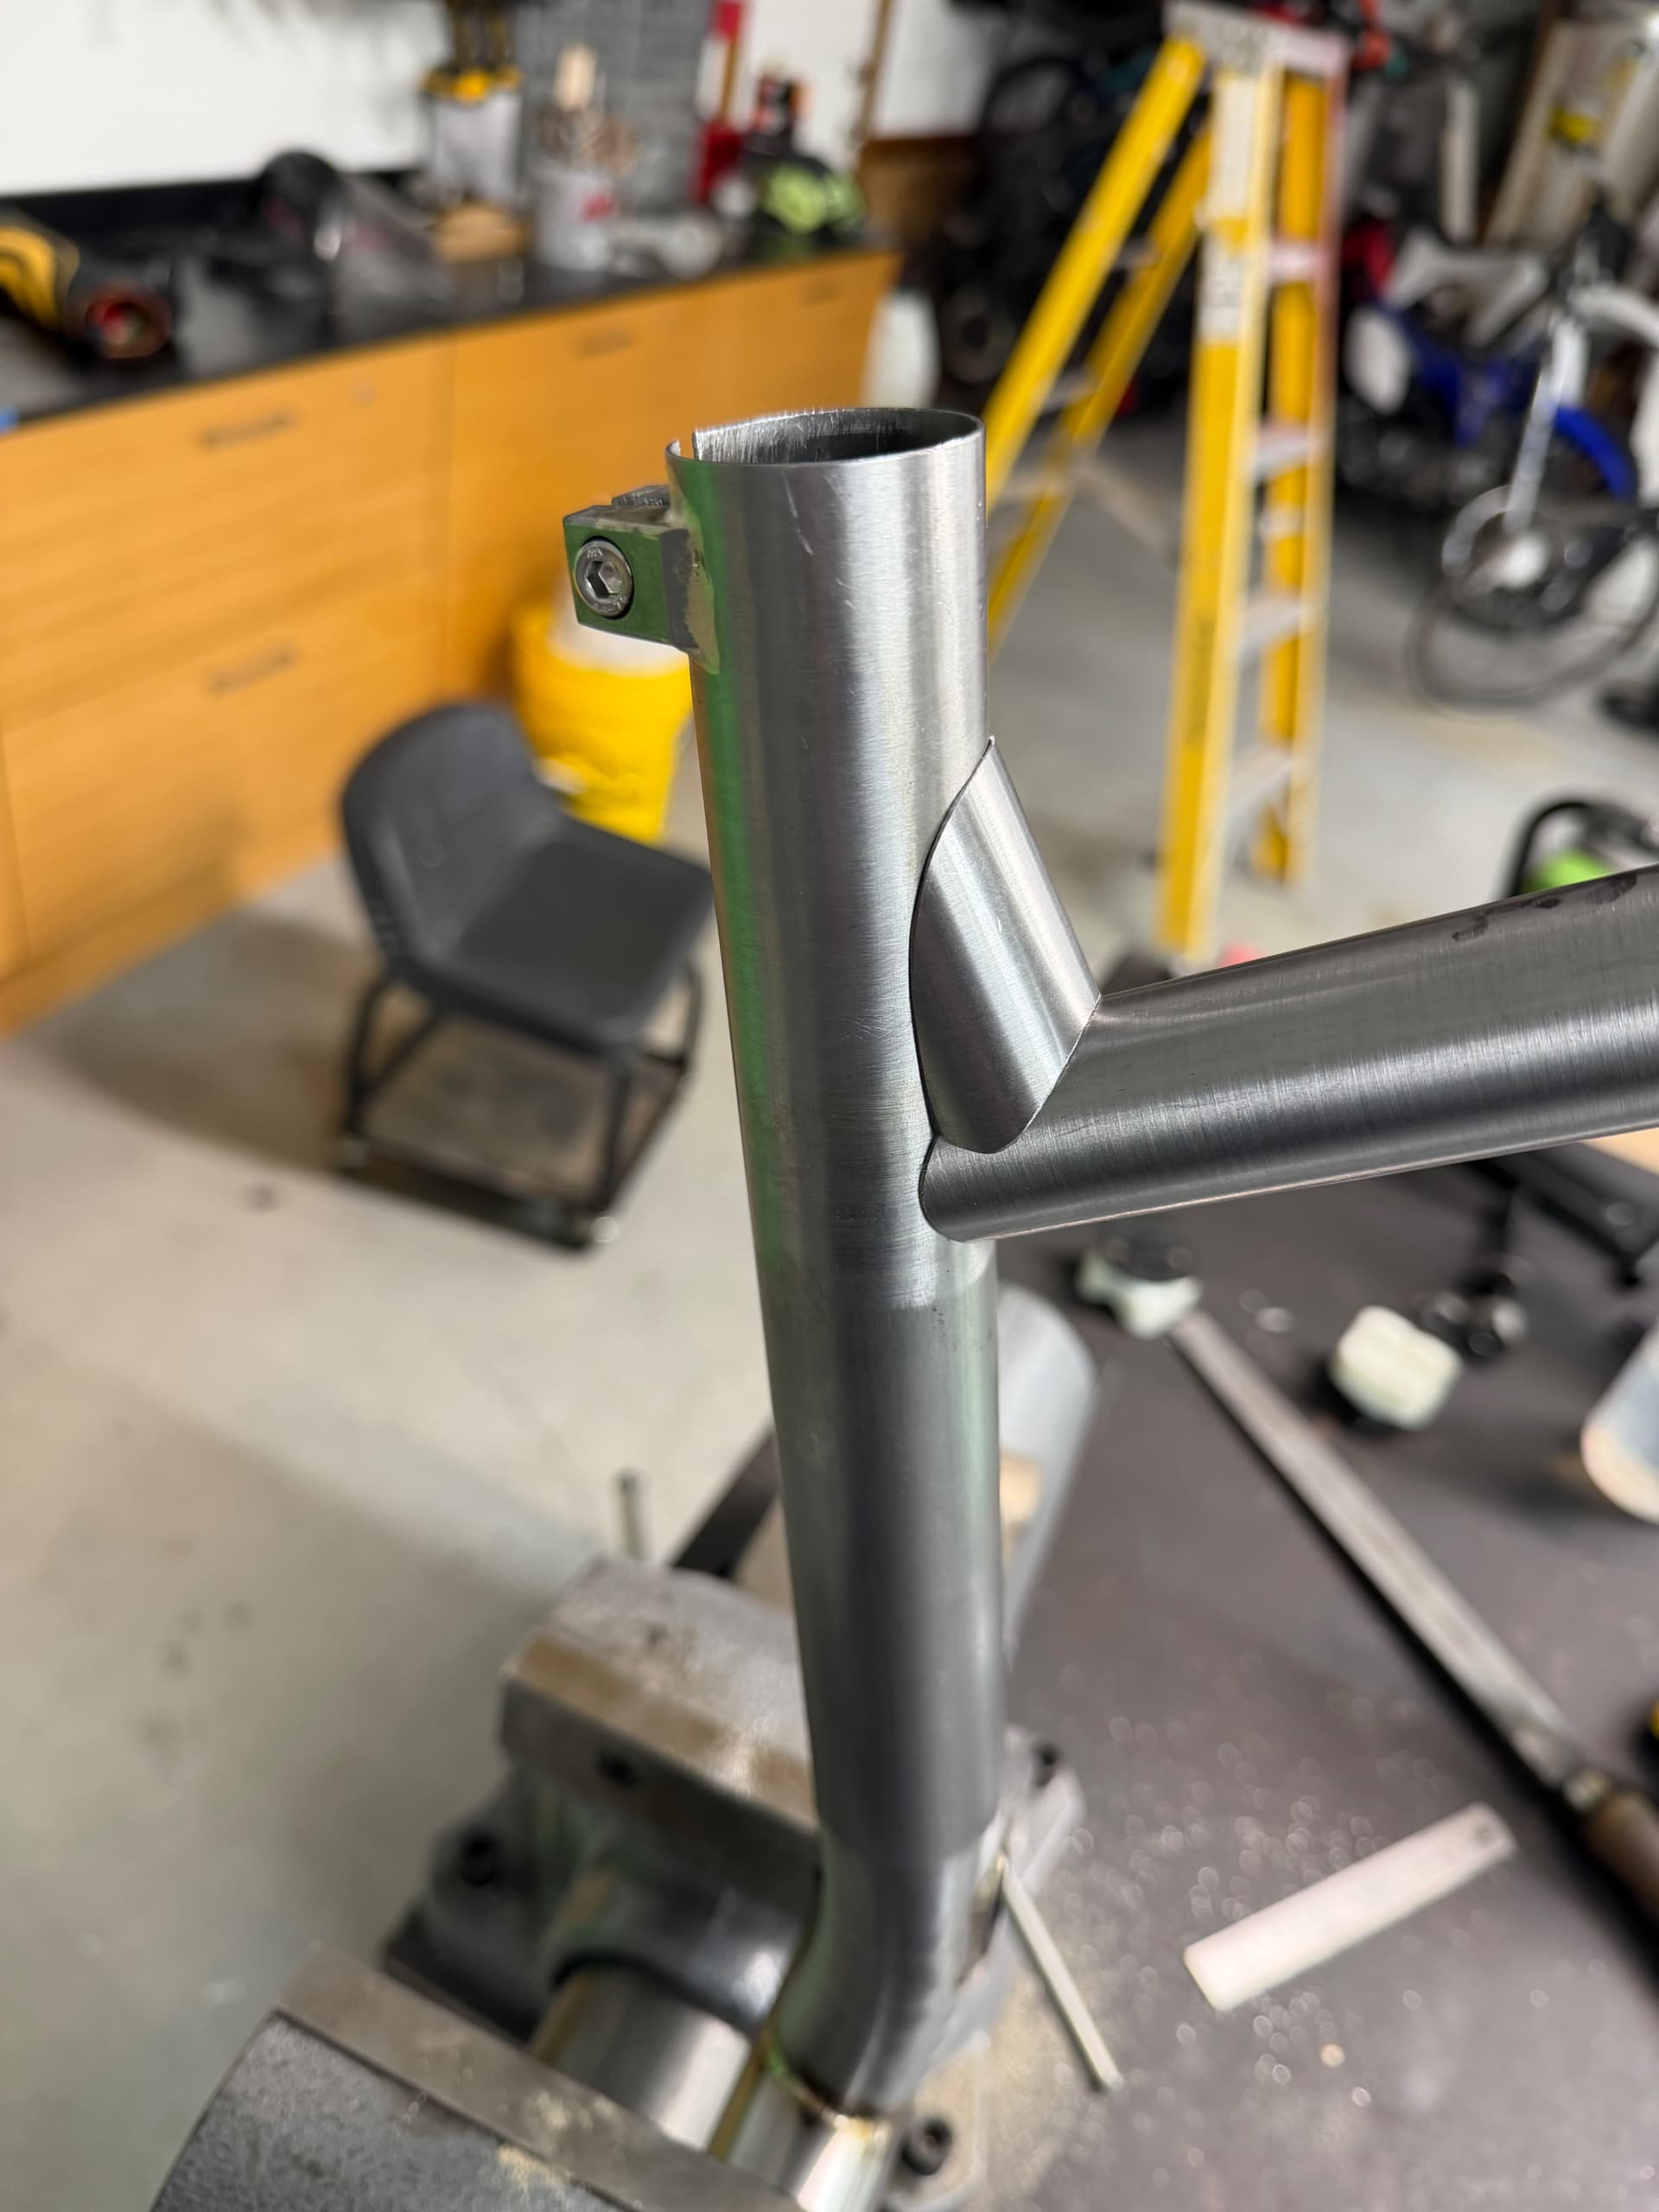
Next up was milling the slot for the port. Thankfully I remembered and didn’t have to drill and file and f-around with this after the frame was already built… I guess I can learn from my mistakes!
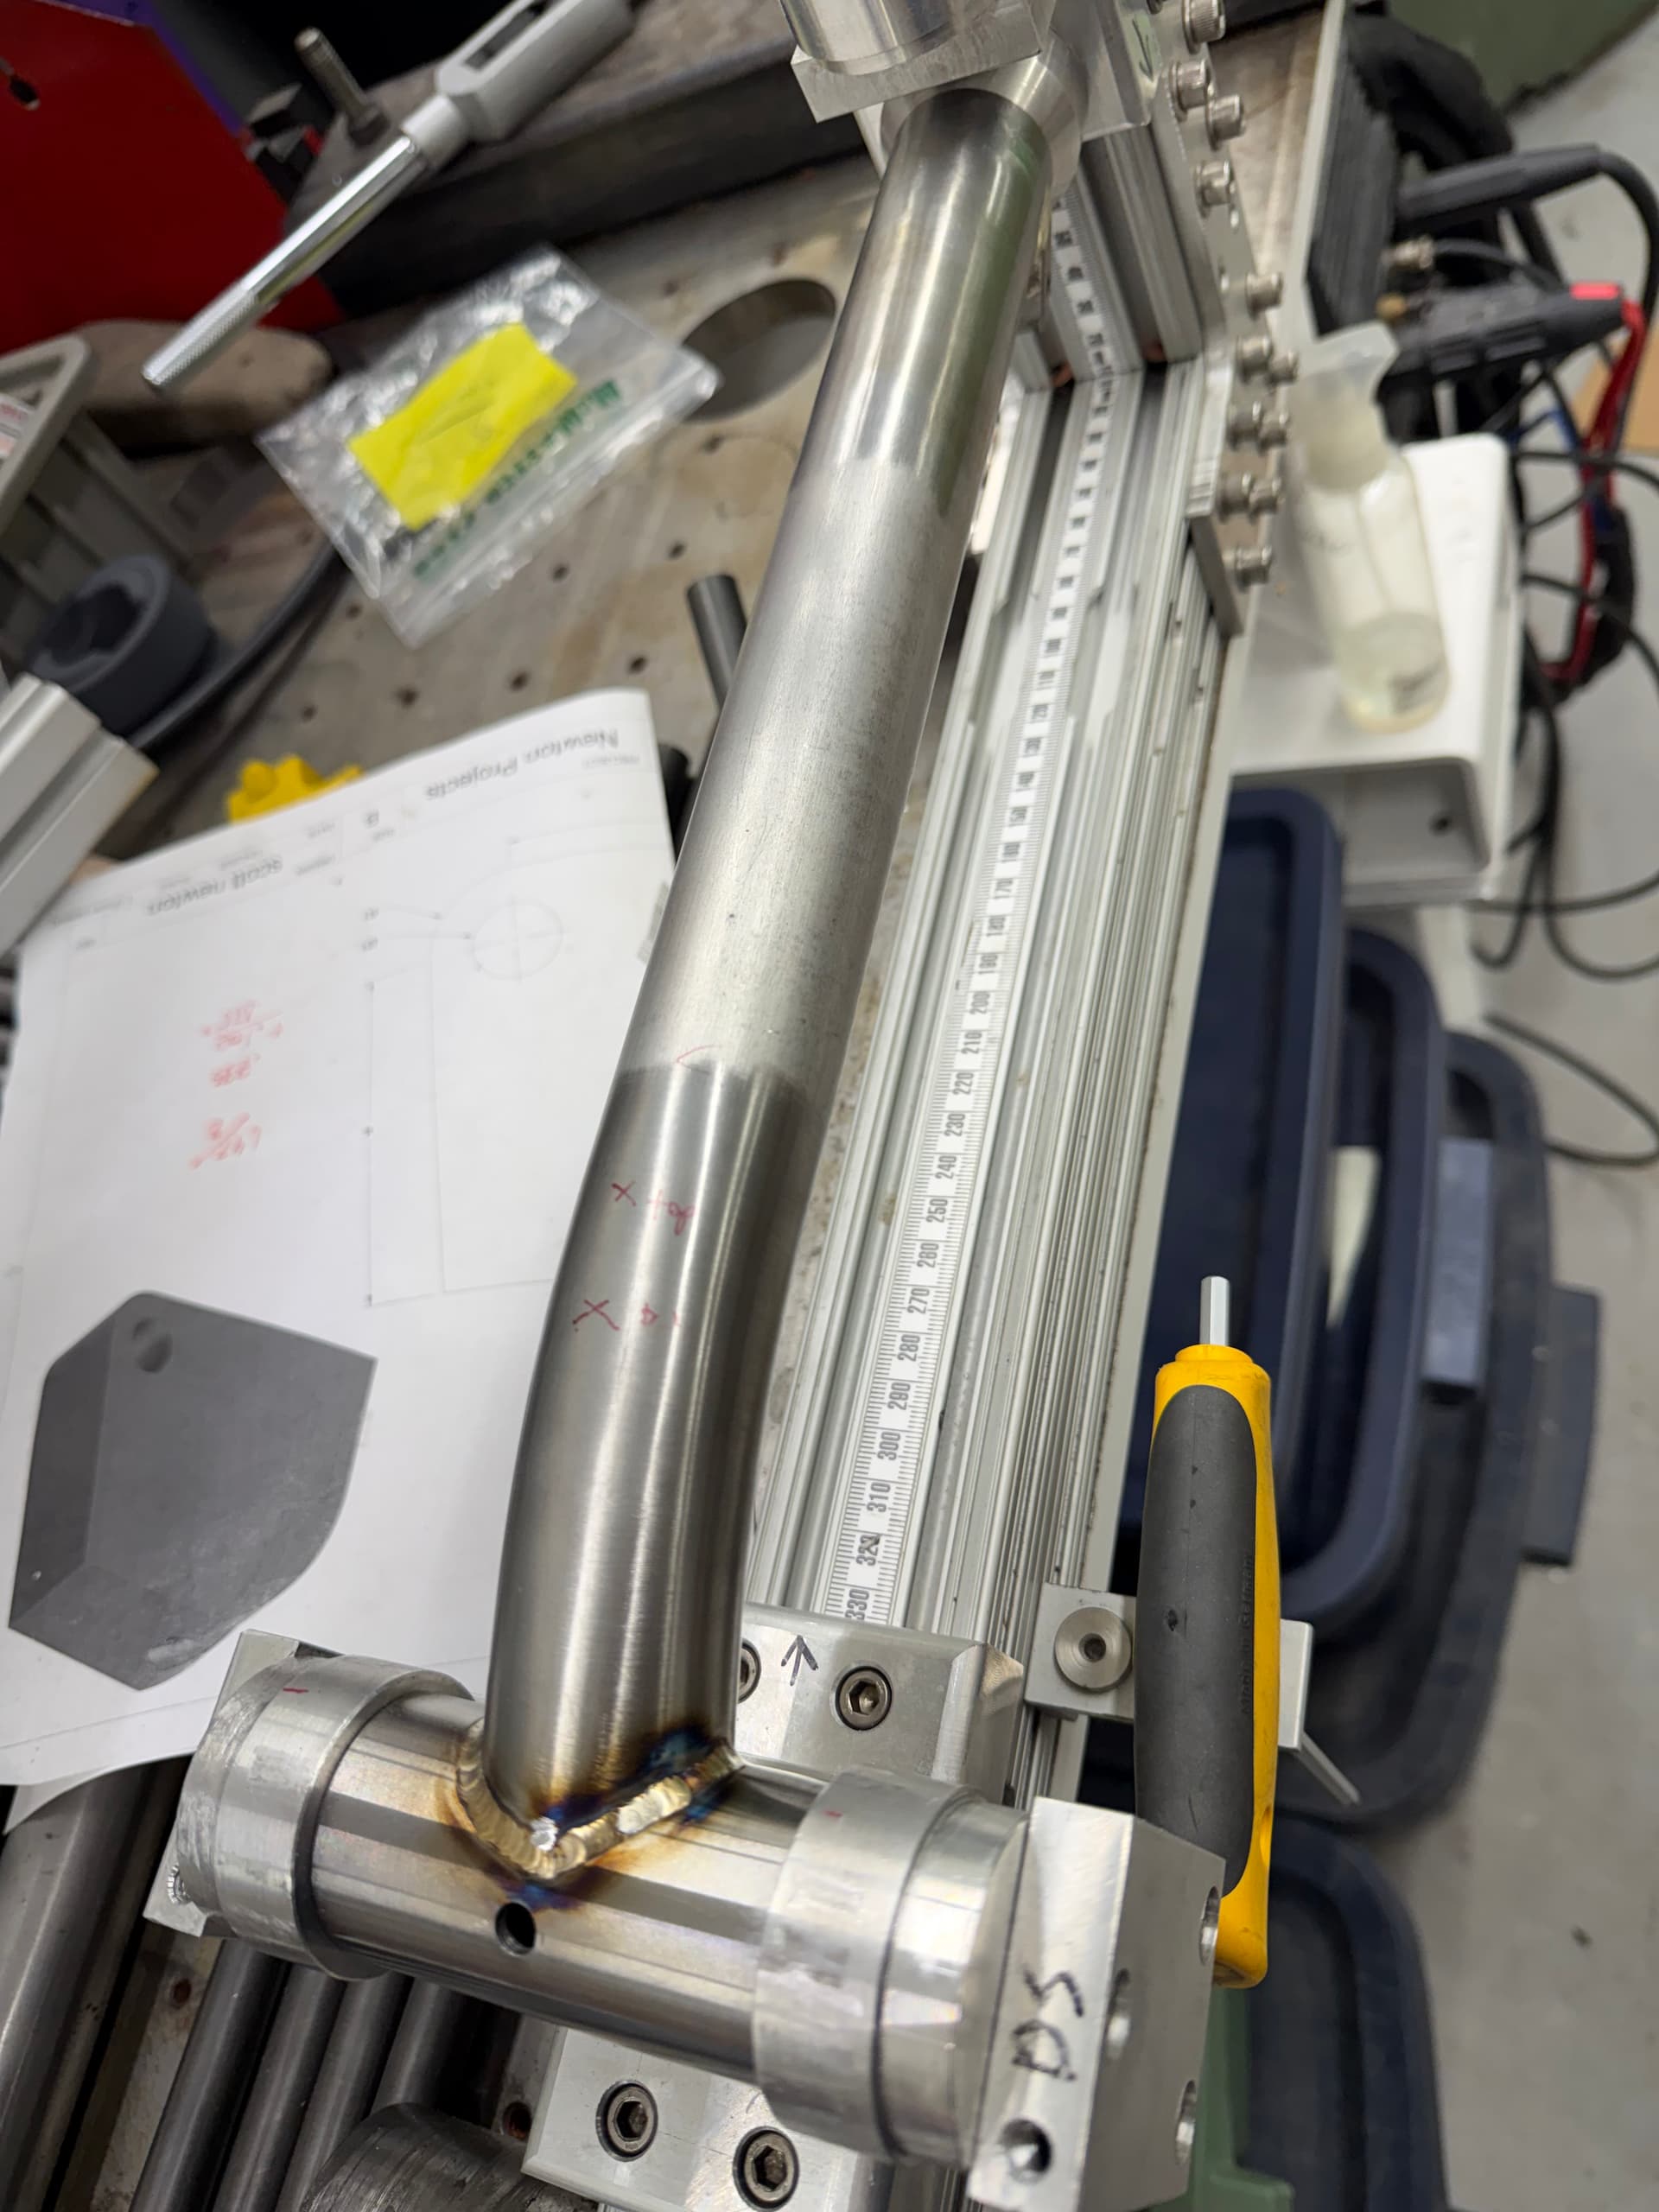
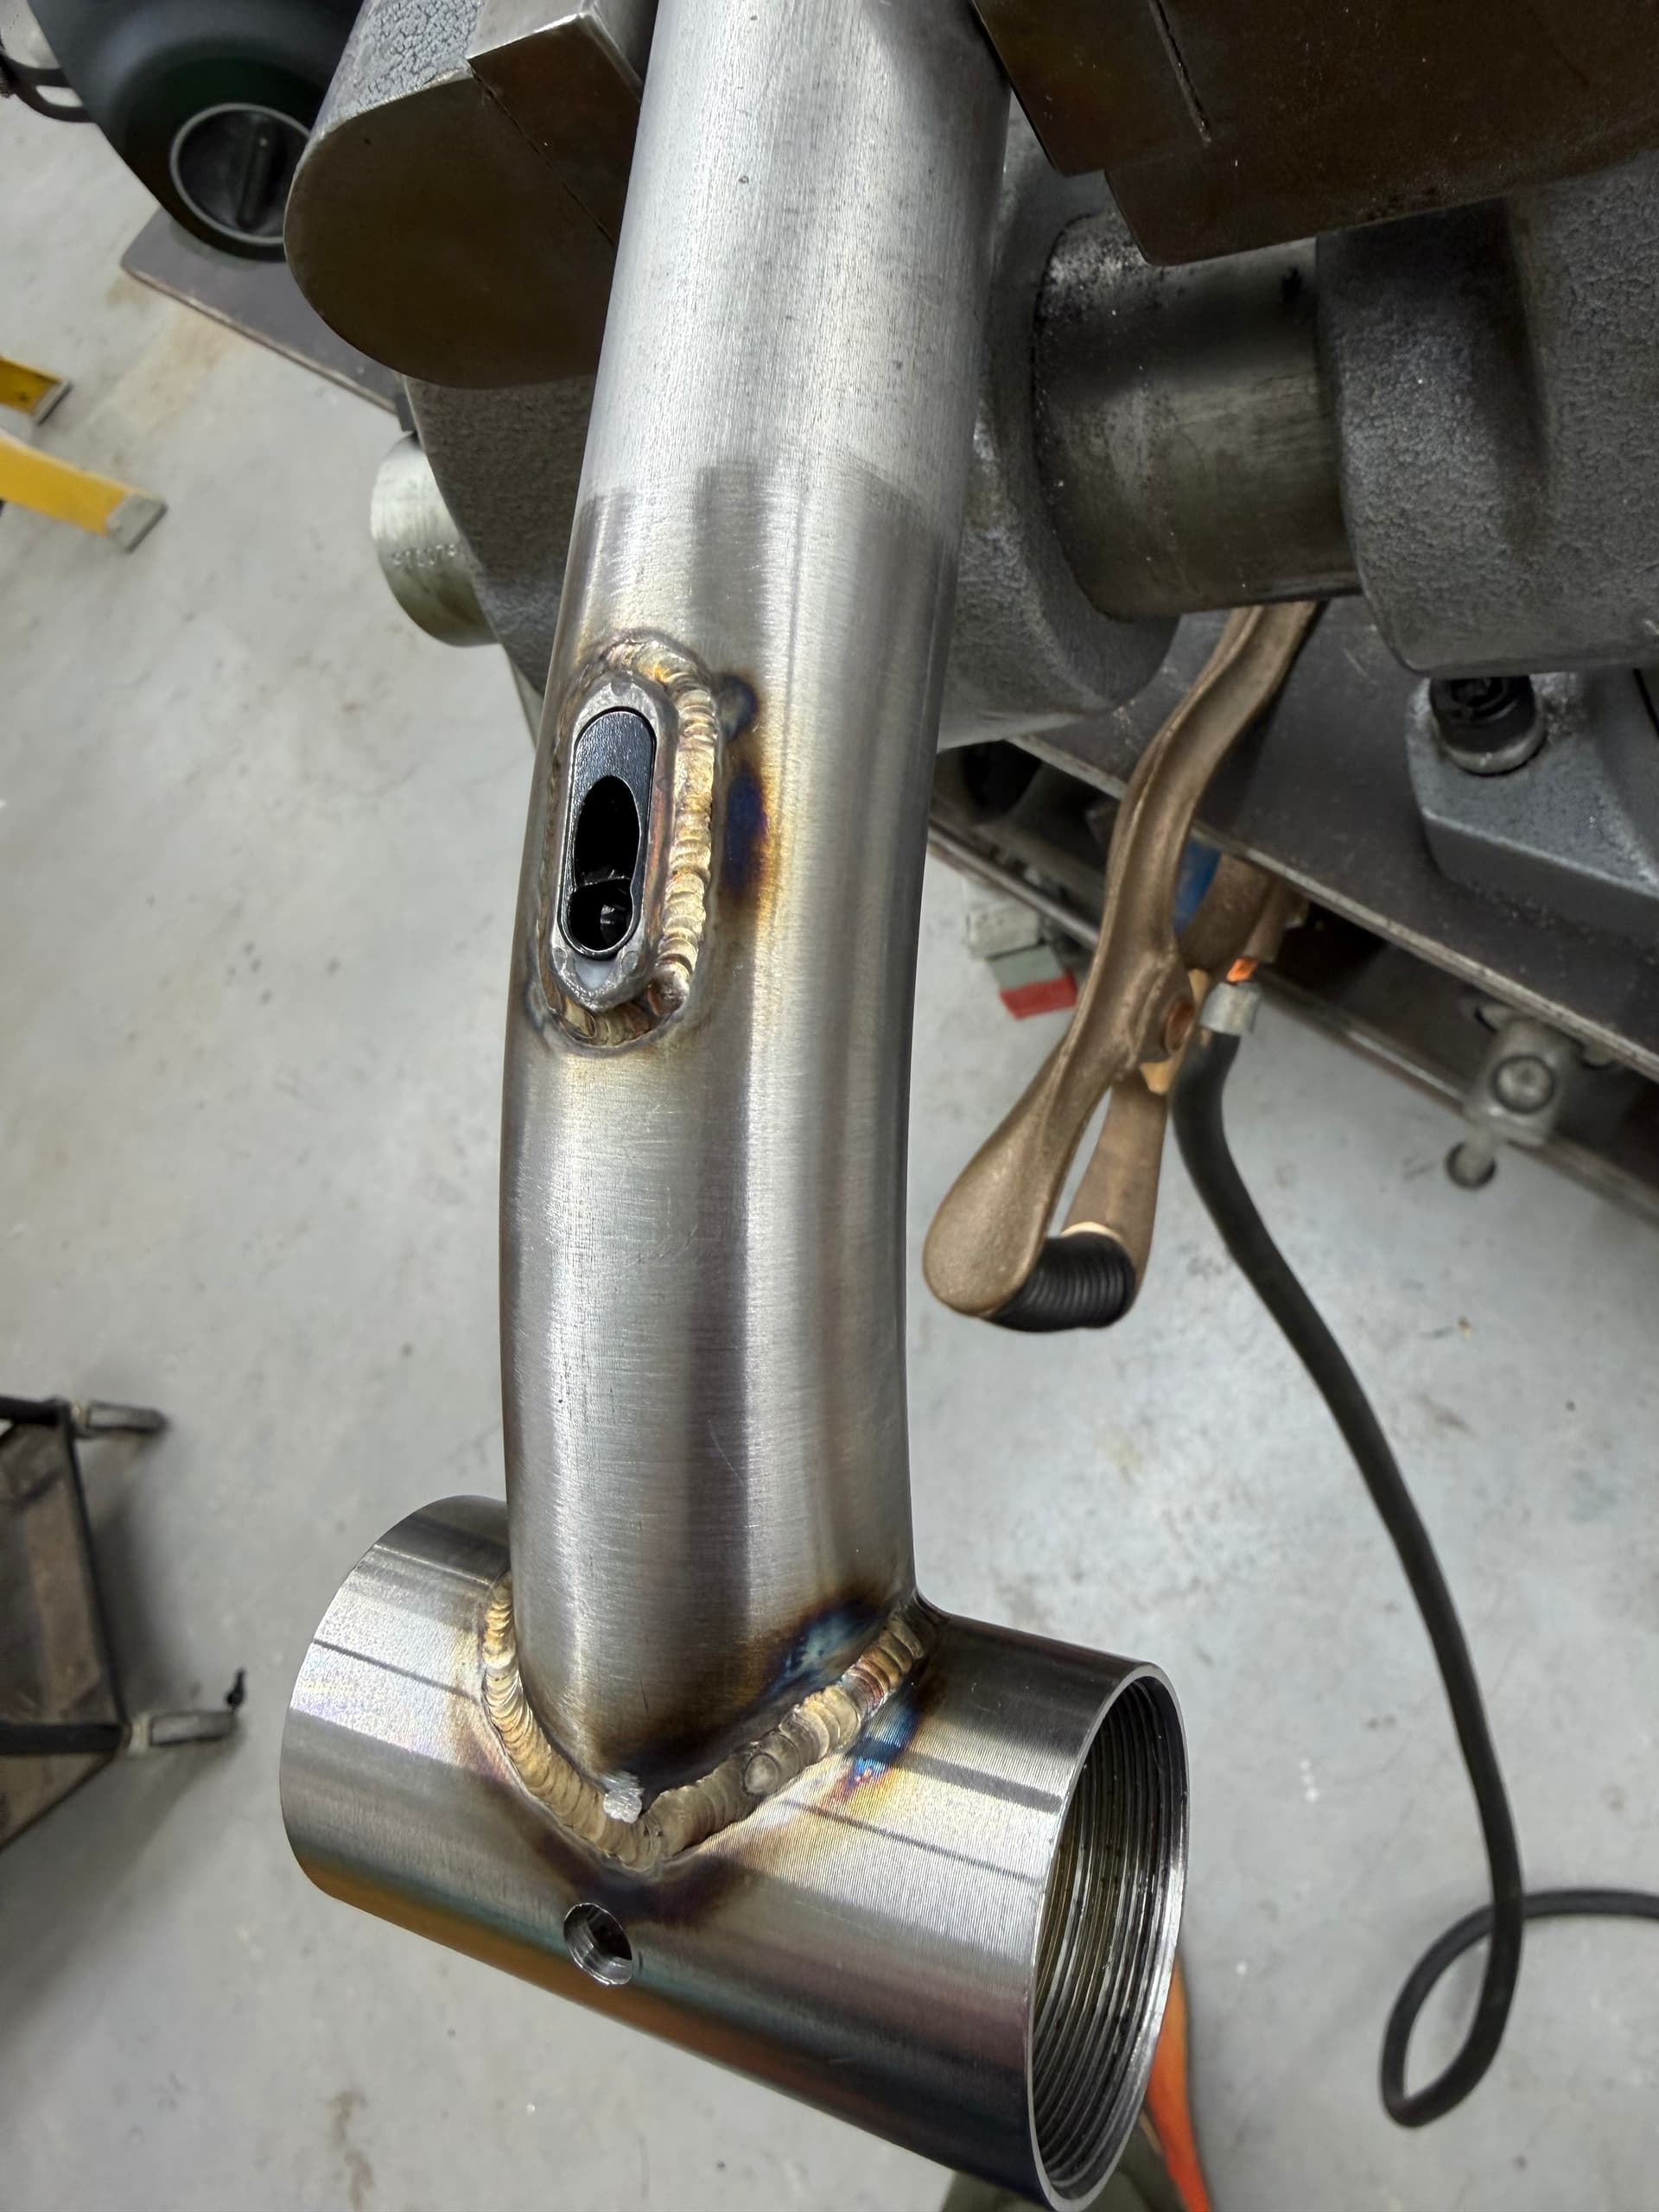
I was a bit concerned about the dropper post cable port being so close to the main pivot from a perspective of long term strength under flexing right there, so I decided to weld the port in place. I would trust a perfect silver braze, and I love how it looks, but I’ve really been having a hell of a time with silver brazing lately. So I went with what I am more comfortable with, and welded it in. Second pic shows how I used an aluminum chunk as a heat sink, and it worked great!
Finally, I decided to try a shim instead of the usual ST collar after noticing that’s how Starling does it. I’m trying to keep things light(er) in non critical areas, so I thought this fit the bill. I also like the idea of not having a sleeved joint to weld near the top of the ST. Since I don’t believe there are off the shelf options for this particular shim, I turned my own. Unfortunately, it fits a little “too good”, and doesn’t have a nice slip fit for the post, so I’ll continue messing with that.
On the subject of seat tube shim- Starling uses epoxy or something to keep theirs in place. Any suggestions on process or what I might use? Initial thought is some red loc tite and an expanding exhaust mandrel to hold it snug during cure…
my ST shims stay in place only by friction. I also turn my own shims, but with a bigger OD and slightly bigger ID to nearly fit the seat post. Than I cut the slot - also bigger than usual. After that I squeeze it into the ST, hold it in place by clamping it slightly! with the binder but with a washer through it’s slot and the shim slot to control the degree of clamping and to stop the shim from spinning. Now I ream it down to perfectly fit my seat post.
I’m shure that it’s possible to calculate which ID+OD = perfect Fit! but I never tried because….just because
Ohh- that’s a good idea! Is yours an adjustable reamer? I have one, an adjustable cheap model, but I always try very hard to never have to use it, so I haven’t yet!
The adaptive bike you made your partner in your profile looks super cool. Would be fun to hear more about that sometime.
I use Cyclus Tools reamers fr my STs but adjustable reamers in good quality are better, I guess. I use an adjustable one for my Ø44mm seats. It’s a 4kg monster but I bought it so I use it and got used to it
I made the adaptive downhill quad around 15 years ago and we had a lot of fun on it. Traveling to Tennerife riding lavarock and bike park trails and natural trails here in austria. Tina also participated in a very cool race. There’s so much more to tell! That’s probaply why I haven’t done my “introduction post” it would take ages to write especially for someone who learned english mostly by whatching movies and reading Dirt mag
Does PETG create enough friction to hold the post without squeezing it to much with the clamp? There’s a point where dropper posts stop working propperly.
RE: PETG seatpost shim…. I don’t know myself, but Burf from BTR made a post about it fairly recently saying it worked. But you bring up a good point- I’ve had some bikes where getting enough clamping without binding the dropper is a challenge!
For the first year of riding I didn’t have any slipping. Second year of abuse and late in the year it’s had some slipping. I have not over cranked it to the point of binding the dropper. I should print another fresh one to confirm back to no slip. A touch of carbon anti slip paste likely solves all issues. Also a light fuzzy skin on the id of the shim.