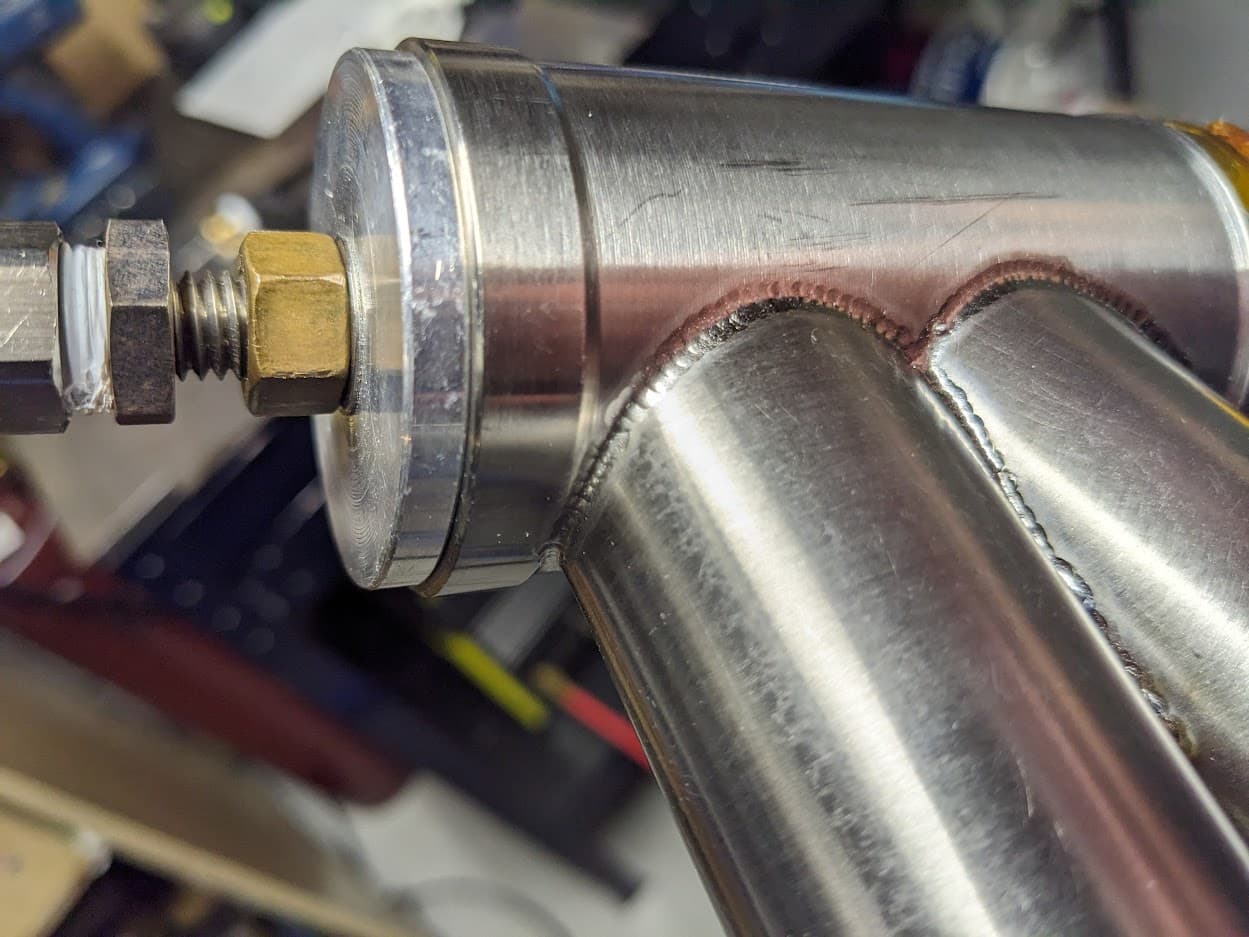
Titanium has a tendency to bridge across the root and never actually fuse the parent material. By doing a root pass and a cap you fuse parent material, then build up the fillet giving the joint the best possible chance of not failing. Doing a or multiple root passes followed by a or multiple cap passes is common practice in other industries with many different materials.
4 Likes
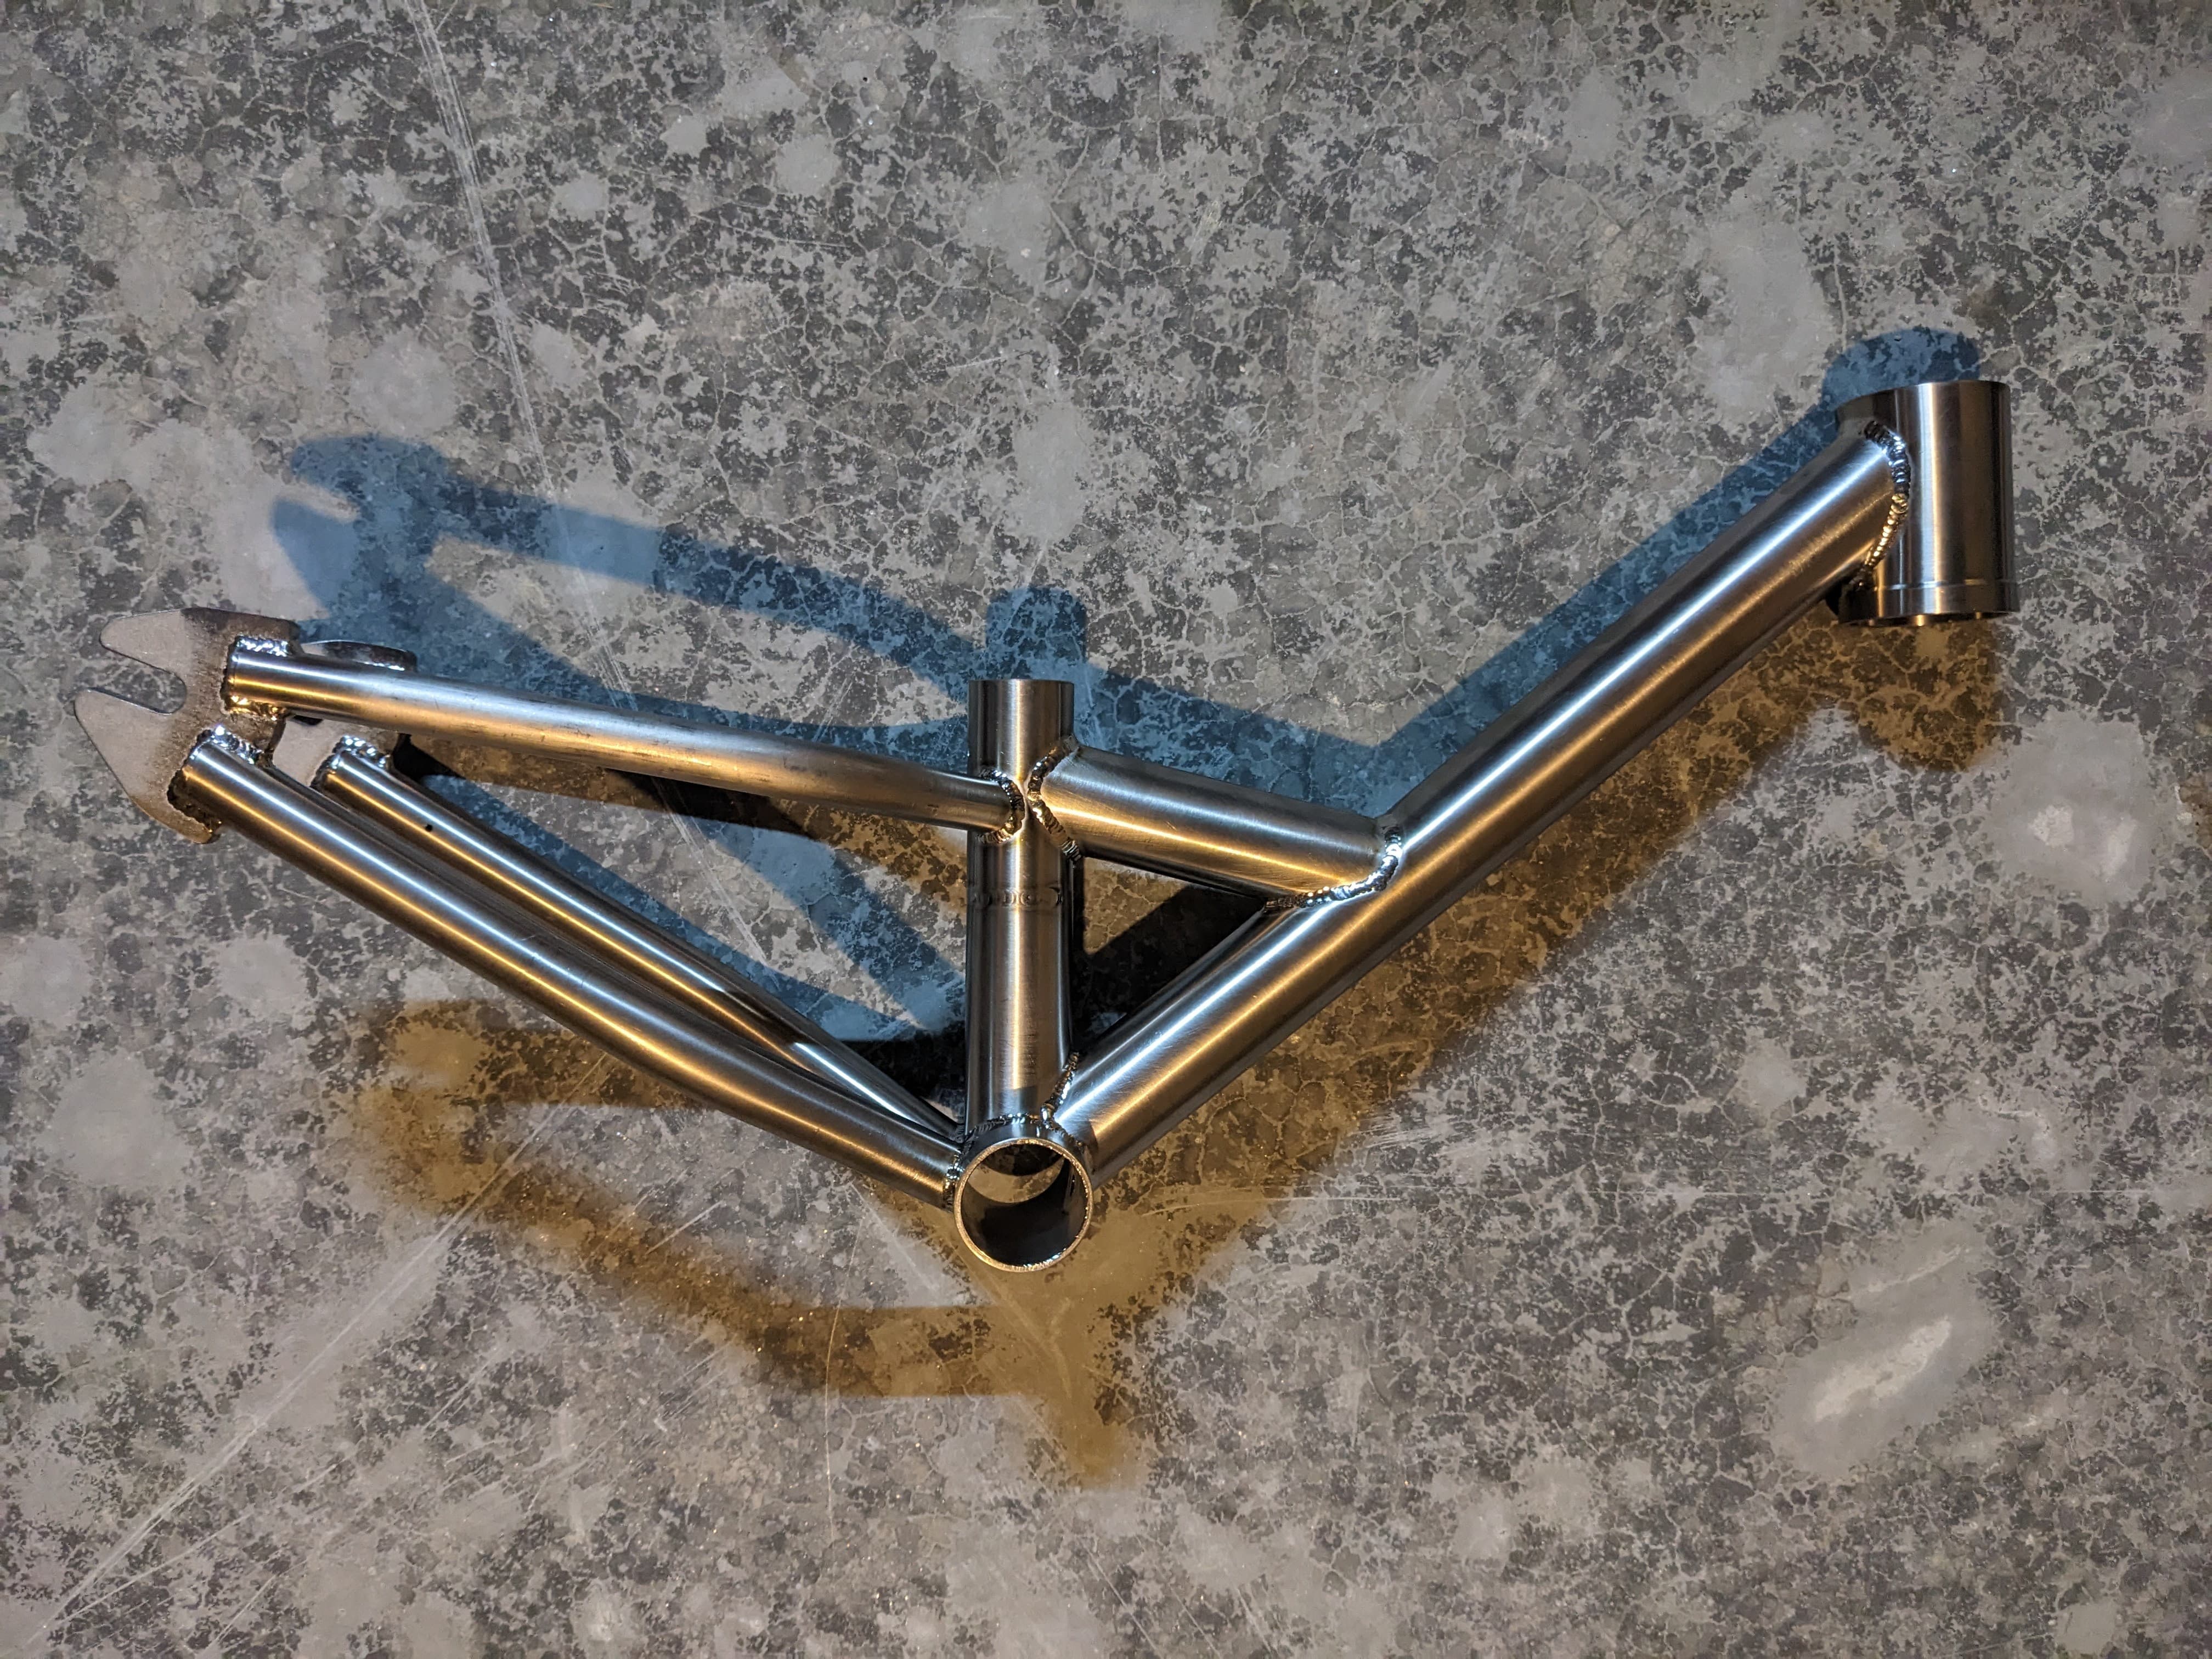
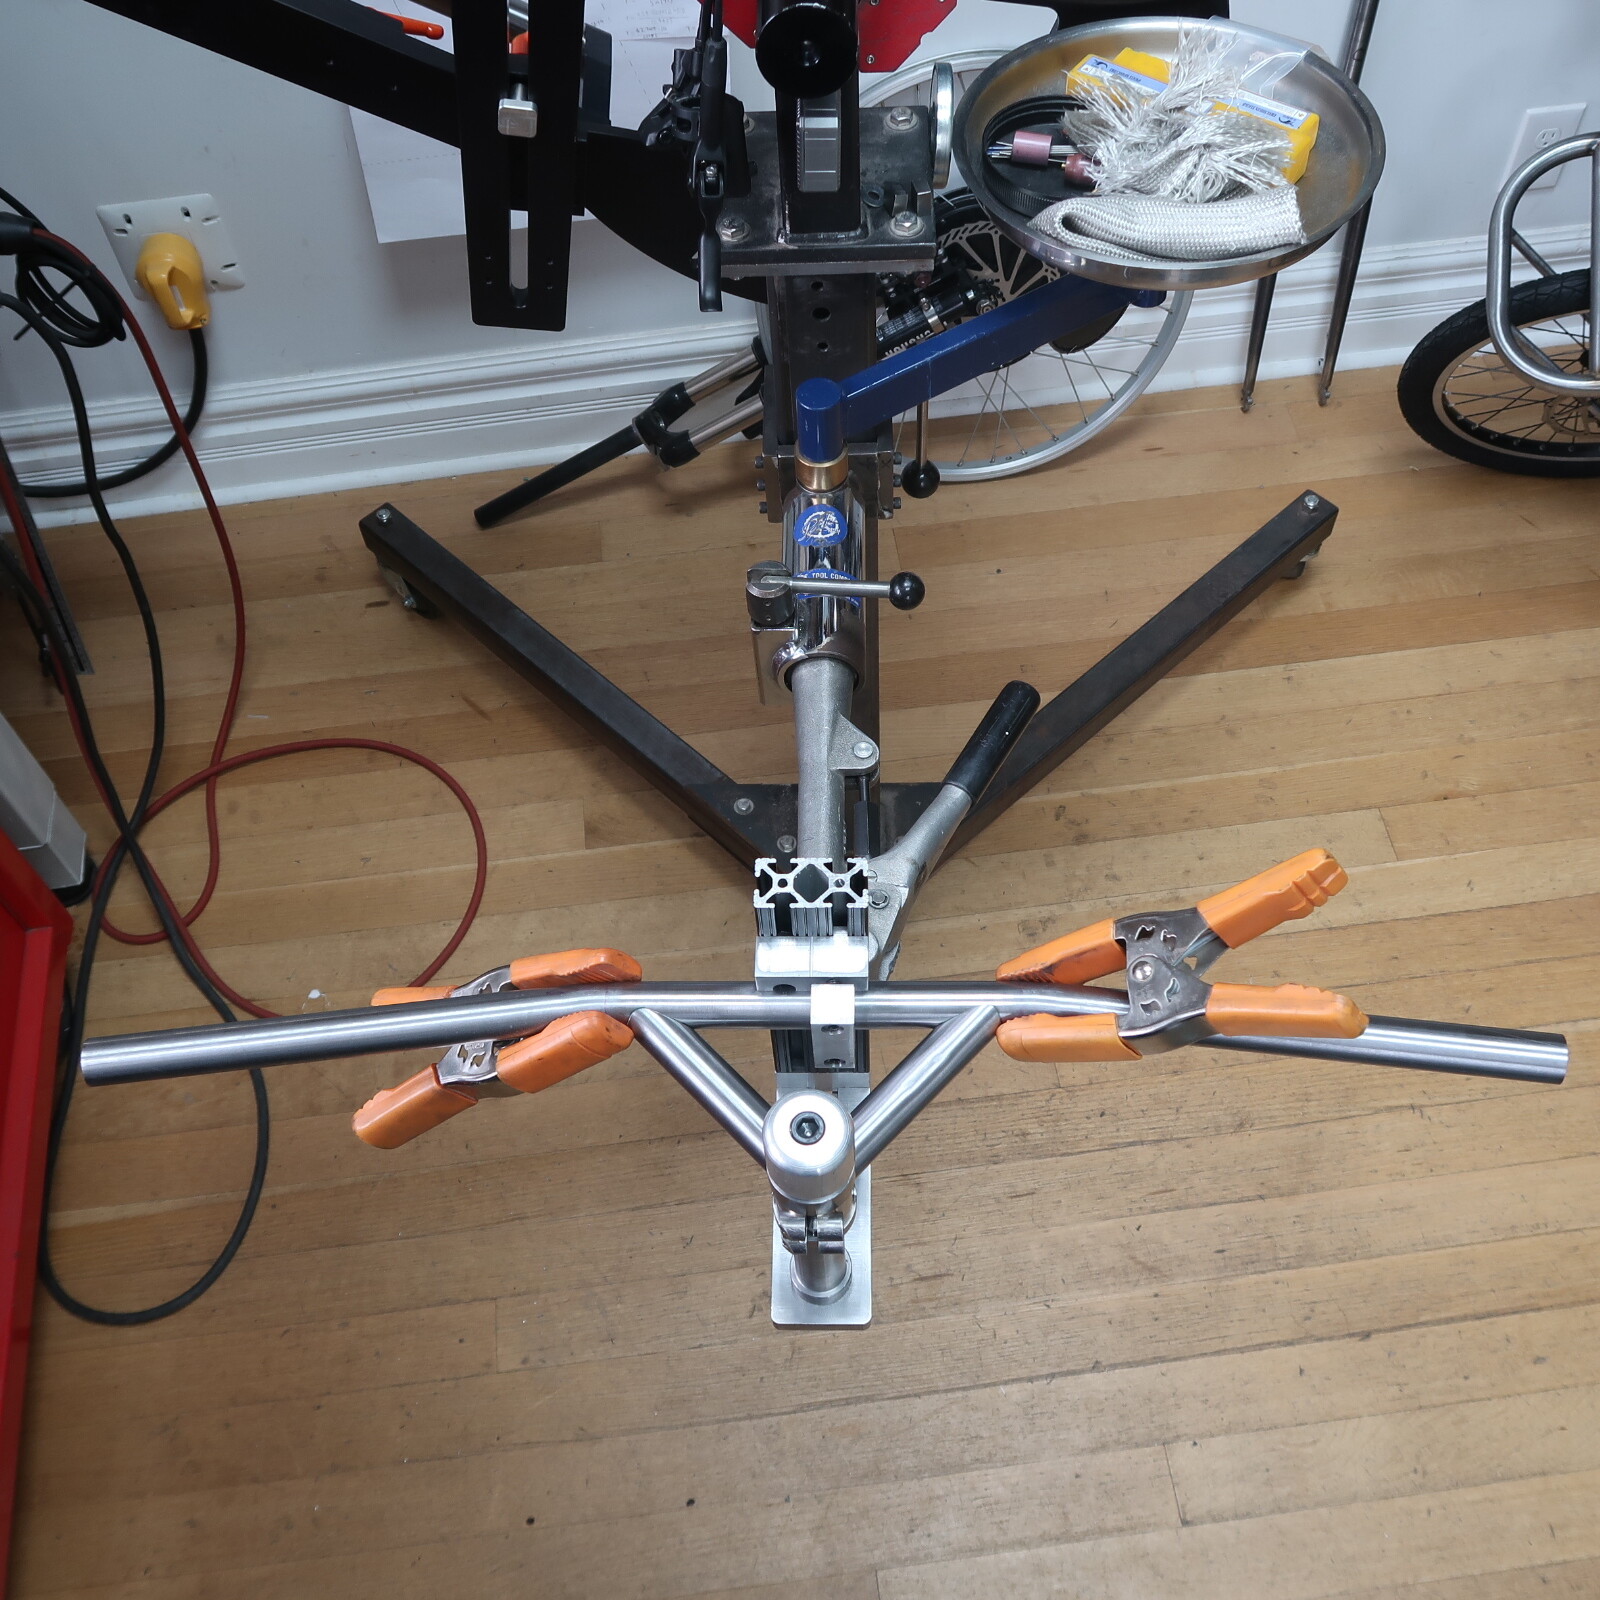
Decided to go overboard and make something interesting with the practice kit. Strider frame as a gift for a friend of mine. Was happy to fusion weld the whole thing without using much filler, and bending the stays on my hack setup went a lot better than expected. Decided to do capped stays and plate dropouts, not my favorite but it left some wiggle room for fitup. Biggest issue I am having is with back purge, I seem to have good coverage where I had heat sinks, but otherwise too much color. I was using about 10cfh for backup during fusion and around 5 on filler. I noticed in the fusion pass the argon was coming out of the miters and disrupting my torch flow once it was nearly sealed. I only had 4 1/8" holes for venting so I’ll probably use larger vents in the future and up the flow as @Neuhaus_Metalworks suggested. I have a hard time visualizing where I should be venting and how much is needed compared to the flow rate

4 Likes
That is really cool. You got me thinking.
Did you ever weld steel or just jumped right into Ti?
1 Like
I’ve done 14 frames in steel, can’t wait to go back ![]()
1 Like
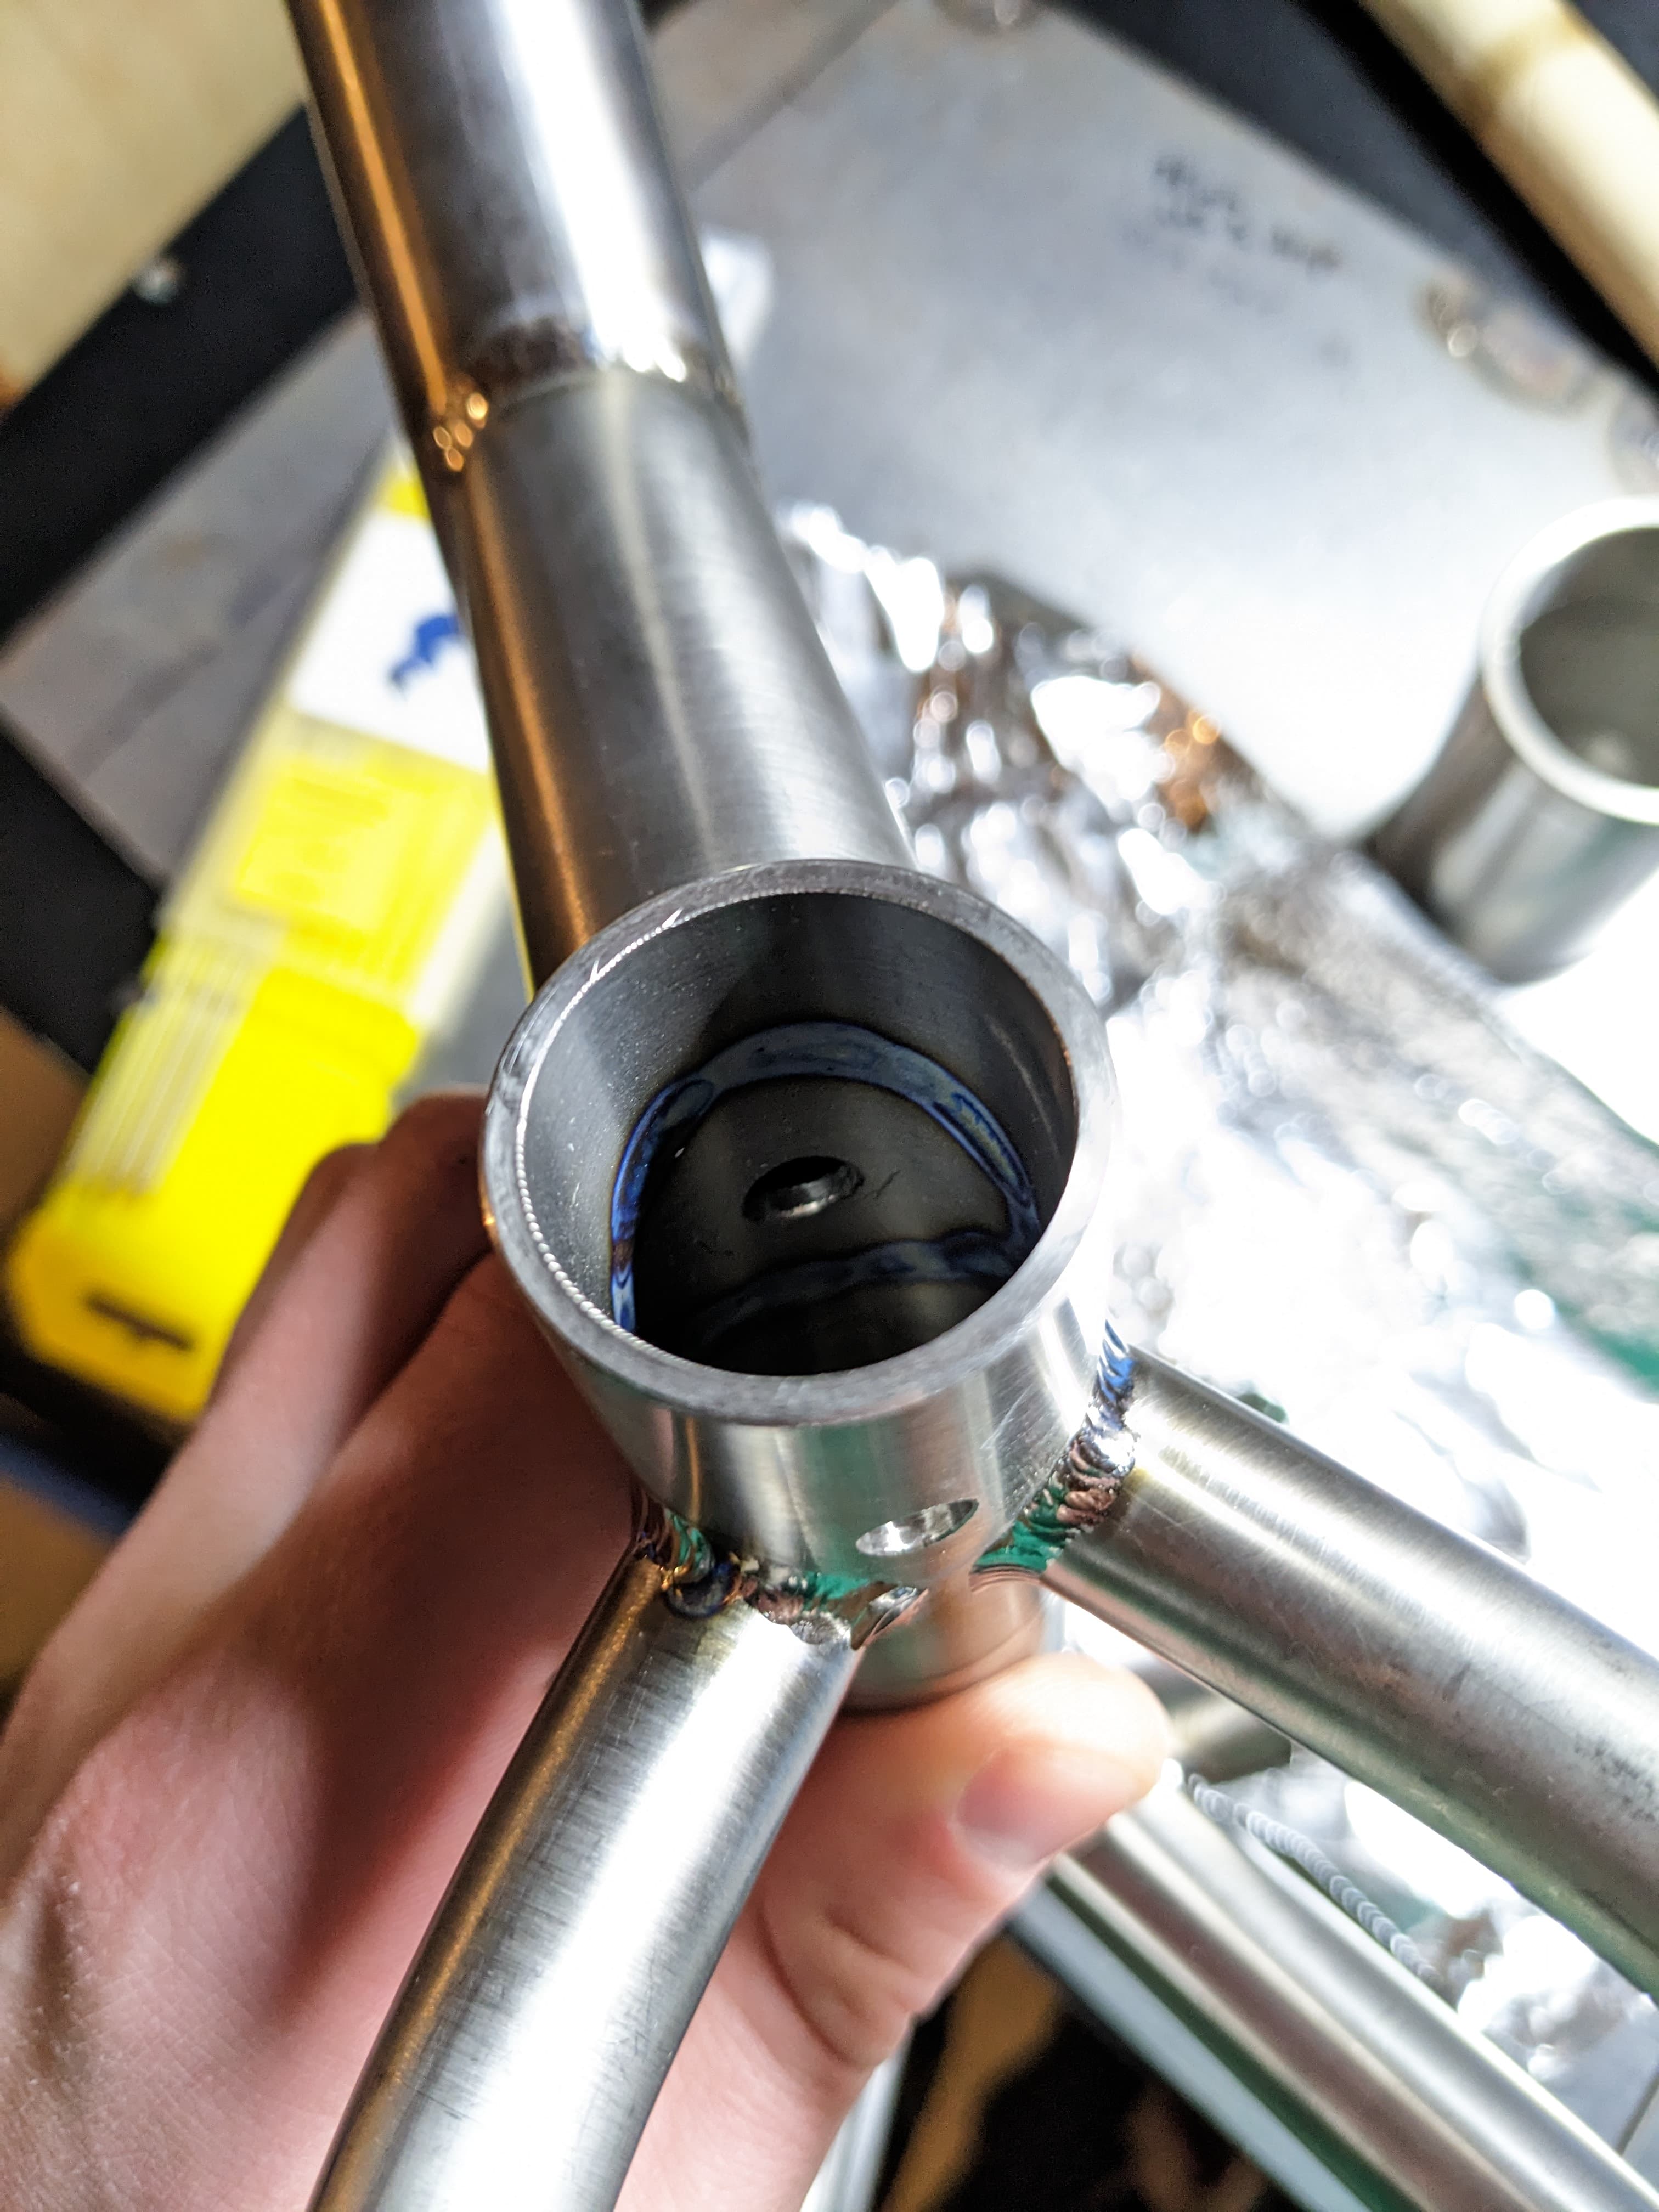
Hopefully you don’t mind me commandeering this thread, looking for some feedback on these practice welds. No purge on these. Seems like alot of micro cracks all throughout the weld is this normal? Due to the lack of purge? Am I using enough filler? Thanks!
From what I learned in the UBI class - that is the grain structure the Ti forms as it shifts from liquid to solid. Not inherently a bad thing, but it’s good to keep an eye on. Contrary to steel where you don’t really want to see any grain structure like that. The more prominent the grains, the hotter your weld. I’d say that bead is a bit on the hot side, but I wouldn’t “fail” it.
Again this is just me parroting what I learned at UBI so folks with more expertise may be able to clarify/correct that!
3 Likes
Don’t mind at all! Take my word with a grain of salt but I would treat every joint like it’s the real thing so you know what you’ll get when it matters. Argon is cheap peace of mind imo. Looks pretty good to me but others can offer better feedback
2 Likes
Whenever you have time, I’m curious what machine settings you use for TI, thanks!
I use a variety of settings based on what part of the frame I am working on. To generalize, fusion is done at fairly low amperage with a low peak amount time. The cap or second pass is done more similarly to steel but lower amps.
2 Likes
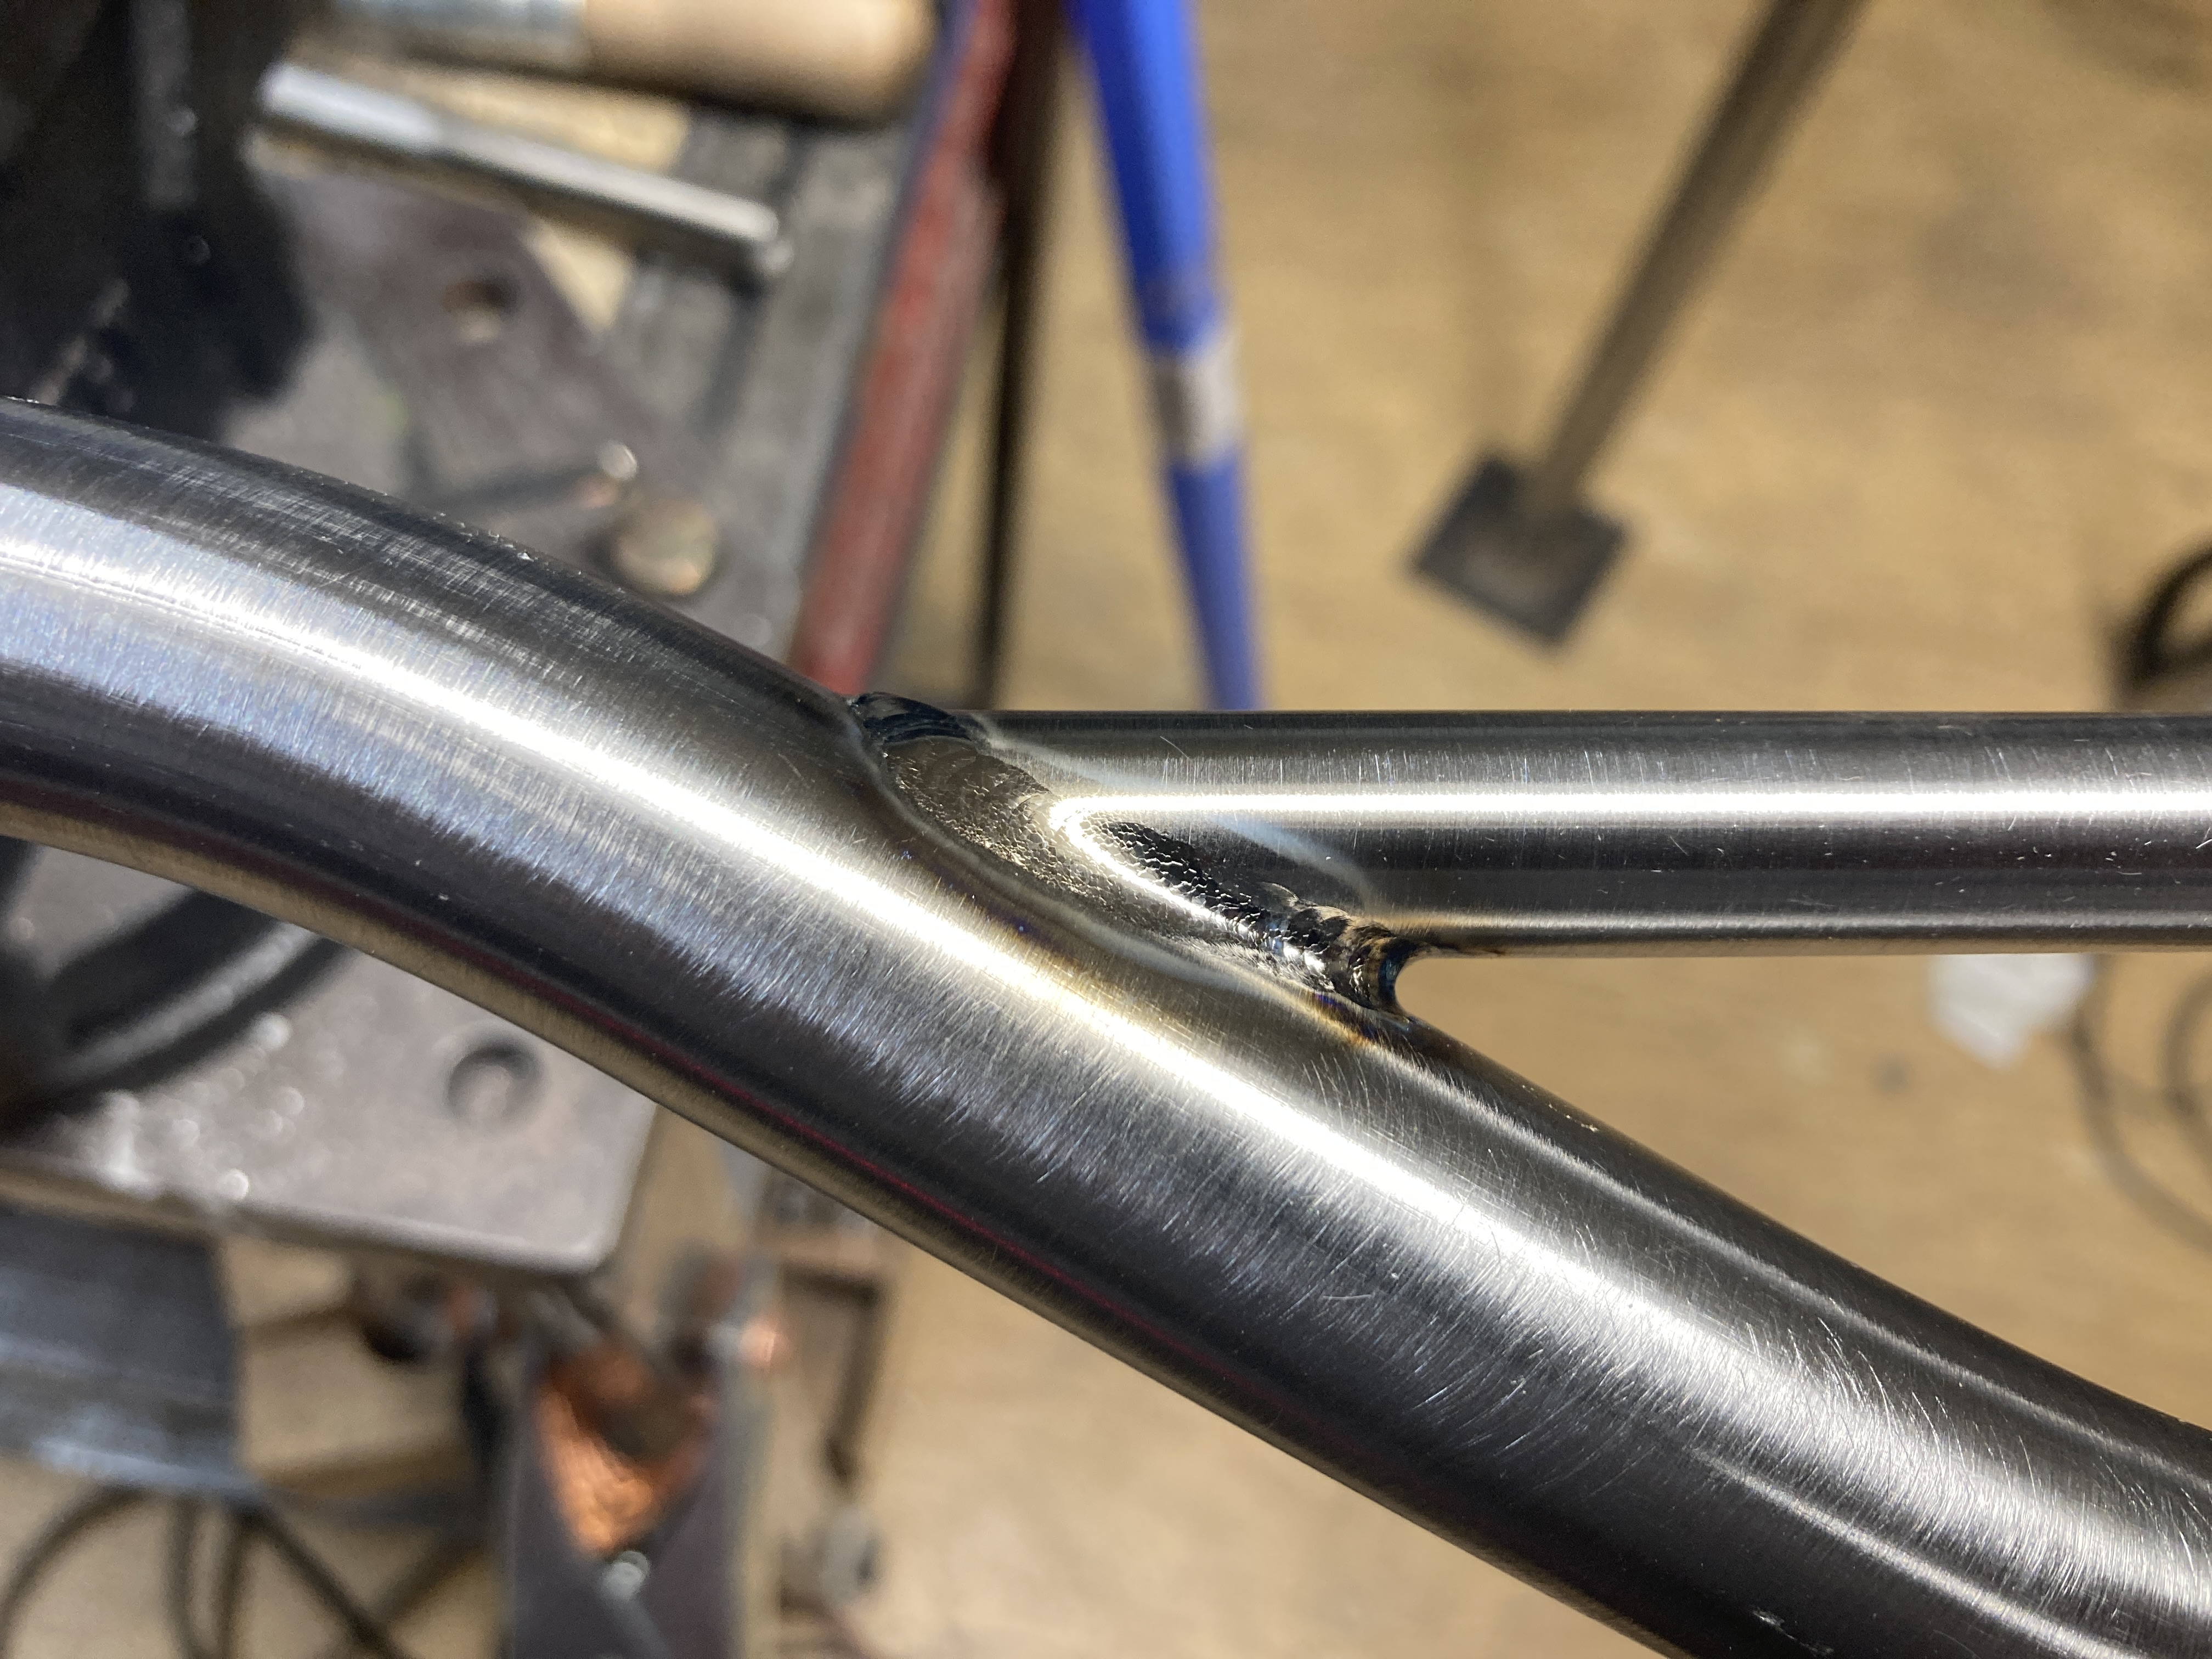
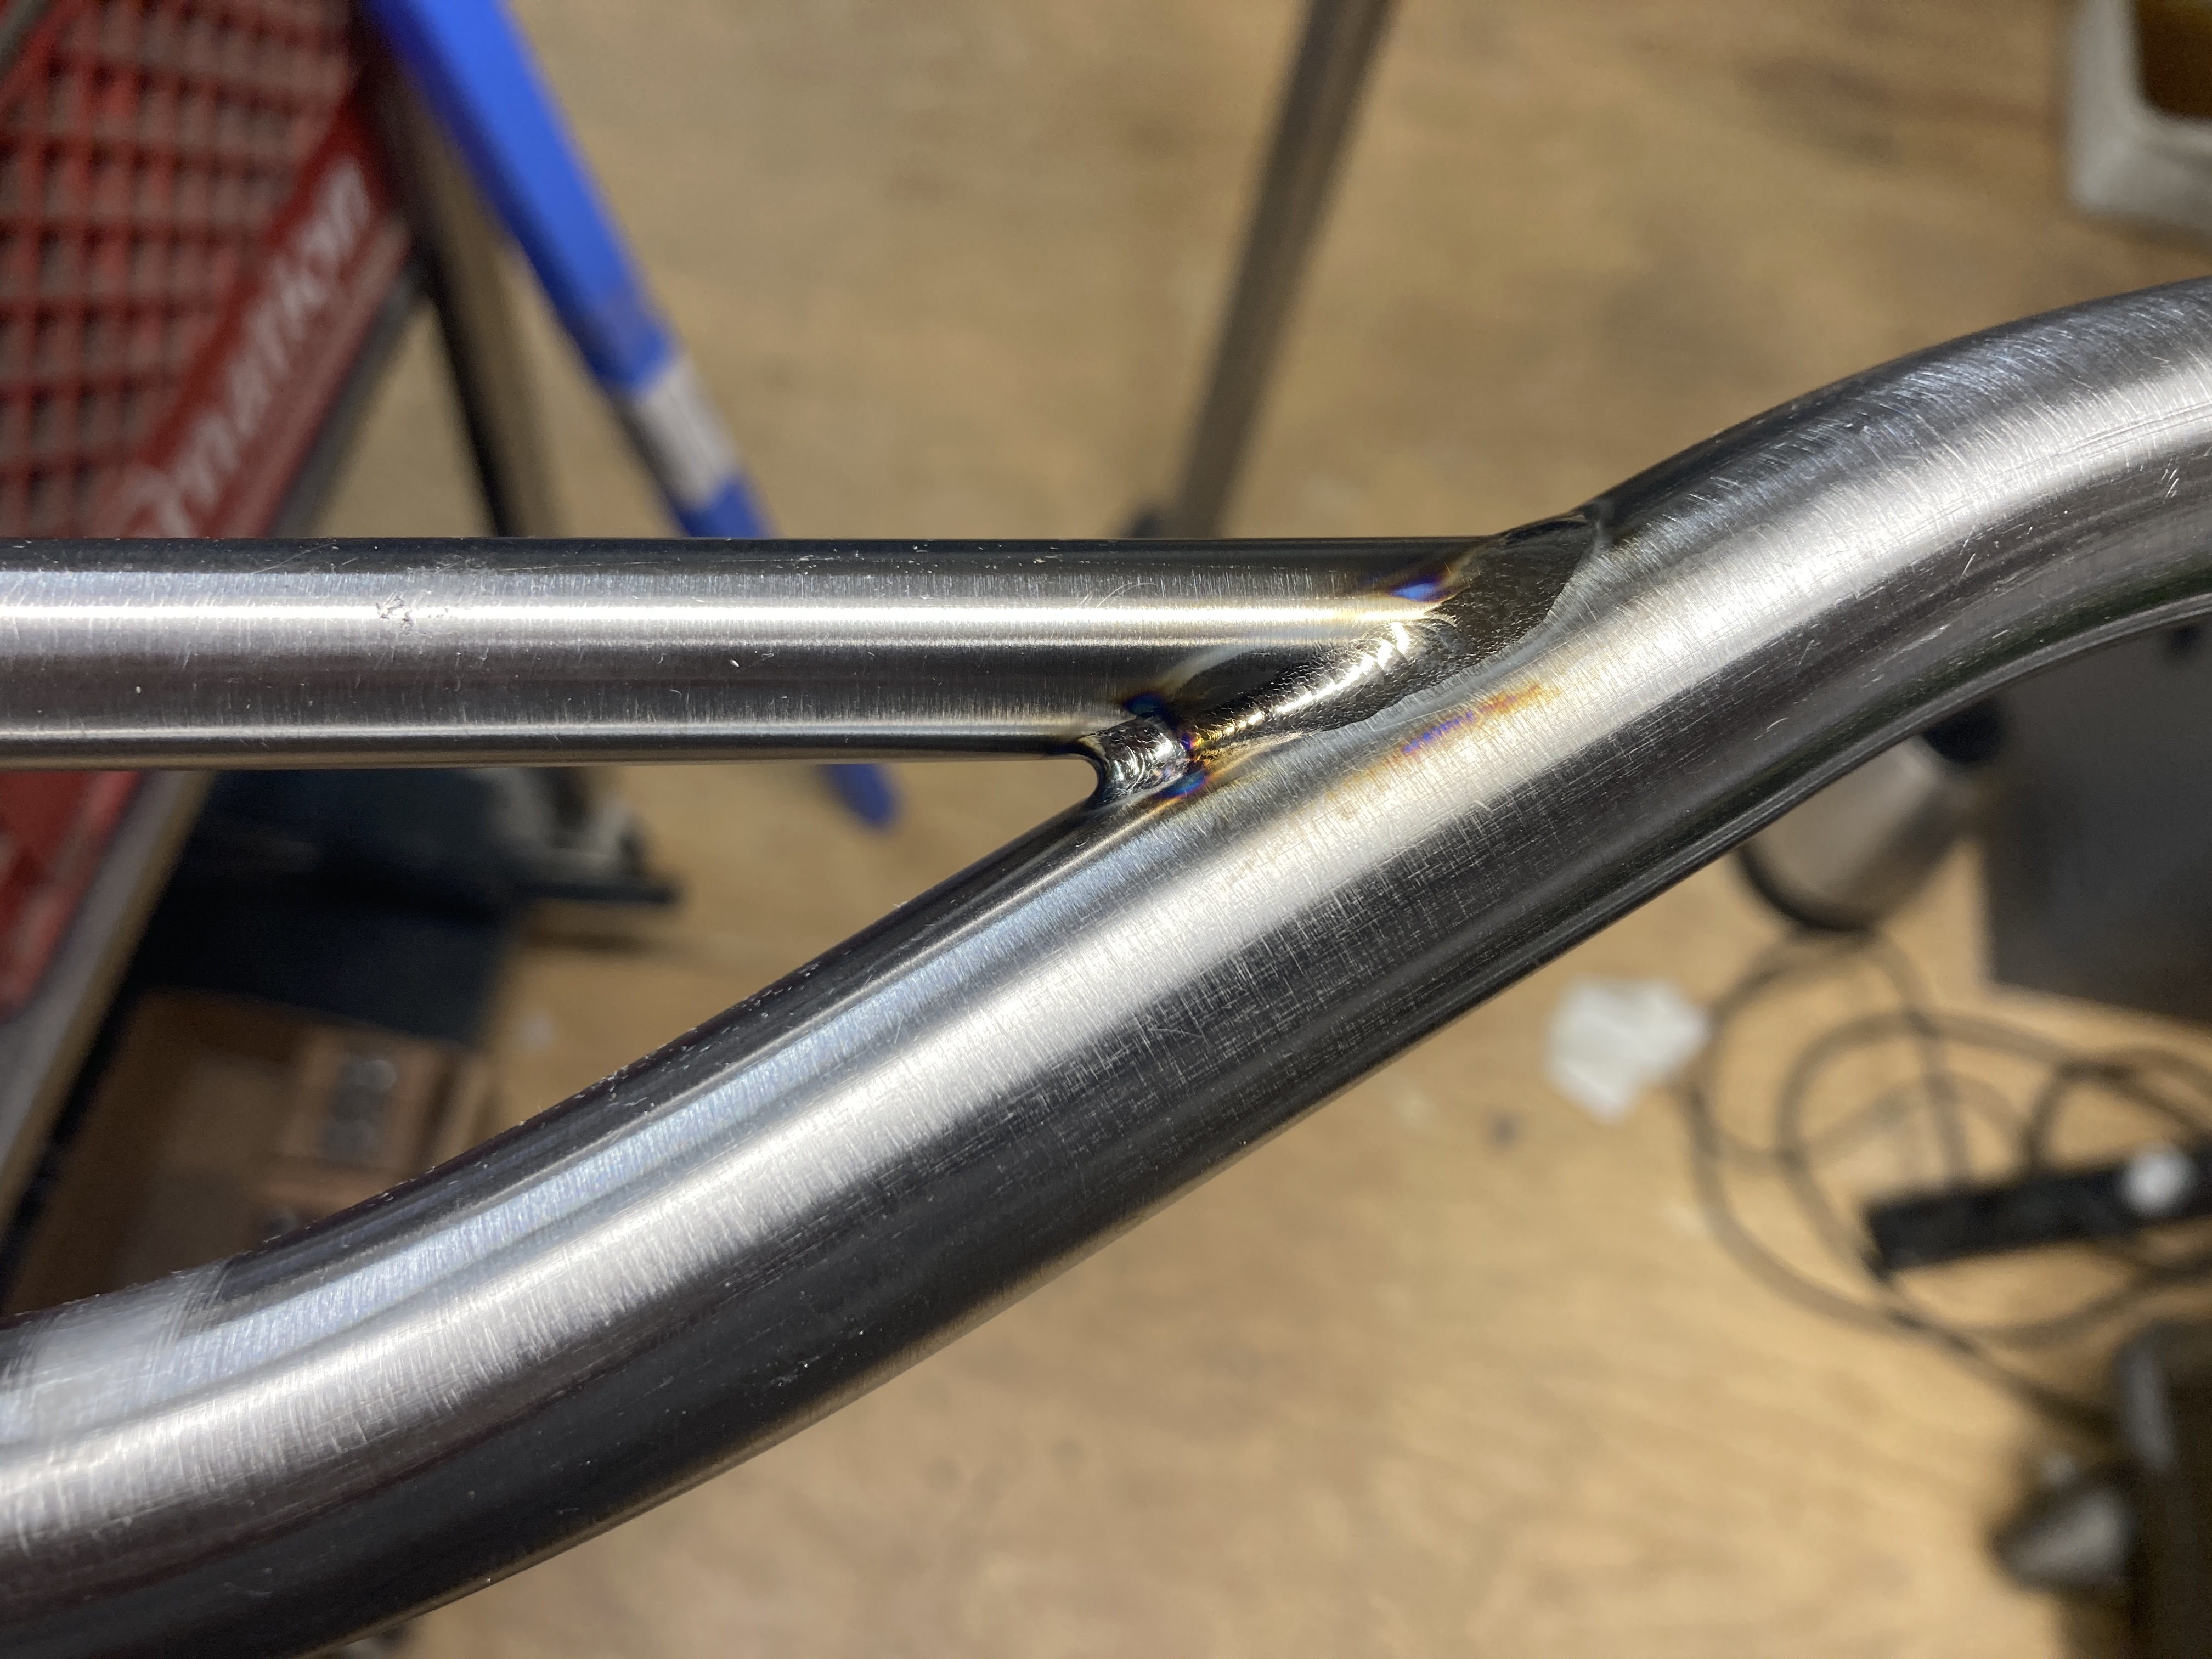
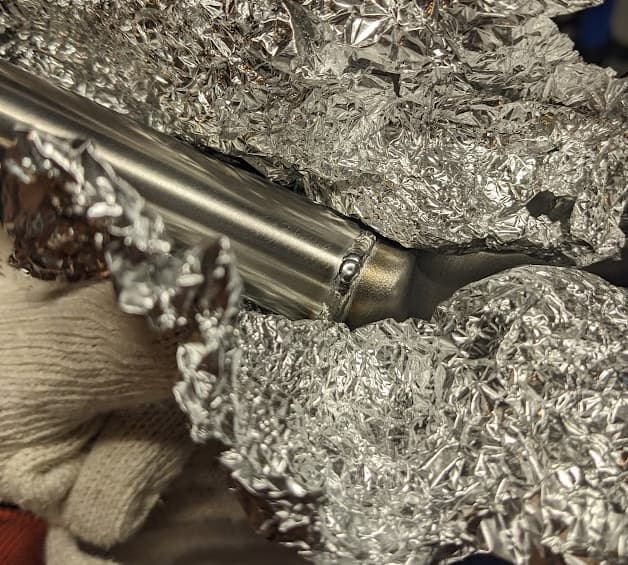
Here’s my first ti welds, I did a fusion pass on the first set of bars and went with one pass on the second set. I got some discoloration towards the end, I’m assuming due to my impatience and not letting it cool enough between beads. Also I should have made a foil dam for the acute part of the joint. Overall I’m happy with the results.
Ti seems to weld similar to copper (and aluminum) in that, it takes a couple pulses to get up to temp and then once up to temp you need to back off the amps. Beyond all the cleaning and preparation, it’s very enjoyable to weld.
6 Likes
What type/size/thickness titanium are you using for the handlebars?
I’m Ti-curious and would love to make the leap to titanium but the cost is scaring me away.
These are .063 or .065, can’t remember. 7/8” annealed grade 9. I’d like to find some .083
I’ve been meaning to ask @Meriwether on what he uses. I think these will be fine for moderately rowdy riding.
About $100 for 36” from tiger titanium. The cost is definitely intimidating, but that’s probably the largest barrier (aside from purge set up which you can certainly poor boy as I did). If you are comfortable welding steel, you have the skills to do titanium.
It cut, filed, and welded much easier than I anticipated
That doesn’t sound too expensive and cobbling together a back purge setup would not be too difficult. Is there a reason you choose annealed grade 9? There are so many types of Titanium, I’m pretty green.
Joe titanium has a description of each grade of titanium that they have available. I chose grade 9 because it has the qualities that pertained to my intended use.
I have some scrap pieces of titanium tube that were shared with me, I’m happy to send it to you.
I was going to order from Joe titanium. I plan on bending the bars like you did so I’m trying figure out what material to order. I made a bull moose bar out of 7/8 .049 4130 , Would love to make a titanium version! Thanks for the scrap offer!
2 Likes
Welds looks great!
I use the same thing, 065 wall annealed. You can use CWSR it’s just harder to bend and if you bend it enough it can crack. Annealed is best for bending.
I used Ti Joe’s 061 annealed for awhile but the surface finish was hit or miss for some reason.
2 Likes
What filler rod do you use? I’m wondering if I should just buy a bunch.
I bought a small quantity (10 rods) off of mundaka.technologies on eBay. ERti-5 .045 and Neuhaus sent me some .028 to have at the ready while doing a fusion pass.
I have 9.5-.25 rods left after doing two sets of bars
I mostly use .035" 6Al-4V from Titanium Joe.
2 Likes
Sorry for a long post here, just recording my thoughts and notes before I forget and hopefully they are helpful to some.
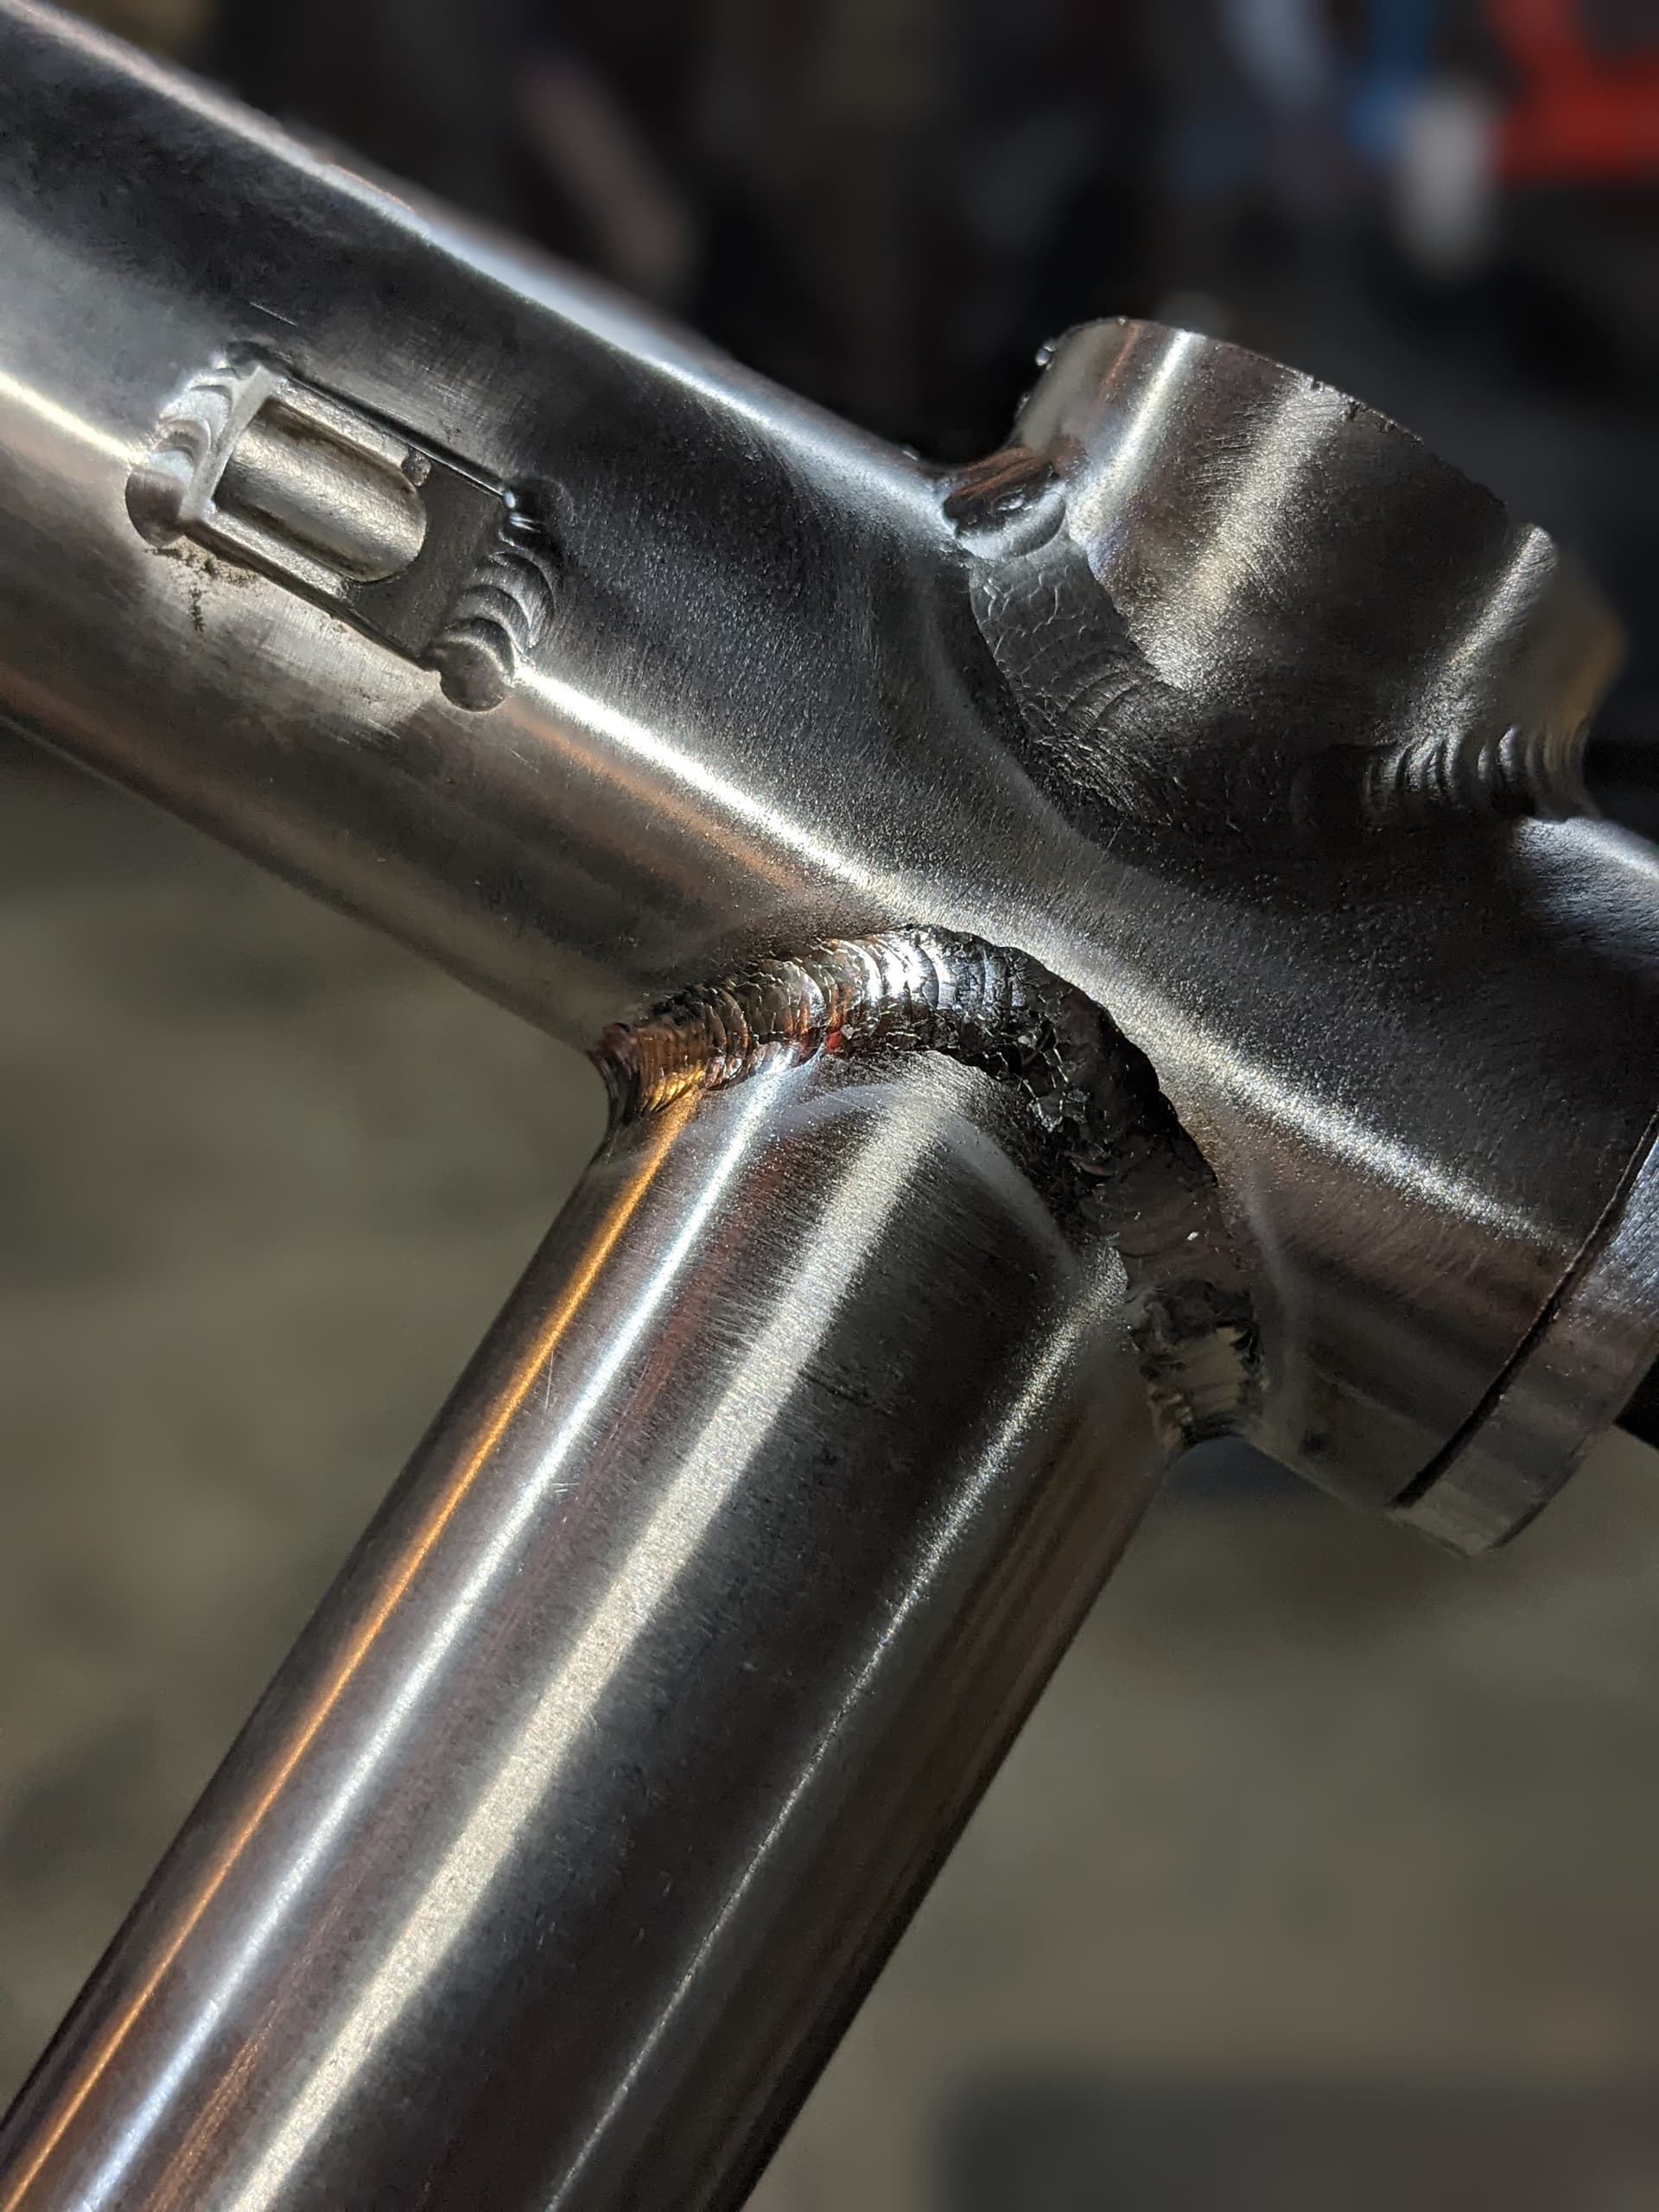
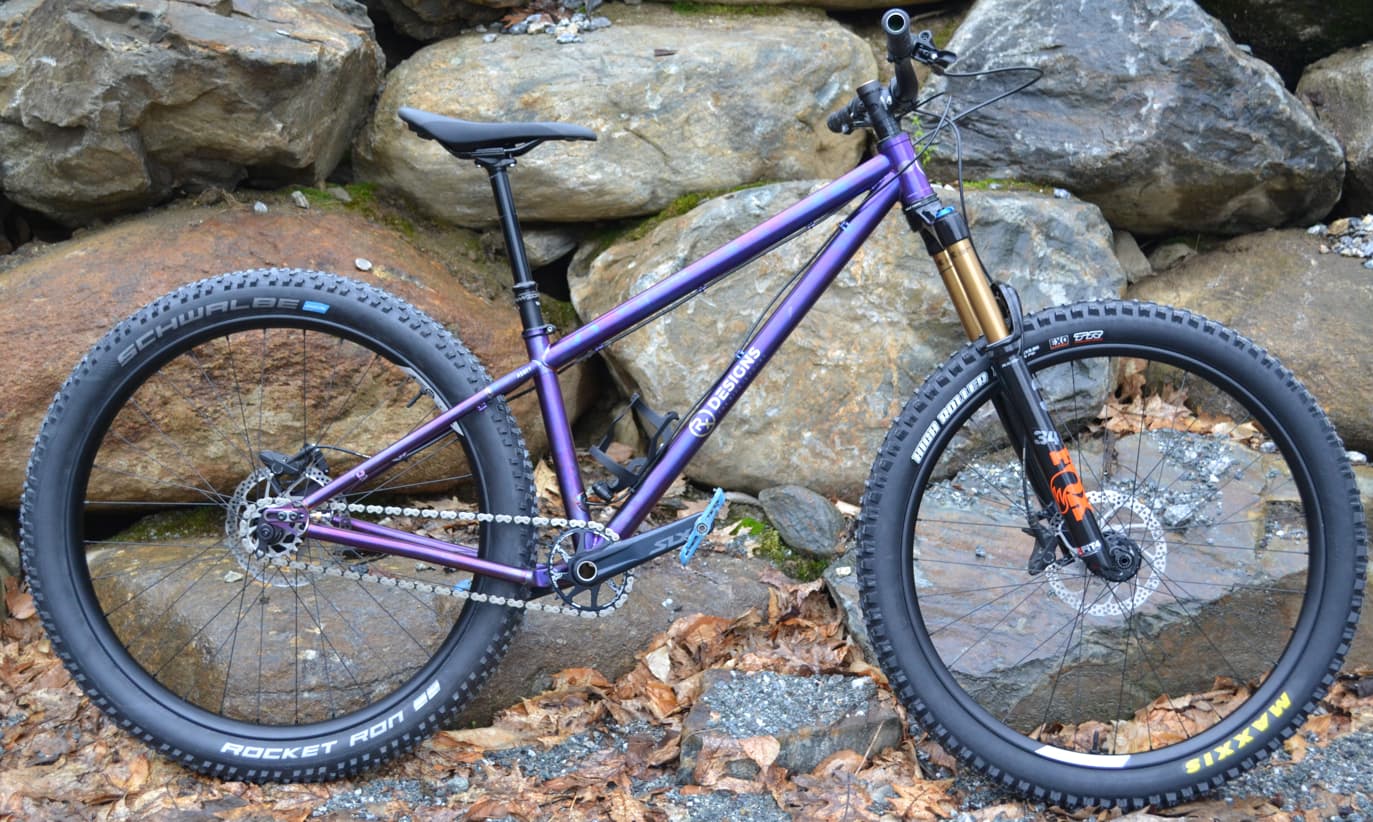
As usual I decided to try something way over my head and it was a struggle. My girlfriend wanted a hardtail with plus tires, so I drew up a small hardtail sliders and 3" tire clearance. I’ve been working with 3d printed yokes whenever I can to speed up my process, so I used them on the chainstay and seatstay. The designs are my own, and they were printed by RAM3D in new zealand. Great customer service, really good pricing and the lead times aren’t horrible. I asked them to be printed with an internal support lattice, but I’m not convinced this was the right move, at least with the type of lattice they use and since I didn’t have any internal hollow geometries to support. My thought was that it may add strength and stiffness but that’s probably wishful thinking. The lattice actually slightly interfered with the miter since it terminated at the miter surface. I’m sure I could have sent a model with an offset surface to fix that mistake. Technically it was flush but things warped. The seatstay yoke turned out great, both were printed in wall thicknesses slightly thicker than steel. The chainstay yoke was another story, it warped so bad I had to re-miter the BB cut on my mill. I think this was a fault of my design. The way it gets printed ends with a thin unsupported surface that I could see pulling out of line very easily (which it did). I also think that the lattice contributed significantly in pulling this area around, another reason to not use it or specify an offset termination surface.
Everything mitering wise went well, I didn’t have any major issues cutting or filing the Ti, and I kept my miters as tight as possible which helped a lot during welding. I was able to bend .047 wall .875" diameter chainstays on the famous vevor chinese bender with really nice results, I really took a gamble on that one. Wouldn’t be possible without a follow bar and clamp like others have done
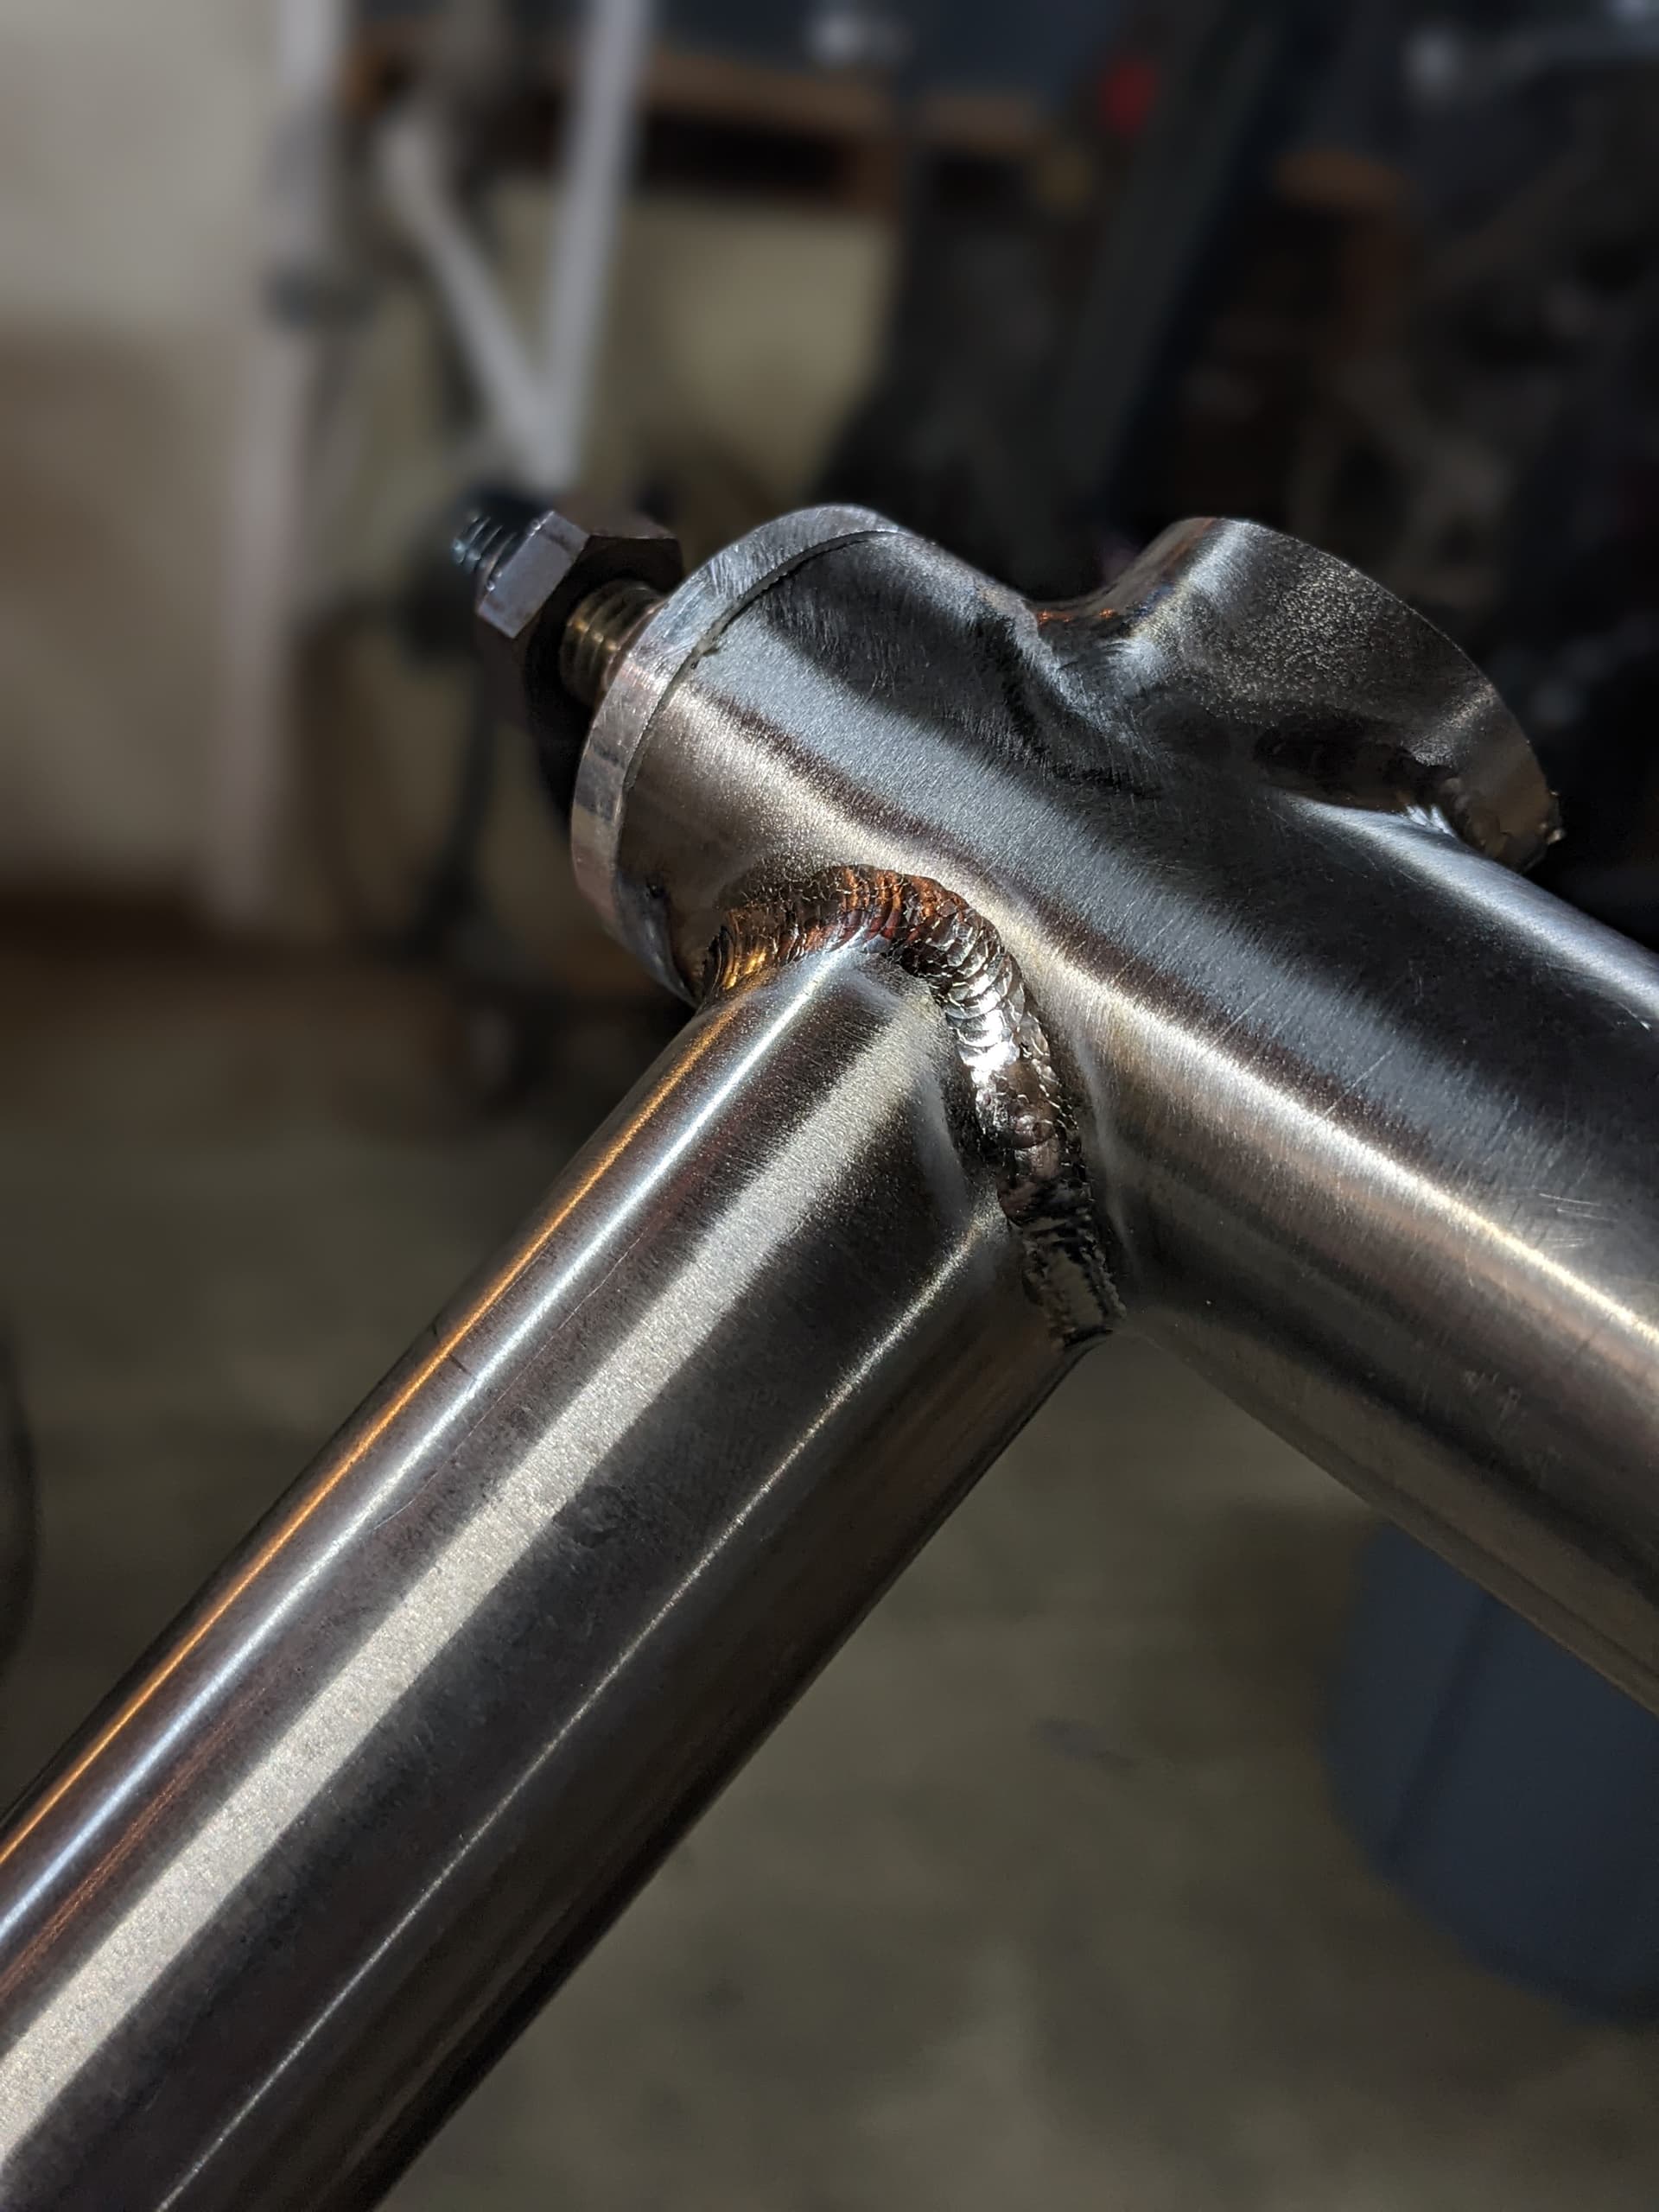
Fusion welding went surprisingly well, didn’t have any keyholes only small spots of color on the dropouts and I had better venting for back purge so there wasn’t as much disturbance in flow once the frame was sealed up. The biggest pain was the tiny acute angle between the top and downtube, it was near impossible for me to get in there. Better welders out there make it seem like no sweat but I really was struggling to get that closed up. I really could have gone with a longer headtube to save myself the trouble but I wanted to be sure the stack wouldn’t be too high. I’ll hopefully never do that miter again.
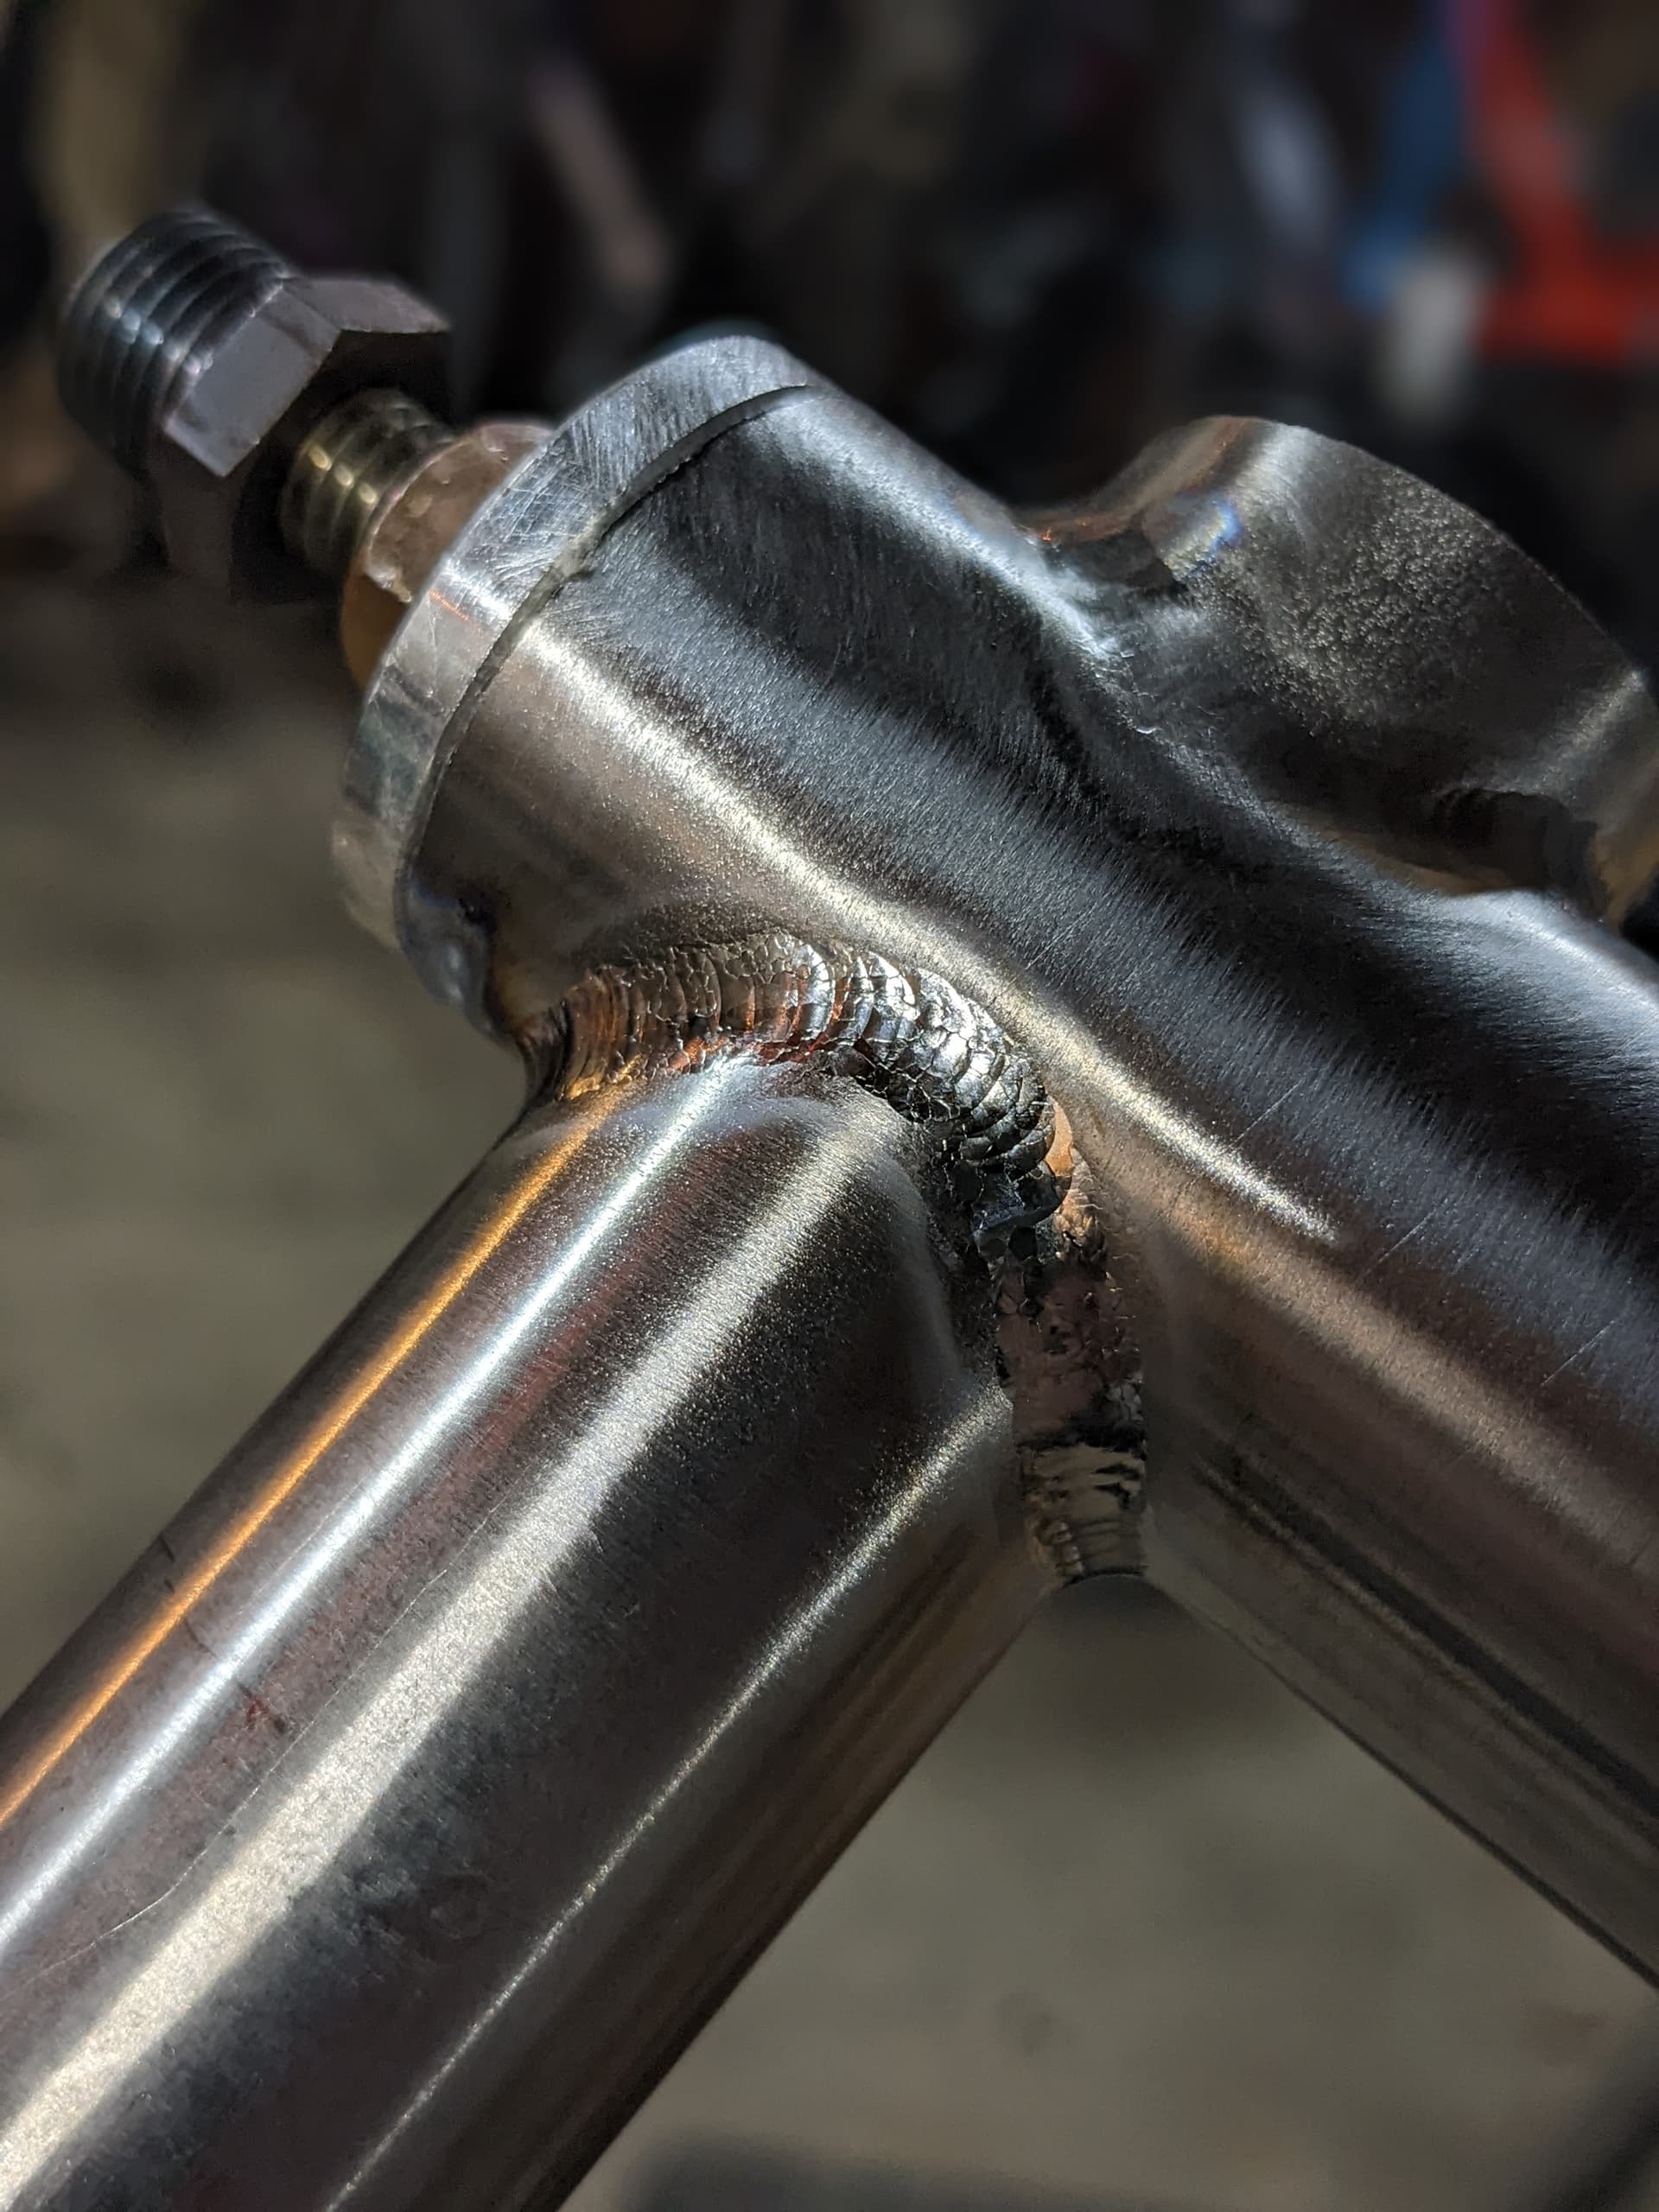
On the filler pass is where I got completely wrecked, a number of areas went worse than expected. I tried to make a good tinfoil argon dam for the slider hoods but it wasn’t enough to keep them from getting color. I also learned very quickly that the yoke lap/butt joints need a healthy amount of tinfoil shielding to prevent the gas from rolling off too quickly. Once I got that dialed the prints welded just like the rest of it. Overall my welding was sub par and I’m really not proud of it, I learned a lot but the whole process was incredibly stressful.
Luckily my back purge worked well, no color inside the BB HT or ST. I used the super thick 1.625 OD BSA BB and had minimal distortion, didn’t have to chase the threads which was a relief. My girlfriend wanted a fully anodized frame so I decided to give it a shot, took way longer than expected and the finish wasn’t nearly as even as I was hoping. But she likes it and its definitely unique so I’ll take it. One thing I didn’t account for with regards to clearance was the additional thickness of shimano chainrings. The stock two piece chainring interfered with the yoke where the outer ring bolts to the spider due to the fasteners. This was definitely oversight on my part but it seems silly to have a two piece ring when it adds that much thickness. I can’t find anywhere that sells the outer ring alone to replace for wear but someone can probably educate me about that one. I swapped for a one piece oval and had plenty of room.
Probably won’t attempt another Ti frame for a long time, the added time, cost, and stress wasn’t worth it for me. Although when I picked the bike up it certainly made me want one.
12 Likes