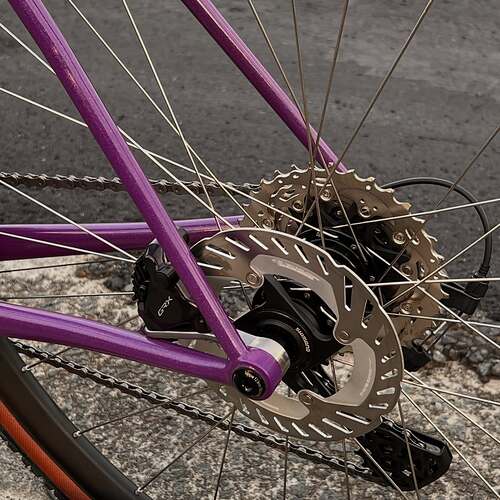
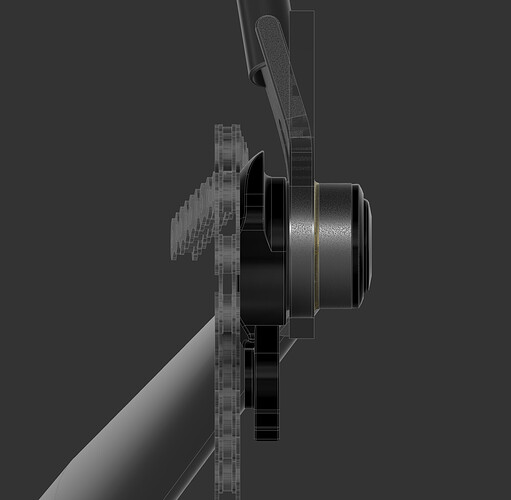
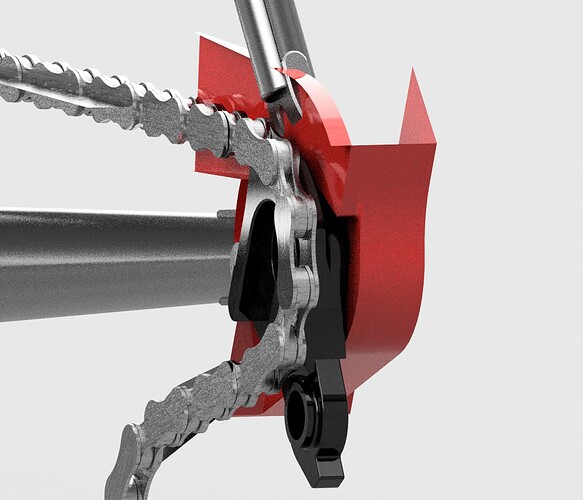
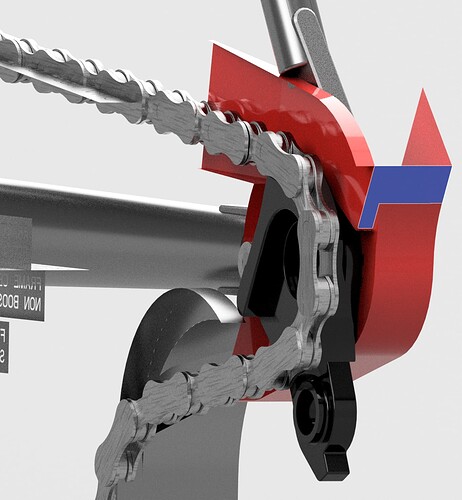
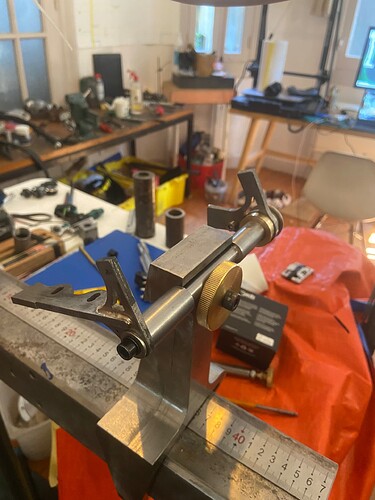
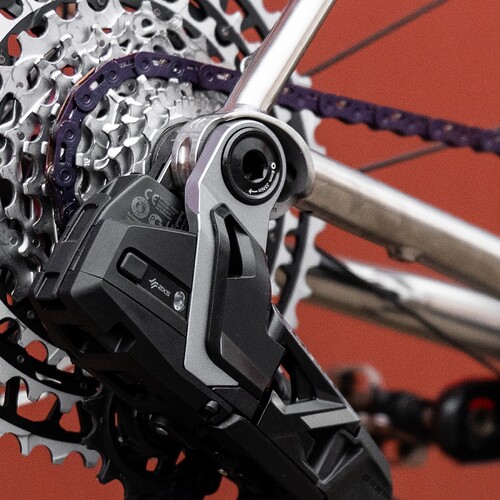
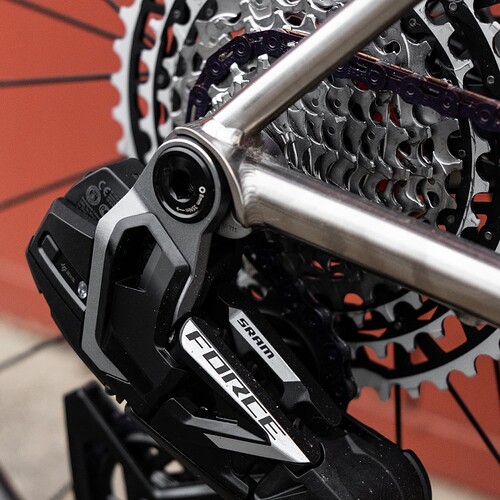
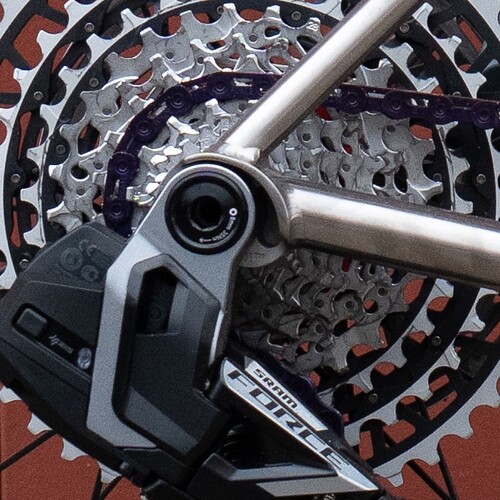
I checked and found no issues installing the full mount derailleur to the C82 dropout. Personally I have noticed what others have said that these derailleurs really need to be torqued correctly. No trusting your wrist-o-meter calibration. Use a torque wrench.
Looks sleek! is it 3d printed?
Does the stays aligned symetrically? and how you make the hanger stopper for that?
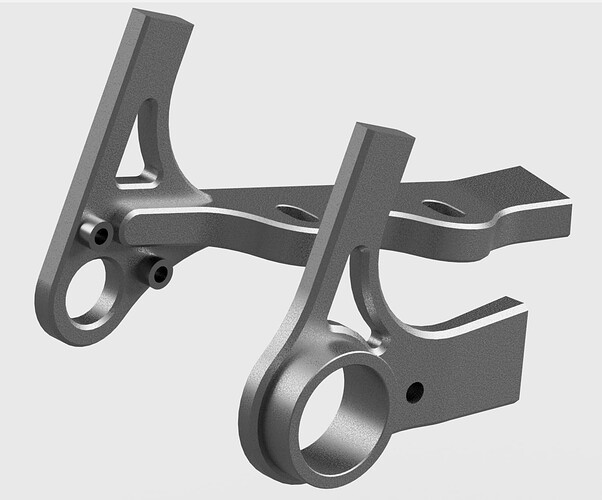
Not 3D printed. Machined the frame ends out of 304 stainless.
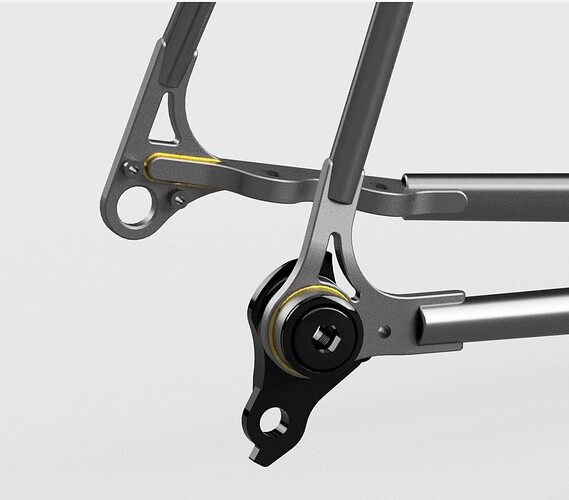
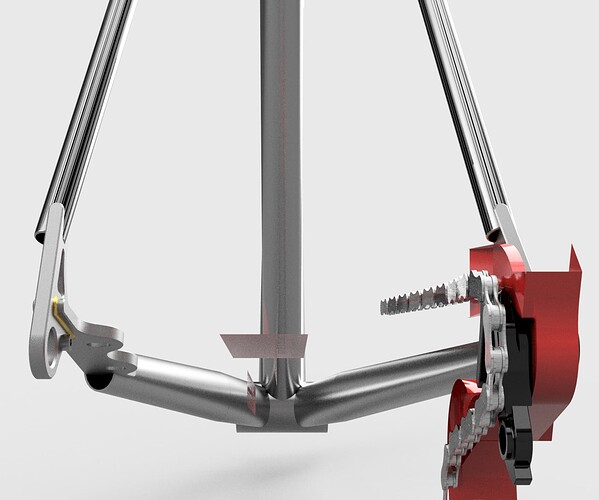
The seat stays are 14/10.5 single taper so land on the 12.5 width nicely. I did machine a little ‘end cap’ with a spigot that goes into a hole in the ring.
The chain stay I squashed from 13.5 to about 11 across and mitered to land neatly. I’ve designed a UBM (uni. brake mount ) to go on the NDS and it means the rear end is symmetrical again.
In future I’ll model it up so that it’s all 3D printed with square cuts on the stays onto some spigots so that it look seamless similar to what I did with this.
Great post! Replaceable hangers are much less important on steel frames anyway, because you can just bend them back. And if they do crack or break you can just weld them.
So UBM style bracket has passed with flying colours. A little design issue mainly to do with placement of front bolt but first ride out was a 106km 2600m ascending gravel race and it was flawless in operation.
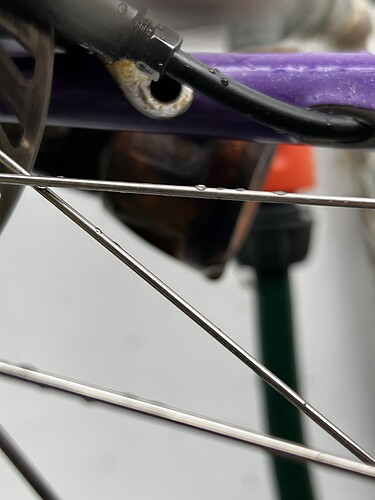
EDIT: This photo shows the front bolt sitting behind the hose entry. It was awkward to get the bolt in. There are a couple things going on here. The bolt center is at 90mm from the axle. From memory the patent is at 110mm which would definitely help. This is a 140 disc so I still think 110 might be in issue for access. To fix that would be to rotate the caliper slightly so the hose passes above the bolt. would only need to be 2ish degrees. The other issue I had here was hose exiting the chainstay was too close to the caliper. Doesn’t leave much room for assembly.
You’ll also notice the bolt is missing yet the bracket still did it’s job. No idea when it came out during teh ride but I didn’t notice any weird noices or behaviour from the brake in use. If you are going to try and design a UBM pay attention to where teh face of teh chainstay face is going to sit. I was lucky in some ways that is was about the right spot with the stays I used.
That’s the cleanest UDH/FM solution I’ve seen on a metal frame! ![]() Excellent work!
Excellent work!
Cheers mate.
Not to steal @DEVLINCC 's thunder, as I think this is super clean, but you might be interested to see my sliding dropout version that’s documented here. It’s in the same vein as Sean’s UBM style solution.
I really love how this turned out- a super clean integration of the brake mount, allows you to build a symmetric rear end, and keeps you flexible for the future. Definitely keeping this style of mount in mind for my next build!! Appreciate you sharing your efforts here.
That’s super clean Jim! I missed seeing those posts for some reason. Noice!
after following along with a few other people’s, and pouring over the commercial offerings, i’ve put together a drawing of my first flat mount/UDH dropout set.
its laser-cut, with some tidying up (little bends, rounding edges, chamfers etc… ill do that all by hand) with a solder-in UDH tube which I will turn on a lathe, it has a custom machine screw for the rotation stop, and (Im feeling maybe optional) m3 cap screws for NDS wheel alignment. the necessary 10.0mm brake mount thickness ill achieve with some 3mm washers under the bolt heads
ive thrown the UDH masks on it, and i’ve scoured the sram and Shimano tech docs for caliper clearance and I /THINK/ im good. so its time to offer it up for some criticism; what have I missed? is someone with more FM/UDH experience here up for applying the mask and or a critical eye?
PCR_flatmount_UDH_dropout_v1.step (297.1 KB)
step attached, go ballistic, more than happy to provide a different file if anyone wants one too.
NB: it meets symmetrical stays (!) but note that this has been designed for a specific bike, so if the angles look a little funny, or the tabs a little tight, thats why.
The concept is cool! A few observations:
- Is the DS insert the right thickness and diameter? My memory is that it needs to be 12.5mm thick. Your drawing shows 12mm. The diameter should be a minimum of 25mm. Your drawing shows 24.6mm.
- How are you offsetting the NDS plate 7mm so it’ll be symmetrical with the DS plate?
- I assume you’re attaching the NDS CS to the flat mount plate. So the chainstays will be approaching the dropouts at different angles. That might make for a tricky setup. But it’s doable.
hey thanks heaps for the Audit!
- you’re right, its not, I misread the 12.5mm as 12mm +/- 0.5mm when reading the sram drawing. good catch, thanks.
1.1) I had broken the edges with a small chamfer (as habit) which throws the diameter of the face out of spec, however the cylindrical outer surface is 25.00 diameter, I think ill bump this a tiny bit and retain the chamfer.
- I was a bit unclear above, the plates are Asymmetrical, but the chain stays are symmetrically placed about the centreline of the bike, the shorter one on the DS doesn’t get quite so far outboard simply because it isn’t as long. so they both land centered as drawn.
2.1 I outright forgot seat stays exist; as drawn, they will be asymmetrical which isn’t at all what I want… im going to go away and work that over now ![]()
- where the chainstays land on each plate, requires a simple, straight, even, centered slot in the end of either stay, the NDS one is simply 90’ out of phase; i’ve shaped the end of each plate to be perpendicular to, and centered on the CS centreline
thanks again. super helpful.
will report back with v1.1
alright, here we go.
the dimensions are restored, the seat stay tubes are symmetrical, though the DO/SS interface will take a little bit of careful fitup. nothing too complex, and given ill be bending the plates aswell as cutting and filing the slots by hand, i can measure and finagle till my heart is content.
PCR_dropout_FM_UDH_V2.step (640.4 KB)
That’s a cleverly simple way of making the seatstays symmetrical. ![]()
Not sure if it’s possible because of the bent DS plate, but I’d be tempted to shorten the SS tabs. More tube and less tab is usually lighter and stronger.
You can also potentially slim up the tabs so they’re closer to the diameter of the tubes. This is mostly aesthetic though. Some builders like to show the tabs or file them into fins while others prefer a seamless transition from tab to tube.
You mentioned using washers to get the 10mm thickness for the brake mount. I’d be tempted to get some 5mm thick plates cut in the shape of the brake mounts and braze them to the main tab. Maybe both plates could have small holes for placing locating pins while brazing the parts together.
Thinking more about it, it’d be nice if the bonus plates were stainless and you brazed them to the top of the main plate. Then you could keep the brake mount faces clear of paint/powder. Actually it’d probably be best if all the plates were stainless. Sram specs that the UDH interface be clear of paint.
Great design! I really like the bolts as ND hub alignment to avoid machine work.
yeah I hear ya,I’im a leave-the-tabs-because-they-show-how-it-was-assembled guy for sure.
shorter lighter and stronger is a thought,
I do feel like there is space to step into this gap behind the fin, which would let me straighten that slot up, and sneak both stays in a little, which would let me shorten the NDS ss tab.
itd also stop a thrown chain trying to get behind the fin which, you know, Murphys law…
but to meaningfully shorten the DS tab at all, means further worsening alignment with the stays on one side or the other, or if I try and tuck it in any reasonable amount, it ends up WAY inside the mask pretty quickly; I think id end up slapping the chain off it a fair bit.
seeing how hard this interfered surprised me, so I had a loo at the initial bend and discovered even that doesn’t clear the mask!?
so ive backed off that bend a smidge; enough to /just/ clear, and ive I pulled the stays up a touch too for posterity.
I think it’s about time to get a working prototype, going to cut one of these out, stick together a DO/CS/BB subassembly and have a go.
I want to say a huge thanks again for taking the time and effort to help me out with analysis and feedback here @manzanitacycles, its really appreciated, aswell as to the people in earlier posts from whom i’m OBVIOUSLY drawing lot of inspiration… wouldn’t have this without any of ya.
back home for a couple of days, I apologise that I can’t solder filets as consistent as fusion 360… and please excuse the disaster-sphere that is the background ![]() I aim for a tidy workshop- messy bench strategy, and right now, everything is a bench.
I aim for a tidy workshop- messy bench strategy, and right now, everything is a bench.
I feel like this first pass is looking good. ignoring the paint considerations mentioned above. ( ill just run mating surfaces as raw or blued steel, this is a personal bike )
decided against soldering the spacers/standoffs for now, ill see how I feel about them in aluminium and can come back to it for round two after some use. I did kind-of like the idea that the spacers could be removed if I was using an adaptor that provided space for the necessary bolt length, not sure about an adapter torsionally, but I run 140mm rotors on the road anyway, and I JUST replaced my cx bike (135QR/ISO160) , so that testing might fall on someone else’s next build.
one note was, I soldered the DS tube on with a little extra meat left on it, before grabbing the dropout by the outside of the tube in the 3jaw, finish boring the hole, and facing the inside of the dropout face out to 28mm OD; this seems like a pretty sound workflow to ensure good interfacing with the UDH hangar; it means the outer clamping surface of the tube wasn’t cut in the same pass, but thats the easiest to fixup after the fact with a file, and I imagine the least important.
Here’s my latest hooded UDH dropout design.
As slim as I possibly could make it while still maintaining full UDH/T-Type compatibility.
I’m quite happy with how it came together and how it looks with a T-type derailleur in place.
I like the little weight savings relief/scallop on the rear of the dropout. Very clean. Any photos of the dropout alone?
