I did a wishbone for a road+ bike and found it convinient just to make the bend into the tube and align the bend with a dummy tire in a seat/chainstaymitering jig for cutting/brazing.
9 Likes
here’s a detail pic
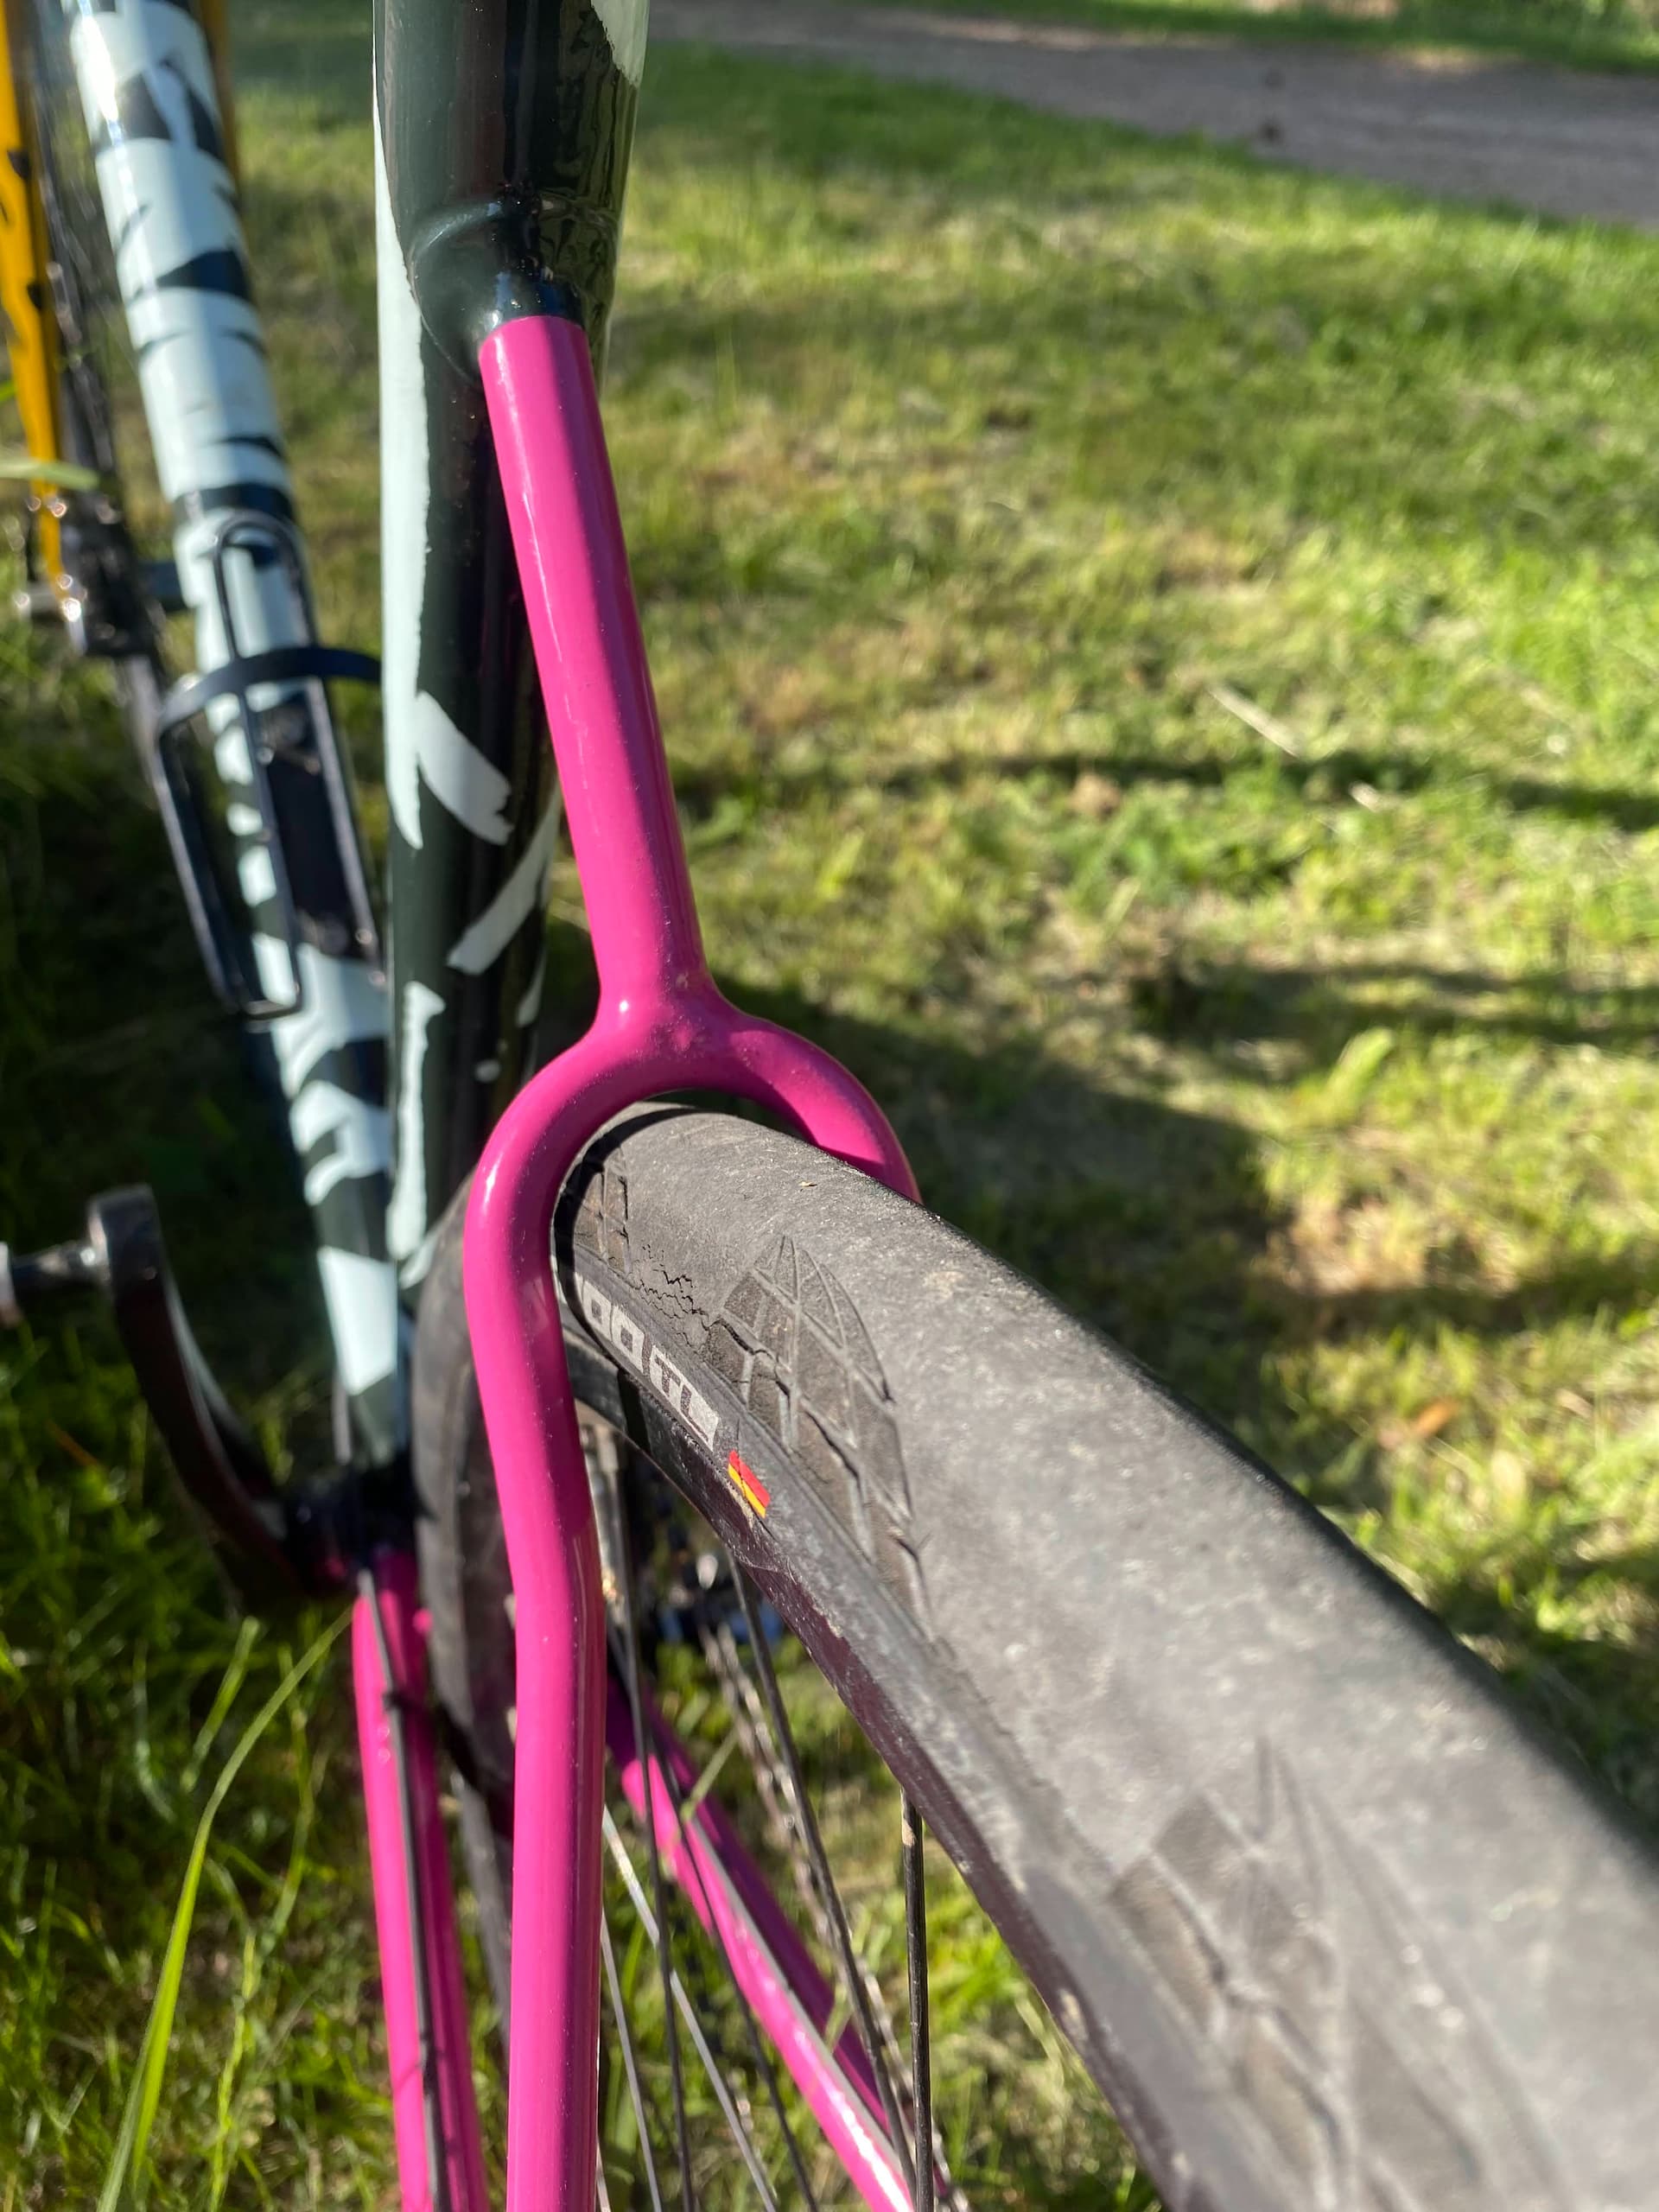
i used a 10x1mm 4130 so the bending was not an issue. The wishbone is 12mm and was lugged to seatube with a piece cut from a larger diameter tube to reinforce the thin seatube, and the seatstay were accompanied by unnecesserily beefy 19mm straight 4130 chainstays.
7 Likes
I love this and I remembered I have a 3/8in (9.5mm) 4130 tubing in the garage, went to check and damn those are skinny - I would love to see more closeups in particular of the area where the dropouts are, from this picture it seems those tubes are bigger than 10mm, maybe it’s the paint and the angle?
My current project uses rockers and 19mm chainstays, curious to see how you integrated those 10mm tubes into the rockers
Ive build about 20 wishbones of the “single loop” style. I’ve bent these in three or four sizes, but now just have two dies, one for road tyre sizes and one for cx/grav tyre sizes up to about 55mm internal diameter
I use 4130, 8mmOD tube with a 0.9mm wall.
i’ve previously used 8mmOD 316 stainless tube with a 1.2mm wall, its never given me any trouble but the 4130 makes me happier.
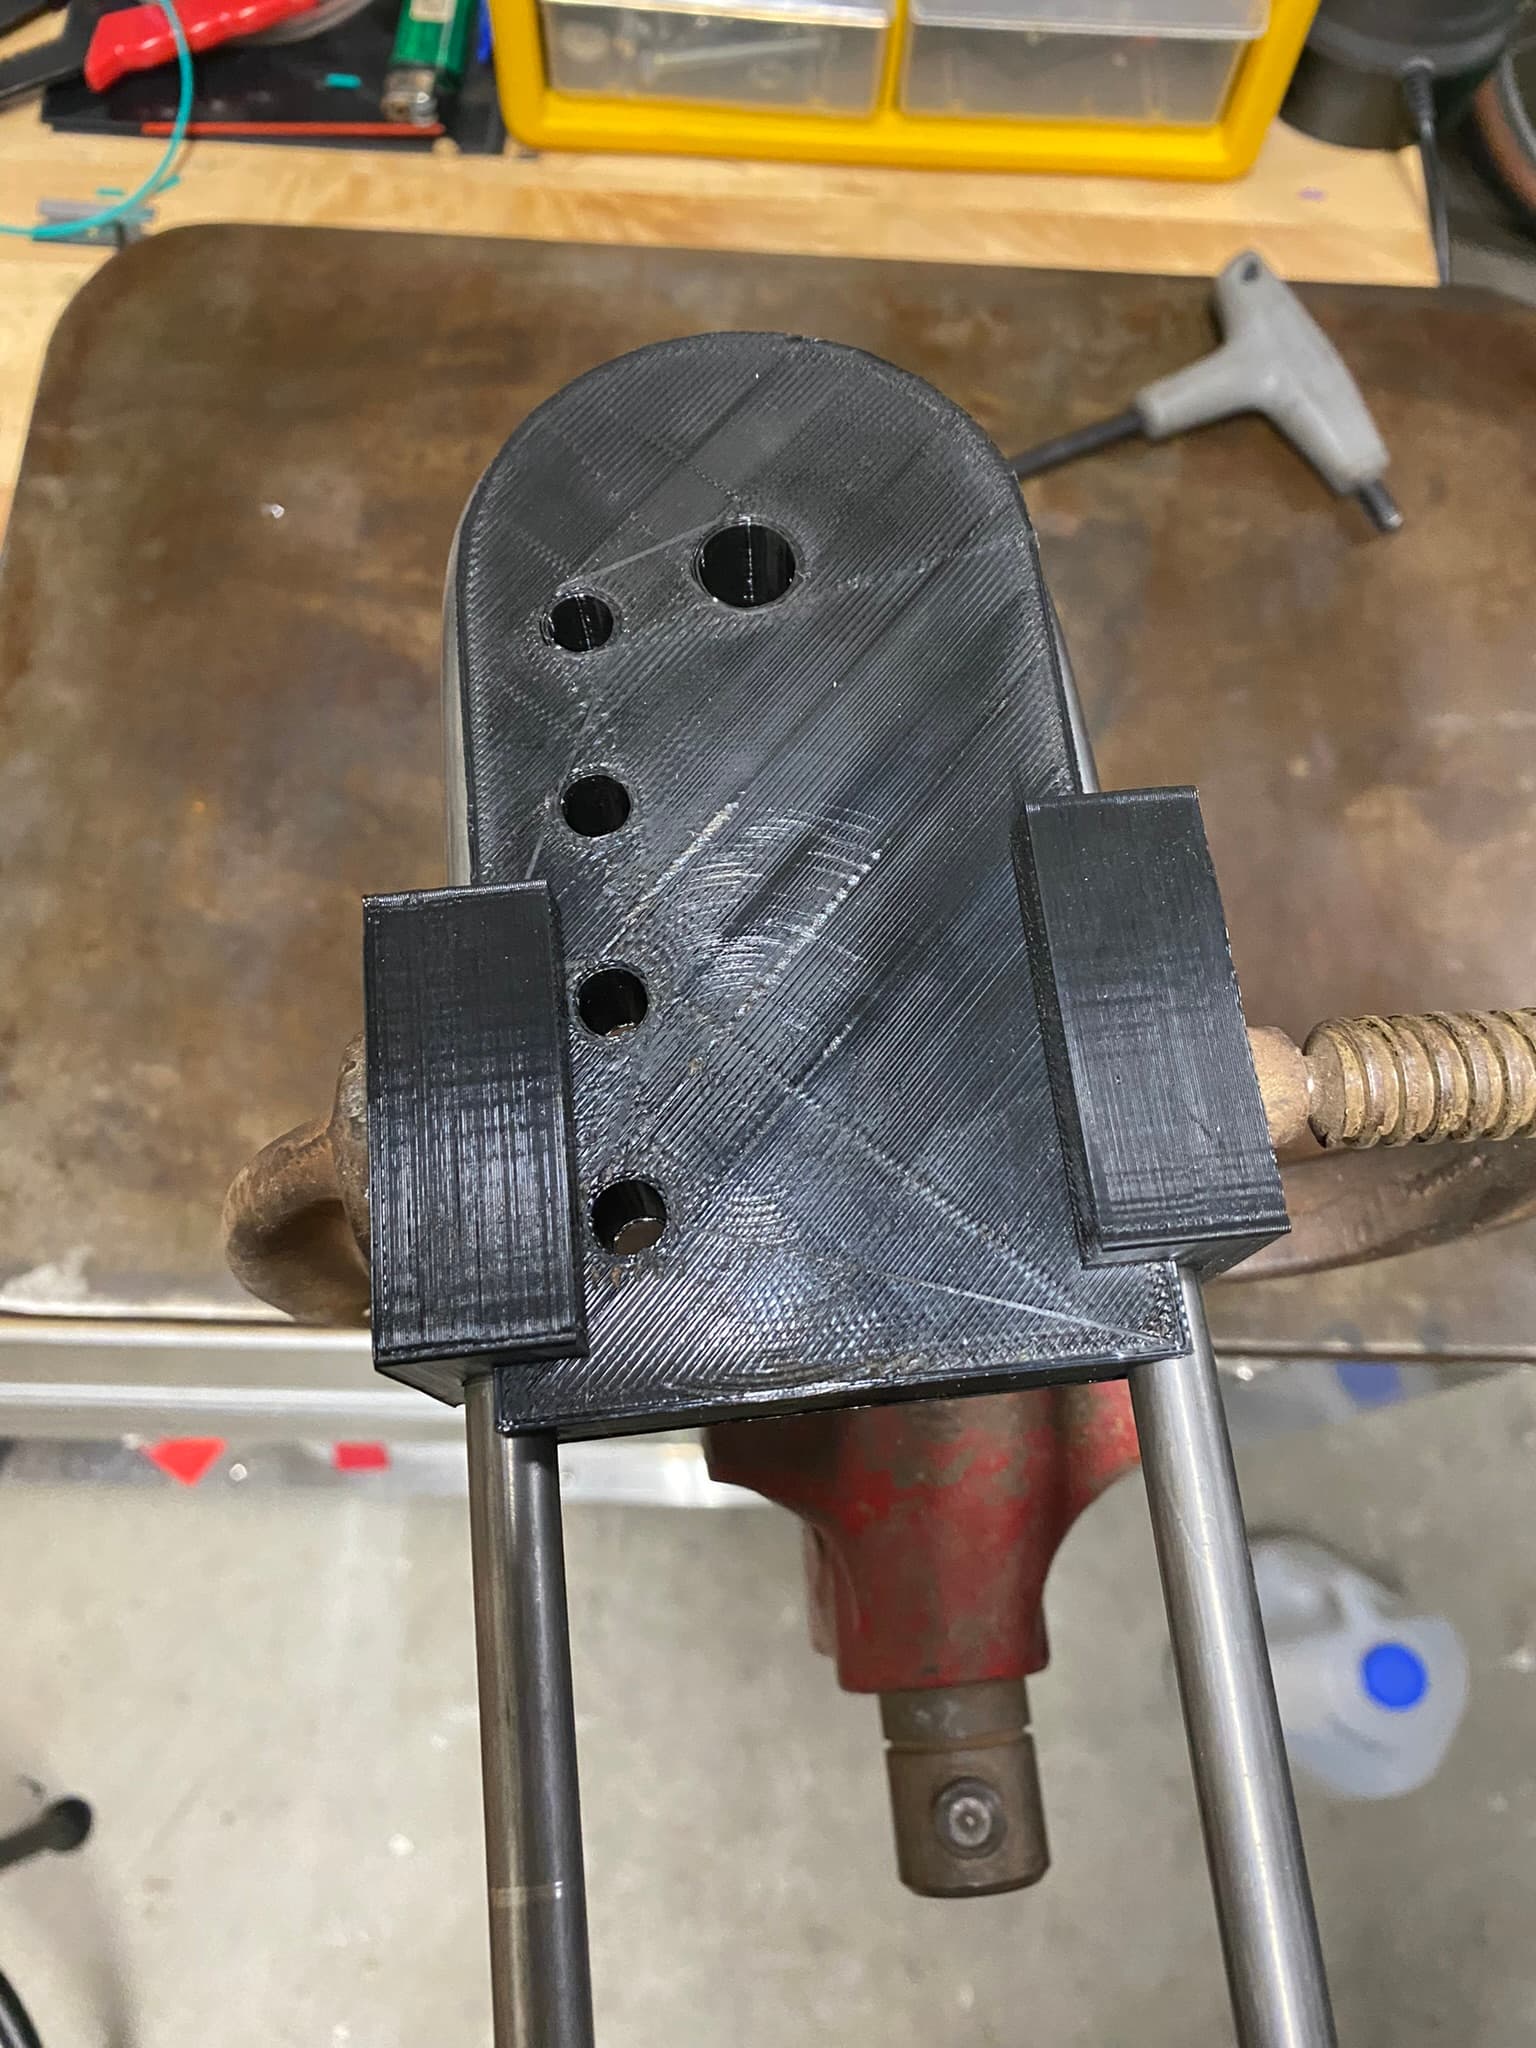
I machined some dies by turning aluminium stock to the CLR and then plunging in 4mm with a 8mm round form tool, and wiggling it back and forth about 0.25mm so the slot is a nice and gentle loose fit.
ive made dies for a few different benders ive owned in the past but they’ve always been designed for bigger tubes and a bit of a bear to setup in my history of small shops, (not to mention, the followers and “clamps on one end of the bend” always want to dent the tube, so now I just put the die in a vice and bend the tube around it by hand.
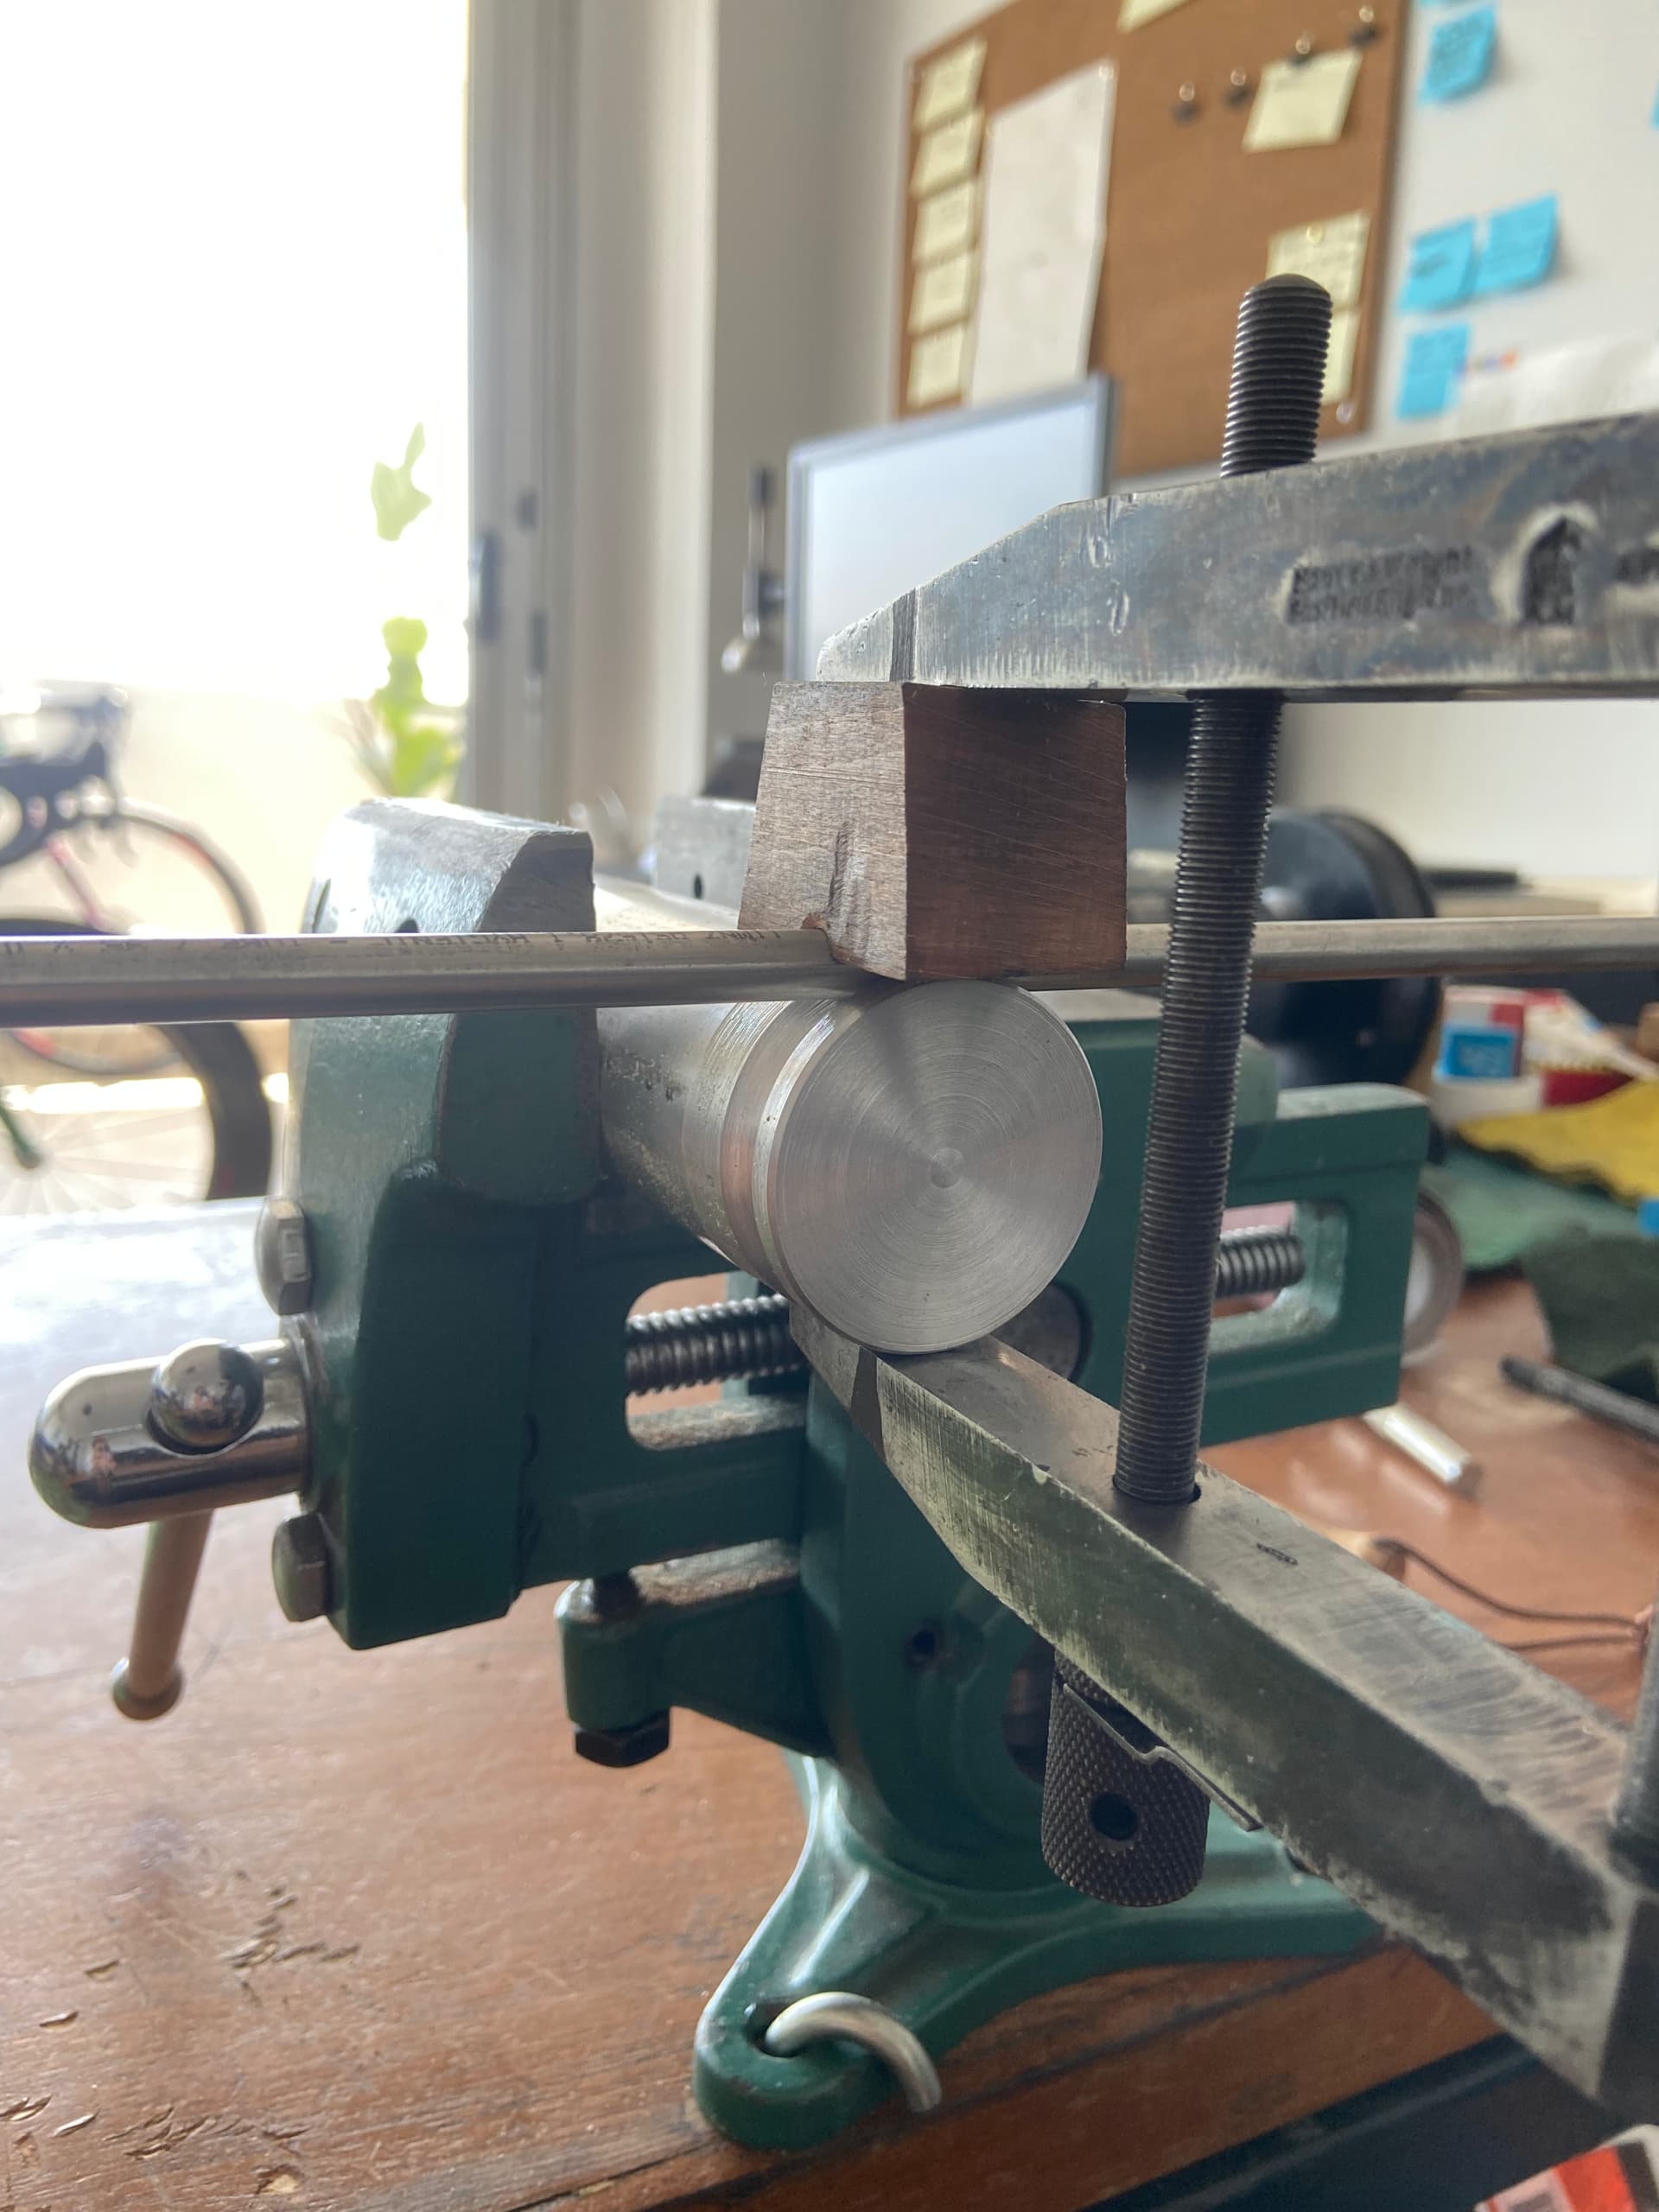
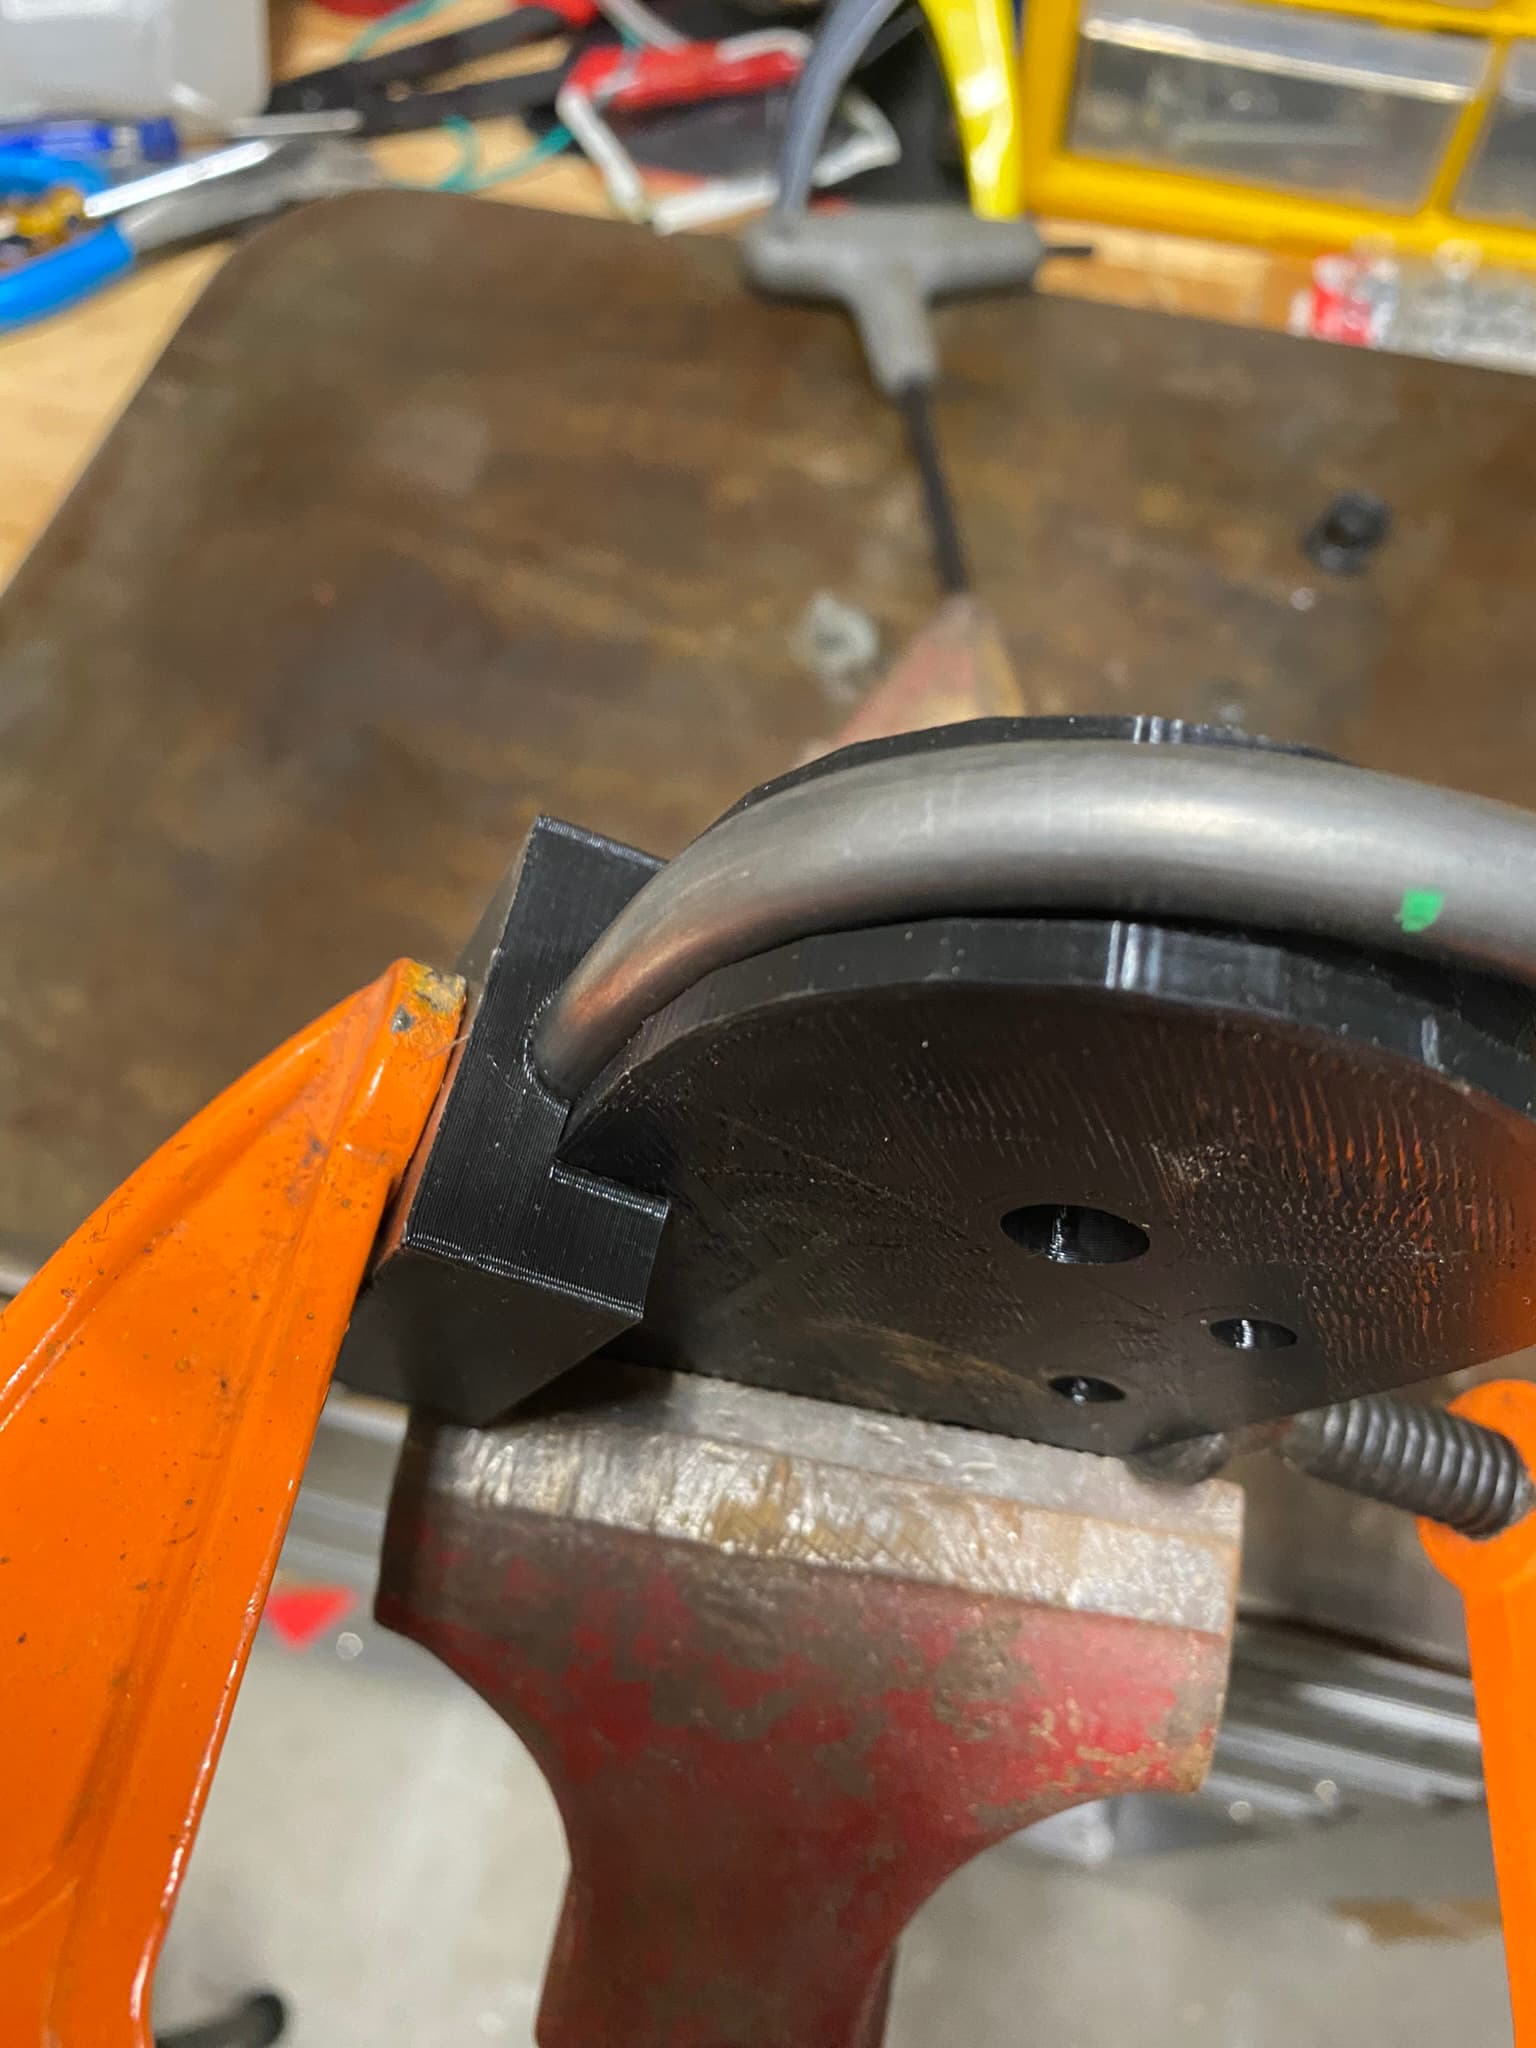
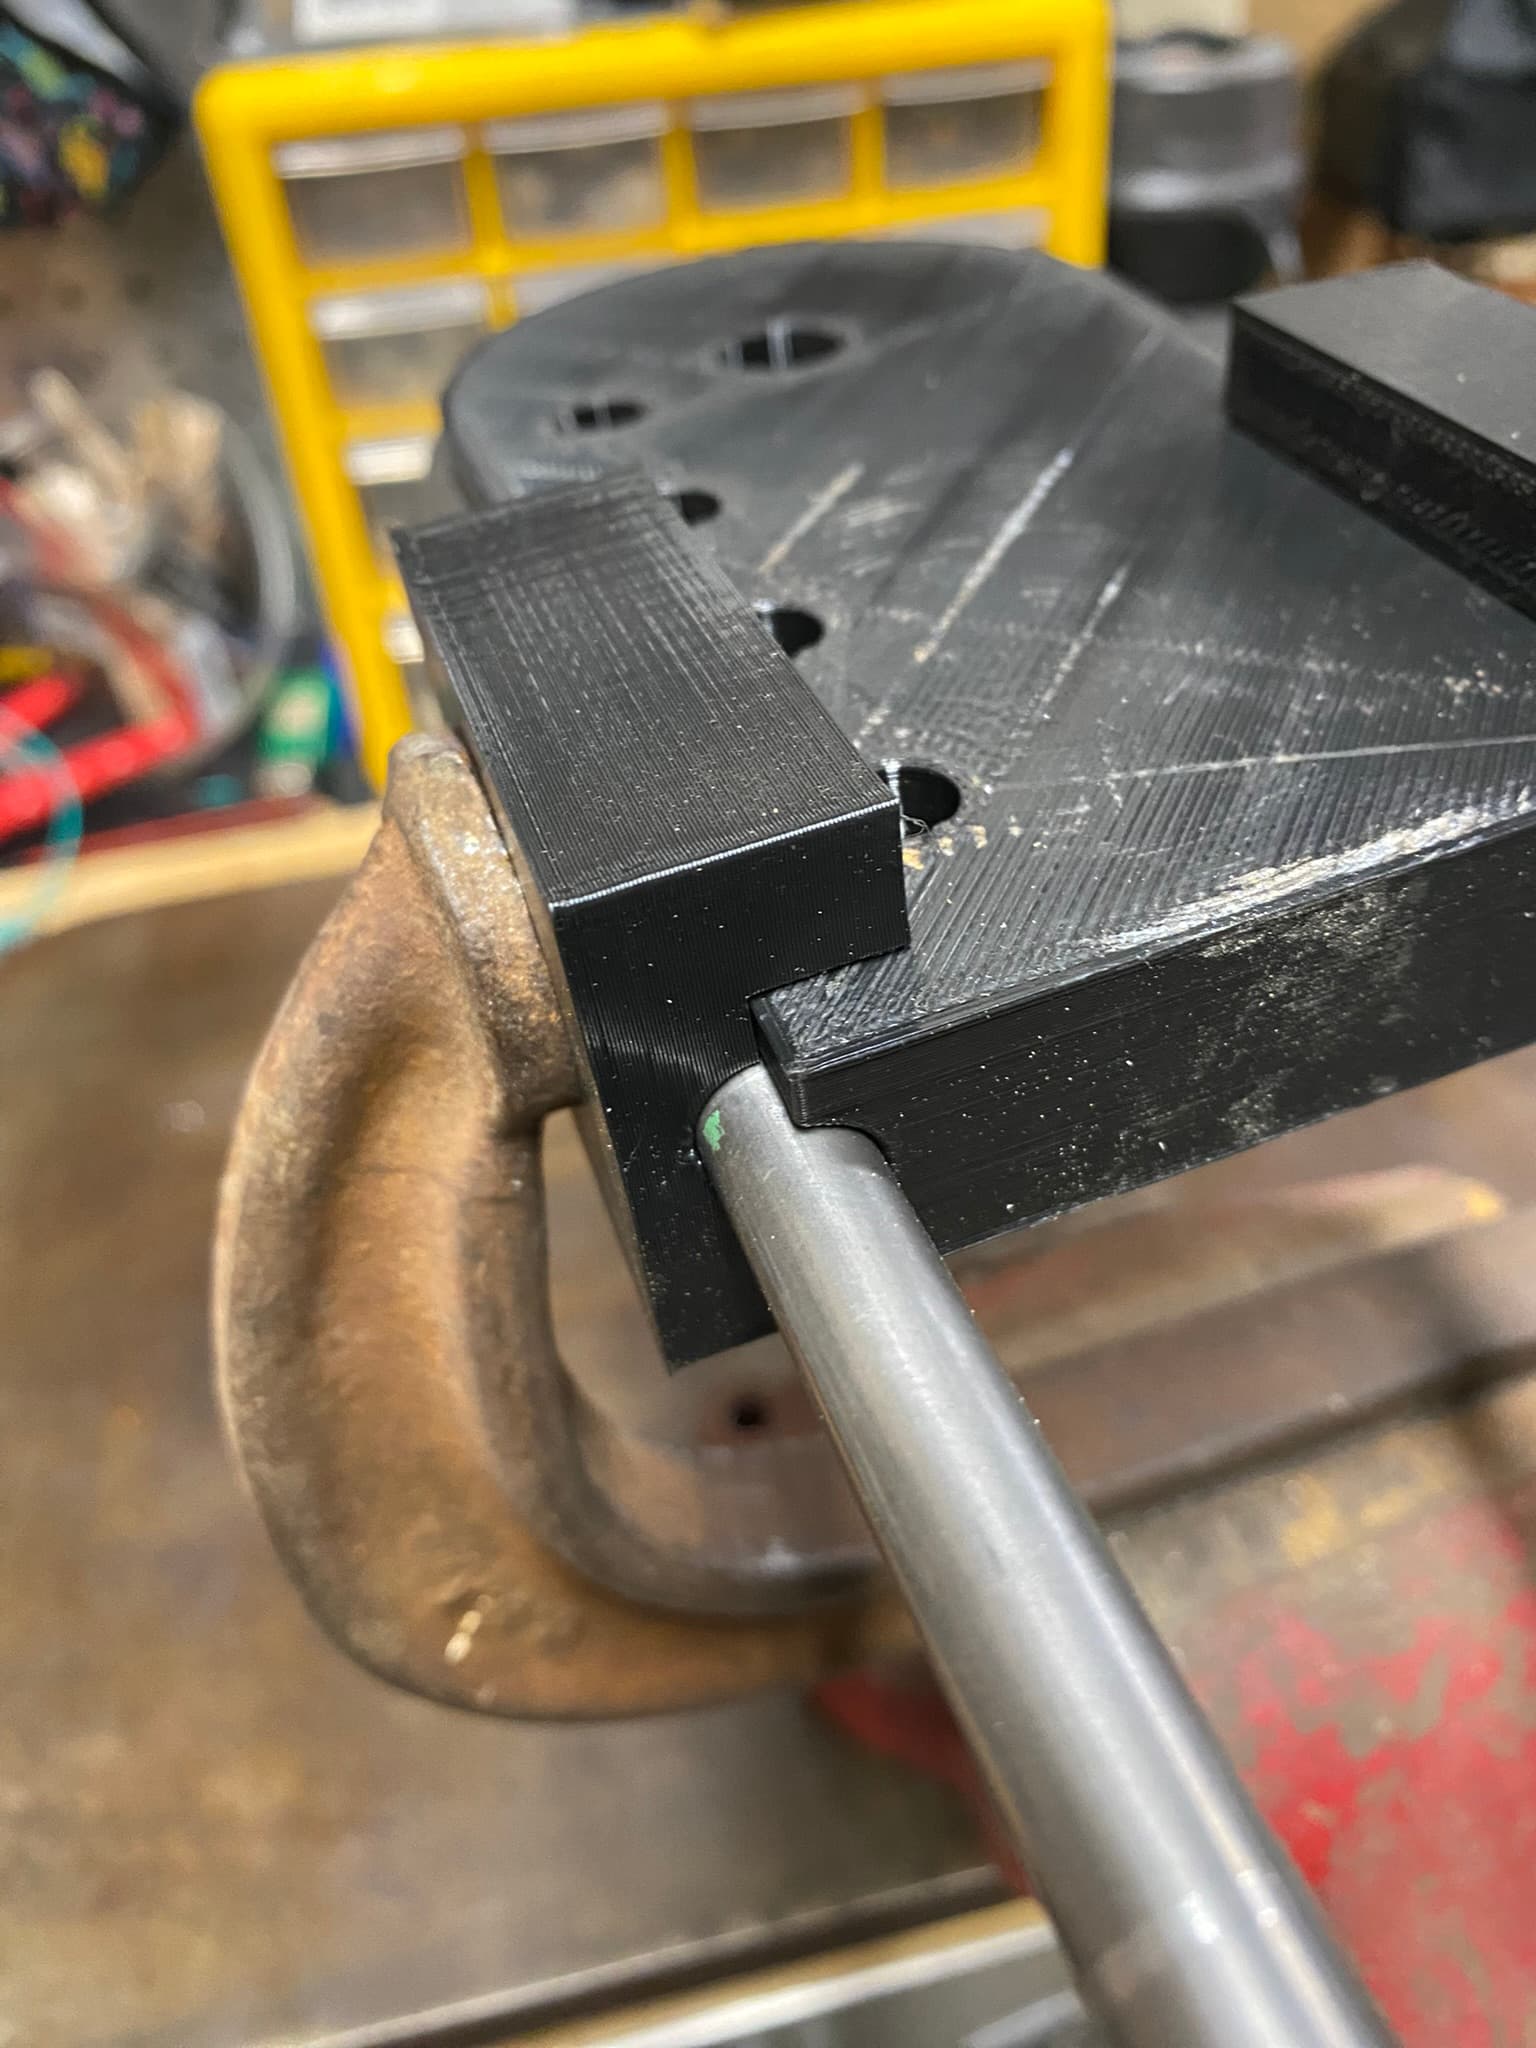
I put the middle of the “loop tube” in the slot of the die, and clamp a little shaped wooden block over it to hold it to the die using a skinny machinist clamp, (i’ve been thinking I could drill and tap a small hole into the die and make a nice block that cinches down to do this, and I wouldn’t mind the slot being deeper too, maybe 16-20mm, so may remake these tools…), then I put the die in the vise, so the tube is on top of the die, and is parallel with the jaws when viewed from above, and is level with the horizon when viewed from the front. the slot in the die is in a vertical plane.
then I gently bend both ends of the tube down around the die by hand until its just about right, and call it done. I can open it or close it a little later with little-to-no effect.
the short upper leg of the wishbone is usually a piece of slightly thicker 4130 tube around 12-16mm OD that i’ve cut off the end of an old stay, finding a nice tapered piece from a recycled tube makes me happy. I flatten one end a little by squishing or hammering so it meets the loop tube at the same width.
I have 16x0.9 and 16x1.2mm tube in stock for this, but usually use a recycled bit of something smaller OD.
on a new bike for myself im working on, Ive flattened the upper out over its entire length, to form a flat oval the whole way, and will be drilling a hole through the assembly for a weld in rim brake mount; i can send a photo when its done.
I tack the two tubes together laid flat on a table with small shim under the loop tube where needed (to get them lined up how I want, the taper/flattening can make this tricky), and I make DAMN SURE its in the middle before welding fully as a sub assembly. before installing it into an otherwise finish welded frame.
don’t forget a drain hole ![]()
there’s a few more pics of them around on my instagram @raddnessnotmaddness
12 Likes
You just gave me the push to test a couple of ideas, thank you!
2 Likes
![]()
![]()
![]()
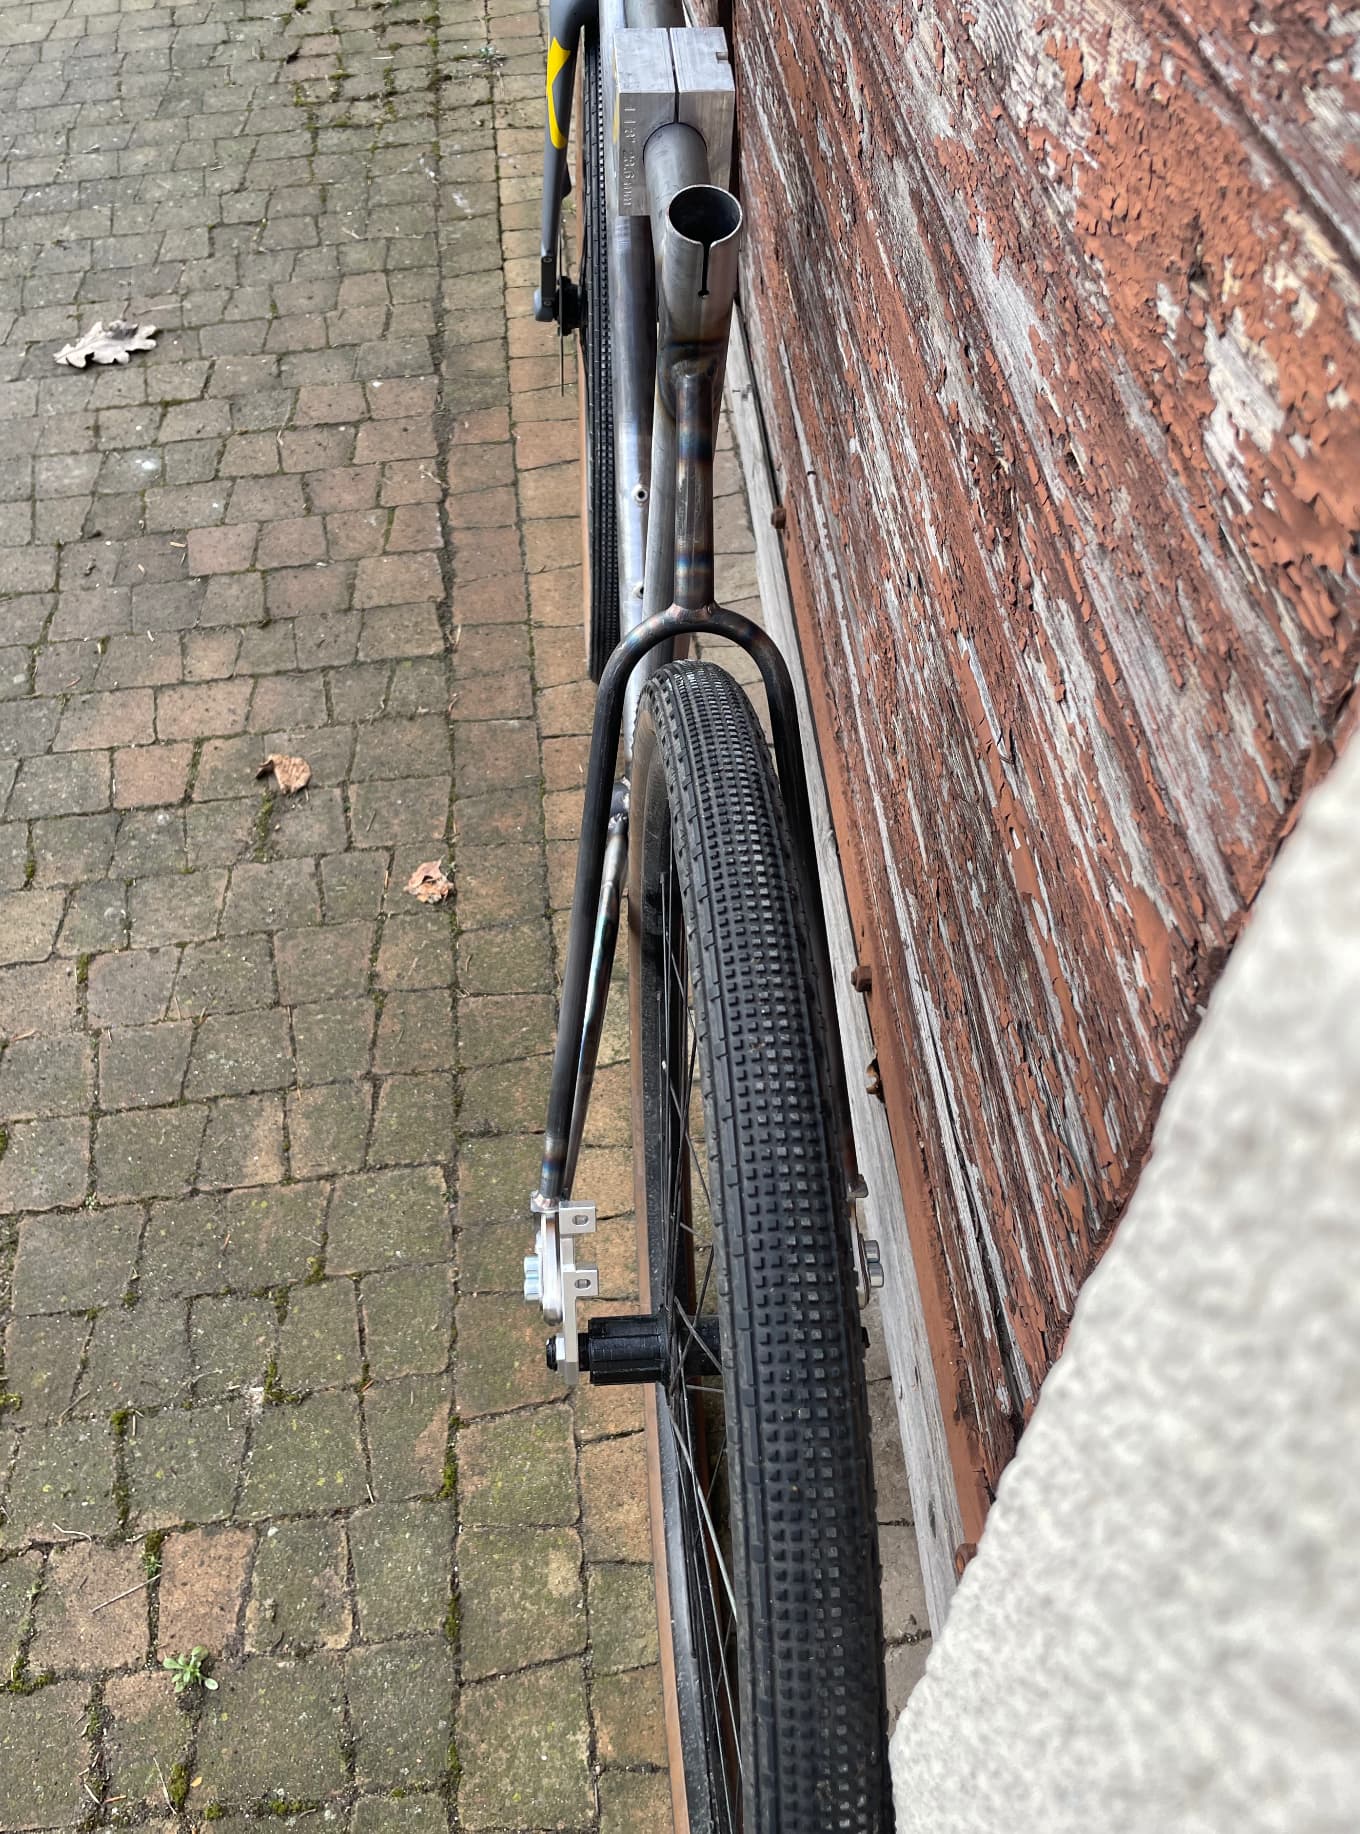
That looks so good. I love the clearance.
Next time you get a chance, can you photograph your setup? I think I understand, bit is hard to visualize. It’s awesome you can get those results with your current setup.
1 Like
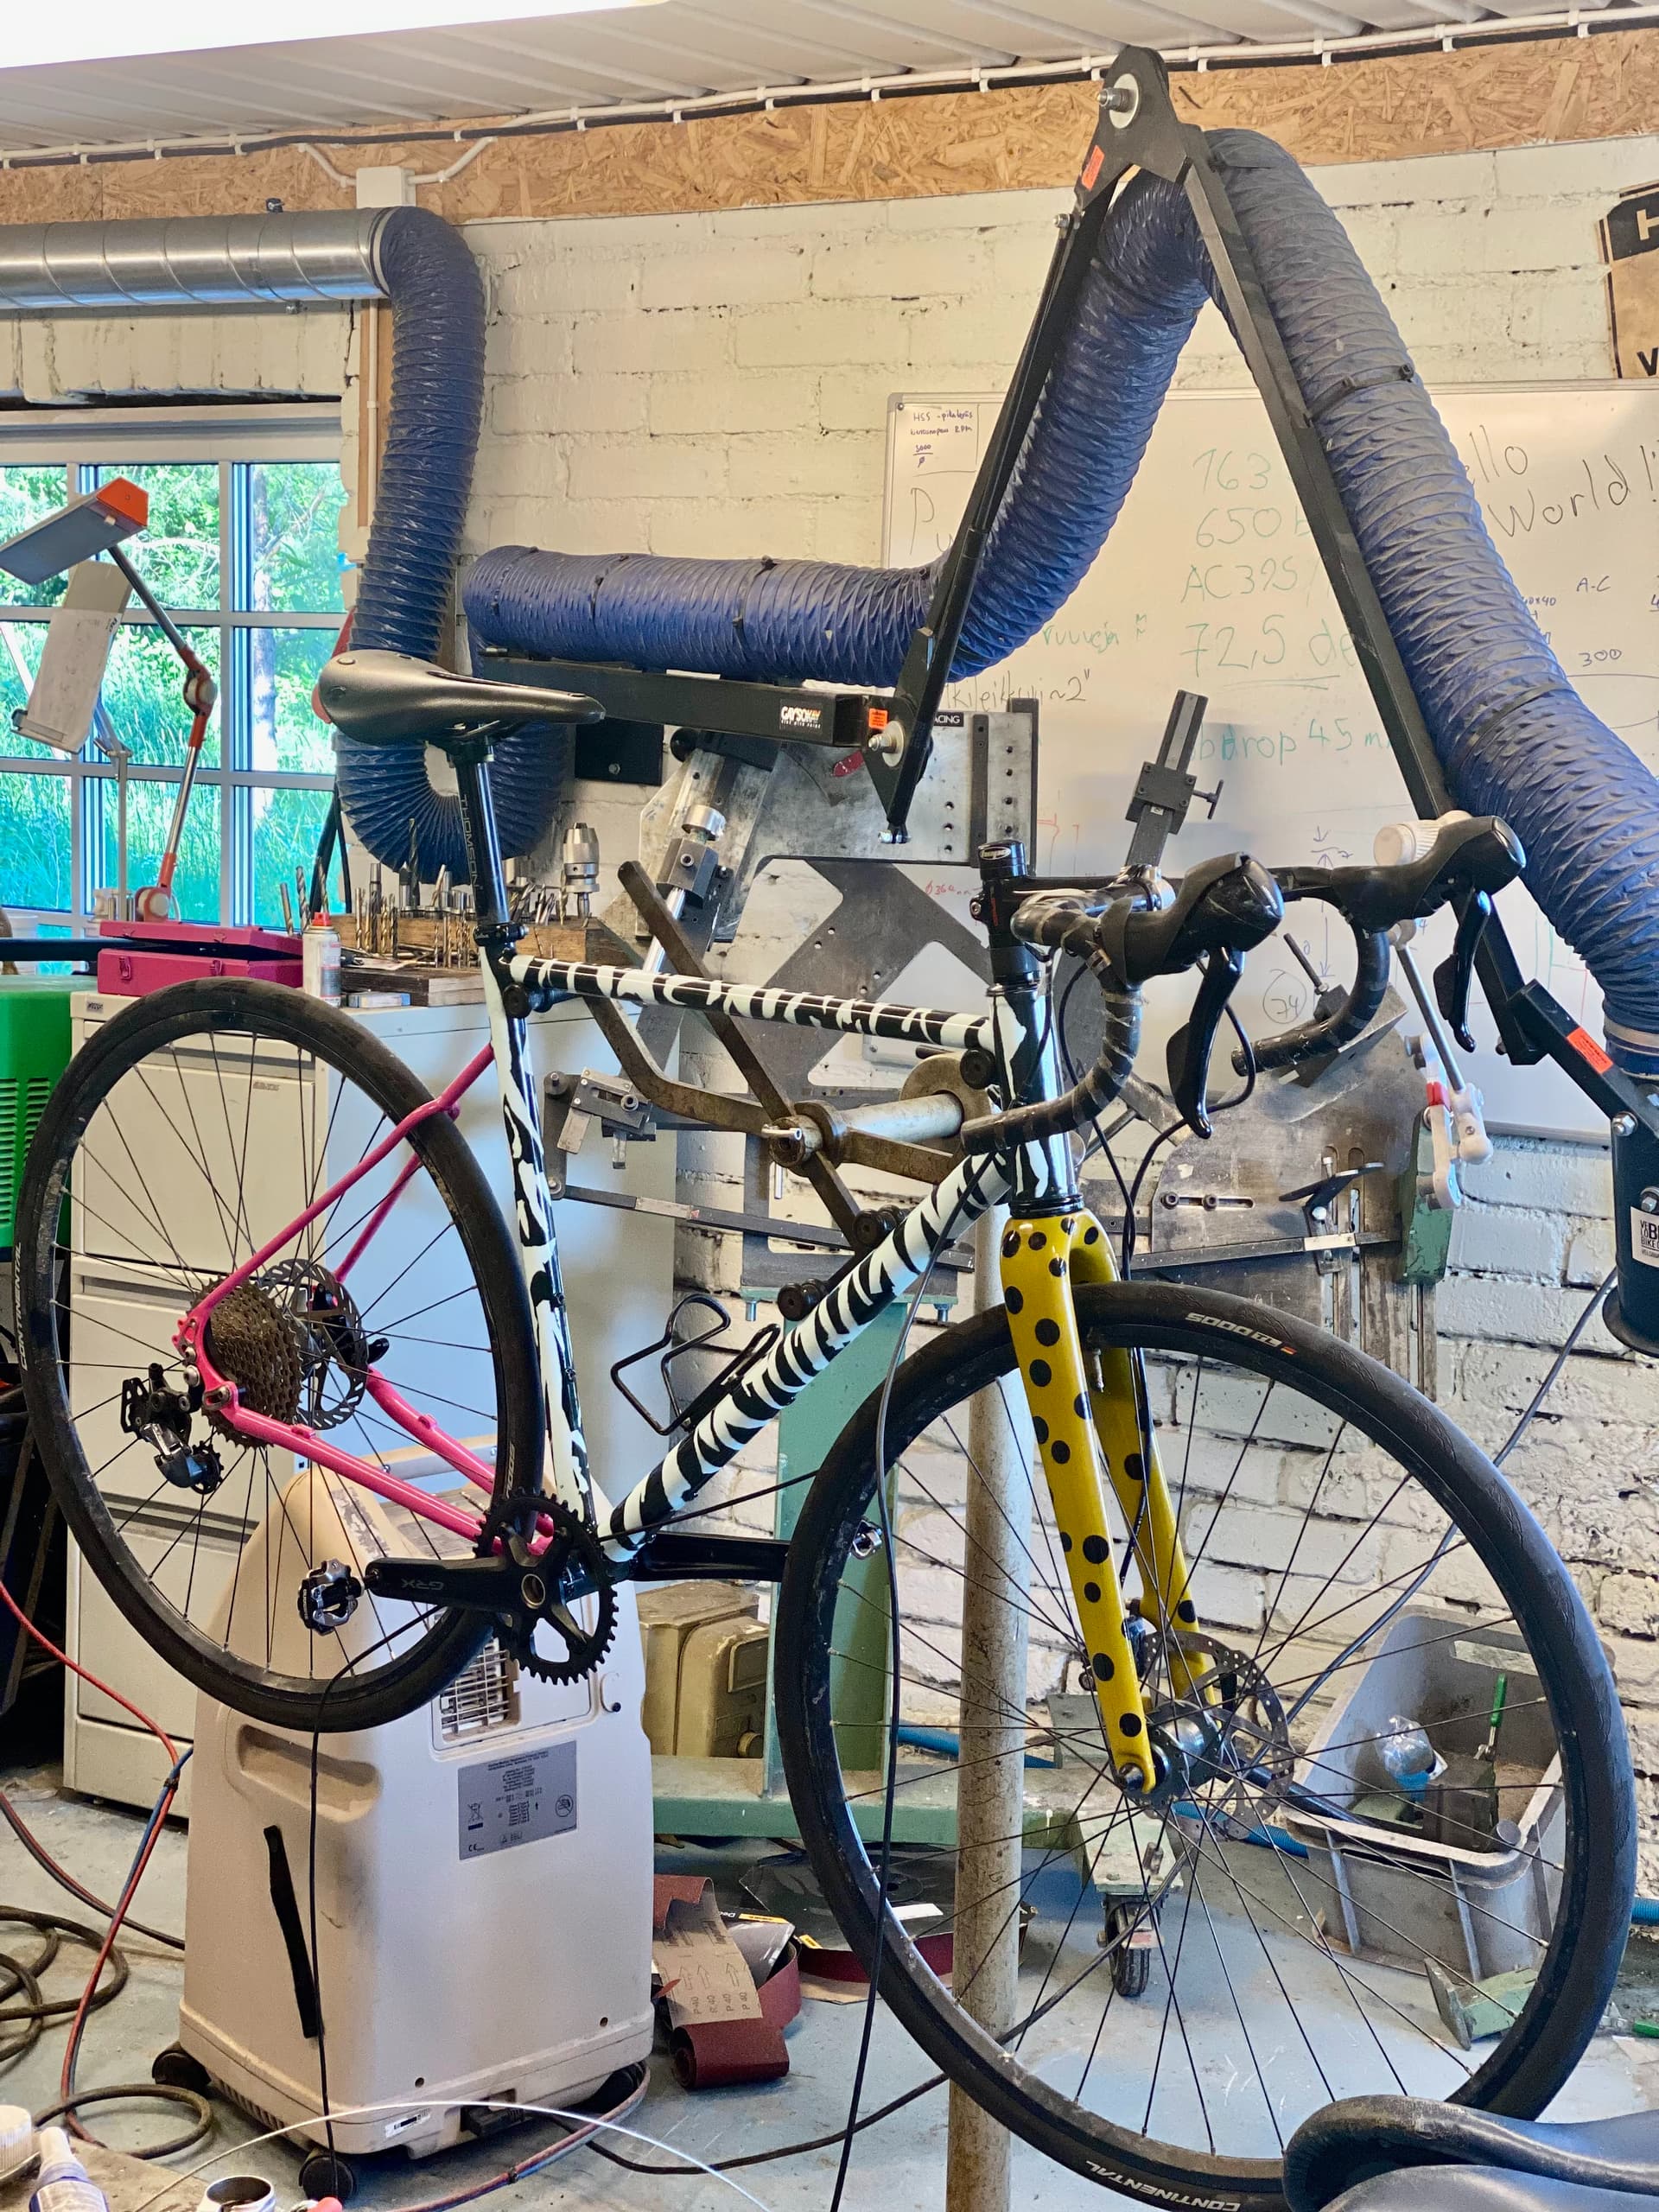
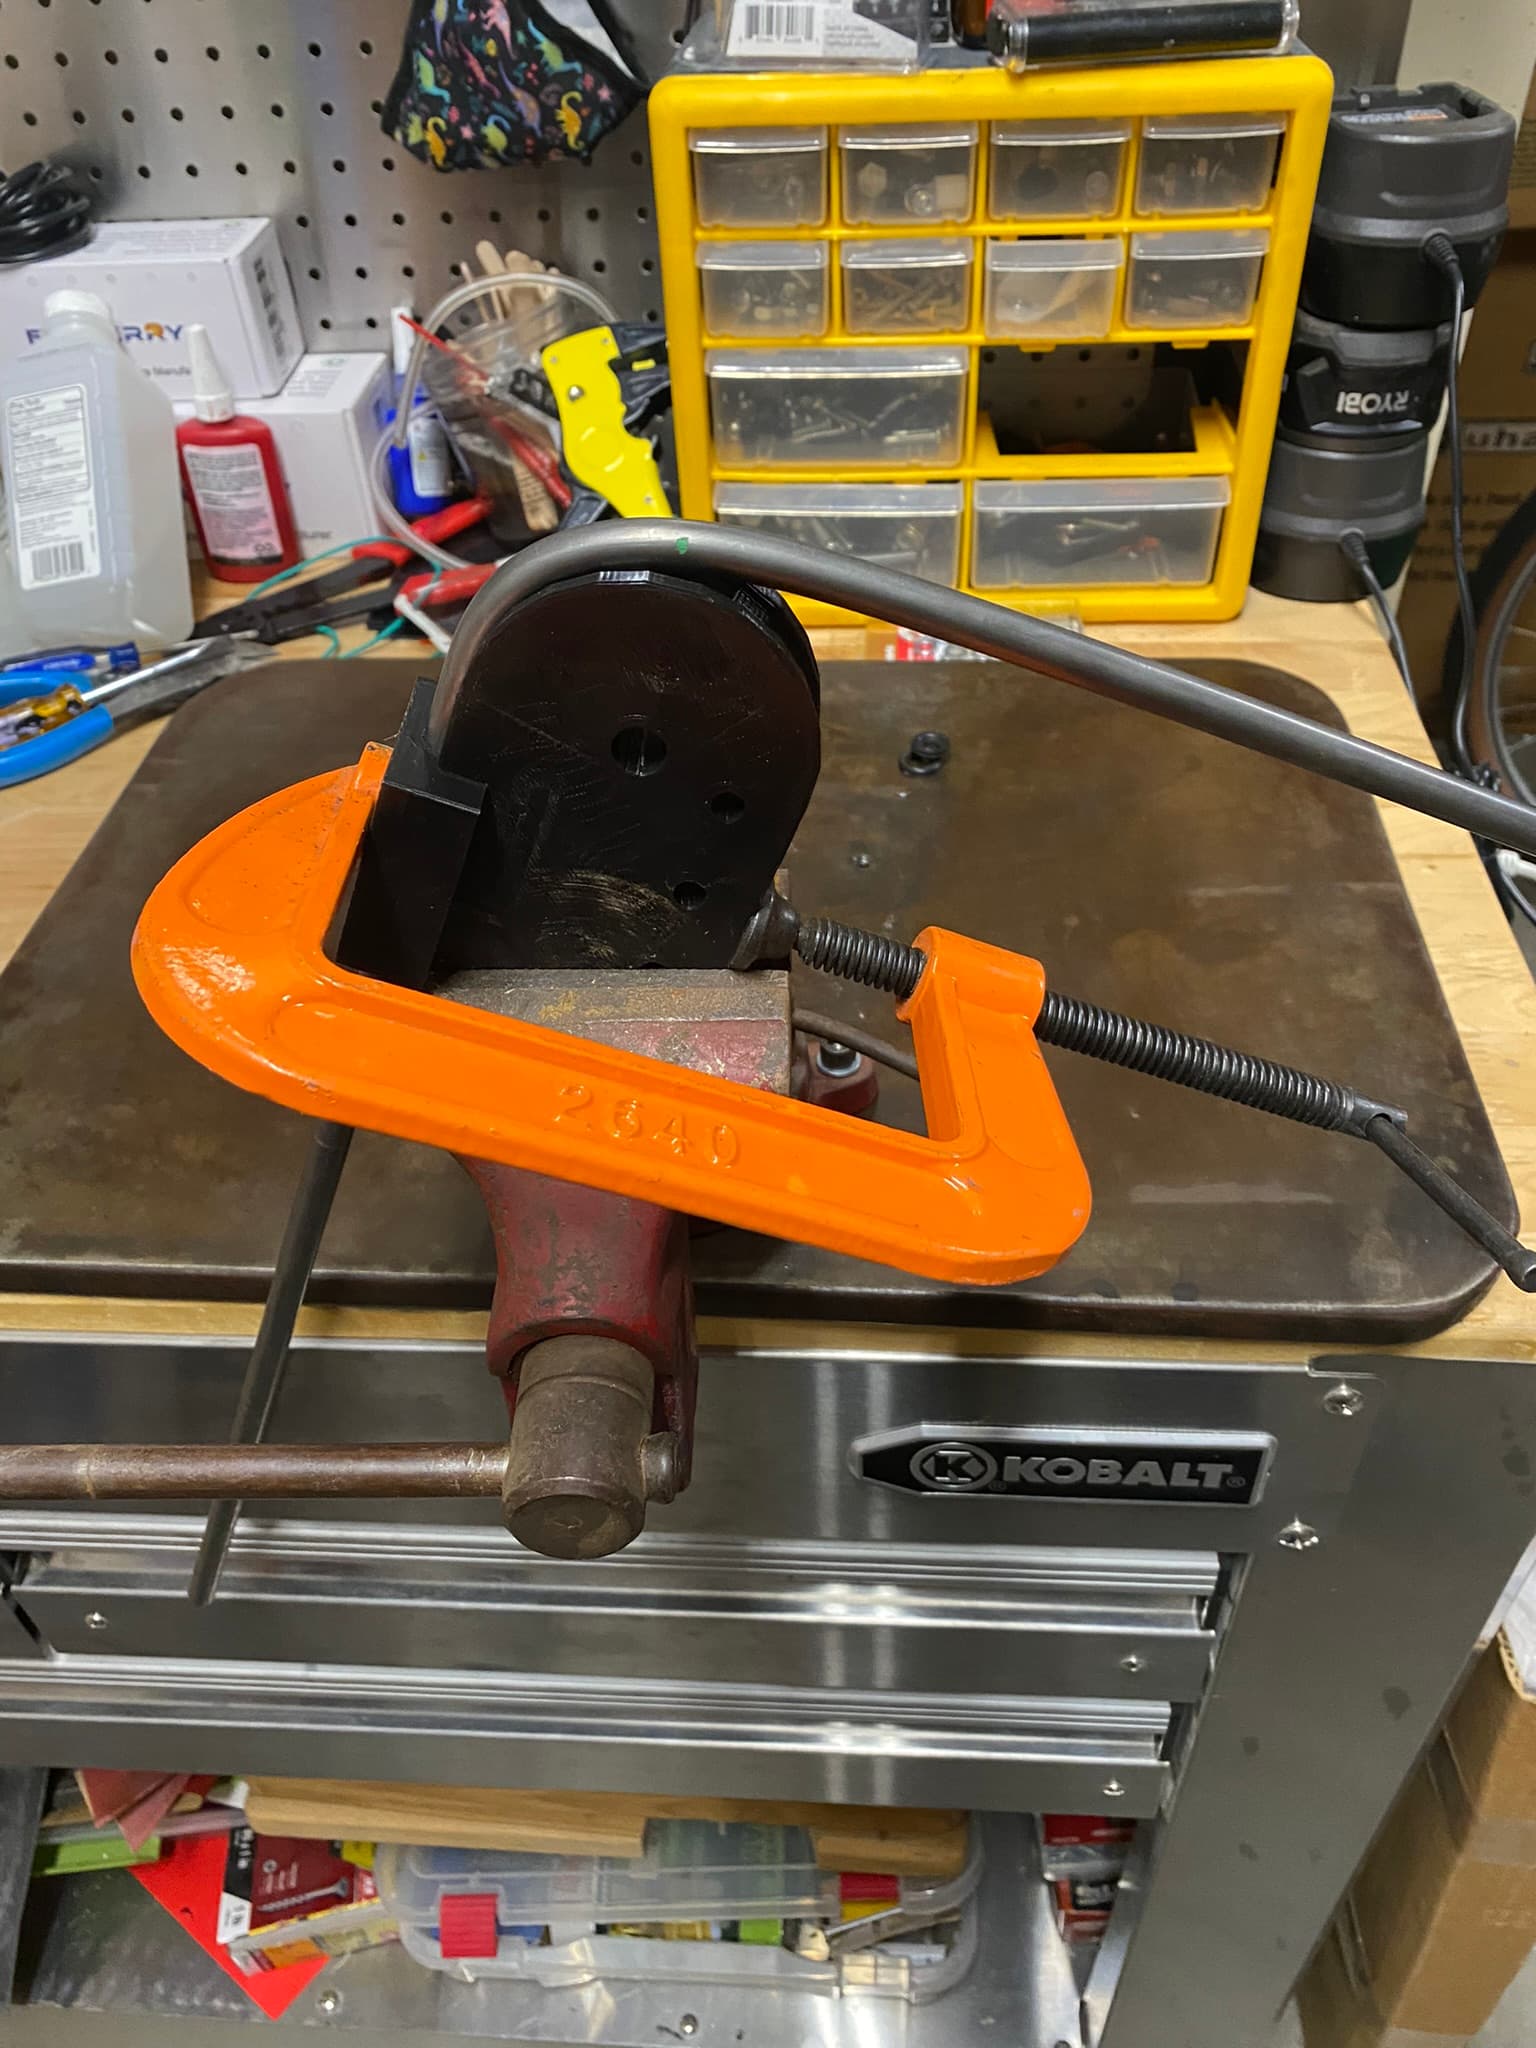
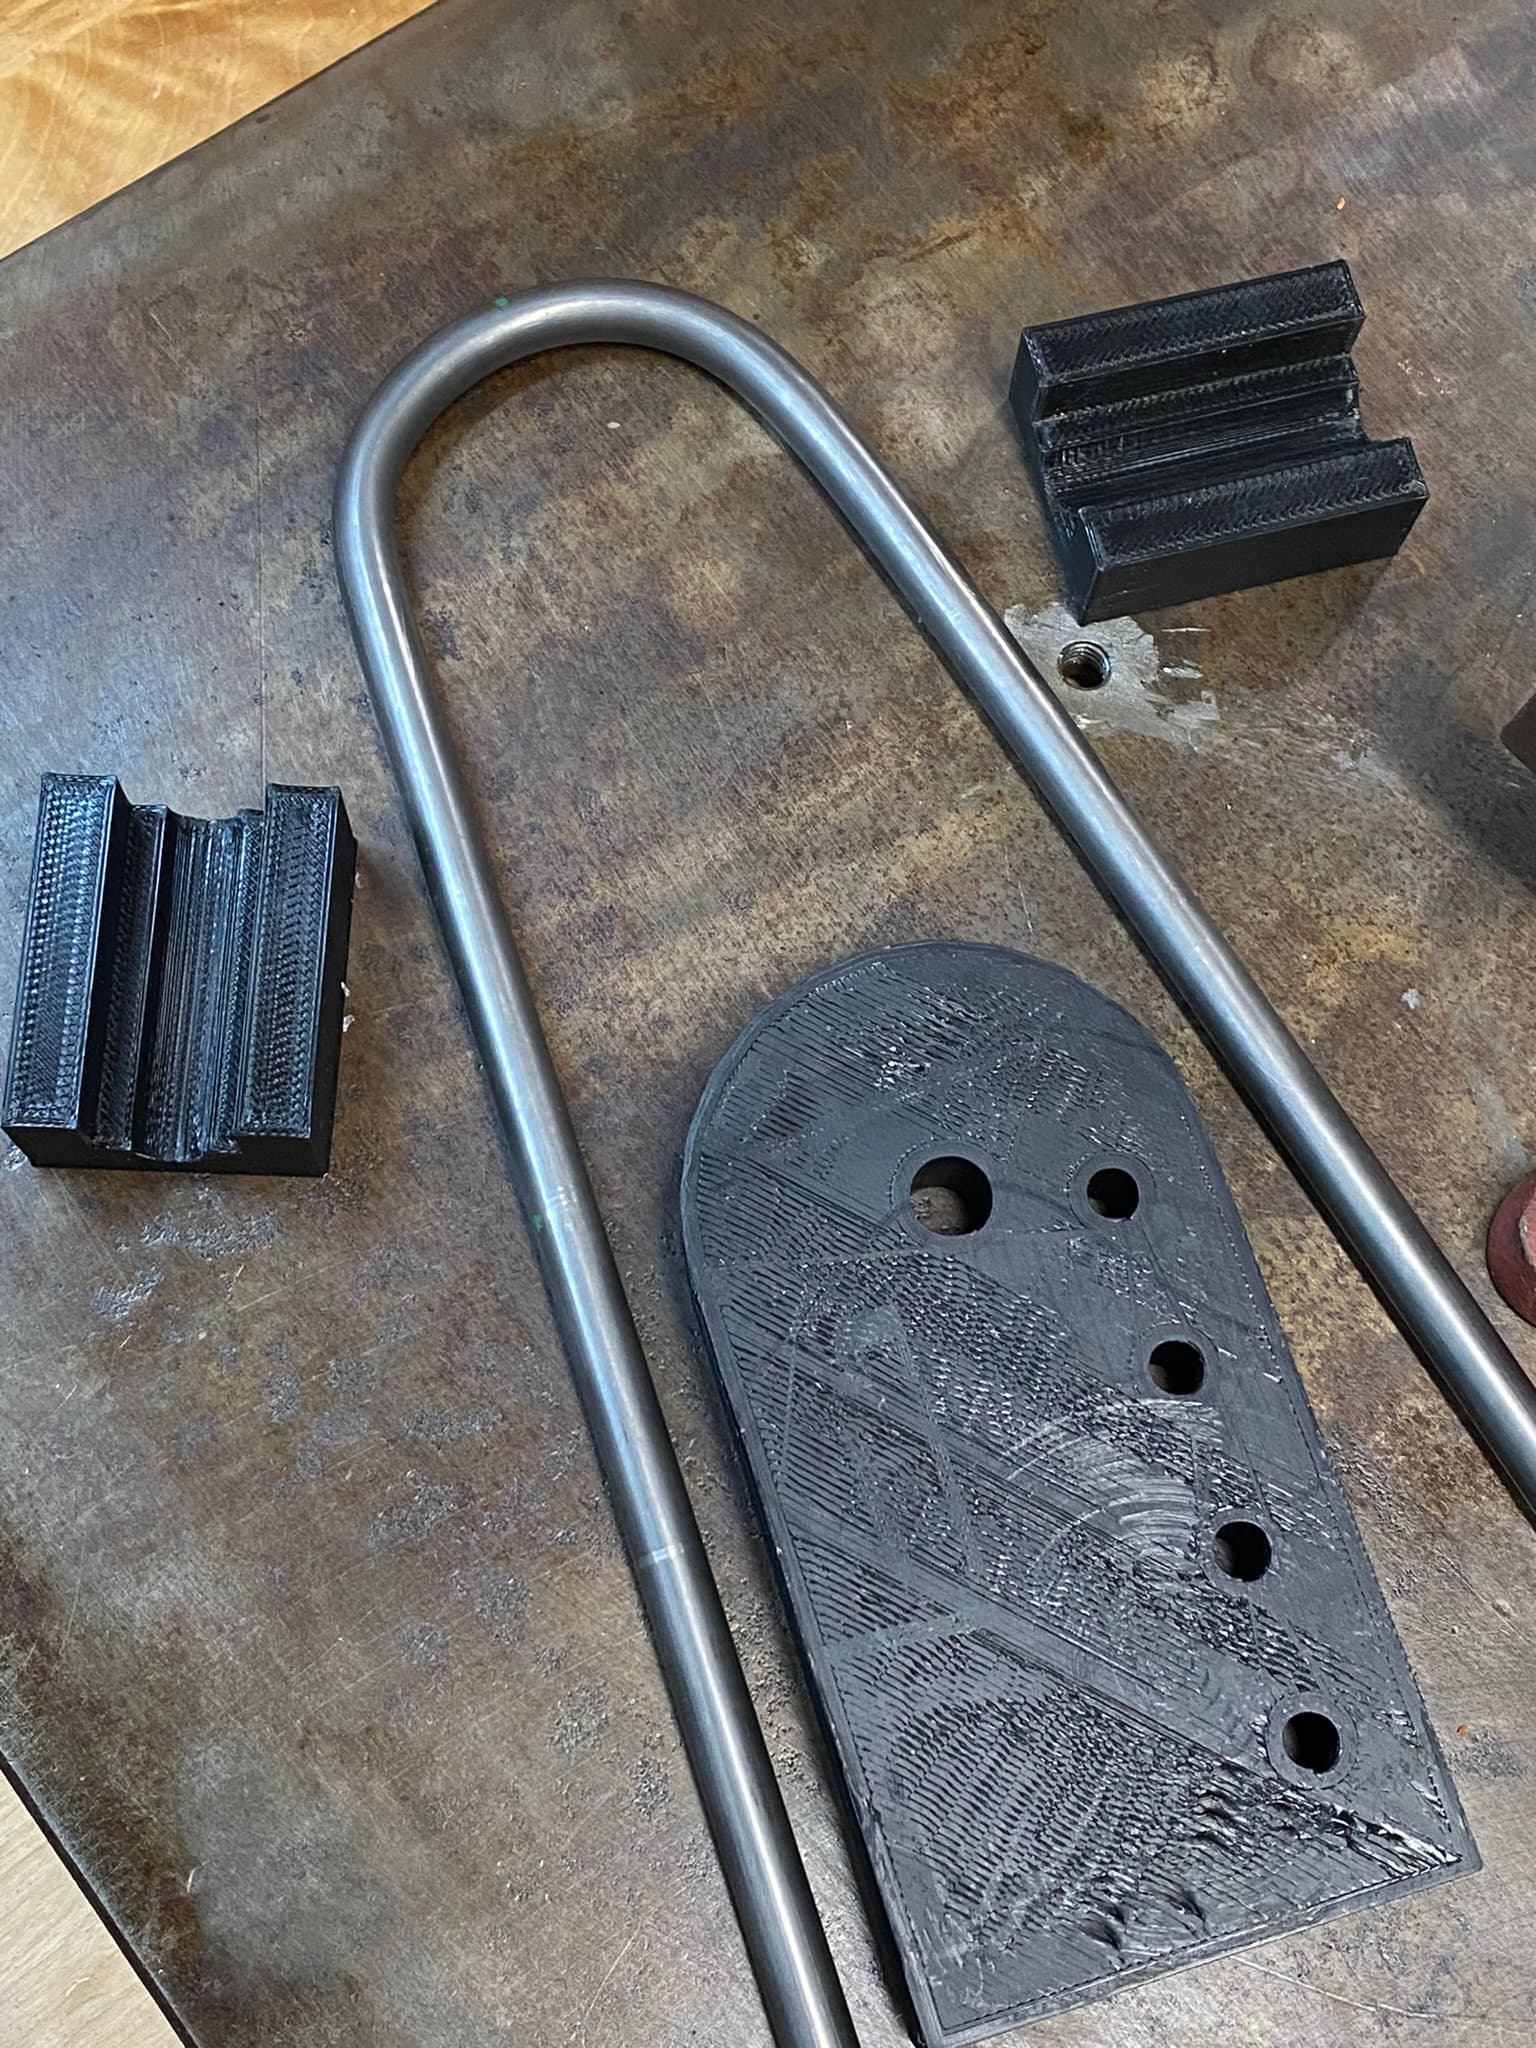
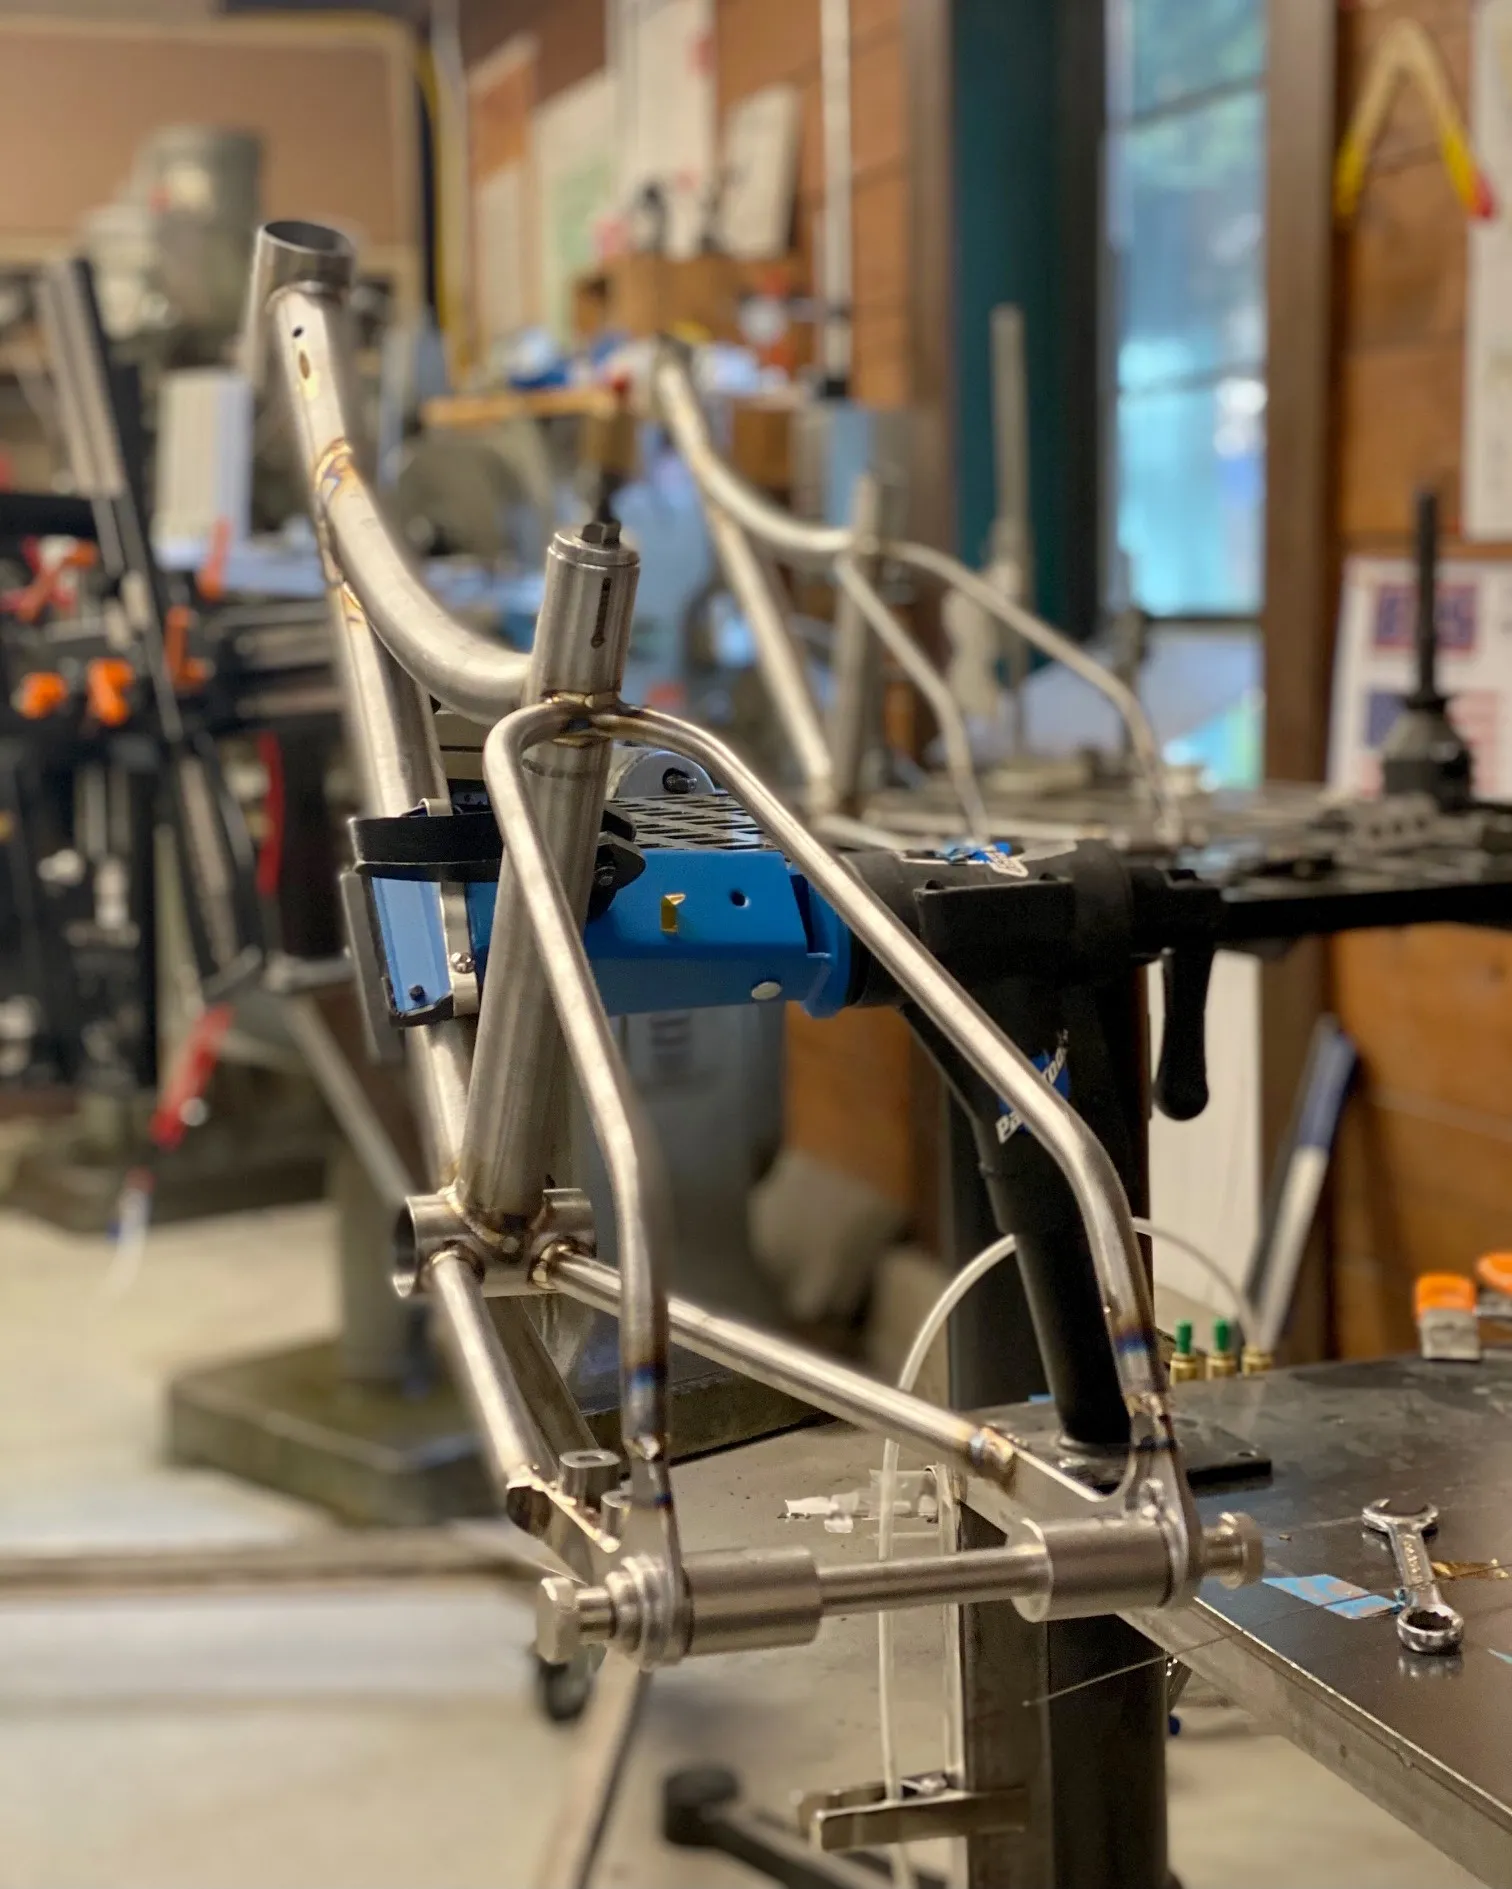
Thanks. I’m pretty happy with the results, here’s a few images from around the “workshop” today;
a mockup of how I bend the loop/stay tube, pretty simple but works a charm. as mentioned earlier the fit in the “round-slot” is pretty loose.
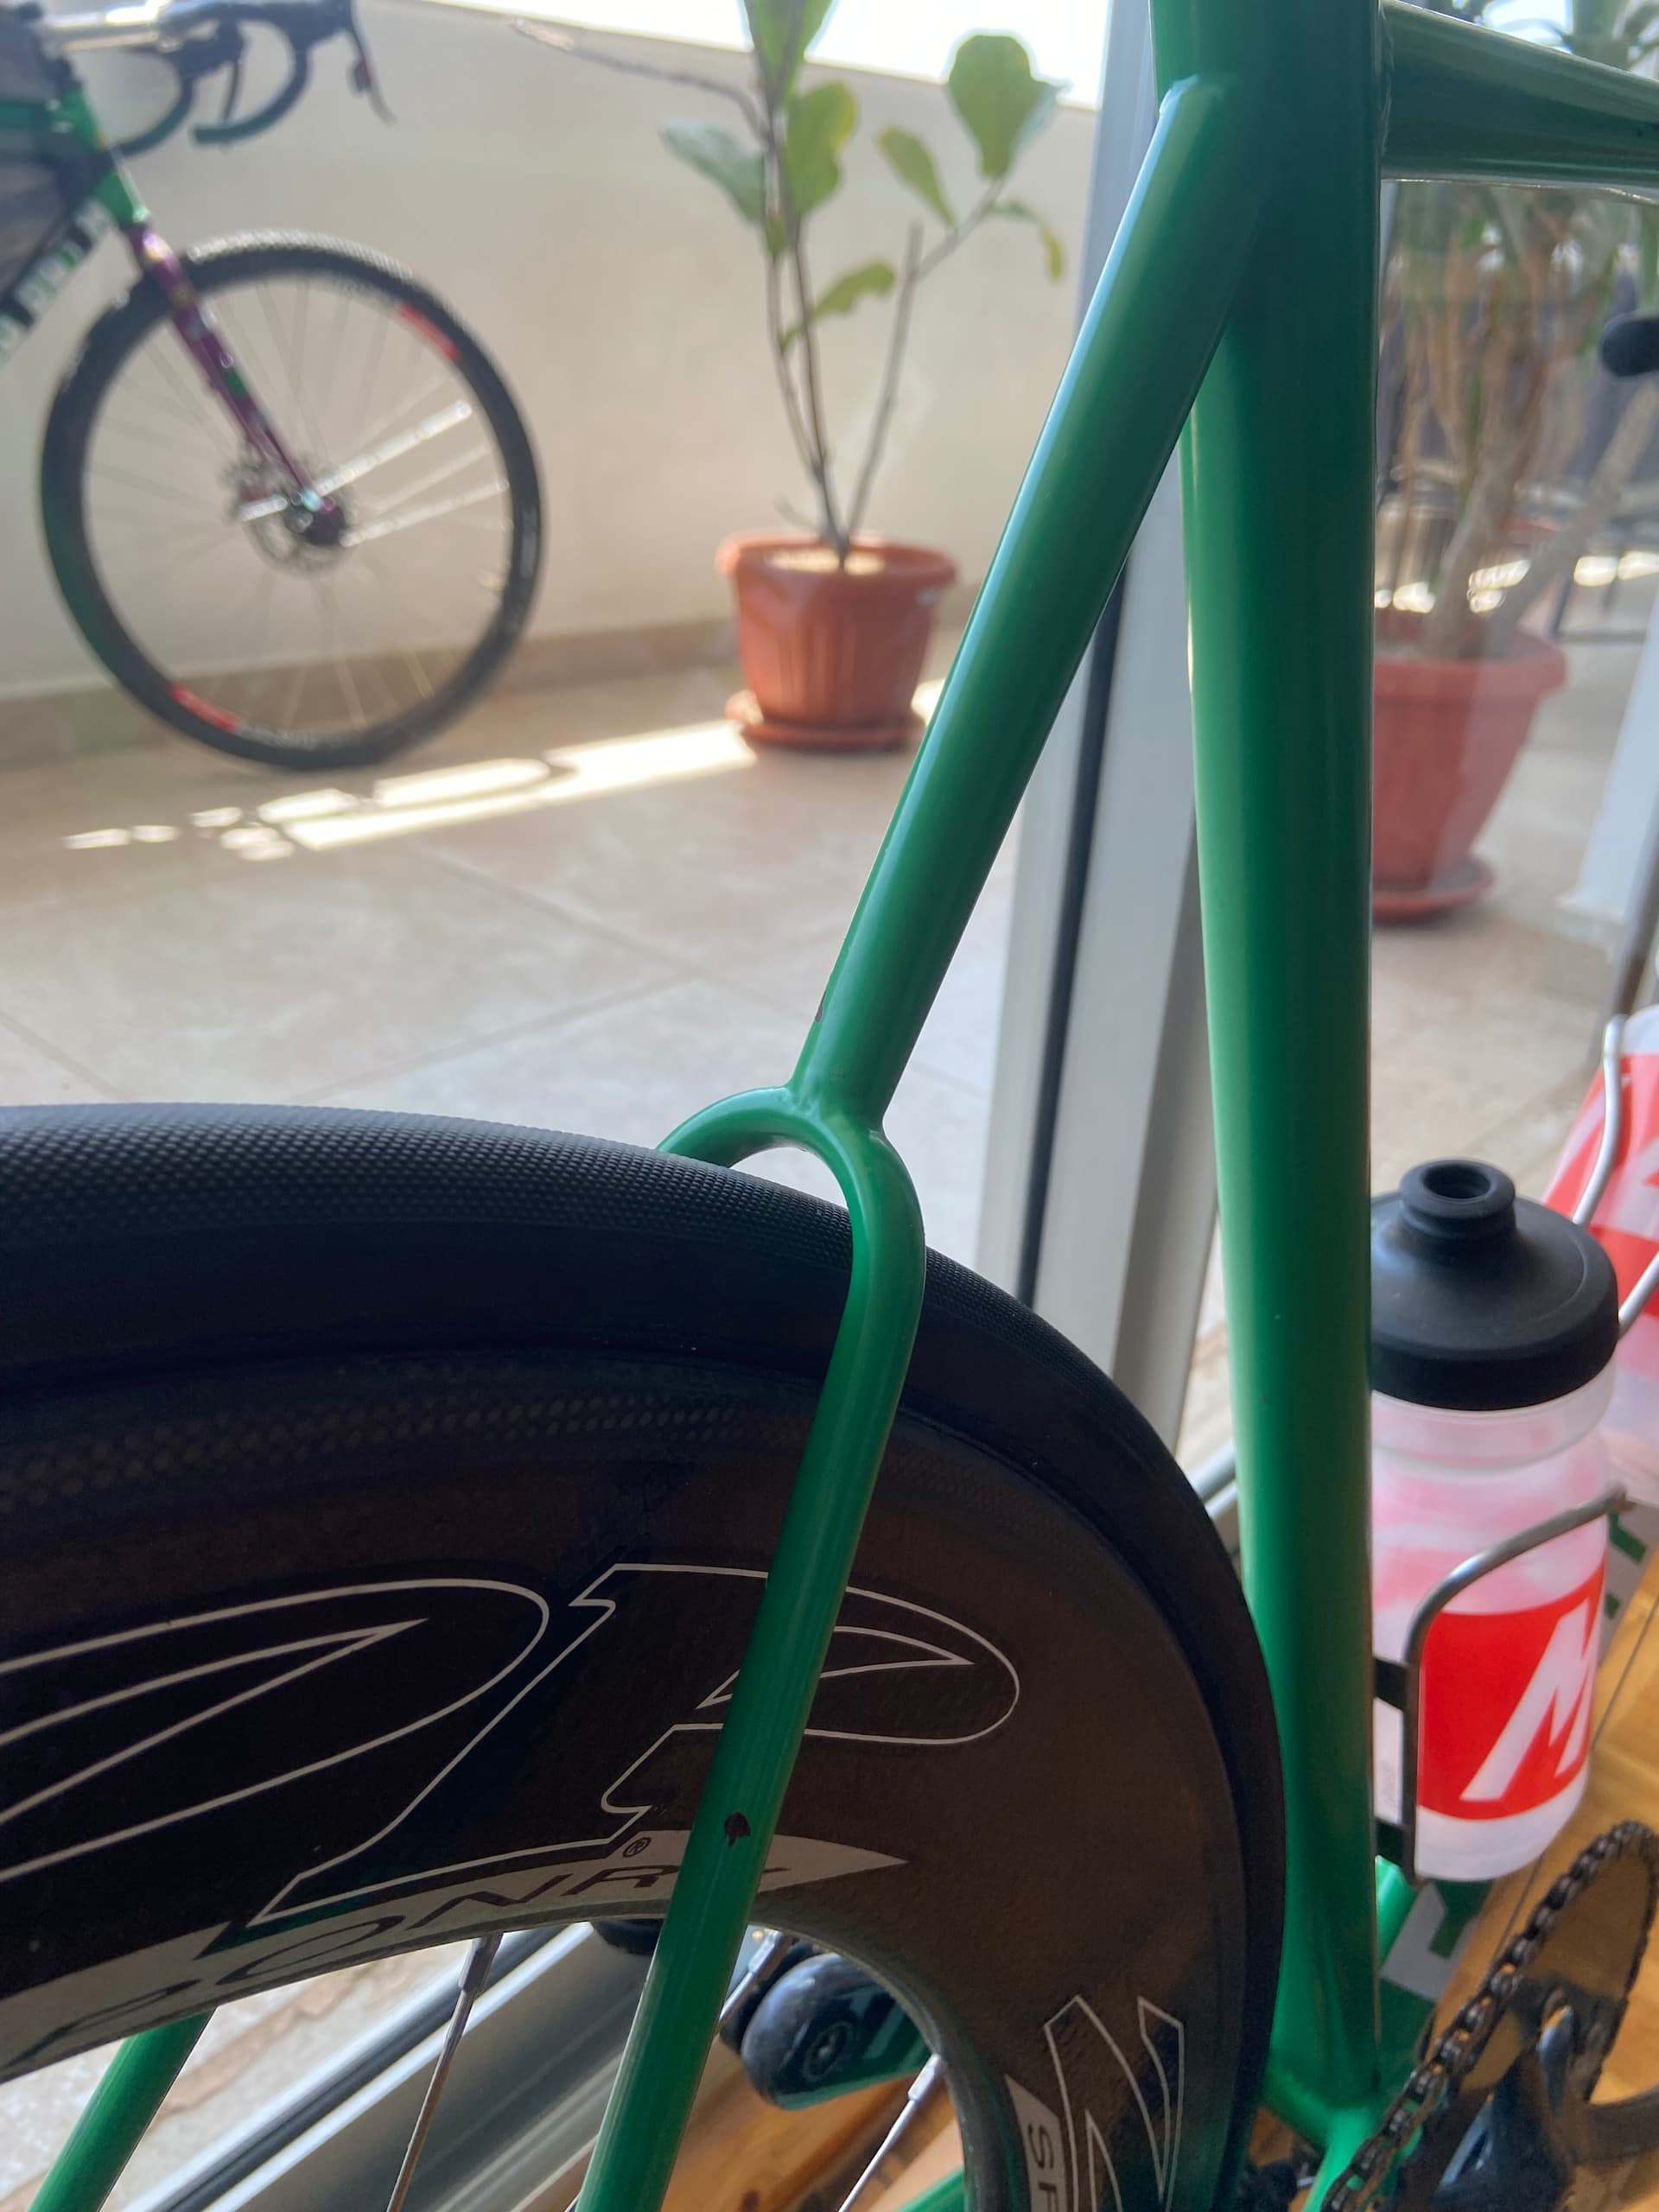
here’s another example of the finished stay, this time using a more tapered upper tube, this ones on my personal road bike. (the rear rim brake is direct mount under the chain stays, so shoot me)
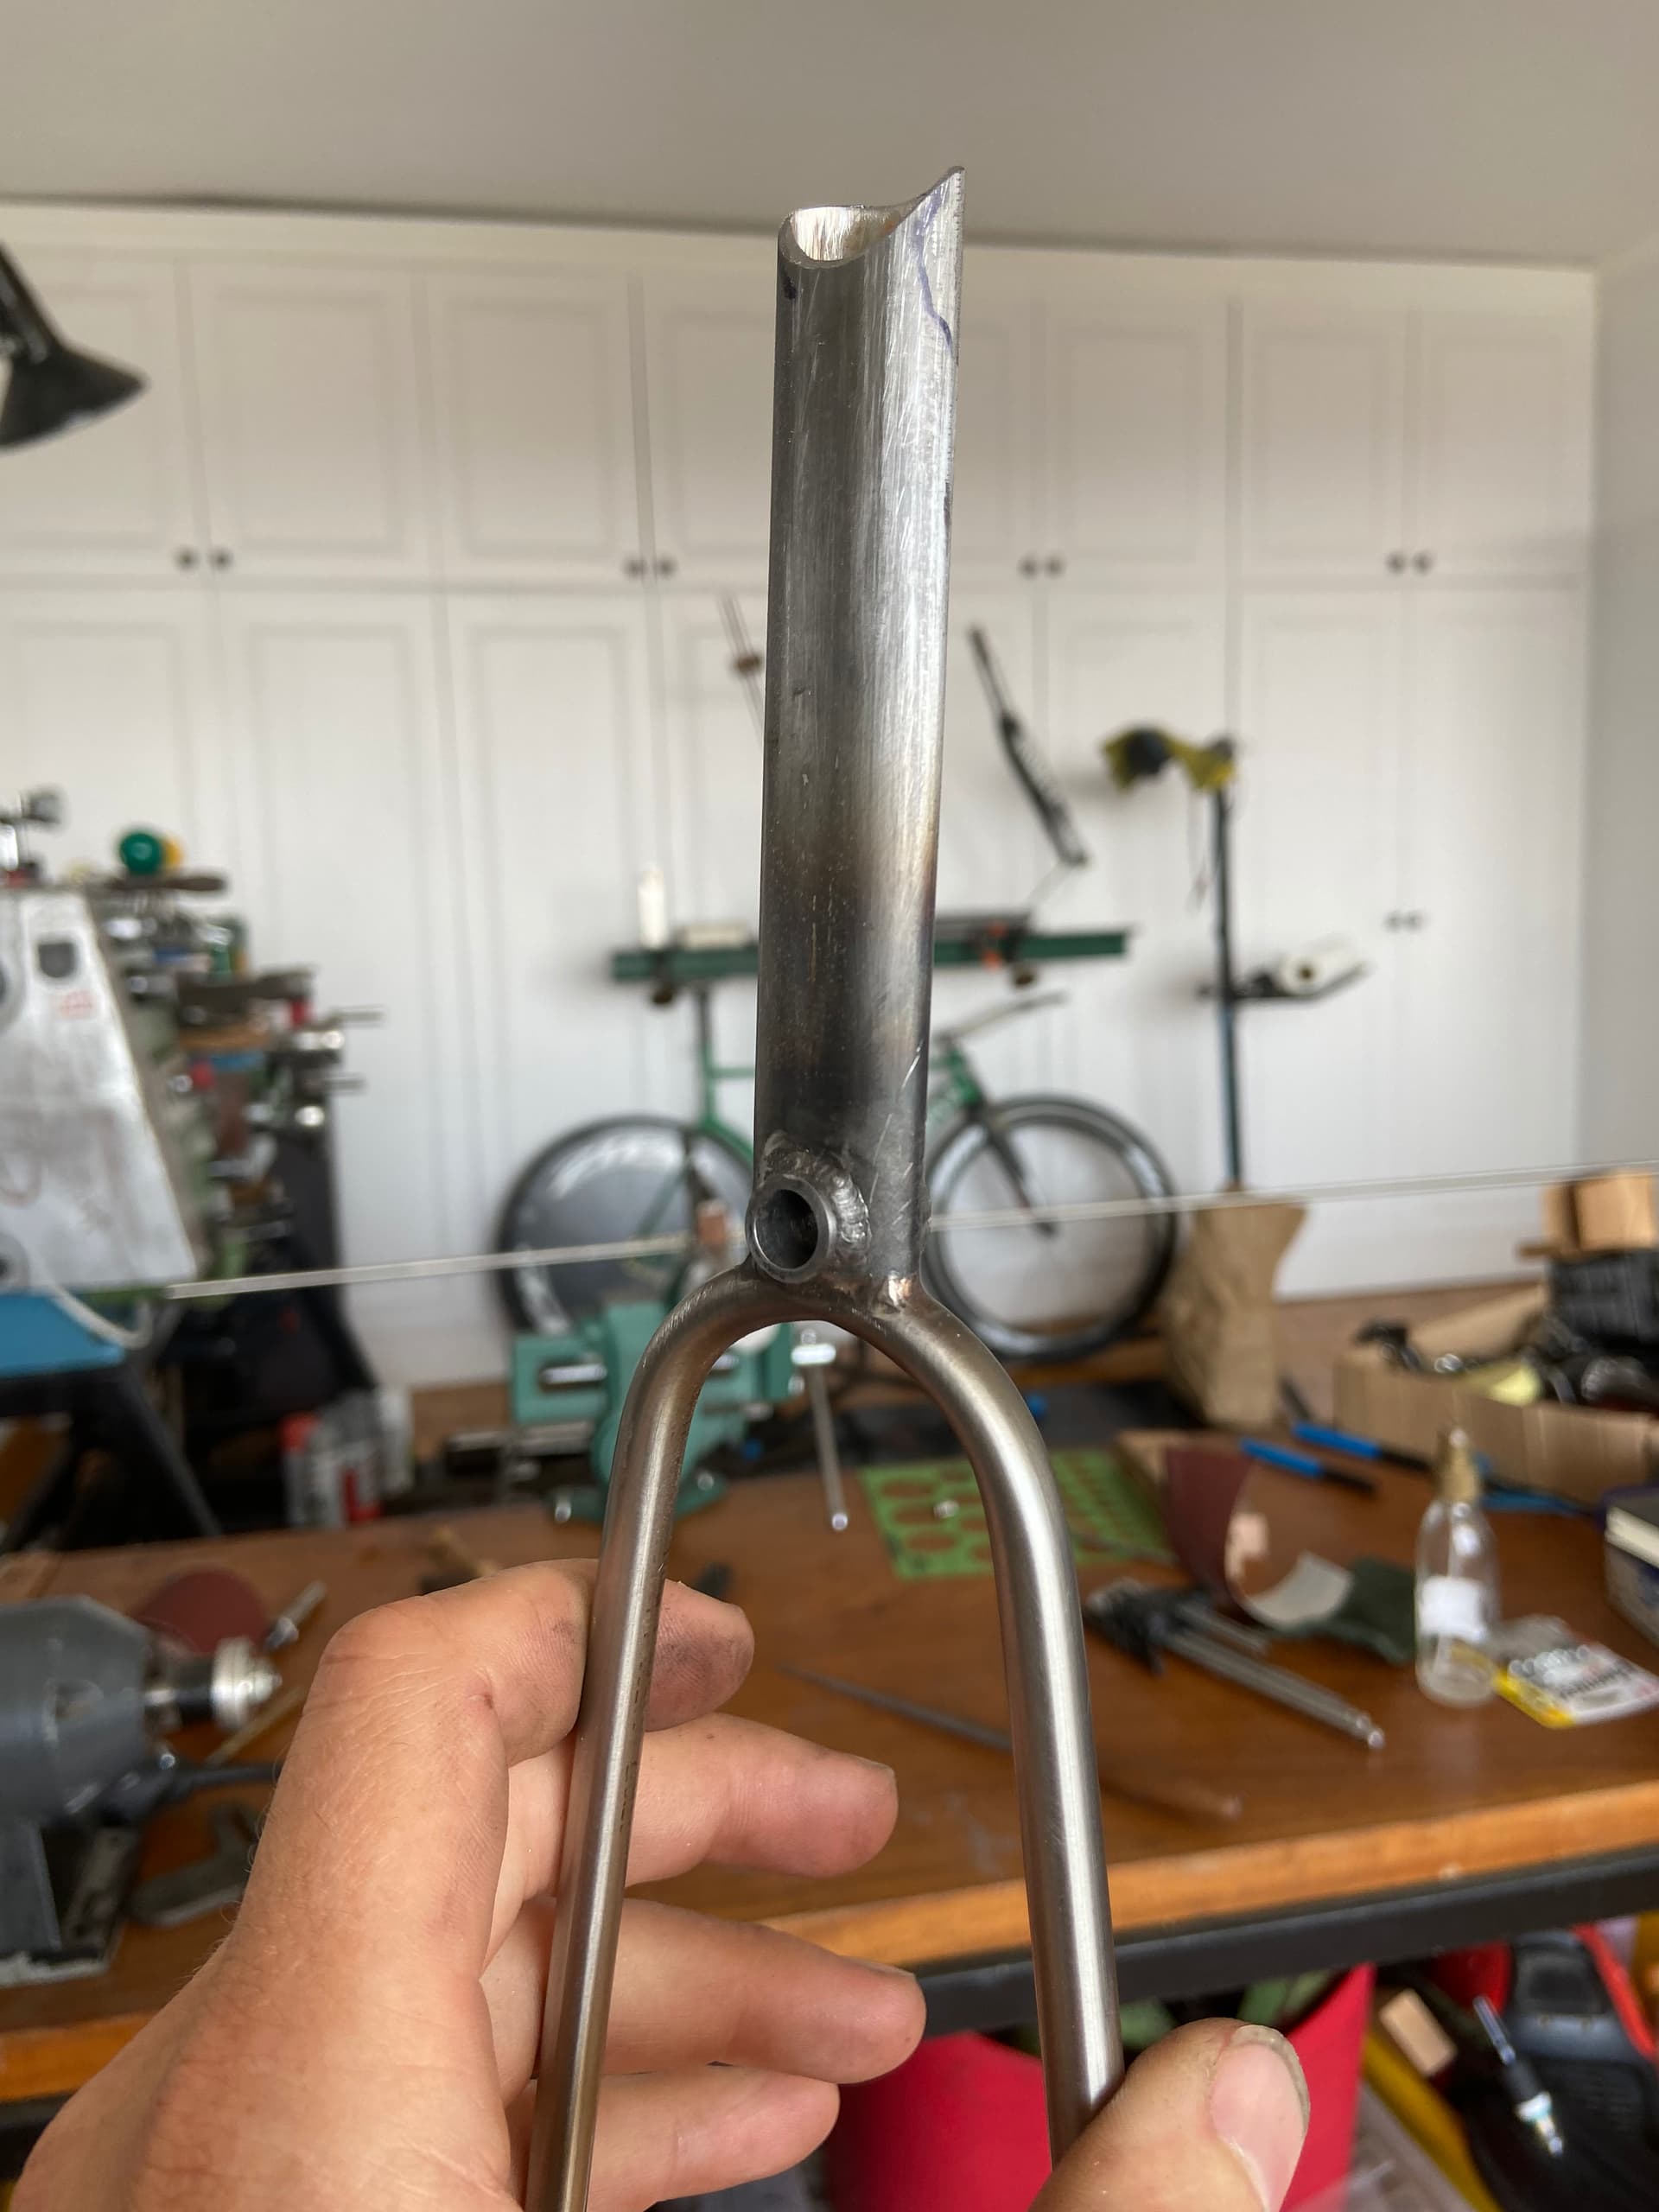
…aaand lastly a sneak peak at a wee prototype; this is a welded subassembly, as usual, but this time with a “past-oval” tube, and including a rim brake mount hole/face (pic is from the brake nut side) , ready (for some cleanup, jeez! and then) to be welded into the frame.
(this is the first one of these i’ve done, and i’m not 100% sure how it’ll hold up. the braking forces are working across the short side of the oval, but this is just play.
A little disappointingly, I had to close this bend down a little after the initial bend in the die, usually I get away with this, but I asked a bit much just squeezing it by hand and on the first go, i kinked it. classic ![]()
I decided to press on with it given its a personal bike to a test run a few ideas, and i’m very short on stock ( and now live somewhere it’s VERY difficult to get. ) it’ll be hidden by the brake caliper anyway.
hope this is somewhat useful
10 Likes
Great work. Why not drill a hole in the round stock for an attachment clamp?
3 Likes
that’s a great idea.
3 Likes
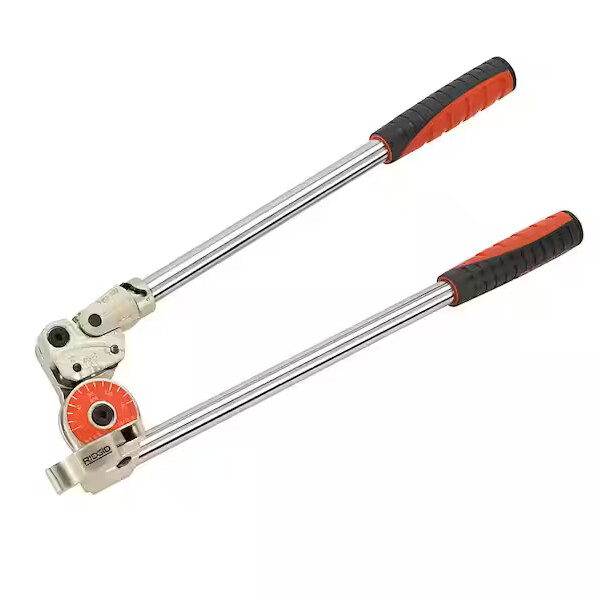
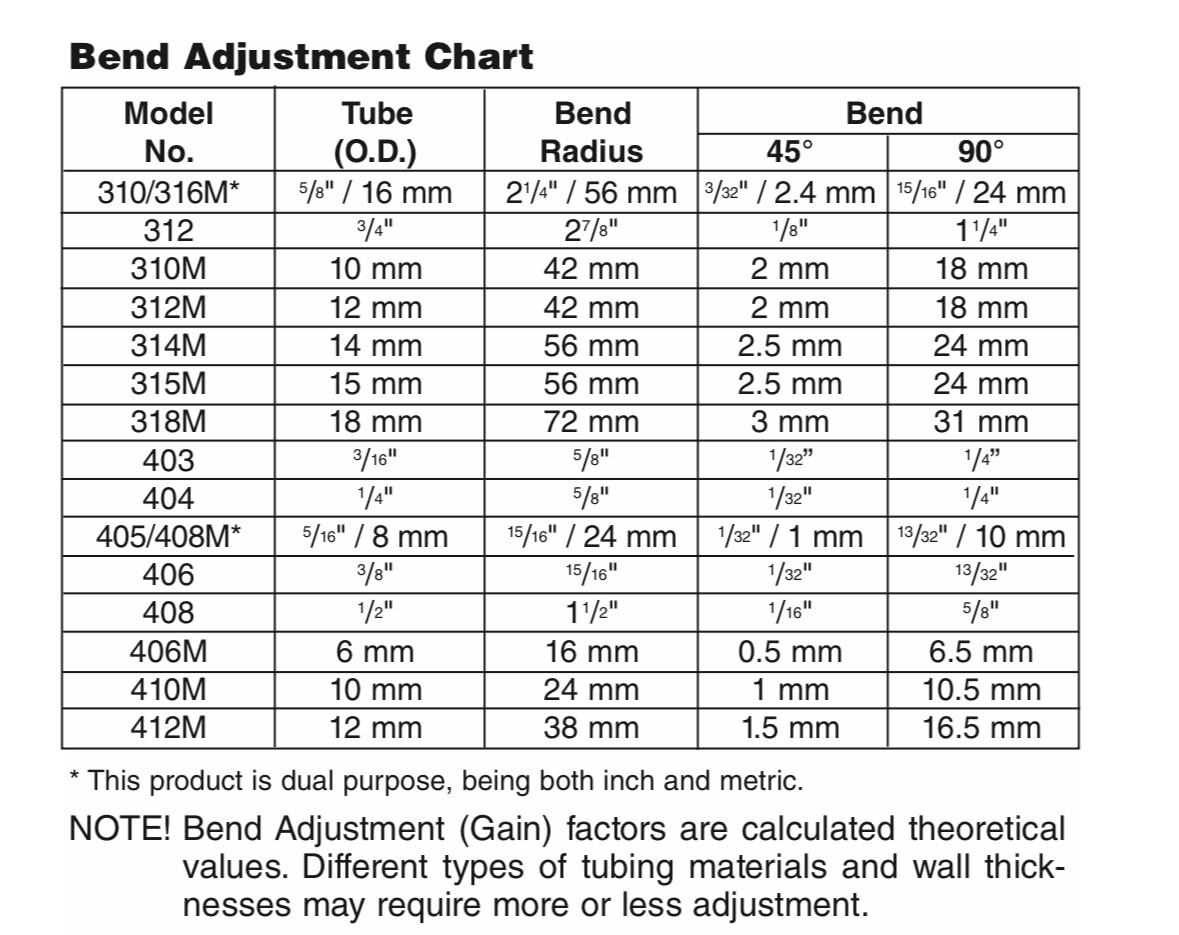
That is very helpful, I made a 3D printed die yesterday on 10% infil but it’s not enough to bend my seatstays, mostly because I realized they are 10x1.2, will have to use a longer lever. Thank you for the pics, very useful and for me, a hobbyst builder that makes 1-3 bikes a year, buying a dedicated bender is not in the cards right now. I wonder if with your diameters, a sturdy “plumbing” bender would fit the task.
Something like this:
1 Like
First try, I manually bend one side while keeping the other side clamped to the die… The side that was clamped is perfectly straight and then rounded, the other side has a bend to it that is different from his brother… my 10% infill die cracked at the end but I think I can improve on the design and make a better bend, this is not symmetrical and even thought it’s not kinked you can notice that it’s not perfect… I have another 4130 to try with…
the super light dies are single use but it’s a 40gr material in total, worth it.
11 Likes
that’s a result.
the “different” bend, I ultimately decided, was an acceptable bend, it just needed to be the same on both sides, hence my “both sides at once” method.
impressive strength from the 10% infill print, I think its probably time I built/bought a 3d printer.
6 Likes
I am insanely appreciative of all of the advice and photos everyone!! I am loving the die setup @crowe-molybdenum, and the consensus seems to be doing it all as a sub-assembly. I’m on a bit of a wild hair at the moment, will update once I’m finished for better or for worse!
3 Likes
Great ideas. I am in the process of building a gravel bike and want to give this a try
2 Likes

10 Likes
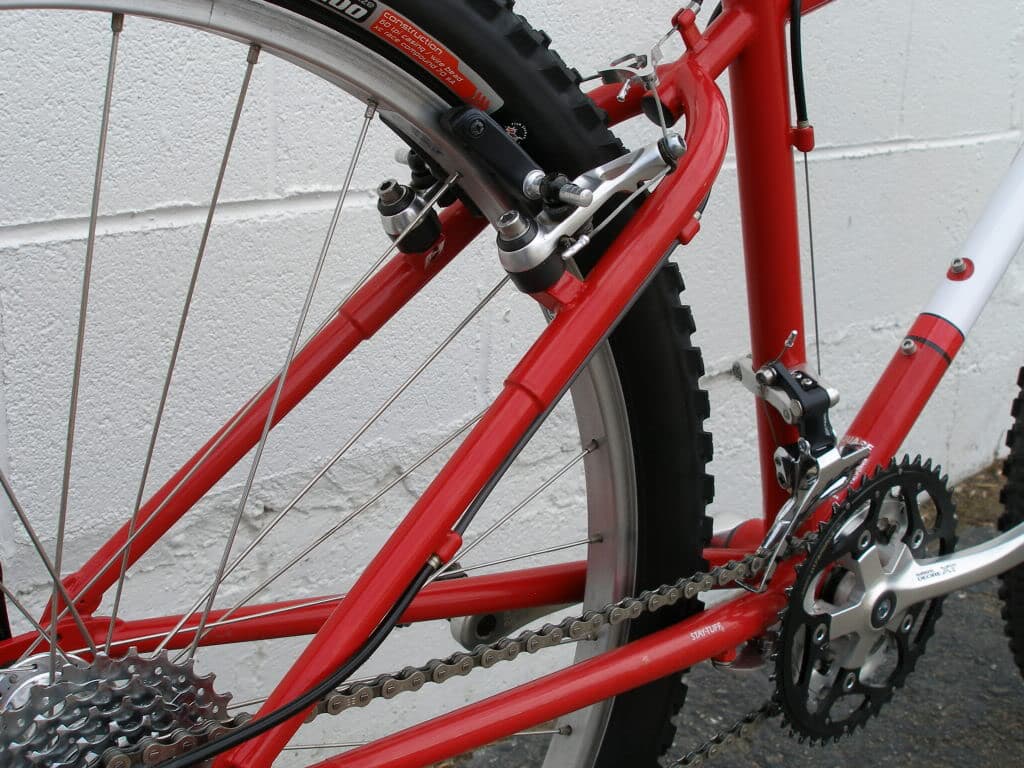
Not sure the tire clearance works out but this Rigid bender is great for 1/2” x .035 tubing wishbone with a 1.5” radius die. Different models can do different OD’s and radii. Smooth bends, great for racks and bridges too.
8 Likes
Just got a cheap amazon bender for 3/8in tubing and worked like a charm, I am less amused that the same identical bender that I paid $55 can be also found for $38…
Worked flawlessy on 4130 3/8in tubing (0.049 thick), the only downside is the bending radius is too narrow for anything but road tires. I am thinking I may make a 3D printed die and replace the one that came with it.
2 Likes
I am curious if anyone ever tried a wishbone setup but instead of a centered single tube to connect the seat stay to the seat tube they used two smaller tubes slightly spread part.
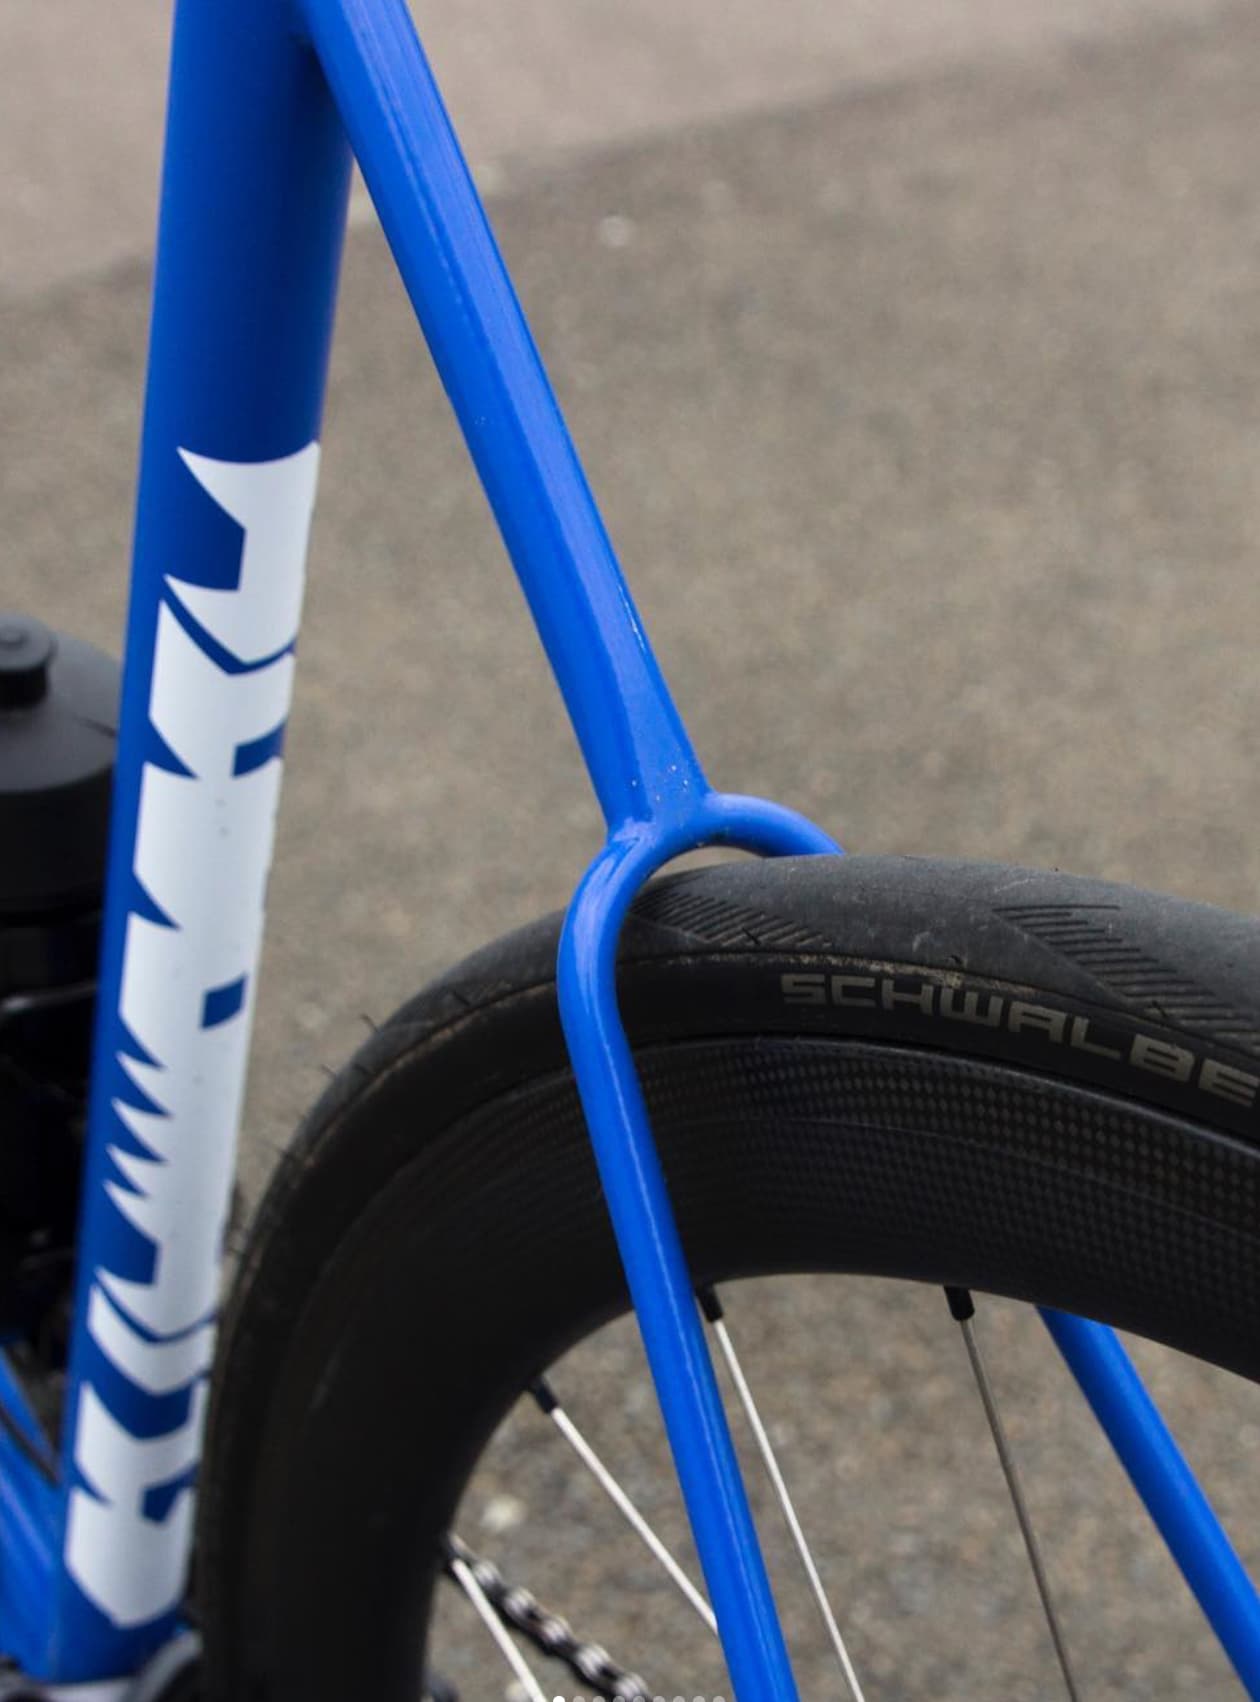
@Matt this plumber style bender will do the job pefectly. You just need to match the bender to tube diameter perfectly. I have struggled with 1/2 inch bender on 12mm tube and it did not work. I got a 1/2 inch tube (12.7 mm) and worked like charm. Bending diameter is pretty good looking as well for a ~42mm tyre.
4 Likes