Thanks for the inspiration on this thread. Tons of cool stuff going on!
What bender did you use for this? It seems like a pretty tricky: tight CLR close together.
Thanks for the inspiration on this thread. Tons of cool stuff going on!
What bender did you use for this? It seems like a pretty tricky: tight CLR close together.
@sikocycles Thanks man.
@Flav-CCW Thanks! I was thinking about 1950’s rockets and space styling when I did those. The Jetsons cartoon actually, haha.
I’d love to see more pics of your work!
@DEVLINCC Nice cad!
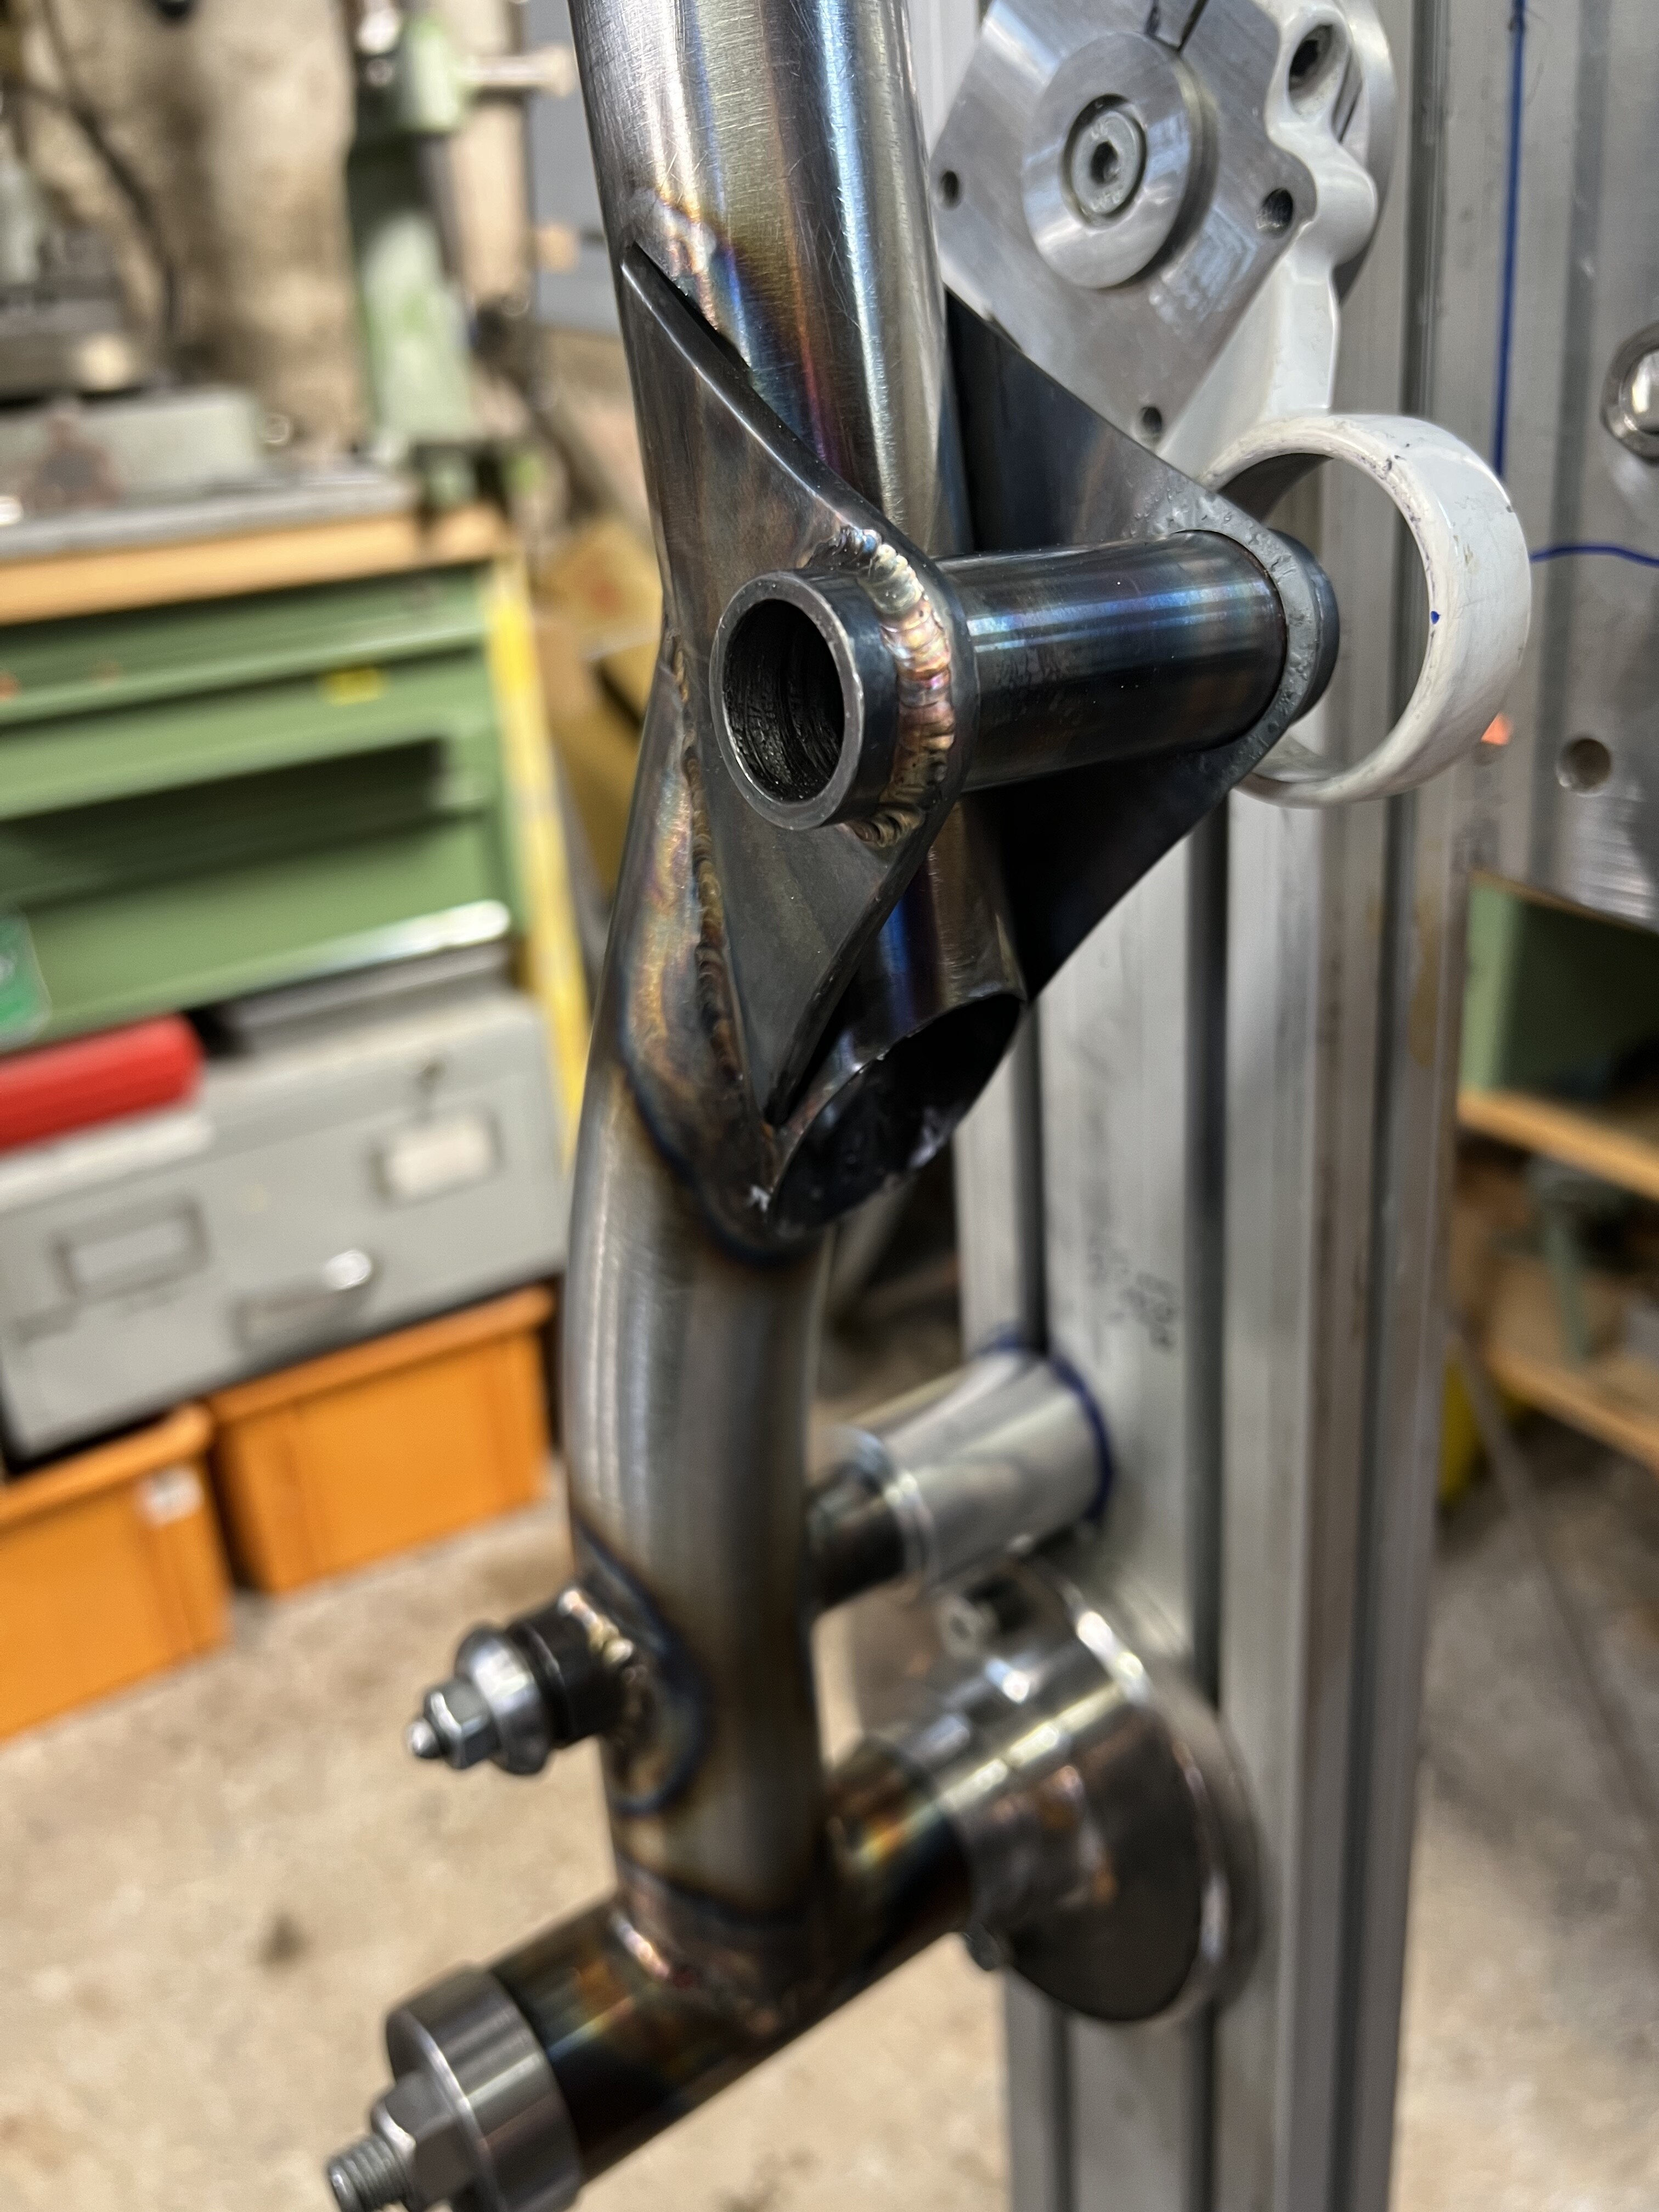
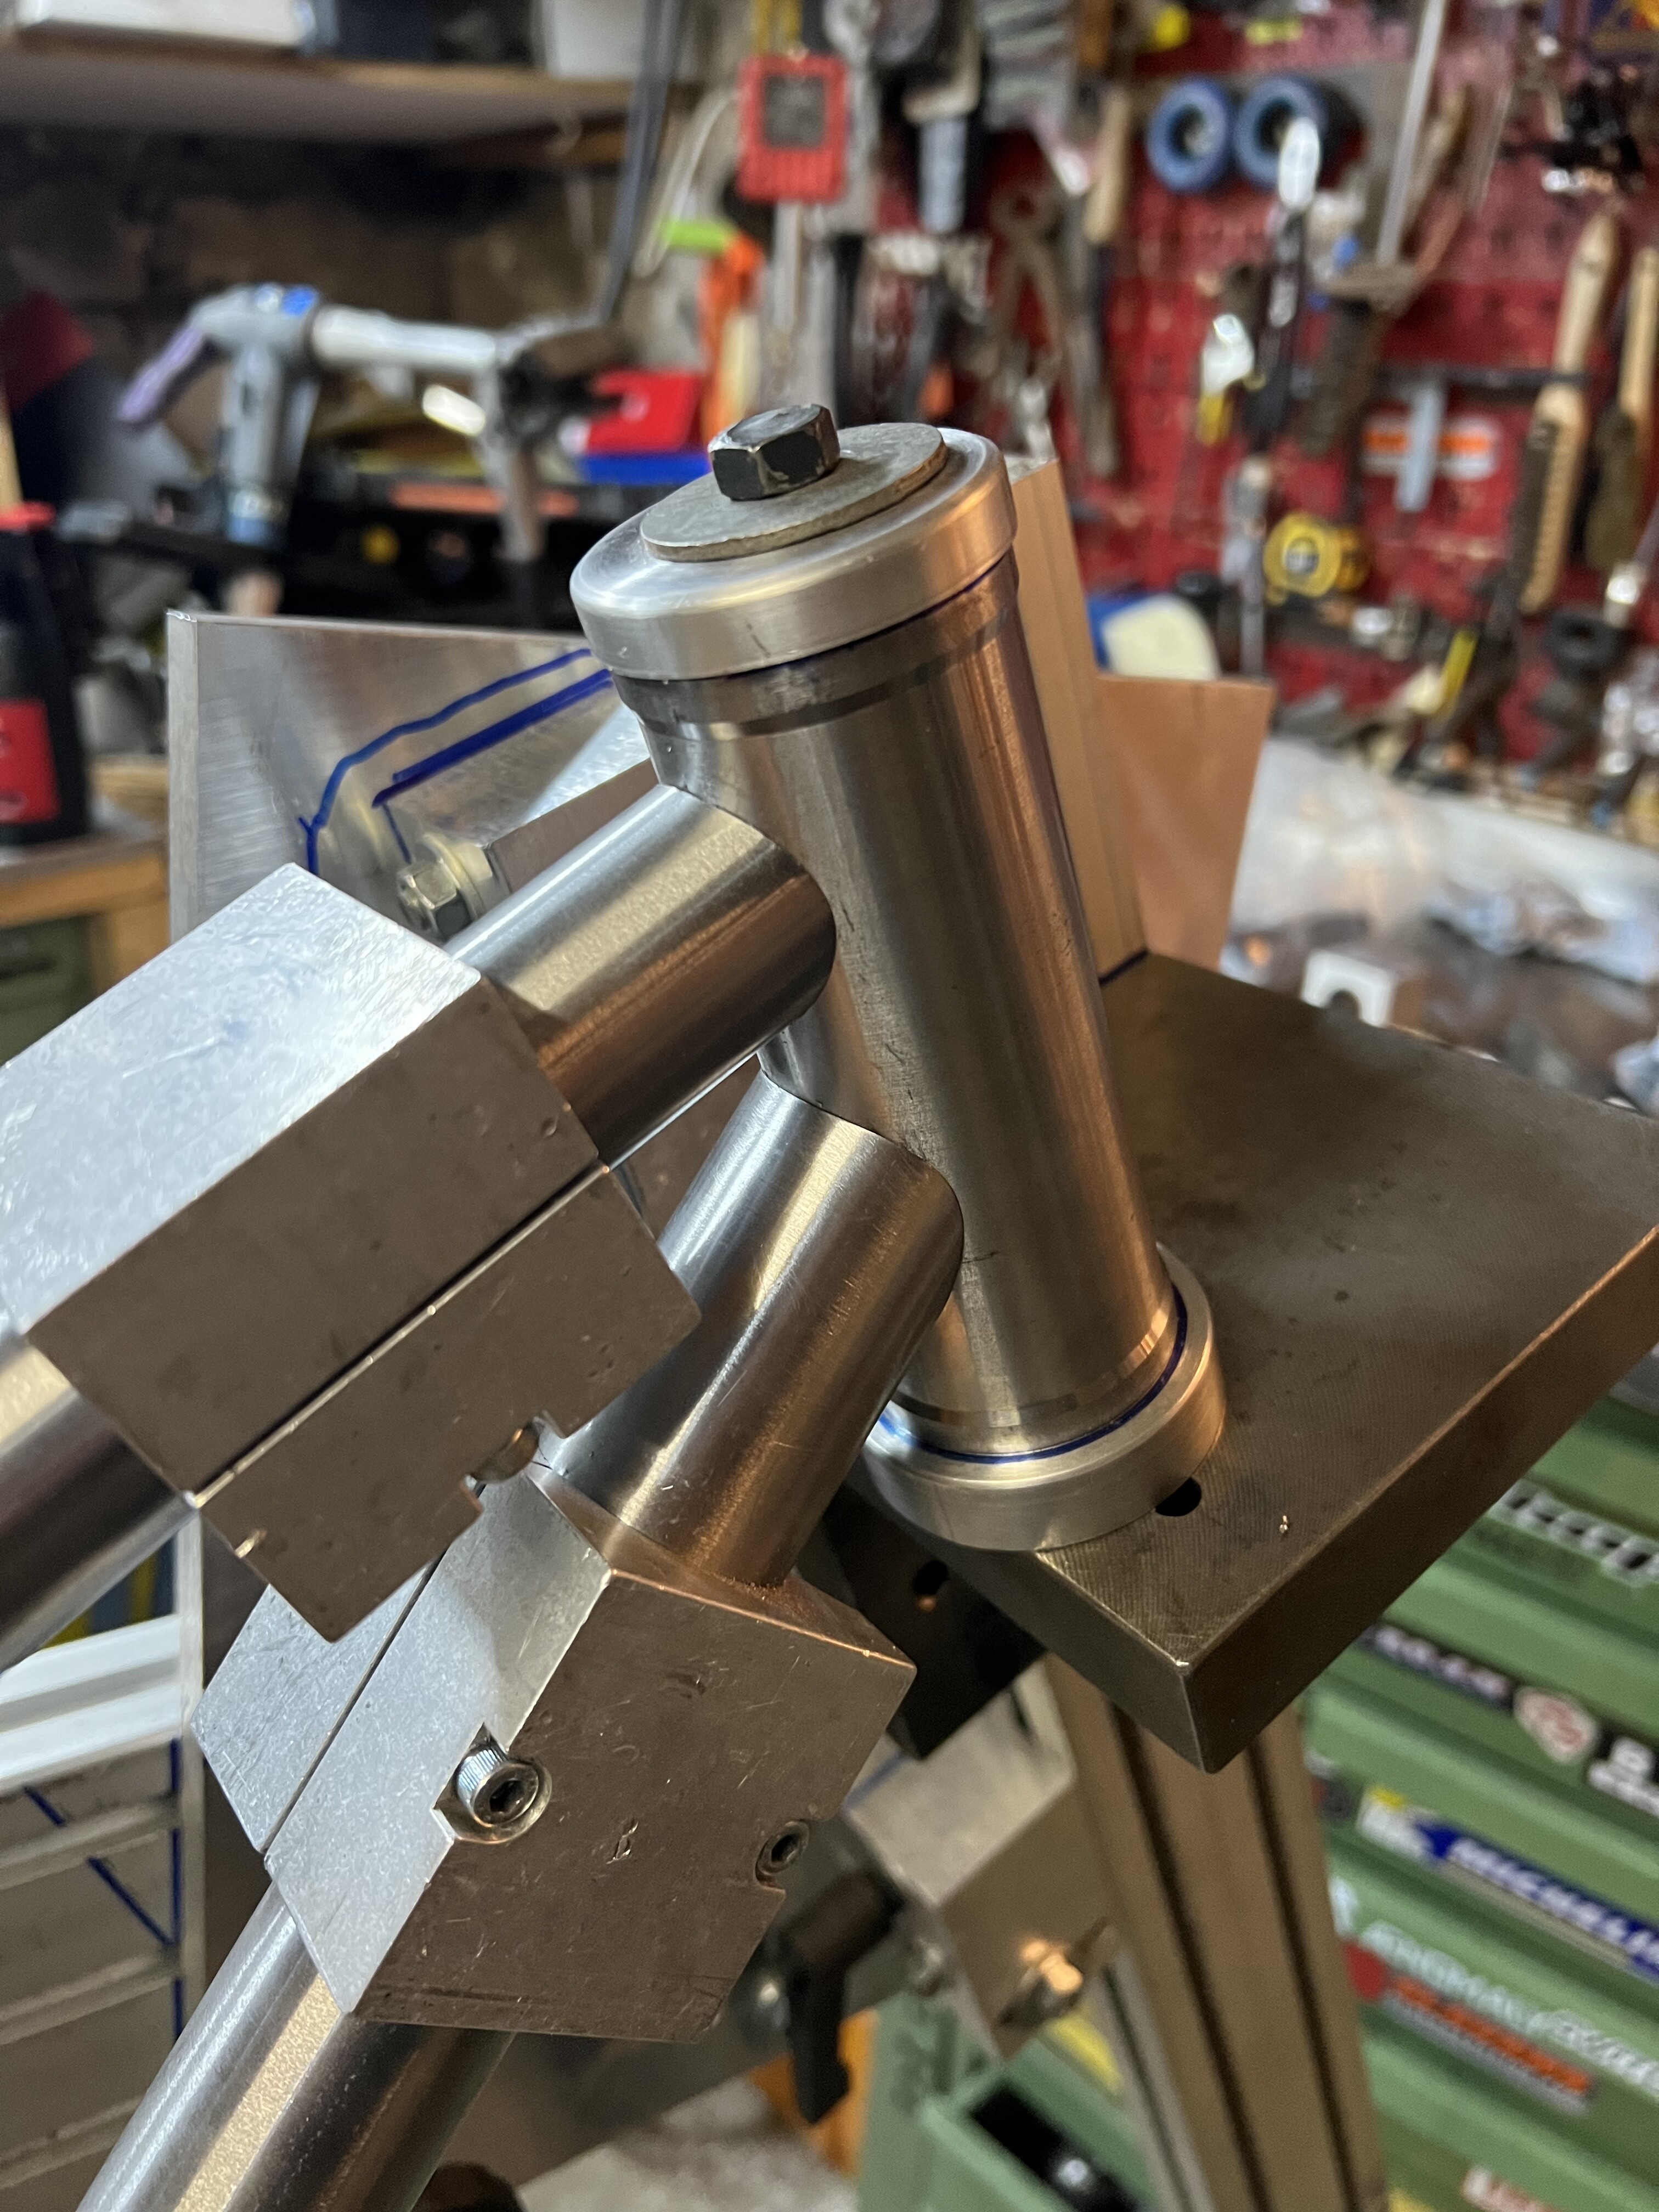
I like how you did your upper pivot. I’d like to try and box in mine with some thin sheet or something to try and make it flow better.
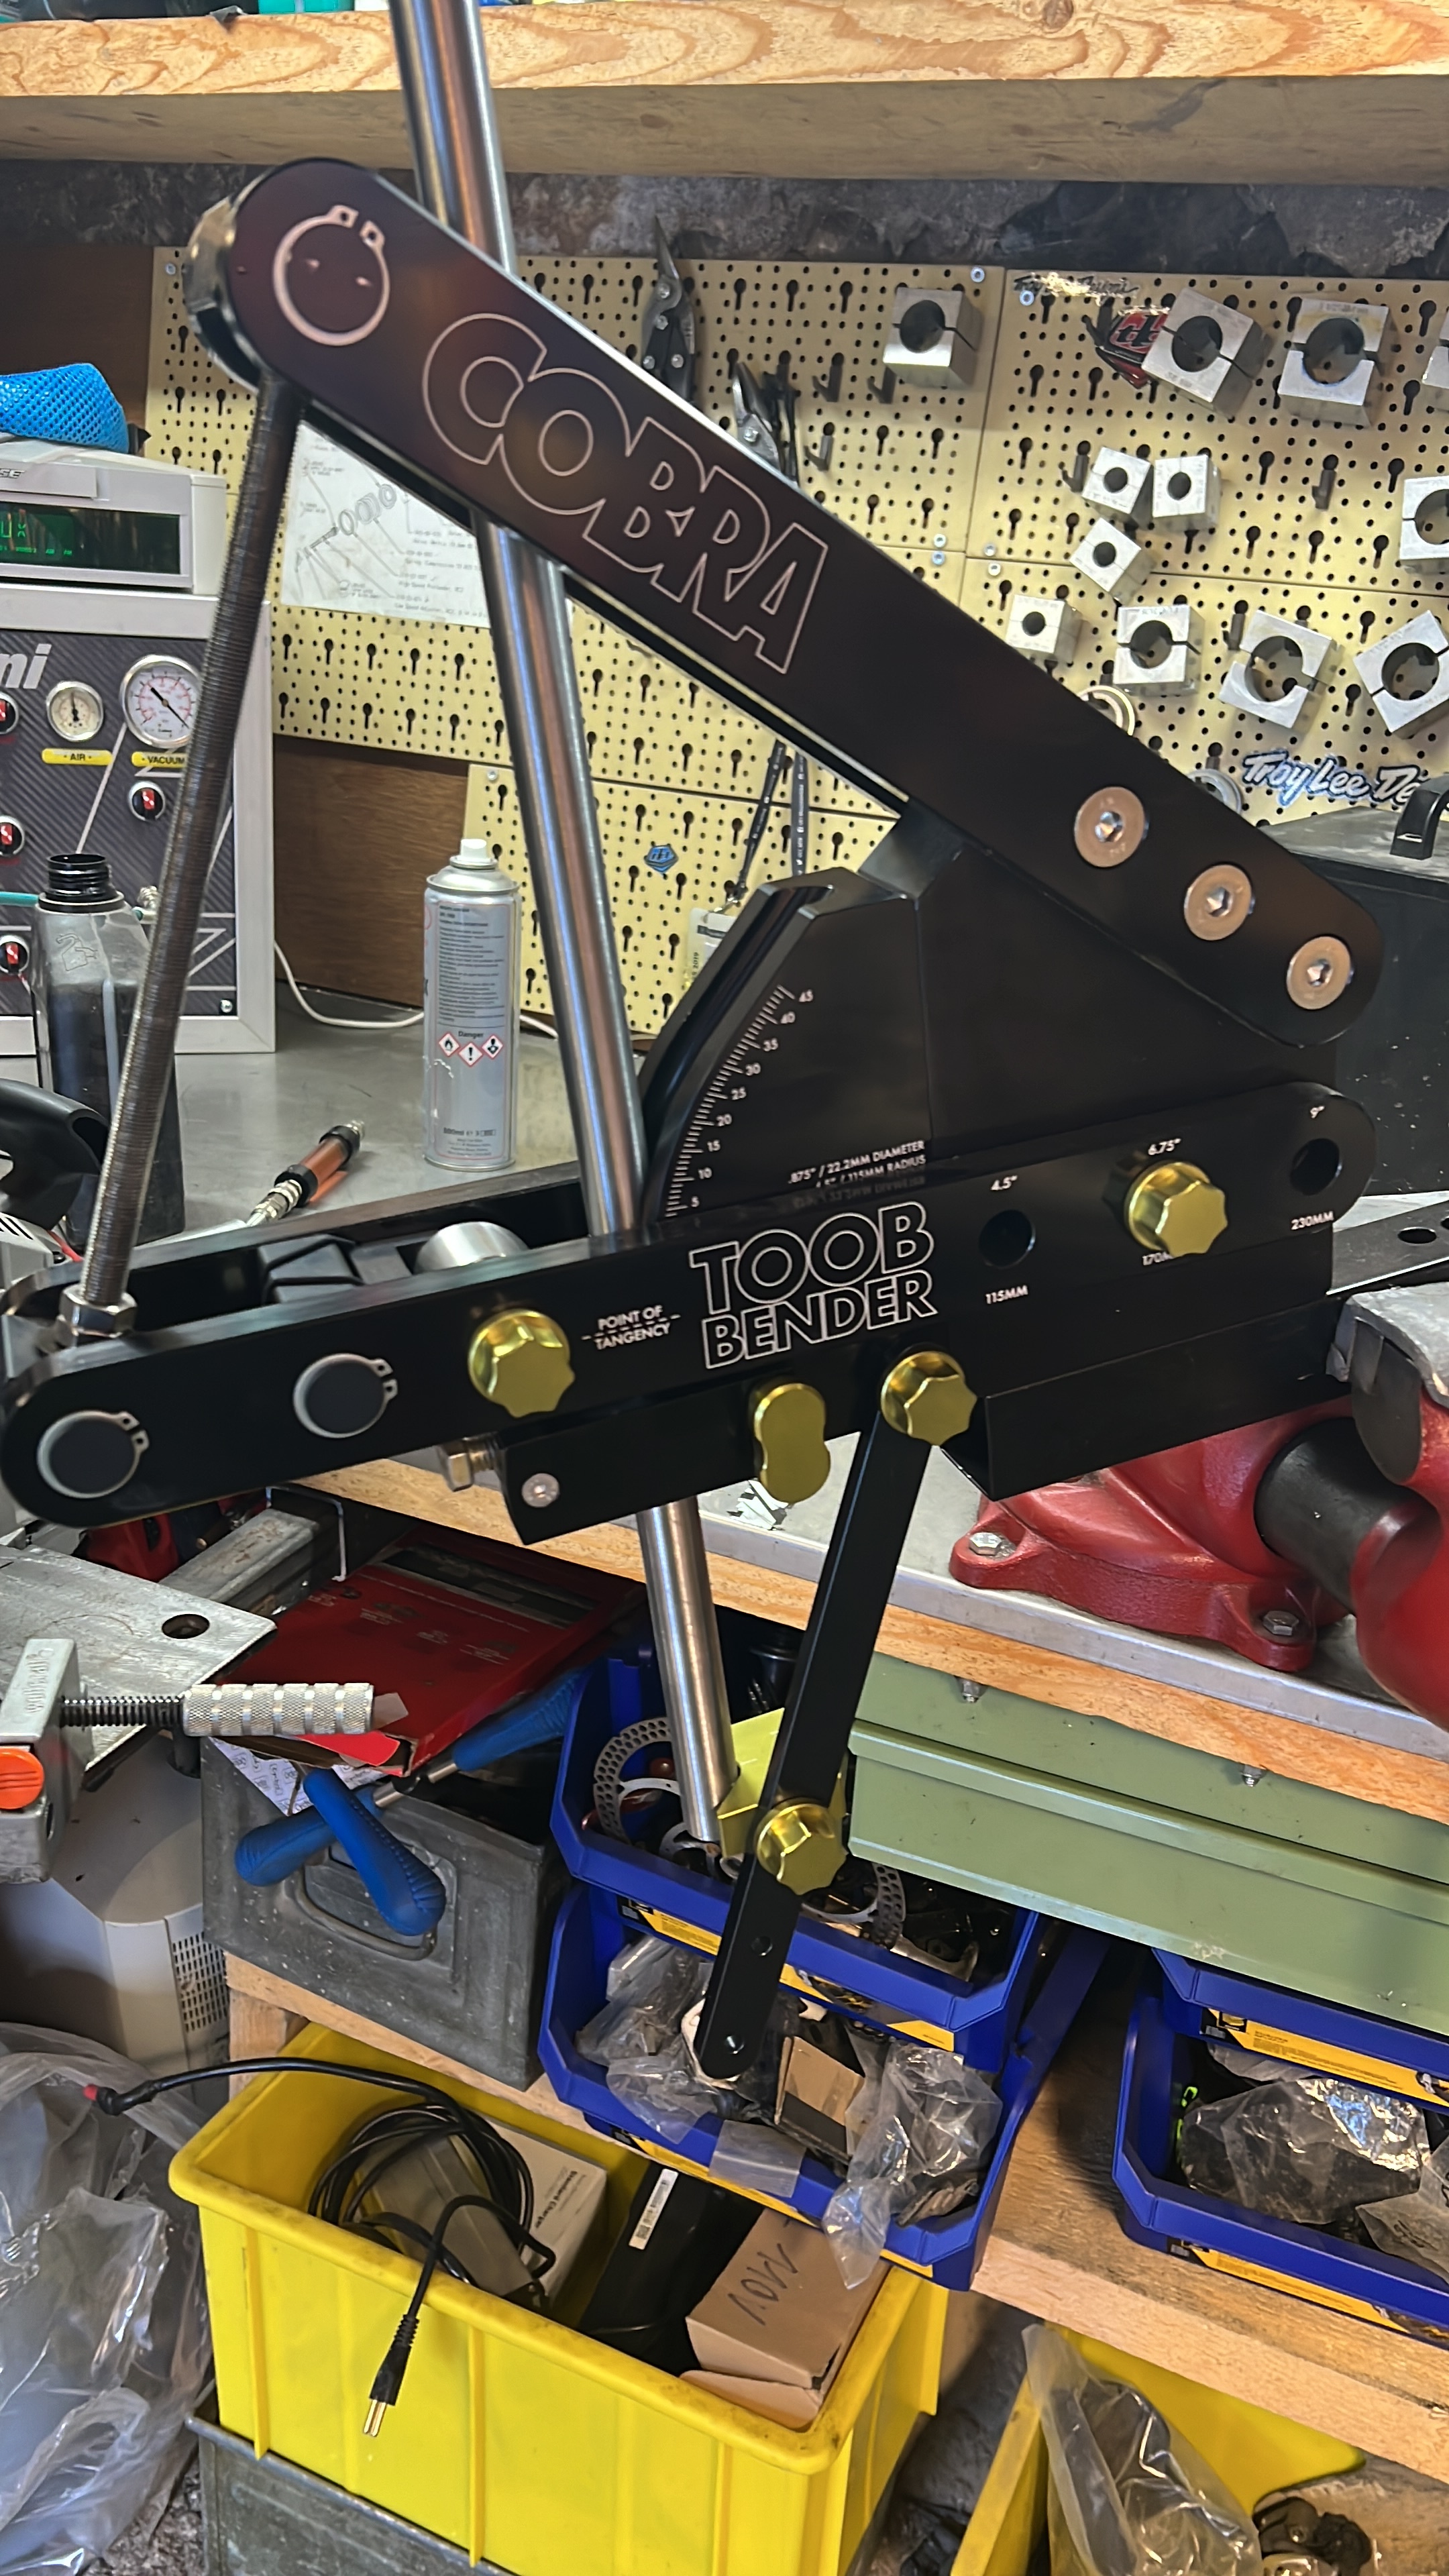
@Daniel_Y I used a friend’s Cobra Toob Bender for those. Nico from Egerie
[https://instagram.com/egerie_velo_moto?igshid=YmMyMTA2M2Y=]
Cheers. It does look good but structurally having plates that come from the sides is more efficient. I reckon use your swoopy bottom mount shape and use a cross plate to stiffen it all up. or take that shape and print a cool hollow section that starts at the side tangent and fill the inner area in with a shell section.
That could be cool.
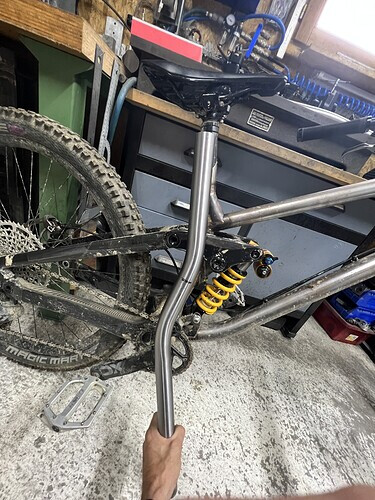
Yeah, up until now, I try and keep the welds on the sides of the seat tube thinking that it is less of a stress riser compared to welds on the front of the seat tube. It is all hidden by the linkage so that’s mostly why I didn’t change anything yet.
A 3d printed thing would be cool there but I enjoy the hands on approach.
@DEVLINCC Do you use a cnc lathe for your externally butted seat tubes? I’d like to attempt some of this but my old manual lathe has a bit of a taper that I haven’t been able to get rid of. I’m a novice so it’s probably me and not the lathe.
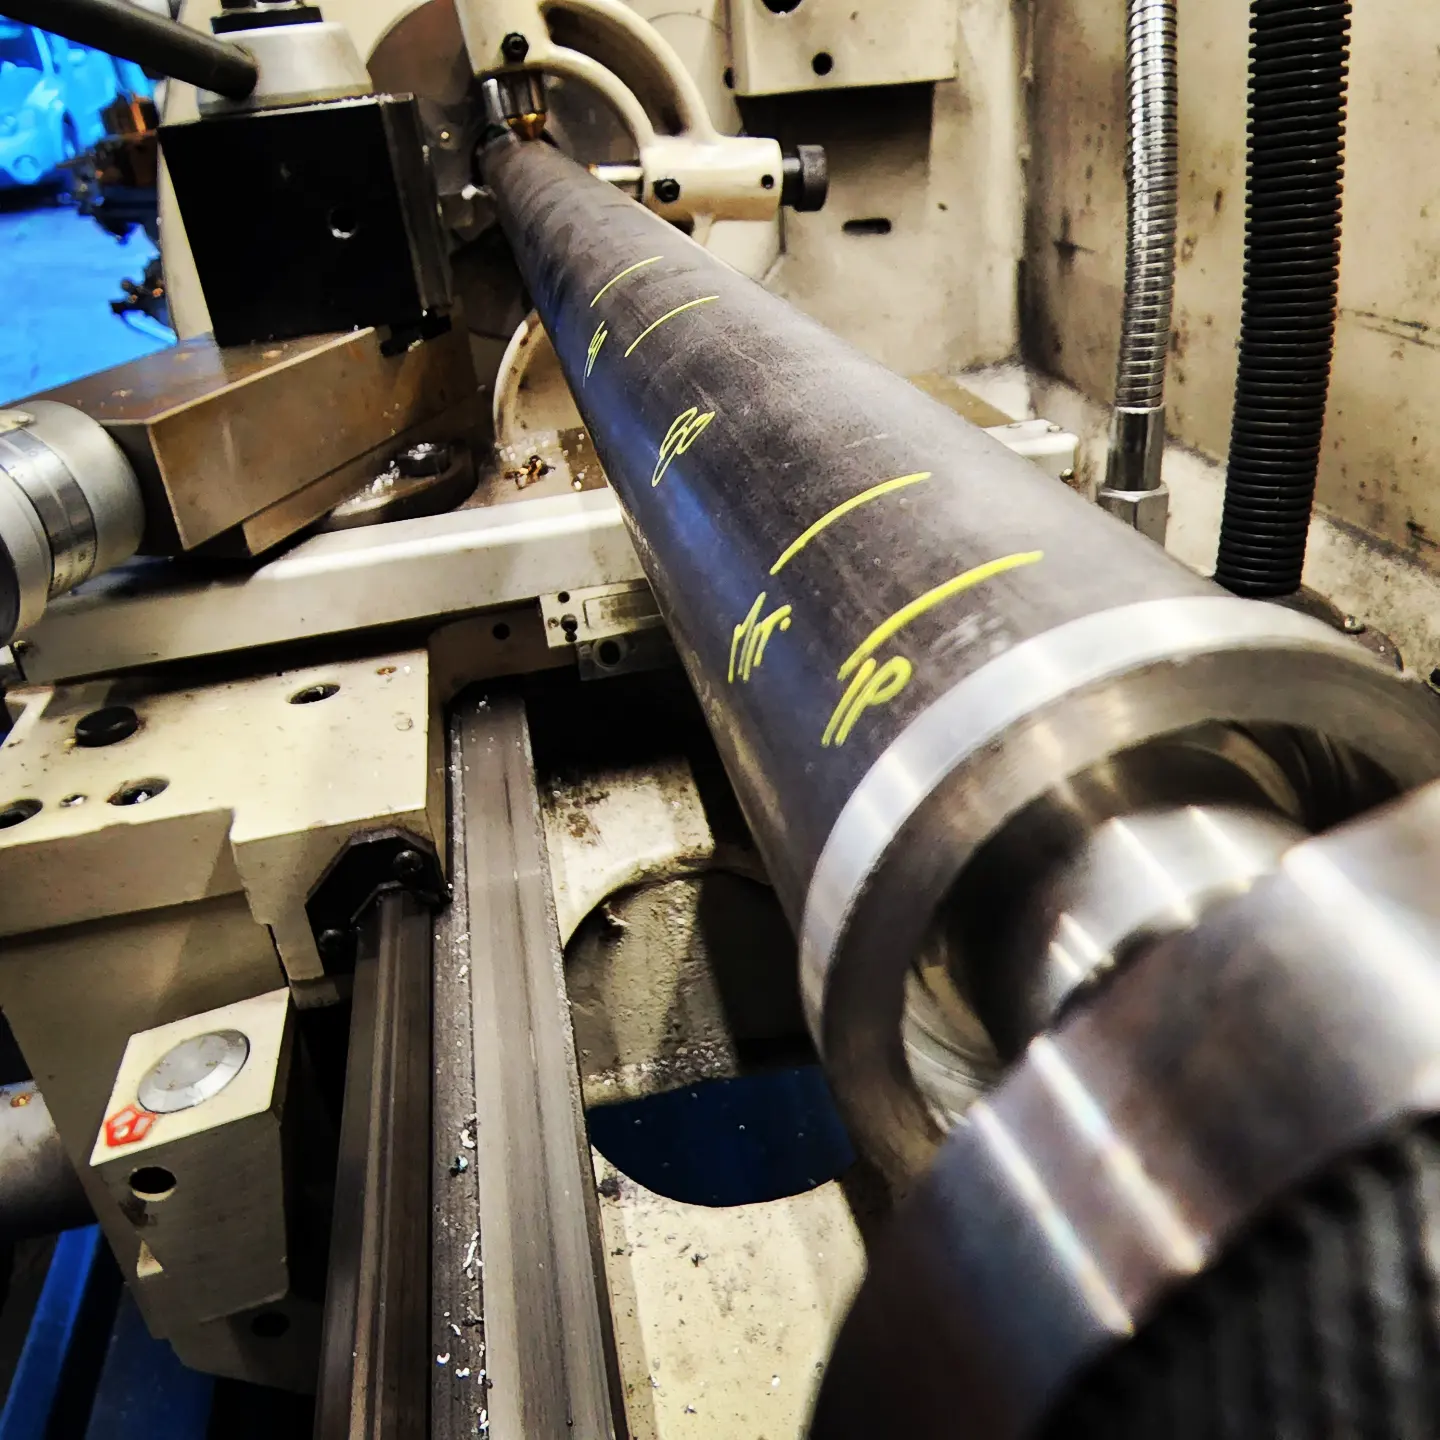
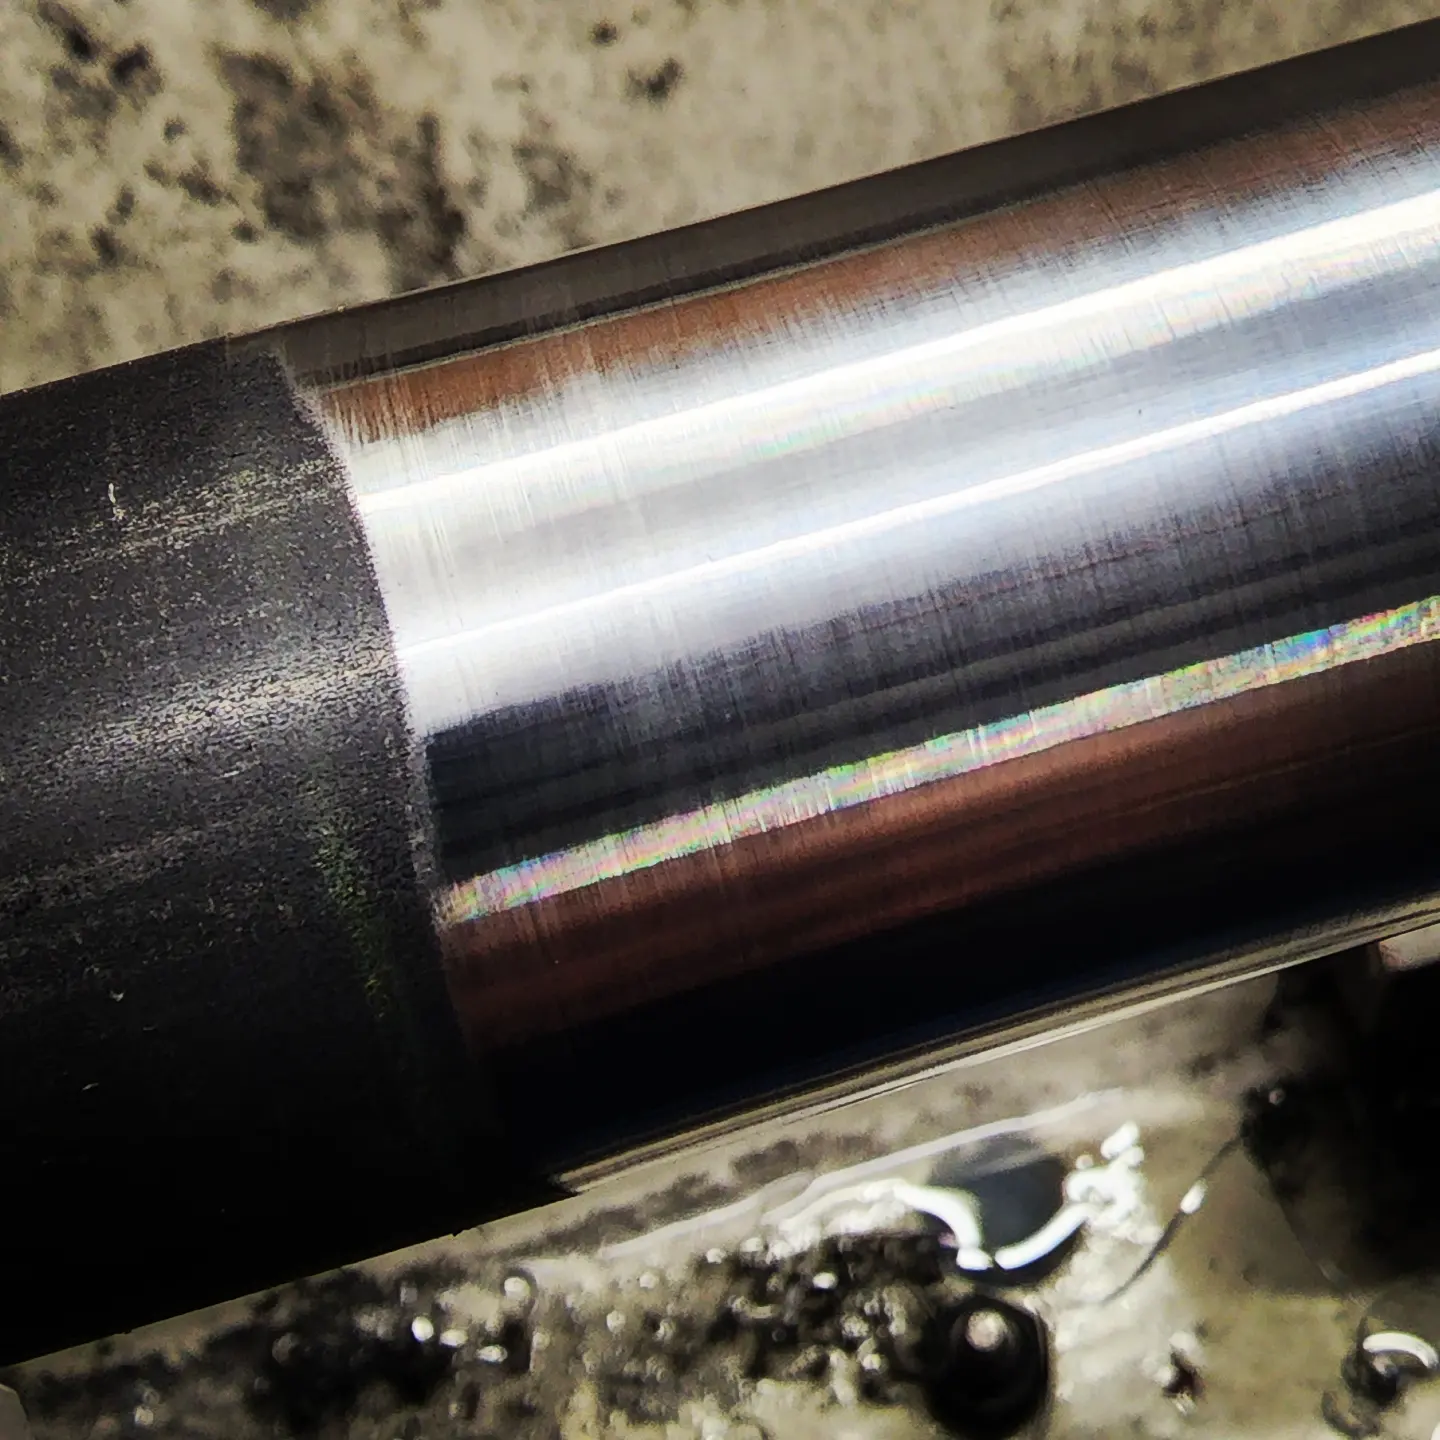
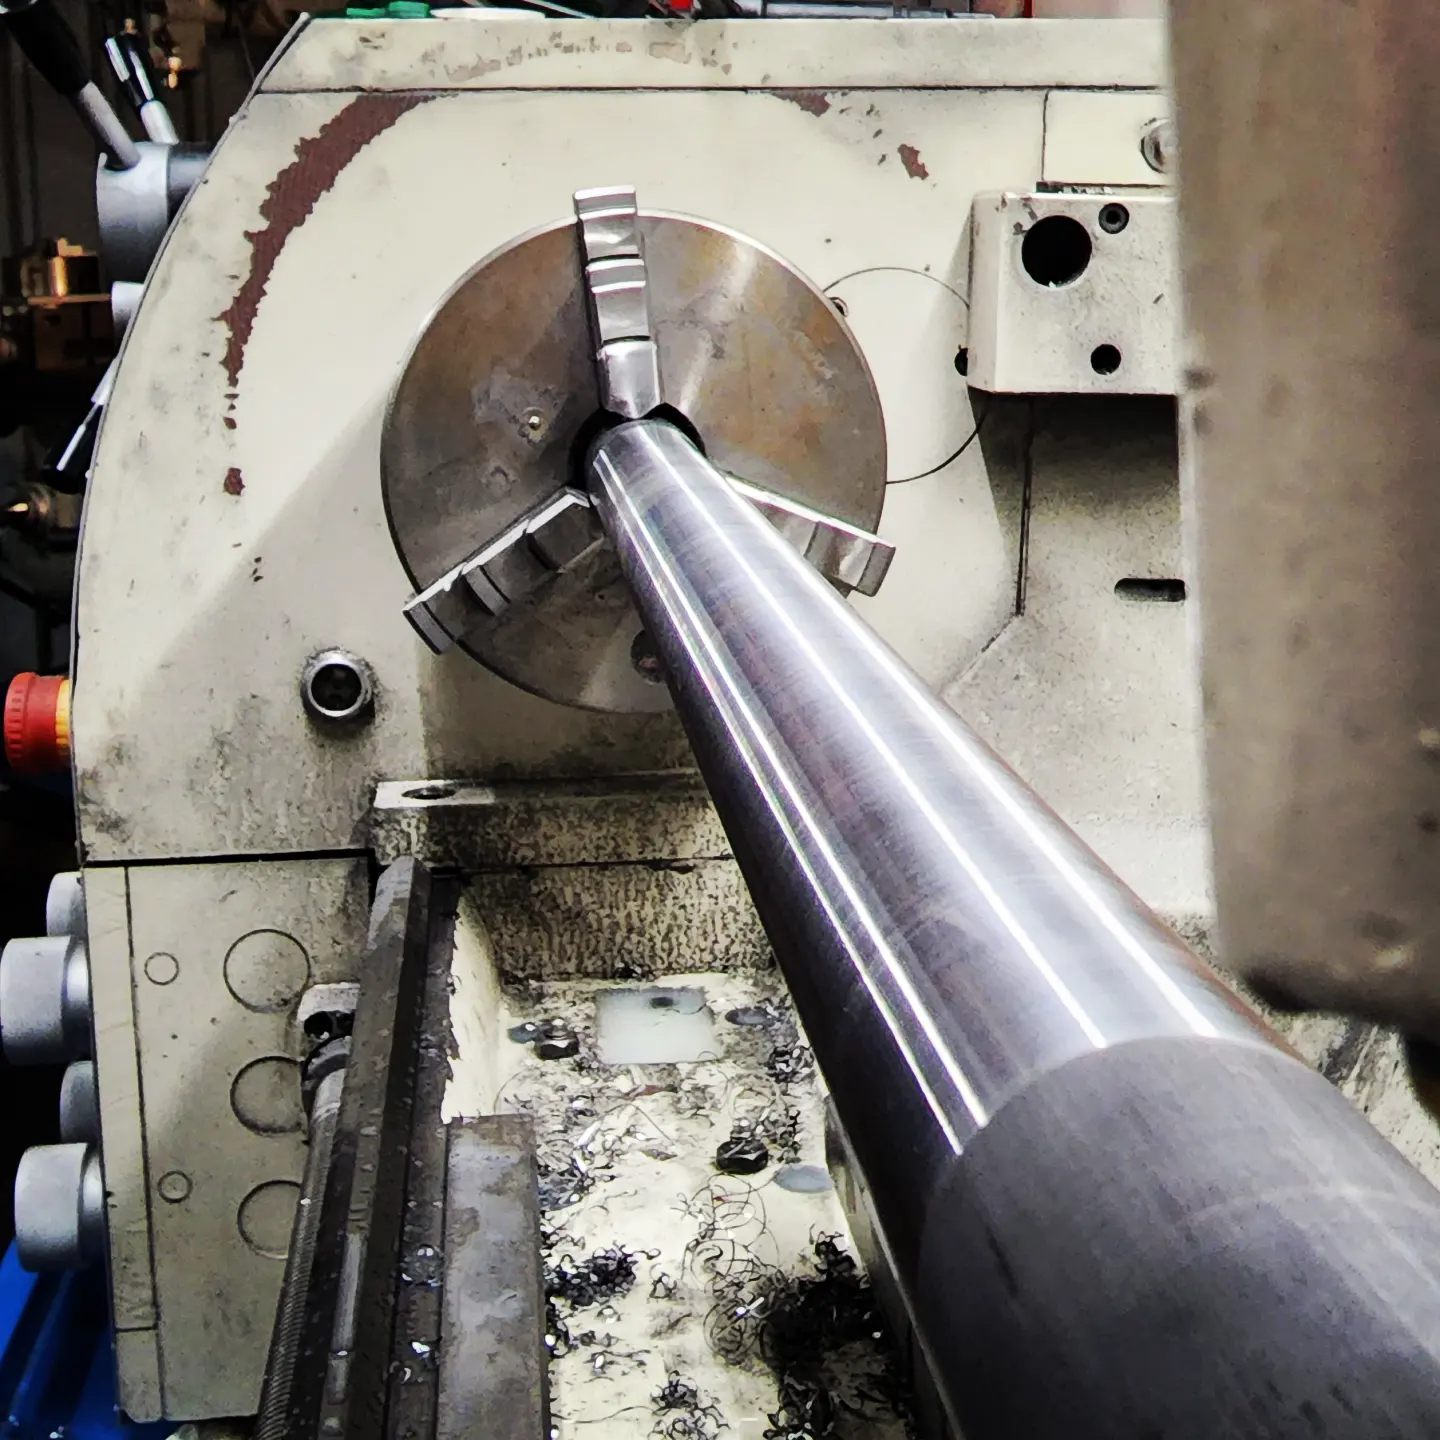
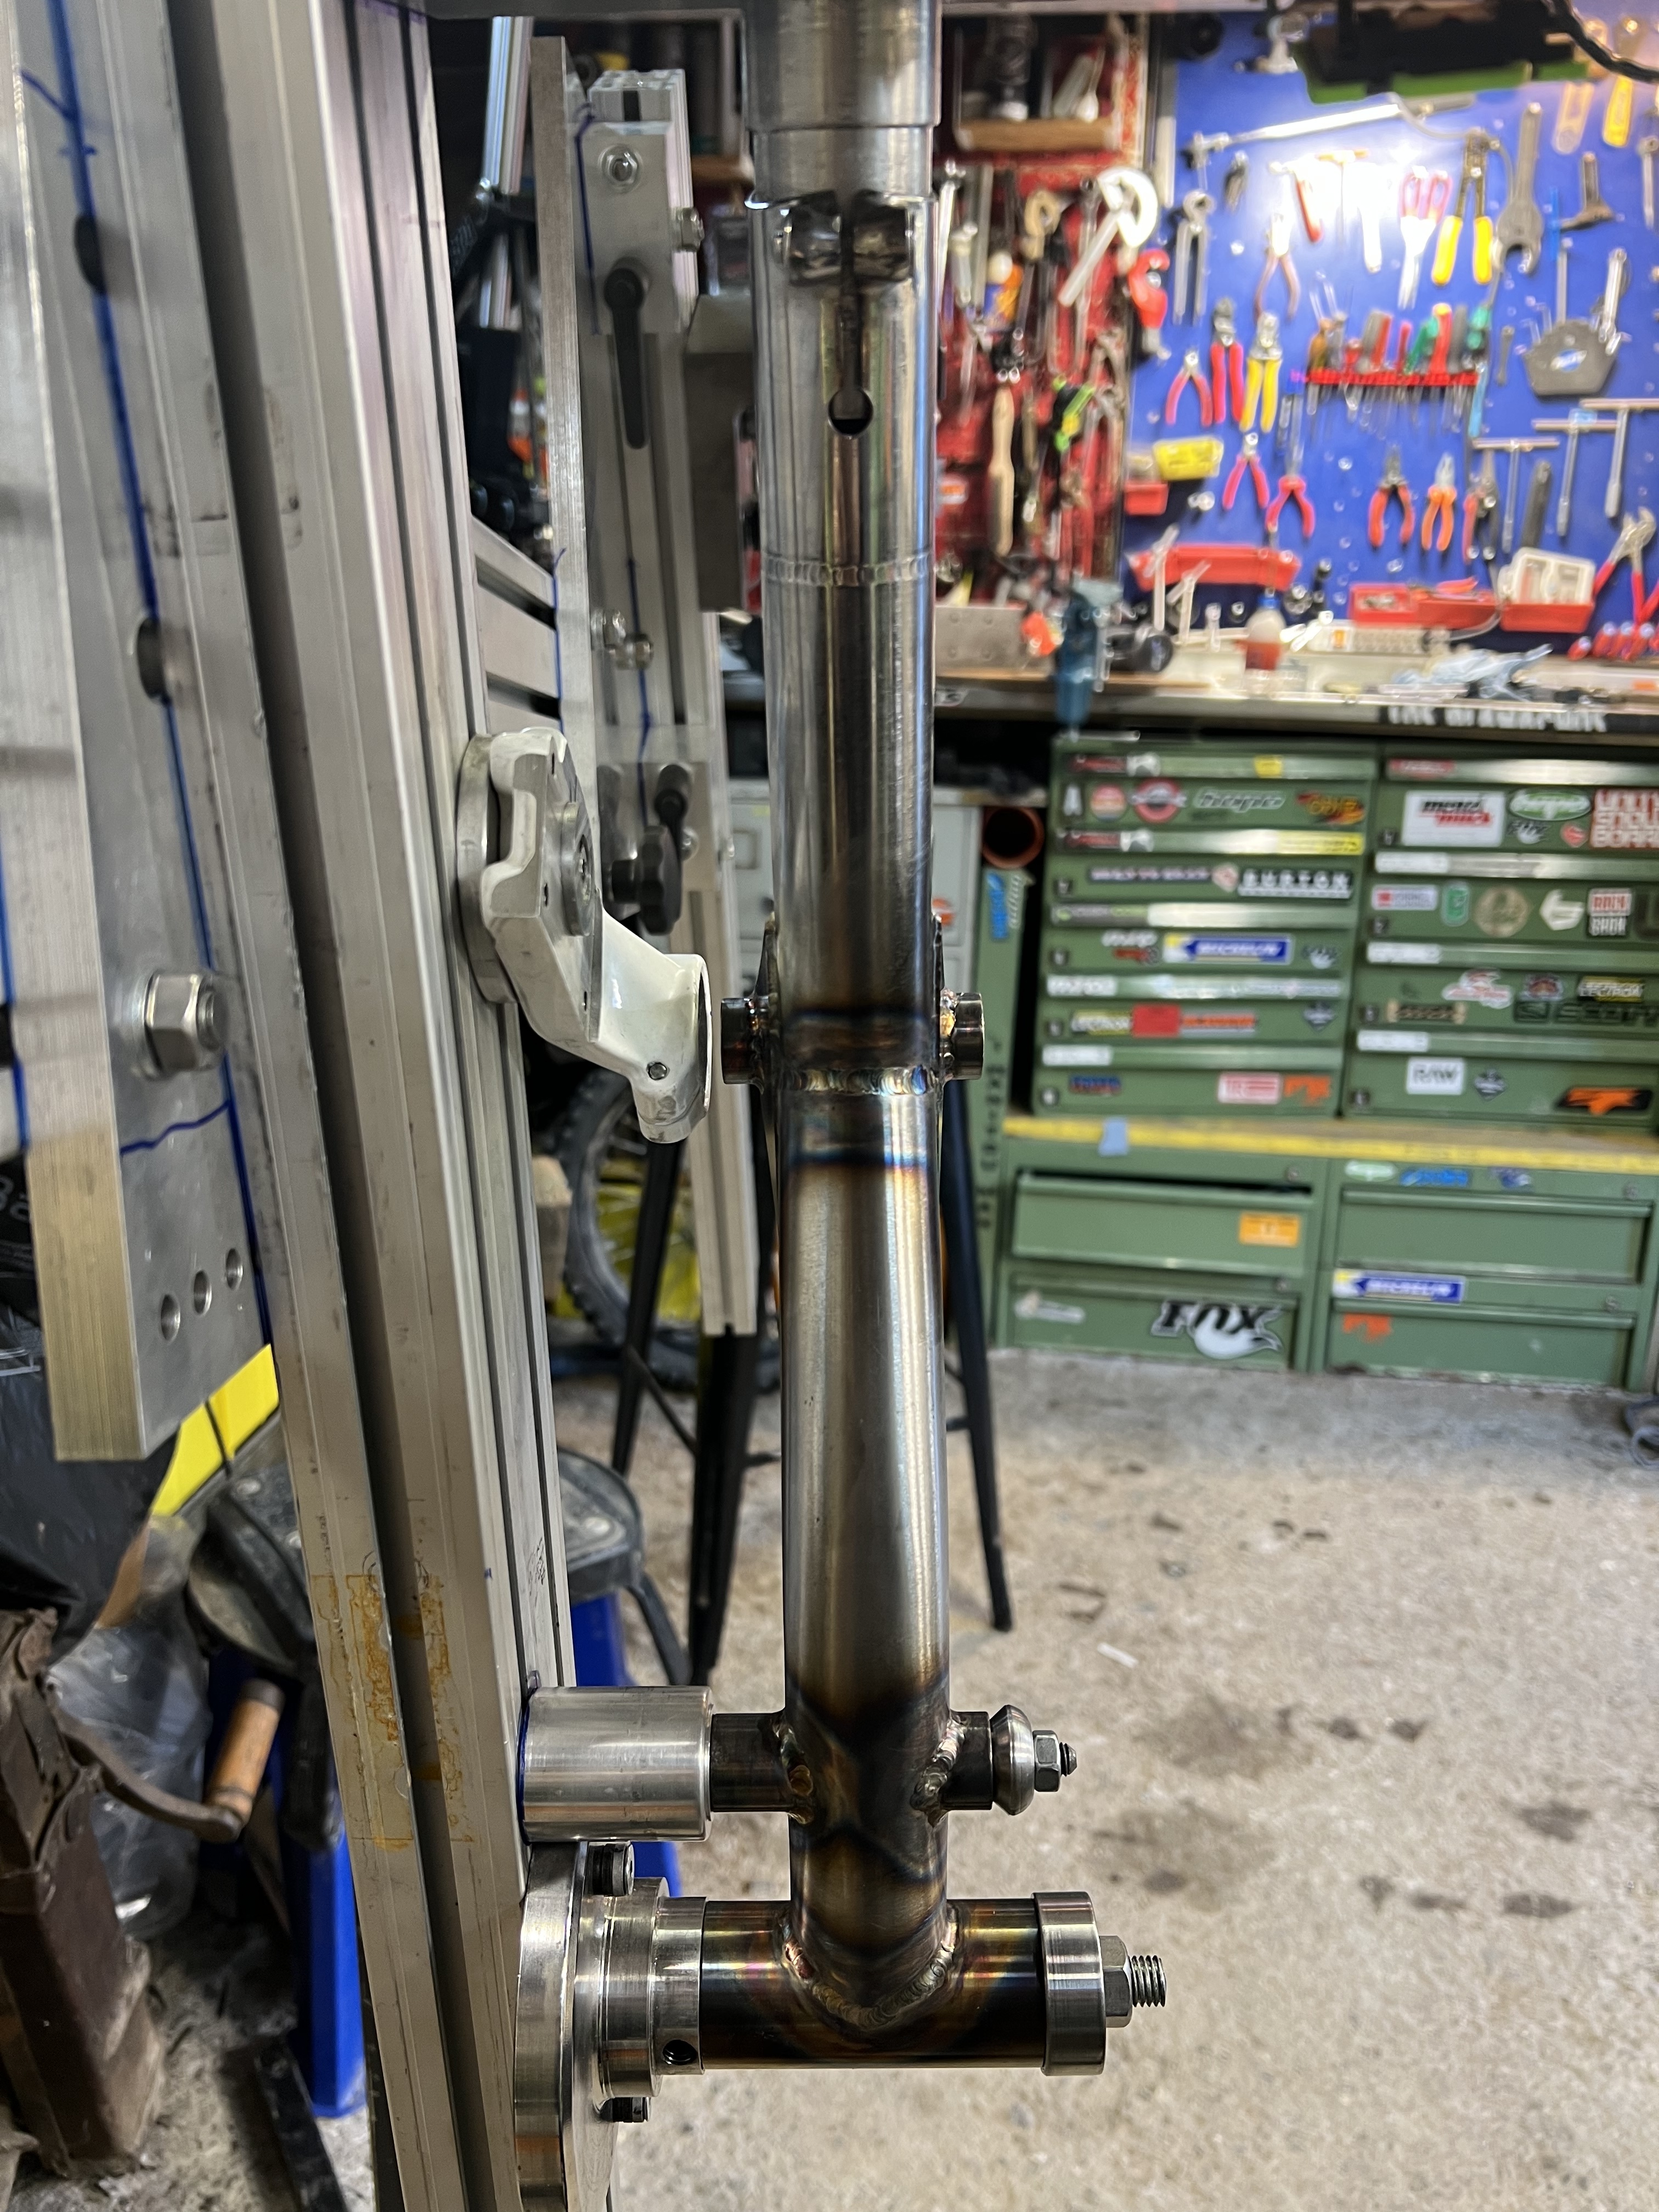
Manual lathe only but I’ve tuned it so it doesn’t have a taper. The seat tubes are easy. I have been making my own custom butted top tubes. Run the speed right down, use a steady, lots of coolant and hit in one pass. So end up with a 1.2/0.9/1.2 tube with 40mm tapers. head tube butt is about 75mm long and seat tube butt about 30mm long.
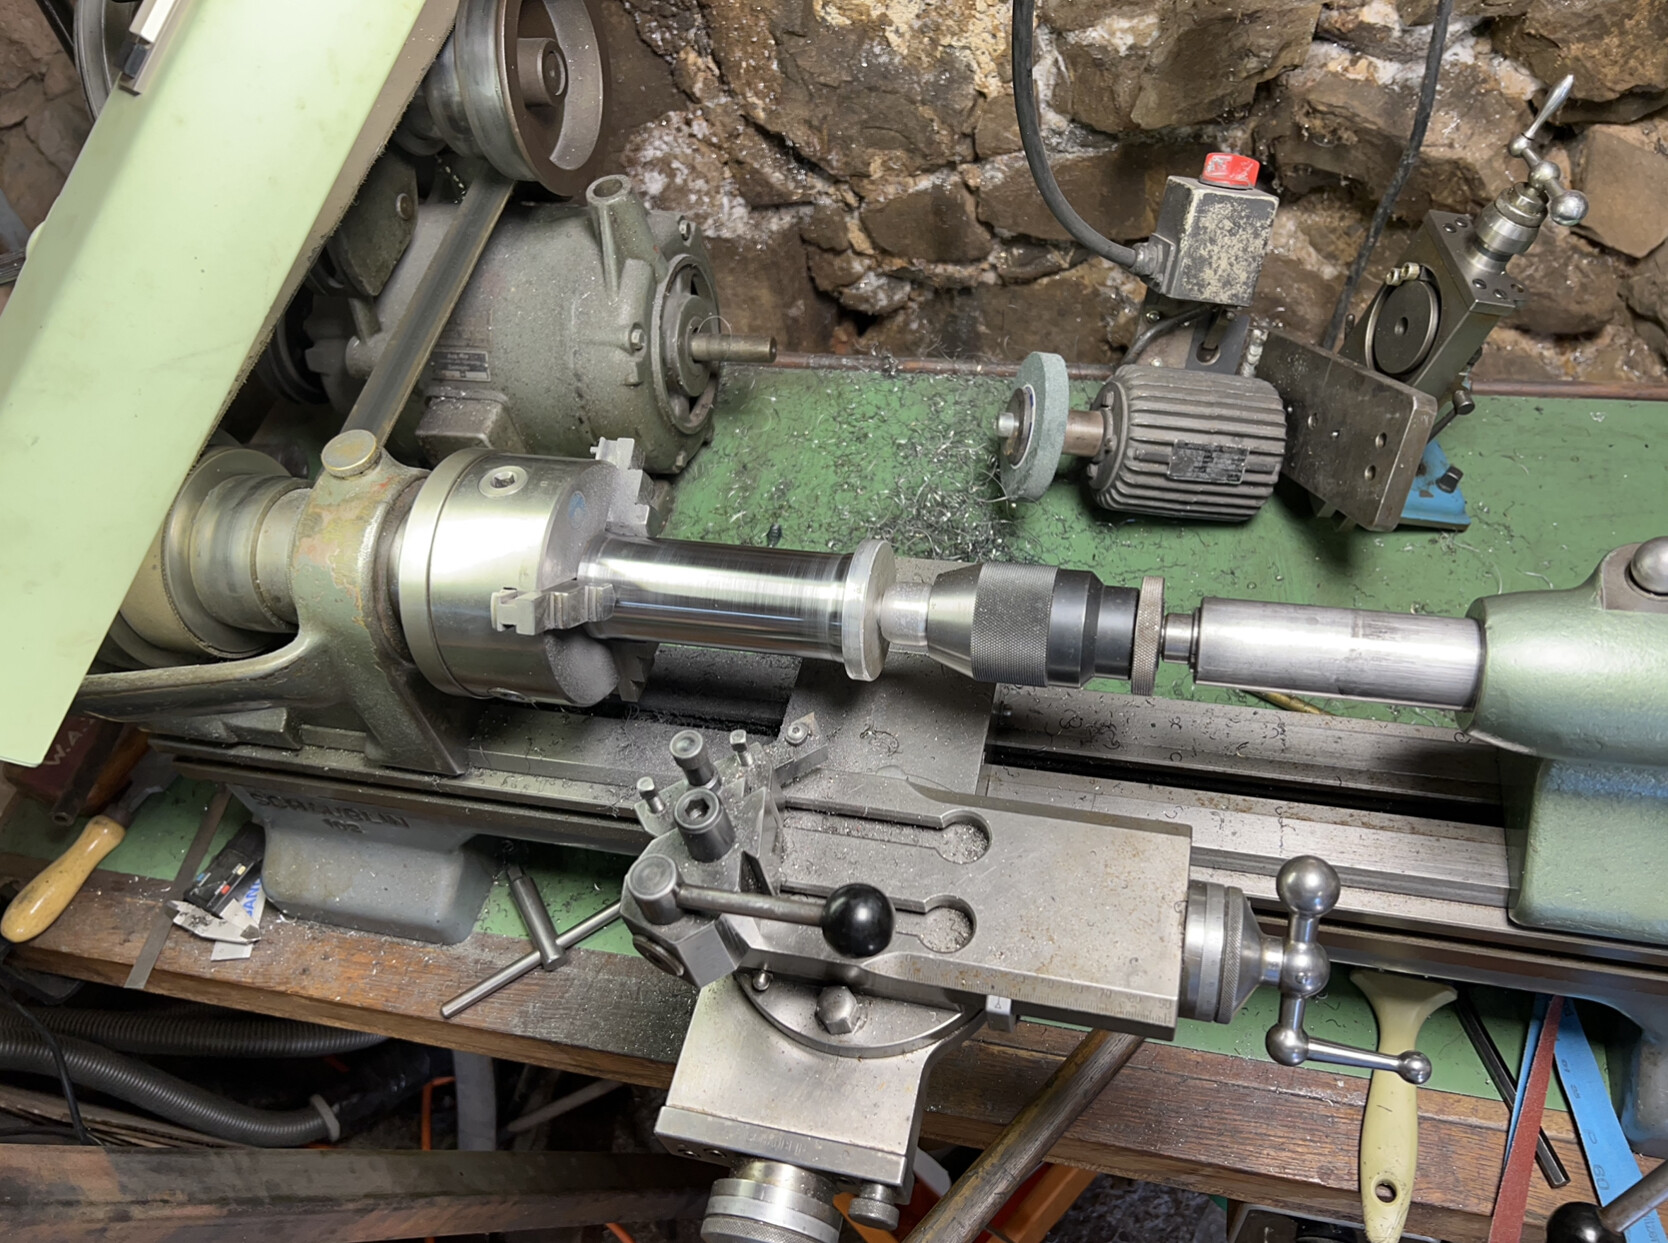
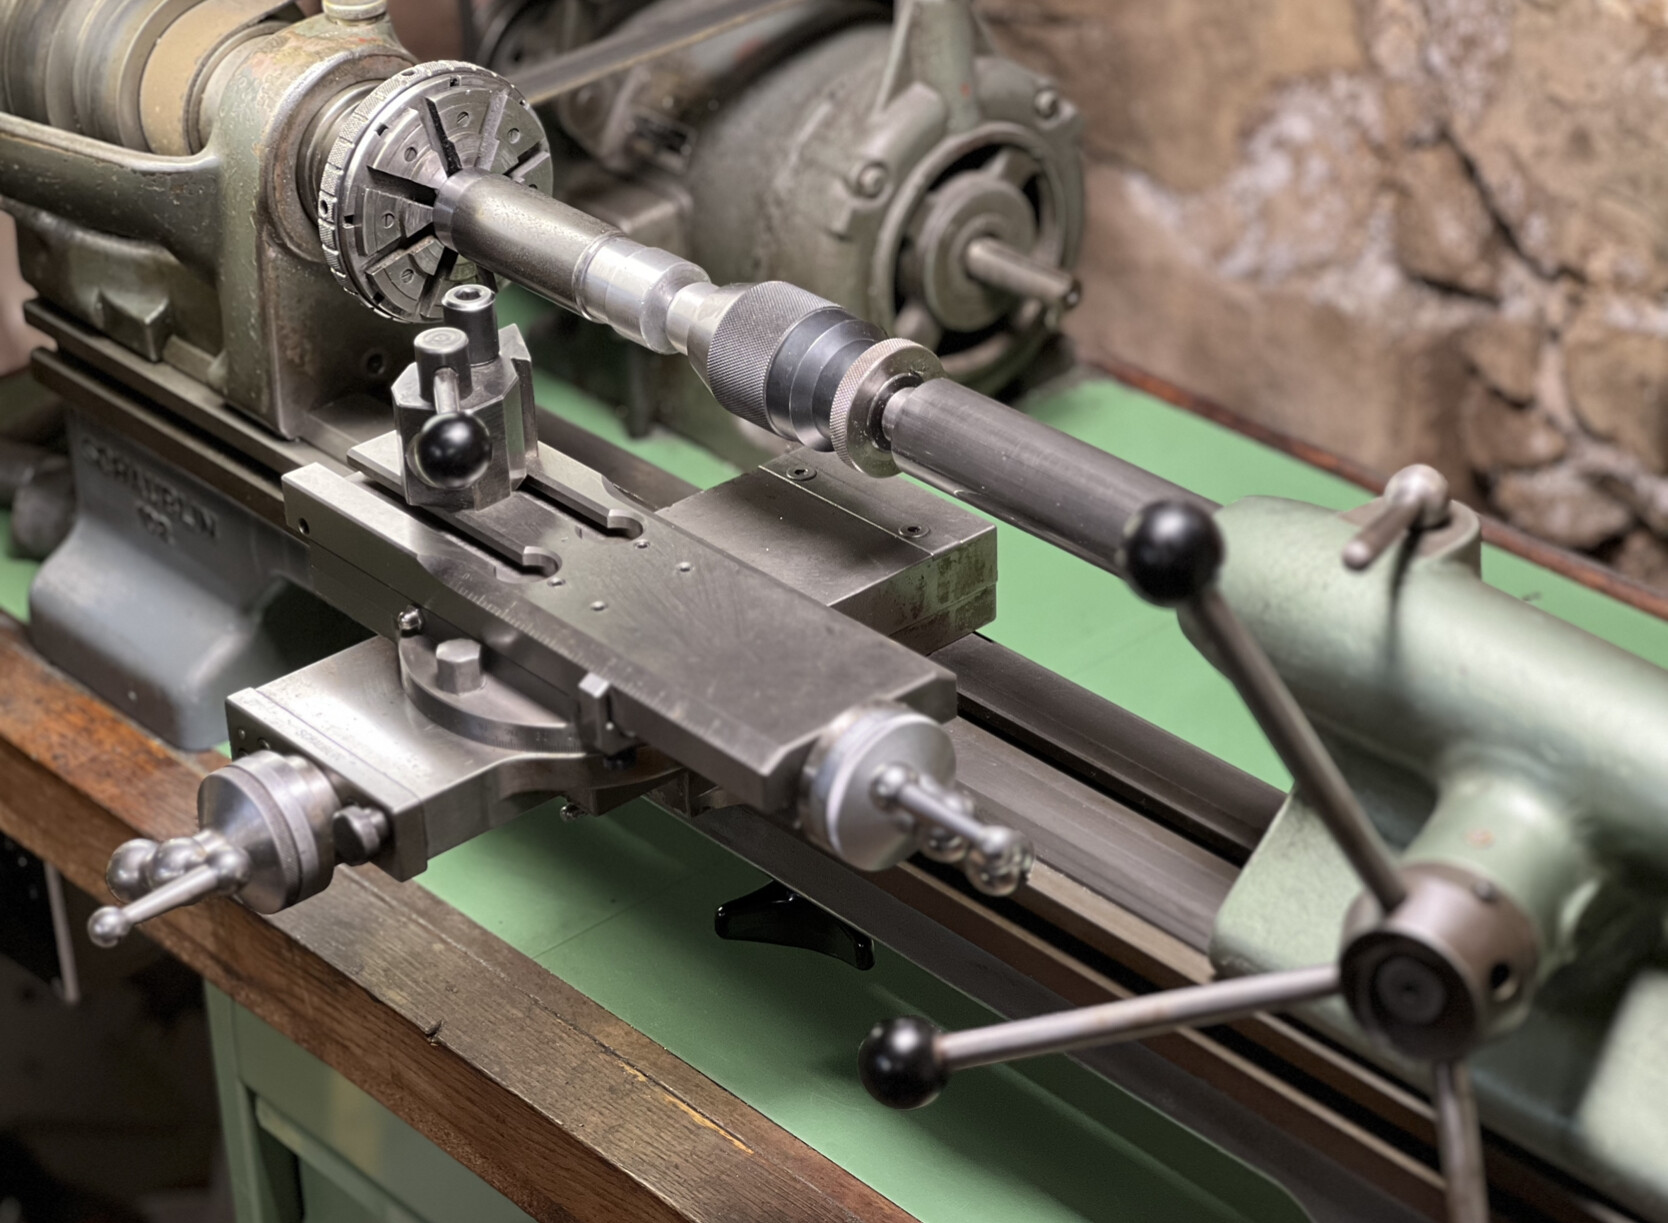
Im about to do some more to make a destructive test front triangle so will try and document it. Here are some photos but rhey don’t tell the whole story.
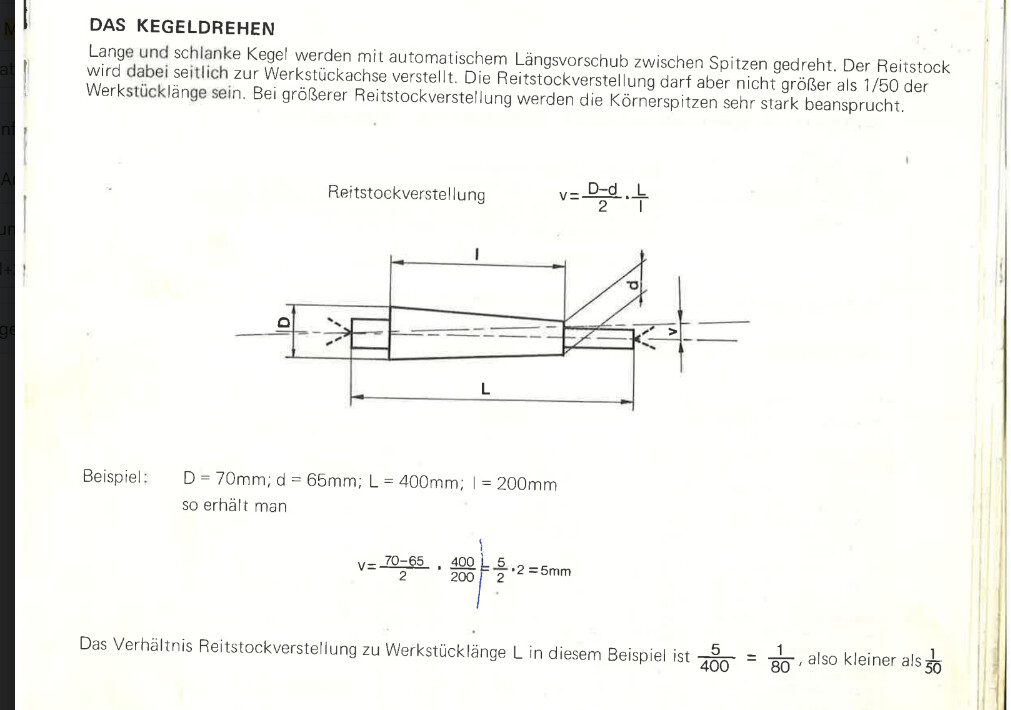
Have you ever checked the alignment of your tail- and headstock? On most lathes the tailstock can be adjusted out of center in order to manufacture precision tapers between centers (like morse tapers for example)
In most designs I know, the headstock can also be adjusted but this is a bit more complicated…
Awesome! Thanks @DEVLINCC
I’ll give it a go. I have a steady rest that I borrowed form a friend.
@Luniz82 Ok thanks for this recommendation. I don’t see any way to adjust my tail stock other than a spacer. I think I just need to get better at the dial indicator and the lead hammer tap tap tap on the cross slide. I’m very new to all of this so I’m learning as I go. Thanks for the idea!
The bed could be twisted too. So you need to figure out which way the taper is going and shim the base plate at tge far end to impart a correcting twist. The previoys workshop yo current I used a 1mm thick washer under one sude which got me within tolerance.
For example if its drifting in ie. diameter getting smaller as you appriach the head stock you’ll want a shin under the front edge of the tail support. If its drifting out, the shim will be on the backside. You won’t need much.
Ah ok. I’ll have a look. I didn’t think about bed twist but more wear in the bed. I have looked into getting someone to re-scrape the bed and match the headstock to the tail stock. Supposedly it is possible to get these back to high precision but I didn’t want to pay a lot for precision when I have so much to learn on all the other fronts.
Also, I heard from a local frame building friend about a watchmaking apprentice who restores these old Schaublins for decent prices. I should get in touch and see what he charges.
A very talented metal fabricator friend is coming over this weekend for some snowboarding. I’ll see if he has any advice or ideas. I’m sure he will point me in the right direction.
Thanks again for showing me how you do your external butts. That’s giving me all sorts of ideas. I have been wondering for a while but I didn’t dare to ask you!
One more thing, It’s just a plain lathe and doesn’t have a lead screw. My issue is probably do to me not knowing how to properly set up the cross slide? I bet I’m not tightening the screws in the right order or using the right technique. I need to make a better attempt and try harder with what I have first, I think.
To be honest it will be really hard to do tubes in bigger lengths on that. I persevered with a small bench lathe doing stuff but never custum butted tubes. It wasn’t until I bought a full featured 38mm bore floor standing latge that I could attempt this. That ended up being an Aus$7500 purchase.
Yeah, I think you are right! I’m just exploring here and want to try it just for the experience/fun. I have friends with cnc lathes and also engineer friends in the bike industry that I could ask to make them for me. I’m enjoying doing it myself with what I have. I still can’t believe I’m making these bikes and they are holding up!
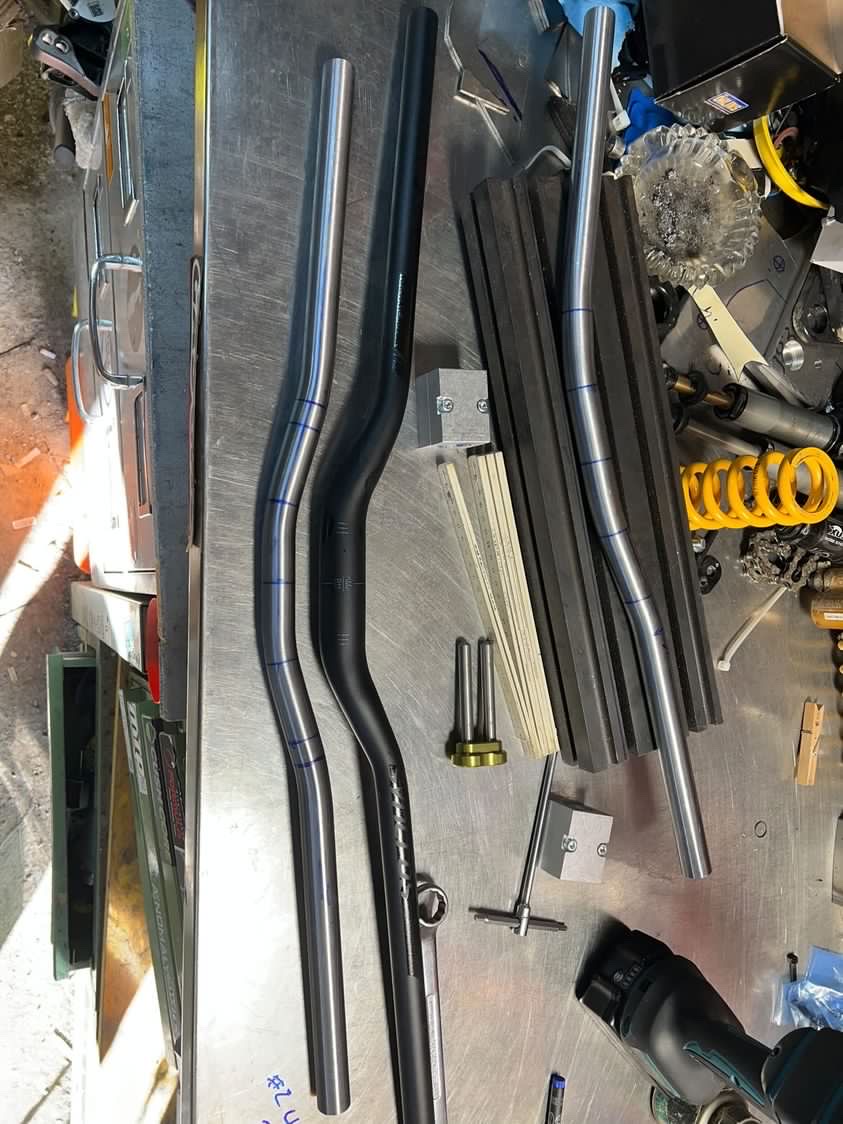
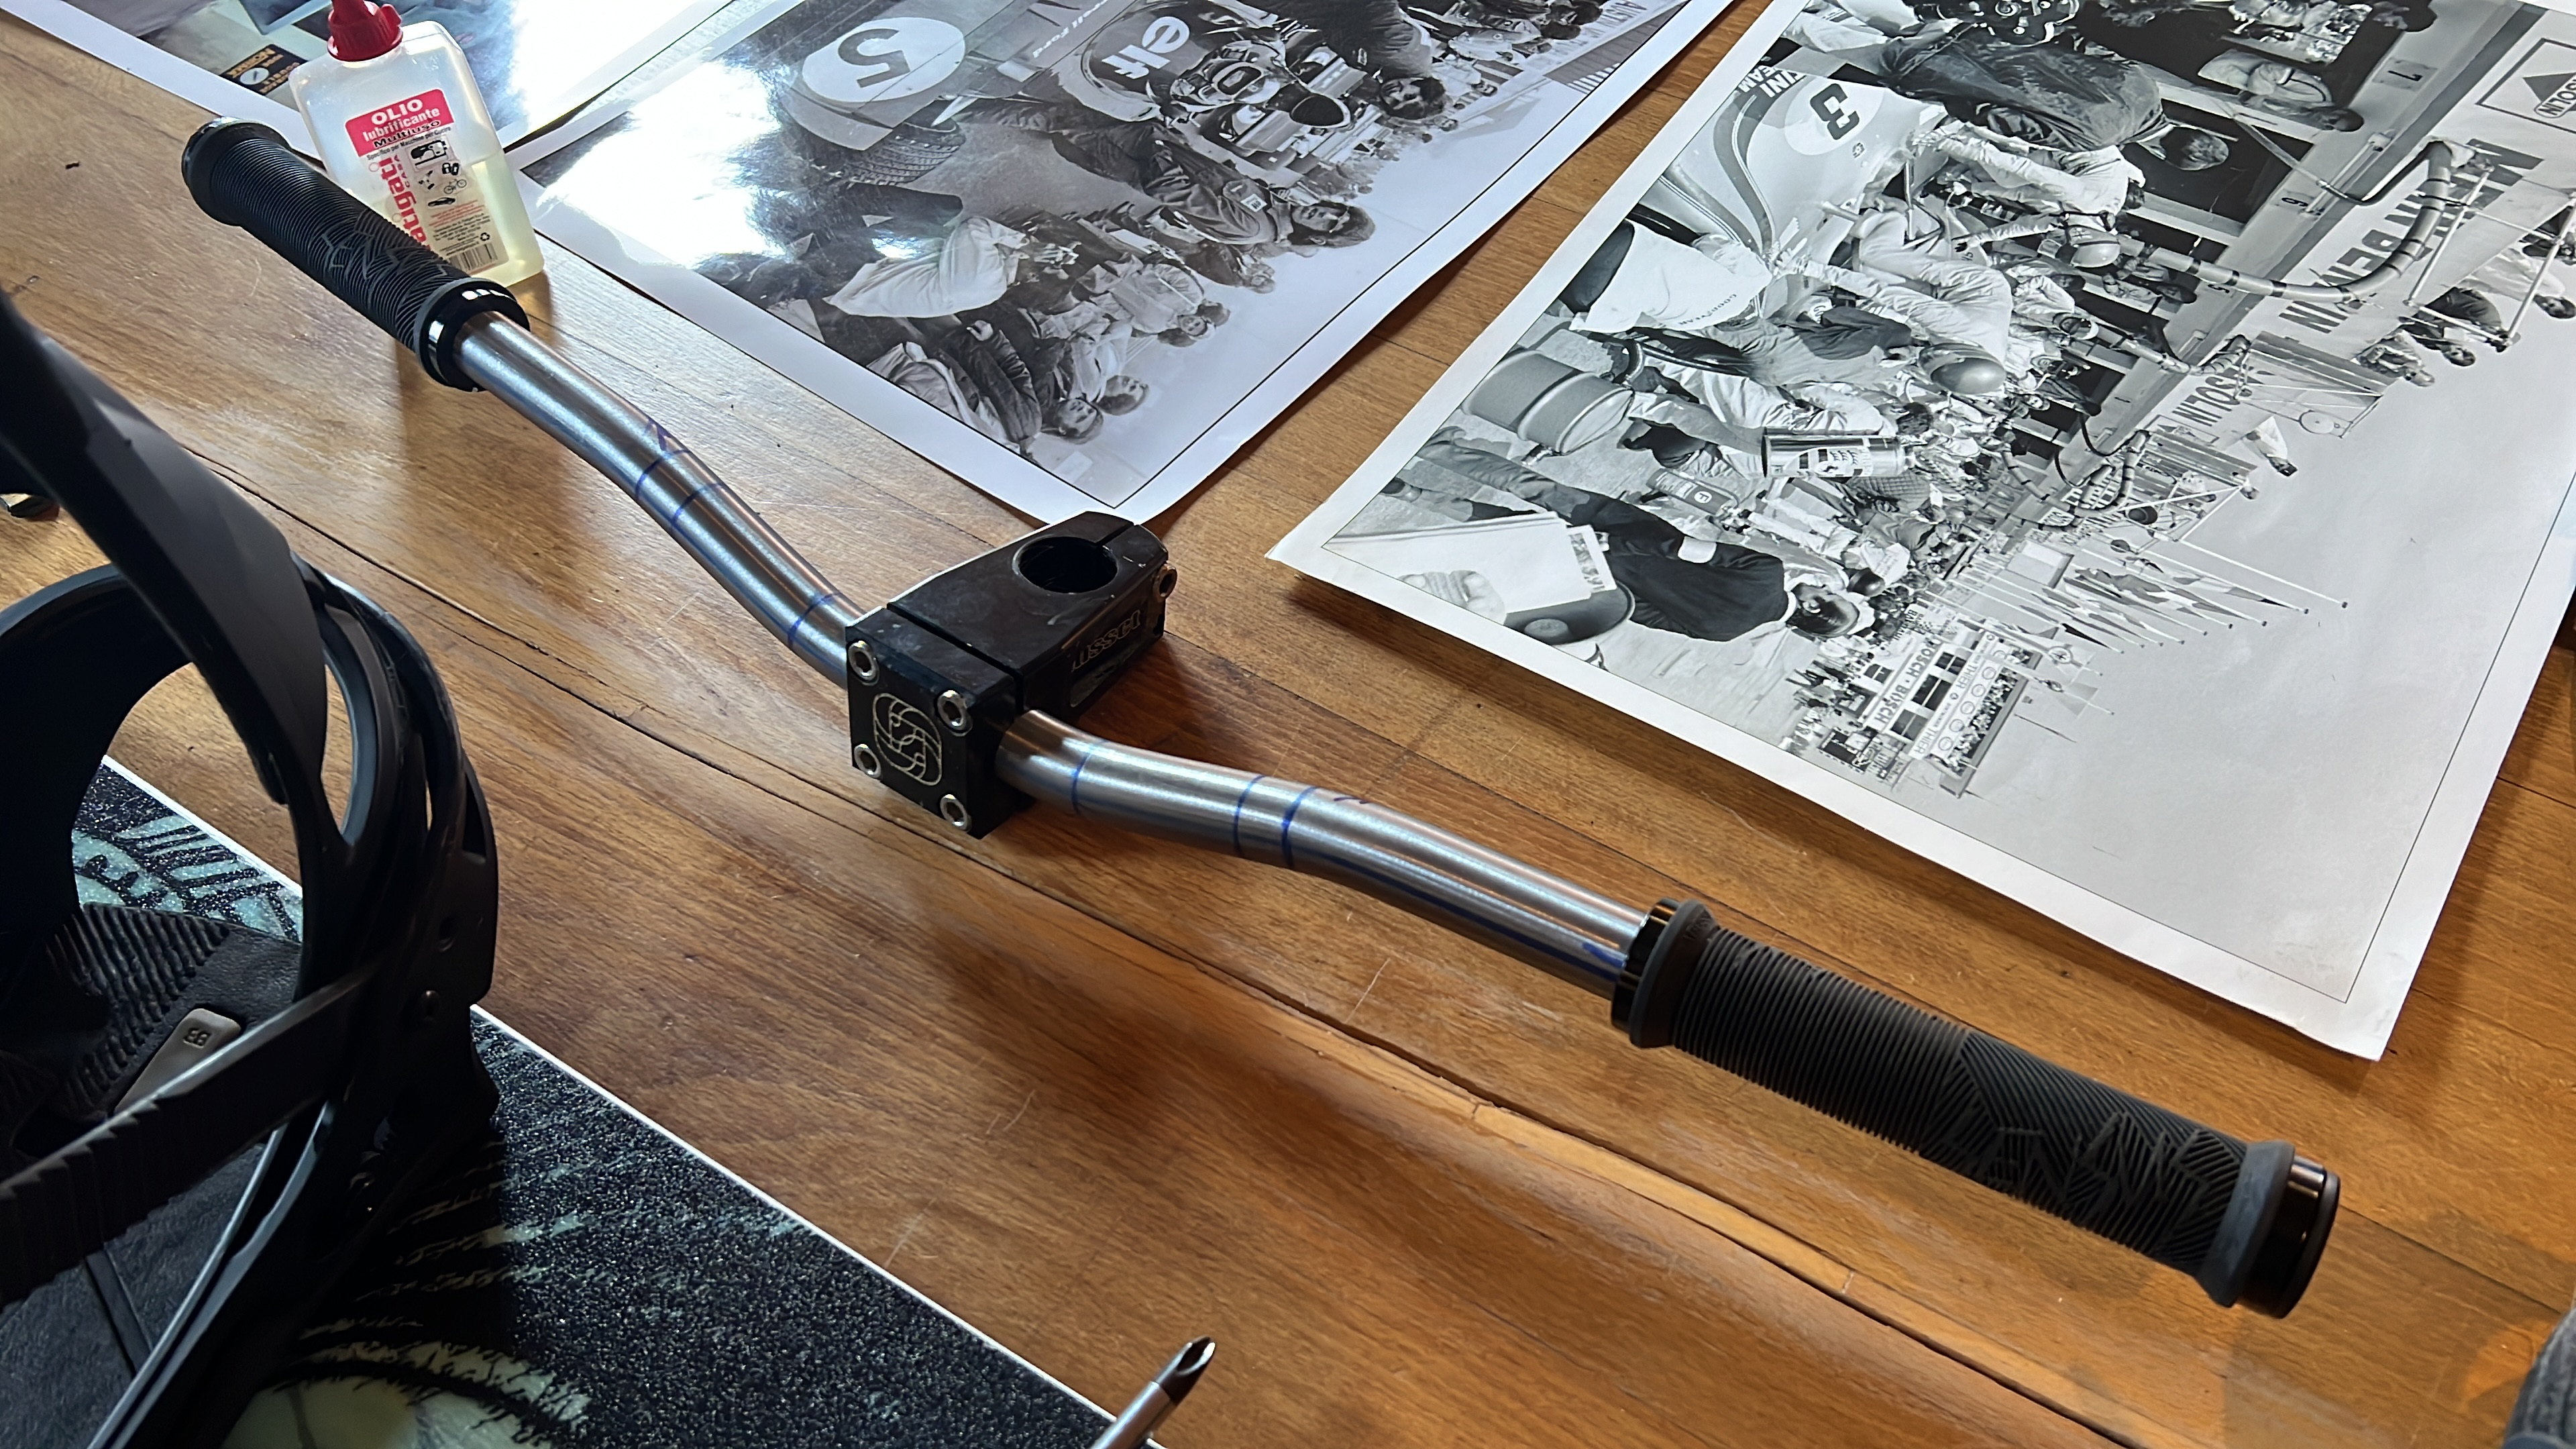
I’m currently trying to bend handle bars for similar reasons. Feeding the curiosity…. @wzrd has been super helpful sharing the black magic!
Oh yeah, I get the joy of making cool stuff with next to nothing. Its a hard grind but you do learn heaps of good stuff. Then when you get the bigger machine and you realise how much easier life is you’ll laugh with joy and shake your head at the same time. ![]()
From that little green anodized part I can tell that you used a Cobra bender for your bars .
How was it? I agree on the term “black magic”
I made a bender designed around the same idea, tube loaded verticaly but still haven’t figure out a good way to index tubes vertically for handlebars and multiple bends.
Good eye! Yeah, I used a Toob Bender. I don’t know how I’m going to do it yet. I might have to mount it horizontally to use a digital angle gauge?
This time, I used the lower chain stay double v grove guide block to clock the bar an equal amount to the right and left vertically. I was wondering if I could make a guide block system down there that could give more back sweep?
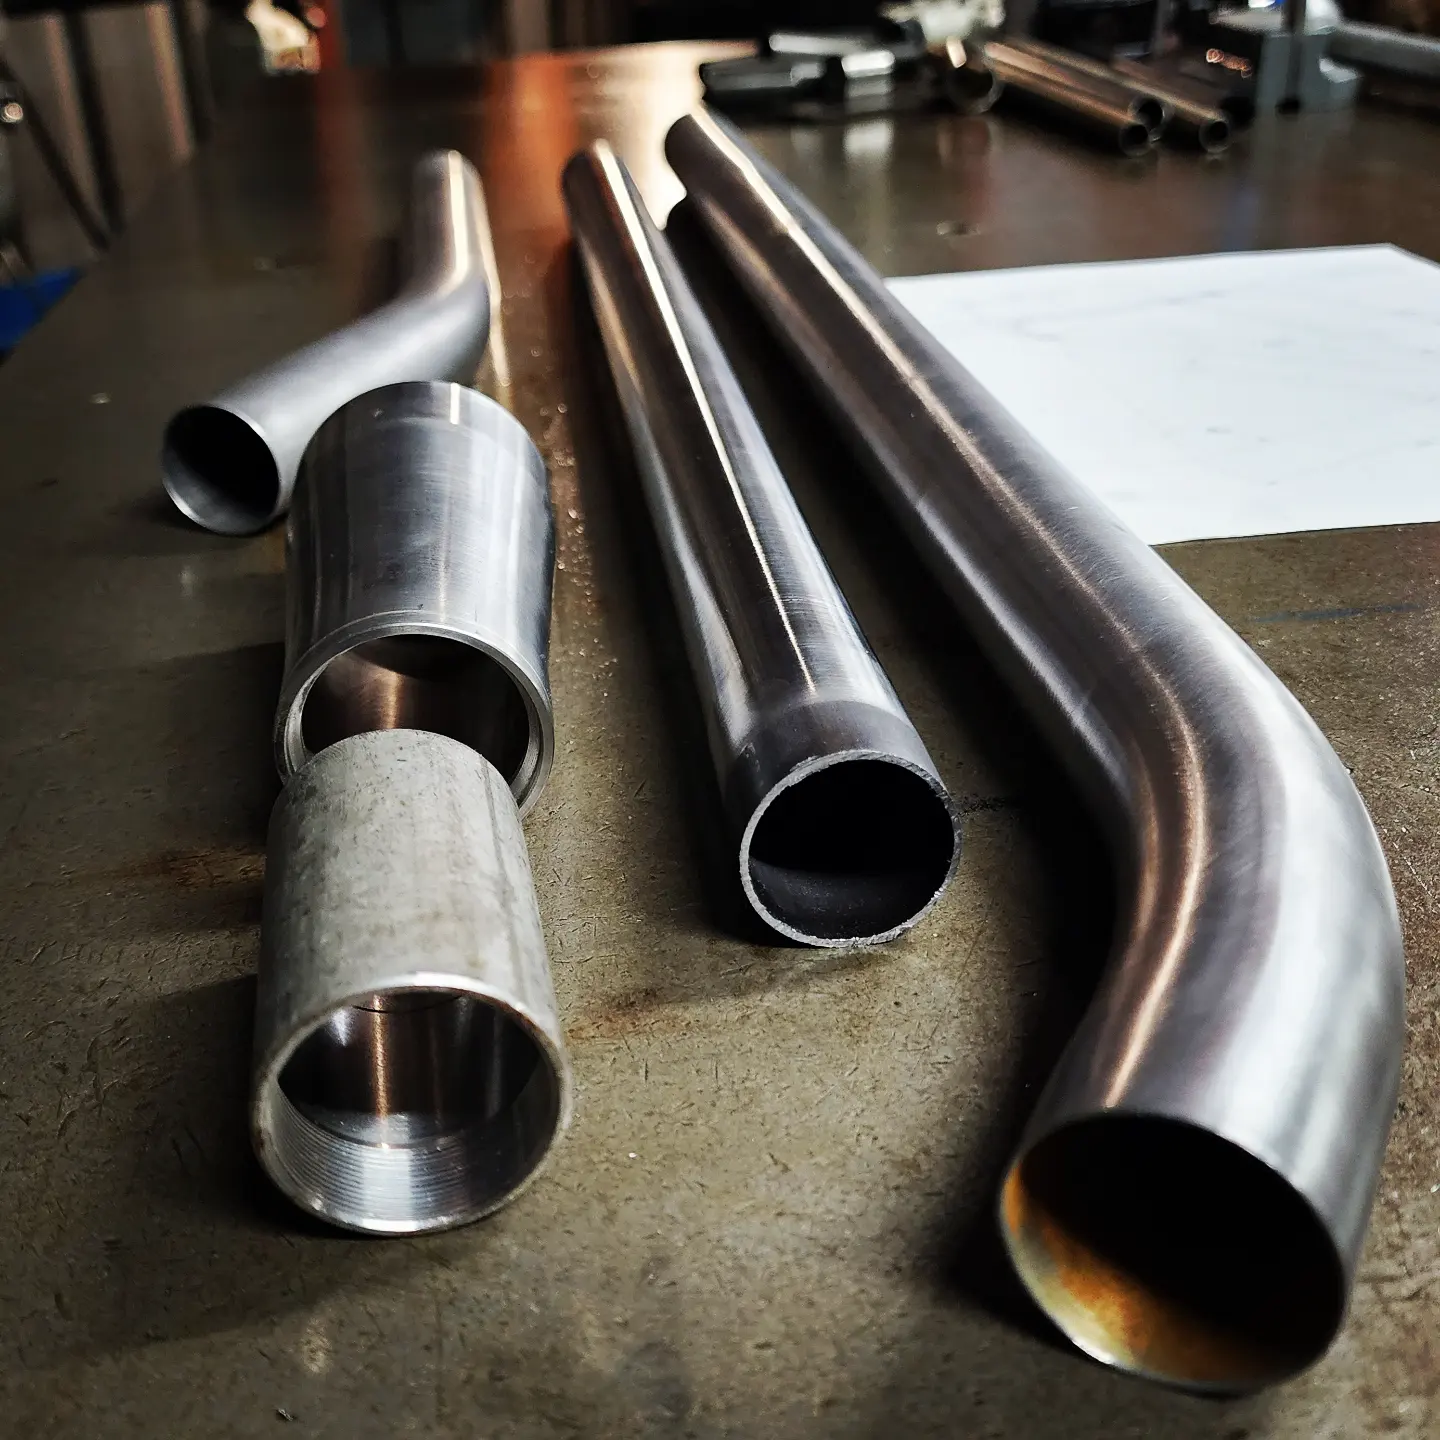
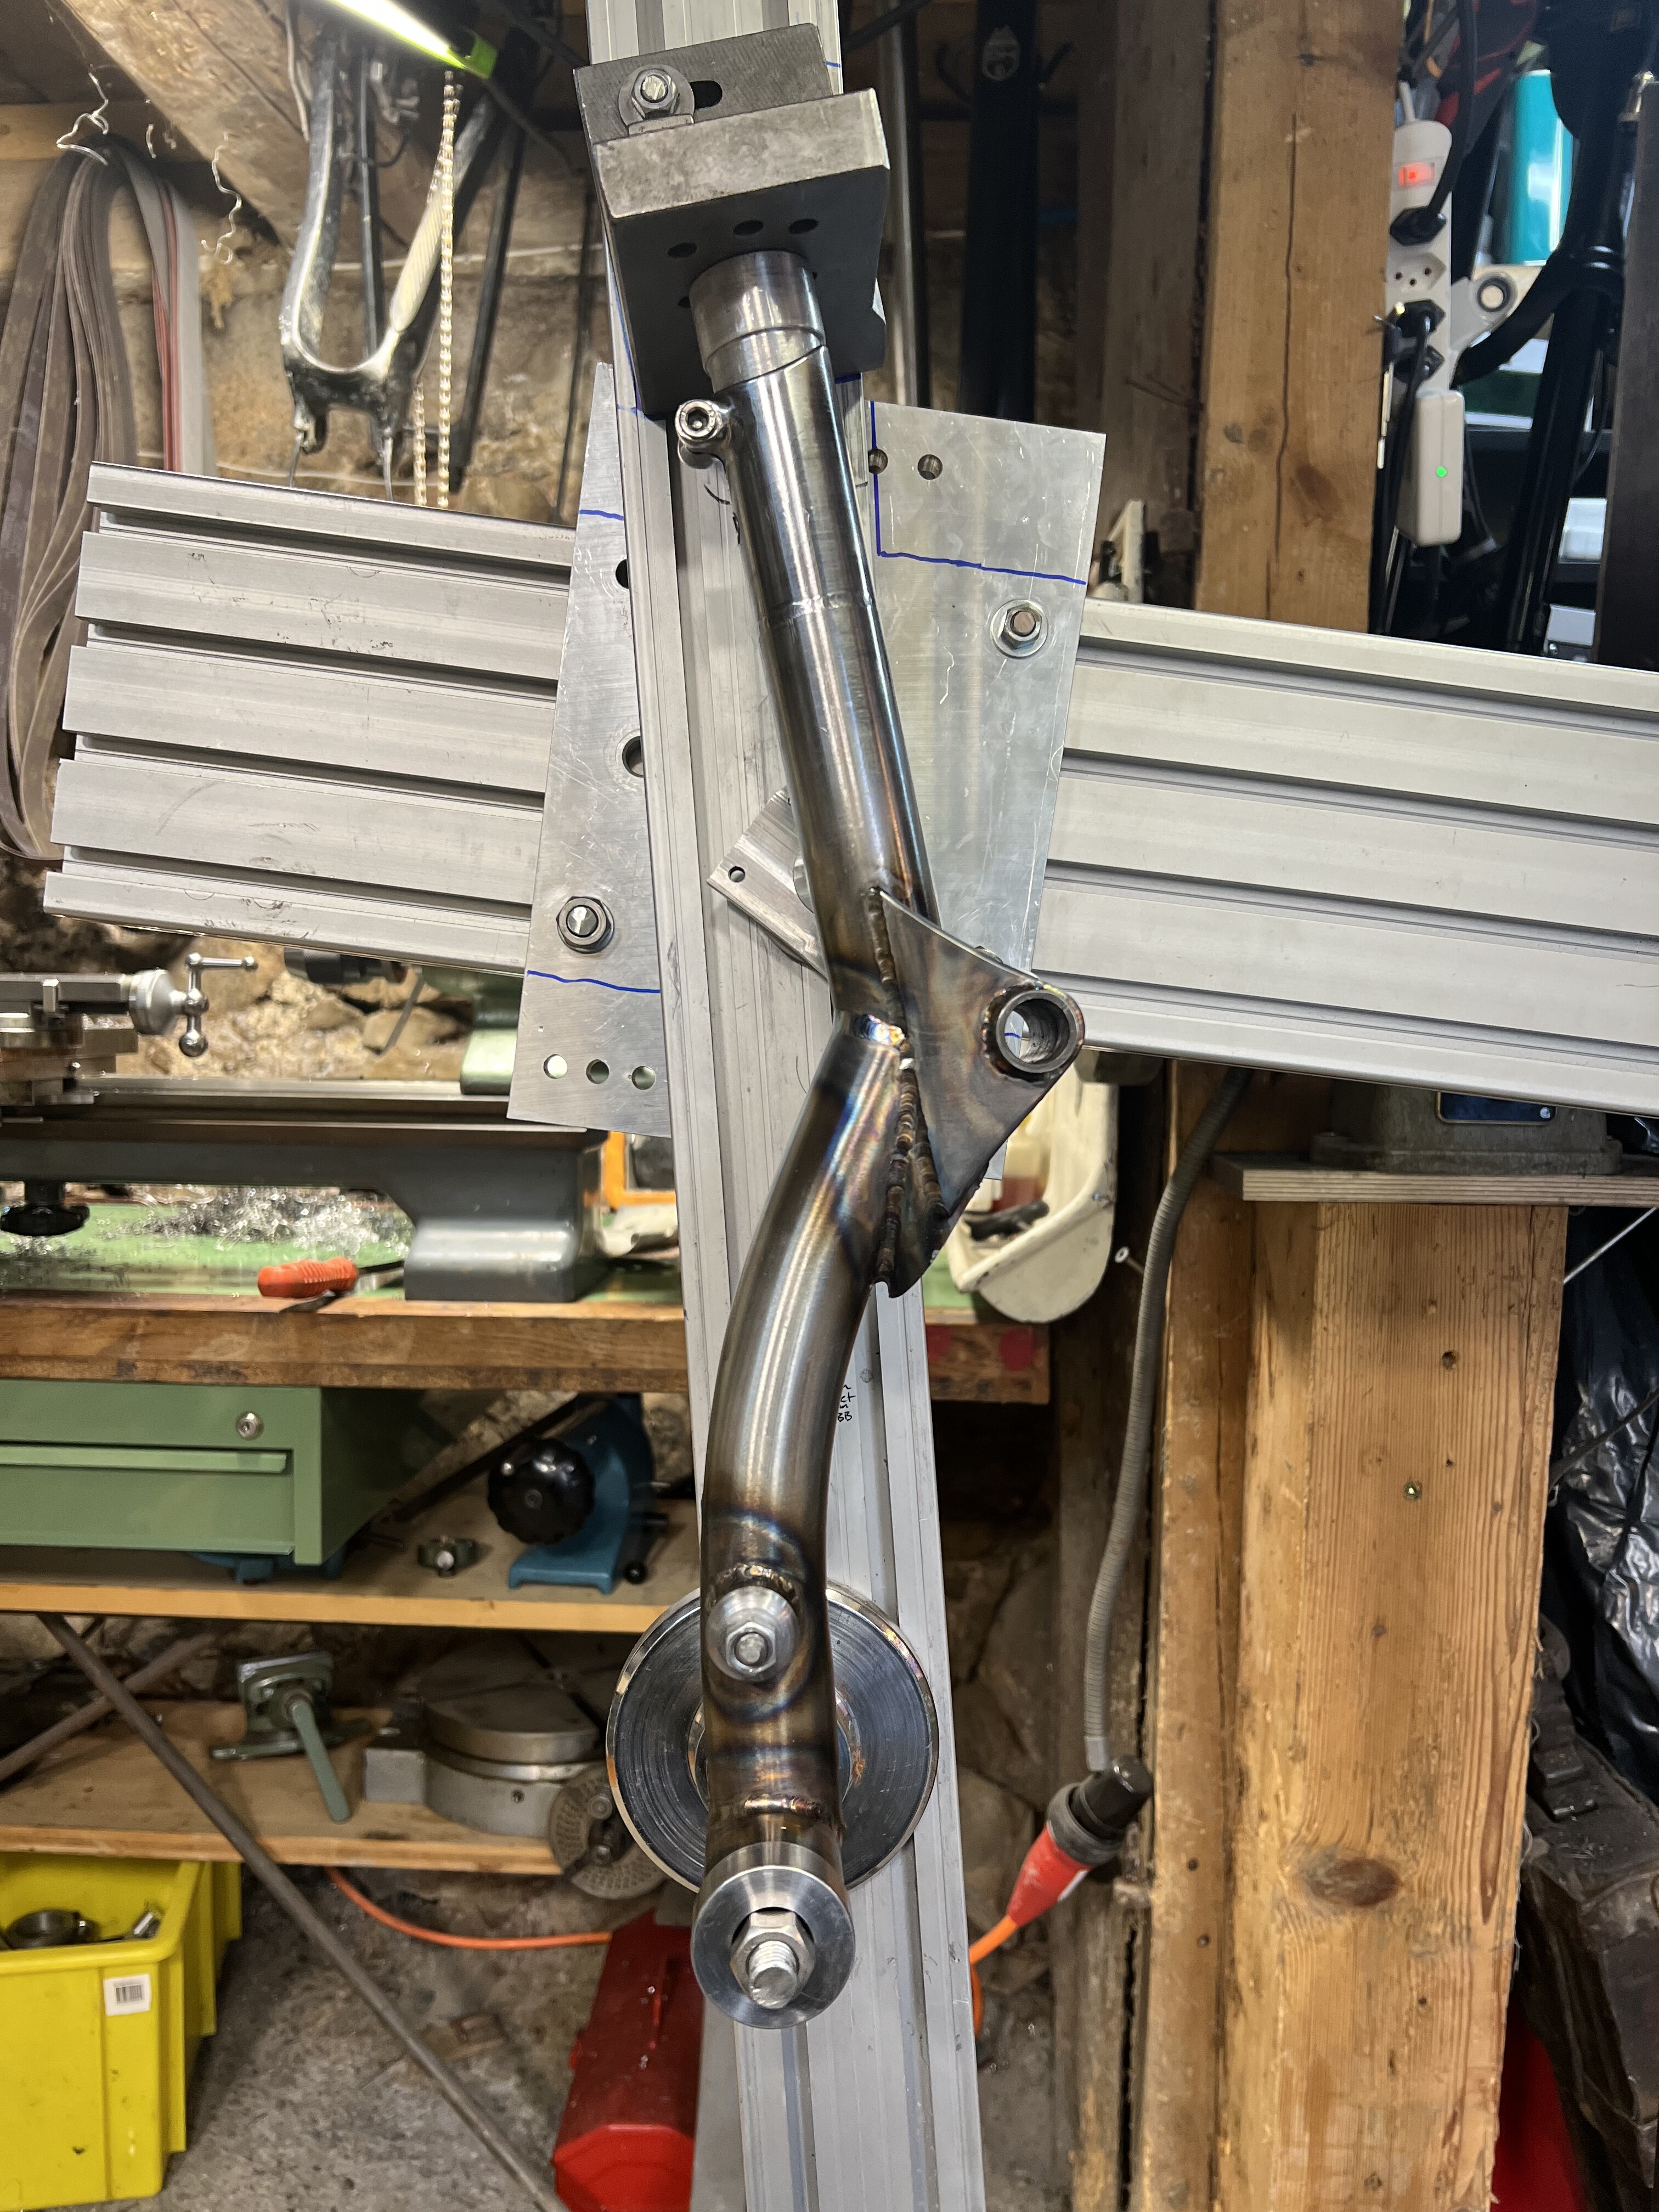
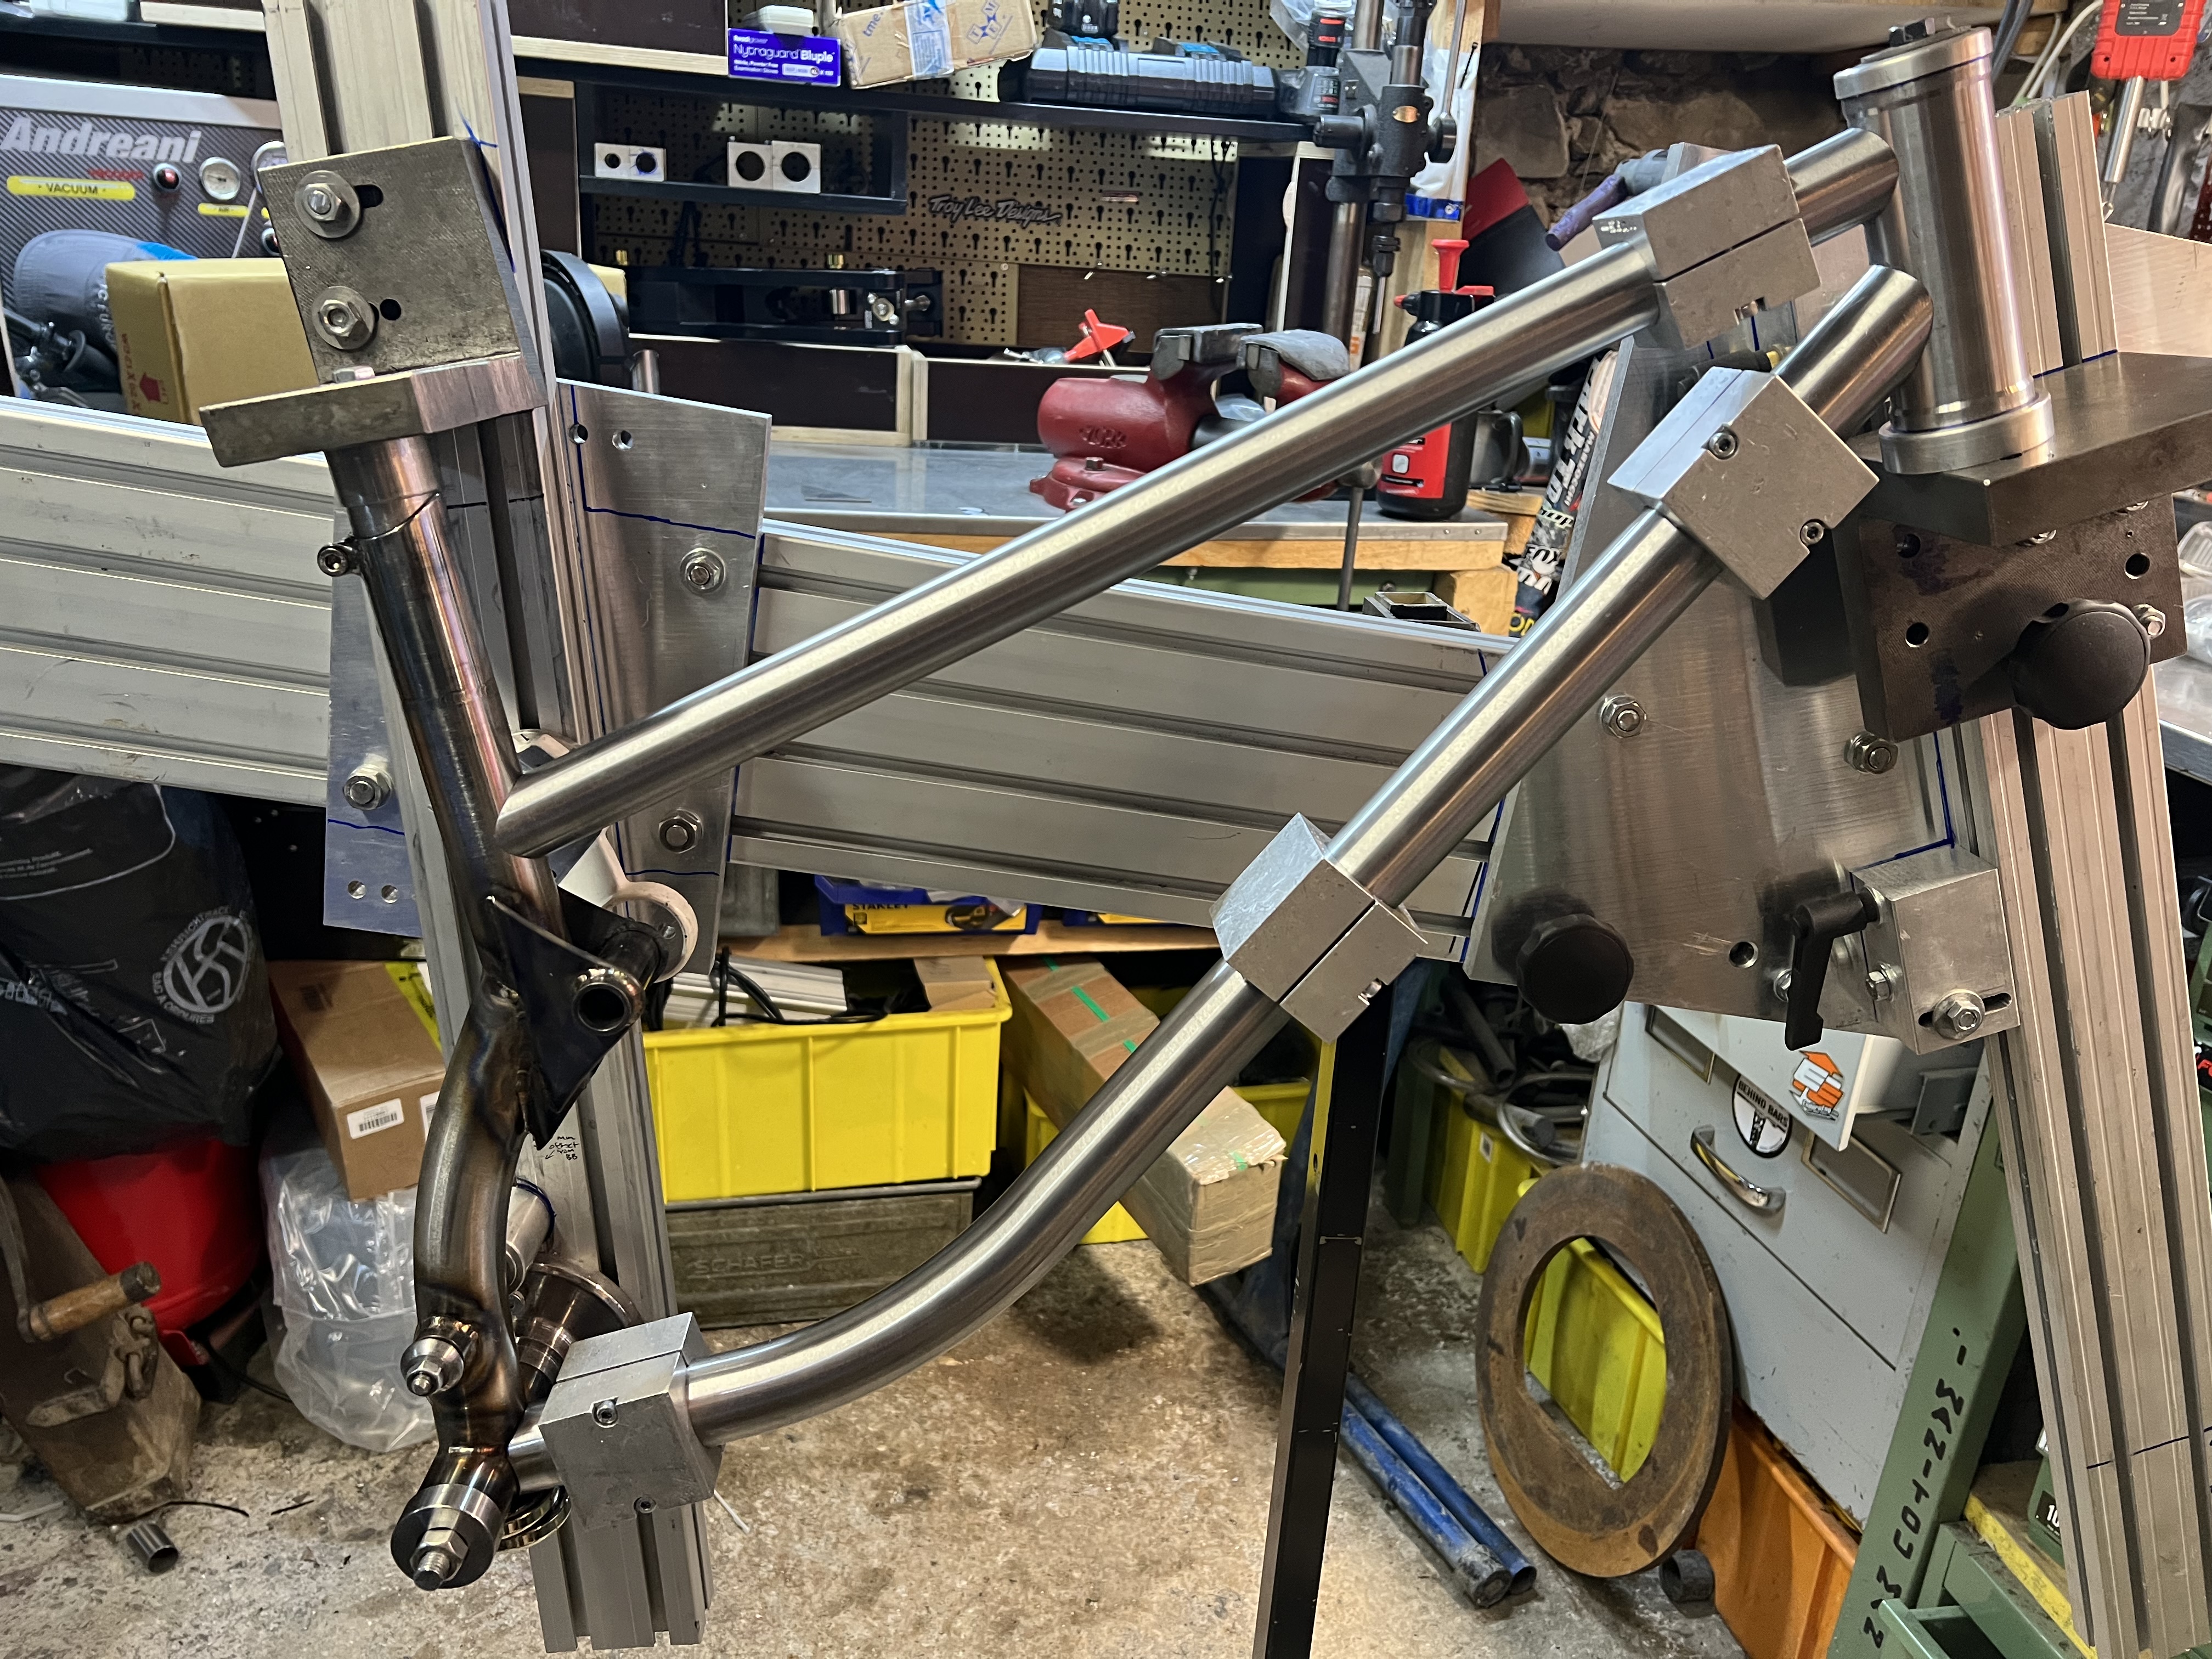
A new frame that I’m slowly working on. I used a 38.1 mm tube for the main pivot area instead of a 35mm. The tubing blocks are much bigger and the radius on the bent tube is bigger which made the 38.1 a much bigger challenge to miter. I think I’ll stick with 35mm for that spot and use a thicker wall tube if I need more strength rather than a bigger diameter. Every step was harder with 38.1 compared to a 35mm tube and provided for more vibrations and workpiece holding challenges.
I’m going pretty slow on my latest frame (miter challenges) so here’s a GoPro of 3 of us riding 3 of my bikes on our main backyard trail. I’m in the middle and they haven’t tried my bikes before this run. My wife is behind us and she was also on one of my steel front triangles.

Nice work dude. Toight mitres